



Afro buns are one of the most versatile, protective, and stylish ways to wear natural hair. Whether you’re heading to a professional meeting, a casual weekend brunch, or a glamorous evening event, a well-executed afro bun can be exactly what you need—protective styling that looks intentional and polished. The beauty of bun styles for afro-textured hair is that they work with your natural texture rather than against it, showcasing the volume, bounce, and dimension that makes natural hair so striking in the first place.
What makes afro buns different from buns in other hair types is how they interact with curl patterns, coil structures, and hair density. A bun that sits beautifully on straight or wavy hair might need adjustments when you’re working with tighter curls or coils. The good news? Once you understand how to position, secure, and maintain an afro bun for your specific hair type and texture, you’ll have instant styling options that work in countless situations. From casual to formal, from gym-ready to date-night worthy, bun styles give you flexibility without sacrificing protection or style.
The styles in this guide range from sleek and refined to textured and voluminous, meaning there’s genuinely something here for different occasions, different hair densities, and different personal aesthetics. Some of these styles require minimal manipulation and products, while others let you lean into edge control and precision. All of them showcase your natural hair and keep it safely secured away from daily friction and breakage.
1. Classic High Afro Bun
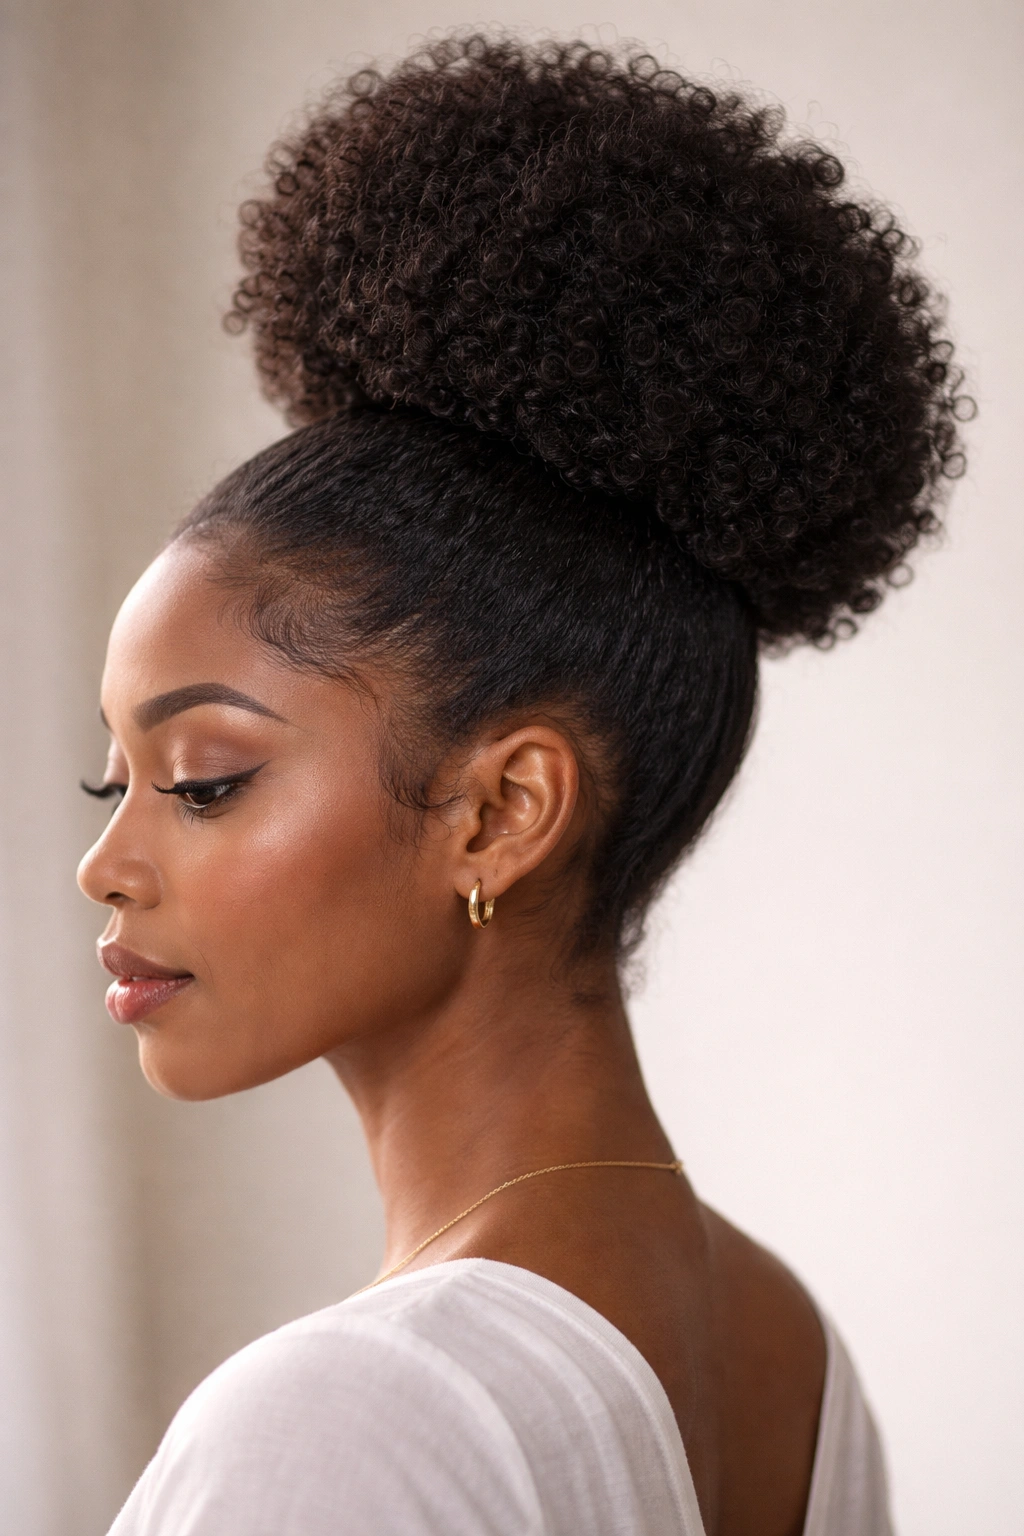
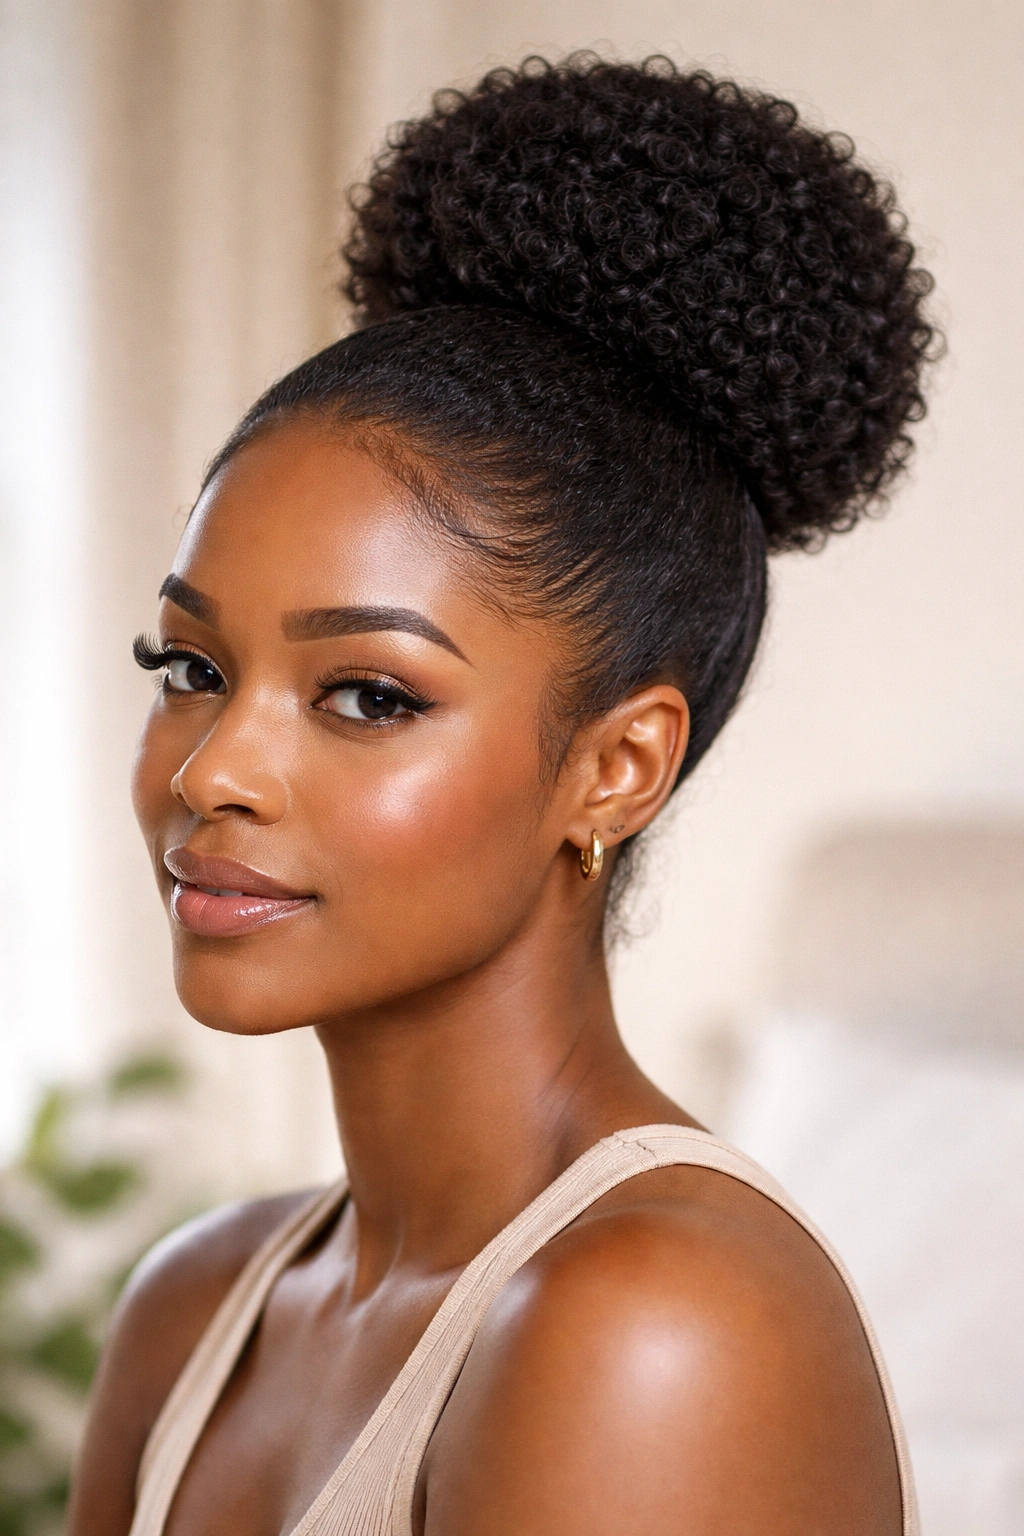
The classic high afro bun is the gold standard of protective styling, and for good reason—it’s elegant, timeless, and works beautifully with virtually any face shape. This style gathers your hair at the crown and creates a full, rounded bun that sits high on your head, letting your natural texture shine through rather than forcing it into a tight knot. The appeal is partly in the ease: you’re not flattening your curls, you’re celebrating them.
Why This Style Works So Well
A high afro bun maintains volume at your crown while keeping hair off your shoulders and neck, making it perfect for warm weather or when you want a fresh-faced look without hair framing your face. The high placement elongates your neck and draws attention upward, which is genuinely flattering for most face shapes. Because the bun sits naturally at the crown of your head—right where your hair naturally wants to gather—you’re working with your hair’s growth pattern rather than fighting it, which means less tension and less breakage. The full, rounded shape of an afro bun is forgiving; small loose pieces and flyaways actually add to the soft, intentional aesthetic rather than looking messy.
How to Style Your High Afro Bun
Start with clean or refreshed hair—you can do this on day-two or day-three hair if you’ve kept it moisturized. Apply a light leave-in conditioner or styling cream through your hair, working from root to tip, which adds slip and definition without weighing curls down. Flip your head forward, gather all your hair at the crown, and secure it loosely with a stretchy coil or hair tie. Once the ponytail is secure, gently lift the gathered section straight up, then twist or coil it around the base of the ponytail, tucking the end under and securing it with bobby pins. The key is working gently—you’re not aiming for zero flyaways; you’re aiming for a soft, textured aesthetic where some curl definition shows through.
Best For
This style suits nearly every occasion but genuinely shines for professional settings, workout days, and casual outings. If you have finer-textured afro hair or lower hair density, a high bun is particularly flattering because it visually concentrates your hair, making it appear fuller. It’s also wonderfully practical for keeping hair completely off your face and shoulders—perfect for anyone who finds hair-framing irritating during focused work or exercise.
Pro tip: Don’t apply your bun tie at the very root of your hair. Instead, position it an inch or so away from the scalp, which takes tension off your hairline and distributes the weight of the ponytail more evenly across your crown.
2. Low Faux Hawk Bun
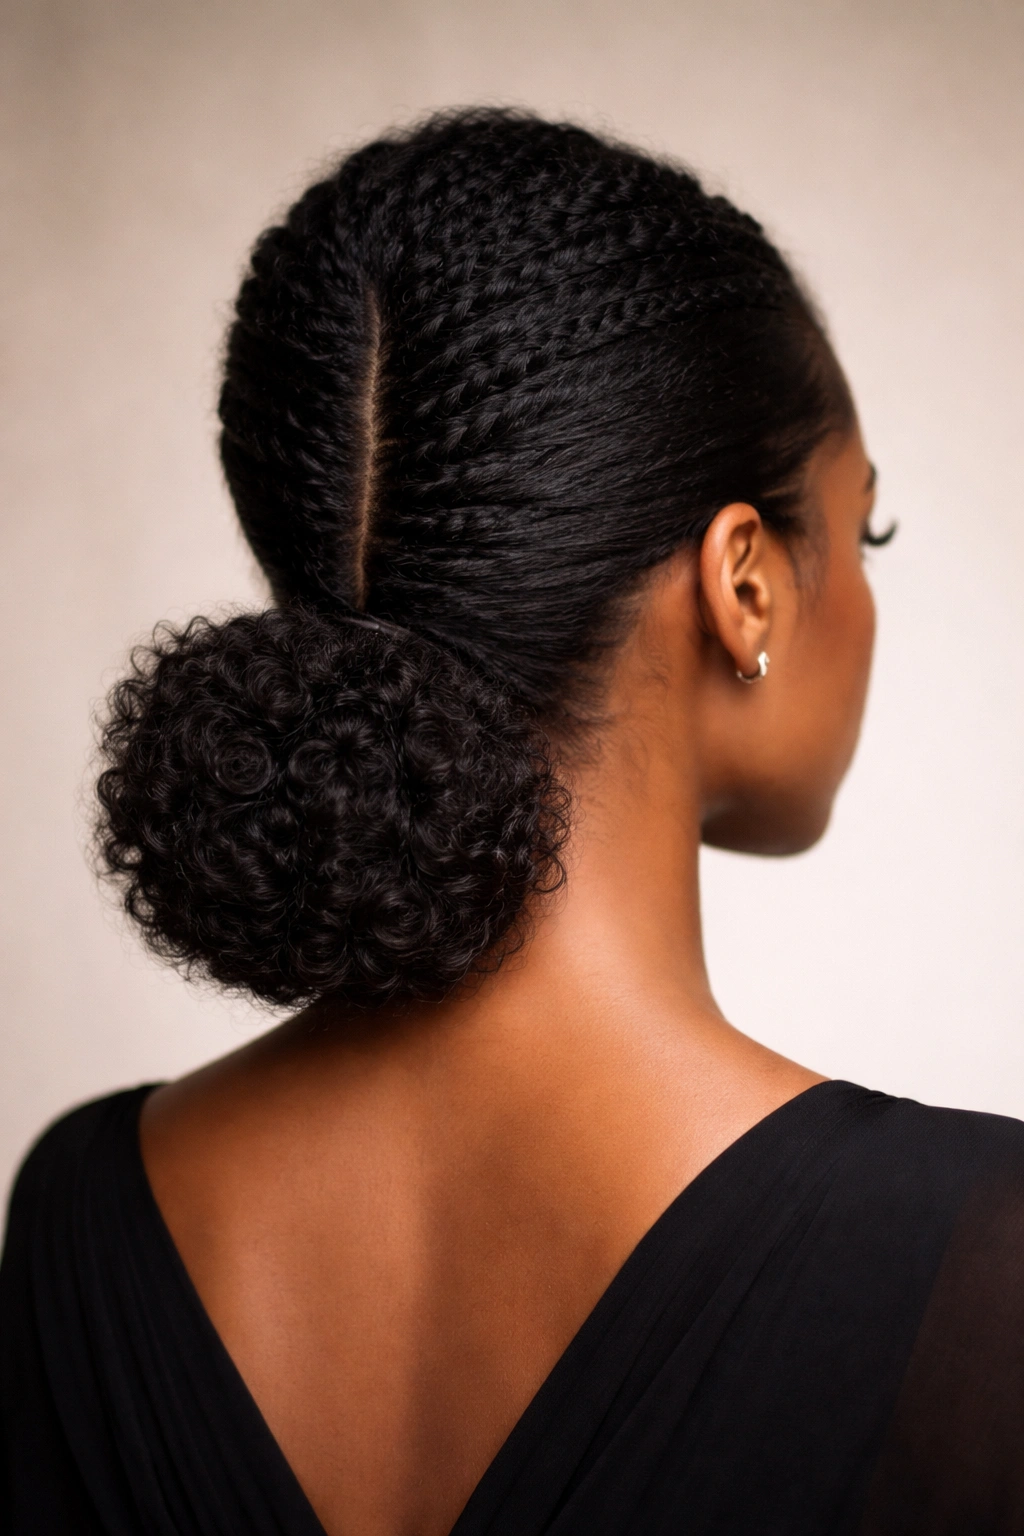
A low faux hawk bun is the sophisticated, less-aggressive cousin of a traditional mohawk. Instead of shaving the sides, you create height and definition along the center of your head from forehead to nape by braiding, twisting, or smoothing the sides while keeping the center section fuller and voluminous. This culminates in a bun at the base of your neck, giving you an edgy-meets-elegant vibe that works for nights out, creative professional environments, and anyone who loves a bit of intentional drama in their styling.
Why This Style Reads as Intentional and Bold
The low faux hawk bun draws the eye straight down the center line of your face and head, which naturally flatters your features and creates a visual focal point. Because the sides are smoothed or braided while the center stays full, you get incredible dimension and visual interest—this isn’t a “I’m protecting my hair” style, this is a “I’m making a statement” style. The center section, with its natural coils and curls on full display, contrasts beautifully with the controlled sides, creating movement and texture that reads as high-fashion even though the execution is surprisingly straightforward.
How to Style Your Low Faux Hawk Bun
Apply smoothing cream or gel to the sides of your head and brush or comb them backward and downward toward the nape, securing each side with bobby pins as you go. For the center section, you can leave it completely loose and voluminous, or braid it loosely from crown to nape—either works. Gather the hair at the nape into a bun using your preferred method (twisted, coiled, or gathered and secured). The contrast between the smooth, controlled sides and the textured center is what makes this style visually striking, so don’t skip the smoothing step on the sides.
Best For
If you’re comfortable being the center of attention and love styles that signal creativity and confidence, this one’s for you. It works beautifully for date nights, creative industry events, performances, or any time you want to feel like the most intentionally styled person in the room. It also works wonderfully for transitioning hair that’s longer on top and shorter on the sides.
Worth knowing: The smoother your sides, the more the center pops. Don’t be shy with your smoothing product on the sides—you want them almost sleek for maximum contrast.
3. Top Knot Bun
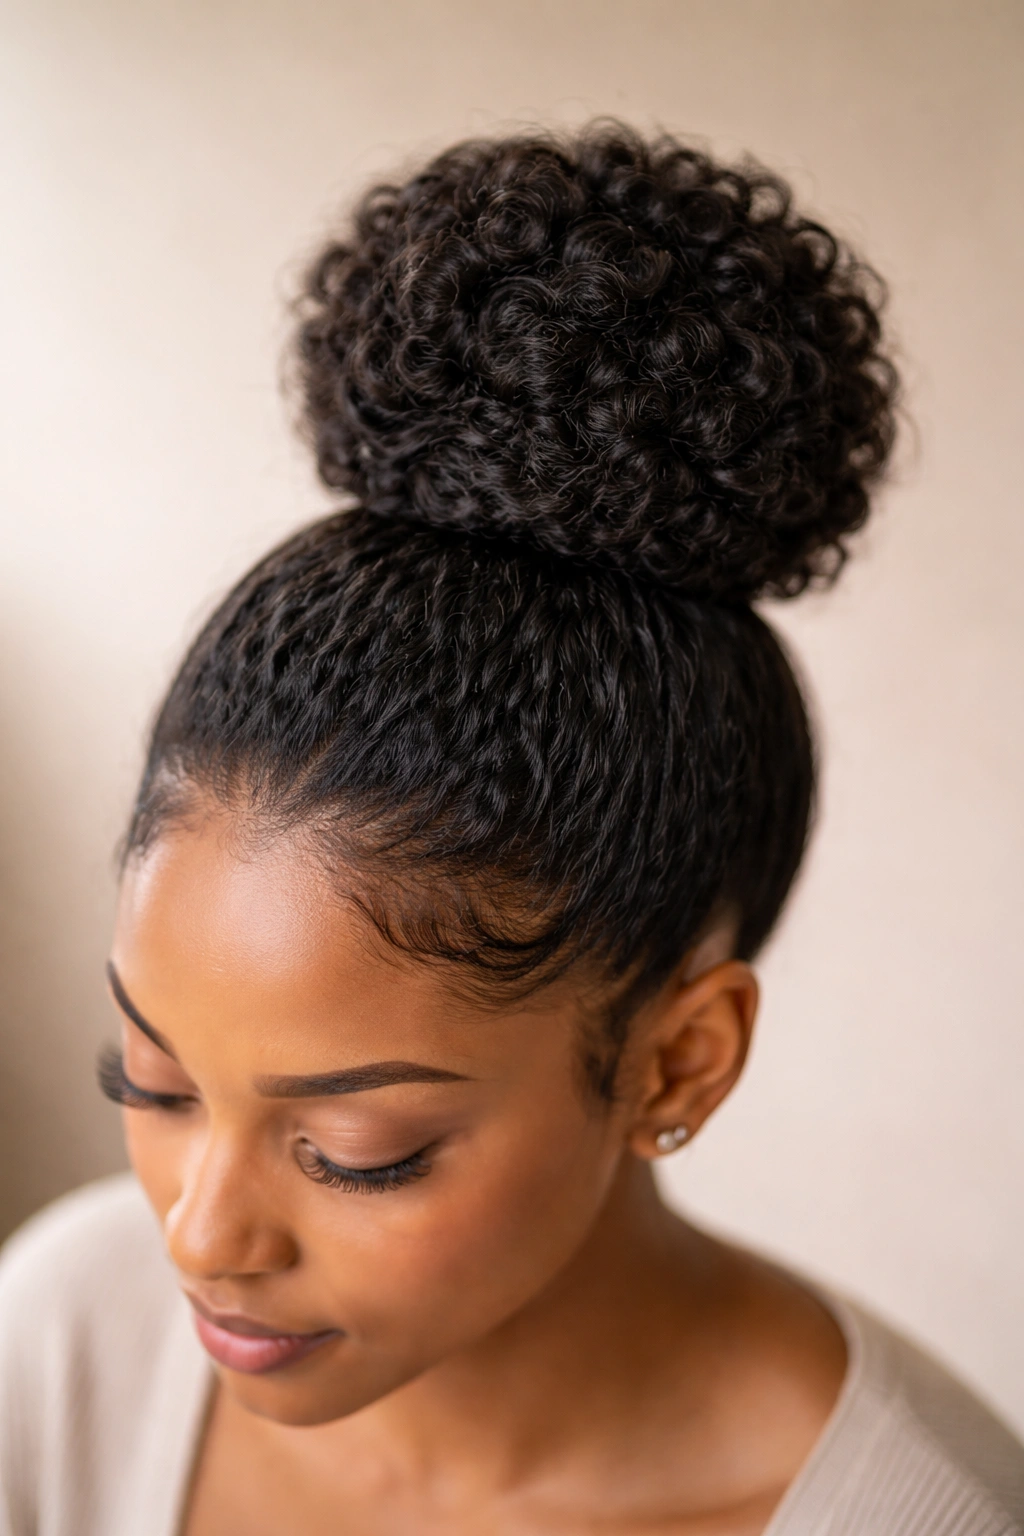
The top knot bun sits at the very apex of your head, creating a rounded, compact bundle of coils that’s simultaneously casual and put-together. This style works with your natural volume and curl pattern to create a knot that sits away from your scalp rather than pressed against it, which means your curls maintain their bounce and you get a genuinely three-dimensional silhouette. It’s the “I woke up like this but make it intentional” style—playful, approachable, and surprisingly flattering.
Why Top Knots Are Underrated for Natural Hair
A true top knot celebrates curl pattern instead of flattening it. Because the bun sits high and isn’t pulled tight against the scalp, individual coils and curls have room to express themselves, creating a textured, almost sculptural aesthetic. This style actually minimizes tension on your edges and hairline compared to sleeker bun styles, making it one of the more protective options available. The rounded shape also frames your face beautifully, especially for oval, square, or rectangular face shapes, and the height it creates helps elongate your neck.
How to Style Your Top Knot Bun
Flip your head forward and gather all your hair at the very crown—you want the ponytail positioned at the peak of your head, not toward the back. Secure loosely with a coil or hair tie, then gently twist or coil that ponytail around its base, allowing your curls to bunch and stack naturally. The goal is a rounded knot, not a tight, compact ball—think of it as stacking your curls upward rather than pulling them tightly. Secure with bobby pins, and don’t worry about perfection; slightly loose, textured top knots are more visually interesting than tight ones.
Best For
Top knot buns work beautifully for casual settings—running errands, gym days, relaxed brunches, or any time you want to look effortlessly put-together. They’re also excellent for people with delicate edges or sensitivity to tension, since the lack of tightness means minimal pull on your hairline. Taller or larger top knots suit longer faces and smaller frames, while more compact top knots work well for rounder faces or taller frames.
Quick tip: If your top knot feels too loose and you’re concerned it won’t stay put, try using a spiral hair tie or claw clip at the base instead of a traditional elastic—these tend to grip afro-textured hair more securely without requiring extra tightness.
4. Twisted Side Bun
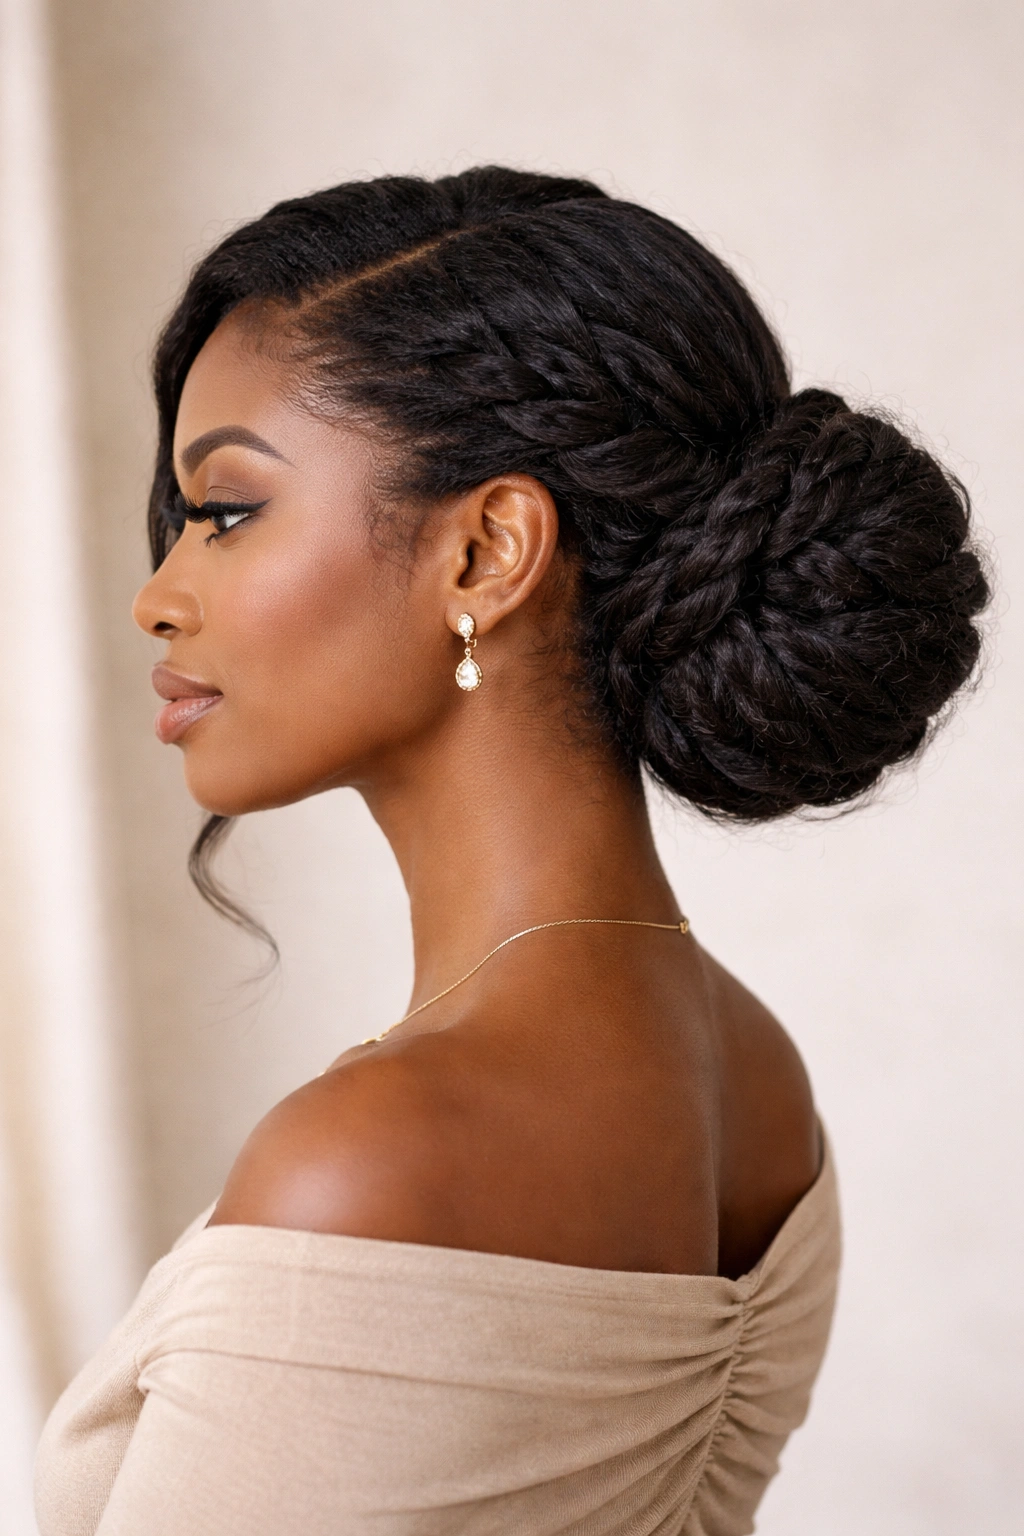
A twisted side bun gathers your hair to one side of your head—typically over your ear or just behind it—and creates a romantic, asymmetrical look that’s more interesting than a centered bun while still being completely wearable for professional and casual settings. The twist adds texture and dimension, creating an illusion of more intricate styling than the actual technique requires. This style works beautifully if you love an off-center aesthetic or if you’re styling around a part, edge pattern, or scalp sensitivity on one side.
Why the Side Placement Changes Everything
A side bun naturally creates asymmetry, which is more visually dynamic than centered styles. The off-center placement also works beautifully for showing off hairstyles or parts on the opposite side of your head—if you’ve got a beautiful scalp pattern or edge design, a side bun puts it on display. The twist itself adds visual interest and texture without requiring tight tension, and the softness of twisted hair looks more romantic and less severe than a tightly wound bun. This style also tends to feel more modern and fashion-forward than its centered counterparts.
How to Style Your Twisted Side Bun
Create a deep side part, then gather the majority of your hair—the larger section—to one side of your head at ear level. Before securing, separate a small section and twist it loosely, then wrap that twisted section around your gathered hair as you form the bun, tucking and pinning as you go. The twist becomes a decorative element that sits visibly around the bun, creating texture and interest. If your hair is very thick or dense, you might want to twist multiple small sections around the base of the bun rather than creating one large twist.
Best For
This style is perfect for anyone who loves asymmetrical styling or wants to show off an interesting part or scalp design. It works well for professional settings where you want to look polished but not severe, date nights where you want romance without formality, and casual days where you want a little extra visual interest. It’s also genuinely excellent for people dealing with scalp tenderness or sensitivity on one side, since you’re placing the weight and tension on the side that’s comfortable.
Pro tip: Don’t twist too tightly, and leave a few loose curl spirals visible around the bun. This softness is what makes the style beautiful—a tight, controlled twist reads very differently.
5. Multi-Bun Style
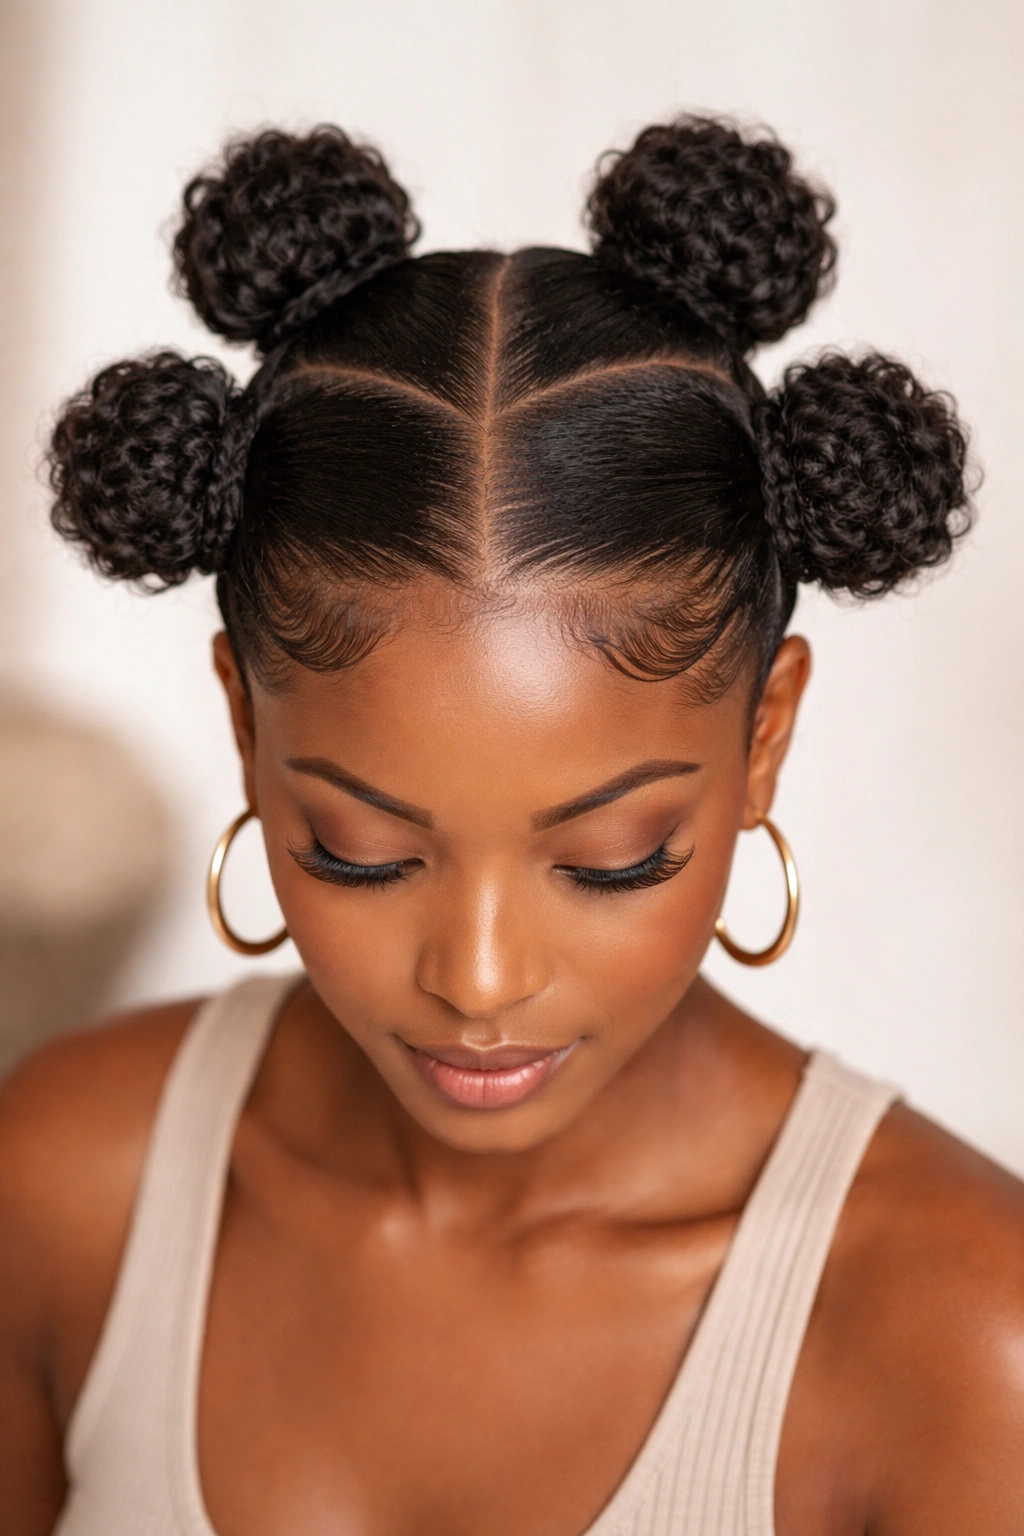
The multi-bun style divides your hair into multiple sections and creates two, three, or even four small buns scattered across your head rather than gathering everything into one central point. This style is playful, youthful, and genuinely striking—it showcases your curl pattern beautifully and creates a completely different silhouette than traditional single-bun styling. It’s bold enough to make a statement but casual enough to wear on everyday occasions.
Why Multiple Smaller Buns Work So Well
Instead of concentrating all your hair in one point, multiple buns distribute the weight across your scalp, significantly reducing tension and the potential for breakage. Each individual bun can be smaller and lighter, which means you can use smaller, less-damaging hair ties and secure them with minimal tightness. The visual effect is striking—your natural texture is on full display across multiple points, creating volume and dimension that a single bun simply can’t achieve. This style also has a distinctly creative, fashion-forward feel that signals confidence and individuality.
How to Style Your Multi-Bun Setup
Start by dividing your hair into sections—two sections for a double bun (typically left and right), three for a triangle pattern, or four for a square pattern. Use clips to separate each section, then work on one section at a time. For each section, apply a light styling cream, gather the hair, twist or coil it around itself, and secure with bobby pins. The buns don’t need to be perfectly symmetrical; in fact, slight variations in size and tightness create a more interesting, intentional aesthetic. If you have very thick hair, you might need to use multiple hair ties per bun for security.
Best For
This style is perfect for creative professionals, performers, music festivals, and anyone who wants to express personality through their styling. It works beautifully for shorter afro hair or tapered styles where you want to showcase the cut and curl pattern across your whole head. It’s also excellent for active days—the multiple buns distribute weight so evenly that you can wear this style during intense workouts without worry.
Fun fact: The placement of your buns completely changes the vibe. High placement reads youthful and playful, while buns positioned lower and toward the back read more sophisticated and editorial.
6. Wrap-Around Crown Bun
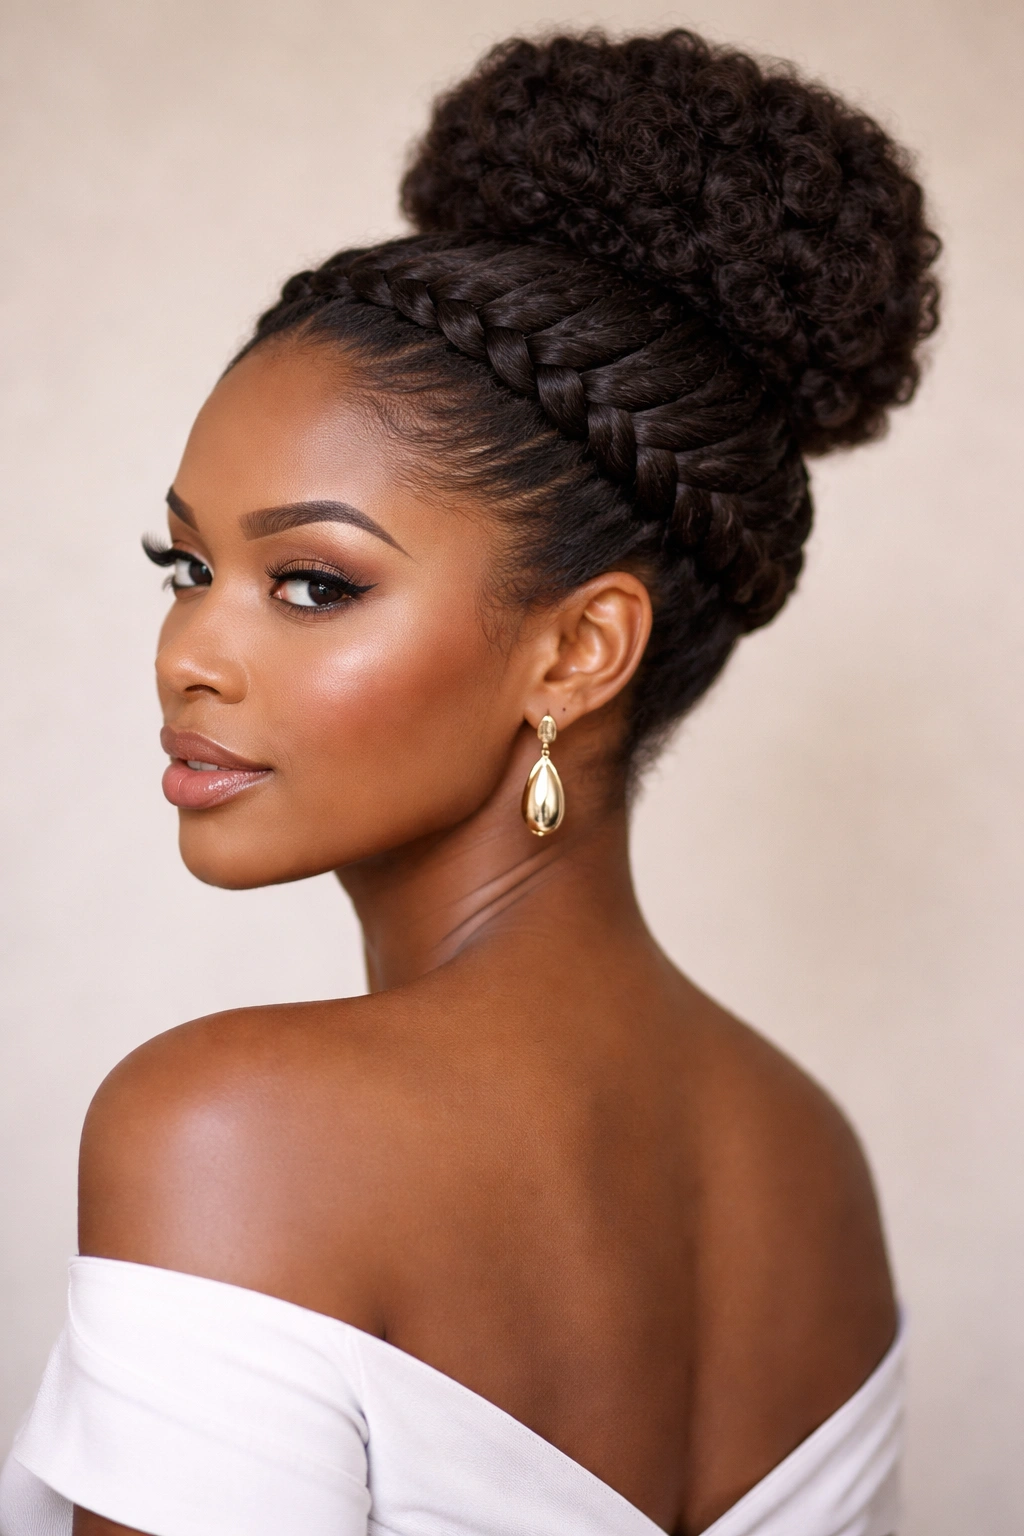
A wrap-around crown bun creates the illusion of an intricate crown or halo by braiding or twisting a section of your hair around your head and gathering the remaining hair into a bun at the crown or nape. This style marries protection with visual complexity—it looks like you spent significant time styling when the execution is actually quite straightforward. It’s regal, romantic, and undeniably beautiful, making it perfect for special occasions or anytime you want to feel extra.
Why the Wrap-Around Creates Visual Drama
The wrap-around section frames your face and draws attention upward, creating a naturally flattering focal point. By incorporating a braid or twist around your crown, you’re adding a decorative element that makes the style read as intentional and elevated, even though it’s simply a protective style. The contrast between the detailed wrap and the textured bun creates visual interest and sophistication. This style also works beautifully for showing off edge work, laid edges, or scalp designs, since the braid follows your hairline.
How to Style Your Wrap-Around Crown Bun
Start by creating a deep side part and braiding or twisting a section of hair from one side of your head all the way around to the opposite side, following the natural curve of your hairline and crown. Secure the braid temporarily with a clip. Then gather all remaining hair—both the hair not included in the braid and the end of the braid itself—into a bun at your crown or nape. Weave the braid around the base of the bun, wrapping it around your bun like a crown, and secure everything with bobby pins. The braid should sit visibly, framing your face and encircling the bun.
Best For
This style is absolutely stunning for formal events, romantic occasions, celebrations, and photo opportunities. It works beautifully for weddings, engagement parties, date nights, and professional events where you want to look elevated. It’s also perfect if you love showcasing detailed edge work or scalp art, since the braided crown naturally draws attention to your edges and hairline. This style works best on longer or fuller hair, where the bun has enough volume to be visually substantial and beautiful.
Worth knowing: Use a thin braid or twist for the crown section rather than a thick one—a delicate wrap reads more elegant than a chunky one, and it takes less hair, leaving more for your bun.
7. Textured Underbun
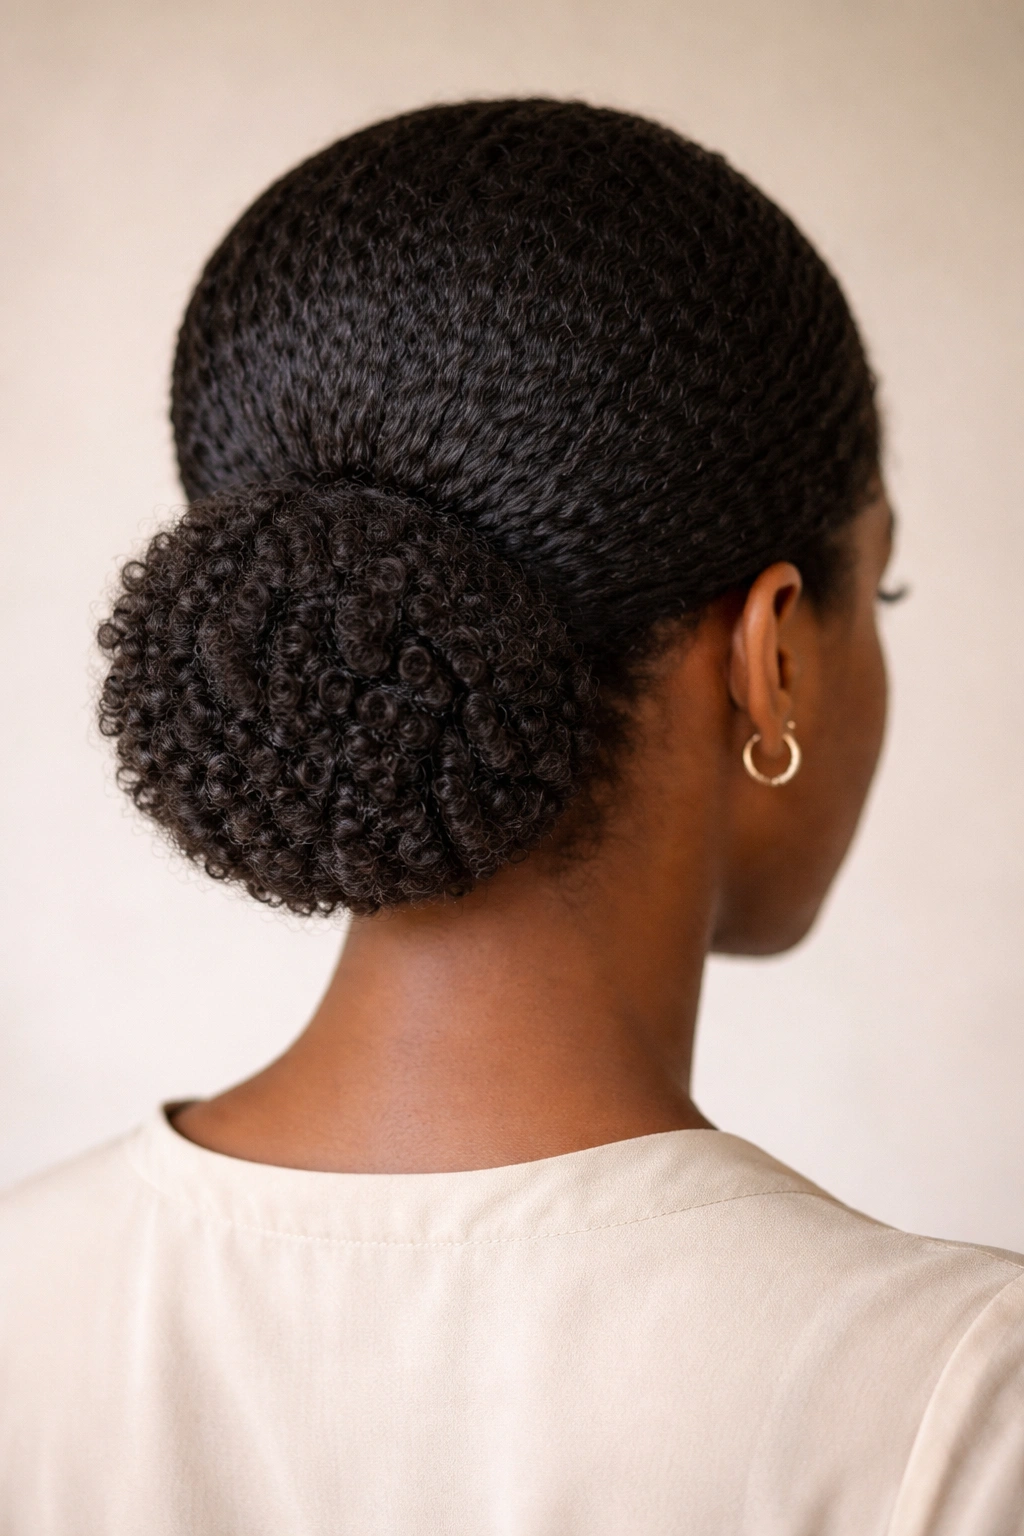
A textured underbun tucks your gathered hair underneath, creating a low bun that sits at the nape of your neck with the rounded, full shape of your coils and curls facing downward rather than upward. This style is sophisticated, office-appropriate, and genuinely unique—the reversed positioning creates a completely different silhouette than traditional buns. It’s particularly beautiful if you want your natural curl pattern on display from the back while maintaining a clean, professional look from the front.
Why the Underbun Reads as Elevated
By positioning the bun underneath, you’re creating visual interest from the back while maintaining a clean profile from the front. This style works beautifully for professional environments because the front reads polished and controlled, while the back showcases your beautiful natural texture. The rounded shape of your natural coils, visible from behind, creates a soft, intentional aesthetic that reads as high-maintenance in the best way—it’s clear you care about your hair and presentation. The underbun positioning also naturally reduces tension on your hairline, making it one of the gentler securing methods.
How to Style Your Textured Underbun
Create a low ponytail at the nape of your neck and secure it loosely with a hair tie. Instead of twisting the hair upward and over the base, gently coil or twist it downward and underneath the ponytail base, tucking the ends under and securing with bobby pins. The coiled section should curve downward, creating a rounded shape that points toward the back of your neck. Leave some texture visible—you want individual coil definition to show, not a tight, compact knot. Smooth the front and sides of your hair as much as you prefer, using edge control if desired.
Best For
The textured underbun is ideal for professional settings, job interviews, and any situation where you want to look polished from the front while keeping your style interesting and textured from the back. It works beautifully for people with noticeable curl patterns who want those curls on display in a sophisticated context. It’s also excellent for anyone with a sensitive hairline or edges, since the underbun positioning creates minimal tension on the delicate perimeter of your head.
Pro tip: Smooth your edges gently with edge control or styling cream, but don’t flatten the underbun itself—the textured, dimensional look is what makes this style beautiful.
8. Sleek Edge Control Bun
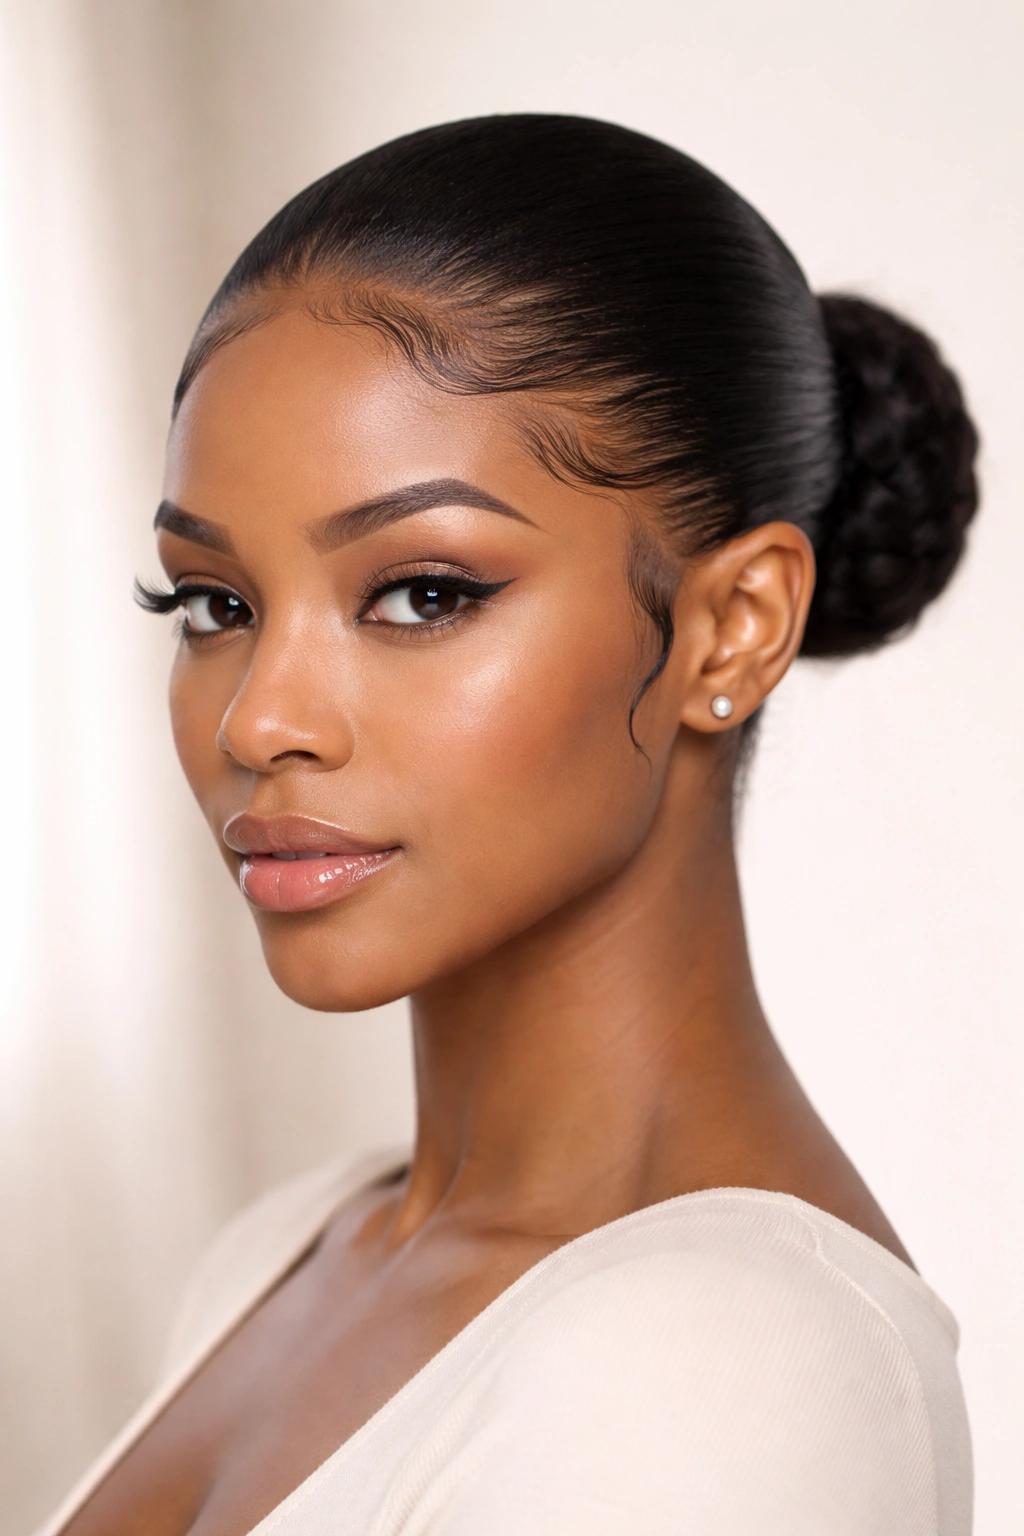
A sleek edge control bun takes precision and intentionality to the maximum, creating a smooth, sculpted look from your hairline all the way through your bun. This style uses edge control or smoothing gel on your hairline and temples, creating laid edges that curve smoothly into a sleek, compact bun. It’s sharp, modern, and undeniably powerful—this is the bun style that turns heads and makes people assume you have your life completely together, even on days when that’s only partially true.
Why Precision Edge Control Matters Here
The sleek bun isn’t just about pulling hair back; it’s about creating clean, intentional lines from your hairline through your crown and into your bun. Laid edges create visual drama and sophistication—they frame your face beautifully and create a polished aesthetic that reads as effort and intention. The contrast between the sleek sides and front and the textured or smooth bun at the back creates visual interest and dimension. This style also tends to be one of the most secure options since the smooth front sections help keep flyaways under control all day long.
How to Style Your Sleek Edge Control Bun
Apply edge control or smoothing gel to your hairline, temples, and the front sections of your hair, using a small brush or edge control brush to smooth the hair downward and backward in intentional patterns. You can create curved patterns, straight patterns, or more artistic designs depending on your preference and skill level. Once your edges are laid and the product has set slightly, gather all your hair into a tight, high or low ponytail (depending on preference), and create your bun by twisting or coiling the ponytail section into a compact, smooth bundle. Secure with bobby pins and smooth any flyaways with additional edge control.
Best For
This is the ultimate style for special occasions, performances, important meetings, and any time you want to feel powerful and polished. It works beautifully for people who love bold styling and aren’t afraid to be noticed. It’s also excellent for gym days and athletics, since the sleekness and tightness mean zero movement or flyaways. Anyone with a strong facial structure can rock this style beautifully—the clean lines draw attention to your face, which works best if you genuinely like the look of your facial features without softening.
Real talk: This style requires regular touch-ups as your hair grows and your edges start to texture. Plan on refreshing your edges every 3-4 weeks with edge control between wash days to maintain the sleek aesthetic.
Styling Tips That Work for All Afro Bun Styles
Successful afro bun styling starts with the foundation of healthy, moisturized hair. Dry, brittle hair won’t hold a bun beautifully and will break more easily, so focus on deep conditioning treatments, leave-in conditioners, and regular moisture replenishment before you even think about styling. Your hair needs to be hydrated enough to be pliable without being dripping wet—that sweet spot of damp-but-not-soaked is when hair is most cooperative.
The type of hair tie or fastener you choose matters far more than most people realize. Avoid traditional rubber bands and elastic ties without cushioning, as these create stress points and can snap hair. Instead, choose spiral hair ties (also called coil ties), seamless hair ties, or covered elastic bands that distribute pressure evenly. For tighter bun styles, a claw clip can work beautifully instead of a hair tie, and it requires less tightness to stay secure. The looser your securing method, the less tension on your hair and scalp.
Don’t aim for perfection—intentional imperfection is actually the hallmark of beautifully styled afro buns. A few loose curl spirals around your bun, slightly asymmetrical twists, and visible texture actually read as intentional styling rather than messy hair. The softness and dimension that comes from not over-controlling every curl is what makes these styles so visually striking. Aim for “purposefully imperfect” rather than “perfectly polished,” and your buns will immediately look more sophisticated.
Protecting Your Hairline and Edges While Bunning
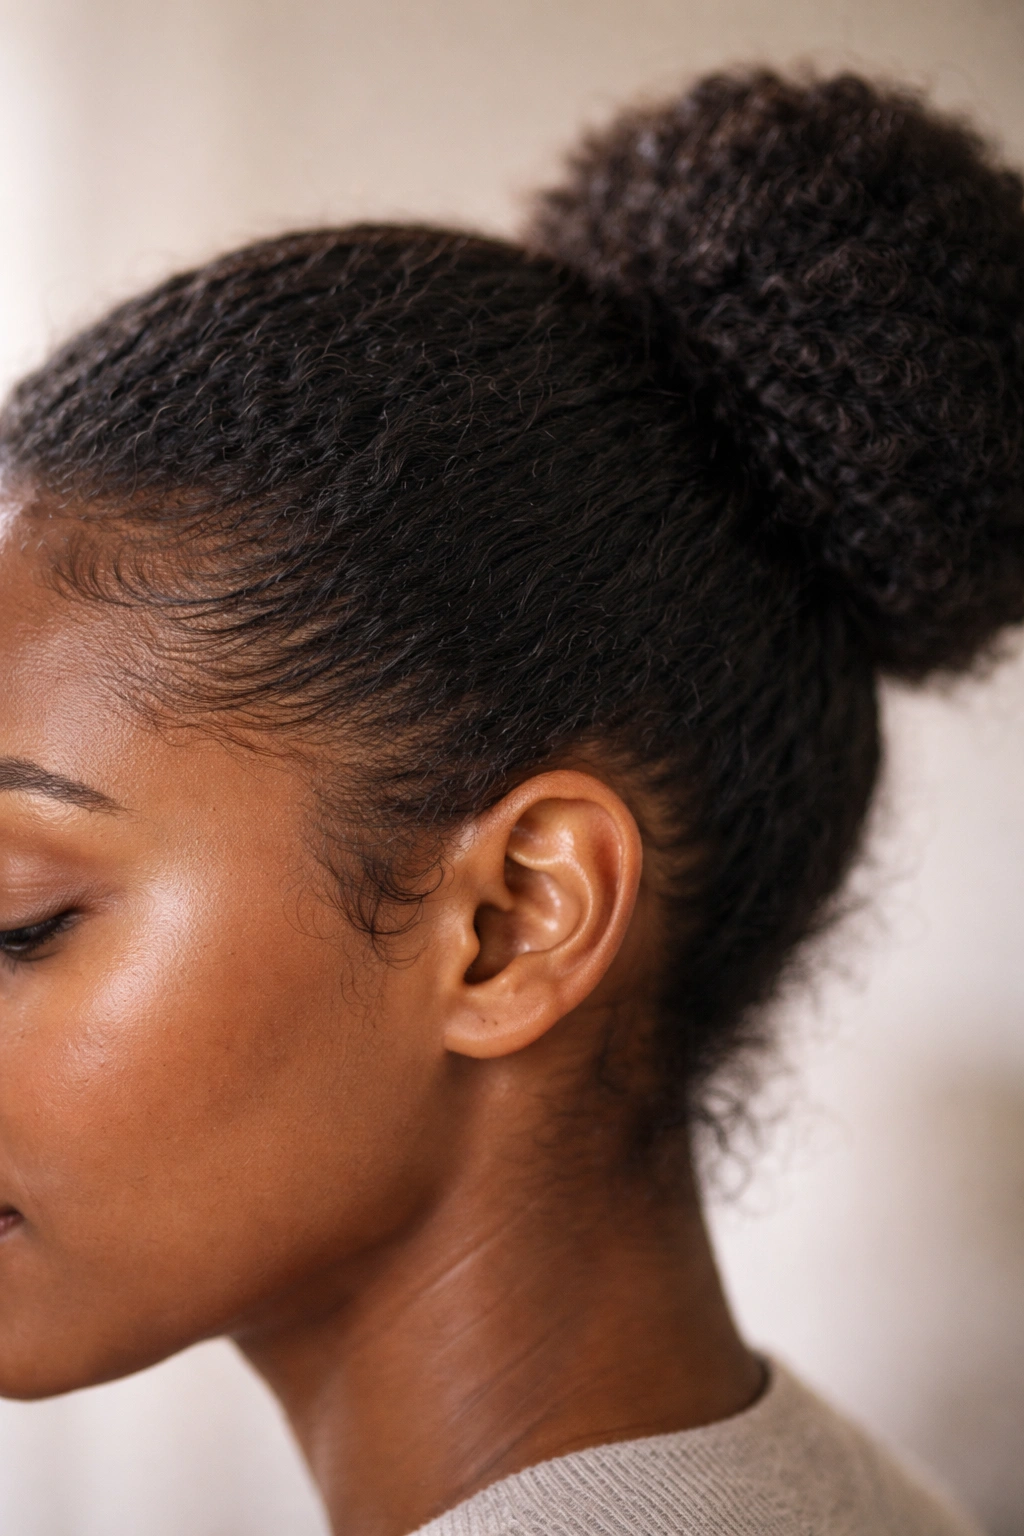
Your edges and hairline require extra attention when you’re regularly wearing buns, since the gathering point creates tension at the base of your ponytail. To minimize damage, never create your ponytail right at the root—instead, position your hair tie an inch away from the scalp, which distributes weight across a broader area and reduces stress on any single group of hair follicles. Alternate which side you create a side bun on if you wear side buns regularly, and rotate between high, low, and side placements throughout the week to avoid putting constant tension on any single area.
Apply a nourishing oil or serum to your edges and hairline before styling, and continue to moisturize these delicate areas throughout the week, even on days you’re not styling. Your edges have smaller, more delicate hair strands than the rest of your head, and they deserve dedicated care. If you’re using edge control, make sure it’s not so strong that it’s causing pulling or irritation—your edge control should hold your edges without feeling tight or uncomfortable.
Take breaks from bunning regularly. If you’re wearing buns five or six days a week, consider taking one or two days completely off from any hair ties or gathered styles, letting your hair down and allowing your hairline to recover. This rotation approach significantly reduces the risk of traction alopecia or permanent damage to your hairline. Your hair will thank you, and you’ll actually get better-looking buns because you’re not consistently recreating tension in the same locations.
Final Thoughts
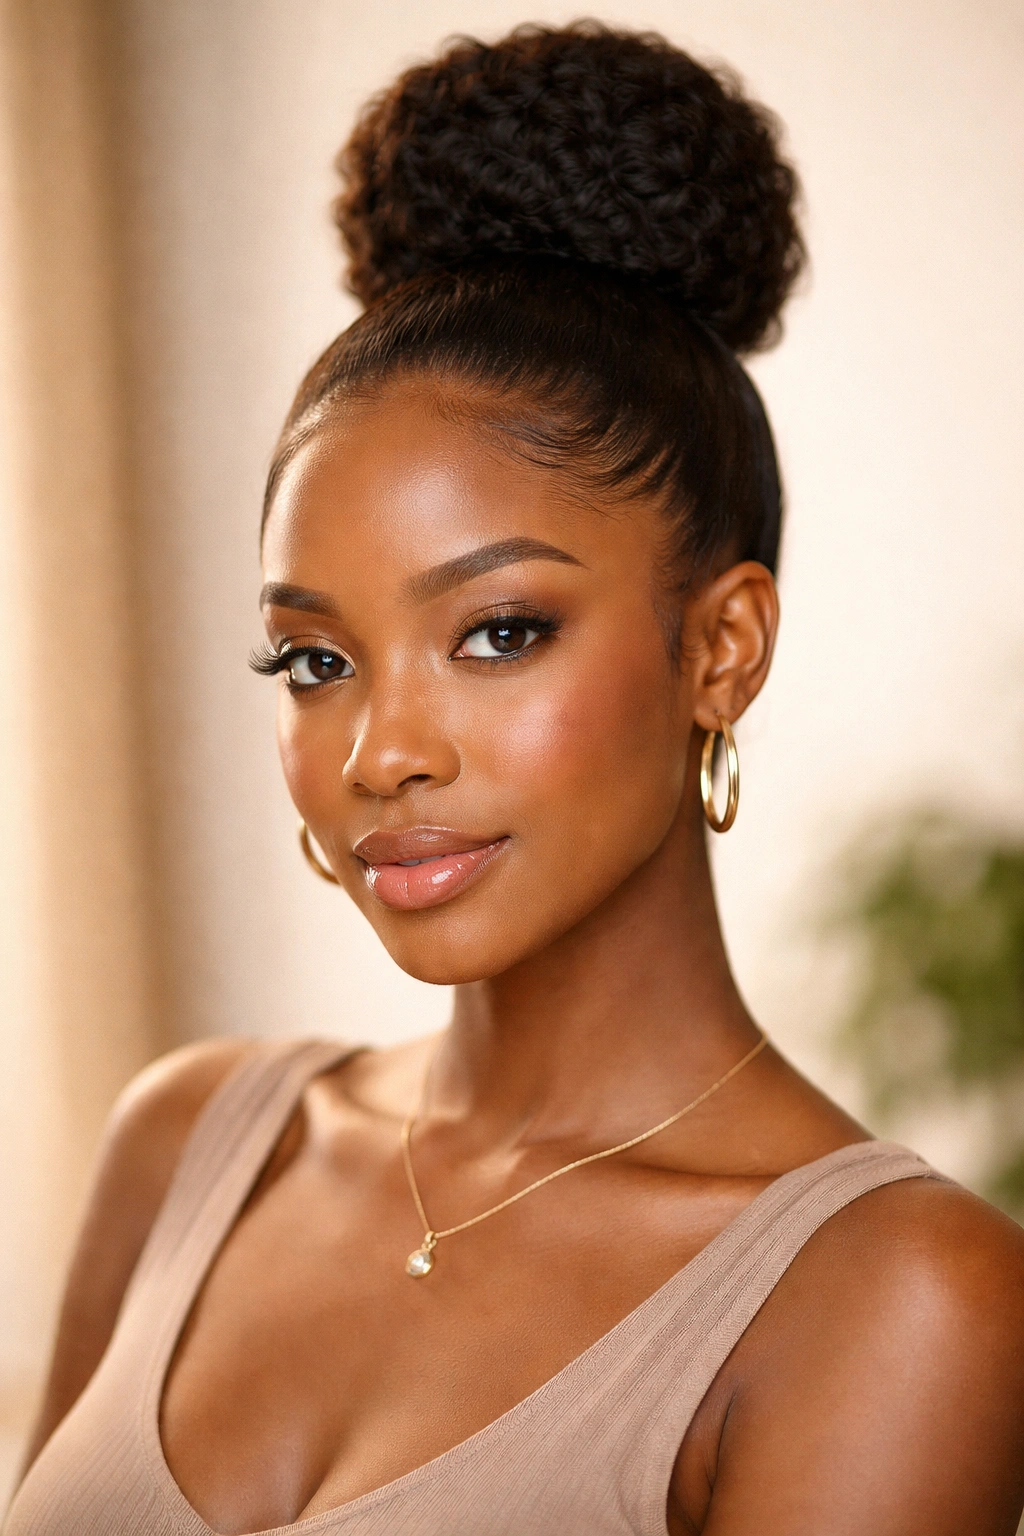
Afro bun styles are genuinely one of the most practical, beautiful, and protective styling options available to natural hair wearers. Each of the eight styles in this guide offers something different—whether you’re seeking sleek professionalism, playful creativity, romantic elegance, or effortless sophistication. The key to finding your favorite bun style is experimenting with different placements, securing methods, and levels of texture or smoothness until you discover what feels good on your head and looks good on your face and frame.
The real power of bun styling is that it works with your natural hair rather than against it. You’re not forcing your curls into a shape that doesn’t suit them; you’re arranging them intentionally and letting them do what they naturally do—bounce, coil, express texture and personality. A well-executed afro bun takes five to ten minutes to create once you’ve practiced it a couple of times, which means you’ve got instantly accessible styling options for literally every occasion and mood. That’s not just convenient; that’s genuinely empowering.
