



Afro hair has incredible natural texture and volume that opens up a world of styling possibilities—but finding hairstyles that are genuinely easy to create and maintain without hours of manipulation can feel frustrating. Whether you’re looking for protective styles that let your hair rest, quick everyday looks you can throw together in fifteen minutes, or beautiful options for special occasions, there’s so much more than the standard wash-and-go out there. The key is finding styles that work with your hair’s natural structure rather than against it, minimizing heat damage while maximizing that gorgeous volume and texture you were born with.
The right hairstyle can completely transform how you feel about your hair and how much time you spend styling it. Easy doesn’t mean boring—it means smart. It means understanding which techniques protect your hair, which tools are worth the investment, and which styles deliver maximum impact for minimal effort. The hairstyles in this guide are specifically chosen because they’re achievable for most people, whether you’re a styling beginner or someone who’s been working with their texture for years.
1. The Classic Wash-and-Go
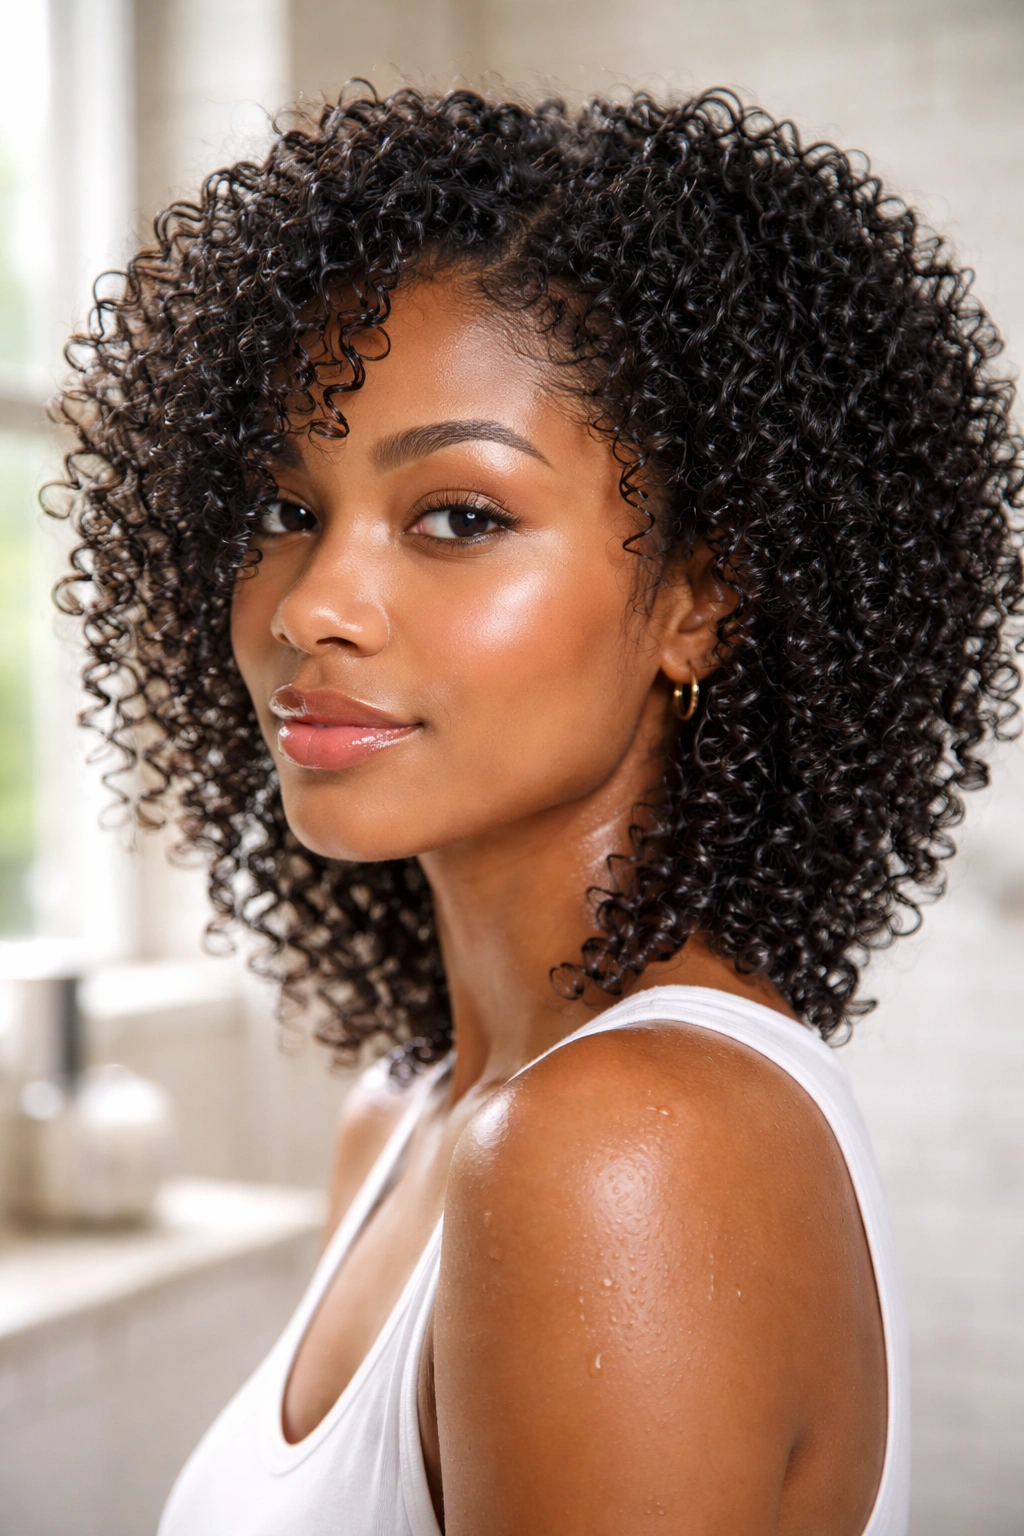
The wash-and-go is the foundation of easy afro styling, and when done right, it’s genuinely stunning. This style celebrates your hair’s natural curl pattern and texture without any added manipulation beyond washing, conditioning, and moisturizing. Start with a thorough wash using a sulfate-free shampoo designed for textured hair, then apply a rich conditioner and let it sit for several minutes before rinsing with cool water to seal the cuticle.
Why This Style Works
The beauty of a wash-and-go is that you’re working entirely with your hair’s natural structure, which means there’s zero heat damage and minimal breakage. Your curls and coils are already perfectly designed by nature—you’re just giving them the moisture and definition they need to shine. This style also saves you tremendous time since there’s no blow-drying, straightening, or intricate styling required.
How to Make It Look Its Best
- Apply a leave-in conditioner to soaking-wet hair while it’s still dripping, focusing on the mid-lengths and ends
- Use a curl-defining cream or gel on medium-length hair, applying it section by section with downward motions to encourage pattern formation
- Let your hair air-dry completely, or use a diffuser attachment on low heat if you want faster results without disrupting your curl pattern
- For extra volume at the roots, flip your head forward while air-drying or gently lift sections with your fingers
One honest note: wash-and-go results vary enormously depending on your hair’s porosity, curl pattern, water quality, and which products you use. It might take a few tries to find the exact product combination that keeps your curls defined and frizz-free rather than droopy or poofy. Water quality matters too—hard water can interfere with moisture absorption, so if you’re struggling, consider a clarifying wash or installing a filter showerhead.
2. High Puff or Top Knot
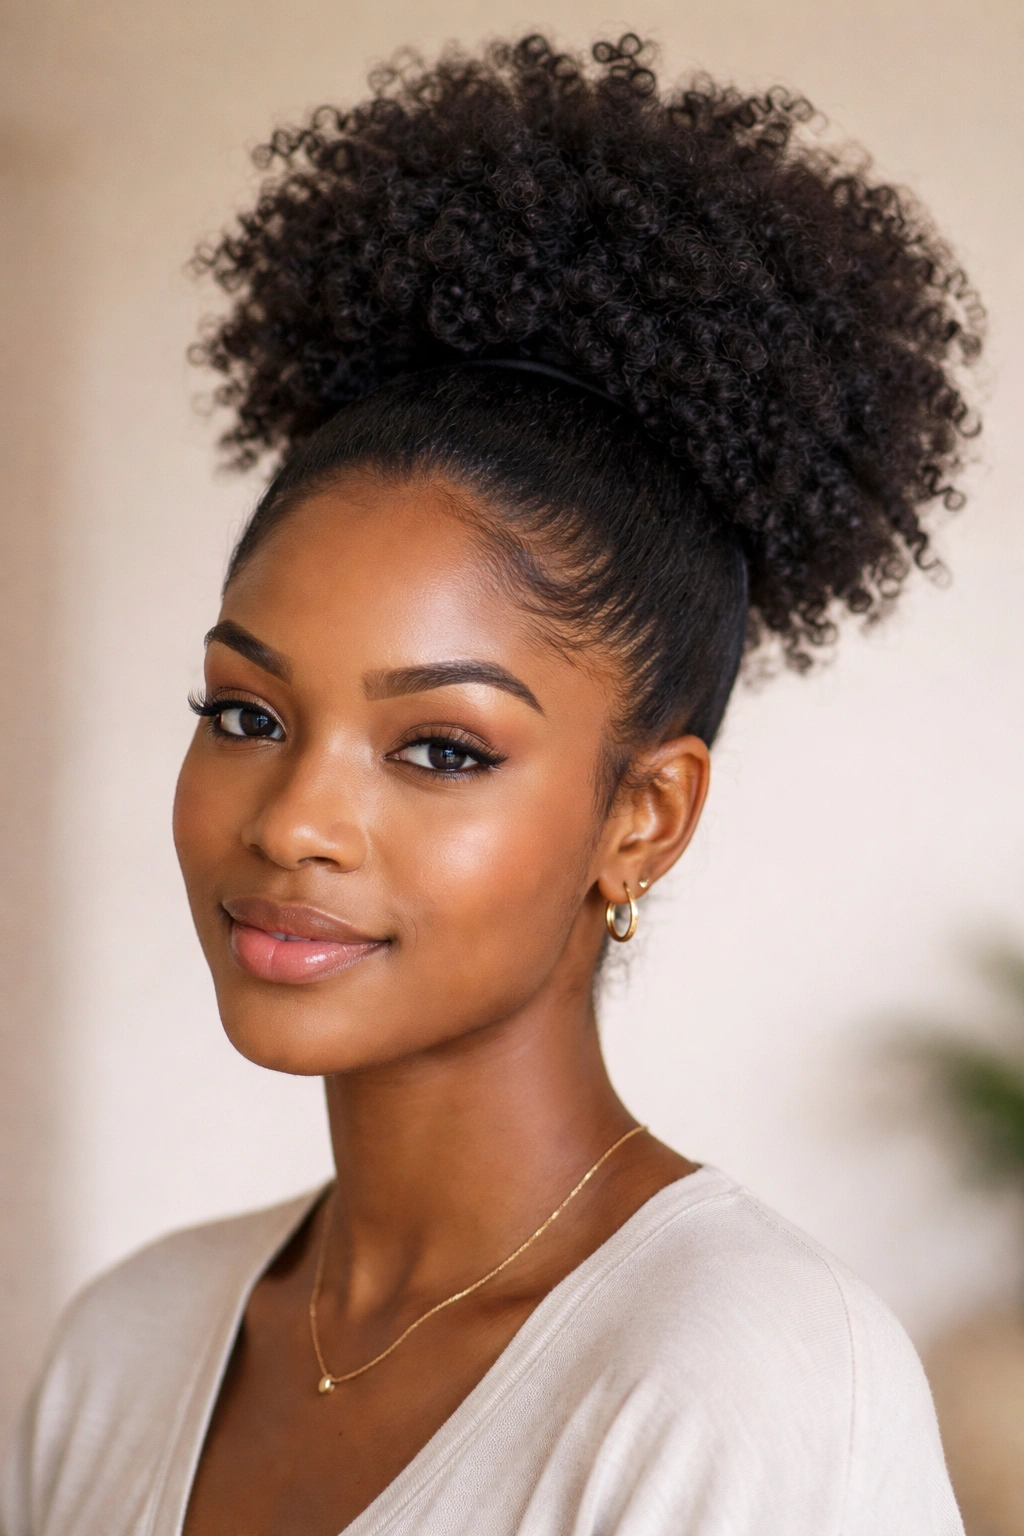
A high puff is one of the fastest and most flattering hairstyles for afro hair, and it works for virtually any curl type and length. Gather your hair at the crown of your head and secure it firmly with a hair elastic, then fluff the gathered section outward to create volume. This style takes literally two minutes to create and instantly looks intentional and put-together, whether you’re heading to the gym or running errands on a busy day.
Why This Style Works
The high puff protects your ends by keeping them bundled up and away from friction with your clothes and the environment. It also creates a focal point that draws attention upward, which many people find incredibly flattering. Because your hair is gathered in one spot, there’s no tangling, minimal shedding, and virtually no daily maintenance required.
How to Perfect the High Puff
- Start with hair that’s been refreshed with a spray bottle of water mixed with a small amount of leave-in conditioner
- Gather all your hair at the crown and secure tightly with a smooth elastic—velvet or silk elastics are gentler than rubber bands
- Gently fluff the puff by loosening the hair around the perimeter and lifting sections upward for volume
- Smooth your hairline if desired with a small amount of edge control applied with a soft brush
- Option: wrap a silk or satin scarf loosely around the base for extra polish and texture protection
The key difference between a high puff and a top knot is that a puff stays loose and round, while a top knot involves twisting the hair and forming it into an actual knot shape. Both are equally easy and equally flattering—choose based on whether you prefer a softer, rounder silhouette or a more deliberately styled look.
3. Twisted High Bun
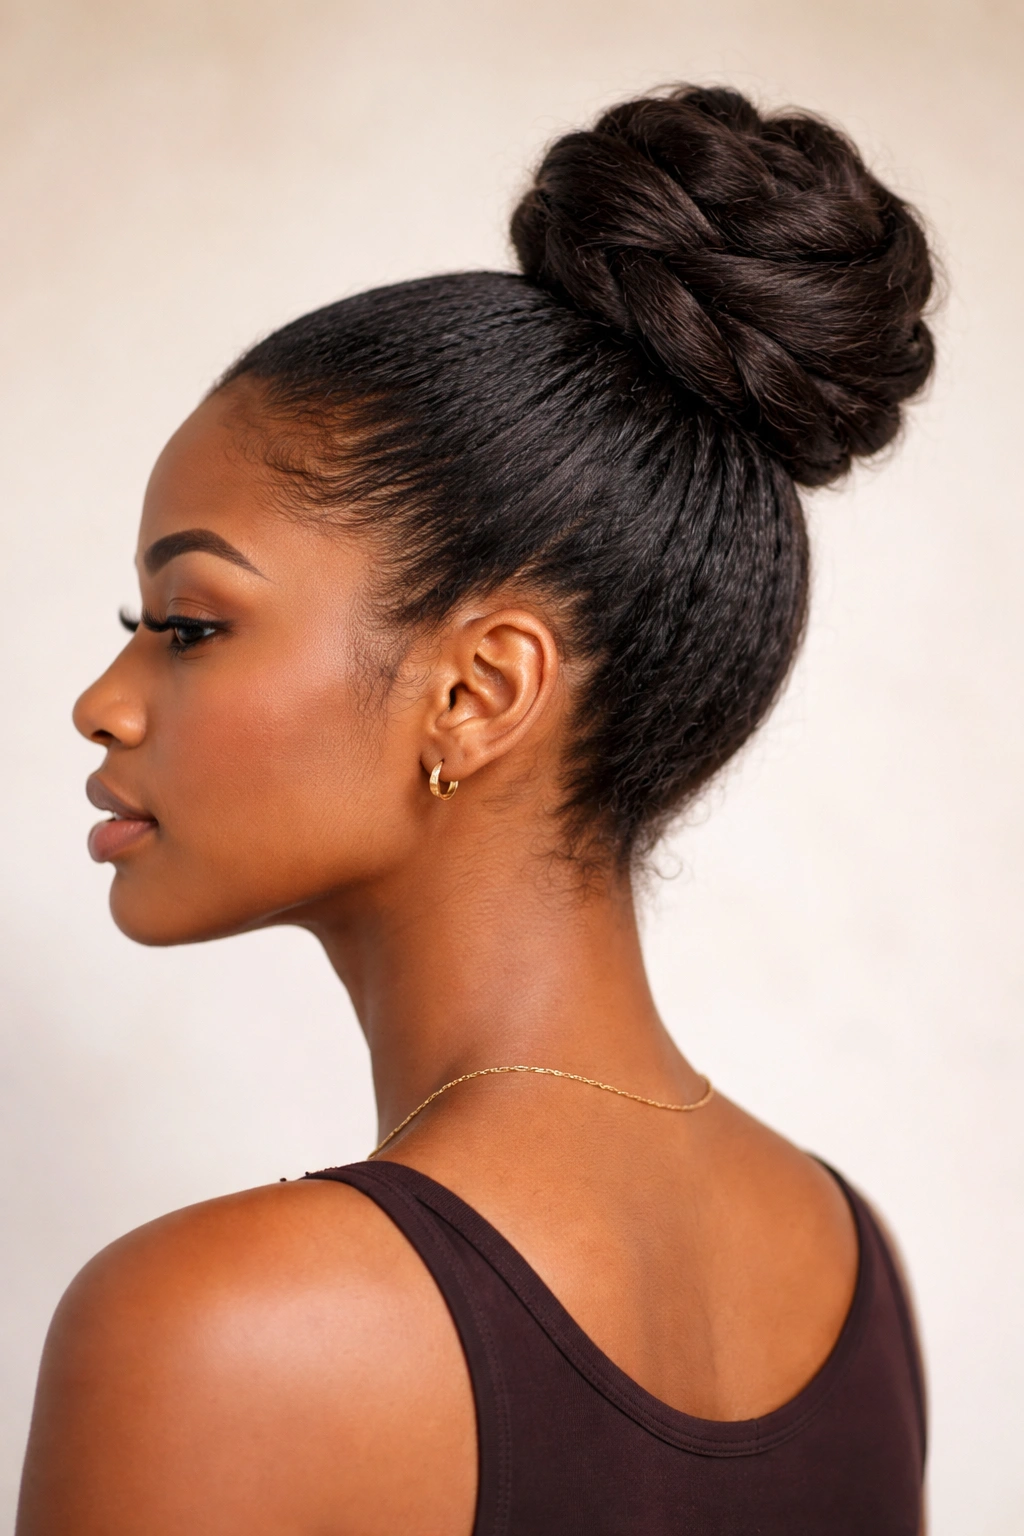
A twisted bun combines elegance with ease, and it’s sophisticated enough for work or a night out while still being quick enough for a casual day. Gather your hair into a high ponytail, then divide it into two sections and twist each section around the other, wrapping the twists together into a bun shape at the base of your ponytail. Secure with bobby pins and smooth any flyaways.
Why This Style Works
Twisting creates a more deliberate, finished appearance than a simple puff, which makes people perceive it as more formal and intentional. The twisted structure also holds better throughout the day without shifting or loosening, so you can go from morning through evening without needing to touch it up. Your ends are completely protected inside the bun, which means this is an excellent protective style choice.
How to Execute It Flawlessly
- Start with hair that’s been refreshed and has enough moisture to hold a shape without being dripping wet
- Secure your ponytail high and firmly—a loose foundation means your bun will unravel throughout the day
- Divide the ponytail into two even sections and twist each one tightly away from your head
- Wrap both twists around each other and around the base of the ponytail to form the bun
- Anchor with 4-6 bobby pins inserted at different angles for stability
- Tuck any loose ends back inside and smooth your hairline
Pro tip: If you have shorter hair or less volume, backcombing the ponytail section lightly before twisting gives you more body and makes the finished bun appear fuller and more substantial.
4. Feed-In Braids
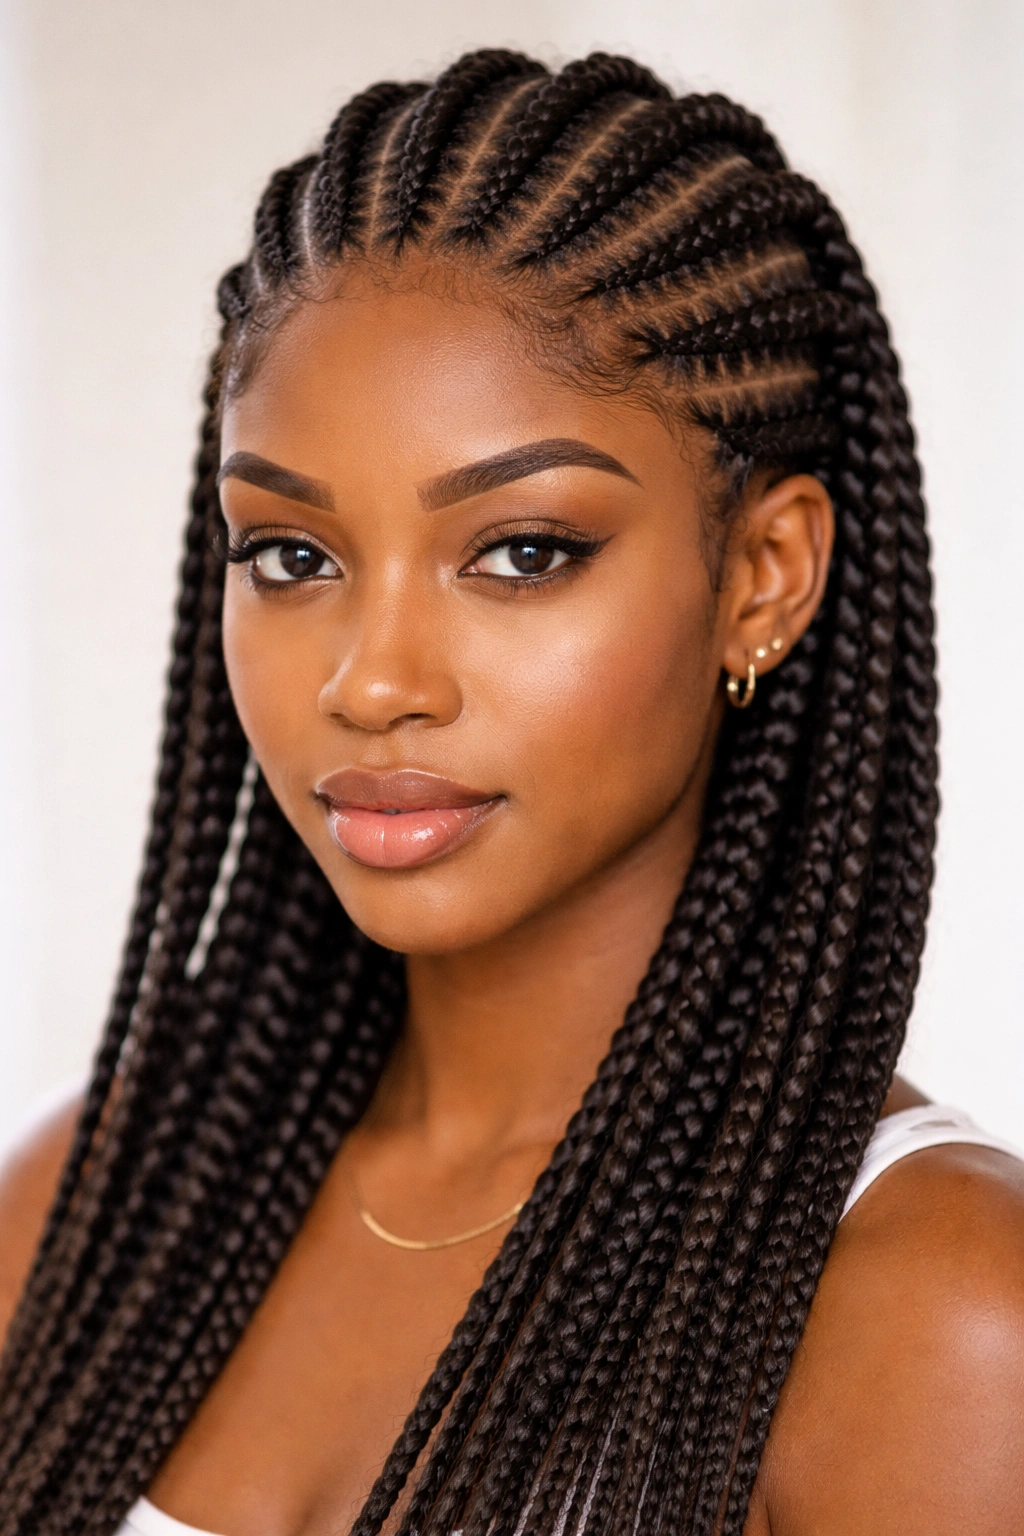
Feed-in braids are protective, elegant, and surprisingly straightforward once you understand the technique—you’re literally feeding small sections of new hair into the braid as you move down your head. This creates a braid that appears to originate from your scalp rather than beginning with three chunky sections, which looks more polished and allows you to use less hair per braid, making it less heavy on your scalp.
Why This Style Works
Feed-in braids are an excellent protective hairstyle because your actual hair is secured inside the braids, which keeps it away from friction, manipulation, and environmental stressors. They last longer than regular braids without looking tired, and the feed-in technique distributes weight more evenly across your scalp, reducing tension and the risk of traction alopecia. This style is also genuinely beautiful when done well—it looks intentional and artistic rather than utilitarian.
Step-by-Step Technique
- Start at your hairline by taking a small section of hair and beginning a regular three-strand braid
- Instead of picking up hair from only the sides like a regular Dutch braid, you’re going to pick up new hair from underneath and feed it into the main sections
- As you move down the head, continue adding thin extensions of hair to each section of the braid
- The key is adding consistent, thin amounts so the braid looks uniform and doesn’t suddenly get thicker
- Secure the end with a clear elastic and smooth any flyaways
- Space multiple braids evenly across your head or create just one statement braid
Honest truth: feed-in braids have a learning curve. Your first few attempts will feel awkward and might look uneven, and that’s completely normal. Watch detailed video tutorials, practice on someone else’s hair if possible, and give yourself grace. After you’ve done it five or six times, your hands will understand the motion and it becomes intuitive.
5. Clip-In Faux Bob
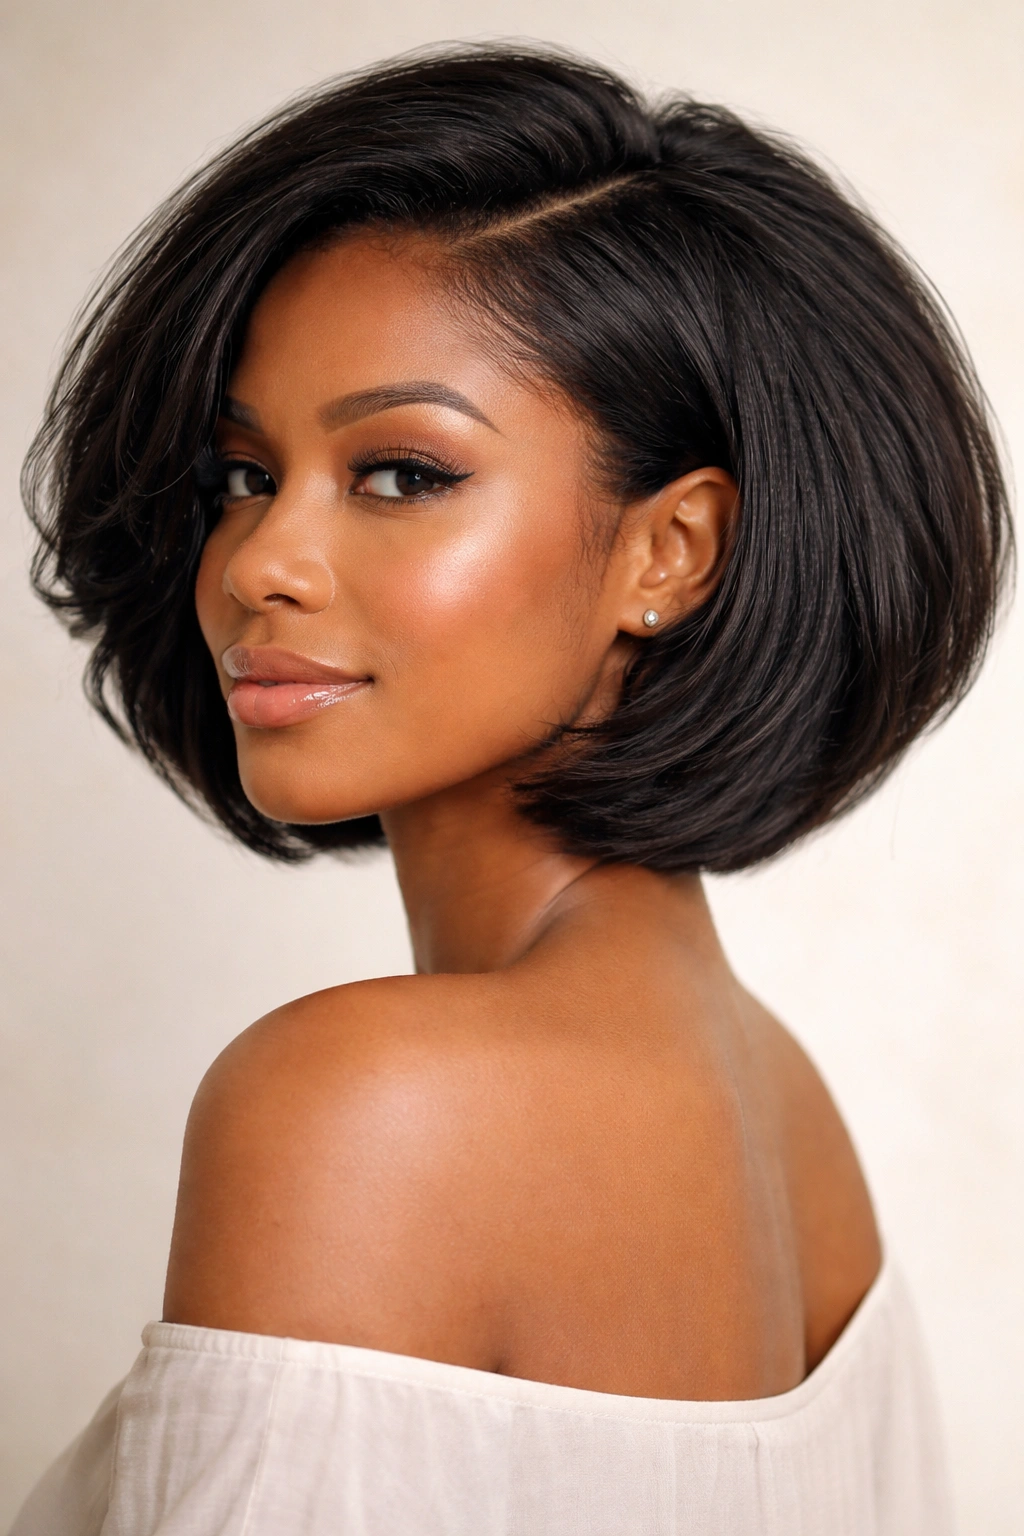
A faux bob lets you enjoy a sleek, short silhouette without cutting your hair or dealing with the styling demands of an actual short cut. Clip hair extensions styled into a bob shape underneath your own hair, then fold your real hair over the top to create the appearance of a complete bob. It’s a dramatic transformation that takes about ten minutes and lets you return to your regular hair whenever you want.
Why This Style Works
This is genuinely the easiest way to experiment with a completely different look without any permanent change or long-term styling commitment. Your own hair stays protected and completely tucked away, which means zero manipulation while you’re rocking the bob. The weight distribution of clip-ins is different from an actual braid or heavy style, so it feels lighter and causes less scalp tension.
How to Apply and Style
- Start with your hair smoothed into a low ponytail or bun at the nape of your neck to get your hair out of the way
- Clip the extension weft to your hair at the perimeter where your natural hairline would be with a short bob
- The extension should start at the sides of your head around ear level and extend across the back
- Fold your own hair down over the top of the clips to conceal them completely
- Style the visible portion however you’d like—smooth it, add waves, apply edge control to your hairline
- Remove the clips to take off the style, then gently release your real hair from the ponytail
Choose quality clip-ins made specifically for textured hair rather than standard straight-hair extensions, which won’t blend smoothly with your natural texture. Specialty retailers that cater to textured hair carry clip-in sets designed to work beautifully with different curl patterns and coil patterns.
6. Bantu Knots
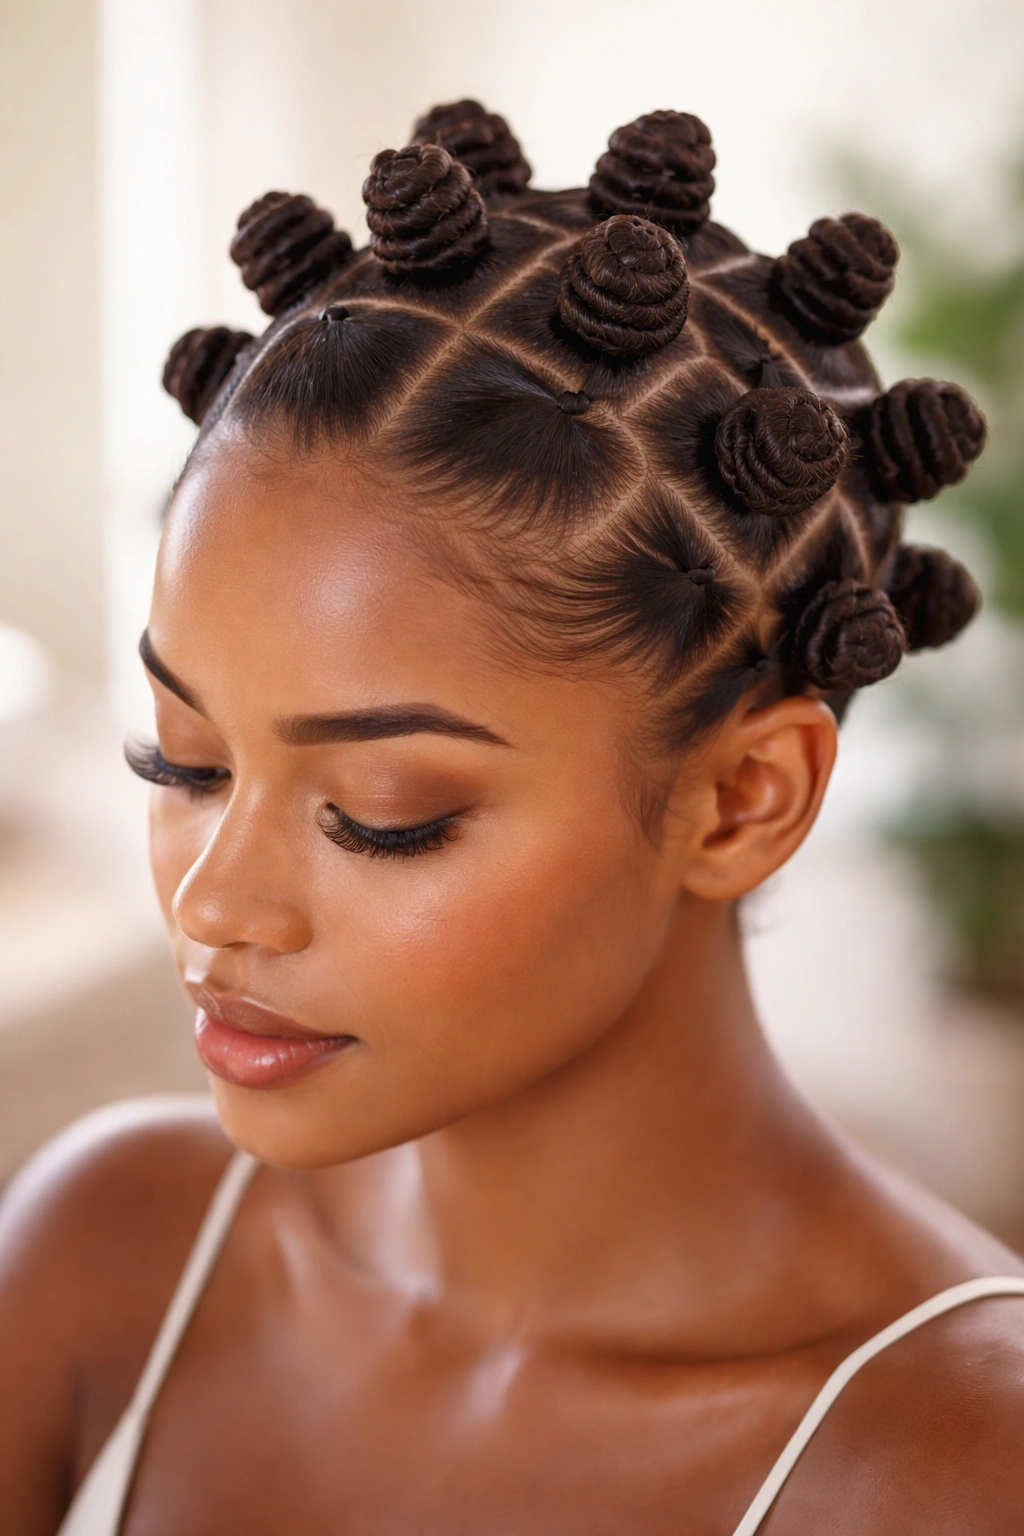
Bantu knots are a stunning protective style that’s also incredibly easy to create, even though they look intricate and intentional. Section your hair into square or rectangular zones, then twist each section tightly and wrap it around itself to form a knot sitting close to your scalp. These knots can be left as-is for a gorgeous textured look, or unraveled the next day for beautiful defined curls.
Why This Style Works
Bantu knots offer multiple style options in one—you get the knots themselves as a beautiful finished look, or you can unravel them for a full head of defined curls. The protective benefits are substantial: each knot keeps a section of hair safely bundled, reducing tangling and breakage. This style also serves as a low-heat styling method if you’re looking to add curl definition without heat tools.
How to Create Perfect Bantu Knots
- Start with clean, moisturized hair and divide it into sections using clips—the size of your sections determines the size of your knots
- Take one section and twist it tightly from the ends all the way to the roots
- Once twisted, wrap the twisted section around itself, tucking the ends underneath to form a knot
- Use bobby pins to secure each knot close to the scalp if needed, or they’ll stay in place on their own
- Leave the knots in overnight or for several days—the longer they sit, the more defined your curls will be when you unravel them
- Gently unravel each knot to reveal beautiful springy curls
The versatility here is genuinely wonderful: wear the knots for 2-3 days as a protective style, then transform into curls for another 2-3 days by unraveling them. It’s two complete looks from one styling session.
7. Flat Twists
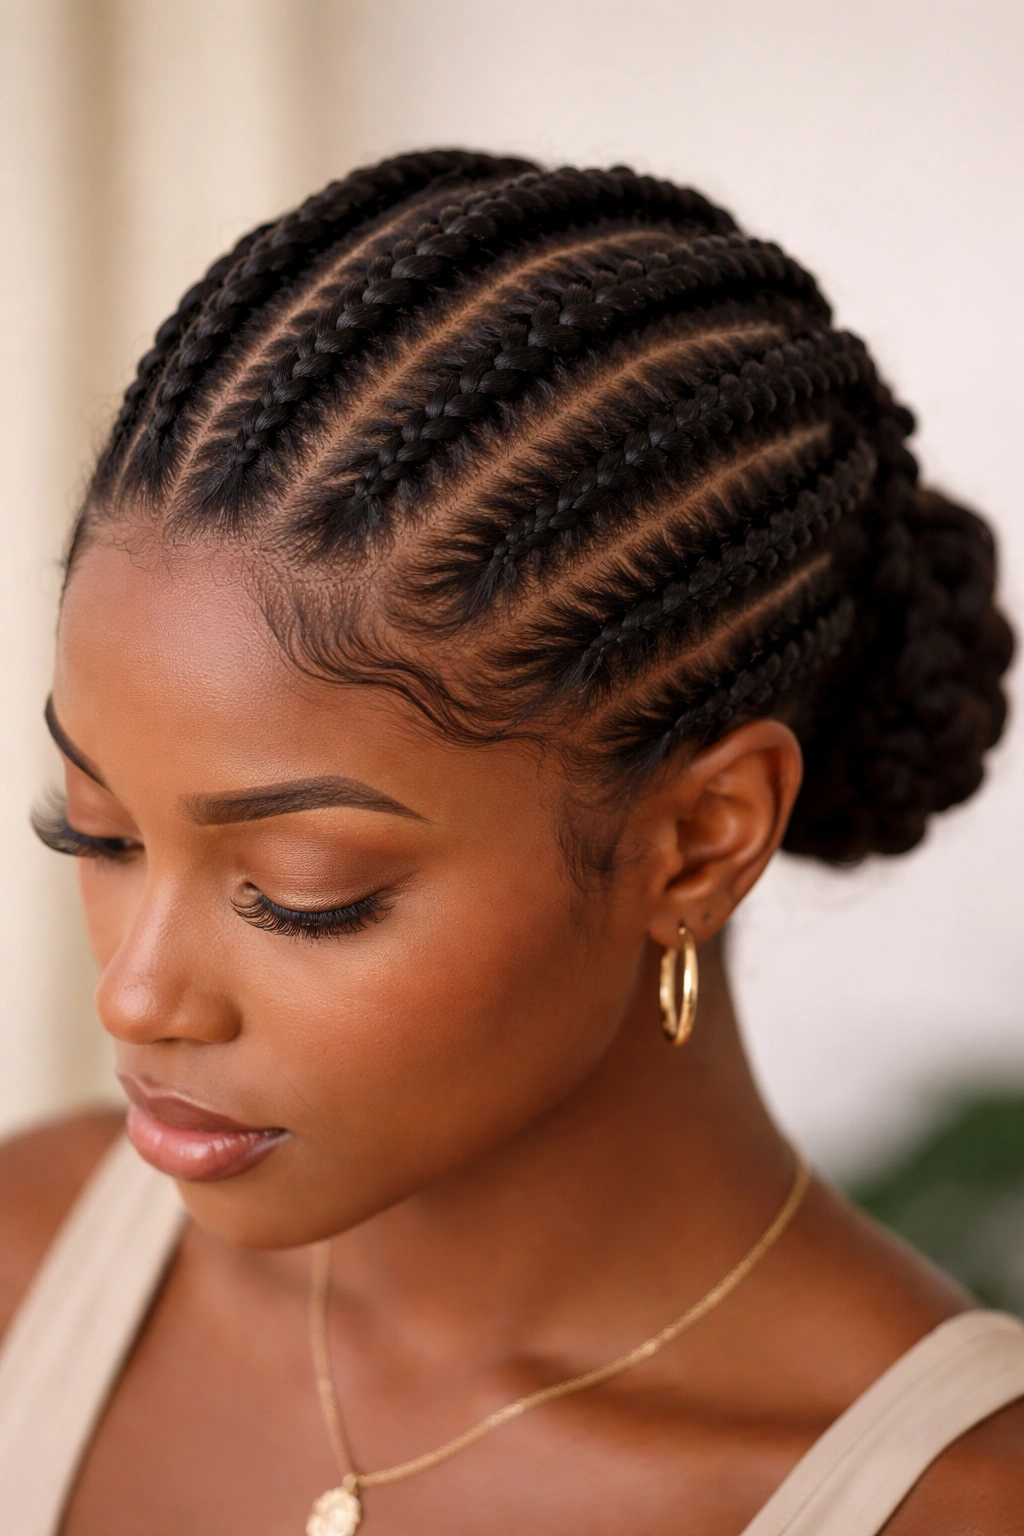
Flat twists are elegant, protective, and surprisingly achievable even if you’ve never twisted your own hair before. They’re essentially like cornrows but created with two strands instead of three, which makes them slightly easier to execute and gives them a sleeker appearance. You can create a pattern across your entire head or just one or two statement twists as an accent.
Why This Style Works
Flat twists keep your hair securely protected for several days, and the two-strand structure is genuinely easier to master than traditional three-strand braids or cornrows. They also provide excellent definition if you unravel them after a day or two, similar to how Bantu knots work. The sleek appearance makes them appropriate for professional settings and formal occasions, while the ease of creation means they’re practical for everyday wear.
Creating Defined Flat Twists
- Start with clean, moisturized hair and divide it into sections with clips
- Take one small section at your hairline and divide it into two strands
- Twist the two strands around each other while simultaneously picking up new hair from the scalp beneath
- Keep the twist close to your scalp as you feed in new hair—this is what makes it a flat twist rather than a regular twist
- Continue down to the ends and secure with a small clear elastic
- Create twists in any pattern you like—a single center line, multiple lines across the head, or diagonal twists for visual interest
The advantage of flat twists is that they’re forgiving if they’re not perfect. Unlike cornrows, which look noticeably uneven if the tension isn’t consistent, flat twists are beautiful even with slightly imperfect technique because of how the light plays across them.
8. Twist-Out
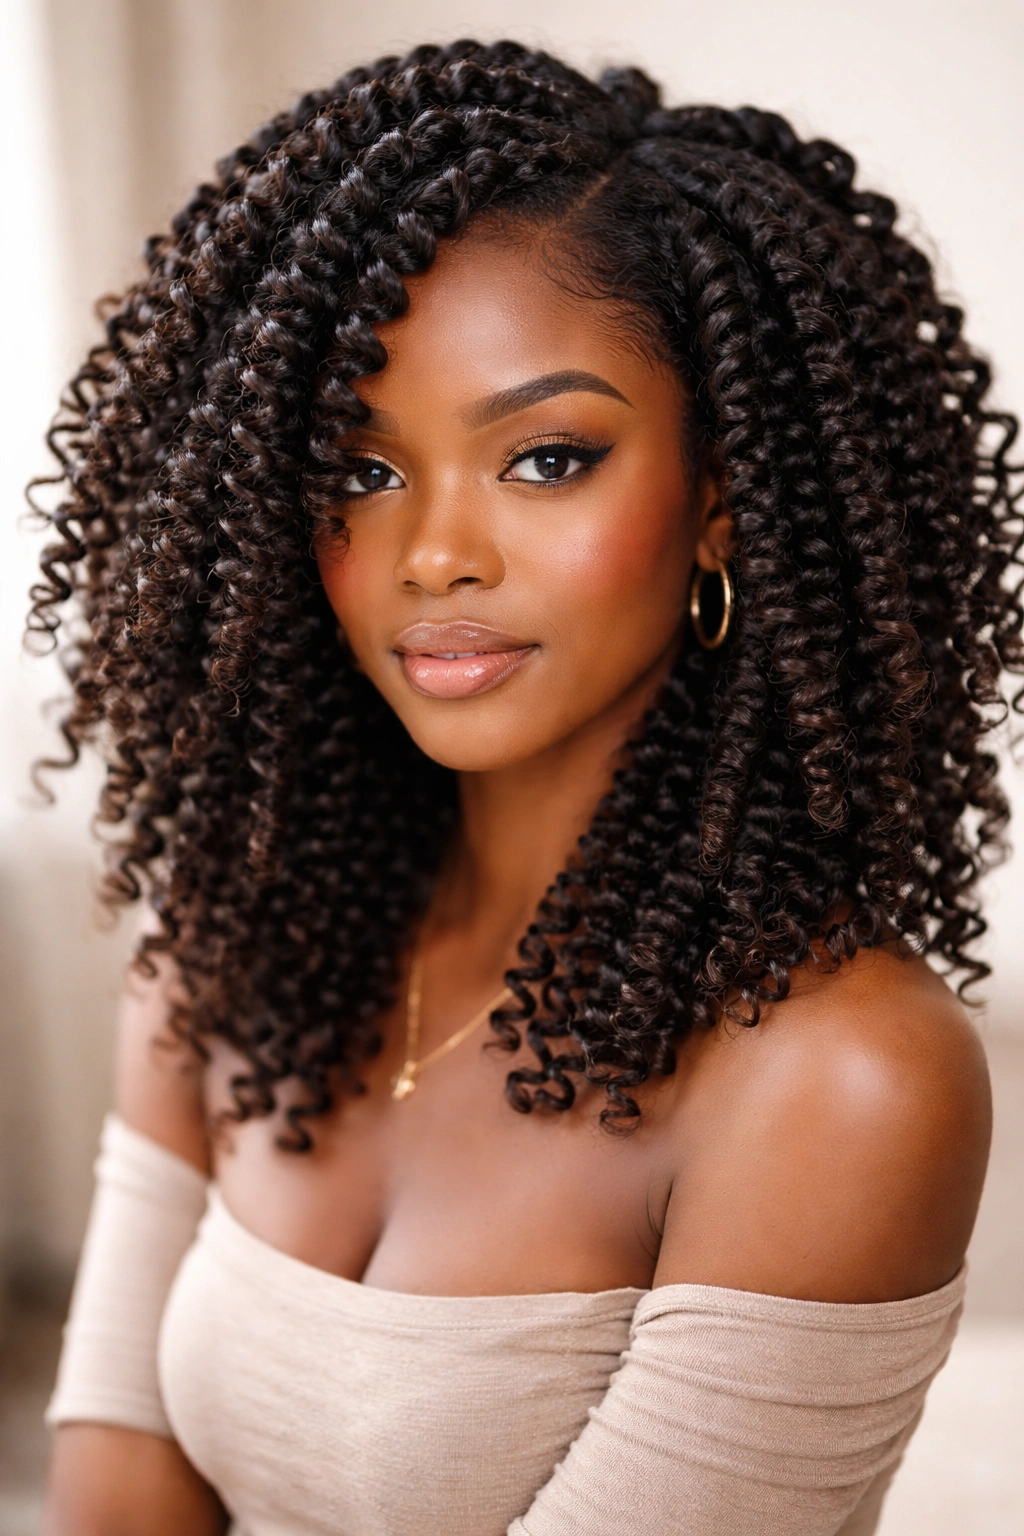
A twist-out is a natural styling method that creates beautiful defined curls and waves using nothing but your own hair, a bit of product, and time. Divide clean, moisturized hair into sections and twist each section tightly, let it set overnight (or longer), then unravel the twists to reveal stunning curl definition. This is a genuine protective style because your hair is safely twisted and undisturbed while it sets.
Why This Style Works
Twist-outs are low-heat styling—technically zero heat if you air-dry, though some people use a diffuser to speed things up. Your hair gets beautiful definition and wave pattern without any heat damage or manipulation. The twists themselves also serve as a protective style while they’re setting, so you’re getting two benefits: safe styling overnight plus gorgeous curls the next day.
Perfecting Your Twist-Out
- Wash your hair and apply a rich leave-in conditioner while it’s dripping wet
- Divide into 6-12 sections depending on how much definition you want (more sections = tighter, more defined curls)
- Apply a curl cream or gel to each section and twist it tightly from roots to ends
- Let the twists air-dry or use a diffuser on low heat until completely dry
- Unravel the twists gently, starting from the bottom and working upward
- Avoid touching the curls too much once unraveled—let them settle for a few minutes before styling
- Fluff at the roots for volume and shake out gently for a fuller appearance
Important: your twist-out will look different depending on how wet your hair was when you twisted, how much product you used, and how long you left the twists in. Experiment to find your preference—wet twists create tighter curls, while damp twists often create softer waves.
9. Chunky Two-Strand Twists
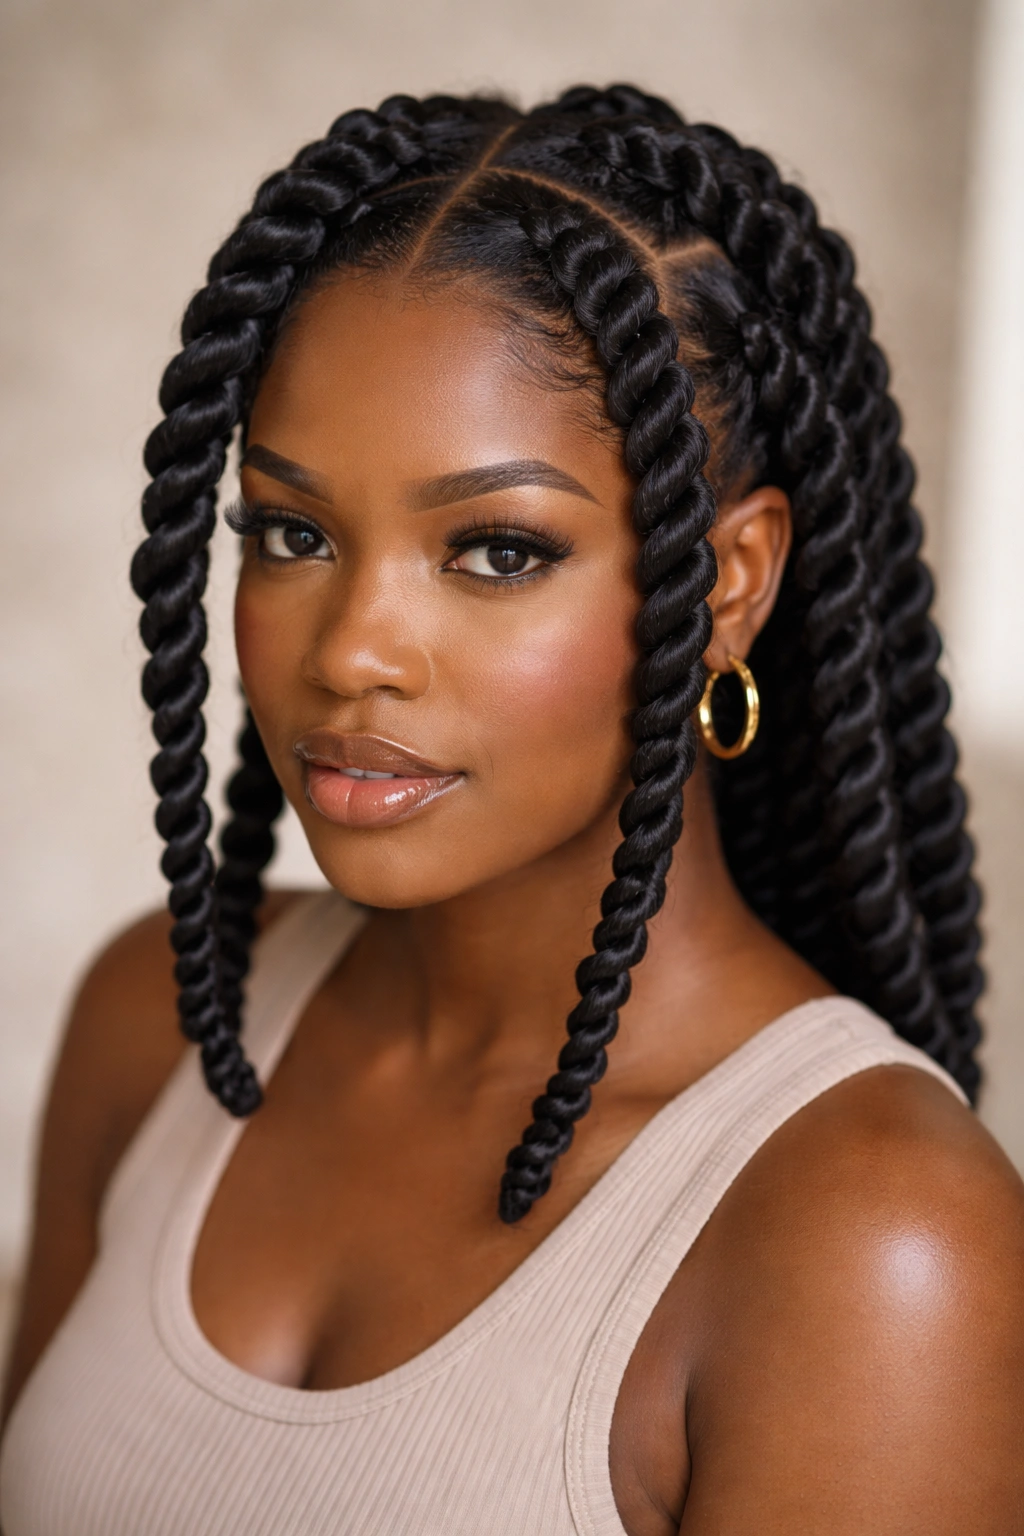
Chunky two-strand twists are thicker, simpler twists that are quick to create and look absolutely beautiful as a finished style. Rather than dozens of thin twists covering your entire head, you create just 4-8 thick twists using large sections of hair, which takes about 20-30 minutes instead of several hours. These can be left in for days as a protective style or styled in dozens of ways.
Why This Style Works
The primary appeal of chunky twists is speed combined with impact. You get a completed, intentional hairstyle in a fraction of the time required for thinner twists. They’re substantial enough to hold up beautifully throughout the day and throughout the week without needing to be re-twisted. Your hair is also fully protected within the twists, making this an excellent low-maintenance protective style.
Creating Chunky Twists That Last
- Start with clean, moisturized hair and apply a twisting cream or butter
- Divide your hair into 4-8 even sections using clips, depending on the look you want
- Take one section and divide it into two strands
- Twist the two strands around each other from roots to ends, keeping tension consistent
- The twists should feel firm enough to hold shape but not so tight that they’re uncomfortable
- Secure each twist with a small elastic at the end
- Wear as-is for a beautiful twisted style, or unravel after a day or two for gorgeous curls
Chunky twists are perfect for people who want a protective style but don’t have hours to spend styling. They’re also forgiving if your twisting technique isn’t perfect—the chunky size means minor imperfections are completely invisible.
10. Pineapple Ponytail
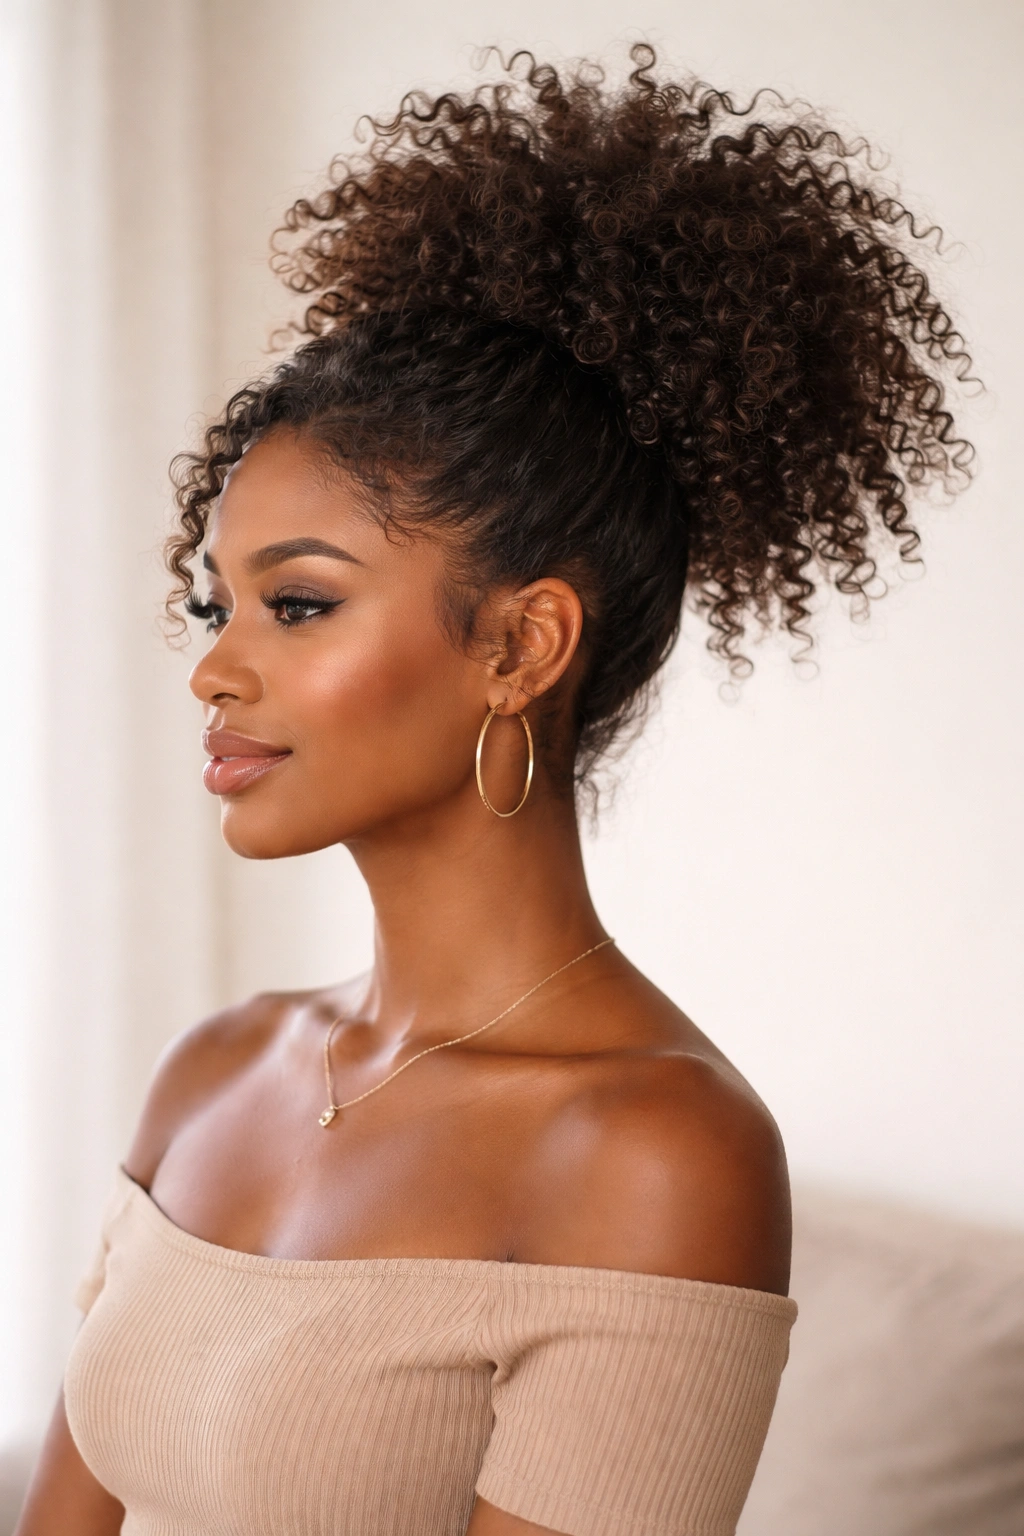
A pineapple ponytail is technically a protective sleeping method, but it’s also a genuinely cute daytime style that protects your curls while keeping them defined for multiple days. Gather all your hair high on your head into a loose, high ponytail using a silk or satin elastic, then gently fluff it for volume. The name comes from the shape it creates—a rounded silhouette reminiscent of a pineapple.
Why This Style Works
This style is revolutionary for preserving your curls overnight because it keeps them elevated and separate rather than compressed against a pillow, which would flatten them. The silk or satin elastic is gentler on your hair than rubber bands, reducing breakage and friction. As a daytime style, it’s casual and approachable while still looking intentional and styled.
Getting the Pineapple Effect
- Use a silk or satin elastic—never rubber bands or tight elastics that create creases
- Gather your hair at the very crown of your head, pulling it up and slightly back
- Keep the elastic loose enough that you’re not creating tension on your scalp
- Gently arrange and fluff the ponytail so it fans out in all directions, creating that pineapple shape
- Use your fingers to lift sections and create a rounded, voluminous silhouette
- Smooth your hairline if desired, but keep everything loose and relaxed
This works beautifully for sleeping: you get to go to bed with styled hair and wake up with your curls intact and defined, ready to go without any restyling. It also means you can extend your style for multiple days without needing to wash and restyle each morning.
11. Passion Twists
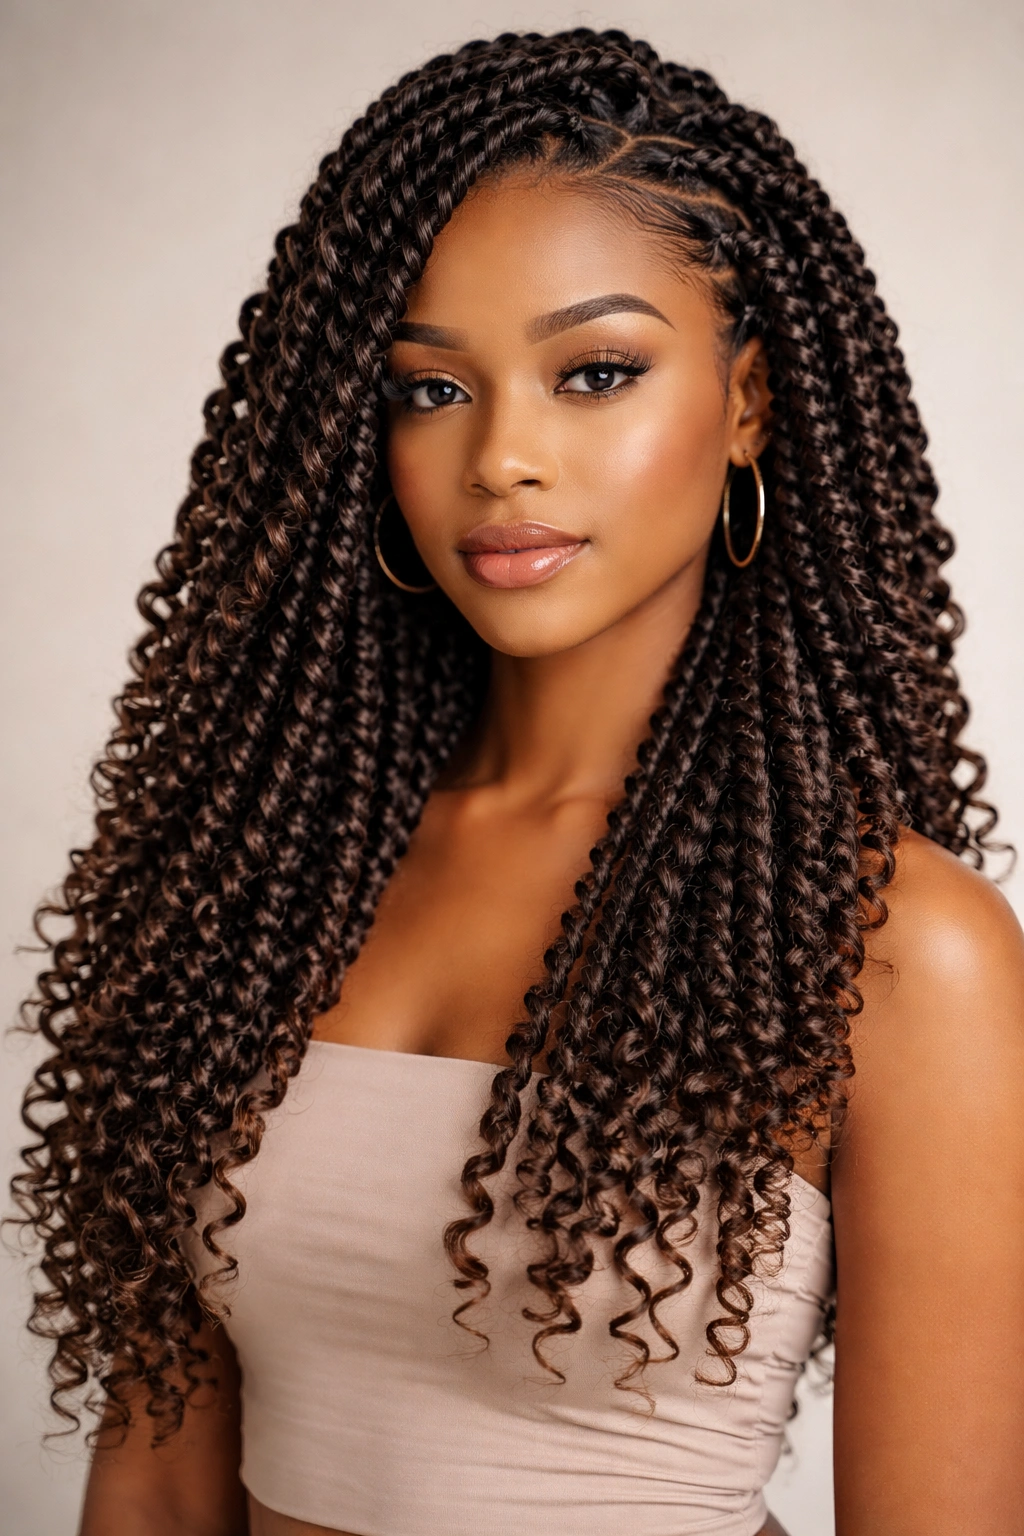
Passion twists are a fun hybrid protective style that combines your own hair with pre-twisted extensions, creating a fuller, more voluminous look than regular twists while still being quicker to install than full braids. You wrap pre-twisted extensions around sections of your natural hair, spiraling them down to create a bouncy, textured style. The result looks intricate but is genuinely straightforward to execute once you understand the wrapping technique.
Why This Style Works
Passion twists offer beautiful volume and bounce with the protection of a hairstyle where your natural hair is bundled and secured. Because you’re using extensions, the style lasts longer than regular twists before needing to be re-done, typically 4-6 weeks. They also create a more dimensional appearance than single-strand twists because of the texture variation and layering.
How to Install Passion Twists
- Start with clean or freshly moisturized hair and section it into manageable zones
- Take a section of your natural hair and a pre-twisted extension
- Hold them together at the base and begin wrapping the extension around your hair in a spiral motion, moving downward
- The extension should wrap around your hair tightly enough to stay secure but not so tightly that it’s uncomfortable
- Continue spiraling to the ends and secure with a small elastic
- The finished twist should have visible texture with both your hair and the extension visible throughout
Passion twists are incredibly forgiving because the extensions add volume and hide any imperfections in your technique. Even if your wrapping is slightly uneven, the finished style looks intentional and beautiful. Choose extensions in a color that blends with your hair or go bold with a contrasting color—both look gorgeous.
12. Side-Swept Ponytail with Edges
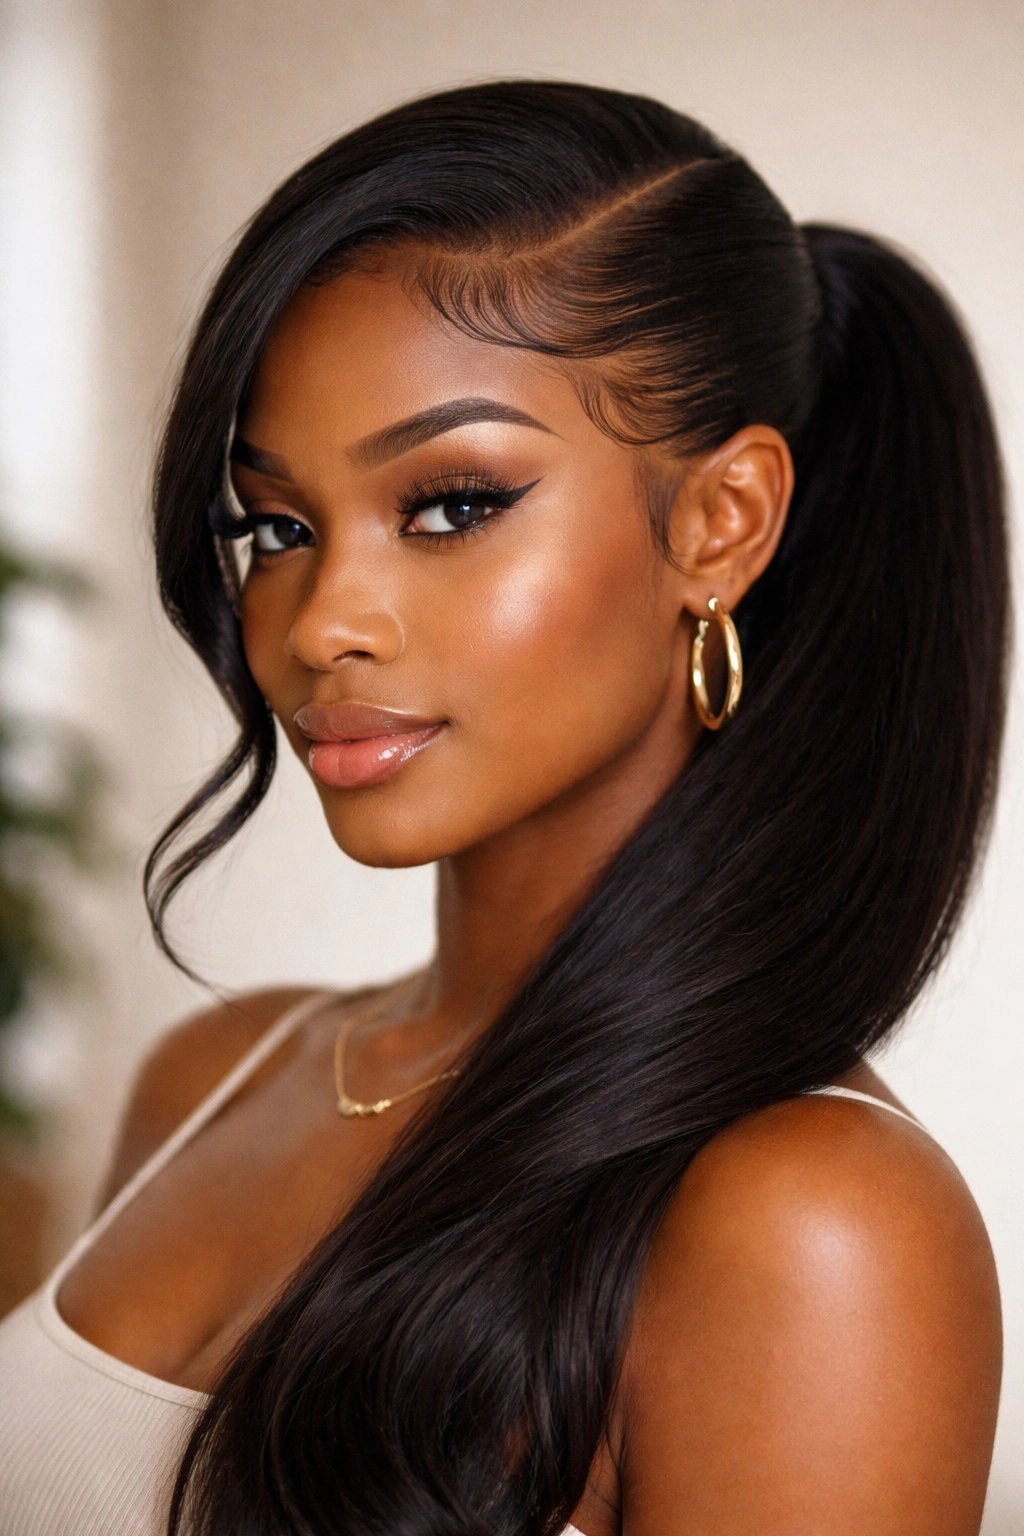
A side-swept ponytail is a classic, polished style that works for virtually any occasion, and when you smooth your edges with edge control, it looks genuinely refined and intentional. Gather your hair to one side of your head and secure with a smooth elastic, then create a sleek hairline using a soft brush and lightweight edge control. Finish by taking a small section from the ponytail and wrapping it around the elastic to hide it.
Why This Style Works
This style is versatile enough for work, church, dates, or casual outings—it’s appropriate anywhere while still looking like you made an effort. The side part is extremely flattering for most face shapes because it frames one side of your face while creating dimension. Your hair is neatly gathered, which means minimal daily maintenance and excellent protection for your ends.
Creating a Polished Side Ponytail
- Create a deep side part by running a comb from the crown of your head to one side of your hairline
- Gather all your hair to the side where there’s more hair
- Use a smooth elastic, preferably silk or satin, to secure the ponytail firmly
- Take a small 1-inch section of hair from the base of the ponytail
- Wrap this section around the elastic to conceal it, pinning underneath with a bobby pin
- Smooth your hairline with a soft brush and apply lightweight edge control for polish
- Optional: take a few face-framing pieces and curl them gently with your fingers or a curling tool
The key to making this look polished rather than casual is the smooth hairline and the wrapped elastic—those two details transform it from a quick ponytail into an intentional style.
13. Crown Braids
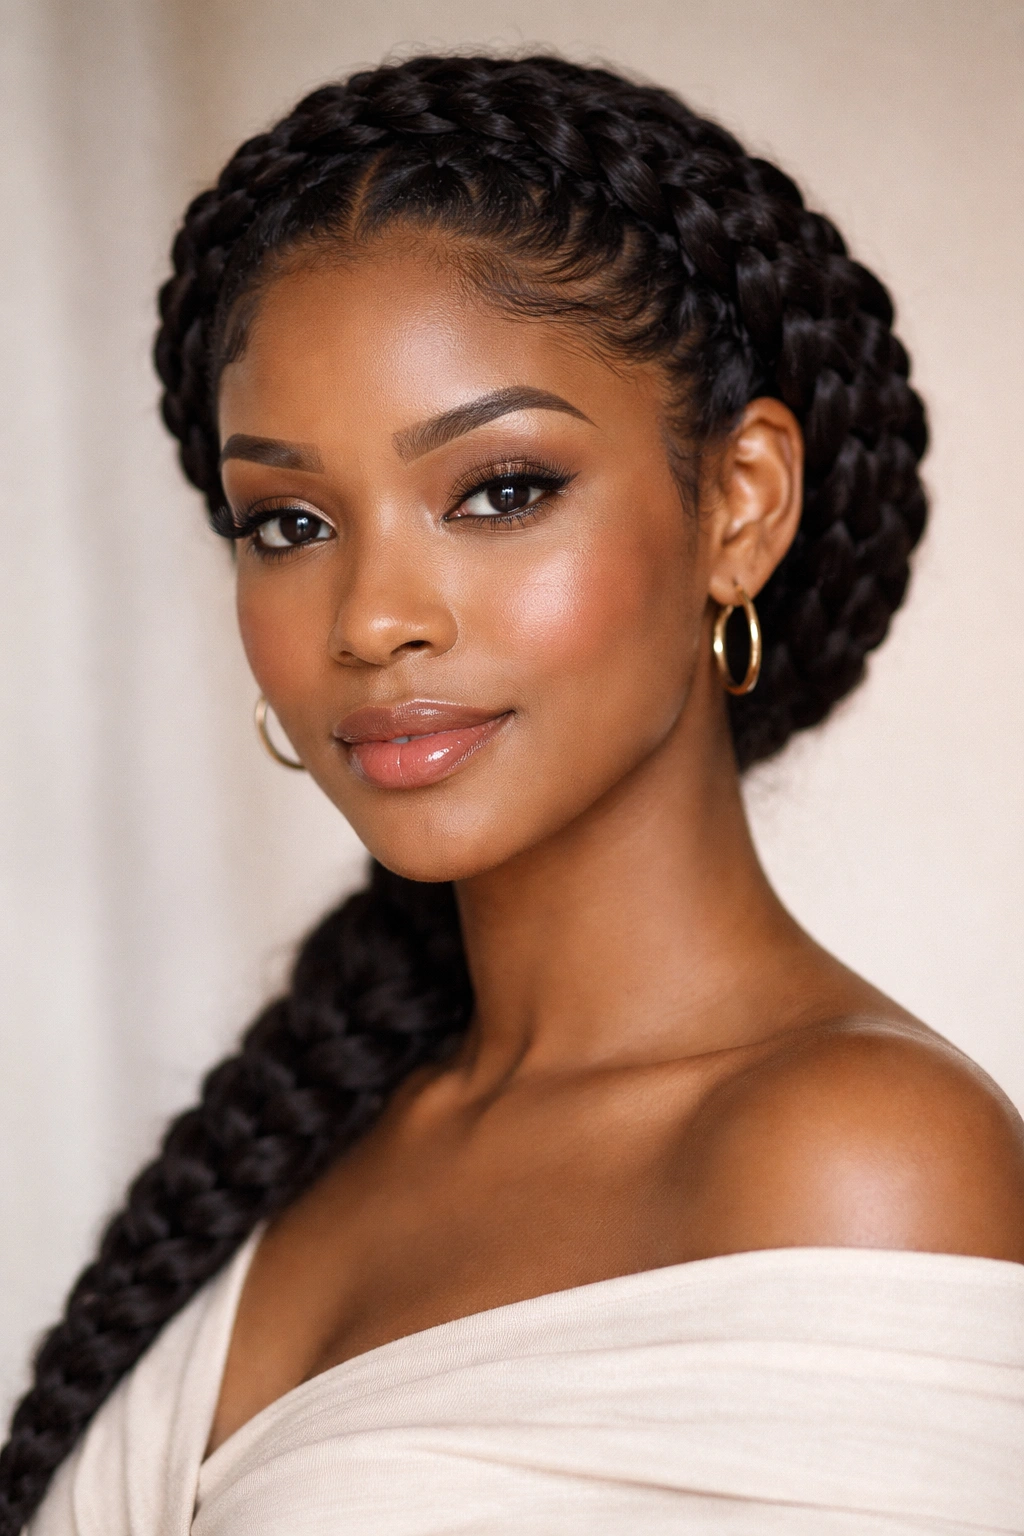
Crown braids sit at the top of your head in a gorgeous halo effect, making you look like you spent hours styling when you actually invested maybe 15 minutes. These are typically two braids that start at one side of your head, curve around to the back, and finish on the opposite side, creating a crown-like frame. They’re perfect for special occasions but also absolutely wearable for everyday styling.
Why This Style Works
Crown braids instantly elevate any look—they’re elegant enough for formal occasions but casual enough for everyday wear. They protect the ends of your hair by keeping them bundled in the braids while leaving the sides and top of your head visible, so you get the protection benefits without looking like your entire head is in a protective style. The framing effect also draws attention to your face in a flattering way.
Executing Crown Braids
- Start at one side of your head near your temple
- Create a traditional three-strand braid, picking up hair as you go and moving toward the back of your head (this is a Dutch or cornrow style braid)
- Curve the braid toward the opposite side of your head, following the curve of your skull
- Finish the braid just behind your ear on the opposite side and secure with a small elastic
- Create a second braid following the same path on the other side of your head
- The two braids should curve around your head like a crown
- Gently pull the braids outward to add volume if desired
Crown braids are surprisingly achievable even if you’re new to braiding. The slightly curved path makes them look more complex than they are, but you’re really just creating two regular braids.
14. Wash-and-Wear Locs
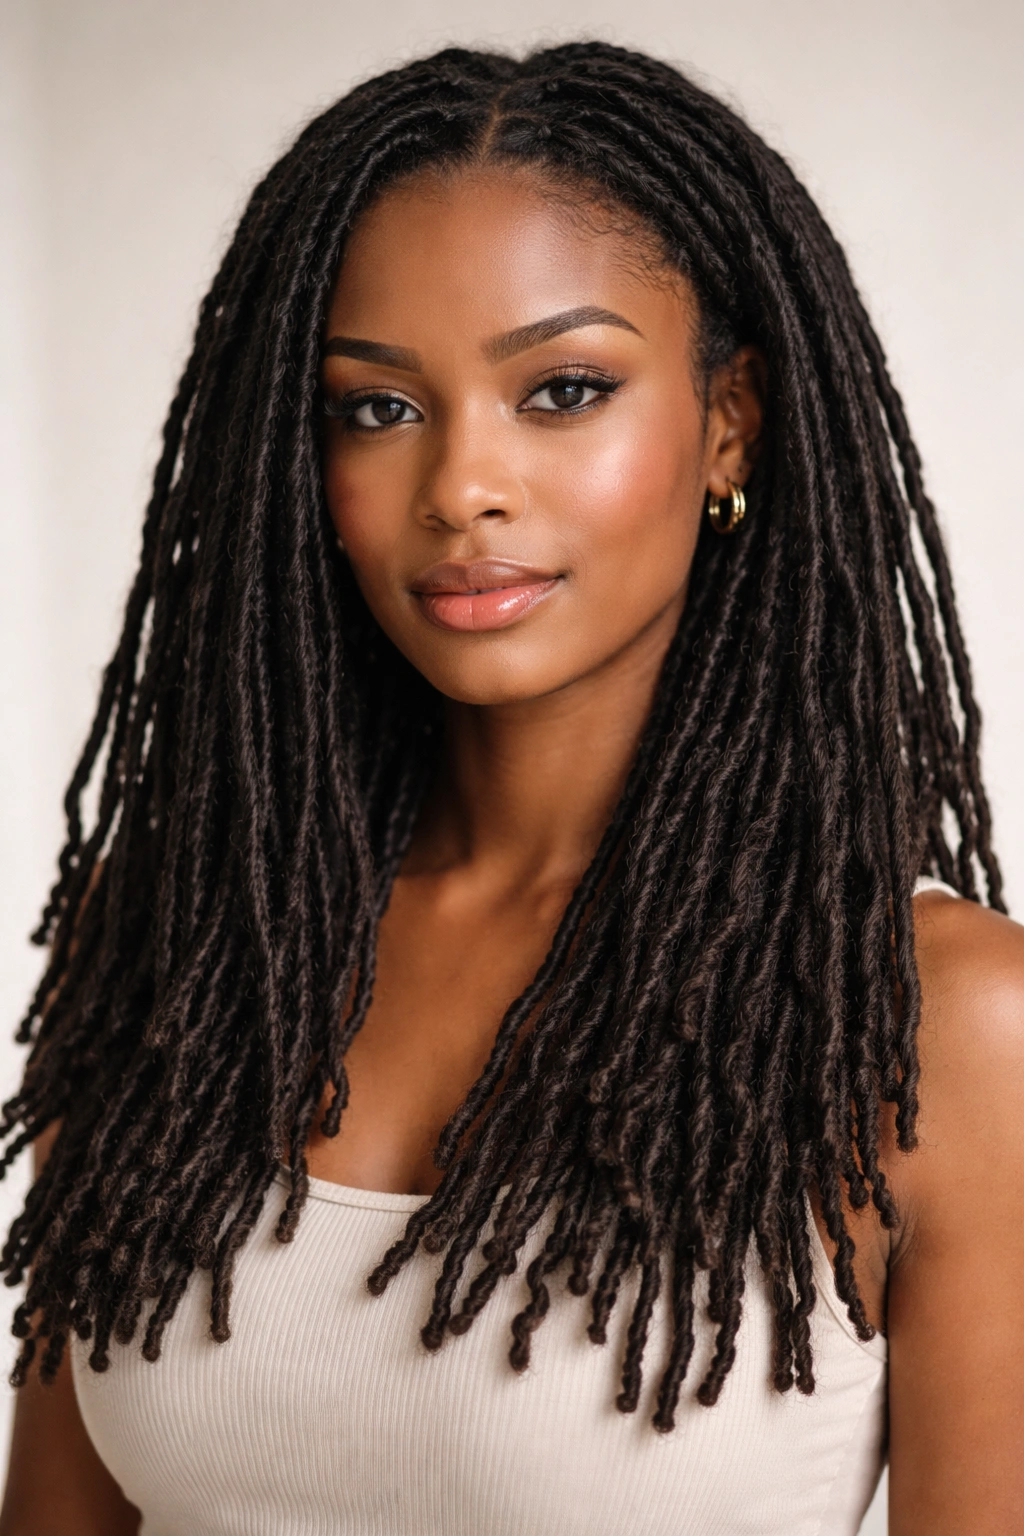
If you’re considering locs and want to know about the styling ease factor, the good news is that once they’re mature and established, locs are genuinely one of the easiest hairstyles to maintain. You wash them weekly, let them air-dry, and you’re done—there’s no daily styling, no products needed for holding, and minimal daily manipulation. They’re also a beautiful protective style that allows your hair to thrive and grow.
Why This Style Works
Locs are the ultimate low-maintenance protective hairstyle. Once they’re established (typically after 3-6 months, depending on how you start them), there’s virtually no daily styling required. You wash them, let them dry, and you’re set for several days. They also create a beautiful, artistic appearance and can be styled in countless ways—updos, buns, half-ups, wrapped styles, etc.
How the Maintenance Works
- Wash your locs weekly with a residue-free shampoo to keep them clean and prevent buildup
- Let them air-dry completely before styling or putting them up, which typically takes 24-48 hours
- Retwist or maintain the roots every 4-8 weeks depending on your hair growth rate and the look you want
- Avoid frequent manipulation and excessive pulling on the roots
- Moisturize your locs with a lightweight oil or hydrating spray as needed
- Protect them while sleeping with a satin scarf or bonnet
Locs aren’t technically a quick or easy commitment upfront—the beginning stages require patience and consistent maintenance as you develop them. But once you’re past that initial phase, they become genuinely the easiest long-term hairstyle because there’s so little daily work required. Many people find that the simplicity and protective benefits make the initial investment completely worthwhile.
Final Thoughts
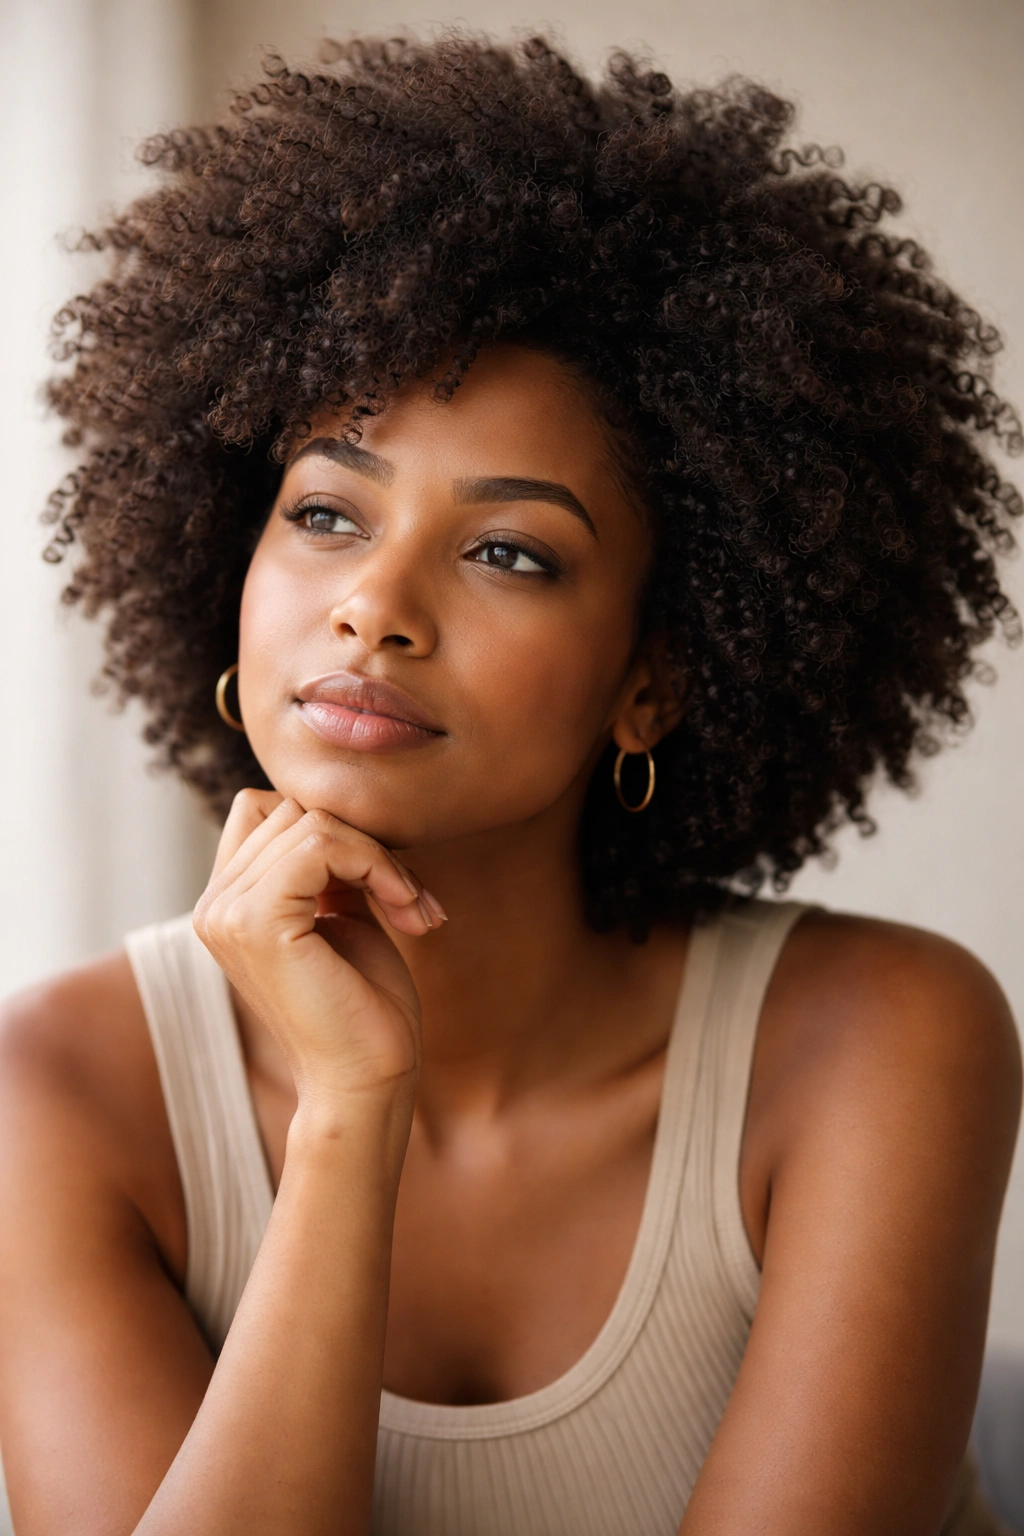
The beauty of afro hair is that you have so many genuinely easy options that don’t require hours at the salon or constant daily manipulation. Whether you’re drawn to the simplicity of a wash-and-go, the polish of a high puff, the elegance of braids, or the long-term ease of locs, there’s a style that fits both your hair and your lifestyle. The secret to easy styling isn’t rushing the process or cutting corners—it’s choosing techniques that align with your hair’s natural structure and investing in quality products that actually work with your texture rather than against it.
Real talk: not every style will work perfectly on your first try, and that’s completely okay. Your hair is unique, and what works beautifully for someone else might need slight adjustments to work for you. Give yourself grace while you’re learning, watch tutorials from stylists with similar hair texture, and don’t hesitate to ask friends or family members for feedback or hands-on help when you’re trying something new. The goal isn’t perfection—it’s finding styles that let you feel beautiful and confident while keeping your hair healthy and protected.
