Wavy hair has a reputation for being difficult to style, but the truth is that waves are actually ideal for ponytails. The texture gives you natural grip, dimension, and movement that straight-haired friends have to work hard to create artificially. When you lean into what your waves naturally do instead of fighting them, you unlock ponytail possibilities that look effortlessly polished, undone in the best way, or dramatic and intentional—depending on what you’re after that day.
The challenge most people with wavy hair face isn’t the waves themselves, but knowing which ponytail styles work with the texture rather than against it. A high, sleek, razor-sharp ponytail might require more styling effort than you want, while a style that embraces the movement and texture can take less time and look more interesting. The right ponytail for wavy hair isn’t about fighting frizz or heat-straightening everything into submission—it’s about choosing a style that celebrates what your waves bring to the table.
The styles that follow aren’t just variations on the same theme. Each one plays with your waves differently, uses the texture in a distinct way, and solves different styling needs depending on your hair type, the occasion, and how much time you’re willing to spend. Some work best when your waves are freshly dried and defined. Others look better on day-two or day-three hair when the texture has relaxed and softened slightly. Some are genuinely no-effort styles that take five minutes, while others benefit from a little intentional styling to make them shine.
Let’s walk through eleven ponytail styles that actually work for wavy hair—not in spite of the waves, but because of them.
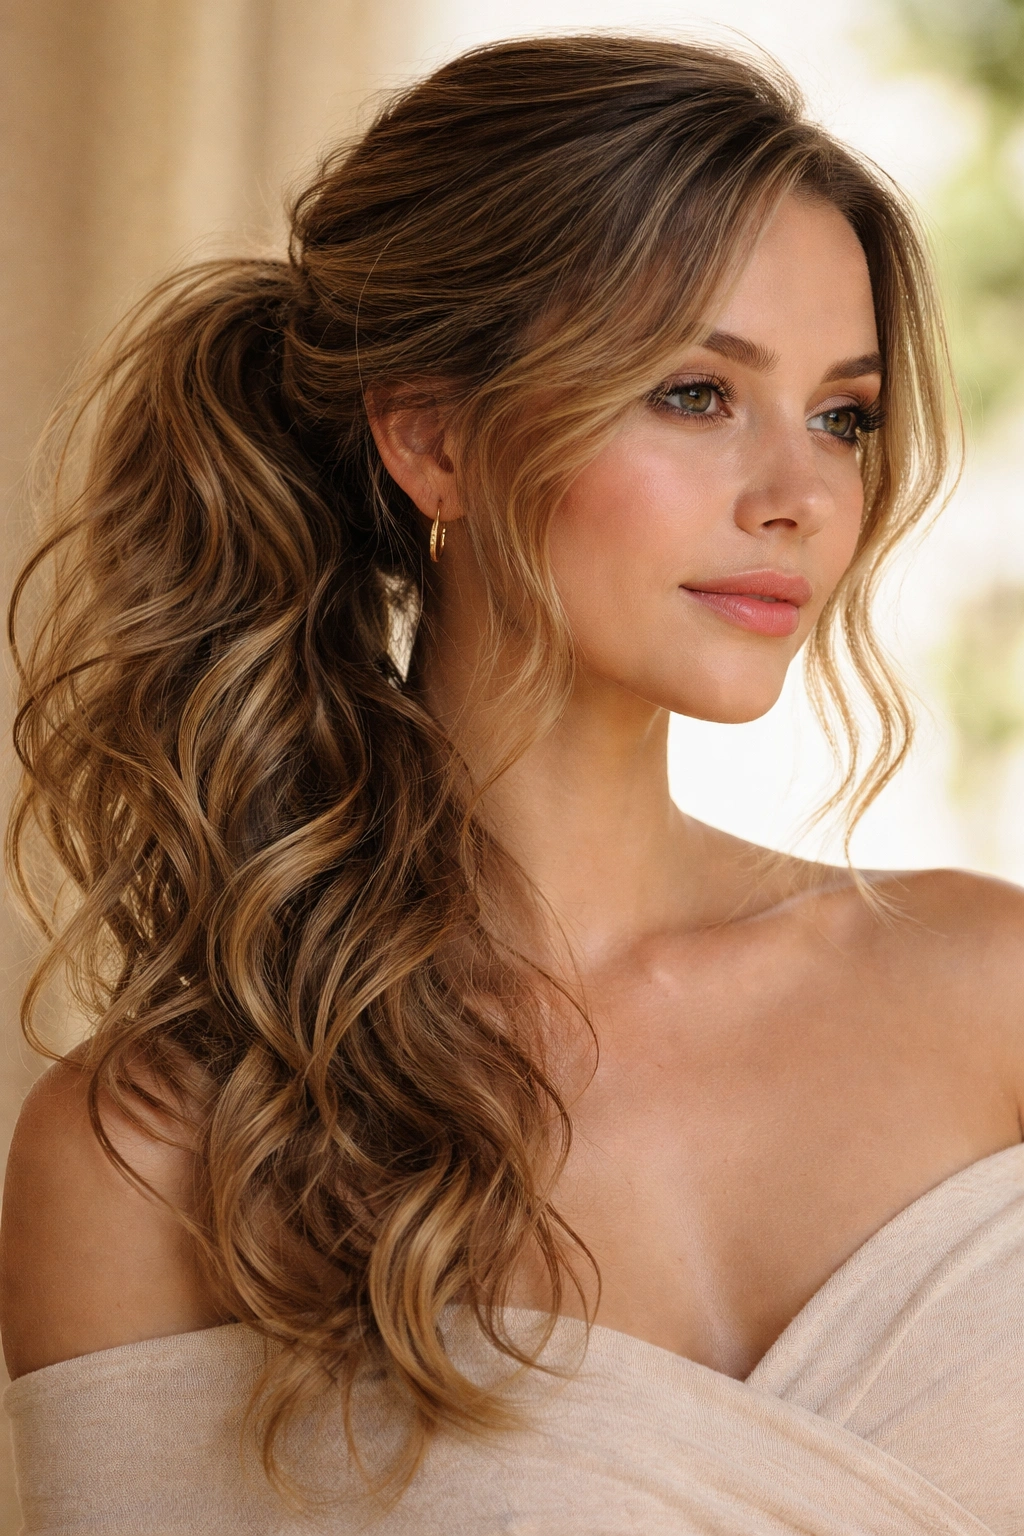
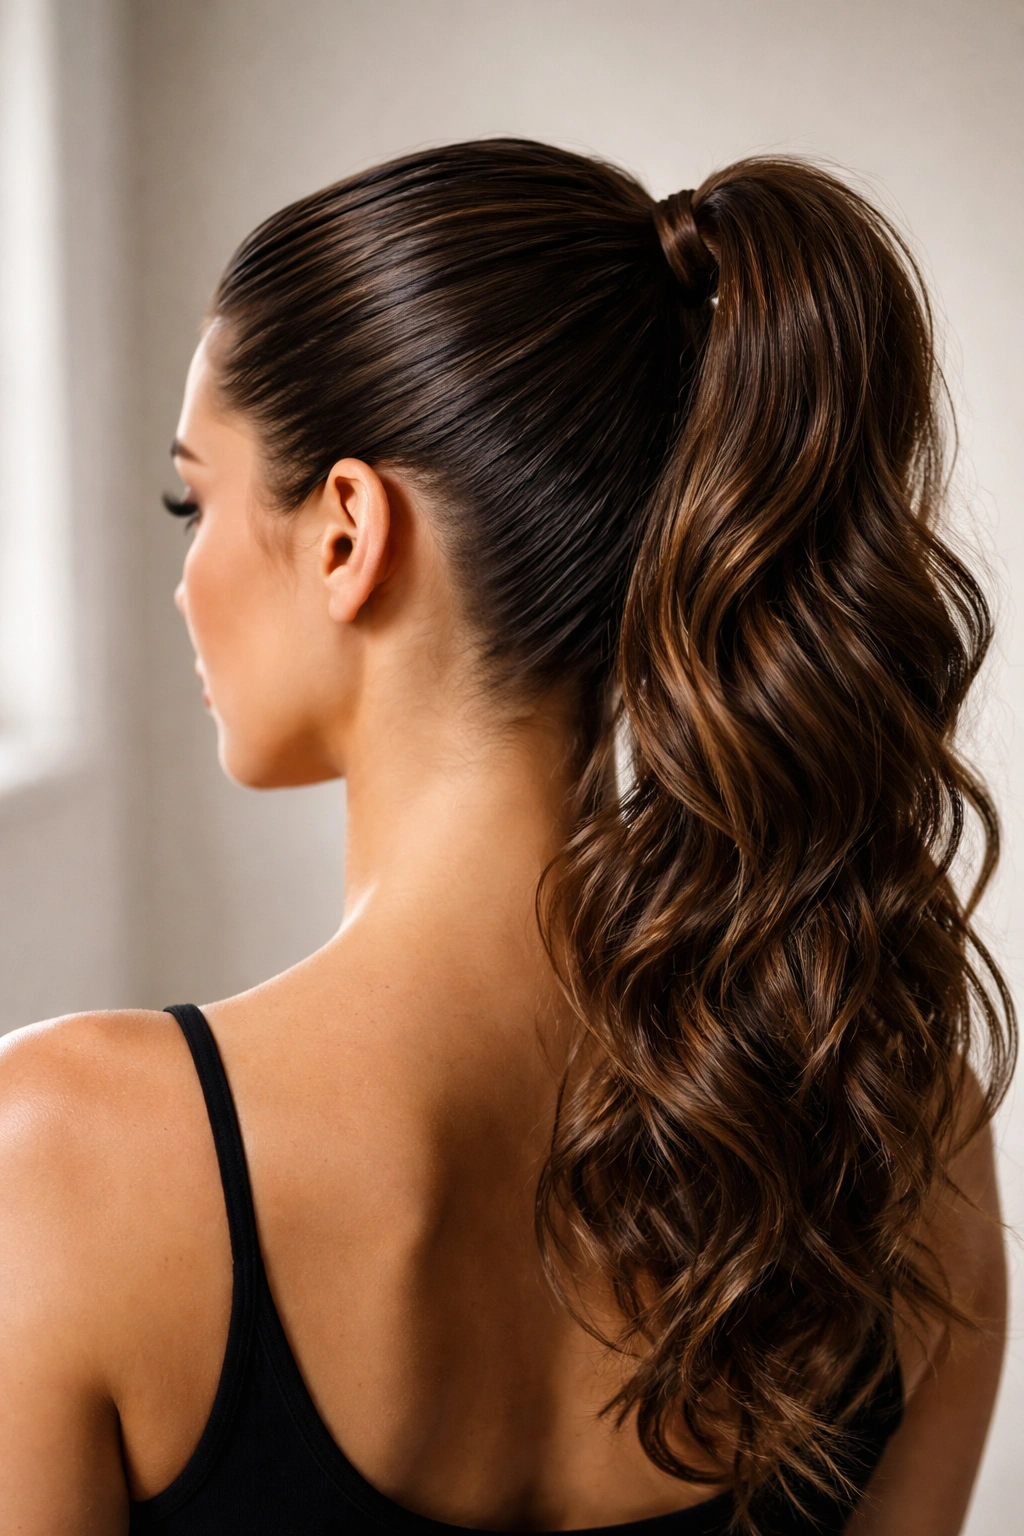
1. Textured High Ponytail
A high ponytail with wavy hair reads as intentional and polished without looking stiff or overly done. The key is gathering your hair at the crown—not directly on top of your head, but slightly forward and higher than where you’d normally part. This positioning prevents the ponytail from pulling uncomfortably on your scalp while emphasizing the height and frame that waves naturally create.
How the Waves Work for You
Wavy hair at the crown has a natural lift and bounce that helps a high ponytail avoid looking flat or pulled-back. The texture catches the light differently at each point along the section you’re pulling back, creating visual interest instead of a solid, monotone line. This textural variation is what separates a high ponytail on wavy hair from the sleek, almost plastic-looking high ponytails you see on stick-straight hair.
Creating the Look
Start with your waves fresh or refreshed with a light texture spray. Flip your head upside down and gather the hair at the crown, smoothing out any bumps as you secure it with a sturdy elastic. The goal isn’t smoothness—it’s controlled texture. Use a boar-bristle brush or your fingers to gently tease the section you’re pulling back without creating obvious bumps. Secure the ponytail, then take a thin section from the ponytail itself and wrap it around the base of the elastic to hide it. This wrapped detail adds polish without requiring elaborate styling.
Pro tip: If your ponytail feels loose by midday, it’s not because wavy hair doesn’t hold ponytails—it’s because the elasticity of your waves relaxes over time. A quick refresher with dry texture spray re-grips the hair and firms up the hold without re-doing the entire ponytail.
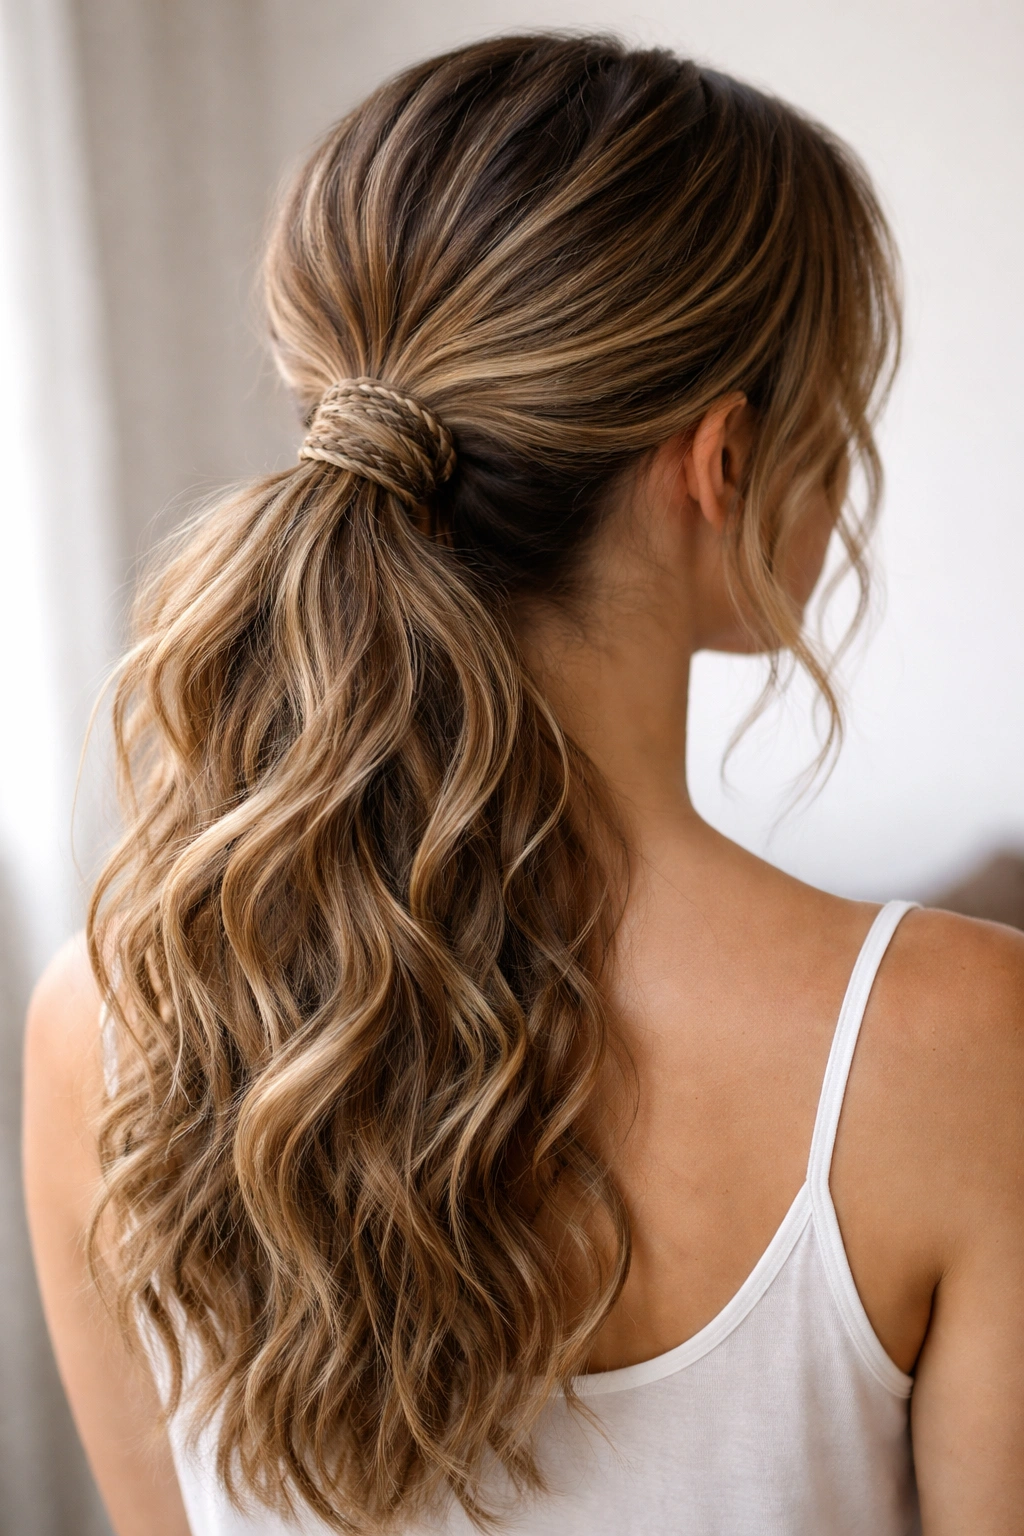
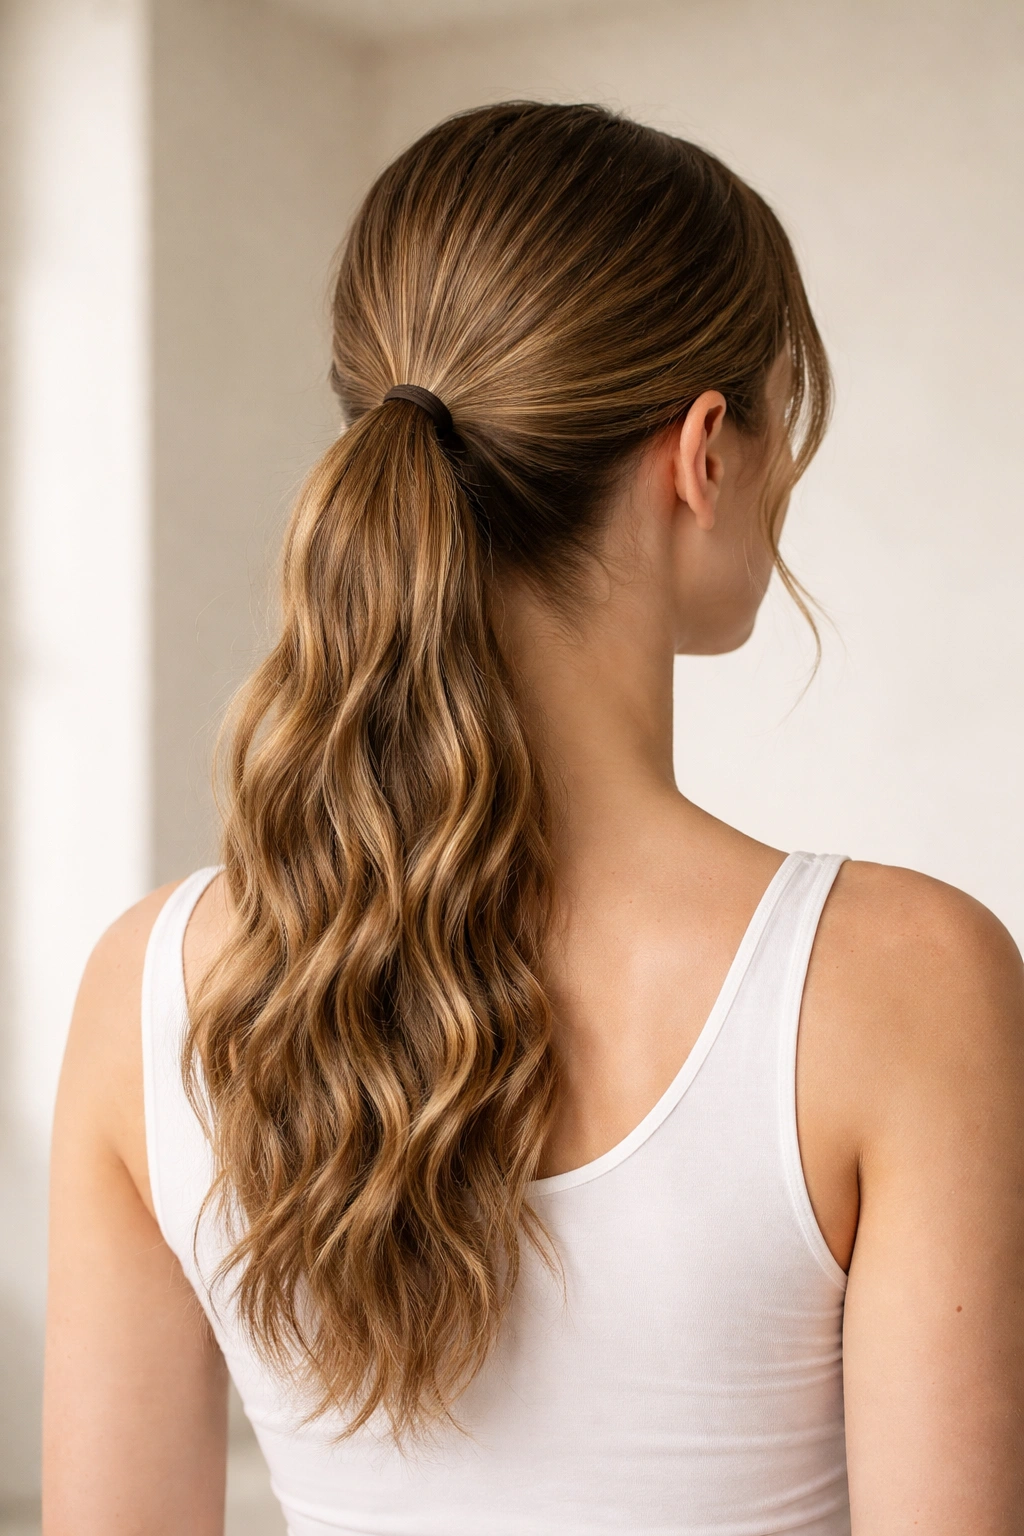
2. Undone Low Ponytail
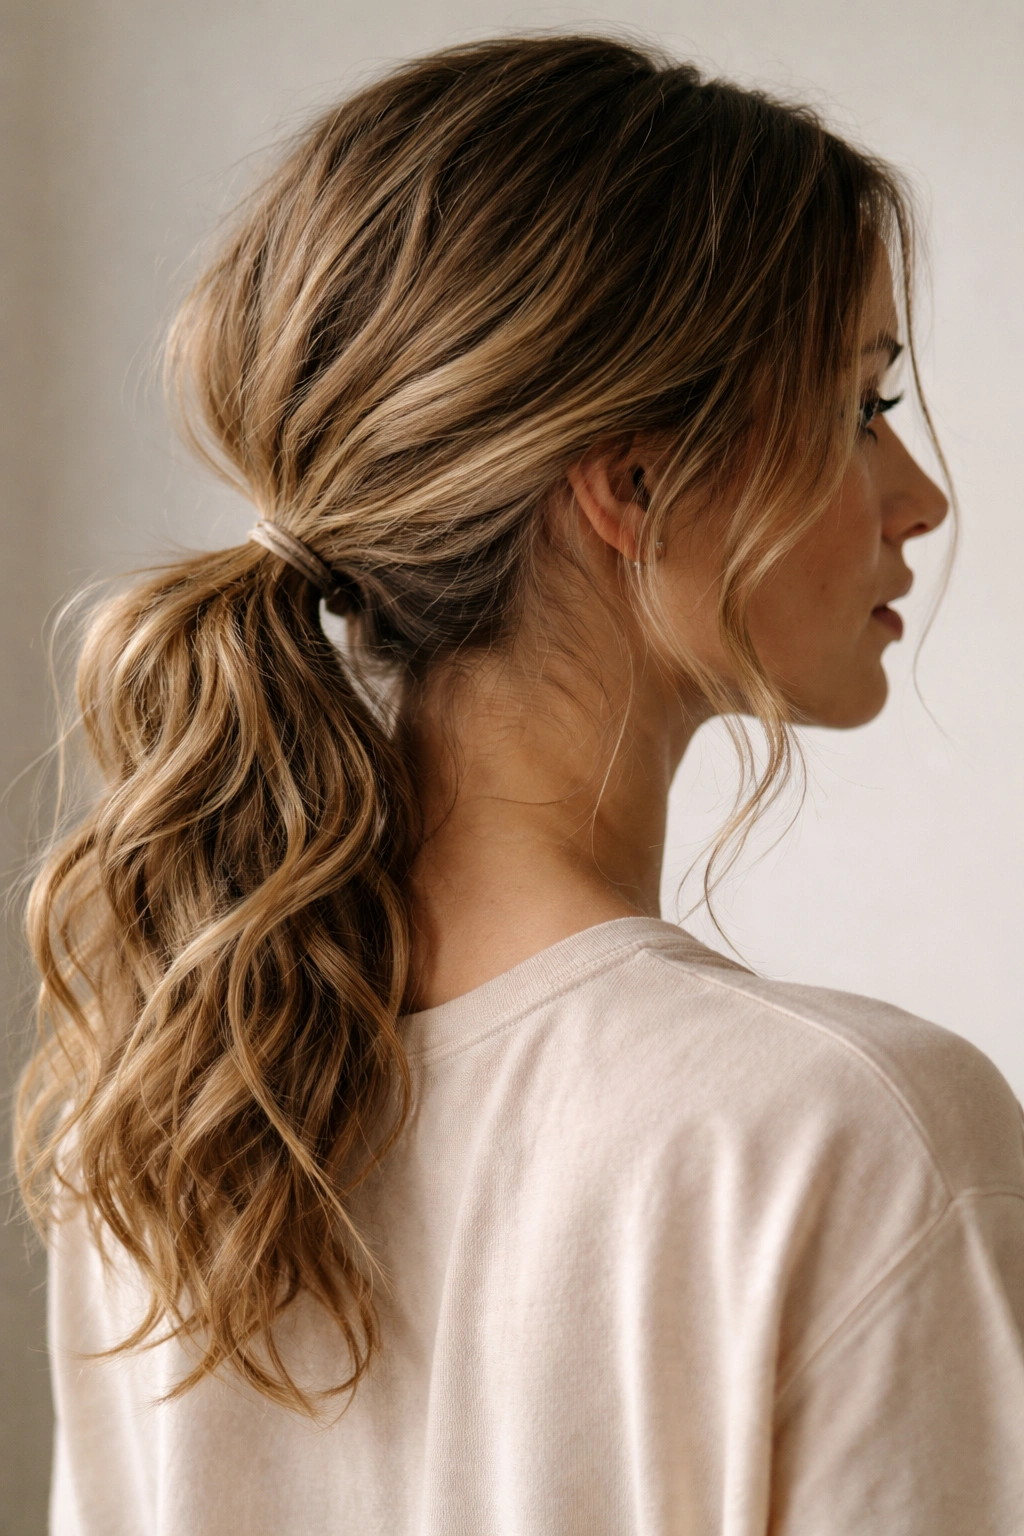
This is the ponytail that looks like you threw your hair back without thinking, even though it’s actually intentional. For wavy hair, an undone low ponytail sits at the nape of your neck and leans into the texture, the movement, and the slight messiness of your waves. The messiness is the point—it’s what makes the style feel contemporary and effortlessly put-together rather than formal or dated.
Why This Works Better on Wavy Hair
Straight hair requires deliberate rumpling and texturizing to achieve an undone aesthetic, but wavy hair arrives halfway there already. Your waves provide the movement and the gentle chaos that makes this style feel loose and natural. The lower placement also means you’re working with hair that’s less likely to be flyaway-prone, since longer ends weigh down more predictably than shorter pieces.
Styling Tips for Success
Gather your hair at the nape of your neck—lower than you think looks good, honestly. Secure it loosely with an elastic. Don’t smooth everything. Instead, deliberately pull out a few face-framing pieces and a few pieces from around your hairline to soften the look. Take sections from the ponytail itself and gently separate them, letting the waves create organic texture. If your waves are looking flat or undefined, a light misting of sea salt spray before gathering adds definition and prevents that limp, greasy look.
The second-day or third-day version of this style actually looks better than the first-day version because your waves have relaxed and softened, and any product you used is no longer shiny or obvious.
3. Twisted Sleek Ponytail
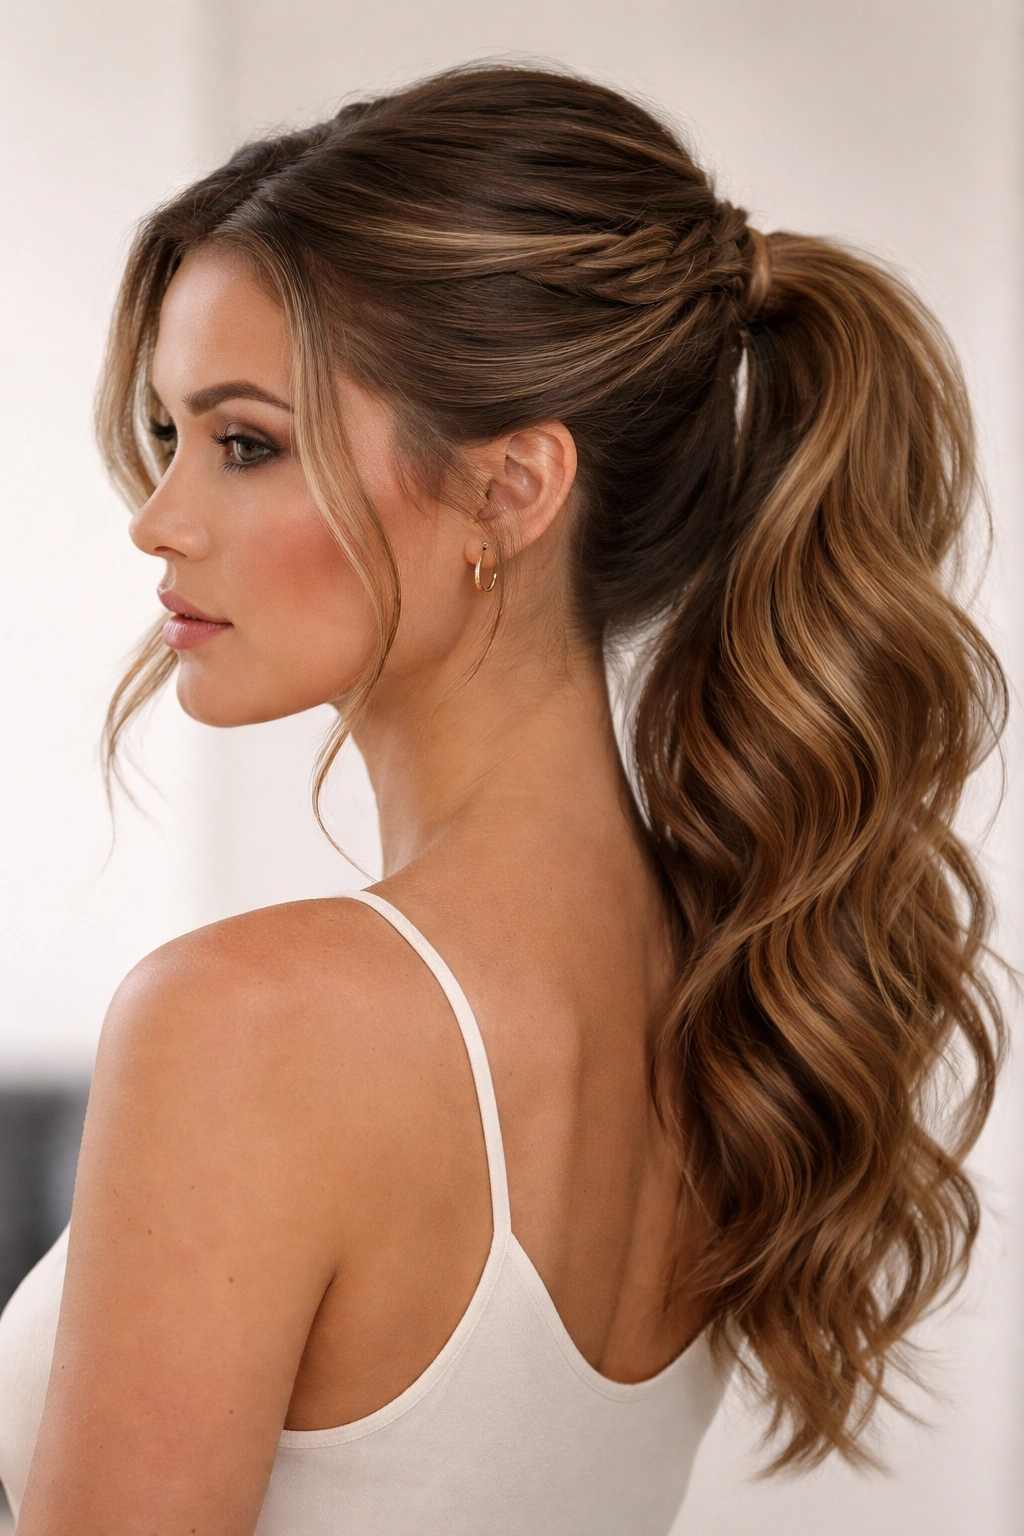
When you need a ponytail that reads as intentional and polished—not undone, but still textured—a twisted sleek ponytail delivers. Instead of smoothing all your hair straight back, you create two twisted sections from the front of your hair and wrap them around the crown before securing your ponytail. The twist adds dimension and visual interest while the overall effect reads as styled without being overly formal.
Building the Twist Detail
Start at the temple on one side of your head. Take a section about two inches wide and twist it loosely toward the back of your head, following the curve of your skull. Stop when you reach the crown. Repeat on the other side. Pin both twisted sections at the crown with bobby pins, letting them cross slightly or sit parallel depending on your preference. Then gather all your hair into a ponytail just below where the twists sit. The twists create a subtle but noticeable frame around your face and add a tailored element that elevates the entire style.
Making Waves Work in the Twist
Don’t smooth your twists flat with a brush. Instead, gently twist sections of damp or slightly dampened hair and let the waves create organic ridges within each twist. This textured twist approach looks intentional—like you designed it that way rather than accidentally failing to smooth your hair. If your twists are looking too thin or fragile, take sections of the twisted hair and gently pull them apart to make the twist look thicker and more substantial.
Worth knowing: This style works on second-day hair just as well as freshly washed hair, because you’re not relying on the smoothness of freshly blow-dried strands. The waves actually help the twist hold its shape longer throughout the day.
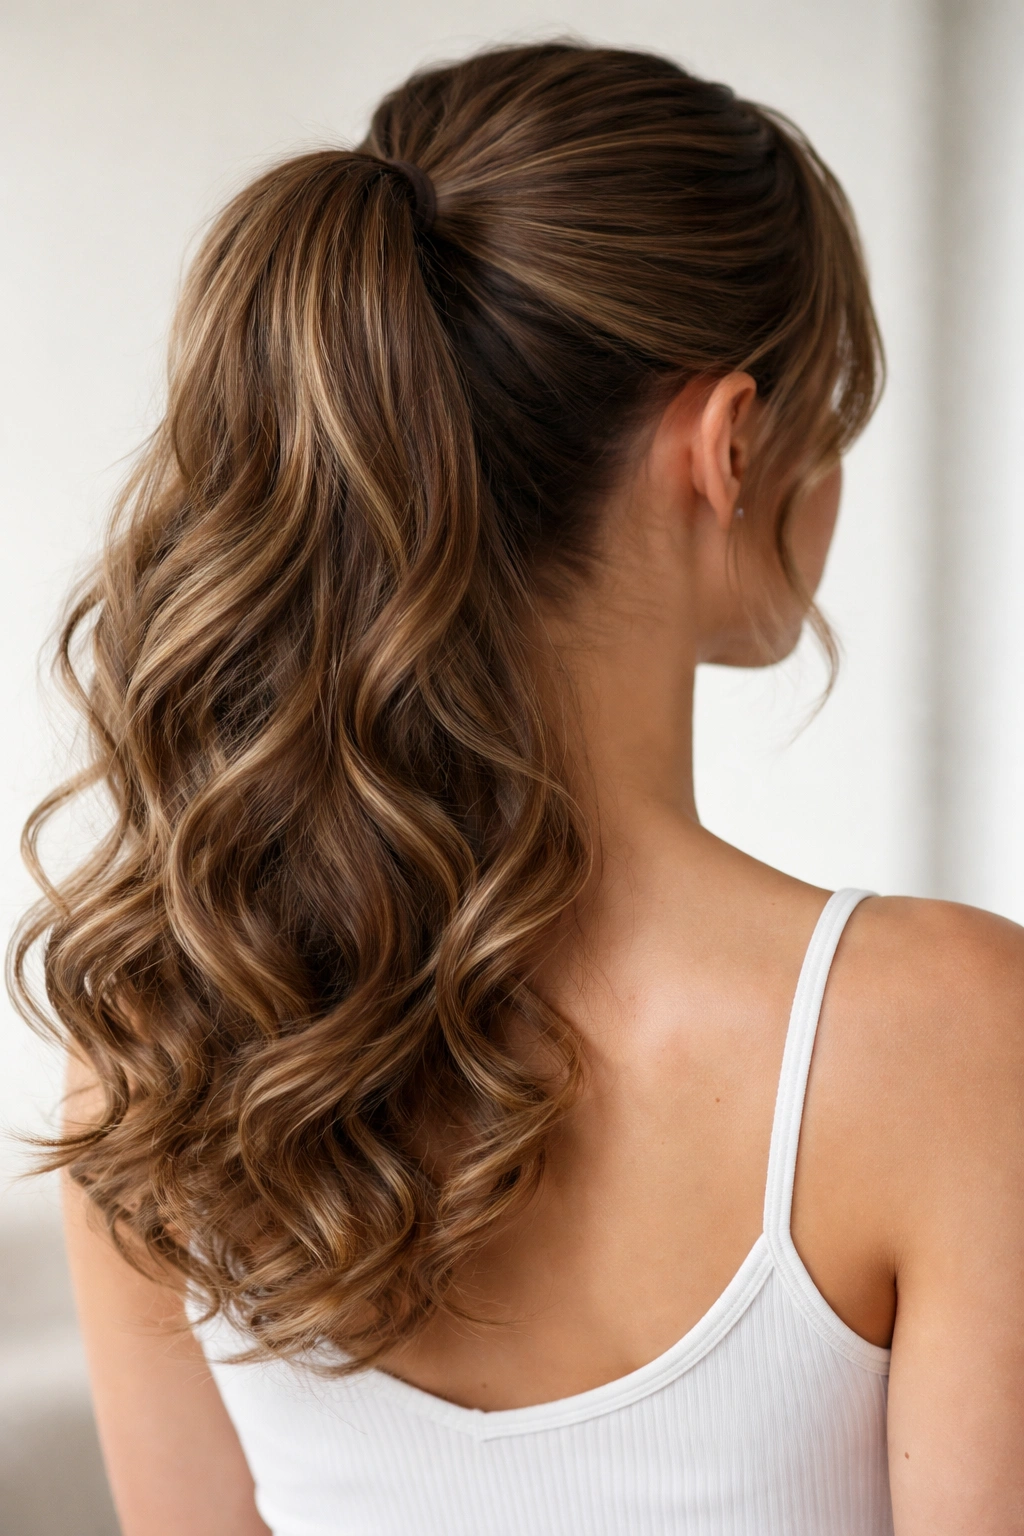
4. Voluminous Half-Up Ponytail
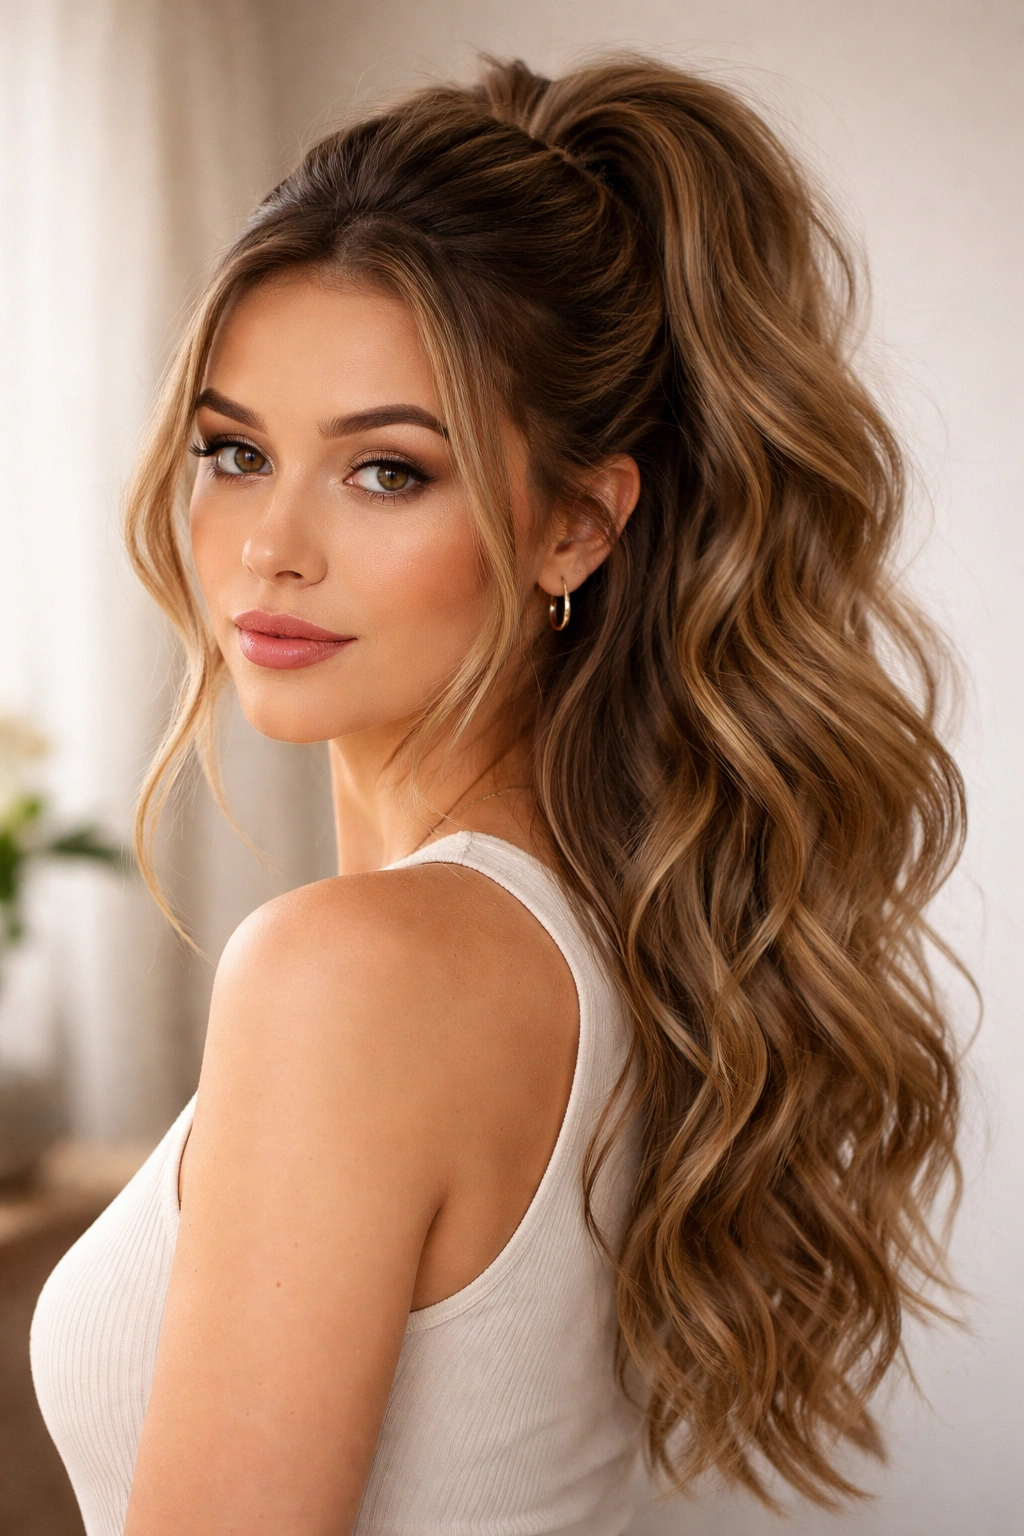
A half-up ponytail combines the face-framing softness of loose hair with the practical benefits of a ponytail. For wavy hair specifically, this style is a game-changer because you get to show off the texture and movement of your waves in the down section while keeping the upper half of your hair secured and off your face. The volume comes from your waves, not from backcombing or aggressive teasing.
Placement and Gathering
Start by identifying where the “half” should sit. For most face shapes, this means gathering hair from about the temples back to the crown, leaving the lower half of your hair down. Part your hair slightly off-center for a modern, asymmetrical feel. Gather the top section and secure it loosely with an elastic. The key is securing it loosely—a tight half-up ponytail looks dated and uncomfortable. Loose reads contemporary.
Maximizing Wave Texture
Before gathering the top section, flip your head upside down and rough up the roots with your fingers. This creates natural volume without the need for teasing. When you flip back up and gather the top section, that underlayer creates built-in fullness. The wave texture in both the secured top section and the loose bottom section means your hair naturally has shape and movement rather than looking like a flat, limp rectangle.
Take a thin strand from the secured ponytail and wrap it around the elastic to hide it and add a finished detail. Let some wispy pieces fall around your face—don’t smooth them back aggressively. These pieces frame your face and soften the overall effect.
5. Braided Wrap Ponytail
This style combines a low ponytail with a thin braid that wraps around the base, creating a polished, intentional look that works beautifully with wavy texture. The braid adds visual interest and disguises the elastic while the waves throughout the ponytail give the style movement and dimension that a sleek braid-wrapped ponytail on straight hair wouldn’t have.
Creating the Wrap Braid
Gather your hair into a low ponytail and secure it with an elastic. Take a thin section of hair from the side of the ponytail—about the width of a pencil or slightly thicker. Divide this section into three strands and braid loosely. This thin braid doesn’t need to be perfect or precision-tight; wavy hair actually makes a looser, more organic braid look intentional and contemporary. Wrap the braid around the base of the ponytail, covering the elastic, and secure it with a bobby pin that matches your hair color.
Wave-Friendly Braiding
Because your hair is wavy, the braid will have natural texture and variation instead of looking like a smooth, uniform line. This is exactly what you want. Don’t attempt to smooth the braid strands flat as you braid. Instead, let the waves show through. If you want the braid to look more defined, spritz it lightly with a lightweight holding spray before wrapping, which helps the braid structure hold while still letting the waves shine through.
Pro tip: If braiding feels complicated, you can skip the actual braid and simply wrap a thin twirled section of hair around the base. Twisting is faster than braiding and creates a similarly polished result.
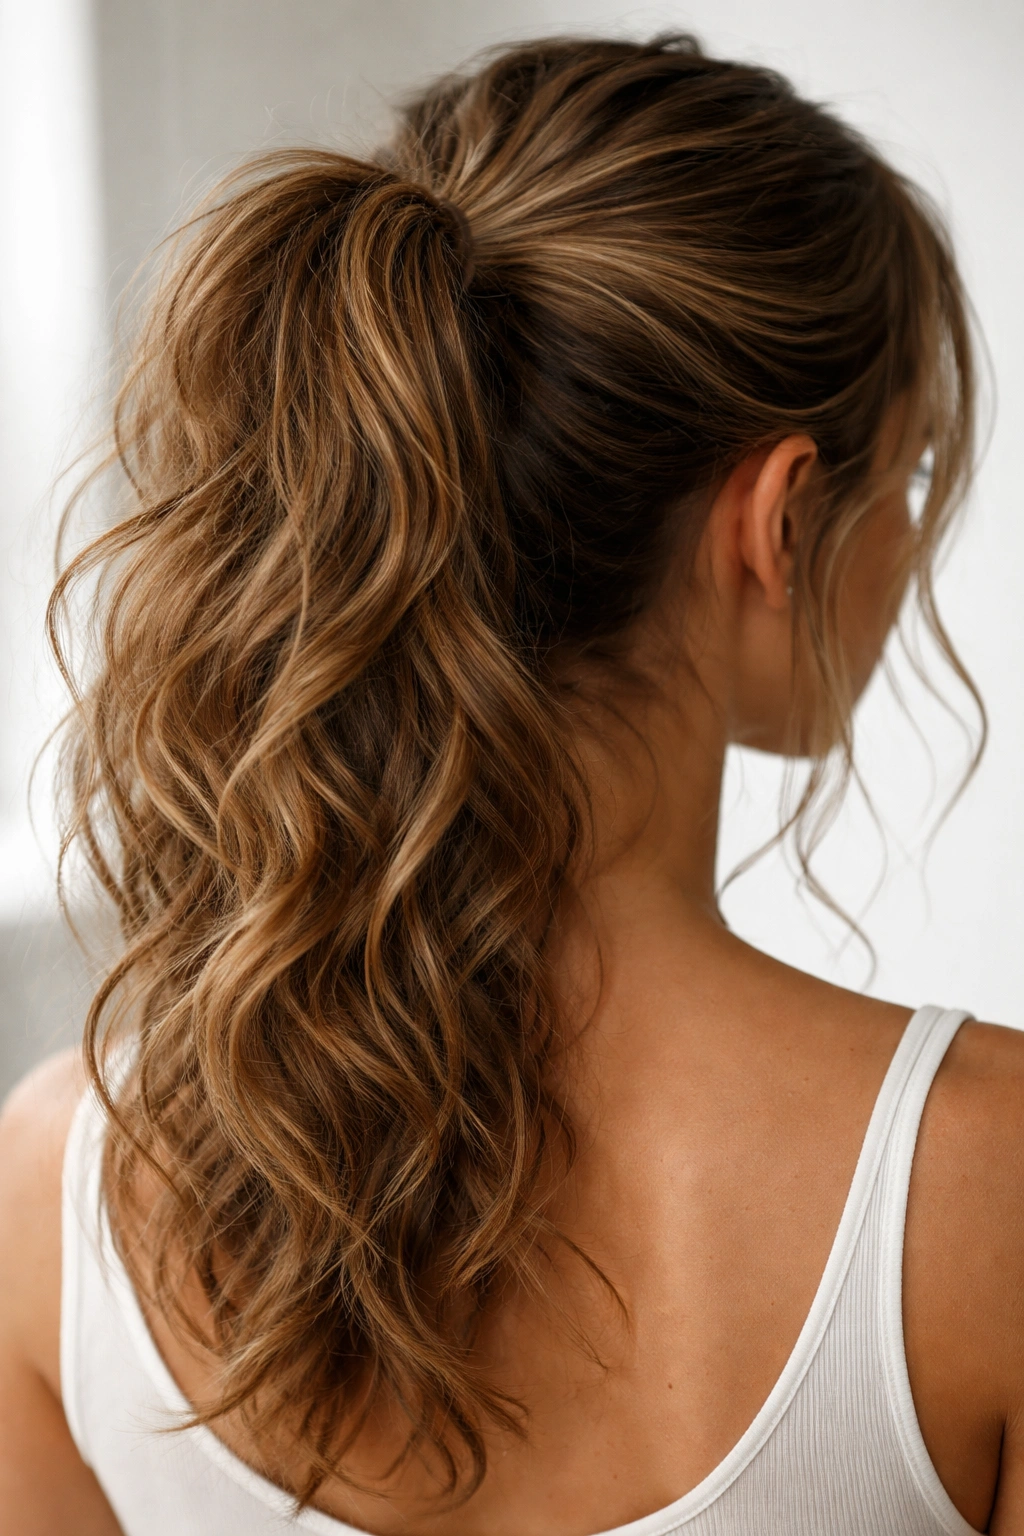
6. Tousled Side Ponytail
A side ponytail creates an asymmetrical, romantic frame that flatters most face shapes while playing beautifully with wavy texture. Positioned low and to one side, a side ponytail with waves has movement, visual interest, and a softer overall aesthetic than a centered ponytail would. The tousled aspect means embracing the texture rather than fighting it, which makes this style surprisingly quick to create.
The Art of Controlled Tousle
“Tousled” doesn’t mean messy or unkempt—it means deliberately texture-forward. Start with your waves refreshed or partially air-dried. Flip your head to one side and gather your hair where it naturally falls, which is typically somewhere between ear-level and shoulder-level depending on your preference. Don’t smooth the hair as you gather it. Instead, let bumps and texture remain visible. Secure the ponytail with an elastic.
From here, take sections from the ponytail and gently separate them, creating an intentionally textured, separated look rather than a smooth, sleek line. The waves will naturally create ridge patterns as you separate—these ridges are beautiful on their own and don’t need to be fixed or smoothed away.
Face-Framing Pieces
Pull out a few pieces around your hairline and temple before gathering the ponytail. These loose pieces soften the transition from your face to the gathered hair and create a more flattering frame. Because wavy hair has natural movement, these pieces won’t look scraggly or poorly placed—they’ll look intentional and romantic.
7. Bubble Ponytail
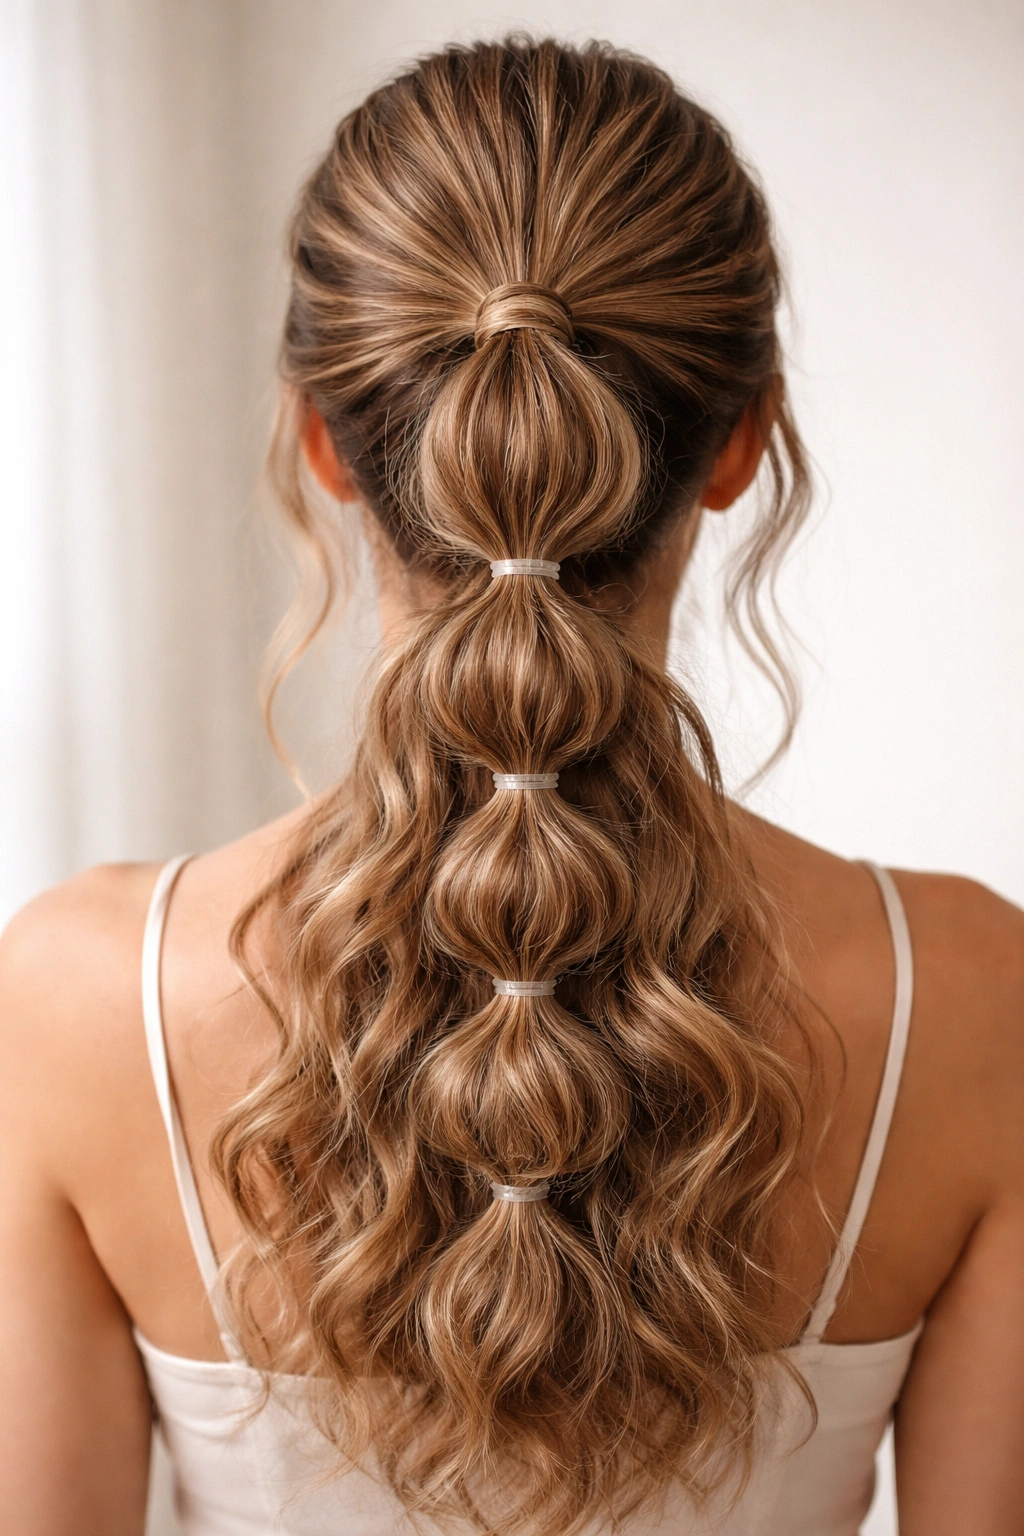
A bubble ponytail stacks multiple small sections secured with elastics along the length of the hair, creating a segmented, dimensional look that reads playful and modern. Wavy hair makes this style particularly interesting because the texture creates visual separation between each bubble even when the elastics aren’t super tight. The waves add organic visual interest that you’d have to work to create on straight hair.
Creating Distinct Bubbles
Start with a standard high or mid-height ponytail. Secure it with an elastic. About two inches down from the elastic, place a second elastic around the ponytail. Gently tease or fluff the hair between the two elastics by taking sections and pulling them apart slightly. This puffing creates the “bubble” effect. Continue down the length of the ponytail, spacing elastics about two to three inches apart and fluffing the hair between each set.
Working With Wave Texture
The fluffing step is easier and looks more natural with wavy hair because the waves already have texture and movement. You’re not creating texture from a smooth, straight strand—you’re enhancing and separating texture that already exists. This means the bubbles look fuller and more intentional with less aggressive fluffing required. The waves also help the elastic sit at different depths within each bubble section rather than sitting in a uniform line, which adds to the dimensional, textured appearance.
Worth knowing: This style looks fresher and fuller on day-two or day-three hair when your waves have relaxed slightly and your hair is less shiny. The matte finish and relaxed texture make the bubbles look more substantial.
8. Straight-Across Ponytail
This is a clean, minimalist style where your ponytail sits horizontally across the back of your head rather than at a traditional vertical point. The unconventional placement is what makes this style contemporary and interesting, and wavy texture adds sophistication to the geometric simplicity of the style. It works beautifully as a low, wrapped style or as a mid-height statement.
Understanding the Placement
Instead of gathering hair from all around your head into a single vertical point, you’re gathering only the hair that sits across a horizontal line—roughly from ear to ear around the back of your head. The hair above this line stays down, and the hair below stays down. Only the hair in the middle section is secured. This creates a clean, architectural look that’s far more modern than traditional ponytail placement.
Elevating With Waves
The texture of your waves becomes the focal point when your ponytail has such clean, geometric lines. Don’t smooth your hair for this style. Instead, let your waves create visual texture in both the down sections and within the ponytail itself. The contrast between the structured placement and the organic wave texture is what makes this style interesting and sophisticated.
Take a thin section from the ponytail and wrap it around the elastic to conceal it. For extra polish, consider a thin braided wrap instead of a twisted one—the braid’s structure complements the geometric placement of the ponytail itself.
9. Messy Textured Ponytail
This is the opposite of a sleek ponytail. It’s deliberately, intentionally messy—the kind of ponytail that looks like you didn’t try, even though you actually did. For wavy hair, this style is one of the easiest because you’re working with your natural texture rather than against it. The waves are literally the point of the style.
Embracing the Chaos
Gather your hair into a ponytail at whatever height feels comfortable—high, mid, or low all work equally well. Secure it with an elastic. Now, instead of smoothing anything, do the opposite: take sections from the hair around the ponytail base and gently pull them out, creating a halo of tousled texture. Take sections from the ponytail itself and separate them with your fingers, letting the waves create organic ridges and movement. The messier it looks, the more successful the style.
The Intentional Approach
Don’t be timid. Messy doesn’t mean neglected—it means deliberately texture-forward. If your ponytail feels too neat or controlled, spend two minutes pulling pieces out and separating sections until it reads as intentionally undone rather than accidentally sloppy. The difference is in the intentionality of how you’ve tousled the texture.
Pro tip: A light texture spray or dry shampoo before gathering actually helps this style because it gives your waves more grip and makes the intentional tousling look more defined and less like hair that’s just falling apart. The product helps the texture hold its separated structure throughout the day.
10. Slicked-Back Dramatic Ponytail
When you want drama and polish, a slicked-back ponytail pulls your hair away from your face with intention while the slicked elements create a sharp, sophisticated frame. This style actually works beautifully on wavy hair because you’re not trying to create a razor-sharp, perfectly smooth result. Instead, you’re creating a controlled, intentional direction with the slicked-back elements while letting your wave texture show through in the actual ponytail.
The Slicking Technique for Wavy Hair
Apply a smoothing serum or lightweight gel to damp hair at the front and sides. Use a firm brush or a fine-tooth comb to brush this hair straight back and toward the crown, where you’ll gather your ponytail. The goal isn’t absolute smoothness—it’s directional control. Some texture and slight wave visibility in these slicked-back sections actually adds sophistication rather than detracting from it.
Gather your hair into a high, sleek ponytail. The slicked-back elements frame your face dramatically, and the ponytail itself can remain textured—even wavy and separated. This contrast between the controlled, slicked front and the textured ponytail is what makes the style work so beautifully on wavy hair.
Finishing Touches
Take a thin section from the ponytail and wrap it around the elastic, smoothing this wrap section with the same product you used on the slicked-back sections. This wrapped detail adds polish and makes the style feel intentionally designed rather than rushed.
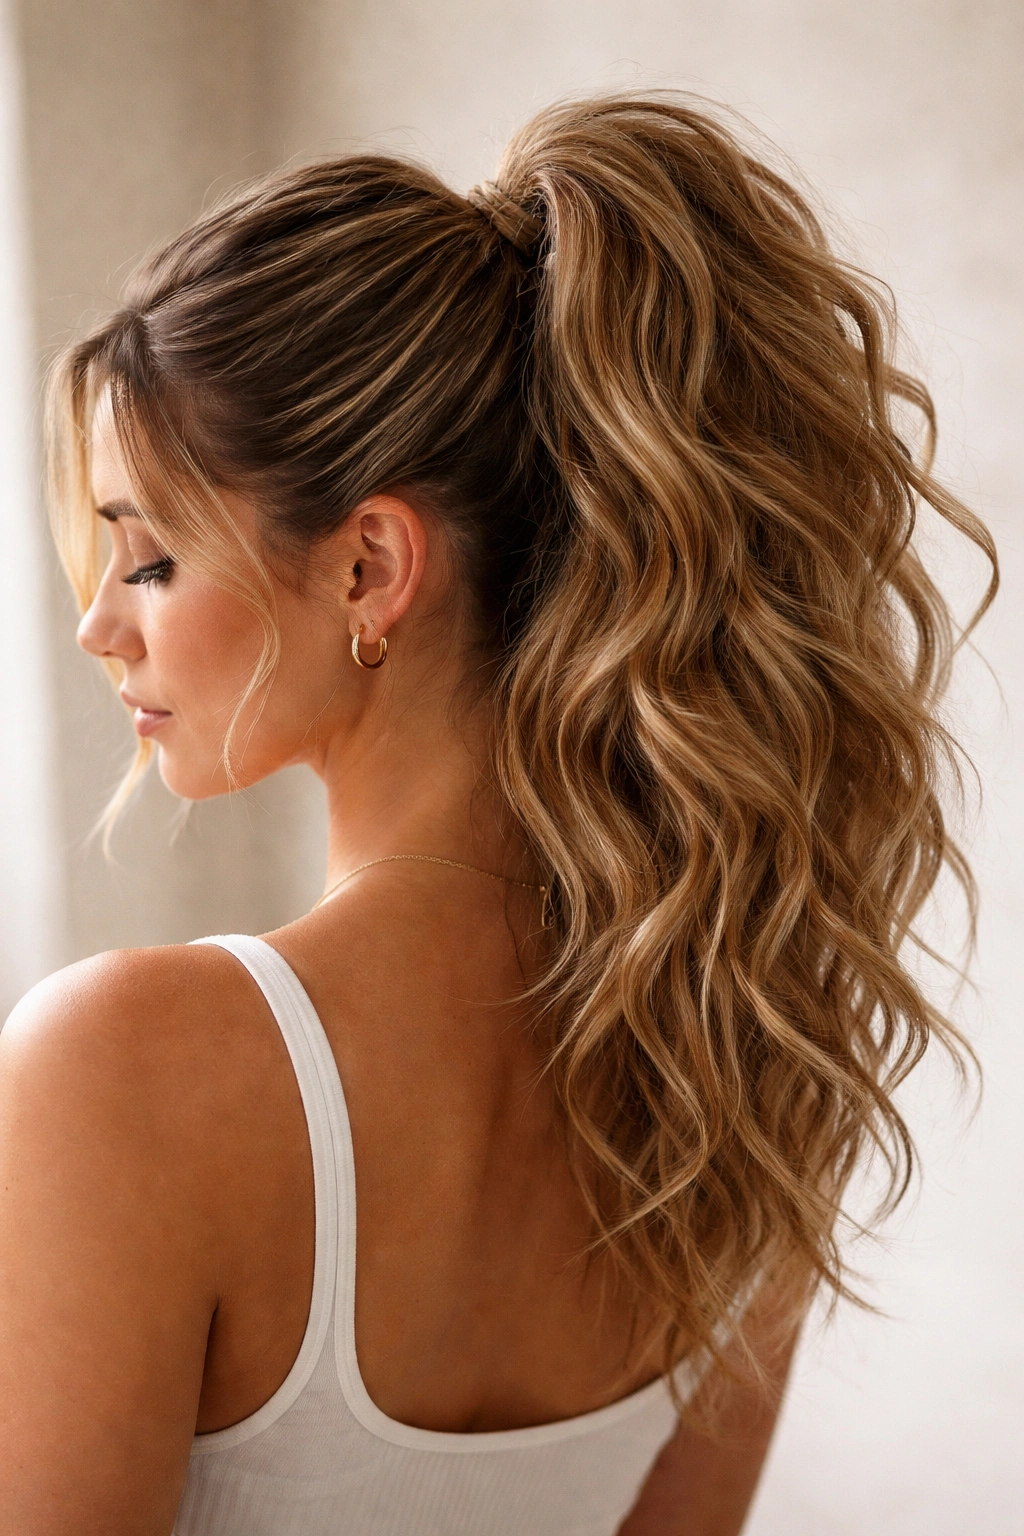
11. Curled-Ends Ponytail
For the final style, take a standard ponytail and add curl definition or movement to the ends of the ponytail itself, creating a style that combines the practicality of a ponytail with the visual interest of curled or enhanced texture. This works particularly well with wavy hair because you’re enhancing texture that already exists rather than creating curl pattern from straight hair.
Curling the Ponytail Ends
Gather your hair into a ponytail at whatever height you prefer. Once secured, take sections of the ponytail and curl them away from your face with a curling iron, a wand, or even a flat iron if you know how to use one. The curls don’t need to be uniform or perfect. In fact, varying the curl directions and intensities creates more dimension and visual interest. Alternatively, if you use curling methods with your ponytail already in, braid sections of the ponytail loosely, secure the braid ends with small elastics, and leave them for a few hours or overnight. When you release the braids, you’ll have wave-enhanced texture without heat.
Creating Intentional Movement
The beauty of curling your ponytail ends is that you’re creating movement from the mid-shaft down while keeping everything secured. The curls draw the eye down the length of the ponytail rather than just to the base, making the entire style feel more dynamic. Because your hair is already wavy, the curls blend seamlessly and look like an intentional enhancement rather than an artificial addition.
Worth knowing: This style looks fresher on day-two hair after the curls have relaxed slightly, because the softer curl pattern looks more natural and blends better with your wave texture.
Final Thoughts
Wavy hair isn’t something to work around when you’re choosing a ponytail style—it’s what makes your ponytail options more interesting, not less. The texture, the movement, and the natural dimension are advantages. The eleven styles above aren’t a list of compromises; they’re a list of approaches that actually look better on wavy hair than they do on straight hair.
The common thread through all of these styles is embracing the wave texture rather than fighting it. When you stop trying to smooth everything into submission and instead lean into the movement and dimension your waves naturally provide, you unlock ponytail possibilities that feel effortless, contemporary, and genuinely suited to your hair. Some of these styles work best with freshly dried waves and defined texture. Others look more polished on day-two or day-three hair when the waves have relaxed and softened. Experiment with different styles at different stages of your hair cycle, and you’ll discover which approaches feel most natural and look most flattering for your specific wave pattern and face shape.