



Half up half down styles have become a go-to for anyone with textured hair who wants versatility without sacrificing volume or natural texture. These styles offer the best of both worlds—you get the elegance of a pulled-back look with the freedom and fullness of hair down, and for afro textures, they’re particularly stunning because they showcase the density and dimension of your natural curl pattern. Whether you’re heading to the office, a formal event, or just want a polished everyday look, half up half down styles work across virtually every occasion and hair length.
The beauty of half up half down styles on afro hair isn’t just aesthetic—it’s practical too. This approach reduces daily manipulation of your entire head while still giving you a styled, intentional look. You’re protecting the ends of your hair by securing them partially, and you’re allowing the natural shrinkage of curls and coils to work with you rather than against you. Plus, if you’ve recently washed and stretched your hair or are working with a protective style, half up half down arrangements let you transition between states without starting from scratch.
Why Half Up Half Down Works Beautifully on Afro Hair
Half up half down styles sit at a sweet spot for textured hair because they balance protection with expression. When you gather only a portion of your hair, you’re reducing the weight and tension distributed across your entire scalp, which matters significantly for curl and coil health. Your roots stay supported without the strain that comes from full protective styles, and your hair gets to breathe while still being intentionally styled.
The sectioning involved in half up half down styles also gives you a chance to work with your hair’s natural texture rather than fighting it. With afro hair, this is crucial—coils and curls have their own trajectory and behavior. When you section and secure hair, you’re simply directing that natural movement, not forcing it into a shape it doesn’t want to hold. The result feels organic and effortlessly chic, which is exactly what makes these styles so popular.
Another major advantage is that half up half down styles photograph well and translate across different settings. You can wear the same style to a casual brunch or dress it up for an evening event by changing your accessories or adding embellishments. For anyone who wants a single protective or styled approach that works multiple ways, this is the answer.
1. The Twisted Crown Half Up
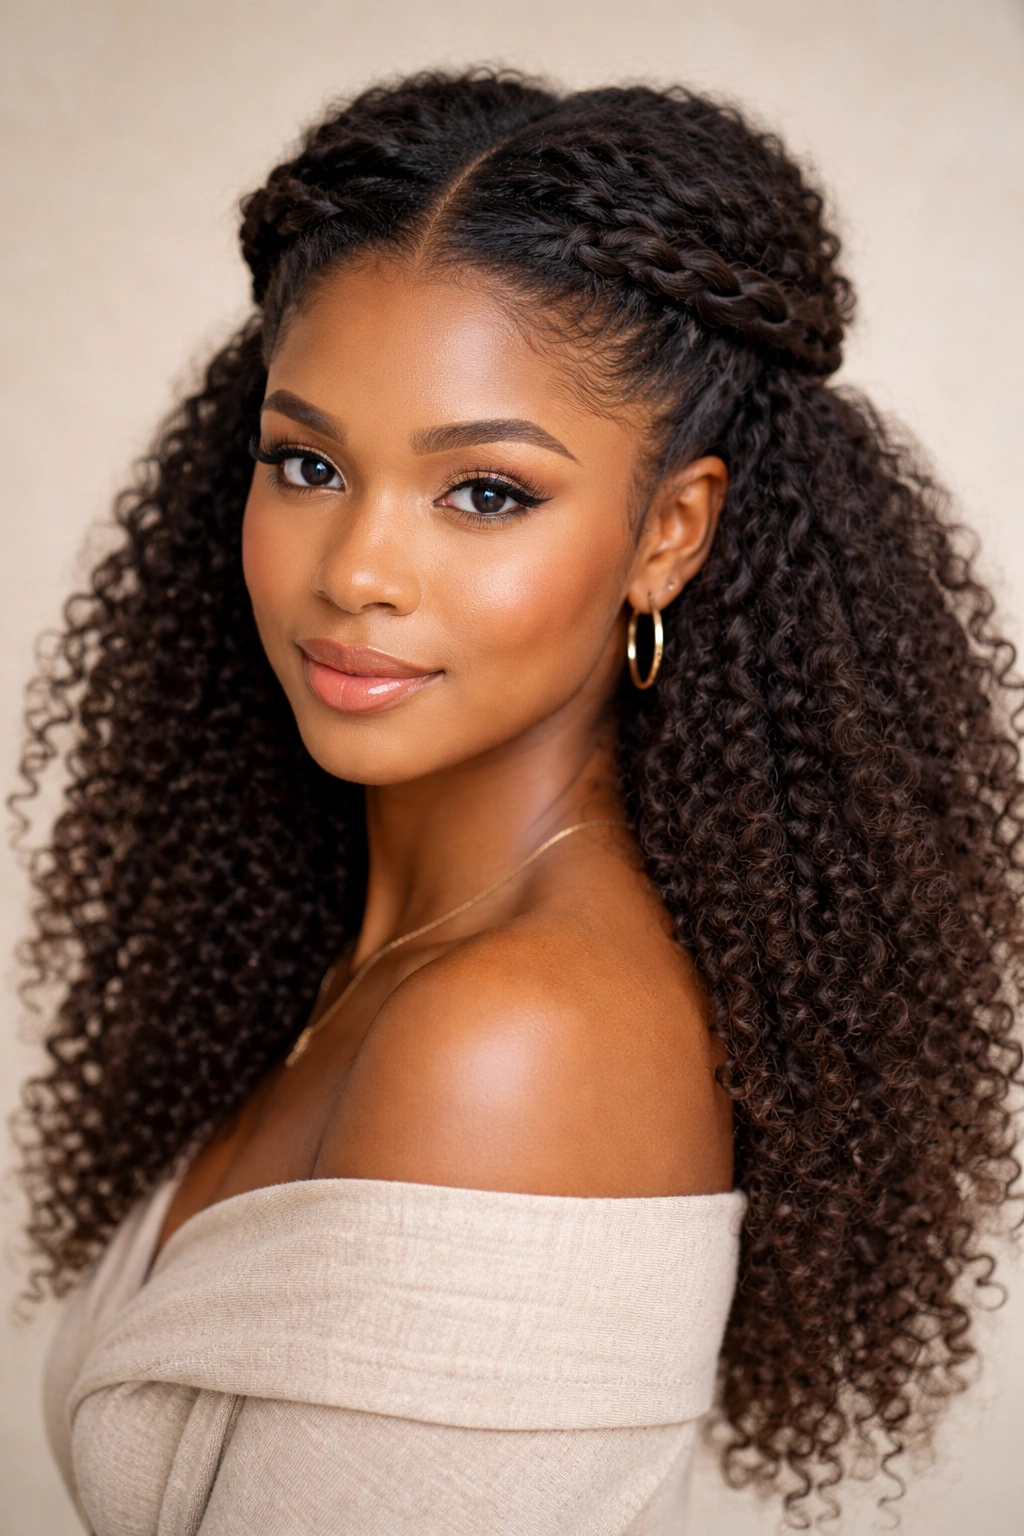
The twisted crown creates an elegant frame for your face while keeping the bulk of your hair down in its full, natural state. Two sections of hair are twisted from opposite sides of your head and meet at the back, where they’re secured together—think of it as creating a crown effect while letting everything else flow free.
How to Style the Twisted Crown
Begin with clean, moisturized hair that’s been stretched slightly (blow-dried on low heat or air-dried while damp works perfectly). Section a piece of hair from one temple area, about the width of two fingers, and twist it loosely toward the back of your head, following your natural hairline. Do the same on the opposite side. Let the twists curve naturally—they should follow the shape of your head, not pull tightly. When both twists reach the back, cross them over each other once and secure everything with a bobby pin or small clip hidden beneath the twists. The crossed effect adds visual interest, and because the twists are loose, they showcase the texture of your hair beautifully.
Styling Tips and Customization Options
- Loose vs. tight twists: Looser twists look more romantic and show curl definition; tighter twists read as more polished and defined. Choose based on your mood and the occasion.
- Add texture before twisting: For extra dimension, pineapple your hair slightly the night before (gather the top portion loosely on top of your head) or mist with a light texturizing spray before twisting.
- Secure strategically: Use small bobby pins that match your hair color, or clip-in pieces if you want the security without the visual weight. Hide them beneath the twists at the back.
- Accessorize: A delicate hair cuff, wrapped around the base where twists meet, adds an understated luxury feel. Gold, silver, or brass all work depending on your style preference.
The twisted crown works on hair from about shoulder-length up to waist-length and actually looks best when your hair has some weight and fullness to it.
2. The Puff Crown Half Up
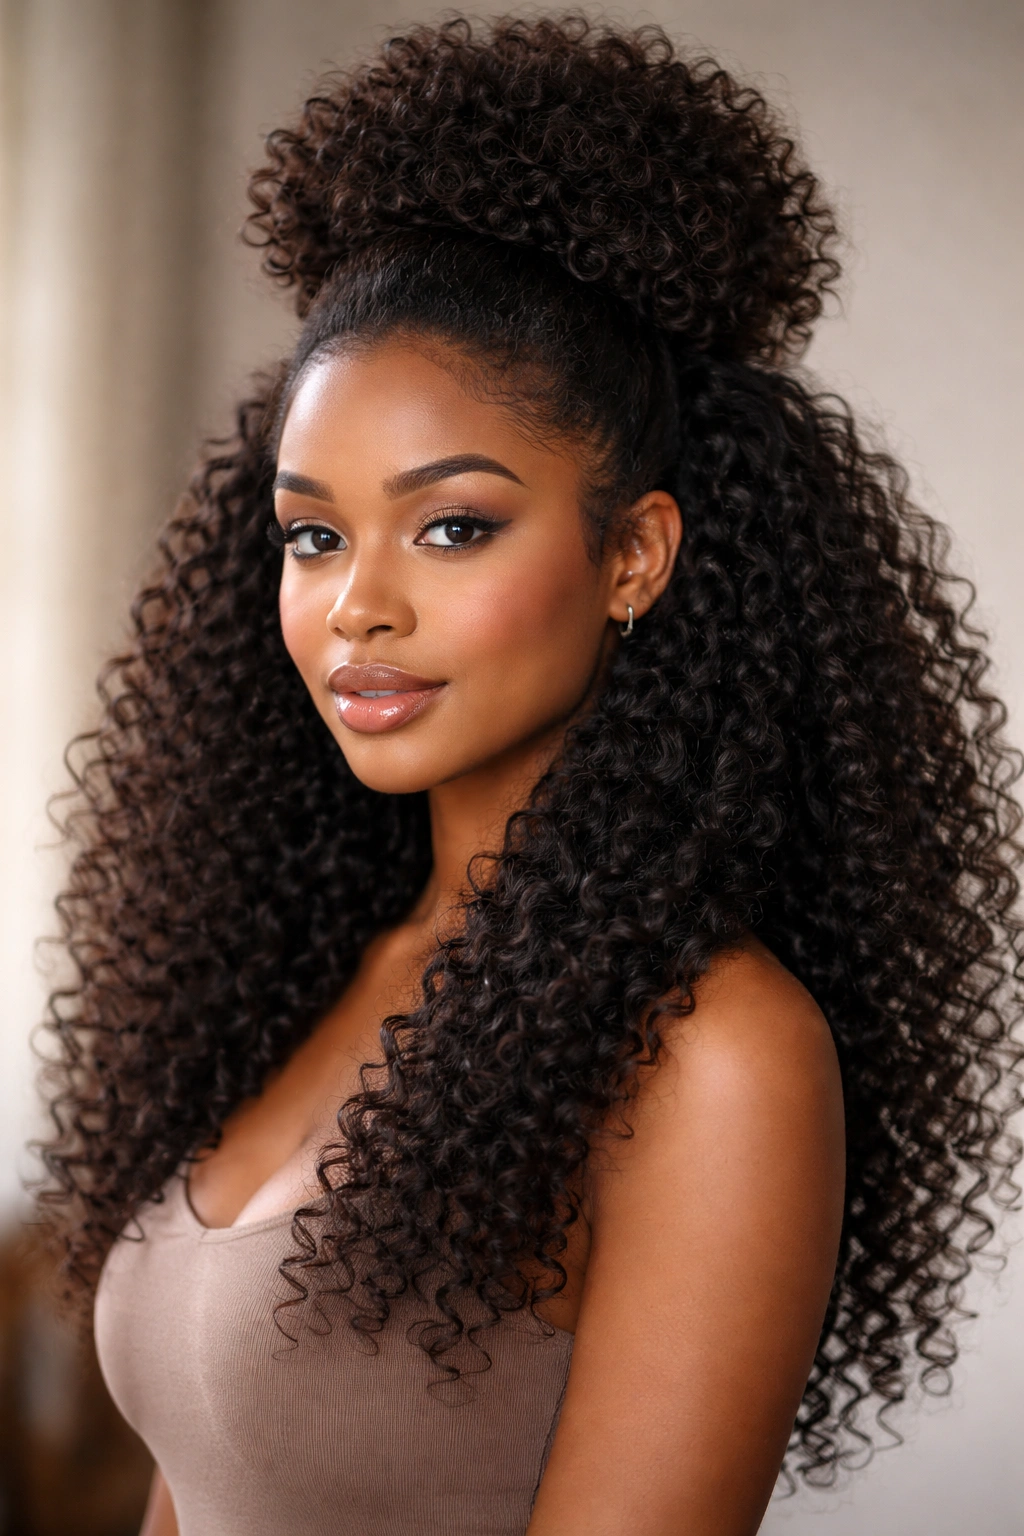
A puff at the crown—created by gathering the very top section of your hair and styling it into a bun or spherical shape—brings height and drama while the rest of your hair cascades down. This style is bold and modern, perfect when you want to make a statement.
Creating the Perfect Puff Crown
Identify where you want your puff to sit on your crown—usually this is at the highest point of your head, slightly back from the top. Gather this section (typically an area about the size of your palm or slightly larger) and secure it with a hair tie at the base. Now take that gathered section and gently flip it upward and over itself to create a rounded bun shape, then pin or secure it in place. The key to a flattering puff crown is making sure it sits at the right angle—lean slightly into your natural hair growth pattern rather than forcing it to be perfectly round. This creates a more intentional, less costume-like appearance.
Pro Tips for Puff Perfection
- Control flyaways with a light gel: A small amount of lightweight gel or mousse smoothed over the puff before securing keeps everything in place without looking stiff or wet-looking. Avoid heavy products that weigh down your curls.
- Don’t over-secure: One good hair tie at the base is usually enough. Multiple ties or clips can create a pinched, artificial look.
- Vary the texture: You can create a smooth puff, a textured puff where you gently pull a bit of curl outward for dimension, or even a puff with some waves defined by a light defining cream.
- Adjust the size to your face: Larger puffs look balanced on larger frames and longer faces; smaller, tighter puffs can look stunning on petite frames or if you prefer a more subtle statement.
This style adapts beautifully to different hair lengths and works particularly well if you have a medium to long length to work with.
3. The Braided Halo Half Up
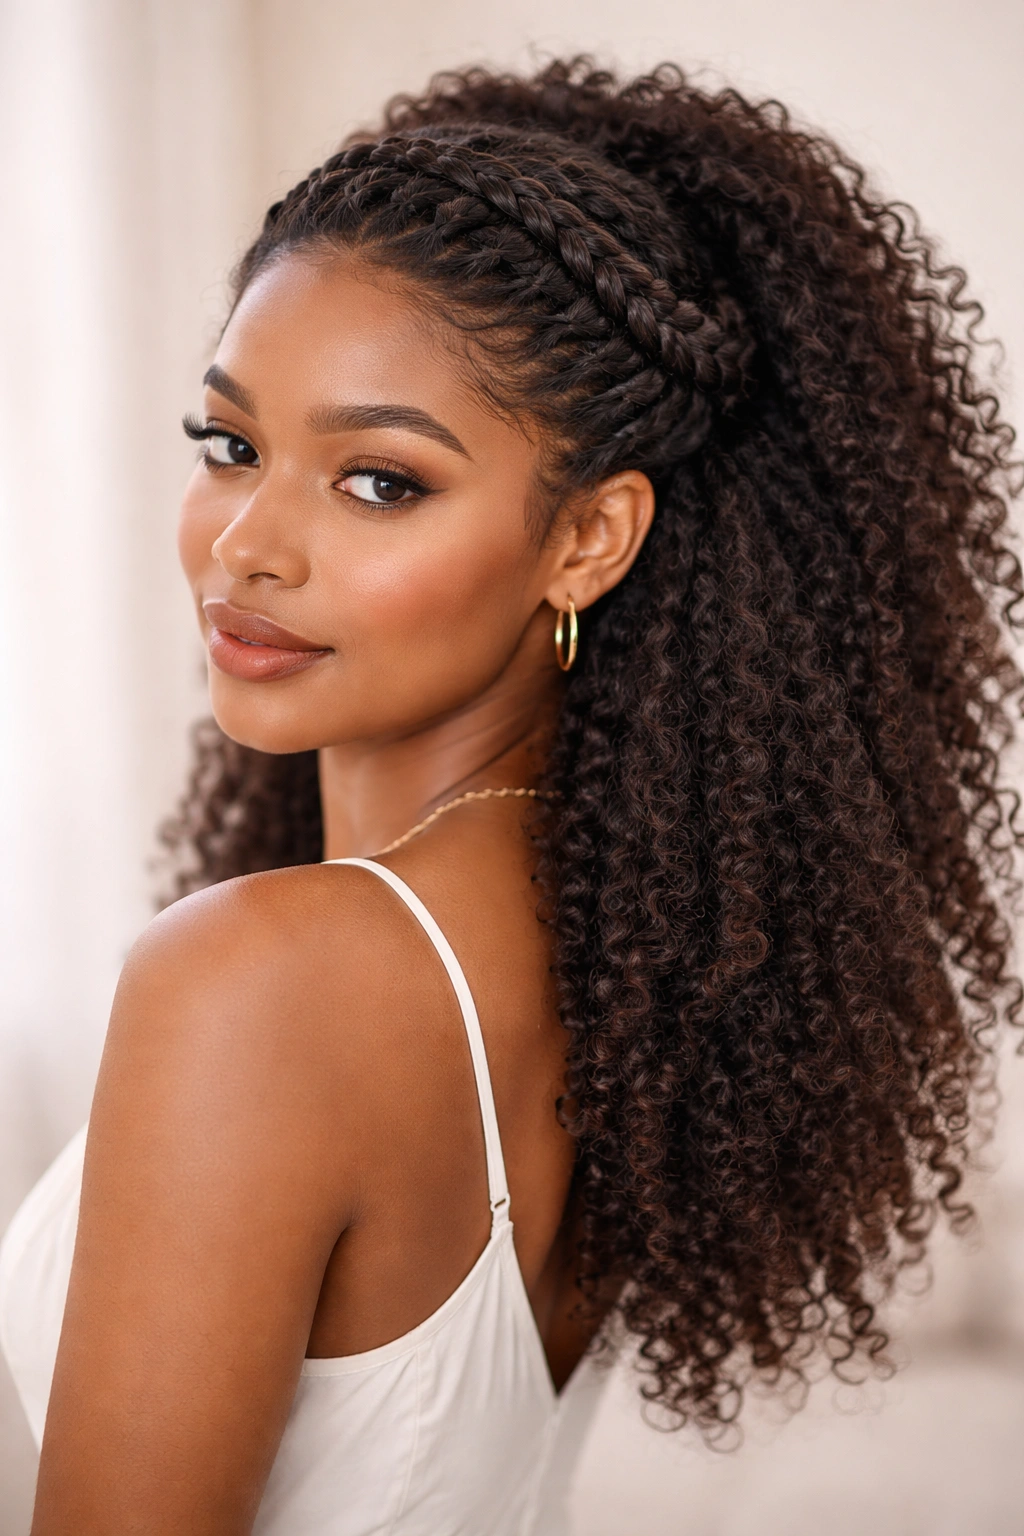
A braid that arcs from one side of your head to the other, creating a halo effect, is romantic and intricate-looking while being surprisingly simple to execute. Only the braid is technically “up,” but the effect is so structured and intentional that it reads as a complete hairstyle.
Executing the Braided Halo
Start by sectioning a section of hair from one side, roughly at your temple. This braid should begin fairly low and arc up and back—think of it as following an invisible circle around the back of your head. Start a three-strand braid and add small sections of hair as you go (this is called a crown braid or Dutch braid if you prefer the braid to sit on top of your hair, or a French braid if you want it slightly embedded). Continue braiding toward the opposite side of your head at roughly the same level where you started. Secure the end with a clear or matching hair tie. The magic is in the arc—let the braid follow your head’s natural curve, and the halo effect emerges.
Customization and Styling Notes
- Braid placement: The braid can sit at your hairline for a delicate, Shakespearean feel, or lower at ear level for something more dramatic and modern.
- Braid pattern variation: Try a thick, chunky three-strand braid for definition, or a thinner, more delicate braid if you want something subtle. Some people even do double braids (one on each side of the crown).
- Tighten or loosen: A tight braid looks crisp and defined; a loosely woven braid with gently separated sections looks dreamy and textured. Post-braid, you can gently pull sections outward to increase dimension.
- Add embellishments: Tiny flowers, beads, or even thin yarn woven into the braid during styling adds color and personality.
This style shows off braiding skill without requiring extreme technical ability, and it genuinely flatters most face shapes.
4. The Two-Section Topknot Half Up
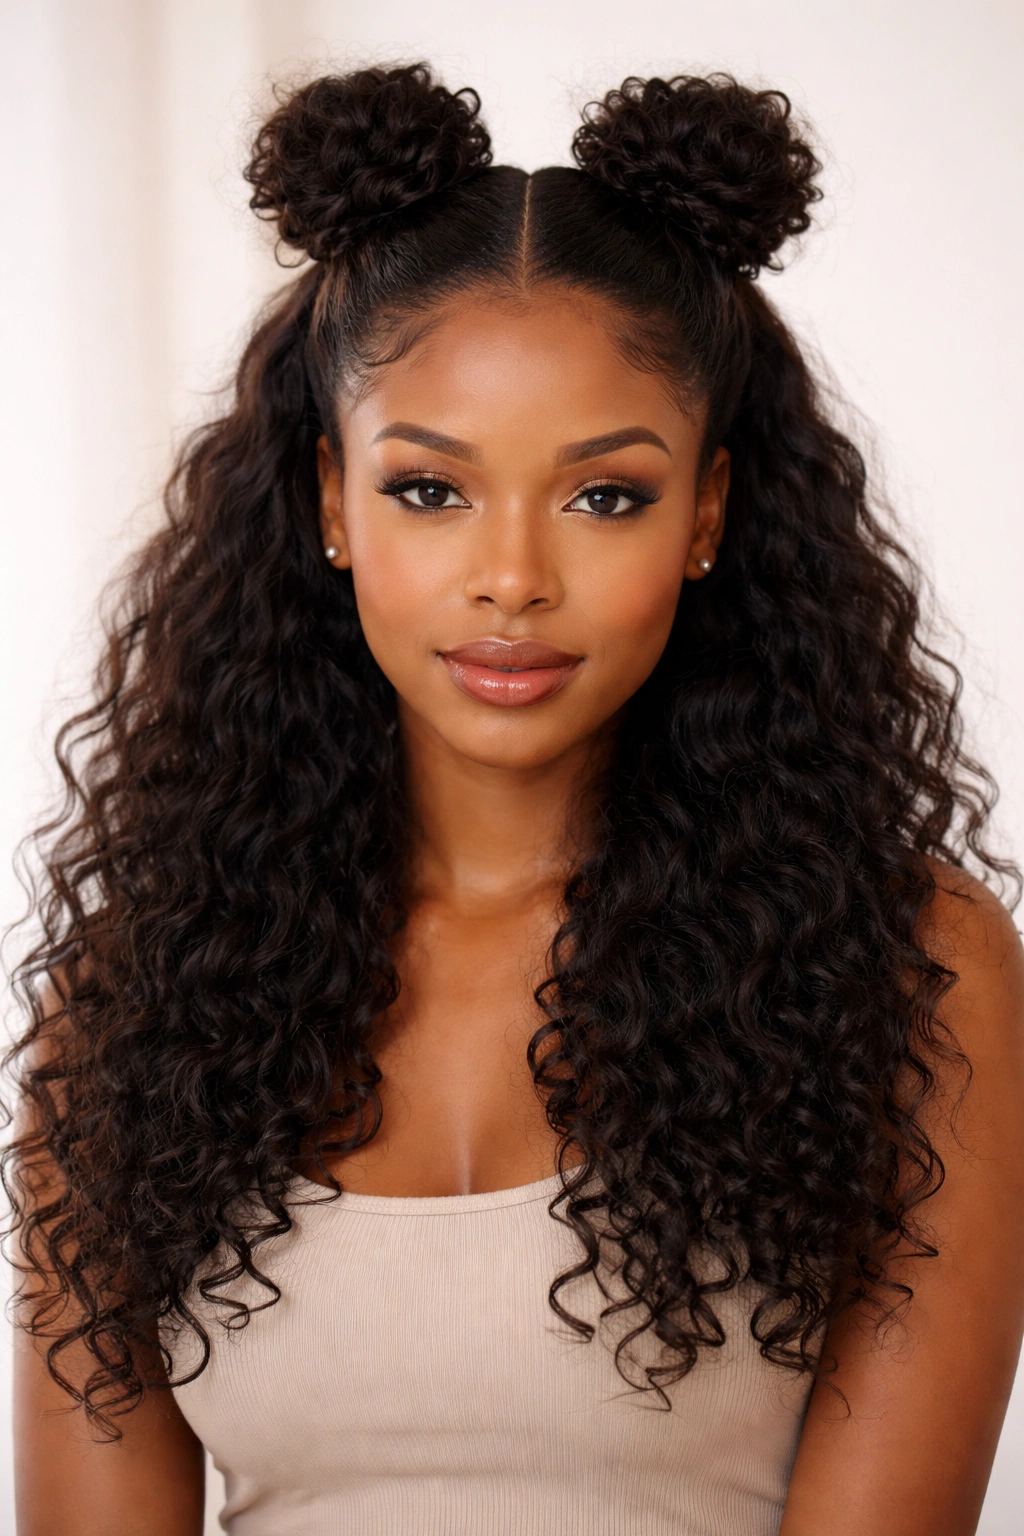
Two buns or knots positioned on either side of your crown, with everything else down, creates a playful, modern look that’s part cute, part editorial. This style has a bit of personality and works beautifully for younger looks or anyone wanting something less traditionally formal.
Building Your Double Topknot Style
Divide your crown area in half with an invisible center line. Gather the section on one side (roughly from the center part to your temple area) into a small, high ponytail secured with a hair tie. Take that ponytail and twist it or wrap it around itself to create a bun, securing it with bobby pins. Repeat on the opposite side. The result is two small buns positioned symmetrically on your crown. Make sure both buns are at roughly the same height—checking in a mirror from the front ensures balance. These buns should sit high enough to feel intentional but not so high that they look awkward or child-like (unless that’s the vibe you’re going for).
Styling Variations
- Size matters: Tiny, tight knots feel sophisticated; larger, looser buns feel playful and youthful. Match the size to the occasion and your personal style preference.
- Add definition: Before securing each bun, you can create a small three-strand braid at the base of each ponytail, then wrap that around to form the bun. This adds visual detail and structure.
- Clip them up: If you prefer not to use ties (which can create creases), secure the buns entirely with bobby pins, hiding them inside the bun for a seamless look.
- Asymmetric option: Try placing one bun slightly higher or larger than the other for a modern, deliberately asymmetrical statement.
This style is especially striking on longer hair and looks great on anyone with enough hair density to create defined knots.
5. The Wrap-Around Half Up with Loose Curls
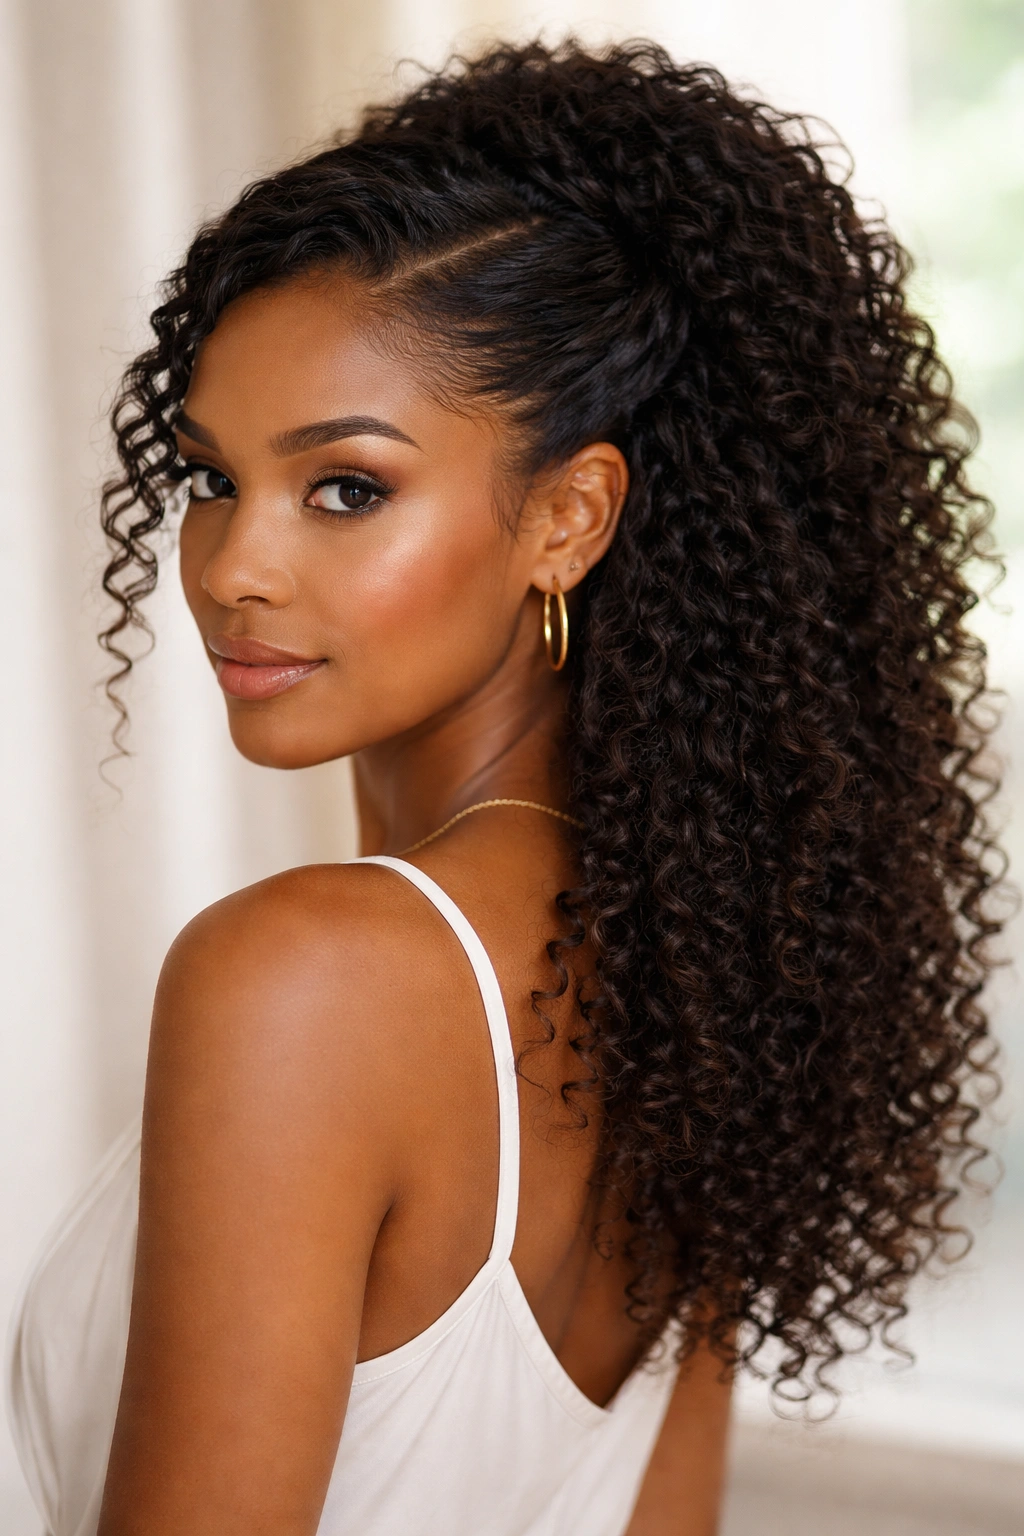
A section of hair from one side is wrapped around to the back and secured, creating a diagonal line that frames one side of your face while letting your curls show off their full, natural pattern. It’s sophisticated without being overly formal.
Creating the Wrap-Around Look
Take a thick section of hair from one side (starting roughly at your ear) and gently smooth it back, following the natural curve of your head toward the opposite side. Secure this section at the back with a clip or bobby pin. What makes this different from other styles is that the hair being wrapped isn’t twisted or braided—it’s simply smoothed slightly and guided back, so your curl pattern remains visible and the hair looks intentional but effortless. The goal is a soft, guided look, not a slicked-back appearance.
Customization for Your Texture
- Use a smoothing cream or mousse: Apply a light amount to the section being wrapped so it stays in place without looking wet or overly defined. This also helps your curls maintain their shape as they stretch slightly during the wrapping.
- Incorporate texture: Rather than smoothing completely, you can leave the section you’re wrapping with some texture intact—pull out a few curls, create subtle waves, or even braid a thin section within it.
- Wrap tightness: A loose, flowing wrap reads as effortless; a tighter wrap reads as more polished. Adjust based on the occasion.
- Accessorize the secured end: Hide your clip under a delicate cuff, or let it peek out with an interesting design—it becomes part of the statement.
This style is flattering on virtually every face shape because the diagonal line can be angled to emphasize or balance facial features depending on which side you choose to wrap from.
6. The Gathered Puff with Loose Coils
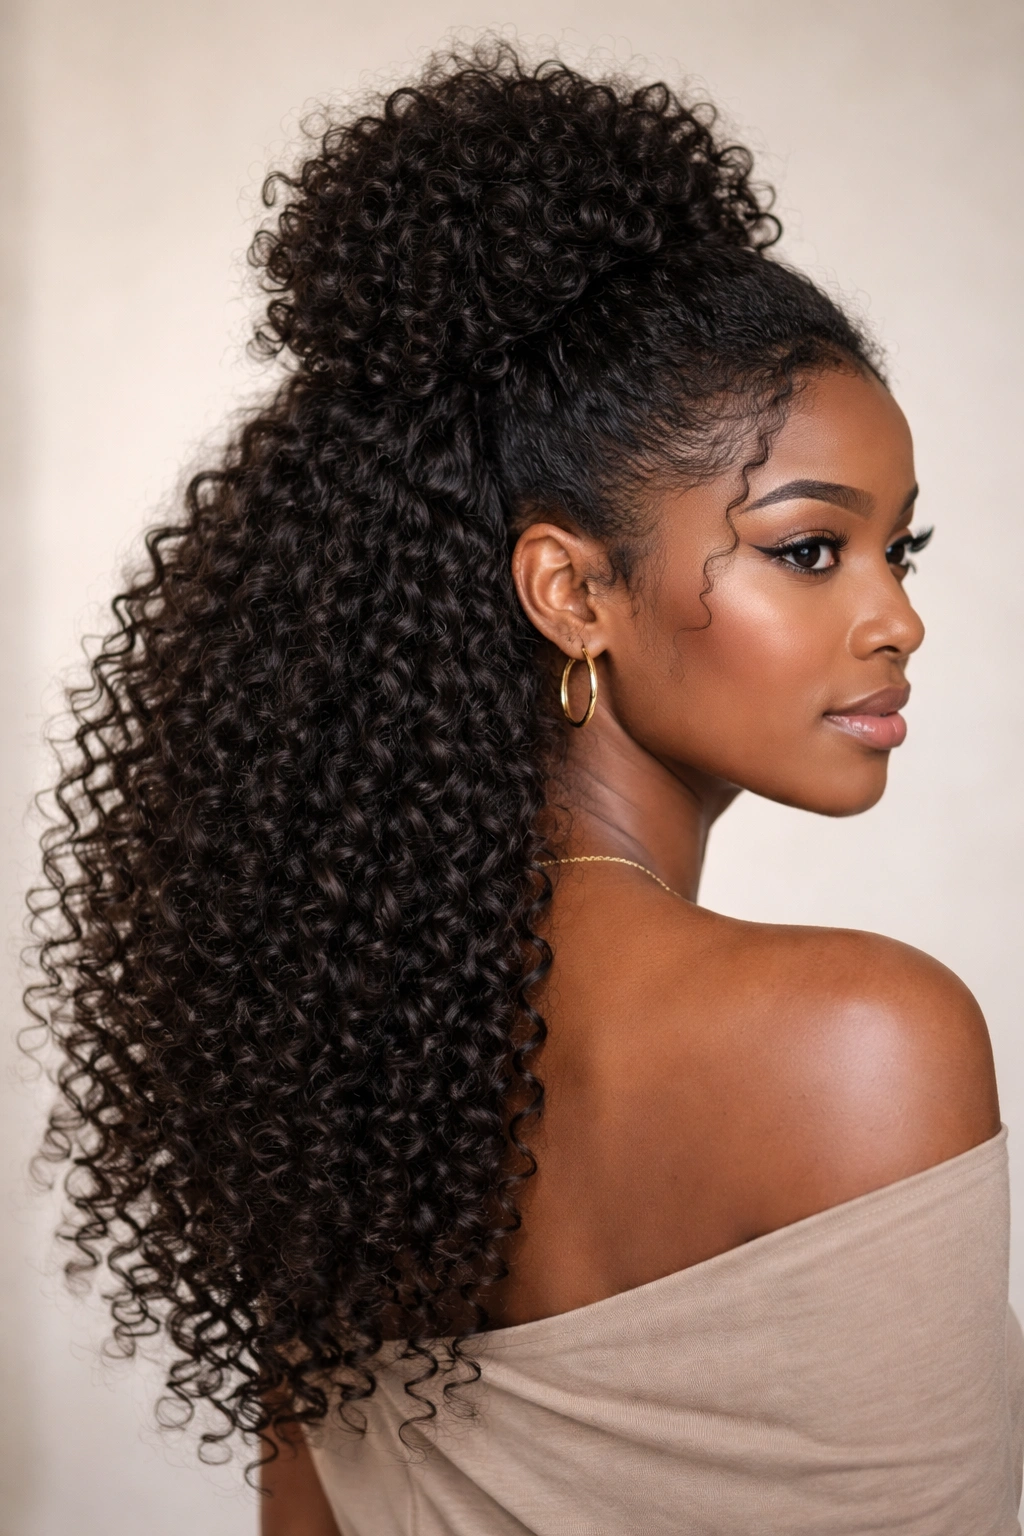
A gathered section at the crown is loosely secured into a puff shape, but instead of making it round and compact, you allow sections of it to fall and cascade down your back, creating a hybrid that’s somewhere between a puff and loose hair. The texture shows, the style reads as intentional, and it’s surprisingly easy to execute.
Building the Cascading Puff
Gather the top third or half of your hair (depending on how much you want in the puff versus down) and secure it at the base with a hair tie. Rather than making this a neat, compact bun, you’re going to gently let sections escape and fall. Take several small sections from the gathered hair and carefully pull them outward, allowing them to cascade down alongside the puff. Think of this as a controlled release—you’re creating defined sections that fall, not making the whole thing messy. Secure any flyaways with bobby pins placed strategically inside the puff or hidden in the falling sections.
Style Variations and Tips
- Control the cascade: The sections that fall can be twisted slightly before release, creating definition; or left completely loose to maintain maximum texture and volume.
- Adjust puff position: A higher puff reads as more youthful and playful; a lower puff sits more formally and elegantly.
- Density matters: This style works best if you have enough hair density to create a substantial puff—if your hair is finer, you might need to backcomb slightly at the base before gathering to create volume.
- Secure wisely: Use bobby pins that match your hair color, and hide them well. A visible pin breaks the aesthetic.
This style is particularly beautiful on longer hair with defined coils or curls because the cascading sections show off the texture beautifully.
7. The Side-Swept Half Up with Spiral Coils
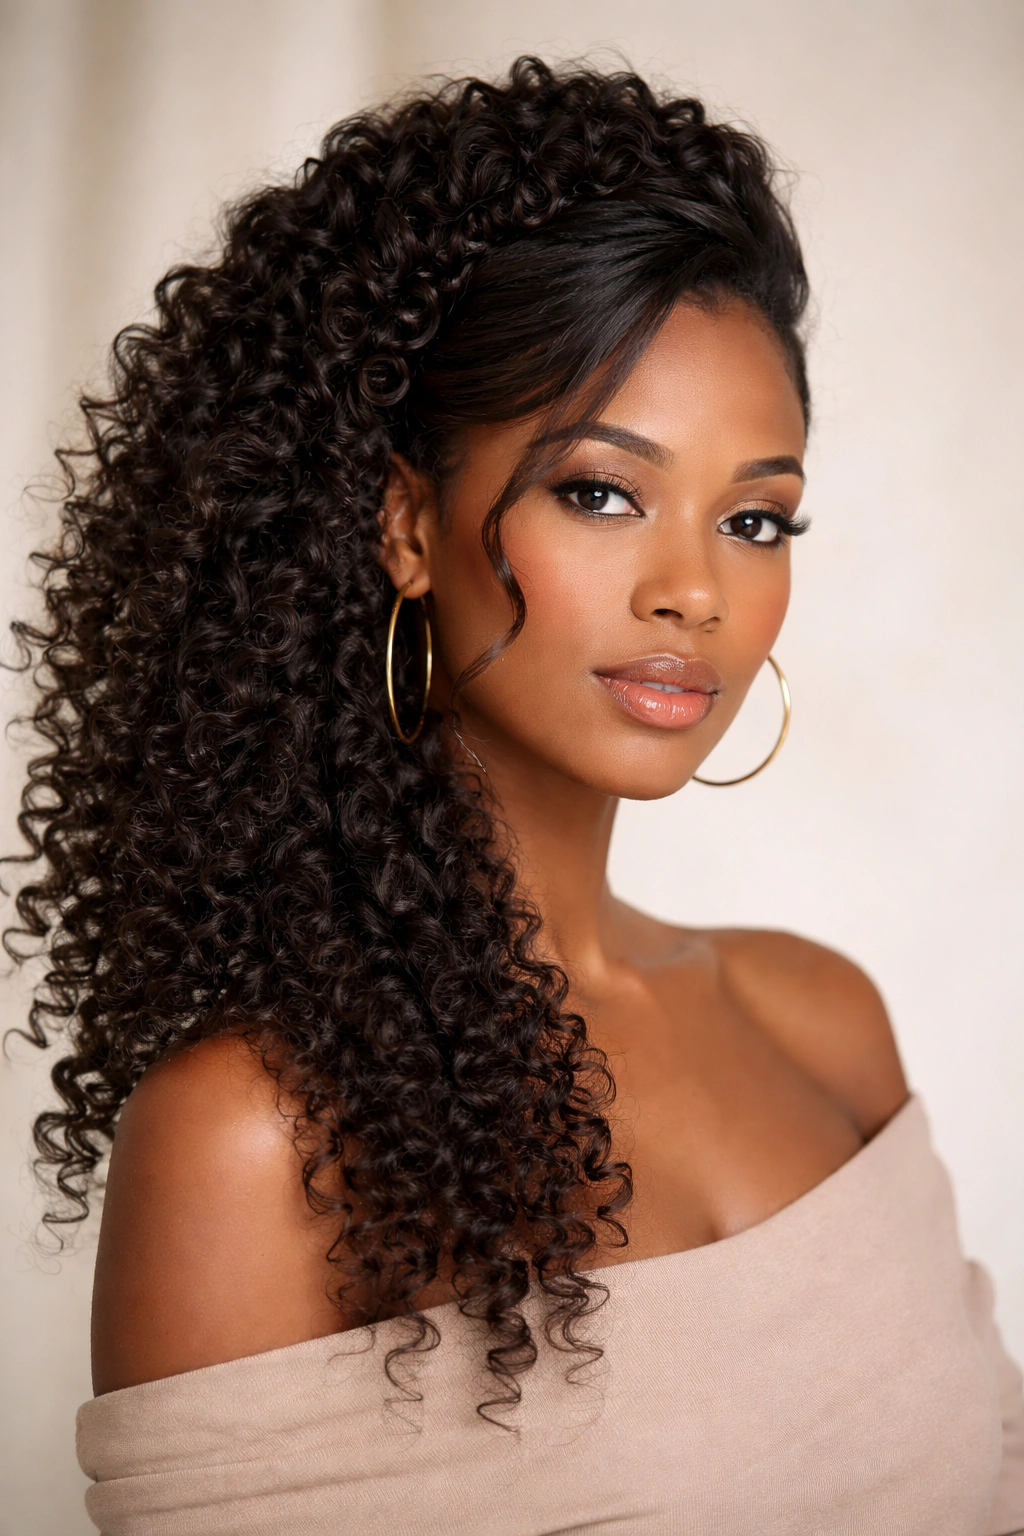
Hair is gathered from one side and swept toward the opposite side (or the back), where it’s secured, while the opposite side flows completely loose. This creates an asymmetrical, almost sculptural look that’s modern and striking. For added definition, the gathered section can be spiraled or twisted for visual interest.
Executing the Side Sweep
Determine which side you want to sweep from (this should balance your face shape—if you have a wider face, sweep from the fuller side; if you want to add width, sweep from the narrower side). Gather a generous section of hair from that side, starting roughly at your temple or ear, and guide it toward the opposite side or the back of your head where you secure it with a clip or hair tie. The beauty of this style is its asymmetry—it should feel a bit dramatic and deliberate.
Enhancing with Spirals and Definition
- Spiral the gathered section: As you gather the hair, you can twist it tightly (creating a rope effect), loosely (creating waves), or even spiral it by wrapping it around your fingers. Secure in place.
- Add products for hold: A light texturizing spray or mousse helps the gathered section hold its shape and prevents the style from looking droopy throughout the day.
- Define your coils: Before gathering, you might separate your coils slightly using a pick or coil cream, so the gathered section shows defined texture rather than blending into one mass.
- Balance the asymmetry: Sometimes adding a subtle accessory (a cuff, a clip, or even a delicate piece of jewelry) to the secured section helps balance the visual weight of the asymmetrical style.
This style is incredibly flattering and works beautifully on shoulder-length hair and longer—it needs enough length to create obvious visual distinction between the gathered and loose sections.
8. The Dutch Braids into Bun Half Up
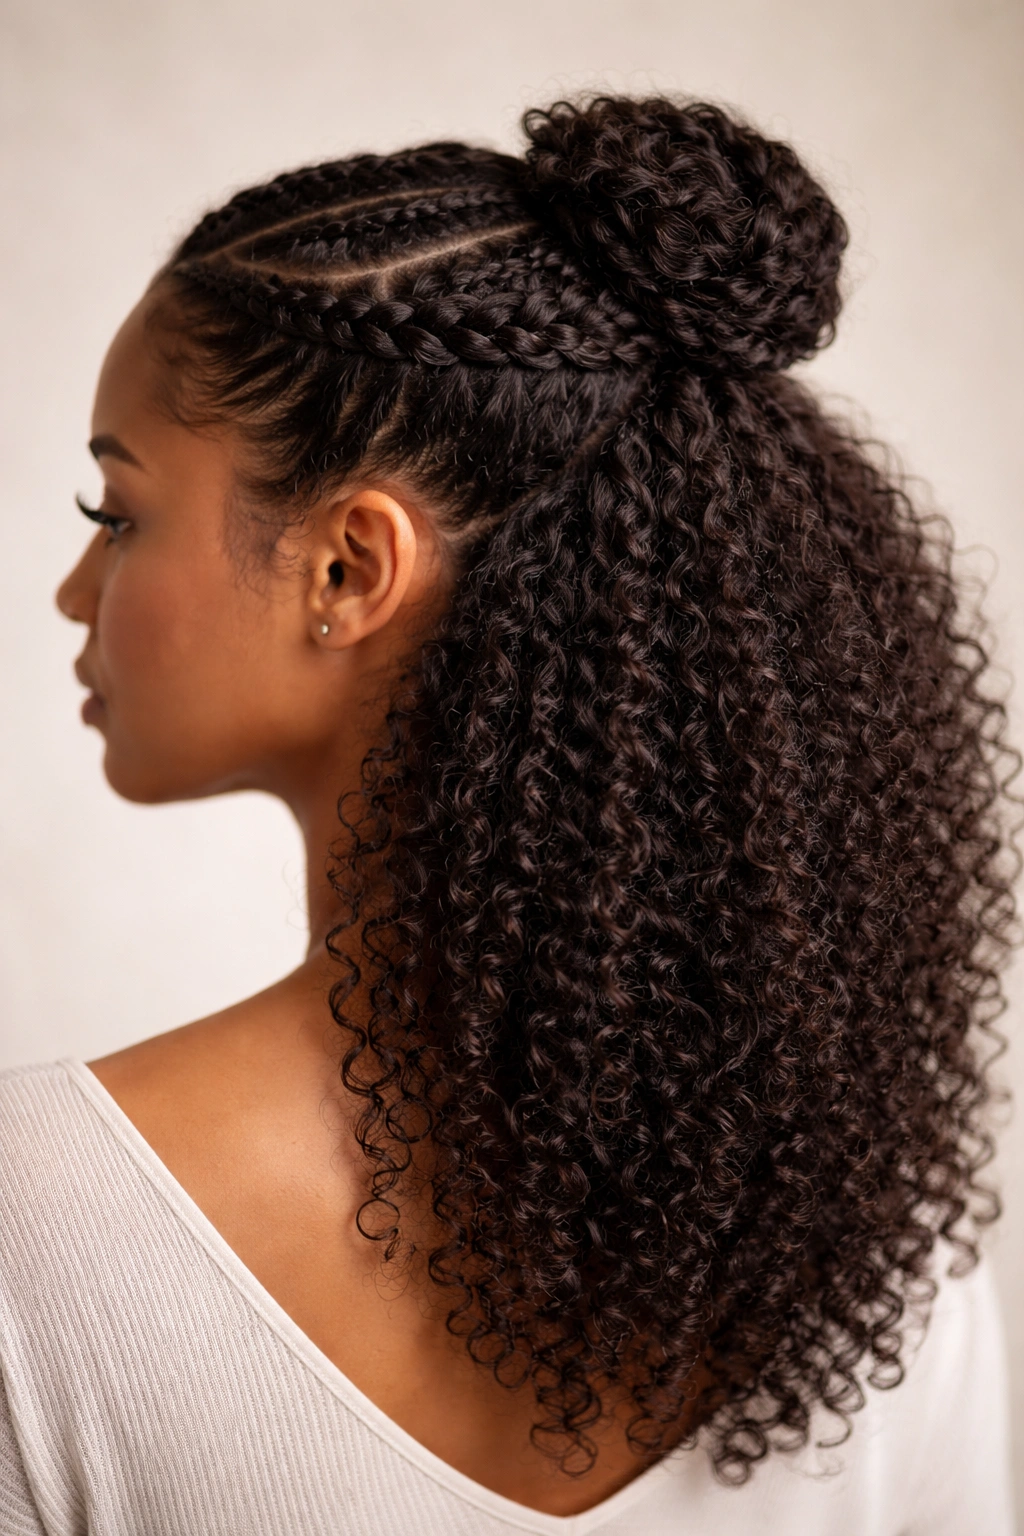
Two Dutch braids (where the braid sits on top of the hair and creates a raised line) start from your temples and meet at the back of your head, where they combine into a single bun. It’s intricate-looking and intentional while showcasing textured hair beautifully.
Creating the Double Dutch to Bun Effect
Start one Dutch braid at your left temple, adding hair as you work your way back (the braid should arc slightly upward and follow the natural contour of your head). Do the same on the right side, so both braids are working their way toward the center back of your head. When both braids meet at the back, you have a few options: you can combine the ends into a single ponytail and create a bun from that, or you can create two small buns side by side at the back. The combined-bun option reads as more elegant; the two-bun option is more playful.
Styling Considerations
- Braid tightness: Tight, crisp braids read as polished and structured; loose braids with gently separated sections read as romantic and textured. Both are beautiful—choose based on the occasion.
- Bun location: How high or low you position the final bun changes the entire vibe. A high bun feels youthful and energetic; a lower bun feels more sophisticated.
- Accessorize the meeting point: The spot where your braids meet or combine is the visual anchor of this style—consider adding a hair cuff, a delicate clip, or wrapping the area with a thin strand of metallic thread or yarn.
- Control flyaways: Use a light gel to smooth any baby hairs along the braids without weighing them down.
This style requires a bit more skill than some others, but the payoff is substantial—it looks intricate and intentional, which reads as high-effort styling even though the technique is quite manageable.
9. The Voluminous Swoop Half Up
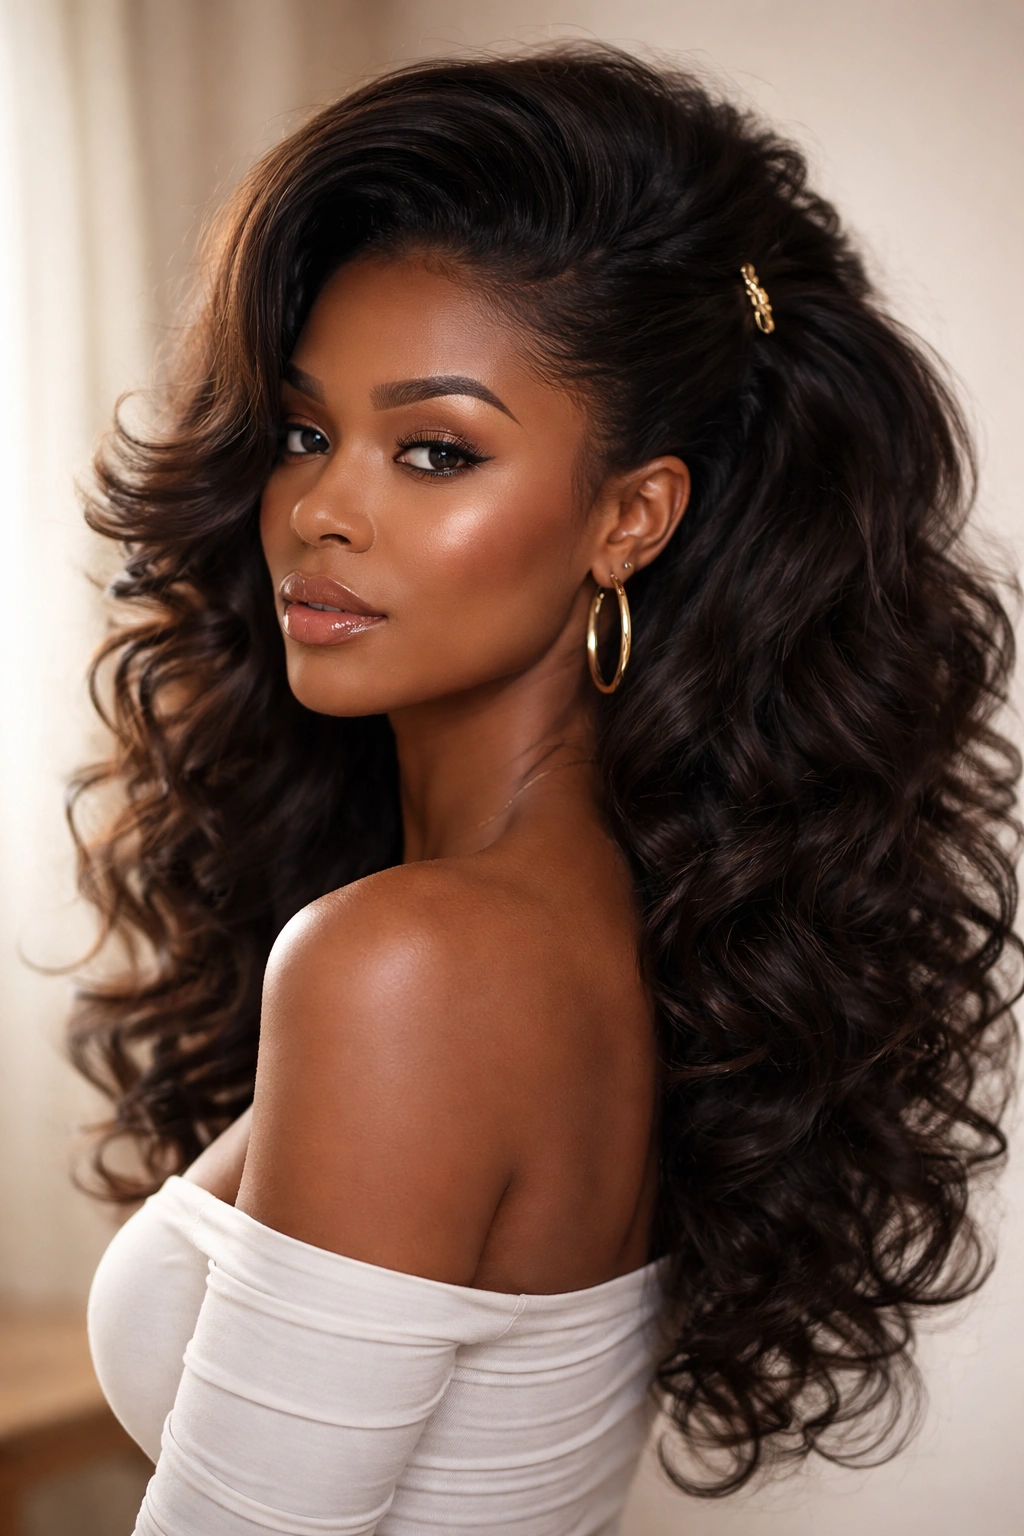
A large section of hair from one side is swept back and secured at the center-back of your head, creating maximum visual drama and volume. This style reads as bold and statement-making—it’s not subtle, and that’s entirely the point.
Building Volume for Maximum Impact
Start by making sure your hair has texture and body—a light spray-in mousse or texturizing spray applied before styling helps. Take a very generous section from one side (almost one-third of your hair), starting low and working upward. Gently lift this section upward and back as you guide it toward the center back of your head, where you’ll secure it with a large clip or multiple bobby pins. The key to a voluminous swoop is NOT smoothing the hair flat—you want some gentle waves and volume throughout the gathered section.
Creating Dimension and Drama
- Backcomb for lift: At the roots of your gathered section, gently backcomb to create lift and volume, then smooth the top layer so it looks intentional rather than tangled. This creates a sculptural quality.
- Don’t smooth completely: Leave some texture and wave in the gathered section—this adds dimension and movement.
- Secure generously: This style involves a lot of hair and needs secure anchoring. Don’t be shy with bobby pins; hide them well throughout the gathered section.
- Add a dramatic accessory: A large statement clip, a decorative hair cuff, or even a small hair stick positioned at the secured point draws attention and completes the look.
- Play with placement: Securing this section at the back-center creates one look; securing it slightly off-center or even on the opposite side creates a different, equally striking vibe.
This style requires medium to long hair and definitely benefits from hair that has natural density and texture. It’s perfect for anyone who wants to make a bold statement while keeping their hair partially down.
Master Tips for Styling and Maintaining Half Up Half Down Looks
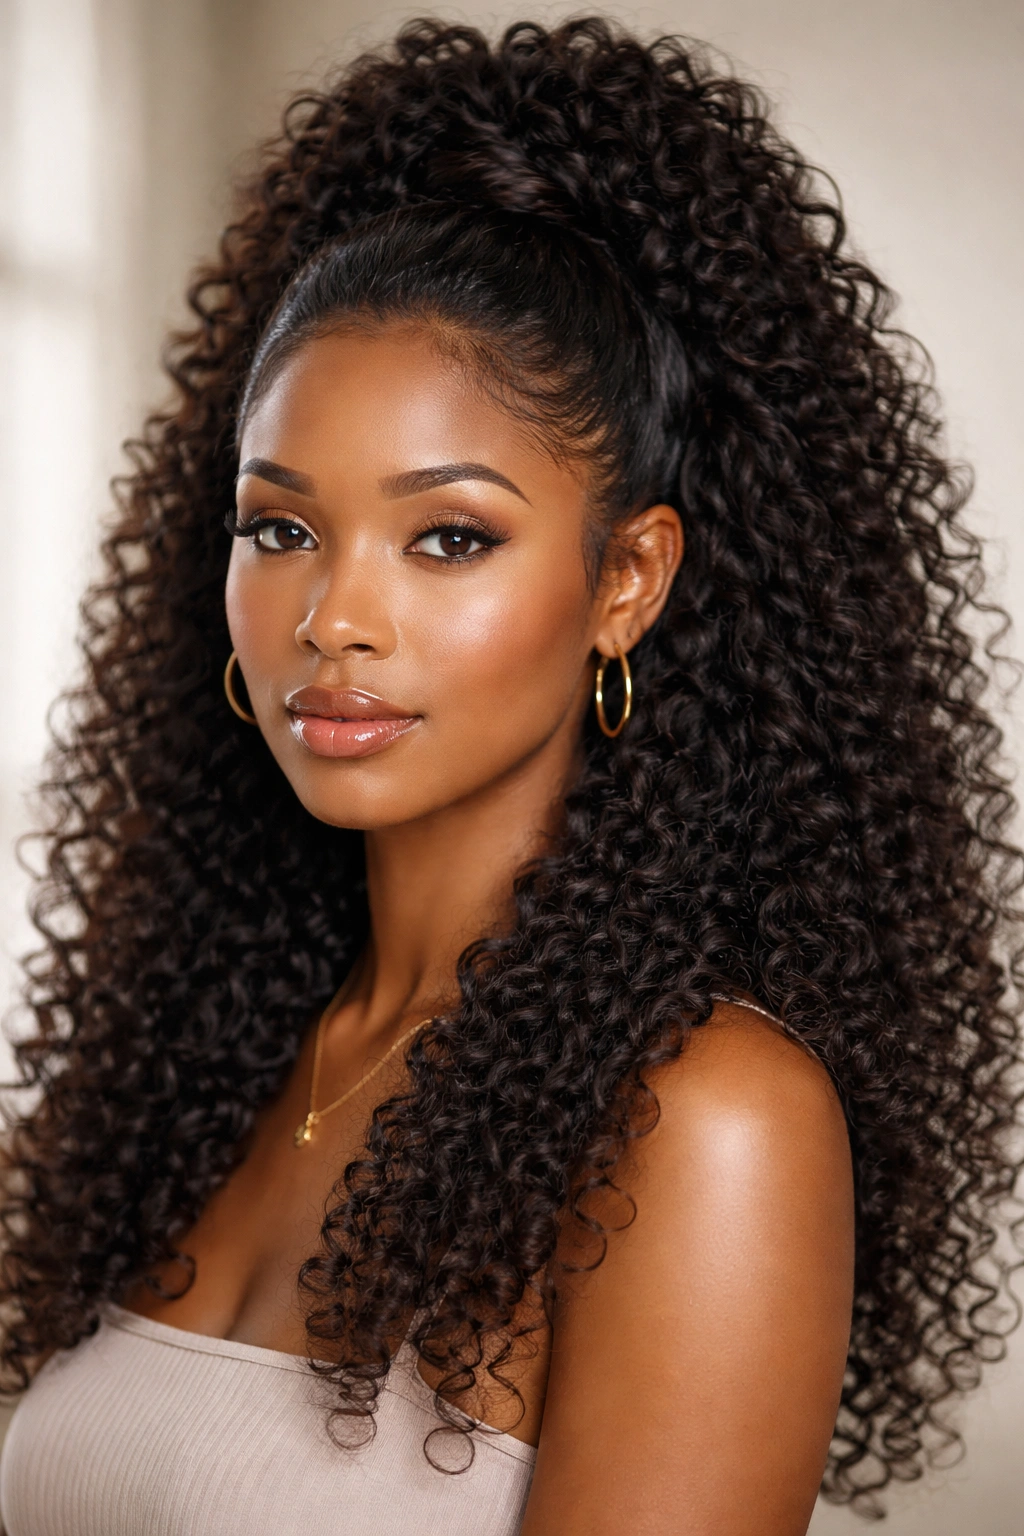
All of these styles rely on a few core techniques and habits that make execution easier and results longer-lasting. Getting these fundamentals down transforms your half up half down styling confidence dramatically.
Moisture and Preparation Matter Enormously
Start with properly moisturized hair—this is the foundation for every style. Moisturized hair holds shapes better, accepts products more evenly, and looks shinier and healthier overall. If your hair tends to be dry, apply a leave-in conditioner or moisturizing spray before you even begin styling. Slightly damp hair (not soaking wet, but with a bit of moisture still present) often holds styles better than completely dry hair because the moisture helps hair stay pliable without being floppy.
For all these styles, giving your hair some texture beforehand creates a better grip and helps the style hold longer. This could mean doing a pineapple style overnight, using a texturizing spray, or even light finger-coiling sections before you begin. Texture gives you something to work with.
The Right Product Makes Everything Easier
You don’t need heavy gels or edge controls to make these styles work—in fact, for half up half down styles on afro hair, lighter products typically look better. A light mousse, a texturizing spray, a curl-defining cream, or a lightweight gel applied sparingly creates hold without weighing your hair down or making it look stiff or wet. Product choice depends on your hair’s density and your preference—experiment to find what gives you the hold you need with the visual finish you want.
When securing hair (whether with twists, braids, or gathered sections), apply your product to just the sections you’re working with, not your entire head. This allows the down portion of your hair to maintain its natural movement and texture.
Securing Techniques Determine Longevity
Bobby pins work best when they’re inserted with the wavy side up (the waves grip hair better) and at an angle slightly parallel to your hair growth. Rather than using a single bobby pin to secure, use two or three crisscrossed for maximum hold. Invest in bobby pins that match your hair color so even if they peek out, they’re not visible.
Hair ties matter too. Cloth-covered elastics or spiral hair ties (which don’t crease hair) are gentler than regular rubber bands. Avoid super-tight ties that can cause breakage; they should hold your hair securely without cutting off circulation or creating dents.
For twists, braids, and other sculptural elements, a light hairspray applied after styling helps everything stay in place without feeling crunchy. A flexible hold hairspray is better than an extra-strong formula, which can make hair look stiff.
How to Choose Which Style Works for Your Hair and Face Shape
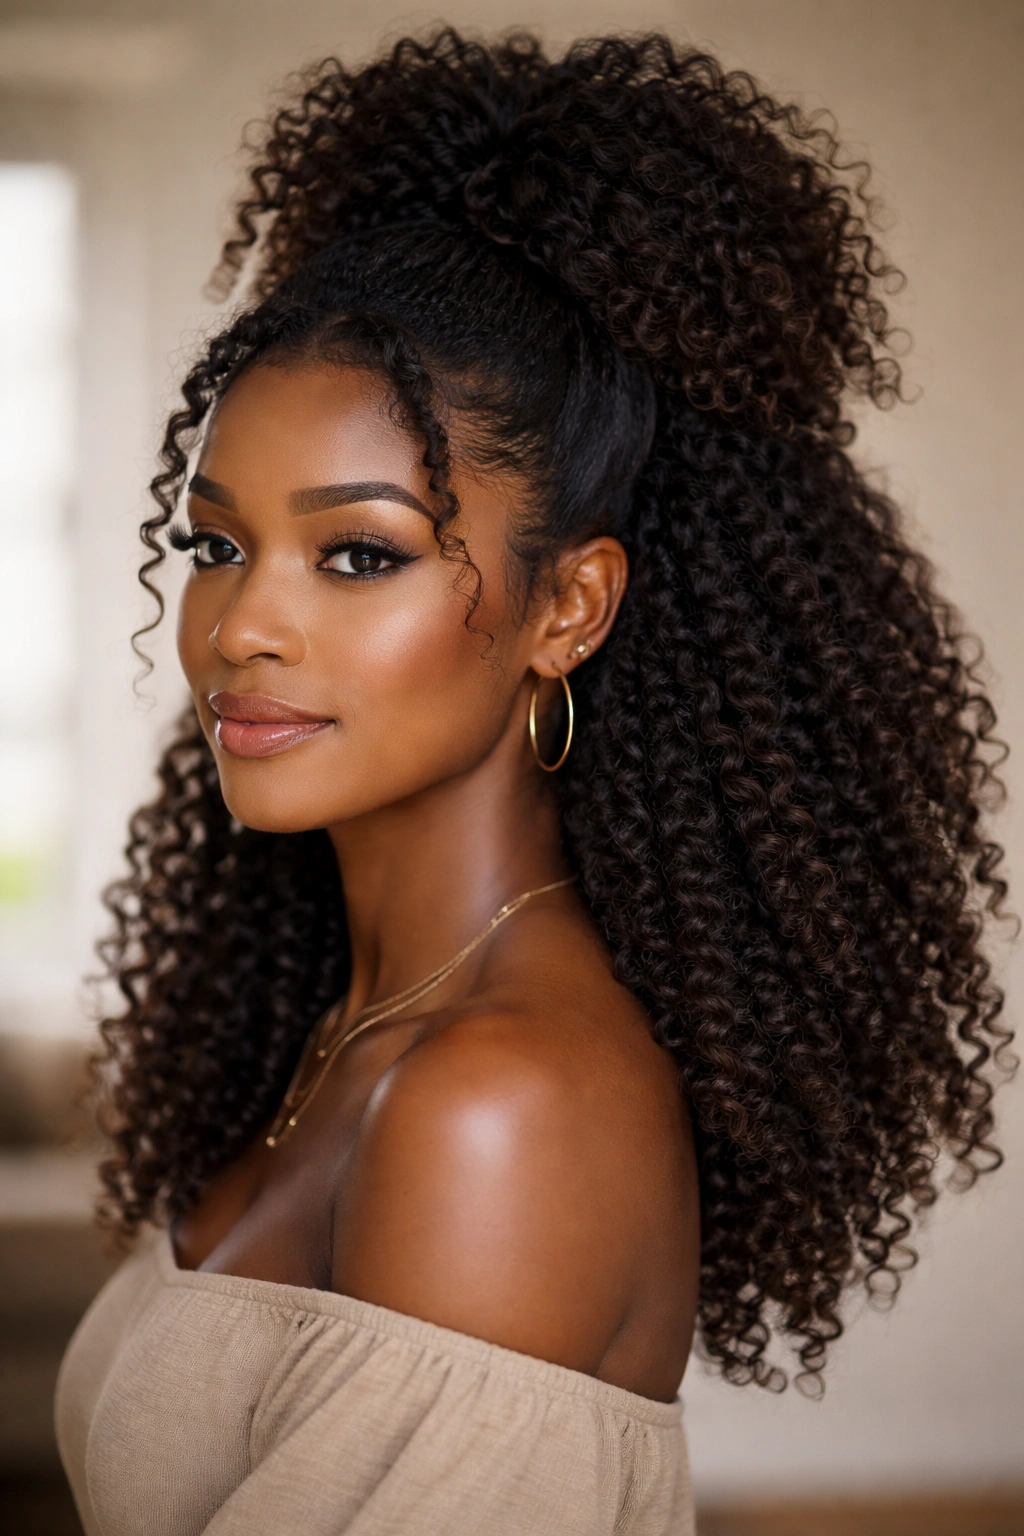
Not every style works perfectly for every person, and understanding what flatters you makes the process of choosing a style much easier.
Consider Your Hair Density and Texture
Styles like the twisted crown and side-swept half up work beautifully on most hair types, but they especially shine on hair with defined coils or curls. Styles like the double topknot and puff crown work best on hair with enough density to create substantial, visually distinct buns. If your hair is finer or less dense, you might need to backcomb at the root to create volume.
The braided styles (twisted crown, braided halo, Dutch braids into bun) work on all textures but show off definition beautifully on hair with visible curl or coil patterns. If your hair is tightly coiled, loosely braiding and then gently pulling sections outward reveals that beautiful texture.
Match Your Face Shape
The twisted crown and braided halo work beautifully on most faces because they frame the face softly. If you have a rounder face, side-swept styles and asymmetrical styles like the wrap-around create the illusion of length and angles. If you have a narrower face, fuller styles like the voluminous swoop or gathered puff with cascading coils add width and dimension in flattering places.
Face-framing elements matter too. Any style where some hair falls along your face (like the cascading coils or the wrap-around) works beautifully for anyone wanting to soften their features. Styles where you sweep everything back (like the voluminous swoop) emphasize your features—best if you love your face wide open, less ideal if you prefer some framing.
Think About Your Lifestyle and Hair Health
If you’re styling daily or switching between styles frequently, choose styles that don’t require extensive manipulation or tension. The wrap-around, twisted crown, and cascading puff are gentler on your hairline and scalp than tight braids or tightly secured buns.
If you’re protective styling between washes (which is great for hair health), choose styles that you can maintain well without re-doing every single day. Some of these styles hold for 2-3 days with light refreshing; others work better as a single-day style.
Care, Maintenance, and Refresh Strategies
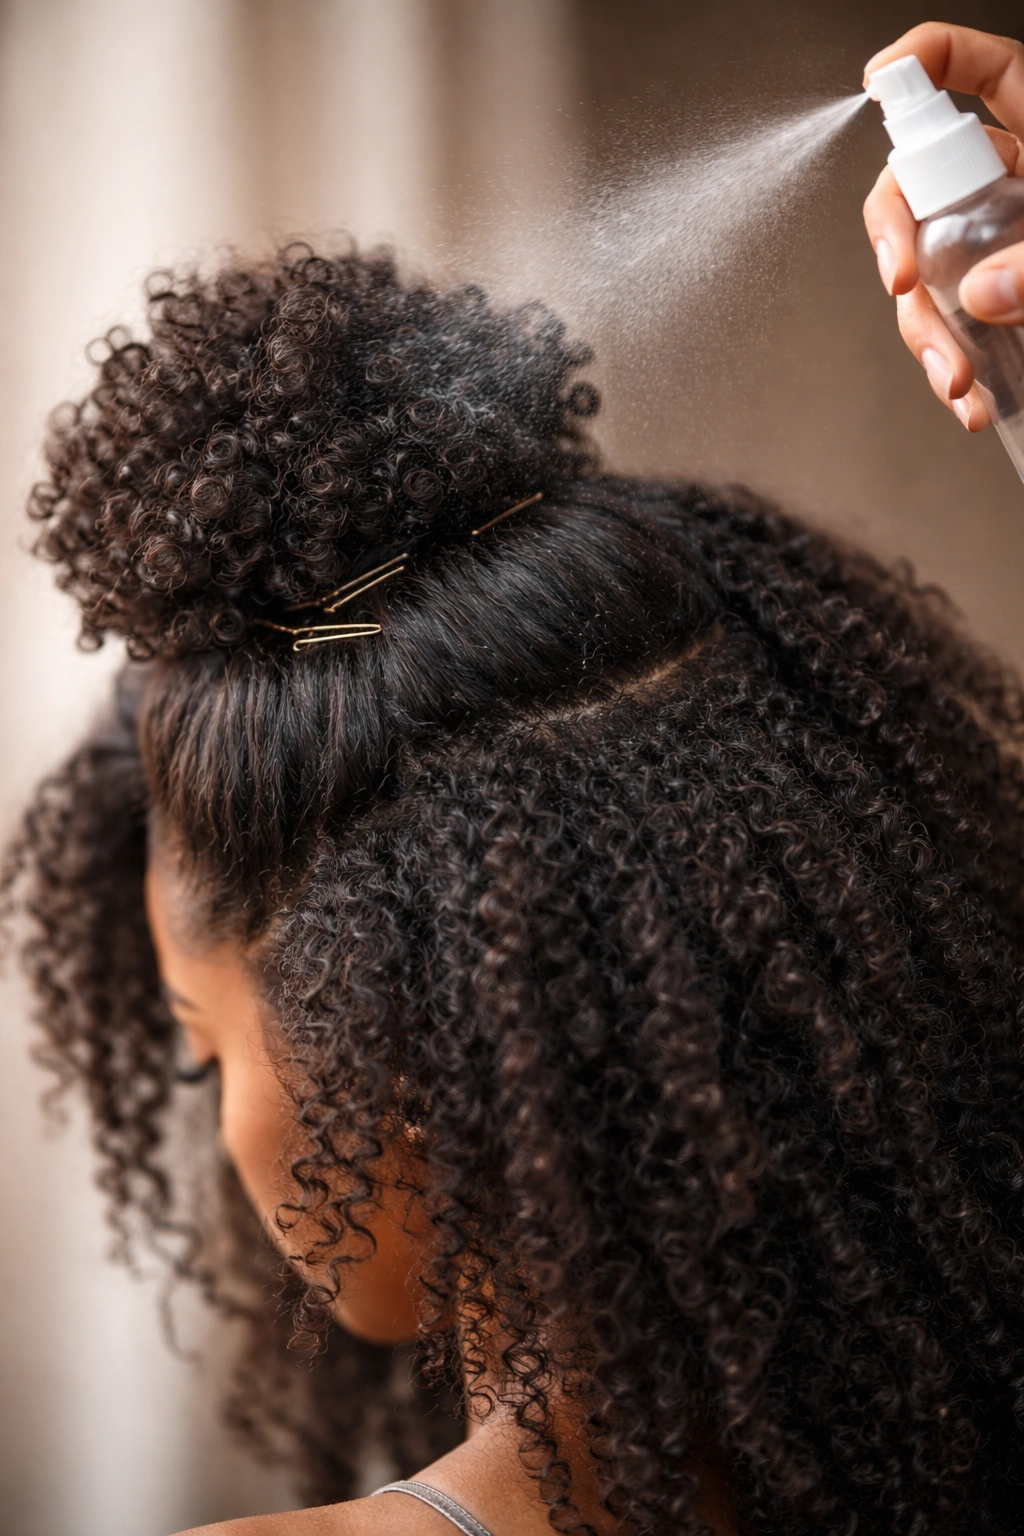
These styles aren’t truly set-it-and-forget-it, but they’re close. Maintaining them properly keeps them looking intentional for days while protecting your hair.
Day Two and Beyond
Most of these styles look good on day one and can be refreshed into looking fresh again on day two or three. In the morning, mist your hair lightly with a moisture spray, gently redefine any flyaways with a light gel, and you’re often good to go. Braids and twists actually often look better on day two when they’ve settled slightly and have even more texture.
If your gathered sections or bun starts to look loose, you can tighten it by removing the existing pins or clip, smoothing any new flyaways, and re-securing. This takes about a minute and revives the style completely.
Protecting Your Hair While Wearing These Styles
Sleep is when hairstyles break down and hair experiences the most friction damage. For these styles, use a silk or satin pillowcase or wrap your hair in a silk scarf (keeping the style intact as best you can). If you’re wearing a puff or bun, you can sleep on the opposite side of your head so there’s less pressure on the secured section.
Don’t leave these styles in for more than 2-3 days in a row, even if they still look good. Your roots need rest and your hair needs moisture breaks. Plan to take the style down and moisturize your hair thoroughly before re-styling.
Refreshing Products You Might Need
Keep a light texturizing spray, a water-based leave-in conditioner, and a small container of light gel or mousse in your styling arsenal. These three products can refresh virtually any of these styles without needing to wash your hair or start from scratch. A light touch with these products—not heavy-handed application—is key.
Choosing Your Next Style Adventure
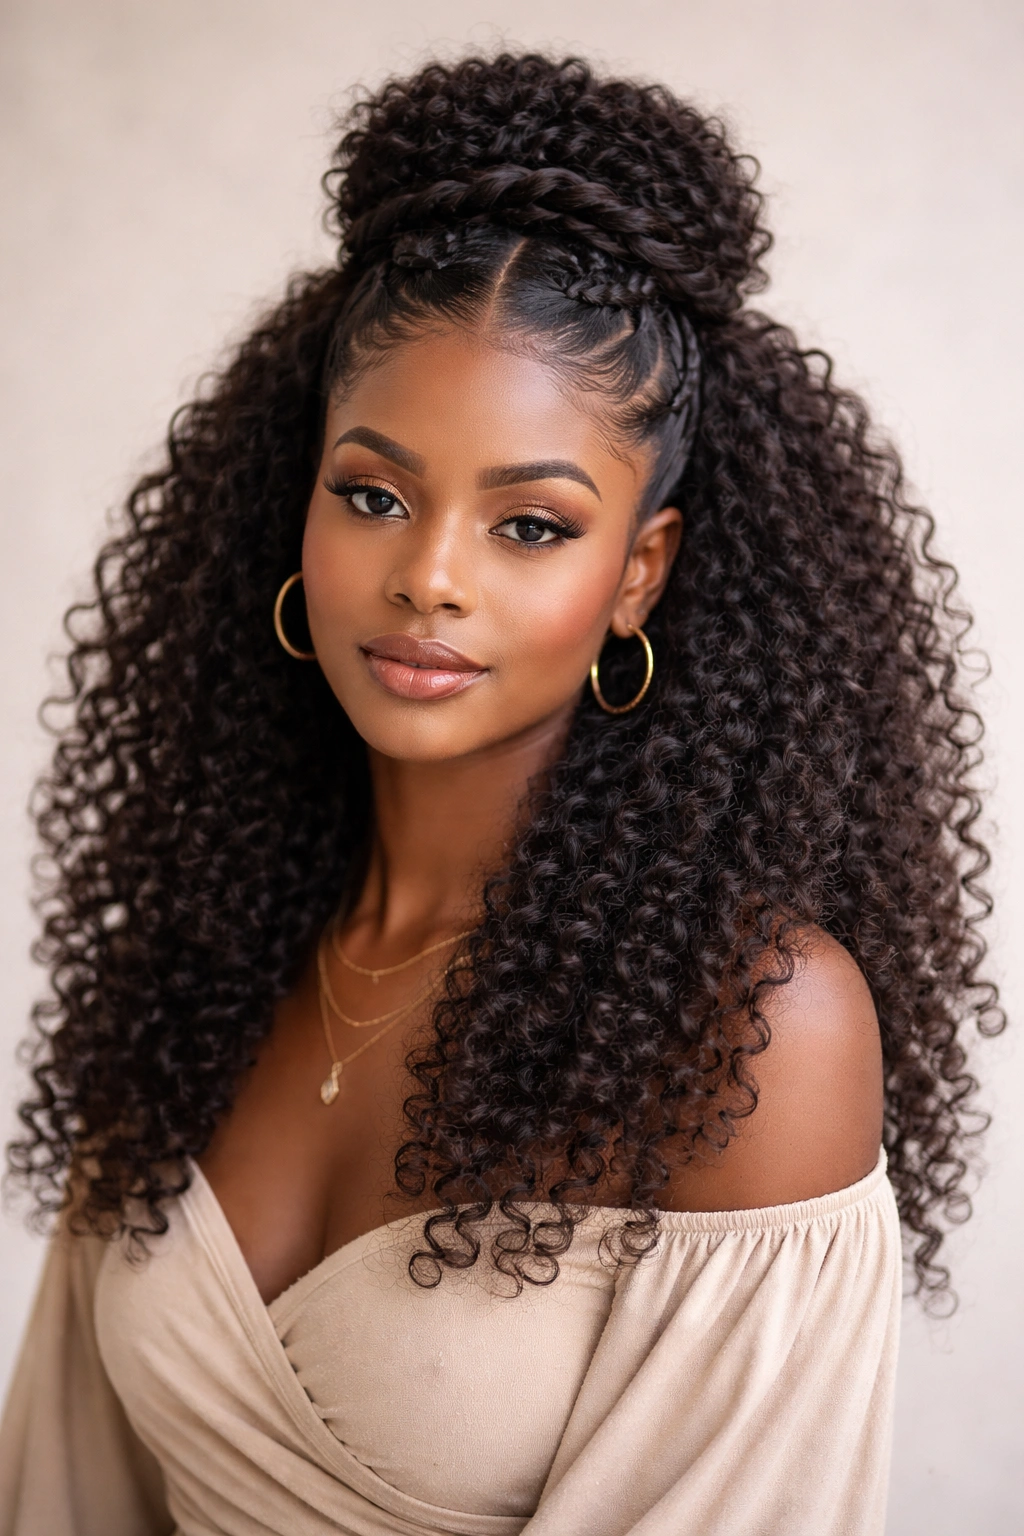
Half up half down styles offer an incredible range of options, from romantic braided halos to bold asymmetrical swoops, from playful double buns to elegant gathered puffs. The magic is that they all work beautifully on textured hair specifically because they work with your hair’s natural patterns rather than against them.
Start with whichever style calls to you most—whether that’s the twisted crown for elegance, the puff crown for drama, or the wrap-around for effortless sophistication. Each one is learnable with a bit of practice, and each one gets easier the second and third time you do it. Your hands develop muscle memory, you figure out which products work best for you, and you learn the small customizations that make each style feel personally yours.
The real joy of half up half down styling is the versatility. You can wear the same base style—say, a twisted crown—to the office with a minimal approach, and then to an evening event with added jewelry and a bold lip. You can modify these styles infinitely: tighten the braids, loosen them, add color or texture, swap out your accessories. That flexibility means you’re never bored with your styling options.
Final Thoughts
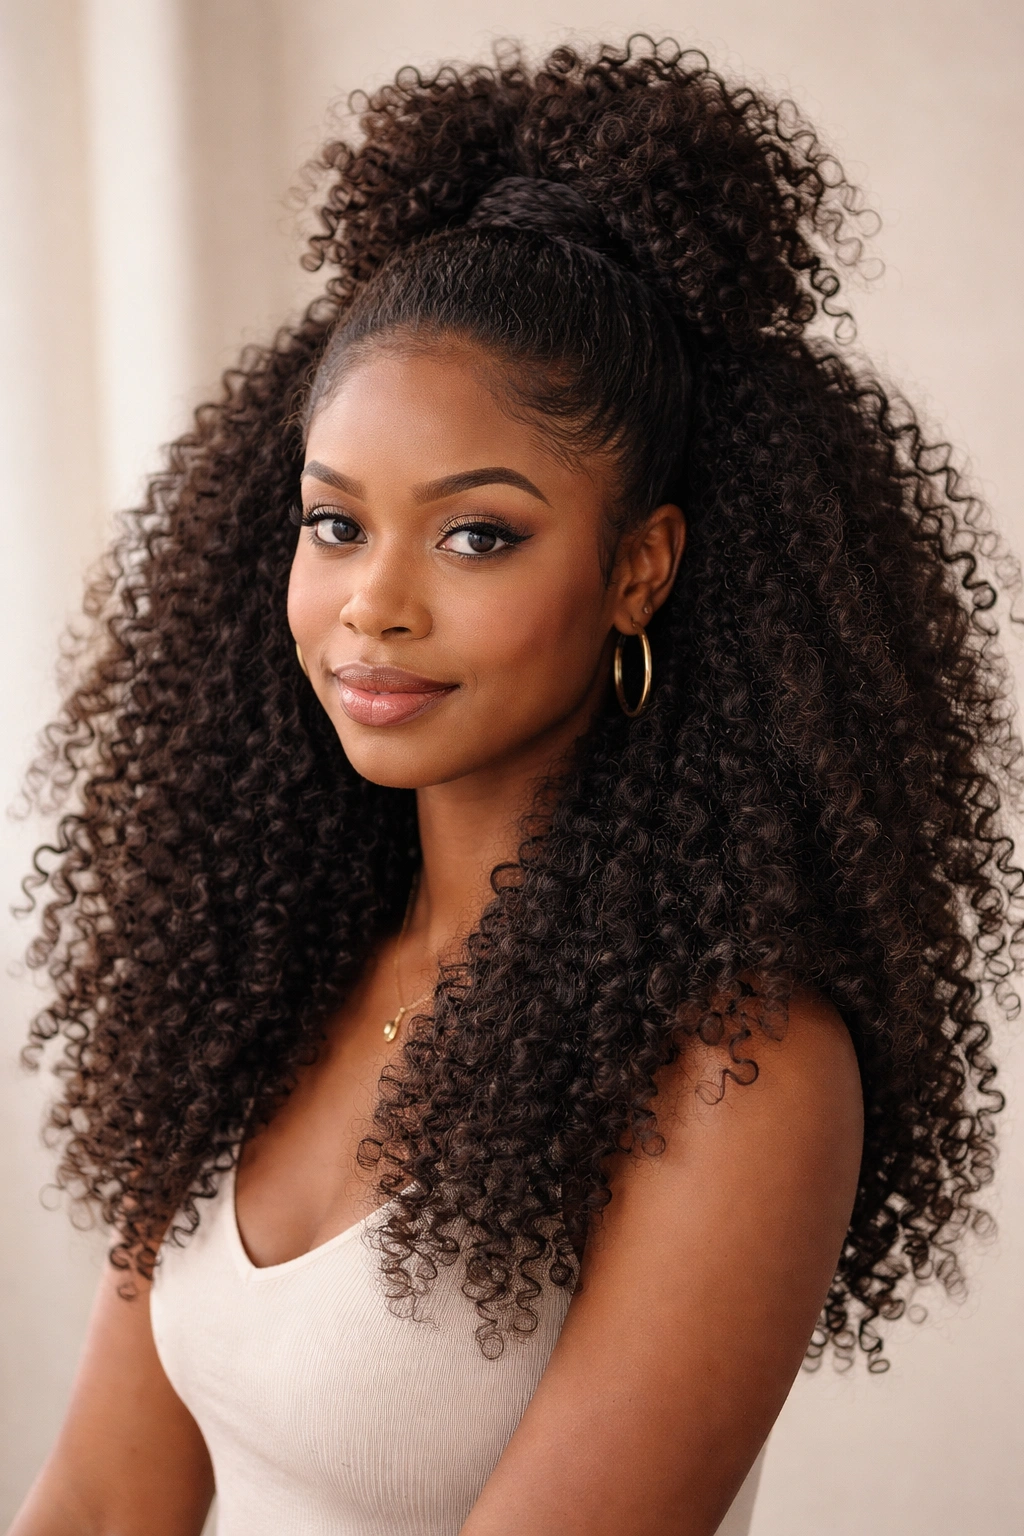
Half up half down styles are a gift for anyone with afro hair who wants intentional, protective styling that doesn’t require commitment to a full protective style. They sit beautifully between casual and formal, everyday and special-occasion, effortless and intentional. Each of the styles covered here offers a distinct vibe and visual impact—your job is simply to try them, find the ones that make you feel confident and beautiful, and make them yours through practice and customization.
Start with one. Master it. Then try another. Before long, you’ll have a entire toolkit of half up half down styles ready for any situation, any mood, any occasion. Your hair is beautiful exactly as it is, and these styles simply give you different ways to showcase that beauty depending on what your day calls for.
