



Short 4C hair is a beautiful canvas for creativity, and there’s something uniquely satisfying about styling textured hair that works with your natural curl pattern rather than against it. If you’ve got short, coily locks, you already know that the right style can be the difference between a good hair day and a great one — especially when you choose cuts and styles specifically designed to celebrate 4C texture rather than fight it.
The challenge with short 4C hair isn’t a lack of options; it’s knowing which styles will actually look intentional, last more than a day, and keep your hair healthy while you’re rocking them. You want styles that feel effortless but polished, that work with your natural shrinkage, and that don’t require spending three hours in the styling chair or sleeping on a pillow shaped like a pretzel to maintain them overnight.
Here’s the real talk: 4C hair is magnificently dense and full of natural volume. When you lean into that instead of fighting it, you unlock styling possibilities that other hair types simply can’t achieve. The styles below are all specifically chosen for short 4C hair — they celebrate your curl pattern, work with your hair’s natural behavior, and actually look like you spent time on your appearance rather than like you just rolled out of bed (unless that’s the vibe you’re going for, which, honestly, is also valid).
1. The Textured Tapered Cut with Natural Coils
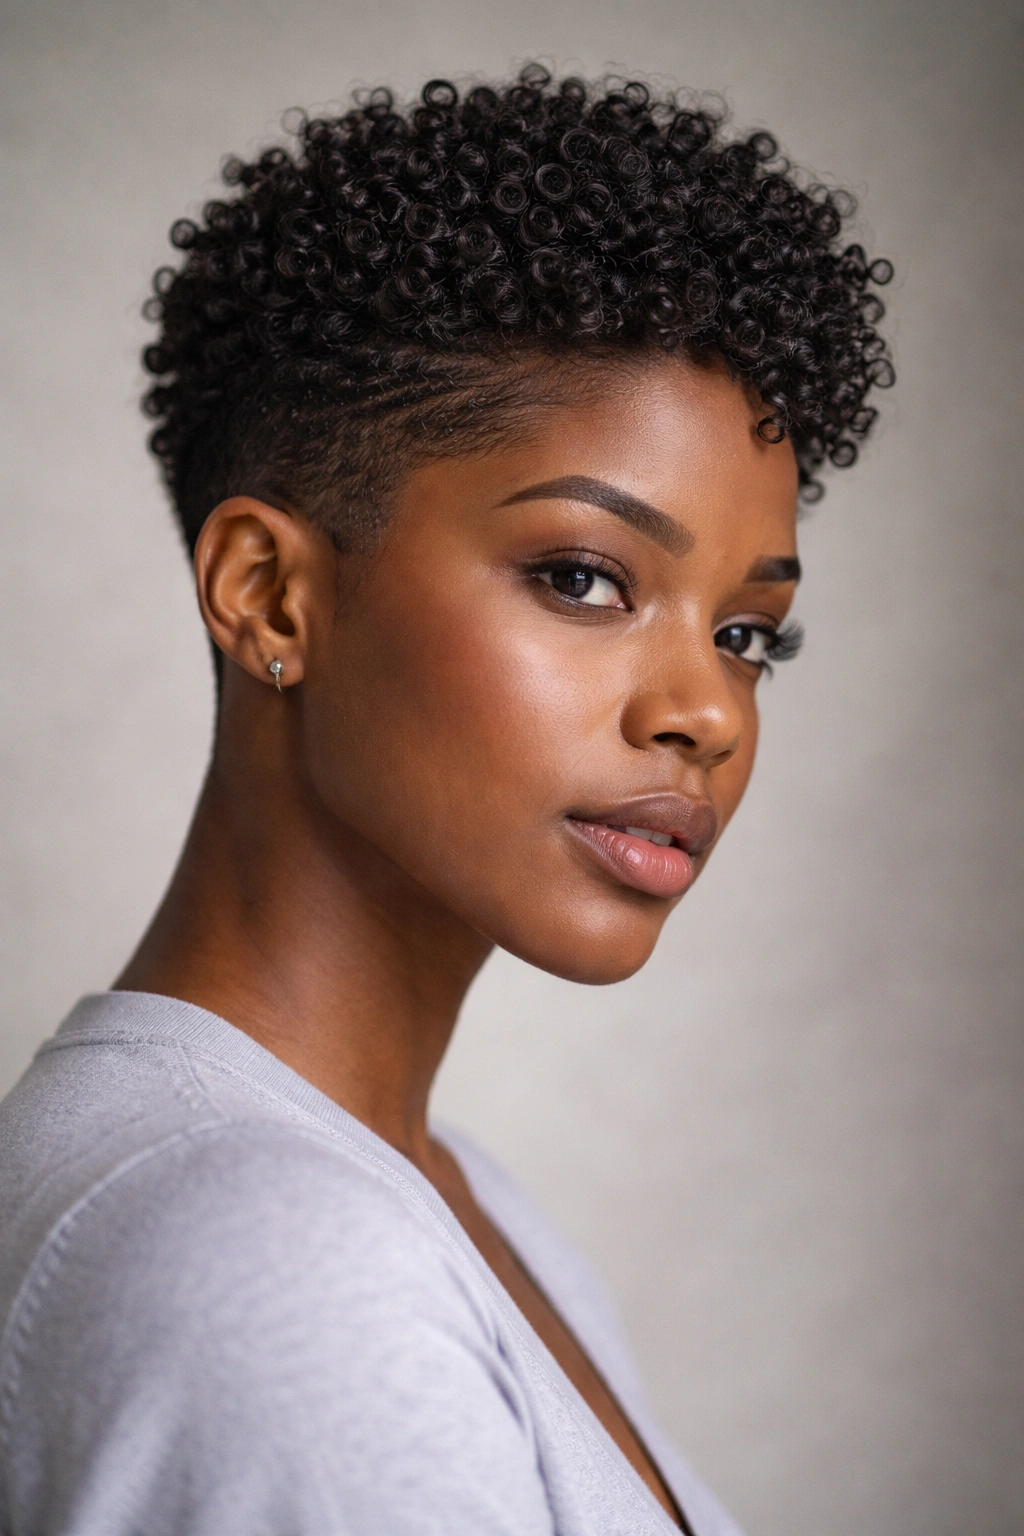
A textured tapered cut is the foundation piece that makes every other style on this list possible. This cut works with your 4C texture rather than trying to smooth it out, leaving your hair shorter and tighter on the sides and back while keeping a bit more length on top. The beauty of this approach is that your natural coils have room to expand and show off their definition without the weight pulling them down.
Why This Foundation Cut Works
Your 4C hair has natural shrinkage — sometimes 30 to 50 percent when you wash it — and a textured taper actually embraces that reality instead of fighting it. When a stylist cuts your hair dry and works with your coils in their natural state, they’re creating a cut that looks intentional at every stage: wet, damp, and completely dry. The tapered sides give you a sharp, put-together look that frames your face, while the slightly longer top gives you flexibility for styling.
How to Style and Maintain It
- Style your coils with leave-in conditioner and light oil while hair is damp to define them naturally
- Use a light cream or gel if you want more hold and definition, but you don’t need to do anything fancy to make this cut look good
- Sleep on a silk or satin pillowcase to reduce friction and keep your coils intact overnight
- Refresh between washes with a light water spray and a touch of moisturizer — no re-styling required
Pro tip: Ask your stylist to cut your hair in its natural, coily state rather than stretching or smoothing it. This ensures the cut flatters your actual hair texture and looks intentional when you wear it naturally.
2. Defined Twist-Out Softness
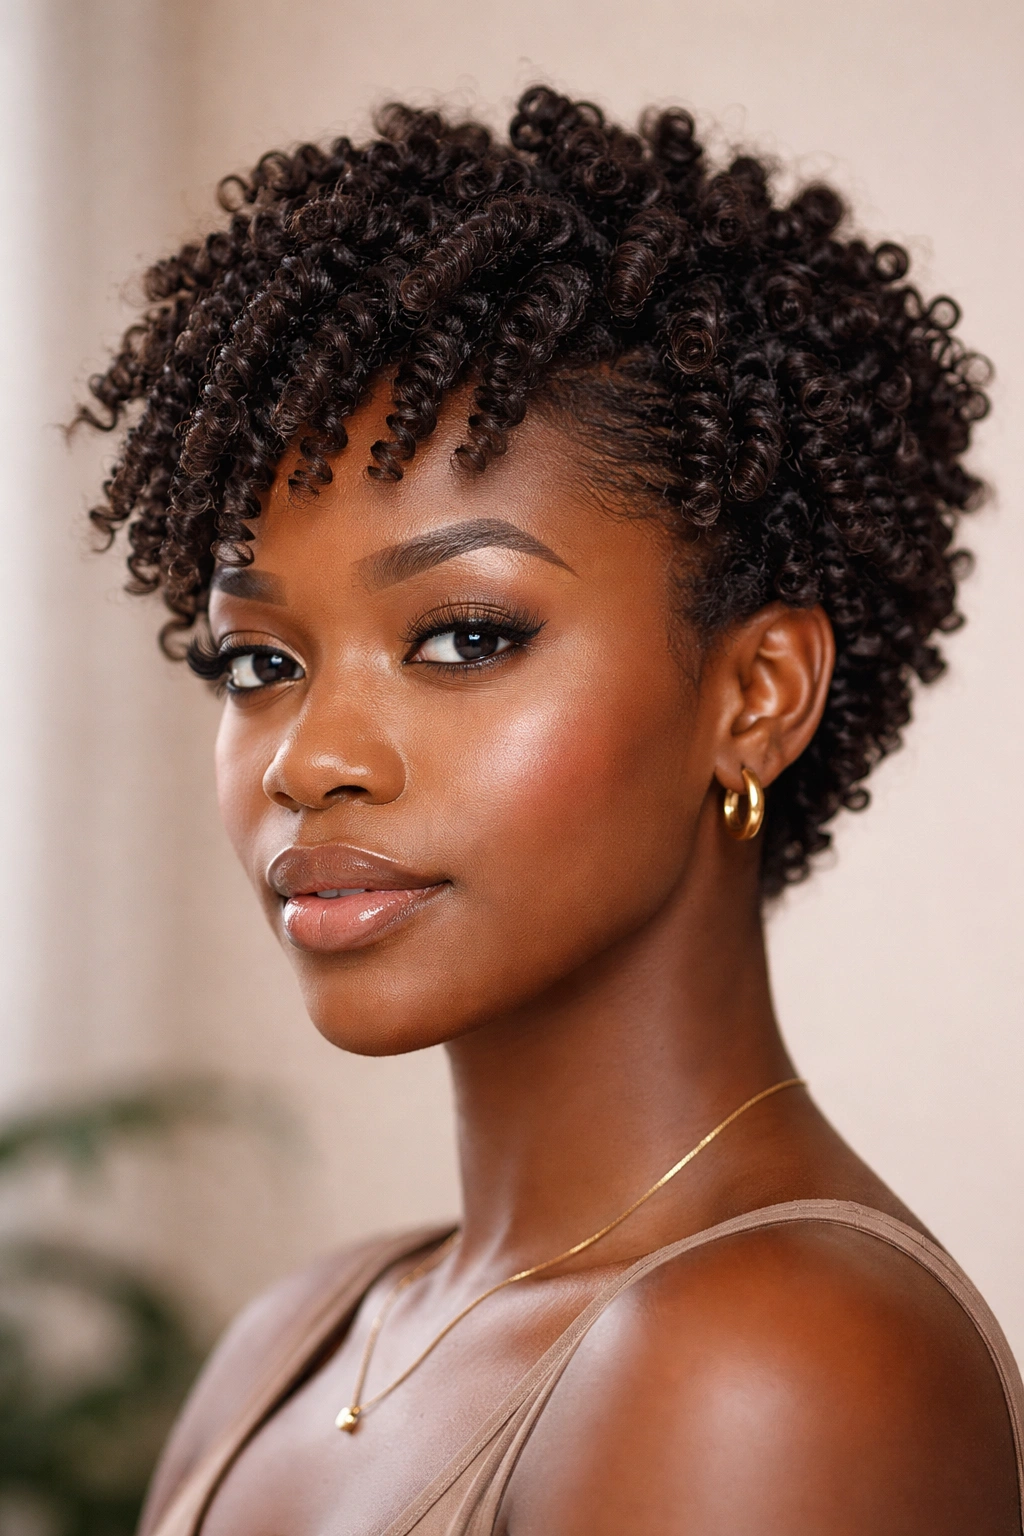
A twist-out is one of the most transformative styles for short 4C hair because it temporarily elongates your coils while creating a softer, fuller silhouette. You create the style by twisting small or medium sections of damp hair (usually in two-strand twists), letting them dry completely overnight or under a bonnet, then unraveling them to reveal beautifully defined waves and coils.
The Science Behind Why Twist-Outs Work
When you twist damp hair and let it dry in that twisted position, you’re essentially giving your coils a temporary “memory” of a stretched state. As your hair dries, it sets into a pattern that’s longer and more elongated than it would be in its completely natural, shrunken state. For short 4C hair, this means your twists can last 4 to 7 days before shrinkage brings you back to your natural, tighter curl pattern — giving you serious style mileage from one styling session.
The Step-by-Step Process
- Apply a twisting cream or butter to damp sections of hair, working in small to medium sections depending on how defined you want the look
- Twist each section around itself in a two-strand or three-strand pattern, leaving the ends out if you want a softer, curlier finish
- Let your hair air dry completely or use a bonnet dryer for faster results (usually 6 to 8 hours, or overnight)
- Gently unravel each twist carefully to avoid frizz, and fluff your coils with your fingers for a fuller appearance
- Set everything with a light hair oil or curl-defining spray if you want the look to hold longer
A twist-out can look completely different depending on how thick you make your twists and whether you two-strand or three-strand twist — thinner twists create tighter definition, while thicker twists give you a softer, wavier texture.
3. Sleek Low Bun with Tucked Edges
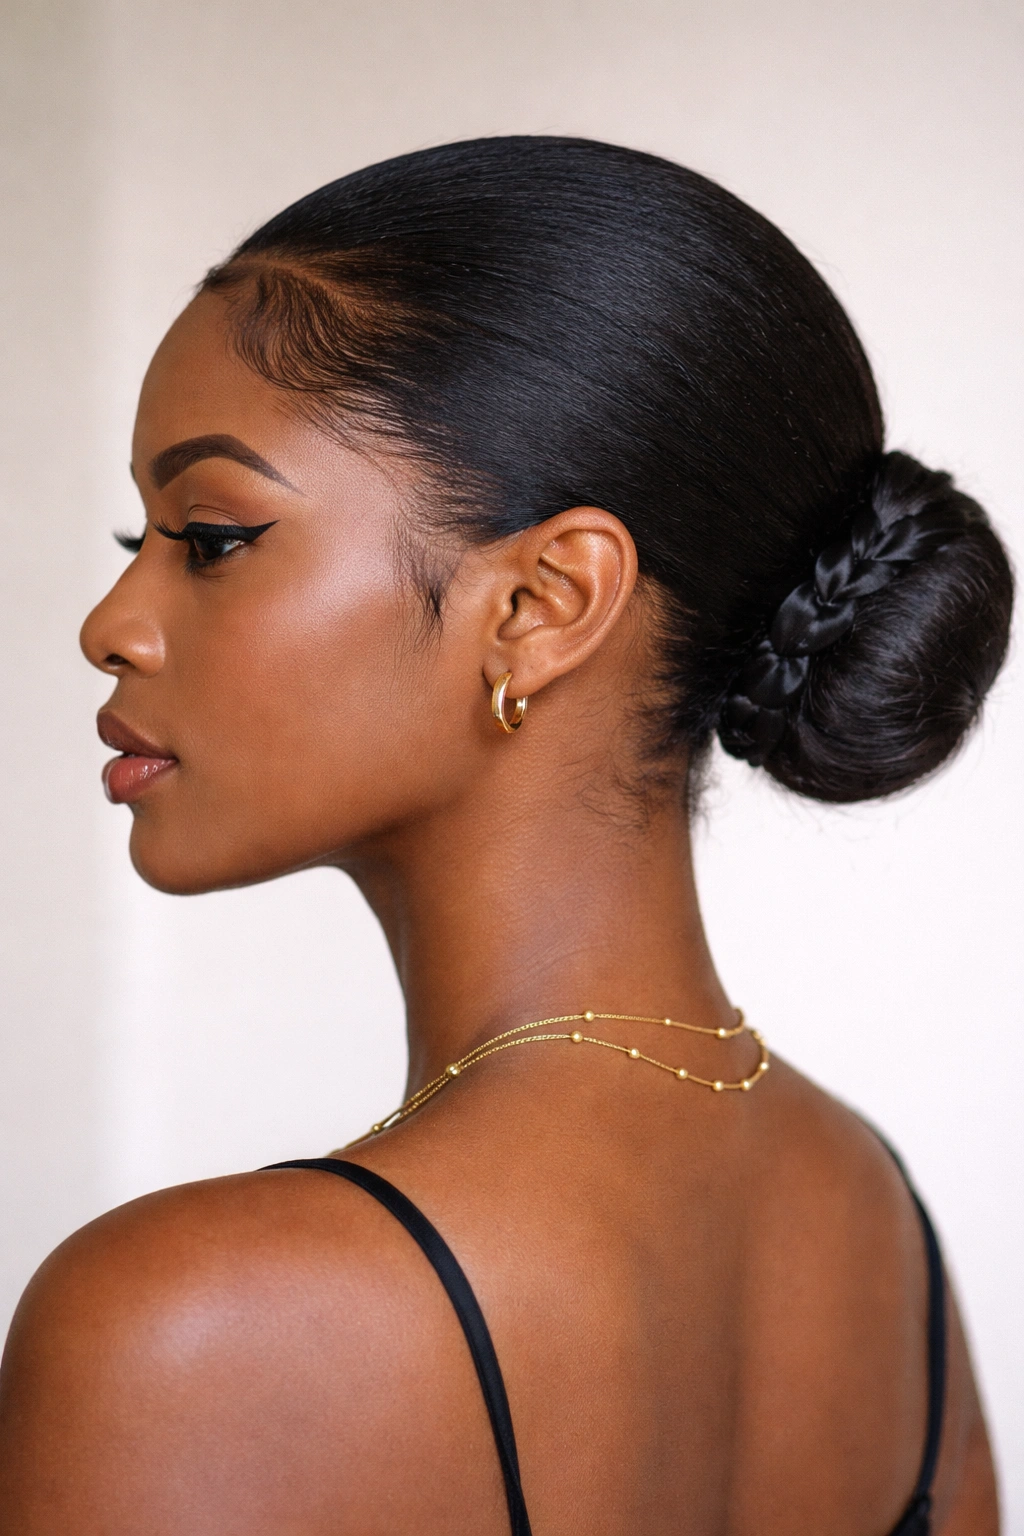
The low bun is the ultimate go-to style for short 4C hair when you want something polished, protective, and effortless. This works because your natural coils have enough density and grip to hold a bun without tons of bobby pins or tight elastics that could damage your hair. A sleek bun with clean, controlled edges looks intentional and put-together — perfect for work, school, or any situation where you want a neat, contained look.
Creating Definition and Shine
The secret to a bun that doesn’t look matted or dull is using the right products and technique. Start with damp hair and apply a light cream, gel, or edge control specifically designed for natural hair — these products have moisture built in and won’t turn your hair into a rigid, crusty shell. Use a soft-bristled brush or fine-tooth comb to gently bring your hair back into a low ponytail, then twist or coil it into a bun at the base of your neck and secure it with a silk or satin-lined elastic.
Edge Control That Looks Natural
- Apply edge control only to the perimeter of your hairline, not your entire hair
- Use a small soft brush (not a regular toothbrush) to smooth edges and create a polished line
- Avoid pulling so tight that you’re creating tension on your hairline — sleek doesn’t mean painful
- Consider a flexible gel or mousse edge control rather than a heavy butter, which can look greasy on short hair
Worth knowing: Sleep in a silk bonnet on the night before you want to wear your bun. This preserves the style and keeps your edges intact so you’re not starting from scratch in the morning.
4. Puff with Side-Swept Styling
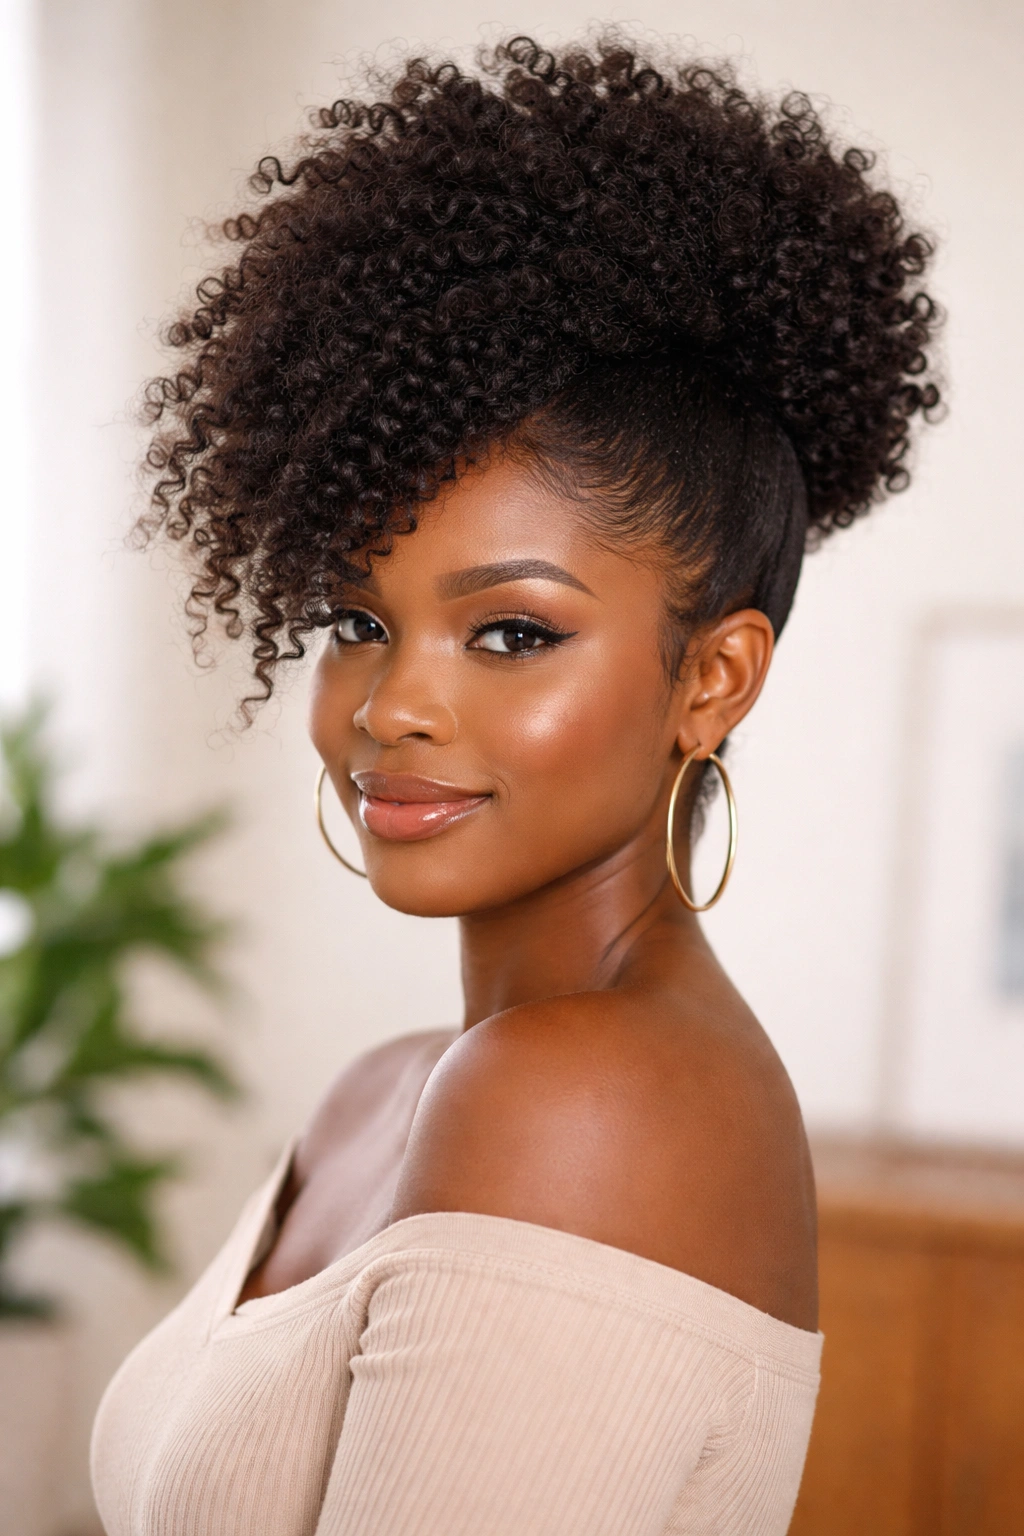
The puff is an icon of short natural hair styling, and on 4C hair it’s a statement. This style gathers all your hair into a high or mid-level ponytail at the crown, creating a rounded, voluminous shape that shows off the density and fullness of your coils. A side-swept puff angles that volume toward one side of your head for a flirty, fashion-forward look that feels modern and intentional.
The Volume Advantage of 4C Hair
Your 4C coils naturally compress and shrink when wet and loosened when dry, which means a puff is almost easier to create and maintain on 4C hair than on looser curl patterns. When you gather your hair into a puff, the natural density and texture immediately fill out the shape, giving you volume that would require teasing or backcombing on other hair types.
How to Achieve the Side-Swept Look
- Start with completely dry hair or hair dried with a diffuser for maximum volume
- Create a high ponytail or puff base using a smooth, stretchy elastic lined with silk or satin
- Gently pull the elastic slightly off-center or to one side to angle the volume that direction
- Fluff your puff with your fingers to create a rounded, airy shape rather than a tight ball
- Consider adding a decorative hair clip or cuff on the angled side for extra visual interest
A side-swept puff works beautifully with your natural shrinkage — the shorter your hair, the rounder and fuller your puff will look, and that’s exactly the vibe you’re going for.
5. Bantu Knots for Dimension and Texture
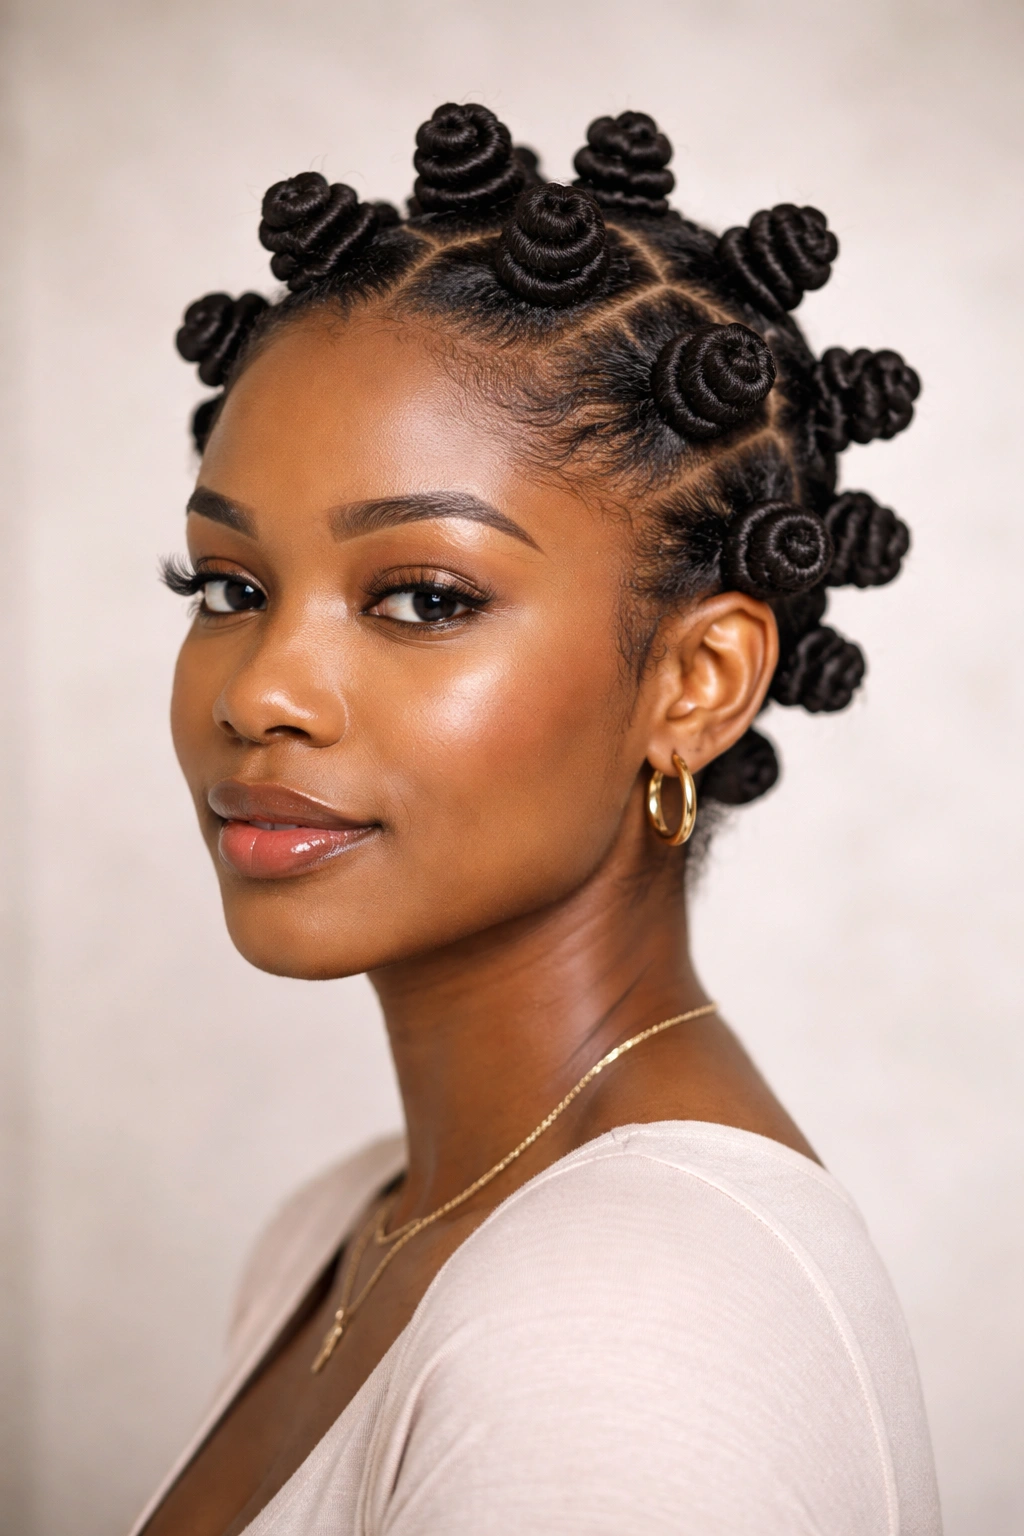
Bantu knots are a traditional protective style that creates beautiful texture and movement when you take them down. This style works by twisting or coiling small sections of hair into knot shapes and securing them, then (after they fully dry) releasing the knots to reveal voluminous waves and coils. On short 4C hair, Bantu knots create incredible dimension and a natural-looking, textured style that’s genuinely different from your everyday look.
The Cultural and Practical Significance
Bantu knots have deep roots in African hair culture and are one of the most protective styling methods available for natural hair. They’re protective because your hair is twisted up rather than pulled, and because your coils get to rest in a new configuration while the style sets. For short hair, they’re particularly interesting because the finished texture is so defined and visually striking — you get a dramatically different look from the same hair.
Creating Defined Knots That Hold
- Section your completely dry hair into small or medium squares using a comb and clips
- Apply a twisting cream or lightweight gel to each section
- Twist or spiral the section around itself, coiling it as tightly or loosely as you prefer
- Once you reach the ends, wrap them around the coiled base and secure with a small bobby pin or hair tie
- Leave your Bantu knots in for 3 to 7 days depending on how defined you want the final texture
- Gently unravel each knot slowly to avoid frizz and create bouncy waves
The longer you leave Bantu knots in, the more set your waves will be when you take them down. Many people do them in the evening and sleep in them overnight, then take them down the next morning for an instantly voluminous style.
6. Short Faux Hawk with Clean Lines
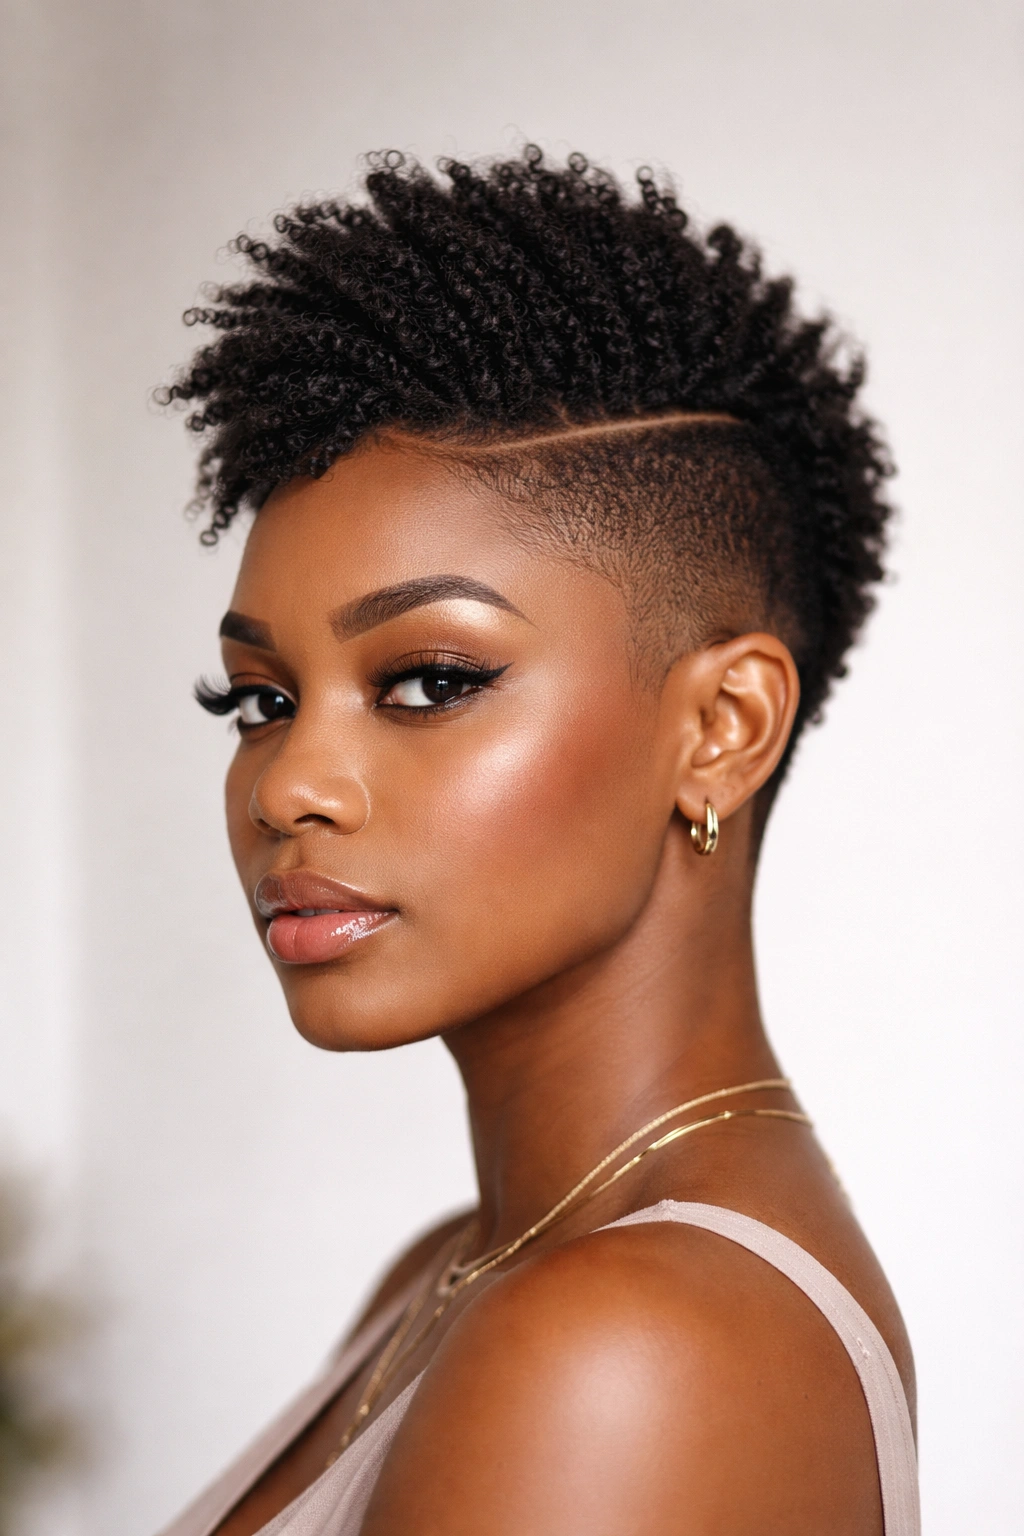
A faux hawk channels edgy energy while actually protecting your natural hairline and sides from daily manipulation. This style gathers the hair from your sides and back into a central ridge down the middle of your head, creating the visual impact of a hawk without shaving the sides. On short 4C hair, a faux hawk looks bold and intentional, and because your coils are naturally dense, the hawk shape holds beautifully without needing lots of product or styling tricks.
Styling with Confidence and Attitude
The faux hawk works best when you embrace the texture of your coils rather than trying to smooth everything into a sleek line. Apply a strong-hold gel or pomade to the center section of your hair, smooth it back, and let the natural texture of your coils show through. Your 4C hair’s natural volume is actually the feature that makes a faux hawk look impressive — you’re not trying to create height with teasing; you’re working with the height your coils naturally give you.
Building Your Faux Hawk
- Section your hair into three main parts: left side, center ridge, right side
- Apply styling gel to the center section and smooth it back toward the crown using a firm brush or your fingers
- Secure the center section in place using bobby pins hidden within your coils or a flexible elastic
- Smooth the side sections with a light edge control for a polished look
- Accessorize with hair cuffs, beads, or decorative clips along the hawk ridge if you want extra flair
A faux hawk can be softened for everyday wear or made bold and statement-making for nights out — it’s entirely up to how much product and polish you put into the style.
7. Coil Coalescing (Chunked-Out Definition)
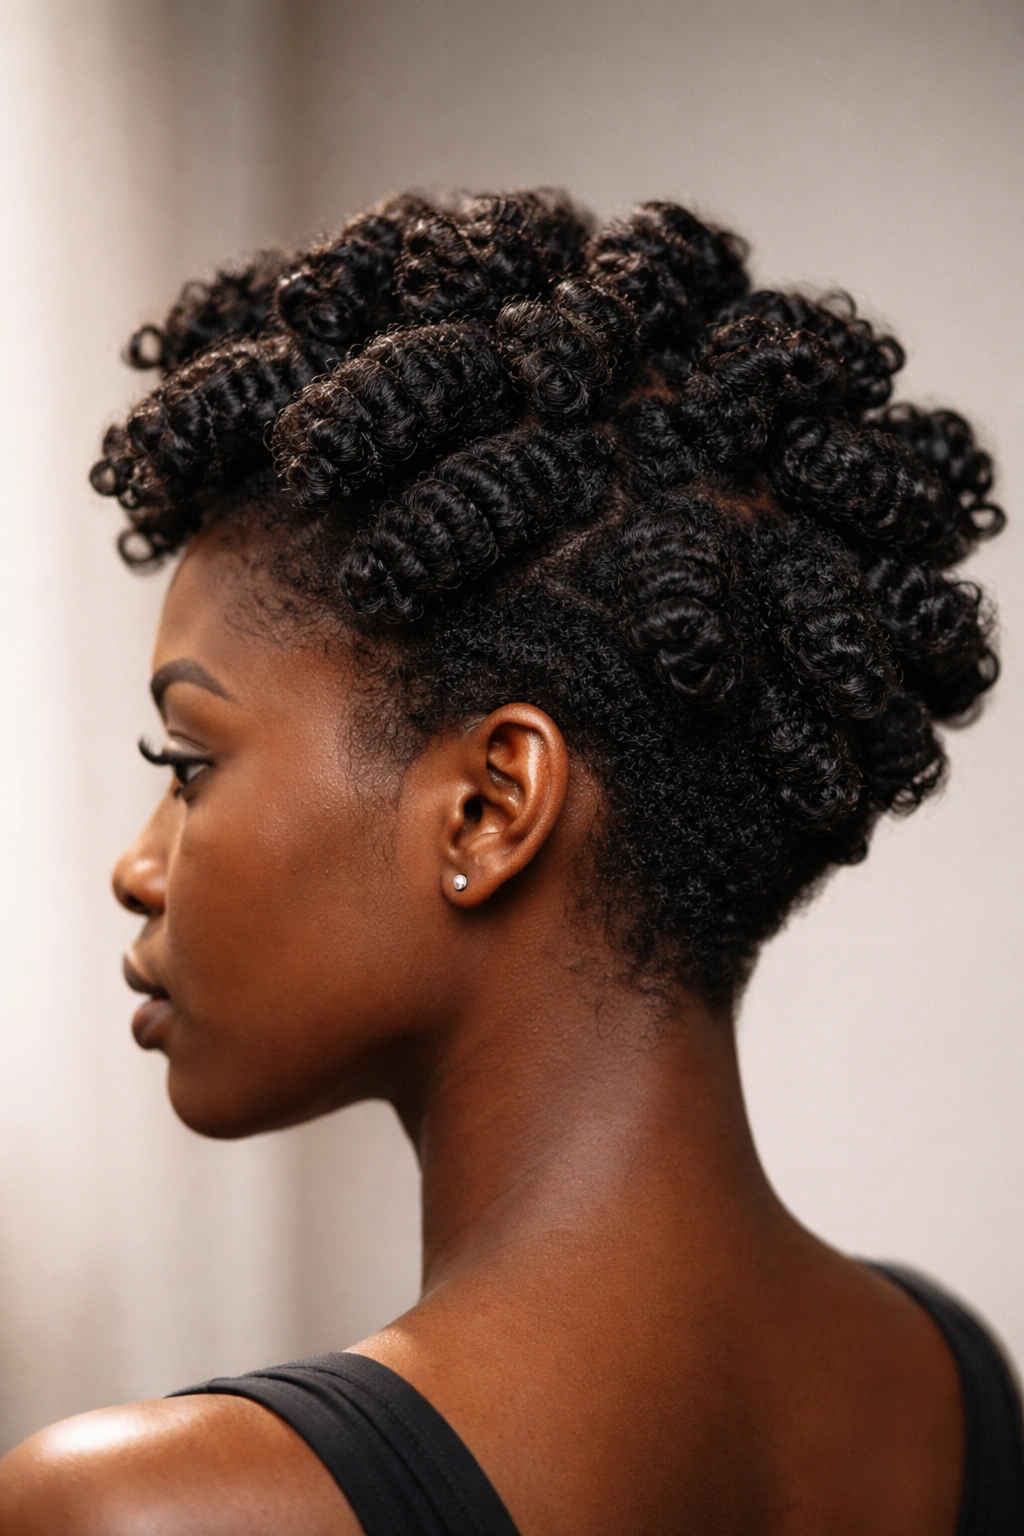
Coil coalescing is a styling technique where you deliberately separate your hair into larger, distinct coil sections and define each one individually. Rather than trying to create tiny, uniform curls, you’re embracing your natural coil pattern and making it bigger — creating a look that’s texturally stunning and visually bold. On short 4C hair, this looks incredibly intentional and editorial, like you spent time thoughtfully styling each coil.
The Art of Strategic Definition
The key to successful coil coalescing is using the right product and technique to enhance what’s already there. Apply a curl-defining cream or gel to damp hair and use your fingers or a denman brush to gather and shape coils into larger sections. The goal isn’t uniformity; it’s intentional texture that showcases the unique shape and movement of your natural coils. On short hair, this creates an almost sculptural quality that’s very striking.
Products and Methods That Work
- Use a curl-defining cream, custard, or gel specifically formulated for coils and waves
- Work with damp hair, not soaking wet, for better control and definition
- Use your fingers more than tools to encourage natural coil patterns rather than forcing a shape
- A denman brush or curl brush can help define individual coils if you’re going for a more polished look
- Allow your hair to air dry completely or use a diffuser to set the definition
The result is hair that looks meticulously styled without appearing rigid or overly processed. Each coil is visible and defined, creating dimension and visual interest that makes short 4C hair look intentionally textured rather than simply natural.
8. Braided Crown with Soft Coils
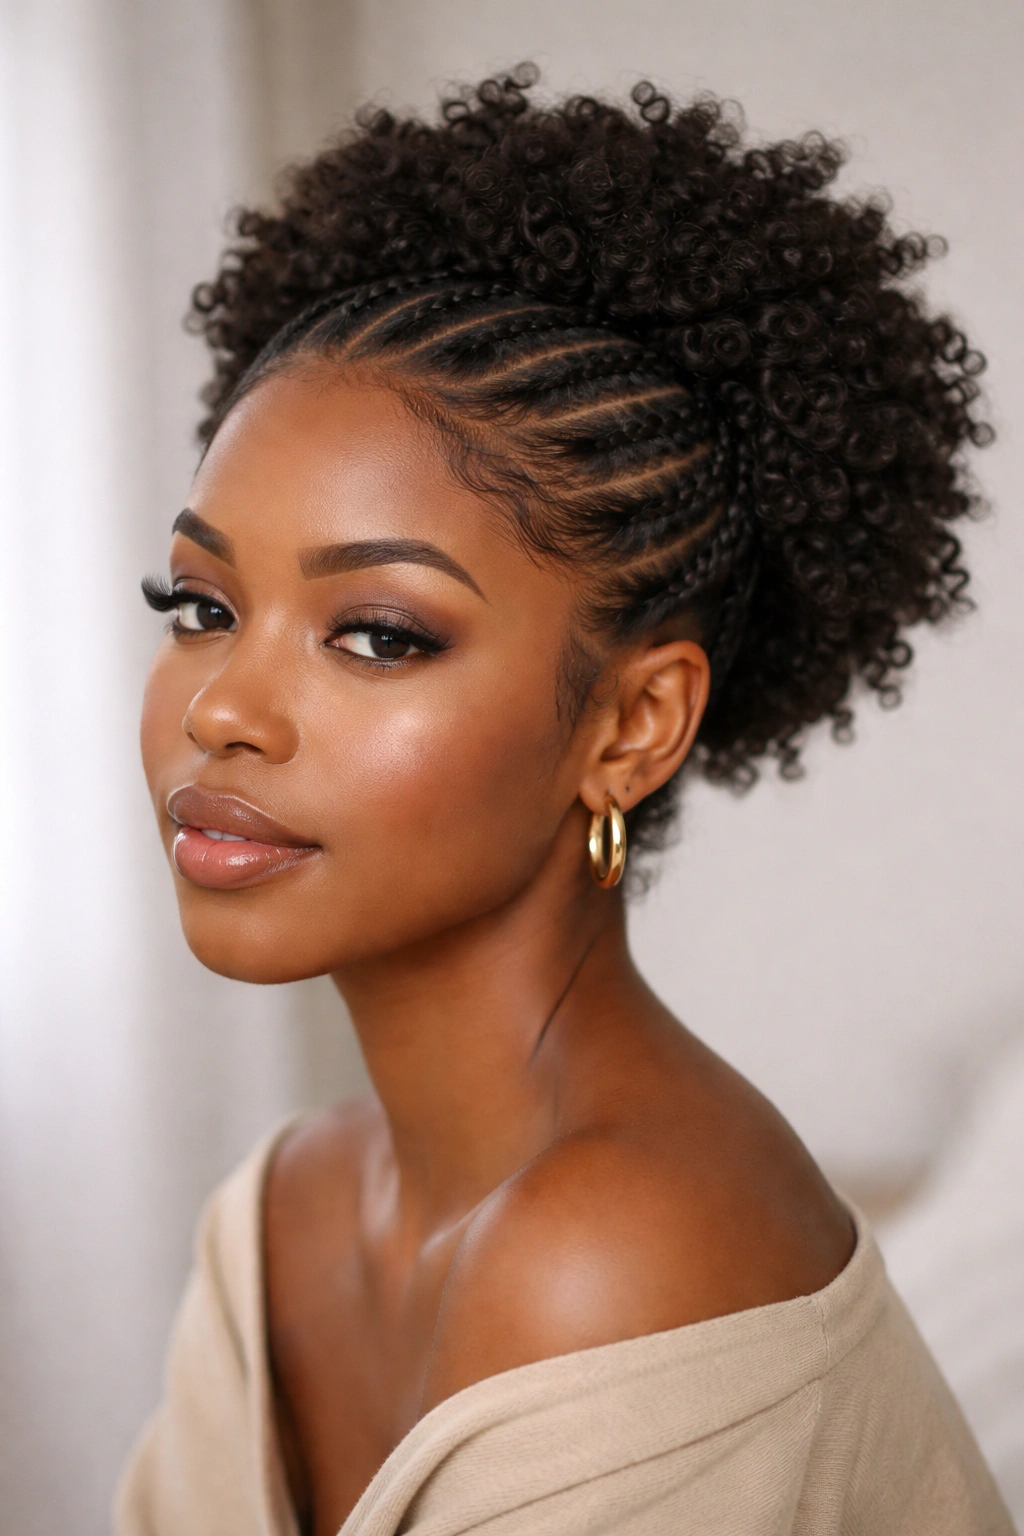
A braided crown combines two styling techniques: small braids that frame your face and hairline, paired with coils at the crown that you leave natural and unbraided. This hybrid style is protective around your hairline (which is always smart for long-term hair health) while keeping the top of your head free and voluminous. It’s elegant enough for formal occasions but edgy enough to feel modern and fashion-forward.
Balancing Protection and Style
The genius of this style is that it protects your edges without making you look overly styled or formal. By braiding only a section around your perimeter, you’re reducing daily friction and manipulation on the most delicate part of your hair, while still letting the bulk of your natural coils be on display at the crown. This balance makes it a sustainable style you can wear multiple times per week without compromising your hair health.
Building Your Braided Crown
- Start with damp or slightly damp hair that’s been moisturized with leave-in conditioner
- Create thin cornrows or box braids along your hairline from one side to the other, braiding upward and slightly back
- Leave the hair at your crown (the top and back) completely free and unbraided
- Define the coils at your crown with a curl cream or defining gel while they’re still damp
- Let the braids and coils dry completely, then gently fluff the unbraided section
This style lasts beautifully for 5 to 7 days, making it great for weekly styling. The braided portion keeps your edges protected while you’re living your life, and the free coils at the crown give you a soft, feminine aesthetic that doesn’t feel overly constructed.
9. The Wash-and-Go Perfected
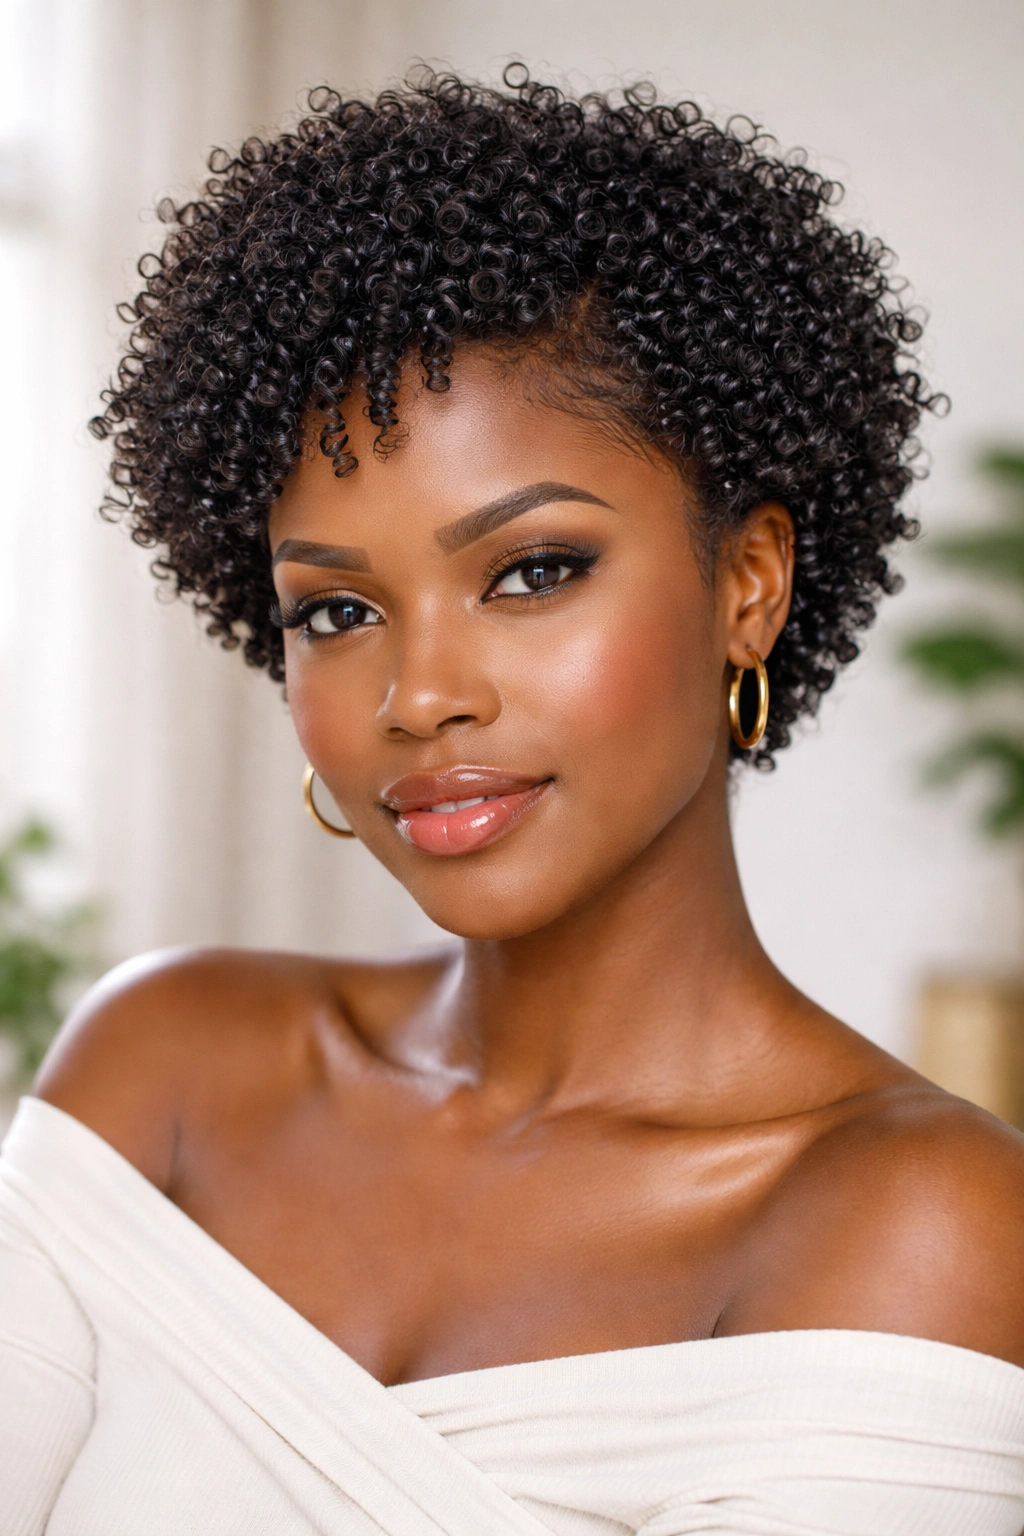
A wash-and-go is the fastest and least labor-intensive style option, but don’t let that fool you into thinking it’s low-impact. A truly intentional wash-and-go on short 4C hair requires the right products, the right application method, and the right drying technique — but once you nail those elements, you’ve got a style that looks effortlessly beautiful and takes less than 15 minutes to create.
The Science of Product Layering
The secret to a wash-and-go that looks defined and intentional rather than frizzy or undefined is using a layered product approach. Start with a lightweight leave-in conditioner applied to soaking-wet hair, then layer a curl cream or gel on top, and finish with a light oil. This combination seals moisture into your coils while providing hold and definition. Your 4C hair benefits from this multi-step approach because it needs that moisture retention to keep coils from drying out and frizzing.
The Perfect Wash-and-Go Formula
- Apply leave-in conditioner to soaking-wet hair, distributing it evenly throughout
- Apply curl cream or gel in a scrunching motion, working from the bottom of your hair upward
- Lightly coat with a natural oil (jojoba, argan, or your favorite), focusing on mid-lengths and ends
- Diffuse dry on medium heat for 20 to 30 minutes, or air dry completely if you have time
- Scrunch gently as your hair dries to encourage coil formation and reduce frizz
The result is hair that looks naturally textured and polished without any manipulation or styling tools beyond a diffuser. This is sustainable, protective, and genuinely beautiful when done right.
10. Flat-Twisted Sides with Free Coils
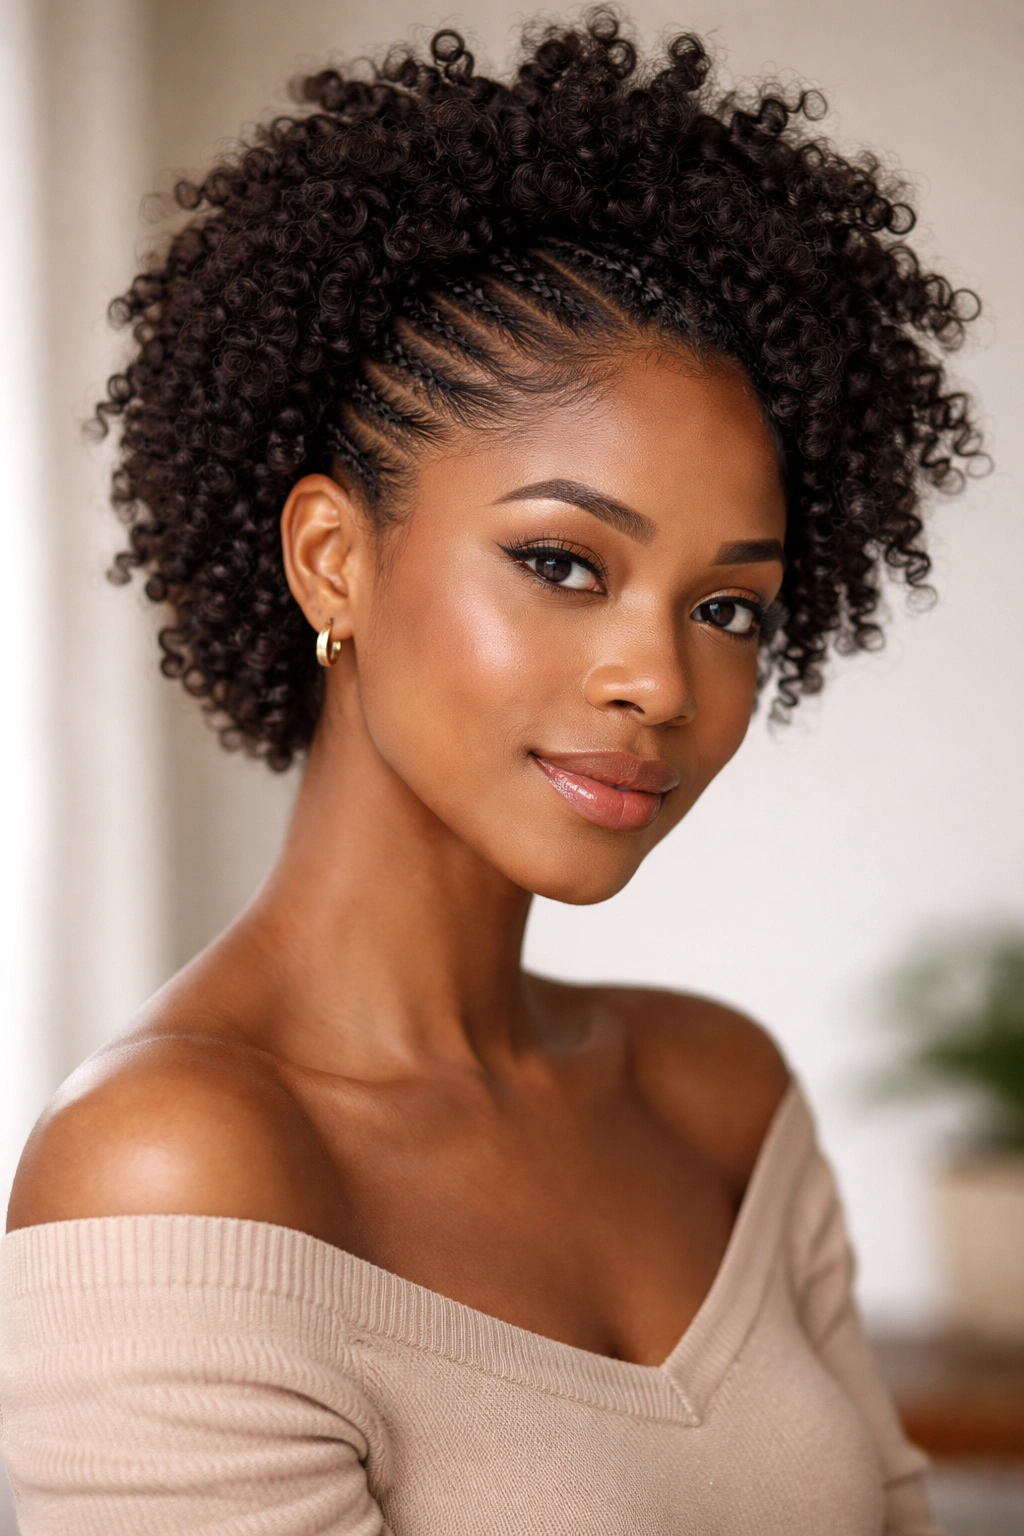
Flat twists along your sides, paired with free coils at the crown and back, create a hybrid protective style that’s both polished and romantic. This style takes elements of protective styling (the flat twists) and combines them with the free-flowing beauty of your natural coils, creating something that feels fashion-forward rather than purely utilitarian.
The Protective Element Meets Style
Flat twists are created by twisting two sections of hair while simultaneously pushing them toward your scalp, creating raised lines of texture that run along your head. By flat twisting only the sides — from your temples back toward your ears — you’re protecting your edges and reducing daily manipulation on delicate areas, while the rest of your hair remains completely free. This is a great style for someone who wants the protection benefits of braiding but doesn’t want an entirely braided look.
Creating Polished Flat Twists
- Start with damp, detangled hair that’s been moisturized with leave-in conditioner
- Section your hair from your temple toward your ear, creating a diagonal section from your forehead back
- Apply a light gel or cream to the section and begin flat-twisting, pushing the twist toward your scalp
- Flat twist from your temple all the way back to where your ear ends
- Repeat on the opposite side, creating a mirror image
- Leave the coils at your crown and back completely natural and defined with a curl cream
- Allow everything to dry completely before sleeping
Flat-twisted sides give you a put-together appearance while flat-twisted sections are also incredibly durable — they’ll look sharp for 5 to 7 days, making this a practical choice for busy people who still want intentional style.
Final Thoughts
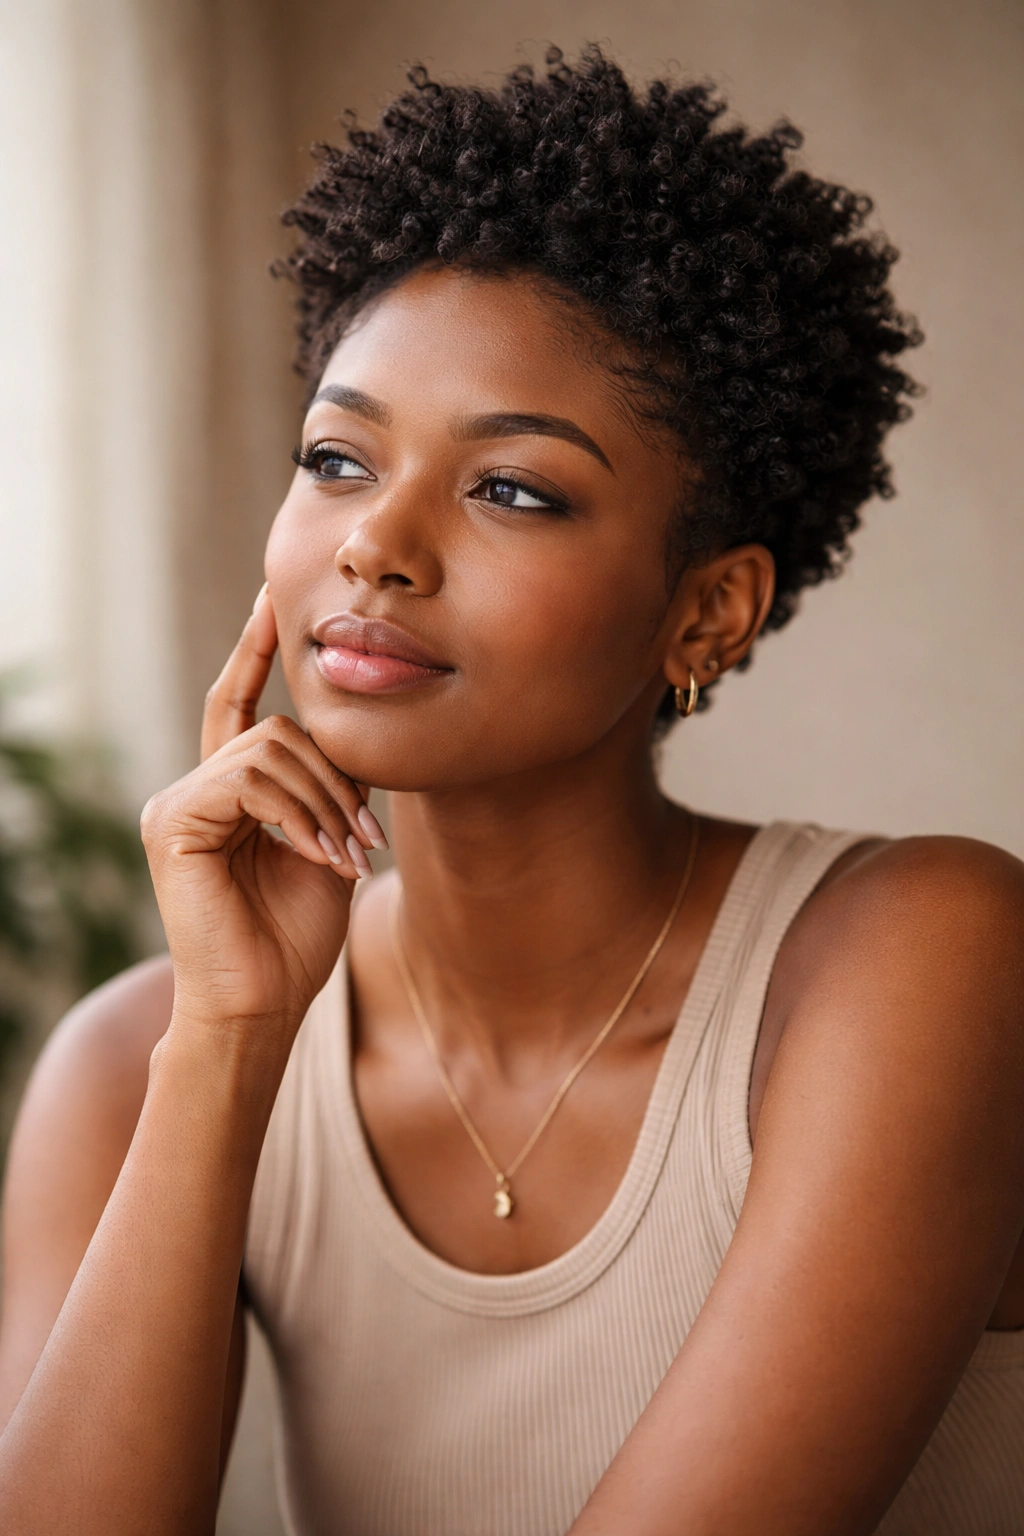
Short 4C hair is genuinely one of the most versatile hair textures to style, and the options above barely scratch the surface of what’s possible. The styles that look best and feel most sustainable are always the ones that work with your natural curl pattern and texture rather than against it. Your coils are a feature, not a flaw — and when you choose styles designed specifically for how 4C hair actually behaves, you’ll find yourself excited about styling rather than frustrated.
The most important thing to remember is that protective styling and beautiful styling aren’t mutually exclusive. You can rock a style that genuinely protects your edges and hairline while also looking intentional, polished, and absolutely gorgeous. Your short 4C hair deserves styles that celebrate its density, its natural volume, and its beautiful texture — and that’s exactly what these options do.
