



There’s something undeniably powerful about an afro bun—it’s practical, it’s beautiful, and it works for everything from a lazy Sunday at home to a board meeting or a night out dancing. The thing most people miss is that afro buns aren’t one-size-fits-all. Your hair texture, the occasion, how much time you have, whether you’re going for polished or playful—all of that changes which style actually makes sense for you. The difference between a bun that lasts all day versus one that falls apart by noon often comes down to technique, not genetics or luck.
If you’ve ever felt frustrated trying to recreate an afro bun style from a video where the hair texture didn’t match yours, or spent forty-five minutes getting everything perfect only to have it unravel by afternoon, this guide is for you. We’re going to walk through eight bun styles that actually work with textured hair, and for each one, you’ll get the specific technique, the best occasions to wear it, and the real-world maintenance tricks that keep it looking fresh. Some of these styles are classics you’ve probably seen a hundred times—but done the right way, with your specific hair type in mind. Others might be fresh territory, a new way to style your hair that becomes your go-to.
The beauty of learning multiple afro bun styles is that you’re essentially building a versatile toolkit. One style might be your weekday work look, another your weekend vibe, and a third becomes your emergency solution when you need your hair up and out of the way in five minutes. Once you understand the foundational techniques—how to gather your hair, how much tension is actually helpful versus damaging, what products keep everything in place without causing buildup—you can adapt and customize to suit your specific hair, your head shape, and your style preferences.
1. Classic High Afro Bun
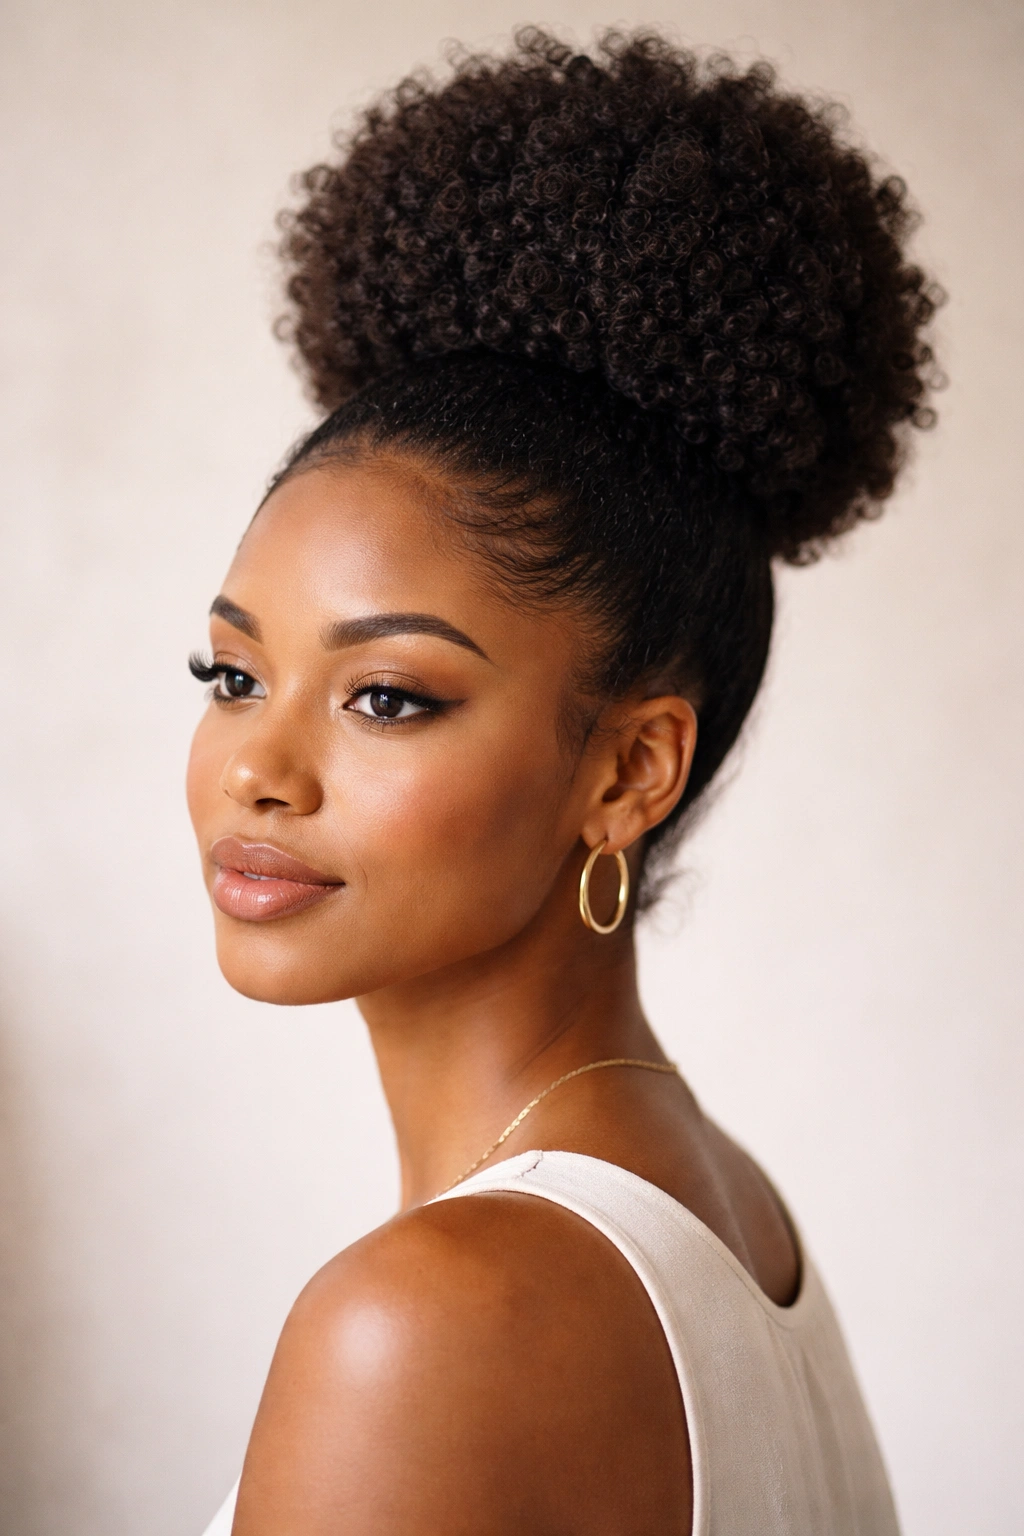
The classic high afro bun is the foundation every natural hair journey includes at some point. You’re gathering your hair at the crown and securing it into a rounded, full shape that sits high on your head. What makes this style iconic is how it works with your natural hair texture rather than fighting against it—the coils and curls actually create the shape and volume you’re looking for, no smoothing or flattening required.
Start with clean or refreshed hair. If your hair is a day or two old, lightly mist it with water or a refreshing spray and finger-comb through to loosen any compressed areas. Apply a lightweight styling cream or gel to your hands, then use your fingers to smooth the hair back and gather it into a high ponytail at the crown. The key here is not to pull too tightly—you want the ponytail secure enough that it won’t slip, but loose enough that you’re not creating tension that stresses your hairline. Once your ponytail is in place, take the ends and twist them gently around the base of the ponytail, wrapping them to create a bun shape. Secure with bobby pins inserted horizontally through the bun. Use at least 4-6 bobby pins, spacing them evenly around the bun so the weight distributes evenly and nothing feels like it’s pulling on one spot.
Why This Style Works for Textured Hair
The high afro bun is forgiving because you’re not trying to hide or tame your natural texture—you’re celebrating it. Your hair’s natural curl pattern actually helps hold the shape without needing to make it artificially smooth or sleek. The volume that comes naturally from afro-textured hair fills out the bun beautifully and makes it look fuller and more intentional than it might on straighter hair types.
Best Occasions and Styling Tips
- Weekday work or professional settings: This bun looks polished and put-together without feeling overdone or like you spent an hour getting ready.
- Gym or active days: The high placement keeps your hair off your face and neck, and the security of multiple bobby pins means it won’t shift when you’re moving or sweating.
- Casual errands or weekend hangouts: You can dress this bun down with a t-shirt and jeans or dress it up with a blouse for the same look.
- Pro tip: Smooth the front hairline with a small amount of edge control for a neater appearance, but don’t overdo it—a completely gel-slicked look doesn’t always complement the fullness of the bun.
Keep this style in for 3-4 days maximum. On day two or three, you can refresh the edges and the front with a little edge control and water, but after that, take the bun down and let your hair rest for at least a day before putting it back up.
2. Low Twisted Bun
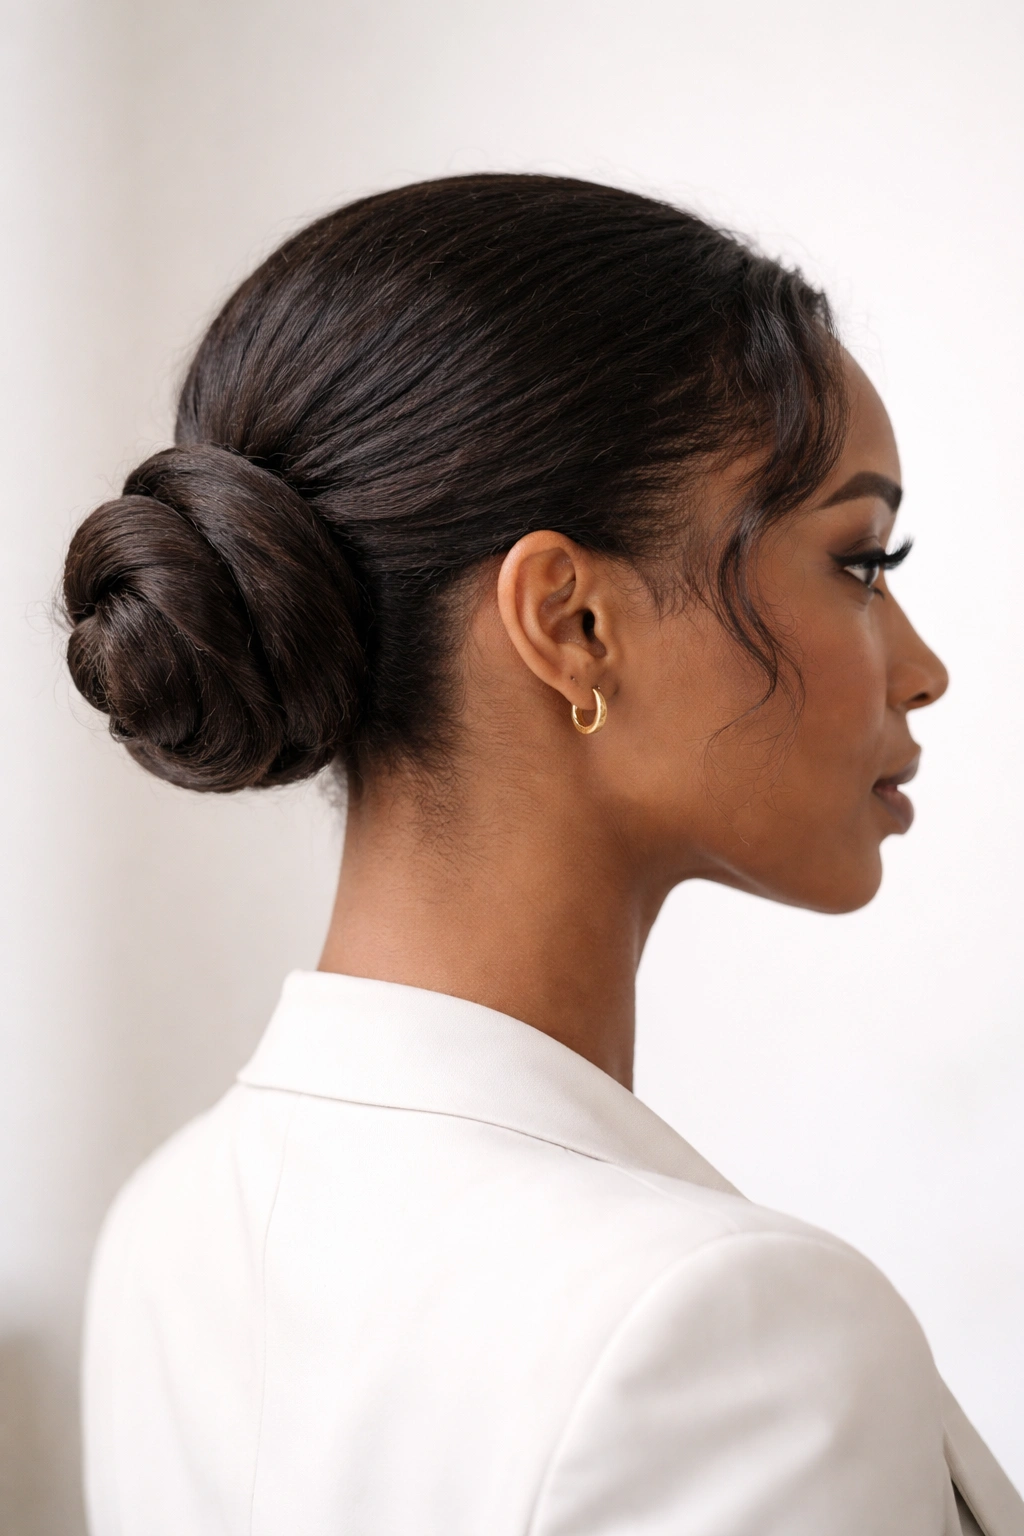
If the high bun feels a bit young or casual for what you’re going for, a low twisted bun gives you sophistication and elegance. You’re gathering your hair lower, closer to the nape of your neck, and twisting it rather than wrapping it. This small shift in placement and technique completely changes the vibe—suddenly you’re in professional, pulled-together territory, and it works beautifully for formal events, job interviews, or nights out.
Part your hair down the middle or create a side part, depending on what flatters your face shape—this step makes a bigger difference than people realize. Smooth the hair back toward the nape of your neck with a styling cream or lightweight gel. Gather your hair into a low ponytail, keeping it centered at the nape. This time, instead of wrapping the ponytail around the base, you’re going to gently twist the ponytail section, holding tension in the twist as you spiral it around and around itself, forming a twisted bun. The twist gives you a more defined, intentional look than a simple wrap. As you spiral, tuck the ends underneath and secure with bobby pins. The twist itself should look neat and controlled, not messy or loose.
The Science Behind the Twist
Twisting your hair actually engages the curl pattern in a way that helps hold the style longer and more securely than a simple wrap. As you twist, you’re essentially pre-coiling your hair, which means less unraveling and a bun that genuinely stays put for days without looking like it’s coming loose. The visual effect is also different—a twist reads as more deliberate and polished, while a wrap can sometimes look a bit casual by comparison.
Best Occasions and Styling Tips
- Job interviews or important meetings: This bun signals that you’re serious, professional, and put-together.
- Date nights or evening events: Pair it with a nice blouse or dress and some jewelry, and it reads elegant and intentional.
- Weddings or formal occasions: Position the bun slightly to one side for an asymmetrical look that feels more formal and dressy than centered.
- Pro tip: Smooth your edges with a creamy edge control product and take a few minutes to make sure the sides of your hair lay smoothly—this bun’s elegance depends on a neat, controlled appearance.
A low twisted bun can last 4-5 days if you take care of it. Sleep on a silk or satin pillowcase to reduce friction and frizz. In the morning, you might notice some loose hairs around the base—that’s normal. Use a small comb or even a clean toothbrush to gently smooth them back down and re-secure with a bobby pin if needed.
3. Double Bun Look
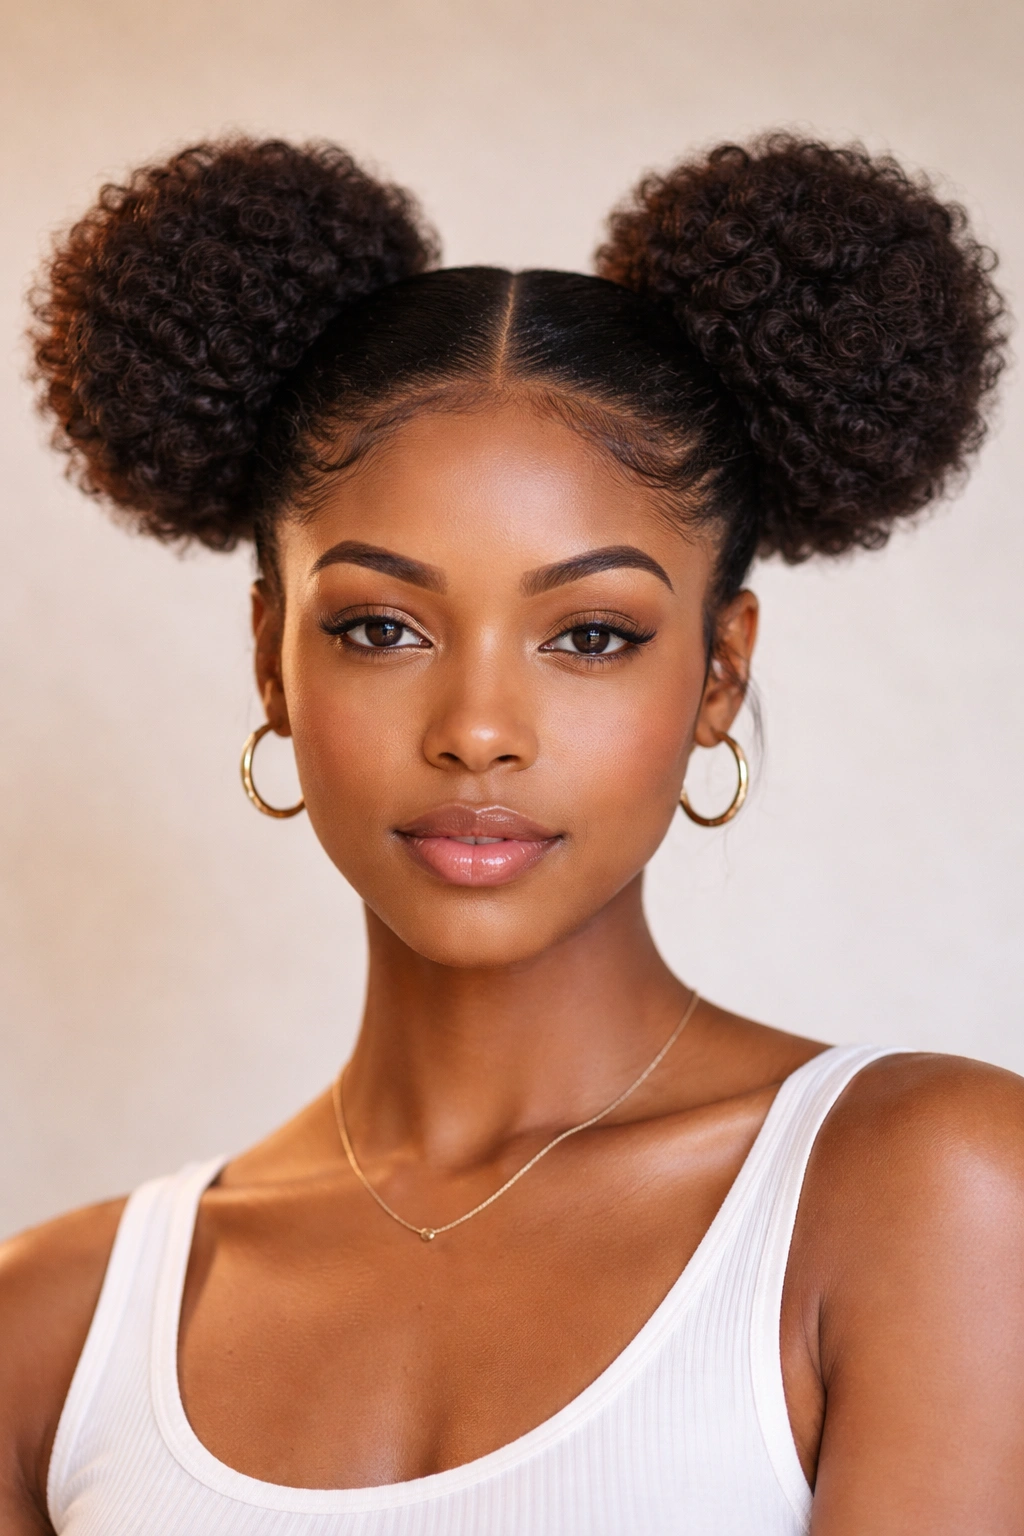
Double buns take you immediately into fun, playful territory. You’re creating two symmetrical or near-symmetrical buns, usually positioned one on each side of your head, either at the same height or with one slightly higher than the other for a more casual, modern vibe. This style works on all hair lengths and textures, and it’s popular because it’s genuinely cute while being practical enough for actual daily wear—your hair is fully secured, nothing’s falling in your face, and it photographs well.
Create a middle part from your hairline to the nape of your neck, dividing your hair into two equal sections. If you want a more playful, modern look, don’t worry about making the part perfectly straight—a slightly wobbly or off-center middle part actually adds to the charm. Secure each section into a ponytail, positioning them where you want your buns to sit. If you want both buns high, position the ponytails high on each side. If you want a more relaxed look, lower the ponytails toward the ears. Take each ponytail and twist it gently, then wrap the twist around the base of that ponytail, securing with bobby pins. You should have two distinct, separate buns.
Why the Double Bun Is Having a Moment
Part of why this style has become so popular is that it feels youthful and intentional in a way that reads as confident, not childish. It’s a style choice that says you know what you’re doing and you’re having fun with your hair. It also happens to be extremely practical—because you’ve divided your hair into two sections, each bun is smaller and lighter, which means less tension on your hairline and better comfort if you’re wearing the style all day.
Best Occasions and Styling Tips
- Casual weekends, brunch with friends, coffee runs: This style is your go-to when you want to look effortlessly put-together without actually trying hard.
- Creative or artistic workplaces: In environments where personal style is valued, double buns signal individuality and confidence.
- Music festivals or outdoor events: The dual buns keep your hair very secure even in windy conditions, and they look cute in photos.
- Pro tip: Add a small hair accessory—a gold cuff, a decorative clip, or a small scarf wrapped around one or both buns—to elevate the look from casual to intentional.
Style the edge of each bun neatly with edge control, and consider smoothing the middle part with a tiny bit of gel. The symmetry and clean lines are what make double buns look polished. You can wear this style for 3-5 days depending on your hair and how well you secure each bun initially.
4. Bubble Bun
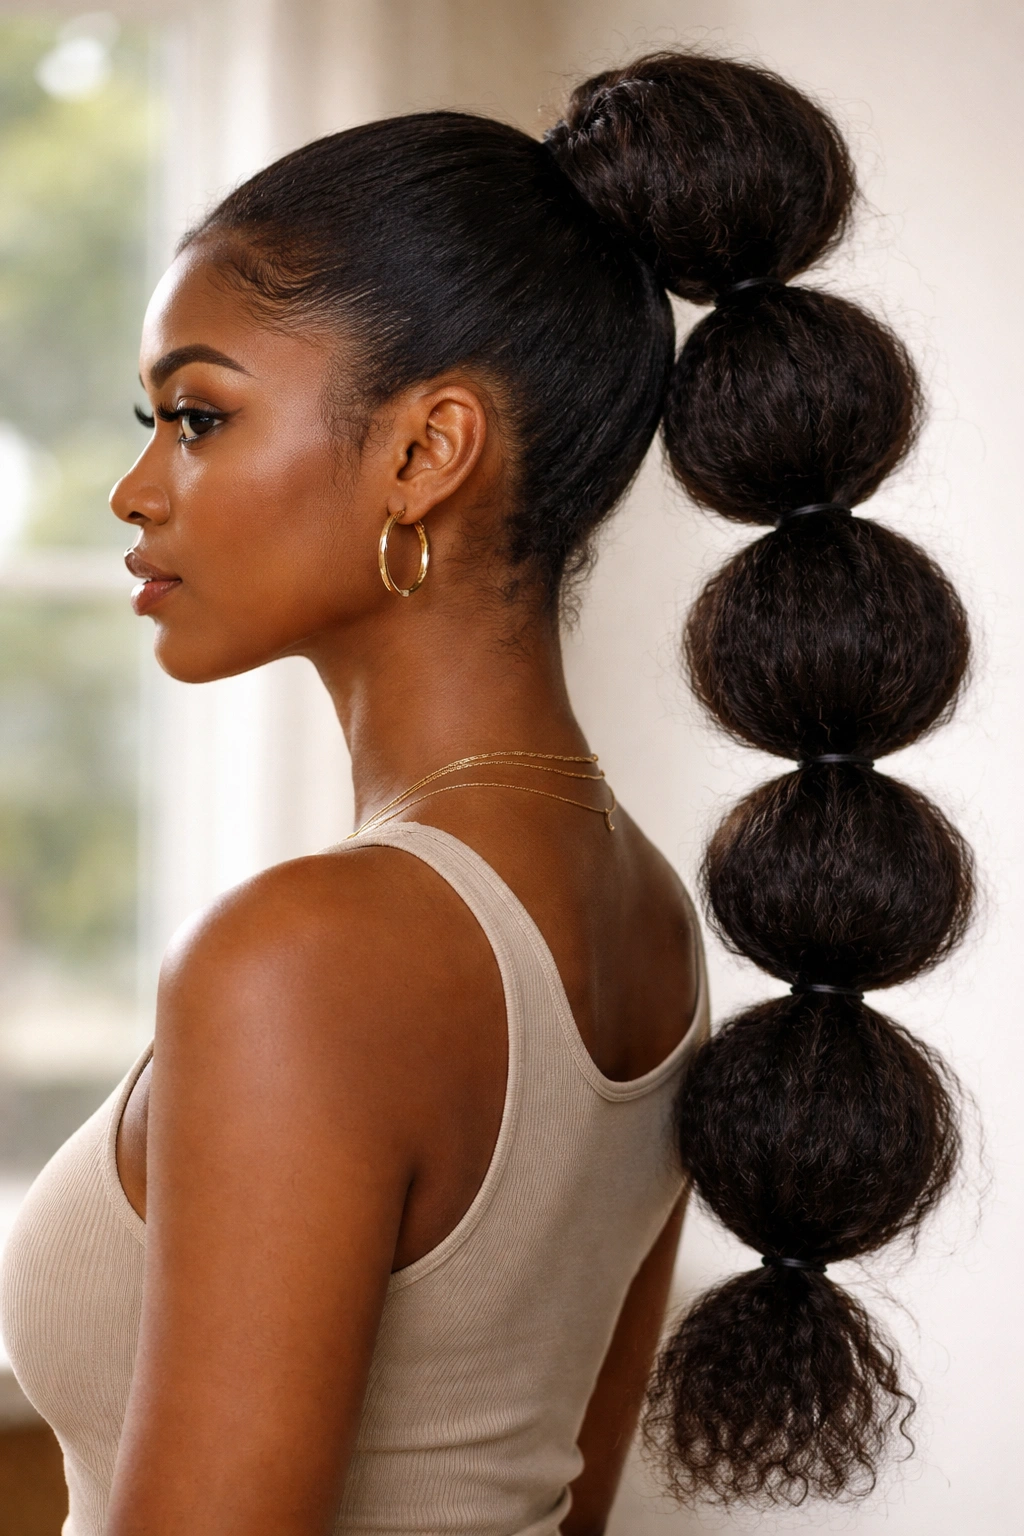
The bubble bun is the style you choose when you want maximum visual impact with a playful, textured look. Instead of creating one bun at the crown or nape, you’re creating multiple smaller buns stacked along a vertical line, creating a bubble or pearl-like effect when viewed from the side. It sounds complicated, but once you understand the technique, it’s actually quite straightforward and looks absolutely stunning.
Start with a clean or refreshed ponytail. Secure your hair into a high ponytail at the crown. Now, take a small hair elastic and wrap it around your ponytail about an inch below the hair tie you just used. Push the section of hair above this second elastic upward, creating a small bubble. Move down another inch and add another elastic, again creating a bubble of hair above it. Continue this pattern down the length of your ponytail, creating 4-6 bubbles depending on your hair length and thickness. The bubbles should be roughly equal in size for a cohesive look. Once you’ve created all your bubbles, take the very end of your ponytail and twist it, then wrap it around the base of the bottom bubble and secure with bobby pins. You can leave the bubbles as they are, or gently tease each section outward to make them look fuller and more textured.
The Magic of the Bubble Bun
What’s brilliant about this style is how it transforms the visual weight of your hair. Instead of creating one large, heavy bun, you’re distributing that volume across multiple bubbles, which makes the style feel lighter, more dynamic, and more interesting. The bubble bun is also extremely secure—because you’ve created those intermediate tie points, even if a bubble loosens slightly, the whole structure doesn’t collapse. It’s a style that looks like you spent serious time styling your hair, but that doesn’t require major technical skill.
Best Occasions and Styling Tips
- Video calls or virtual meetings where you’re on camera: The bubbles create amazing texture and visual interest on screen, and they read as creative and intentional.
- Social events, parties, or girls’ night out: This is a style that makes people ask “how did you do that?” It’s conversation-starting.
- Fun, creative workplaces or school days: Anywhere you want to show off your personality while keeping your hair secured and out of the way.
- Pro tip: Use small, thin elastics that match your hair color—they’ll be far less visible than chunky or contrasting elastics. You can also hide elastics by wrapping a small section of hair around them.
The bubble bun can last 3-4 days, but by day two, those bubbles will have relaxed and loosened slightly. That’s actually fine—the softened version often looks even prettier than the fresh version. Just gently re-plump the bubbles each morning.
5. Sleek Topknot Bun
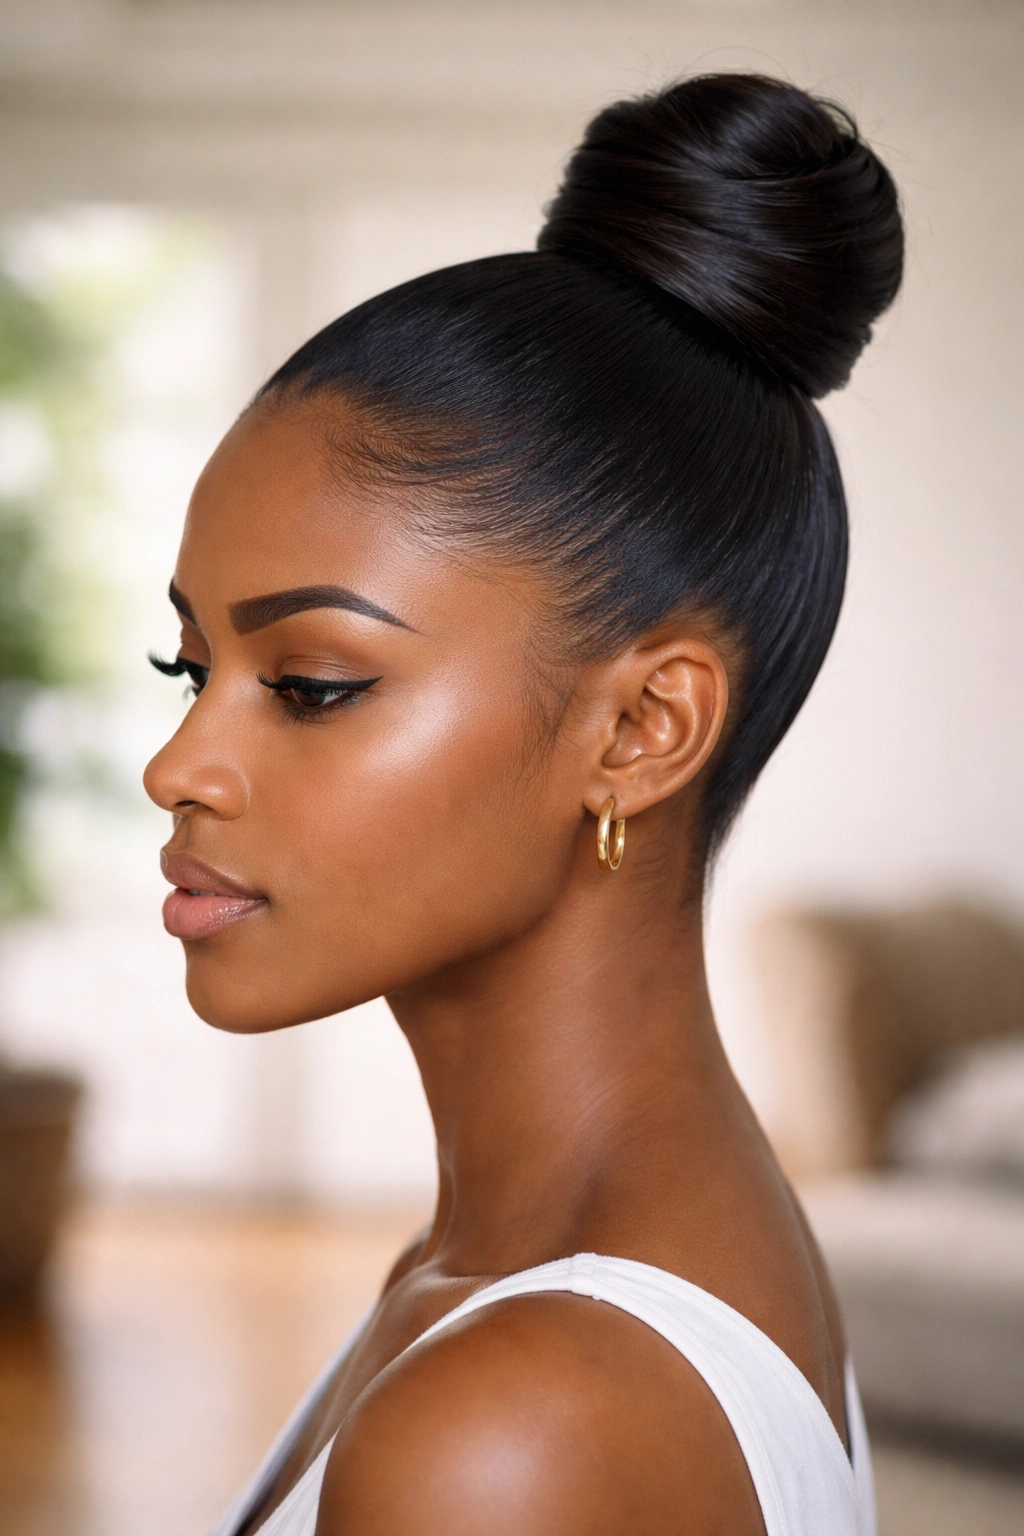
When you want absolute polish and sophistication, the sleek topknot bun is your answer. Every strand is smoothed down, every edge is controlled, and the bun itself is compact and refined. This is the bun you wear to job interviews, court appearances, upscale dinners, or anywhere you want to convey that you’re serious, organized, and in control.
The prep work is crucial for a sleek topknot. Start with clean hair or freshly washed hair that you’ve dried smooth. Apply a smoothing cream or lightweight leave-in conditioner to damp hair, then blow-dry your hair straight or as smooth as possible. If you want extra smoothness, use a paddle brush or a flat brush while blow-drying. Once your hair is dry and smooth, apply a styling gel or smoothing serum to your hands. Brush your hair back into a high ponytail at the very top of your head, smoothing as you go. Use a paddle brush to ensure every strand is lying smoothly. Secure the ponytail tightly with an elastic. Take the ponytail and twist it, then wrap it around the base of the ponytail, tucking the ends underneath and securing with bobby pins. The entire bun should look compact and controlled—no flyaways, no loose texture, no softness. Finish by smoothing your edges with edge control and spraying the entire bun with a light hairspray to keep everything in place.
The Discipline of Sleek
Creating a truly sleek bun requires patience and the right products. Smoothing cream, gel, and hairspray are your friends—don’t shy away from using them because you’re worried about product buildup. One day of wearing a sleek bun with proper products is not going to damage your hair. What will damage your hair is pulling it too tight because you don’t have enough product to keep it smooth and controlled. Use enough product that everything lays smoothly without needing excessive tension.
Best Occasions and Styling Tips
- Professional environments, meetings, presentations: This bun says you mean business and you’ve prepared thoroughly.
- Formal events, galas, award shows: Pair with elegant jewelry and you’ve got a complete, polished look.
- Days when you want your look to feel controlled and intentional: This bun is a mood. You wear it when you need confidence.
- Pro tip: Spray edge control or hairspray on a small brush and use that brush to smooth your edges rather than applying product directly to your hairline—it gives you more control and precision.
A sleek topknot will hold for 3-4 days if you’re careful with it. Sleep on a silk pillowcase so the bun doesn’t get flattened or creased. In the morning, if you see any flyaways or frizz, lightly spray with hairspray to re-smooth them.
6. Puff-on-Top Bun
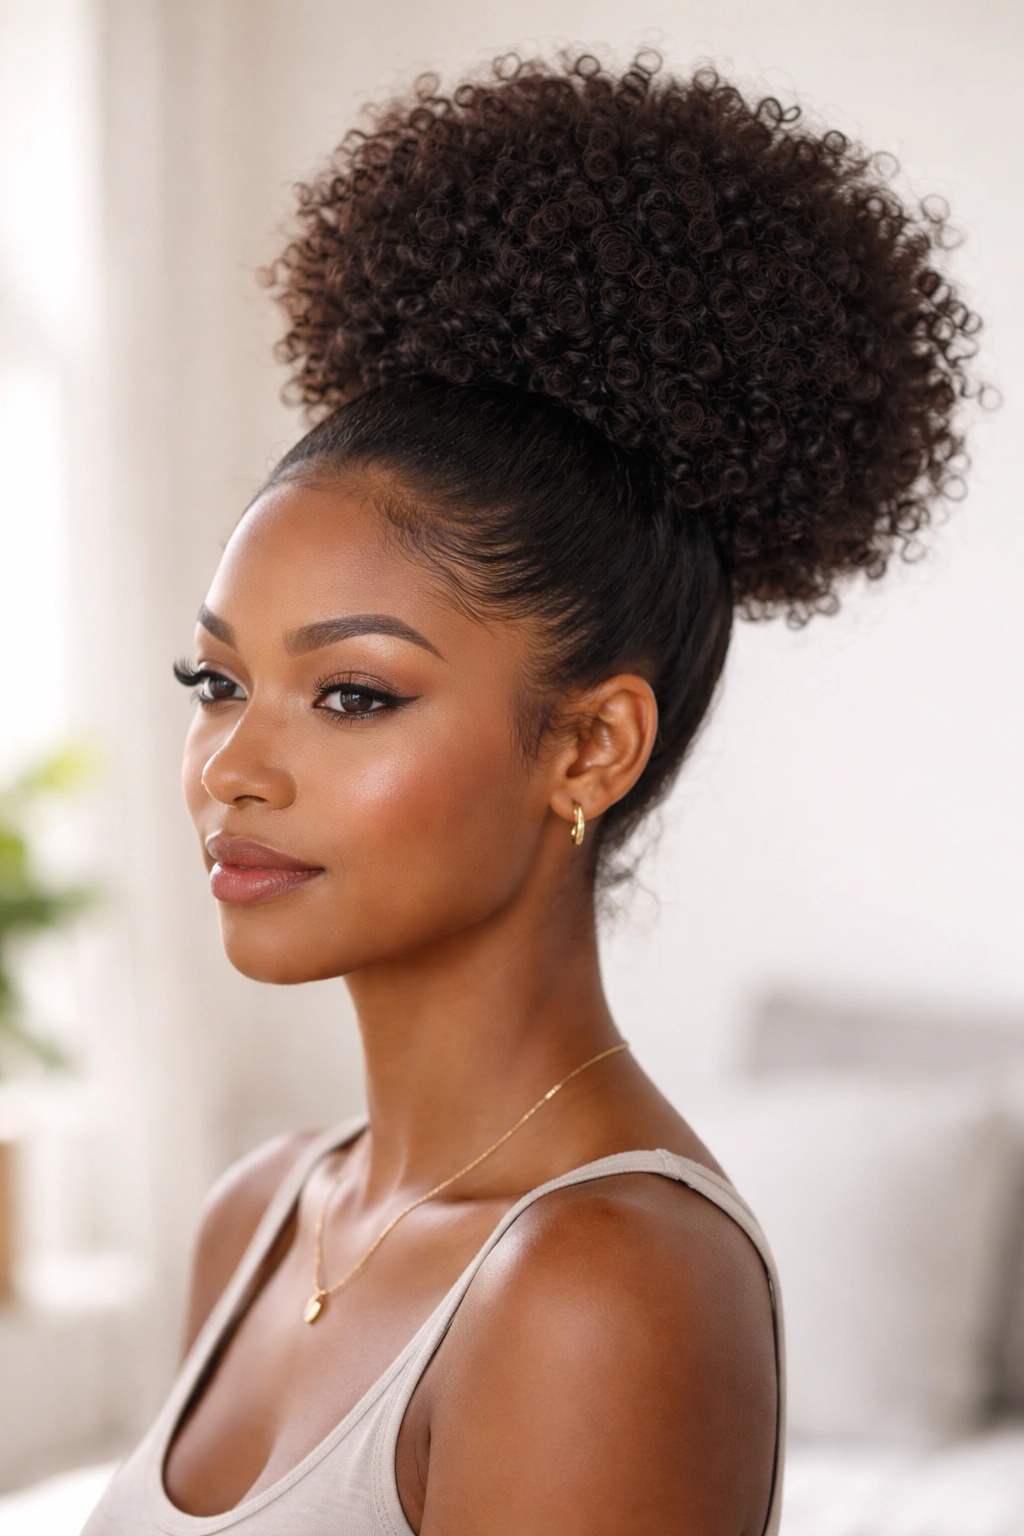
This is the bun for when you want to celebrate your natural texture while still having your hair up and out of the way. You’re creating a high puff (a rounded gathering of unstraightened, natural curly hair) and securing it at the crown, but instead of twisting or wrapping it, you’re letting the natural curl pattern create the shape. The result is a style that’s undeniably you—all your texture, all your volume, completely authentic.
Start with clean or refreshed curly hair. You can finger-comb through your hair or use a wide-tooth comb to gently detangle if needed. Apply a curl-defining product—a gel, mousse, or lightweight cream designed for curls—to your damp or dry hair, scrunching it in gently to encourage curl formation. Gather your hair high on your head, using your fingers rather than a comb to scoop and gather. You want your curls to stay coiled and defined, not combed flat. Secure into a high ponytail with an elastic, but don’t wrap it tightly—let the ponytail section remain full and rounded. You can add bobby pins underneath the puff to help support it and keep it in place all day, but the goal is to let the natural curl pattern do most of the work. If you want, add a decorative clip or hair cuff to the base of the puff for extra style.
Embracing Natural Texture as Structure
One of the best-kept secrets about styling textured hair is that your natural curl pattern is actually excellent at holding styles. When you work with it instead of against it, you don’t need as much product, tension, or manipulation. A puff-on-top bun looks even better the second or third day, when your curls have settled and tightened further. This is one of the few styles where your hair improves over time.
Best Occasions and Styling Tips
- Casual everyday wear, running errands, relaxed environments: This bun says you’re confident in your natural hair and you’re not trying to be anything other than yourself.
- Gym days or active outings: Your natural curls are incredibly secure, and any frizz or loose strands just look like part of the textured style.
- Social events where you want to look effortlessly beautiful: This style takes minutes but looks like you woke up gorgeous.
- Pro tip: Refresh the curls each morning by lightly misting with water and scrunching in a tiny bit of gel—this re-defines curl pattern and keeps the puff looking fresh throughout the day.
A puff-on-top bun can last 5-7 days easily, longer than most other bun styles. Your hair actually curls tighter as the days pass, so the style becomes more secure, not less. Just refresh the edges and the definition as needed.
7. Side Swept Bun
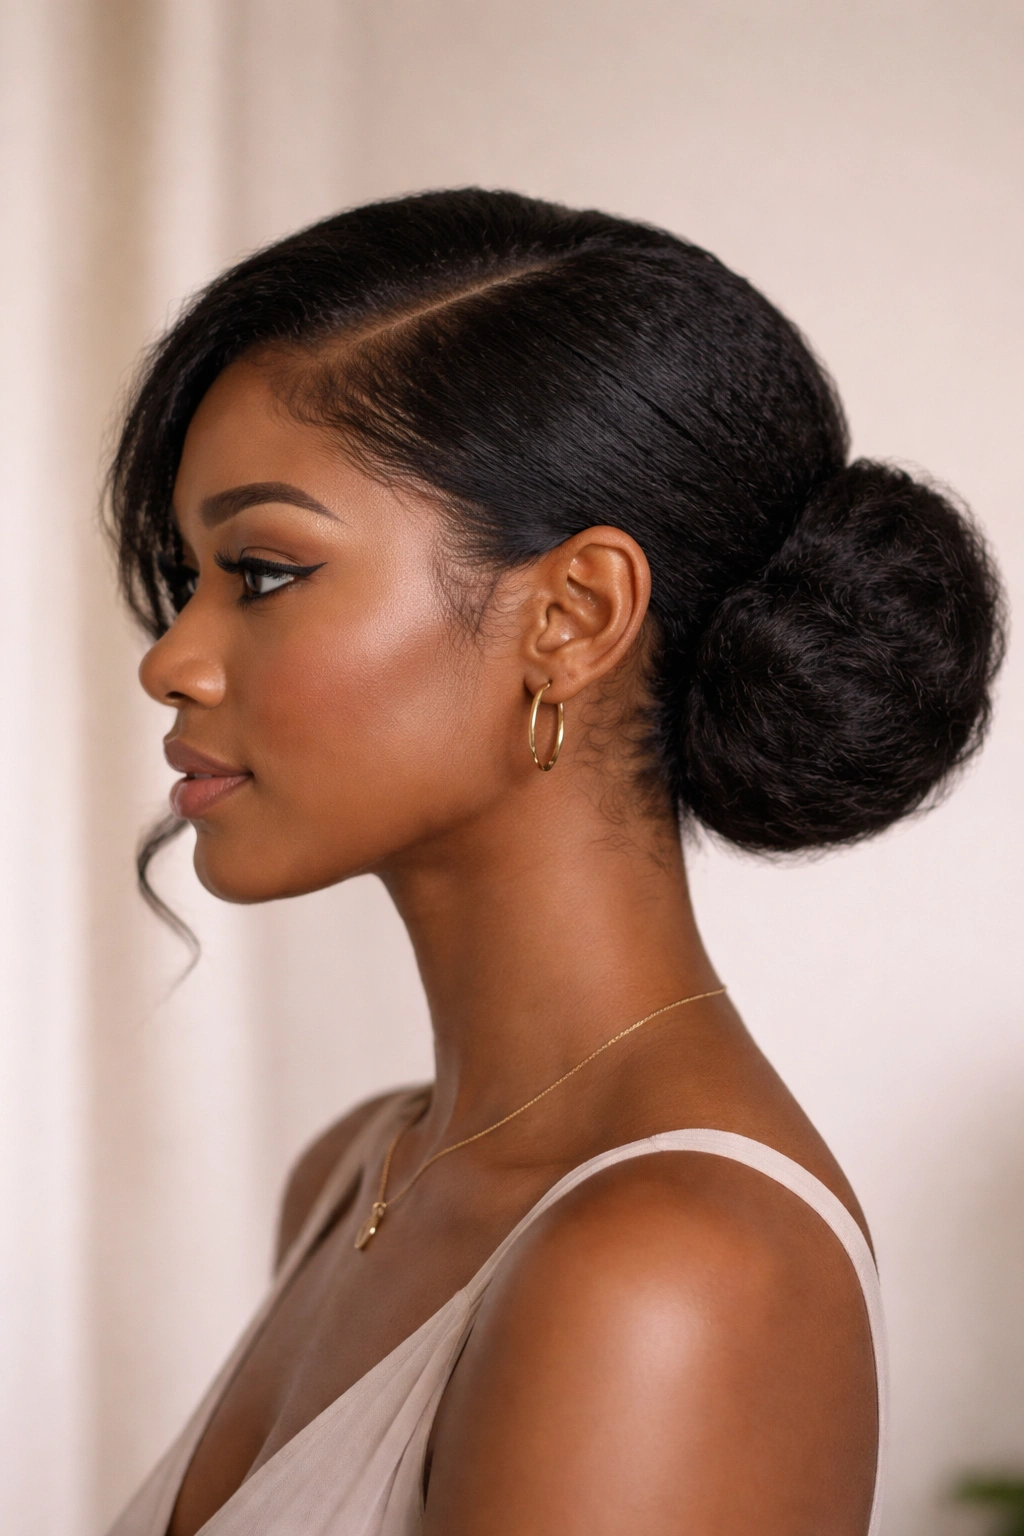
The side swept bun is your answer when you want elegance and a flattering asymmetrical look. You’re creating a bun positioned toward one side of your head—usually slightly lower than center—which creates a beautiful line and works incredibly well for showing off your face and highlighting your profile. This style is flattering, romantic, and interesting without being difficult to execute.
Create a deep side part, positioning it wherever feels most flattering on your head—usually this is somewhere between the center and the side of your head. Take a section of hair from the smaller side of the part and pin it back or tuck it behind your ear to keep it out of the way. Now gather the remaining hair into a low ponytail on the same side of your head where your bun will sit, roughly at ear level or slightly lower. Smooth the hair back with a styling cream or gel, ensuring the front and sides lay smoothly against your head. Secure the ponytail, then twist and wrap it into a bun, securing with bobby pins. The asymmetrical placement is what makes this style work—the bun sits to the side rather than centered, creating visual interest and balance.
The Flattering Power of Asymmetry
Side-swept styles have been flattering people for decades because asymmetry creates lines that draw the eye in interesting directions. A side-swept bun shows off your jawline, your cheekbones, and the nape of your neck—features you might not emphasize in other styles. If you have a side you prefer showing to the camera or in photos, this bun lets you favor that side.
Best Occasions and Styling Tips
- Dates or romantic outings: This bun is undeniably elegant and shows more of your face and neck than a centered bun.
- Photography sessions or occasions where you’ll be taking photos: The asymmetry photographs beautifully and looks more interesting than centered styles.
- Formal events where you want to look polished but still show personality: Pair with a statement earring on the side where your bun sits for extra impact.
- Pro tip: Add a few baby hairs or smaller curls framing your face by gently pulling out a small section from near the front—this softens the look and prevents it from feeling too severe or pulled back.
A side-swept bun will last 4-5 days if you sleep carefully (try to avoid sleeping on the side where the bun sits, as this will flatten it). Refresh the side part each morning and smooth any flyaways with a light hairspray.
8. Braided Crown Bun
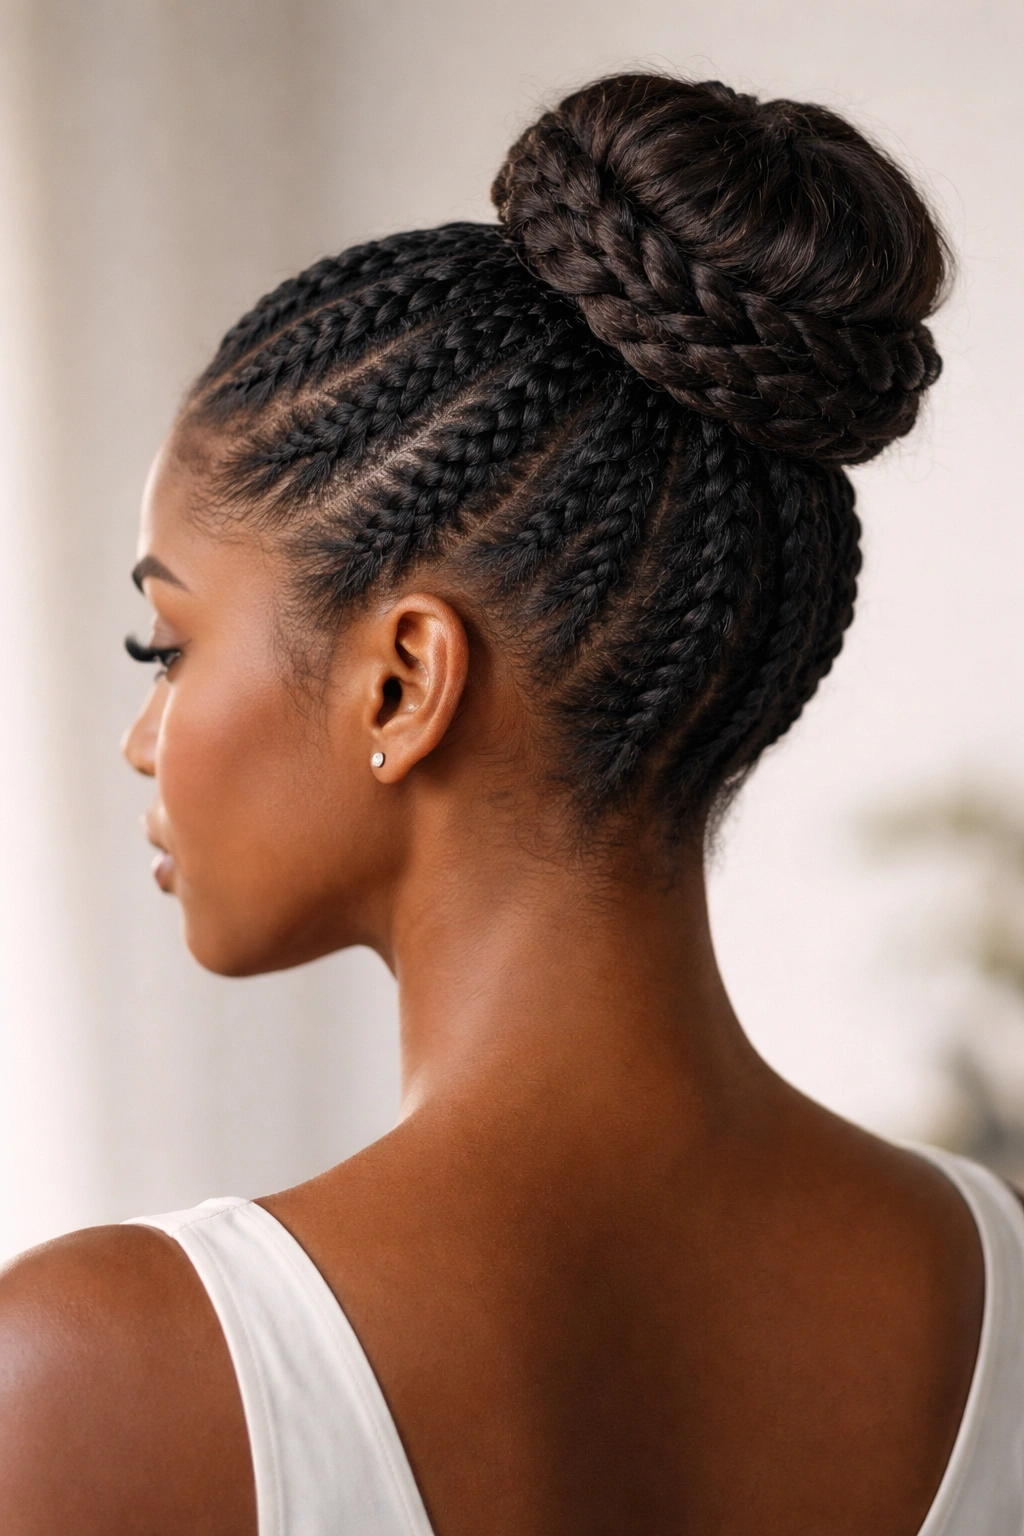
For the ultimate expression of creativity and intentional styling, the braided crown bun combines the elegance of braids with the practicality of a bun. You’re creating one or more braids that frame or wrap around your head, then gathering the remaining hair into a bun at the crown or nape. The result is a style that looks like you spent serious time getting ready—and while it does take longer than some of the simpler styles on this list, it’s absolutely worth it for special occasions.
Section out a small section of hair from one side of your head, starting at the temple area. Braid this section tightly, feeding in small pieces of hair as you go to create a Dutch or French braid that curves along the side of your head toward the back. Secure the braid with a tiny elastic. Repeat on the other side of your head if you want a symmetric look, or create one braid on one side for asymmetry. Once your braids are in place, gather the remaining unbraided hair at the crown or nape (depending on where you want your bun) into a ponytail. Twist and wrap this into a bun, securing with bobby pins. You can leave the ends of your braids loose flowing down the back, or you can wrap them into the bun along with the other hair.
The Craftsmanship of Braided Styles
Braided styles require a bit more technical skill than some other bun variations, but they communicate something important—you’ve invested time and intention into your appearance. This is a style for moments when you want to feel special, whether that’s a job promotion, a birthday, a special date, or just a day when you need to feel like your best self.
Best Occasions and Styling Tips
- Weddings, formal events, special celebrations: This is a statement style that says this moment matters.
- Date nights or romantic occasions: The combination of braids and a bun reads romantic, thoughtful, and intentional.
- Days when you want to feel powerful or special: There’s something about intricate braiding that boosts confidence—you literally see the effort you’ve invested when you look in the mirror.
- Pro tip: Braid slightly tighter than feels natural, because braids loosen throughout the day as your hair settles and as you move around. You want them tight enough that day two still looks intentional, not sloppy.
This style can last 5-6 days if you secure it well and treat it gently. Sleep on a silk pillowcase, and in the morning, you can tighten any loose braids by gently re-braiding them or using bobby pins to re-secure them to the main bun.
Final Thoughts
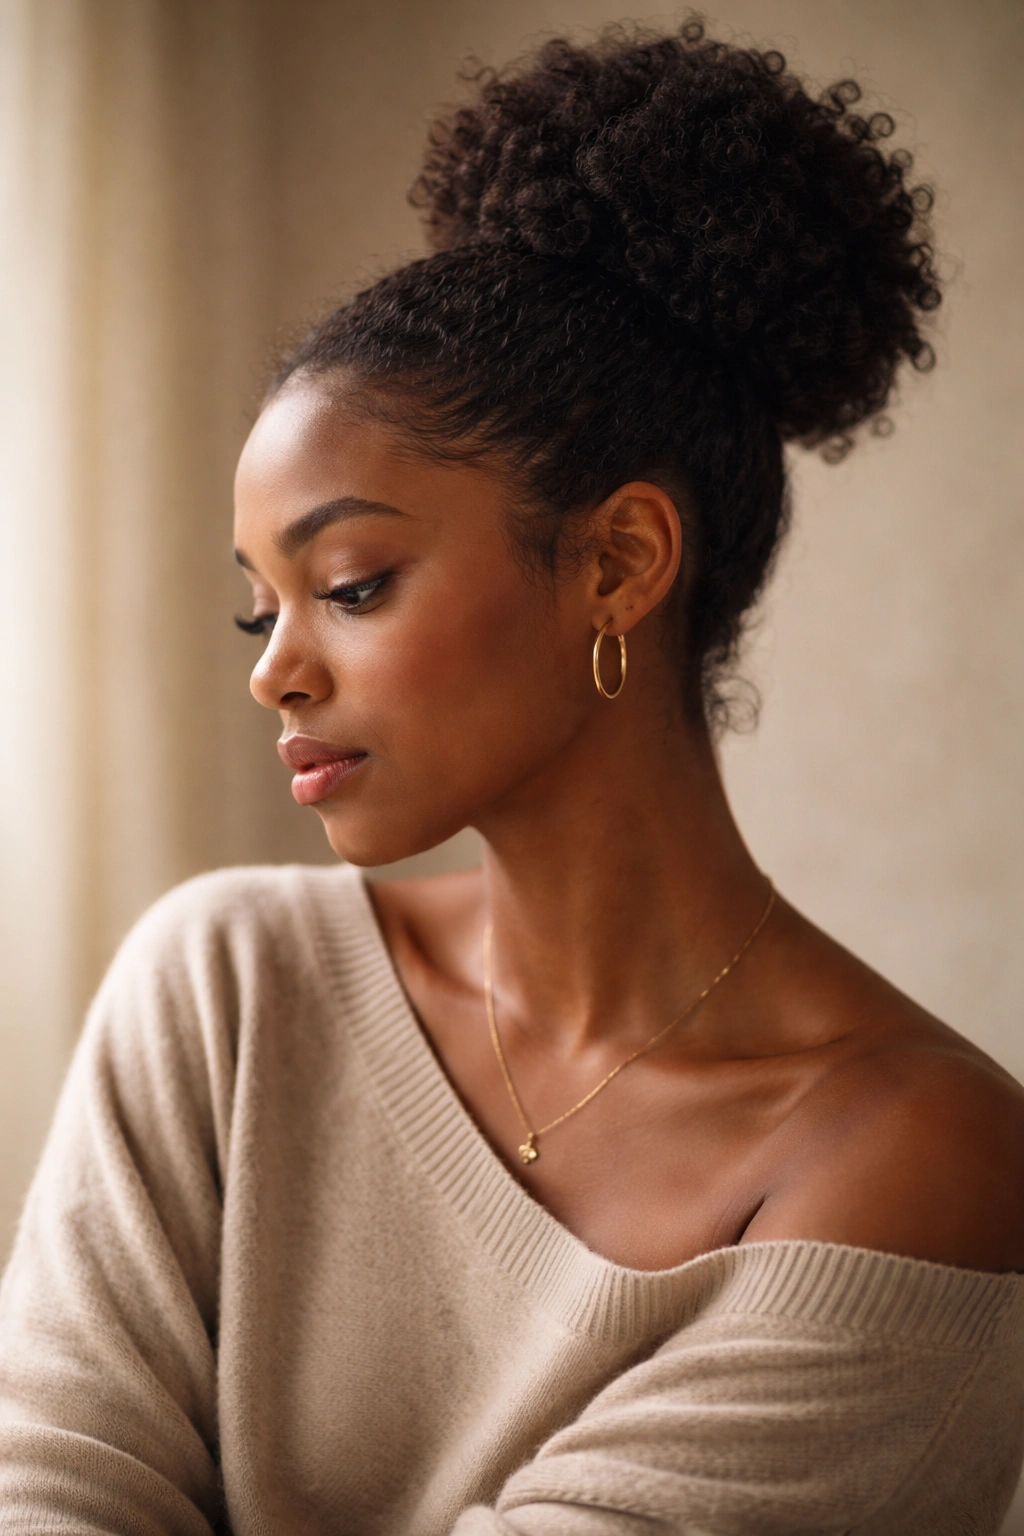
Learning to style your afro hair into buns that work for your life means having options for literally every situation. You’ve got the professional buns for work and interviews, the playful styles for casual days and social events, and the special-occasion styles for moments that call for something more intentional. The real skill isn’t learning eight different bun styles—it’s understanding the principles underneath them. How much tension is healthy, how to gather and secure hair without damage, what products work with your specific curl pattern, and how to maintain a style once you’ve created it.
The most important thing is to listen to your hair and your hairline as you’re styling. If something feels tight or painful, loosen it. If a style falls out by day two, try a tighter ponytail or add an extra bobby pin. If your edges feel stressed, use less tension and more product. Your hair is not resistant to styling—it just wants to be handled with intention and care. Once you’ve figured out what works for your specific hair, you’ll find yourself reaching for these styles over and over because they work, they last, and they make you feel good.
The bun styles in this guide are just the beginning. Once you understand the basic techniques—how to create a secure base, how to twist or wrap your hair, how to position bobby pins for maximum hold—you can start experimenting with variations. Mix elements from different styles. Try a double bun with twisted sections instead of wrapped ones. Create a braided crown and finish with a puff instead of a sleek bun. Your hair is incredibly versatile, and you’re the expert on what feels best and looks best on you.
