



Natural hair and cornrows have a relationship that goes way beyond just looking good—though they absolutely do. Cornrows serve as a protective styling method that shields your natural texture from environmental stress, reduces daily manipulation, and gives your hair a chance to grow stronger. Whether you’re looking to transition protective styles throughout your seasons, need a low-manipulation option for your lifestyle, or simply want to explore the creative versatility that cornrows offer, there’s a style for every hair type, face shape, and personal aesthetic. The beauty of cornrows lies in their adaptability; they work for everything from casual everyday wear to special occasions, and they can be styled alone or combined with other elements like curly edges, beads, or hair extensions.
The key to a successful cornrow experience—whether you’re installing them yourself or visiting a braiding specialist—is understanding your hair’s specific needs and what the style demands in terms of tension, maintenance, and care. Each cornrow style has its own personality and practical considerations. Some require more precision during installation, others demand specific aftercare routines, and a few work better with particular hair lengths or densities. This guide walks you through ten versatile cornrow styles that genuinely work with natural afro hair, offering specific details about installation, styling time, who each style works best for, and the real-world maintenance involved.
1. Classic Straight-Back Cornrows
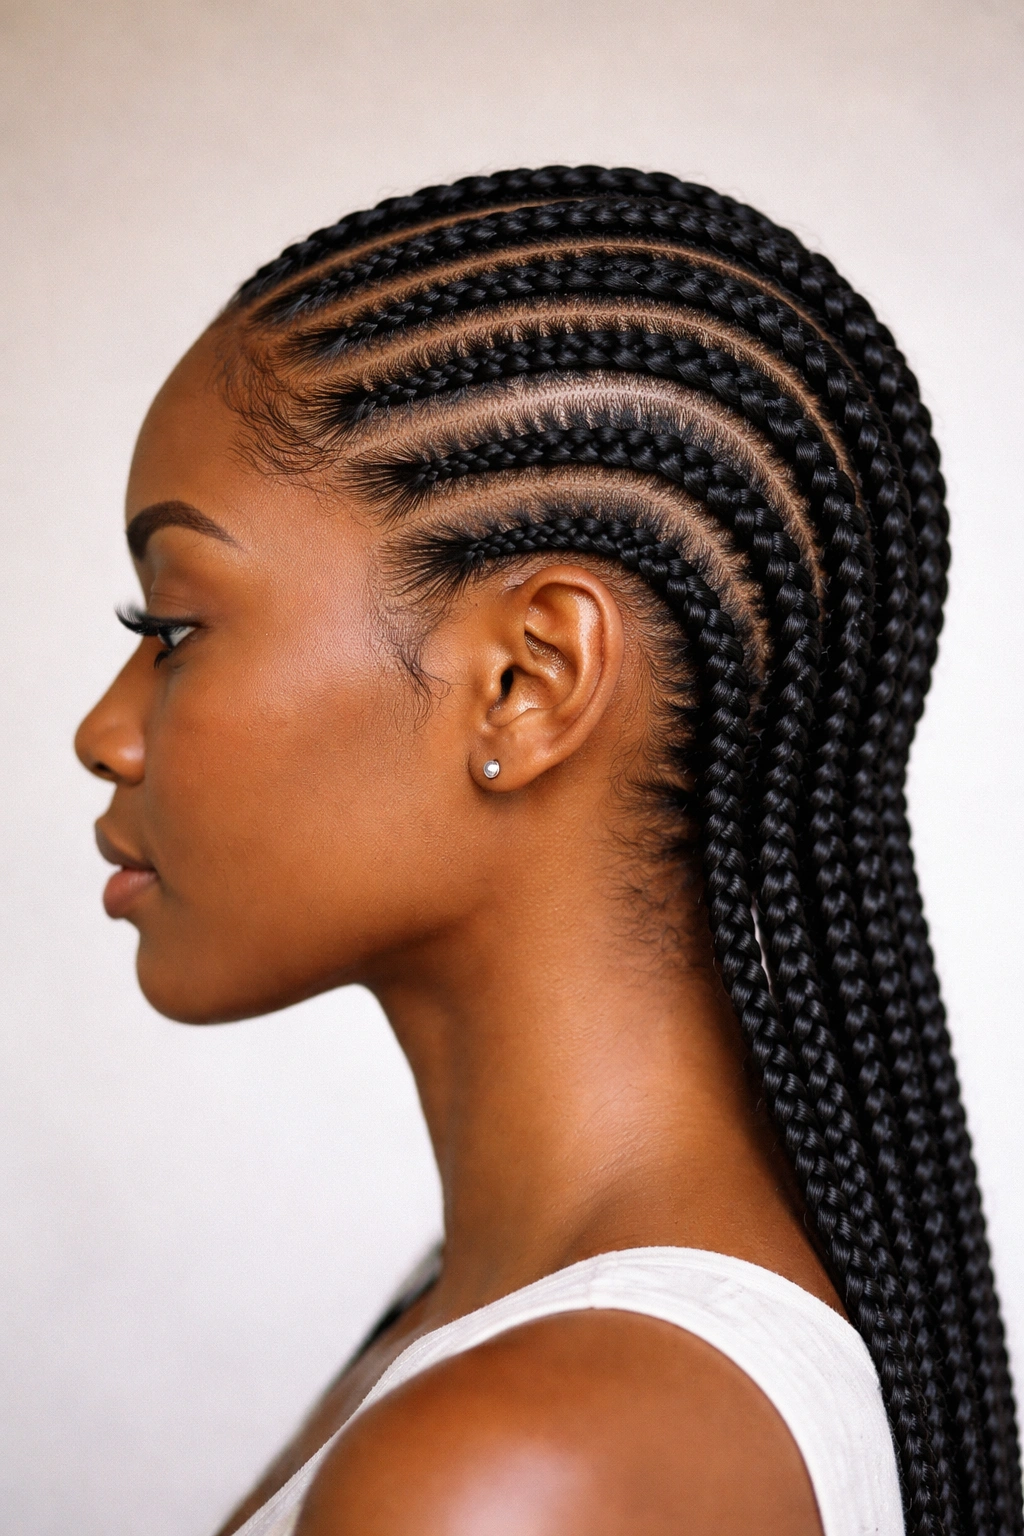
This is where most people start, and for good reason—straight-back cornrows are the foundation that everything else builds on. The rows run horizontally from your front hairline straight toward the nape of your neck, creating clean, parallel lines. What makes this style so effective is its simplicity combined with its undeniable impact. You get immediate polish without requiring specialty tools, extra hair, or complicated styling tricks. The straightforward pattern means installation time is typically shorter than more intricate designs, which translates to lower tension on your scalp and less time sitting in the chair.
Why This Style Holds Up So Well
Classic straight-backs work beautifully because they suit virtually every face shape and hair density. The horizontal lines are forgiving—they don’t require the precision of geometric patterns, yet they still create visual interest and texture. If you’re new to wearing cornrows or returning to natural hair after years of other styling methods, this is genuinely the best starting point. Your scalp will adjust more gently to the tension, and you can gauge how your hair responds before moving to more complex designs.
What You Should Know Before Installing
- Installation takes 1.5 to 3 hours depending on how many rows you want and your hair’s thickness and texture
- The tension should feel snug but never painful—if your scalp hurts after 24 hours, the braids are too tight
- These typically last 2 to 4 weeks with proper maintenance before new growth makes them look shaggy
- Daily or every-other-day moisturizing with a lightweight oil or moisturizing spray keeps your scalp healthy and prevents dryness
- Sleeping with a silk or satin scarf protects the braids and reduces frizz at the roots
Pro tip: If you’re installing these yourself, section your hair into even parts using a comb and clips before you start braiding—it makes the process exponentially faster and ensures the rows are evenly spaced.
2. Cornrows with Curly Edges
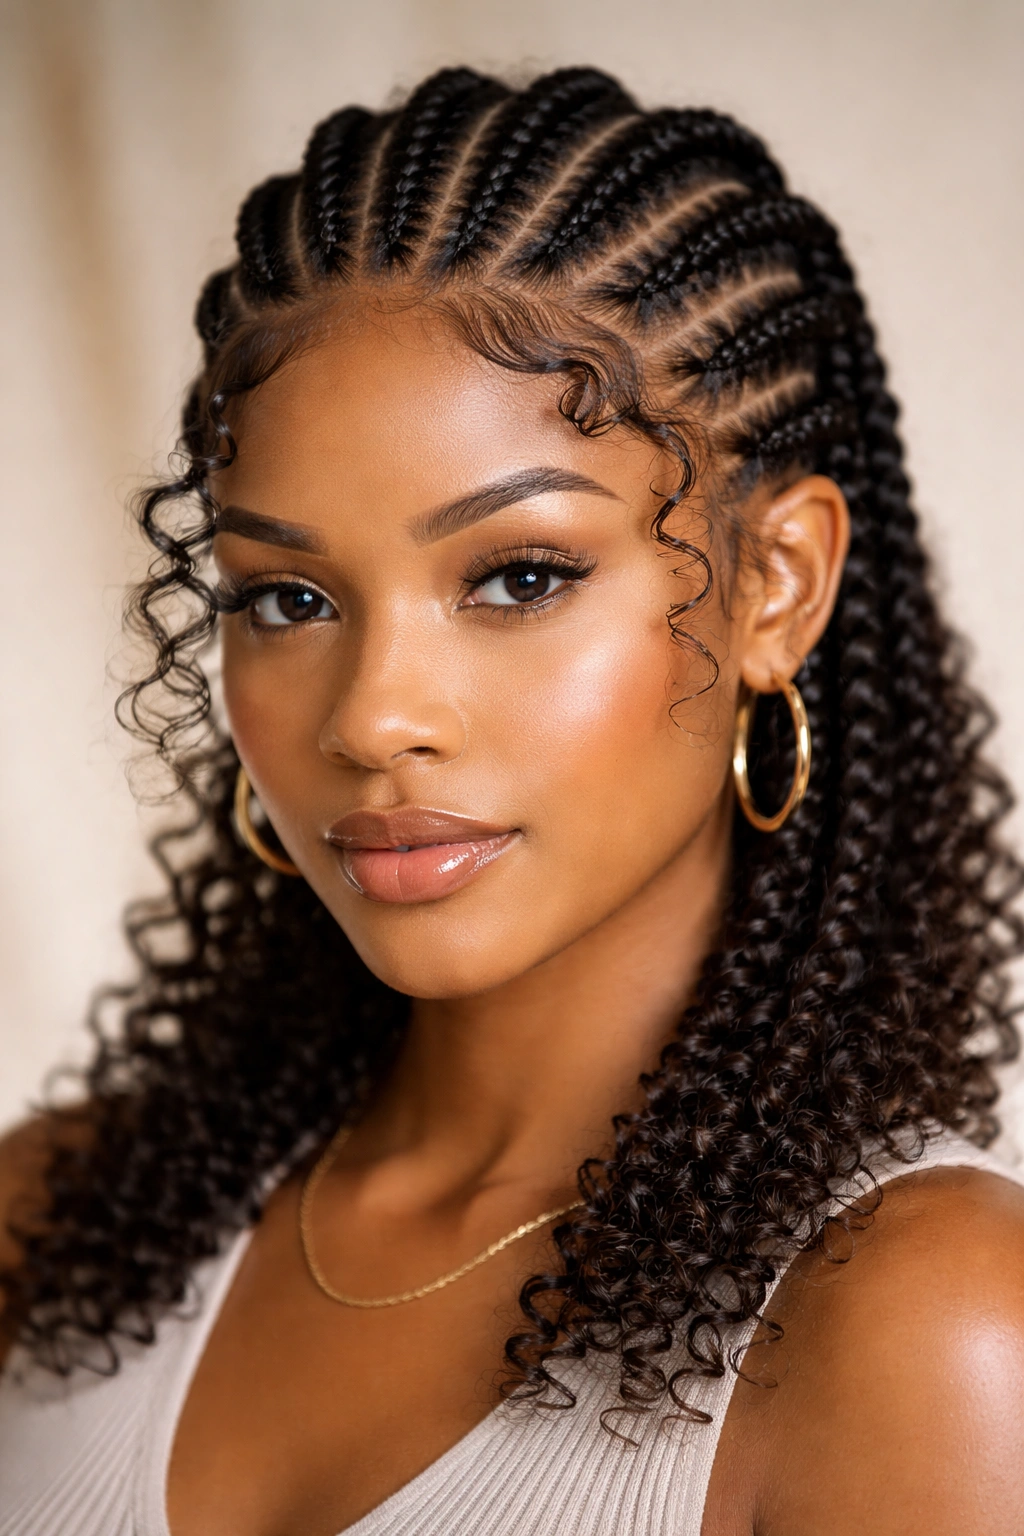
Also called “loose cornrows” or “soft edges,” this style braids most of your hair into tight, defined cornrows while leaving the hair at your edges loose and curly. The contrast between the structured braids and the natural, textured edges is visually stunning and creates a softer aesthetic than fully braided styles. This approach offers practical benefits too—you’re protecting most of your hair while giving your edges a break from constant tension. For people with finer edges or those who’ve experienced edge thinning, this style is a compassionate option that still delivers the protective styling benefits of cornrows without sacrificing edge health.
The Aesthetic and Maintenance Balance
The curly edges add softness and femininity while the cornrows maintain that sleek, intentional look. You get visual interest from the texture contrast, and the style photographs beautifully. Maintenance-wise, this is where you win—your edges need only light moisturizing and you can style them differently day to day without disturbing the braids. Some days you might smooth them into a sleek baby hair pattern with edge control, other days you let them coil naturally. The flexibility here is genuinely refreshing.
Installation and Care Details
- Installation typically takes 2 to 3.5 hours because the braider must create a clean demarcation between the braided section and the loose edges
- Your edges need moisturizing 2-3 times daily with a lightweight product—this is more maintenance than fully braided styles, so be realistic about commitment
- The style lasts 3 to 5 weeks if you’re careful with your edges, though the braids themselves hold longer
- Sleeping is easier because you don’t have to protect the entire head—just the edges need a silk bonnet or scarf
- This works best on hair that’s at least 4-6 inches long so the edges have enough length to coil and show texture
Worth knowing: If your edges are sensitive or you’ve had tension alopecia before, ask your braider to start the cornrows slightly further back from your hairline—you’re not sacrificing the look, just protecting your edge integrity.
3. Feed-in Cornrows
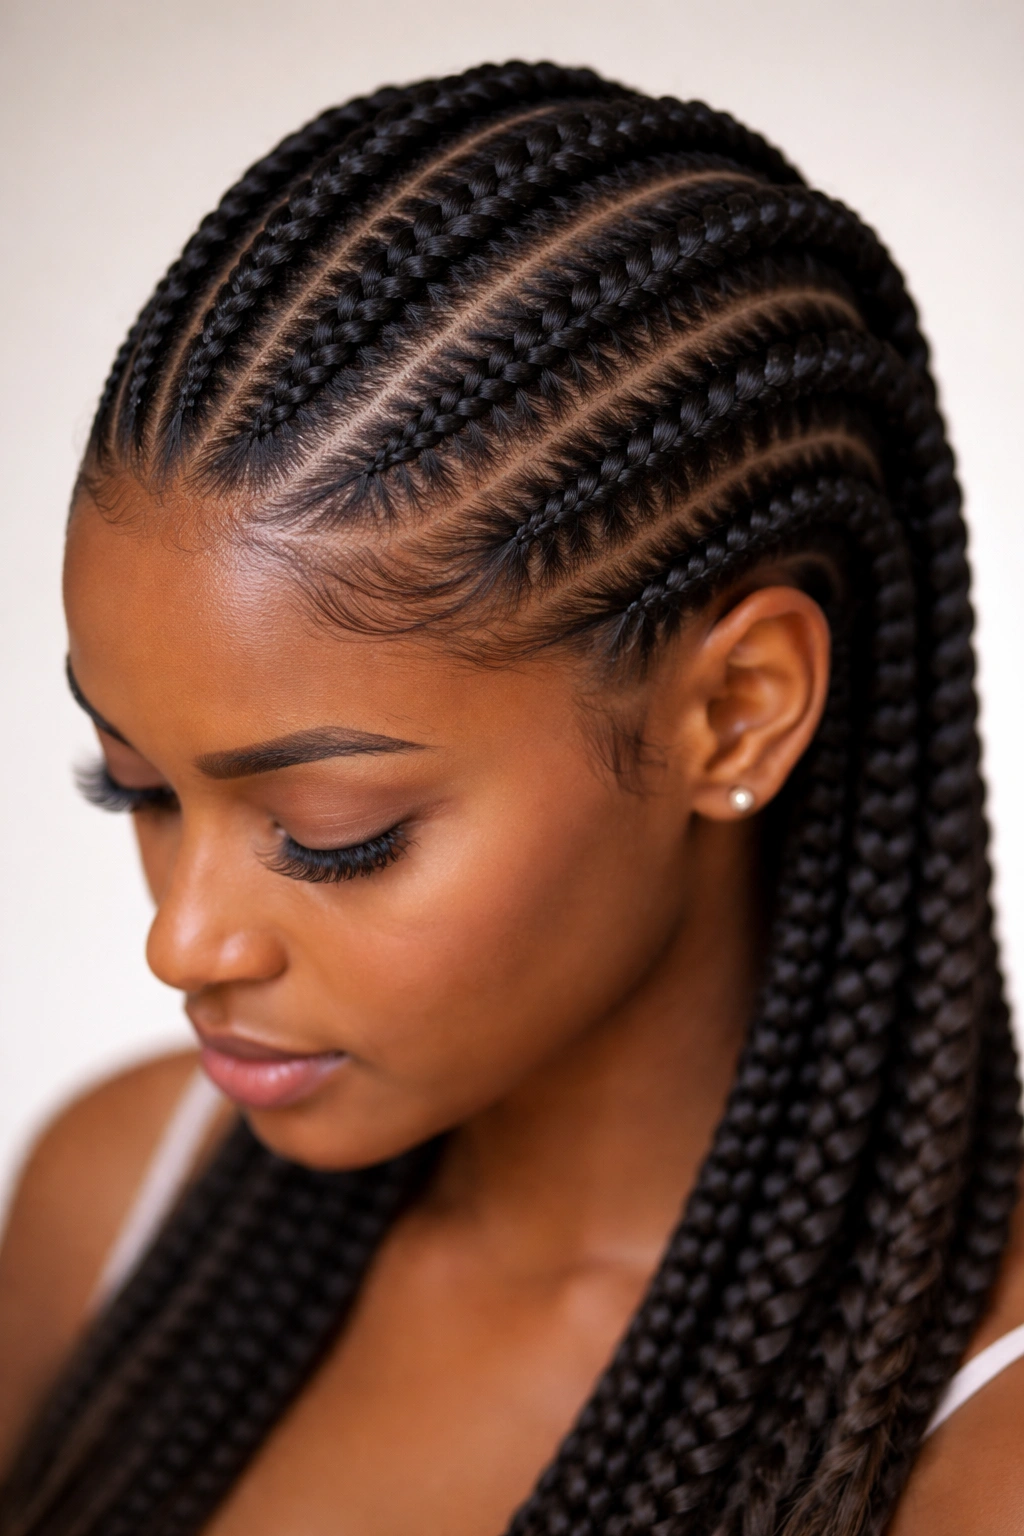
Feed-in braiding is a technique where the braider gradually incorporates synthetic hair (or sometimes your own hair if you have enough length) into the cornrow as they work, creating a braid that looks thinner at the root and gradually gets fuller. The result is a cornrow that appears to be growing directly from your scalp with minimal tension right at the hairline. This method has revolutionized protective styling because it dramatically reduces root tension compared to traditional box braids or basic cornrows. If you’ve worried that braided styles would damage your hair or edges, feed-in cornrows represent a genuinely gentler alternative.
Why This Technique Changes Everything
The genius of feed-in cornrows is that they protect your edges while still creating the sleek, defined look of cornrows. The tension is distributed more evenly across the length of the braid rather than concentrated at the root. You’re essentially letting the synthetic hair do some of the heavy lifting, which means your natural hair isn’t bearing the full weight. For people with any history of tension-related damage or those with naturally fine or delicate strands, this is the compassionate choice.
Technical Details and Expectations
- Installation takes 2.5 to 4 hours because the feed-in technique requires precision and patience—it’s not rushed work
- You’ll use synthetic hair (usually Kanekalon or a similar fiber) which adds minimal weight and integrates beautifully with natural texture
- These typically last 4 to 6 weeks and often look better in weeks 2-3 as the style settles
- Moisturizing your natural hair is easier because you can access the roots without disturbing the braids
- The style requires a braider with genuine skill—this isn’t a budget option, but the investment protects your hair
Insider note: Ask your braider to use the thinnest size synthetic hair available for your feed-ins if you have fine hair or sensitive edges—thicker hair looks intentionally textured rather than naturally grown.
4. Cornrow Crown
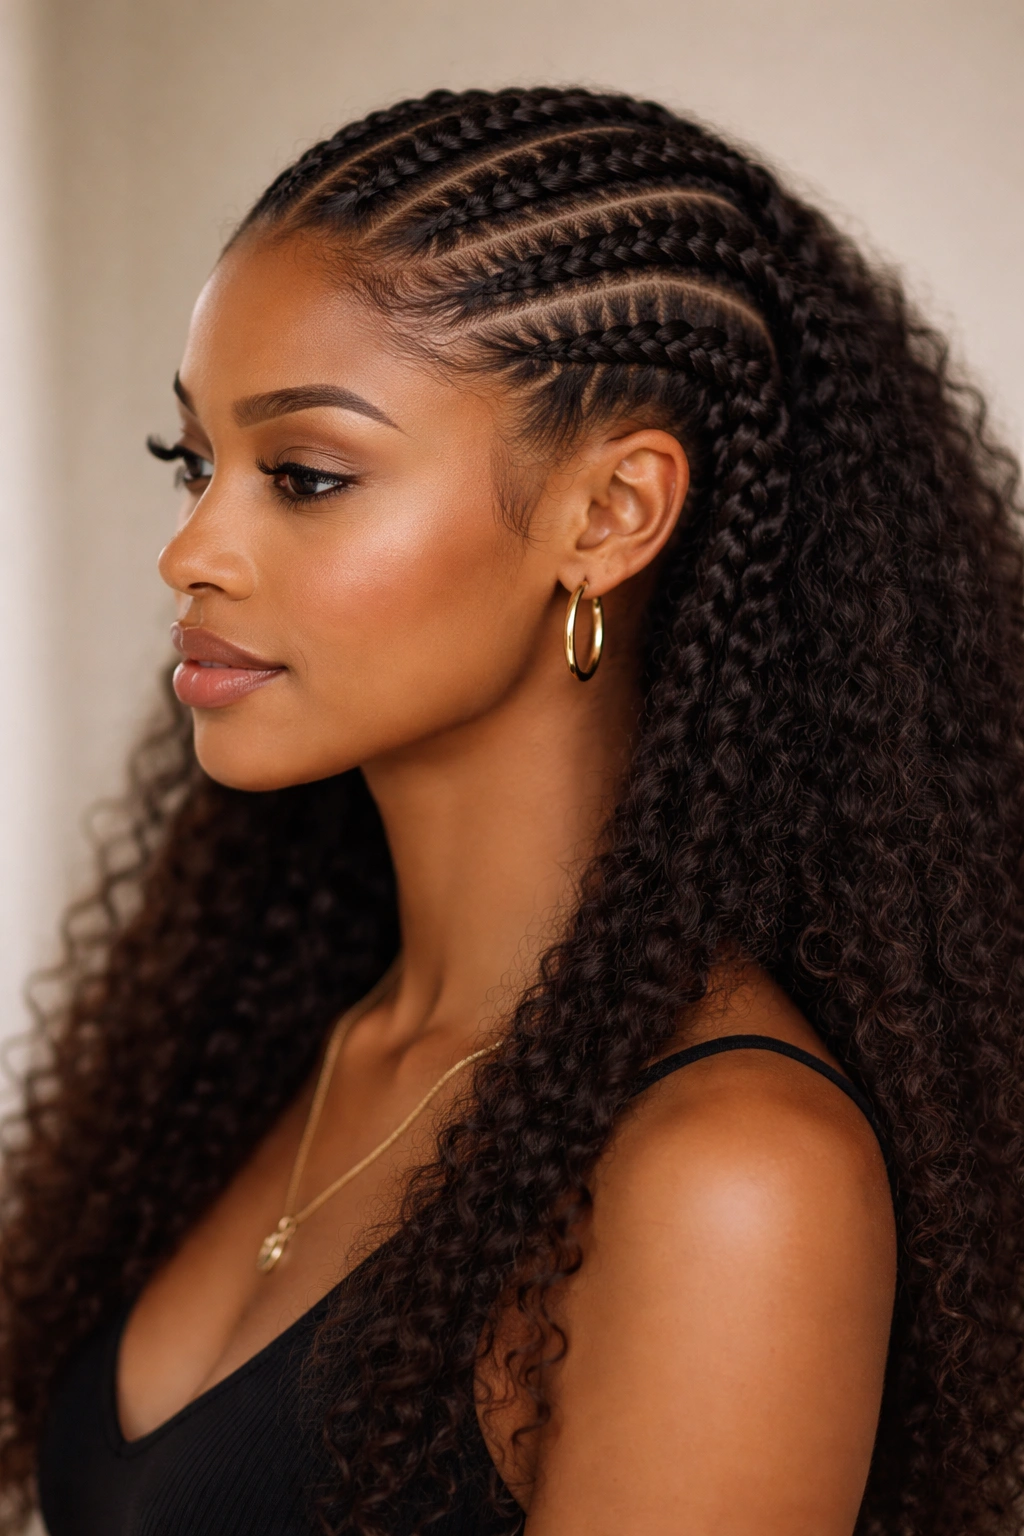
Picture cornrows that start at one temple, curve across the crown of your head like a halo or headband, and end at the opposite temple, leaving the rest of your hair down. This is the cornrow crown, and it’s genuinely one of the most flattering protective styles available. You get the protective benefits of braiding your hair while maintaining the fullness and length of your natural texture down your back. The cornrows create a sophisticated, intentional frame for your face while your loose hair below shows off your curl pattern and length.
Who This Style Serves Best
This works beautifully for people who want protective styling without the commitment of full-head braids, those with longer hair who want to showcase length, and anyone who prefers a softer aesthetic to fully braided styles. The crown cornrows don’t feel as heavy as full braids, and you can still put your loose hair into ponytails, buns, or puffs for variety. If you’re transitioning between natural hair phases or building length, the crown style lets you protect your crown area—typically the oldest and most fragile part of your hair—while keeping the younger growth at the ends in its natural state.
Styling and Longevity Considerations
- Installation takes 1 to 2 hours since you’re only braiding the crown section
- The cornrows last 3 to 5 weeks while the loose hair underneath can be styled freely without affecting the braids
- You can switch up the loose hair daily—straightened one day, in loose waves the next, in a puff the day after
- Sleeping is comfortable since only the crown is restrained and you can maintain the loose hair with a bonnet
- This style works on hair as short as 5-6 inches for the crown and longer for the loose sections
Pro tip: Apply deep conditioning treatments to your loose hair while wearing the crown cornrows—you’re protecting your edges and crown while actively nourishing the rest of your hair.
5. Side-Swept Cornrows
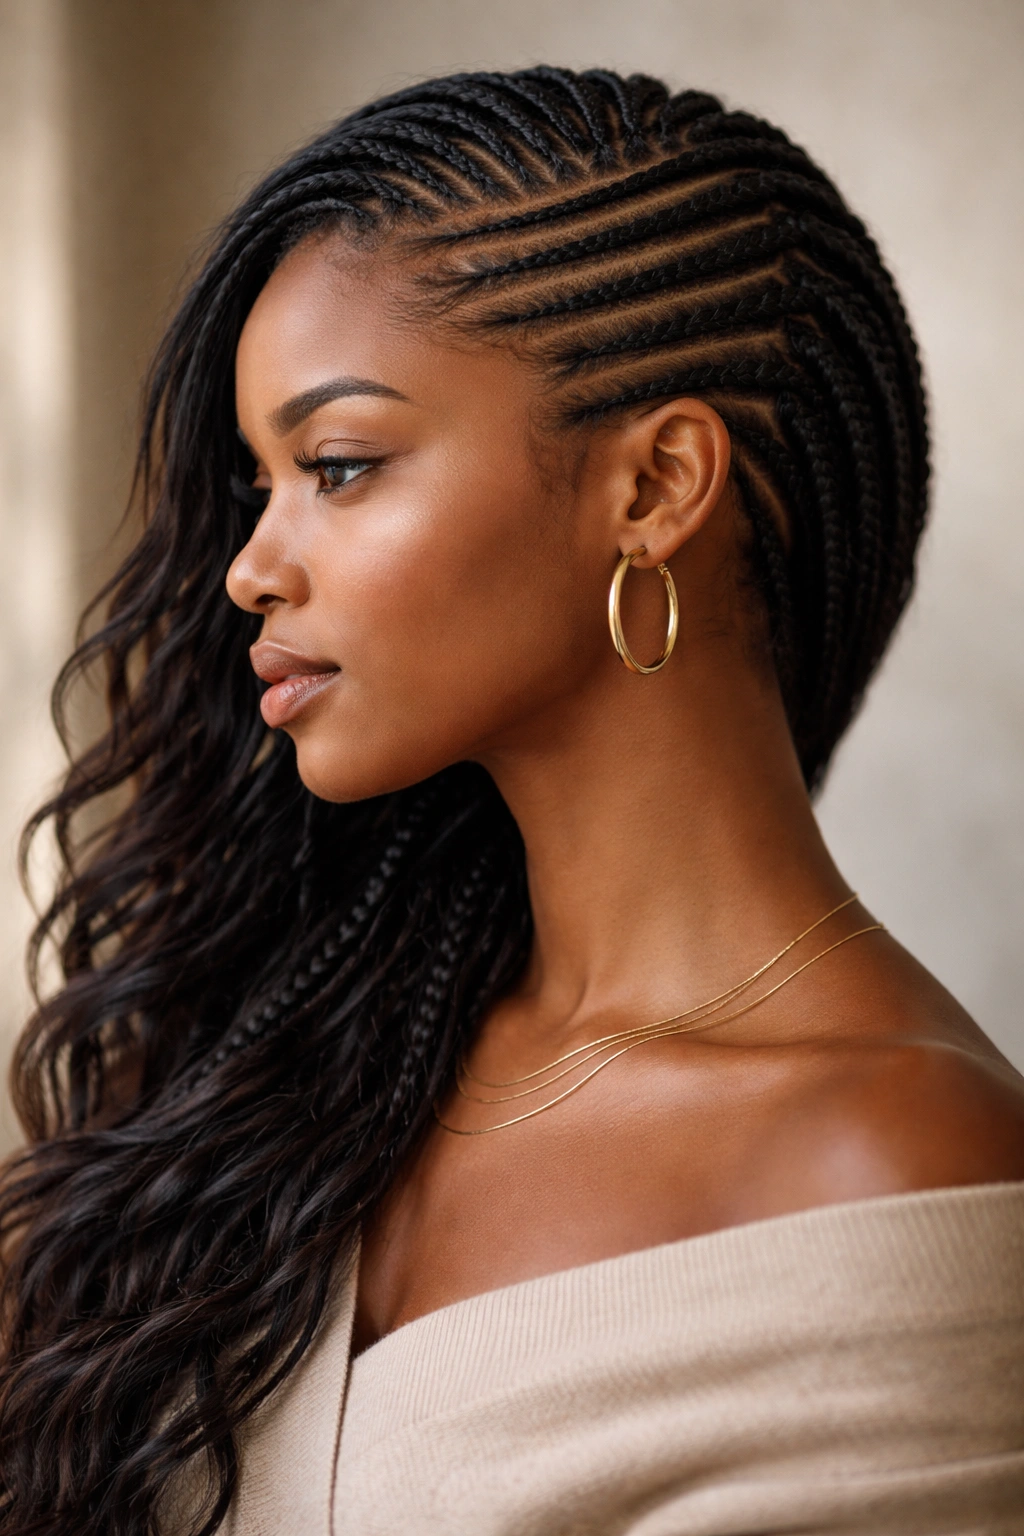
Rather than rows running straight back or following the crown, side-swept cornrows angle diagonally from one side of your head toward the opposite side, creating a dynamic, artistic pattern. The cornrows might start thick and full on one side, then taper toward the opposite temple. The effect is sophisticated and works for both casual and formal occasions. Side-swept styles are particularly flattering on rectangular or square face shapes because the diagonal lines soften angular features. The asymmetrical design adds visual interest and shows off your personal style more boldly than straight-back rows.
The Visual Impact and Versatility
Side-swept cornrows photograph beautifully and read as intentional, stylish, and creative. The diagonal pattern naturally draws attention toward whichever side you want to emphasize—you can sweep toward your best angle if that matters to you. The style works with loose curls at the ends, with a bun pulled to one side, or with half your hair down and half pulled back. You’re not locked into one look; you can restyle the loose sections daily while keeping the protective braids intact.
Installation Complexity and Care
- Installation takes 2 to 3.5 hours because the diagonal pattern requires careful planning and precise sectioning
- Your braider needs to map out the design before starting to ensure even spacing and flow
- These last 3 to 5 weeks depending on how tight your braids are and how well you care for your scalp
- Sleeping requires a silk bonnet to protect the pattern and prevent flattening
- Moisturizing follows the same pattern as other cornrow styles—2-3 times weekly for your braids and daily for exposed edges
Worth knowing: The side-sweep pattern means one side of your scalp experiences more tension than the other—ask your braider to braid slightly looser on the heavier side to keep things balanced.
6. Cornrows into Bun
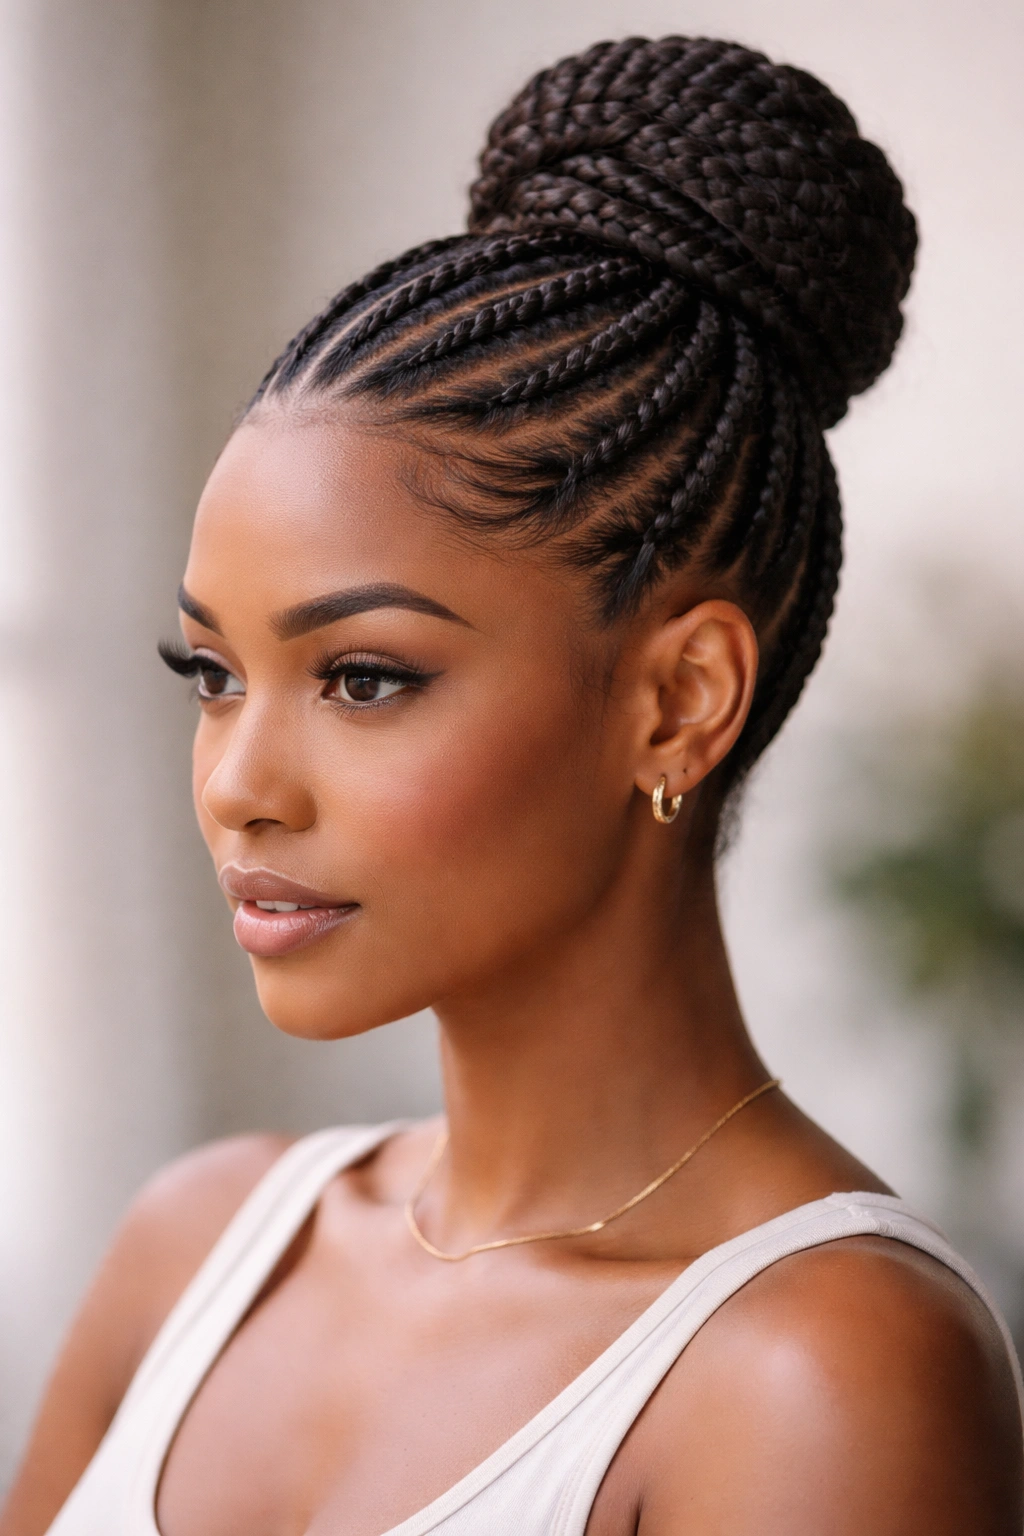
This style cornrows your hair from your hairline toward the crown, then gathers the loose hair at the crown into a bun. You’re combining protective styling with a polished, unified look. The cornrows create structure that makes the bun sit perfectly and look intentional, while the bun itself collects the length and shows off your natural curl pattern. This is a standout style for work settings, events, or anyone who wants something more formal than loose cornrows but less visible than full-head braids.
Why This Combo Works Strategically
The bun on top of cornrows creates multiple benefits: your edges and crown get protection from the braids, your length gets showcased in the bun, and the overall look is polished without being severe. The cornrows create a stable base that keeps the bun positioned perfectly all day—it won’t slip or fall flat the way a bun can when your hair is loose. If you have a lot of hair, the bun becomes voluminous and beautiful; if you have finer hair, the bun still reads as intentional and full because it’s anchored by the cornrows.
Practical Application Details
- Installation takes 2 to 3 hours for both the cornrows and the bun
- The cornrows typically run from your hairline toward the crown where they meet the bun’s base
- This style lasts 3 to 5 weeks with the bun staying fresh-looking longer than loose styles
- You can vary the bun daily—tight and smooth some days, loosened and softened on others
- Sleeping means laying your head on a silk pillow to protect both the braids and the bun shape
- This works best on hair with at least 6-8 inches of length so the bun has enough hair to appear full
Pro tip: Secure the bun with a silk or satin scrunchie rather than elastic bands—it reduces breakage and friction against your natural hair.
7. Zig-Zag Cornrows
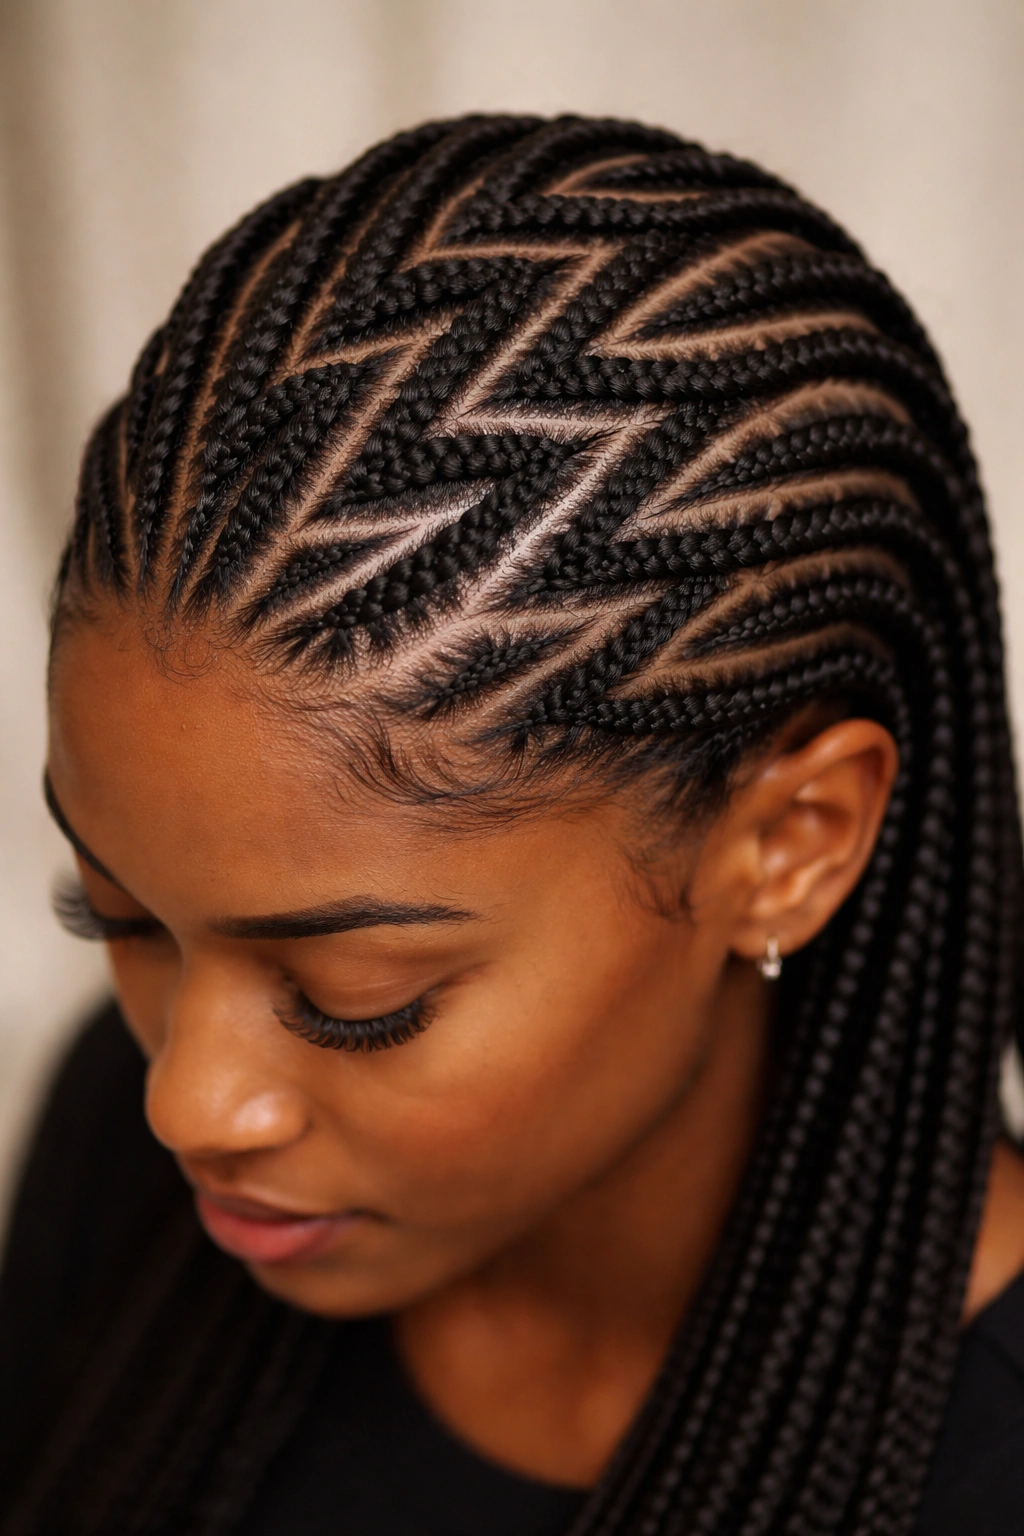
Instead of cornrows running straight or gently curved, zig-zag cornrows follow a sharp, angular back-and-forth pattern across your head. This creates a geometric, artistic look that reads as deliberately stylish and creative. The zig-zag pattern is visually striking and creates optical interest that draws attention to your braiding skill and personal aesthetic. This style is perfect for people who want their cornrows to be a statement—not just protective styling, but actually a feature of their look.
The Artistic and Practical Sides
Zig-zag cornrows serve both aesthetics and protection. Visually, they’re undeniably cool and show personality. Practically, the pattern distributes tension more evenly across your entire scalp compared to straight-back cornrows, because the diagonal changes give different areas brief moments of less intensity. The style also works beautifully with accessories like cowrie shells, gold cuffs, or decorative beads woven into the braids.
Technical Considerations and Timeline
- Installation takes 2.5 to 4 hours because the pattern requires precise mapping and careful execution
- Your braider should create a visual guide or blueprint before starting so the zig-zag pattern is even and symmetrical
- The pattern works best with 5-7 rows running zig-zag across your head
- These typically last 4 to 6 weeks since the tight geometry keeps everything locked in place
- The style suits all hair types and textures equally well—the pattern looks good on tight coils, loose waves, or anything between
- Moisturizing is straightforward—spray your braids 2-3 times weekly and focus on your scalp
Worth knowing: Zig-zag patterns look even more dramatic in smaller, tighter cornrows—ask your braider to create thinner rows if you want maximum visual impact.
8. Cornrows with Beads
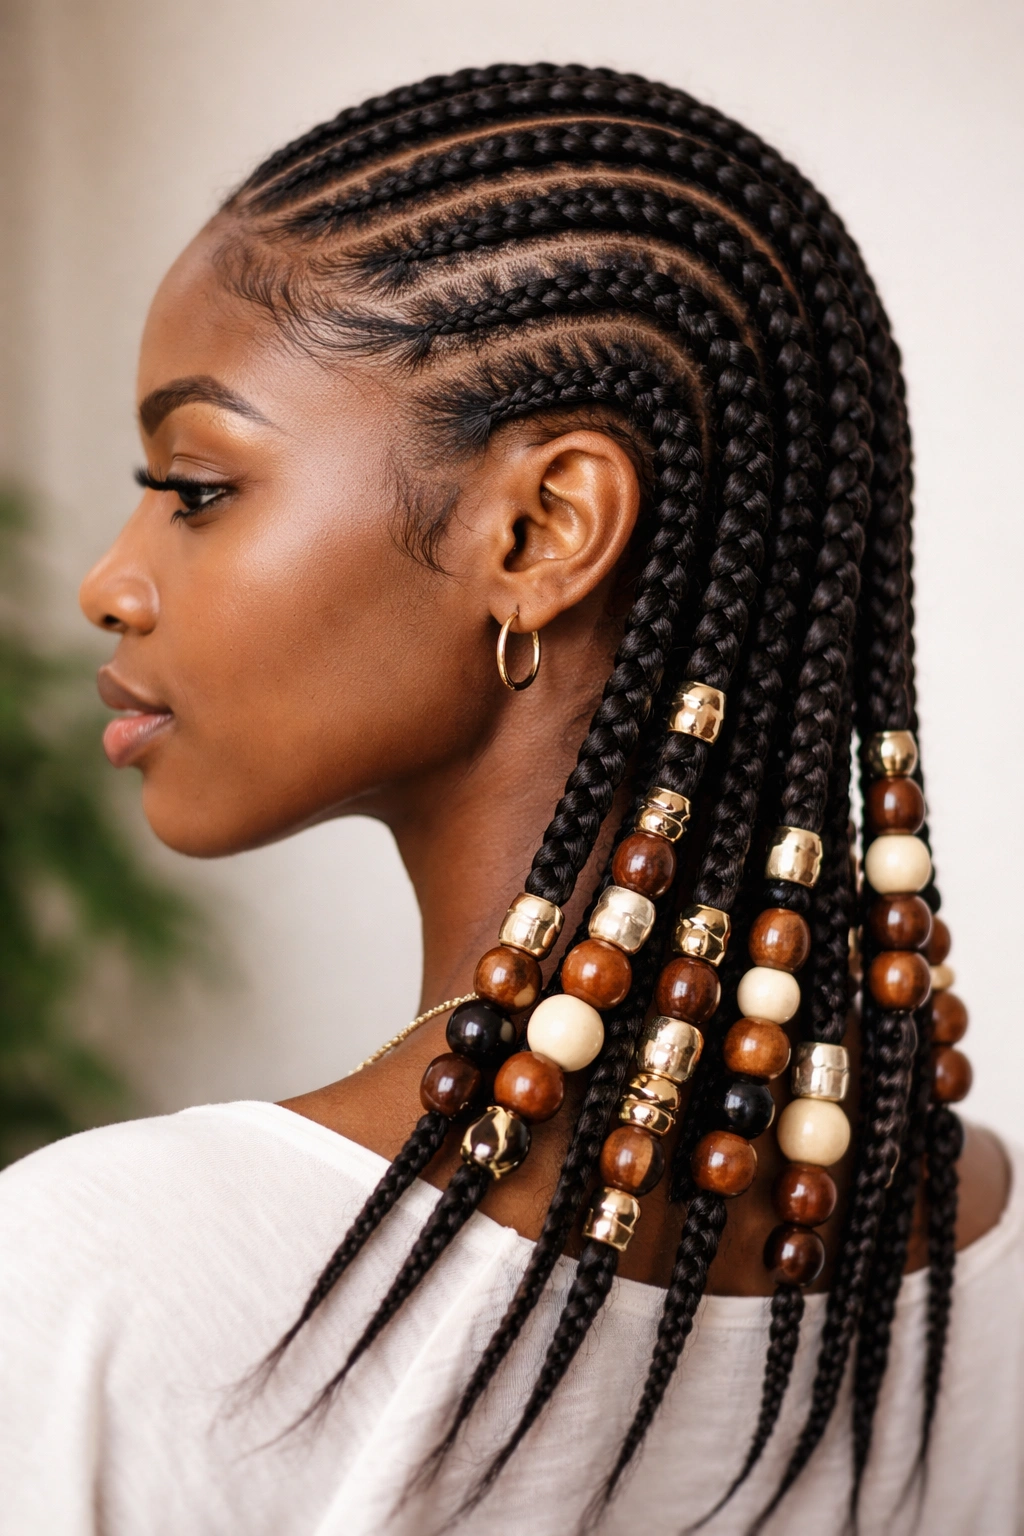
Adding beads to your cornrows serves both aesthetic and practical purposes. Wooden beads, metal cuffs, gold tubes, or colorful acrylic beads can be slid onto the ends of your braids or threaded throughout, creating a finished, intentional look. Beads add weight to the braid ends, which can actually help the braids hold their shape longer. Visually, beads transform cornrows from a simple protective style into a genuinely decorative statement. This is the version of cornrows that feels celebratory and creative while still offering full protective benefits.
The Aesthetic Possibilities
Beads open up endless creative directions. You might choose natural wood beads for an earthy vibe, gold or silver cuffs for elegance, colorful acrylic beads for playfulness, or a mix of metallic and natural beads for contrast. You can match your beads to your clothing, your jewelry, or simply your mood. The beads also serve a practical function—they prevent the loose ends of your braids from unraveling, which extends the lifespan of the style. Some people find that beaded braids feel more finished and intentional than plain braids, which adds to the overall appeal.
Beading Process and Maintenance
- Beads are typically added during installation though they can also be added later by sliding them onto completed braids
- Installation with beads takes 3 to 4 hours since the braider must stop and secure a bead after each braid is complete
- You’ll need beads with holes large enough for your synthetic or natural hair to pass through multiple times
- These styles last 4 to 6 weeks thanks to the structural support the beads provide
- Sleeping is comfortable—just lay your head on a silk pillowcase to prevent snagging
- Beads stay in indefinitely unless they crack or you choose to remove them
Insider note: If you choose metal beads, make sure they’re not so heavy that they pull uncomfortably on your braids—the weight should feel secure, not painful.
9. Cornrows into Ponytail
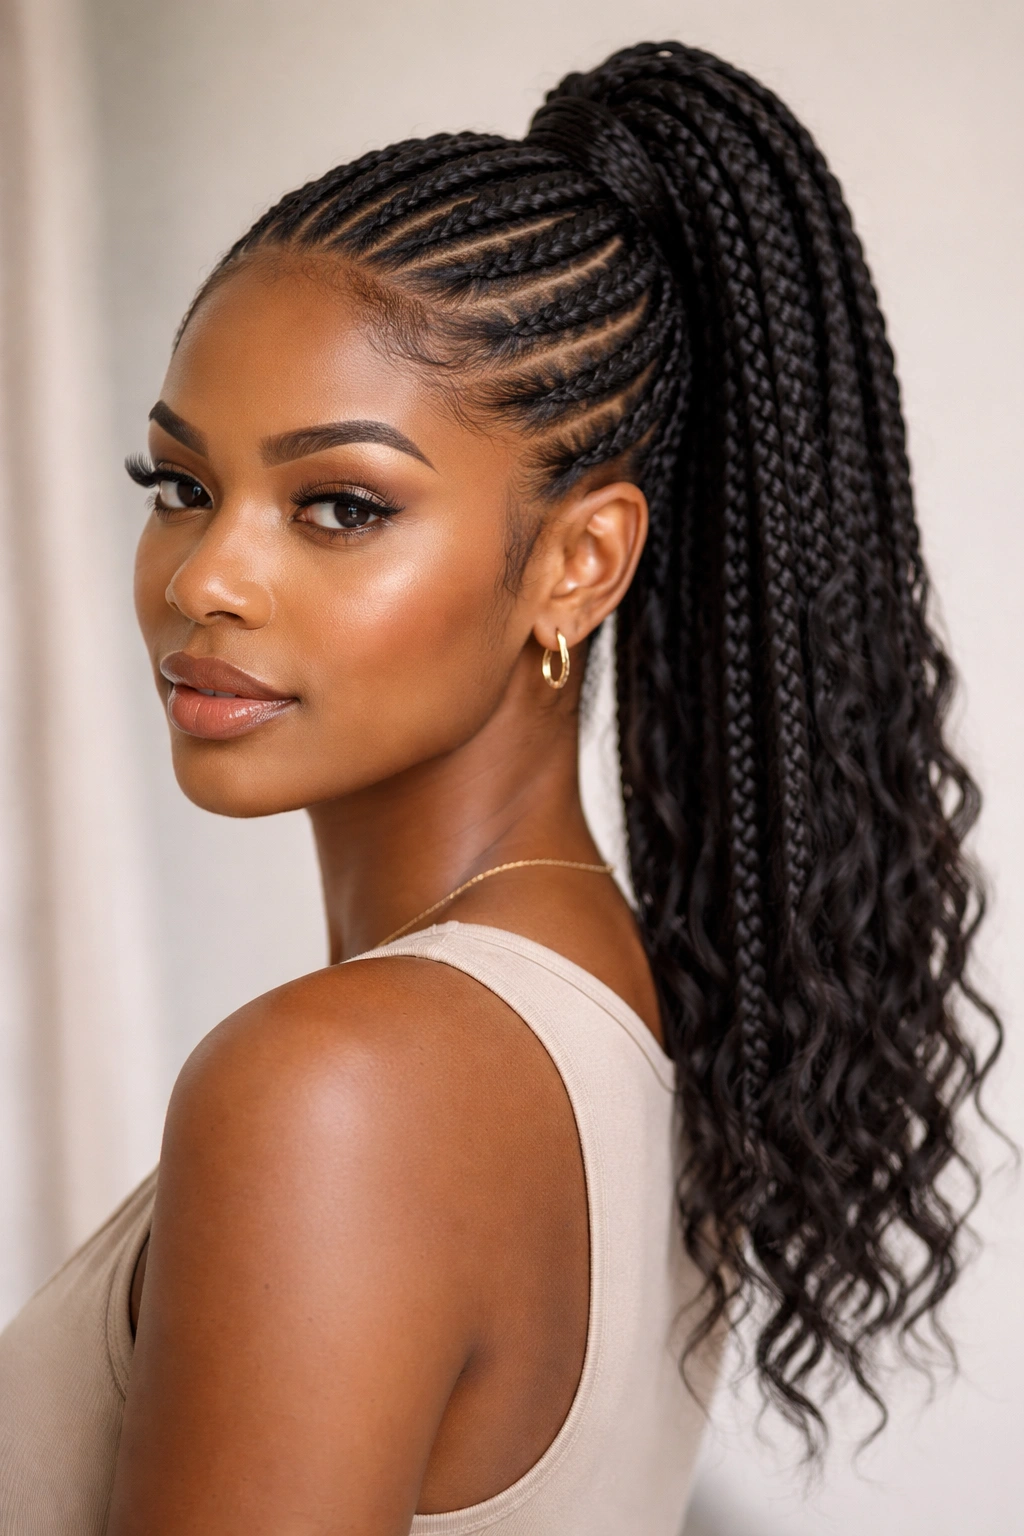
This style gathers your entire head into cornrows that all flow toward the crown or the nape of your neck, where they’re collected into a high or low ponytail. The result is a sleek, unified look that’s protective, stylish, and practical. The cornrows create a smooth, secured base that keeps the ponytail positioned perfectly and looking intentional. This style works beautifully for active situations—workouts, sports, or jobs where you need your hair completely off your face and neck.
Why This Combination Excels
Cornrows into a ponytail eliminate the need for tight elastic tension at your hairline because the cornrows are already holding everything in place. Your edges get protected by the braiding, your hair is fully contained and off your body, and you don’t have the tightness of a full-head braid. The style can be worn high and playful or low and sophisticated depending on where you gather the ponytail. You can loosen the ponytail slightly to soften the look, or keep it sleek and tight for maximum polish.
Styling Duration and Longevity
- Installation takes 2.5 to 3.5 hours depending on how many cornrows you want
- The ponytail can start anywhere—at the crown for a high pony, at the nape for a low style, or at the base of your skull for a mid-height option
- These last 4 to 6 weeks with the ponytail staying fresh longer if you don’t sleep with your head on it
- You can switch the ponytail’s position daily without touching the cornrows
- Moisturizing follows standard cornrow care—2-3 times weekly for the braids
- This works beautifully on all hair lengths as long as you have enough length to gather into a functional ponytail
Pro tip: Use a silk or satin scrunchie at the base of your ponytail to reduce friction and breakage where the ponytail gathers.
10. Double-Sided Cornrows
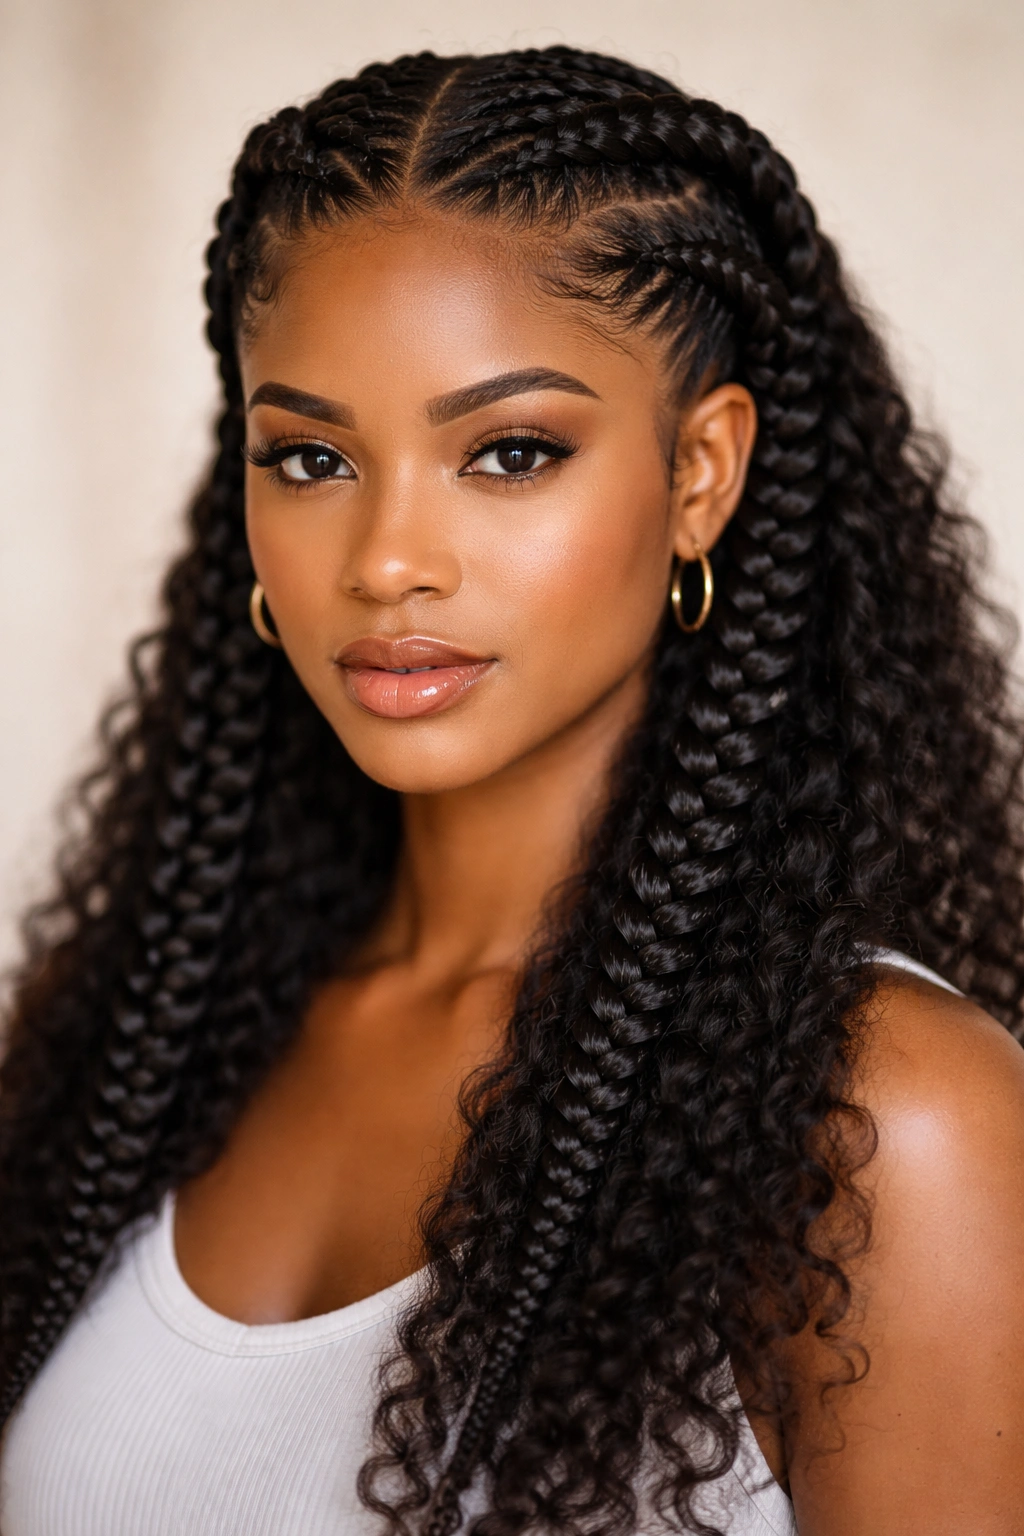
Double-sided cornrows refer to two thick, prominent cornrows running down either side of your head from your hairline back toward your crown or nape. Sometimes the loose hair in the middle is left down, sometimes it’s gathered into the cornrows at the crown, and sometimes it’s braided into a third row or pulled into a bun. This style is iconic and works for virtually every face shape and hair texture. The two side cornrows frame your face beautifully, create immediate visual interest, and offer solid protective benefits without requiring your entire head to be braided.
The Versatility and Face-Framing Power
Double-sided cornrows work for casual everyday wear and formal occasions. They frame your face without concealing it, showing off your features and your curls at the top. You can wear your hair loose and voluminous down the middle and back, or you can gather it into additional braids or a bun for a fully unified look. The symmetrical design is inherently flattering and works particularly well on people with round, oval, or heart-shaped faces because the vertical lines create visual balance.
Installation and Style Timeline
- Installation takes 1.5 to 2.5 hours since you’re only braiding two prominent rows
- The rows start at your temple or just behind your hairline and run toward your crown
- These typically last 3 to 5 weeks depending on how tight you braid them
- The middle section can be styled freely daily—loose curls, straightened, twisted into small coils, whatever you want
- Sleeping requires protecting only the braids—use a silk bonnet or scarf
- This works beautifully on hair as short as 4-5 inches and looks equally stunning on longer lengths
Worth knowing: If you have a smaller or more delicate face shape, ask your braider to start the cornrows slightly further back from your temples rather than right at your hairline—this prevents the rows from overwhelming your facial features.
Final Thoughts
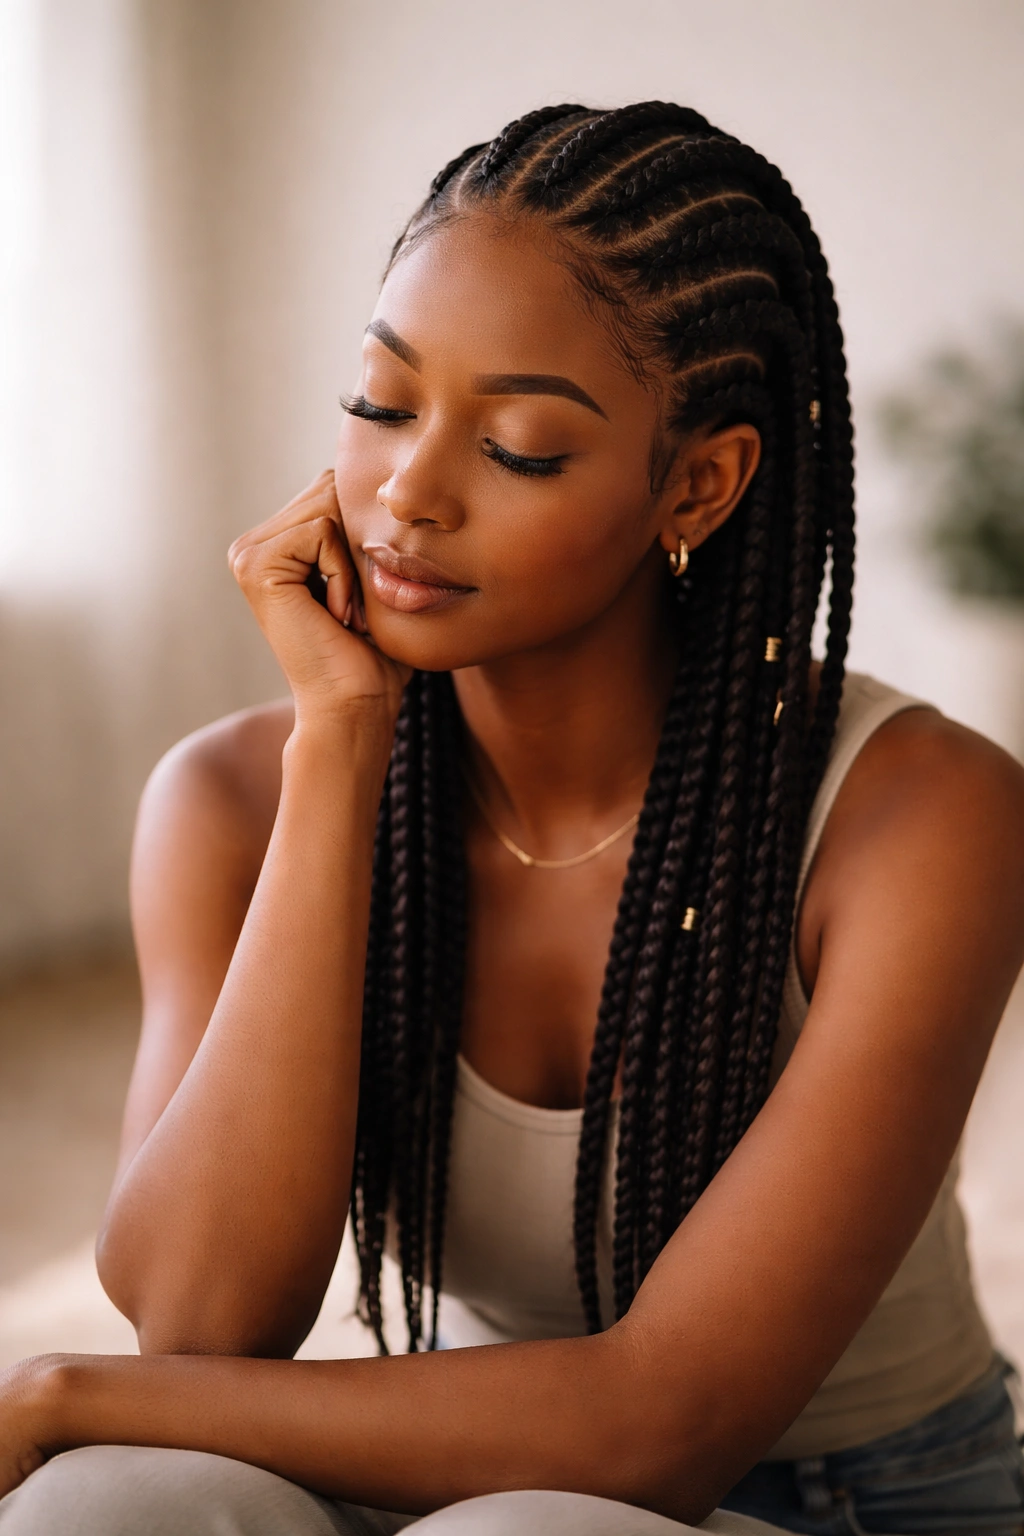
Cornrows represent one of the most protective, versatile, and beautiful styling options available for natural hair. Whether you choose classic straight-backs for their timeless appeal, feed-in cornrows for their gentleness on edges, side-swept rows for their artistic flair, or any of the other styles explored here, you’re making a choice that honors your hair’s health while expressing your personal style. The key to success with any cornrow style lies in three factors: choosing a braider who understands natural hair and tension management, committing to consistent scalp moisturizing and care throughout the duration of the style, and being honest with yourself about how much daily maintenance you’re willing to do for styles with loose sections.
Cornrows aren’t just a protective styling method—they’re a creative outlet, a cultural expression, and a practical solution that lets your natural hair grow stronger while you explore different aesthetics and aesthetics. The style you choose should feel good on your head, make you feel confident, and fit realistically into your daily life. When all three of those elements align, you’ve found your cornrow style.
