



Taking care of natural hair in little girls requires patience, the right techniques, and styles that are both adorable and protective. Afro hairstyles aren’t just about looking cute—they’re about celebrating textured hair while keeping it healthy, manageable, and strong from root to tip. When you choose the right protective styles and maintenance routines, your daughter’s hair can thrive and grow while looking absolutely beautiful every single day.
The challenge many parents face is finding hairstyles that actually work for their daughter’s specific hair type and texture, hold up throughout the week, and don’t require endless maintenance. You want something that protects the ends of her hair from breakage, reduces the need for daily styling (which can cause stress to her hair), and makes her feel confident and celebrated in her own skin. The good news is that there are so many creative, fun, and genuinely cute options out there—and most of them are easier to do than you might think once you understand the technique.
What makes a hairstyle work well for little girls is different from what works for adults. Her hair is still developing, her scalp is more sensitive, you want styles that won’t create tension or pull too tightly, and the style needs to be something she’ll actually keep in without constantly touching or unraveling it. We’re going to walk through ten hairstyles that check all of these boxes—styles that are protective, age-appropriate, genuinely adorable, and realistic for everyday wear or special occasions.
1. Butterfly Locs
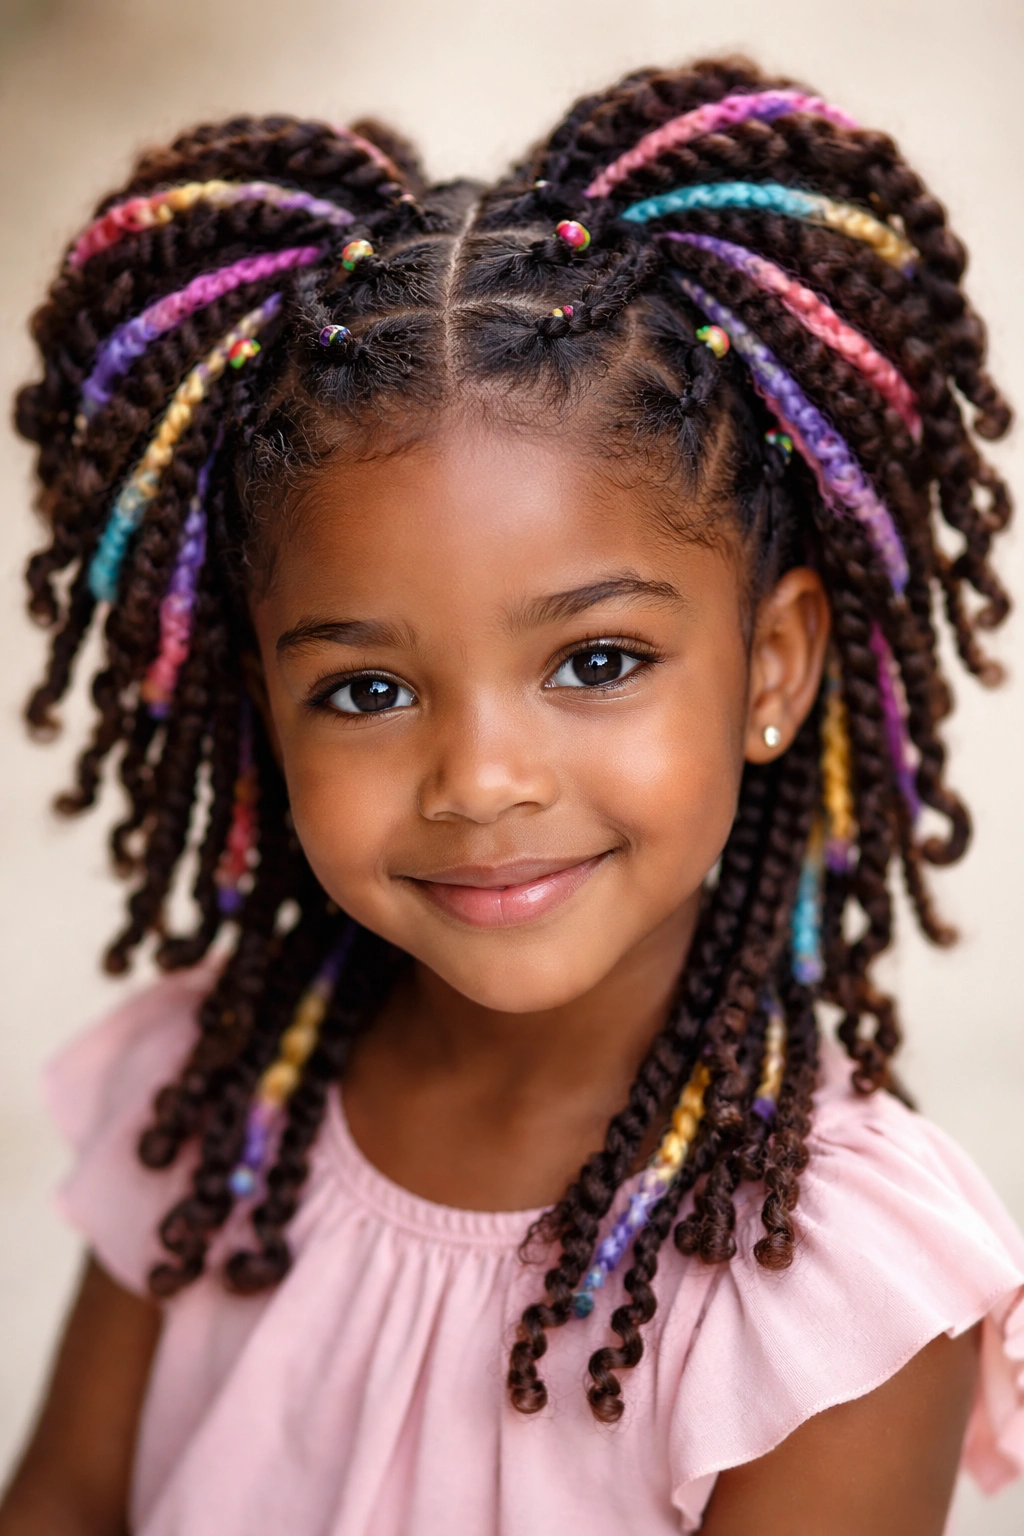
Butterfly locs are one of the most visually striking protective styles for little girls, and they’re becoming increasingly popular because they look incredible while genuinely protecting hair from damage. The name comes from the way the sections stick out from the head in a pattern that resembles butterfly wings—playful, bold, and absolutely eye-catching. What makes this style so special is that it combines the protective benefits of locs with a lighter, less permanent commitment than traditional locs, plus the added texture makes the style hold much better throughout the week.
How Butterfly Locs Work and Why They’re Protective
Butterfly locs involve wrapping individual sections of hair with yarn, thread, or colored string to create defined, textured strands that look dimensional and fun. The protective aspect comes from the fact that the ends of her natural hair are completely encased within the wrapping, so they’re not exposed to friction, breakage, or environmental damage. Because the locs are wrapped rather than braided, they create a softer, more relaxed look than traditional braids while still protecting every inch of her hair.
What You Need to Know Before Getting Started
- Preparation is everything: Start with clean, moisturized hair that’s been deep conditioned. Detangle thoroughly before creating sections—any knots will become exponentially worse once you start wrapping.
- Section size matters: Smaller sections (about the size of a pencil eraser) create finer, more delicate locs that suit little girls better than thick, chunky sections. Thinner sections also look more elegant and are easier for her to manage.
- Choose gentle wrapping materials: Yarn or thread works beautifully, but make sure it’s not so tight that it creates tension on her scalp or roots. If you use yarn, choose colors that complement her skin tone or match outfits she loves.
- The wrapping technique requires patience: The wrap should be snug enough to hold the section together but not so tight that you could see indentations in the strand. It’s a skill that takes practice—don’t get discouraged if your first few attempts aren’t perfect.
Pro tip: Butterfly locs typically last 4–6 weeks, making them an excellent protective style for the warmer months when you want to minimize daily heat styling and manipulation.
2. Box Braids with Beads
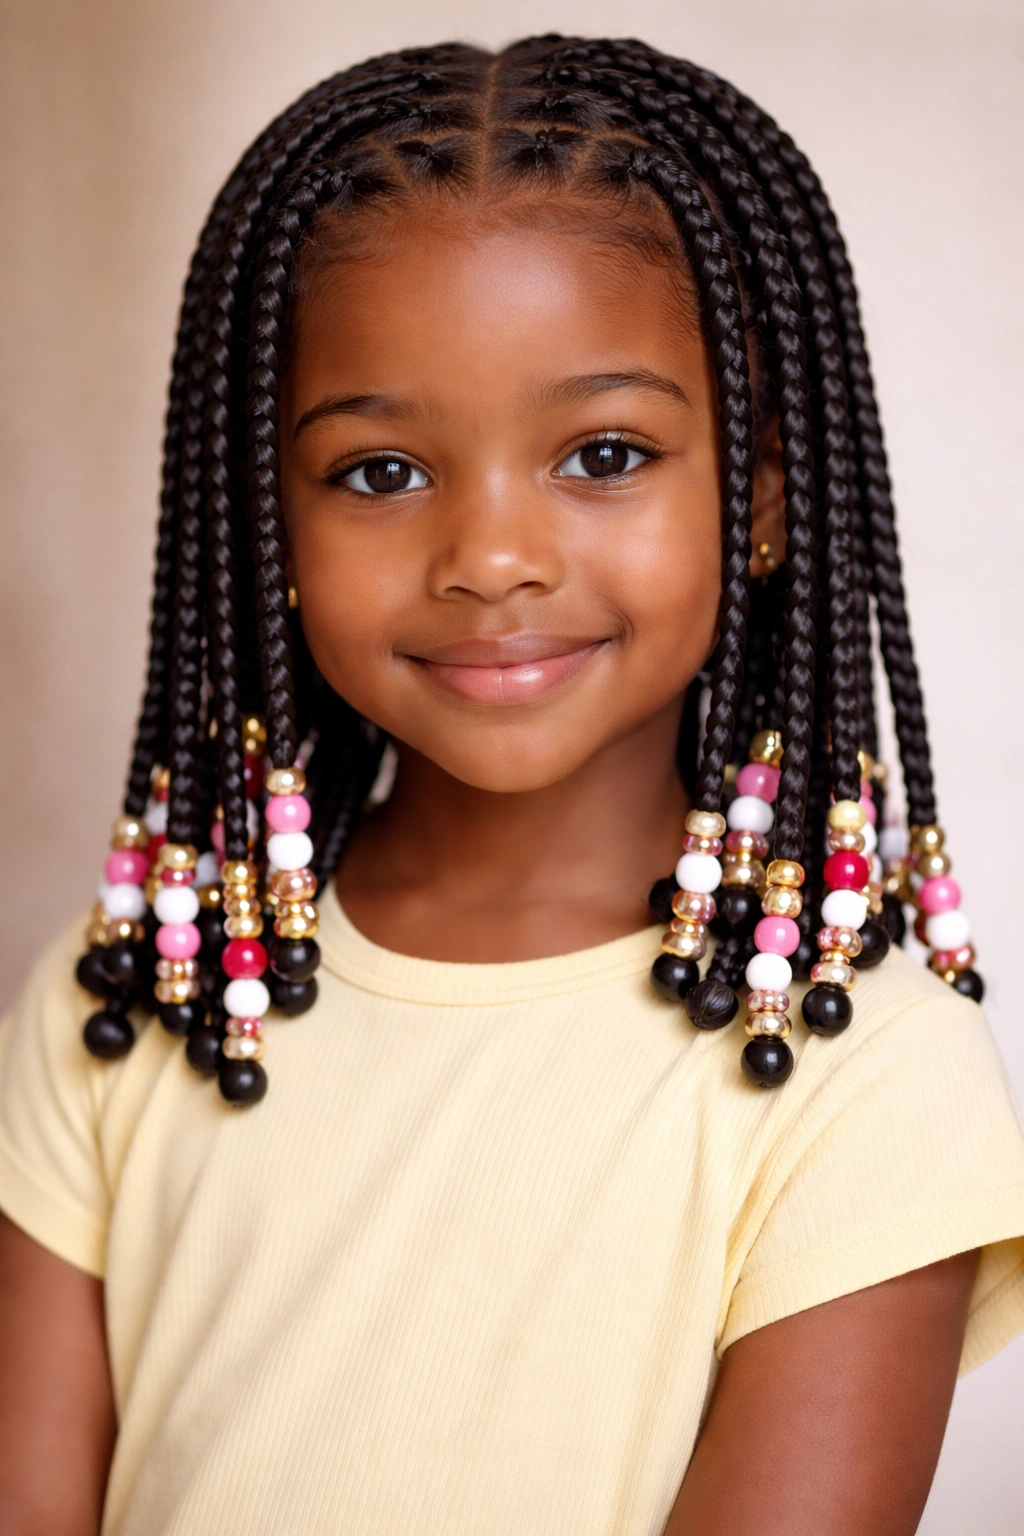
Box braids are a timeless protective style that’s been a staple in Black communities for generations, and for good reason. They’re versatile, genuinely protective, and when you add colorful beads to the ends, they instantly become a fun, celebratory style that makes little girls feel special and stylish. The beads serve both a practical purpose—they help secure the ends of the braids and prevent unraveling—and an aesthetic one, allowing for creative color combinations and play.
Why Box Braids Work So Well for Children
Box braids distribute the weight of the hair evenly across the scalp, which reduces tension on any one area and allows the hair underneath to rest and recover from daily styling. Because the braids are already “done,” there’s minimal manipulation throughout the week—she can wear them as-is without needing to restyle daily, which is huge for reducing breakage and stress to growing hair. The enclosed ends mean no split ends forming at the tips, and the protective barrier from the braid itself shields the hair from environmental exposure.
Customization and Style Options
- Bead choices transform the entire look: Glass beads, wooden beads, acrylic beads, or even metal cuffs all create completely different vibes. Mix metallic beads with natural wood, or go rainbow with multicolored acrylic beads.
- Placement flexibility: Beads don’t have to go on every single braid—you can do a pattern (every other braid beaded, or just a few accent braids). You can also place them at different lengths along the braid rather than only at the ends.
- Braid thickness options: Thin, delicate braids create an elegant, refined look; medium braids are the sweet spot for durability and manageability; thick braids make a bold statement but can be heavy on a young child’s head.
- Parting patterns: You can braid all the way across the head in straight lines, create curved parts, or do zigzag partings for extra visual interest.
Worth knowing: Box braids typically last 4–6 weeks if maintained well. Have your daughter sleep on a silk or satin pillowcase to prevent frizz, and refresh the edges with a light gel and toothbrush every few days to keep them neat.
3. Lemonade Braids
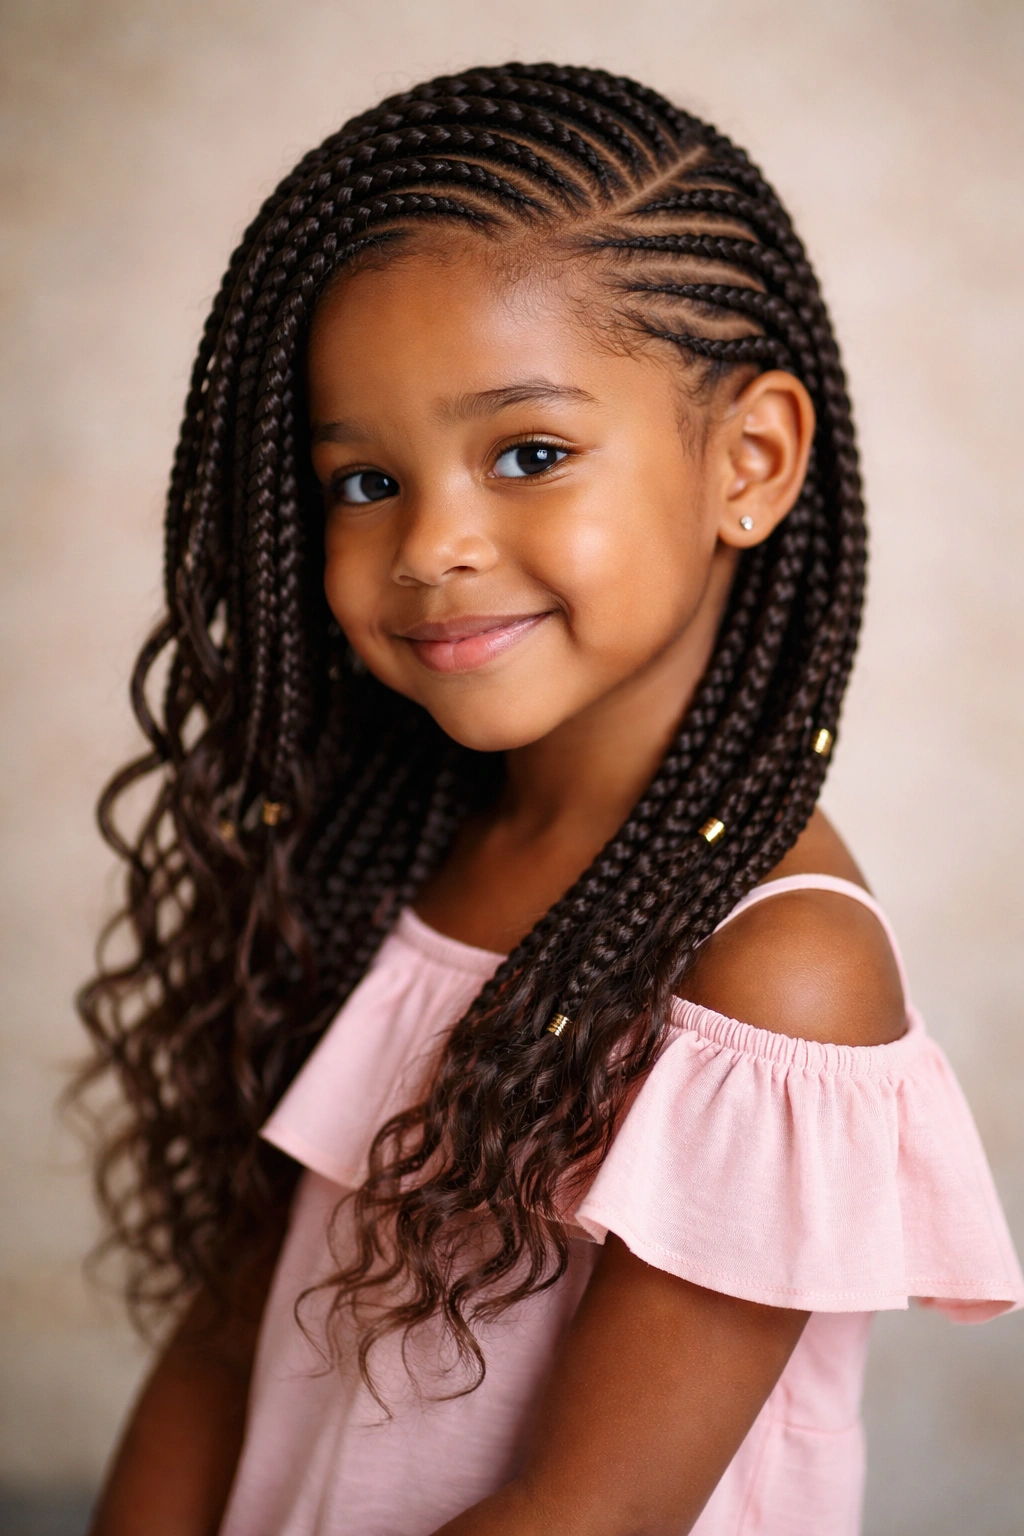
Lemonade braids are essentially the goddess of protective styles for little girls—they’re stunningly beautiful, manageable enough for parents to maintain, and they photograph like a dream. Named after Beyoncé’s iconic braided hairstyle, lemonade braids are cornrows that start at the scalp and continue down the side of the head in a curved or swooping pattern, typically ending with loose braided tails. What makes them different from traditional cornrows is the artistic, off-center placement and the way the loose ends create a softer, more romantic aesthetic.
The Visual Appeal and Protective Benefits
The style works because it’s genuinely protective—the cornrowed section keeps the majority of her hair tucked away and safe from damage, while the loose braided ends at the side create a playful, youthful look that feels less “formal” than a fully cornrowed head. The cornrows follow the natural growth pattern of the hairline, so they don’t create excessive tension on the edges (which is especially important for maintaining a healthy hairline in growing children). The combination of the sleek cornrow with the textured braid creates visual depth and dimension.
Installation Tips for Best Results
- Plan the pattern first: Decide whether you want one thick cornrow sweeping from one side, two parallel cornrows, or multiple cornrows in a pattern. Sketch it out with a comb on her dry hair first to make sure the placement looks balanced.
- Use a sturdy gel with hold: A gel with enough hold to keep the cornrow smooth all week is essential. Make sure it’s a product designed for kids’ hair and isn’t too heavy or drying.
- Keep tension moderate: This is critical for little girls. The cornrow should be firm enough to last the week without becoming loose, but not so tight that you can see tension at the roots or she complains of discomfort.
- Maintain the loose braids: The braided tails tend to frizz fastest since they’re exposed. Refresh them every 3–4 days with light moisture and a smoothing cream to keep them looking polished.
Insider note: These styles photograph beautifully and are perfect for special occasions, but they also work great for everyday wear because they’re low-manipulation once installed.
4. Bantu Knots
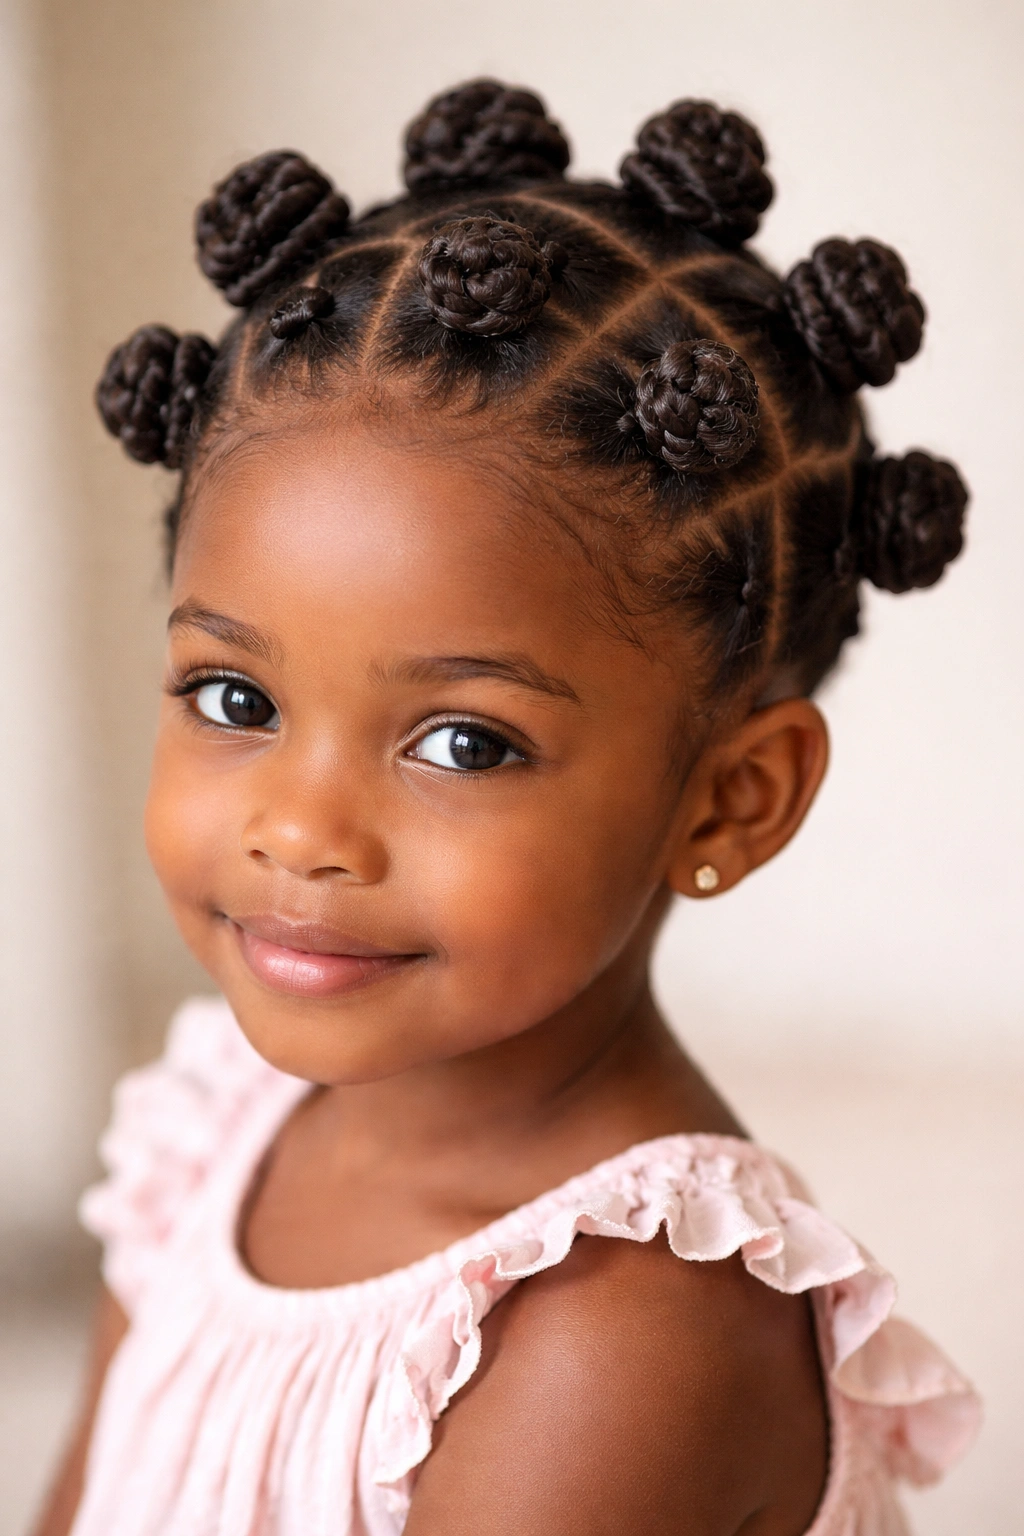
Bantu knots are an ancient protective styling technique that’s having a major resurgence because they’re genuinely practical, strikingly beautiful, and perfect for little girls who like to experiment and change their look frequently. A Bantu knot involves twisting a section of hair and then coiling it into a spiral knot, creating a dimensional, textured appearance across the entire head. The style is protective because it keeps the ends of the hair tucked safely inside the knot, away from environmental exposure and breakage.
Why Bantu Knots Are Perfect for Protective Styling
Each knot is essentially a little protective package for a section of hair. Because the ends are completely enclosed, they can’t split, fray, or experience dryness from air exposure. The twisting and coiling motion also doesn’t create the same level of tension that tight braiding can create, making it a gentler option for sensitive scalps. Plus, if you leave the knots in and let them dry completely, you can take them down and have beautiful spiral curls—essentially getting two hairstyles from one installation.
Creating Beautiful, Proportional Knots
- Section size determines the finished look: Smaller sections create delicate, detailed knots that suit little girls beautifully; larger sections create bolder, chunkier knots. For a child, aim for sections about the size of a large grape to a small marble.
- Twist tension affects the final appearance: A loose twist creates a softer, more relaxed knot; a tight twist creates a crisper, more defined knot. Both are beautiful—it depends on the look you’re going for.
- Placement and pattern: You can create knots all over the head in rows, scatter them randomly across the crown, or do a pattern (like knots only on top with straight sections underneath). Experiment to find what flatters her face shape.
- Moisturize before knitting: Make sure hair is clean and well-moisturized before creating the knots. Dry hair is more prone to breakage during the twisting process and won’t look as shiny and healthy in the finished style.
Pro tip: If you want the curl-out look after wearing Bantu knots, don’t take them out immediately after they dry. Wait 24–48 hours so the curls fully set, then gently unravel each knot from bottom to top to release beautiful, defined spirals.
5. Fulani Braids with Gold Cuffs
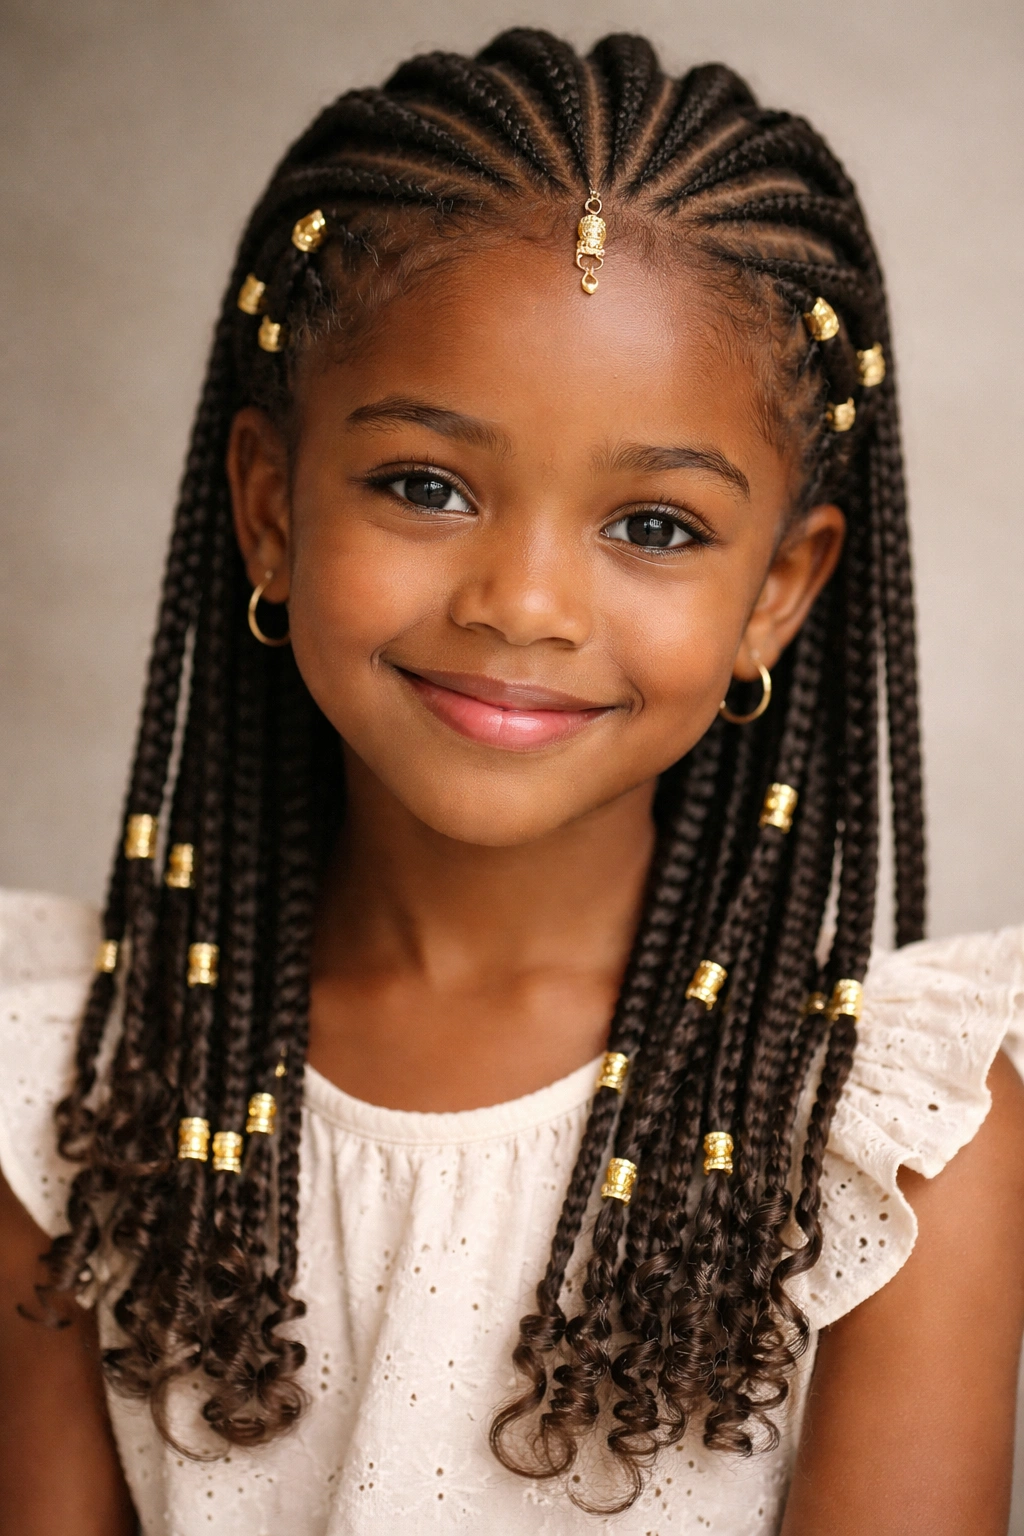
Fulani braids are a cultural style with roots in West African tradition, characterized by delicate cornrows running straight back from the face with decorative cuffs or rings woven throughout. The style is elegant, celebratory, and absolutely perfect for little girls who love a polished, sophisticated look. Gold cuffs add a luxe element that makes even an everyday style feel special and appropriate for dressing up.
The Cultural Significance and Styling Approach
Fulani braids honor a rich cultural heritage and the tradition of adorning hair with precious metals and beads. The style is unmistakably beautiful because of its simplicity and the way the braids frame the face. When you add gold cuffs—whether metallic rings, decorative tubes, or sliding cuffs—the style instantly feels more celebratory and intentional. For little girls, this style is empowering because it allows them to wear their hair in a way that connects to cultural roots while looking absolutely stunning.
Customizing Fulani Braids for Your Daughter
- Braid placement: Traditional Fulani braids run straight back from the forehead, but you can adapt this by creating several cornrows, spacing them evenly across the head, or creating a pattern that frames her face beautifully.
- Cuff options and placement: Gold cuffs can go on every single braid, on alternating braids, or clustered near the face for maximum visual impact. Mix different cuff styles—some sliding cuffs, some fixed rings—for added dimension.
- Adding beads or charms: Beyond gold cuffs, you can thread small gold beads onto the braids, add small charms at the ends, or combine beads and cuffs for extra sparkle.
- Hair texture and volume: Fulani braids work beautifully on coily, kinky, or textured hair because the natural texture adds dimension to the braids. If her hair is finer or straighter, you might add a small amount of hair extension to create fuller, more defined braids.
Worth knowing: This style absolutely photographs beautifully and is perfect for special occasions, family photos, or any time you want your daughter to feel like the celebratory star she is.
6. Cornrows with a Twist
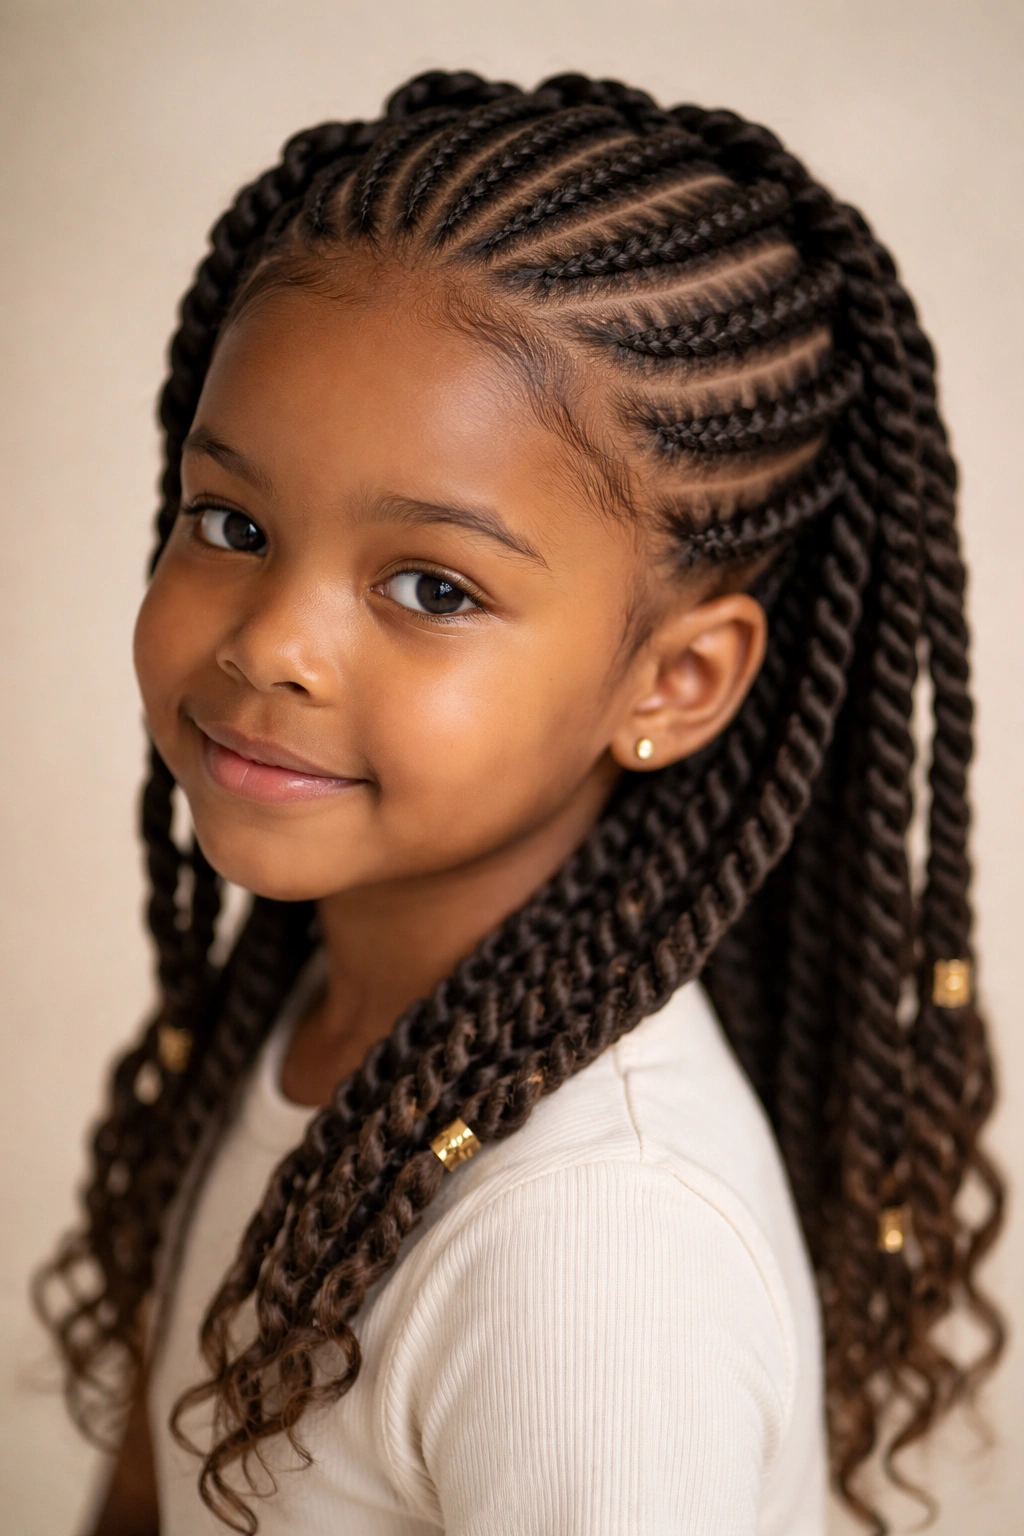
Cornrows with a twist—sometimes called cornrows with twists—combine the sleek, protective benefits of cornrows with the softer, more dimensional look of twisted sections. Instead of braiding each section, you twist two sections of hair around each other, creating a rope-like appearance that’s textural and visually interesting. The result is protective styling that feels more relaxed and playful than traditional cornrows while still keeping hair safely tucked away.
Why the Twist Element Changes Everything
A twist requires less tension than a braid to look neat and polished, making it an excellent option for little girls with sensitive scalps or a history of tension-related breakage. The twisted sections have a naturally softer appearance that feels less formal and structured than cornrows, which makes the style feel more age-appropriate for young children. Because each section is still closed off and protected, you get the same protective benefits as cornrows with a gentler application process.
Variations and Creative Options
- Single strands versus double strands: You can twist one strand of hair around another, or divide a section into two parts and twist them together. Twisting two strands creates a rounder, fuller appearance; single-strand twists on a base create a spun, rope-like texture.
- Combination styling: You can create cornrows on one side of the head and twists on the other for visual balance and interest. You can also alternate between cornrows and twists in a pattern across the head.
- Twist-outs as a bonus: If you create twists, let them fully dry or set overnight, then gently unravel them for beautiful, wavy, textured curls. You essentially get two hairstyles from one installation.
- Adding extensions: If her hair is fine or she wants fuller-looking twists, you can add hair extensions section by section as you’re creating the twists for added volume and visual impact.
Quick tip: Twists can be a bit more fragile than cornrows because there’s less structure holding the sections together. Make sure the twist is snug enough to last several days without unraveling, but not so tight that it creates discomfort.
7. Ghana Braids (Feed-In Braids)
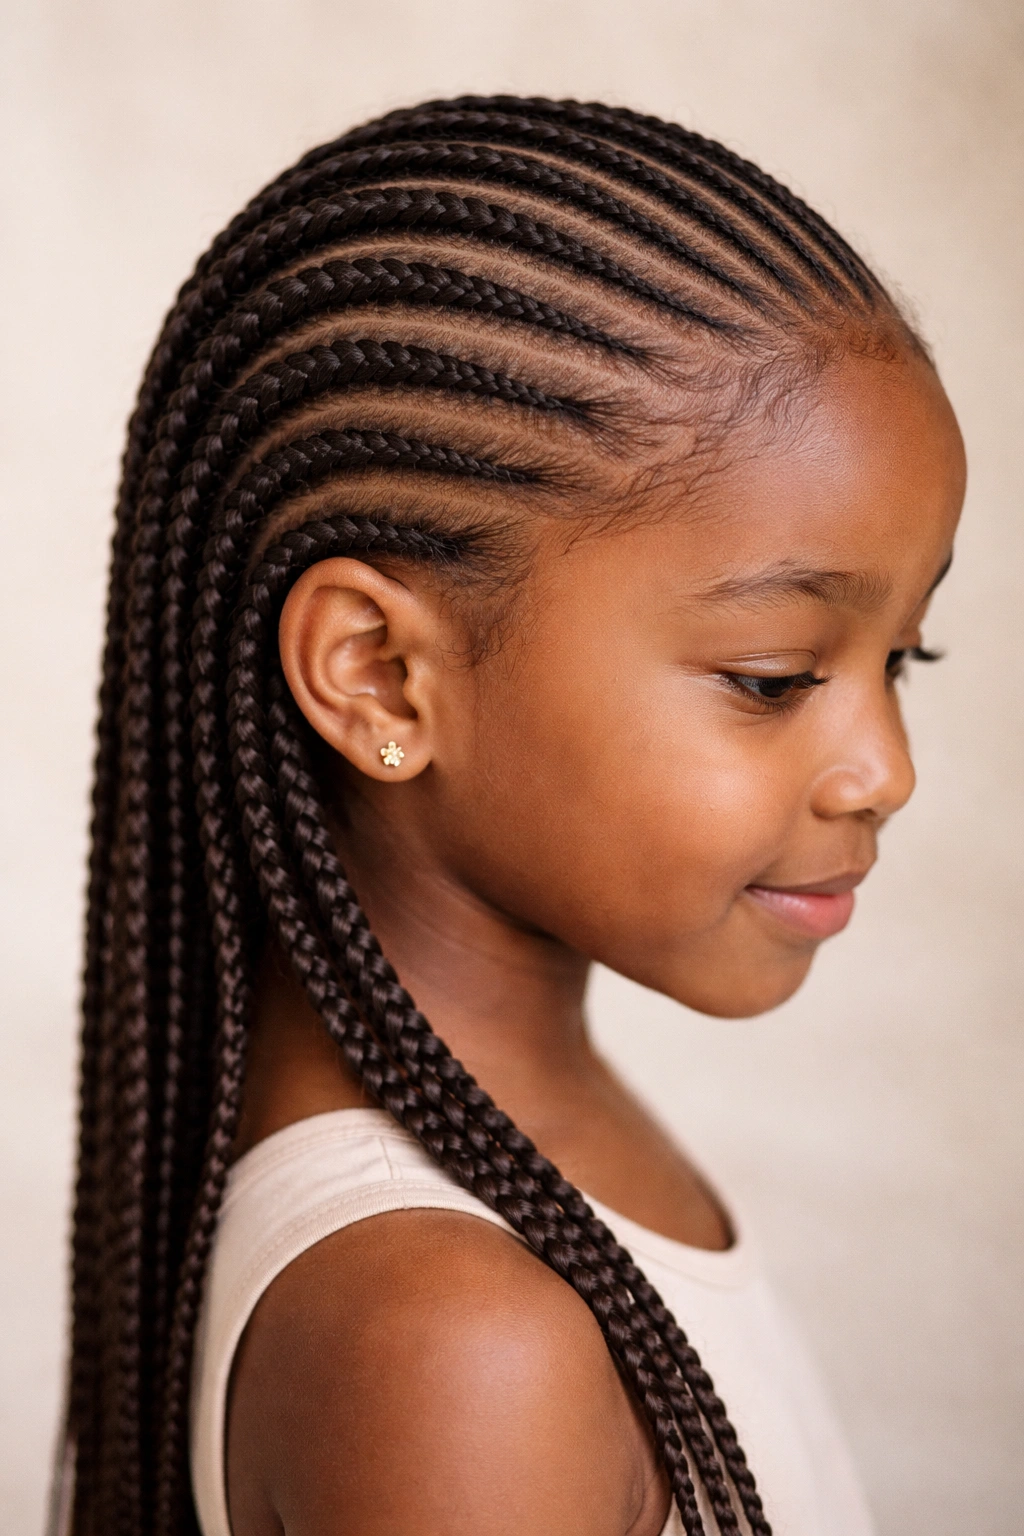
Ghana braids, also called feed-in braids, are a modern innovation on traditional braiding where you gradually feed hair extensions into the braid as you create it, resulting in thinner, more delicate-looking braids that appear to start from the scalp and continue down. The beauty of this technique is that it distributes the weight of extensions gradually, reducing tension on the scalp while still creating protective, long-lasting braids. For little girls, this creates an elegant, intricate look that’s both stunning and genuinely protective.
The Feed-In Technique and Why It Works
Instead of starting with a large section of hair and braiding a pre-made extension into it from the start, feed-in braids begin with a thin section of her natural hair and gradually introduce the extension as you braid down the length. This creates an incredibly fine, detailed appearance and makes the braids look more like they’re growing from her scalp naturally. The gradual introduction of extension also means less weight is concentrated at the roots, reducing stress to her hairline and scalp.
Execution and Maintenance Strategies
- Extension selection matters: Use high-quality hair extensions that feel soft and won’t tangle or mat. Look for extensions specifically designed for braiding that have a texture similar to or compatible with her natural hair texture.
- Sectioning and planning: Decide on your braid pattern—straight rows are classic, but you can also create curved sections, partial braids, or patterns. Smaller, more intricate sectioning creates finer-looking braids but takes longer to install.
- Tension management throughout: The most common mistake is feeding in the extension too quickly or all at once, which defeats the purpose. Feed the extension in gradually as you braid so that the weight distributes evenly throughout the length of the braid.
- Maintaining the appearance: Feed-in braids can last 6–8 weeks if cared for properly. Use a silk or satin pillowcase at night, keep the scalp clean and moisturized, and refresh the edges as needed with a light smoothing gel.
Insider note: If you want to make Ghana braids look extra elevated and special, leave the first inch or two of the braid unbraided at the top (a loose, airy section) before you start braiding tightly. This creates a beautiful, intentional, almost crown-like appearance at the crown.
8. Twisted Crown
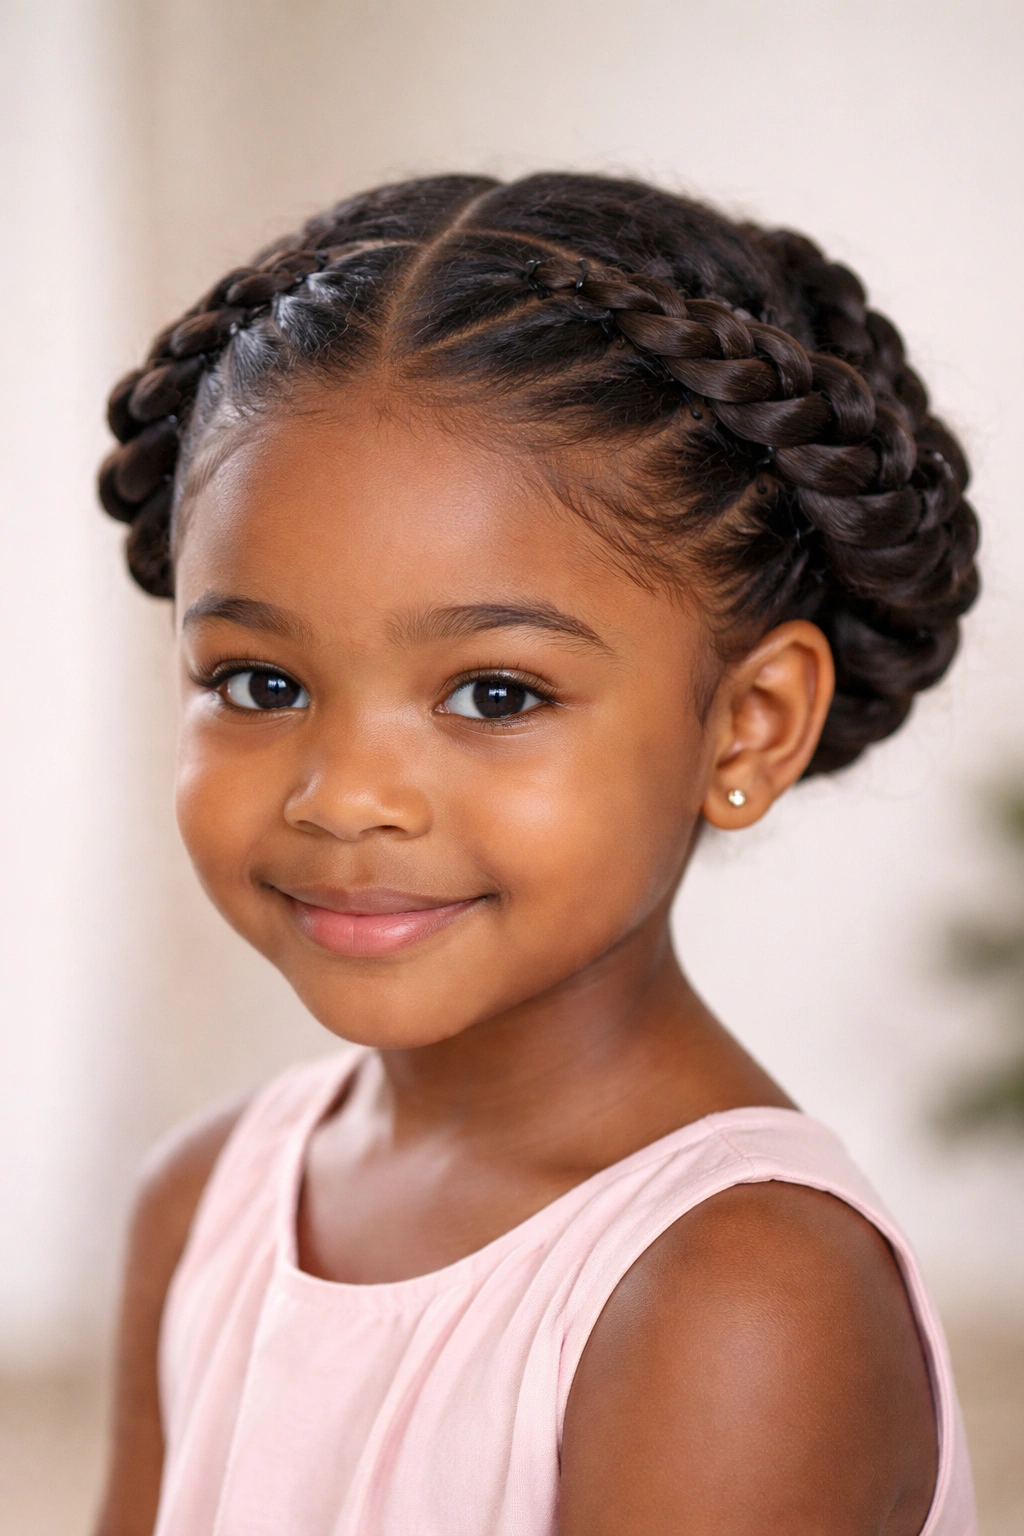
A twisted crown is a hairstyle where twisted sections are arranged into a crown shape around the head, creating an elegant, princess-like appearance that’s perfect for special occasions or when you want to dress up a regular day. The style is typically done with her natural hair twisted section by section, then pinned or tucked into place to form the crown shape, though you can also use extensions to create thicker, fuller twists. What makes this style so special for little girls is that it makes them feel genuinely special and celebrated.
Creating a Twisted Crown That Stays Put
The key to a successful twisted crown is preparing the base properly and securing everything so it doesn’t unravel throughout the day. Start with clean, moisturized hair that’s slightly damp—damp hair twists more smoothly than completely dry hair and will set better. Divide the perimeter of her head into sections and twist each section, then pin the twisted sections into place using bobby pins or small clips. Use a light-hold styling gel or cream to smooth down any flyaways while you’re working.
Design Variations and Customization
- Single twist crown: One large twisted section that wraps around the head like a halo. This works especially well for little girls because it’s simple to create and doesn’t require dividing the whole head into intricate sections.
- Multiple-twist crown: Two or three twisted sections pinned together to form the crown. This creates more visual interest and is a great option if her hair is thick or if you want a fuller-looking crown.
- Half-crown style: Only twist the top section of hair and pin it into a crown shape, leaving the rest of her hair down or in loose curls. This is perfect for everyday wear and lets her enjoy having her hair down while still having an elevated updo.
- Adding embellishments: Once the crown is pinned in place, you can add a small clip, a delicate hair jewelry piece, or even small fresh flowers tucked into the crown for a special occasion look.
Pro tip: Practice this style a few times before a special event so you know how long it takes and can troubleshoot any issues. Having her sit still while you create the crown is easier if you have entertainment ready (a favorite show, podcast, or audiobook).
9. Puffs with Extensions
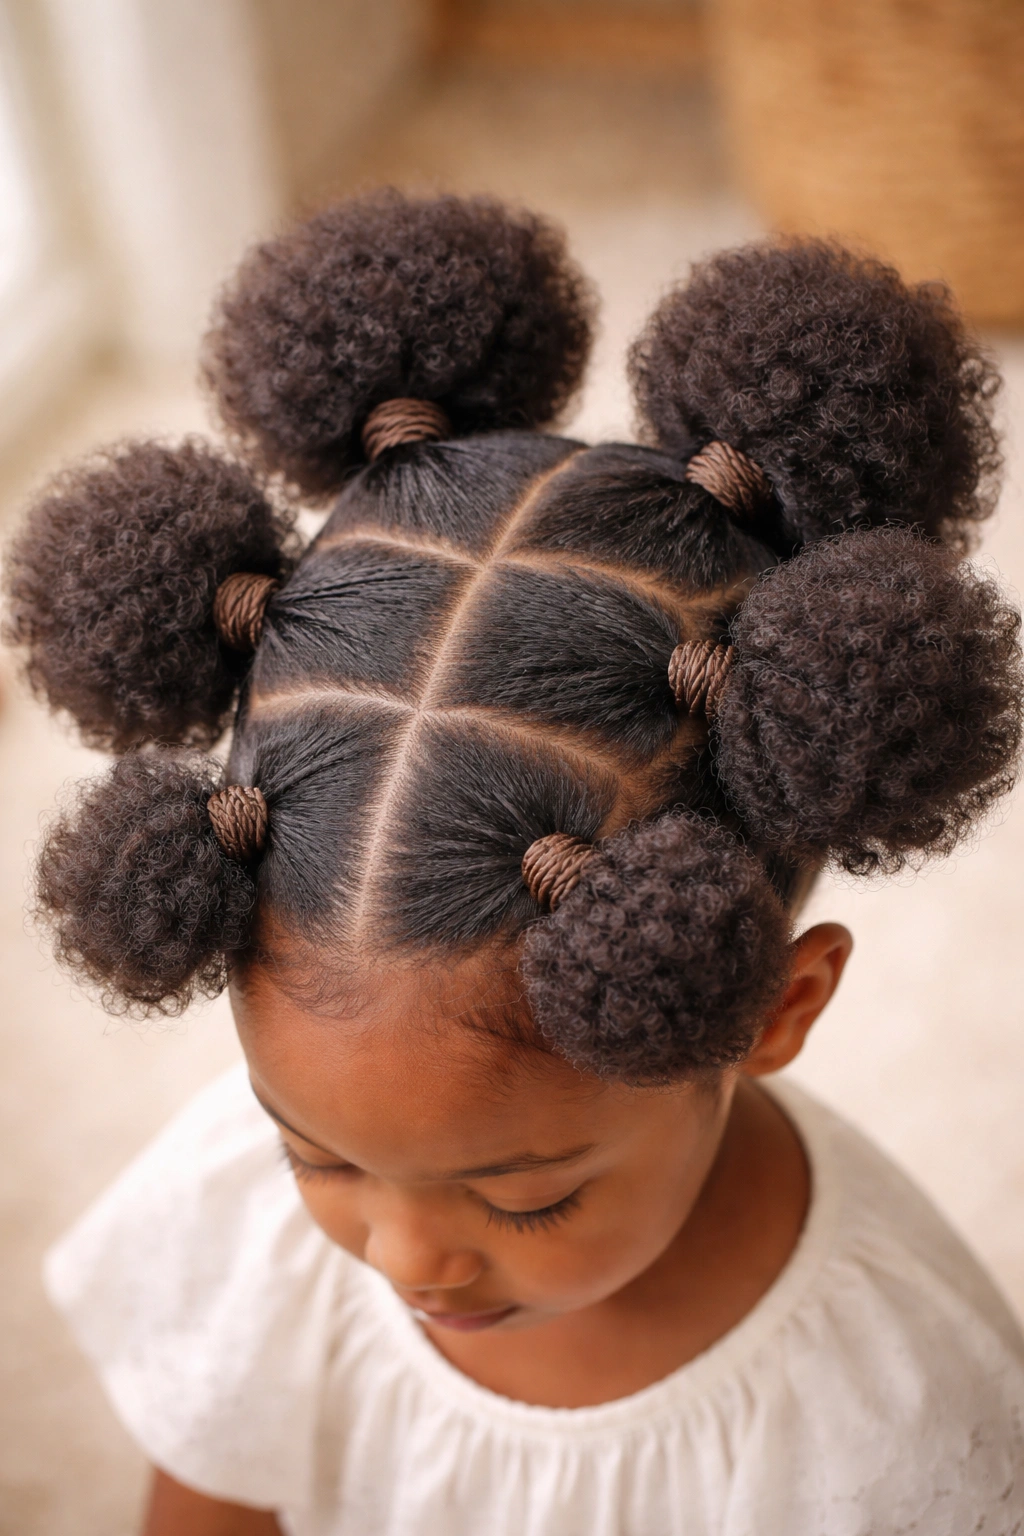
Puffs are a simple, adorable protective style where hair is gathered into round sections on the head and secured with hair ties, creating little puffy spheres of hair. By adding extensions to the puff sections, you create fuller, more voluminous puffs that look more dramatic and can last longer throughout the week without losing shape. The beauty of puffs with extensions is that they’re quick to create, genuinely protective, and endlessly customizable in terms of placement and styling.
Why Puffs Are Perfect for Little Girls
Puffs allow you to keep most of her hair protected while still showing personality and style. They’re not as time-intensive as braids or twists, which makes them perfect for busy weeks or when you need a style that’s quick to install and can be refreshed easily. The enclosed ends are protected from damage, the loose puffed sections reduce scalp tension, and the overall look is playful and age-appropriate for children.
Creating Fuller, Longer-Lasting Puffs
- Extension placement: You can use extensions in a few different ways—add a small amount of extension hair into each puff section before securing it with a tie, or wrap the extension around the base of the puff tie for extra volume and dimension.
- Puff placement and styling: Create puffs all over the head in rows, scatter them randomly for a playful appearance, or create a pattern (puffs on top, braids or twists underneath). You can also do side puffs, front puffs, or back puffs depending on the look you want.
- Hair tie options: Use cloth-covered hair ties or silk hair ties instead of regular elastic, which will minimize breakage and frizz at the point where the hair is secured. Colored ties that coordinate with her clothes or favorite colors make the style feel intentional and put-together.
- Puff volume control: Tighter puffs will hold their shape longer but look neater; looser puffs have a more carefree, voluminous appearance but may need refreshing throughout the week. Find the balance that works for her hair type and your preference.
Worth knowing: Puffs are incredibly easy to refresh—just take them down, spritz the hair lightly with water or leave-in conditioner, re-fluff, and re-tie. You can keep this style going for 1–2 weeks with simple daily refreshes.
10. Crochet Braids with Curls
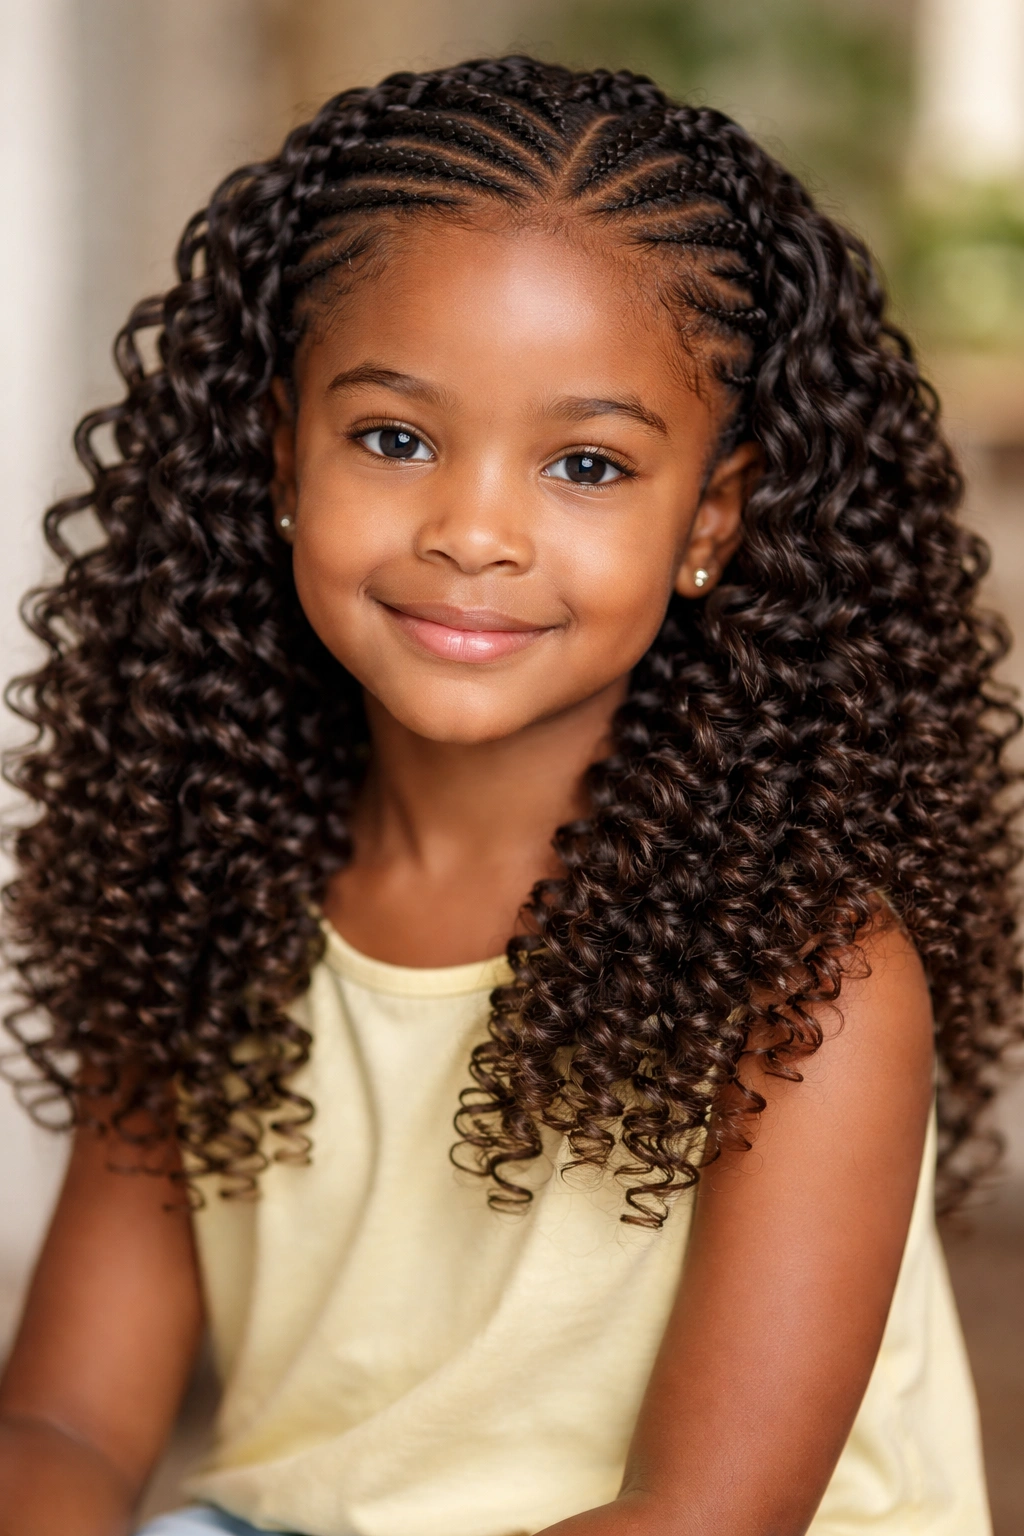
Crochet braids involve braiding a cornrow as the base, then using a crochet hook to pull loop through the braids and attach pre-made curly hair extensions. The result is a style with defined curls throughout, achieved through the extensions rather than the natural hair, which keeps the child’s own hair protected and tucked away completely. The curly texture created by crochet braids is visually stunning and the style can last 4–6 weeks with proper care, making it an excellent long-term protective option.
Understanding the Crochet Braid Process
Crochet braids start with cornrows as a base—these are typically thin, neat cornrows that run from the front of the head to the back (or in whatever pattern you choose). Once the cornrows are complete and you’ve applied a lightweight gel to smooth them, you use a crochet hook to pull each loop of pre-made curly hair through the cornrows, securing them in place. The curly extensions attach directly to the cornrows, creating a completely protective style where all of the natural hair is tucked away.
Extension Selection and Customization
- Curl pattern and texture: Pre-made crochet hair comes in many different curl patterns—loose waves, defined curls, tight coils, kinky textures. Choose a curl pattern and texture that complements her natural hair and that she loves looking at.
- Hair length and volume: You can choose shorter extensions for a more compact style, or longer extensions for a more dramatic, flowing look. Thicker extensions create fuller-looking curls; thinner extensions create more delicate, intricate curls.
- Color options: Extensions come in virtually every color—you can match her natural hair color, create an ombre effect with lighter tips, or go bold with bright colors or metallic highlights that reflect light beautifully.
- Customizing the base pattern: Straight-back cornrows are classic, but you can also create curved patterns, side patterns, or partial cornrows with loose hair underneath for a mixed style.
Quick tip: The cornrow base is crucial to the success of crochet braids. Make sure the cornrows are braided consistently, smoothly, and tightly enough to hold the extensions without slipping, but not so tightly that they create discomfort or excessive tension.
Final Thoughts
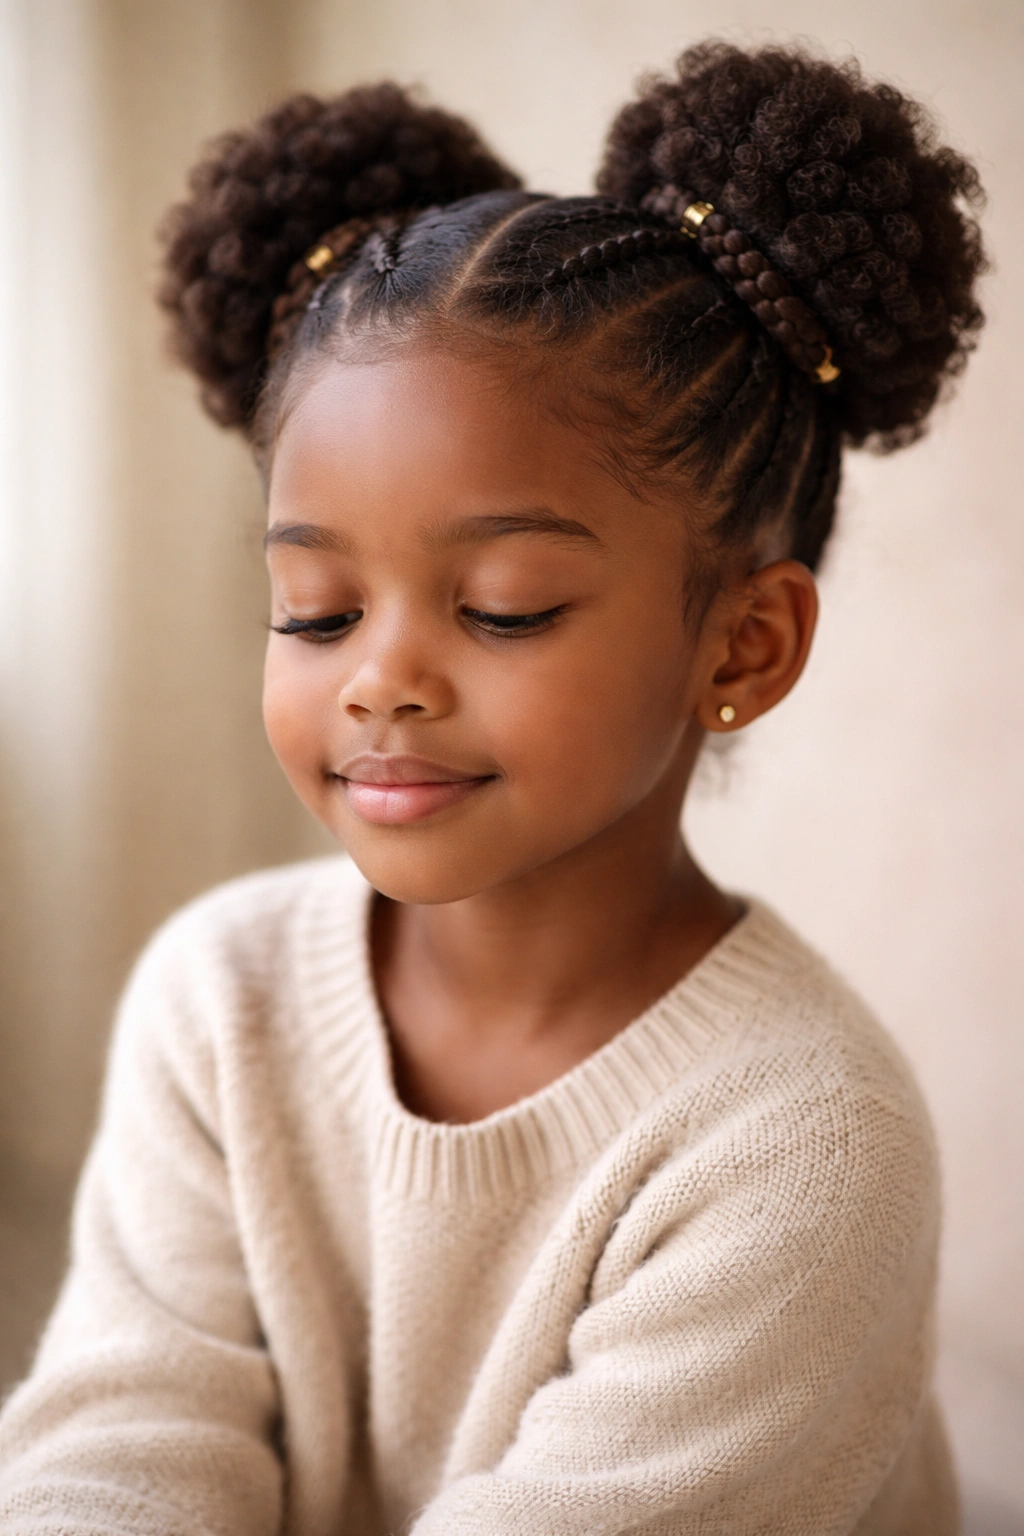
Choosing the right protective hairstyle for your daughter is about balancing aesthetics, protection, manageability, and her own preferences and comfort. Each of these ten styles offers genuine protective benefits—keeping her hair safe from damage, reducing daily manipulation, allowing her natural hair to rest and grow healthy—while also making her feel absolutely beautiful and celebrated in her own skin. The styles range from quick daily options like puffs to more elaborate special-occasion styles like twisted crowns, so you can find something that works for your lifestyle and your daughter’s hair type.
Remember that every child’s hair is different, and what works beautifully for one little girl might need adjustment for another. Don’t be discouraged if the first time you try a style it doesn’t come out perfectly—hairstyling is a skill that develops with practice, and your daughter will likely find the process of bonding over hair care genuinely meaningful. The time you spend creating these styles is time spent celebrating her natural beauty, teaching her about hair health and care, and creating memories together. That matters far more than perfect execution, and it’s something she’ll carry with her long after the hairstyle comes down.
