



Whether you’re heading to the gym, running errands, or styling your hair for a low-key vibe, a messy bun with laid edges combines the best of both worlds — effortless texture with polished, groomed edges. The contrast between the deliberately undone crown and the sleek, defined hairline is what makes this look so appealing. It’s casual enough for everyday wear but detailed enough to show you put actual thought into your styling.
The magic of a messy bun with laid edges lies in the detail. Most people focus on the bun itself and neglect the edges, but laid edges are what elevate a random topknot into an intentional, finished style. Laid edges frame your face, create a focal point, and add an extra layer of polish to even the most relaxed bun. The key is understanding that these two elements — the textured volume of a true messy bun and the smooth, geometric precision of laid edges — actually complement each other beautifully when executed together.
What makes this style so versatile is that you can adapt it for virtually any hair type, texture, and length. Whether you’re working with bone-straight hair, natural curls, coils, or waves, there’s a messy bun with laid edges variation that’ll work for you. The styling techniques and products shift depending on your hair, but the core concept remains the same: embrace the texture up top, and nail the edges with precision.
1. The Classic Laid-Edge Bun
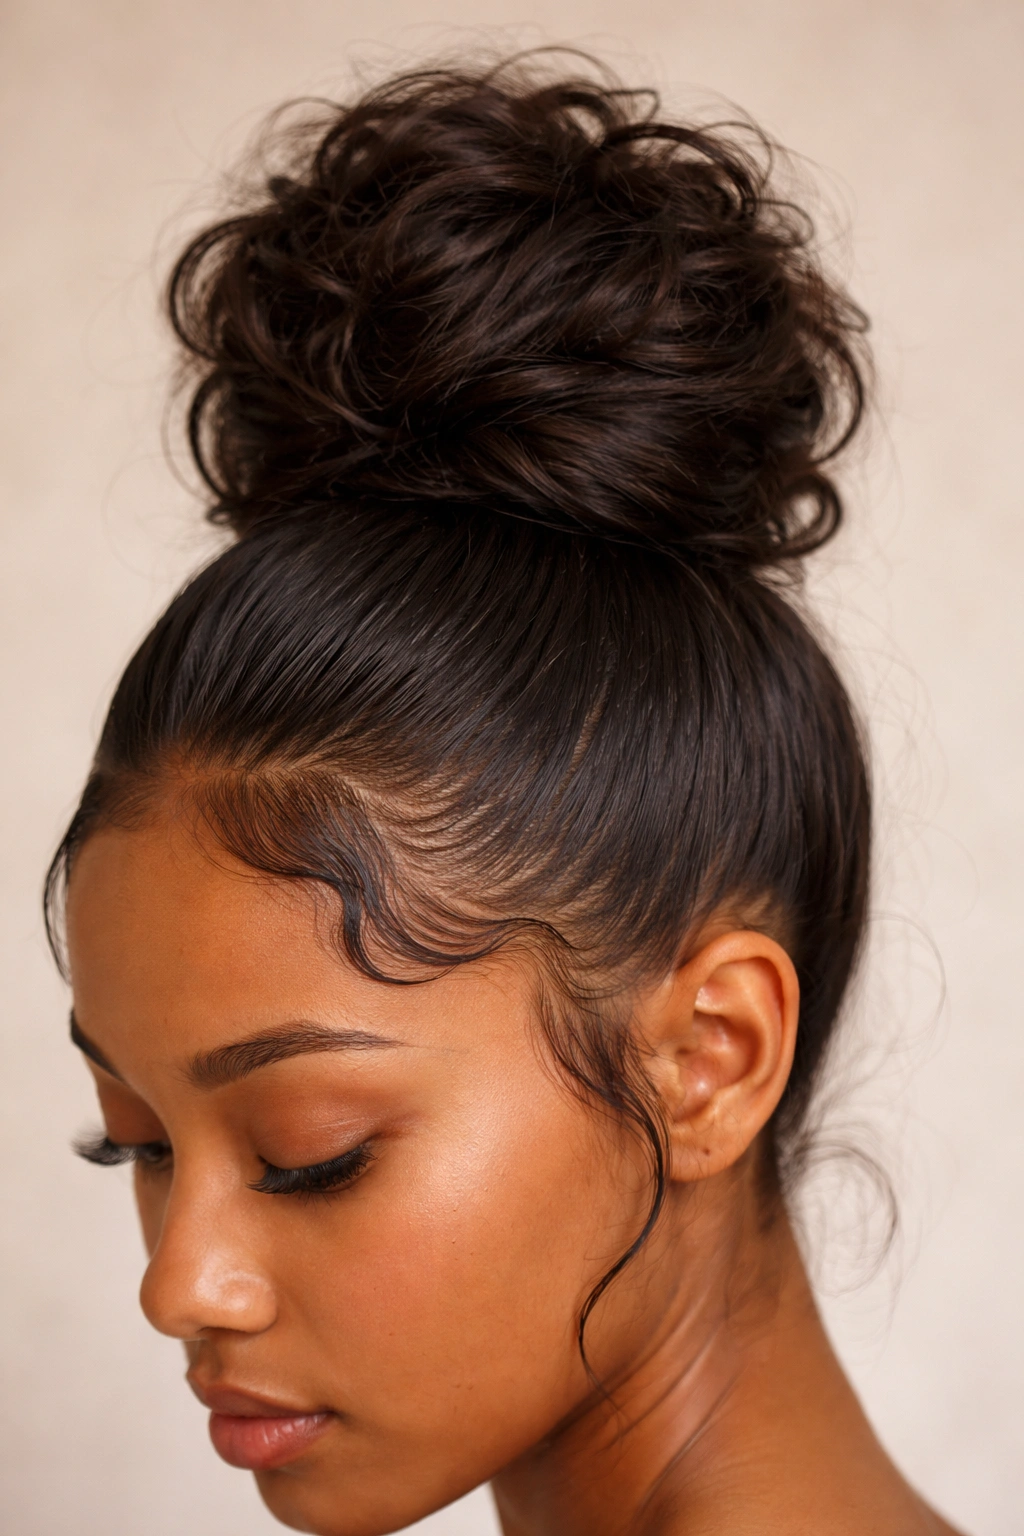
This is the foundation messy bun style — the one that launched a thousand tutorials and became a staple across every hair type. You’re gathering your hair into a high or mid-height ponytail, twisting or teasing it slightly, and wrapping it loosely around the base to create volume and that “just-rolled-out-of-bed” texture at the crown. The edges, meanwhile, are where you dial in the intentionality: smoothed down with gel, edge control, or a brush, they create a sharp contrast against the looser bun.
Why It’s the Gold Standard
The classic laid-edge bun works because it’s inherently balanced — the messiness feels intentional rather than neglected, and the edges prove you care about detail. This style flatters most face shapes because the laid edges create a clean frame around your forehead and temples, while the volume at the crown adds height and softness. It’s appropriate for office settings, casual outings, and everything in between, which is why it’s become the default “I want a messy bun with edges” ask.
How to Execute It Perfectly
Start by applying a lightweight gel or edge control to your hairline before you even gather your hair. This gives you a head start and means the edges stay laid throughout styling. Brush your hair back into a high or mid-level ponytail — the placement depends on your preference and face shape, but most people find mid-height (roughly at the crown of your head) most flattering. Secure it with a elastic band, then gently tease or backcomb the ponytail to add texture and volume. Twist the teased section loosely and wrap it around the base of your ponytail, tucking the ends underneath and securing with bobby pins. Go back to your edges with an edge brush or small toothbrush and more gel, defining them into clean lines along your hairline and temples.
Pro tip: Use a boar-bristle brush or a dedicated edge brush for smoother, shinier laid edges — it distributes the product more evenly than your fingers alone.
2. The Sleek Gel Messy Bun
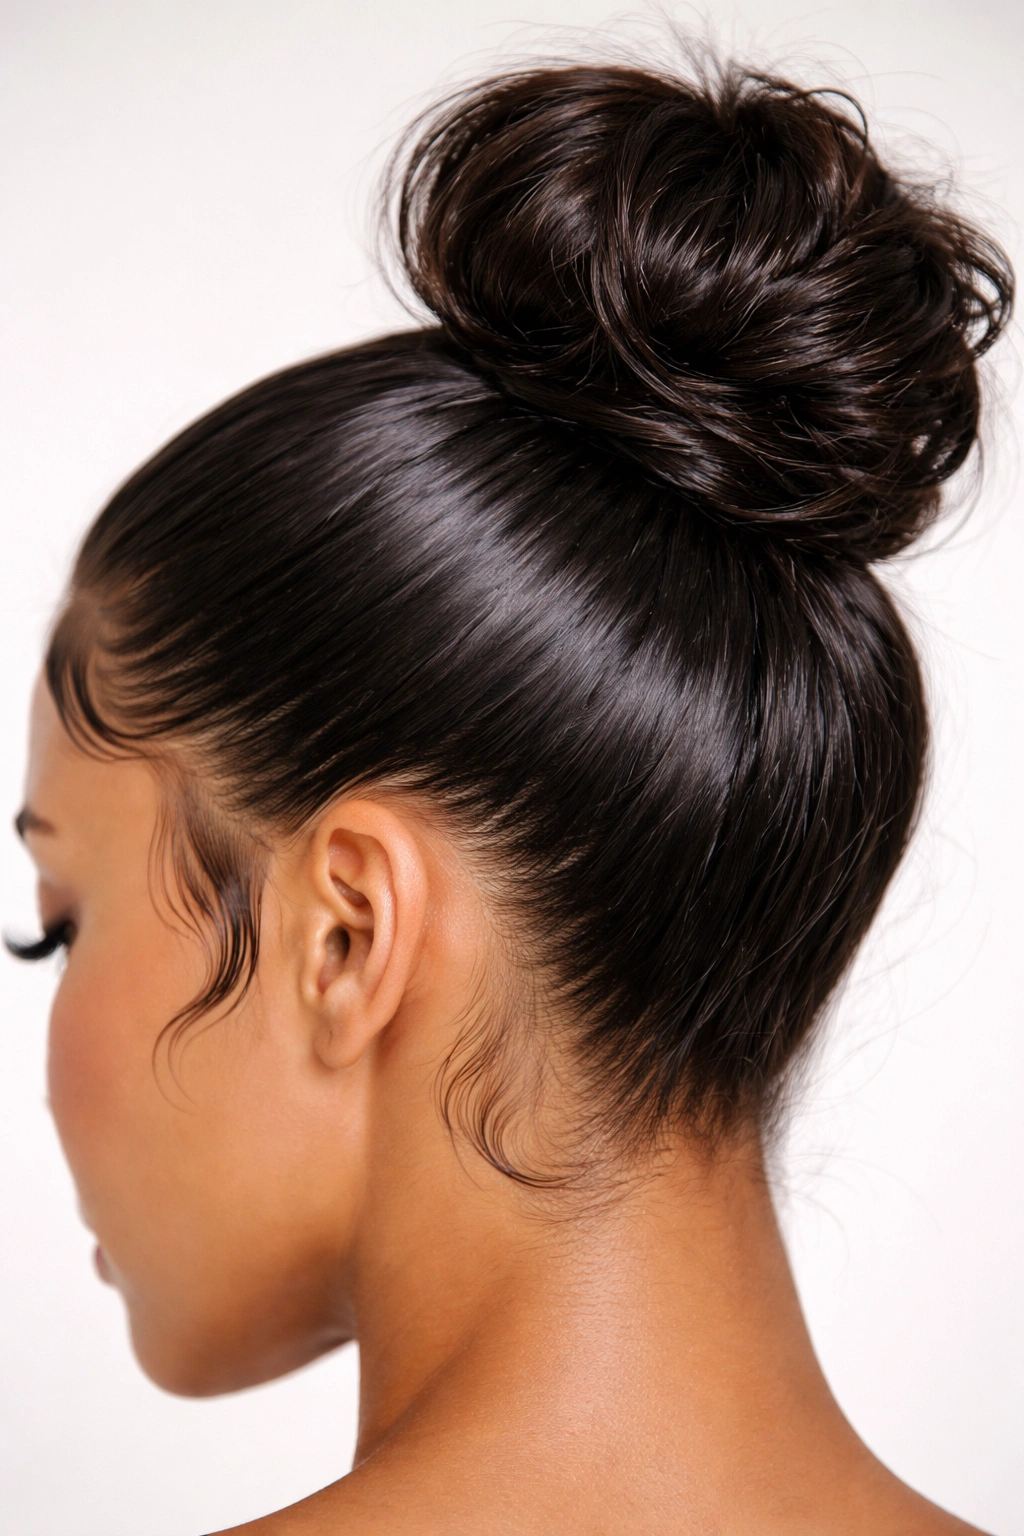
Where the classic laid-edge bun lets some texture show at the crown, the sleek gel version keeps the messy texture more controlled and unified. You’re still creating a bun with intentional volume, but the overall silhouette is tighter and more polished. The edges receive the same precision treatment, but because the rest of the bun is more contained, the laid edges become an even more striking design element — they’re the statement, not just the finishing touch.
What Sets It Apart
The sleek gel messy bun appeals to people who love the aesthetic of laid edges but want the bun itself to feel more refined and intentional. It photographs beautifully because the contrast between the smoothness of the gel and the geometry of the edges is more dramatic. This style also works really well for people with finer hair who struggle to create dramatic texture, because the gel actually helps hold the shape and creates the illusion of more volume than you might naturally have.
The Technique That Makes It Work
Apply a strong-hold gel or edge control throughout your entire ponytail before you start styling — not just to the edges. This is the key difference. Gather your hair into a sleek ponytail and smooth it down as you go, using the gel and a brush to eliminate flyaways. Once your ponytail is smooth and consolidated, then you create the bun by twisting or coiling the ponytail loosely around the base. The gel helps the bun hold its shape while still allowing some intentional texture to peek through. Finish by laying your edges with precision, making clean geometric lines that contrast against the smoother base of the bun.
Worth knowing: This style works best when you have at least shoulder-length hair, because you need enough length to create a full bun while still maintaining the sleek ponytail foundation.
3. The Curved Laid-Edge Bun
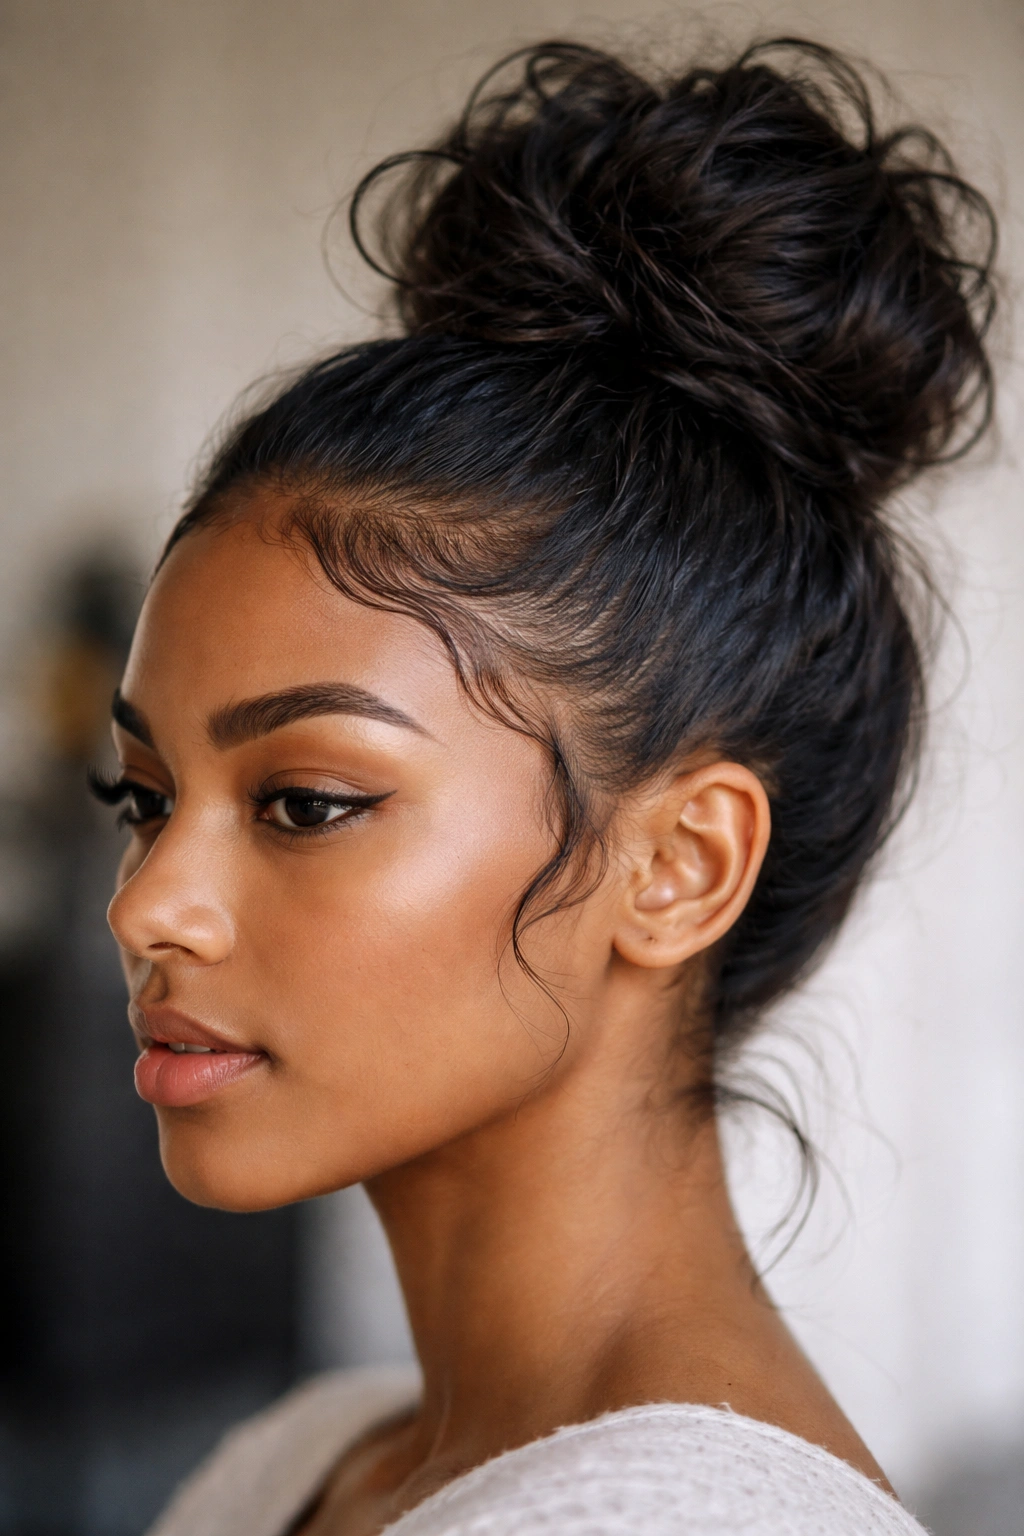
Instead of laying your edges in straight lines along your hairline, the curved laid-edge bun creates flowing, curved lines that follow the natural contours of your face. Think of sculpted, arched lines along your forehead and temples, almost like decorative waves. This variation adds an extra dimension of artistry to the laid-edge look and gives your styling instant visual interest.
Why This Style Has Extra Impact
Curved laid edges are more sculptural and fashion-forward than straight lines. They’re the choice of stylists who want to show technical skill and create a look that feels custom-tailored to your face. This variation works particularly well if you have a high forehead, because the curves can help frame and proportion your features in a flattering way. It’s also an excellent style if you love playing with edge designs and want your styling to feel like a genuine artistic expression.
Creating the Perfect Curves
You’ll need a good edge control product with strong hold — something that stays in place when you’re manipulating it into curves. Start with a regular messy bun at the crown, styled however you prefer. Then, map out your curved lines mentally before you apply any product — think about the shape you want and how it’ll balance your face. Use a small toothbrush or edge brush to apply your edge control in curved motions, following the lines you’ve mapped out. Work in sections, smoothing as you go, and don’t rush this part. You might need to go over the curves multiple times to get them sharp and defined.
Insider note: Film videos or take photos of your curved edges from the side, not just straight-on — the dimension of the curves is most visible from different angles.
4. The Two-Toned Messy Bun
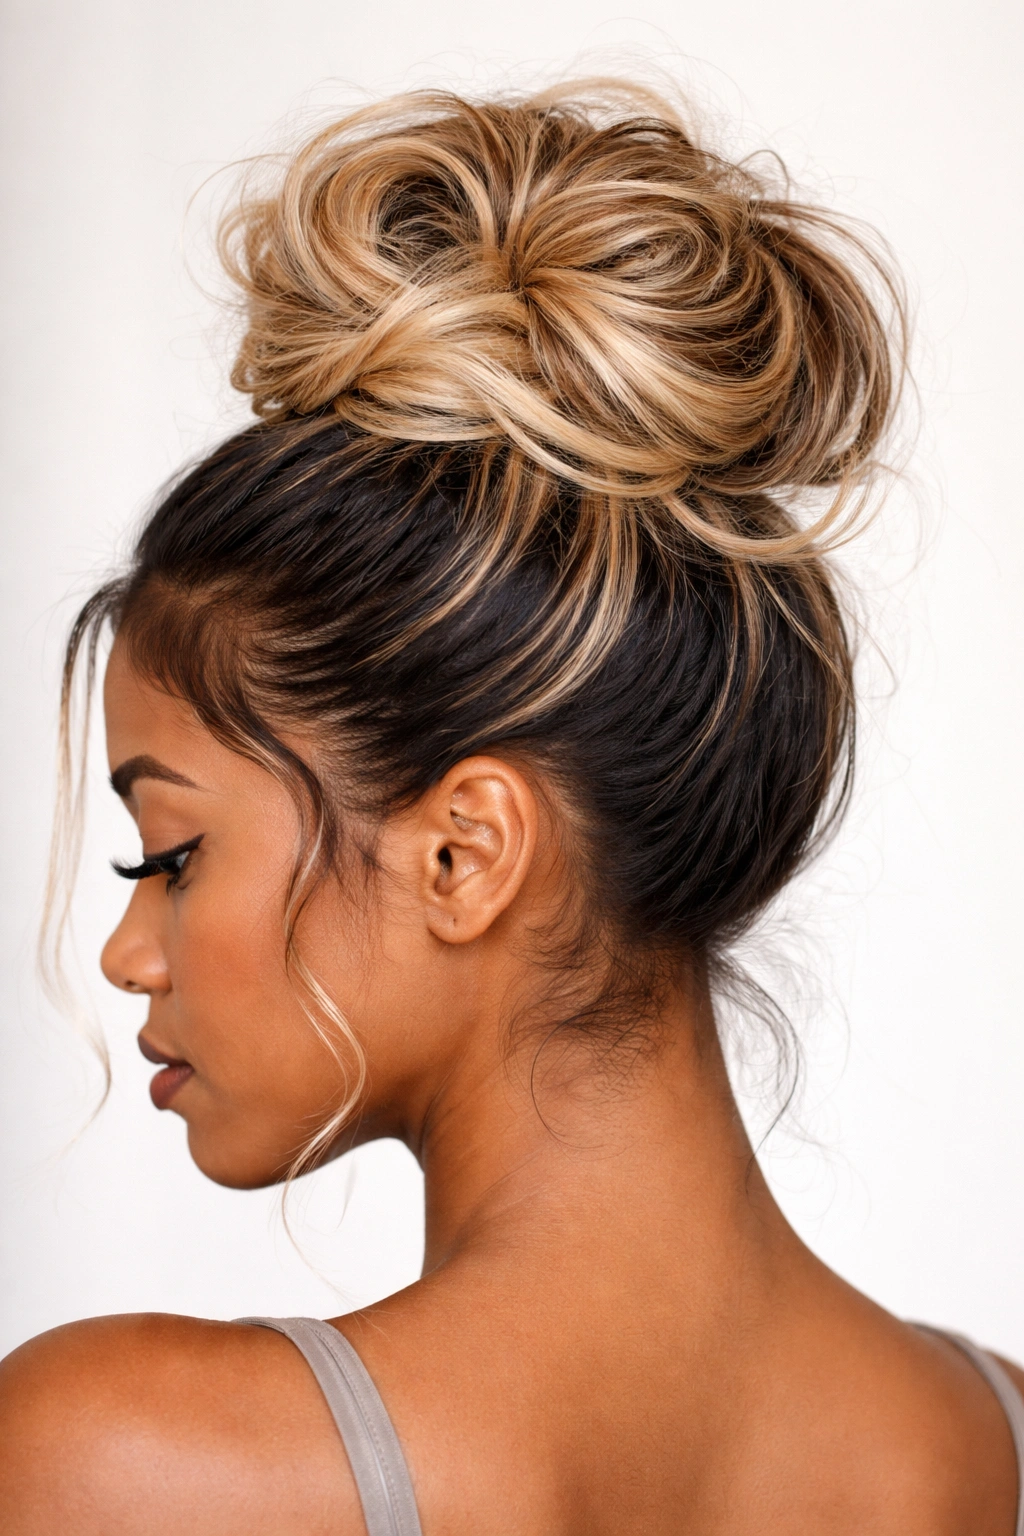
This style plays with color contrast to emphasize laid edges even more dramatically. If you have a lighter base color with darker roots, or if you’ve intentionally created a two-tone color effect, a messy bun with laid edges becomes the perfect canvas to show off that contrast. The laid edges are usually in your base color (often lighter), while the bun showcases the texture and depth created by the color variation.
The Visual Appeal
Two-toned messy buns are visually striking because the color contrast adds dimension that a single-color bun can’t achieve. Your edges appear even more defined because they’re in a different shade than the bun itself, creating natural contrast without you having to do anything extra. This style also works beautifully in photos and videos, because the color variation reads clearly from a distance, whereas other subtle details of the style might get lost.
How to Maximize the Color Contrast
Start by understanding which color in your hair is lighter and which is darker. Typically, your darker color is concentrated at the roots, so when you gather hair into a ponytail, you’re automatically mixing both shades. When you create the bun by twisting or wrapping the ponytail, the color variation will naturally create a striped or blended effect throughout the bun’s volume. Your edges, since they’re pulled smooth, will show more of your base color and less of the color variation — this is what creates that beautiful contrast. Style your edges cleanly and precisely with gel or edge control, letting them showcase that lighter shade. The messier bun becomes a color showcase, while the edges frame everything in a more uniform tone.
Quick styling note: If your two-toned effect is subtle, you might want to use a lighter gel or edge control on your edges to enhance the color contrast even further.
5. The Flyaway Messy Bun with Pattern Edges
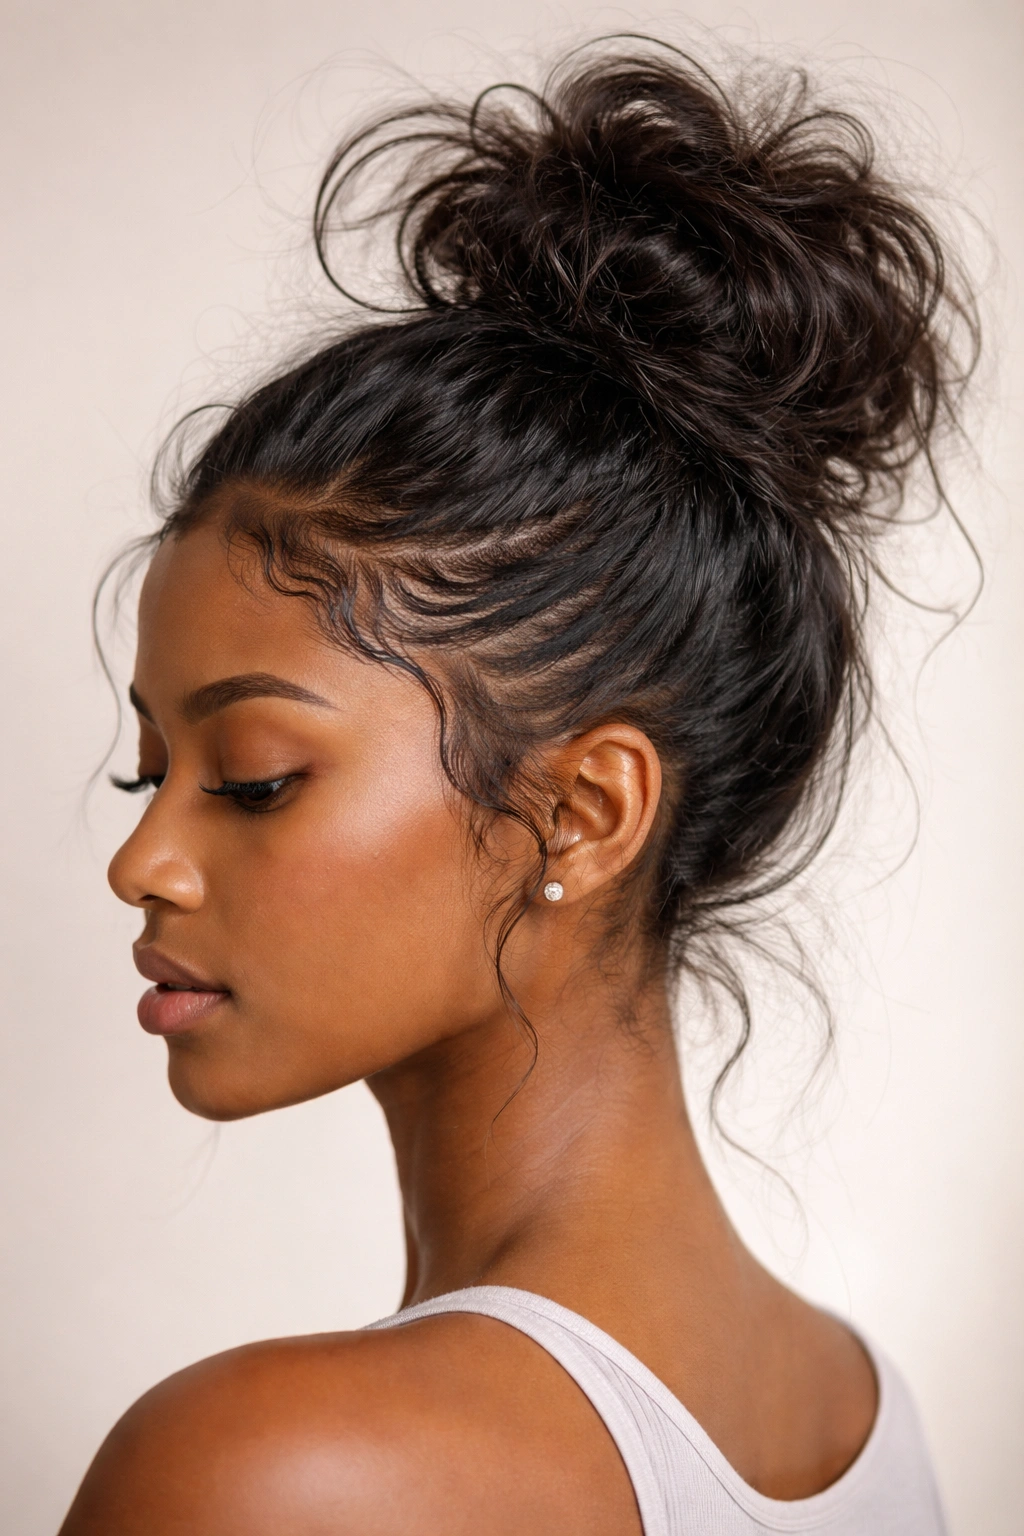
This variation celebrates the intentional messiness of a true messy bun while adding a graphic element to the laid edges. Instead of simple straight or curved lines, you’re creating a specific pattern — maybe a geometric design, a subtle zig-zag, or connected curved lines. The flyaways and texture at the crown stay loose and organic, but the edges become an intentional design element.
What Makes This Unique
The pattern-edge messy bun is for people who love detailed styling work and want their edges to be the focal point and conversation piece of their look. It requires more skill and a steady hand, but the payoff is a genuinely custom, artistic hairstyle. This variation is popular for special occasions, photoshoots, or any time you want your hair to make a statement. The contrast between the relaxed, textured bun and the precise, patterned edges creates visual interest and shows technical styling ability.
Creating a Pattern
First, sketch out your pattern idea mentally or even lightly on paper so you know exactly what you’re going for. Simple patterns work better than overly complicated ones — think geometric shapes, repeating curves, or connected lines. Apply your edge control with a small, precise brush, going slowly and deliberately. Start with one complete pattern section before moving to the next, so you can ensure each section is consistent. A pattern that runs from your center part along both sides of your hairline is a classic approach, but you can get creative with where your pattern sits.
Pro tip: Use a white or contrasting-color edge control if your hair is dark, or a dark edge control if your hair is light — the contrast will make your pattern design much more visible and impressive.
6. The Bubble Bun with Laid Edges
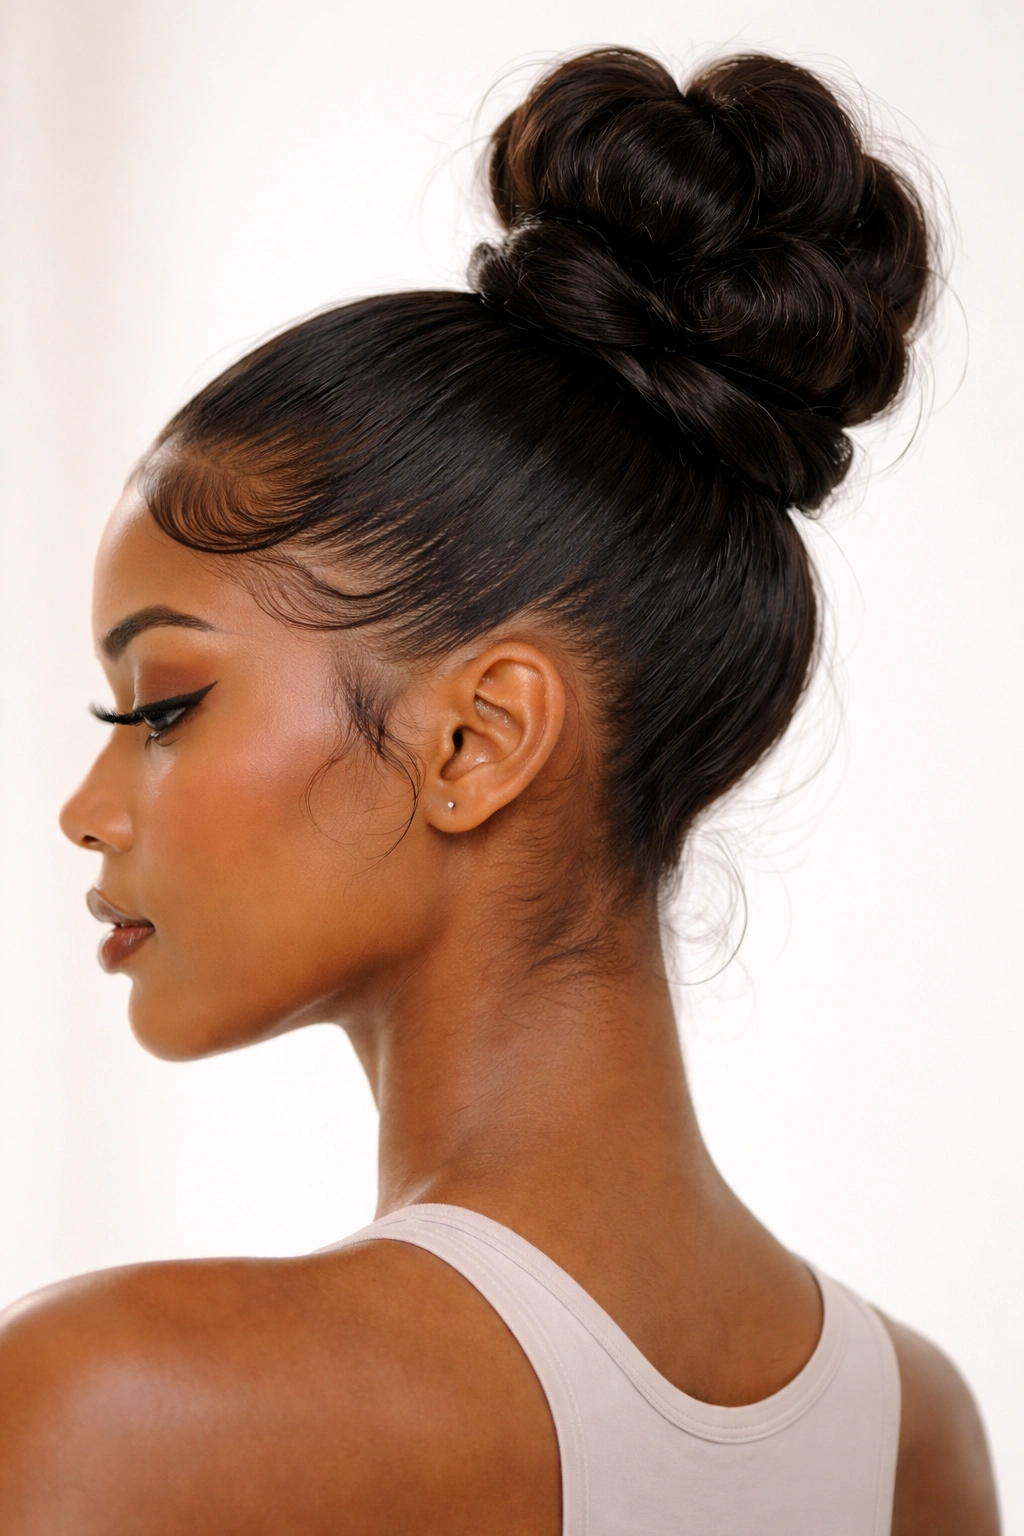
The bubble bun variation stacks multiple smaller buns or sections on top of each other, creating a larger, more voluminous final shape. When you add laid edges to a bubble bun, you’re emphasizing that the volume is intentional and structured, not just a tangled mess. The edges frame this sculptural bun and give it definition.
Why Bubble Buns Stand Out
Bubble buns are more visually interesting than a single compact bun because they create height and dimension. Adding laid edges makes the style feel intentional and editorial — like you’ve really thought about every element. This style is perfect if you want maximum impact and don’t mind spending a bit more time on styling. It also works beautifully for people with really thick or long hair, because the bubble structure distributes the weight and looks less heavy than a single consolidated bun.
Building Your Bubble Bun
Gather your hair into a high ponytail and secure it with an elastic. Create your first “bubble” by dividing the ponytail into sections — typically, you’ll create 2-3 bubbles depending on how long your ponytail is. Start at the base of your ponytail and secure the first section with another elastic, gathering just a few inches of hair and leaving the rest hanging below. This creates your first bubble above the elastic. Repeat this process, creating 2-3 bubbles by securing each section with an elastic as you move down the ponytail. Once all your bubbles are created, gently pull and tease each one to add volume and texture. Wrap loose ends under your bottom bubble and secure with bobby pins. Finish by laying your edges smoothly and precisely, creating a clean frame for this voluminous, structured bun.
Worth knowing: Bubble buns require a good amount of hair to look full and intentional — if you have fine or thin hair, this style might look limp rather than sculptural.
7. The Off-Center Messy Bun with Graphic Edges
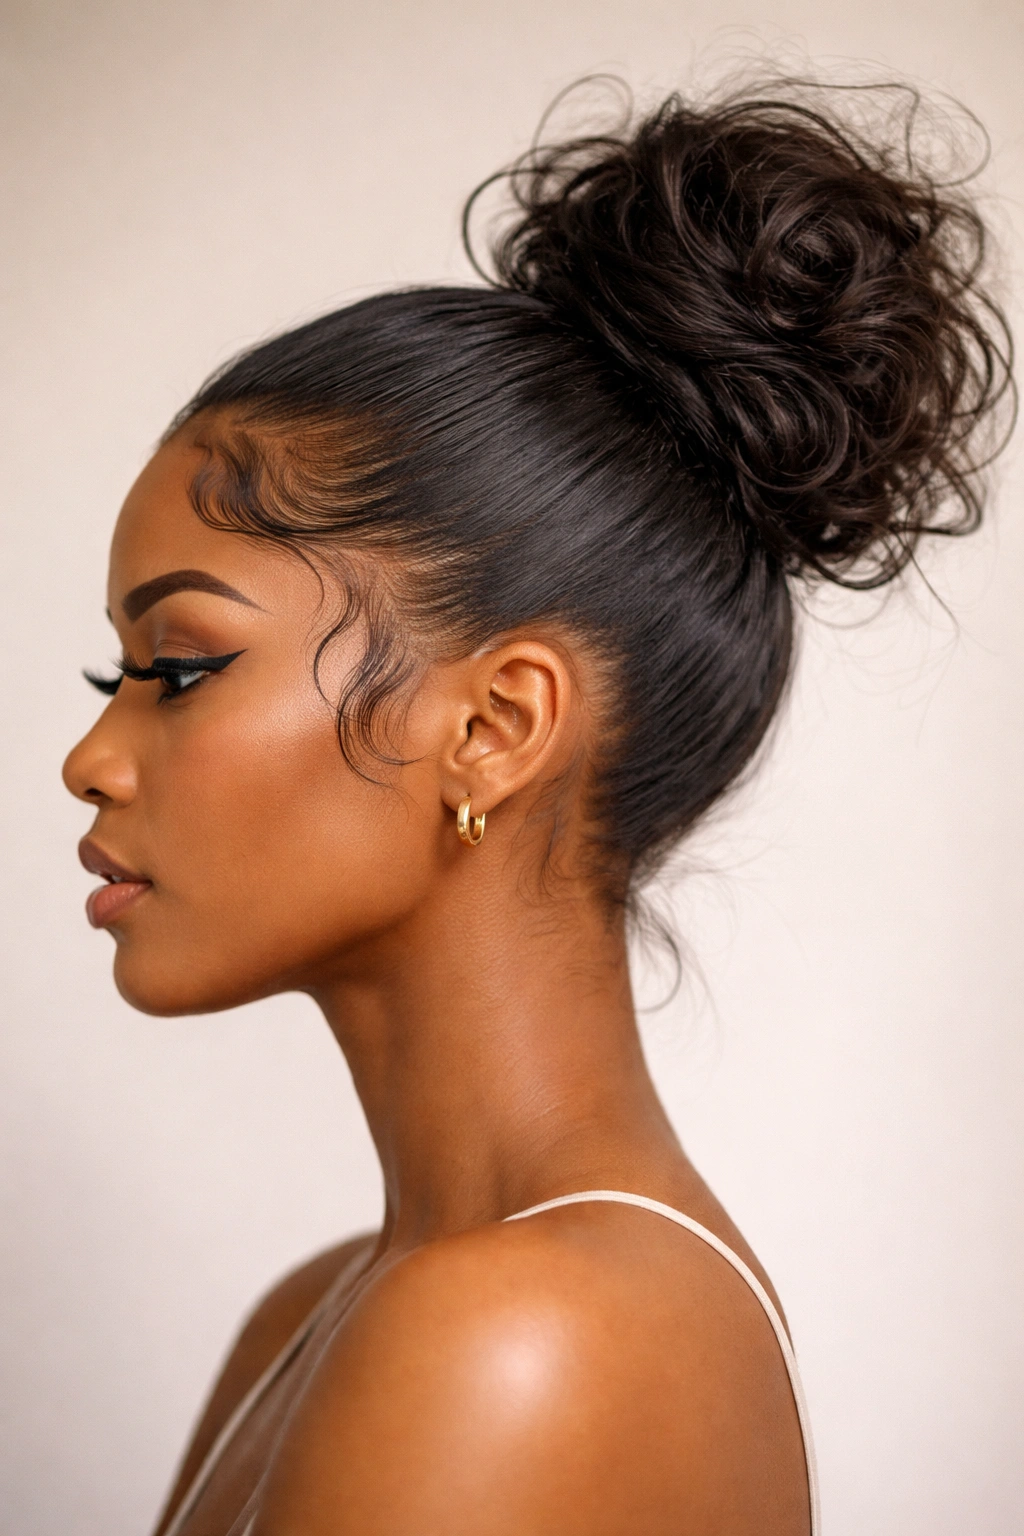
This style shifts the bun to one side of your head rather than centering it, and pairs that asymmetrical placement with bold, graphic laid edges. The off-center placement is more dynamic and interesting visually than a centered bun, and graphic edges amplify that modern, fashion-forward feeling. It’s the kind of style that photographs beautifully and feels contemporary and intentional.
The Modern Appeal
Off-center messy buns are more interesting than centered ones because the asymmetry draws the eye and creates movement. Paired with graphic edges, this style reads as editorial and high-fashion. It’s perfect for people who like to experiment with their styling and don’t want their hair to blend into the background. This style also works well if you have an asymmetrical face shape or prefer to style your hair away from one side.
Achieving the Off-Center Look
Decide which side you want your bun on — typically, one side feels more balanced with your face shape and hairstyle. Brush your hair to that side and gather it into a ponytail positioned toward that side of your head, roughly at ear height or slightly higher. The ponytail doesn’t have to be perfectly centered on the back of your head — it should sit off to one side. Tease and twist this ponytail into a messy bun as you normally would. Now, the graphic edges become your statement: lay your edges on both sides of your face, creating bold, intentional lines. You might create lines that mirror each other, or lines that complement the off-center placement of your bun by being more prominent on the side where the bun sits.
Quick tip: An off-center bun can emphasize asymmetrical features, so consider your face shape and which side feels more flattering before you commit to the placement.
8. The Textured Messy Bun with Baby Hairs
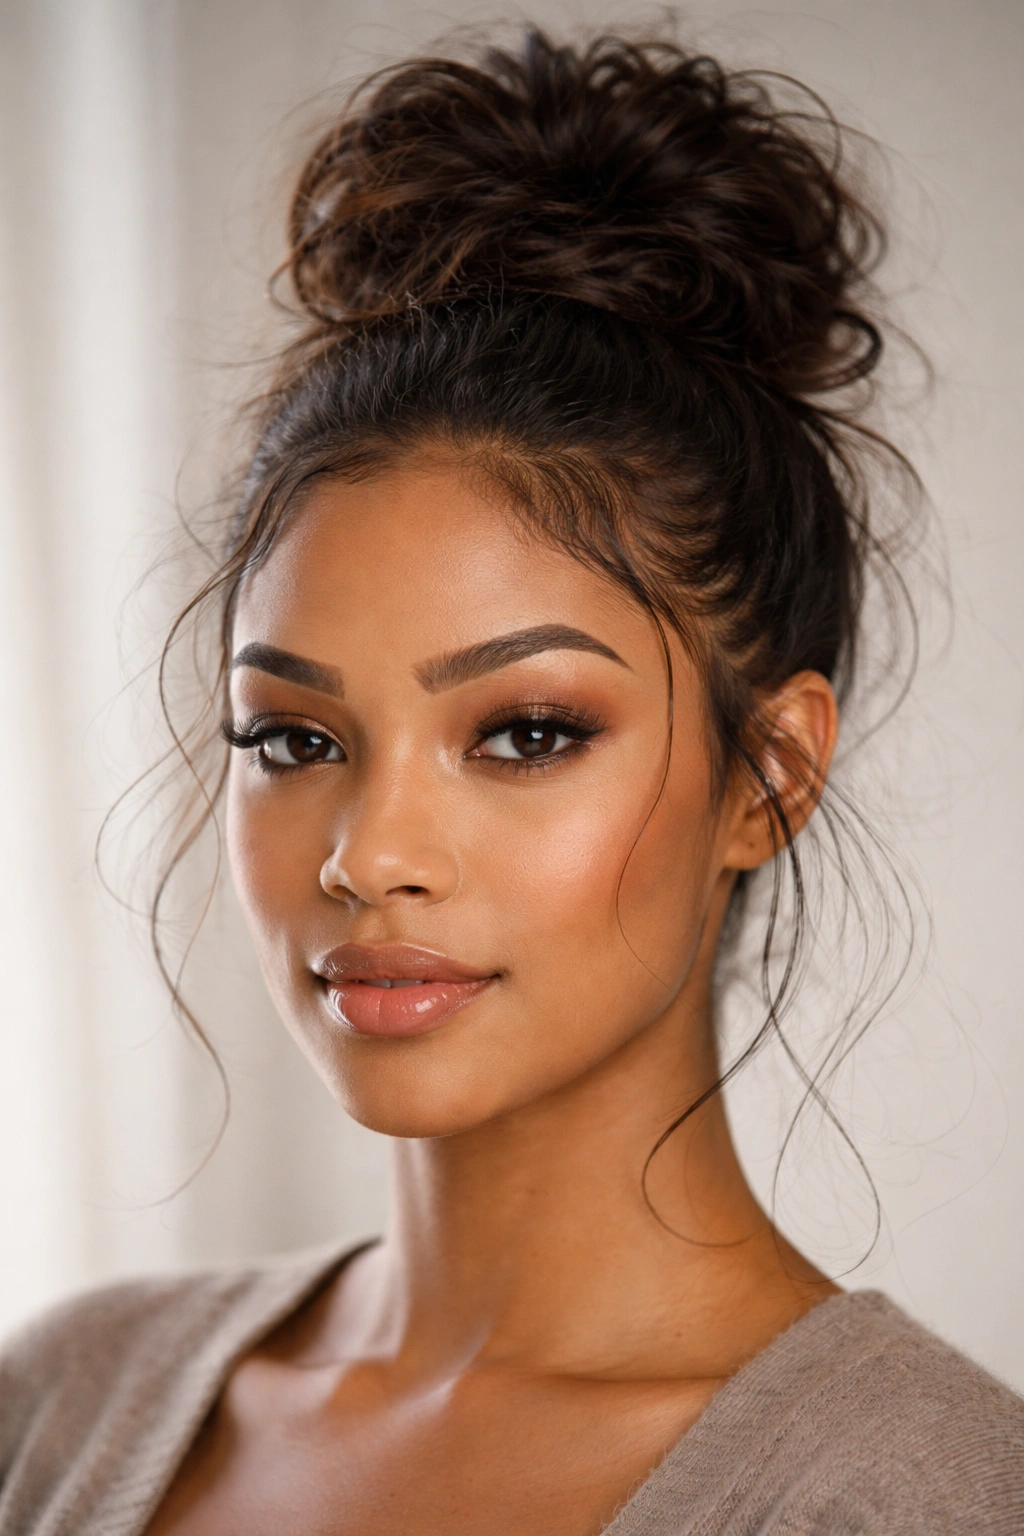
This final variation celebrates the detail of actual baby hairs and flyaways rather than trying to smooth them completely away. You’re laying your hairline edges smoothly, but you’re intentionally leaving small wisps of baby hairs loose around your face and hairline. These delicate wisps soften the look and add a romantic, intentional element to the overall style.
Why Baby Hairs Matter
Baby hairs are that fine, wispy hair that grows around your hairline naturally. Traditionally, people try to control or eliminate them, but modern styling celebrates them as a design element. When you lay your edges while leaving baby hairs free, you’re creating a soft frame around your face that looks intentional and flattering. This variation is particularly stunning if you have naturally fine, wispy baby hairs or if you’ve styled your baby hairs with a light gel to define them subtly.
Styling This Look
Create your messy bun as you normally would — high, mid-level, or low depending on your preference. Once the bun is secured, go back to your hairline and lay your edges smoothly with gel and a brush, creating clean, defined lines. But here’s the key difference: before your gel completely sets, gently release or smooth a few small wisps of baby hair along your hairline, especially around your temples and at your center part. You can use a light gel or mousse to define these wisps so they look intentional rather than accidental. They should feel like a soft frame for your face, not a styling mistake. The laid edges are still the main event, but the delicate baby hairs add softness and dimension.
Pro tip: Curl or wave your baby hairs slightly with a small curling iron or a curl cream for extra definition and a more romantic, intentional look.
Final Thoughts
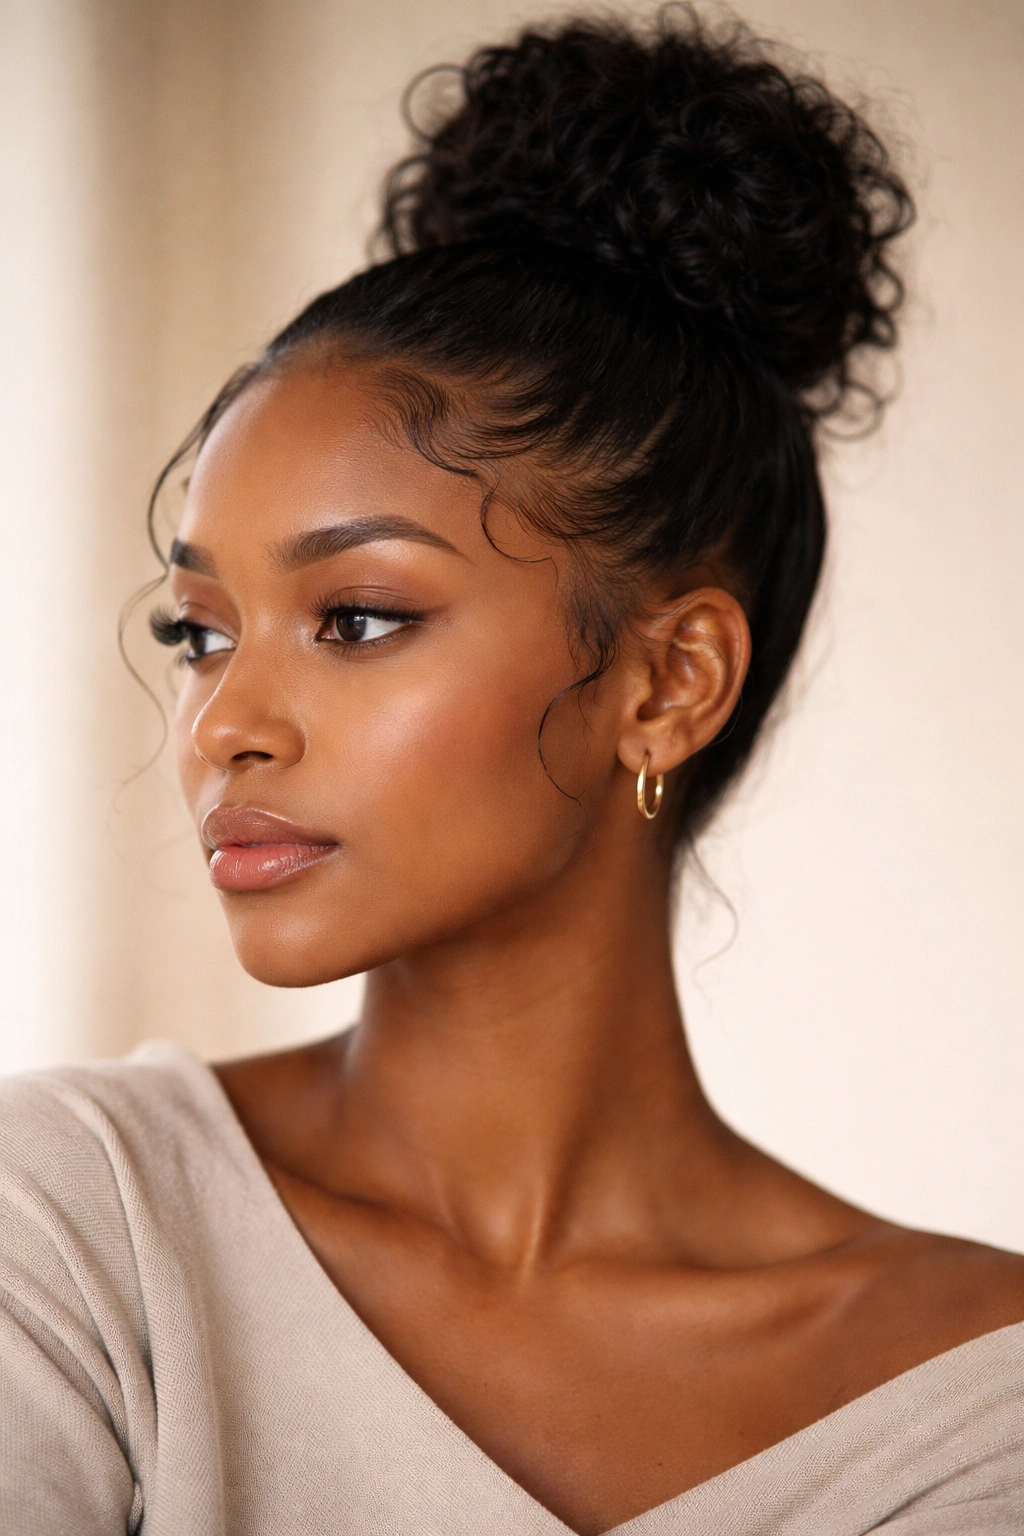
A messy bun with laid edges is the perfect style because it bridges two opposing aesthetics: relaxed and polished, effortless and intentional, textured and sleek. The eight variations above show just how adaptable this style really is, whether you’re drawn to the classic simplicity of straight edges, the artistry of curved or patterned designs, or the dimensional interest of off-center placements and bubble structures. The beauty of this style is that it works for virtually every hair type, length, and texture — you’re just adjusting the technique and products based on what you’re working with.
The key to nailing any of these styles is understanding that the laid edges are just as important as the bun itself. Rushing through your edges or treating them as an afterthought undermines the whole look. Invest in good edge control or gel, get a dedicated edge brush or small toothbrush, and spend time actually laying your edges with precision. That attention to detail is what transforms a basic messy bun into something that looks intentional, stylish, and genuinely thought-through.
Whether you’re reaching for the classic laid-edge bun on a busy morning or spending time creating a pattern-edge design for a special occasion, this hairstyle has proven itself endlessly versatile and genuinely flattering. Start with whichever variation appeals to you most, practice the technique a few times, and don’t be afraid to experiment once you’ve got the basics down. Your laid edges are a canvas for creativity, and your messy bun is the perfect vehicle for expressing your personal style.
