



There’s nothing quite like the freedom of a music festival—the music, the energy, the vibe—but if there’s one thing that can kill the experience, it’s hair in your face all day. Whether you’re dancing through a three-day camping festival or catching shows at a city venue, the right hairstyle makes all the difference. Messy buns are the ultimate festival move because they’re practical, they look intentionally undone in the best way possible, and they give you that effortlessly cool aesthetic that festival culture celebrates. The key is choosing a style that actually stays put through hours of movement, won’t fall apart when you get sweaty, and still looks Instagram-worthy when you catch yourself in a reflective surface. Beyond just pulling your hair up and calling it done, there are distinct messy bun variations that work for different hair textures, face shapes, and the specific kind of festival energy you’re going for. Some styles lean boho and romantic, others go punk and edgy, and a few are pure practical genius for serious festival-goers who plan to be on their feet from sunrise to headliner. Let’s explore the messy bun styles that’ll keep your hair under control while keeping your festival vibe absolutely intact.
1. The Textured Crown Bun
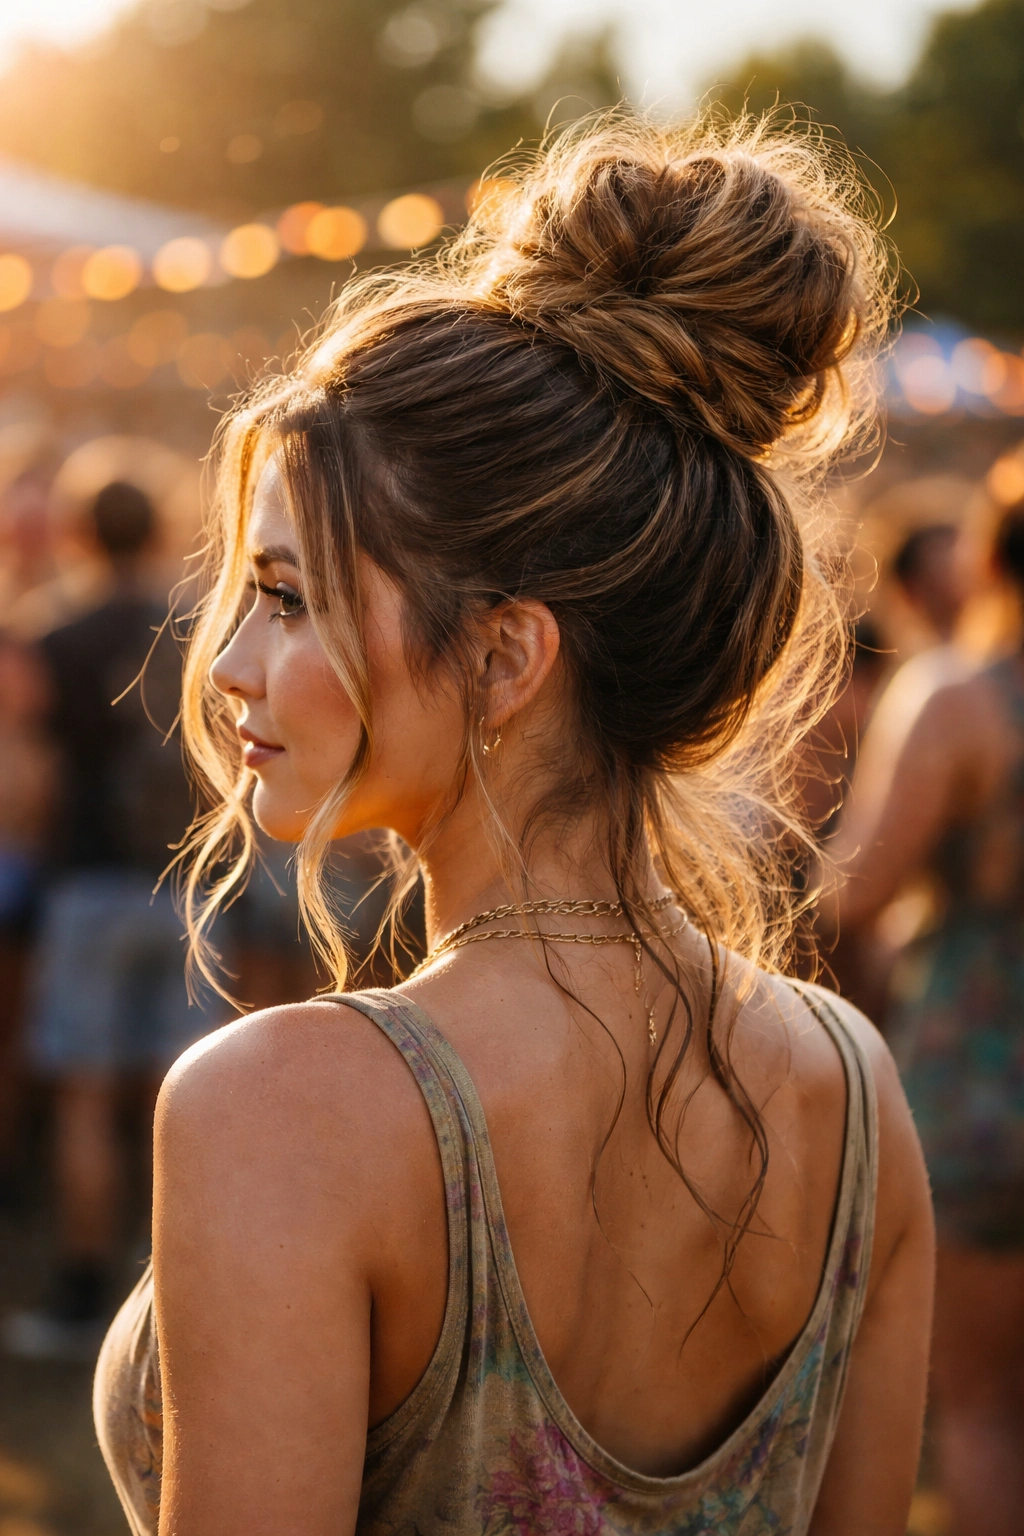
This is the messy bun that says you woke up like this—except you actually planned it carefully. The textured crown bun sits high on the crown of your head and gets its staying power from deliberate waves and bumps rather than a sleek wrap. This style works because it distributes the weight of your hair across multiple sections, making it incredibly stable even when you’re jumping around.
How to Create the Textured Look
Start by blow-drying your hair with a round brush to create volume at the roots, or use a texturizing spray if you’re starting with hair that’s already a day or two old—festival hair, basically. The texture is actually your friend here. Use a curling iron or wand to create loose waves throughout, concentrating on the crown and upper sections. Don’t aim for perfect waves; slightly bent, undone waves are exactly what you want.
Building the Structure
- Flip your head upside down and gather all your hair at the crown point
- Secure it loosely with a elastic band—don’t pull it too tight, as that defeats the messy aesthetic
- Twist the ends of your hair around the base of the bun to create volume and shape, pinning sections as you go with bobby pins
- Pull small sections out intentionally around your face and throughout the crown for that deliberately undone texture
- Use a texture spray or light hairspray to hold the style without making it stiff
This style typically lasts 8-10 hours through active festival movement, and it gets better as the day goes on because the texture makes it more interesting as it loosens slightly.
2. The Braided Base Bun
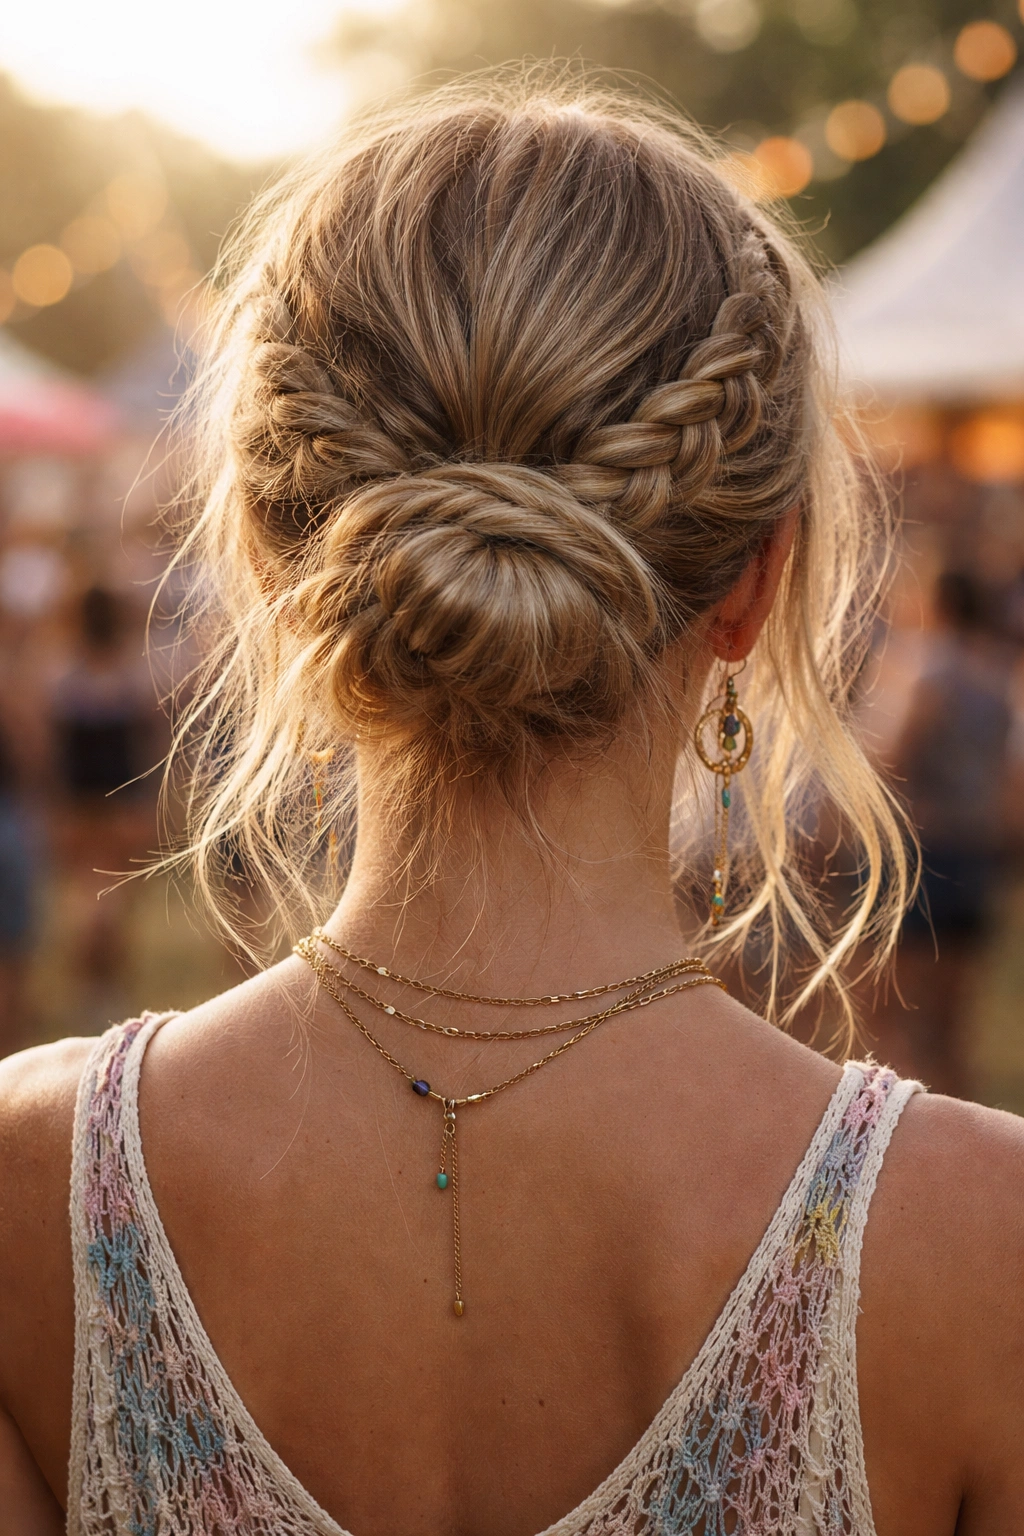
If you want a messy bun that’s engineered to stay put all day and night, the braided base bun is your answer. By creating a foundation braid before you wrap the bun, you’re essentially locking everything into place while maintaining that carefree, undone appearance.
The Two-Braid Foundation
This isn’t about perfection—messy braids are part of the charm. Divide your hair into two sections down the middle. Create a loose French braid (or dutch braid if you want texture) down each side, letting pieces fall out naturally as you go. The goal is braids that look like they happened by accident, not ones that look tight and polished.
Wrapping Into the Bun
- Bring both braids to the back of your head at the nape or slightly higher, depending on how high you want the bun
- Cross the braids over each other at least once, which adds visual interest and security
- Wrap both braids around the base point and pin them securely with multiple bobby pins
- Pull and tease the wrapped braids outward to increase the bun’s diameter and create texture
- Leave the very ends of the braids slightly loose and hanging, or tuck them under and pin them
The beauty of this style is that the braids literally become the infrastructure of your bun—even if you’re dancing hard enough to cause chaos, the braids hold everything in alignment. This style can easily last 12+ hours.
3. The Spiky Top Knot
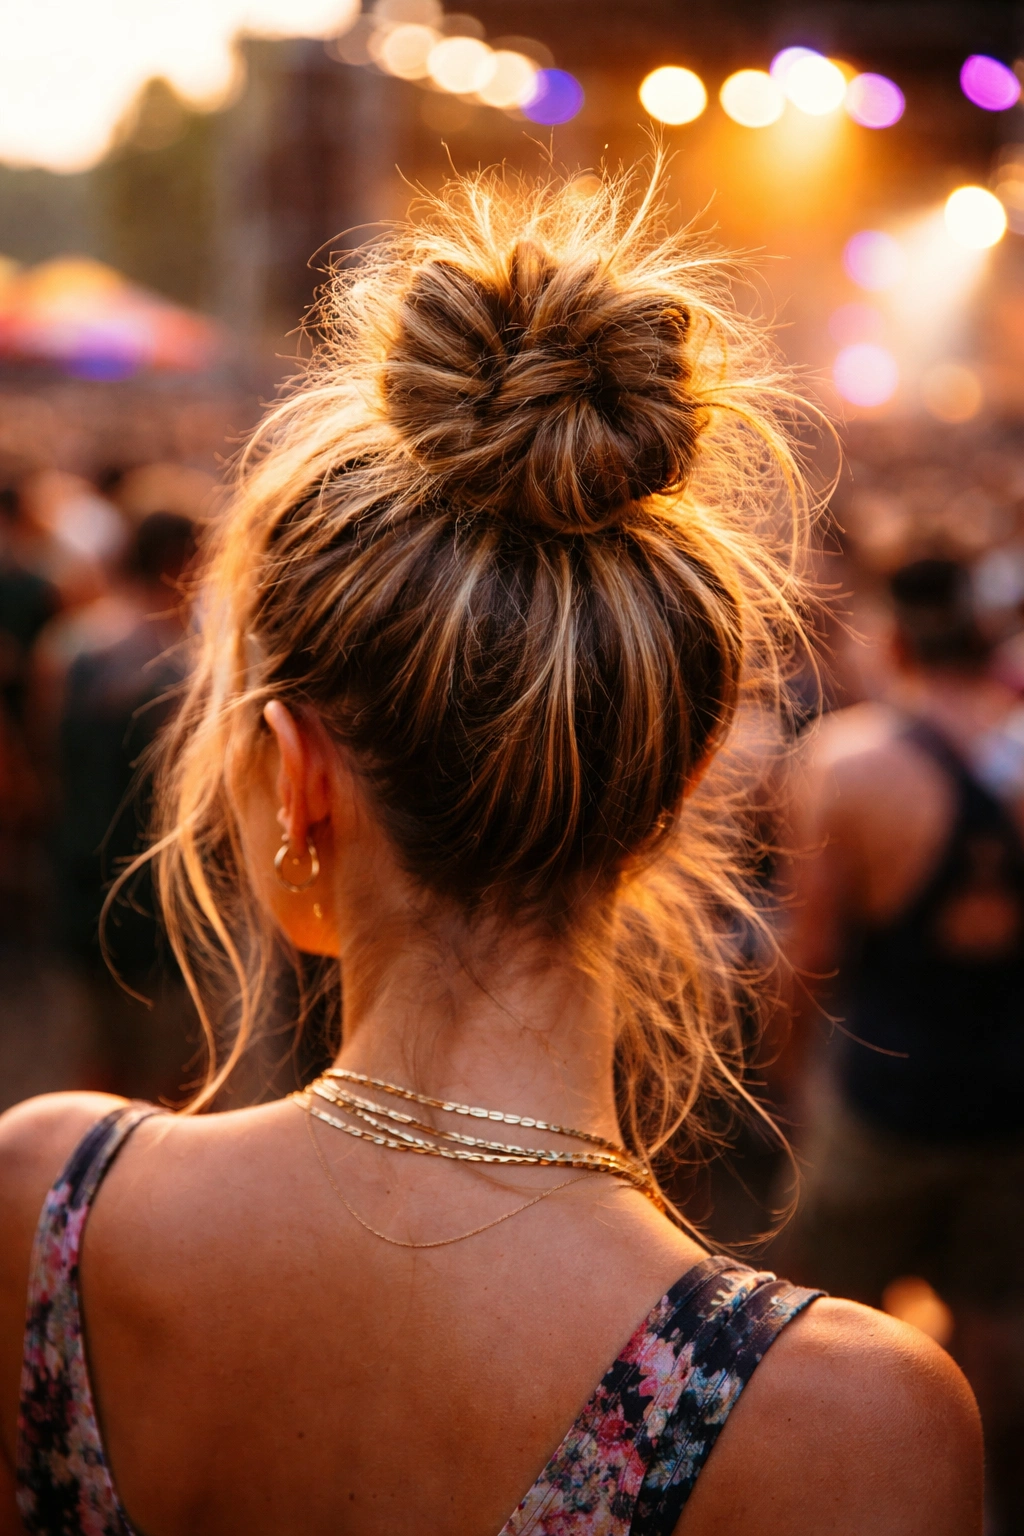
For the festival-goer who wants something playful and unapologetically bold, the spiky top knot takes the crown bun concept and cranks the texture up to maximum. This style is all about controlled chaos—it’s messier and more sculptural than other options, which is exactly why it stands out in a festival crowd.
Creating the Spike Effect
The secret to spiky dimension is strategic backcombing and the right product combination. Blow-dry your hair with maximum volume, tilting your head in different directions to get texture throughout. Use a large barrel curling iron to add loose waves, and don’t straighten anything—rumpled is the goal.
Building the Spiky Shape
- Gather hair at the very crown of your head and secure loosely with an elastic
- Backcomb the gathered section and the halo of hair around it to create volume and grip
- Using bobby pins, secure small sections of hair at varying heights around and within the bun, creating peaks and texture
- Tease the bun itself gently to increase its overall size and make it look fuller
- Use a strong-hold texture spray (not slick hairspray) to hold the shape without weighing it down
This style reads as intentional texture rather than “I didn’t brush my hair.” Festival crowds love this energy—it’s clearly deliberate but completely effortless-looking.
4. The Side-Swept Festival Bun
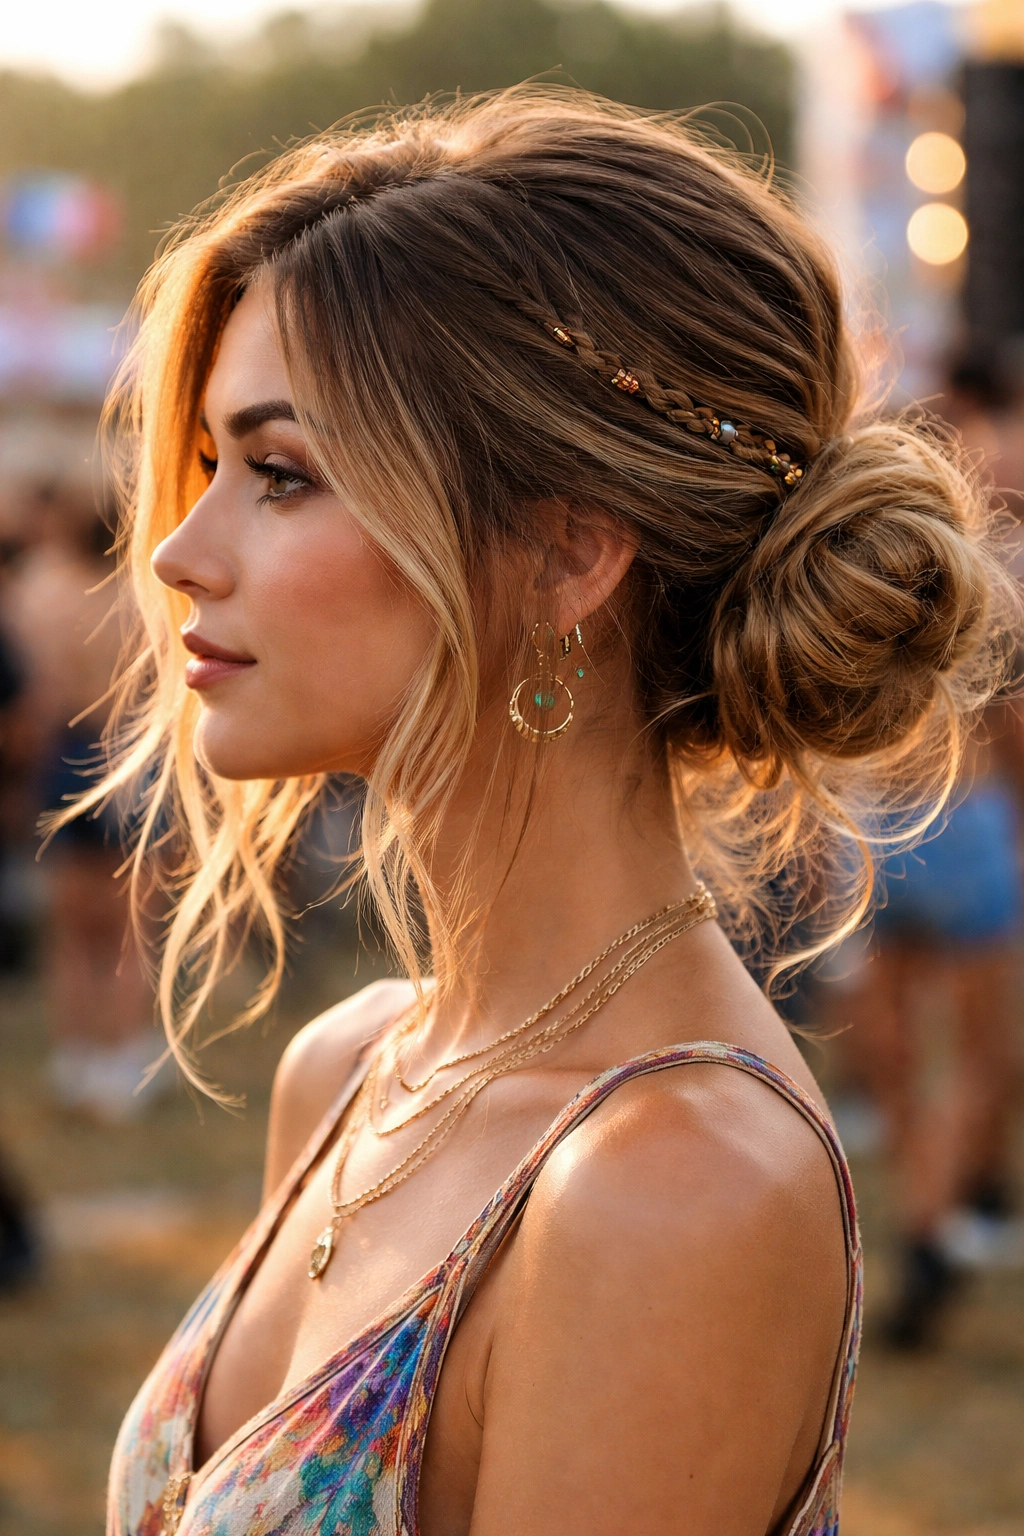
The side-swept bun is perfect if you want to show off your face while keeping hair completely controlled. By sweeping everything to one side and securing the bun there, you create asymmetry that’s flattering and interesting while freeing up one entire side of your head.
The Asymmetrical Advantage
This style works particularly well for festival settings because it photographs beautifully from one angle (perfect for those candid festival pics with friends), and it keeps hair entirely off your neck and shoulders—crucial when you’re in a crowd and moving around constantly.
Creating the Sweep
- Use a round brush to blow-dry all your hair with volume, aiming it toward one side
- Create waves or texture with a curling iron, again emphasizing the side you’re sweeping toward
- Use a large paddle brush to smooth the hair over to your chosen side, sweeping from the opposite side
- Gather the hair at the base of the side you’ve swept toward, positioning it lower—around ear level or slightly lower
- Twist and wrap the gathered hair into a bun, securing with bobby pins
- Pull pieces down and away from the bun to create softness around your face and down the back
The exposed side of your head (whether it’s shaved, undercut, or just bare) becomes part of the style, giving you edge and visual interest. This bun stays secure because the side-sweep naturally pulls hair away from the crown where it’s most likely to slip.
5. The Double-Coil Bun
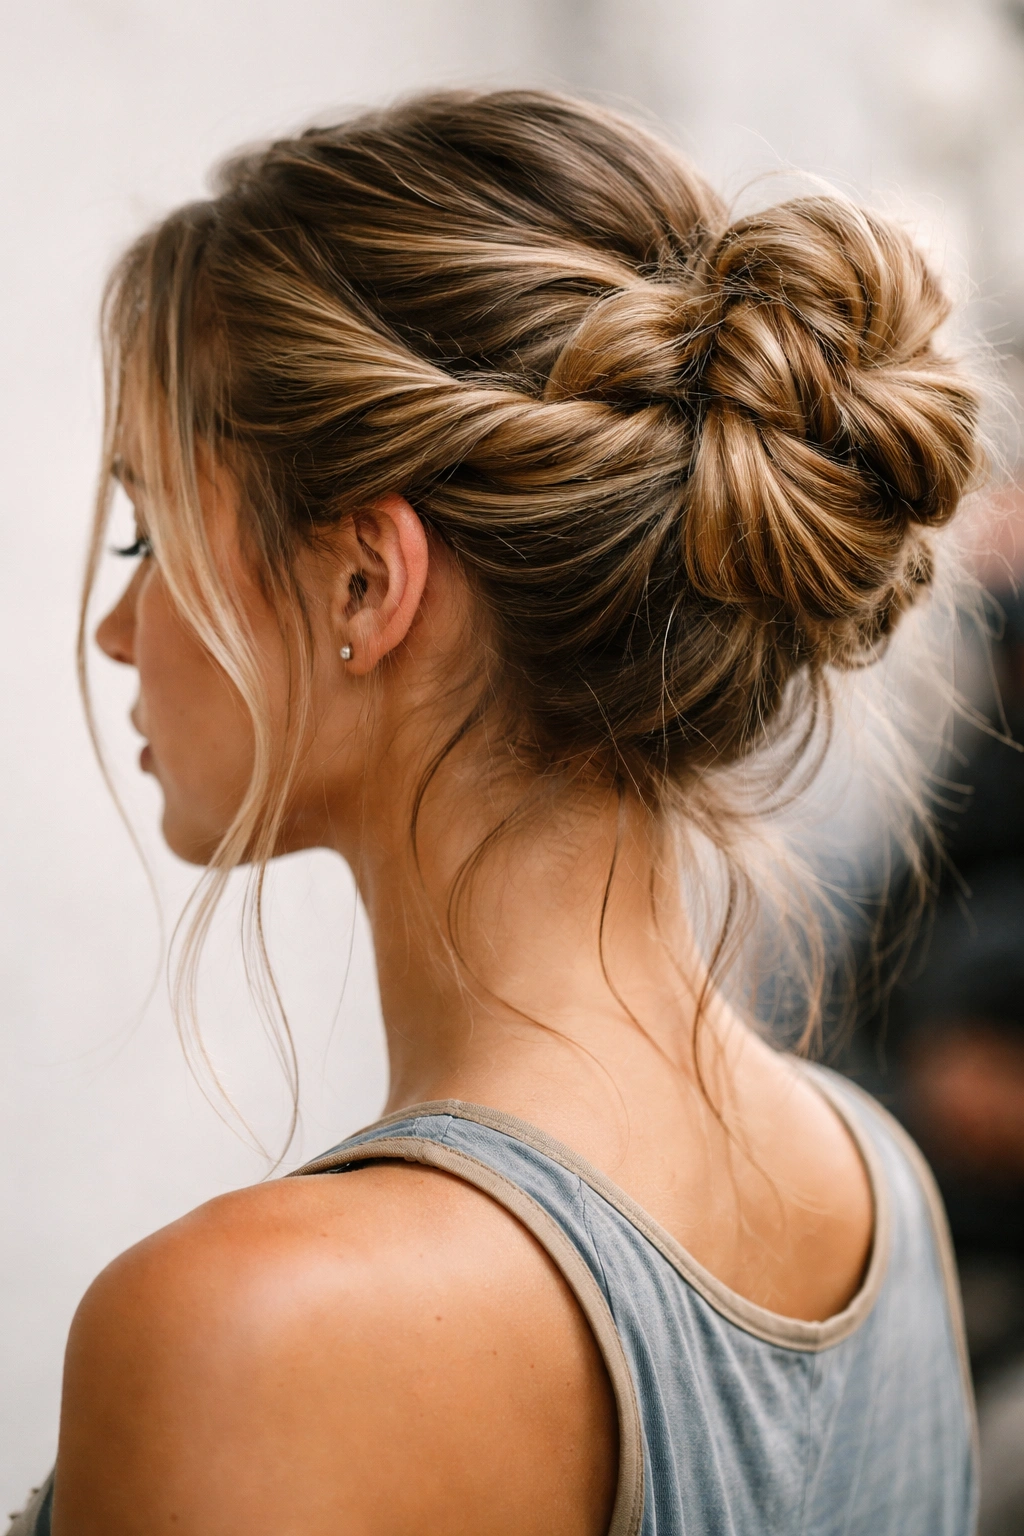
This is the technical masterpiece—two coiled sections of hair wrapped around each other to create a bun that looks impossibly intricate while being surprisingly stable. It’s sculptural, artistic, and absolutely the move if you want to stand out visually at the festival.
The Coiling Technique
Start with textured hair—use waves or braids as a base if your hair is straight. The texture gives the coils grip and definition. Divide your hair into two even sections, either down the middle or front to back, depending on the look you want.
Building the Double Coil
- Take the first section and twist it tightly while wrapping it around your head in a coil shape, securing as you go with bobby pins
- Take the second section and do the same, wrapping it around and through the first coil, weaving them together as you go
- The two coils should interlock, creating a dimensional, braided-looking effect even though you’re really just working with twists
- Pin both coils securely at the crown or back, depending on where you’ve positioned them
- Pull small sections out from within the coils to add texture and soften the overall look
This style requires a bit more time to create (15-20 minutes), but it’s genuinely conversation-starting and photographs like you’ve got a professional stylist following you around the festival.
6. The Halo Braid Bun
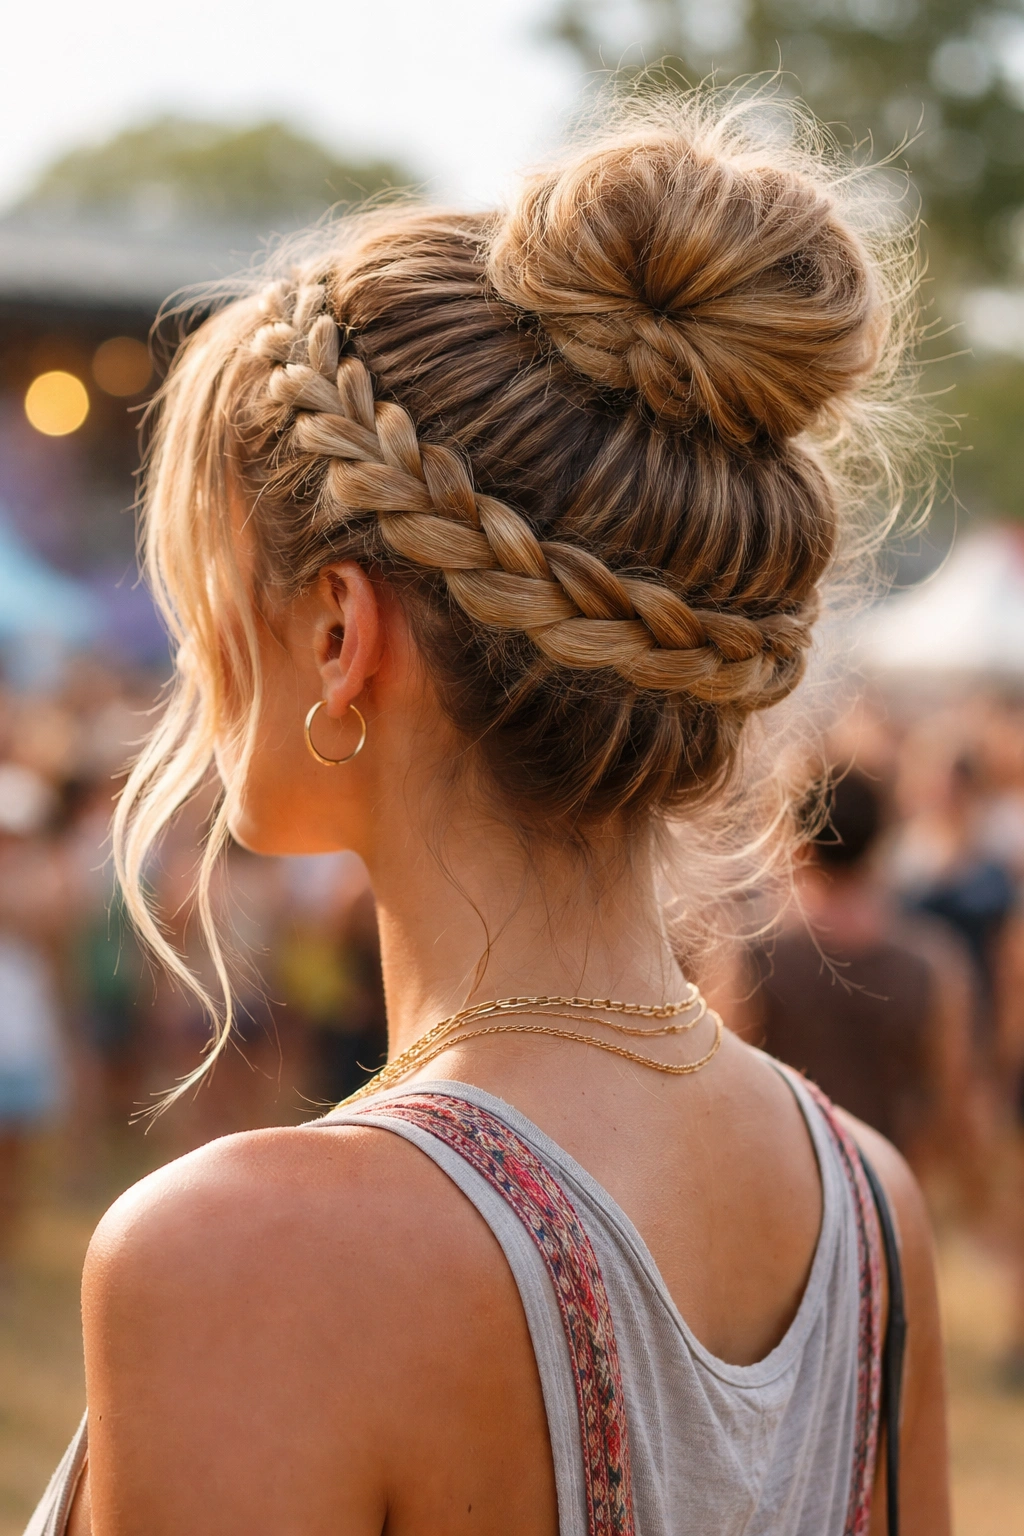
The halo braid bun is the boho-chic entry that bridges practical festival hair and actually-really-beautiful styling. It’s romantic without being fussy, it’s completely secure because the halo braid wraps around your entire head, and it photographs beautifully in natural light.
Creating the Crown Halo
A halo braid is a braid that wraps around your head like a crown, starting at one side and finishing at the other. You can use a French braid, Dutch braid, or even loose, playful rope braids—whatever matches your vibe.
The Full Halo Bun Technique
- Create your halo braid starting at one side of your head (around ear level), working it loosely around the back and finishing on the other side
- Gather all remaining hair (which will be mostly on top of your head at this point) and twist it into a bun shape at the crown
- Secure the bun with bobby pins, then wrap the loose ends of your halo braid around the base of the bun and pin them in place
- The braid essentially becomes a frame around your entire updo
- Pull small pieces out of both the braid and the bun to create a cohesive, intentionally undone texture
This style is perfect for festival settings where you’re going to be photographed a lot. It reads as deliberately styled without looking like you spent hours on your hair.
7. The Messy High Pony Bun
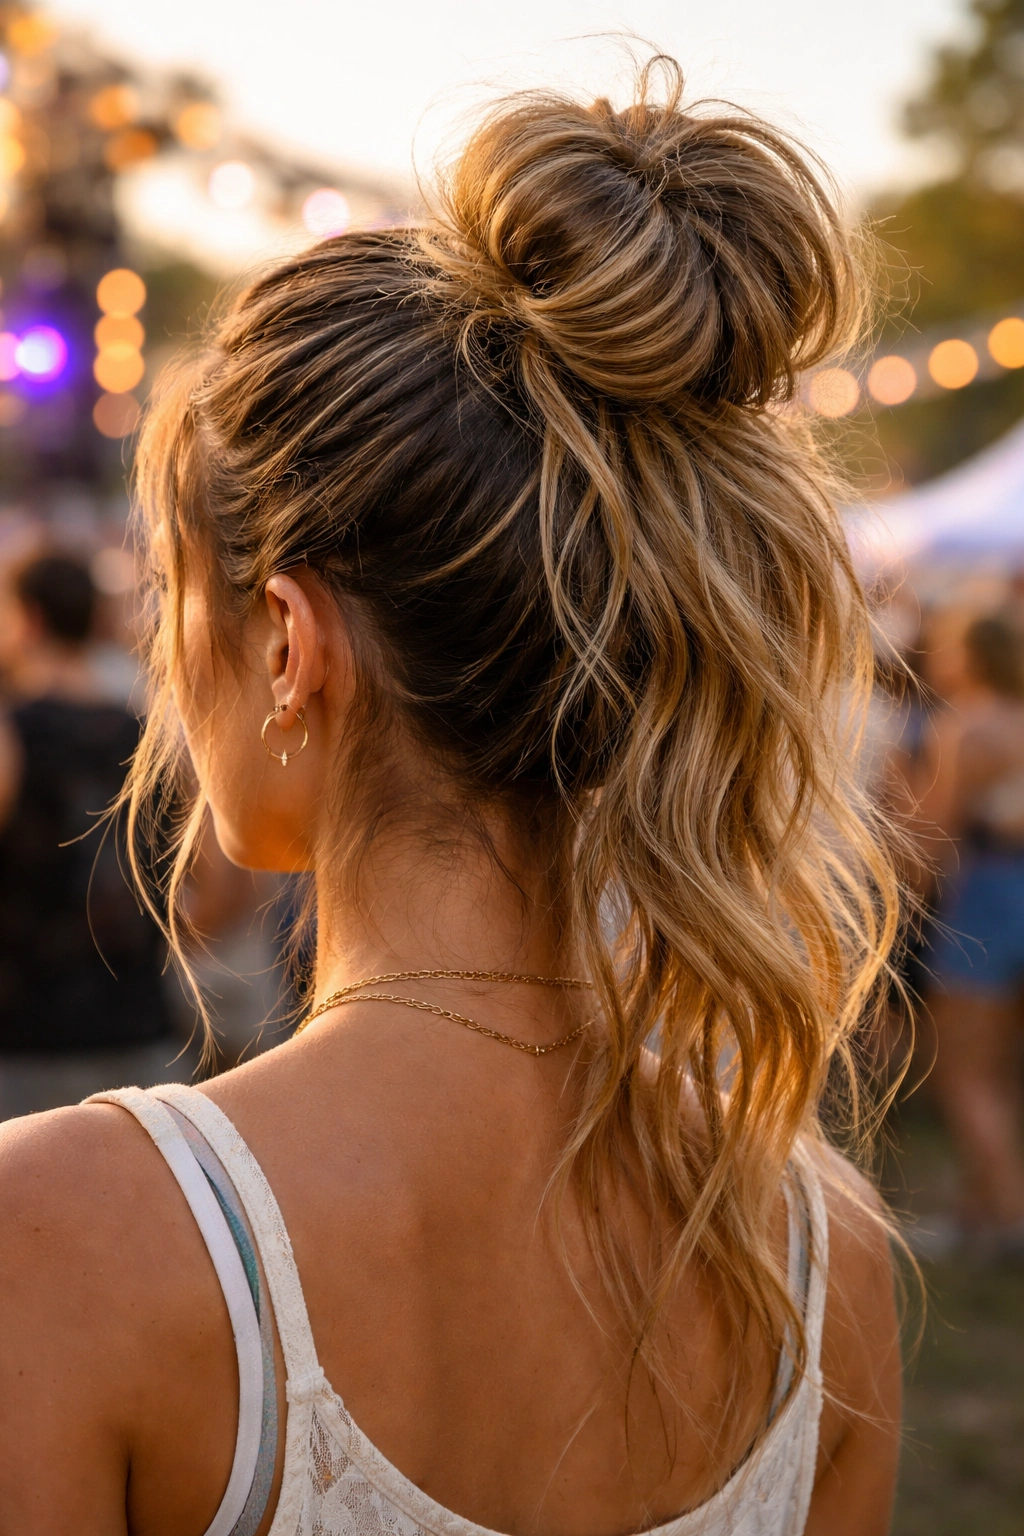
This is the simplest option on the list, but simple doesn’t mean boring—it’s the perfect choice if you want something you can execute in five minutes, that’ll stay put all day, and that gives you maximum neck freedom in a hot, crowded festival environment.
The High Pony Foundation
Gather all your hair at the very crown of your head and secure it with an elastic band. This elastic should be tight enough to hold everything securely, but not so tight that it gives you a headache over hours of festival-going.
Converting to a Bun
- Take the ponytail and loop it up, but don’t pull it all the way through the elastic—leave the ends hanging
- The ponytail itself becomes the bun shape, and the hanging ends create the “messy” texture
- Secure the looped portion with bobby pins on multiple sides to keep it from shifting
- Take those hanging ends and wrap them loosely around the base of the bun, tucking and pinning them in place
- Pull small sections and pieces throughout to create texture and volume
The genius of this style is that it requires minimal styling skill, it’s genuinely comfortable for extended wear, and it looks intentional without requiring any heat tools or complicated technique. Plus, if your bun starts to slip as the day goes on, you can quickly re-tighten the elastic without destroying your hair.
8. The Twisted Wrap Bun
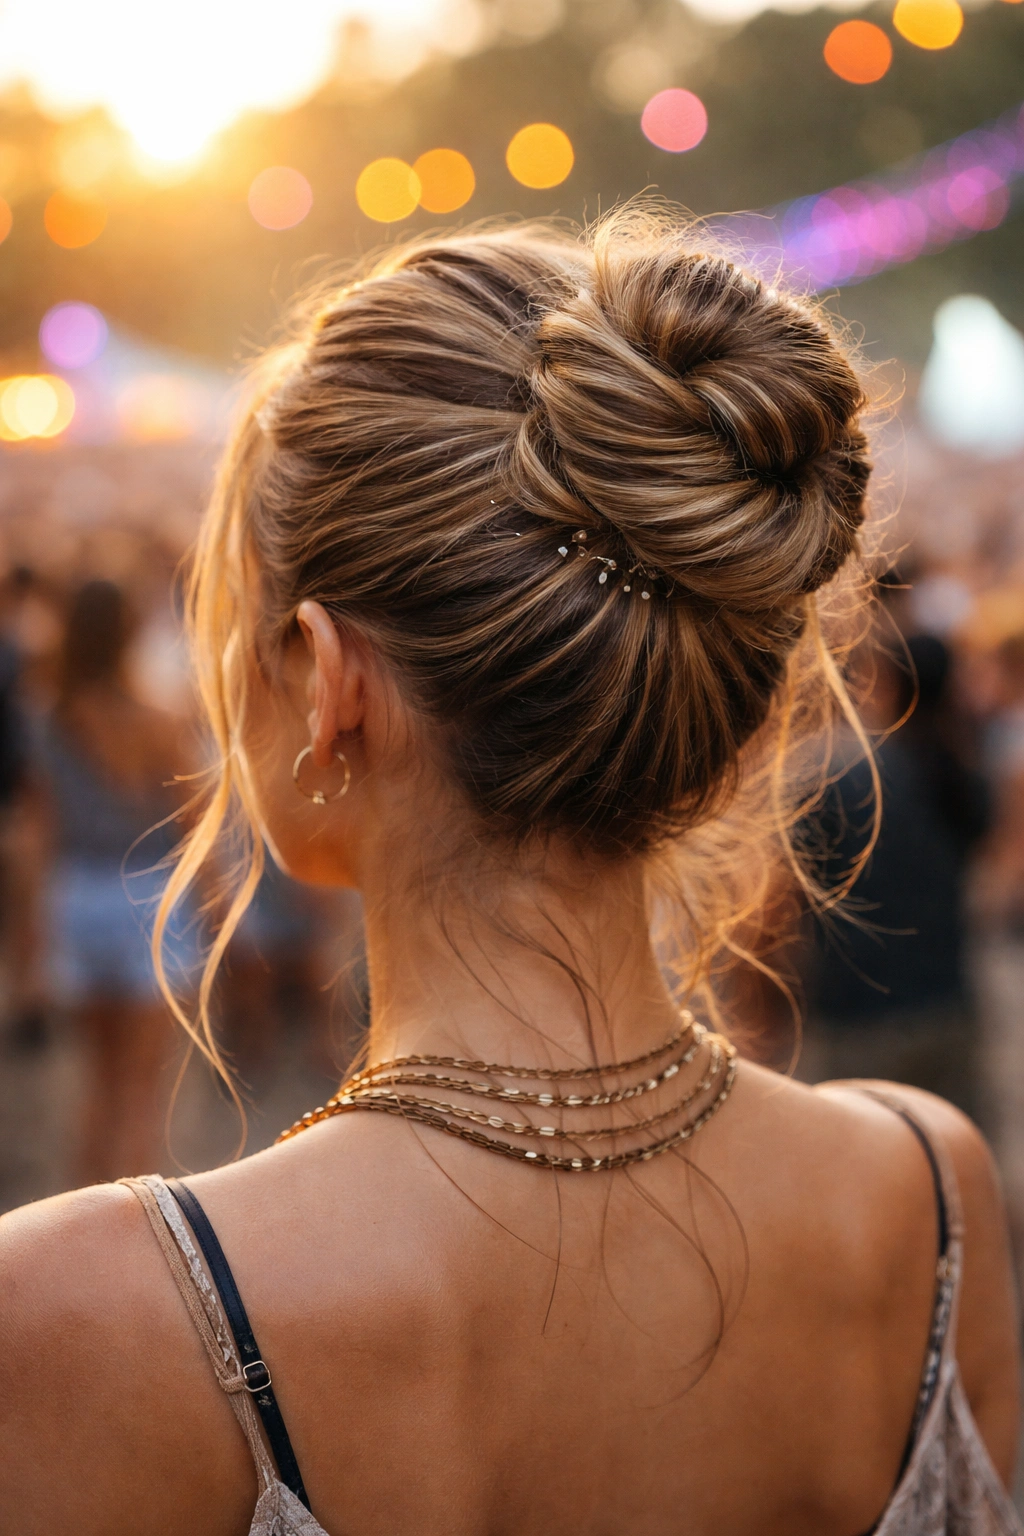
The twisted wrap bun is pure architectural beauty—it’s structured, it’s completely secure, and it looks like an actual piece of art on top of your head. This style uses tension and strategic pinning to create a bun that won’t budge even if you’re in the pit during the headliner.
The Strategic Twisting
Begin with slightly damp hair (this gives you grip) or use a texturizing spray for traction. Blow-dry with volume if you want the finished bun to look fuller.
Building the Wrap Structure
- Divide your hair into 3-4 sections depending on thickness—you’re essentially creating multiple twist strands
- Twist each section tightly, starting from the roots and working down to the ends
- Begin wrapping these twists around each other at the crown, layering and weaving them together
- As you wrap, pin each layer securely with bobby pins inserted at different angles for maximum hold
- The twists should overlap and interlock, creating a lattice-like texture
- Once everything is wrapped and pinned, gently tease the surface of the wrapped twists to create texture and visual interest
- Use a light hairspray to hold without creating a stiff, shellacked appearance
The result is a bun that looks professionally done while being completely messy and textured. This style typically lasts through an entire day and night of festival activities without needing adjustment.
Final Thoughts
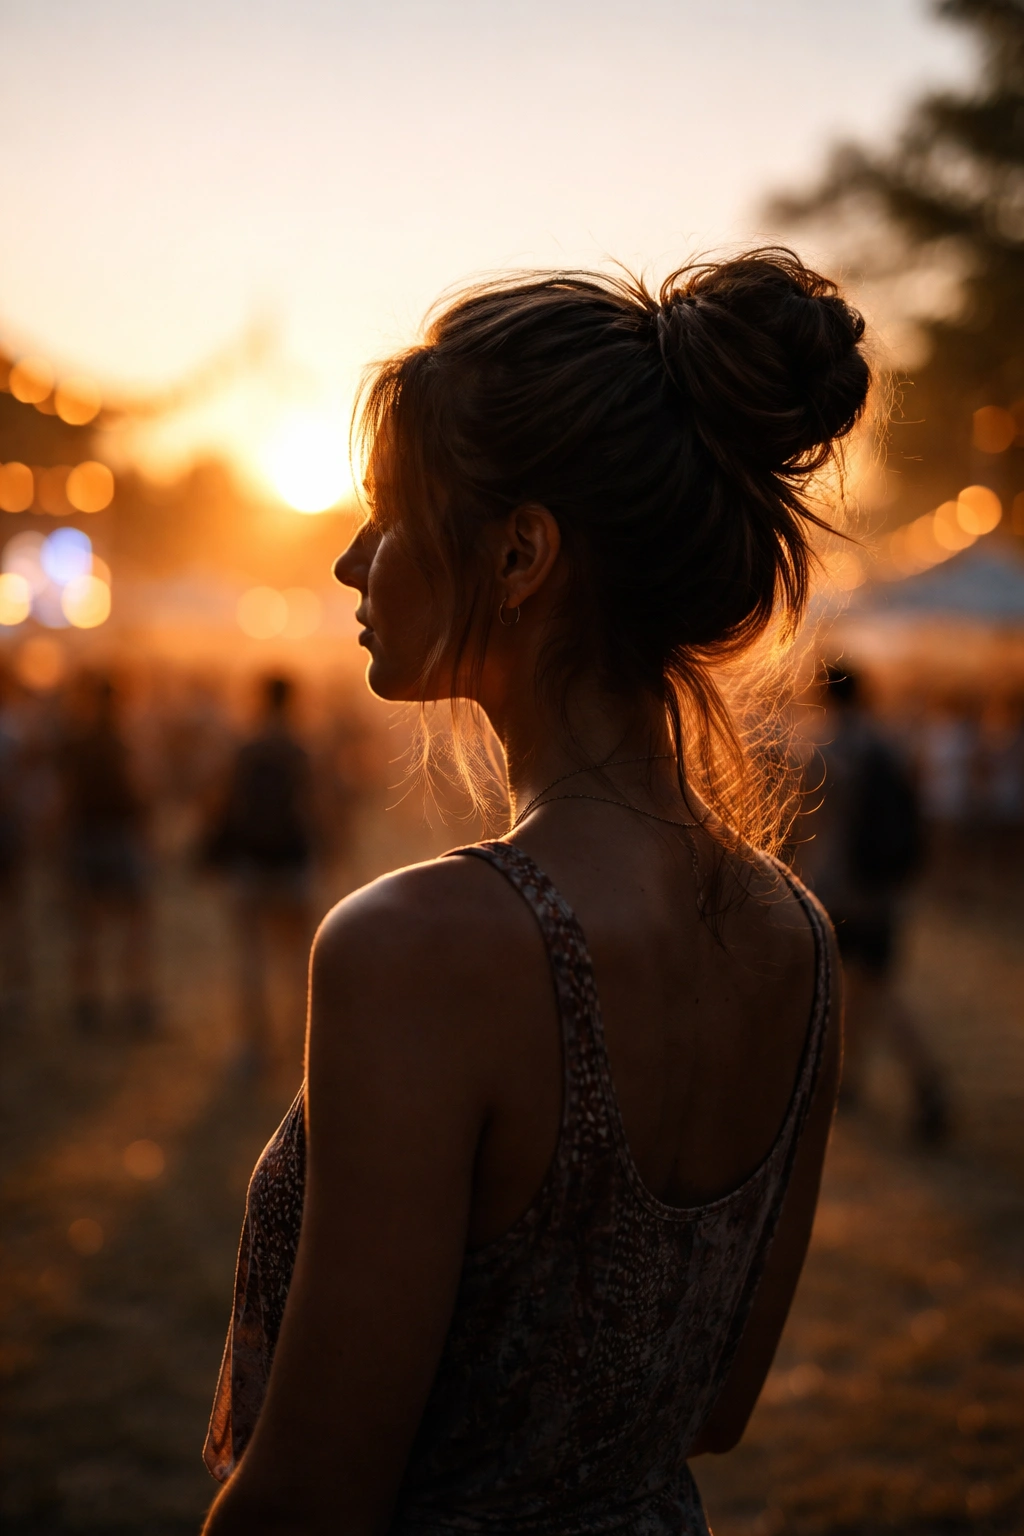
The right messy bun can genuinely transform your festival experience, turning hair from a source of frustration into an actual asset to your overall look. The style you choose depends on your hair texture, how much time you want to spend styling, and the aesthetic vibe you’re going for—whether that’s romantic and bohemian, edgy and artistic, or purely practical and no-nonsense. What matters most is choosing a style with enough texture, strategic pinning, and intentional messiness that it’ll hold up through hours of dancing, sweating, and moving through crowds. The best festival bun is one you don’t have to think about once it’s in your hair, freeing you up to focus on the actual reason you’re there—the music, the friends, and the unforgettable moments. Start with one of these styles, adjust it to suit your hair and preferences, and you’ll nail the effortlessly put-together festival look that makes you feel confident from sunrise to the final song.
