



Messy buns get a bad rap. People assume they’re what you resort to when you’ve run out of time and can’t be bothered to actually style your hair. But here’s the real secret: a truly great messy bun is intentional, flattering, and paradoxically easier to pull off than a sleek ponytail because it hides all your imperfections while still looking polished enough for nearly anywhere you need to go.
The best part? You don’t need special training, expensive tools, or even three bobby pins. With the right technique, you can create any of these eight styles in under two minutes flat—even faster once you practice them a couple of times. Whether you’re heading to the gym, a casual coffee date, or trying to look put-together while working from home, these styles work across hair types, lengths, and textures. They’re genuinely forgiving, which is the whole appeal of the messy bun in the first place.
What makes a messy bun actually work, though, is understanding the difference between “I didn’t try” and “I intentionally went for that undone vibe.” That’s what separates a style that looks effortless from one that just looks messy. Let’s walk through eight distinctly different approaches, each with its own personality, each achievable in the time it takes to brush your teeth.
1. The Classic High Messy Bun
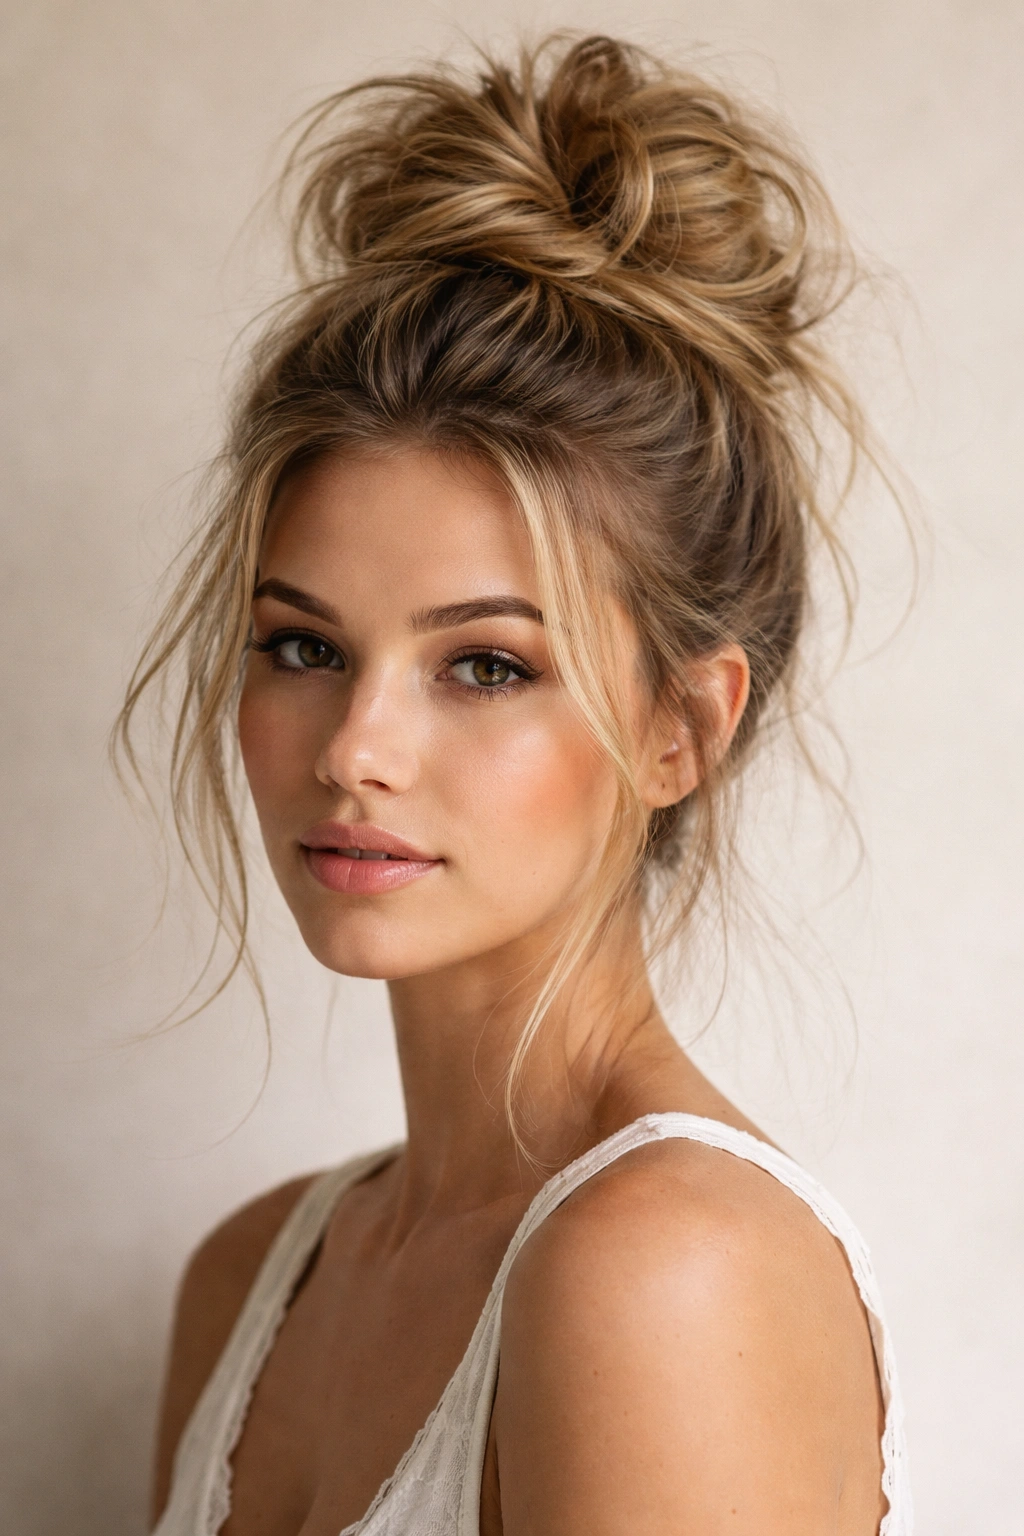
This is the foundation style—the one that works everywhere and never looks out of place. A high bun sits at the crown of your head, roughly where you’d wear a topknot, which makes it ideal for keeping hair off your face during workouts, in the office, or whenever you just need to get it up and out of the way.
Start by flipping your head forward and gathering all your hair at the crown using your fingers. Don’t use a brush here; the slightly textured grab you get from running your fingers through your hair actually helps the bun grip better and prevents it from sliding down throughout the day. Once you’ve got all your hair bundled at the crown, secure it loosely with a hair elastic—and this is crucial—leave a few loops of hair escaping on purpose rather than pulling it all the way through on the final wrap.
Gently tease those escaped loops with your fingers, loosening and fluffing them slightly to create that intentional-looking, undone texture. The key is making sure the bun sits at the crown and not tilted to one side, which signals that you actually meant for it to look this way. Once you’ve fluffed the loose pieces, use a couple of bobby pins to anchor any pieces that feel wispy or uncomfortable.
Why It Works Everywhere
The high messy bun reads as casual but still intentional, which is why it’s become the standard across gyms, offices, and weekend hangouts. It’s not so polished that it looks overdone, and it’s not so undone that it looks neglected.
How to Get It Right Every Time
- Flip your head forward before gathering, not after. This helps you see exactly where your crown is and ensures the bun sits in the right spot.
- Leave roughly two inches of hair escaping in the loops rather than pulling everything all the way through.
- Use a textured hair tie, not a smooth one. Textured ties grip better and slide less throughout the day.
2. The Twisted Low Bun
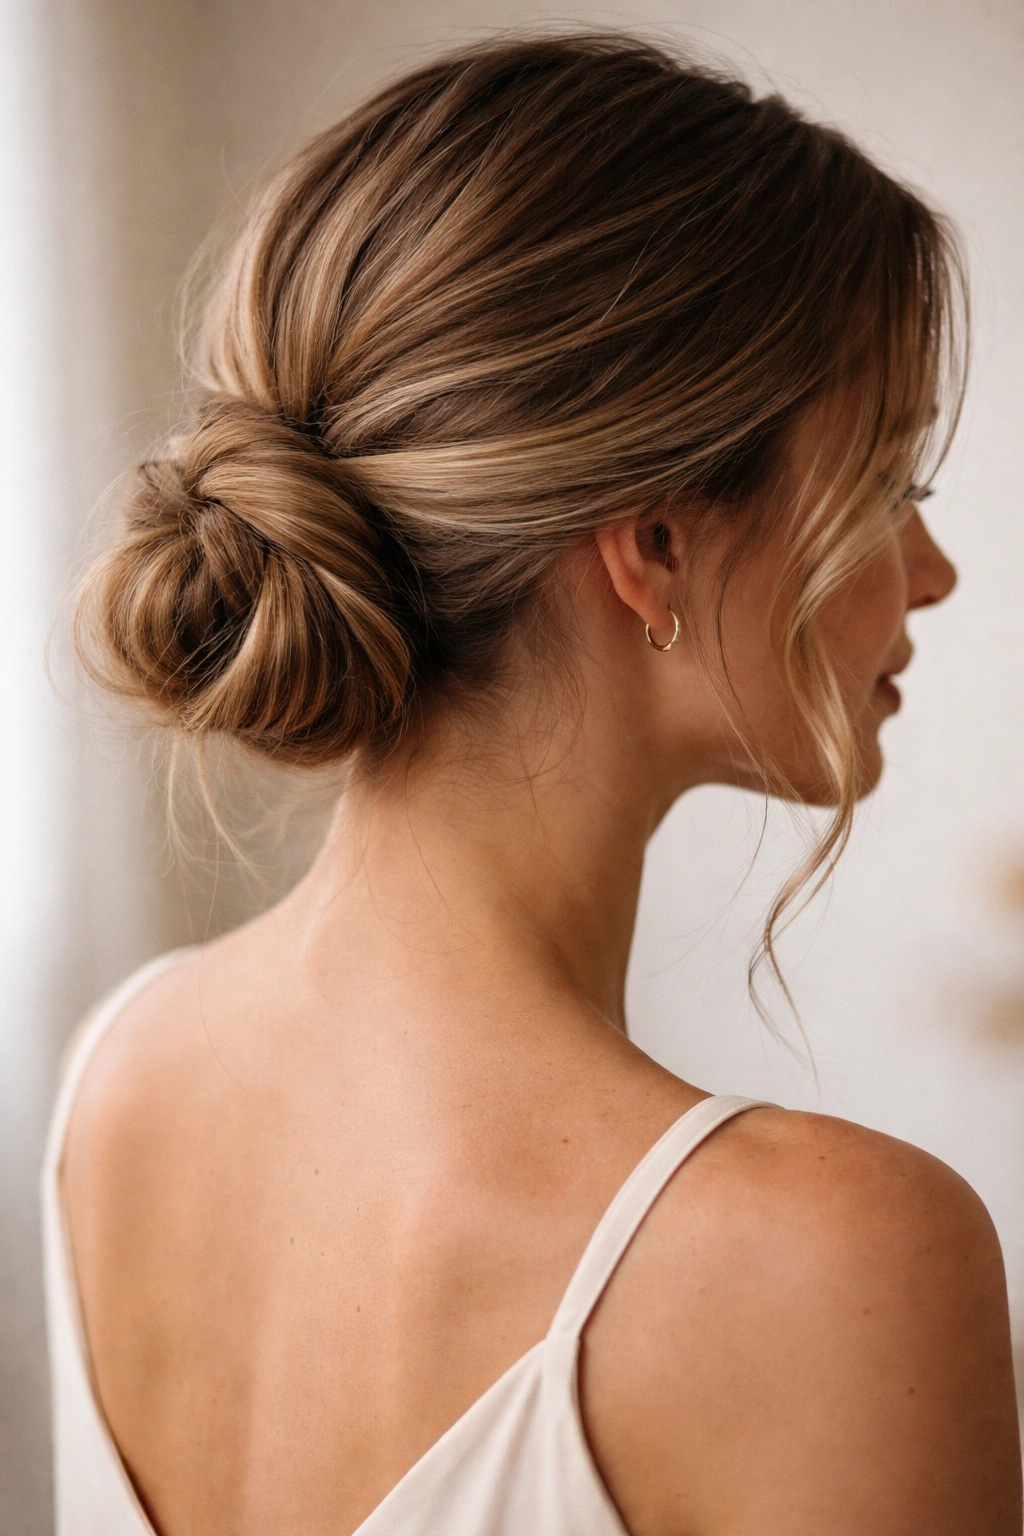
A low bun positioned at the base of your neck creates an entirely different vibe from the high style—it’s slightly more sophisticated while still maintaining that effortless, messy quality. This style works beautifully if you have a longer face and want to balance your features, or if you’re going somewhere that calls for a touch more polish than a gym session.
Brush your hair back and gather it into a low ponytail positioned at the nape of your neck, about three inches above where your neck meets your shoulders. Take that gathered ponytail and divide it into two sections. Twist the first section clockwise around itself, then twist the second section the same direction, and wrap them around each other in a spiral. You’re essentially creating a two-strand twist that winds around itself—it takes maybe thirty seconds and creates a sophisticated texture that a regular bun wouldn’t have.
Once you’ve twisted the spiral as high as you can while keeping it anchored, wrap it around the base of the ponytail to form a bun and secure it with bobby pins. Leave some pieces loose around your face and the lower back of your head to create that messy, undone effect. The twisted texture inside the bun catches light differently than a regular wrapped bun, which is what makes this version look more intentional and refined.
Why Twists Add Visual Interest
Twisted styles create depth and movement that smooth, wrapped buns don’t. The texture reads as more intentional and takes exactly zero additional time because you’re creating the style as part of the formation process.
Pro Tips for Twisted Buns
- Twist both sections in the same direction—clockwise or counterclockwise—rather than in opposite directions. Same-direction twists create a smoother spiral.
- Don’t make the twists too tight. A slightly loose, relaxed twist looks more effortless and is easier to manage if you need to adjust it later.
- Pull out wisps around your face before securing the bun completely so you don’t accidentally pin them down.
3. The Side-Swept Messy Bun
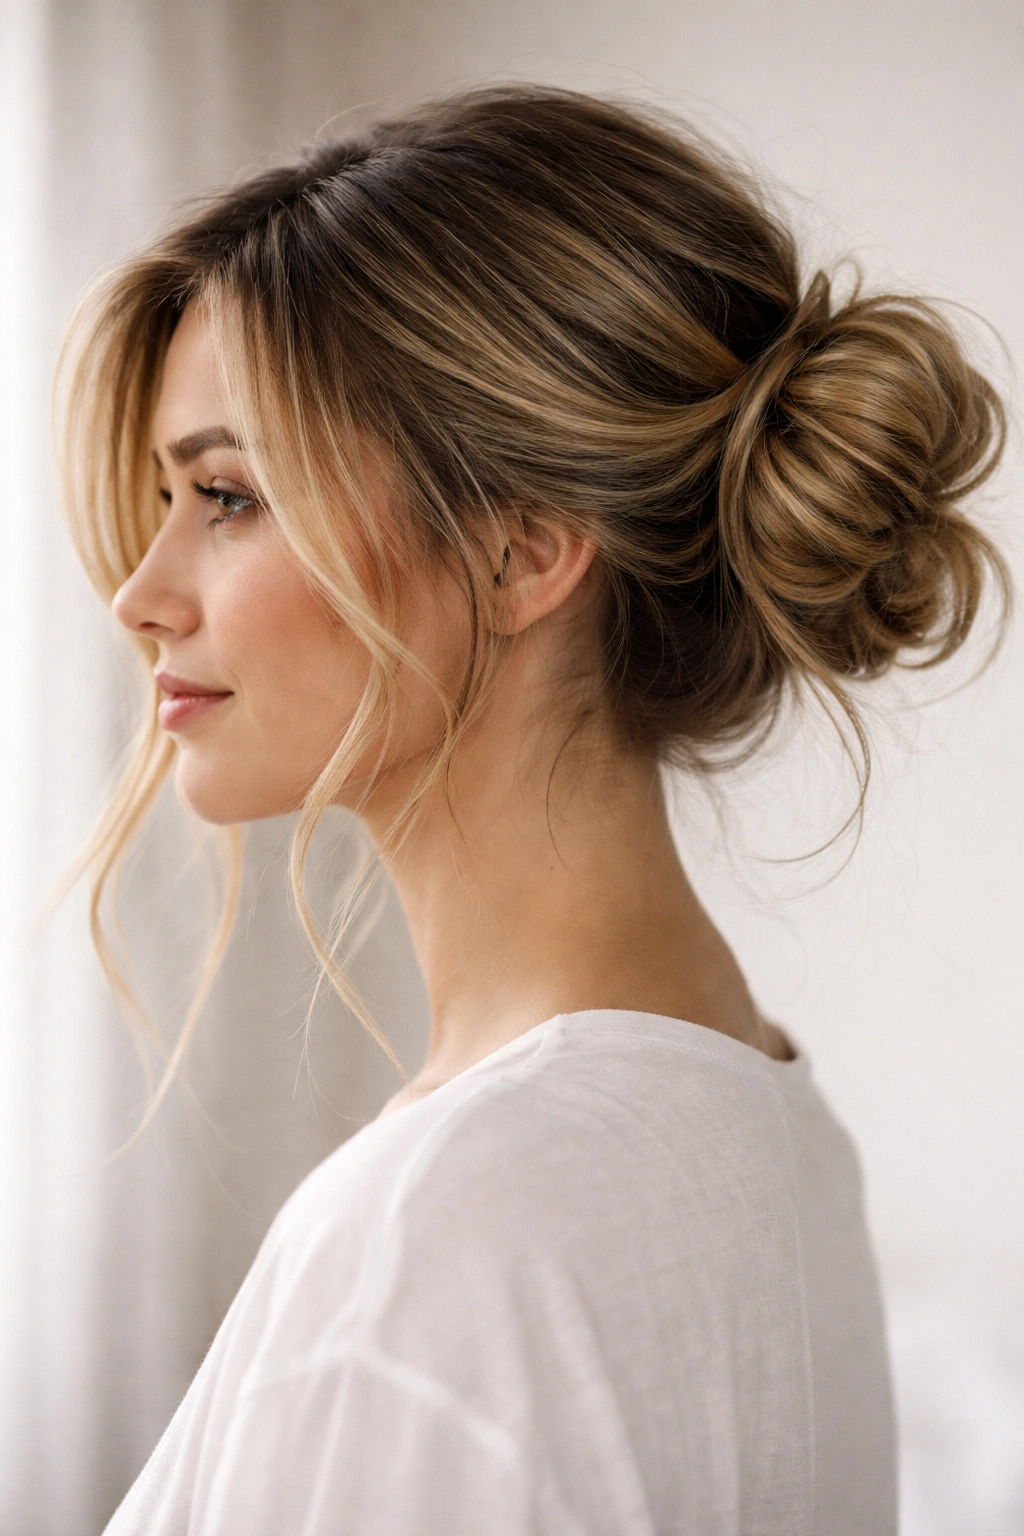
Instead of positioning the bun at the center of your head, sweep all your hair to one side and create the bun there. This asymmetrical approach instantly adds personality to the style and works particularly well if you have a side part or just prefer the way you look with hair shifted to one side.
Start with your hair down and brush it all to one side, gathering everything toward your ear. The gathered point will be positioned more toward the back of your head rather than at the crown or nape—roughly at ear level when you turn your head to the side. Secure the gathered hair into a ponytail at that side point, and then create your bun by leaving loops loose from the elastic and gently tugging them to create volume and texture.
The beauty of the side-swept style is that it automatically creates asymmetry, which reads as intentional and modern. It also leaves some hair on the opposite side of your head loose, which frames your face and softens the overall look compared to having everything pulled back at the center. Secure with a couple of bobby pins and adjust any pieces that escaped awkwardly.
When to Wear the Side Sweep
This style works well for casual hangouts, date nights where you want to look effort-conscious without being overdone, or anytime you want a little extra visual interest without dramatically changing your look.
Quick Technique Notes
- Sweep your hair to whichever side feels most natural to you. If you naturally part on the left, sweep left. The style should complement your face shape and existing hair habits, not fight them.
- The gathered ponytail point should be roughly at ear level or slightly behind your ear, not at the crown or the nape. This is what creates the asymmetrical sweep.
- Leave the hair on the opposite side completely loose and face-framing. Don’t pull it back or pin it. That contrast is what makes the style work.
4. The Braided Messy Bun
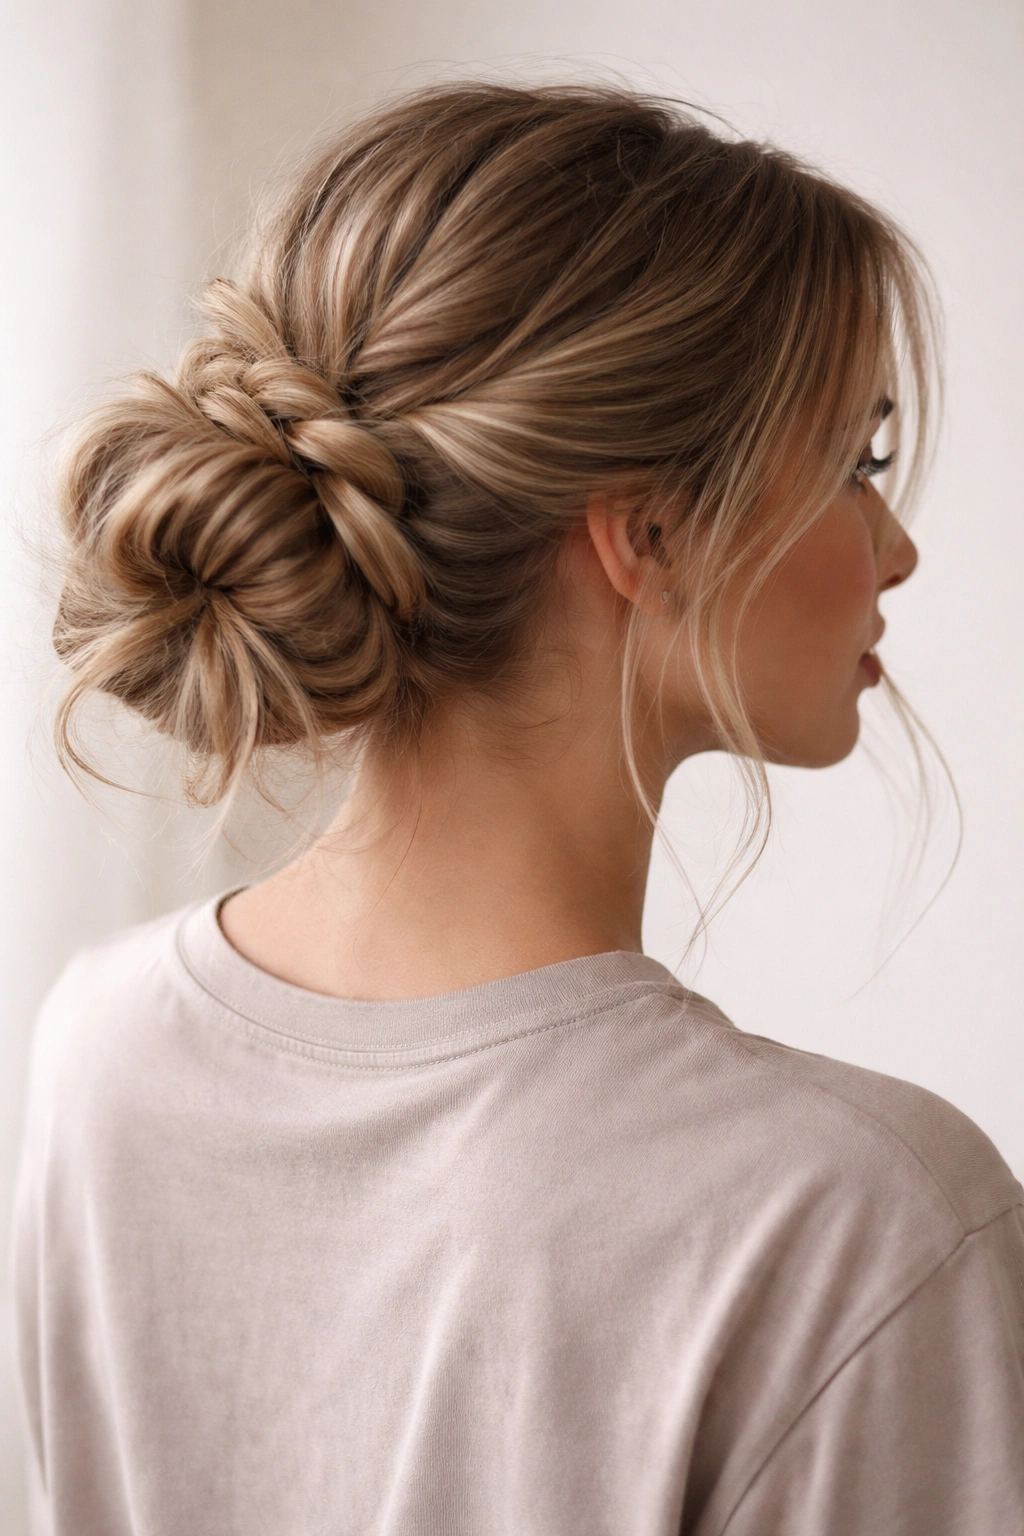
If your hair needs texture and grip to hold a bun well, or if you simply want a more detailed style that still takes under two minutes, incorporating a braid transforms a basic messy bun into something visually more complex and interesting. This style works beautifully for casual events where you want to show that you actually put thought into your appearance.
Start by gathering your hair into a low ponytail at the nape of your neck, just like you would for a low messy bun. Rather than twisting the tail or wrapping it directly, create a three-strand braid using the full length of the ponytail. Braid loosely—tight braids look formal and polished, while loose braids read as more intentional and effortless. Once you’ve braided all the way to the ends of your hair, coil that braid around the base of the ponytail and secure it with bobby pins.
The braid creates natural texture and grip that helps the bun stay secure throughout the day while also adding visual complexity. You can leave some looser pieces framing your face, or pull tiny wisps out from the braid itself to create a softer, even messier effect. The key is not making the braid too tight—messy doesn’t mean sloppy, but it does mean relaxed.
Why Braids Solve Slipping Issues
Braids naturally grip your hair better than a smooth wrap would, which means this style is ideal if you have slippery, fine, or very straight hair that normally won’t hold a bun well throughout the day.
Braiding Tips for Messy Texture
- Start your braid slightly loosely from the beginning. You can always tighten it by pulling the braided sections slightly apart, but you can’t make a tight braid look relaxed.
- Don’t braid all the way to the ends of your hair. Stop about an inch before the tips and leave that piece loose. It looks more intentional than braiding all the way through.
- Pull very gently on alternating sides of the braid after you’ve finished to loosen it and create softer, messier texture throughout.
5. The Textured Top Knot Bun
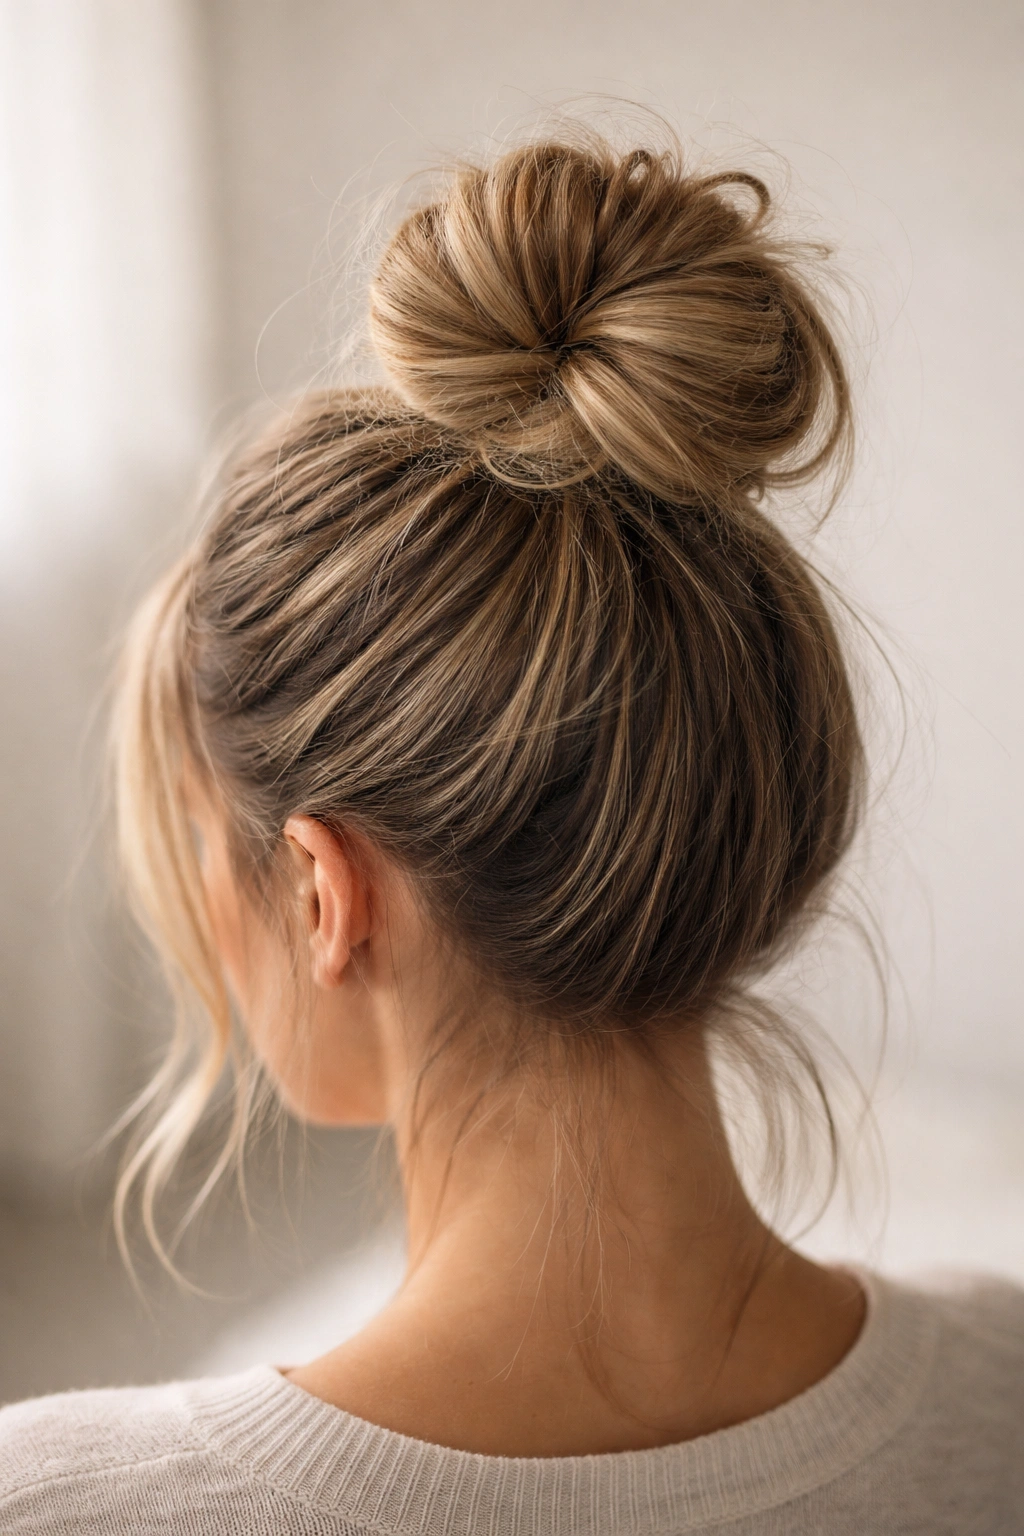
A top knot bun sits at the very crown of your head and reads as playful and youthful. This style is ideal if you want something that looks intentionally styled rather than like a last-minute hair solution. It works beautifully for casual outings, running errands, or anytime you want a pulled-together vibe that still feels relaxed.
Start with your head upright and use your fingers to gather all your hair at the very top of your head, at the crown. You’re aiming for a position slightly higher than the classic high bun described earlier—at the actual peak of your head. Secure it with an elastic, leaving some loops loose for texture. Here’s where this version gets its character: rather than simply fluffing those loops, tease them very gently with your fingers or a small teasing brush to create subtle texture and volume.
You’re not trying to create a voluminous, towering topknot—this is still a messy bun, so texture should look soft and intentional rather than dramatic. Once you’ve gently teased the loose sections, tuck any wispy pieces around the base of the bun and secure with a bobby pin or two. The teased texture makes this version look more styled than the basic high bun while still reading as effortless.
Why Texture Matters in Top Knots
A smooth top knot can read as either too polished or accidentally sloppy, depending on how the light hits it. Adding subtle texture puts you firmly in the intentionally styled category.
Styling the Top Knot
- Use a comb or teasing brush, not your fingers alone. Fingers create clumpy texture; a brush creates finer, more elegant texture.
- Tease very lightly. You’re going for soft volume, not a backcombed mess. A few gentle strokes is usually enough.
- Secure the teased loops in place with a bobby pin positioned at the base so it’s not visible.
6. The Romantic Low Bun with Tendrils
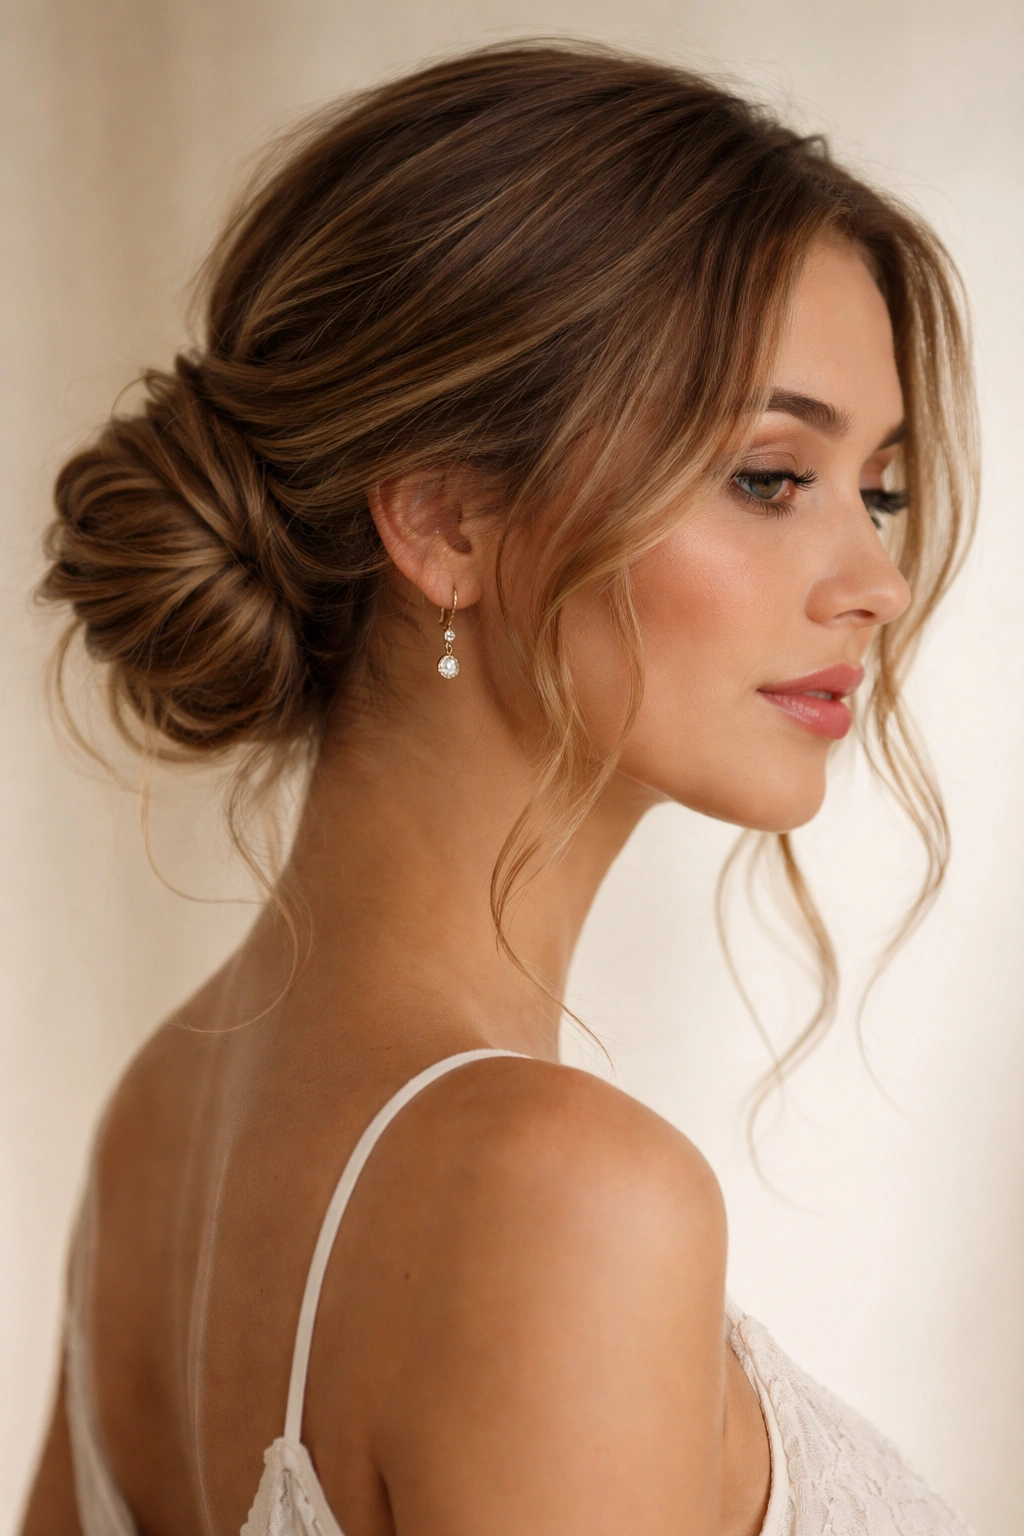
This style incorporates deliberately loose, wavy tendrils around your face, which creates a softer, more romantic take on the messy bun. It’s ideal for date nights, special events where you want to look more polished, or anytime you want the messy bun to feel elevated rather than purely casual.
Rather than gathering all your hair and securing it into a bun, this version intentionally leaves sections of hair loose from the beginning. Start by using a soft brush to gently brush your hair back, then use your fingers to gather the back section of your hair into a low ponytail at the nape of your neck. Leave the front sections—roughly the width of your fingers on either side of your face—completely loose. Secure the gathered section with an elastic and create a loose, messy bun as you would normally.
Now the key step: take those loose front sections and gently tousle them with your fingers. If you want them to wave, you can lightly curl them with your fingers or, if you have time before you get ready, quickly run a flat iron or curling iron over them. The waves create movement that softens the overall style and frames your face beautifully. This takes maybe thirty seconds but transforms the style from casual-sporty to casual-elegant.
When This Style Shines
This approach works beautifully for dinner dates, events where you want to look polished but not overdone, or whenever you want the messy bun to feel like an intentional style choice rather than a practical solution.
Creating Soft Tendrils
- Leave the loose sections slightly thicker than you might expect. Delicate wisps look wispy, but substantial tendrils frame your face better and look more intentional.
- Curl or wave the loose sections slightly. Even light waves create movement and softness that straight hair doesn’t provide.
- Gently tousle the loose sections with your fingers rather than smoothing them. This creates that soft, romantic texture.
7. The Half-Up Messy Bun
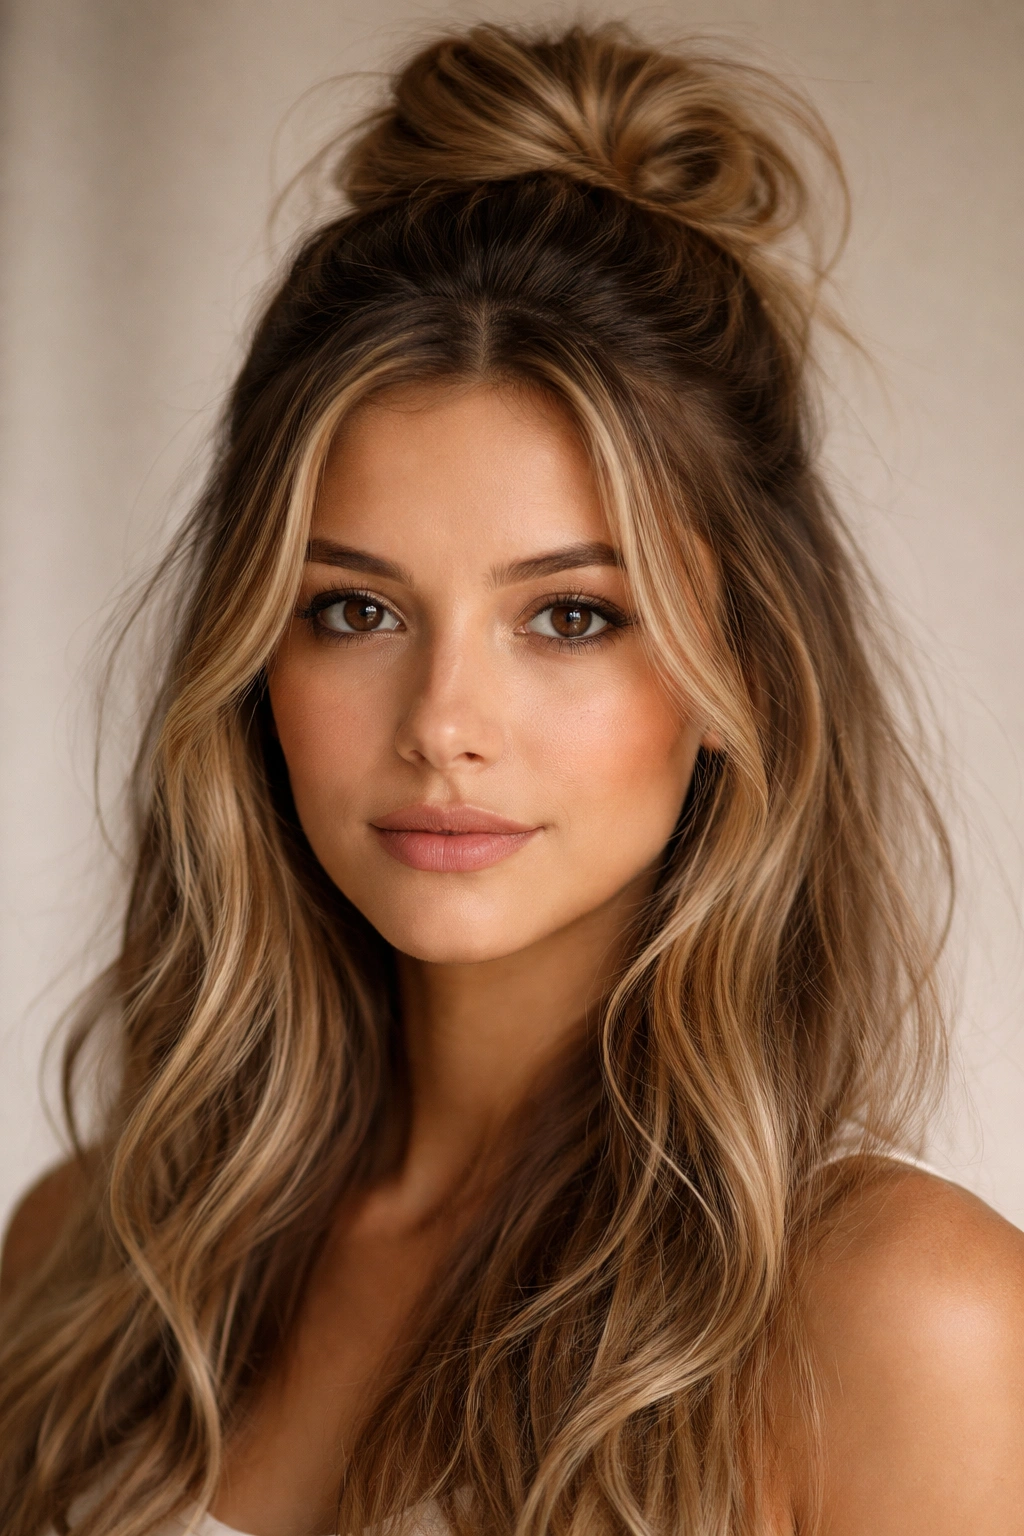
A half-up style splits the difference between wearing your hair down and pulling it fully up, creating a style that’s flattering, practical, and surprisingly versatile. This version works well if you want some hair off your face without fully committing to an updo, or if you have very thick or very long hair that becomes uncomfortable fully pulled back.
Take the top section of your hair—roughly the top third or half, depending on how much volume you prefer—and gather it at the crown using your fingers. You’re not pulling tightly; you’re gathering gently so the hair stays voluminous at the top of your head. Secure this gathered section loosely with an elastic, then create a small messy bun from that upper ponytail by leaving loops loose and gently fluffing them.
The bottom half of your hair remains completely down and loose, creating a contrast between the styled section and the undone section below. This is what makes the style work—it reads as intentional because you’ve clearly made the choice to style half your hair while leaving the other half down. Secure the small bun with a bobby pin and you’re done.
Why Half-Up Works for Versatility
The half-up style works across more occasions and contexts than a full bun because it reads as more casual and approachable. It’s ideal for office settings, casual social events, or situations where you want to look put-together without appearing overdressed.
Proportion Tips for Half-Up Styles
- Don’t gather too much hair—the top third to half is usually the sweet spot. Gathering more than that makes it read as a full bun rather than a intentional half-up.
- Make sure the gathered section sits at the crown, not tilted to one side. Centering it makes the style look more intentional.
- Leave the bottom half completely loose and undone. Smooth or styled hair at the bottom contradicts the whole vibe of the style.
8. The Double Bun Messy Style
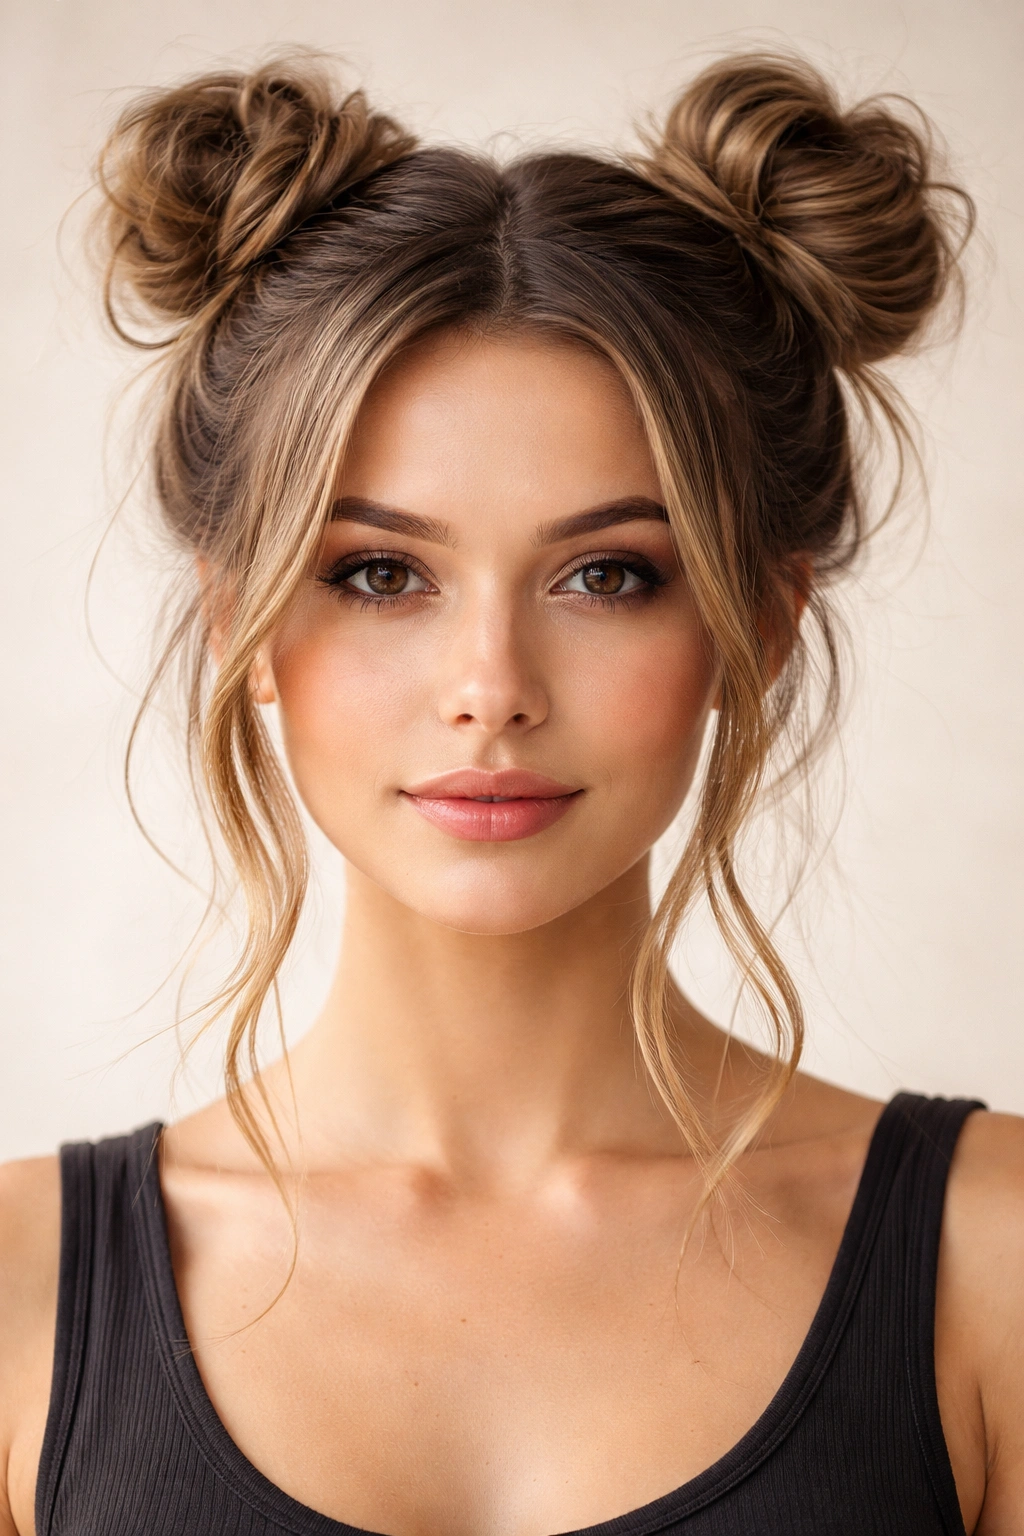
If you’re willing to create two buns instead of one, you open up an entirely playful, youthful aesthetic that reads as deliberately styled and fun. This approach works beautifully for festivals, casual hangouts, or anytime you want a style that makes a subtle fashion statement while still being completely practical.
Divide your hair down the center into two sections using a comb or your fingers. Gather the first section at the crown of one side of your head and secure it loosely with an elastic, creating a small messy bun by leaving loops loose and fluffing them gently. Repeat on the other side, creating a matching small bun at the same height on the opposite side. Both buns should be roughly the same size and positioned symmetrically on either side of your head.
The double bun reads as intentional because it’s clearly a style choice rather than an accident. Leave pieces loose around your face to soften the overall effect, and you’ve got a look that’s playful and fashion-forward while requiring absolutely no more skill than creating a single bun. It’s also surprisingly practical—if you have very thick hair or hair that doesn’t hold well in a single bun, distributing the weight across two smaller buns solves the problem.
Who Should Wear the Double Bun
This style works best for people who feel comfortable with playful, youthful styles and aren’t afraid to stand out slightly. It’s not a style you’d wear to a formal meeting, but for casual events, creative workplaces, or personal style moments, it’s charming and fashion-forward.
Positioning Both Buns Correctly
- Use an actual part in the center of your head, not just an approximation. Run a fine-tooth comb down the center to create a clean line. This makes the style look intentional and symmetrical.
- Position both buns at the same height and distance from the center. Use your fingers to measure if necessary. Uneven buns read as accidental rather than styled.
- Make both buns roughly the same size. It’s okay if they’re not perfectly identical, but they should be obviously intentional matches.
Final Thoughts

The entire appeal of the messy bun—the reason it’s become such a staple across different ages, hair types, and occasions—is that it manages to look effortless while actually being intentional. That balance is what separates a great messy bun from one that just looks like you didn’t try. The eight variations here give you options for different occasions, face shapes, and personal preferences, but they all share the same underlying principle: a little texture, a loose grip, and a few deliberately escaped pieces is what creates a style that reads as polished but relaxed.
The two-minute timeframe isn’t just a marketing hook, either. Once you’ve practiced each style once or twice, you genuinely can execute any of them in under 120 seconds. That’s because you’re not fighting against your hair or trying to force it into some complicated shape—you’re working with your hair’s natural texture and gravity to create something that looks intentional. The classic high bun gets you through a gym session. The romantic low bun with tendrils works for a date night. The double bun makes a playful statement at a casual event.
What matters is understanding that these aren’t haircare emergencies or signs that you didn’t have time to style yourself properly. They’re legitimate styling choices that work across different contexts and personalities. Start with whichever style resonates with you, practice it a couple of times, and then explore the variations when you feel confident. Your hair will thank you, and so will your schedule.
