



The messy bun has evolved from a lazy weekend hairstyle into a sophisticated, versatile option that works across virtually any occasion — but not all messy buns are created equal, especially when you’re working with the texture and volume of natural curls. The challenge with curly hair is real: regular bun techniques often flatten your curl pattern, create uncomfortable tension that weakens hair at the roots, and don’t showcase the gorgeous texture you’ve worked hard to define and maintain. The good news? There are specific messy bun styles designed to work with your curls rather than against them, giving you effortless-looking styles that actually protect your hair while keeping curls bouncy and defined.
Whether you’re looking for something polished enough for work, casual enough for a gym session, romantic enough for a date night, or practical enough for a traveling day, the right messy bun can transform how you style your natural curls. These aren’t generic “just twist it up” approaches — they’re intentional styles that honor your curl pattern while delivering that coveted tousled, lived-in vibe. The key is understanding how to work with curl placement, where to anchor your bun for maximum hold without breakage, and which technique keeps your curls from getting compressed into submission.
Let’s walk through eight distinct messy bun styles that work beautifully with natural curls, each with specific techniques so you can master them on your own terms.
1. The Pineapple Bun with Face-Framing Tendrils
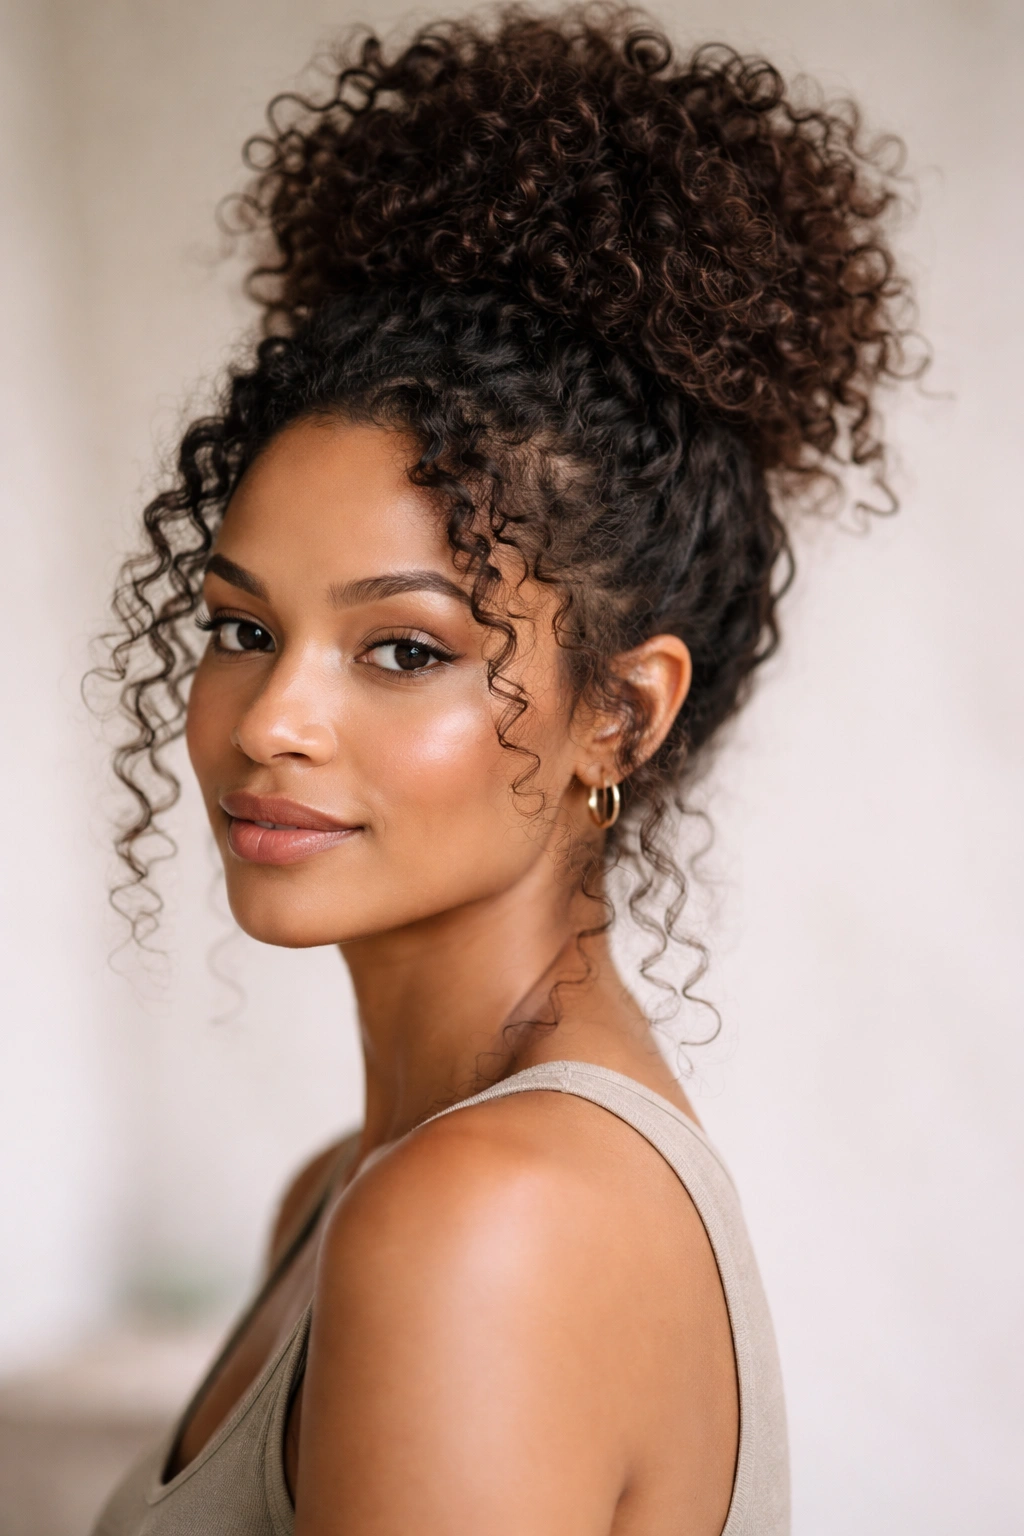
The pineapple bun is the gold standard for protecting curls while you sleep, but it translates beautifully into a daytime style when you intentionally leave some curls loose around your face. This style works by gathering your hair into a high, loose knot on top of your head while allowing strategic curl pieces to frame your features, creating soft dimension and a romantic, effortless appearance. The magic happens when you don’t aim for perfection — the looser, the better, because that’s what lets your curl pattern shine through rather than getting compressed.
How to Create This Style
Start with curls that have been refreshed with a light misting of water and reactivated with a leave-in conditioner or curl cream. Using your fingers (not a brush, which can disrupt curl formation), gently gather the hair from your hairline back toward the crown, aiming for a placement roughly where your natural part sits. Secure this section loosely with a silk or satin scrunchie, leaving about 2-3 inches of hair unsecured above the elastic so you can create the “pineapple” top.
Gently twist that remaining section and wrap it loosely around the base of the scrunchie, tucking the ends underneath without pulling tight. Pull out 3-4 face-framing pieces around your hairline and temples — these should be curls that fall naturally, not forced sections. The beauty of this style is its intentional imperfection: bumpy curls escaping the bun, pieces that don’t lie flat, and texture visible throughout are exactly what make it work. Hold it in place with a light flexible-hold hair gel or mousse applied only to flyaways, never to the body of the bun.
What Makes It Perfect for Curls
- Gathering at the crown preserves the majority of your curl pattern since the bun sits above, not on top of, most of your curls
- The high placement naturally elongates your face and neck while keeping hair off your shoulders
- Face-framing pieces prevent the look from feeling too severe or pulled-back, maintaining softness
- The loose gathering actually encourages curl clumping rather than disrupting it
Pro tip: Sleep in this bun with a silk bonnet or head wrap for second-day curls that look intentionally tousled — you’ll wake up with a bun that looks even better than the day you created it.
2. The Spiral Wrap Bun with Volume at the Crown
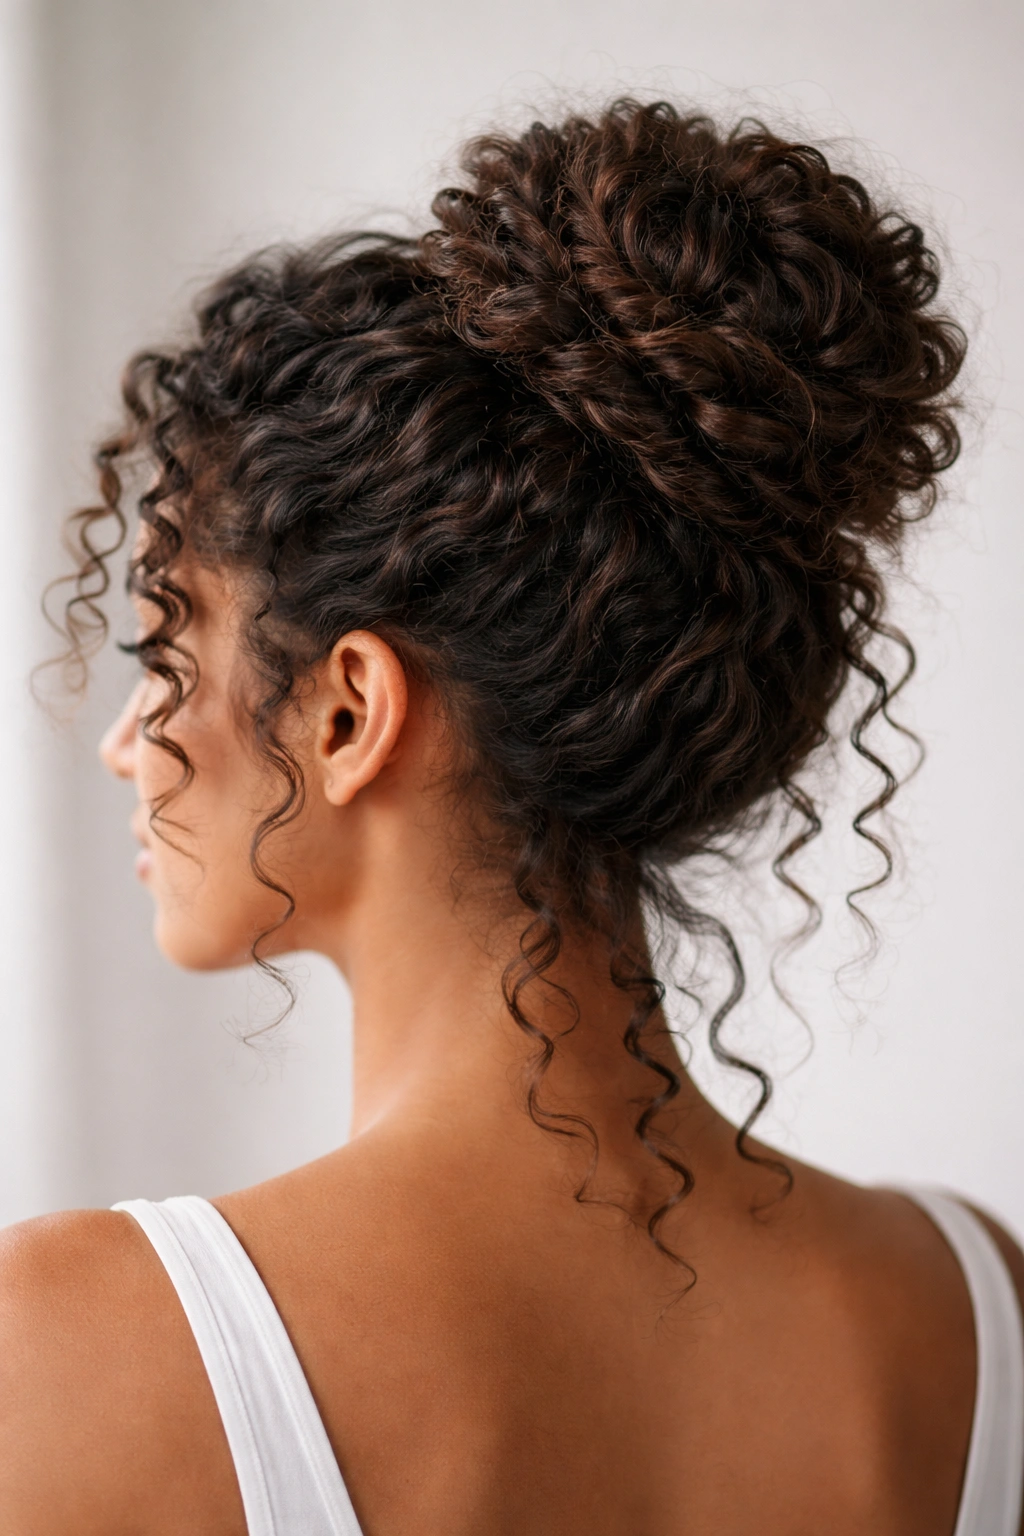
This style uses a spiral wrapping technique that keeps your curls intact while creating architectural interest and a polished appearance suitable for professional settings or special occasions. Instead of twisting hair into a traditional bun, you’re wrapping sections around each other in a deliberate spiral pattern that showcases curl texture rather than hiding it. The result looks intricate and intentional without requiring complicated techniques.
How to Create This Style
Divide your hair into two equal sections down the center back of your head, roughly from your crown to your nape. Take the left section and gently twist it without pulling tight — the twist should loosely contain your curls rather than compress them. Wrap this twisted section clockwise around an imaginary center point at the back of your crown, pinning as you go with bobby pins that match your hair color. Repeat the same spiral motion with the right section, wrapping it in the opposite direction so the two spirals meet and interlock at the base.
The key to this style’s success is loose twisting and gentle wrapping. Your curls should still be visible within the twisted sections, not flattened or hidden. Once both spirals are in place, gently massage the overall bun shape to add volume and encourage curl definition to pop through. Secure everything with bobby pins tucked into the curl pattern itself — hiding pins between curls rather than on top makes the style look cleaner. Finish with a light-hold spray that sets without creating crunchiness.
Why This Works for Defined Curls
- Spiral wrapping naturally accommodates curl patterns instead of fighting against them
- The technique creates height and volume at the crown, flattering most face shapes
- Visible curl texture within the spirals reads as intentionally polished, not undone
- The style maintains enough structure to last a full workday without significant loosening
Insider note: This style works especially well on day-two or day-three curls that have started to relax slightly — fresh, super-tight curls can feel too bulky for the spiral technique.
3. The Textured Low Bun with Pieces Pulled Through
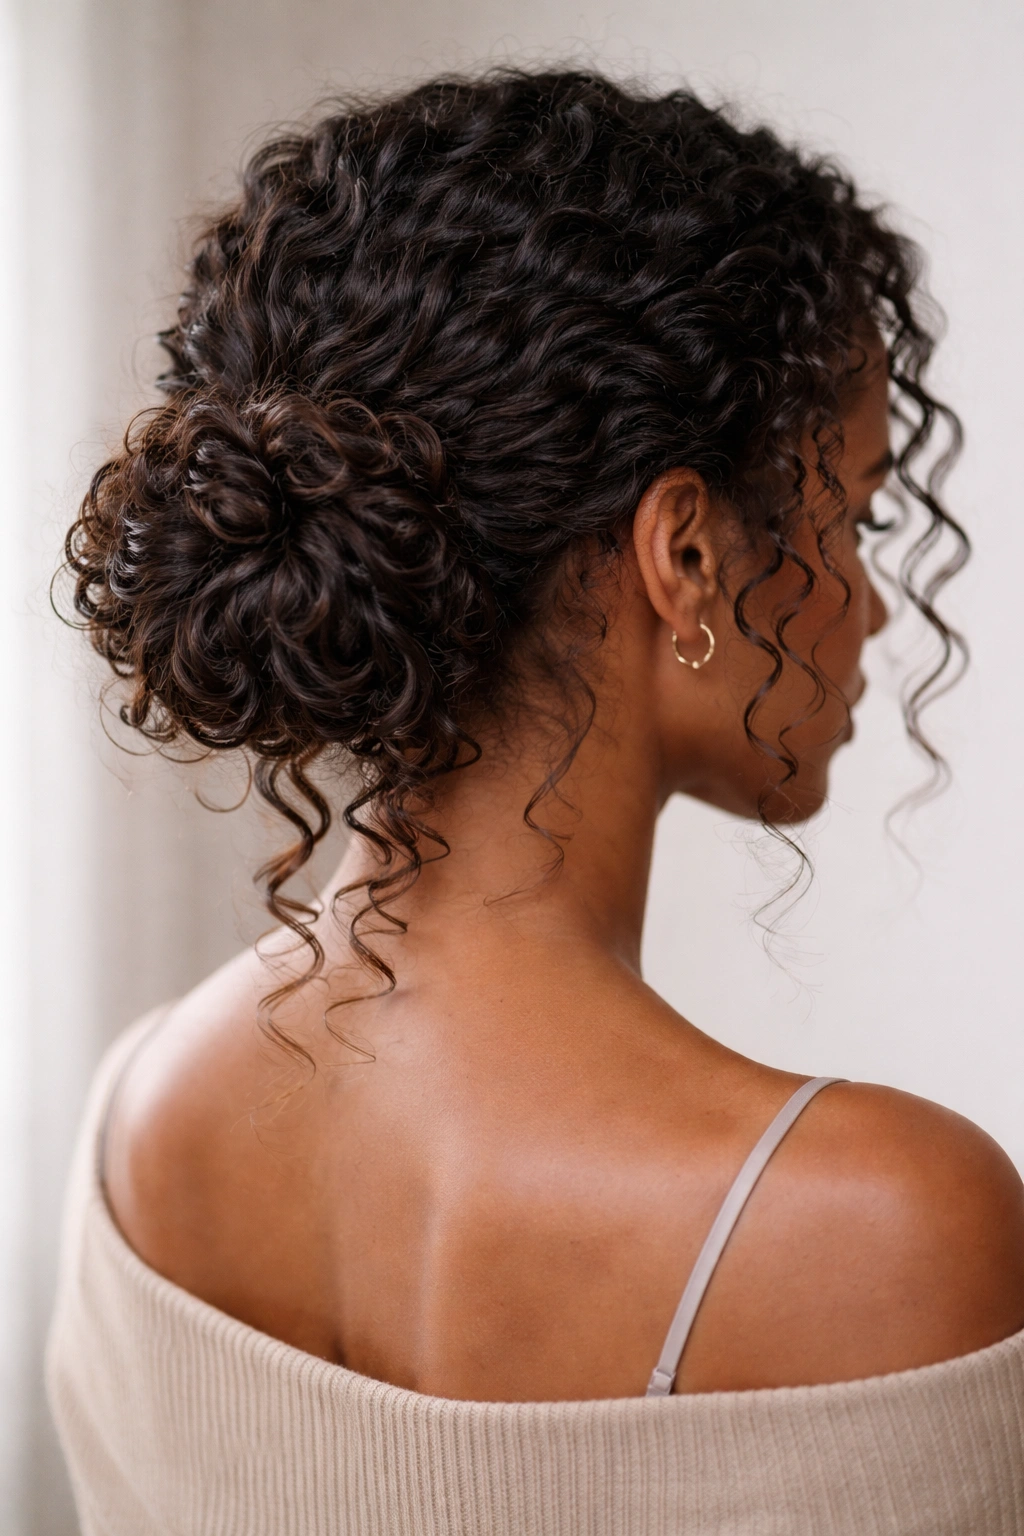
A low bun sits at the nape of your neck, making it perfect for keeping hair off your face and neck while maintaining maximum curl definition. What makes this version different is the intentional technique of pulling small sections of curls through and around the base of the bun after it’s secured, creating dimension and showcasing your curl pattern rather than hiding it behind a tight, neat knot.
How to Create This Style
Gather your hair low at the back of your neck using your fingers to collect hair gently without brushing through it. Secure with a silk scrunchie, aiming for a loose, undone gathering rather than a pulled-back feel. Once secured, take small 1-2 inch sections of curls from around the perimeter of the bun and gently pull them through the elastic, positioning them so they frame the bun’s edges and add volume. These pulled-through pieces should look organic, as though they naturally fell out rather than being strategically placed.
Work around the entire base of the bun, pulling through 8-12 curl sections depending on the thickness of your hair. Take the main body of the bun and gently twist it once or twice without wrapping — this creates a loose, textured knot that shows curl pattern instead of forming a sleek, tight spiral. Tuck the ends underneath and secure with bobby pins hidden within the curl structure. The overall effect should read as casually elegant: definitely intentional, but not overly formal or constructed-looking.
Key Advantages for Natural Curls
- Low placement keeps your curls off your neck and face while preserving volume at the crown
- Pulled-through pieces add texture and dimension that celebrates rather than conceals curl pattern
- The loose gathering and wrapping maintain curl clumping and definition throughout the style
- Works beautifully with all curl types from loose waves to tight coils
Worth knowing: This style actually improves over the course of the day as curls begin to relax slightly and more pieces naturally escape the bun — it looks fresher and more intentional by afternoon than it does first thing in the morning.
4. The Double-Wrapped Crown Bun
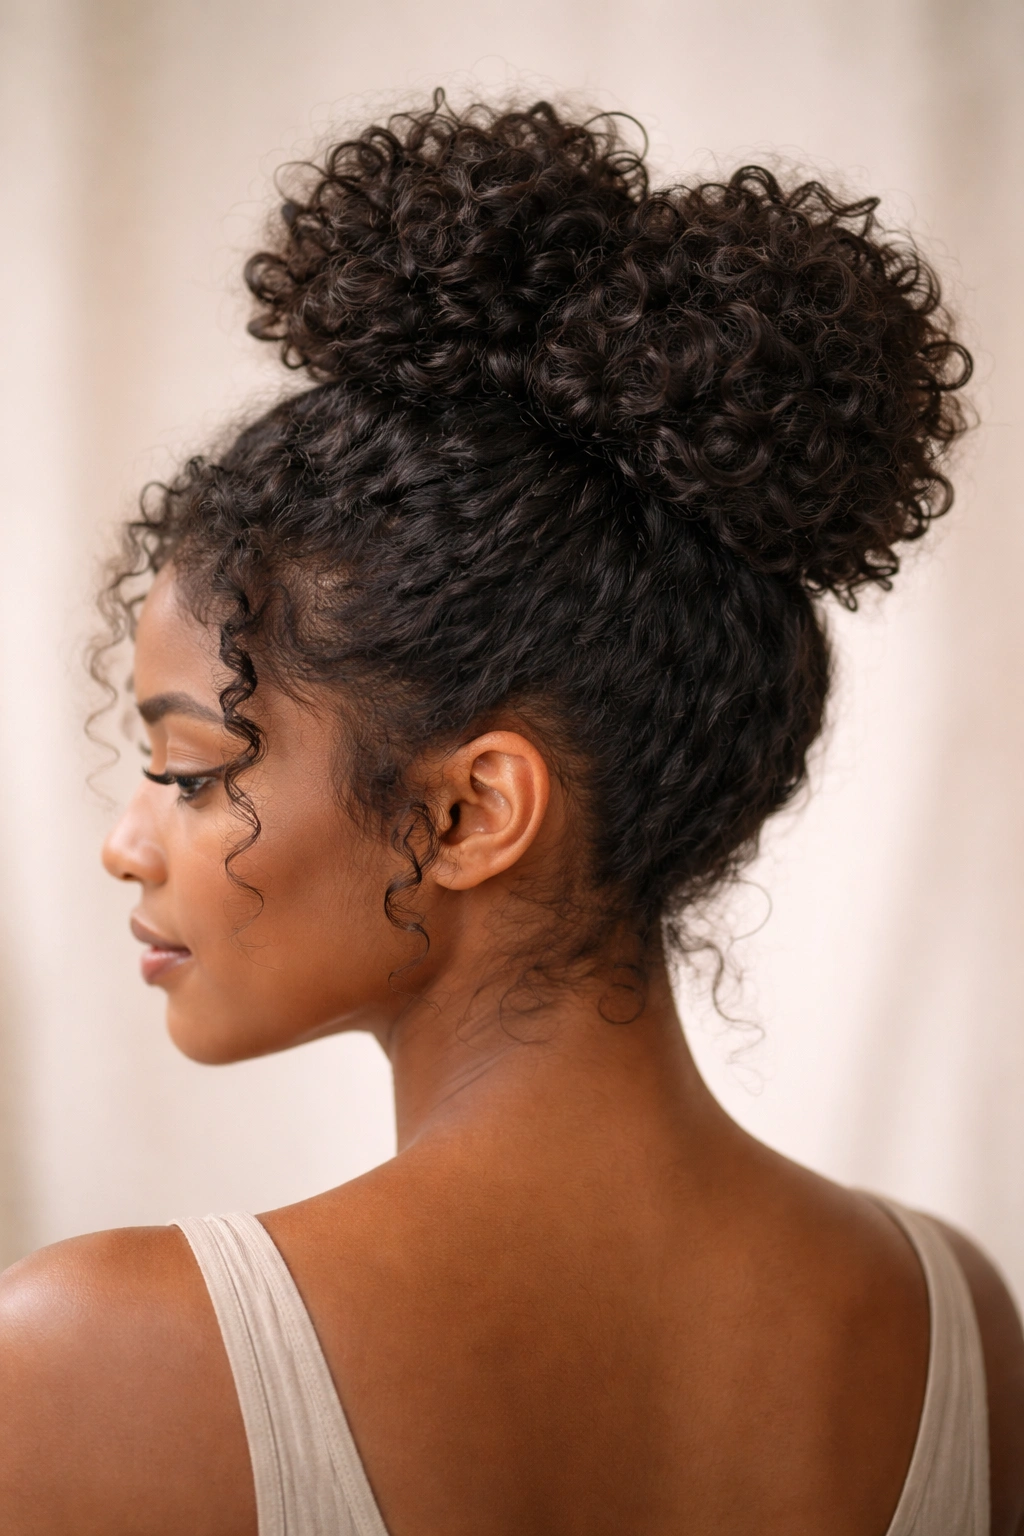
This style creates a statement look by making two distinct loops or wraps that sit at the crown rather than forming a single unified bun. The double-wrapped approach gives you built-in height and volume while the two separate loops showcase curl texture on both sides, making it especially flattering for larger curl patterns and coil textures.
How to Create This Style
Gather your hair at the crown into a loose ponytail, securing with a silk scrunchie. Divide this ponytail into two equal sections. Take the first section and gently create a loose loop by folding it back toward the base and securing that loop with a bobby pin tucked into the curls. The loop shouldn’t be tight or pulled — it should have visible texture and curl definition within it. Repeat with the second section on the opposite side, creating a mirror-image loop.
You’ll now have two distinct loops sitting side by side at your crown, each showing off curl pattern and texture. Take 2-3 small curl sections from the remaining ponytail tail (the part that didn’t get looped) and wrap them around the base where both loops meet, tucking the ends underneath. This wrapping hides the elastic and creates a polished center point that visually unifies the two loops. The overall silhouette should feel balanced, with approximately equal volume on both sides.
Why Curly Hair Loves This Approach
- Two separate loops accommodate more hair volume than a single bun, preventing uncomfortable tightness
- Each loop showcases curl texture independently, celebrating your pattern rather than compressing it
- The style naturally creates height at the crown while allowing curls to cascade from the base
- Works particularly well for thick, dense curl patterns that rebel against traditional single-bun styles
Pro tip: To add extra visual interest, gently massage and separate the curl sections within each loop with your fingertips once everything is pinned — this fluffs up the curls and makes the texture more visible and prominent.
5. The Messy Crown Knot with Floating Curls
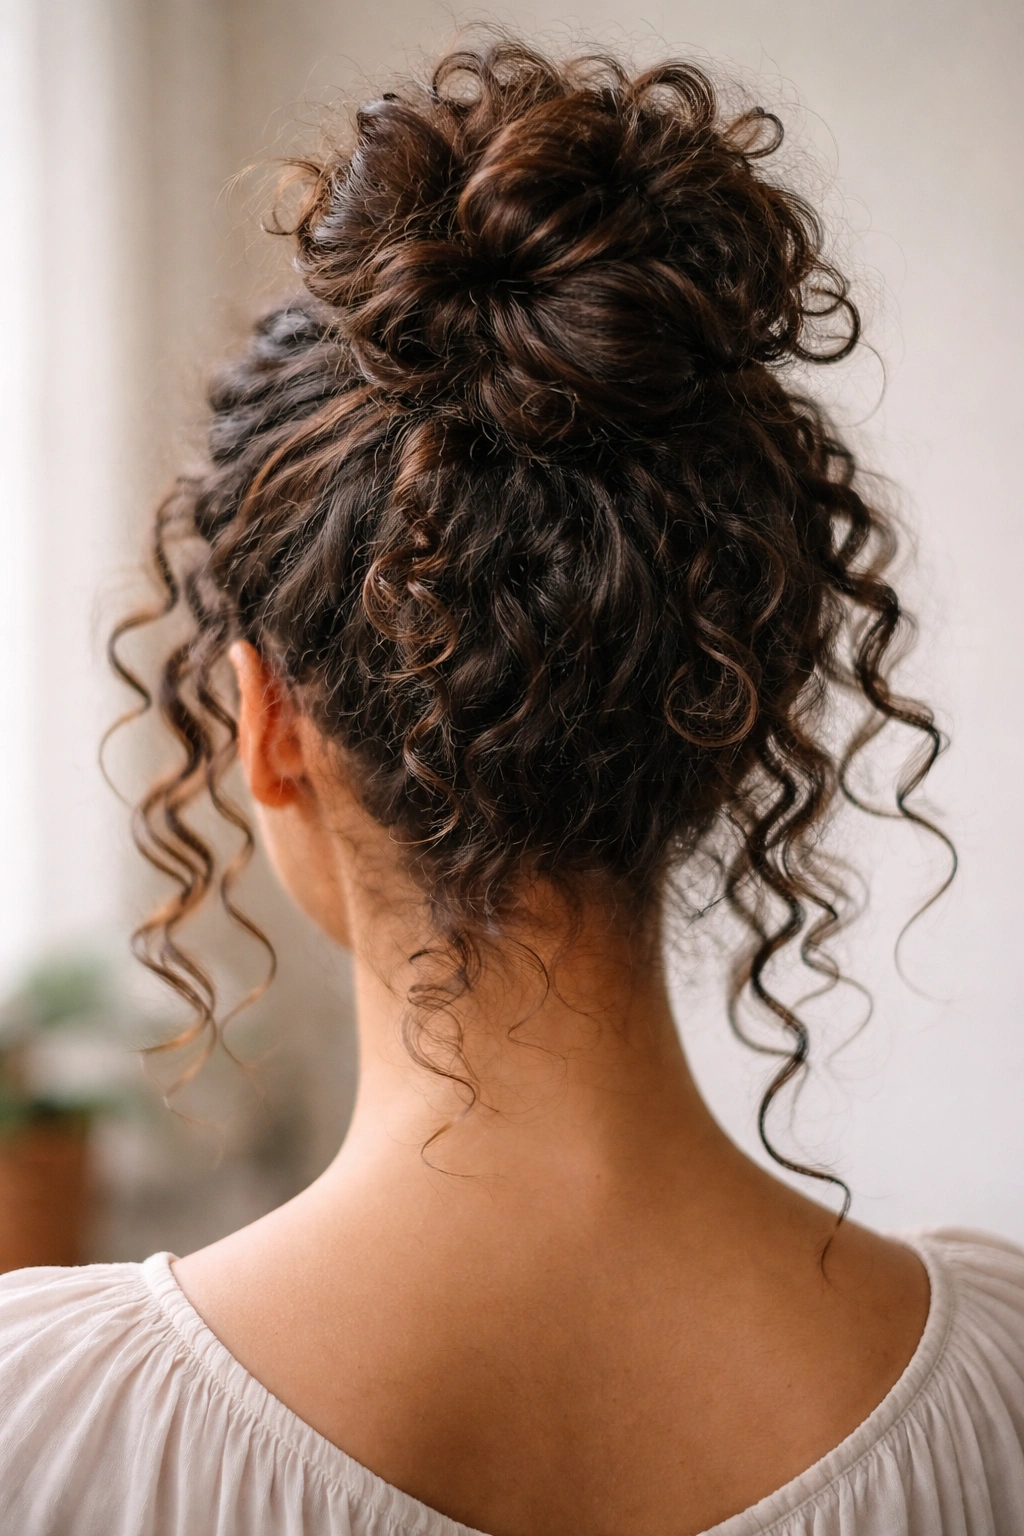
This style sits at the very crown of your head and uses a knotting technique rather than wrapping, which naturally accommodates the volume and texture of natural curls. The “floating curls” are strategically left undone around the sides and back, creating a romantic, ethereal quality perfect for date nights or creative professional settings.
How to Create This Style
Gather the top two-thirds of your hair at the crown using your fingers to gently collect hair without creating tension. Leave the bottom third of your curls completely free. Secure the gathered section loosely with a silk scrunchie, then divide this gathered ponytail into two equal sections. Take the left section and cross it over the right, creating the first half of a knot. Cross right over left to complete the second half of the knot, but keep both the movement and the final knot loose and textured.
Tuck the ends of the knotted sections underneath the knot and secure with bobby pins positioned within the curls themselves. The knot should look intentionally imperfect — bumpy, with visible curl texture throughout, not smooth and polished. Now take those floating curls you left free and gently arrange them around the base of the knot, allowing them to fall naturally down your back and sides. You can lightly finger-coil any pieces that have lost definition, using a curl cream to reactivate them if needed.
What Makes This Beautiful for Curls
- Knotting at the crown creates a focal point that frames your face and draws attention upward
- The floating curls frame your shoulders and back, creating movement and preventing the look from feeling too controlled
- The loose knot showcases curl texture and pattern in a way that reads as intentionally romantic rather than undone
- Works across casual, professional, and formal contexts depending on how you style the floating pieces
Insider note: This is the perfect style for days when your curl definition is slightly relaxed but still present — the floating curls will look beautifully soft and touchable rather than trying to force super-tight coils into submission.
6. The Twisted Stack Bun with Curl Clusters
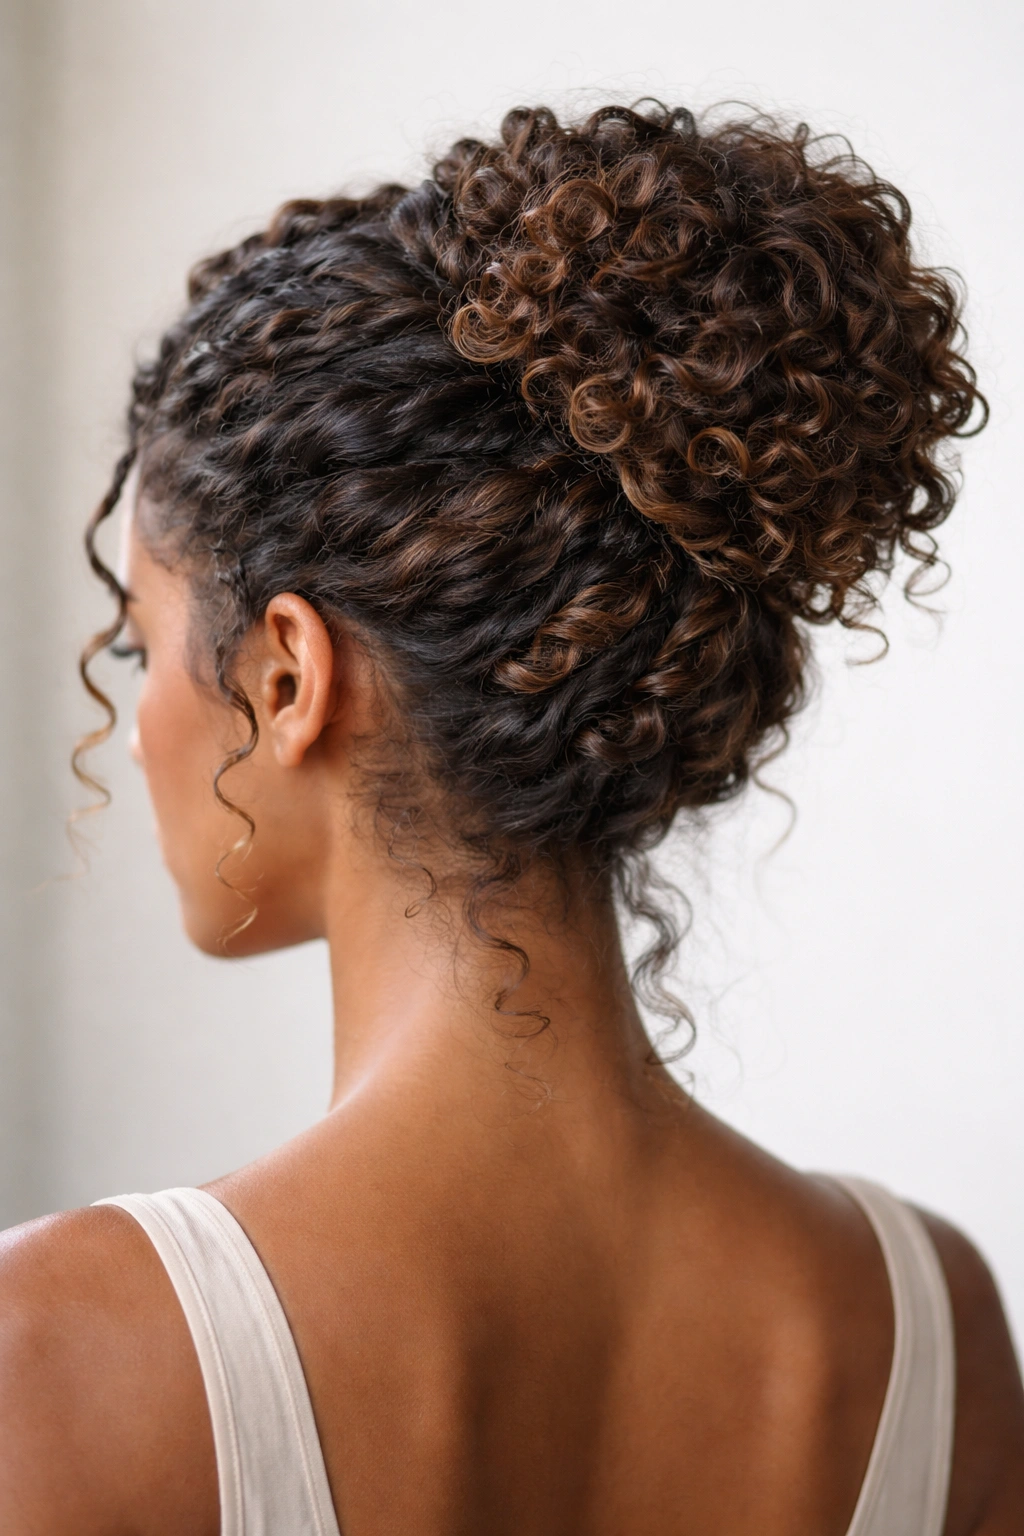
The twisted stack technique involves creating multiple small twisted sections that stack on top of each other, building a bun from the ground up rather than gathering hair and compressing it. This approach is particularly gentle on natural curls because you’re working with individual curl clumps rather than forcing your entire head of hair into a single tight knot.
How to Create This Style
Divide your hair into 4-6 sections, depending on the thickness and density of your curls. Start with the bottom section of hair at your nape and gently twist it without pulling tight — allow your natural curl pattern to remain visible within the twist. Coil this twist into a small, loose loop at your nape and secure with a bobby pin tucked into the curls. Move up to the next section and repeat: gentle twist, loose coil, hidden bobby pin. Continue stacking twisted coils up the back of your head, each one positioned slightly higher than the last.
As you progress, each new twisted section can slightly overlap with the one below it, creating a layered, three-dimensional effect. The final coil at the crown becomes your focal point. Once all sections are twisted and stacked, gently manipulate the overall shape to add volume — use your fingertips to separate and fluff the curl sections within each twisted coil. The result should look like a tower of textured curls rather than a neat, compact bun.
Why This Technique Honors Your Curl Pattern
- Working with individual sections rather than all hair at once distributes weight and reduces tension on any single area
- Each twisted coil remains loose enough to showcase curl definition and texture
- The stacked approach naturally creates height and volume without requiring extra volume-building techniques
- Gentle twisting preserves curl clumping better than aggressive gathering and compression
Worth knowing: This style actually looks better the “messier” it appears — escaping curl pieces, bumpy texture, and uneven coils are exactly what make it work. Smooth, polished perfection would actually undermine the style’s success.
7. The Side-Swept Romantic Bun
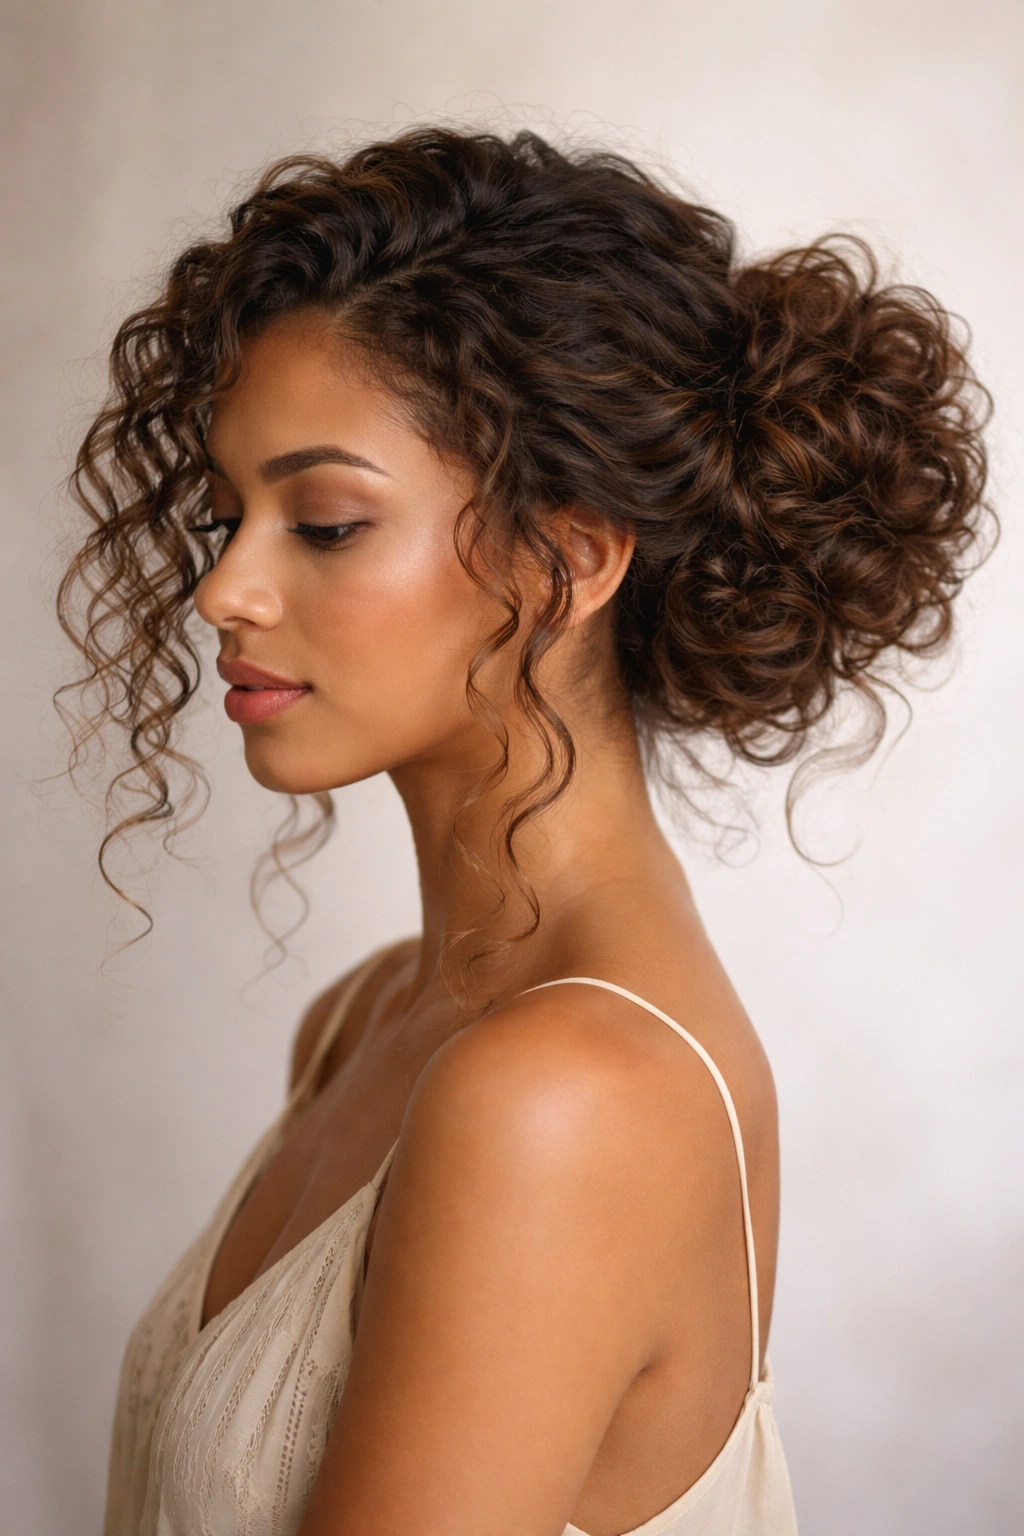
This style gathers hair to one side rather than the back or crown, creating an asymmetrical, romantic silhouette. Side-sweeping elongates your face and neck while the bun placement allows you to showcase curl texture on both the gathered and loose sides. It works beautifully for evening events, special occasions, or any time you want to feel especially polished without looking overly formal.
How to Create This Style
Using your fingers, gently gather hair from the back side of your head diagonally toward one temple or ear, aiming for about two-thirds of your total hair volume. The path should feel natural and organic rather than perfectly geometric. Secure this gathered section low and to the side with a silk scrunchie, creating a side ponytail at approximately ear level. The other third of your hair remains loose, framing your face and cascading down the opposite side of your head.
Create your bun from this side ponytail using a loose twisting or knotting method — avoid pulling tight, as this defeats the romantic purpose. Once the bun is secured with bobby pins, take 4-5 small curl sections from around the bun’s perimeter and gently pull them through or arrange them around the base, softening the bun’s edges. The loose curls on the opposite side should remain flowing, with maybe 1-2 finger-coiled pieces to enhance definition. Use a light-hold product on flyaways only, preserving the texture and movement of both the bun and the loose curls.
Perfect Occasions for This Style
- Date nights and romantic occasions where you want an especially polished but not severe look
- Professional settings where you want to stand out slightly without breaking dress code
- Events where you’ll be photographed from the side, making your profile especially important
- Any time you want the elegance of an updo combined with the softness of loose curls
Pro tip: Side-swept buns photograph beautifully when you position the loose curls so they drape over one shoulder — they add movement and dimension to photos while framing your face flatteringly.
8. The Sculptural Spiral Bun with Defined Sections
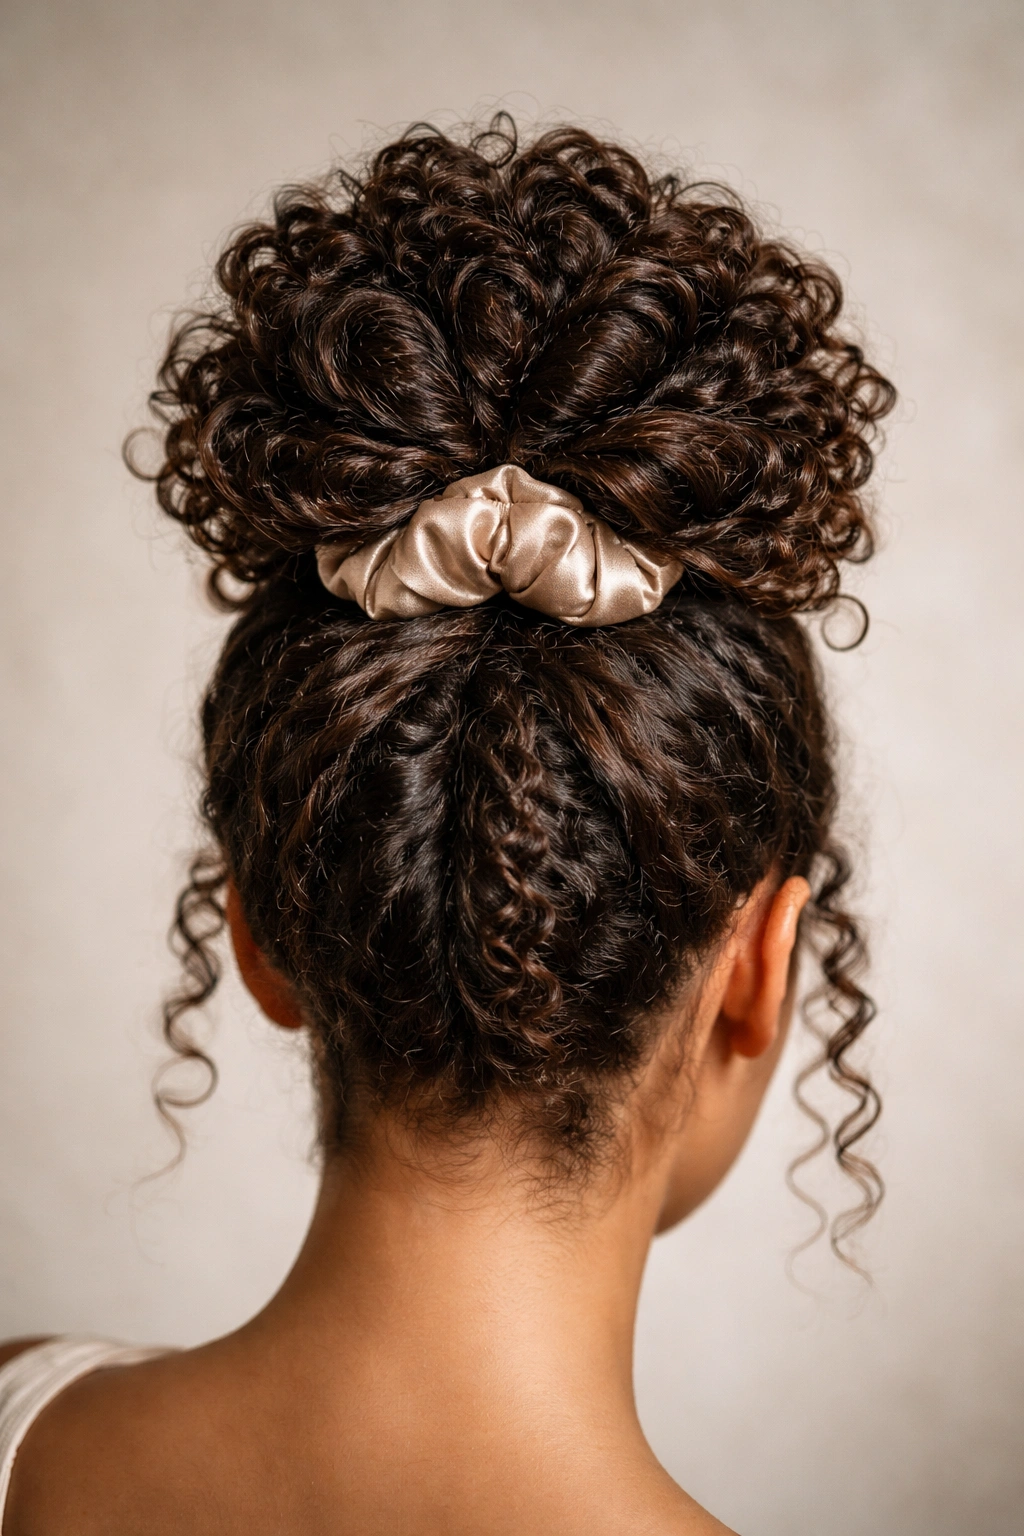
This is the most intentional, architectural style of the group: a bun created by spiraling hair outward from a center point, with each spiral clearly defined and separated to showcase your curl pattern at its most impressive. It requires more precision than the other styles but delivers a show-stopping look that works for any special occasion where you want to make a statement.
How to Create This Style
Gather your hair at the crown or crown-back area and secure with a silk scrunchie. Divide the ponytail into 3-4 equal sections based on your hair volume. Take the first section and gently twist it loosely, then wrap it around the base of the ponytail in a spiral motion, securing with a bobby pin as you complete each revolution. The twist should be loose enough that your curl pattern remains visible, creating a textured appearance rather than a smooth spiral.
Move to the next section and repeat the process, spiraling it in the same direction so all spirals move cohesively around the center point. As you add each section, you’re building outward from the center, creating a flower-like or rose-like appearance. Each spiral should be clearly visible and defined, with distinct separation between sections. Once all sections are spiraled and pinned, gently massage the overall structure to encourage your natural curls to pop through the spiral formations.
What Makes This Style Magazine-Worthy
- Visible spirals create architectural interest that reads as intentional and sophisticated, not accidental
- Each spiral is a distinct showcase for your curl pattern, celebrating rather than concealing texture
- The style works beautifully with any curl type, from loose waves to tight coils
- Photographs incredibly well from every angle — the three-dimensional structure shows definition in any lighting
Insider note: This style requires strategic product use — a light, flexible-hold gel applied only to flyaways before you begin will help the spirals hold their shape without creating crunchiness or stiffness that compromises curl definition.
Final Thoughts
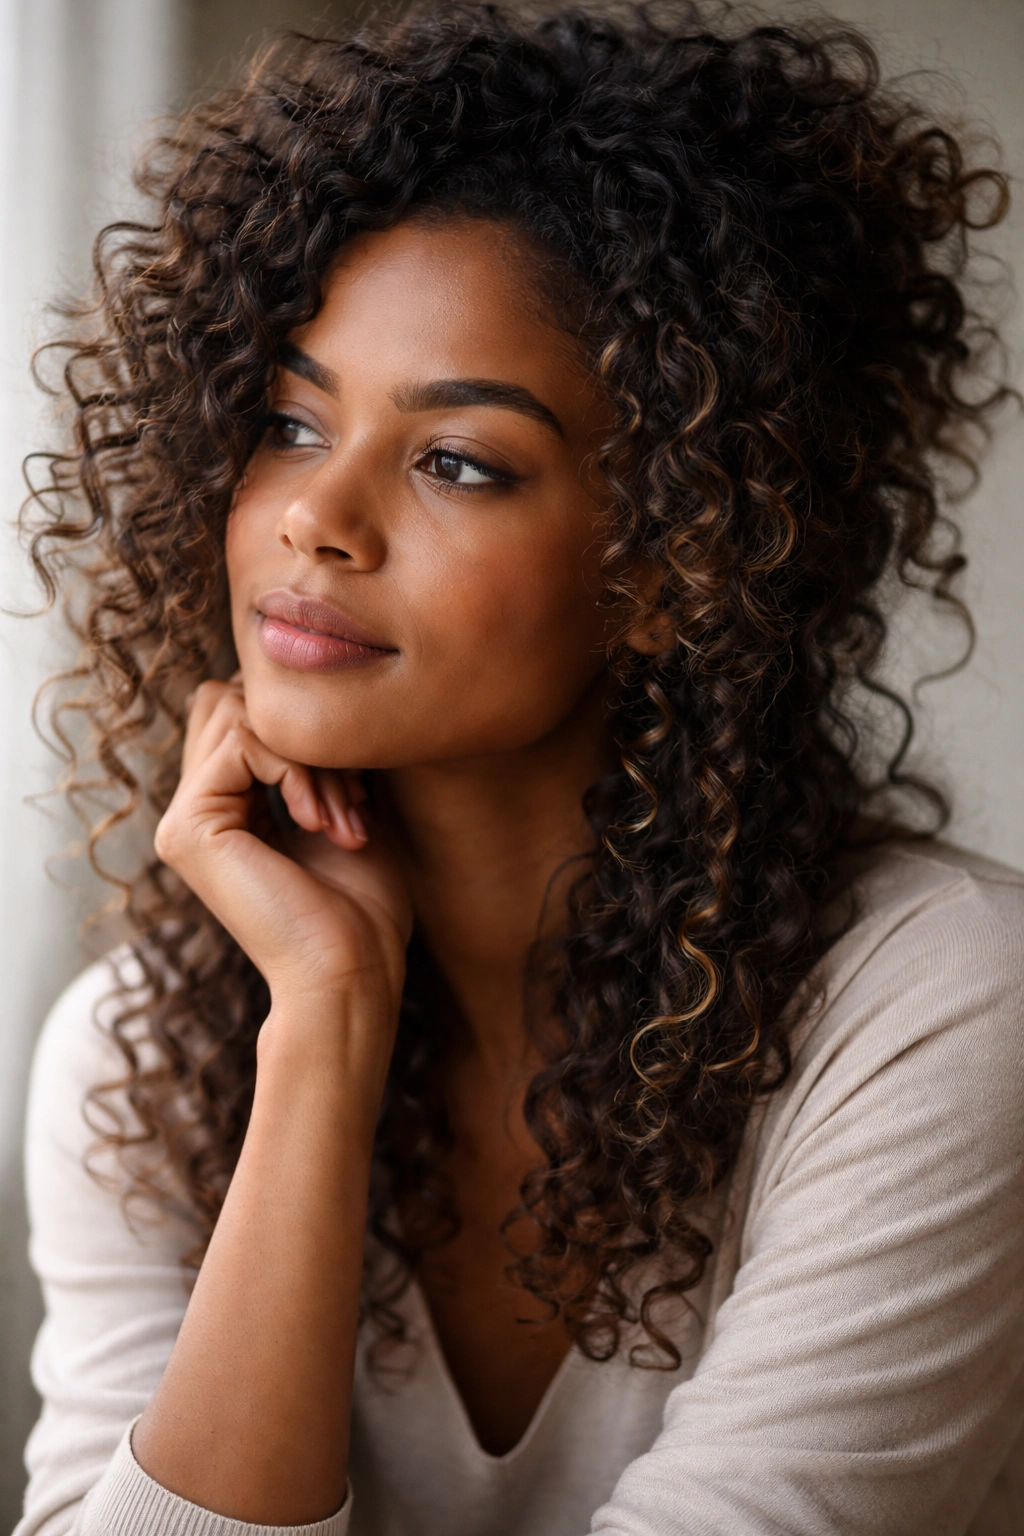
The beauty of styling natural curls isn’t about forcing them into shapes they don’t want to take — it’s about working with your curl pattern to create styles that celebrate rather than compromise your texture. Each of these eight approaches offers a different aesthetic, from casual and romantic to polished and formal, but they all share one essential principle: your curls should remain visible, defined, and comfortable.
The most successful messy bun on natural curls isn’t the tightest or neatest — it’s the one that feels effortless while requiring intentional technique. You’re aiming for that “I woke up like this” vibe while actually using specific methods to get there, and that combination is exactly what makes natural curls so powerful as a styling canvas. Once you’ve practiced a few of these techniques, you’ll develop intuition about what works best for your specific curl pattern, density, and the condition of your curls on any given day.
Give yourself permission to experiment, to leave pieces loose, to embrace the texture and volume your curls naturally provide. That’s not messiness — that’s confidence, and it’s what makes these styles genuinely beautiful.
