



Messy buns have become a surprising star of Indian wedding styling. They’re elegant enough for the big day, romantic enough to complement heavy traditional jewelry, and practical enough to last through hours of celebrations. But the magic lies in how you execute the style — a true messy bun for an Indian wedding isn’t about looking literally messy. It’s about creating texture, dimension, and an intentional, undone-on-purpose aesthetic that somehow reads as both modern and deeply traditional at the same time.
The beauty of messy bun hairstyles for Indian weddings is their incredible versatility. Whether you’re wearing a lehenga, a saree, a sharara, or a wedding gown, a well-crafted messy bun can anchor your entire look. It keeps hair off your face while your family is applying flowers and jewelry, it photographs beautifully from every angle, and it moves gracefully when you dance. More importantly, it can be customized with braids, twists, gems, and decorative pieces to match the formality and aesthetic of your specific wedding celebration.
Indian weddings span multiple events — the mehendi, sangeet, engagement, and shaadi itself often call for different hairstyles. A messy bun gives you a foundational style you can dress up or down depending on the occasion. Add some delicate bobby pins and fresh flowers for a lighter mehendi look, switch to studded pins and jeweled accessories for the reception, or go minimal and sleek for the next morning’s brunch. The same core technique adapts beautifully across your entire wedding week.
The styles below represent the most wearable, photogenic, and practically executed messy bun variations that Indian brides and wedding guests have embraced. Each one works with the texture of Indian hair types, accommodates the weight and drape of traditional Indian garments, and photographs gorgeously in both candid and posed moments.
1. High Textured Messy Bun with Face-Framing Pieces
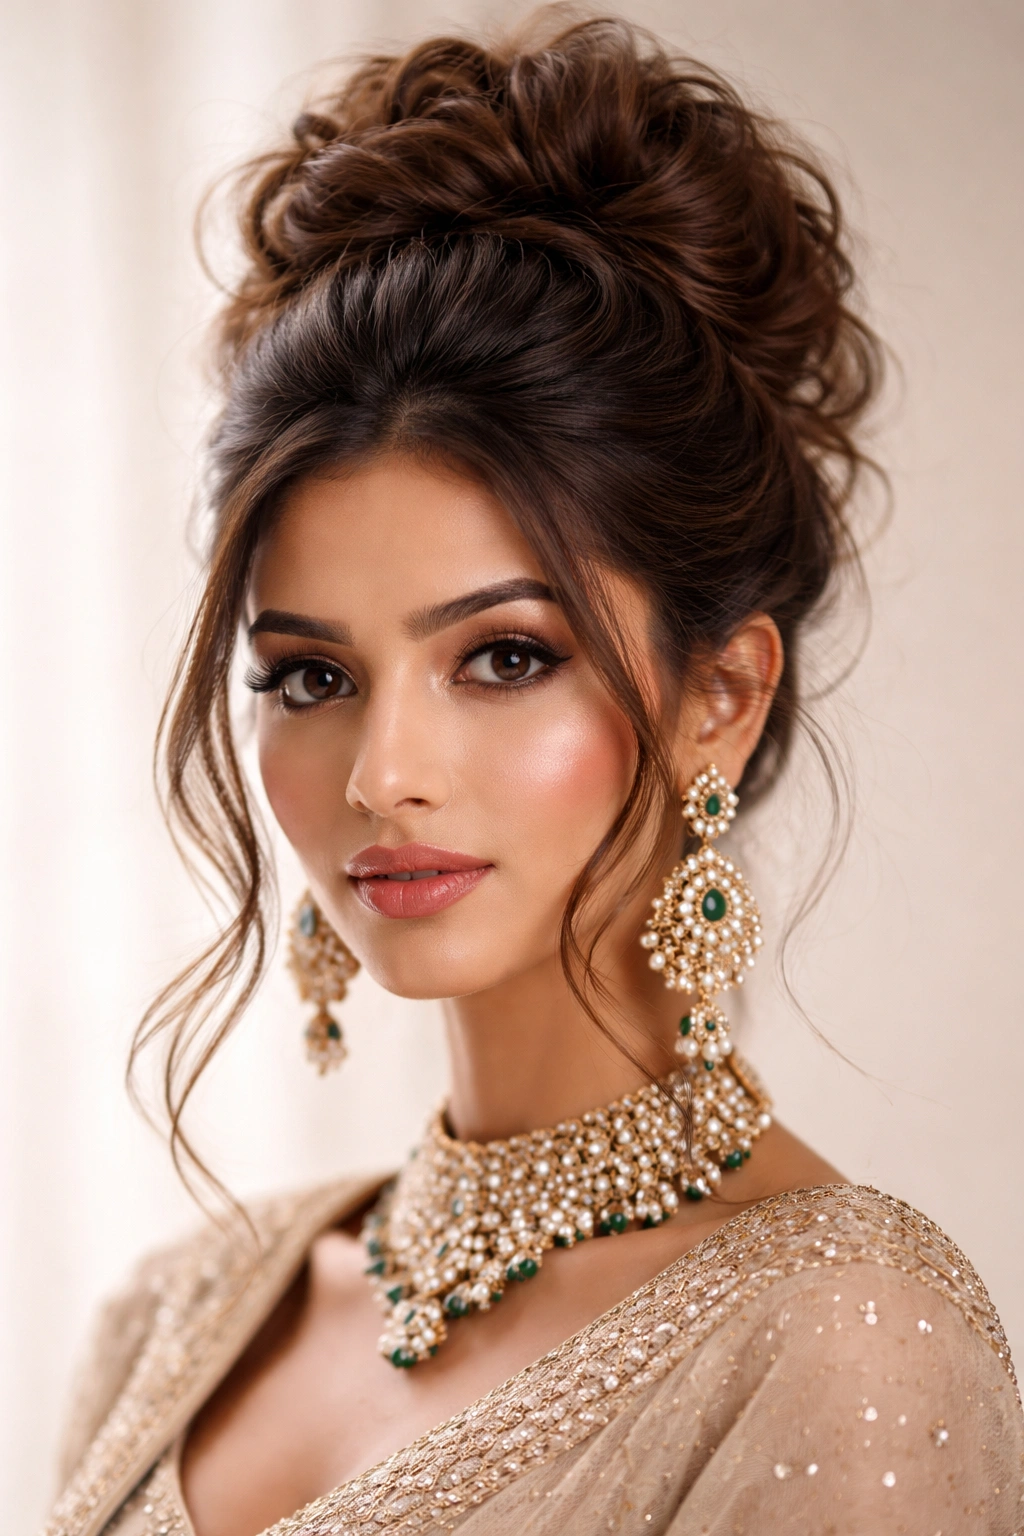
This is the timeless Indian wedding messy bun — the one that works for nearly every face shape, hair type, and occasion. The bun sits high on the crown, creating a lifted, elongated silhouette that pairs beautifully with heavy necklaces and shoulder-bearing garments. The key to this style is intentional texture throughout, not smoothness that reads as accidental sloppiness.
Why This Works for Indian Weddings
The high placement keeps your neck and shoulders completely clear, which means your jewelry becomes the focal point exactly where you want it. Family members can apply tilak, flowers, and decorative pins without struggling around your hair. The face-framing pieces soften your features and create movement when you move, making every candid photo feel dynamic. This style is forgiving with hair texture too — wavy, curly, and straight hair all create beautiful texture in this bun.
How to Create This Look
- Start with hair that’s either freshly washed and blow-dried the night before or lightly textured with dry shampoo (this prevents the bun from looking too slick)
- Section off a few pieces from each side of your face and set them aside with bobby pins
- Gather the rest of your hair into a high ponytail at the crown using a strong elastic
- Tease the ponytail gently at the base for volume and grip
- Twist the ponytail loosely around itself, tucking and pinning as you go to create an irregular, intentionally textured form
- Release the face-framing sections and curl them gently around your face with a 1.5-inch curling iron
- Secure everything with bobby pins in a color matching your hair, using 6-8 pins total
- Finish with a flexible hold hairspray that won’t create a crunchy texture
Pro tip: The most authentic messy bun effect comes from using a texturizing spray before you begin. This gives your hair grip and prevents it from looking overly polished or sleek.
2. Low Side Messy Bun with Braided Detail
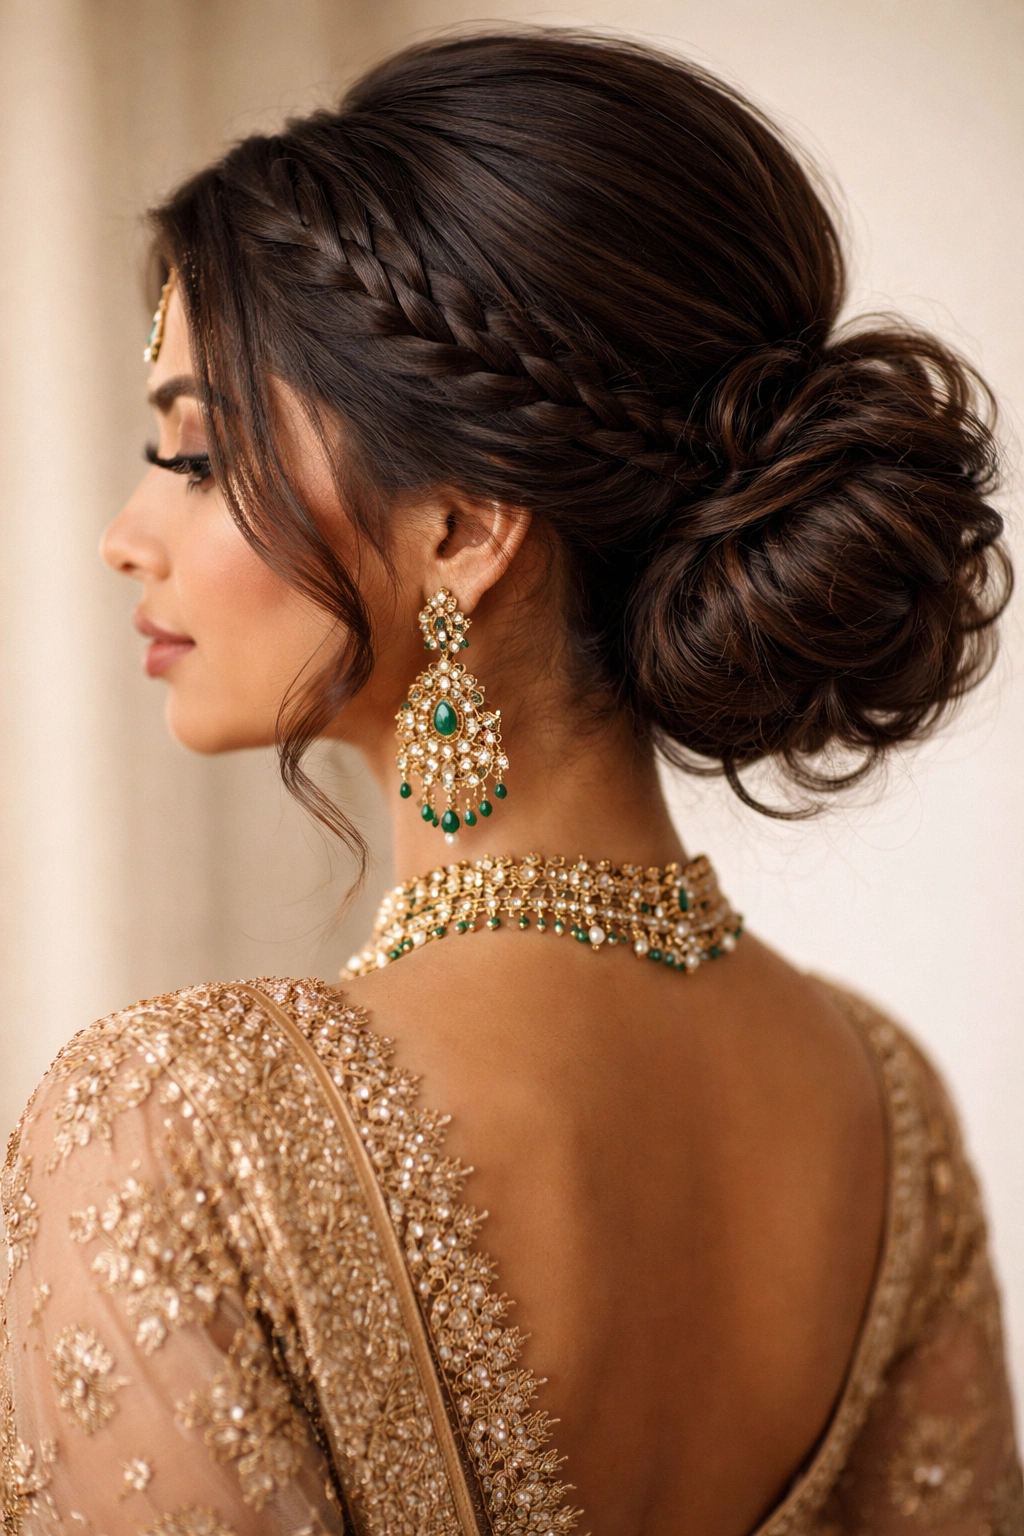
For brides who prefer a softer, more romantic silhouette or want to showcase a heavily embroidered back of their lehenga or blouse, the low side messy bun is the answer. This placement feels less formal than a high bun, which makes it perfect for mehendi or sangeet celebrations. The braided detail adds dimension and prevents the style from reading as incomplete.
The Romantic Appeal of Low Placement
A low bun positioned toward one side of your head creates an asymmetrical, undone quality that photographs beautifully in profile shots. It gives you a longer neckline to work with, making it ideal if you’re wearing a backless or deeply scooped-back blouse. The braided element adds textural interest without the bun feeling like an afterthought — it looks intentional and deliberately styled.
Step-by-Step Execution
- Apply dry shampoo or texturizing spray to clean, second-day hair for optimal grip
- Create a deep side part, sweeping most of your hair toward one side
- From the side with less hair, take a thin section and create a three-strand braid that travels across the back of your head
- Gather all your hair (including the braid end) into a low ponytail positioned toward your non-dominant side
- Tease the base of the ponytail to add volume and texture
- Loosely twist the ponytail and wrap it around itself, tucking the braid into the bun as you coil
- Secure with 8-10 bobby pins in your hair color, leaving some smaller pieces loose around your face and neck
- Use a light-hold spray to keep flyaways soft and moveable, not frozen
Worth knowing: This style works best when created the night before and slept on gently. The pressure creates natural texture that looks lived-in and romantic rather than perfectly executed.
3. Top Knot Messy Bun with Loose Waves
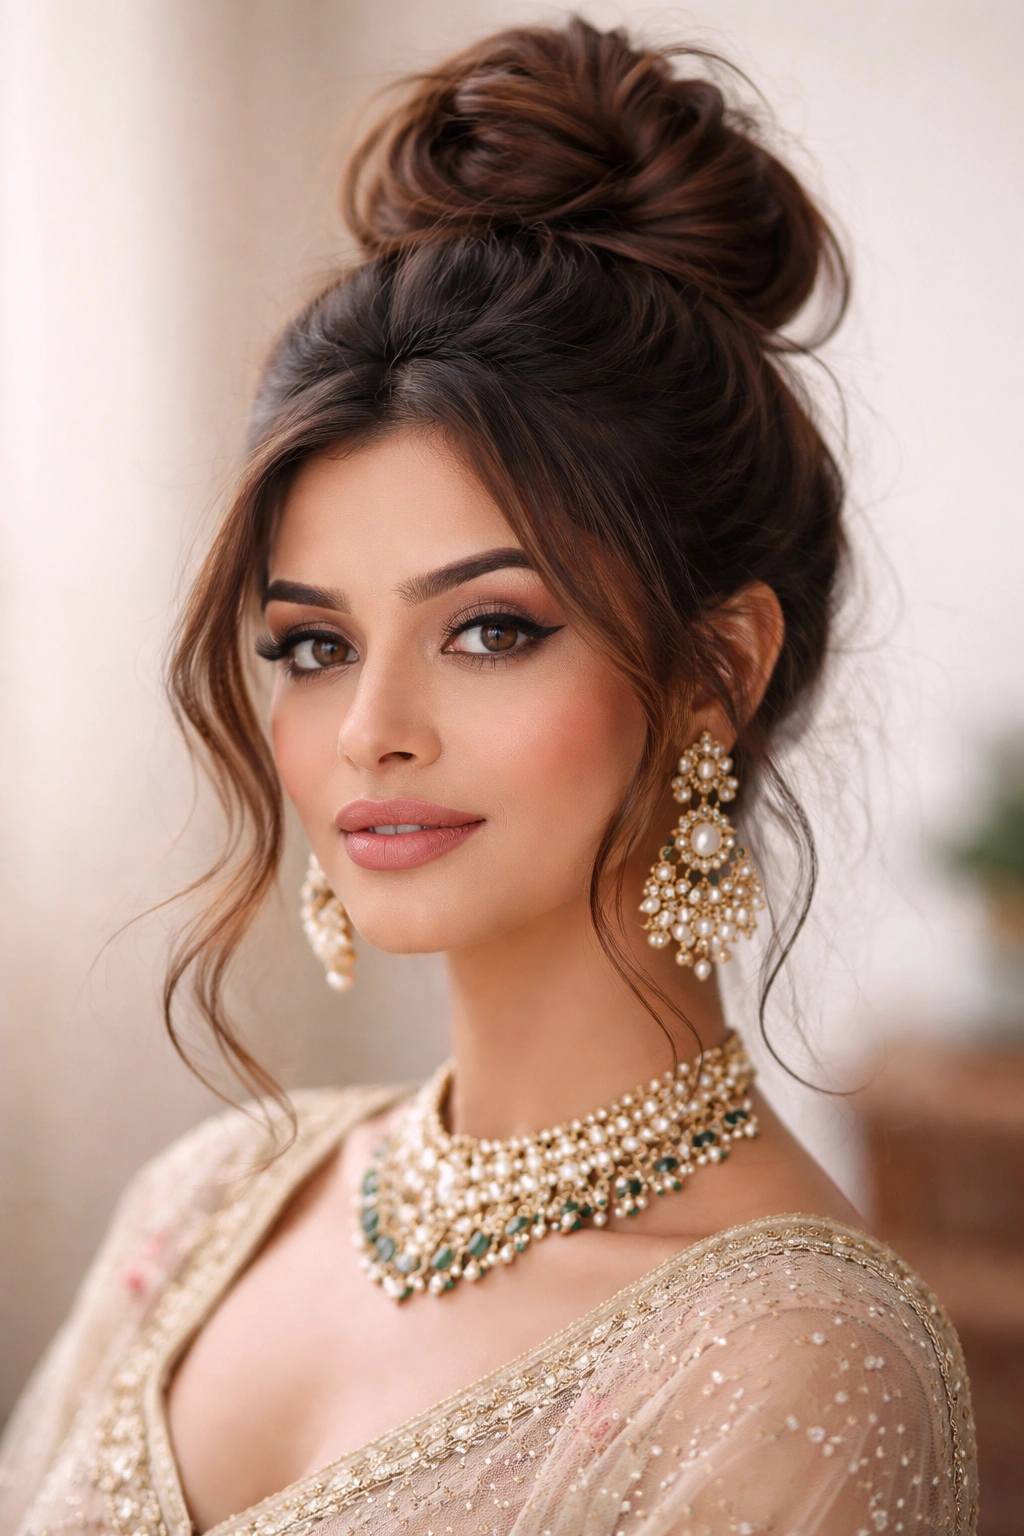
The top knot variation is bolder and more fashion-forward than a traditional messy bun, making it perfect for younger brides or wedding guests who want to feel contemporary while still honoring tradition. This style keeps maximum hair in a bun while longer pieces frame your face and fall to your shoulders, creating a hybrid that balances polished and relaxed.
Why Top Knots Command Attention
A high, tight knot at the absolute crown of your head elongates your face and neck beautifully. The loose waves that frame and fall beneath the bun create movement and texture that’s particularly photogenic. This style is ideal if you have fine or thin hair — gathering hair high on the crown makes even modest volume appear fuller and more substantial.
Creating the Top Knot Effect
- Blow-dry your hair straight or with a soft wave, using a round brush for volume at the roots
- Separate a frame-piece of hair from each temple (about 1-2 inches on each side) and clip these away
- Gather the remaining hair into the tightest, highest ponytail you can achieve at the crown
- Secure with a small elastic that matches your hair color
- Wrap a thin section of hair from the ponytail around the base of the elastic to hide it, securing the wrap with a bobby pin
- Take the remaining ponytail and coil it tightly around the base, securing it very firmly with 10-12 bobby pins
- Release the frame pieces and curl them gently with a 1-inch curling iron away from your face
- Gently pull and loosen individual strands around the crown to soften the top knot and create a slightly undone quality
- Apply a medium-hold hairspray for lasting structure without stiffness
Insider note: The secret to a top knot that reads as intentionally styled rather than accidentally tight is loosening it by about 20 percent after you’ve secured it completely. Pull gently on small sections around the crown to create soft peaks.
4. Textured Bun with Jeweled Pins and Scattered Flowers
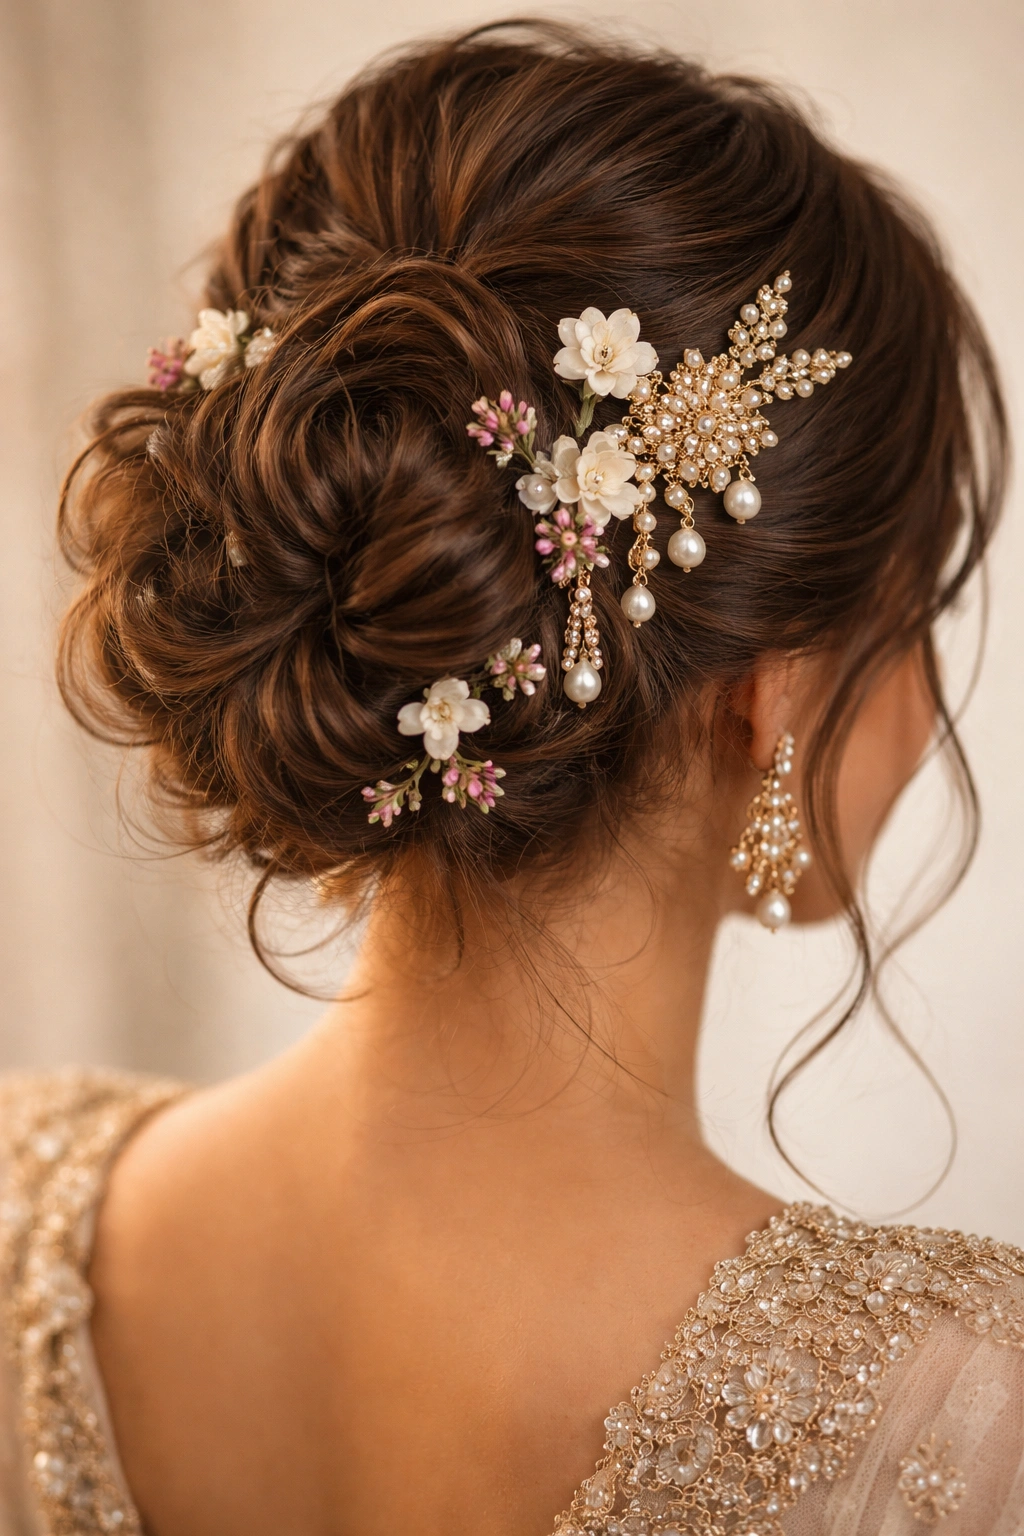
This is the maximalist messy bun — perfect for the shaadi itself when you want your hair to complement an elaborate outfit. Rather than relying on looseness for beauty, this style uses decorative elements as the main attraction. The bun serves as a canvas for jewelry, flowers, and embellishments that coordinate with your wedding attire.
The Art of Accessorizing a Messy Bun
When you’re wearing a heavily beaded lehenga, an ornate necklace, and a maang tika, your hair should coordinate rather than compete. A textured messy bun becomes the base for strategic placement of jeweled pins, fresh jasmine or rose buds, and gold or silver bobby pins that intentionally show. This transforms a casual style into something unmistakably wedding-ready while maintaining the effortless feeling that makes messy buns appealing.
Building a Bun Built for Accessories
- Start with hair that’s been curled throughout with a 1.5-inch curling iron to create natural texture
- Gather hair into a medium-height ponytail (not too high, not too low — allowing room for pins to be displayed)
- Tease the ponytail section generously to create a pillowy base
- Twist the ponytail loosely and wrap it into a bun shape, securing with 8-10 regular bobby pins first
- Now add your decorative elements: place jeweled pins at strategic intervals around the bun (spacing them for visual interest)
- Tuck fresh flowers into the bun, using floral pins to secure them and allowing stems to fall naturally
- Add gold or silver bobby pins visibly around the crown, spacing them symmetrically
- Use a flexible-hold spray that won’t make decorative elements look frosted or stiff
Pro tip: Secure fresh flowers in water picks rather than directly in your hair — this keeps them hydrated and fresh-looking throughout hours of celebration and prevents them from crushing your hair.
5. Dutch Braided Messy Bun with Wrapped Detail
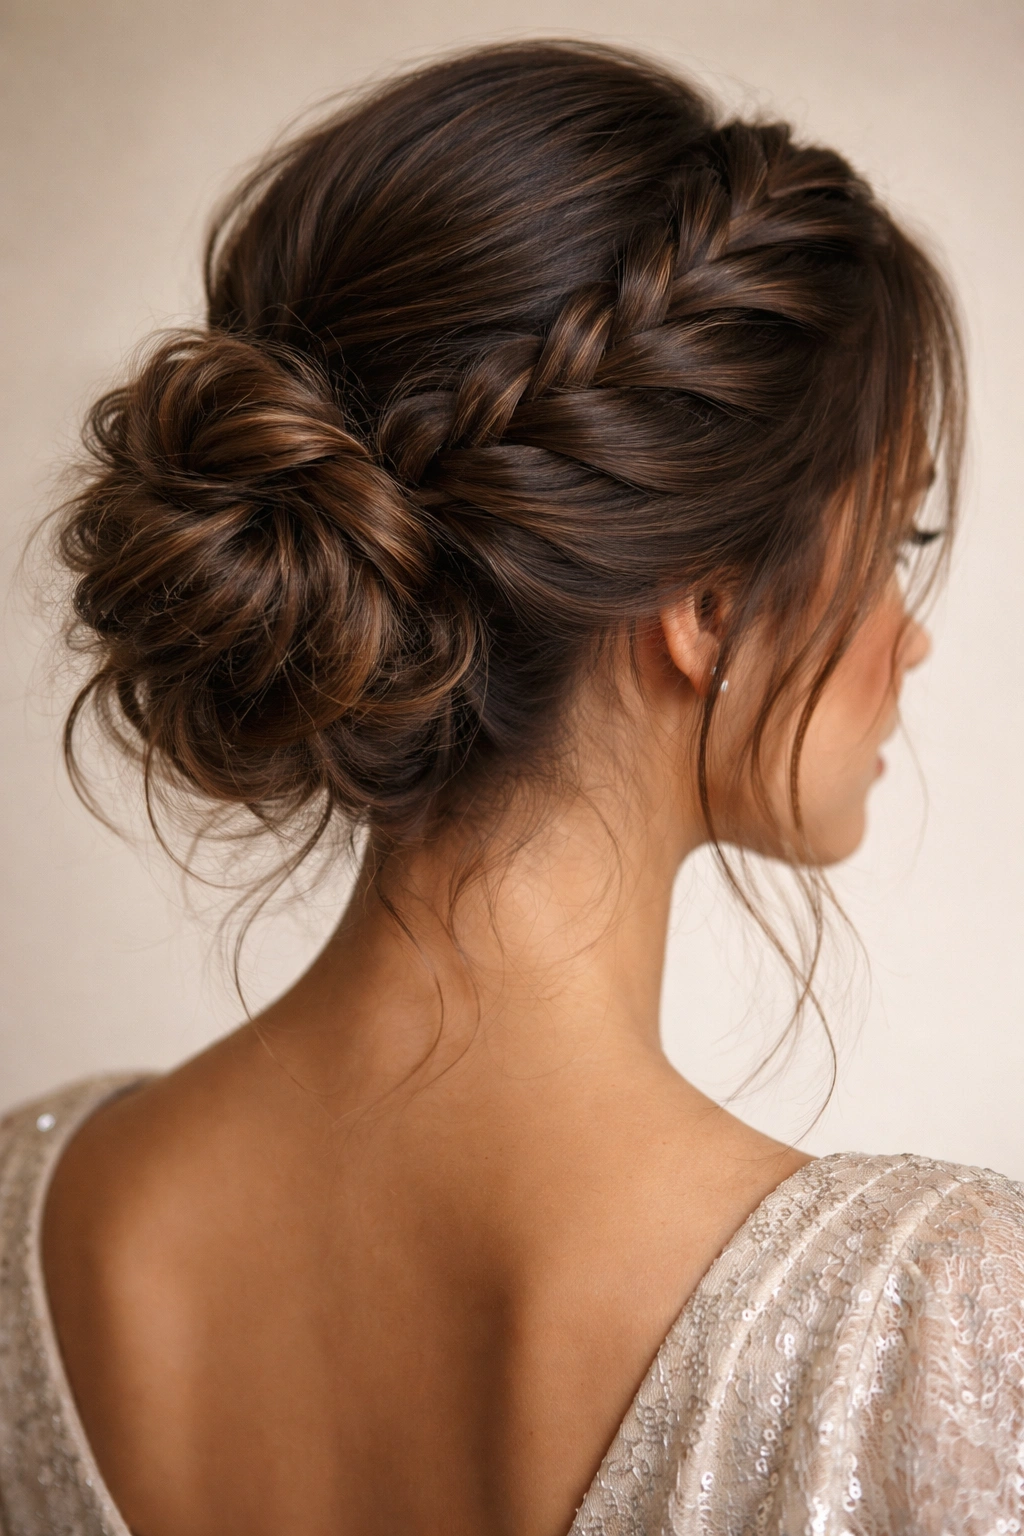
For brides who want texture and visual interest but also a sense of structure and intentional design, the Dutch braid base transforms a messy bun into something that reads as more sophisticated. The braided element travels across the head and feeds directly into the bun, creating a journey that’s fascinating to look at from every angle.
The Visual Impact of Braided Details
A Dutch braid is slightly raised and three-dimensional, which photographs beautifully and creates a technical element that signals you’ve put genuine effort into your style. Combined with a messy bun, it balances the undone quality of the bun with the intentionality of the braid. This style is particularly flattering if you’re wearing your hair down for a pre-wedding event but want to feel polished, or if you have thick hair that benefits from a style with built-in texture and structure.
Technique for a Dutch Braid Into Messy Bun
- Create a deep side part and brush all hair to one side
- Begin a Dutch braid (reverse of a regular braid, with sections going under rather than over) at your hairline, starting above your ear
- Braid back and toward the opposite side of your head, traveling across the back
- As the braid reaches the opposite side, gather all remaining hair into the braid
- Continue braiding until you have about 3-4 inches of unbraided hair remaining
- Gather all hair (braid included) into a low-to-medium ponytail
- Tease the ponytail to create volume and grip
- Twist the entire ponytail loosely and wrap it around itself, with the braid naturally incorporating itself into the bun’s outer edge
- Secure very thoroughly with bobby pins (a bun built on a braid needs extra anchoring)
- Use a strong-hold hairspray to ensure the braid stays defined while the bun stays textured
Worth knowing: This style is best created when your hair has some natural wave or texture already — freshly straightened hair can make the Dutch braid look too rigid to pair effectively with a messy bun.
6. Half-Up Messy Bun for Lightweight Elegance
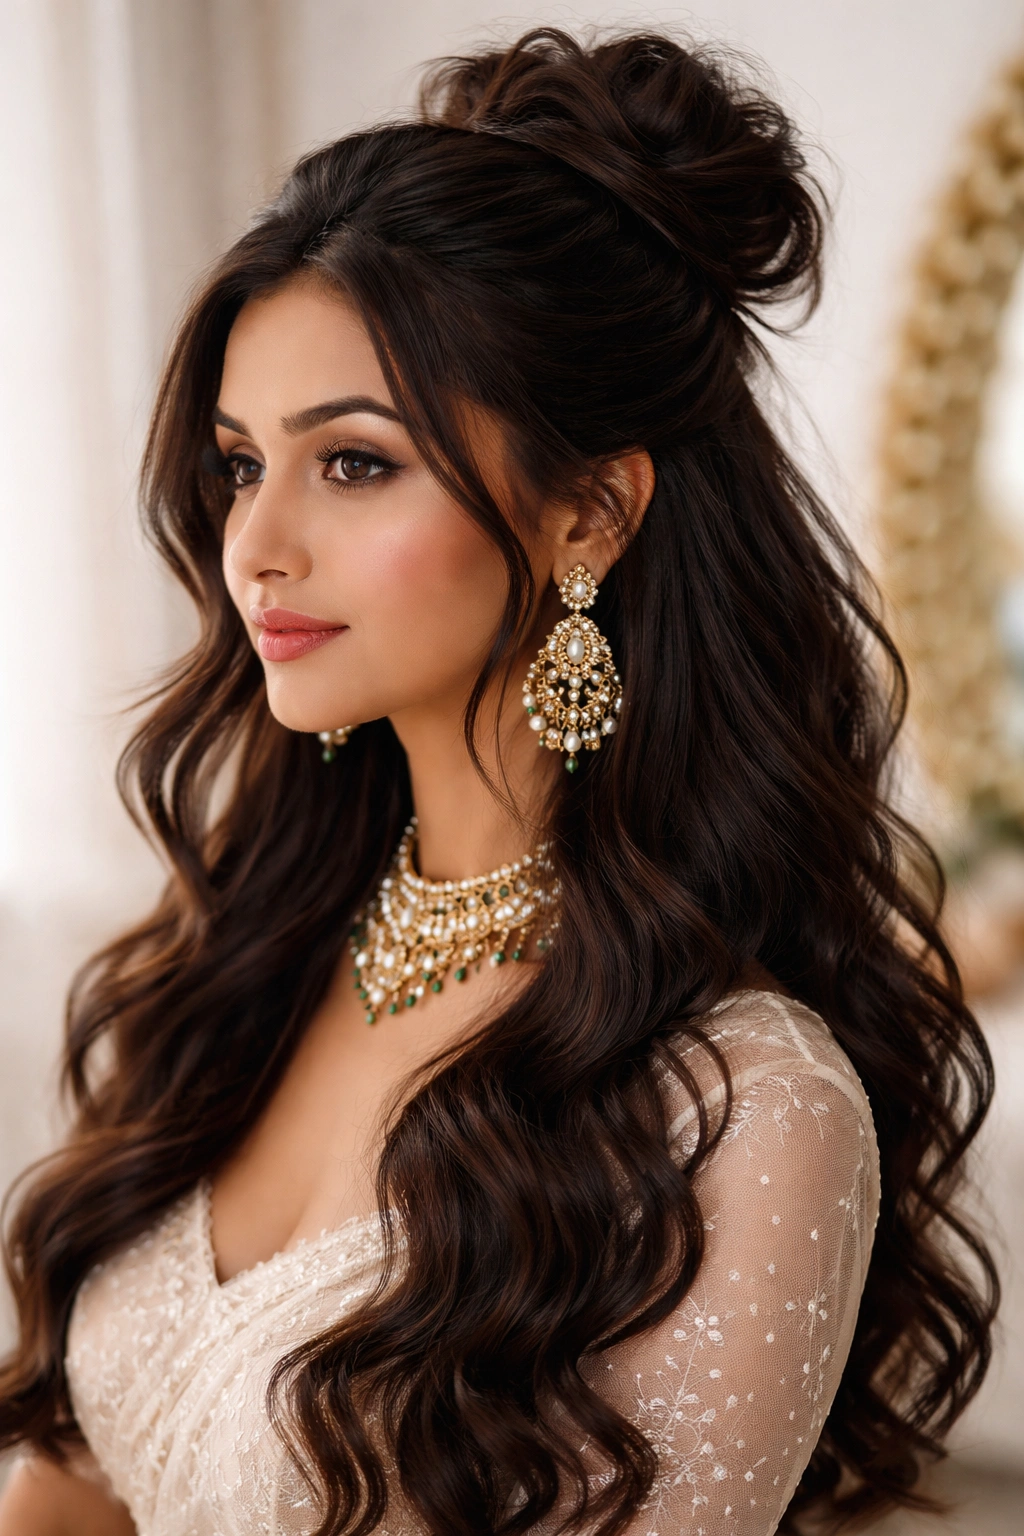
Sometimes the most elegant choice is the simplest one. The half-up messy bun keeps hair partly down while gathering the crown section into a soft bun. This style is ideal for lighter pre-wedding events, for brides with very long hair who feel too constrained by a full updo, or for anyone who wants to feel put-together without the commitment of a completely gathered style.
When Half-Up Works Best
This style is forgiving of different hair textures and lengths because it works with your hair’s natural fall rather than working against it. If you have thick hair, gathering only half of it means the bun doesn’t become bulky. If you have fine hair, the hair falling down your back creates the illusion of length and density. The style is also practical — you can wear it down at mehendi and shift it up for sangeet by gathering more hair into the bun.
Creating Soft, Structured Half-Up Style
- Blow-dry your entire head with soft waves using a large barrel round brush
- Section off hair from your temples to the back of your ears on each side (these will frame your face)
- Gather the crown and upper-back section into a ponytail positioned slightly higher than where you’d naturally part your hair
- Don’t make this ponytail tight — you want it loose enough that hair can still move freely
- Tease the base of the ponytail gently to create texture
- Twist or loosely braid the ponytail section
- Coil it into a soft bun shape, securing with 6-8 bobby pins
- Release the frame pieces and gently curl them around your face
- Leave the remaining hair down, using a curling iron to create soft waves throughout
- Finish with a flexible spray that allows movement and texture
Pro tip: This style looks better when created the morning-of rather than the night before — the half-down section needs fresh curl and movement that gets lost if you sleep on it.
7. Sleek Low Bun with Undone Crown Texture
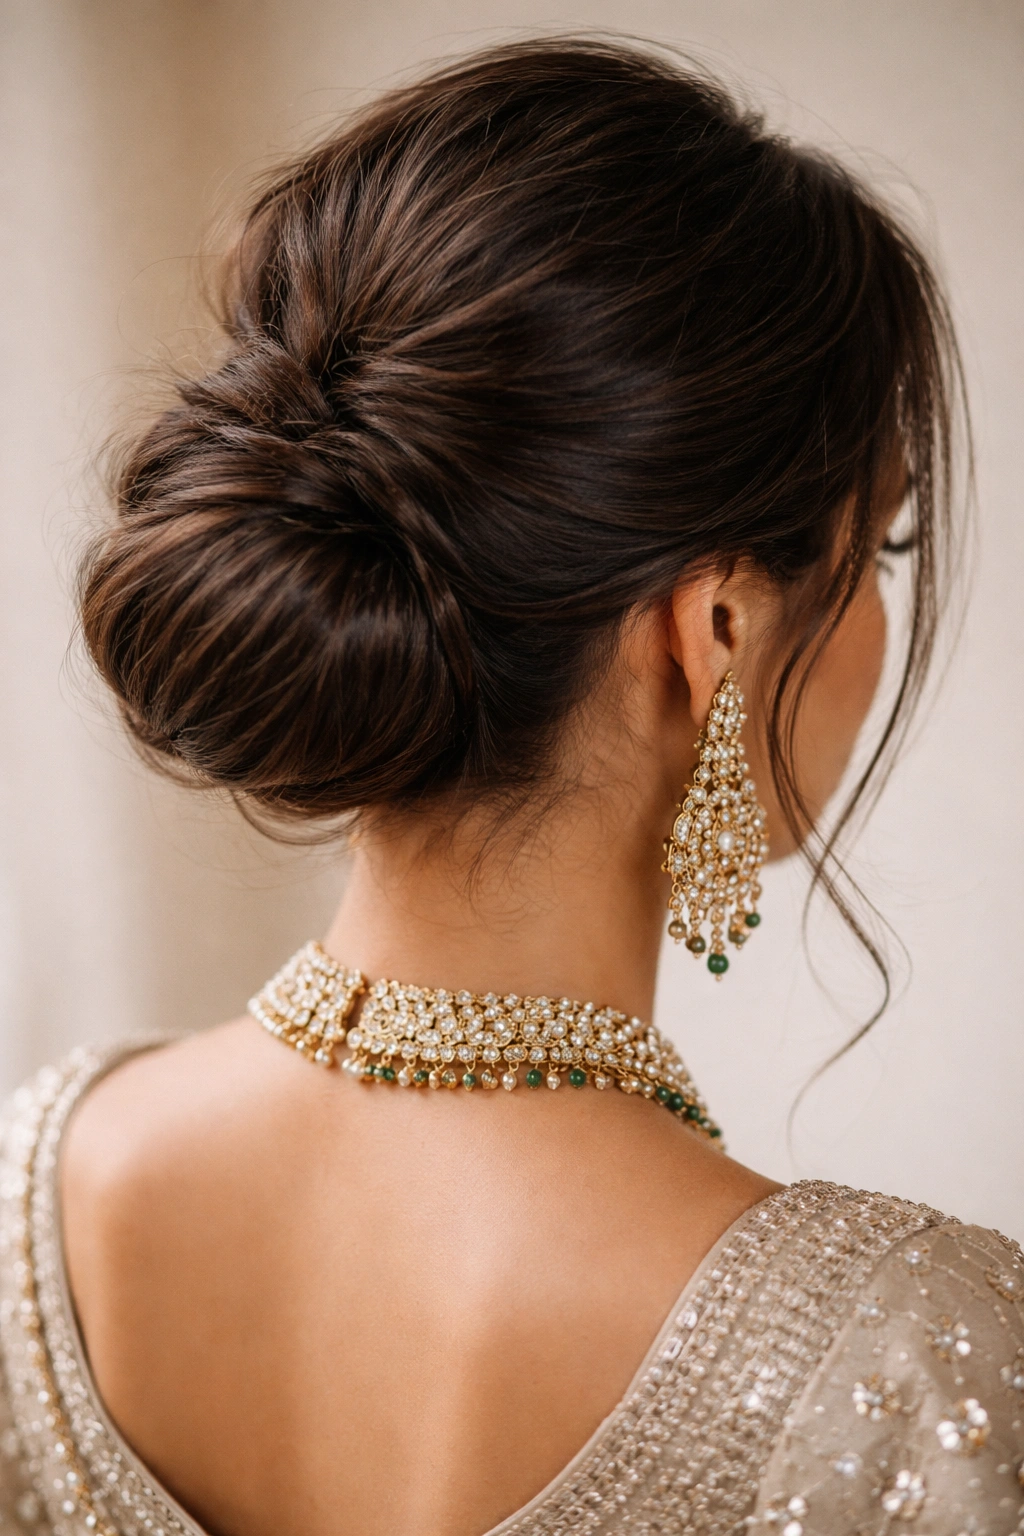
For brides who prefer a more polished aesthetic but still want the approachable quality of a messy bun, this hybrid style delivers. The sides and lower back are smooth and streamlined, while the crown maintains intentional texture and looseness. This is the style that works for more formal occasions or for brides who generally prefer sleeker styling but want one element of softness.
The Polish-Meets-Relaxed Appeal
This style reads as intentional and well-executed rather than accidental or rushed. The smooth sections show precision, while the textured crown proves you’ve embraced the messy bun aesthetic on purpose. It’s ideal if you’re wearing a very formal gown or a heavily embroidered outfit — the sleeker lower sections balance a voluminous dress, while the crown texture keeps you from looking overly formal or icy.
Building Sleek Base with Textured Crown
- Blow-dry your hair smooth using a paddle brush and a concentrator nozzle
- Apply smoothing serum to the lower half of your hair to add shine and control
- Gather hair into a low ponytail, keeping this section very smooth and tight
- Secure with a small elastic
- Wrap a thin section around the base to hide the elastic
- Take the ponytail section and divide it into 2-3 portions
- Tease each portion gently at the base (not the lengths) to create texture
- Loosely coil these textured portions around the ponytail base
- Secure with bobby pins, allowing some texture to show and not trying to hide it
- Take a very small section of hair from the crown area (this is the part that should remain slightly loose)
- Loosen this section gently with your fingers to create soft peaks
- Apply a flexible-hold spray that won’t make the sleek sections look shiny or plastic
Worth knowing: This style requires products with different finishes — use a smoothing serum for the lower sections and a texturizing spray for the crown to create visual contrast.
8. Romantic Bun with Scattered Bobby Pins and Pearls
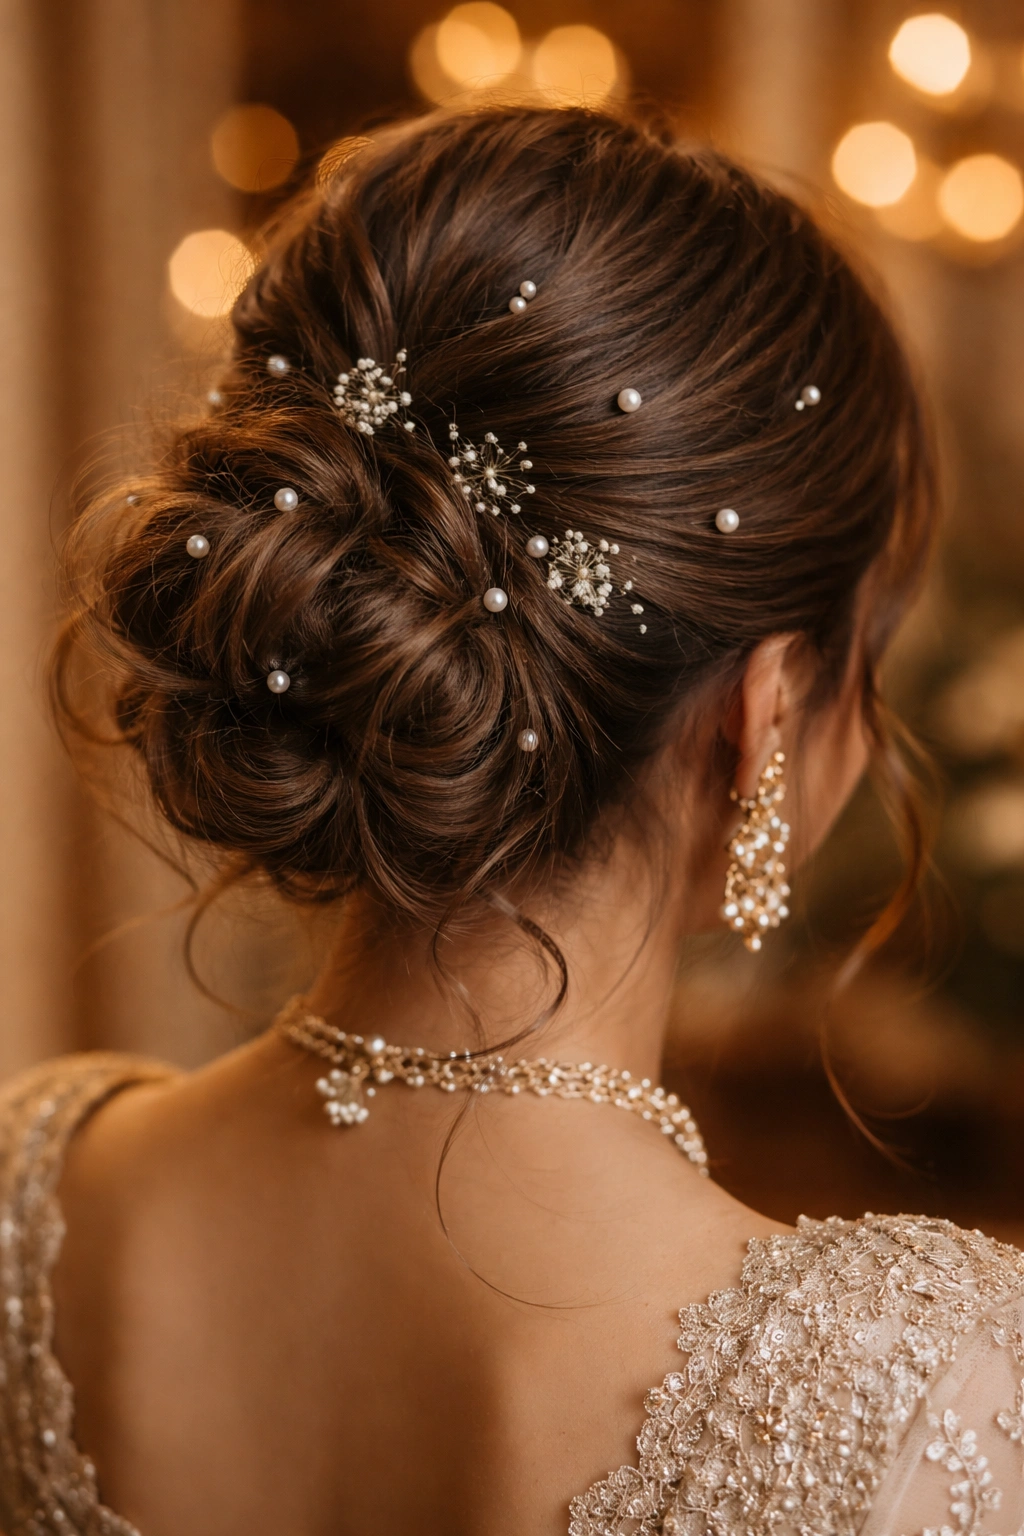
This is the dreamy bride’s messy bun — softly textured, delicately ornamented, and unmistakably romantic. Rather than bold jeweled pins or large flowers, this style uses small scattered embellishments: pearl bobby pins, delicate metal hairpins, tiny baby’s breath flowers. The effect is ethereal and specifically designed for brides who envision a soft, romantic wedding aesthetic.
Creating a Dreamy Aesthetic
The beauty of this style lies in restraint and strategic placement. Instead of clustering all your embellishments in one area, you scatter them throughout the bun, creating a subtle sparkle that catches the light as you move. This works particularly well in indoor or evening lighting, where small pearls and delicate metals catch and reflect light beautifully. The style photographs gorgeously in close-ups because the details are small enough to read as intentional rather than overdone.
Step-by-Step for Romantic Scattered-Pin Style
- Curl your entire head loosely with a 1.5-inch curling iron for soft, romantic waves
- Gather hair into a ponytail at medium height (not too high, not too low)
- Tease the ponytail gently to create a soft, pillowy base
- Loosely twist the ponytail around itself without trying to create a tight, defined shape
- Secure the bun loosely with 6-8 bobby pins, leaving some hair intentionally loose and not trying to hide all the pins
- Now add your embellishments: place pearl bobby pins individually around the bun (not clustered together), spacing them about 2-3 inches apart
- Tuck tiny clusters of baby’s breath or other delicate flowers into the bun, securing with small floral pins
- Add a few small metal hairpins with decorative heads (gold or silver, depending on your jewelry tone)
- Let the entire bun feel soft and slightly undone, with some sections falling loose and creating movement
- Use only the lightest hairspray — just enough to hold the shape without creating any stiffness
Insider note: This style benefits from being created 30 minutes before you need it rather than hours ahead. The bun softens naturally over time, becoming more romantic and less contrived than a freshly created version.
9. Braided Crown Into Low Messy Bun
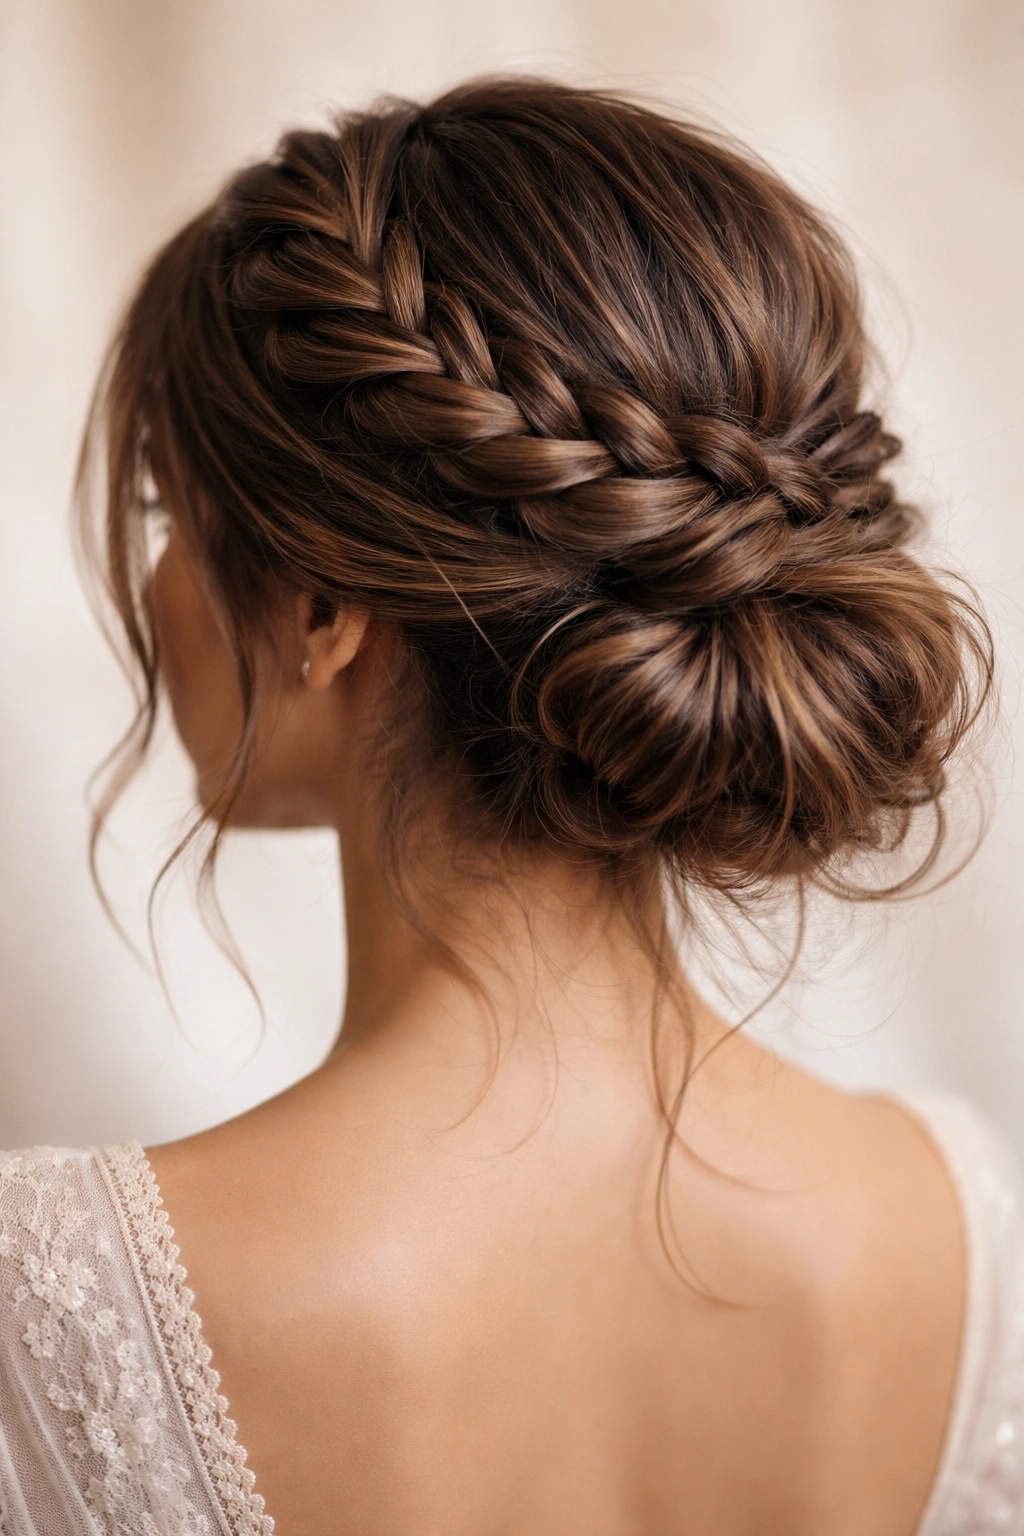
For a wedding style that reads as both intricate and effortlessly elegant, this variation features a braided crown that incorporates all your hair and feeds directly into a low bun. It’s technically complex but appears simple, and it works beautifully across all hair types because the braiding adds structure to the final style.
Why Crown Braids Elevate a Messy Bun
A braided crown gives you a focal point at the top of your head while the bun provides the soft, undone element below. Together, they create a style that’s visually interesting from every angle. The braiding also serves a practical purpose — it helps secure hair at the crown, making the overall style more stable and less prone to falling out during dancing or movement.
Creating a Crown Braid Into Low Bun
- Create a deep side part, sweeping most of your hair to one side
- Begin a standard three-strand braid above your ear on the side with less hair
- As you braid, gradually incorporate hair from below the braid line, working backward like you’re braiding toward the nape of your neck
- Continue this technique until you’ve incorporated all hair on that side
- When you reach the nape, stop braiding and gather all hair (including the braid) into a low ponytail on one side
- Tease the base of the ponytail to create volume
- Loosely twist the ponytail and wrap it into a soft bun, keeping the braided section visible and incorporated into the bun’s edge
- Secure with bobby pins, making sure the braid isn’t pulled so tight that it distorts or flattens
- Use a flexible-hold spray to maintain the texture of both the braid and the bun
Pro tip: Practice this style at least once before your wedding day — the crown braid technique requires confidence to execute smoothly, but once you master it, you’ll have a signature style you can recreate beautifully.
10. Twisted Double-Bun Hybrid with Center Part
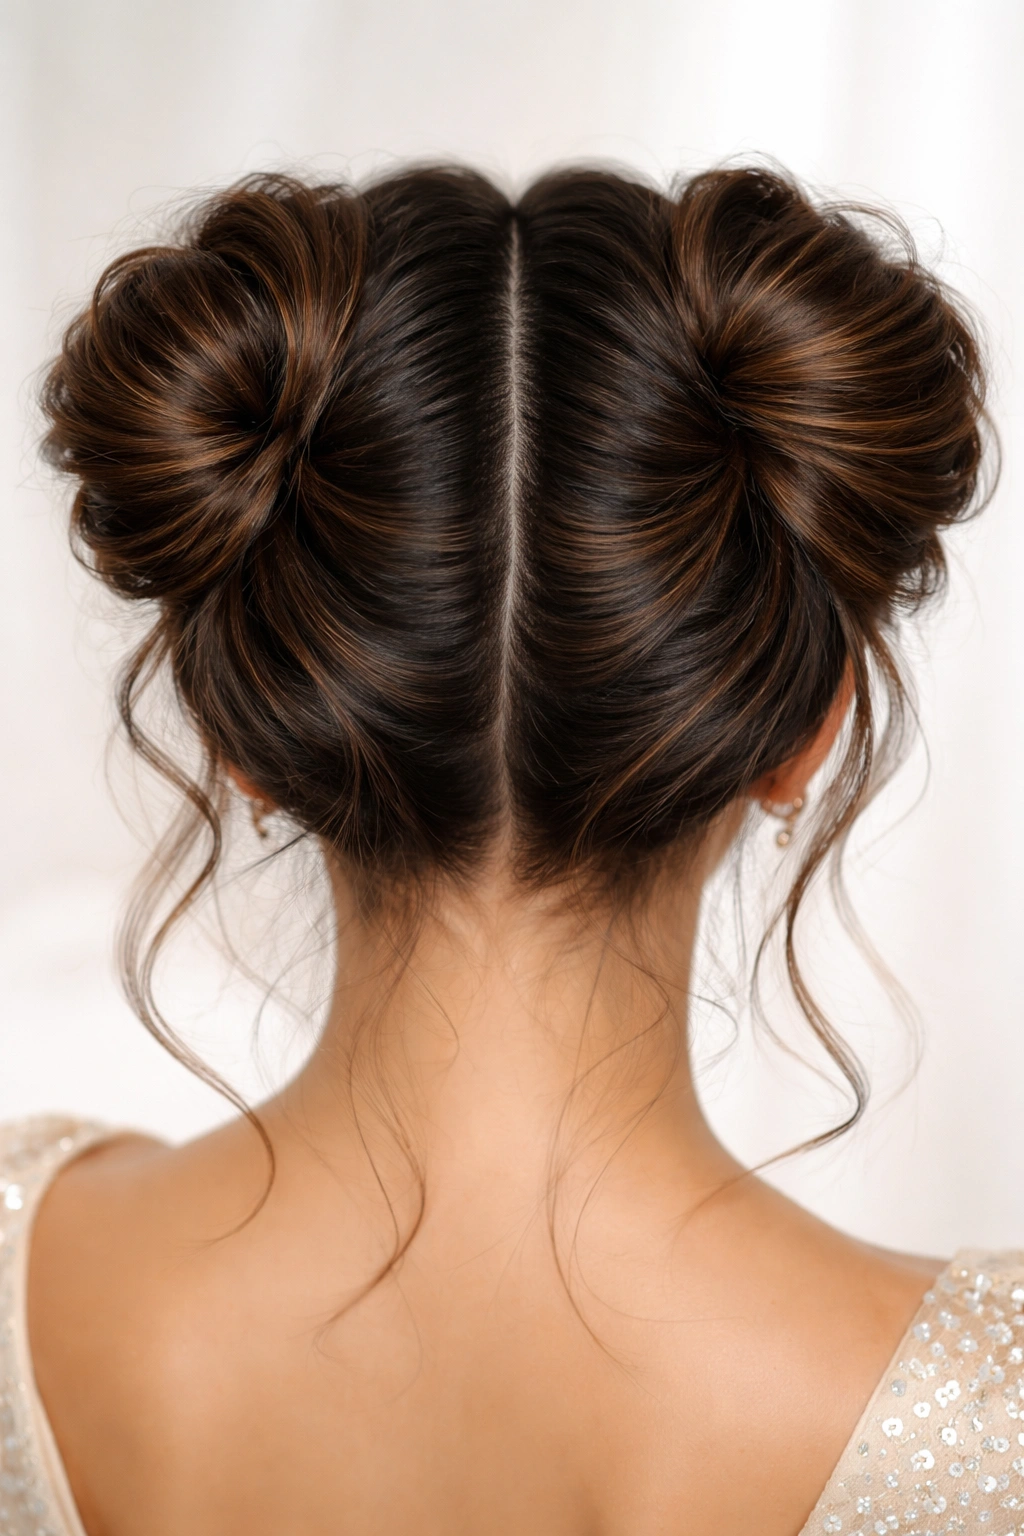
This is the modern, slightly unconventional messy bun for brides who want something distinctly different from what everyone else is wearing. Two soft buns created from left and right sections and positioned close together at the crown create an eye-catching silhouette that photographs beautifully and feels unexpectedly fresh.
When Unconventional Works
This style is best worn by younger brides or bridesmaids for lighter celebrations like mehendi or sangeet rather than the main shaadi itself. It’s bold and modern enough to feel statement-making, yet the messy, soft texture keeps it from feeling too trendy or costume-like. If you have thick hair or long hair with substantial length, this style is ideal because it accommodates volume beautifully while creating visual interest that a single bun might not achieve.
Building Two Buns That Work Together
- Create a center part from your hairline to the nape of your neck
- Divide your hair into two equal sections, one on each side
- On the left side, gather hair into a ponytail positioned toward the upper-left crown area
- Repeat on the right side, creating a matching ponytail on the upper-right crown
- Tease both ponytails generously at the base
- Twist each ponytail loosely around itself
- Coil each twisted section into a soft bun shape, positioning the buns close together so they appear almost connected
- Secure each bun with 6-8 bobby pins
- Leave some smaller pieces loose around your face and at the nape for texture and softness
- Curl the loose pieces gently with a 1-inch curling iron
- Finish with a flexible-hold spray that won’t make either bun look stiff or overly constructed
Worth knowing: The success of this style depends on symmetry — ensure both buns are approximately the same size and positioned at the same height. Asymmetry reads as accidental rather than intentional with this particular style.
Final Thoughts
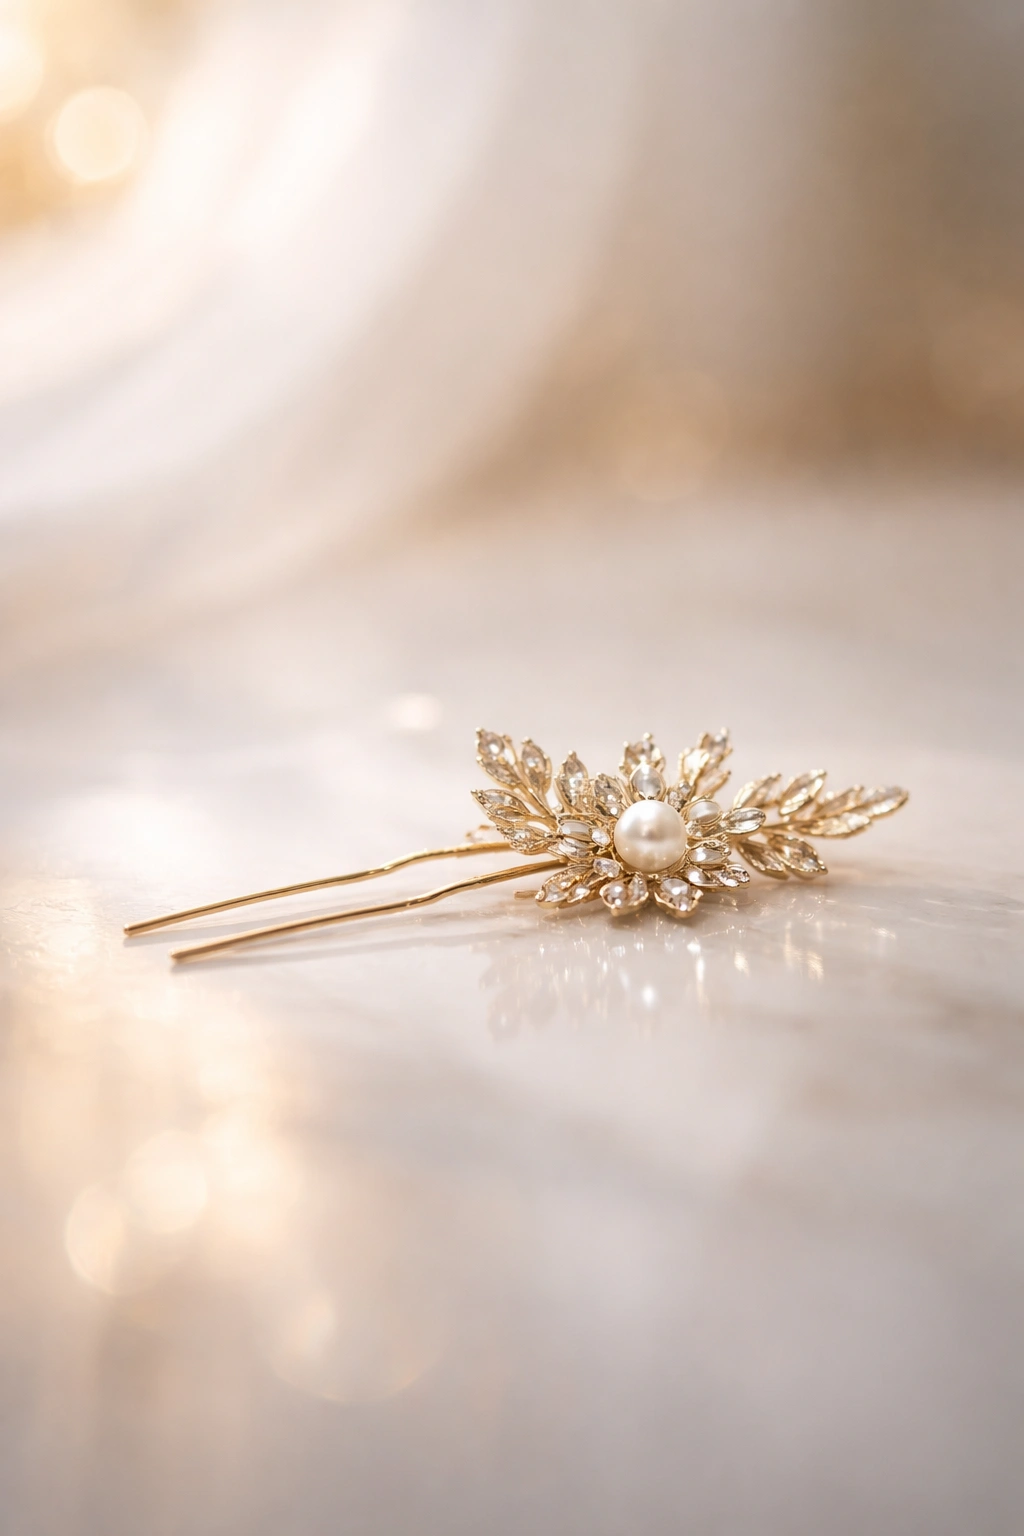
Messy bun hairstyles have become an essential part of the Indian wedding styling toolkit because they’re genuinely versatile, deeply photogenic, and practical enough to survive hours of celebration. The ten styles above represent the full spectrum — from romantic and delicate to bold and modern, from simple half-up versions to technically complex braided variations. Each one can be adapted to suit your specific hair type, the formality of your event, and your personal aesthetic.
The real skill in creating an Indian wedding messy bun isn’t in achieving perfect sloppiness — it’s in creating intentional texture, supporting that texture with strategic bobby pins and secure anchoring, and then selecting embellishments that coordinate with your outfit and jewelry. A truly gorgeous wedding messy bun is equal parts technique, product, and styling choices that feel thought-through rather than accidental.
Test whichever style appeals to you most well before your event. Have your hairstylist create it at least twice during consultations so you understand exactly which products work best, how long the style lasts, and whether any adjustments make it feel more comfortable or more photogenic. Consider creating your style the night before whenever possible — sleeping gently on a messy bun actually improves its texture and creates that lived-in quality that photographs beautifully.
Whether you’re the bride or a guest, a messy bun offers the perfect balance of elegance and ease that suits the joy and movement of an Indian wedding celebration.
