



Your baby or toddler’s natural curls, coils, and texture deserve styling that celebrates rather than fights their hair’s natural beauty. The early years are the perfect time to establish healthy hair care habits and show your child that their hair—exactly as it grows from their head—is worthy of love and attention. Whether you’re looking for protective styles that allow for growth and rest, everyday looks that are easy to maintain, or special occasion hairstyles that make a statement, there are countless ways to style afro hair that work with a young child’s needs rather than against them.
The right hairstyle for your little one balances aesthetics with practicality. You need something that doesn’t pull too tightly on delicate edges, allows for proper moisture and scalp health, and can be maintained without causing stress or damage. Many of the styles most celebrated on social media aren’t actually suitable for babies and toddlers whose hair is still developing and whose scalps are more sensitive. That’s where this guide comes in—we’re focusing exclusively on age-appropriate styles that are beautiful, protective, and genuinely manageable for busy parents.
Beyond the visual appeal, the hairstyles you choose now set the foundation for your child’s relationship with their own hair. When you style their hair with care, keep it moisturized, and normalize the celebration of their natural texture, you’re sending a powerful message: your hair is beautiful just as it is. That early investment in healthy hair practices and positive styling choices pays dividends as your child grows.
1. High Puffs With Colorful Clips
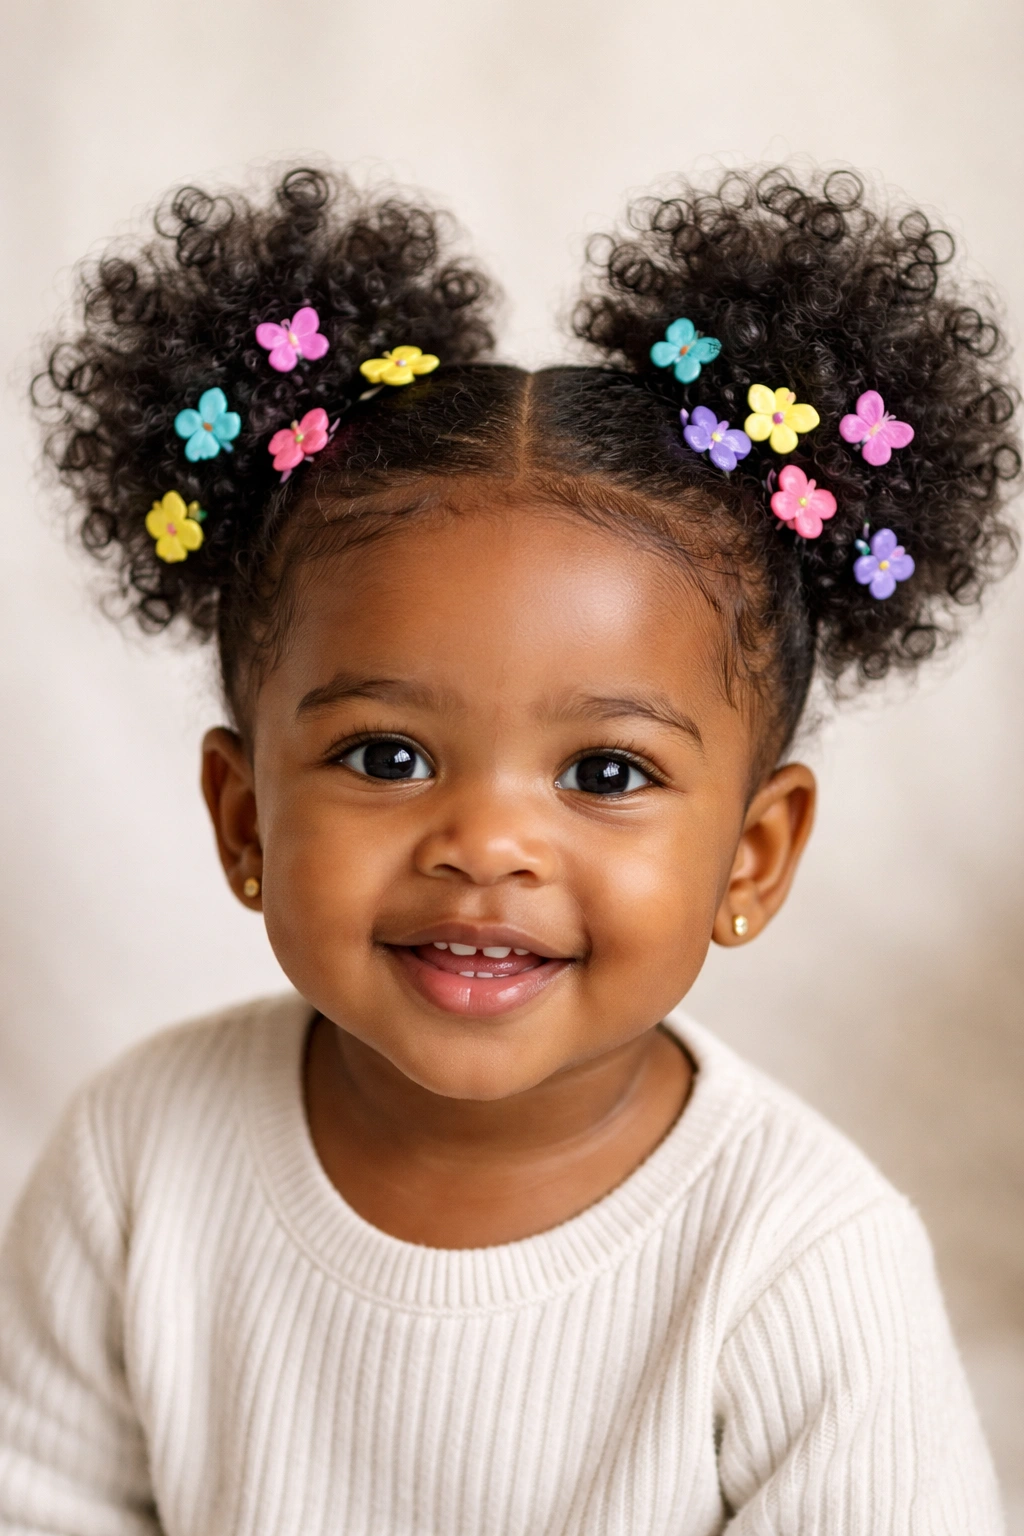
High puffs are the quintessential toddler afro hairstyle—playful, practical, and instantly recognizable. They work beautifully on babies and toddlers because they’re lightweight, don’t require tight tension, and can be styled in minutes once you’ve got the technique down. The style sits on top of the head, which means it doesn’t pull on the delicate hairline that’s still developing in young children.
Why High Puffs Work So Well for Little Ones
High puffs give you serious flexibility in terms of how you want to accessorize and style them. A single puff on top with loose curls falling around it creates an adorable, low-manipulation look. Two puffs—one on each side—give off a more structured, put-together vibe that’s perfect for photos or outings. The beauty is that you can achieve this style with minimal product, minimal manipulation, and minimal time, which matters enormously when you’re dressing a wiggly toddler.
The real magic of high puffs is that they look polished while still allowing the hair to be in its most natural state. You’re not forcing the hair into a shape it doesn’t want to be in. You’re simply gathering it at the roots and securing it with a soft elastic, which means there’s no tension running through the hair shaft. This is crucial for maintaining hair health in babies and toddlers whose hair is still establishing its growth pattern.
How to Create High Puffs Step-by-Step
- Use a soft, seamless elastic—never metal or rough-edged bands that can break delicate hair
- Gather the hair at the crown, holding it loosely in your hand—not tight like you would for an adult ponytail
- Wrap the elastic around once, twice if needed, leaving the gathered section slightly loose at the base
- Gently fluff the puff outward with your fingers, creating volume and shape
- Add a clip, bow, or comb for visual interest and to keep the puff intact if your child is active
Pro tip: Use leave-in conditioner or a light styling cream before creating puffs to give definition and frizz control without the heaviness of gel that can flake or feel uncomfortable on a baby’s scalp.
2. Two-Strand Twists in Sections
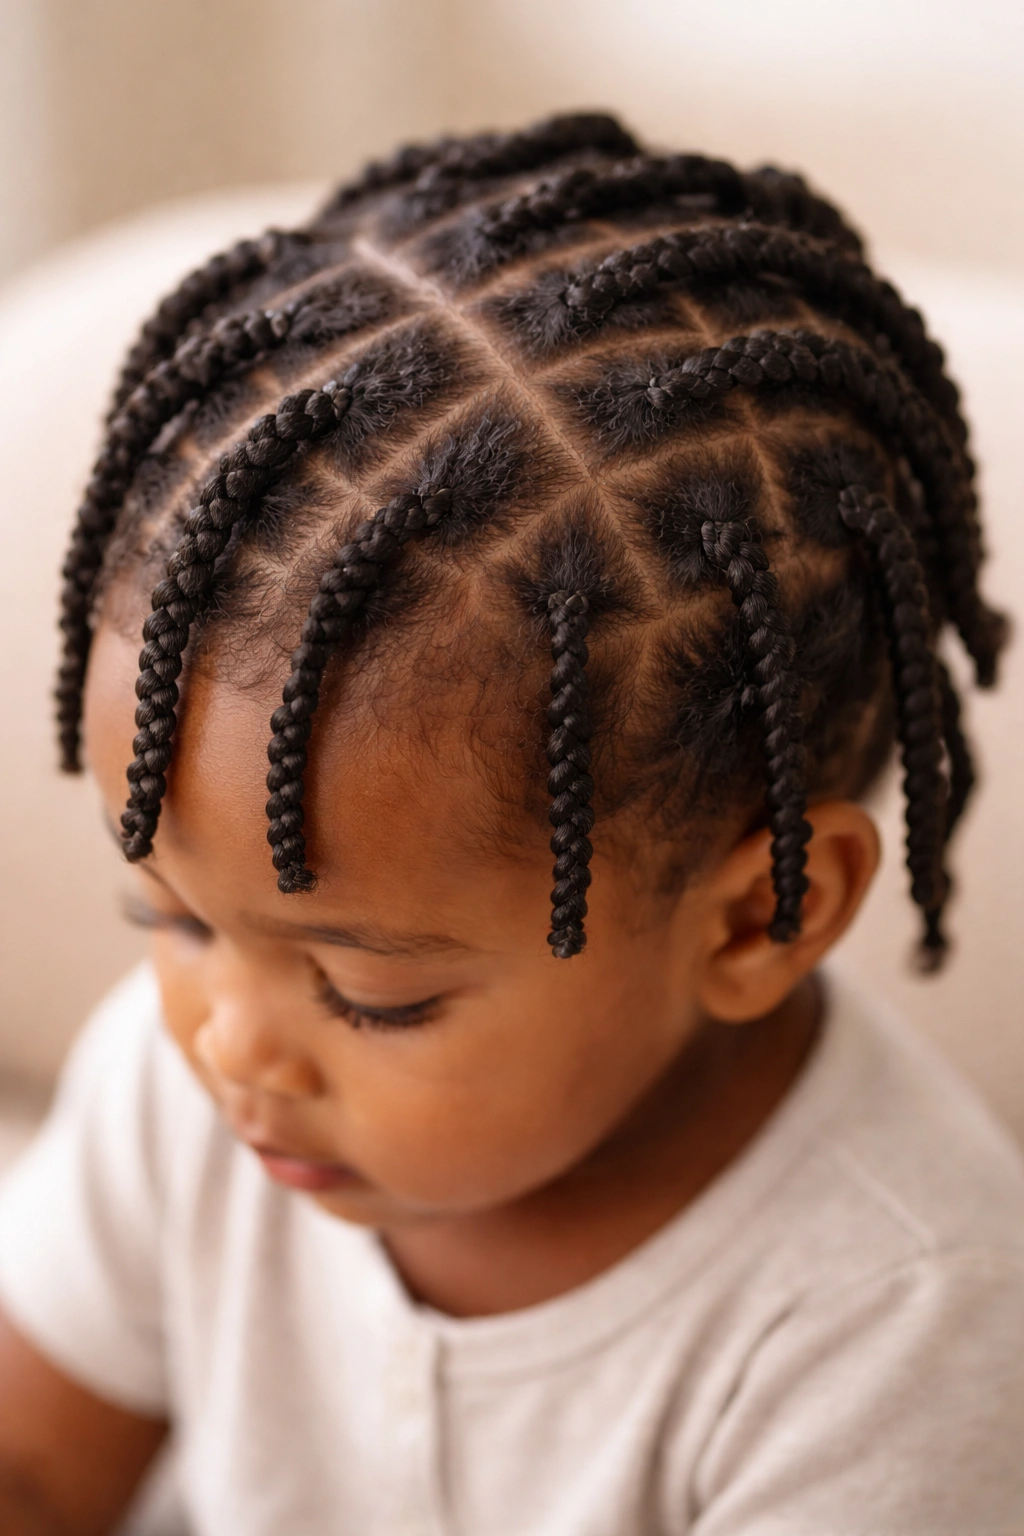
Two-strand twists offer more visual interest and structure than puffs while still being age-appropriate and protective. They’re created by taking two sections of hair and twisting them around each other from root to tip, and they work beautifully on babies and toddlers because you can control the size of each twist to match your child’s hair thickness and your styling time.
The Science Behind Why Twists Protect Hair
Twists are considered a protective style in the curly and coily hair community because they keep the ends of the hair tucked away and protected from manipulation, breakage, and environmental damage. For babies and toddlers, smaller twists—often called “mini twists”—distribute the weight of the style evenly across the scalp rather than concentrating weight in one area. This reduces tension and the risk of traction alopecia (hair loss caused by repeated pulling), which is especially important during the sensitive early years.
The individual twist sections also create a defined curl pattern as the hair dries, and that definition lasts for several days if you pineapple (loosely gather at the top) the style at night. This means one styling session can look fresh for 4-5 days with minimal daily manipulation, which is exactly what growing hair needs.
Styling Two-Strand Twists for Tiny Heads
- Section the hair into manageable pieces—for a toddler, this might be 8-12 sections depending on hair density
- Apply a light moisturizer or twisting cream to each section—avoid heavy butters that can weigh down fine hair
- Twist each section slowly and gently, keeping tension loose rather than tight
- For extra hold without commitment, you can dip the ends in warm water after twisting to set the curl
- Style the finished twists into a puff at the crown, let them hang, or wrap them into a low bun
Worth knowing: Two-strand twists can be done on dry or wet hair, but many parents find that working with damp hair makes the twisting process easier and faster, which is important when you have an impatient toddler.
3. Bantu Knots for Texture and Style
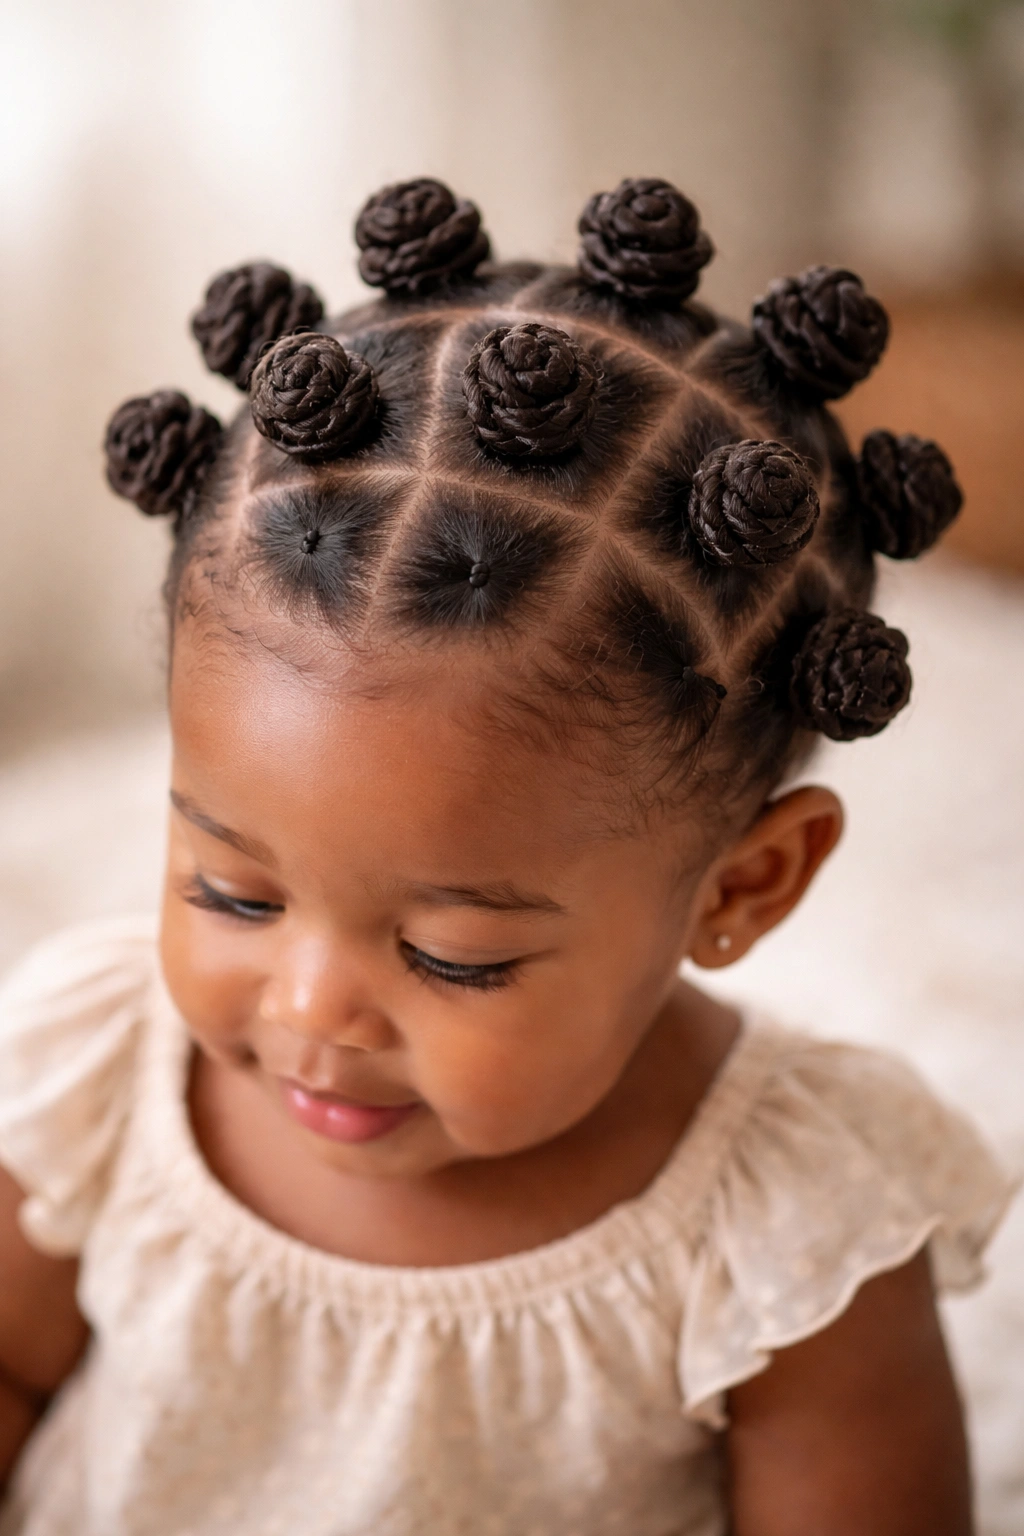
Bantu knots are small, spiral knots created by twisting sections of hair around themselves and securing them close to the scalp. They’re a traditional African hairstyle that’s made a comeback in recent years, and they work wonderfully on babies and toddlers because they create incredible texture, volume, and definition with minimal hair manipulation.
What Makes Bantu Knots Special for Young Children
Bantu knots sit close to the scalp without pulling tightly, which means they’re gentle on developing hairlines. They also create a unique coil pattern that can be worn as-is for a sculptural, textured look, or unraveled to create soft, bouncy waves or curls. The versatility of bantu knots means you get multiple looks from one styling session—you can unravel some knots daily for variety without repeatedly styling the hair.
For babies and toddlers, the styling process can be faster than some other protective styles because you’re working with defined sections rather than trying to create intricate braids or many small individual twists. The knots also stay secure through play, movement, and the general chaos of being a young child, which matters when you’re trying to keep a style looking presentable throughout the day.
Creating Bantu Knots That Actually Stay Put
- Start with damp or slightly moisturized hair—completely dry hair can be difficult to knot
- Divide the hair into sections of equal size (this keeps the knots looking uniform and proportional to your child’s head)
- Take one section and twist it around itself, wrapping the twisted hair in a spiral formation close to the scalp
- Tuck the end of that twisted section underneath and secure with a small bobby pin if needed—this prevents unraveling
- Leave the knots in for 1-3 days depending on your child’s activity level and hair texture
- Gently unravel by reversing the twisting motion, taking your time to avoid breaking the hair
Insider note: Bantu knots look especially adorable when you accessorize with small clips or beads, and they photograph beautifully, which is why this style is so popular for special occasions and milestone photos.
4. Loose Braids With Soft Edges
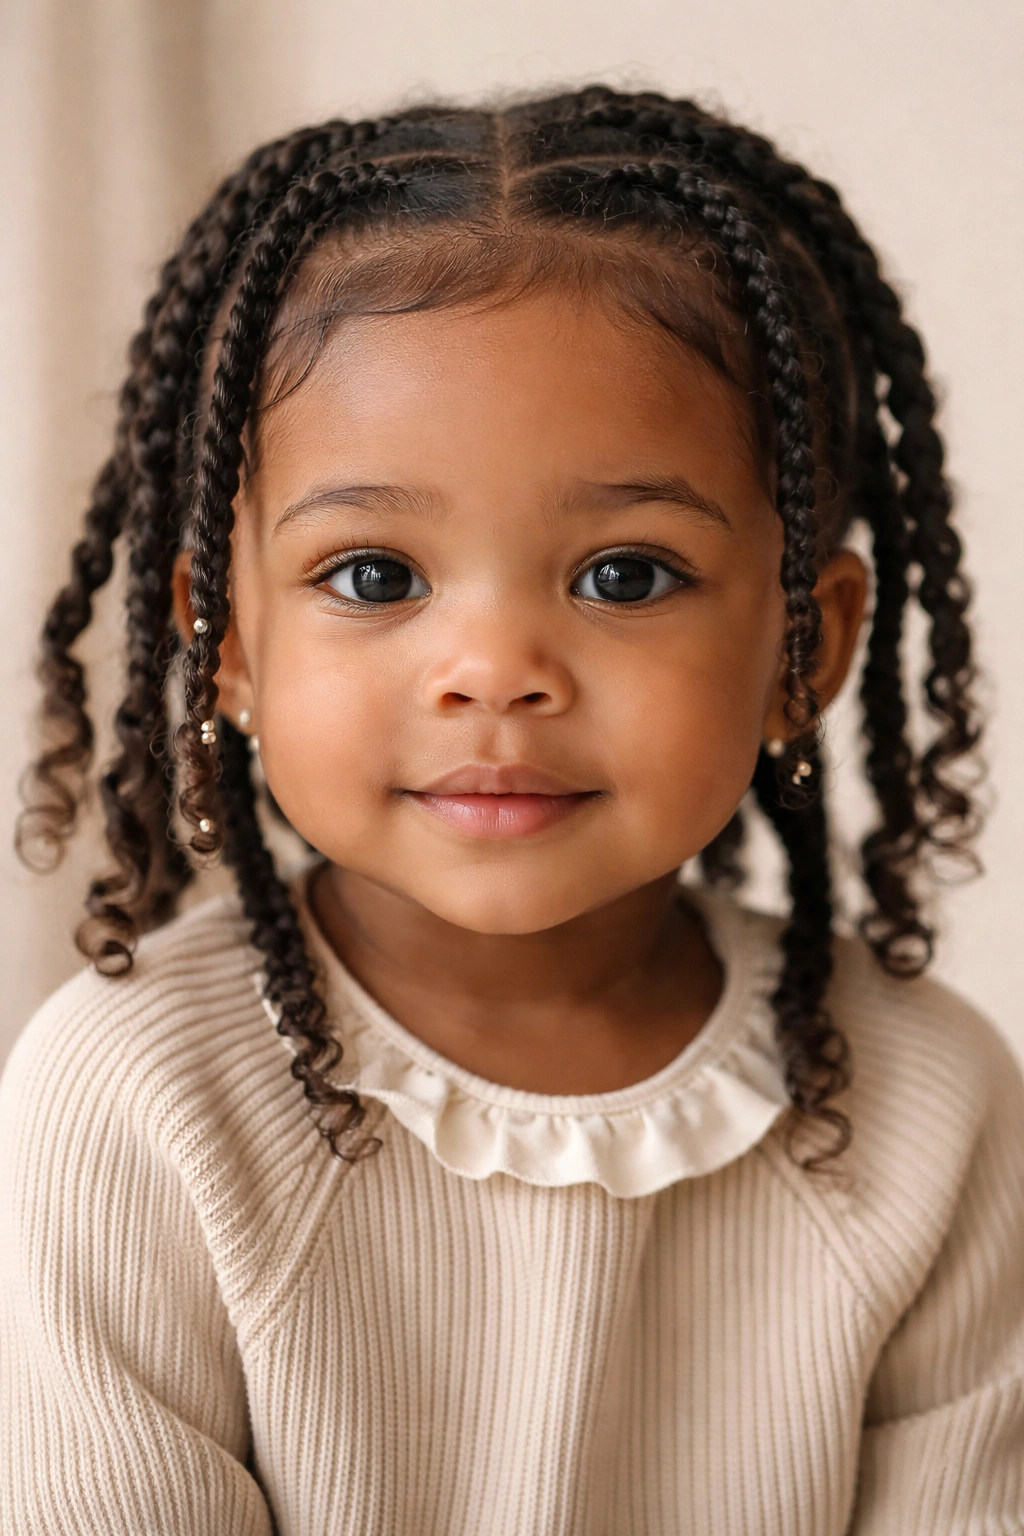
Loose braids are an excellent middle ground between freeform styling and more structured protective styles. They’re not as tight as some braiding styles that can cause tension, but they offer more containment and structure than puffs or twists, making them great for active toddlers who are into everything.
Why Loose Braids Work for Sensitive Scalps
The key word here is loose. Many of the tight braiding styles that are popular for older children and adults are simply not appropriate for toddlers because the tension can damage hair and cause discomfort. Loose braids, by contrast, are created without pulling the hair taut, which means they protect the hair ends while leaving the scalp and edges completely comfortable and tension-free.
Loose braids also dry faster than tightly braided styles, which is practical when you’re managing a young child. They maintain their shape reasonably well overnight or over a few days, so they’re not a high-maintenance style that requires daily redoing. And visually, they’re undeniably cute—loose, undone braids have a softer, less formal appearance than neat three-strand braids, which actually works perfectly for a baby or toddler’s aesthetic.
Braiding Loose and Beautiful
- Start with slightly damp hair to give you something to grip without it being dripping wet
- Divide the hair into 3-5 sections depending on the look you want (more sections create a fuller, more textured appearance)
- Braid each section loosely—imagine you’re braiding with your fingers relaxed, not engaged—rather than pulling tight
- Allow some flyaways and loose texture around the braid for that intentional, soft look
- Secure the end of each braid with a soft elastic or clip rather than a tight band
- You can create one center braid down the back, two side braids, or multiple braids throughout the head depending on styling time and your child’s patience
Pro tip: Loose braids actually look better and softer when they’re slightly undone, so don’t worry about achieving perfection—the looser and more organic they look, the better they photograph and the cuter your child looks.
5. Cornrows in Simple Patterns
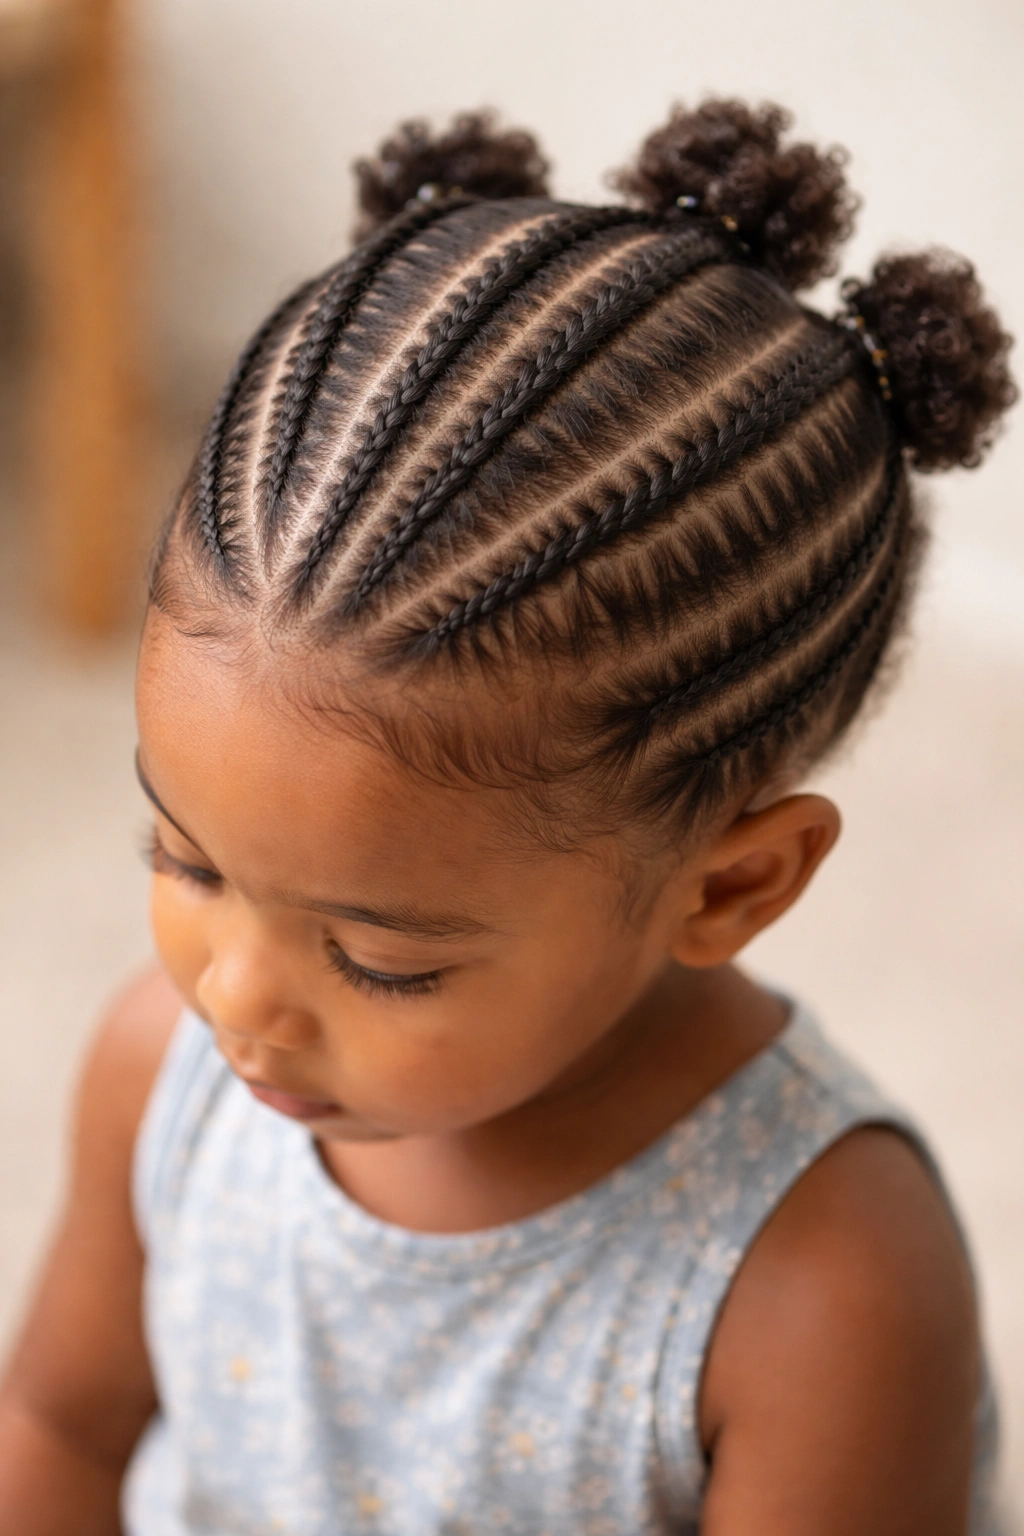
Cornrows are the most recognizable protective braiding style in afro hair culture, and when done loosely and appropriately for a young child’s scalp, they can be absolutely beautiful and protective. The key is keeping the tension minimal and the patterns simple—not intricate designs that require tight pulling, but easy, classic patterns like a simple center part or two-side-braids.
The Protective Benefits of Cornrows for Toddlers
Cornrows protect the hair ends by keeping them tucked away within the braid, and they protect the overall hair shaft by eliminating the daily manipulation that can cause breakage. For toddlers who are in the water frequently (swimming, baths, water play), cornrows are especially valuable because they keep the hair contained and defined, rather than allowing it to become matted or tangled by water and movement.
The braiding process does require time and patience, but once the cornrows are installed, the style lasts 1-2 weeks depending on your child’s hair growth and activity level. This means fewer styling days and less frequent manipulation overall, which is genuinely helpful for maintaining healthy hair as your child grows.
Installing Loose Cornrows for Baby Scalps
- Use a light moisturizer or braiding cream—never anything heavy or greasy that will make the braids look unkempt
- Section the hair into your desired pattern (center part, two sides, or one simple pattern down the back)
- Braid loosely from the roots, keeping your fingers relaxed and your tension minimal
- Avoid pulling the braid tight at the scalp—the braid should feel snug but not uncomfortably tight
- You should always be able to fit a finger beneath the braid at the scalp without forcing it
- Finish with a soft elastic at the end of each braid, or braid to the end and let the braided section remain free for a softer look
Worth knowing: Many parents worry about their child’s hairline being damaged by cornrows, and that concern is valid—tight cornrows DO cause damage. But loose cornrows with minimal tension are actually one of the gentlest protective styles available, which is why they’re often recommended for babies and toddlers.
6. Twisted Crown or Wraparound Style
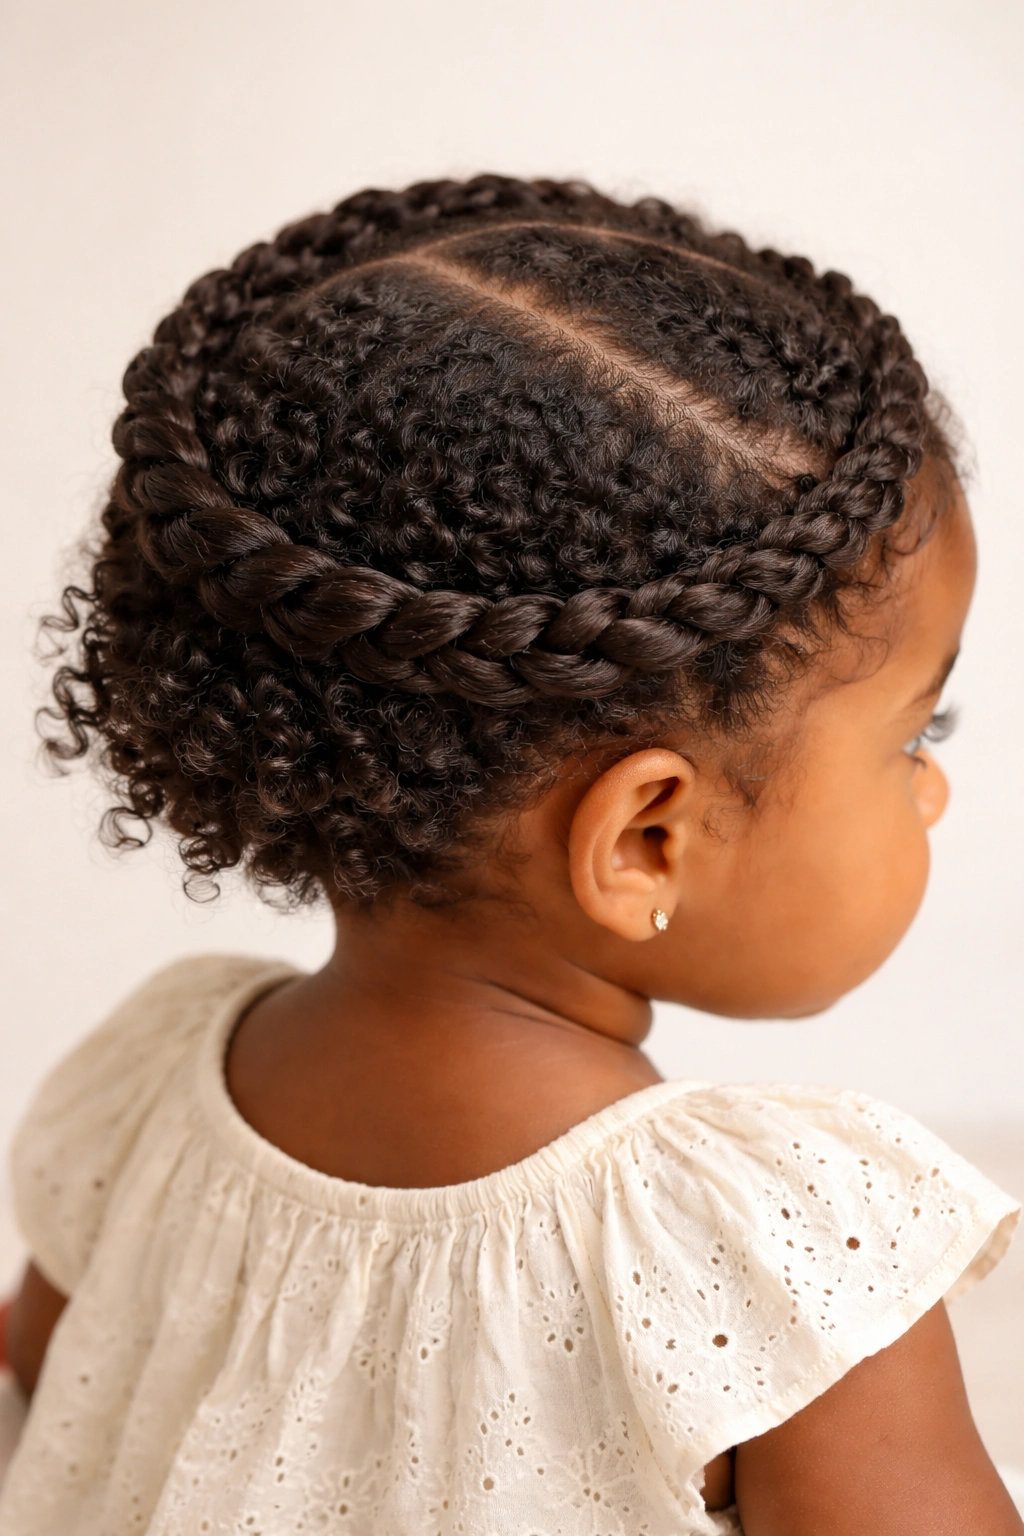
A twisted crown is created by taking two-strand twists (or simple twists) and wrapping them around the head like a crown or halo, securing them into a circular style. This is an intermediate styling option that looks more elaborate than simple puffs but is actually quite straightforward to create once you understand the basic twist.
Why Crown Twists Are Perfect for Special Moments
This style is excellent for birthday parties, photo sessions, holiday gatherings, or anytime you want your child to look extra special. The twisted crown creates a polished, intentional appearance that reads as “dressed up” without actually being more complicated than the everyday puffs and twists you’d normally create. It’s the afro hair equivalent of a simple updo—visually impressive but surprisingly manageable.
The crown style also keeps hair completely off the face and neck, which is practical for warm weather or outdoor play while still being beautiful enough for photos. Many parents find that this style is easy enough to do in under 20 minutes once you’ve practiced it a few times, which makes it accessible even on busy days.
Creating a Twisted Crown in Simple Steps
- Create 2-4 two-strand twists around the perimeter of the head (for a full crown effect, you’d do twists from one ear, around the back, to the other ear)
- Start with moisturized, damp hair for easier twisting and better hold
- As you complete each twist, wrap it around the head in a crown formation
- Secure the end of each twisted section by tucking it beneath the next twist or securing it with a bobby pin
- You can leave some loose texture or puffs in the center of the crown for a full, dimensional look
- Finish by securing the twisted crown with small clips or bobby pins and fluffing any puffs or loose sections
Pro tip: This style holds better and looks fuller when you create the twists with slightly more product than you’d normally use for everyday styling—a light twisting cream or leave-in conditioner helps the twists stay intact through activity and play.
7. Soft, Moisturized Wash-and-Go
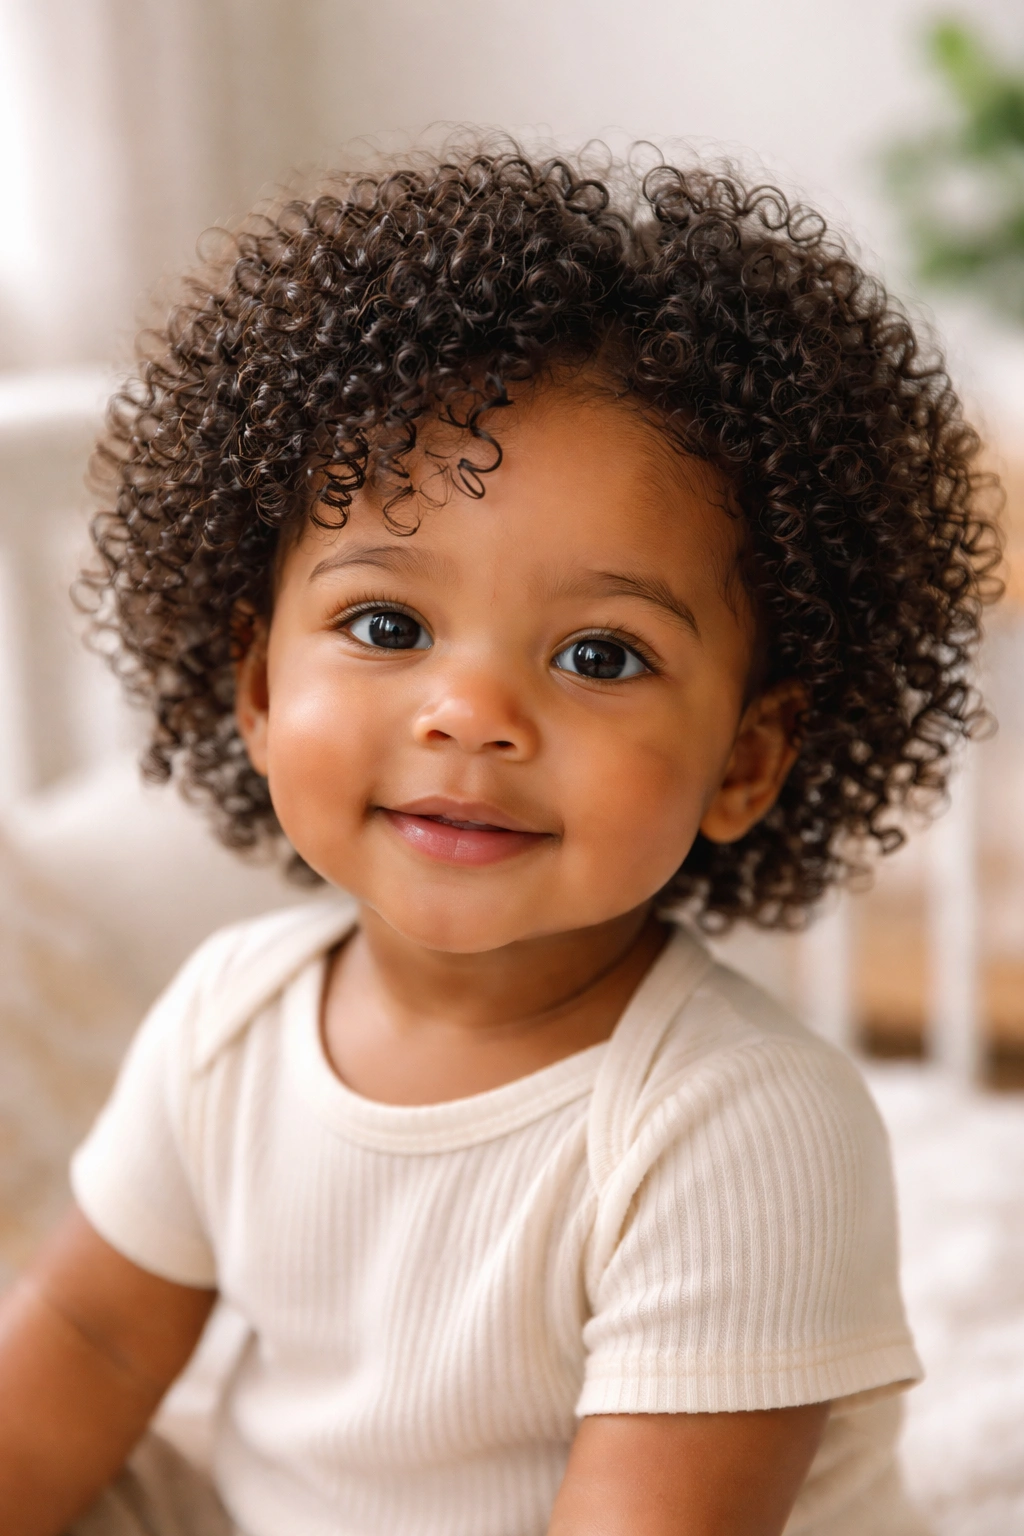
A wash-and-go is exactly what it sounds like: hair that’s washed, conditioned, and left to dry in its natural pattern without any styling, braiding, or manipulation beyond applying products. This is the lowest-manipulation option on this list, and it’s often the healthiest choice for babies and toddlers whose hair needs minimal stress and maximum moisture.
When and Why Wash-and-Go Works Best
Wash-and-go styling is ideal for babies who still have very delicate, fine hair that benefits from being left completely alone between washes. It’s also perfect for parents who want to keep styling time to an absolute minimum, or for toddlers who absolutely refuse to sit still for any styling process. The truth is that sometimes the best thing you can do for your child’s hair is simply not manipulate it—just wash it, condition it properly, and let it dry naturally into its own pattern.
This style also works beautifully if your child has tighter coils or kinks that look amazing in their natural state without any styling. Some hair types actually look better when they’re not twisted, braided, or pulled—the natural coil pattern creates incredible texture and definition on its own.
Perfecting the Wash-and-Go Routine
- Use a gentle, sulfate-free cleanser designed for curly or coily hair—regular shampoos can strip moisture and cause frizz
- Apply a rich conditioner and leave it on for several minutes to allow absorption
- Rinse thoroughly with cool water to close the hair cuticle and enhance shine
- Apply a leave-in conditioner or moisturizing cream while the hair is still very wet
- Use a light oil or curl cream on top to seal in moisture and define the curl pattern
- Allow the hair to air-dry completely, or use a diffuser attachment on a low heat setting if you need it to dry faster
- Avoid touching or separating the curls while they’re drying—let them form their natural pattern
Worth knowing: Wash-and-go requires a solid moisturizing routine because the hair dries faster than it would in a protective style, which means moisture loss is more rapid. You’ll need to moisturize regularly (daily or every other day) to keep the hair soft and prevent dryness and breakage.
8. Side-Parted Puffs With Braided Detail
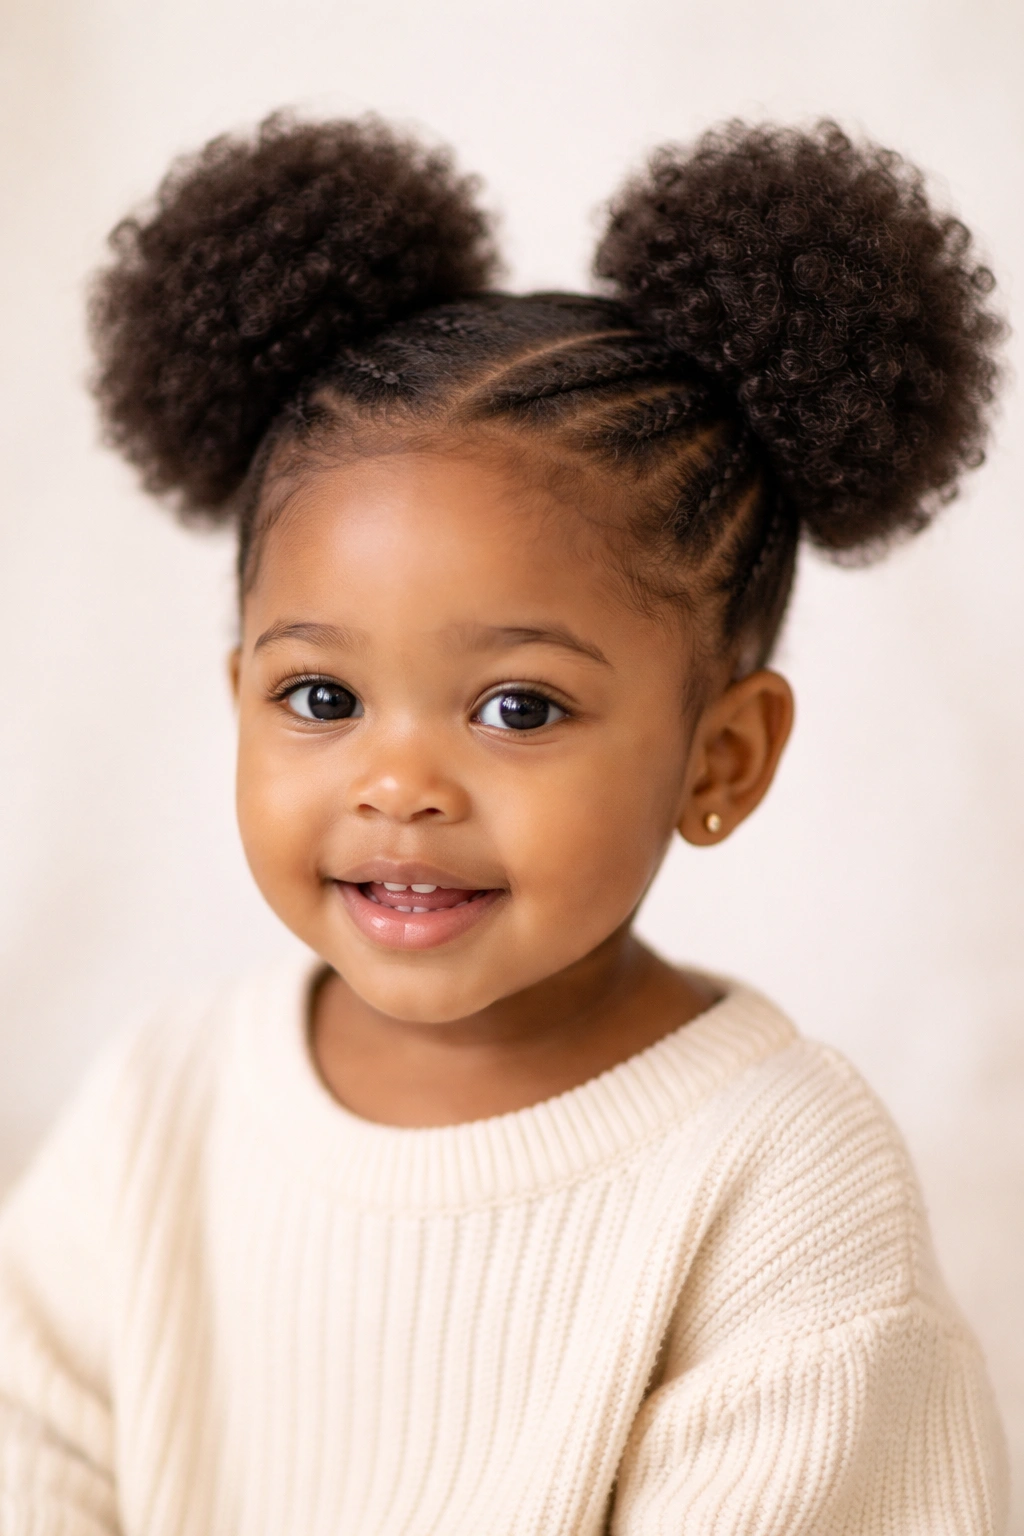
This style combines the simplicity of puffs with the visual interest of a small braided section, creating a look that’s both playful and intentional. You’re essentially creating a high puff while leaving a small section of hair unincorporated into the puff, which you then braid or twist for a detail element.
What Makes This Style Stand Out
Side-parted puffs with braided detail offer more visual complexity than a basic puff without significantly increasing styling time or difficulty. The braided detail draws the eye and creates a focal point, which makes the style photograph beautifully and look more intentional than a simple puff alone. This is a great option if you want to showcase some of your styling skill without committing to a fully braided protective style.
The style also allows you to work with whatever portion of hair you want to style while leaving the rest free and natural, which is helpful if your child has uneven hair growth or if you’re growing out a previous style. You have creative control over where the braid falls and how elaborate it is, so you can adjust the style based on your energy level and your child’s cooperation on any given day.
Building the Side Puff With Braided Accent
- Create a deep side part, leaving a larger section of hair on one side and a smaller section on the other
- Take a thin section from the smaller-hair side and create a simple two-strand twist or loose three-strand braid—this is your detail element
- Secure the braid or twist temporarily with a small clip, moving it out of the way
- Gather the remaining hair (minus the braided detail) into a high puff on the crown, securing it with a soft elastic
- Now take your completed braid or twist and wrap it around the base of the puff or tuck it into the elastic to create an integrated design
- Secure with bobby pins and adjust until it looks balanced and intentional
- Fluff the puff and any loose texture around the braid for a soft, finished appearance
Insider note: This style looks especially elegant when you use a metallic clip or decorative comb to secure where the braid meets the puff—it makes the intentional design element even more obvious and adds a touch of visual interest that photographs beautifully.
Final Thoughts
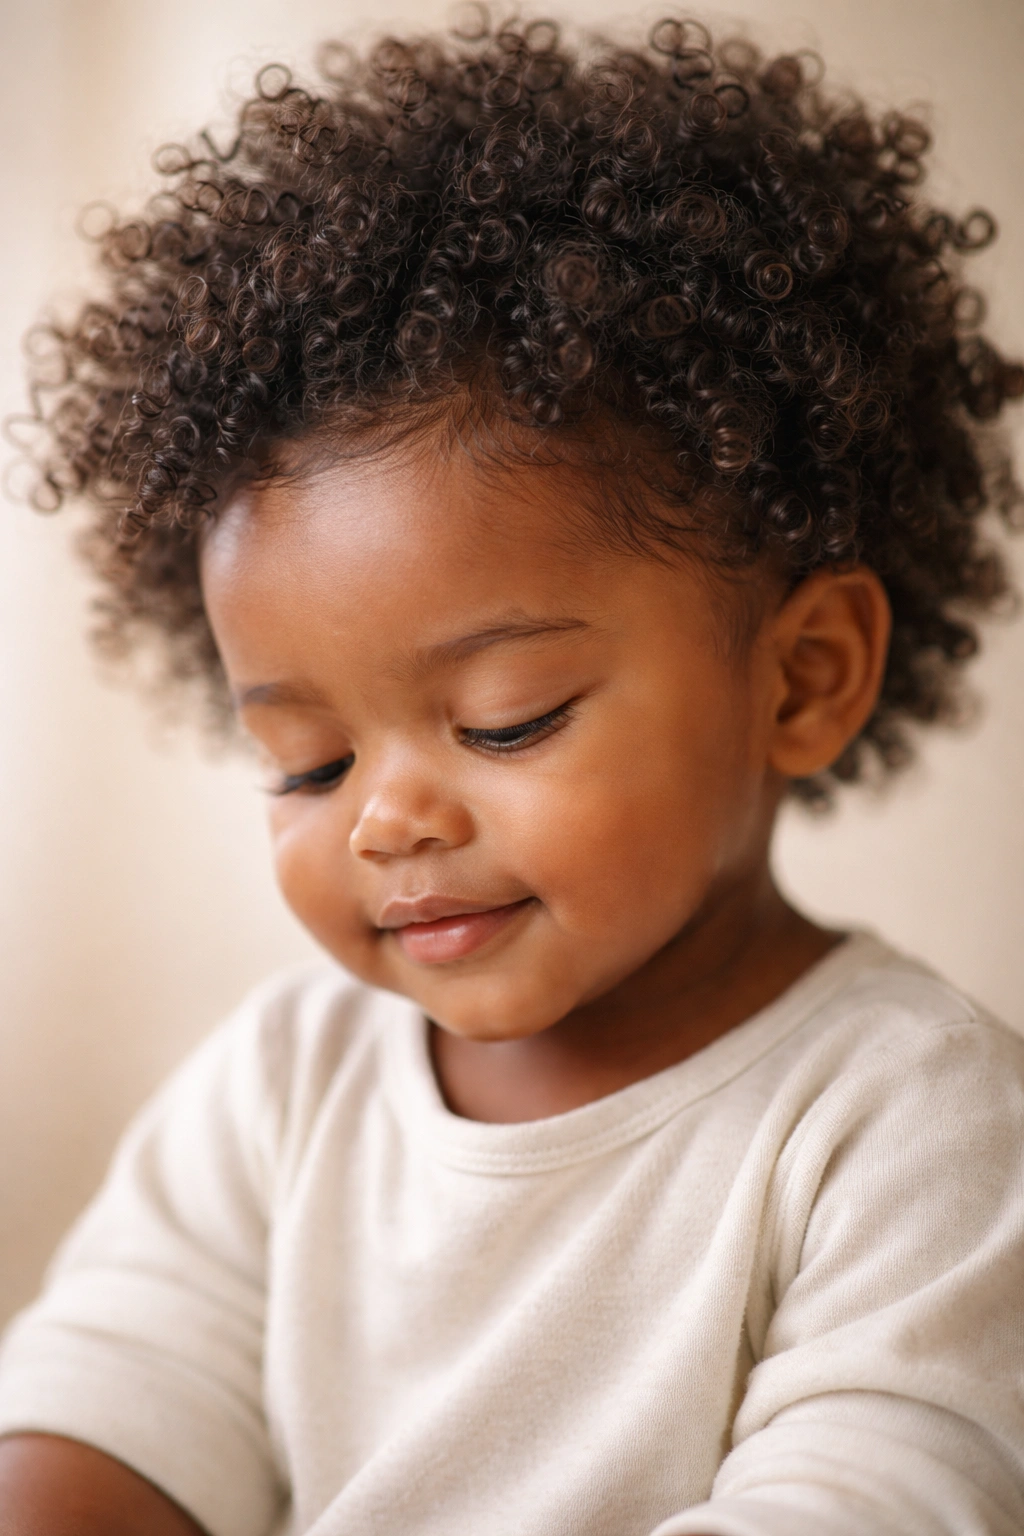
Your baby or toddler’s hair is a canvas for celebration, not a problem to solve. The eight styles covered here work with young children’s needs—their developing scalps, their delicate hair strands, their changing moods, and the reality that most toddlers have about 30 seconds of patience for sitting still. Each style can be adapted, mixed, and matched based on your child’s hair texture, your available styling time, and what looks beautiful to you.
As your child grows, they’ll start to have opinions about their own hair and how they want it styled. The foundation you’re building right now—showing them that their natural texture is worthy of love and attention, that their hair is healthy and beautiful, that styling can be a form of self-expression and care—will shape their relationship with their own hair for life. That’s far more valuable than any individual hairstyle.
Keep the styling sessions short, use the best products you can afford, and don’t hesitate to switch up styles frequently to give your child’s hair breaks between protective styles. Your little one’s curls, coils, and texture are unique to them, and the way you care for them now matters. Every puff, every braid, every twist is an opportunity to affirm that their hair—exactly as it is—is absolutely beautiful.
