



Protective styling is one of the best ways to keep your natural hair healthy while experimenting with different looks, and crochet hairstyles have become the go-to option for many people looking to switch things up without the commitment or time investment of traditional braiding. The beauty of crochet styles lies in their versatility, relative speed of installation, and the fact that they work beautifully on coiled, textured hair. Whether you’re looking for something bold and intricate or soft and effortless, there’s a crochet style waiting for you.
The reason crochet hair has exploded in popularity isn’t just aesthetic—it’s practical. Unlike hand-braided styles that can take eight to twelve hours, most crochet styles can be installed in just two to four hours. You also get incredible volume and dimension without having to buy as much hair as you would for traditional braids. For beginners specifically, crochet offers a lower barrier to entry because the technique is forgiving, the results are stunning, and you can watch your style come together relatively quickly.
What makes crochet styles particularly beginner-friendly is that they don’t require years of braiding experience or perfect tension control. The crochet hook does most of the work for you—you’re simply looping pre-made synthetic hair through your natural hair braids. This means your focus can be on learning the basic technique rather than perfecting hand positioning or maintaining consistent braid thickness. If you’ve never tried a crochet style before, these twelve options offer everything from classic looks to trendy interpretations, all designed with the beginner in mind.
1. Classic Box Braids Crochet
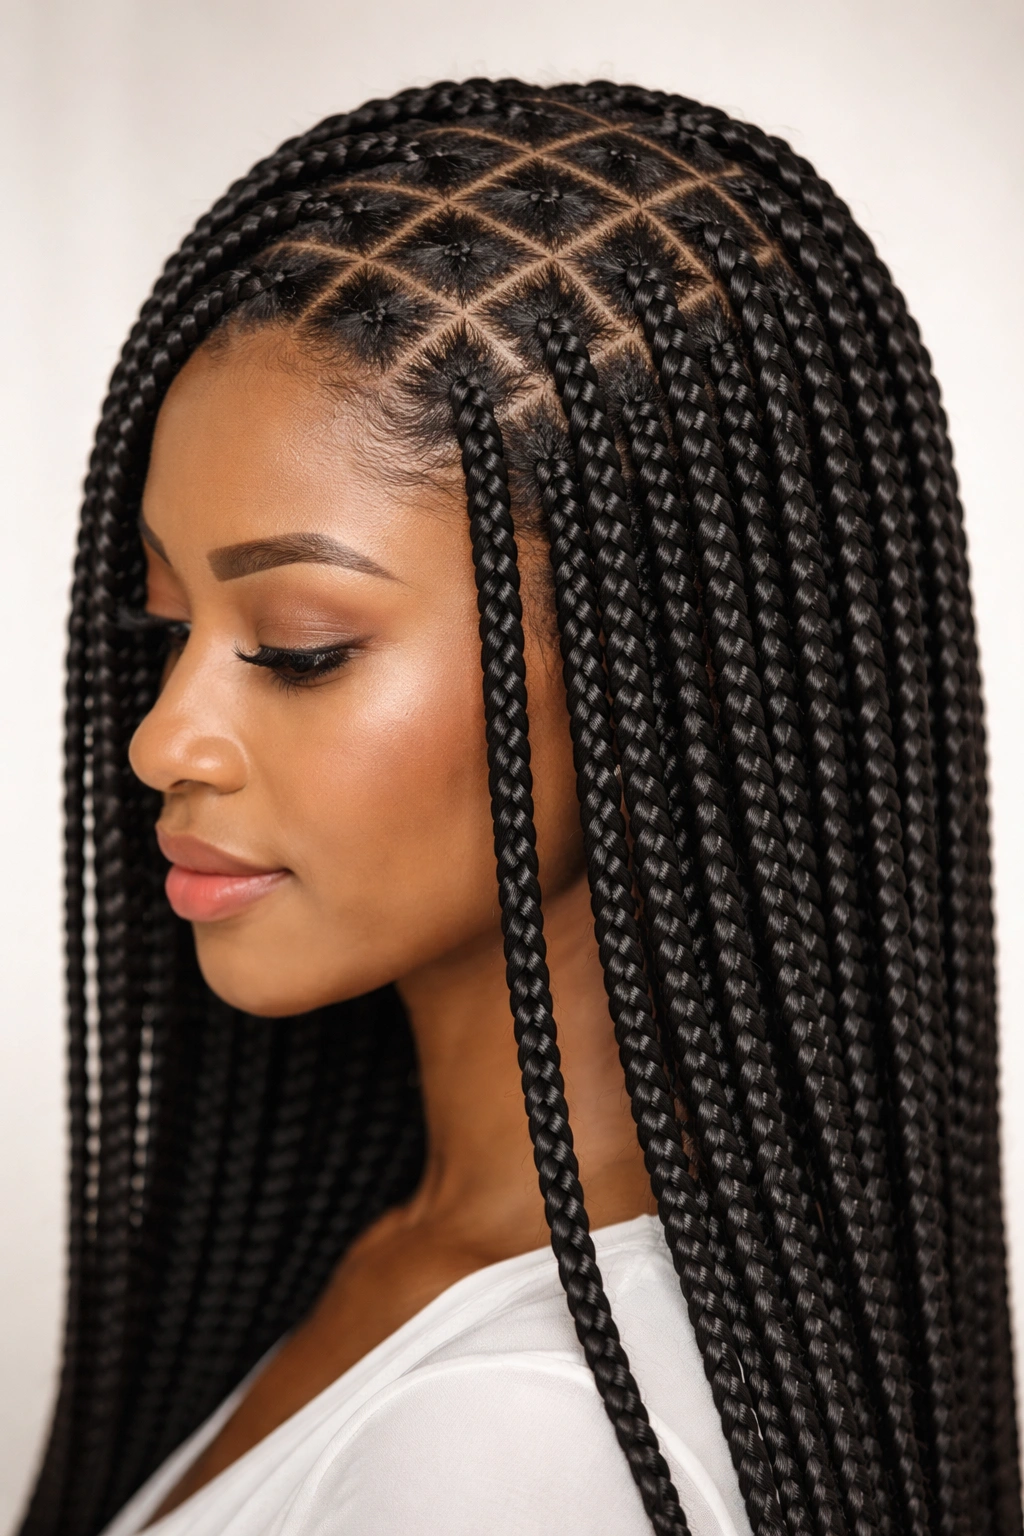
Box braids are the foundation of protective styling, and the crochet version delivers that same clean, geometric aesthetic without the multiple-hour installation time. With crochet box braids, you create small square sections across your scalp, install a base braid into each section, then crochet the pre-made hair through. The result is a perfectly uniform, polished look that works for any occasion.
Why It’s Perfect for Beginners
Crochet box braids are the ideal entry point into protective styling because the installation process follows a straightforward formula that remains consistent throughout your entire head. Once you understand the technique for the first few braids, you’re essentially repeating the same motion hundreds of times. There’s no guesswork about texture or sizing—you control exactly how thick each braid is and how tight they sit against your scalp. The pre-made synthetic hair creates consistent results every single time, which means you’re not fighting with uneven natural hair thickness like you might with traditional braids.
Getting Started with Box Braids
- Choose your hair weight wisely: Beginners should start with medium-weight crochet hair (often labeled as “medium” or “regular”) rather than ultra-light or super-heavy options. Medium weight is easiest to manipulate, doesn’t pull excessively on your edges, and creates a naturally full appearance without being overwhelming.
- Section carefully for symmetry: Use a rat-tail comb to create clean, even sections. Take your time here—uneven sections will be obvious once the braids are installed, so straight lines matter.
- Keep tension consistent: This is where the crochet method shines for beginners. Because you’re not hand-braiding, you don’t need to master tension control. Just crochet smoothly and let the hook do the work.
- Plan for 3-4 hours total: Even as a beginner, you can realistically complete a full head of box braids in an afternoon. Many people finish in 2-3 hours once they develop a rhythm.
Box braids typically last 4-6 weeks with proper care, making them one of the longest-lasting crochet options available.
2. Faux Locs Crochet
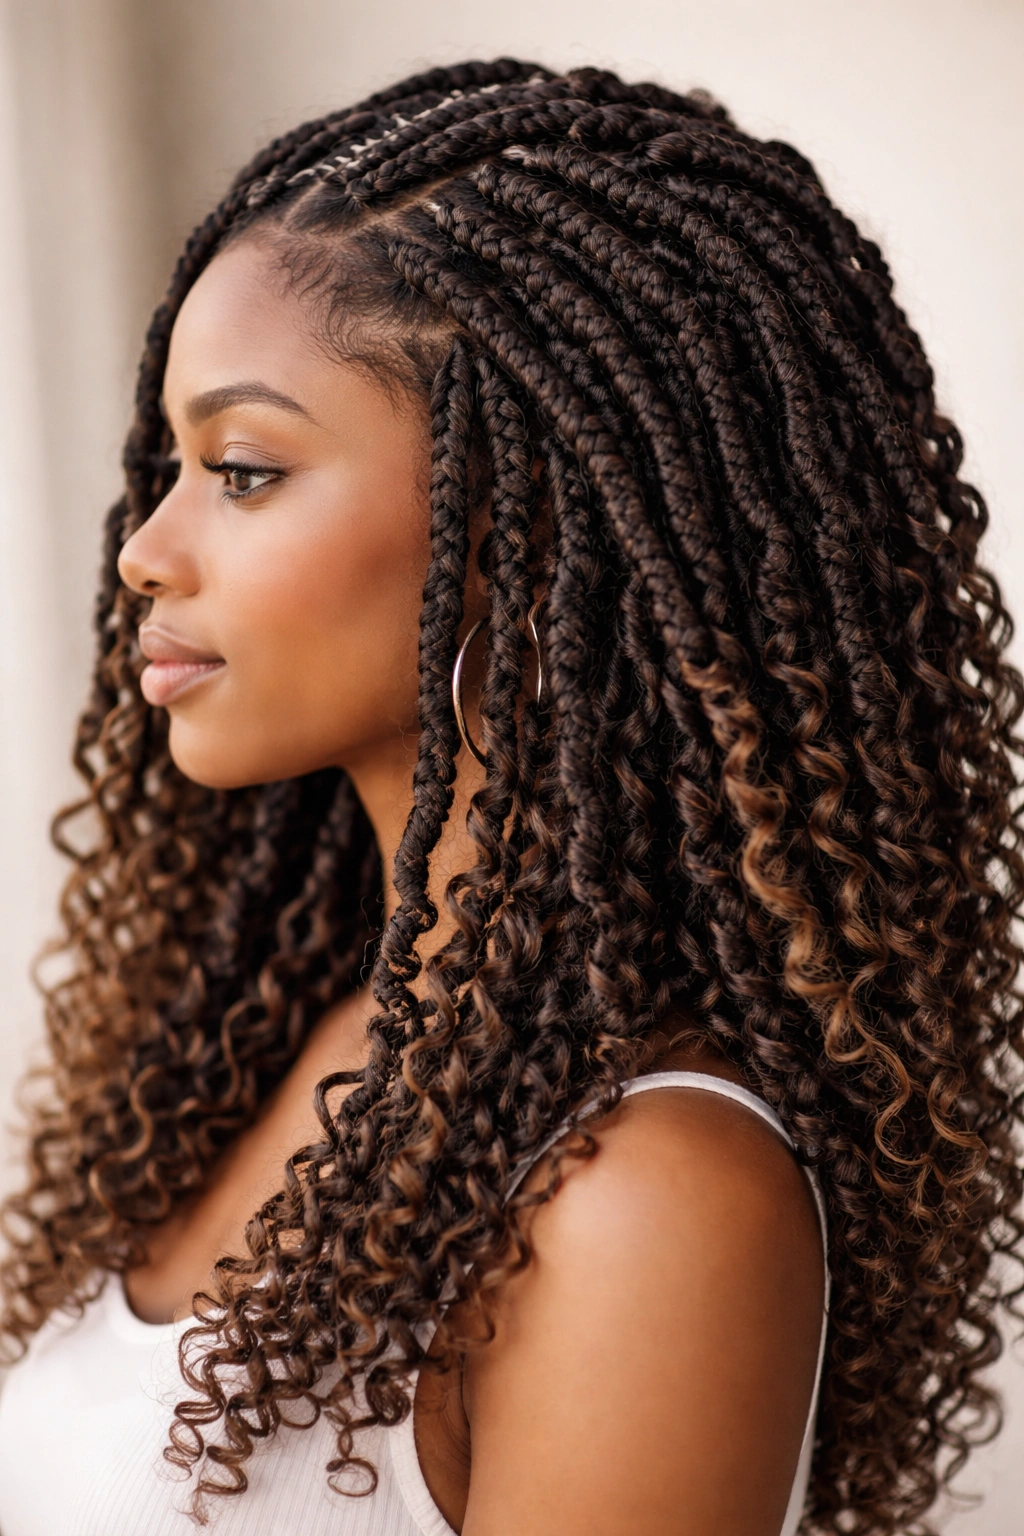
Faux locs give you that coveted locked aesthetic without the permanence or years-long commitment of real locs. Crochet faux locs are created by crocheting textured, curly hair through thin base braids, then rolling the sections slightly to create that signature loc appearance. They look stunning, feel soft to the touch, and open up a whole new category of styling possibilities.
Why This Works for Beginners
Faux locs are surprisingly beginner-friendly because the texture of the hair does a lot of the visual heavy lifting for you. Even if your crochet technique isn’t absolutely perfect, the curly texture camouflages any minor inconsistencies. You also have flexibility with how “finished” your locs look—some people love the slightly fuzzy, natural appearance, while others prefer to roll and smooth them for a more refined finish. As a beginner, you can skip the extra smoothing step entirely and still have a beautiful result.
Installation Essentials
- Select the right hair texture: Kinky, curly, or coily crochet hair works best for faux locs. Avoid straight or wave textures, which won’t create the authentic loc appearance. Most suppliers label these as “faux locs hair” or “loc crochet hair,” making selection simple.
- Create thinner base braids: Faux locs look best when installed into thin base braids—roughly the thickness of a pencil. This creates better movement and a more natural proportion than thicker braids would.
- Skip the rolling step as a beginner: While rolling the locs with a curling iron creates a polished finish, beginners can achieve beautiful results without this extra step. The natural texture of curly crochet hair creates the loc effect on its own.
- Expect 4-5 hours for a full head: Faux locs take slightly longer to install than box braids because of the thinning required, but you’re still looking at a single afternoon of work.
Faux locs typically last 4-8 weeks depending on how well you care for them and how much movement and manipulation they endure.
3. Twisted Crochet Hair
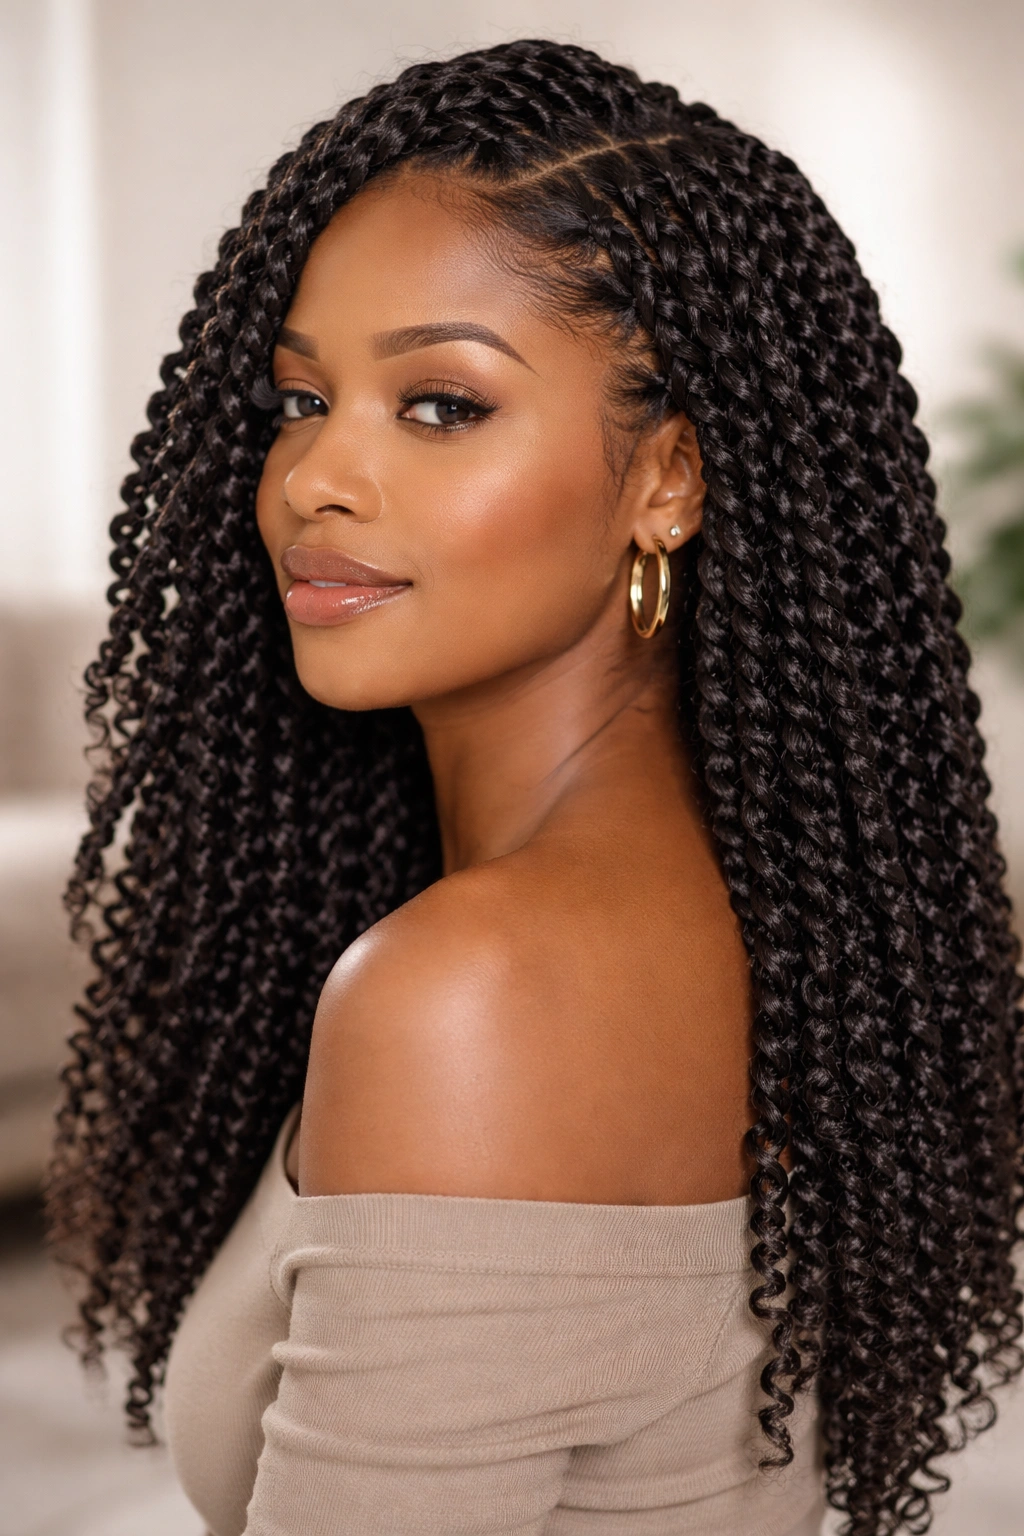
Twisted styles swap the geometric precision of braids for the softer, more organic appeal of two-strand twists created with crochet hair. Instead of crocheting straight through, you’re crocheting hair and then twisting it as it hangs, creating a spiraled texture that’s visually interesting and deeply protective. This style works equally well on its own or twisted upward into a high puff.
Why Beginners Love This Look
Twisted crochet is forgiving in the best possible way. Because twists are less structured than braids, slight variations in thickness or technique actually add to the charm rather than stand out as mistakes. You don’t need to worry about perfectly precise sections or symmetry the way you do with box braids. The twisting motion is intuitive once you get the hang of it, and the overall effect is immediately gratifying. Many beginners find twists faster to install than braids because the twisting happens naturally as the hair hangs.
Mastering the Twist Technique
- Use medium to light crochet hair: Twisted styles look best with hair that’s not too heavy. Lighter weight hair creates more movement and bounce, while heavier options can look dense and undefined.
- Section larger than you would for braids: You can make your sections slightly wider for twists than you would for box braids. This speeds up installation and creates a fuller overall look.
- Twist loosely for volume: Tight twists look sleek but limit the visual interest and movement. Looser twists show off the texture better and move more naturally.
- Install 2-3 hours maximum: Because the technique is simpler than braiding, most people complete twisted styles significantly faster than other protective options.
Two-strand twist styles hold beautifully for 3-5 weeks, with the hair maintaining its twisted definition throughout.
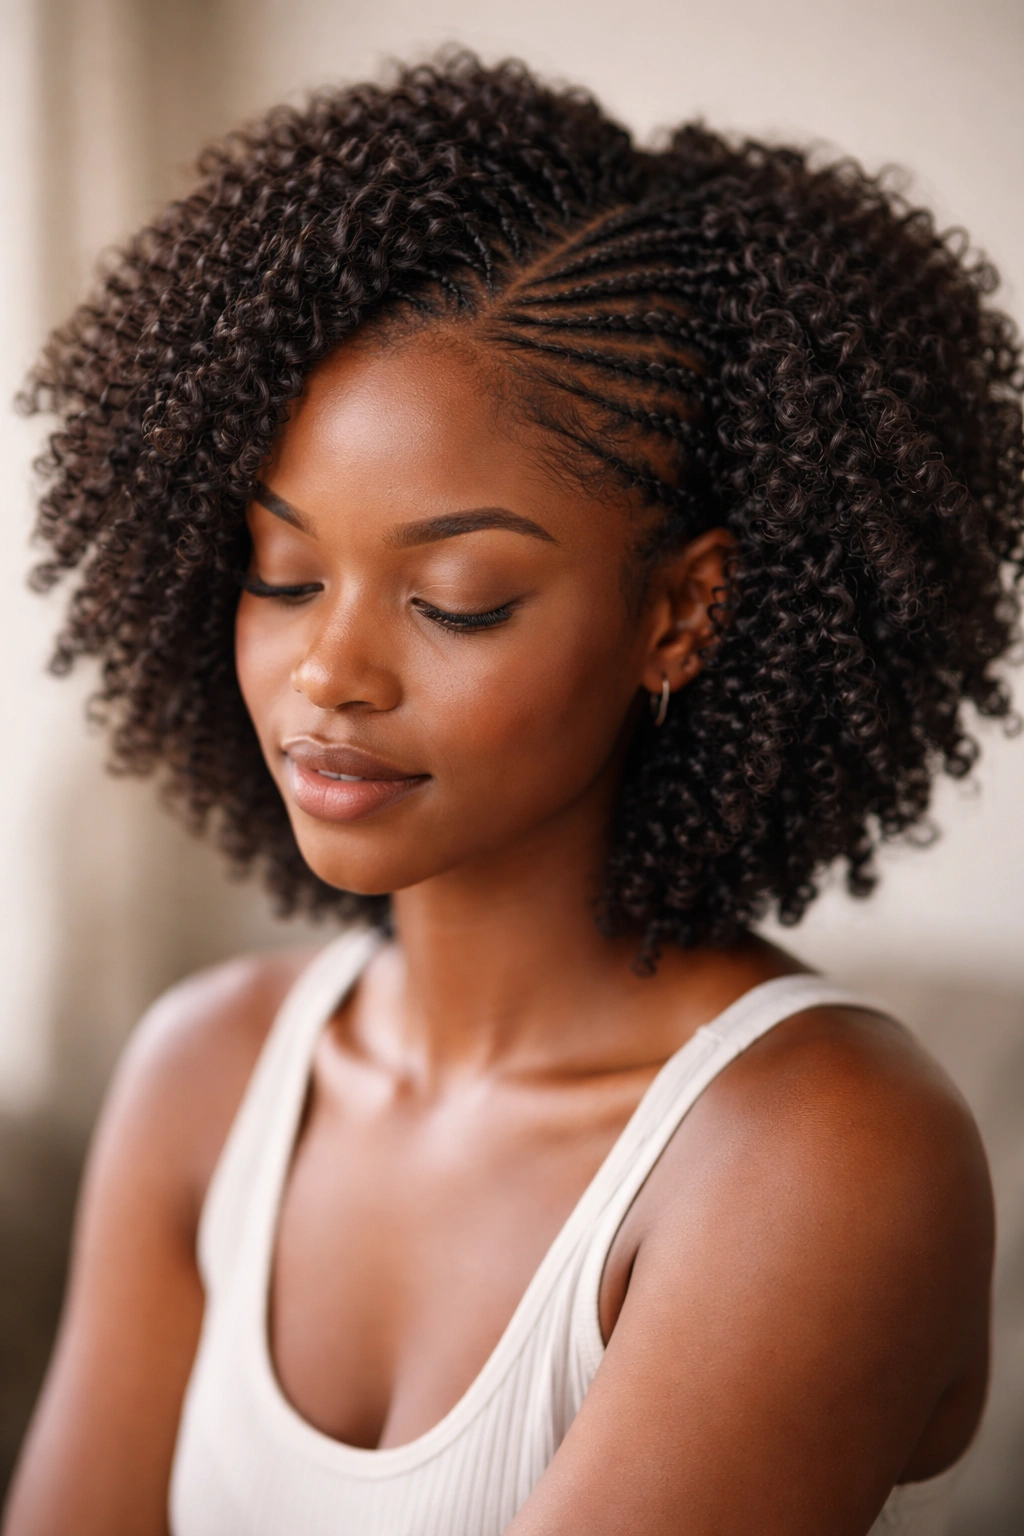
4. Kinky Curls Crochet
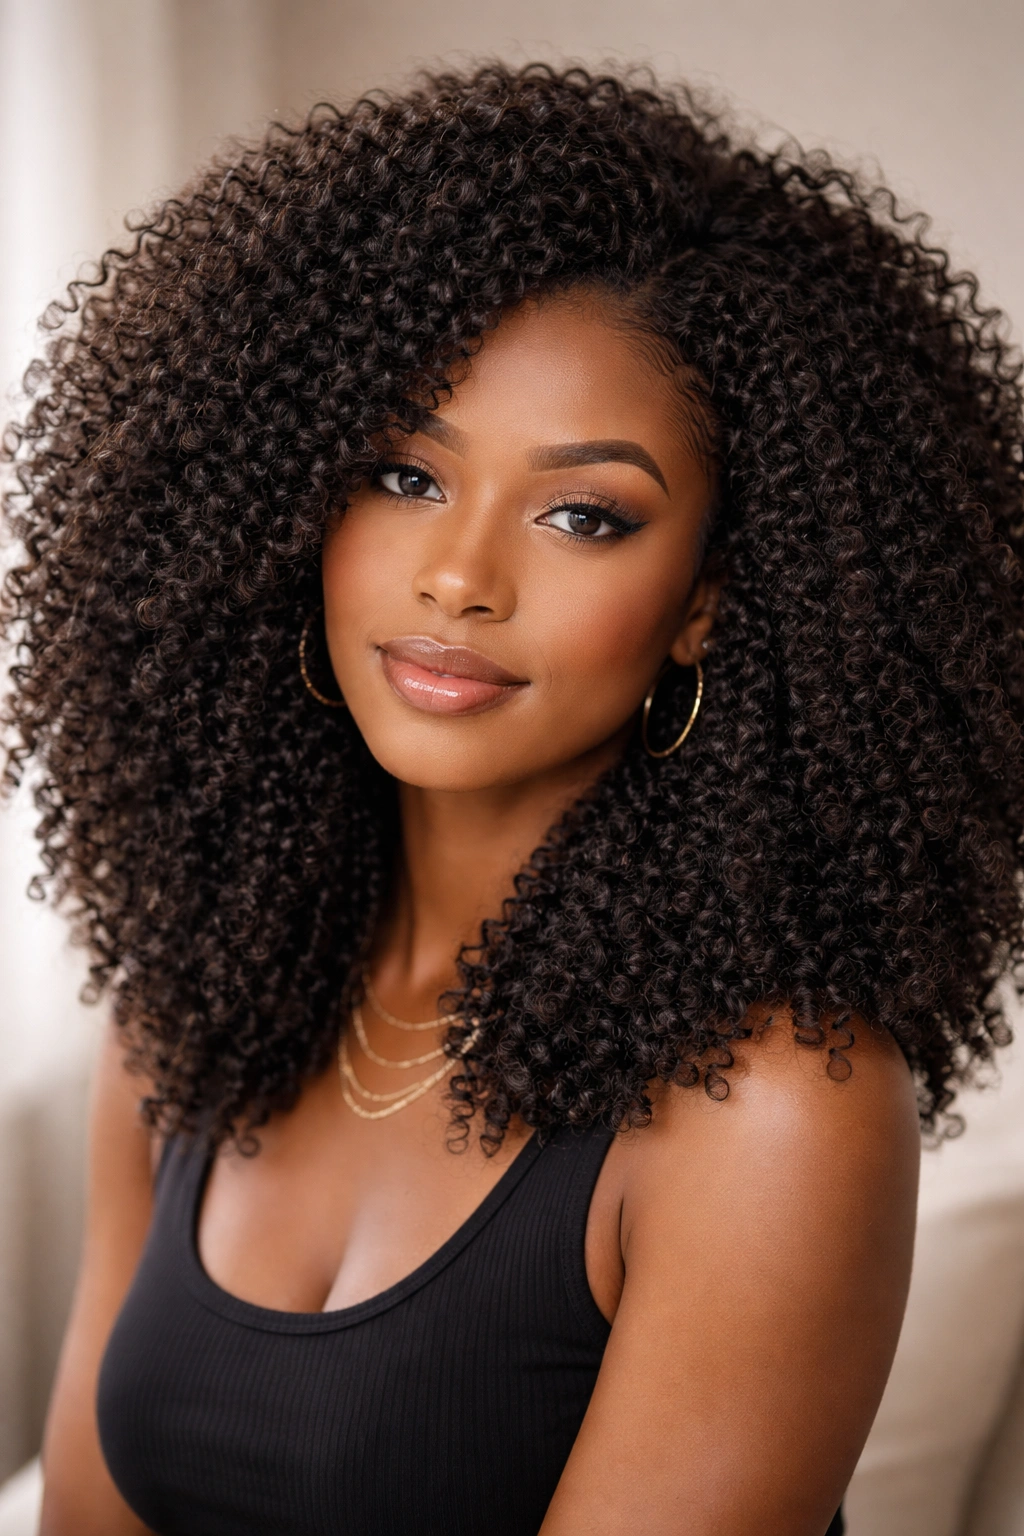
Kinky curls deliver maximum volume and texture with minimal effort. Crochet kinky curl hair has a tight, coily pattern that creates an explosive, full look the moment you remove your hands from it. This style is pure celebration of texture—bold, unapologetic, and undeniably striking.
Why This Is Beginner-Friendly
Kinky curls might be the most forgiving crochet style for absolute beginners because the installation technique is the simplest of all options. You’re not braiding, twisting, or doing anything complex—you’re simply crocheting the curly hair through thin base braids and that’s it. The dramatic curl pattern does all the aesthetic work. There’s nowhere to hide a mistake with kinky curls, but there’s also very little room for mistakes to happen in the first place. Even uneven installation looks intentional and stylish.
Creating Voluminous Curls
- Start with thin base braids: Kinky curls show up beautifully from even the thinnest base braids. You can actually use slightly fewer braids than you might with other styles and still achieve maximum coverage.
- Don’t overthink the installation: Simply crochet and move on. The less you fuss with kinky curl hair, the better it looks. Excessive manipulation can make the curls compress and lose their springy quality.
- Choose the right curl pattern: “Kinky curls” and “curly” are subtly different. Kinky curls have a tighter, more defined coil. Both work beautifully, but kinky curls create a denser, more voluminous effect.
- Plan for 2-3 hours total: This is genuinely one of the fastest crochet styles to install because there’s no braiding or twisting step—just crocheting and you’re done.
Kinky curls maintain their definition and bounce for 4-6 weeks, making them one of the longest-lasting crochet options.
5. Spring Twists Crochet
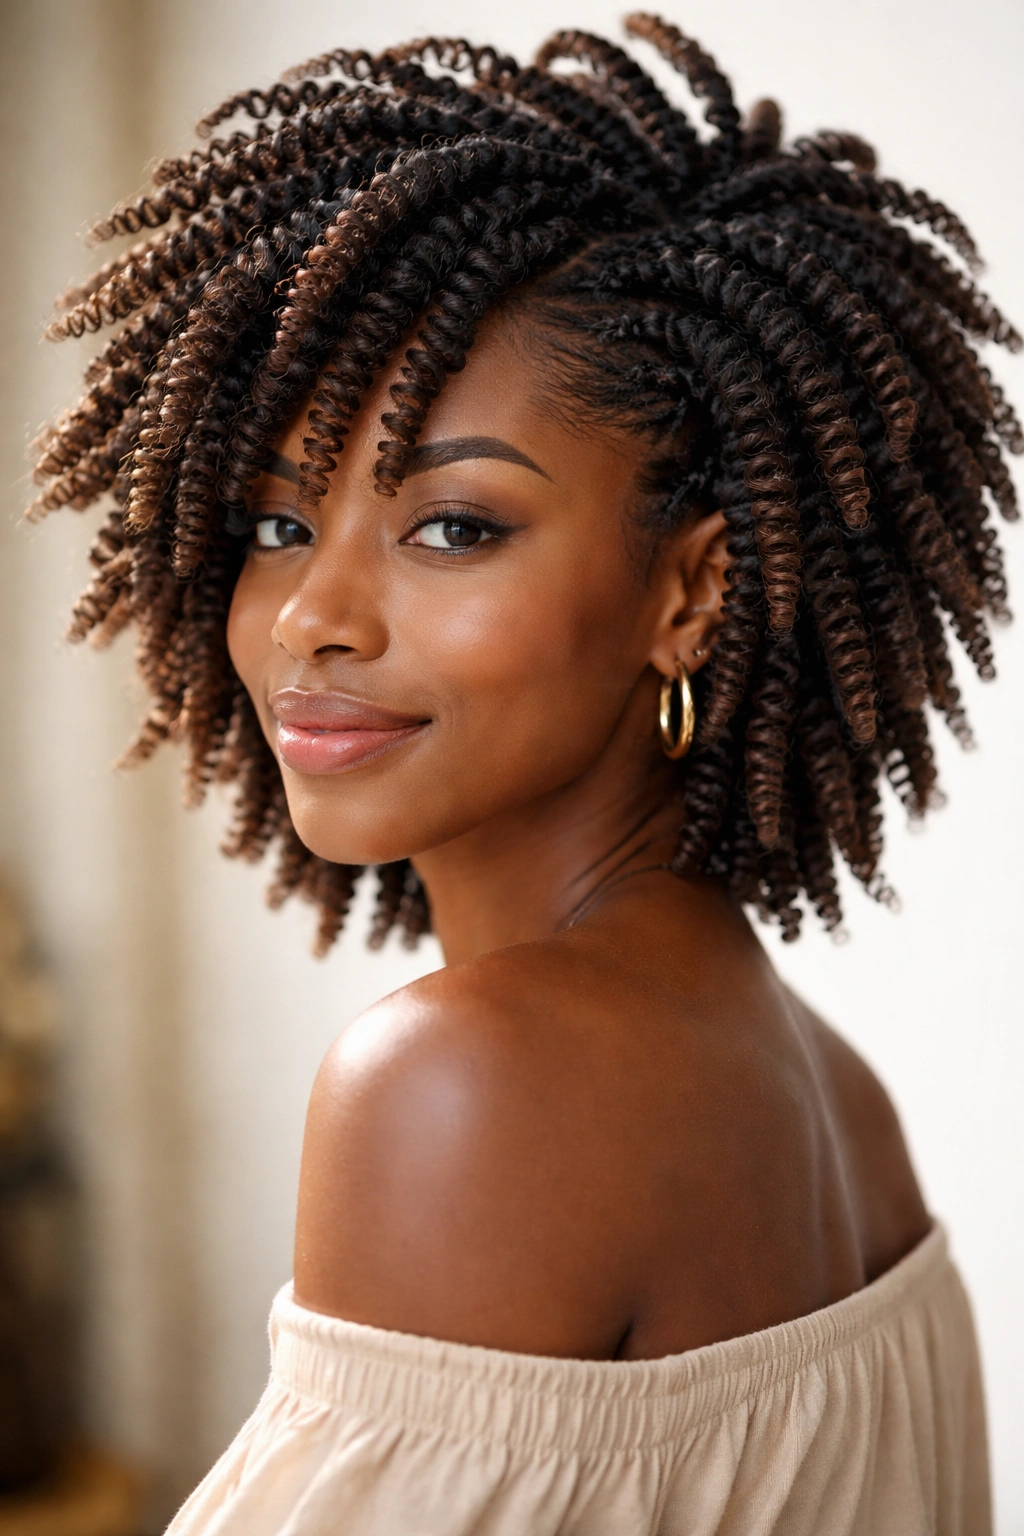
Spring twists are where twists meet coils—the hair is twisted as it’s installed, then the finished twists naturally coil upward on themselves, creating a springy, bouncy texture that’s visually unique and incredibly fun to wear. These are light, airy, and move with your head in the most satisfying way.
Why Beginners Find Success Here
Spring twists teach you the fundamentals of crochet installation while delivering results that look advanced and intentional. The coiling that happens naturally teaches you how crochet hair behaves and moves, which is invaluable knowledge for trying other styles later. Installation is relatively quick, and the visual payoff is immediate. The bounce and movement of spring twists also makes the style feel more natural and less protective-styling-heavy, which appeals to people transitioning into protective styling for the first time.
Installing Spring Twists Successfully
- Select curly or coily pre-twisted hair: Spring twist hair comes pre-twisted and just needs to be crocheted in. This is the easiest version for beginners—no twisting required on your part.
- Crochet in the direction the twist naturally wants to go: The hair will guide you. Don’t fight the texture or try to override the pre-existing twist.
- Use sections slightly larger than for locs: Spring twists don’t need to be as thin as faux locs. Medium-sized sections create the best proportion and fullness.
- Expect 3-4 hours for a complete head: These install faster than braids or hand-twisted styles because the twisting is already done for you.
Spring twists hold their shape and bounce for 3-4 weeks before the coils start to relax slightly.
6. Senegalese Twists Crochet
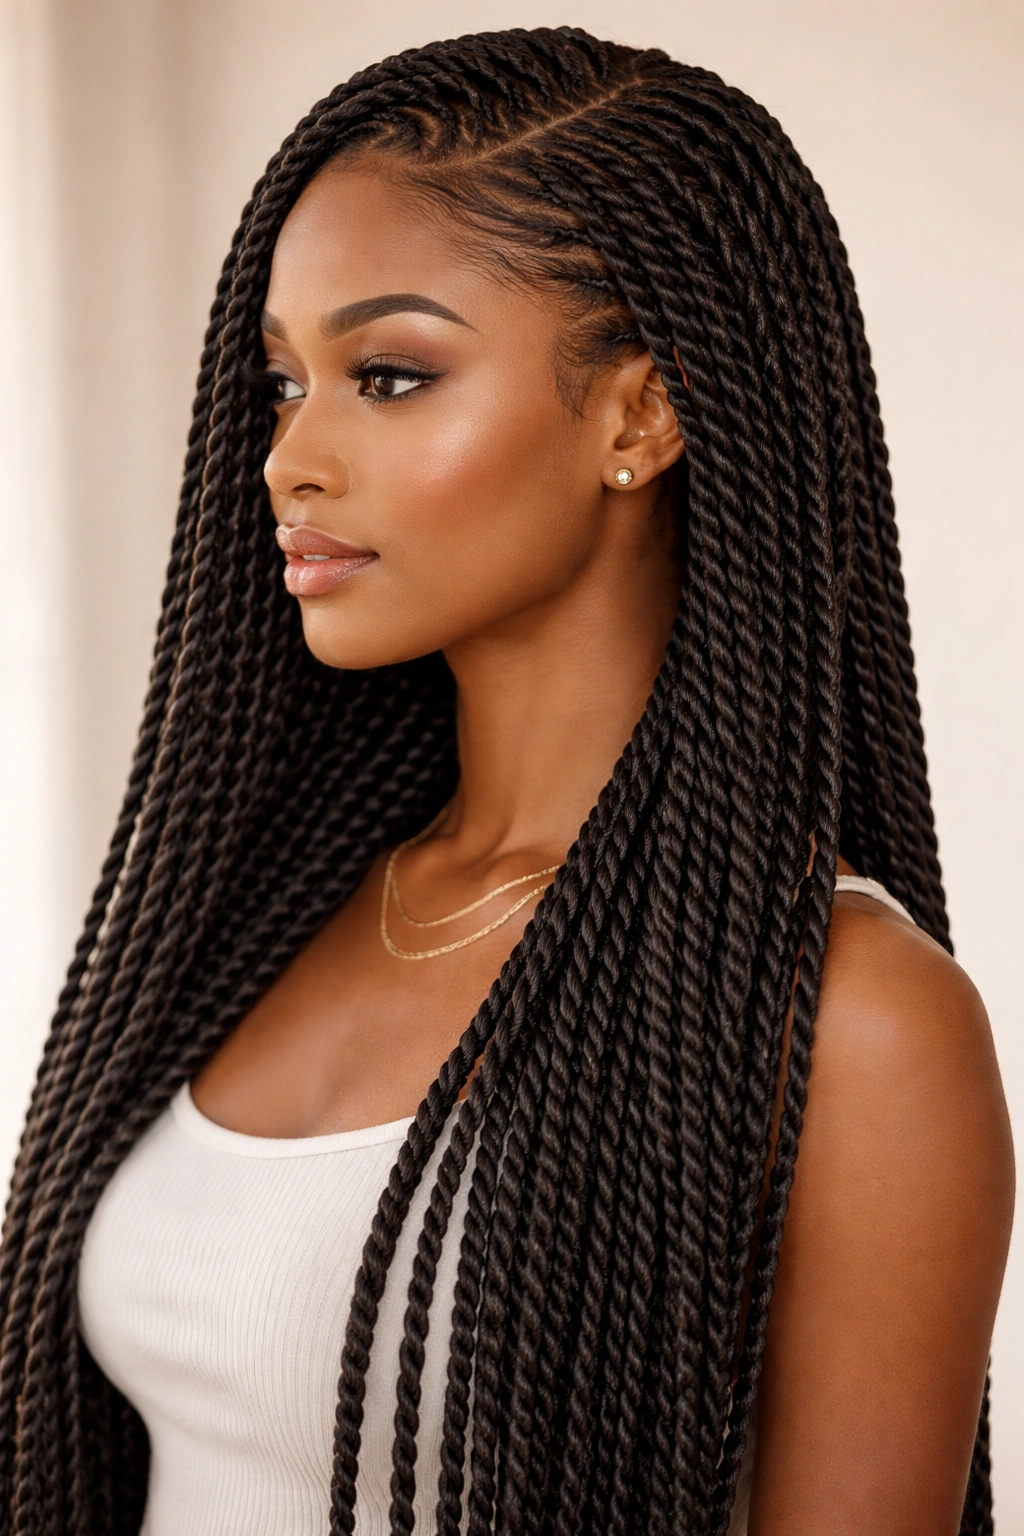
Senegalese twists are thin, elegant two-strand twists that create a sophisticated, refined appearance. The crochet version combines all the advantages of crochet installation with the classy aesthetic of Senegalese twists—you get speed, volume, and polish all at once. These can be styled up or down and work beautifully as a professional style or an everyday look.
Why They’re Beginner-Appropriate
Senegalese twists have clean, organized geometry that appeals to people who like structure and symmetry. The installation process is straightforward—thin sections, consistent twisting, and you’re done. The thinness of the twists means the overall look is refined rather than chunky, which makes even imperfect installation look intentional. Many people find that Senegalese twists are easier to manage daily than thicker styles because the twists move independently and don’t tangle as easily.
Perfecting Your Senegalese Technique
- Master thin sectioning: Senegalese twists rely on precise, thin sections to look right. Your sections should be roughly the thickness of a pencil. Use a rat-tail comb and take time to ensure consistency.
- Keep twists tight at the root, looser toward the ends: This creates dimension and movement. Twists that are uniformly tight look stiff, while varying the tension creates natural movement.
- Twist with intention: Unlike looser twist styles, Senegalese twists should be twisted firmly and clearly. The definition is part of what makes them elegant.
- Plan for 4-5 hours: Because of the thin sections and the need for precision, Senegalese twists take longer than some other styles, but the result is worth the investment.
Senegalese twists maintain their definition beautifully for 4-6 weeks with proper care.
7. Water Wave Crochet
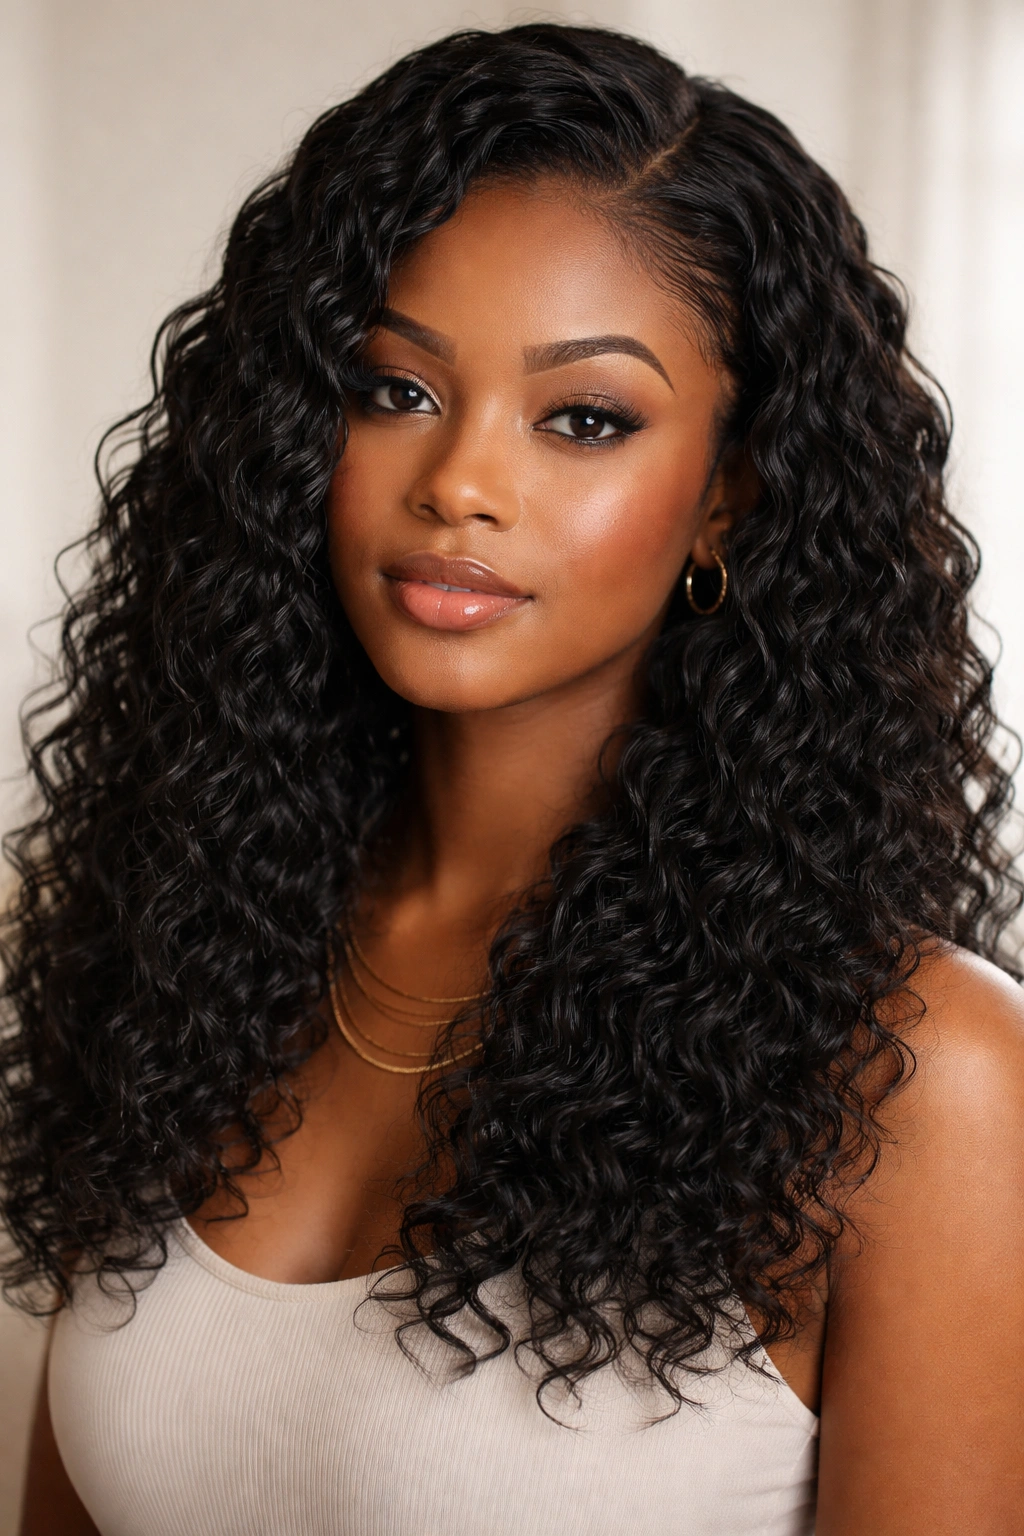
Water wave crochet hair has a rippled, undulating texture that creates a sleek, flowing, almost liquid-like appearance. The waves are tighter at the roots and looser toward the ends, creating dimension and movement. This style is romantic, polished, and works beautifully as shoulder-length styles or longer.
What Makes This Great for Beginners
Water wave texture is exceptionally forgiving because the wave pattern naturally creates visual interest and hides installation imperfections. Even if your sections aren’t perfectly uniform or your crochet work isn’t flawless, the waves do the heavy lifting. Installation is straightforward—you’re crocheting smooth, pre-waved hair through base braids with no twisting or extra steps required. The result looks salon-quality even on a first attempt.
Creating Stunning Water Waves
- Choose true water wave texture: Make sure you’re buying actual water wave crochet hair, not regular curly hair. The wave pattern matters—it’s what makes this style distinctive.
- Install into medium-thickness braids: Water wave looks best with visible base braids slightly thicker than you’d use for locs but thinner than you’d use for box braids. The braids show just enough to create an intentional pattern.
- Keep the waves facing the same direction: As you crochet, ensure the wave pattern flows downward consistently. This creates a polished, directional look.
- Plan for 3-4 hours: Water wave is faster to install than braided styles because there’s no twisting or complex technique involved.
Water wave styles last beautifully for 3-4 weeks before the wave pattern starts to relax slightly from daily wear.
8. Passion Twists Crochet
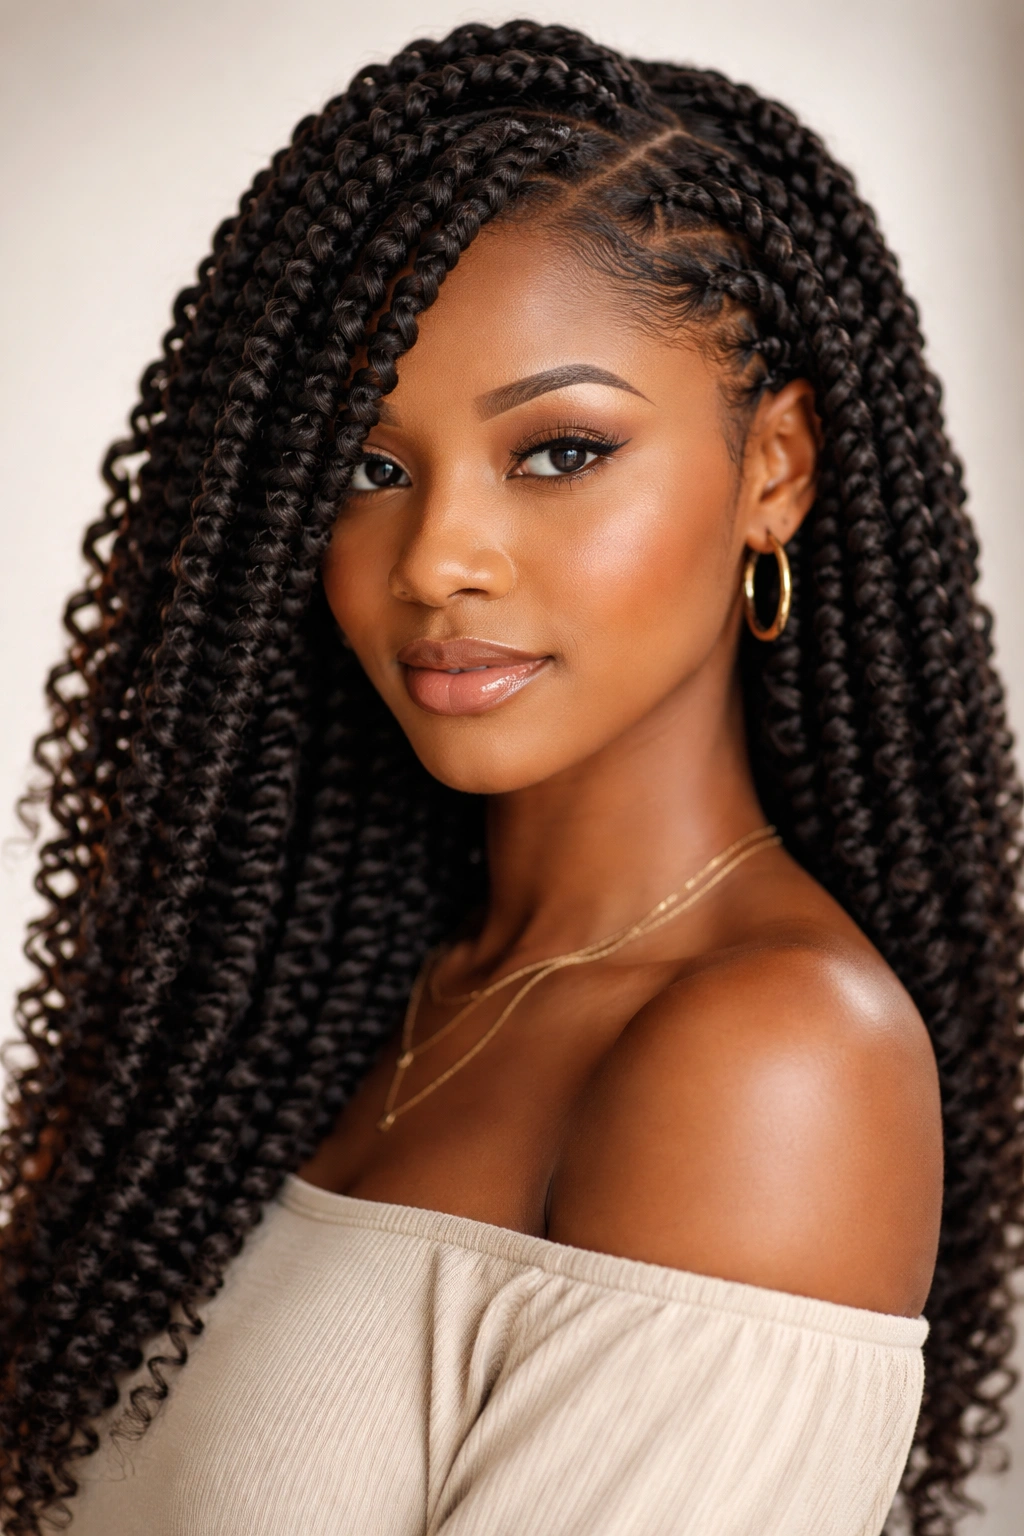
Passion twists are a newer style that sits somewhere between spring twists and traditional twists—they’re created by wrapping crochet hair around natural hair or base braids, creating a rounder, fuller appearance than regular twists but without the springy coiling of spring twists. They’re sculptural, modern, and surprisingly easy to install.
Why Beginners Connect with Passion Twists
Passion twists feel trendy and current without requiring technical mastery. The wrapping technique is intuitive—you’re literally wrapping hair around hair, which is a motion most people grasp immediately. Installation is forgiving because the wrapped texture naturally looks full and intentional even if your wrapping isn’t perfectly precise. Many beginners feel like they’ve achieved something advanced when they finish passion twists, even though the technique is genuinely beginner-level.
Mastering the Passion Twist Wrap
- Use wrap-style crochet hair: Passion twist hair often comes specifically designed for wrapping. It’s typically thicker and more textured than regular crochet hair, making the wrapping easier.
- Section in medium sizes: Your sections should be slightly larger than for locs but smaller than for box braids. Medium sizing creates the best proportion.
- Wrap tightly at the base, looser toward the ends: Start at the root with firm, tight wrapping. As you move down, you can loosen the tension slightly, creating dimension and movement.
- Expect 3-4 hours for a full head: Wrapping is faster than traditional twisting because you’re not creating two-strand twists—just wrapping around a base.
Passion twists typically last 3-4 weeks before the wrapping starts to loosen from daily wear.
9. Boho Braids Crochet
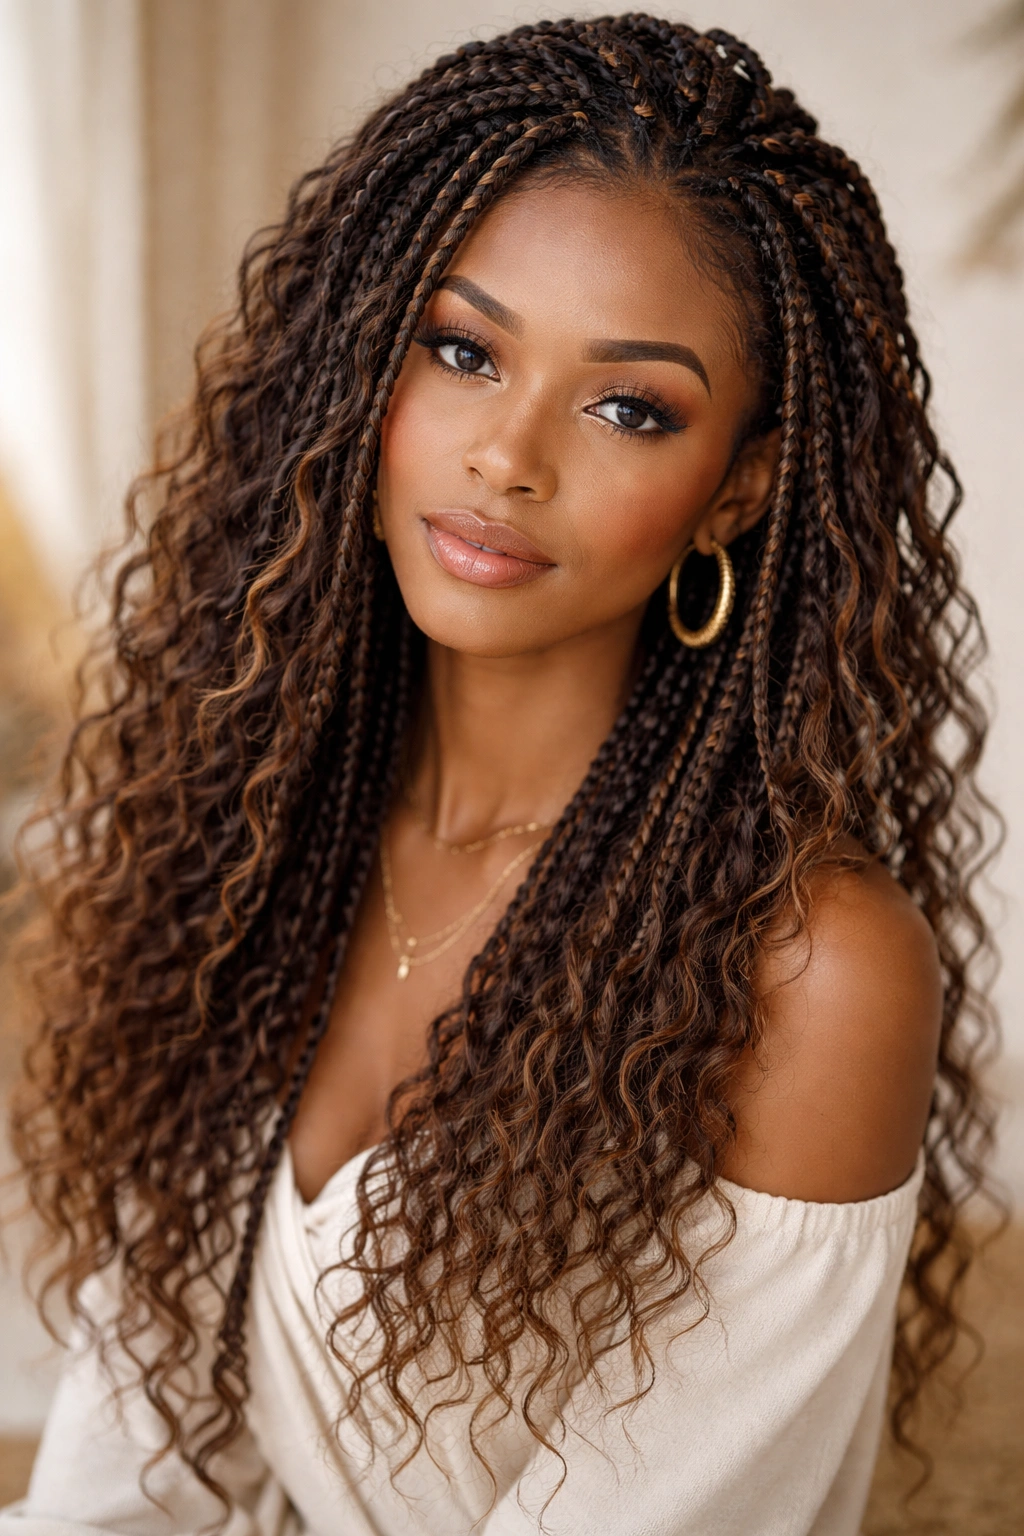
Boho braids combine the structure of box braids with a softer, more textured aesthetic. You install crochet braids similarly to box braids, but then you tease, fluff, and separate the sections to create a rougher, more bohemian appearance. The result is romantic, artistic, and undeniably distinctive.
Why This Works for Beginners
Boho braids teach you the box braid installation technique while also teaching you how to manipulate finished crochet hair to create different aesthetic effects. The “finishing” step—teasing and fluffing—is where you develop an eye for texture and dimension. Even if your initial installation isn’t perfect, the finishing process allows you to adjust the look and actually improve the final result. This empowers beginners by showing them that crochet installation is flexible and responsive to their creative input.
Creating the Perfect Boho Look
- Start with box braid fundamentals: Install your base exactly like you would for classic box braids. The difference comes entirely in the finishing.
- Tease with a fine-tooth comb or teasing brush: Once all braids are installed, use small, quick motions to backcomb the surface of each braid, creating a fuzzy, textured appearance.
- Separate strands intentionally: Use your fingers or a rattail comb to gently separate individual strands and sections within each braid, creating an intentionally undone look.
- Add texture with dry shampoo or edge spray: A light spritz of dry shampoo or texture spray helps the braids hold their teased, separated appearance throughout the week.
Boho braids last 3-5 weeks, though the teased texture relaxes slightly over time and you may want to retease mid-way through the wear period.
10. Marley Twists Crochet
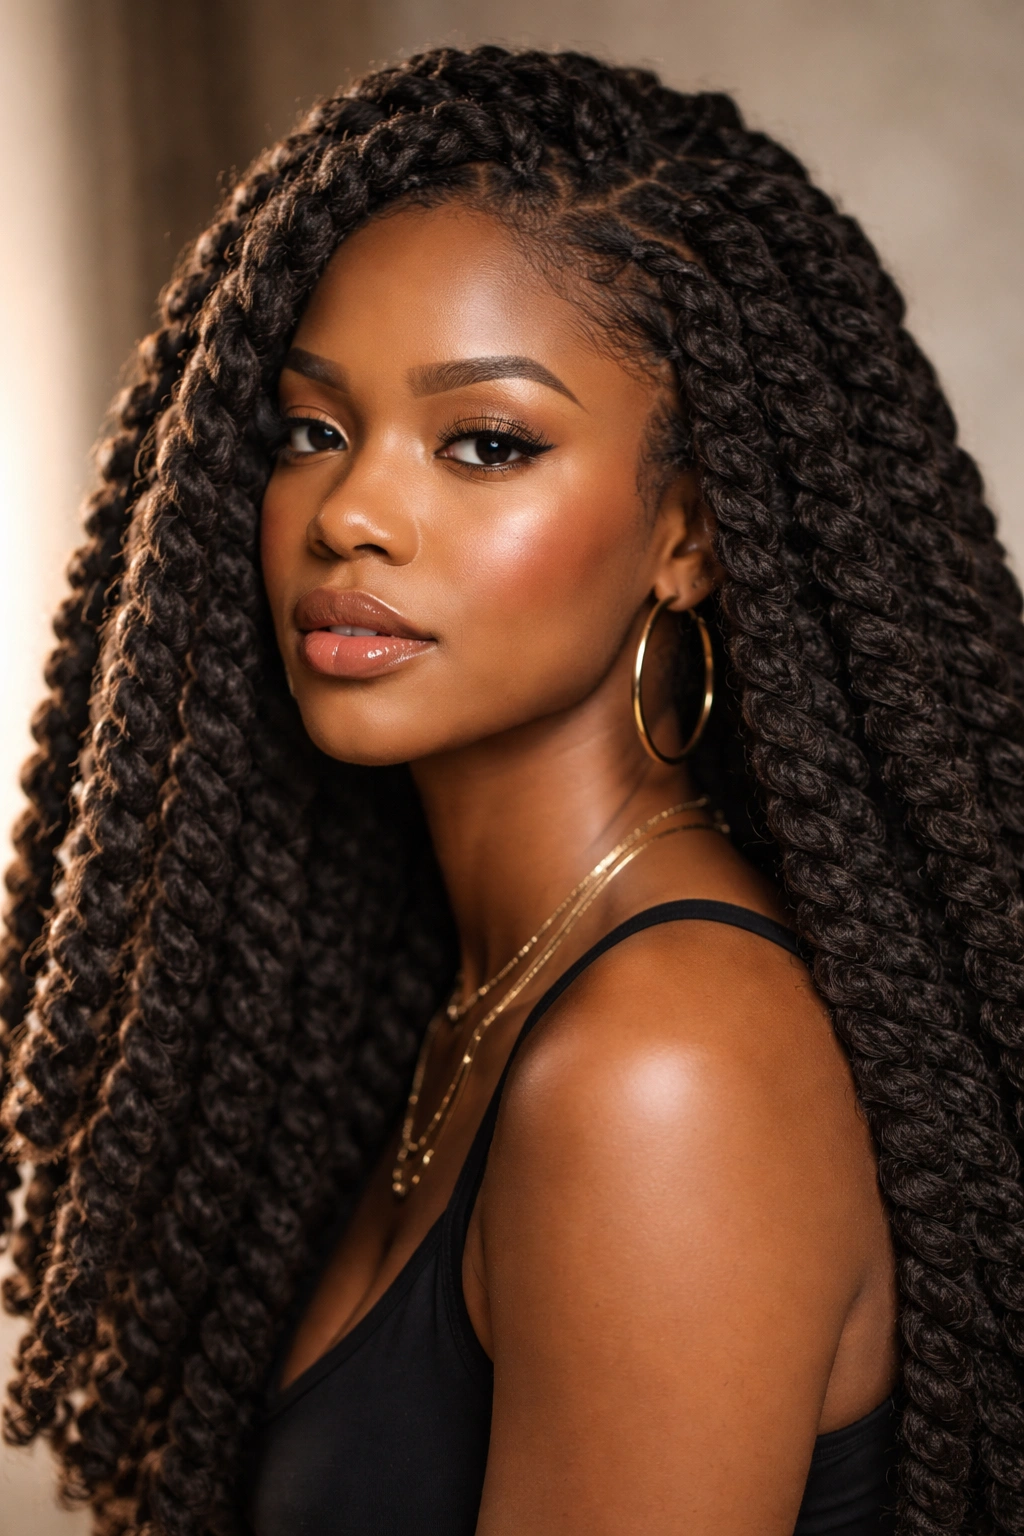
Marley twists are thicker, chunkier twists created with Marley hair, which has a kinky, natural texture. Crochet Marley twists combine the thickness and boldness of traditional Marley twists with the speed and ease of crochet installation. These are statement styles that command attention and look incredible on textured hair.
What Makes Marley Great for Beginners
Marley twists are genuinely simple to install because the hair texture is forgiving, and the chunky size means you need fewer twists overall. Even imperfect twisting looks intentional and stylish with Marley hair because the texture is naturally irregular and organic. You can complete a full head in 2-3 hours, which is faster than many other protective styles. The bold aesthetic of Marley twists makes beginners feel like they’ve achieved something impressive, even though the installation is straightforward.
Installing Marley Twists Flawlessly
- Choose true Marley hair: Marley crochet hair has a distinctive kinky texture that’s very different from other crochet options. Make sure you’re buying actual Marley hair from a reputable beauty supply source.
- Create medium-to-thick sections: Marley looks best in chunky proportions. Your sections should be roughly the thickness of your index finger or slightly thicker.
- Twist firmly but not aggressively: You want clear definition in your twists without pulling your edges or creating tension headaches. Firm but comfortable is the goal.
- Plan for 2-3 hours maximum: This is one of the fastest protective styles to install, partly because Marley hair’s natural texture requires minimal manipulation.
Marley twists last 3-4 weeks before the twists start to unravel slightly from daily wear and movement.
11. Goddess Braids Crochet
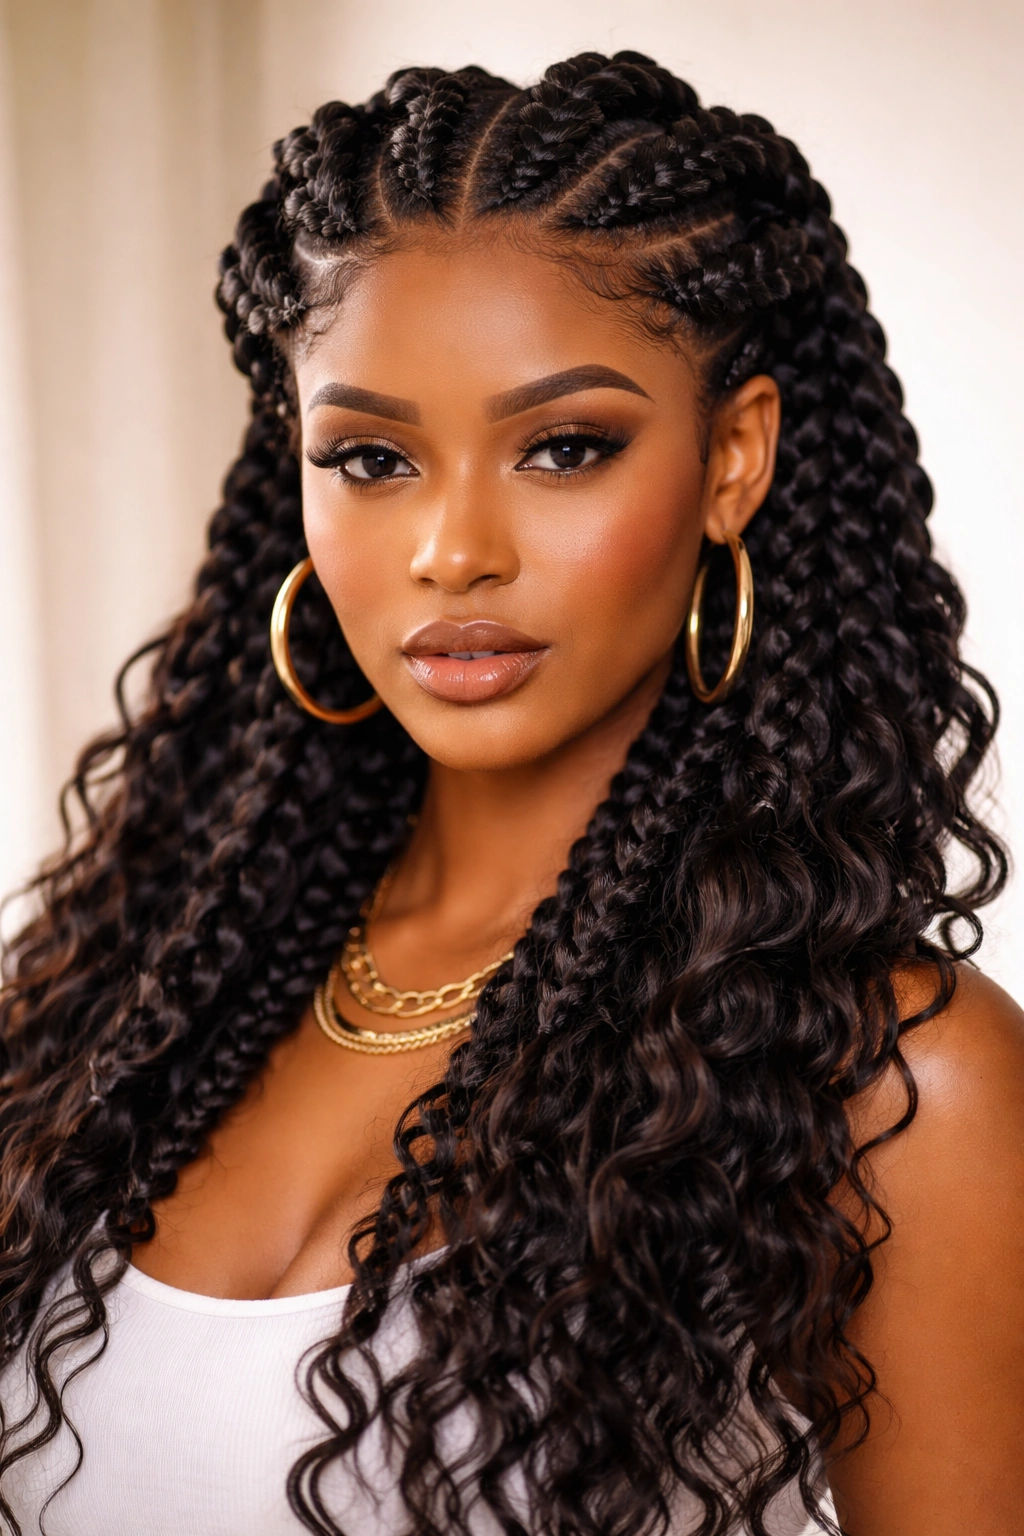
Goddess braids are larger, thicker braids that often incorporate a crown or halo braid pattern across the top of the head, with the remaining hair in regular thick braids. Crochet goddess braids combine the visual impact of this style with much faster installation. They’re bold, beautiful, and work as either casual or formal styles.
Why Beginners Achieve Success Here
Goddess braids are conceptually simple—you’re essentially creating thicker box braids, often with a pattern element. The larger sections mean faster installation and less precision required. Even if your sections aren’t perfectly even or your braiding isn’t flawless, the larger scale makes everything look intentional. The design element (like a crown braid) can be simple or complex depending on your comfort level, giving you flexibility to challenge yourself or keep things straightforward.
Creating Striking Goddess Braids
- Plan your pattern before starting: Decide whether you want a crown pattern, a side part with thick braids, or another configuration. Sketch it out mentally or on paper before you begin.
- Use thick crochet hair: Goddess braids look best with substantial volume. Choose medium to heavy-weight crochet hair that creates visible, dimensional braids.
- Section boldly: Your sections should be significantly thicker than for box braids—roughly the width of two fingers. This creates the goddess aesthetic.
- Install the pattern element first: If you’re doing a crown or halo braid, install that first while you’re fresh, then fill in the remaining braids.
Goddess braids typically last 4-6 weeks, making them one of the longer-lasting protective styles available.
12. Fluffy Curls and Afro Puff Crochet
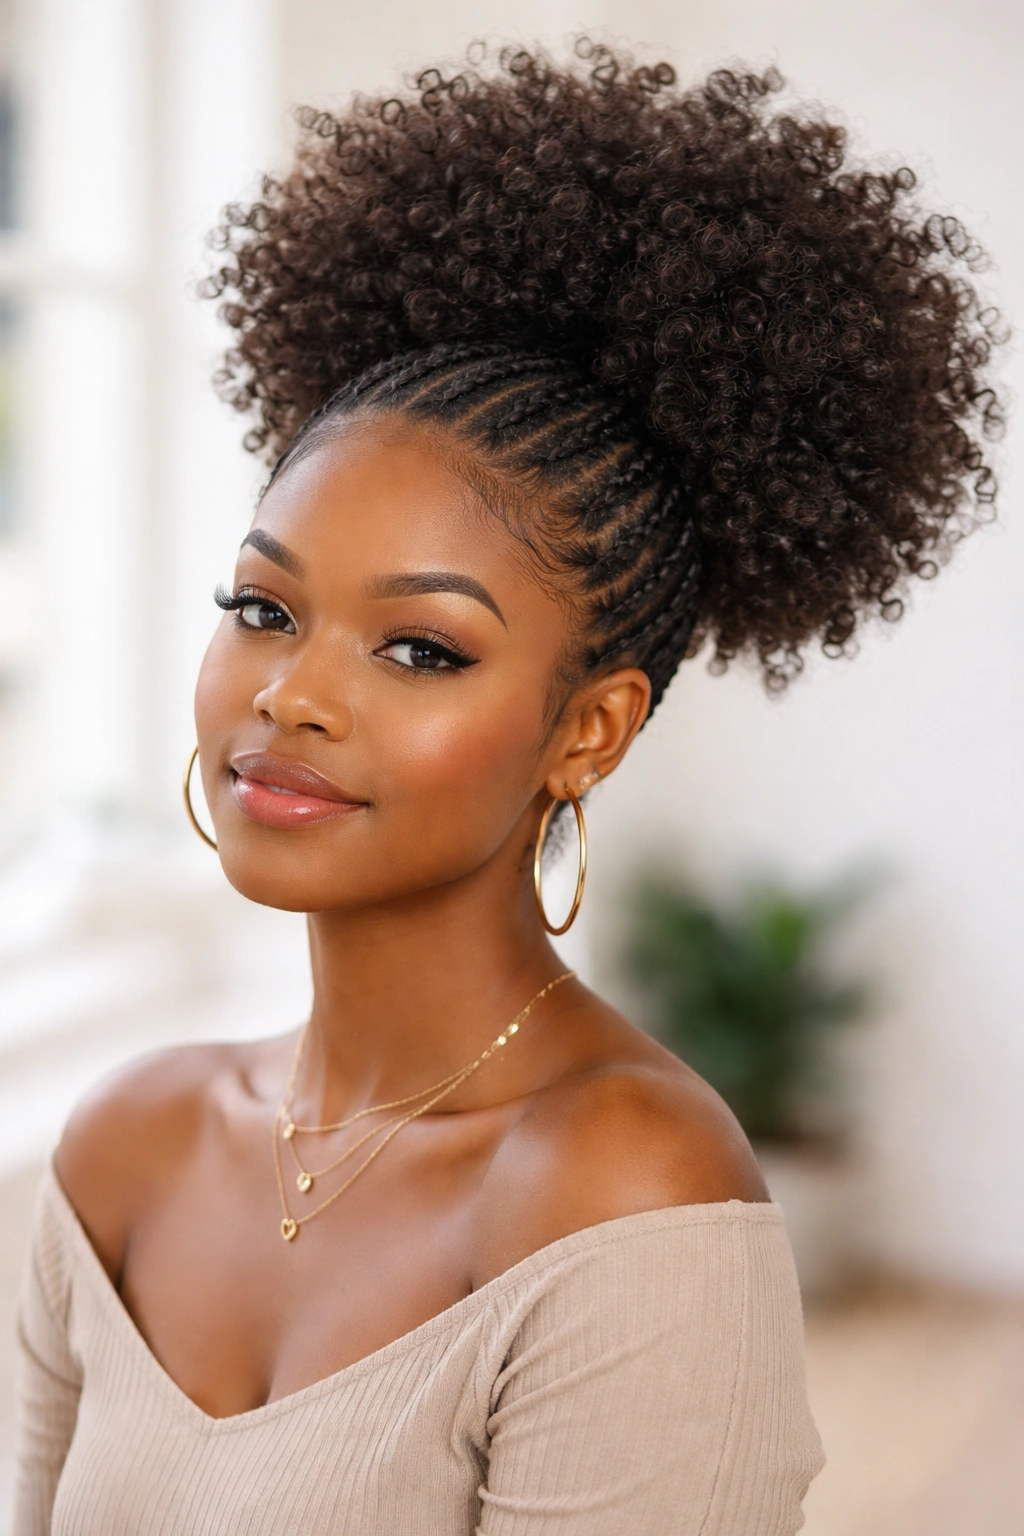
Fluffy curls and afro puff crochet styles are all about celebrating volume, texture, and the natural beauty of curly hair. These styles use bouncy, coily crochet hair installed onto thin base braids, then styled up into high puffs or left down for maximum impact. They’re playful, youthful, and perfect for anyone who loves big hair energy.
Why This Is Perfect for Beginner Experimentation
Fluffy curls and afro puffs are the most forgiving crochet style for beginners because the final result is all about volume and texture, not precision. Your base braids can be slightly uneven or your crochet work can be imperfect, and nobody will notice because the fluffy curls draw all the attention. The installation is fast and straightforward—thin base braids plus coily crochet hair equals stunning results. This style lets beginners achieve impact without requiring technical perfection, which builds confidence for trying more complex styles later.
Building Your Fluffy Curl Masterpiece
- Use the bounciest crochet curl hair available: Kinky curls, coily texture, or even pre-curled styles work beautifully. The curlier and springier the better.
- Create very thin base braids: Fluffy curls look best when installed on thin bases that won’t show through. Your braids should be roughly the thickness of a pencil.
- Install loosely for maximum lift: The looser you crochet, the more the curls spring forward and create volume. Don’t pull tight—let the curl texture do the work.
- Expect 2-3 hours installation: This is one of the fastest protective styles because it’s just thin braids and crocheting with no other steps involved.
Fluffy curls maintain their bounce and definition for 3-4 weeks, though they may relax slightly with daily wear and manipulation.
Final Thoughts
Starting your crochet protective styling journey as a beginner doesn’t require any special skills beyond patience and willingness to learn. Each of these twelve styles offers something different—from the classic polish of box braids to the playful volume of fluffy curls. The beauty of crochet is that the learning curve is genuinely manageable. Your first installation might take five hours while your twentieth takes two, but even that first attempt will deliver results you’re proud to wear.
The best style for you depends on what appeals to your aesthetic and how much time you’re willing to invest in installation. If you like structure and precision, start with box braids or Senegalese twists. If you prefer movement and texture, choose spring twists, water waves, or fluffy curls. If you want to feel trendy and modern, passion twists or boho braids deliver that instantly.
Remember that protective styling is a journey, not a destination. Your first crochet experience will inform your second, which will make your third better still. Every style teaches you something about how crochet hair behaves and what techniques work best for your hair type, hand strength, and personal preferences. Embrace the learning curve, watch tutorials if you need them, and don’t hesitate to reach out to friends or online communities if you get stuck. The crochet community is genuinely welcoming to beginners, and there’s always someone willing to share knowledge and encouragement.
