



Looking good at school or college shouldn’t mean spending hours wrestling with your hair every morning or compromising your natural texture. If you’re rocking an afro, you’ve got natural texture and volume that can create some seriously stunning styles — and the best part is that many of them come together in minutes, stay neat all day, and work perfectly for everything from casual classes to formal events on campus.
The key to finding the right afro style for school life is balancing three things: how quickly you can style it before class, how well it holds up through a full day of activity, and whether it gives you the confidence and comfort you’re looking for. You don’t want something that demands constant adjustments in the hallway or breaks down by lunchtime. You want a style that works with your natural texture, looks intentional and polished, and lets you focus on your classes instead of your hair.
Whether you’ve got tight coils, looser waves, or anything in between, there’s an afro style that’ll work for your routine and your personal vibe. These ten styles range from low-key and protective to bold and statement-making — and honestly, they all deserve a spot in your styling rotation.
1. High-Top Afro
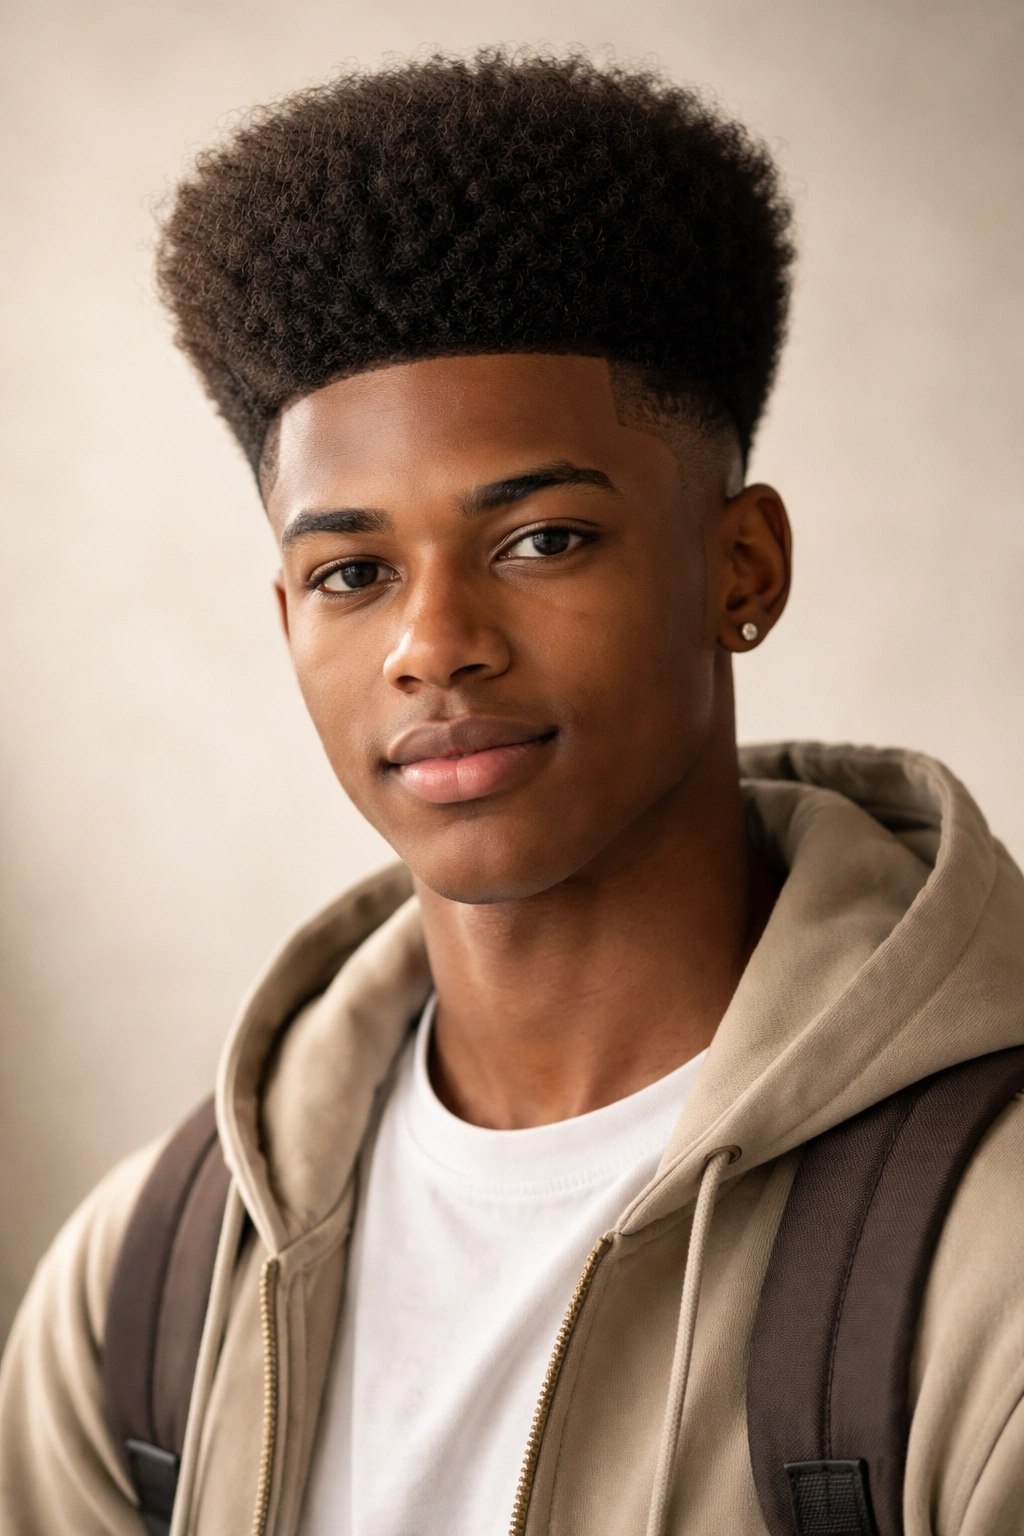
The high-top afro is all about maximum volume and that iconic, statement-making shape that commands a room. This style works best if you’ve got medium to longer afro hair with good natural volume, and it’s achieved by encouraging your natural curl pattern to stand upright and outward from the scalp. Think of it as your hair growing outward in a full, rounded dome rather than hanging downward.
Why It’s Perfect for Campus Life
A high-top afro is genuinely low-maintenance once it’s shaped the way you want it. You’re not relying on products to hold it in place or constantly working to keep parts defined — your natural texture does the heavy lifting. It reads as intentional and polished, which means it works whether you’re sitting in lectures, heading to the library, or walking across campus to grab lunch. The best part is that it works for people with busy schedules because the styling time is minimal.
How to Build and Maintain It
- Use a wide-tooth comb or your fingers to gently fluff your hair upward and outward, starting from the roots
- A light hold styling product (not heavy cream or gel) helps define the shape without weighing it down
- Sleep on a silk or satin pillowcase to preserve the volume and shape between washes
- Refresh the shape in the morning with a light misting bottle of water and a few minutes of fluffing
- Plan for a wash and reset every 7-10 days, depending on your lifestyle and how much your style compresses
Pro tip: A high-top afro actually looks more defined and intentional when you let it grow out for 4-6 weeks without cutting it. The longer the hair, the more dramatic the volume and shape — so if you’re thinking about switching to this style, give yourself that growing-out period first.
2. Twisted Afro
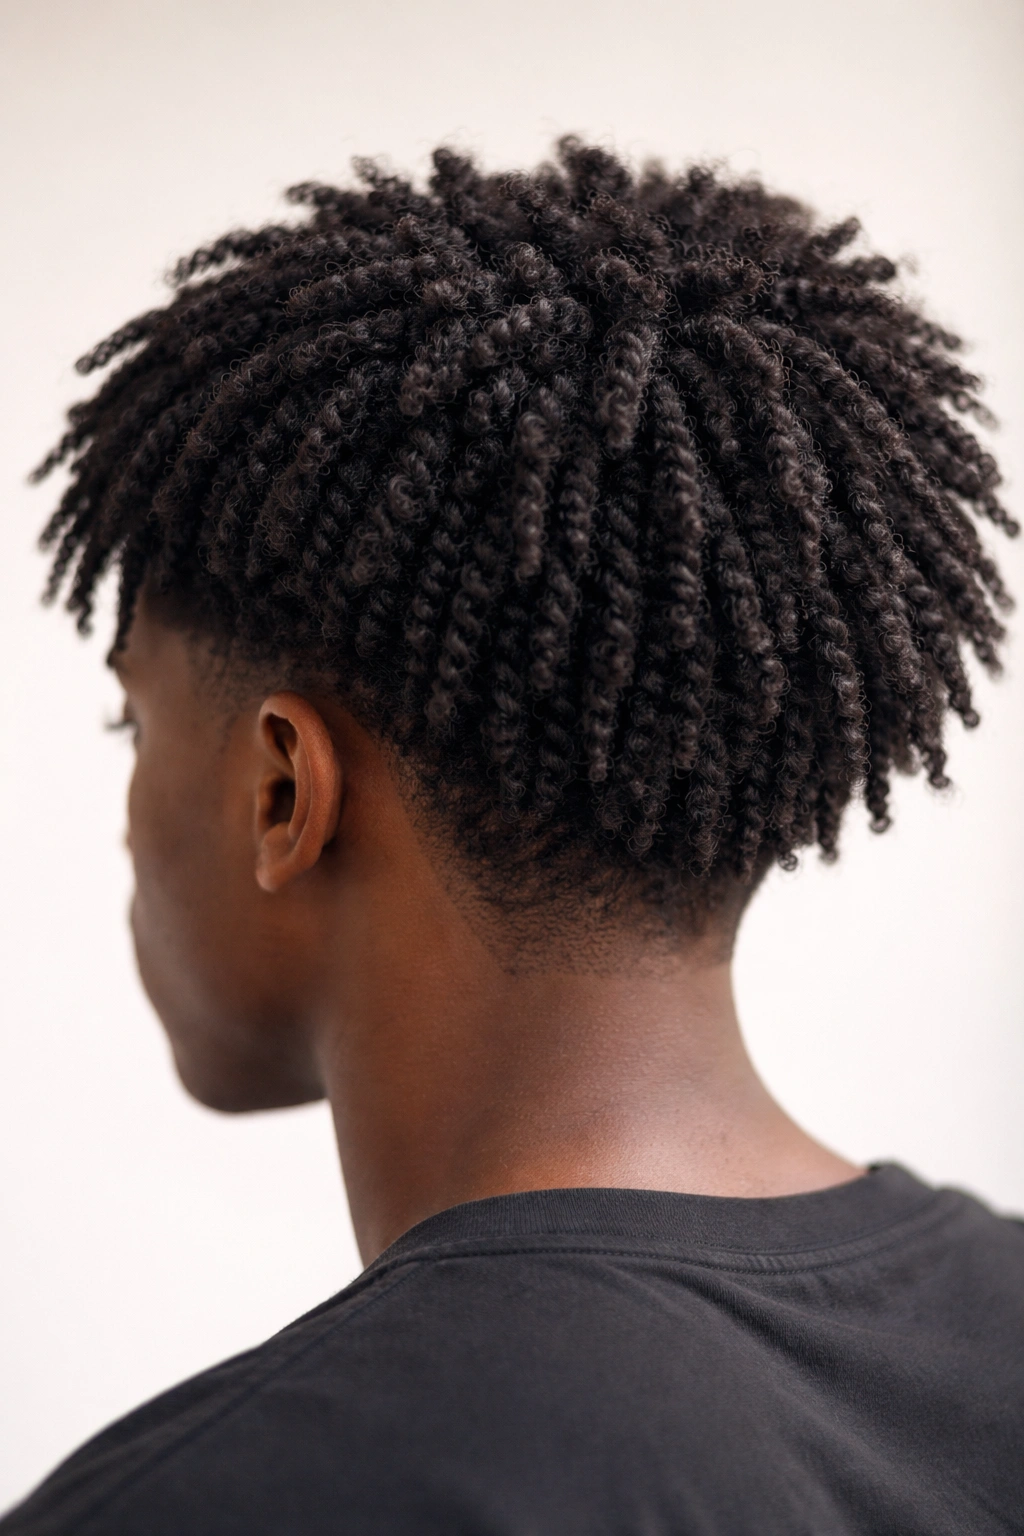
Two-strand twists are one of the most versatile and timeless protective styles, and when you leave them in as a completed look rather than undoing them, you get a textured, defined afro that looks put-together without looking overdone. This style involves sectioning your hair and twisting two strands together from root to tip, then leaving all those twists in place for a sculptural, neat appearance.
What Makes Twisted Afros Stand Out
A twisted afro is seriously practical for the school schedule. You can install the twists over a weekend and wear them for 2-3 weeks without redoing them, which means minimal styling time on school mornings. The twist pattern creates visible definition and texture that looks intentional and neat, so it reads as a finished style even though the maintenance is actually quite minimal. It’s also genuinely protective because your natural hair strands are wrapped together, reducing friction and breakage.
Installation and Care Tips
- Section your hair into 15-30 sections, depending on how thick or thin you want the twists
- Use a light twist cream or butter to help the twists grip and stay intact
- Install twists when your hair is damp, not soaking wet, for better control and faster drying time
- Let the twists fully air-dry before styling or manipulating them — usually 4-6 hours or overnight
- Sleep in a bonnet or wrap to keep the twists clean and intact between washes
- Refresh the roots every 2-3 weeks if you want to extend the look; otherwise, plan to take them down and reinstall after 3-4 weeks
Worth knowing: Twisted afros look freshest and most defined in the first 2 weeks. After that, they can start to look a bit frizzy or lived-in, which honestly still looks great in a campus setting, but if you want that pristine look for important presentations or events, you might want to install fresh twists every 2 weeks instead.
3. Afro with Accessorized Twists
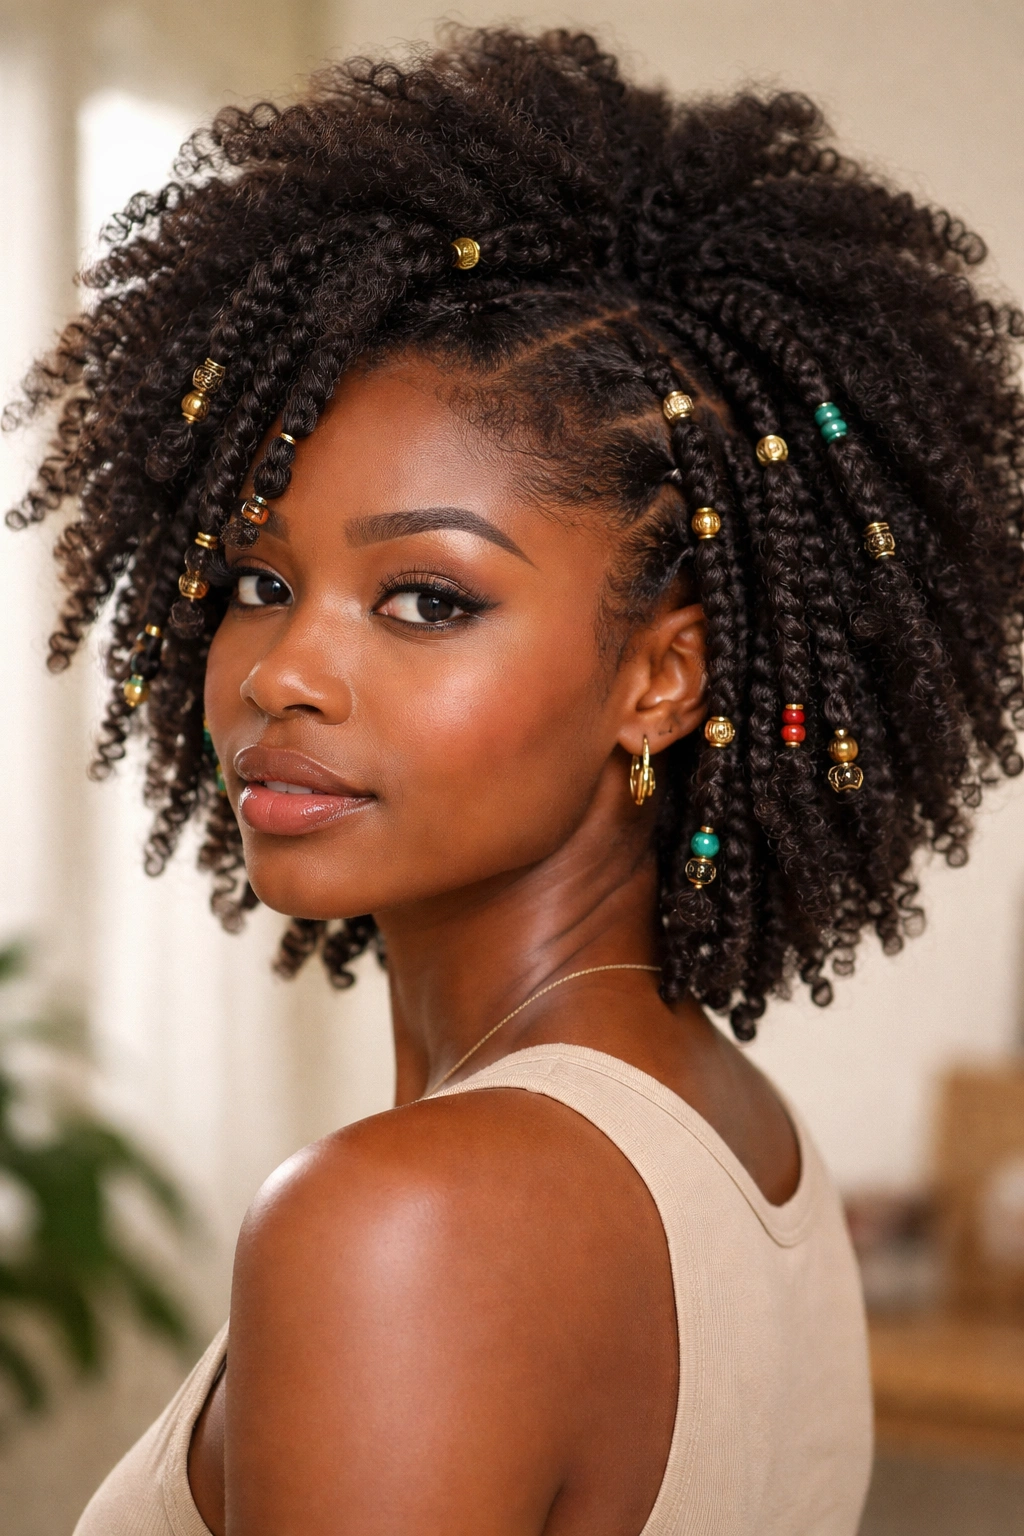
This style takes regular two-strand twists and elevates them by adding colorful hair cuffs, beads, rings, or wrapping thread around select twists or the ends of twists. It’s a way to customize your look, add personal flair, and make your style feel uniquely yours without any additional styling effort.
How Accessories Transform Your Look
Adding beads or cuffs to twists instantly makes the style feel more intentional and polished — it reads as a deliberate aesthetic choice rather than just a protective style. You can customize the look to match your mood or your outfit, which means one protective style base (the twists) can actually feel like multiple different styles depending on which accessories you add or remove. For a campus setting where you might attend classes one day and go to a social event the next, this versatility is genuinely valuable.
Accessorizing Techniques and Options
- Metal hair cuffs and rings slip directly onto individual twists and stay in place
- Decorative beads with large holes slide onto twists — use beeswax or floss to thread and secure them
- Colorful thread or embroidery floss can be wrapped around the base of twists for a subtle pop of color
- Consider your campus environment and personal style — minimal cuffs for a subtle look, or bold colorful beads for a statement
- Mix and match accessories on different twists for an eclectic, collected-over-time vibe
- Change accessories between washes without touching the twists themselves
Insider note: If you’re adding accessories to protect an interview or important event, skip the super colorful beads and go with understated metal cuffs or wrapping — they look polished and professional. For everyday campus wear, go bold with color.
4. Bantu Knots
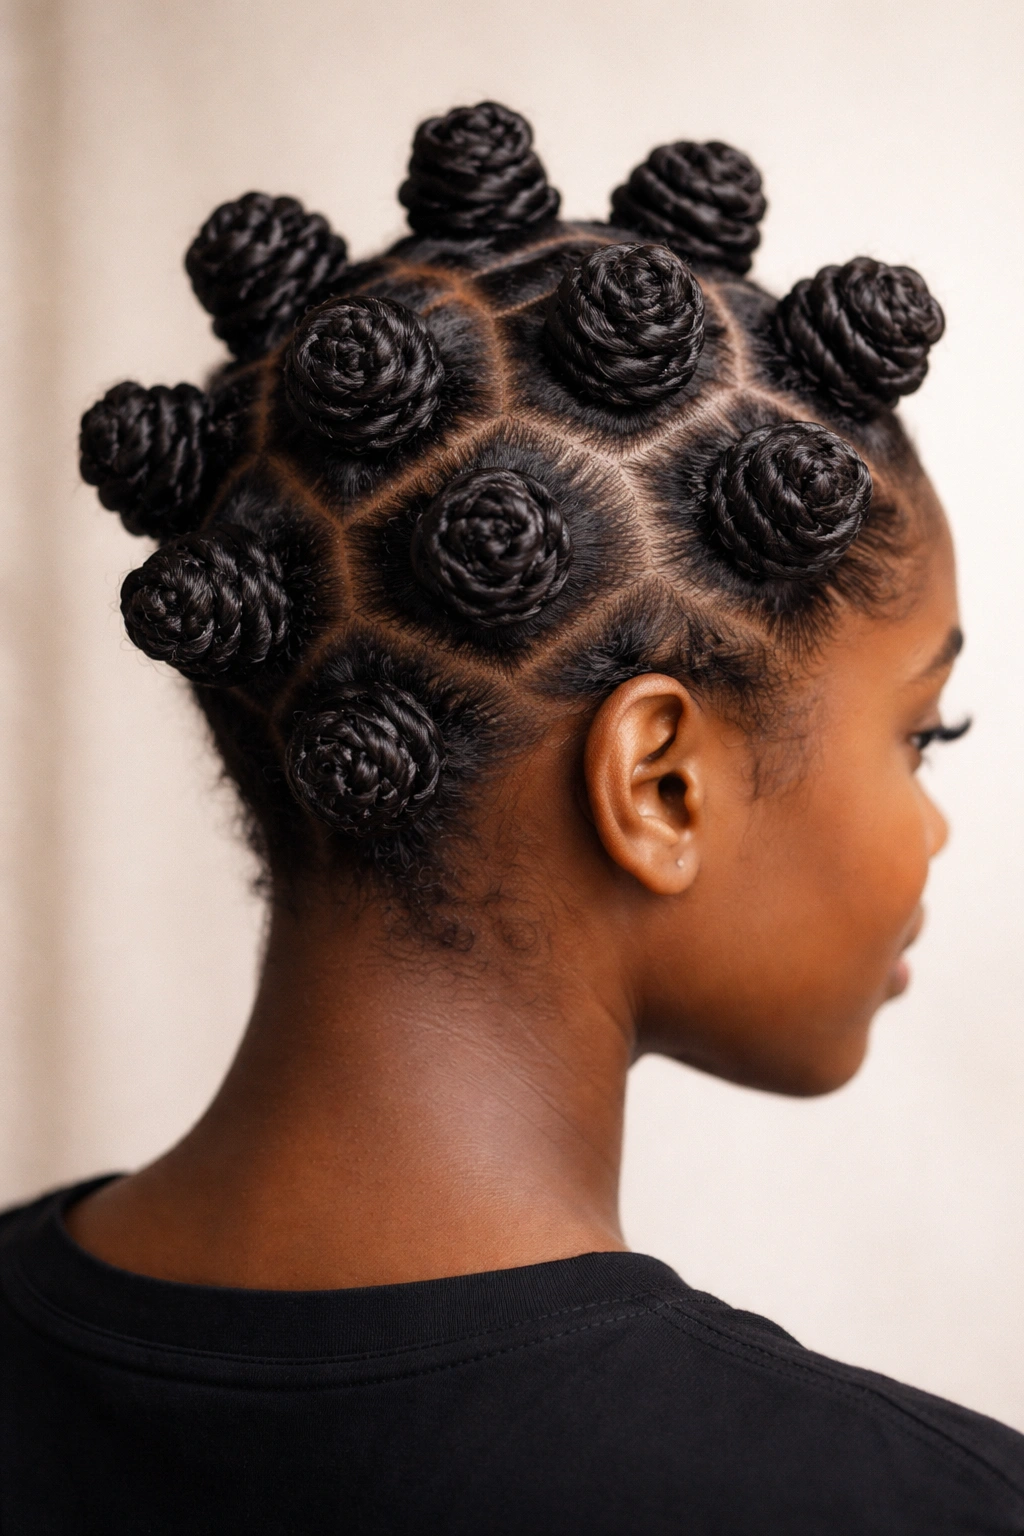
Bantu knots are a traditional protective style that’s part of the larger universe of protective styling in Black culture, and they create a beautiful sculptural look. Each knot is made by twisting a section of hair, then wrapping it around itself to form a small, tight coil knot against your scalp. The result is a series of defined, dimensional bumps that look sculptural and intentional.
Why Bantu Knots Work for School
This style is genuinely stunning and reads as super intentional and artistic — it stands out in the best way on campus. The knots are tight enough to last 2-3 weeks without much maintenance, which means you’re not spending time styling every morning. It’s also protective because your hair strands are firmly coiled and contained, minimizing friction and breakage. If you’re looking for a style that makes a statement and shows off your natural texture and creativity, this is it.
How to Install and Maintain Them
- Section your hair into 12-25 sections, depending on the size knots you want
- Apply a light moisturizing product to each section before creating the knot
- Twist each section firmly from root to tip, then coil the twisted section back on itself and secure it with a bobby pin or small elastic
- Let the knots set for at least 24 hours before sleeping or styling
- Sleep in a bonnet to keep the knots intact and prevent frizz
- After 2-3 weeks, you can take them down and reinstall, or leave them in for up to 4 weeks if they’re still holding
Pro tip: Bantu knots actually look even more beautiful after about a week when they’ve relaxed slightly and show more of the textured knot pattern. That lived-in quality is part of their charm, so don’t stress if they’re not perfectly uniform on day one.
5. Braid-Out Style
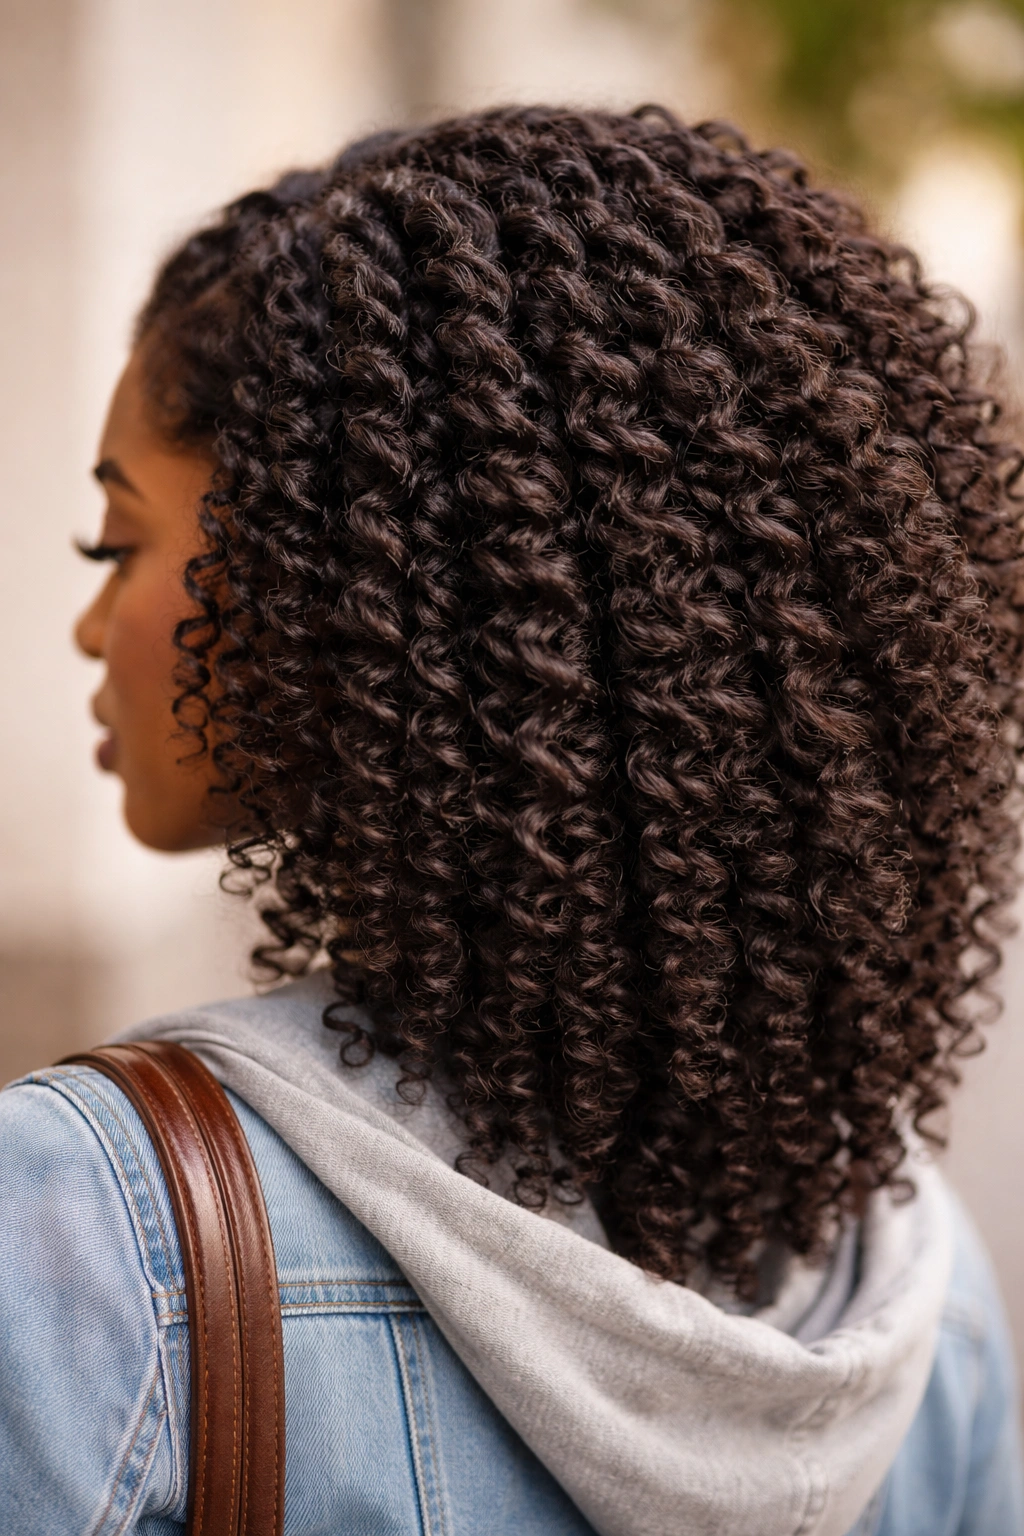
A braid-out is created by braiding sections of your hair and then unraveling the braids to reveal a textured, wavy pattern. It’s a protective style that creates visible definition and dimension, and when you’re wearing the braids out as a completed look (rather than undoing them for another style), it looks like a textured, intentional afro with beautiful pattern and volume.
The Appeal of Braid-Outs for Campus
A braid-out combines the best of both worlds: protective styling benefits with a finished, polished appearance. The braids are tight enough to hold for weeks, but when you’re wearing them undone as a braid-out, they create tons of dimension and character. The style has natural movement and texture that looks great in photos and videos — which matters if you’re on campus and people are constantly taking pictures for social media or student events.
Creating and Wearing Braid-Outs
- Start with damp hair and section it into 6-12 sections depending on braid size and thickness
- Apply a moisturizing cream or twist butter to each section before braiding
- Braid each section firmly from root to tip, starting with bigger braids if you want waves and smaller braids if you want tighter texture
- Install braids when hair is damp; let them dry completely before unraveling — usually overnight or 12+ hours
- Undo the braids carefully by gently untwisting from the tip upward, using your fingers to fluff out the pattern
- Refresh with a light styling product and finger-fluffing every few days
- Sleep in a bonnet to preserve the pattern between washes
Worth knowing: Braid-outs look freshest and most defined the first 3-5 days after you undo them. After that, the pattern softens and the style becomes more of a textured afro. Both looks are beautiful — the crisp pattern is great for important events, and the softer texture is perfect for everyday campus wear.
6. Two-Strand Twists
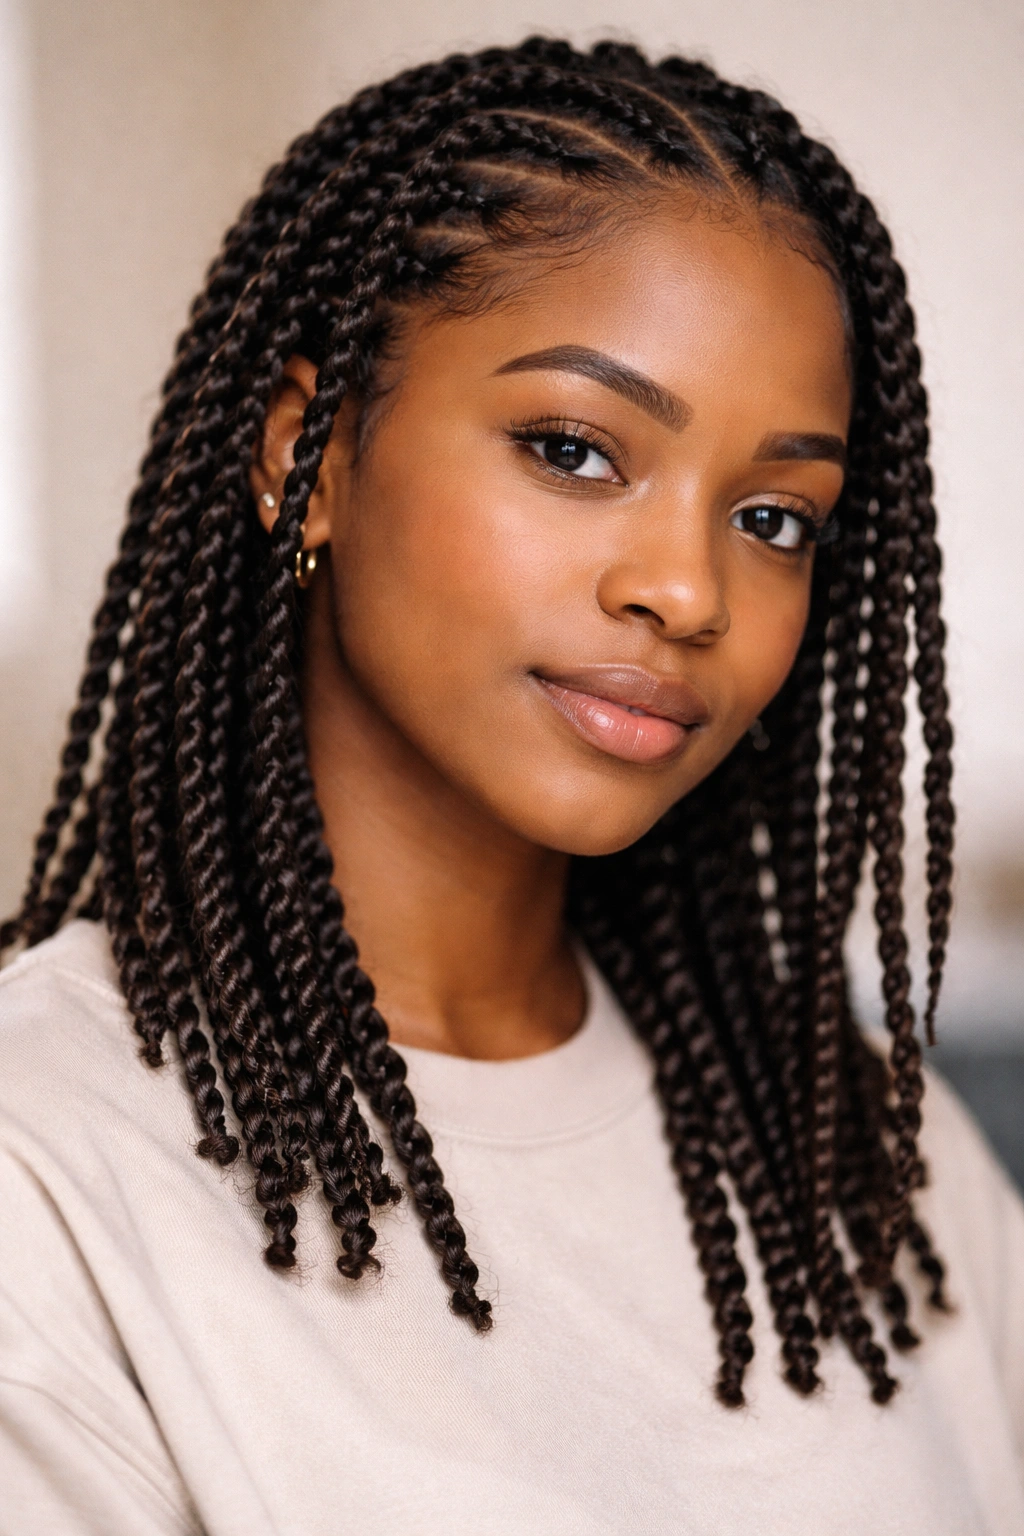
Two-strand twists are a classic protective style where you divide your hair into sections and twist two strands together from root to tip. When you leave them in as a completed style, they create visible definition, texture, and a neat, put-together appearance that works perfectly for a school or college setting where you don’t have time for complicated daily styling.
Why Two-Strand Twists Are a Student Favorite
Honestly, twists are the workhorse of protective styling — they’re straightforward to install, they hold beautifully for weeks, and they look intentional and neat without any additional styling effort. You can install them over a weekend and then just maintain them for 2-3 weeks, which is perfect if you’re juggling classes, projects, and a social life. They’re also versatile enough to dress up or down depending on your mood — you can add accessories for more impact or wear them plain for a subtle look.
Step-by-Step Twist Installation
- Divide your hair into 20-40 sections depending on desired thickness — more sections = thinner twists = more defined look
- Apply a moisturizing product (creamy butter, leave-in conditioner, or twist cream) to each section
- Take one section and divide it into two strands, then twist them tightly around each other from root to tip
- The two strands should wrap around each other, not around a center point — true two-strand twists are symmetric
- Install twists on damp hair for easier control; let them fully dry before sleeping or moving them around
- Maintain by re-twisting the roots every 2-3 weeks to keep the style fresh, or leave them in and embrace the fuzzy roots as part of the look
Pro tip: Two-strand twists actually unravel faster than other protective styles, especially if you’re running around campus and your clothing or backpack straps are catching them. To make them last longer, seal the ends by dipping them briefly in hot water or using a lighter — but do this carefully and maybe ask someone to help you so you don’t burn yourself.
7. Puff Afro
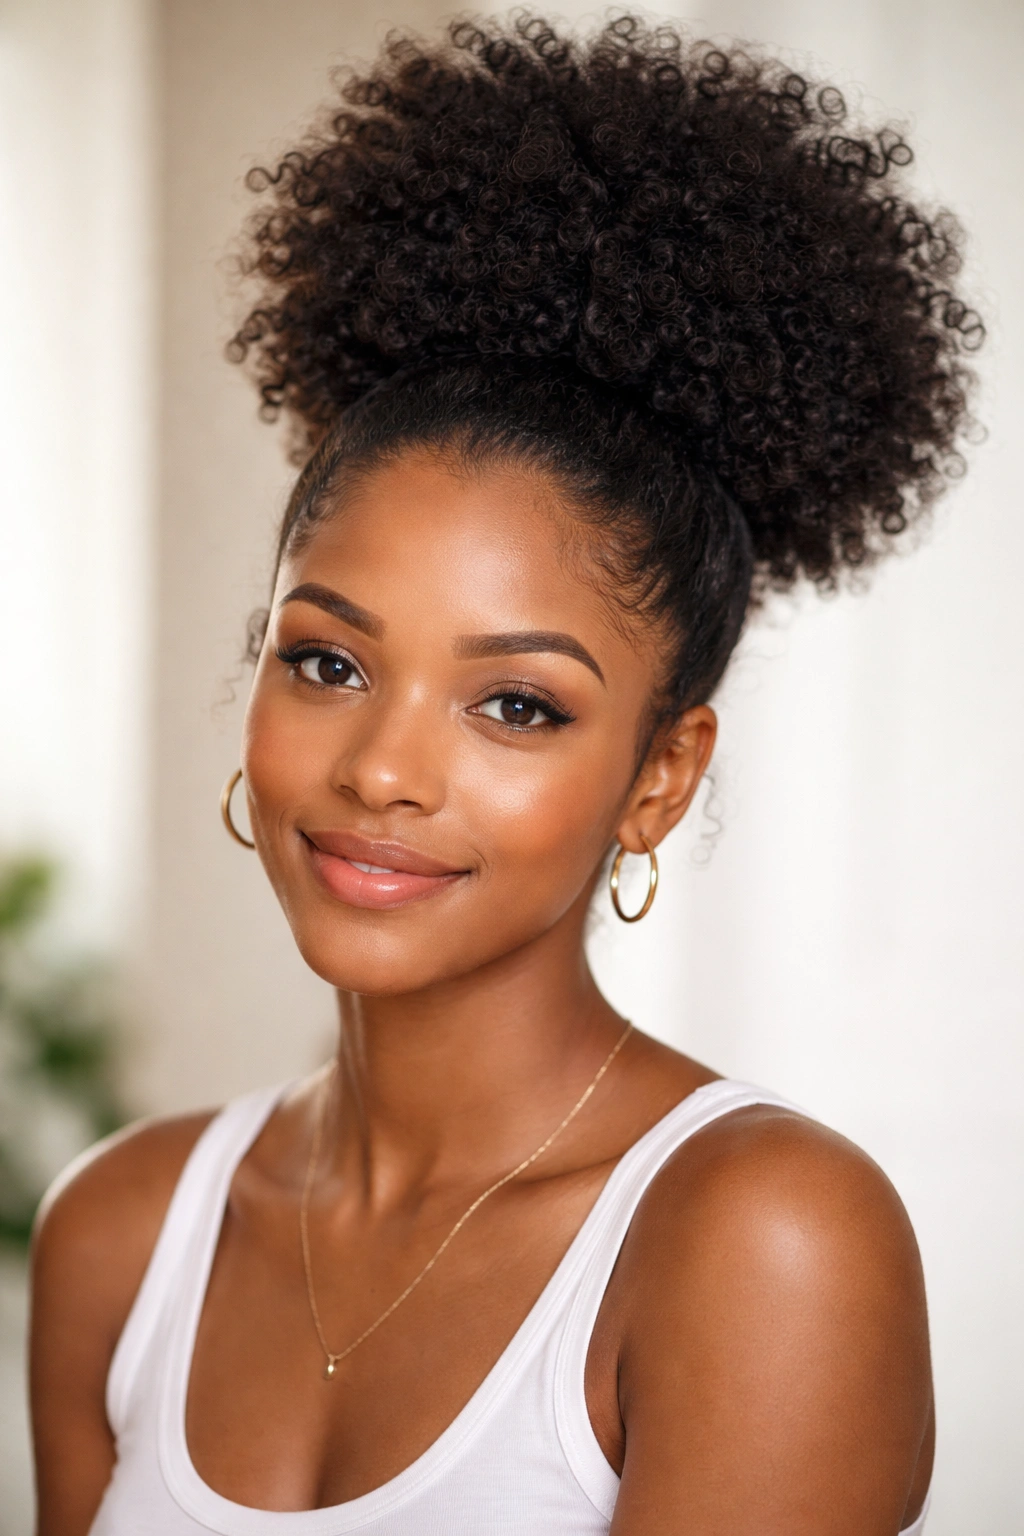
A puff is a simple, minimalist style where you gather your hair into a high or mid-level ponytail and let it sit in a soft, rounded cloud above your head. It’s not tight or severe — the goal is a natural, voluminous, dimensional look that shows off your afro texture while keeping hair off your face. It’s genuinely one of the quickest styles to create in the morning, and it works for everything from casual classes to workout sessions to evening events.
What Makes Puffs So Practical
The puff is hands-down one of the easiest afro styles to create and maintain, which is exactly what you need when you’re balancing a full school schedule. You can do it in less than two minutes with just a hair tie or scarf, and it stays in place all day without coming loose or looking sloppy. It’s also protective because you’re not manipulating most of your hair throughout the day — just the small section held by the band. Plus, you can create multiple puff styles (high puff, side puff, puff with the bottom half in braids) without doing any major restyling.
How to Create the Perfect Puff
- Start with hair that’s moisturized but not soaking wet — damp is ideal
- Use your fingers or a wide-tooth comb to gently gather hair to your desired position (high crown, side, or back)
- Smooth flyaways with a light product (mousse, gel, or edge control) if you want a polished look, or leave them for a softer, more natural vibe
- Secure with a stretchy hair tie, fabric-covered elastic, or silk scrunchie that won’t damage your hair
- Fluff the gathered hair gently with your fingers to create volume and dimension above the tie
- For extra hold, you can apply a light-hold styling product before creating the puff
Insider note: Tight puffs can cause tension and damage over time, so never pull your hair so tightly that it feels uncomfortable or your edges look painful. A comfortable, soft puff that you could sleep in without issue is the right tightness level.
8. Layered Afro Cut
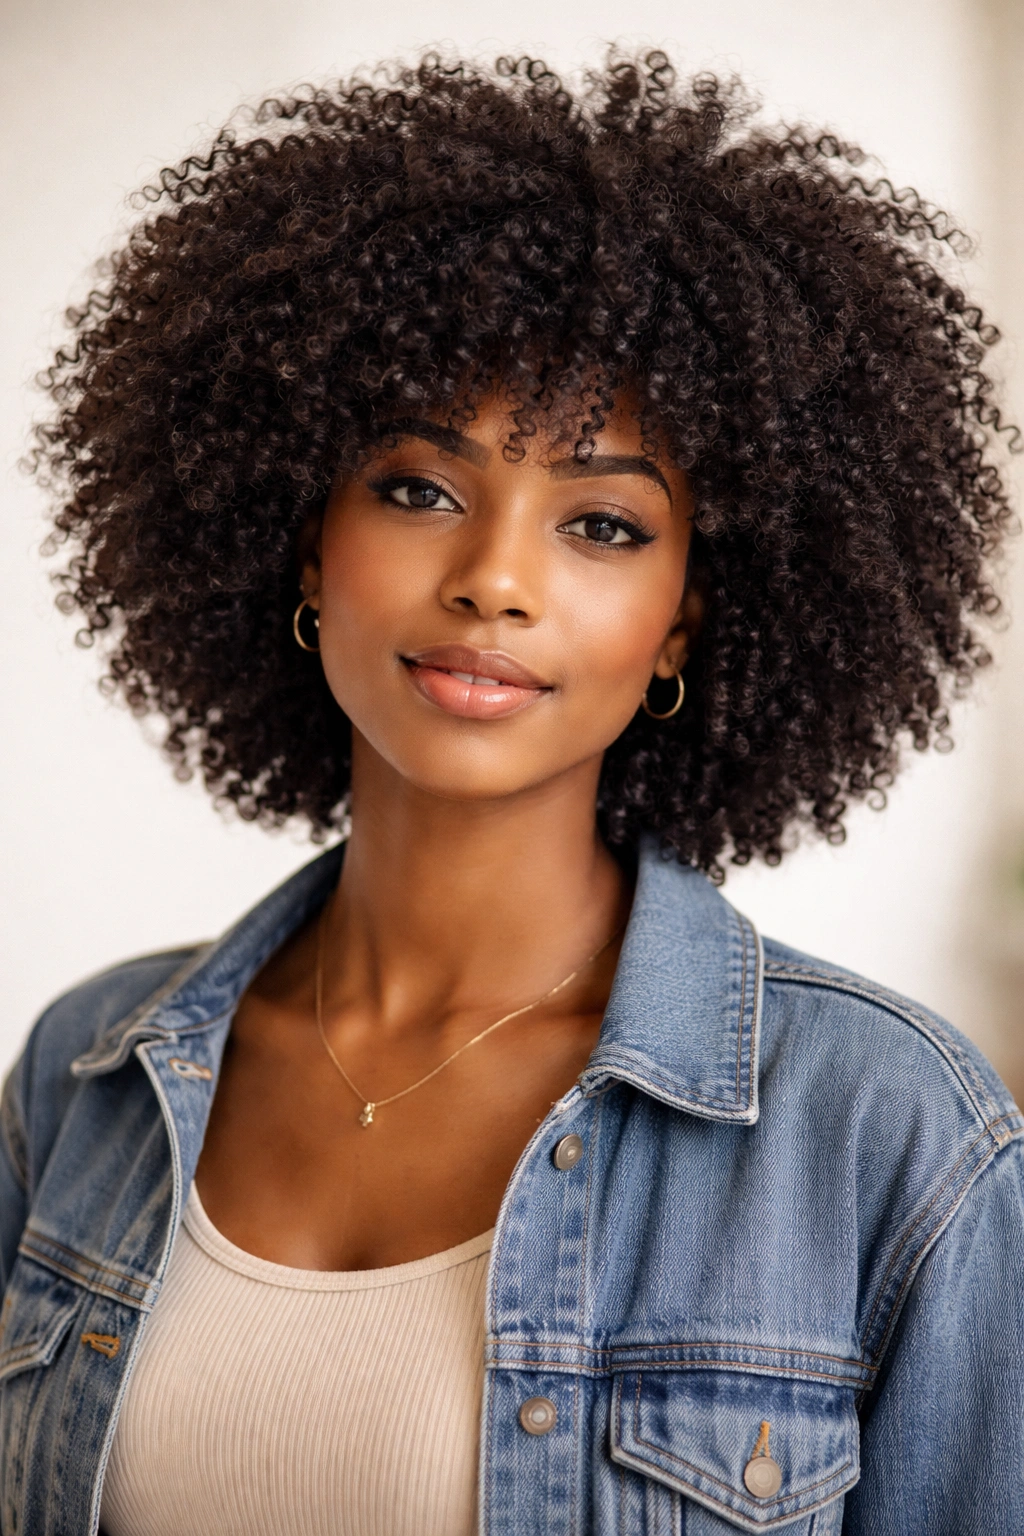
A layered cut is an actual haircut (not a styling technique) where your stylist cuts shorter layers throughout your afro to create dimension, movement, and a more sculpted shape. Layers can be subtle or dramatic depending on how much texture variation you want, and they make your natural afro fuller, more defined, and genuinely easier to style because the layers already create built-in dimension.
The Long-Term Benefits of Layers
Investing in a good layered cut is genuinely valuable if you’re looking for a style that works for months with minimal daily effort. Once you have layers, your afro naturally has more texture and dimension, which means it looks good even on lazy mornings when you just finger-fluff it. Layers also encourage upward growth and shape because the shorter pieces stand up more readily than a full, blunt-cut afro. For college students who want to look intentional without spending lots of time styling, this is a smart long-term choice.
Working with Your Stylist on Layers
- Find a stylist who specializes in textured and natural hair — this is critical because cutting curly and coily hair requires different techniques than straight hair
- Bring pictures of layered afro styles you love so your stylist understands your vision
- Talk about how much daily styling you’re willing to do — more layers mean more shape but potentially more styling time
- Ask about cut maintenance — most layered cuts benefit from a trim every 6-8 weeks to keep the shape fresh
- Consider starting with subtle layers if you’re unsure, then going shorter as you get comfortable with the look
Worth knowing: Layers look best when your hair is moisturized and conditioned regularly. Dry, damaged hair looks stringy when it’s layered, so if you’re considering a layered cut, commit to a good moisturizing routine first.
9. Afro with Shaved Sides
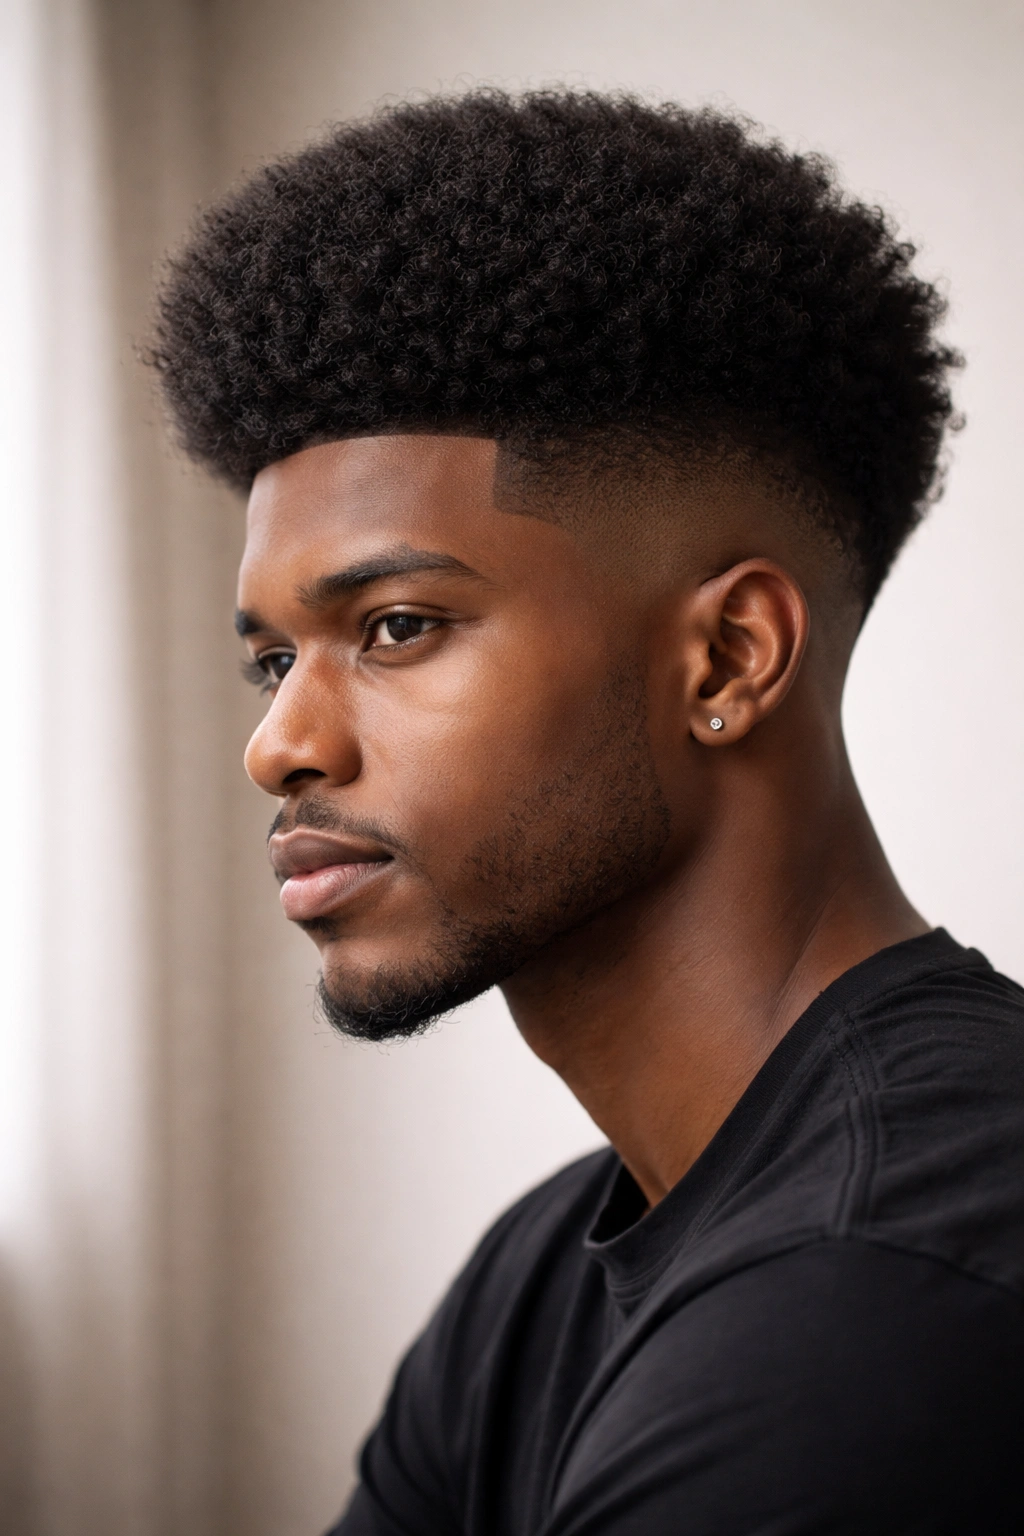
An afro with shaved or closely faded sides (sometimes called an undercut or fade) keeps the volume and length on top while revealing your scalp on the sides and back. This creates a dramatic contrast between the full afro on top and the clean lines of the fade, resulting in a bold, contemporary look that definitely makes a statement.
Why This Style Stands Out on Campus
This style is undeniably bold, and it reads as someone who knows exactly who they are and isn’t afraid to take risks with their presentation. On a college campus where self-expression matters, that kind of confidence is genuinely respected. The style is also practical because the fade requires minimal maintenance — you just need a touch-up every 3-4 weeks to keep the lines clean, and the afro on top needs the same maintenance as any other afro style.
Getting the Cut Right
- Find a barber or stylist who specializes in fades and undercuts on textured hair — this is not the time to ask someone unfamiliar with your hair texture
- Be specific about where you want the fade to start (at the ear, lower, higher) and how low you want it to go
- Discuss fade style options: a tight line, a gradual taper, skin fade, or mid-fade — each creates a different look
- Plan for maintenance touch-ups every 3-4 weeks to keep the fade lines clean and sharp
- Protect the shaved areas with sunscreen if you spend a lot of time outdoors — exposed scalp can burn
Pro tip: If you’re nervous about committing to a full undercut, start with just the back of your head shaved (a design or a simple line) and keep the sides full. This gives you the bold statement without the full commitment, and you can always add to it later.
10. Textured Afro with Volume
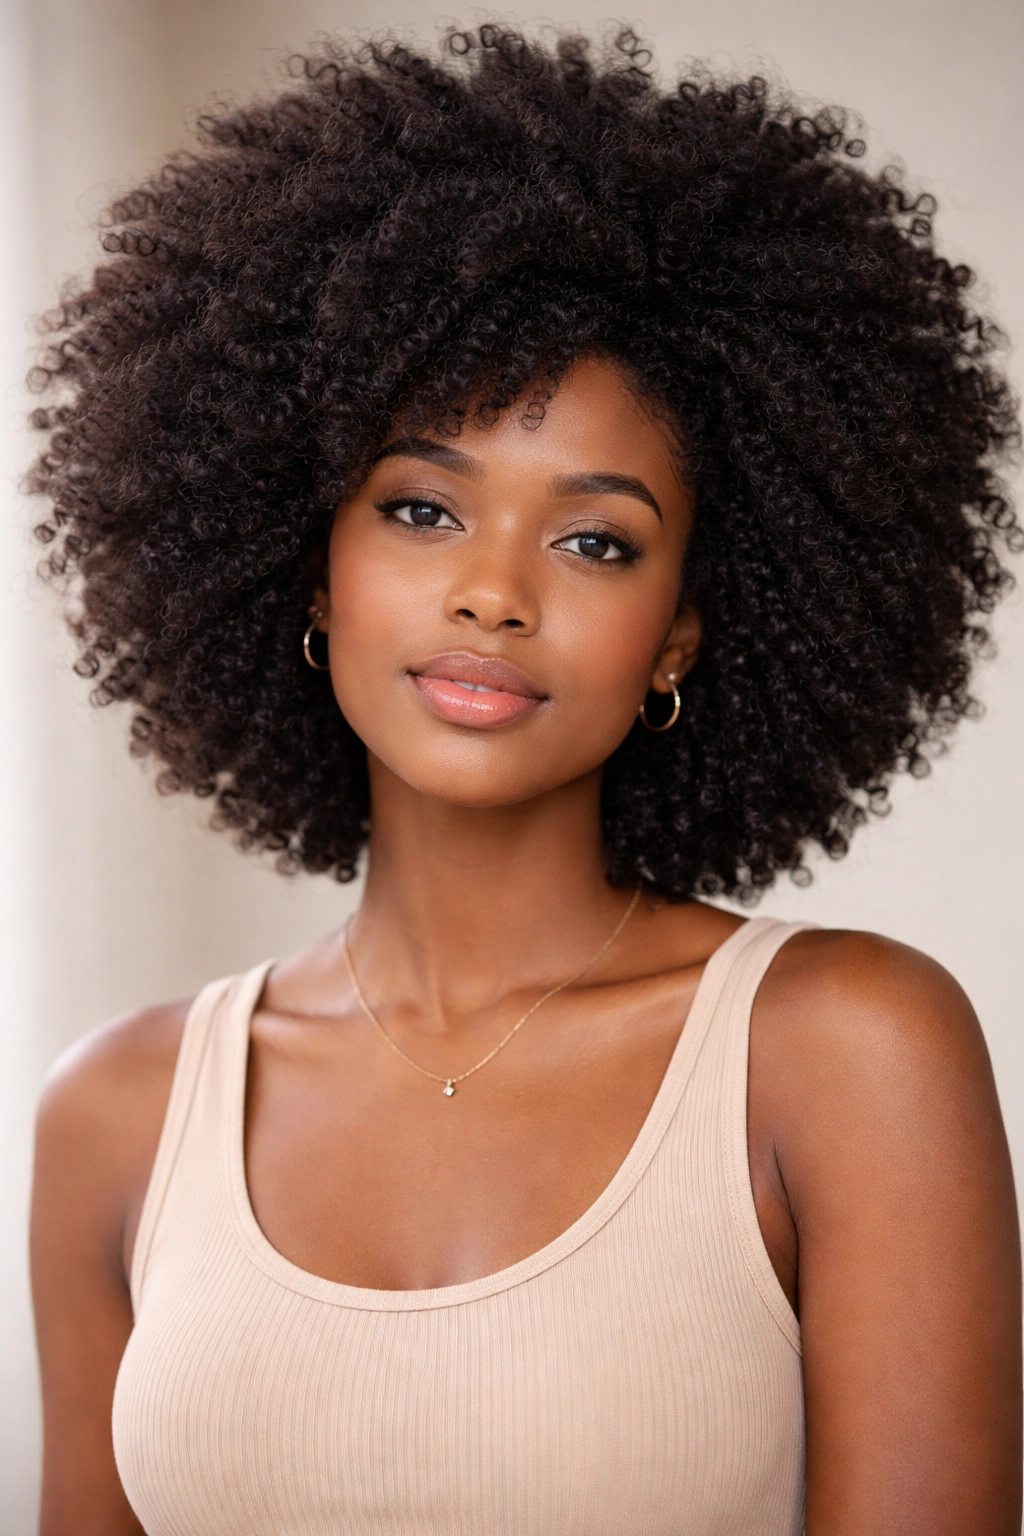
This is a celebration of your natural afro texture in its fullest, most voluminous form — think big, round, dimensional, and unapologetically textured. This isn’t a specific style technique; it’s more of an aesthetic where you’re maximizing your natural curl pattern and volume through proper moisturizing, strategic cutting, and minimal manipulation. It’s genuinely one of the most striking ways to wear your hair, especially if you’ve got a healthy, well-moisturized afro.
Making Your Natural Texture Shine
A full, textured afro is a work of art, and it requires commitment to moisture and health, but the payoff is absolutely worth it. This style works best when your hair is genuinely healthy — moisturized, strong, and free of damage. You’re not relying on any particular styling technique; you’re just letting your natural texture do what it does when it’s in optimal condition. It’s the most low-manipulation option available, which actually makes it one of the best choices for hair health long-term.
How to Build and Maintain a Stunning Afro
- Invest in a solid moisturizing routine: a good leave-in conditioner, a moisturizing cream, and an oil or butter for sealing
- Use the LOC method (Leave-in, Oil, Cream) or the LCO method depending on your hair’s preference for layering products
- Wash your hair weekly or every other week to keep it clean without stripping moisture
- Deep condition every week or every other week — this is non-negotiable for a full, healthy afro
- Use a wide-tooth comb or your fingers to detangle, never a regular brush
- Sleep on a satin or silk pillowcase to preserve moisture and reduce frizz
- Embrace minimal manipulation — the less you touch it, the healthier it stays and the more it grows
Worth knowing: A truly magnificent afro that’s full, healthy, and dimensional takes time to grow and develop. You’re looking at 6-12 months of committed care before you see the full potential. But once you get there, the minimal daily styling effort and maximum impact make it genuinely worth the investment.
Final Thoughts

The reality is that your hair doesn’t have to be a source of stress during school or college — it can actually be a source of confidence, creativity, and self-expression. Every single one of these styles is valid, beautiful, and practical in its own way. Some are protective (the twists, knots, and braids), some are low-maintenance (the puff, the high-top), and some are all about celebrating your natural texture at its best (the textured afro, the layered cut).
The key is finding what works for your hair, your lifestyle, and your personality. If you’ve got limited time for styling, go with the high-top, the puff, or the two-strand twists. If you want to protect your hair while looking intentional and polished, choose the Bantu knots, the twisted afro, or the braid-out. If you want to make a bold statement and have the time to commit to it, the shaved sides or the textured afro are incredible choices.
And honestly, the beauty of having natural hair is that you can rotate through these styles. Try a protective style for a few weeks, then switch to a puff, then grow out your afro into a gorgeous cut. Your hair is flexible, literally and figuratively, so give yourself permission to experiment and find what makes you feel most like yourself.
