



Thick hair is a blessing—until you’re trying to style it into something that doesn’t look like a tangled bird’s nest. The moment you twist your hair into a bun, you’re fighting against volume that wants to escape, strands that slip out, and a weight that can pull the whole thing down into a sad, lumpy situation. A messy bun should look intentional and effortlessly cute, not like you gave up halfway through and gave your scalp a tension headache as a bonus.
The thing is, thick hair requires a completely different approach than fine or medium hair. You can’t just twist, loop, and call it done. You need techniques that anchor your bun to your head, distribute the weight properly, and actually embrace the volume instead of fighting it. The right messy bun style can make thick hair look gorgeous and voluminous—exactly the aesthetic most people are trying to achieve with much thinner hair.
The good news? Thick hair is actually perfect for messy buns once you know the moves. You have the volume to create that full, undone texture without having to tease and backcomb until your scalp feels raw. You just need to know which bun styles are built for the heavy lifting—literally. The styles in this guide are specifically chosen because they work with your hair’s weight and thickness, not against it.
Why Thick Hair Needs Different Bun Techniques
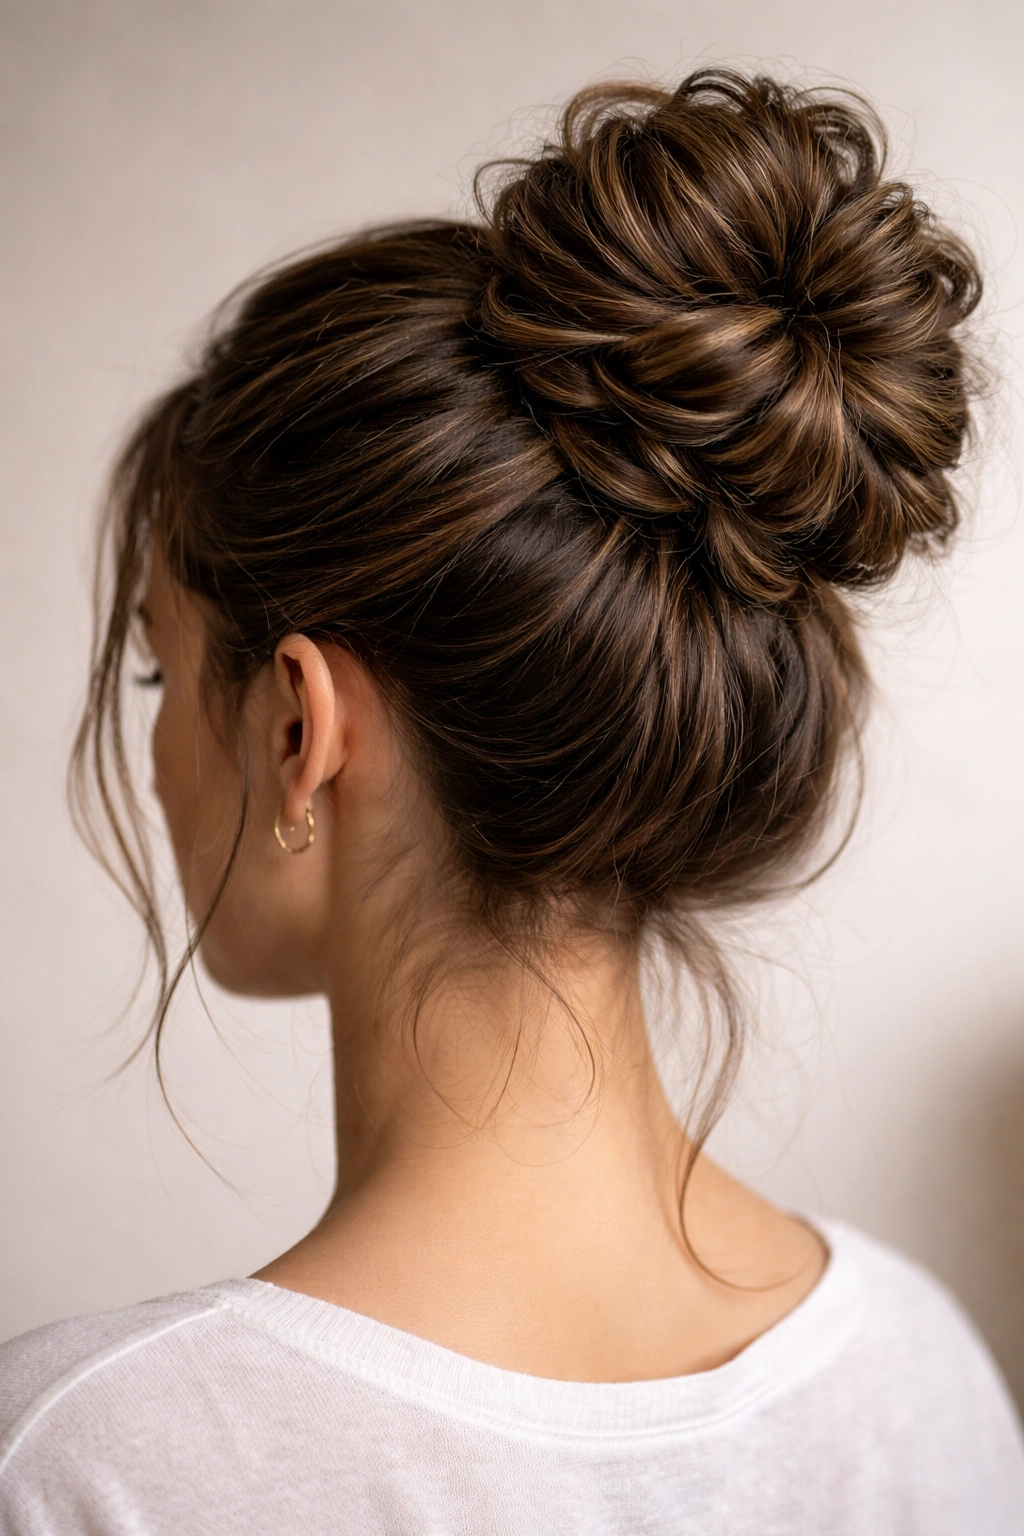
Thick hair sits in a unique middle ground. It’s heavy enough that a simple twisted bun will unravel by mid-afternoon, but it’s also voluminous enough that you can’t use the delicate techniques that work for fine hair. The key difference is that you need maximum grip on the hair itself, strategic weight distribution, and often multiple anchor points instead of one.
When you have fine hair, you can create the illusion of fullness through careful teasing and lots of bobby pins. With thick hair, you’re working with actual substance, so your challenge is control and hold, not volume creation. Your bun won’t stay in place through gravity alone—you need techniques that lock the hair at the scalp and throughout the length.
The styles below all use one or more of these thick-hair-friendly strategies: twisting to create friction and grip, wrapping sections around the base to anchor the weight, braiding for extra security, using claw clips to hold larger sections, or building the bun higher so gravity works with you instead of against you. Each style is designed to keep thick, heavy hair exactly where you want it from morning through evening.
1. The Twisted Tower
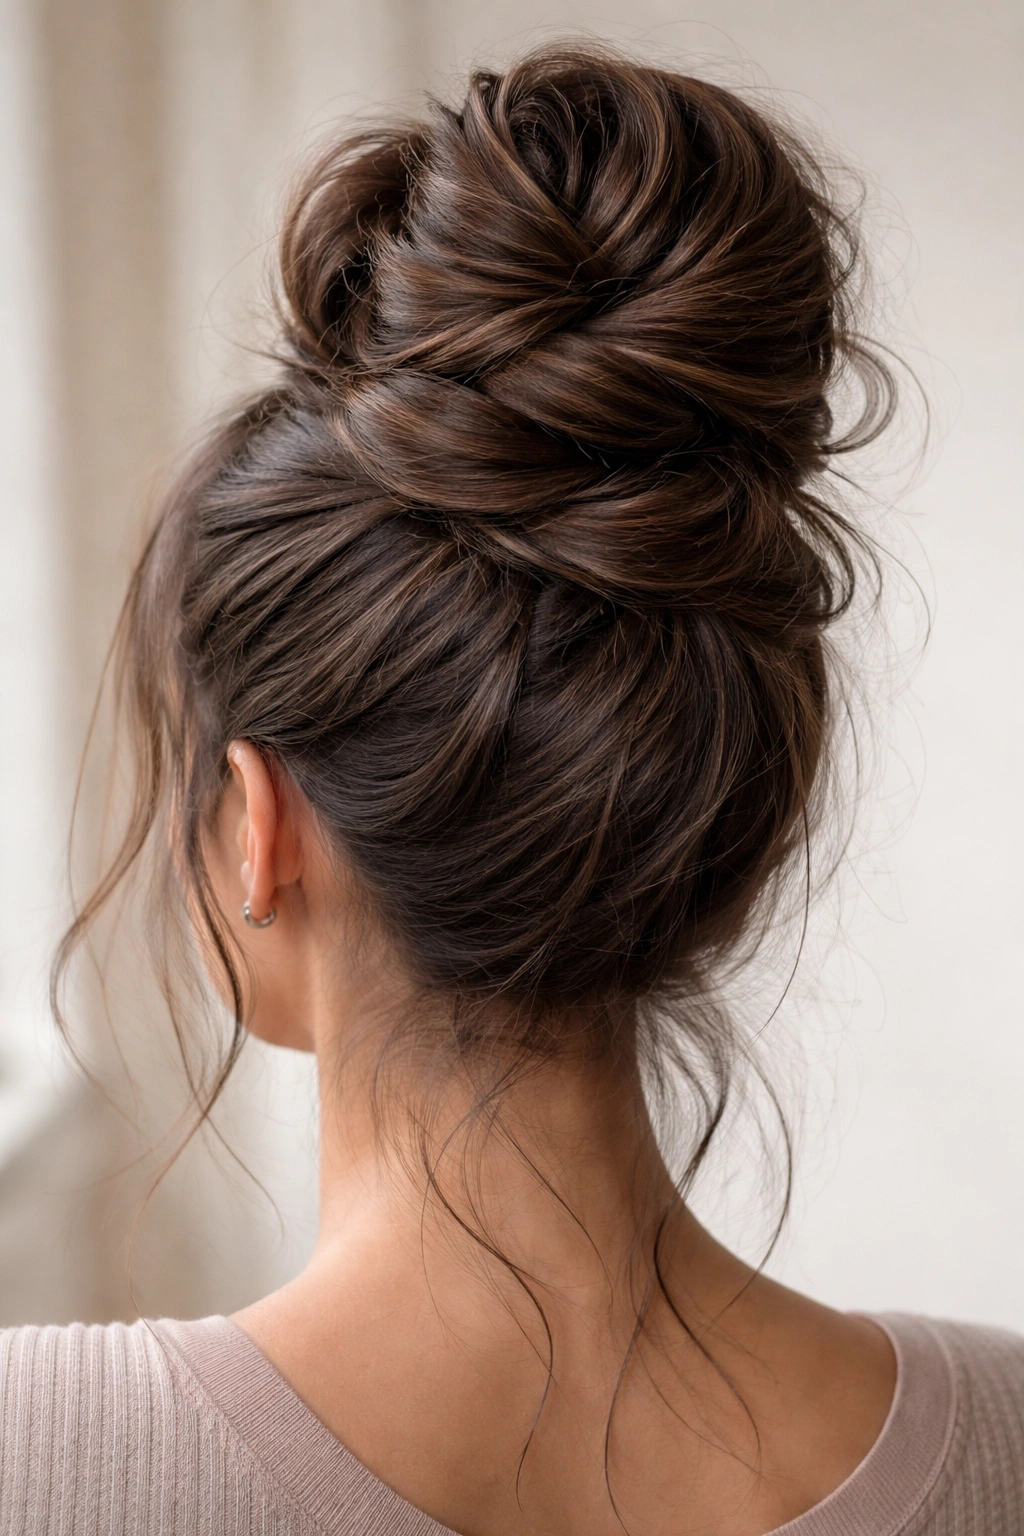
This style is your secret weapon for thick hair because twisting creates friction that keeps everything locked in place. The Twisted Tower starts with sectioning your hair into layers, twisting each one independently, and then stacking these twisted sections on top of each other at the crown. The result is a tall, textured bun that looks effortlessly undone while staying put through your entire day.
How to Create It
Start with dry or lightly damp hair—damp hair grips better and stays twisted. Section your hair into three horizontal layers from the nape of your neck upward, clipping the upper sections out of the way. Take the bottom section, twist it firmly toward one side, and secure it into a small bun at the base of where your full bun will sit. Pin it securely with bobby pins placed horizontally through the twisted bun.
Release the second section and twist it the same direction as the first. Wrap this twisted section around the base bun and pin it in place. The twists should layer on top of each other, creating height and texture. Release your top section, twist it, and wrap it around the stack, securing everything with more pins.
Why It Works for Thick Hair
The Twisted Tower uses multiple layers and anchor points, which distributes the weight of your thick hair across your entire scalp instead of concentrating it in one spot. Each twist creates friction against the next layer, so your hair basically holds itself in place. The technique also embraces your hair’s natural volume—you’re not fighting it or trying to smooth it down, you’re showcasing it.
Pro Tip
For maximum hold, alternate which direction you twist each layer (one clockwise, one counterclockwise). This creates even more grip between sections and prevents the whole thing from rotating throughout the day.
2. The Textured Wrap
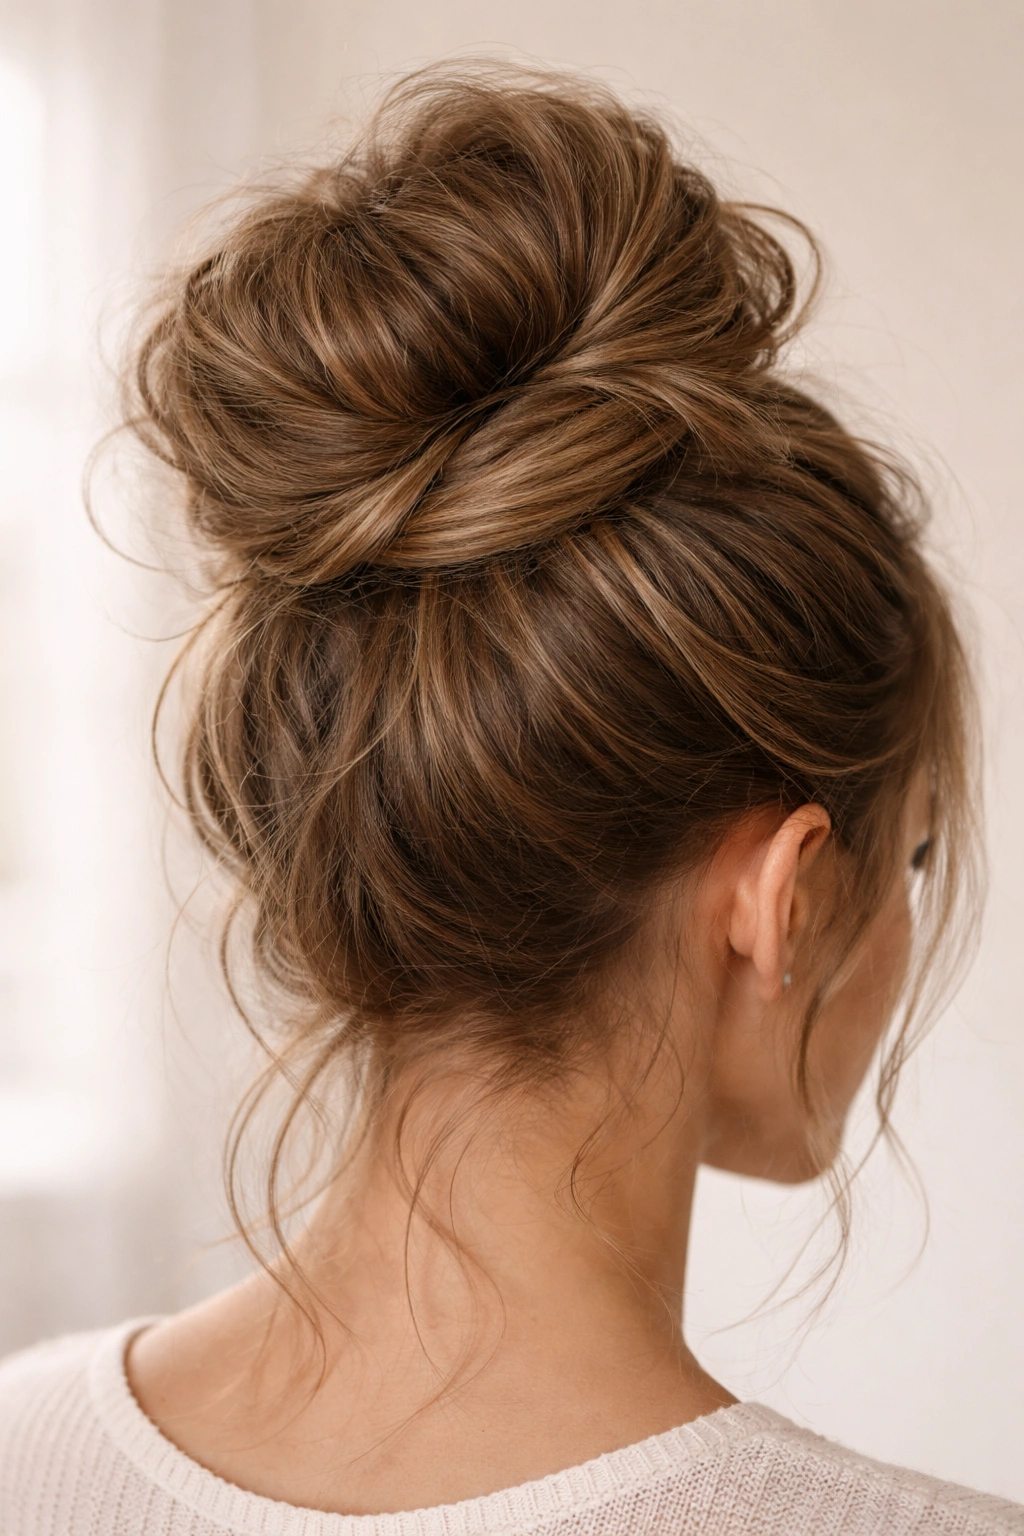
The Textured Wrap is perfect for thick hair because it uses your hair’s own weight and texture to stay put. Instead of creating one tight bun and hoping it holds, you’re making a looser bun at the crown and then wrapping sections of hair around the base to anchor everything. This style looks intentionally disheveled while actually being quite secure.
How to Create It
Blow-dry your hair with some texture—straight hair will slip out of this style, but wavy or slightly curled hair grabs and holds beautifully. Create a high ponytail at your crown using a elastic that matches your hair color. Don’t worry about making it perfect; a little messiness at this stage is actually what you want.
Loosely twist or coil the ponytail and pin it into a bun shape at the base of the elastic. Don’t tighten it—it should look relaxed and full. Now, take a section of hair from one side and wrap it around the base of the bun, tucking the end underneath and pinning it. Repeat on the other side and back. These wraps should be loose and textured, not sleek.
Why It Works for Thick Hair
This technique uses the weight of your thick hair strategically. The wraps anchor your bun at multiple points around the base, so weight is distributed all around instead of pulling down from one central point. The texture and loose construction also mean your hair has more grip on itself—straight, slick hair would slide apart, but textured thick hair stays where you pin it.
Pro Tip
The day after you wash your hair is ideal for this style. Your hair will have natural texture and grit that helps it grip and hold. If your hair is freshly washed and slippery, add some dry shampoo to your roots and mid-lengths about 30 minutes before styling.
3. The Double Bun
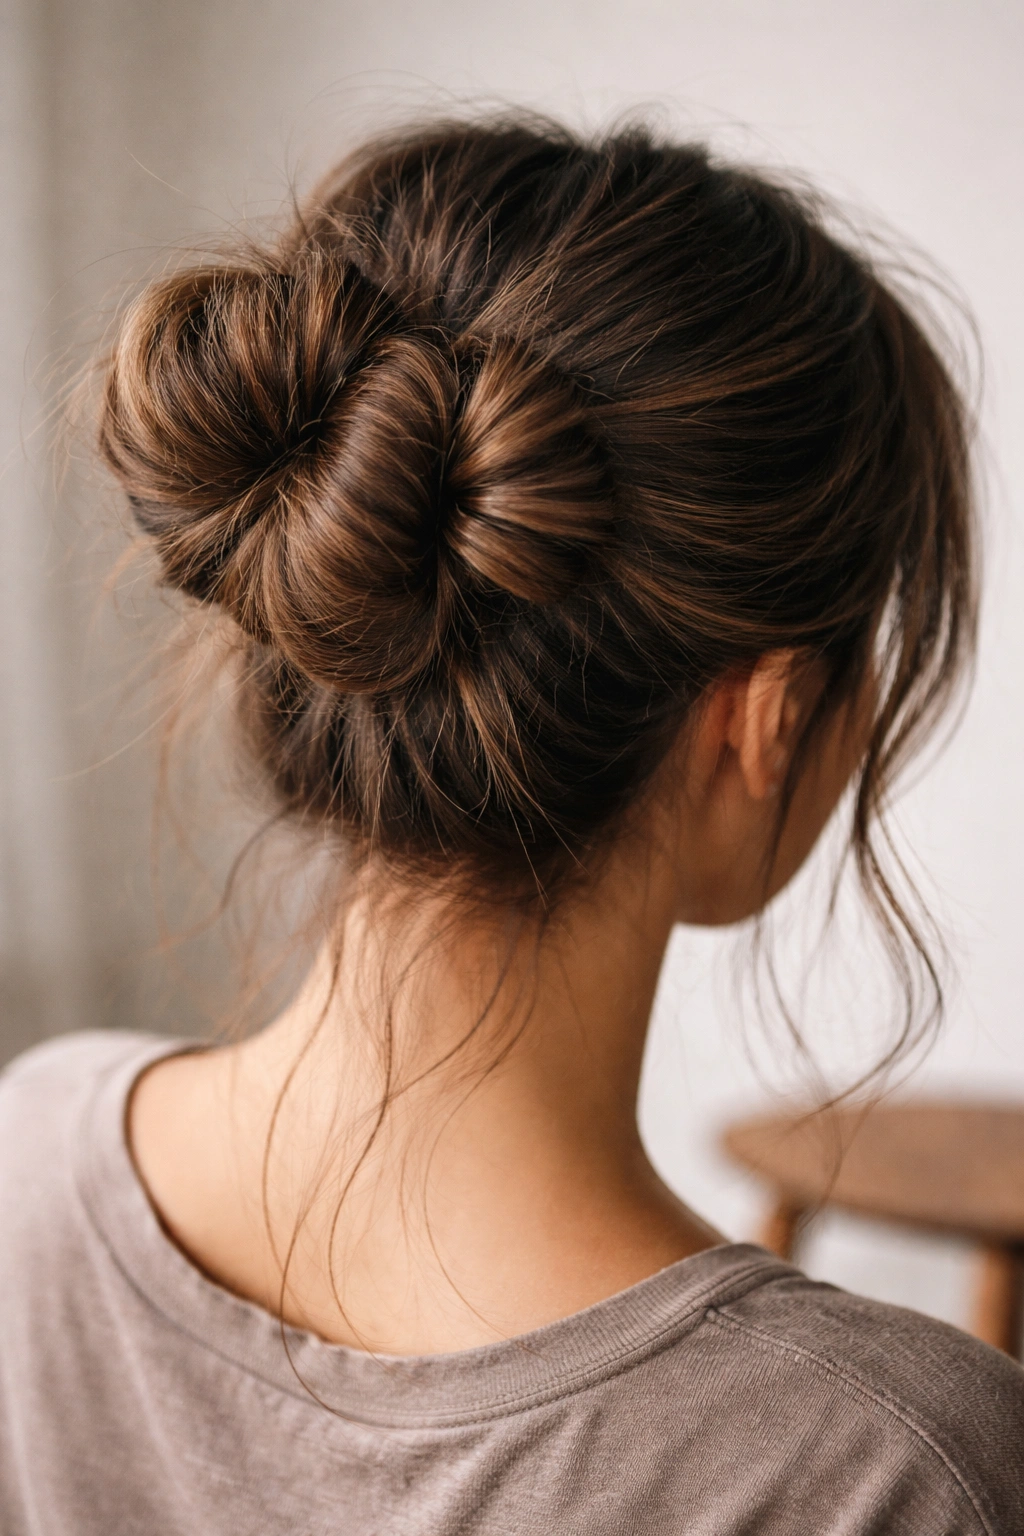
Don’t let the name fool you—the Double Bun isn’t actually two separate buns. It’s one bun made from two separate ponytails that twist together. This technique is genius for thick hair because it cuts your hair volume in half while creating both texture and security.
How to Create It
Create two ponytails at your crown—think of them as left and right halves, with one elastic on each side. They should sit close together, almost touching. Twist the left ponytail clockwise and the right ponytail counterclockwise, then wrap them around each other to create a braided effect. Coil this twisted pair into a bun at the base of the ponytails and pin it securely.
Let a few pieces fall loose around your face and at the nape of your neck for that undone vibe. The messiness is built in because working with two separate sections naturally creates some flyaways and texture.
Why It Works for Thick Hair
By splitting your ponytail into two, you’re working with smaller, more manageable sections. Each section is still substantial (because you have thick hair), but not so heavy that one section can’t stay twisted and secure. The twist-around-each-other movement creates double the friction points, which means your bun practically locks itself into place. Plus, the twisted effect looks way more interesting than a simple coiled bun.
Pro Tip
If your bun starts to feel loose by afternoon, you can quickly tighten it by gently pulling a few of the outer wrapped twists. This redistributes the hair and re-secures everything without needing to take the whole thing down.
4. The Half-Up Messy Bun
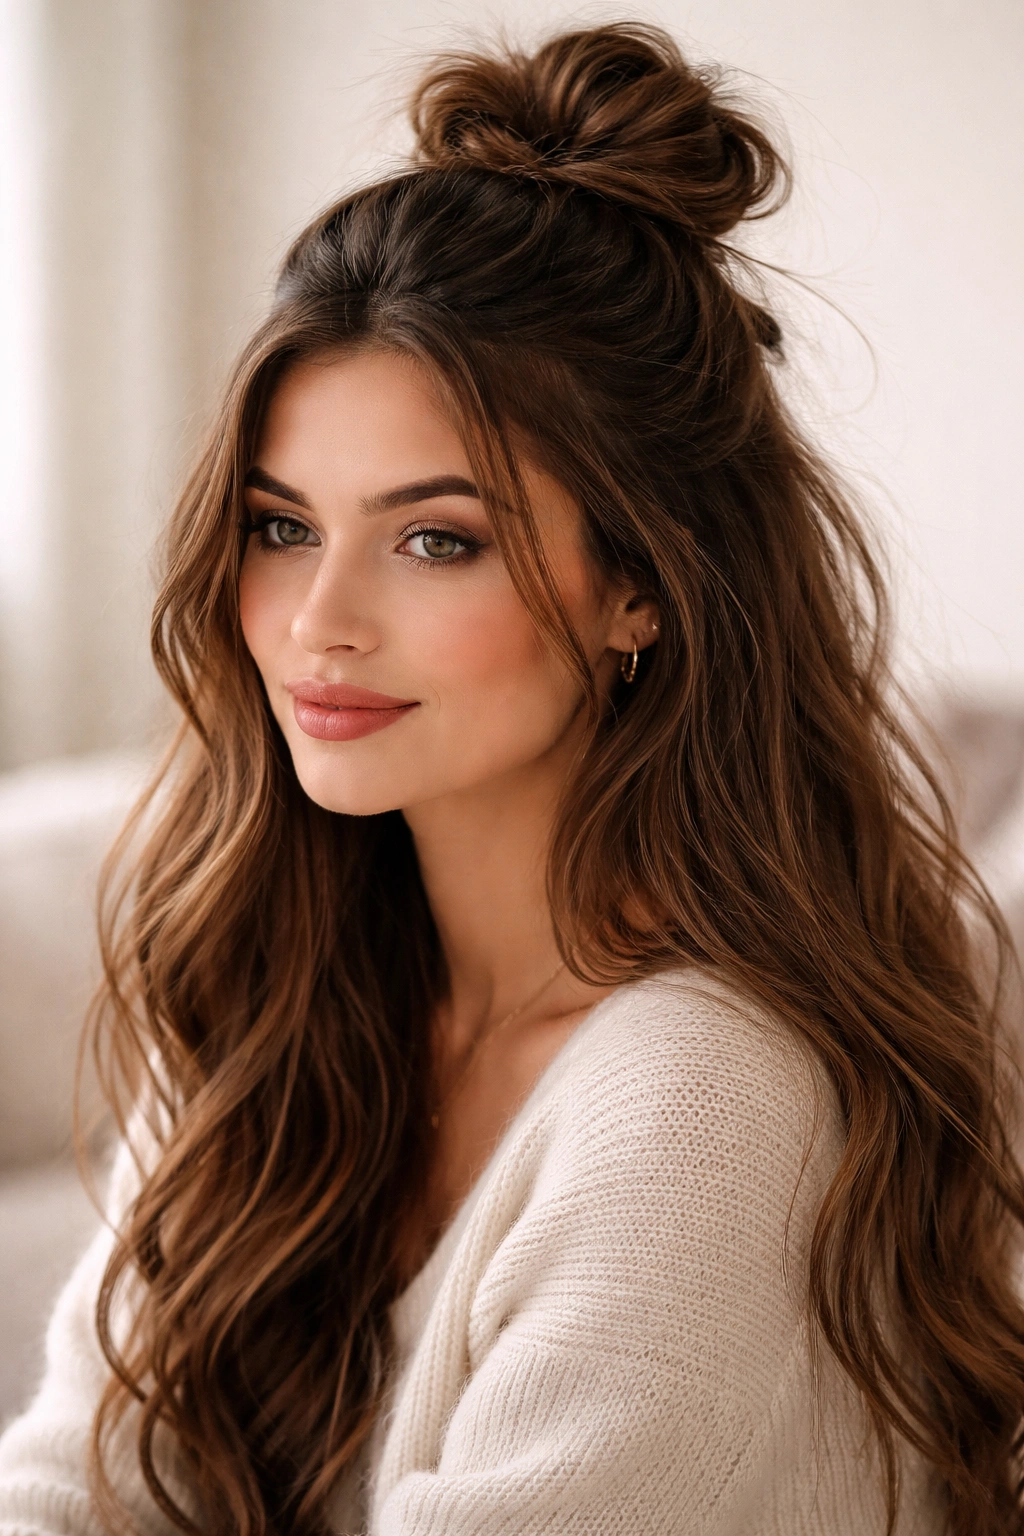
This is the perfect messy bun for days when you want your hair down but still off your face, or when your thick hair is just too heavy for a full bun but you need something more polished than wearing it completely loose. The Half-Up Messy Bun works with your hair’s weight instead of against it.
How to Create It
Take a section of hair from your temples on both sides—roughly the width of your fingers—and bring it back to the crown area. Don’t make this section too thick; with thick hair, you have plenty to work with, so a moderate amount is enough. Secure this section loosely with an elastic, leaving it slightly loose rather than tight.
Create a small bun from this ponytail at the crown or slightly higher, then pull a few face-framing pieces loose and let the back section fall naturally. Take sections from the lower back and gently wrap them around the base of the bun to add dimension and anchor it, pinning as you go. The result should look like you casually gathered some hair and happened to style it into a bun—not that you carefully planned it.
Why It Works for Thick Hair
Half-up styles automatically solve the weight problem because you’re not lifting your entire head of hair. You’re only working with the top portion, which means the base of your bun isn’t carrying the weight of your entire mane. The remaining hair down your back adds visual balance and makes the style look intentionally partial rather than like the full bun didn’t work out.
Pro Tip
For this style, intentionally leave your bottom layers slightly straighter or wavier than your top section. This creates natural contrast and texture without requiring extra styling time.
5. The Braided Base Bun
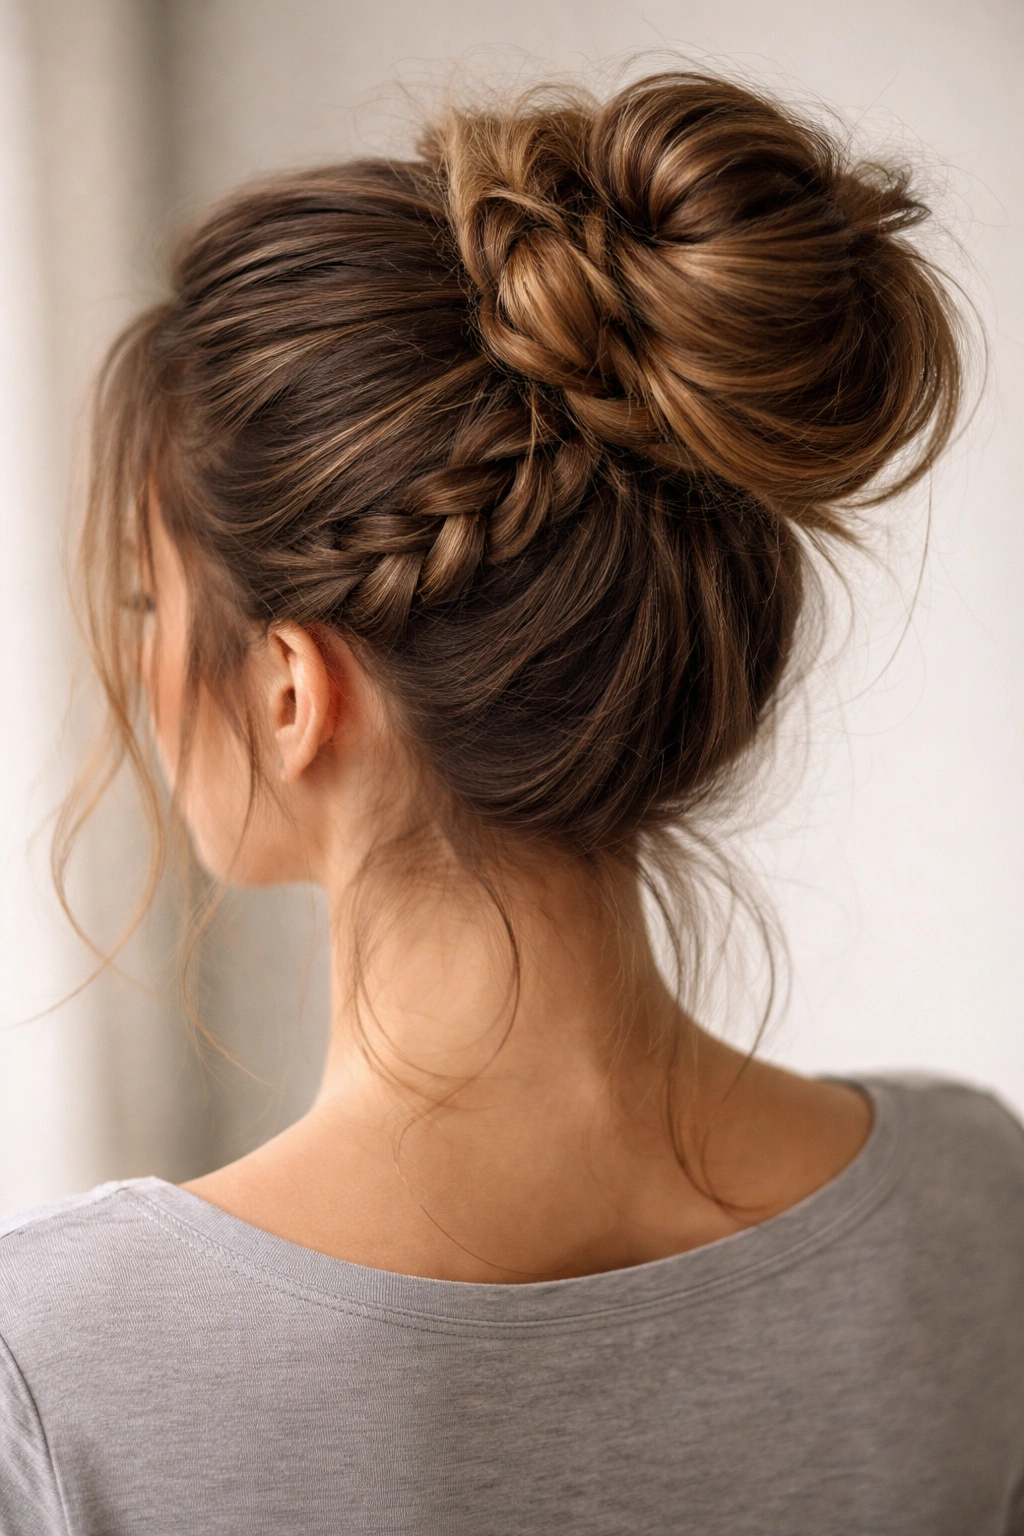
Braids are a thick-hair secret weapon because they lock in volume and create incredible grip. The Braided Base Bun uses a Dutch or French braid to create an anchor at the base of your bun, which means your entire bun is supported by a structure designed to hold thick hair securely in place.
How to Create It
Create a high ponytail at your crown and secure it with an elastic. Now, create a Dutch braid (reverse braid) along the base of this ponytail, starting at one side and going around. This braid weaves around the elasticized base of your ponytail, creating an intricate, textured foundation.
Once your braid is complete and connects back to your starting point, you have a braided ring around the base. Now coil your ponytail loosely inside this braided ring and pin everything in place. The braid acts like an anchor, and your bun sits inside it. Pull pieces loose for that messy texture.
Why It Works for Thick Hair
Braids are one of the few hairstyles that actually get stronger and more secure when you have thick hair. Each strand in your braid has more weight and grip. The braided base creates a literally structural anchor for your bun—it’s not just pretty, it’s functional. Your bun is held in place by the braid underneath it, not just by bobby pins hoping for the best.
Pro Tip
This style looks even more stunning if you Dutch braid instead of a traditional French braid. The raised braid creates more texture and visual interest, and it’s also slightly easier to manage when you’re braiding around a ponytail.
6. The Claw Clip Bun
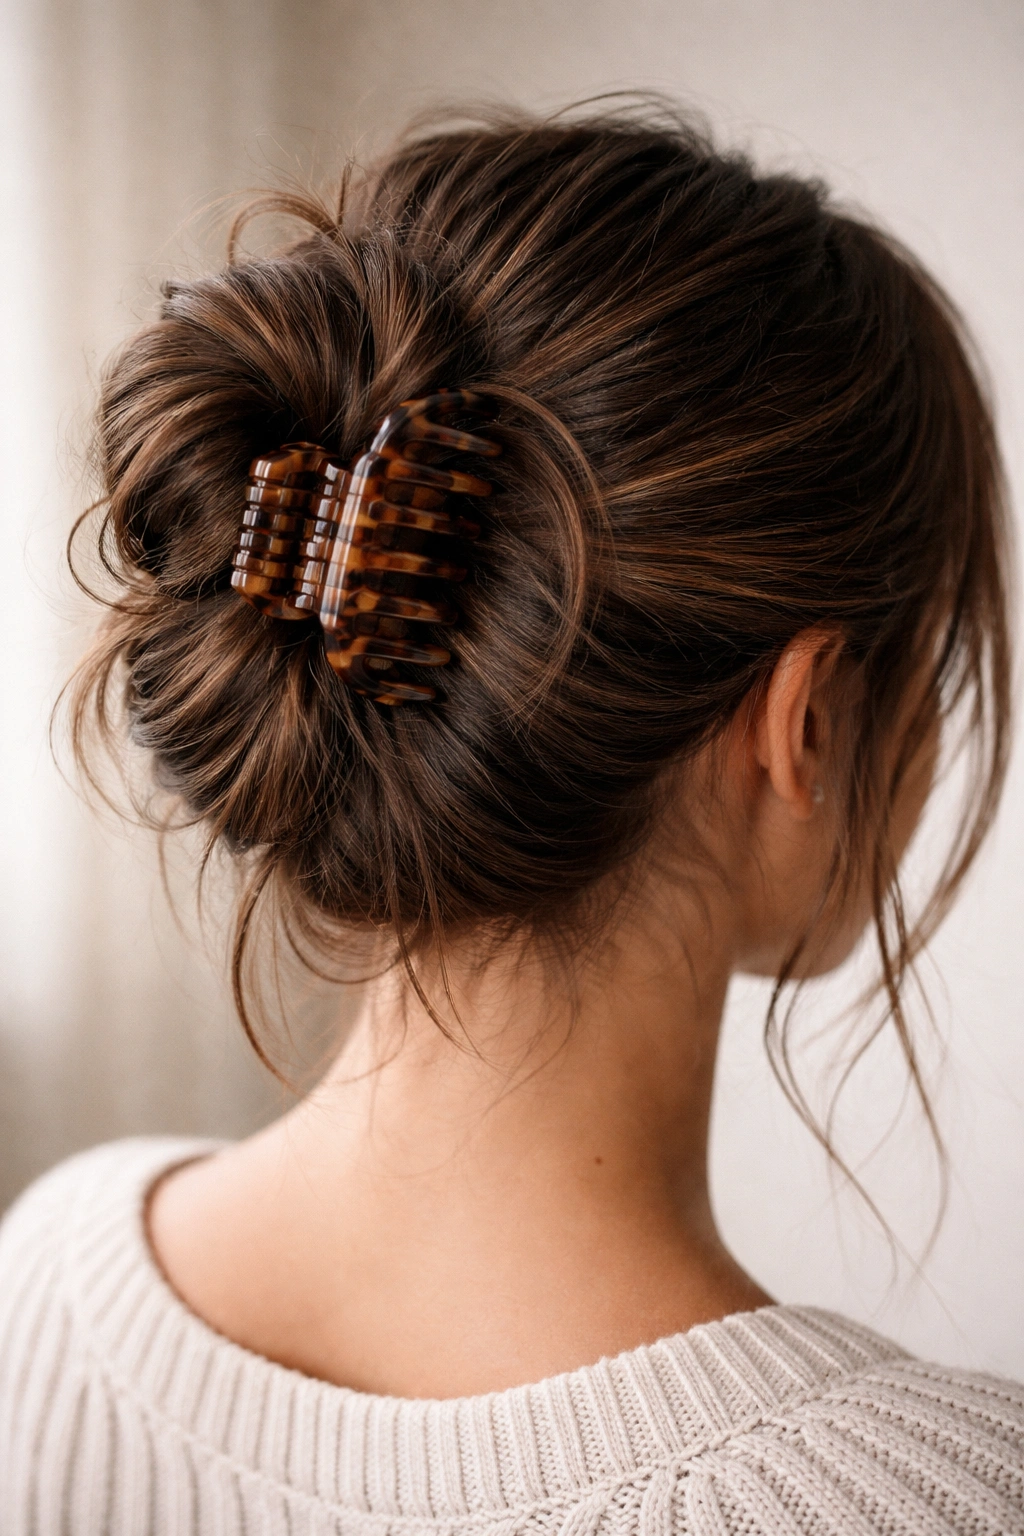
The Claw Clip Bun is straightforward and surprisingly elegant, especially with thick hair. A large claw clip can actually handle the weight of substantial hair without it sliding right out—this is one of the few styles where thick hair is genuinely an advantage over fine hair. The key is using a clip that’s actually large enough.
How to Create It
Create a high ponytail and secure it temporarily with a small elastic. Twist or gently coil the ponytail and position it where you want your bun to sit. Hold it in place with one hand while you remove the elastic with your other. Immediately clamp the hair in place with a large claw clip (aim for clips 3 inches or longer).
The clip should grip the twisted bun base, holding all your hair securely. Pull out a few pieces for that undone look—with thick hair, you can afford to pull out slightly bigger sections without destabilizing the whole bun.
Why It Works for Thick Hair
Large claw clips are designed to hold medium to thick hair. They physically grip the hair rather than relying on bobby pins and tension, which makes them particularly effective for weight distribution. The clip itself becomes the anchor point, so you don’t need to worry about your bun slipping down throughout the day. This is also the fastest messy bun style you can create.
Pro Tip
For extra security, you can use both a small elastic at the base of the ponytail AND the claw clip. The elastic creates the initial ponytail, and the clip secures the bun. This gives you backup hold in case the clip starts to loosen during the day.
7. The Sleek Wrapped Bun with Texture
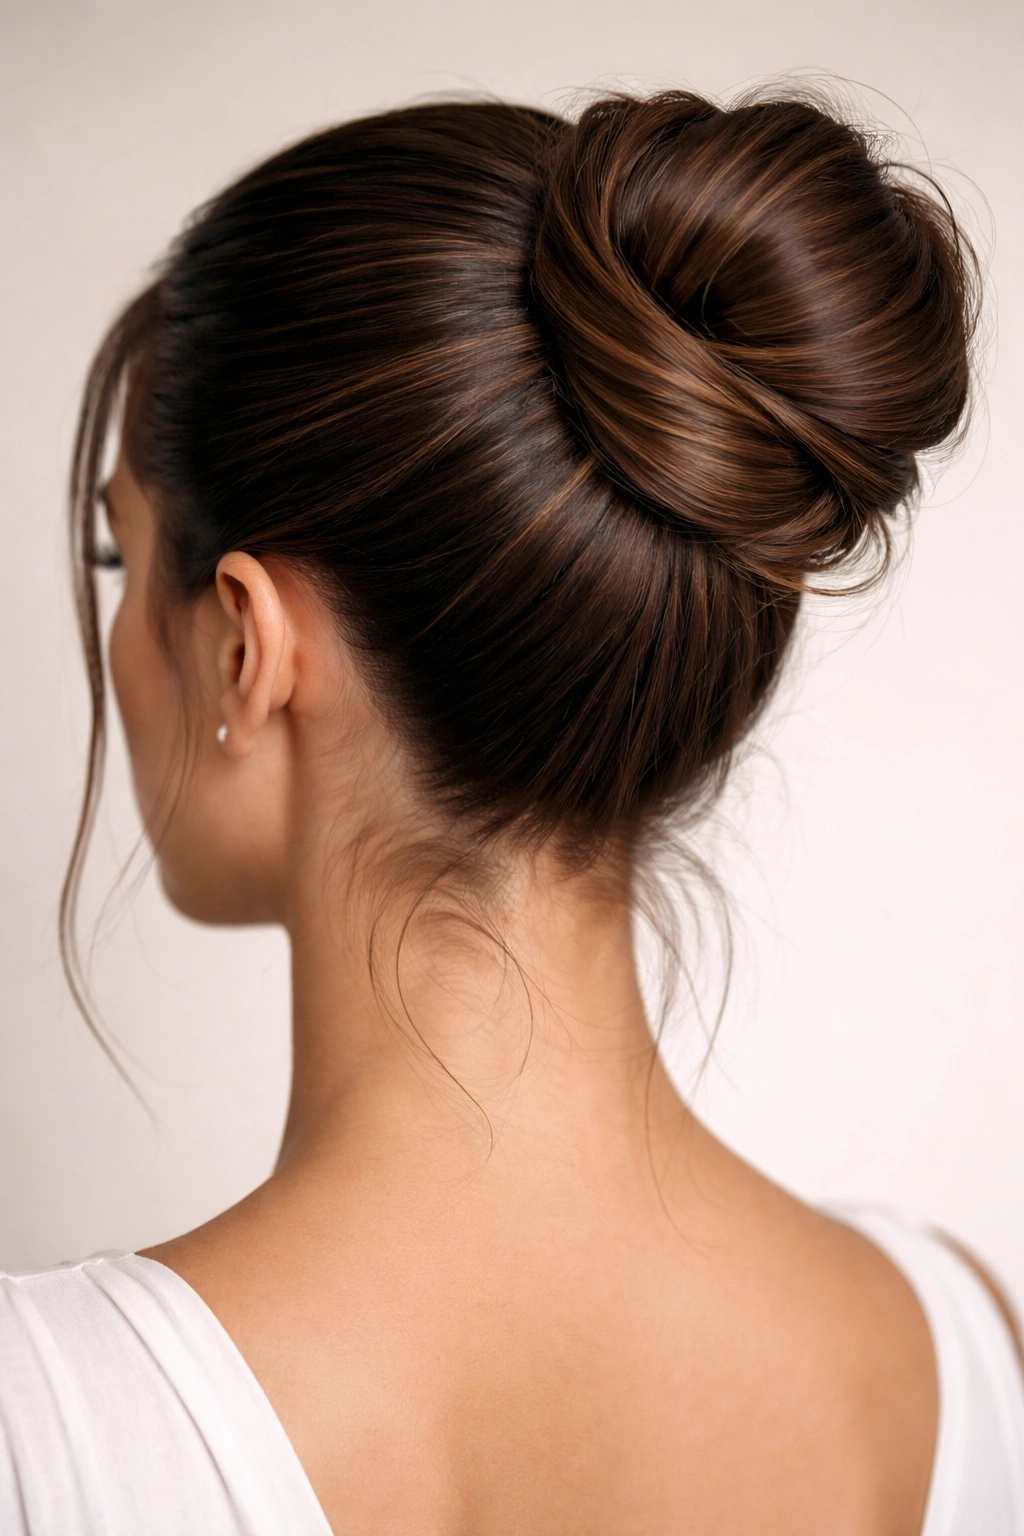
This style is your answer for days when you want your bun to look intentionally polished but still effortlessly beautiful. The Sleek Wrapped Bun uses sleek hair at the crown with textured sections wrapped around the base—it’s the best of both worlds for thick hair that can handle both looks.
How to Create It
Use a gel or smoothing serum to create a sleek, tight ponytail at your crown. The sleekness should be visible—this is the polished part of the style. Secure it with a thin elastic and coil the ponytail into a compact bun directly at the base of the ponytail. Pin it securely.
Now, section out a portion of hair from underneath (the back and sides) and backcomb it slightly to add texture. Wrap these textured sections around the base of your sleek bun, pinning them as you go. The contrast between the sleek crown and the textured wraps creates dimension and that carefully undone aesthetic.
Why It Works for Thick Hair
With thick hair, you can achieve both sleekness and texture in one style without the bun looking skimpy or unfinished. The textured wraps add visual softness to the sleek base, and with your hair volume, everything looks intentional rather than like you couldn’t decide on a style.
Pro Tip
Curl the ends of your textured wrap sections slightly before pinning them. The curled ends will sit on top of the bun and catch the light, creating even more visual texture and interest.
8. The Undone High Bun
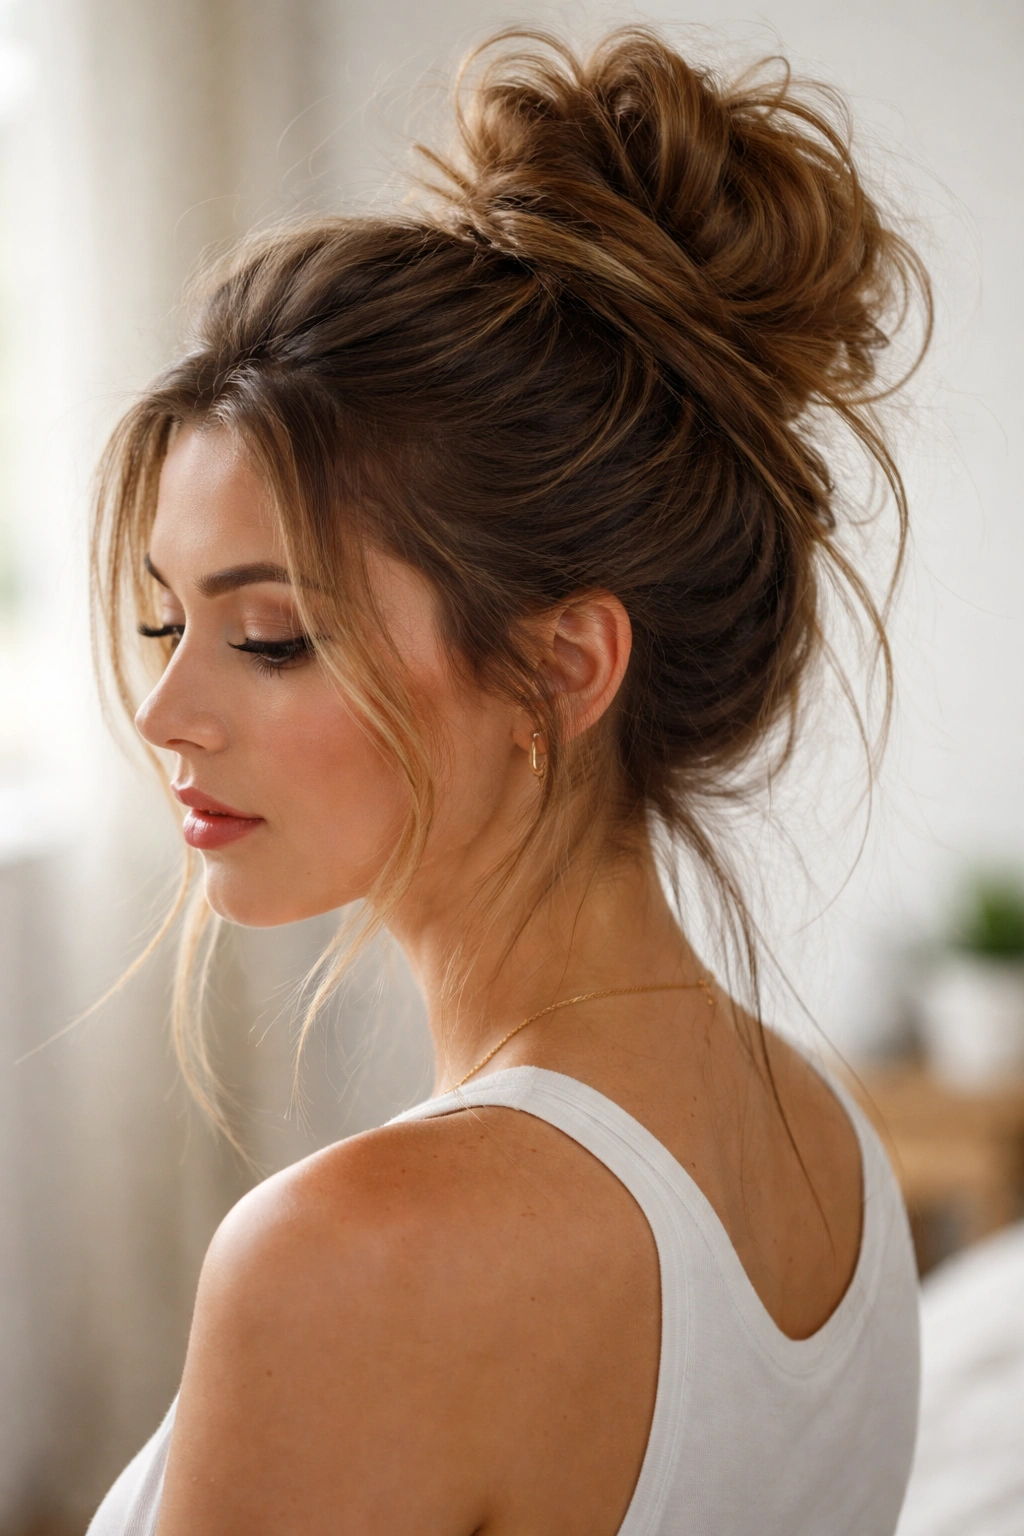
Sometimes the most effortless-looking bun is simply a high ponytail coiled loosely at the crown with strategic flyaways and a few pieces pulled down. This style works beautifully with thick hair because the volume itself creates all the texture you need—you’re not trying to manufacture messiness, it’s naturally there.
How to Create It
Create a high ponytail at your crown using a clear or color-matched elastic. Don’t make it tight—this should be a relaxed ponytail with a bit of movement. Gently coil the ponytail around the base elastic into a loose bun. Instead of pinning it perfectly in place, use just 2-3 bobby pins placed strategically to keep it from rotating, but leave the overall shape loose and undone.
Pull pieces out intentionally around your face and hairline, and let some shorter layers fall naturally at the nape of your neck. With thick hair, you might also gently pull a few small sections from inside the bun to add texture and height. Don’t overthink it—the point is to look like you threw your hair up without much effort.
Why It Works for Thick Hair
This style works because you’re not trying to compress or control your hair excessively. Thick hair naturally wants to be voluminous, and this bun lets that happen. The loose construction means your heavy hair isn’t pulling tight against your scalp all day, and the strategic pins keep everything in place without creating tension. It’s genuinely comfortable while still looking intentional.
Pro Tip
This is the ideal style for second-day hair. Your hair will have natural texture and grit that keeps it from slipping, plus the slight oiliness at the base keeps everything anchored. If you’re doing this style on freshly washed hair, it will feel looser throughout the day, so plan to re-anchor it with a bobby pin or two by afternoon.
Essential Techniques for Thick-Hair Buns
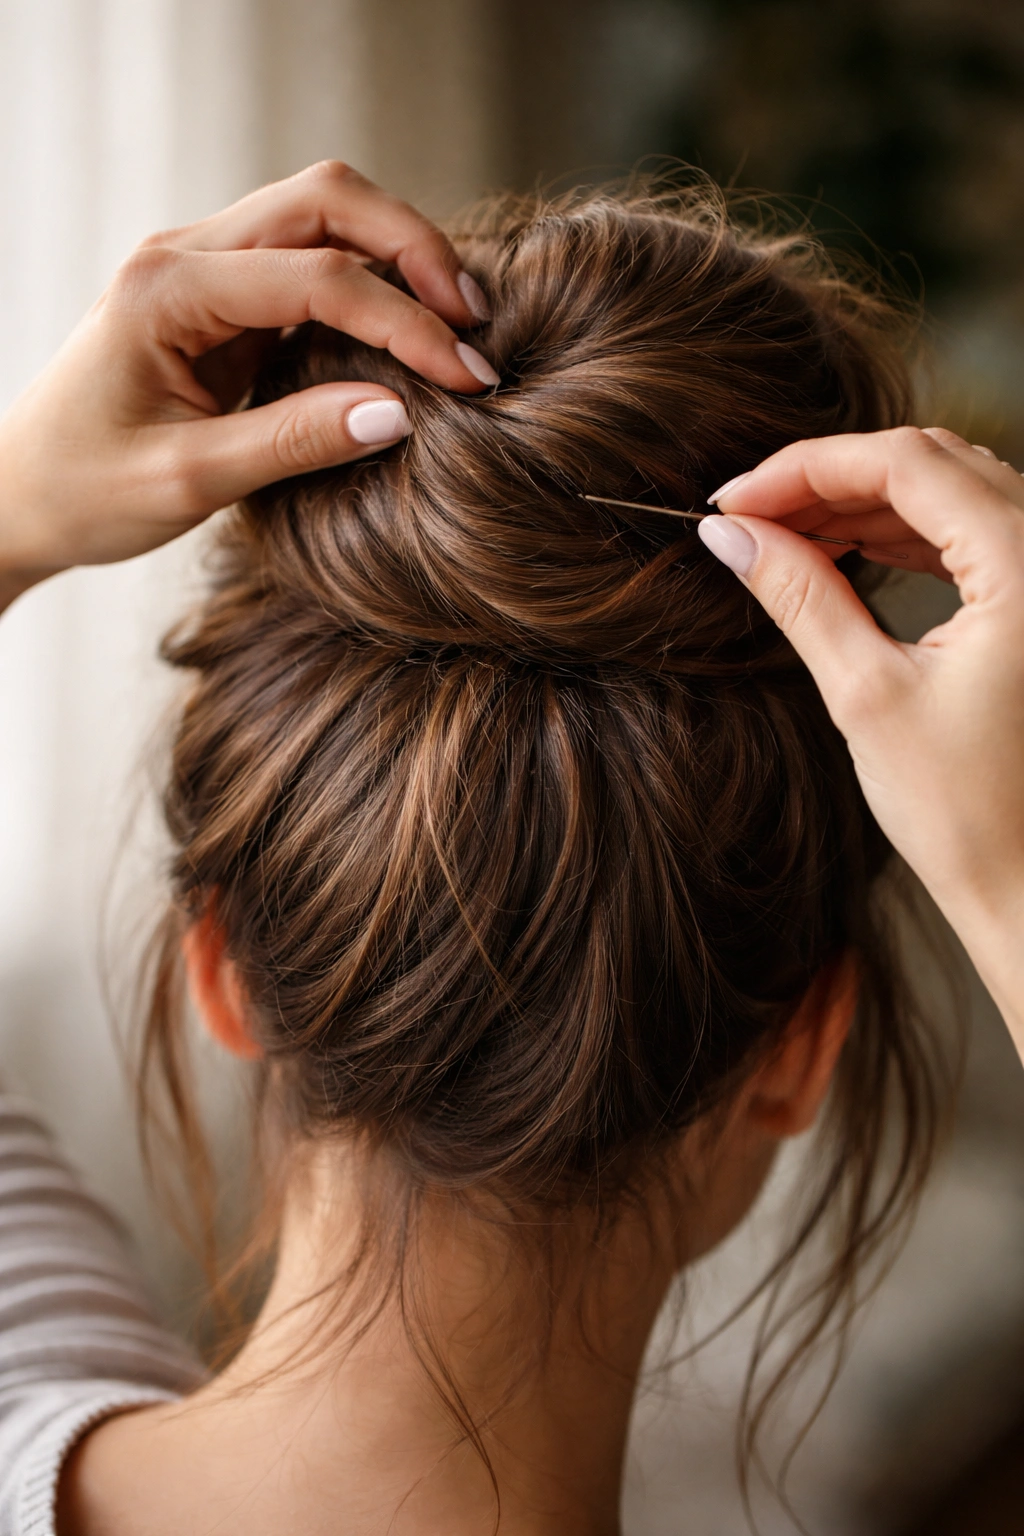
Certain techniques will make every single messy bun style more successful with thick hair. Master these and you’ll feel confident trying any bun variation.
Twisting for Grip
Twisting your hair creates friction between strands, which is your best friend with thick hair. When you twist a section of hair and pin it, the twist itself prevents the hair from slipping. This is why most of the styles above include a twisting element. The tighter your twist, the more grip you create—though “tight” doesn’t mean painful. A firm twist with slight tension is ideal.
Distributing Weight Strategically
Thick hair is heavy, so one ponytail holder at your crown is carrying significant weight. Distribute this load by creating multiple anchor points. Use bobby pins placed horizontally through your bun (they grip better than vertical pins), wrap sections around your base, or braid your hair before bun-ing. The more places your hair is pinned or secured, the better your bun will hold throughout the day.
Backcomb for Texture and Hold
Light backcombing on the underside of your bun adds grip without creating that ratty, over-teased look. You’re not trying to create texture on the top surface (your hair’s weight and volume already does that)—you’re creating microscopic grip on the underside where it’s hidden. This helps your bobby pins catch the hair more effectively.
Using the Right Bobby Pins
Not all bobby pins are created equal. For thick hair, longer bobby pins (2 inches instead of 1.75 inches) give you better grip. Wavy bobby pins grip better than straight ones. And using 2-3 pins per section, placed horizontally through the bun, creates more security than scattered pins. Buy quality pins in a color that matches your hair—they disappear when placed correctly and actually stay in place.
Products and Tools That Support Thick-Hair Buns
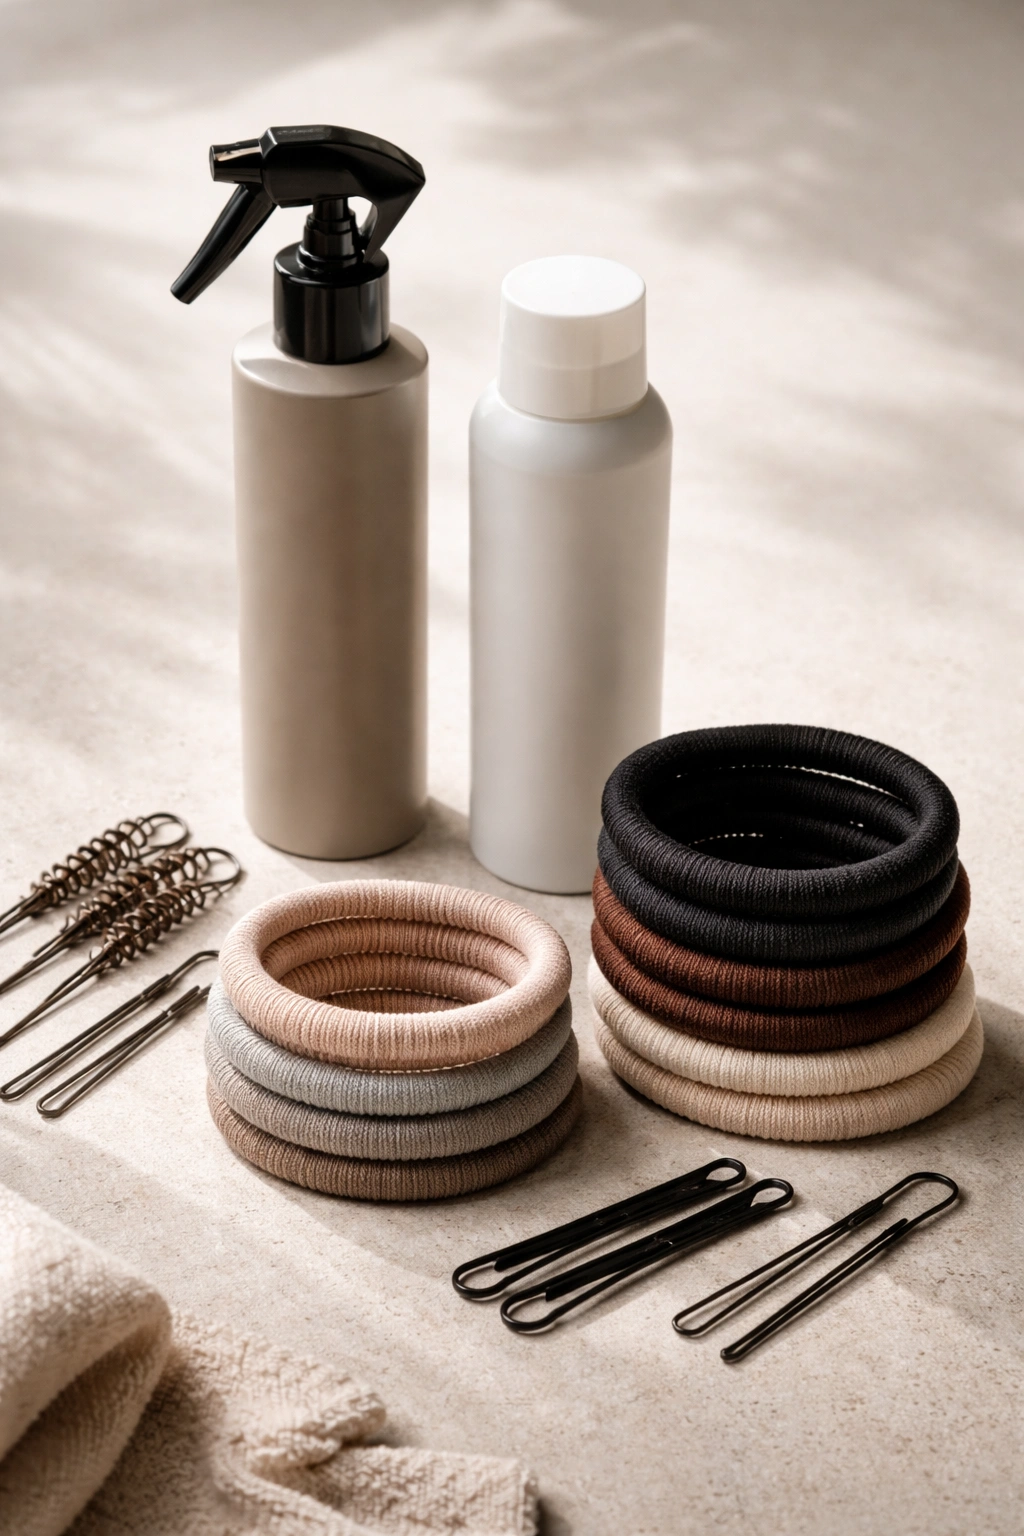
Your styling tools matter as much as your technique when you’re working with thick hair. Having the right arsenal makes the difference between a bun that lasts all day and one that falls apart by lunchtime.
Texturizing Products
Products that add grip to your hair dramatically improve bun hold. Dry shampoo at the roots adds oil-absorbing particles that bobby pins can grip. Texturizing sprays add grit throughout your hair. Sea salt sprays create that beachy texture that naturally holds buns better. Apply these products 30 minutes before styling, so they have time to set into your hair.
Apply texturizing products to your mid-lengths and ends if you’re planning to wrap sections around your bun base. This gives those wrapped sections more grip on the bun underneath. You don’t need much—a light spray or a few spritzes is enough.
Hair Elastics
Invest in high-quality elastics made from fabric-wrapped materials (not bare rubber bands). These distribute pressure evenly and don’t create creases or stress on your hair. For thick hair, use elastics that are genuinely thick enough to wrap around your volume—thin elastics that barely stretch across your ponytail will slip out. Clear or color-matched elastics are your friends; colored patterns show in your finished bun.
Bobby Pins That Actually Work
Buy bobby pins in bulk from professional beauty supply stores, not ones from department stores. Professional pins are actually thicker, stronger, and have better wavy texture for gripping. For thick hair, stock your collection with 2-inch pins and wavy pins. Keep them in your bag because you’ll likely need to re-anchor your bun once during the day.
Claw Clips for Heavy Hair
Not all claw clips are created equal. Look for ones labeled for thick hair, which are physically larger and have a tighter grip mechanism. Test a clip before buying by seeing if it can hold the weight of your hair when you clamp it shut. If it feels loose, it won’t work. A good claw clip for thick hair costs $8-15 and will last years.
Styling Creams and Gels
A light styling cream applied to damp hair before blow-drying creates texture and grip without making your hair crunchy. A gel can smooth flyaways without flattening your bun. Apply creams to your roots and mid-lengths before drying; apply gel only to specific flyaways after your bun is complete. With thick hair, a little goes a long way—more product doesn’t equal better hold.
Styling Tips for Maximum Hold
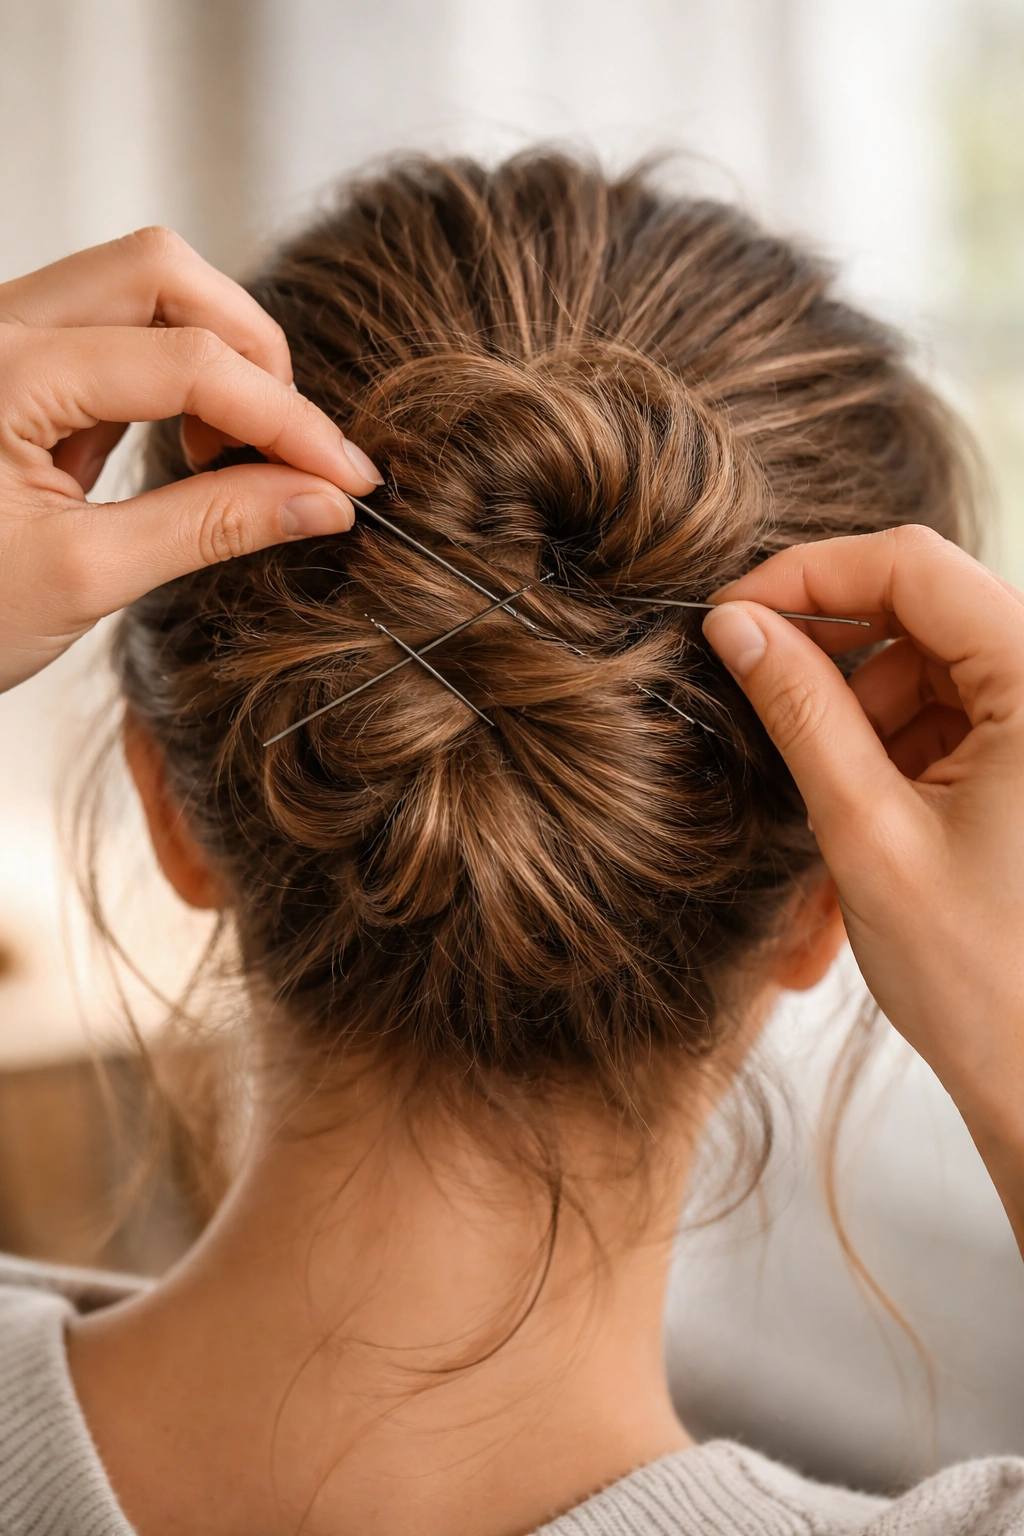
Beyond technique and products, a few styling practices will significantly improve how long your bun stays secure.
Use your blow dryer strategically. After creating your bun, direct cool air at the base for 30 seconds. This helps set your bobby pins and create a grip point. Never blow-dry hot air directly at your finished bun—this can loosen pins and create flyaways.
Pull bobby pins tight as you place them. Press down firmly on the pin as you push it through your hair so it’s snug, not loose. A loose bobby pin is essentially decorative. You should barely be able to move the pin side to side once it’s in—that’s how you know it’s actually securing your hair.
Create a backup system. Use bobby pins horizontally through the base of your bun, but also cross-pin by adding vertical pins that go through the twisted or coiled bun from top to bottom. Two pins worked together grip better than one. This is especially important with thick hair because you have the hair volume to support multiple pins without looking over-pinned.
Re-anchor your bun at mid-day if needed. Keep a bobby pin in your bag. By early afternoon, you might notice your bun has shifted slightly. A single well-placed pin can tighten everything back up without needing a full re-do.
Final Thoughts
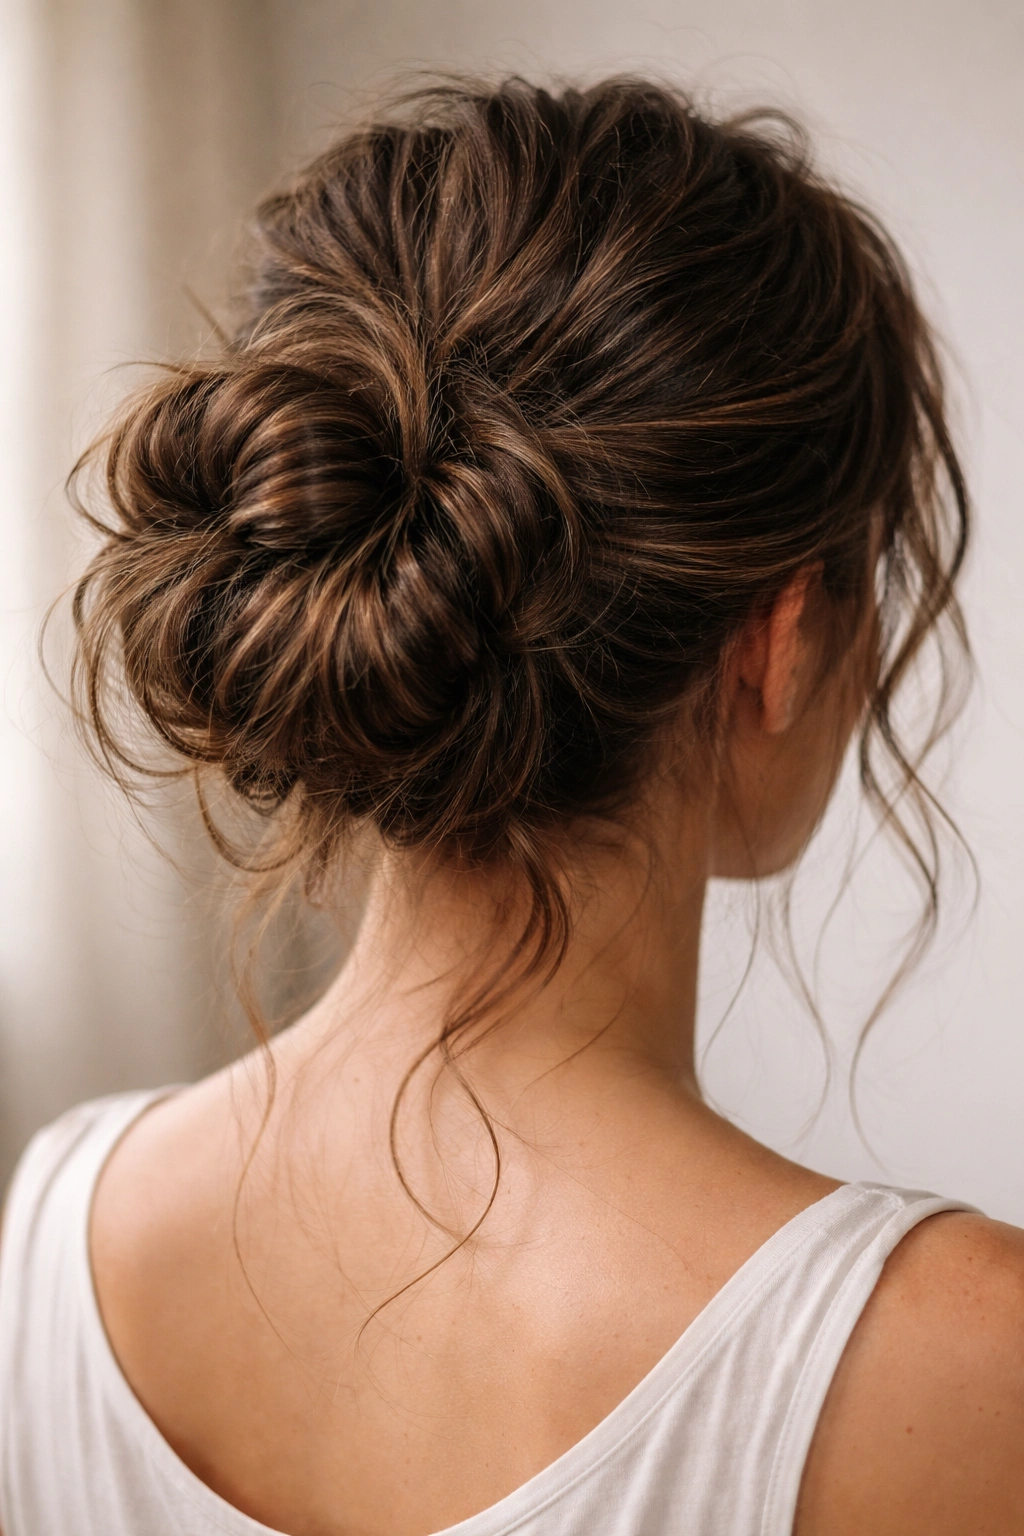
Thick hair and messy buns are actually a perfect match when you know the right techniques. Your hair has the volume to create genuinely beautiful, textured buns, and the weight to keep them in place all day—if you’re using the right methods. The styles in this guide all leverage thick hair’s natural strengths: its ability to hold twists, its substantial texture, and its capacity to be distributed across multiple anchor points.
The real secret isn’t some special technique or expensive product. It’s understanding that thick hair needs different strategies than other hair types, and approaching your bun with that knowledge. Twisting creates grip. Multiple anchor points distribute weight. Strategic wrapping adds security. Once you internalize these principles, you can take any messy bun style you see and adapt it for your thick hair with confidence.
Start with whichever style appeals to you most—The Twisted Tower if you want maximum security, The Claw Clip Bun if you want simplicity, or The Half-Up if you want something lighter. Practice that one until you can do it in the dark. Then branch out to other styles knowing that the same grip-creating, weight-distributing principles apply to all of them. You’re not fighting your thick hair anymore. You’re finally using it to your advantage.
