



The messy bun gets reinvented every season, but there’s something uniquely polished about knotted versions — they look intentional, sophisticated, and far more interesting than a basic twist-and-pin situation. Whether you’re heading to brunch, the office, or a casual date night, a knotted messy bun gives you that “effortlessly put-together” vibe without looking overly formal or try-hard. The beauty of tying actual knots into your bun base is that they add visual texture and hold your style in place longer than traditional messy buns, which means less slipping and re-pinning throughout the day.
The six styles we’re exploring here range from super sleek interpretations to textured, undone versions that work on every hair type and length. Some take just five minutes once you understand the technique, while others let you lean into a slower-paced morning and really customize the look. Most importantly, each one can be dressed up or down depending on your mood and the occasion — a knotted bun works just as well at the gym as it does at a wedding. Let’s break down exactly how to master each style, plus the specific tricks that make the difference between a bun that looks polished and one that falls flat.
1. The Sleek Knotted Topknot
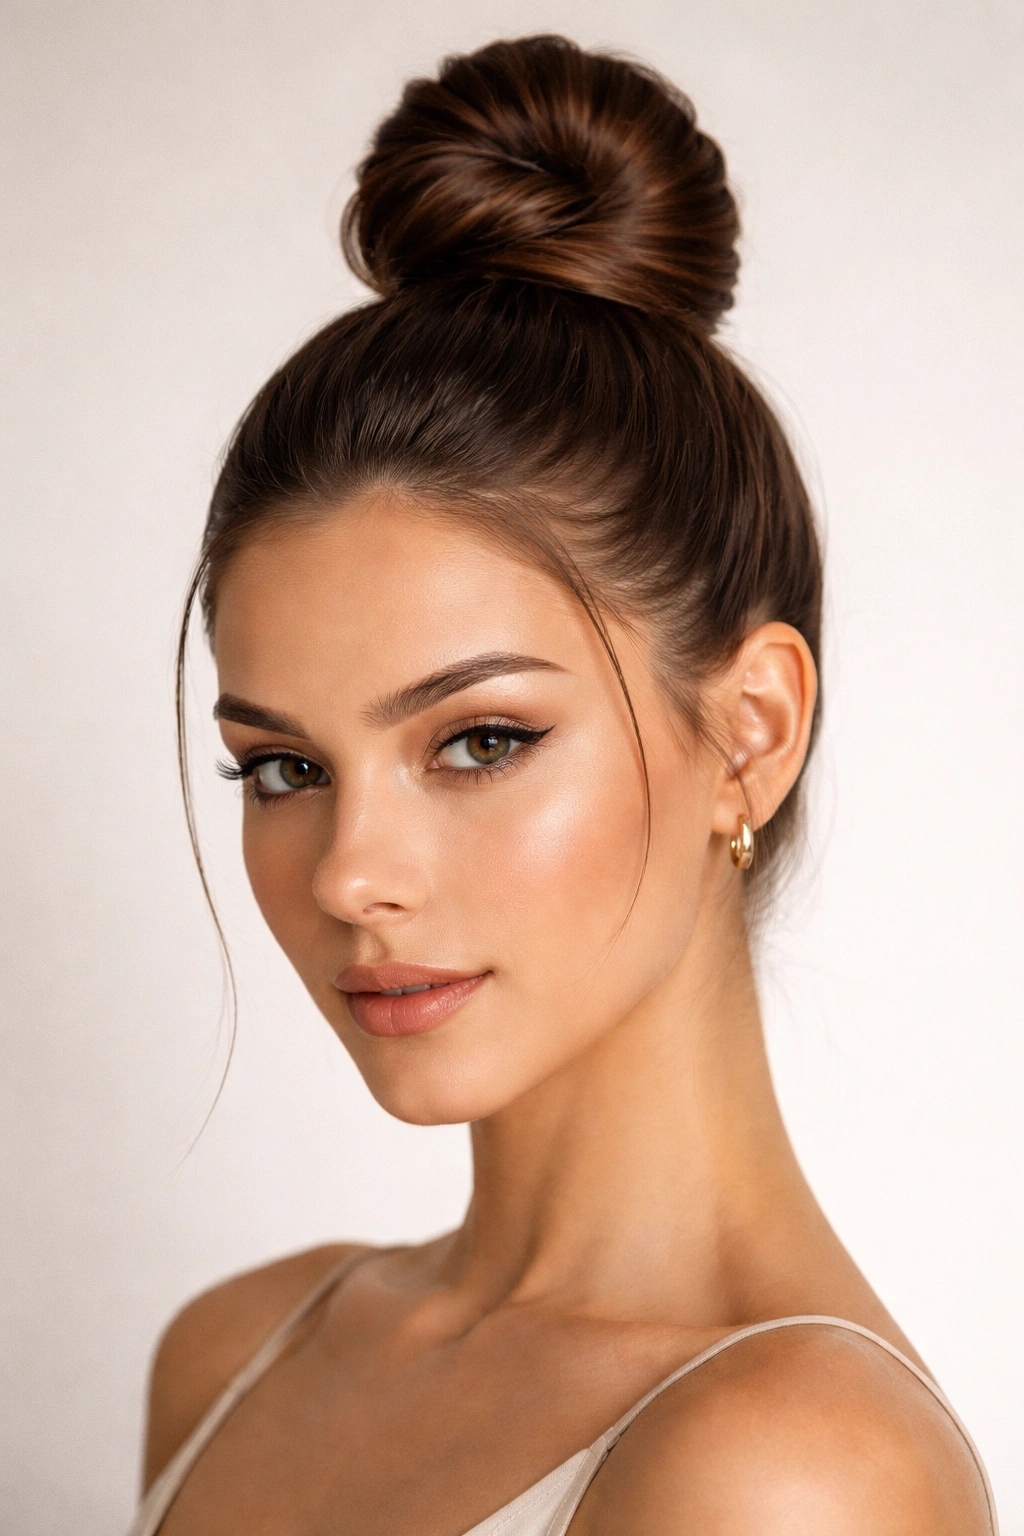
This is the version that sits high on your crown and feels intentional from every angle. Rather than a standard topknot where you’d simply pull hair into a high ponytail and twist it around the base, a sleek knotted topknot involves actually tying the ponytail into a knot before you wrap it into the bun shape. The knot creates a denser base that photographs beautifully and holds better under movement.
How to Create the Perfect Structure
Start by brushing your hair straight back and gathering it into a high, centered ponytail. The key to “sleek” here is using a smoothing serum or gel on your hairline and around the crown — this eliminates flyaways and gives your scalp a polished appearance. Use a fine-tooth comb to smooth out the ponytail itself, working section by section from roots to ends. Once your ponytail is smooth and secure, divide it in half vertically, creating two sections of hair hanging from your elastic.
Step-by-Step Knotting Technique
- Cross the right section over the left section, creating an X shape with your ponytail
- Pull the right section through the opening you just created, completing the knot just like you’d tie a regular knot with rope
- Tighten the knot by pulling both sections simultaneously, keeping it close to your hair elastic — the tighter you pull, the more secure your final bun will be
- Wrap both sections around the knot’s base, coiling them underneath and around the original knot shape, and secure with bobby pins tucked underneath
- Use a smoothing spray or light hairspray to tame any texture and add hold
This style works beautifully on straight or wavy hair, and the knot structure is visible enough to add visual interest. On curlier textures, you might want to lightly smooth sections with a flat iron before knotting to achieve that sleek finish.
Pro tip: This bun stays put longer if you use an elastic with grips built in — they prevent the ponytail from sliding, which means your knot won’t loosen throughout the day.
2. The Twisted Wrap-Around Knot Bun
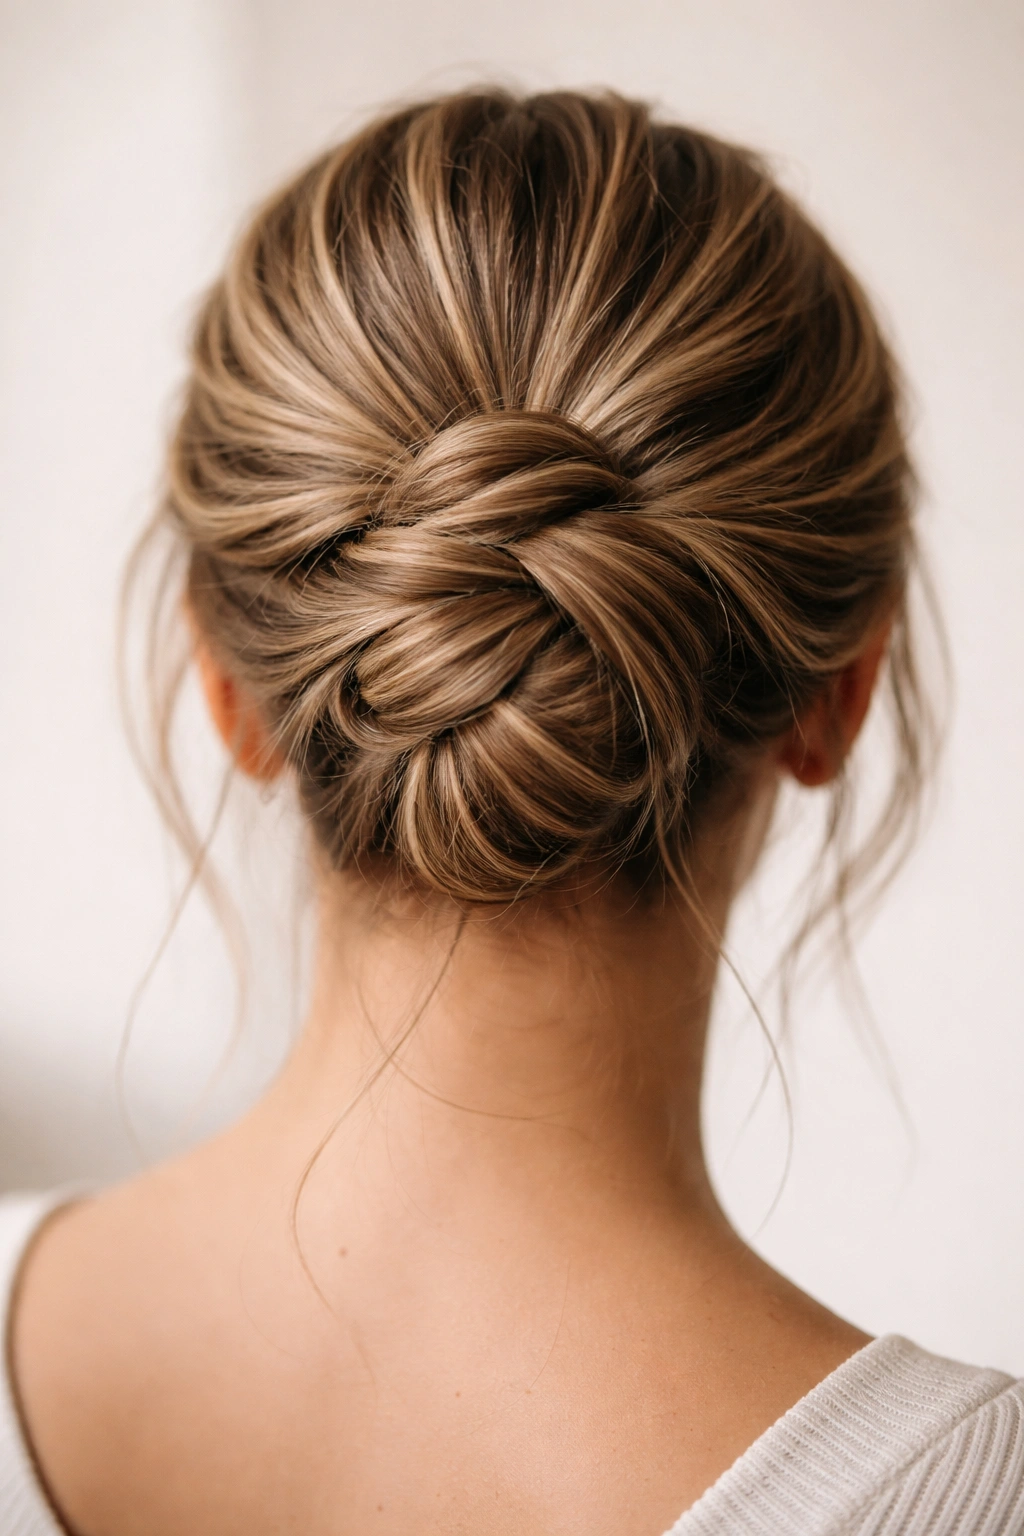
If you’ve ever struggled with keeping a messy bun from unraveling, this version solves that problem. Instead of a single straightforward knot, you’re creating a knot and then wrapping sections of twisted hair around it, which creates a bun with multiple anchor points. The visual effect is soft and romantic, but the hold is genuinely impressive.
Why This Technique Holds So Much Better
The magic here is that you’re creating friction through twisting — twisted sections of hair grip each other and the pins much more effectively than smooth, loose sections do. When you wrap those twisted sections around your knot base, you’re essentially using the tension of the twist itself to support the entire structure. This is why this bun can survive a full day of meetings, a workout, or even dancing without demanding a midday rescue mission.
Creating the Twisted Wrap Layers
- Begin with a high ponytail and tie it in a knot, following the same knotting technique from the sleek topknot style above
- Divide your remaining hair (below and around the knot) into 3-4 sections running down from the knot — you’re essentially sectioning the hair that will wrap around your base knot
- Twist each section tightly, working from the scalp outward, and wrap it around the knot in a spiral motion
- Secure each twisted section with bobby pins as you go, tucking pins underneath so they’re not visible from the front
- Leave a few wisps loose around your face and neck — these add softness and prevent the style from feeling too severe
The wrapped sections create a naturally textured, dimensional look that reads as intentional rather than accidental.
Worth knowing: This style holds best when you use strong-hold bobby pins and don’t overstuff your bun. It’s better to have a slightly smaller, tightly secured bun than a big, loose one that relies on volume rather than pin placement to hold its shape.
3. The Double-Knot Messy Bun
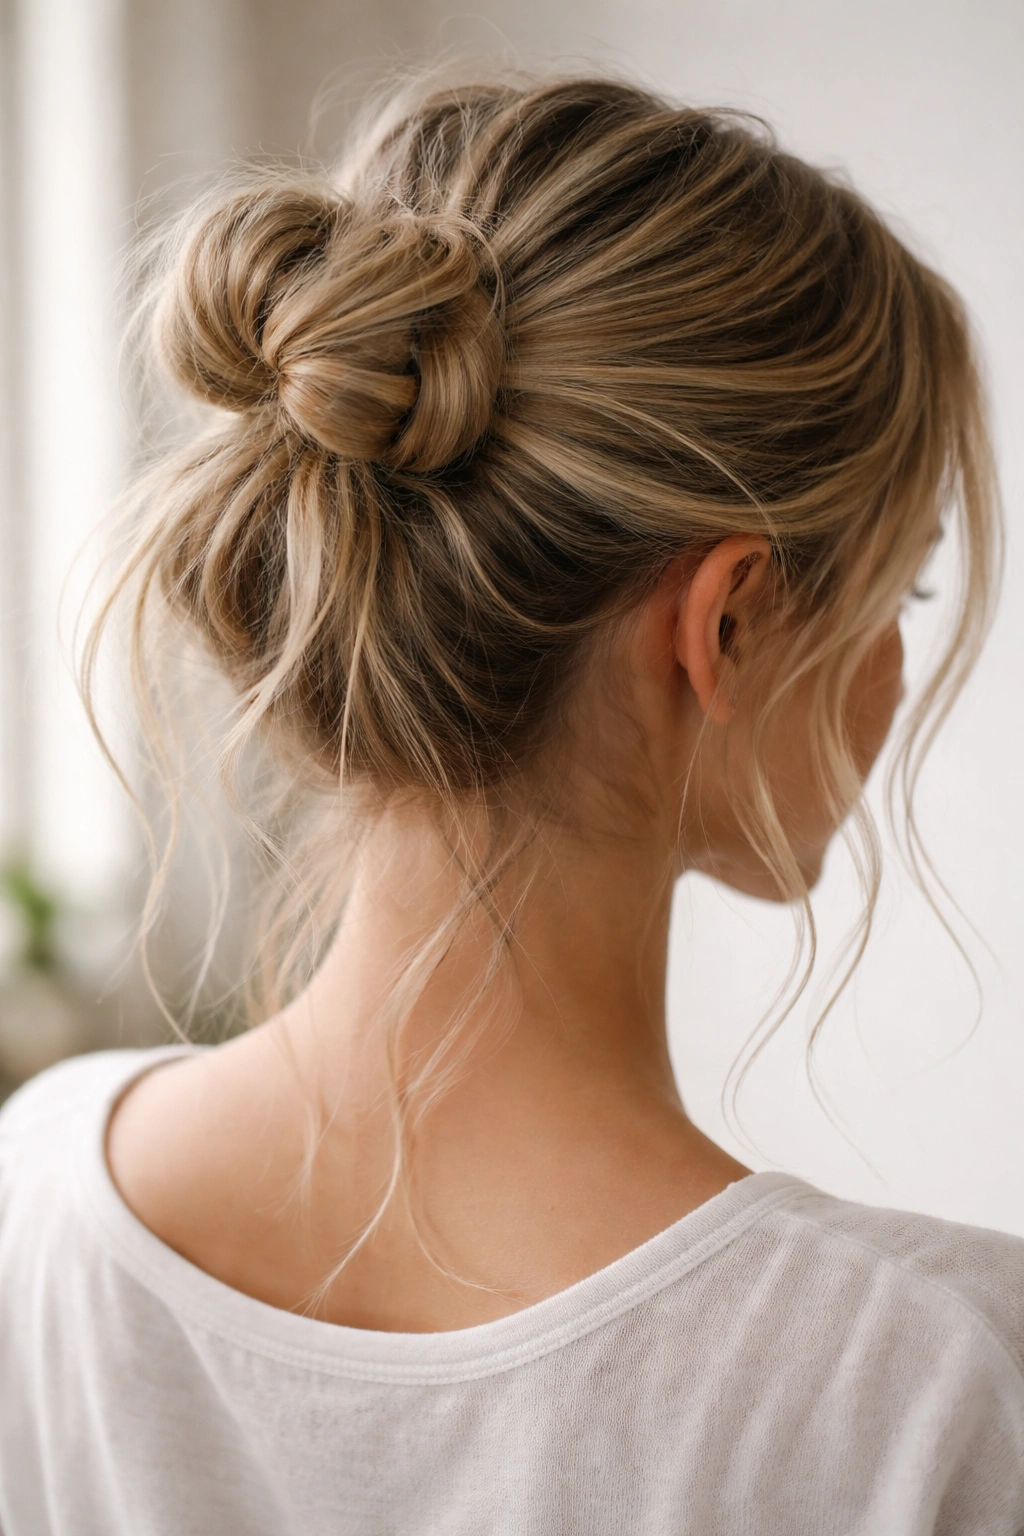
This is the style for people who want maximum texture and a thoroughly unstructured vibe. Instead of a single knot, you’re tying two knots in succession, which creates a chunkier base and naturally leaves more strands loose around the bun — and those loose strands are what give it that desirable messy quality without looking unkempt.
Building Texture With Dual Knots
A double knot requires slightly thicker hair to look intentional rather than sparse, but it’s manageable even on medium-weight hair if you section strategically. Start with a mid-to-high ponytail — not as high as the topknot, but not as low as a classic low bun. The placement matters because two knots take up more length than one, so you want to start high enough that you’ll have plenty of material to work with.
The Two-Knot Process
- Tie your first knot exactly as described in the sleek topknot section, pulling it tight and positioning it close to your hair elastic
- Below the first knot, tie a second knot using the remaining ponytail strands — this second knot sits lower and creates a stacked, multi-dimensional effect
- Wrap remaining hair around both knots, creating a loose, textured spiral that deliberately leaves wisps and strands visible
- Secure with multiple bobby pins, varying the direction of pin placement so they work together to distribute the bun’s weight
- Gently pull individual strands loose from the wrapped sections and the area around the base — this controlled messiness is what makes the style look intentional
Styling Tips for the Perfect Messy Effect
- Don’t brush your hair smooth before starting — a day-old wave or slight texture in your hair actually helps this style hold and look more naturally undone
- Use a texturizing spray on your ponytail before knotting if you have very straight hair — it gives you more grip and helps wisps stay in place
- Leave slightly more hair loose around the nape of your neck than you would with other bun styles — this is signature messy-bun territory
Insider note: If you find your double knot looking too controlled or neat, try lightly backcomb the sections you’re wrapping around the knots before securing them. This creates micro-texture that catches the light and makes the entire bun look more artfully disheveled.
4. The Braided Knot Bun
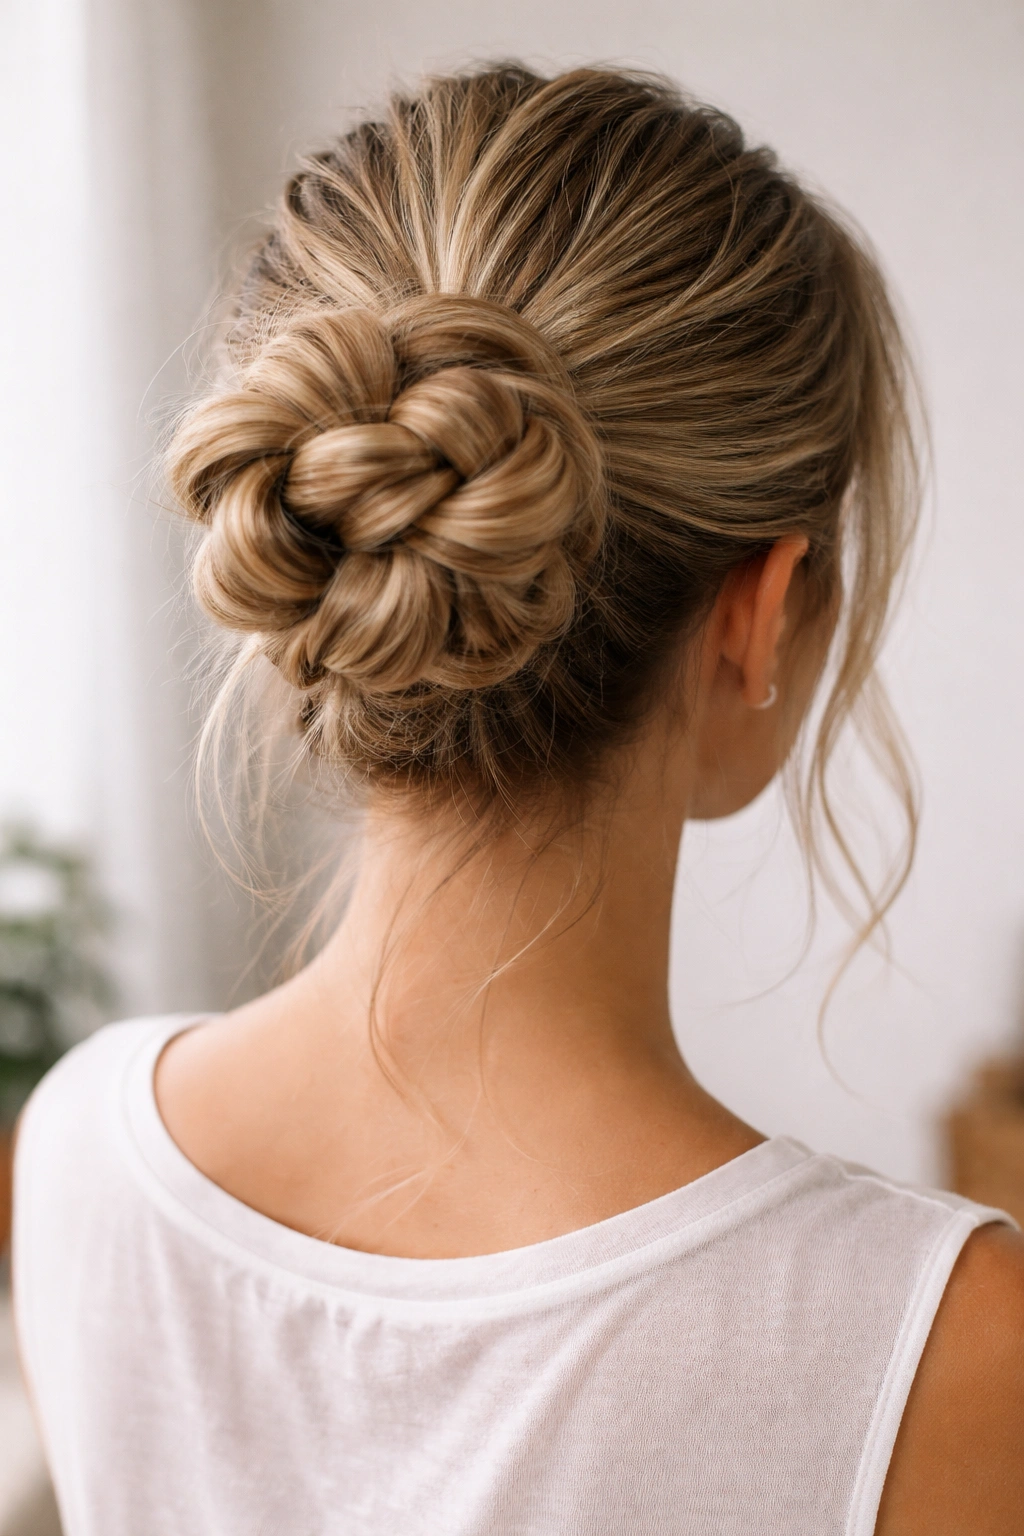
For people who love incorporating braids into their styling repertoire, this version bridges the gap between a braided bun and a knotted bun. You’re creating a braid, tying it in a knot, and then coiling it into a bun shape. The result is intricate enough to feel special but simple enough to replicate on a rushed morning.
How Braiding Adds Dimension
A three-strand braid woven into your ponytail before knotting it creates visual interest from every angle — from the back, you can clearly see the braid pattern, and from the sides, you see the knot structure. This style is particularly flattering for people with shoulder-length to longer hair because the braid gives definition that prevents the bun from looking thin or sparse.
Braid-to-Knot Construction
- Create a high or mid-height ponytail and secure it with an elastic
- Divide the ponytail into three even sections — this is the foundation of your three-strand braid
- Braid your ponytail, working from the base of the elastic down to the ends, pulling each strand snug as you go (a tighter braid holds better)
- Once braided, tie the end with a small elastic, then tie a knot with your braided ponytail, pulling the knot close to your hair elastic
- Wrap the remaining braided length around the knot base, coiling it underneath and securing with pins
- Leave a few wisps loose from the original braided ponytail hanging below the bun for a softer, less constructed look
Styling Variations With Braids
- Two-braid version: Divide your ponytail in half and create two separate braids before tying them together in a knot — this creates a chunkier, more textured look
- Reverse braid version: Create a reverse (Dutch) braid instead of a regular braid if you want the braiding to stand out more visibly
- Partial braid: Braid only the top half of your ponytail before knotting — the unbraid section creates more texture at the base of your bun
Pro tip: This style photographs beautifully in natural light because the braid pattern creates shadows and dimension that make your bun look thicker and more intentionally designed than it actually is.
5. The Side-Knot Low Bun
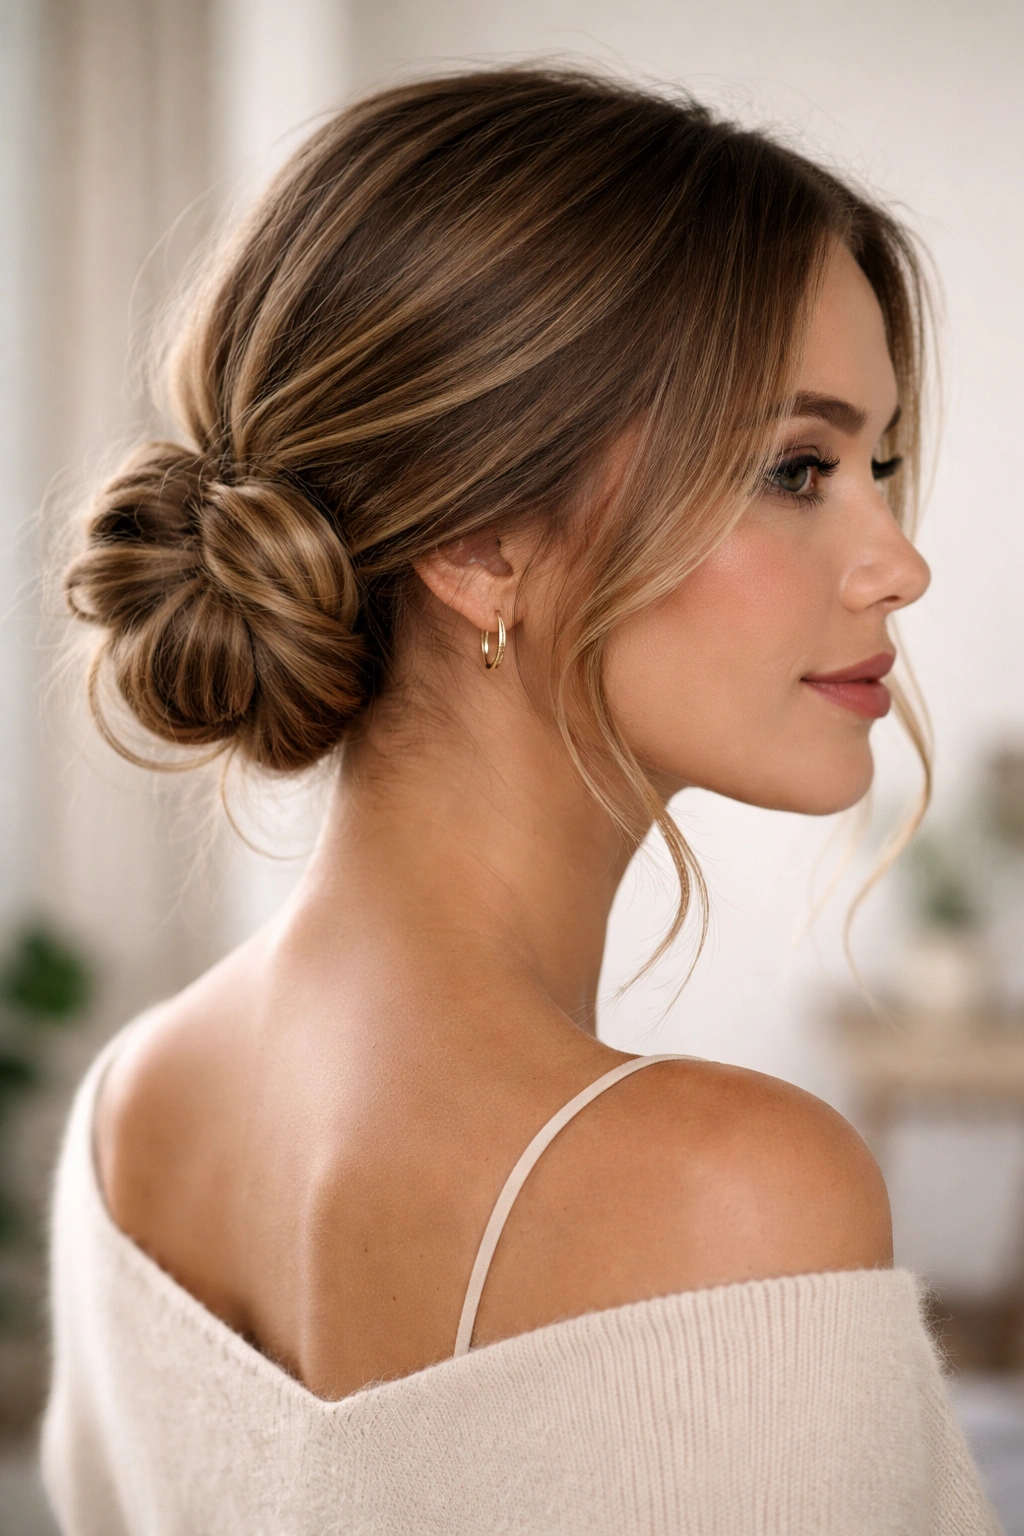
If you prefer your bun worn lower on your head, or if you’re going for a romantic, side-swept vibe, a side-knot low bun is your answer. This version sits at the nape of your neck and slightly to one side, giving you an asymmetrical silhouette that’s more modern than a perfectly centered low bun.
Positioning Your Base Ponytail
The trick to a flattering side-knot low bun is getting the ponytail placement just right. You want it low enough on your head that it sits at your hairline, but positioned slightly to one side rather than dead center. Gather your hair to one side using a brush or comb, smoothing as you go — the side-swept positioning should feel natural, not forced. Use an elastic to secure your ponytail in place, then check in a mirror that the ponytail position feels balanced with your face shape.
Creating the Knotted Low Bun
- Tie your side ponytail into a knot, following the standard knotting technique (cross, pull through, tighten)
- Divide the hair below the knot into 2-3 sections and twist each one
- Wrap the twisted sections around your knot, working in a spiral motion and leaving some wisps loose
- Secure with bobby pins tucked underneath so they’re not visible, especially on the front-facing side
- Leave face-framing strands loose by releasing a few pieces from your side ponytail before knotting — these soften the overall look
Why This Style Suits Different Face Shapes
A side knot draws attention to one side of your face while creating negative space on the other. This can actually be flattering for most face shapes because it creates balance through asymmetry. On round faces, the off-center placement creates the illusion of length. On square or angular faces, it softens hard lines. On longer faces, it visually widens your upper half.
Worth knowing: The hair tie you choose matters more for this style than for centered buns. An elastic that matches your hair color (or is clear) disappears visually, while a contrasting elastic becomes part of the look. If your elastic is visible, make sure it’s intentional styling.
6. The Textured Rope-Knot Bun
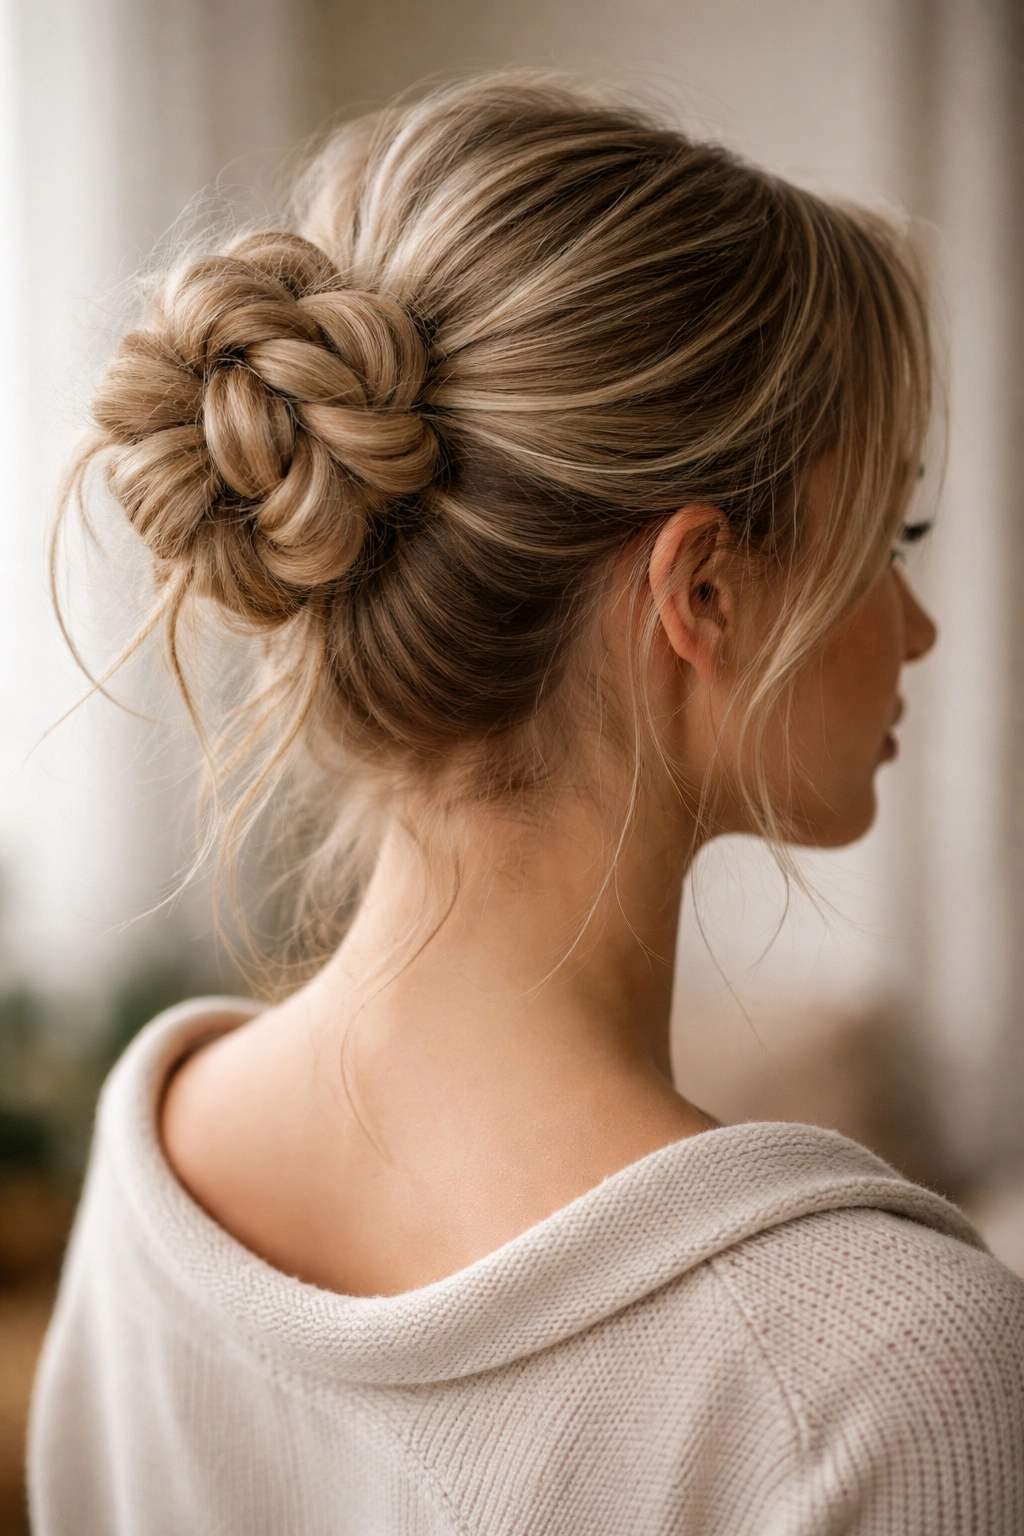
This is the messiest, most undone-looking version, and paradoxically, it requires the most intentional styling technique. The rope-knot bun uses sectioned, rope-twisted hair woven through itself to create a bun with serious texture and visual interest. It’s perfect for people with naturally wavy or curly hair, or for anyone willing to add texture to straight hair using heat tools or sprays.
Building Rope Texture Into Your Knot
Rather than knotting a smooth ponytail, you’re creating a rope-like twist with your ponytail sections before knotting them together. A rope twist is when you take two sections of hair, twist them individually, then twist those twisted sections around each other — it creates a thicker, ropelike appearance that’s less refined than a standard braid but more structured than a simple twist.
Rope-Twisting and Knotting Method
- Start with a high or mid-height ponytail that has some natural texture or has been prepped with a texturizing spray
- Divide your ponytail into two sections and twist each section tightly in the same direction
- Twist the two twisted sections around each other in the opposite direction, creating that rope effect — this should feel chunky and dimensional
- Tie a knot with your rope-twisted ponytail, treating it like one unit rather than separate strands
- Wrap the remaining rope around your knot base, coiling it loosely so individual strands remain visible
- Secure with multiple bobby pins and spray lightly with texturizing spray to hold the shape
- Deliberately release strands from your rope wraps, pulling them slightly loose so the bun has a lived-in, textured appearance
Getting the Texture Right
The difference between this style looking intentionally messy versus actually sloppy is all about the intentionality of which strands you leave loose. Work section by section, leaving some strands pulled out while keeping others tightly coiled. This controlled messiness photographs well and reads as sophisticated rather than undone.
Insider note: If your hair is very straight, blow-dry your ponytail with a wave-creating tool or use a 1.5-inch curling iron to add waves throughout before you start rope-twisting. The pre-existing texture makes the rope effect much more visible and creates better grip when you’re knotting and coiling.
Final Thoughts
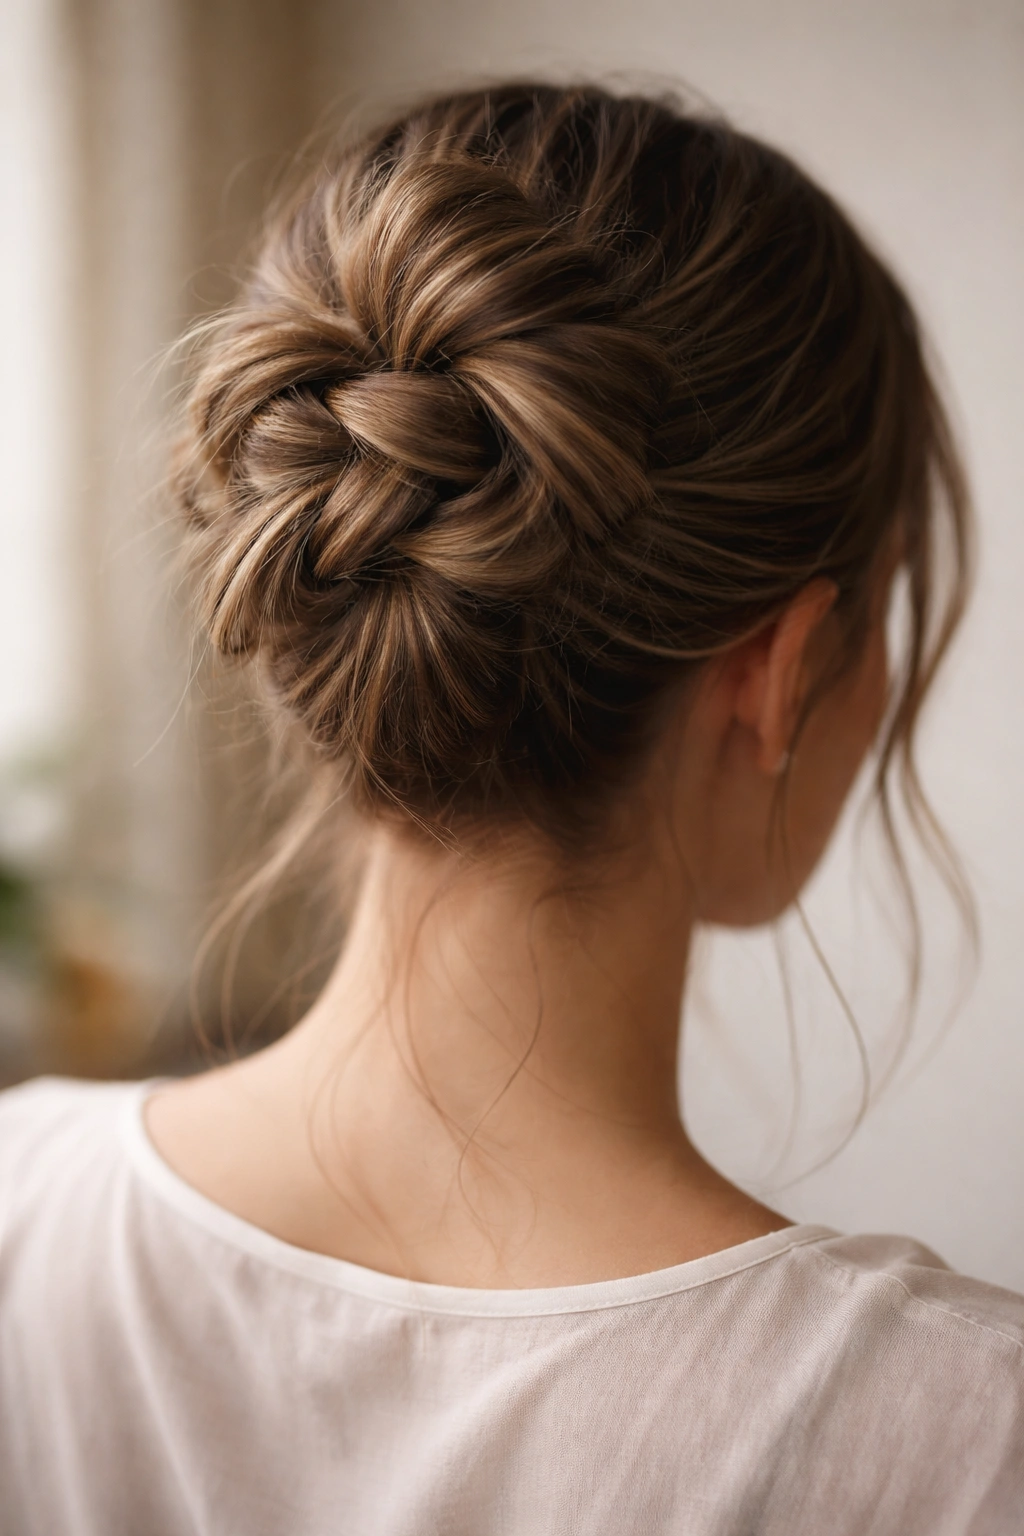
The transformation from a basic messy bun to a knotted version comes down to one fundamental change: actually tying your ponytail into a structured knot before you wrap and pin. That single technique shift gives you better hold, more visual interest, and a style that looks intentionally designed rather than haphazardly thrown together. Whether you lean toward the sleek topknot aesthetic or prefer the romantic, textured rope-knot version, these six styles give you options for every occasion and hair type.
Start with whichever style resonates most with your daily routine and hair texture. If you’re a morning minimalist, the sleek knotted topknot and the double-knot messy bun are your fastest options. If you’ve got ten minutes and love incorporating texture, the braided knot or rope-knot versions are worth the time investment. The real secret is practicing the basic knotting technique until it becomes automatic — then every variation flows from that foundational skill. Once you’ve mastered tying that first knot, you’ll find yourself creating variations and combinations that work perfectly for your hair and your life.
