A French braid can rescue a bad hair day faster than almost anything else in the mirror. Short hair, shoulder-length layers, waist-length thickness — the difference is not whether the braid can work, but how you start it, how small you make the first sections, and where you decide to stop.
That first inch matters. A lot. If the braid slips, the problem is usually grip, not skill: hair that’s freshly washed can be too soft, and hair that’s layered needs tighter picking at the crown so the top doesn’t puff out before you even reach the nape. A little dry shampoo, a tail comb, and a calm hand go a long way.
French braids also have a nice trick up their sleeve. They can look polished and clean, or loose and lived-in, or sporty and almost bluntly practical. The shape changes with the hair you have, and that’s what makes them so useful across short bobs, collarbone lobs, medium cuts, and long hair that seems to swallow every elastic it meets.
The styles below lean on that flexibility. Some are classic, some are a little fussy in the best way, and some are plain old dependable — the kind you reach for when you need your hair to stay where you put it.
1. The Classic Center-Back French Braid
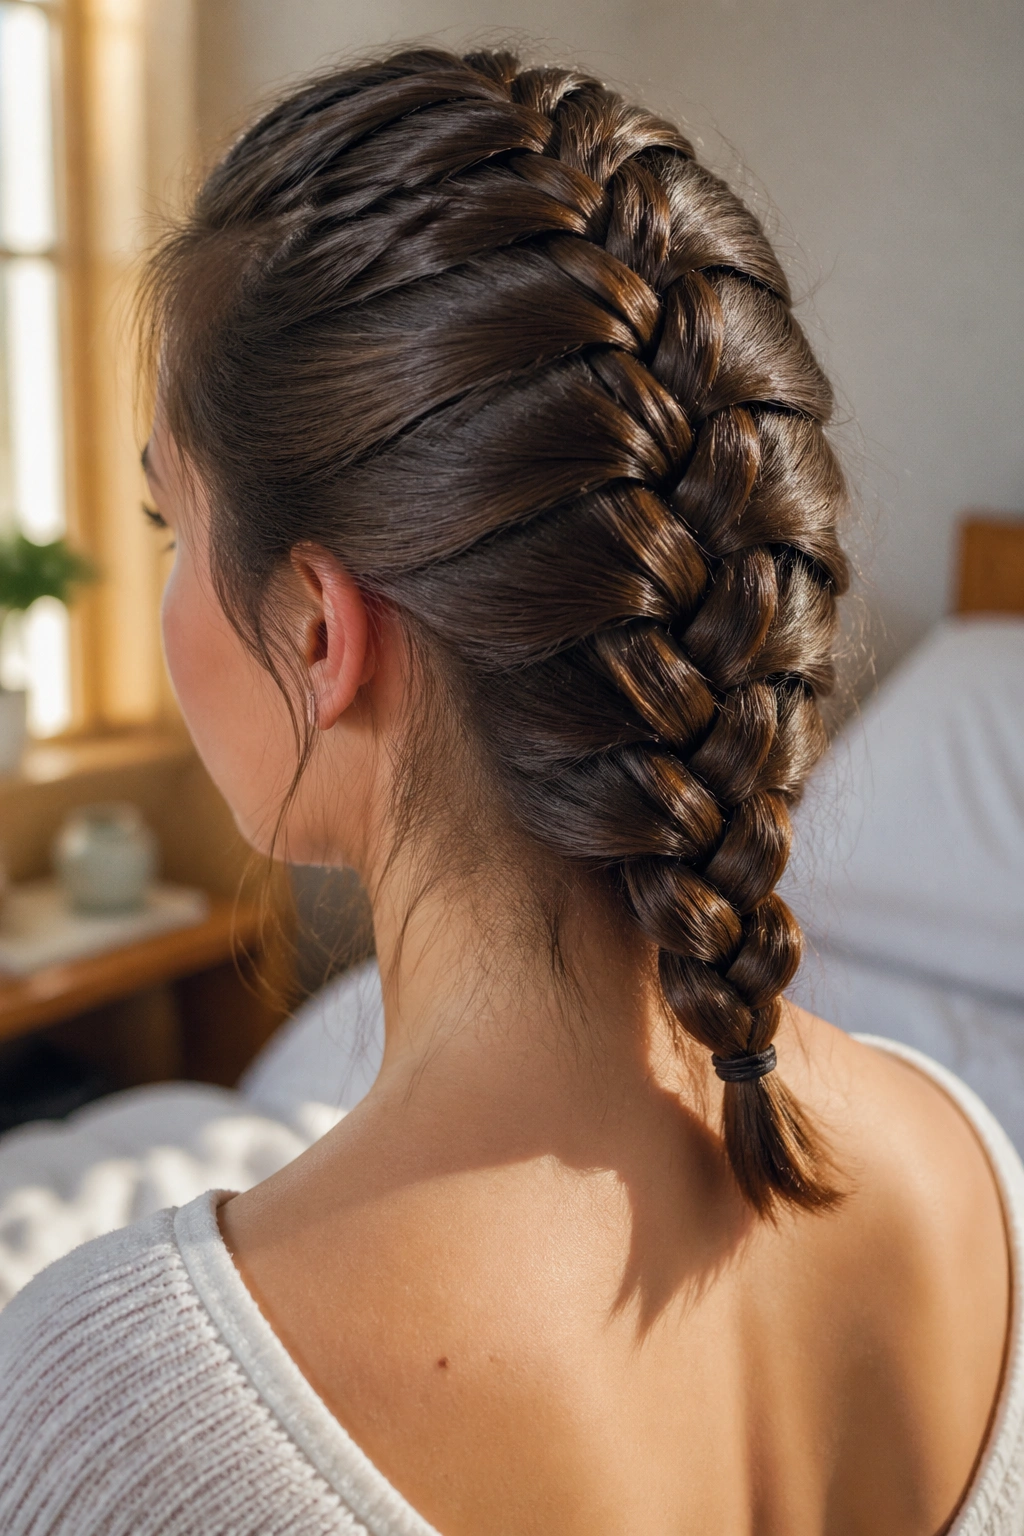
This is the braid most people picture first, and honestly, it earns the fame. A center-back French braid starts at the crown, hugs the head, and gathers hair evenly as it moves down the spine of your head. It keeps layers under control and gives short-to-long hair a clean shape without a ton of fuss.
Why it works across lengths
A chin-length bob can still do a tiny version if you keep the sections narrow and stop early. Shoulder-length hair gives you enough room for a neat, compact braid. Long hair simply makes the tail more dramatic. The trick is even tension, not giant sections.
- Best on hair that has a bit of texture
- Easier with a tail comb and one clear center part
- Stops neatly at the nape or continues into a ponytail
- Holds well when the first three passes are snug
Tip: If the crown keeps puffing out, hold the first section flatter against the scalp and braid the first inch tighter than the rest.
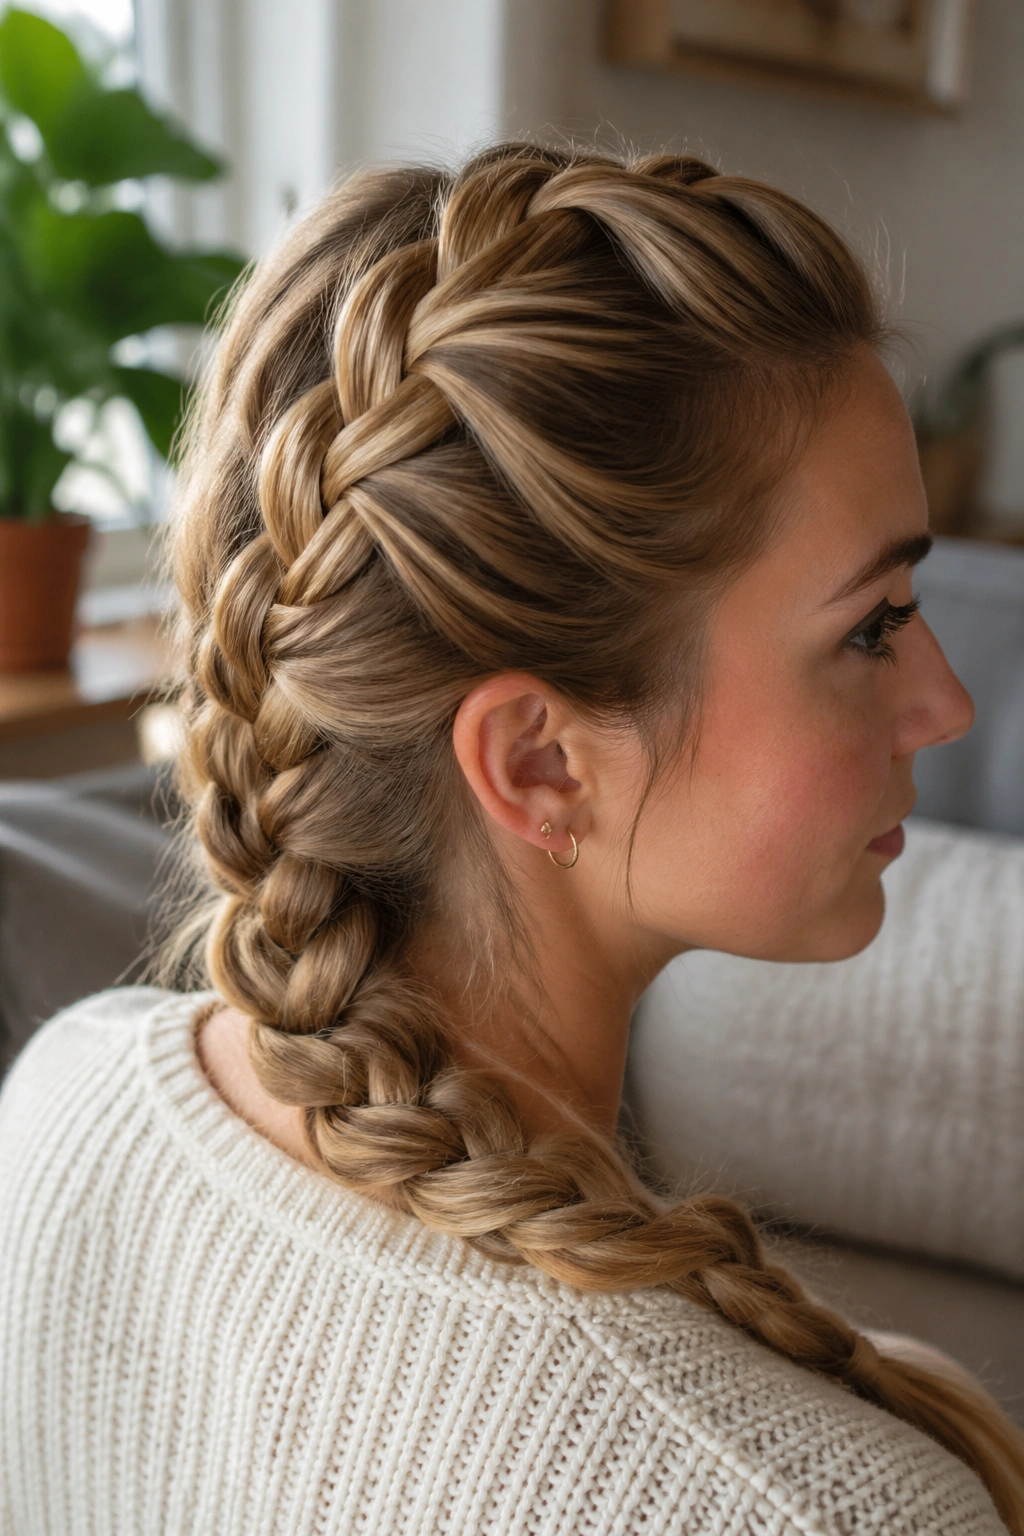
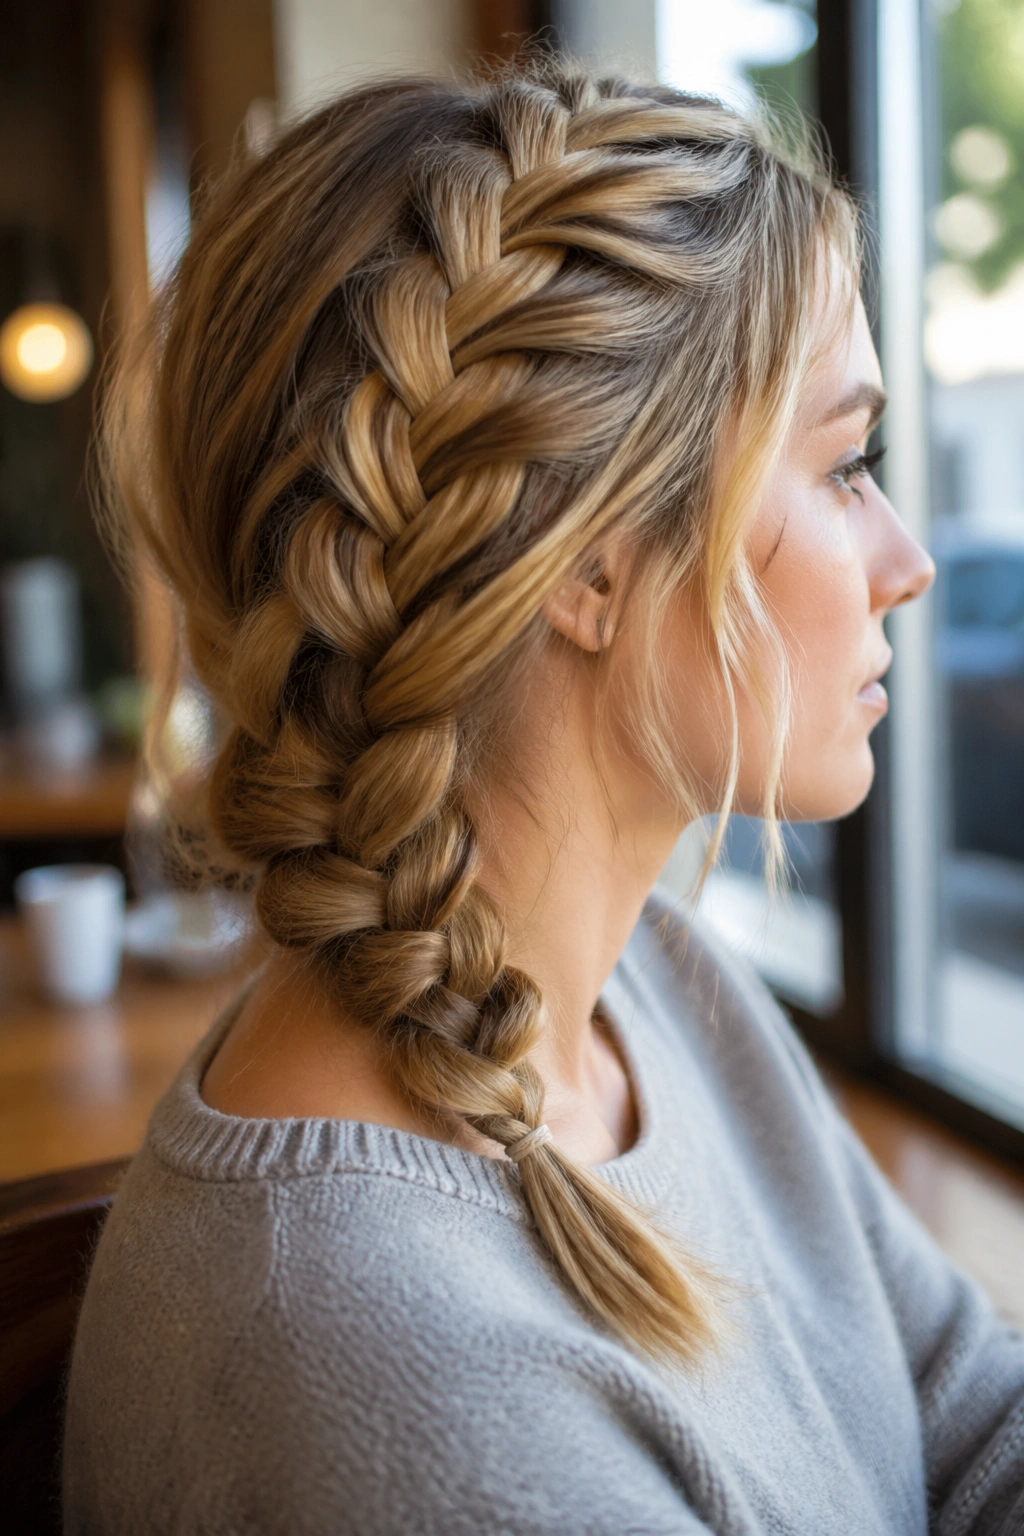
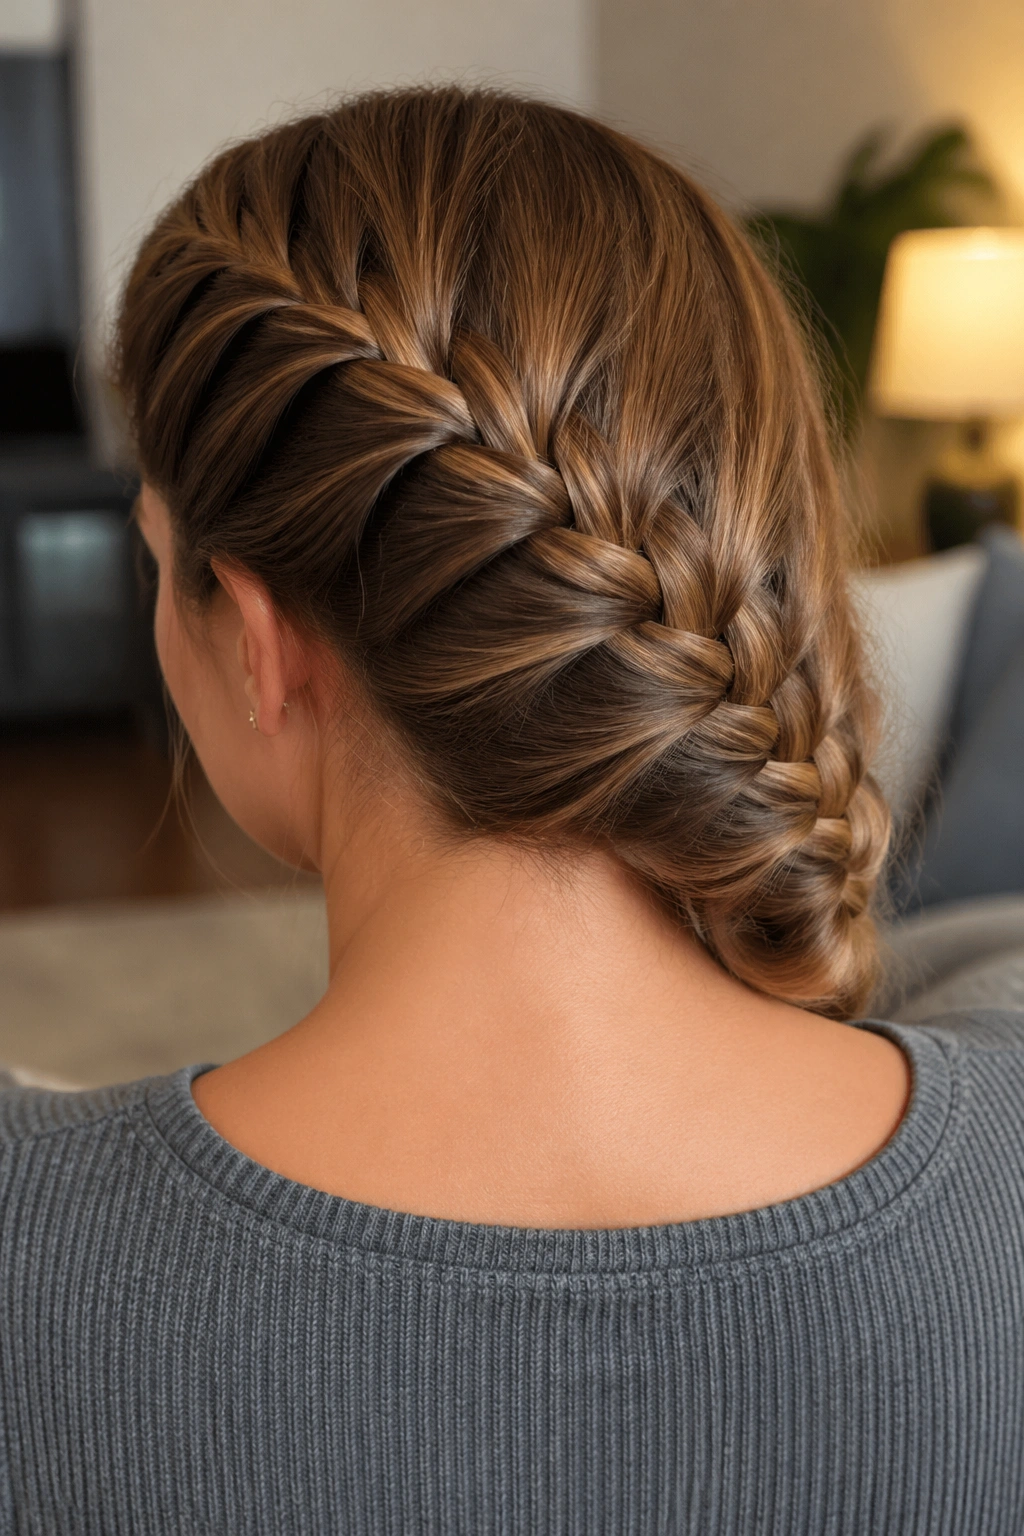
2. A Deep Side French Braid That Slides Over One Shoulder

A side French braid changes the whole mood with one move. Instead of starting in the middle, you sweep the top section to one side and braid diagonally so the finished length falls over a shoulder. It feels softer than a center braid and hides uneven layers better than most styles.
Why does that matter? Because side parts are kinder to awkward grow-out. They also make a shorter cut look a little longer, since the braid pulls the eye downward instead of straight back.
How to keep the side braid from slipping
Start the braid high enough to anchor the front pieces, then angle it behind the ear before the length gets too loose. On a lob, that often means stopping right before the collarbone and securing the tail with a clear elastic. On long hair, you can keep braiding to the end and let the weight rest forward.
A tiny dab of styling cream on the front pieces helps the braid stay smooth. Not too much. You want grip, not grease.
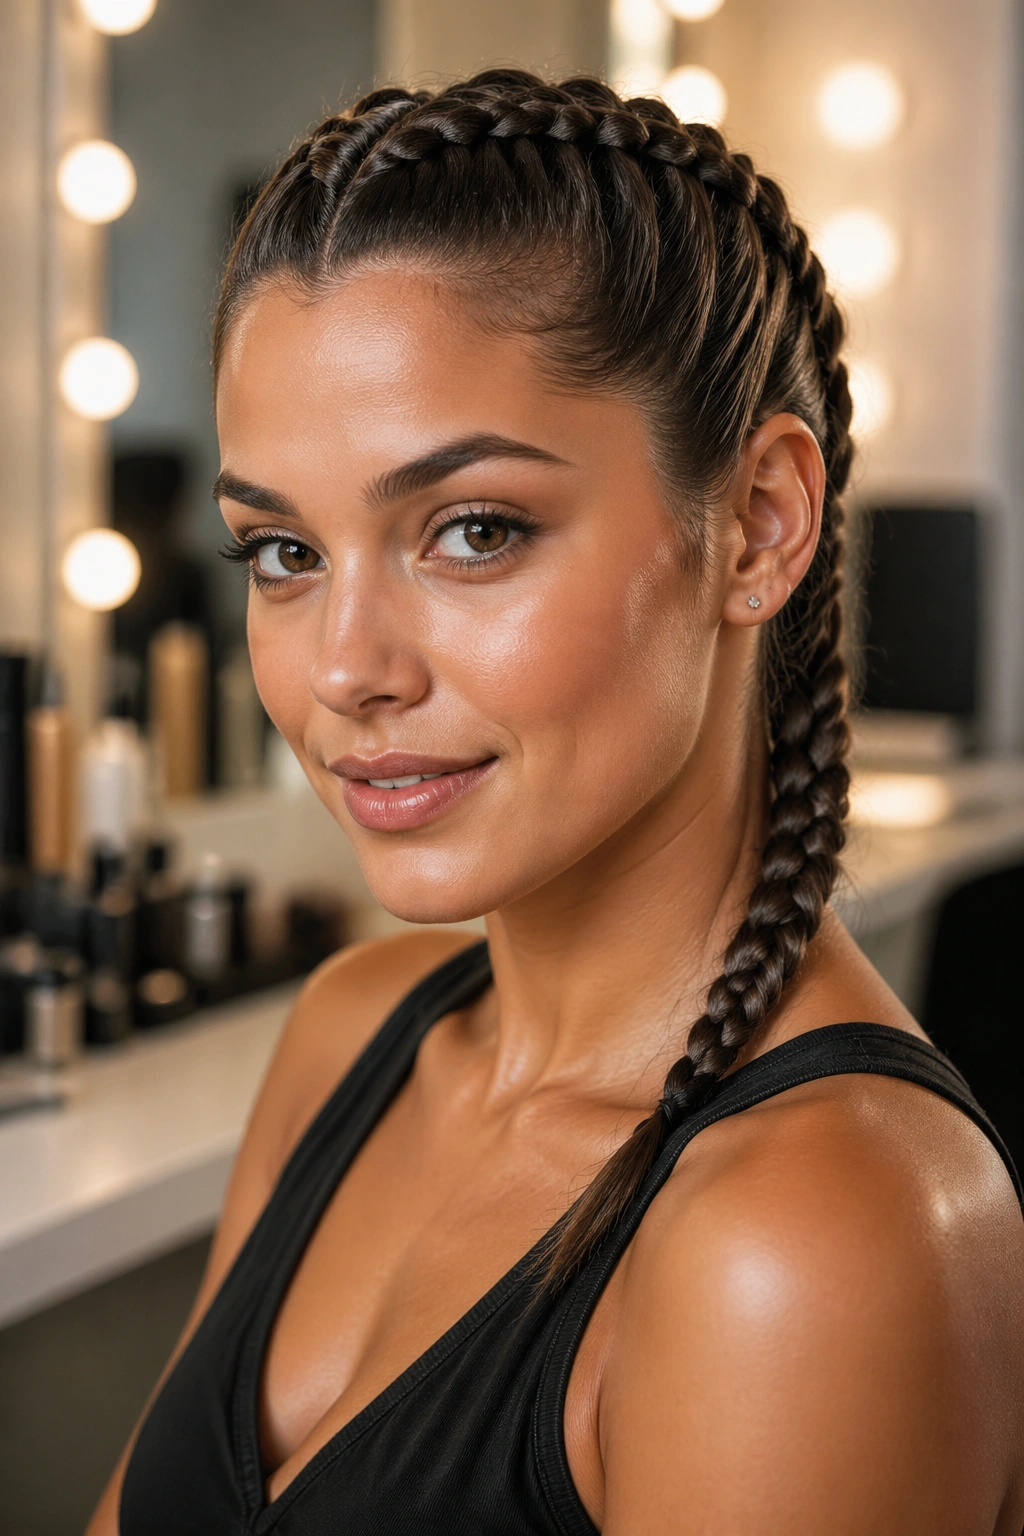
3. Double French Braids for a Clean, Secure Look
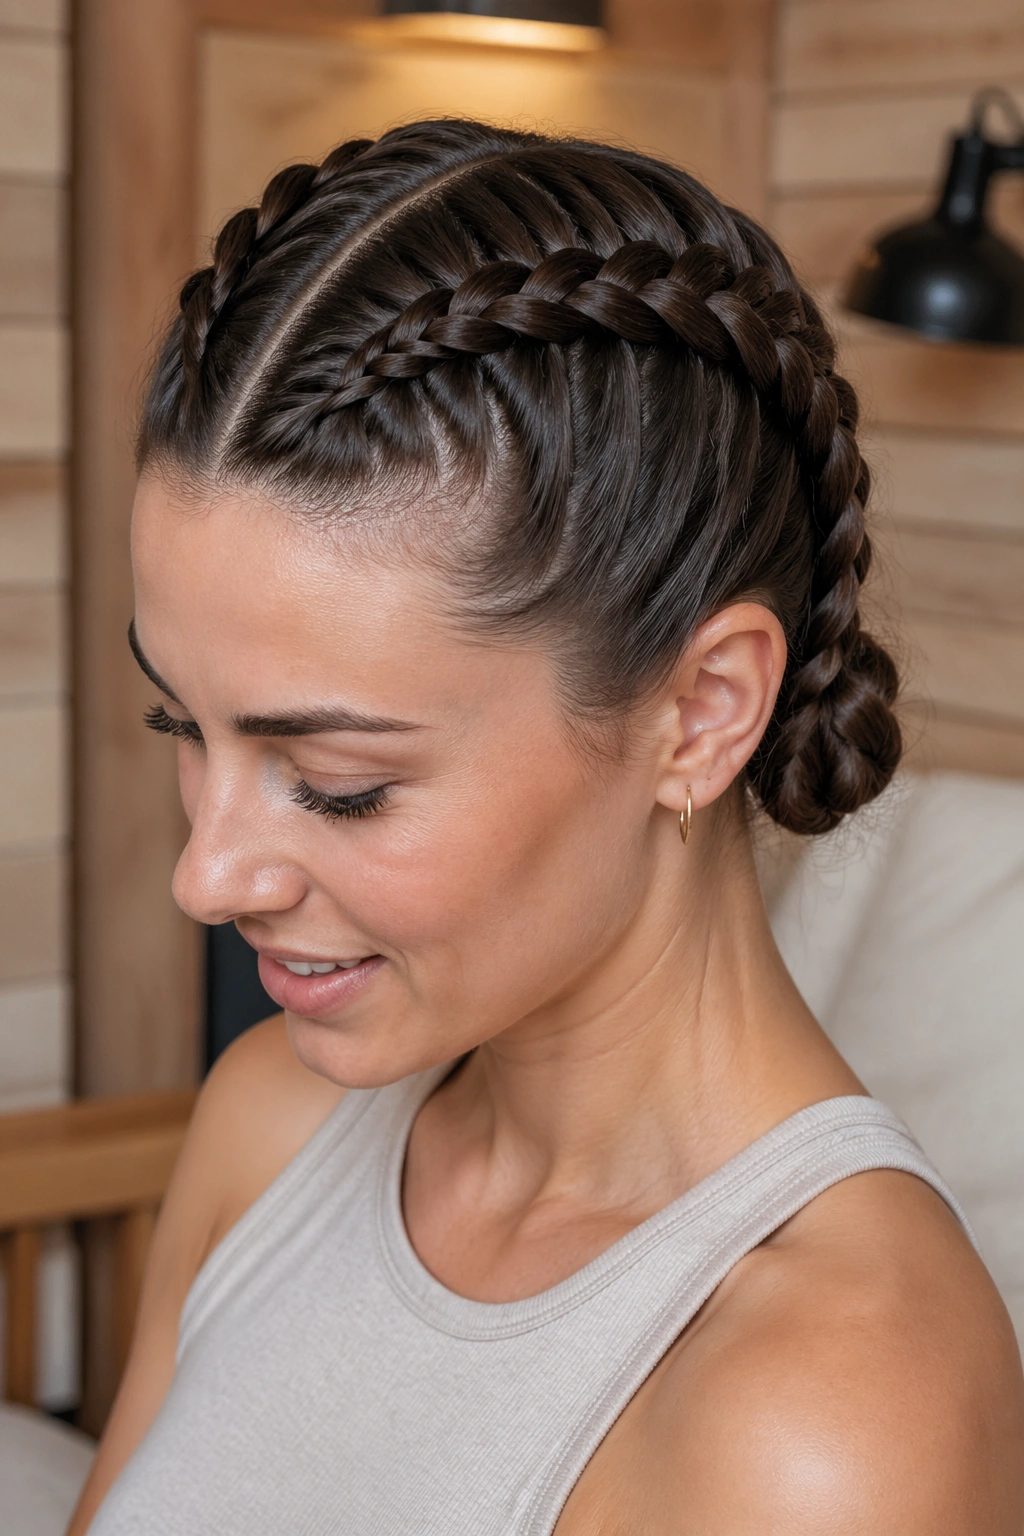
Two braids are workhorse hair. They’re practical, yes, but they also look sharp in a way a single braid sometimes doesn’t. Split the hair down the middle and French braid each side from the hairline to the nape, then finish the tails with elastics or fold them into buns.
This style is one of the easiest to adapt to length. Short hair gets a sporty, tucked shape. Medium hair gives you neat lines and good hold. Long hair turns into a heavier, more dramatic pair of braids that stay put through real movement.
- Great for workouts, travel, and humid days
- Easier if the part is clean and straight
- Keeps layers from poking out at the sides
- Can be worn tight or slightly loosened
My take: If you hate redoing your hair halfway through the day, this is the one to keep in your pocket.
4. The Half-Up French Braid That Keeps the Face Clear

A half-up French braid is one of those styles that looks more complicated than it is. You braid only the top section — usually from the front hairline or crown — then leave the rest loose. It’s a smart move when you want the face-framing hair off your cheeks without losing length.
The style flatters almost every cut because it doesn’t ask the whole head to do the same thing. A bob gets a little lift at the crown. A lob keeps its swing. Long hair stays soft through the bottom half, which keeps the braid from feeling too severe.
The main thing is section size. Too much hair at the top and the braid turns bulky. Too little and it disappears. Aim for a band of hair about two to three inches deep across the front, then braid it snugly until you reach the back of the crown.
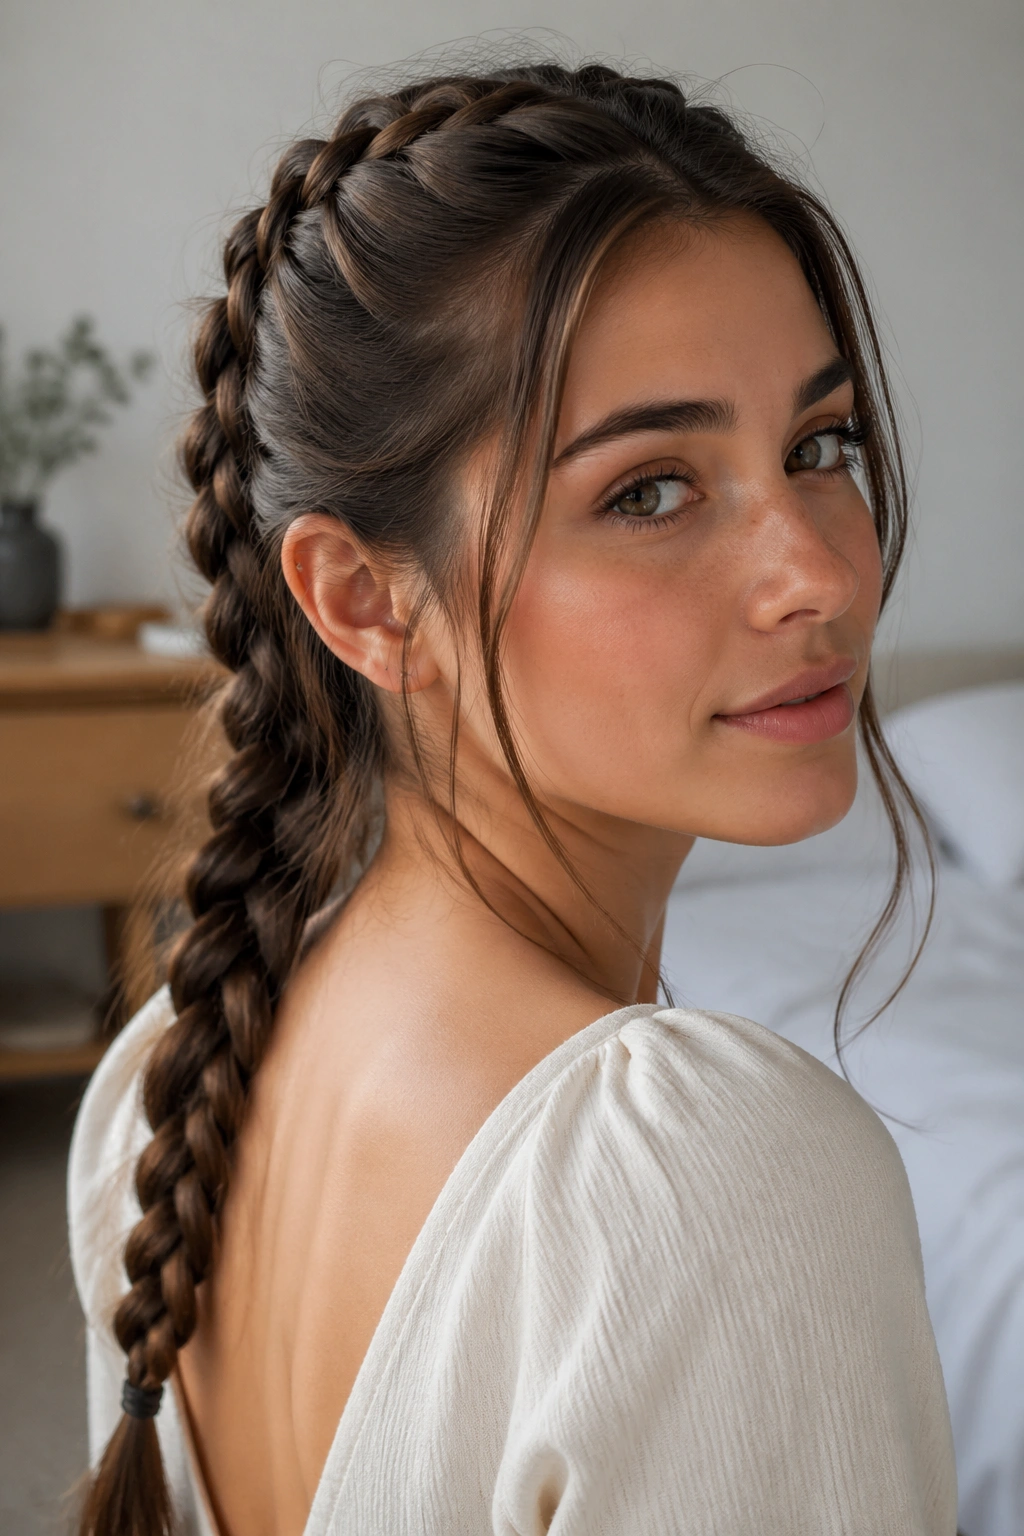
5. French Braid Into a Low Ponytail
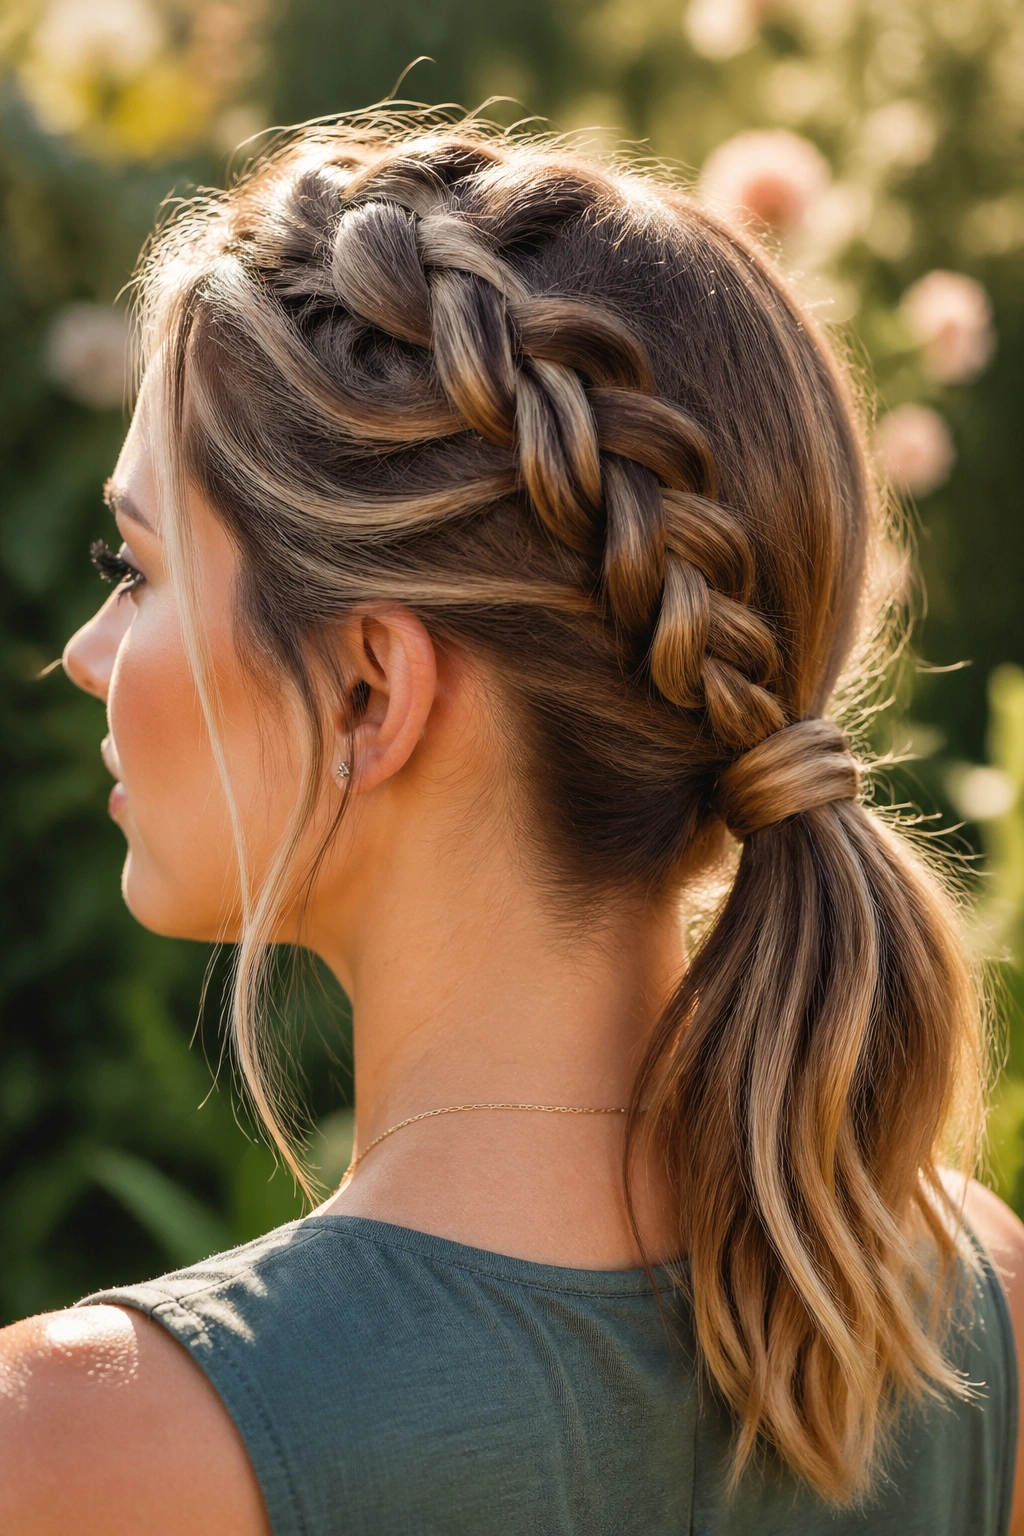
Some mornings call for efficiency, not romance. A French braid into a low ponytail gives you both structure and speed: braid from the crown to the mid-back of the head, then tie the remaining hair low at the nape. It’s tidy, practical, and much nicer-looking than a plain ponytail when your hair is on the second or third day.
This style is especially good for layered cuts because the braid controls the top while the ponytail lets the ends move. On shorter hair, the braid can end earlier and the ponytail can sit closer to the base of the skull. On long hair, it feels sleek and stable.
Best when: you need something that stays in place without looking rigid.
A small elastic at the braid’s end keeps the transition into the ponytail from sagging. If your hair is fine, backcomb the ponytail base just a little for more lift.
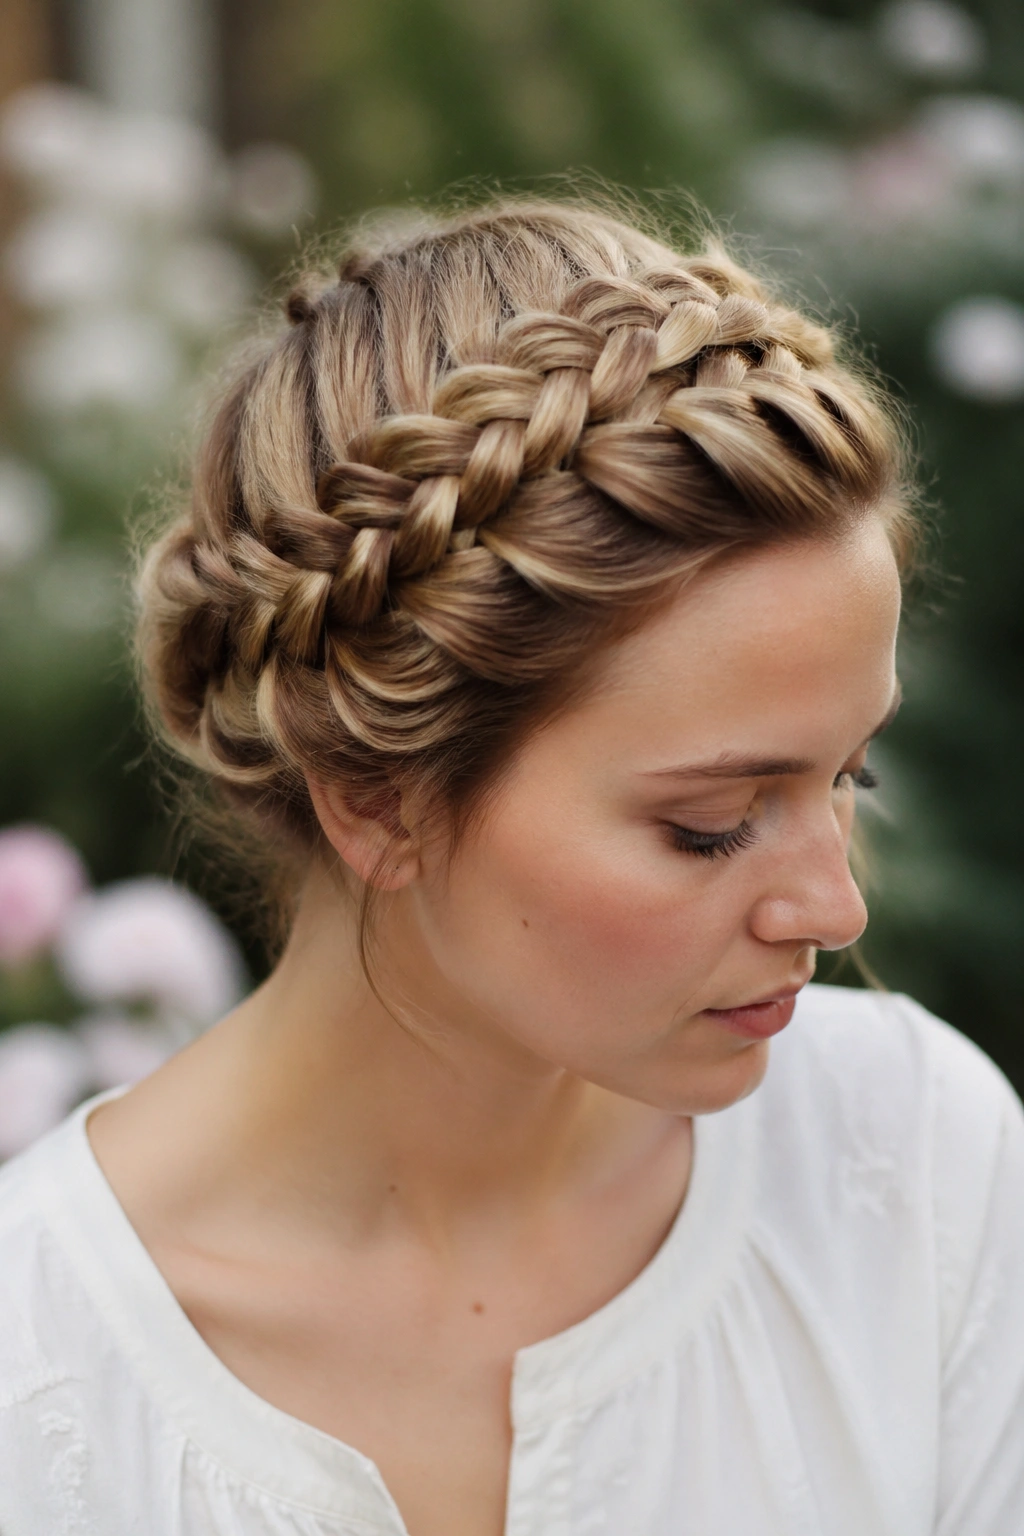
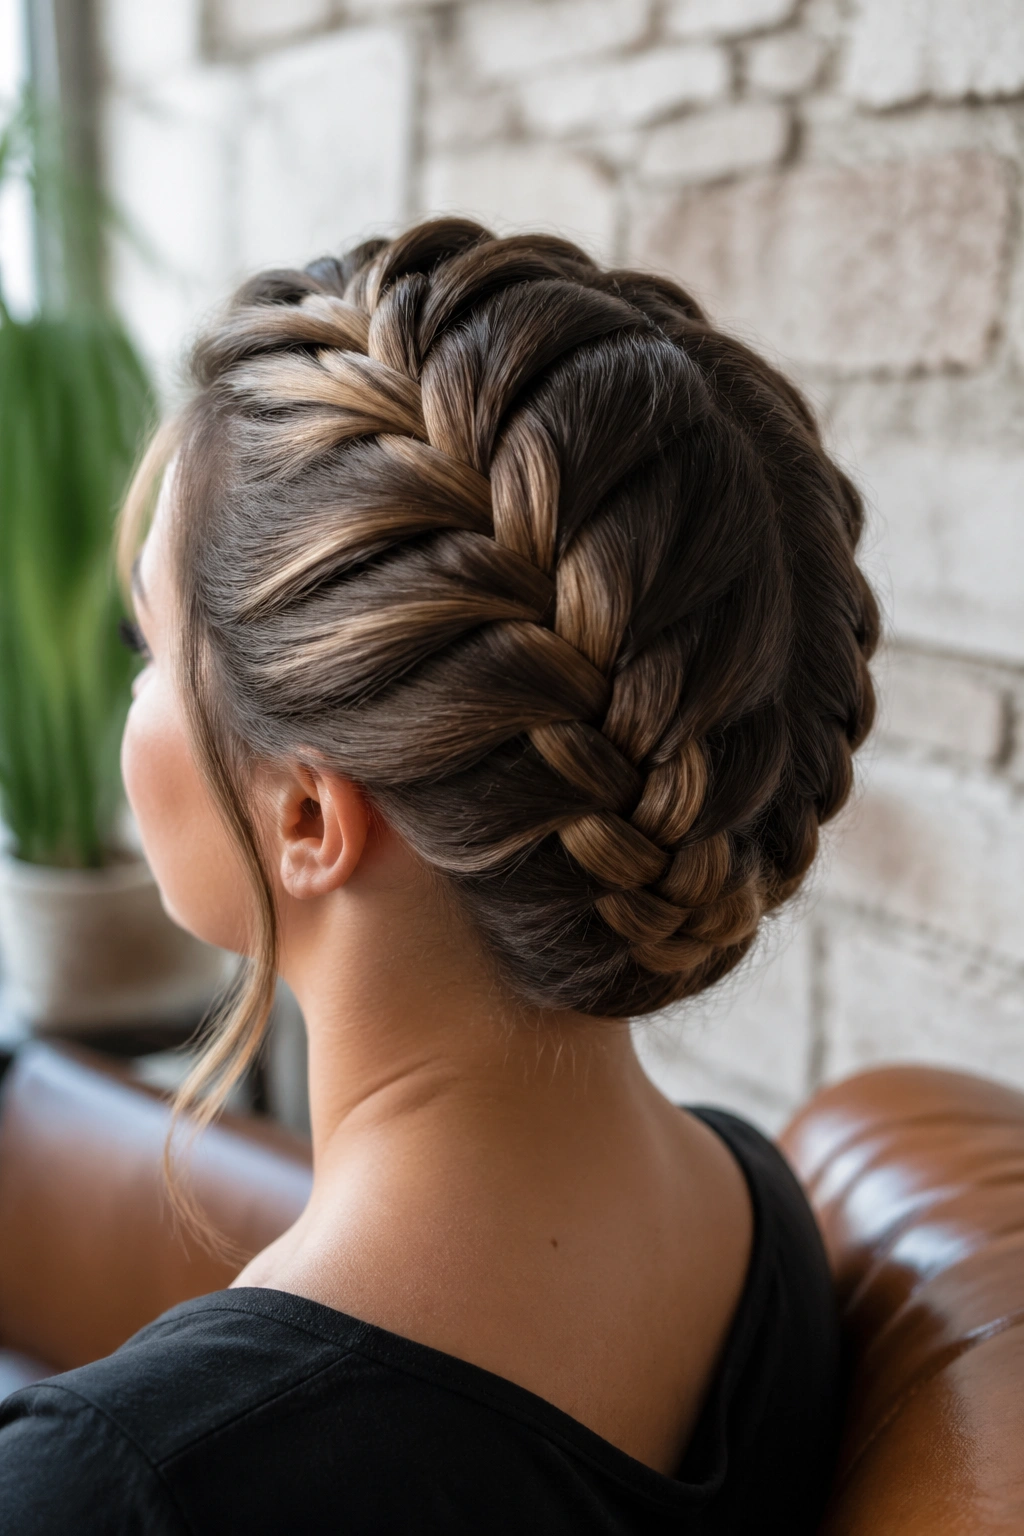
6. The Crown French Braid That Wraps the Head
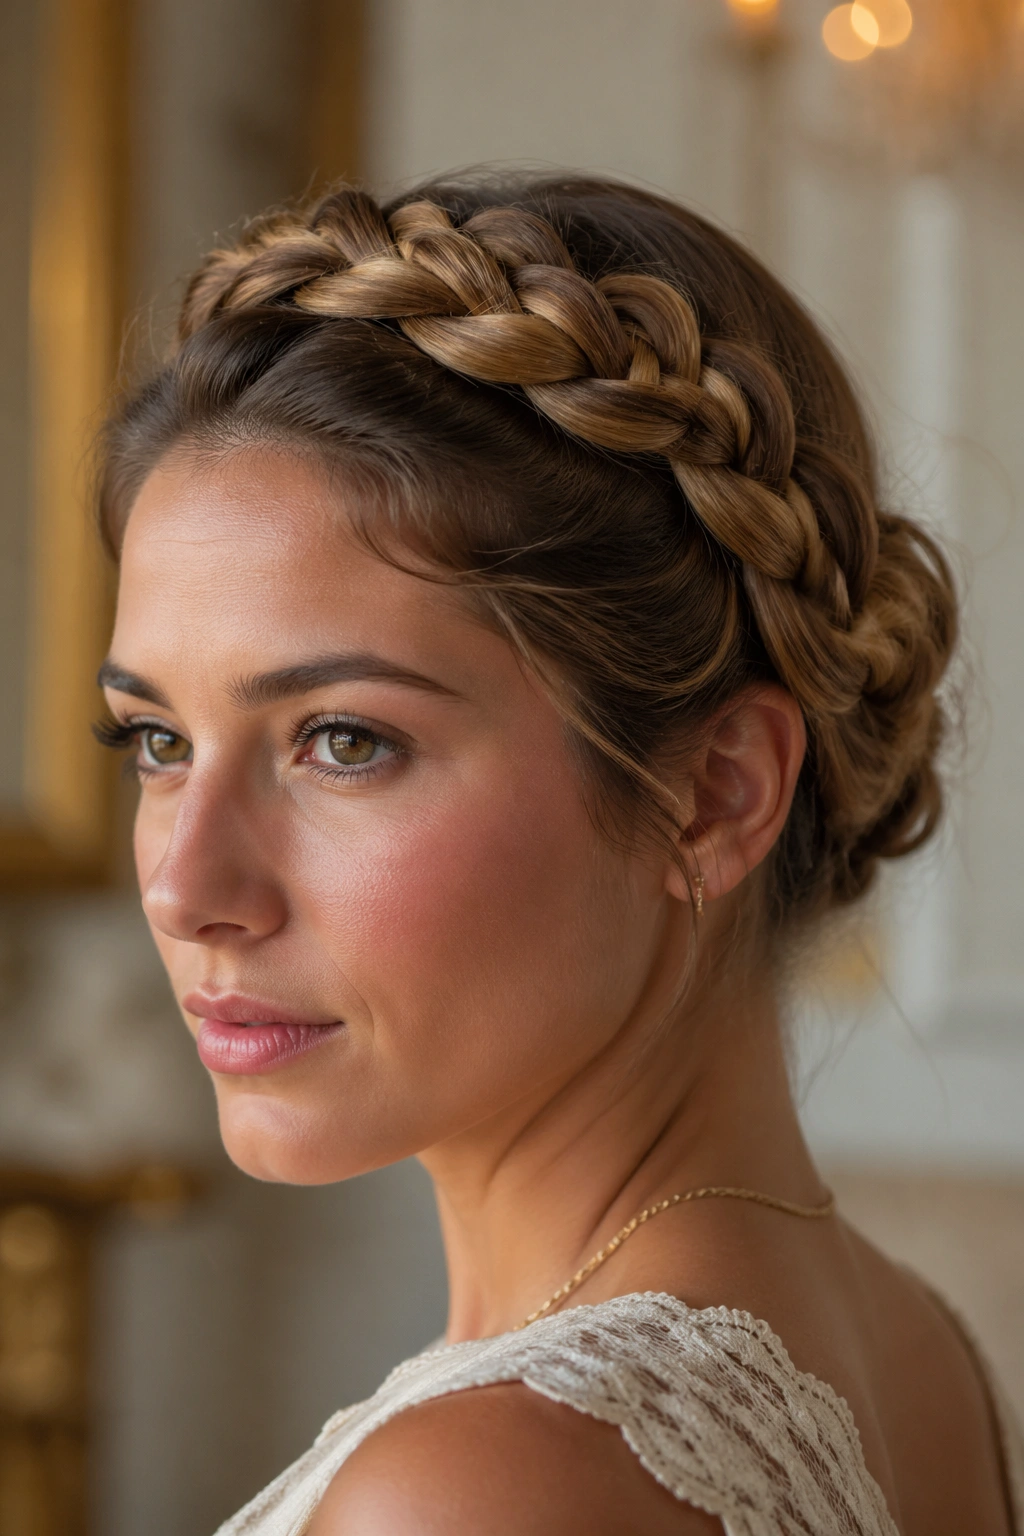
A crown braid is the dressier cousin in the French braid family. Instead of dropping straight down, the braid curves around the head like a halo and can be pinned into a full loop or left as a partial wrap. It’s not the fastest style in the group, but it looks deliberate in a way that plain braids don’t.
Medium and long hair give you the easiest wrap, since there’s enough length to travel around the head and still have tails to pin. Shorter hair can still do a half-crown that starts near one temple and ends behind the opposite ear.
What to watch for
The shape needs balance. If one side is braided tighter than the other, the loop starts looking lopsided fast. Use a mirror and check both sides before pinning. A few hidden bobby pins placed in the direction of the braid help the crown stay flat.
This is one of those styles that benefits from a little imperfection. Perfect symmetry can look stiff. A softer curve feels better.
7. The French Braid Headband for Shorter Cuts
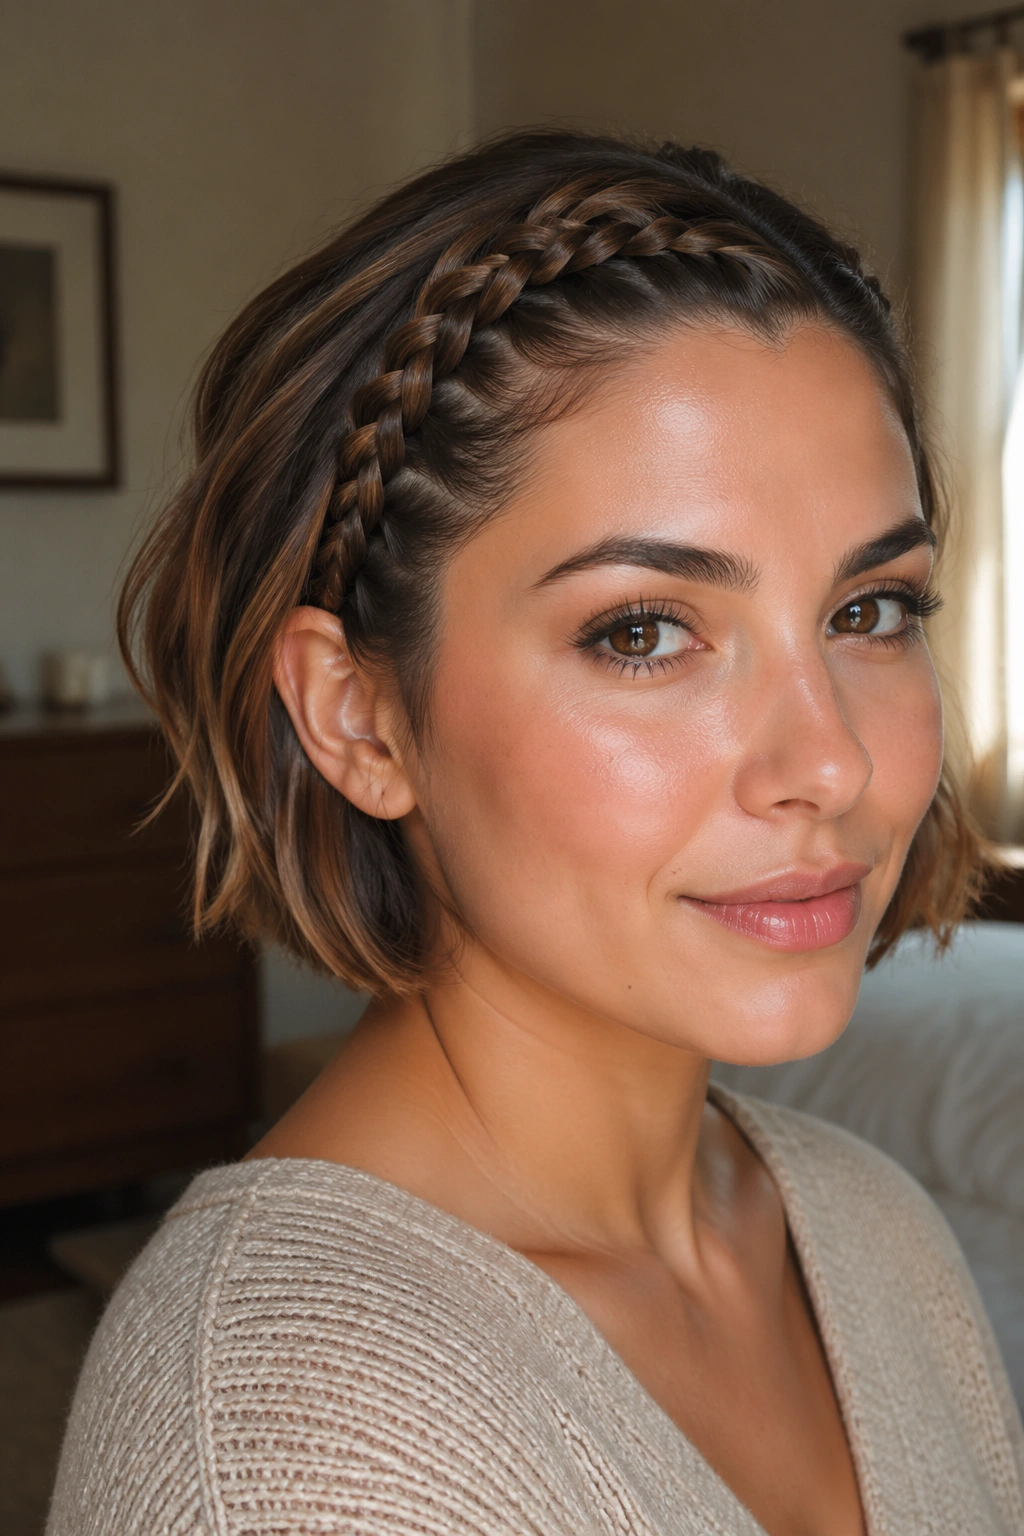
Can a short cut wear a French braid and still look intentional? Absolutely. A French braid headband uses only the front strip of hair, usually from one temple across the top of the head to the other side, then pins the braid just behind the ear. It keeps hair off the face and gives a bob or lob a built-in accessory.
This one is a favorite for chin-length and shoulder-length hair because it doesn’t demand much length at all. You are braiding the hair that would otherwise fall in your eyes. That’s the whole point.
How to get the cleanest line
- Use a fine-tooth comb to carve a narrow front section
- Keep the braid flat against the scalp
- Anchor the end with two crossed bobby pins
- Tuck any tiny loose ends under the braid
Small note: If the hair at your temples is slippery, a mist of texturizing spray before braiding makes the whole thing easier to hold.
8. Double French Braids Fused Into Space Buns
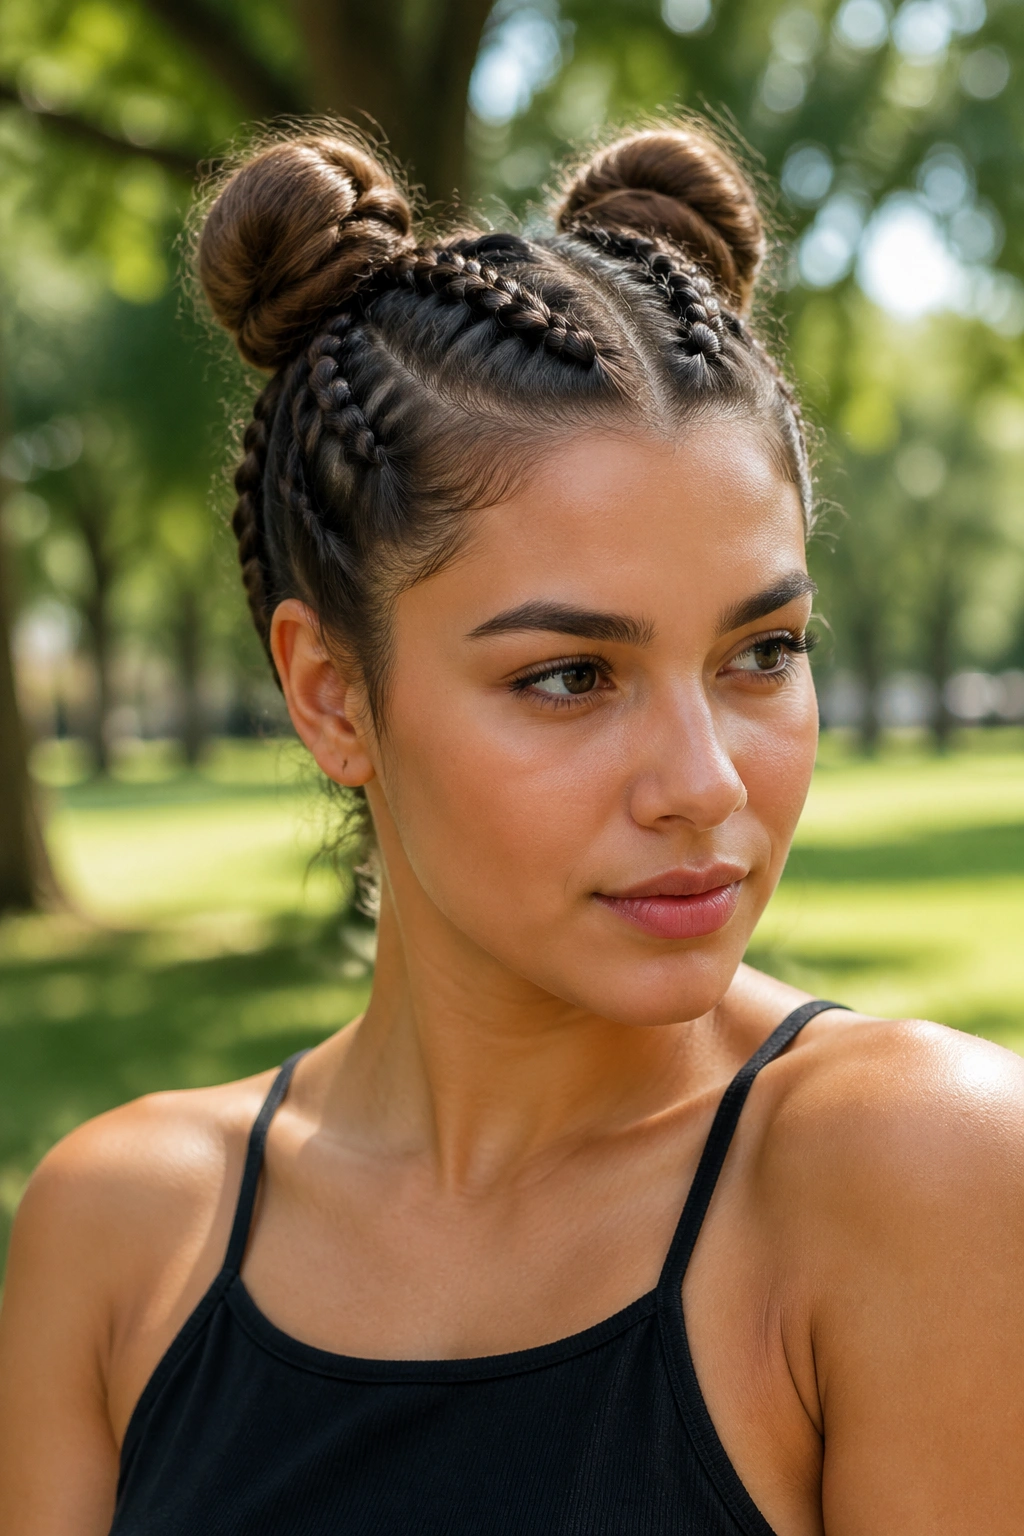
This style starts with two classic French braids and ends with two buns. It sounds playful because it is, but it’s also practical. The braids pull the hair back securely, and the buns hide the ends so you don’t need a long tail to make the style feel finished.
Medium-length hair is the sweet spot, though shorter hair can still do mini buns and long hair can make fuller, rounder knots. The trick is to braid down only as far as the length allows, then twist the tails into tight little coils.
The look can be neat or messy. If you leave the buns a little flatter, the style feels sporty. If you pancake the braids before twisting, it gets softer and more casual. Either way, it holds.
9. The Inside-Out French Braid With More Lift
People sometimes call this the reverse French braid, but the feel is different enough to deserve its own spot. Instead of crossing sections over the middle, you cross them under, which pushes the braid outward and gives it a raised shape. The braid sits proud of the scalp instead of lying flat.
That extra lift matters on fine hair. It gives the braid some body without forcing you to tease the crown into a puffed mess. On thicker hair, it creates a bold, rope-like profile that looks cleaner than it sounds.
How to use it
Start with small, even sections and keep your fingers close to the scalp. If the braid starts to sag, the sections are too loose or the tension is dropping as you move down. Keep the first few passes snug, then relax slightly once the shape is set.
It’s a little harder than a standard French braid. Worth it.
10. The Loose, Pancaked French Braid
A loose French braid is one of the easiest ways to make a braid look fuller. You braid normally, then gently pull at the outer loops after securing the end. That “pancaking” process widens the braid and makes the whole thing feel softer, which is handy if your hair is thin or not especially long.
I like this style on shoulder-length cuts because it adds the illusion of more hair without needing extensions or extra product. On long hair, it turns a plain braid into something that looks almost braided by hand in an old movie. In a good way.
Quick details
- Start with a firm braid, then loosen only the outer edges
- Pull a little at a time, not all at once
- Use dry hair with a hint of texture
- Leave the front pieces soft if you want a less formal finish
A little looseness goes a long way. Too much, and the braid loses its shape.
11. The Sleek Tight French Braid That Stays Put
If you want hold, go tight. A sleek French braid pulls the hair close to the scalp and leaves almost no slack between sections. It’s clean, sharp, and hard to beat when you need something that won’t loosen halfway through the day.
This version works on nearly every length because it relies on control more than size. Shorter hair just needs smaller grabs. Medium hair gives the neatest balance. Long hair looks glossy and deliberate if you smooth the top first with a light cream or gel.
The style has a certain honesty to it. Nothing fluffy. Nothing hidden behind soft texture. If the braid is uneven, you’ll see it, so take your time at the crown and keep your parting tidy. A rat-tail comb makes this easier than fingers alone.
It’s not the most forgiving braid, but it’s one of the most reliable.
12. French Braid Into a Low Bun
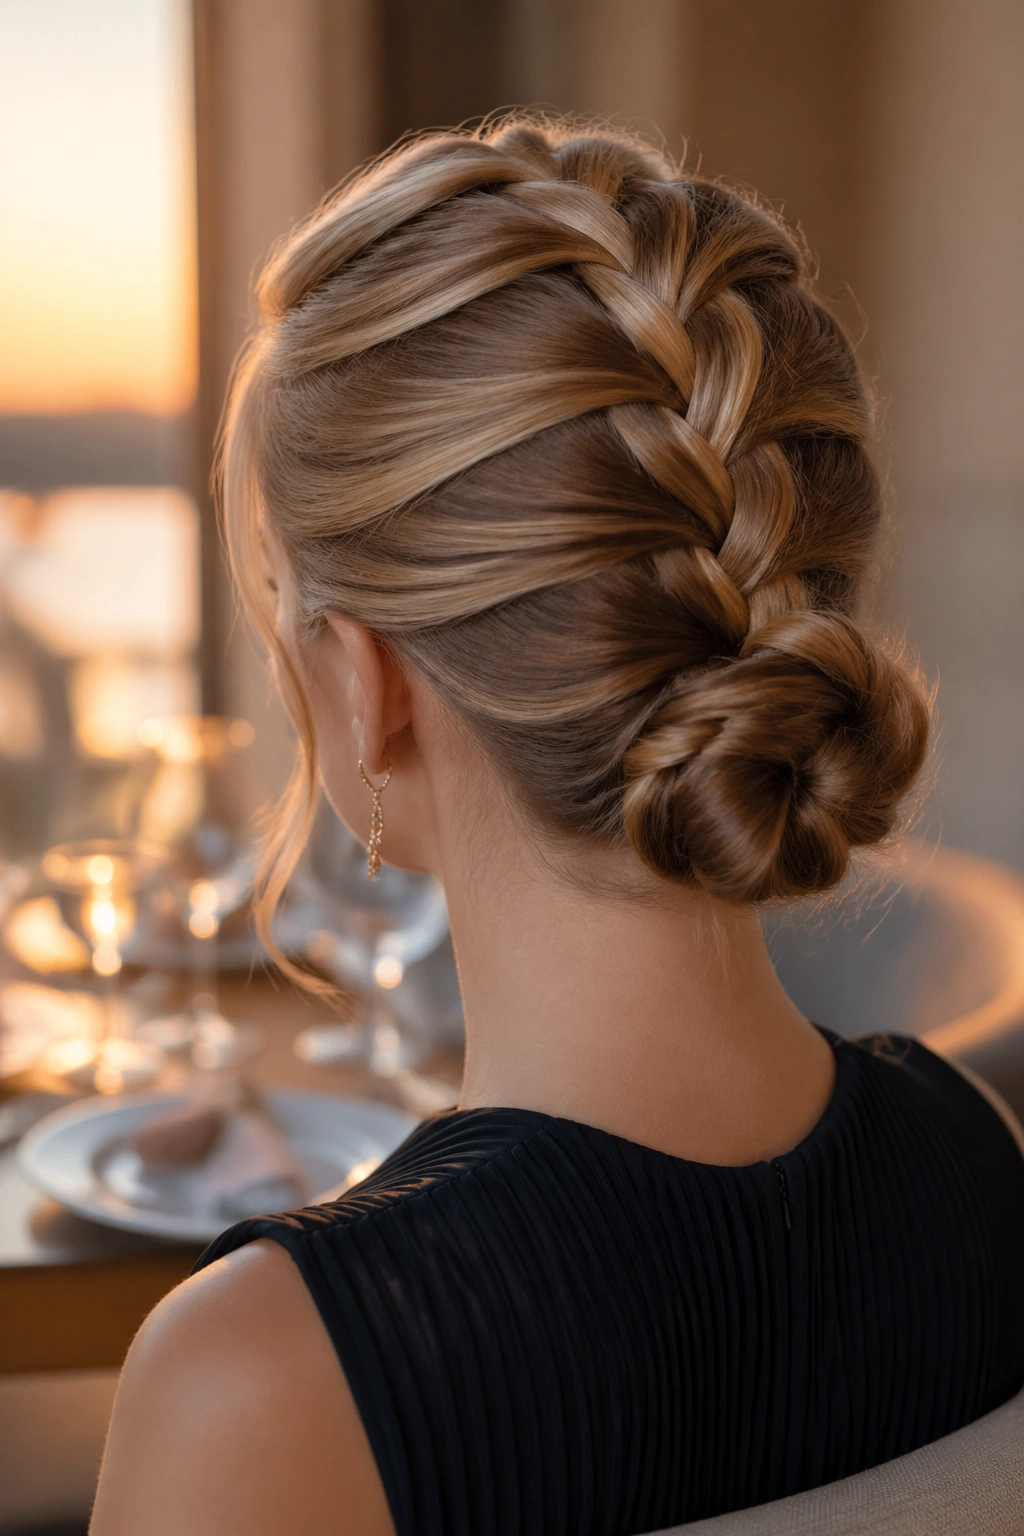
A French braid into a low bun gives you the structure of a braid and the polish of a bun in one move. Braid from the crown to the nape, then twist the tail into a bun and pin it flat or keep it slightly loose. It’s a strong choice for events, workdays, and any time you want your hair off your neck.
Medium and long hair make the easiest buns, but shoulder-length cuts can still get a smaller tucked knot. On shorter hair, the bun may be tiny, which is fine. Tiny buns have their own charm.
Why this version works
The braid controls the top section, where frizz and flyaways usually show first. The bun handles the ends. Together, they make the style feel finished without needing a lot of extra decoration.
Use at least four bobby pins if your hair is thick. Two is usually not enough.
13. The Center Mohawk French Braid

A mohawk French braid runs down the middle of the head and leaves the sides either smooth, pinned back, or tucked away. It has edge. It also keeps the face open, which makes it a good pick when you want a braid that reads stronger than “pretty.”
This style is useful on shorter cuts because it gives structure to the top without needing a long tail. On long hair, the braid can keep going all the way down the center and finish into a ponytail or bun. Either way, the shape is bold without being fussy.
The sides matter here. If you leave them too puffy, the braid loses its clean line. A light mist of styling spray and a fine brush help the side hair stay close.
Best for: gym days, concerts, or any moment when you want the hair out of the way and still want to look like you meant it.
14. French Braid With Face-Framing Pieces Left Out
A few loose pieces around the face can change a braid from strict to soft in about five seconds. This version uses a standard French braid through the back but leaves two front tendrils out before you start. Those pieces can be straight, waved, or curled under depending on the mood.
Why does this matter? Because a fully pulled-back braid can flatten some faces and make shorter cuts look severe. Leaving hair around the cheekbones softens the line, and it also gives layered hair room to breathe.
Where to leave the pieces
- One piece near each temple for a balanced frame
- Slightly thicker sections if your hair is very dense
- Thinner wisps if you want the braid to stay the main event
Pin the braid first, then style the face pieces second. If you curl them, use a small barrel so the bend looks natural instead of ringlet-heavy. A little movement at the front keeps the whole style from feeling too formal.
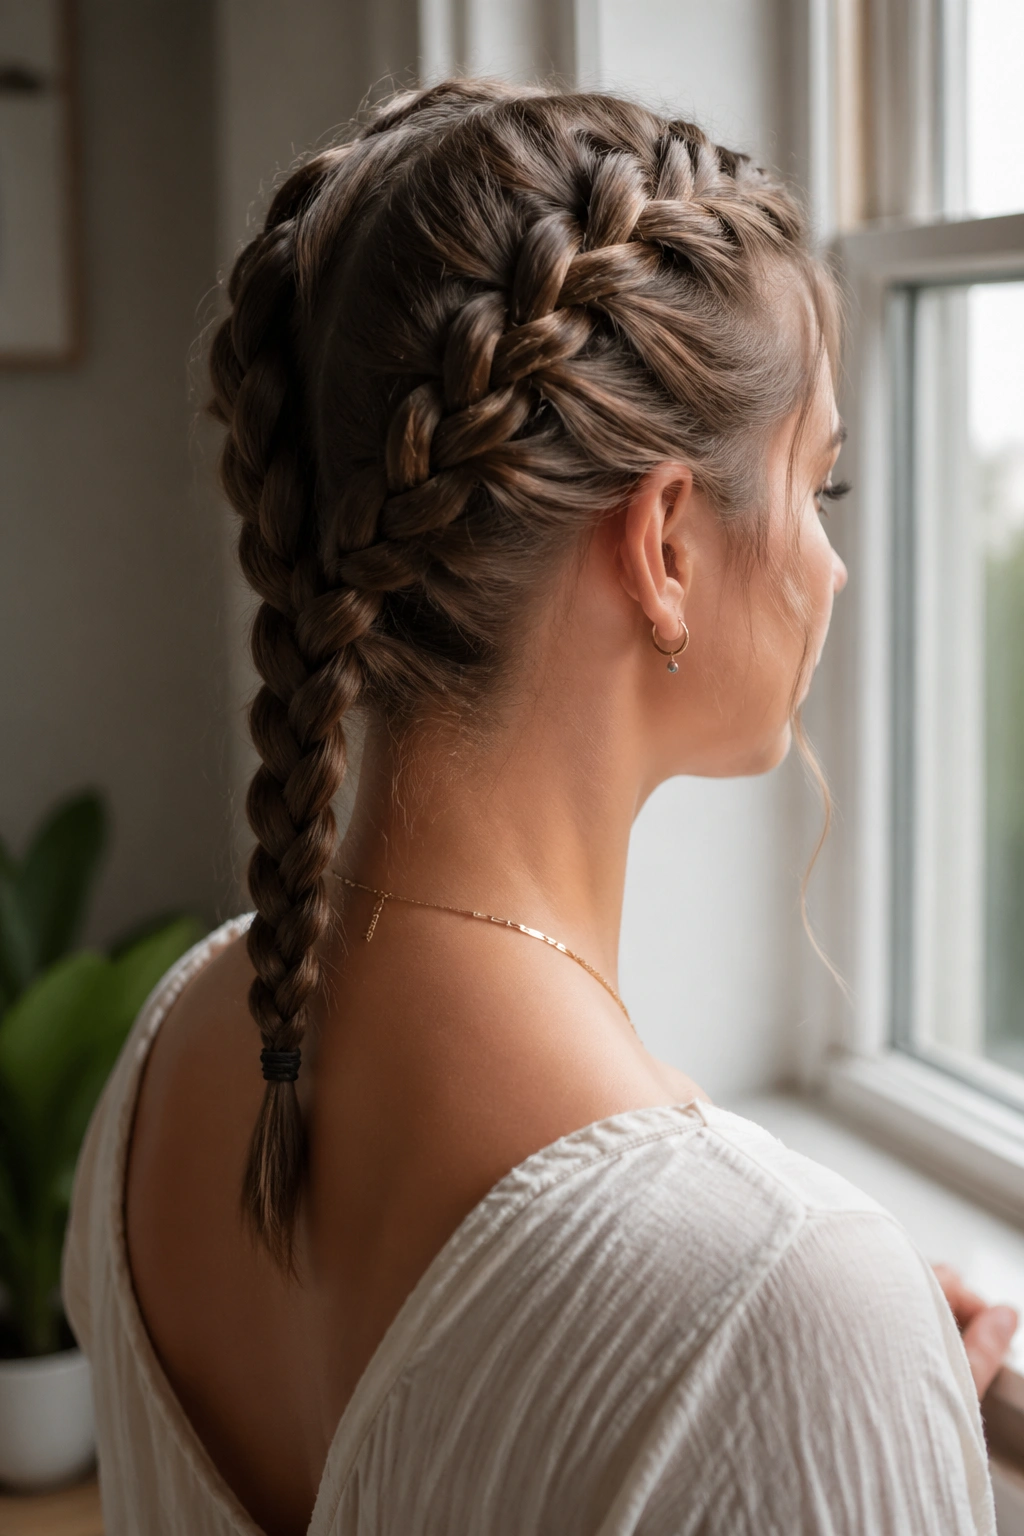
15. French Braids Pigtail Style

Two French braids worn as pigtails have a school-day feel, but the style works far beyond that. It’s neat, balanced, and surprisingly flattering on medium and long hair because the twin braids frame the head evenly. On shorter hair, the pigtails often stop near the shoulders, which still looks intentional.
This one is ideal when you want your hair secured but not all gathered into one mass at the back. It also handles layers well. Each side is only responsible for itself, so the braid stays cleaner than a single braid that has to swallow a lot of lengths at once.
A clean center part makes this style sing. If the part drifts, the whole look starts to feel off. Keep the braids mirrored in size, even if they are not perfectly identical — twins, not clones.
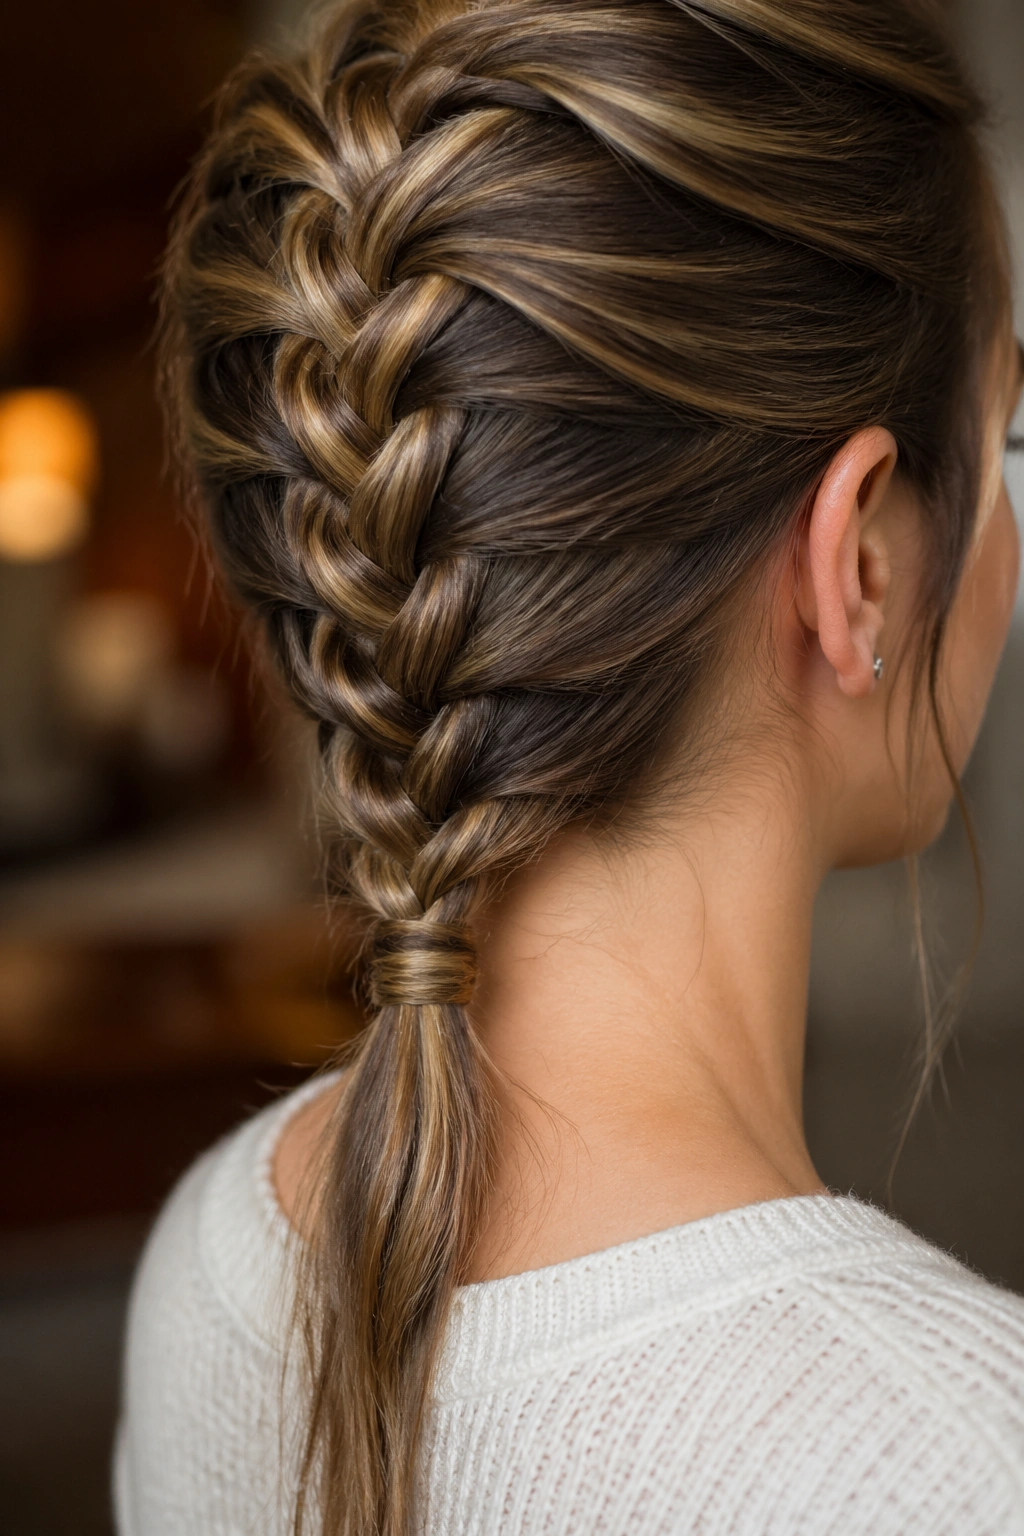
16. French Braid Into Fishtail Ends
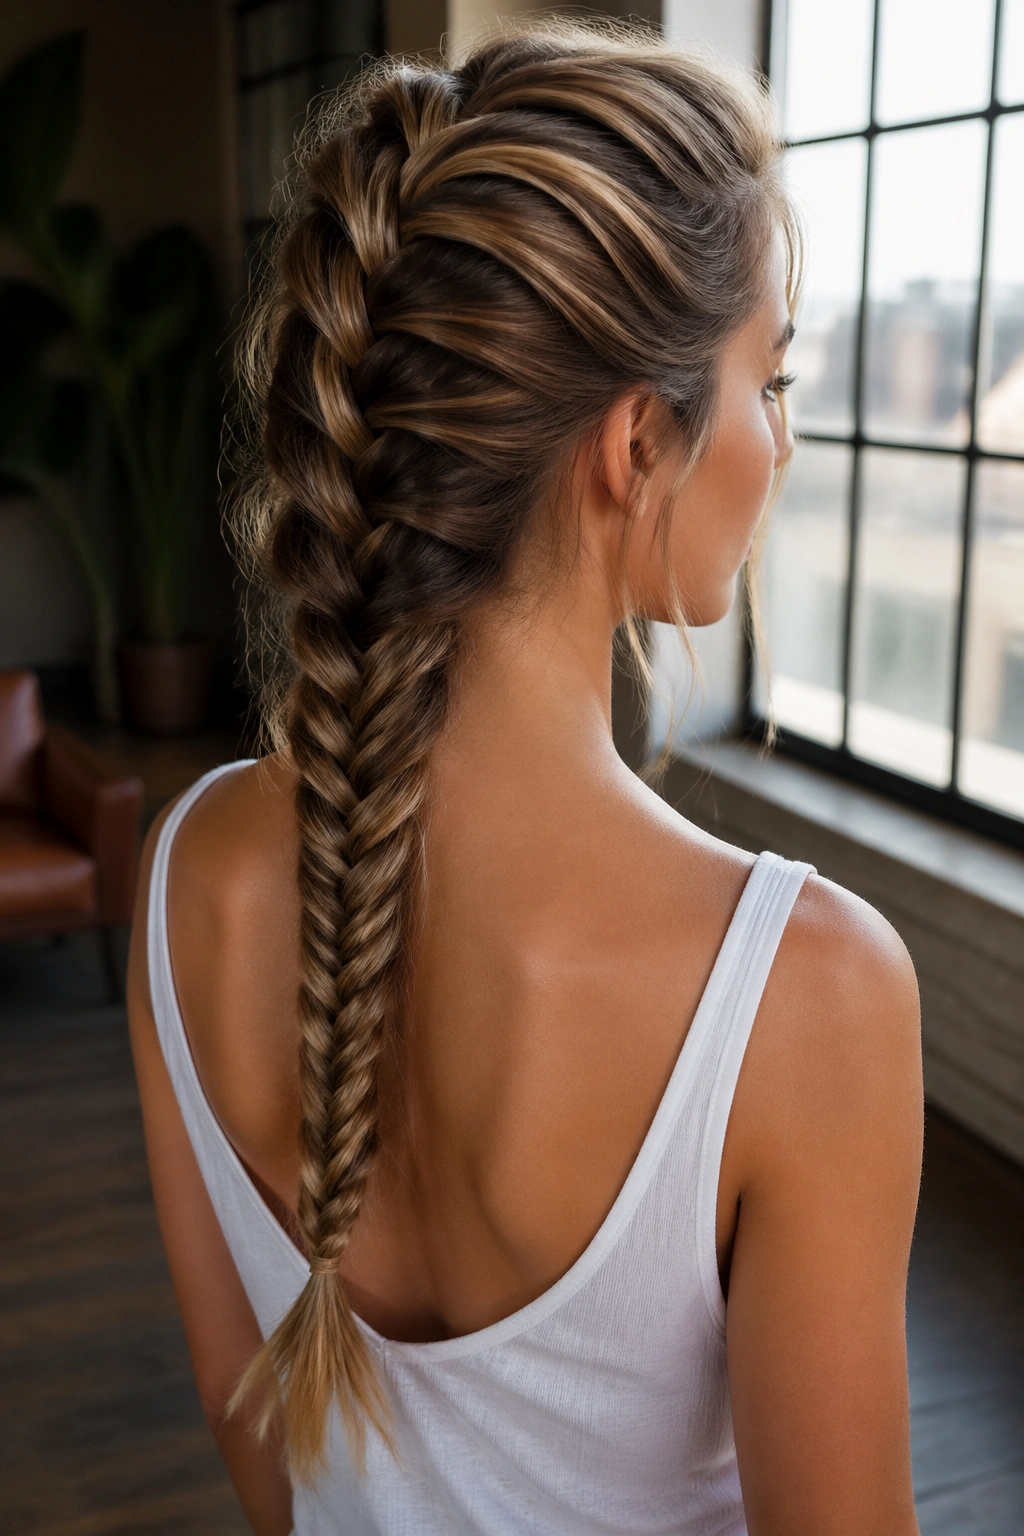
A French braid that transitions into a fishtail braid gives you two textures in one hairstyle. The top half has the smooth woven structure of a French braid, and the bottom half switches into the finer, more detailed fishtail pattern. It looks complicated, but the move is simple once you know where to change gears.
Long hair shows the contrast best because there’s room for both braid types to read clearly. Medium hair can still do it if you keep the fishtail section short. Short hair usually works better with this style when the goal is texture more than length.
The switch point
Start the fishtail once you’ve used up the hair around the nape and still have at least 5 or 6 inches left. If you switch too early, the fishtail gets lost. If you switch too late, there’s barely any room for the pattern to show.
I like this one for photos and events. It gives plain hair some edge without needing a giant updo.
17. The French Braid for a Bob
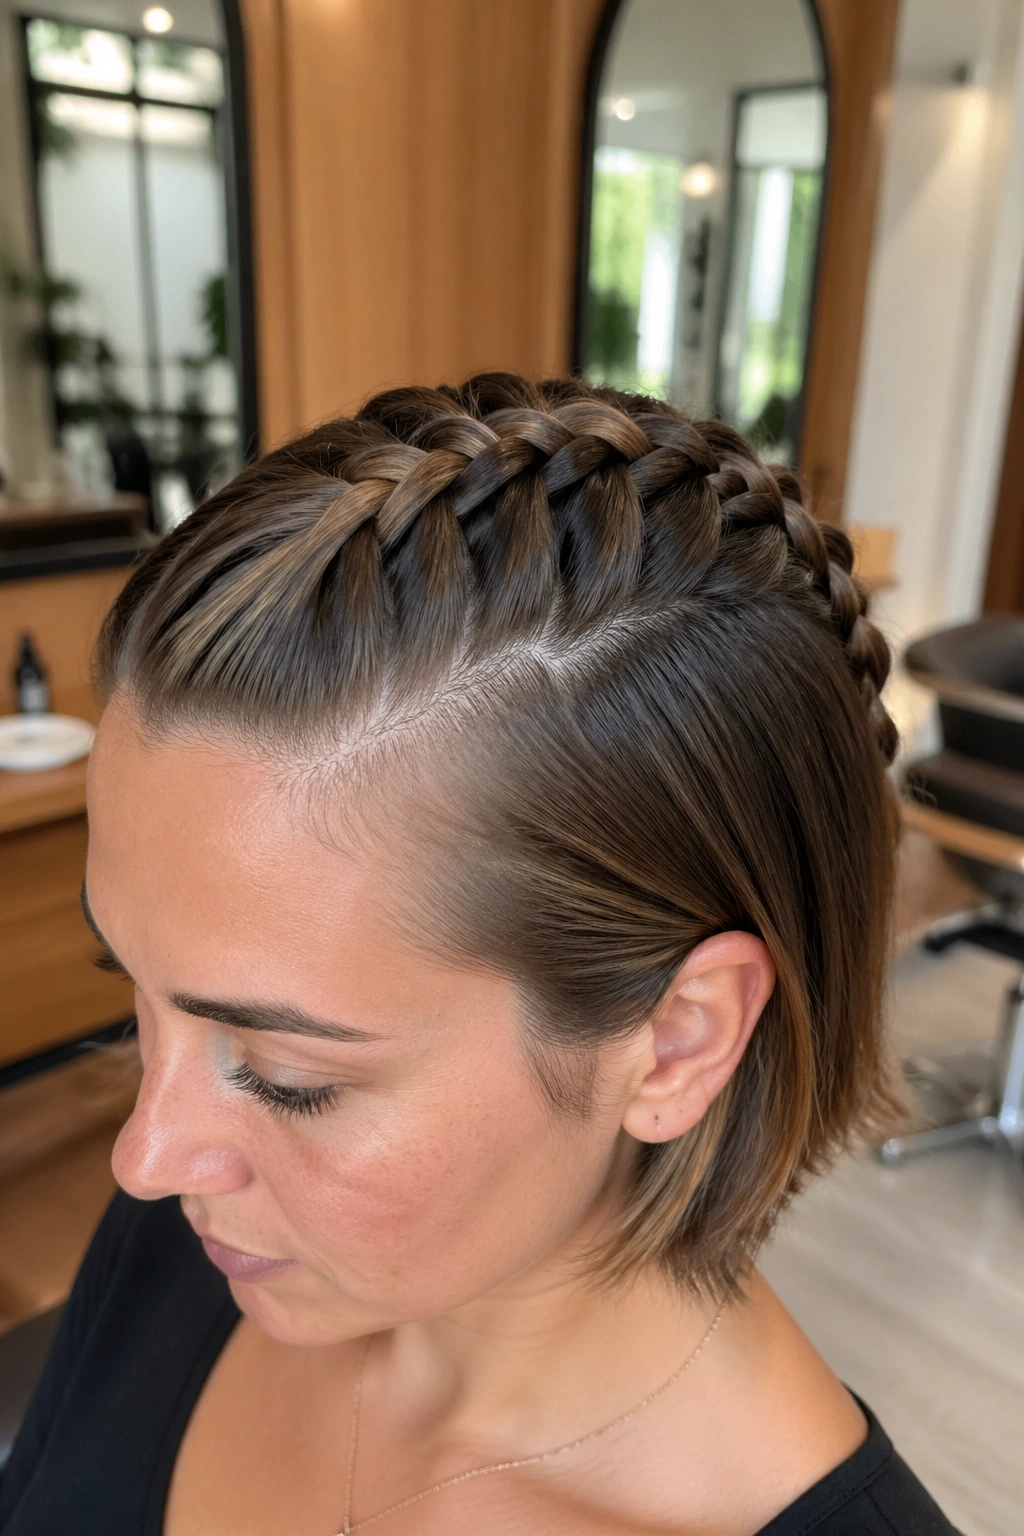
A bob can wear a French braid, and not in a half-hearted way. The key is to braid smaller and flatter than you would on longer hair. Start high at the hairline, use thin side sections, and keep the braid shallow so it hugs the head instead of trying to float off it.
This is where a tail comb earns its keep. On a bob, even a quarter-inch difference in section size changes the whole look. If the ends are too short to finish as a full braid, pin them under the base or let them tuck into a tiny tail at the nape.
A bob braid looks best when the texture is a little rough. Freshly washed hair can slide apart. Day-old hair with dry shampoo usually behaves better, and it gives the braid enough grip to hold the shape.
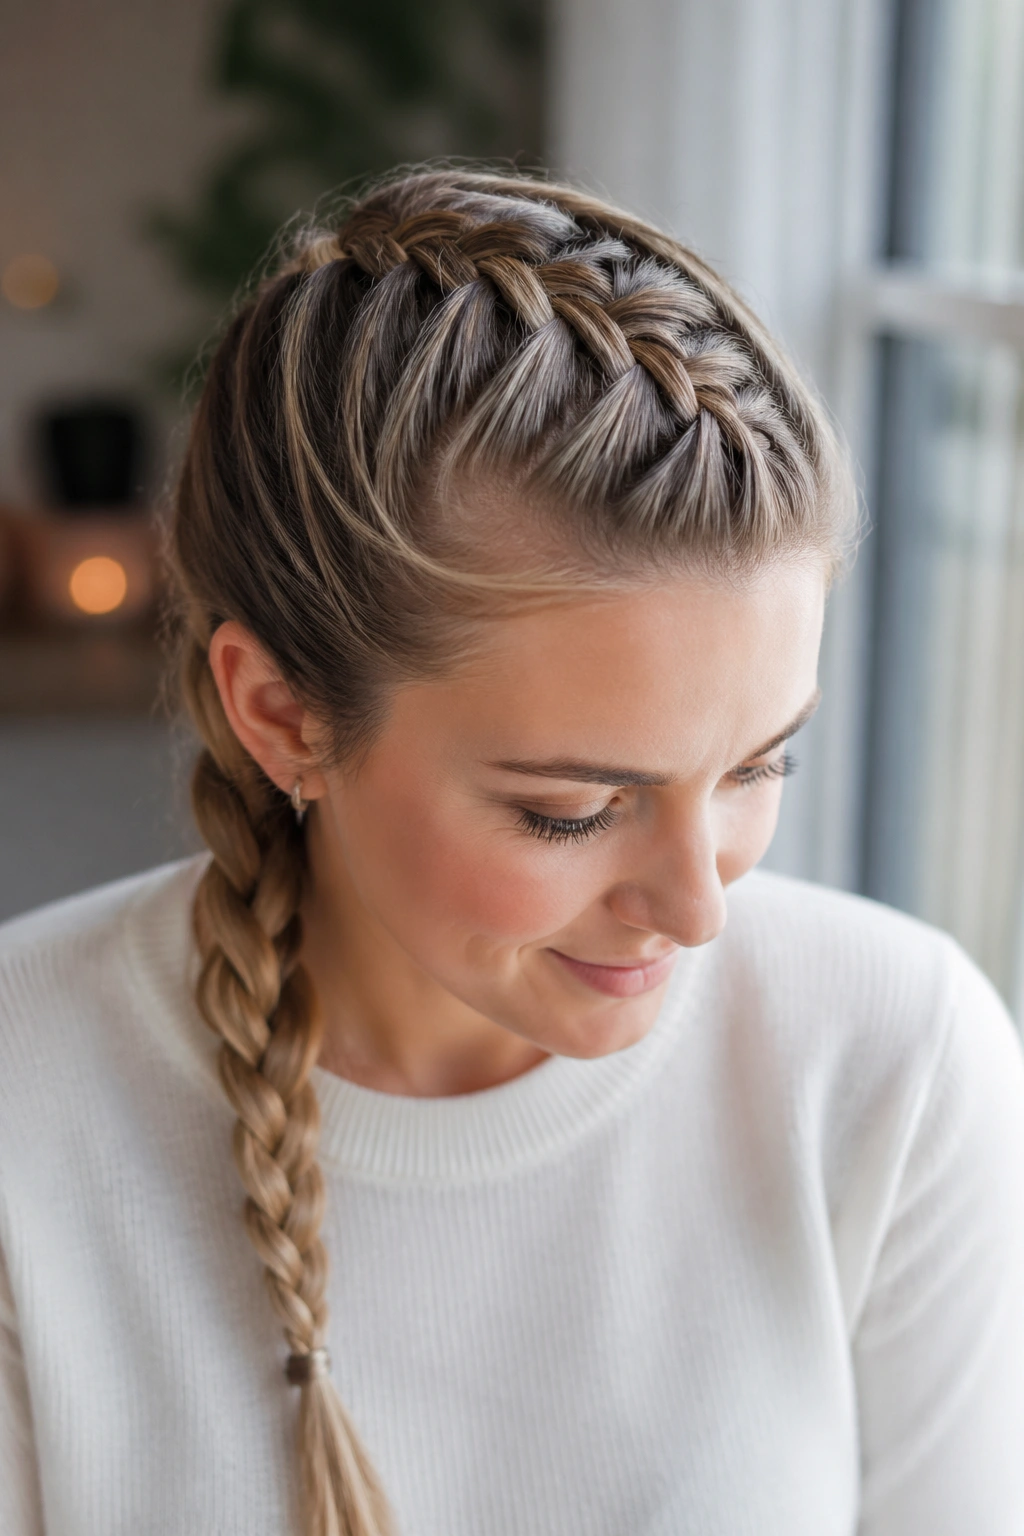
18. The French Braid for a Lob

A lob is the happy middle ground for French braids. There’s enough length to braid cleanly, but the hair still feels light enough to move. That balance makes a lob good for half-up braids, side braids, and low braided ponytails, all without the extra weight long hair brings.
Shoulder-skimming layers can slip out at the front if the sections are too big. Keep the first few grabs narrow and braid a touch tighter near the crown. Once the braid gets past the widest part of the head, you can relax your hands a little.
How to use it
If the ends land right at the collarbone, stop the braid at the nape and secure the rest as a ponytail or bun. If your lob is longer, a full braid will usually hang just below the shoulders and look balanced rather than bulky.
This cut may be the easiest length for beginners. Not because it’s simple, but because it forgives a few uneven stitches.
19. The French Braid for Curly Hair
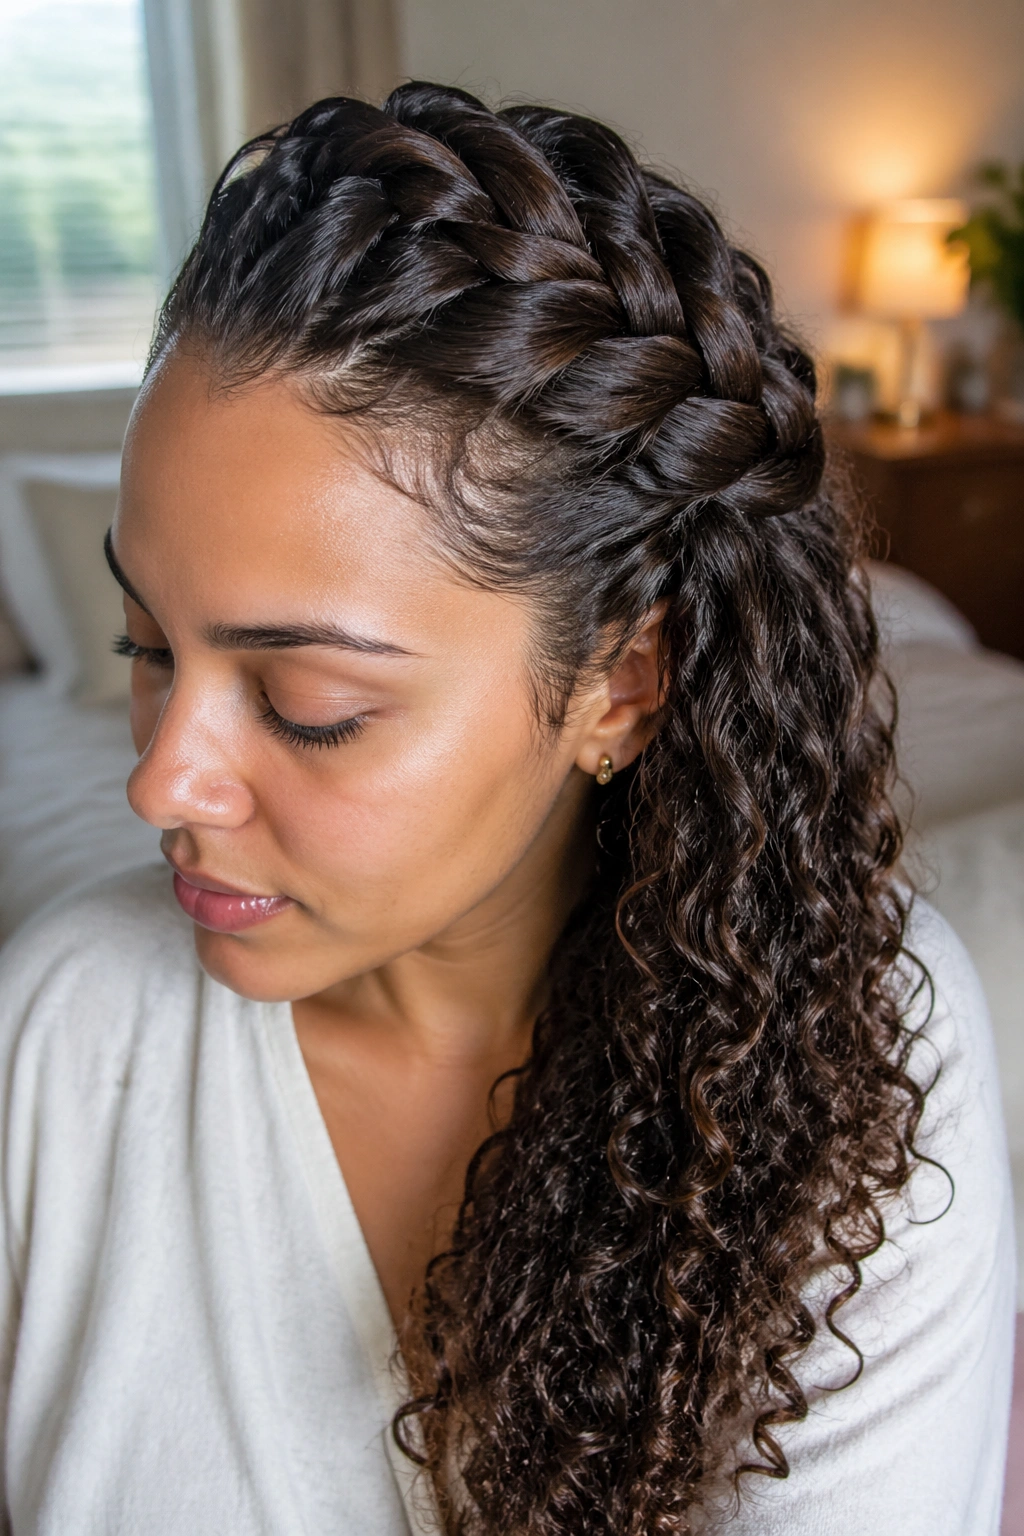
Curly hair makes French braids look richer because the braid isn’t lying down flat in the same way straight hair does. The texture gives the plait some lift, and the strands fold into each other in a way that feels full even when the braid is tight.
The only real issue is shrinkage. Curly hair can look shorter once you start braiding, so leave yourself a little more length at the tail than you think you need. Detangle gently first, then braid while the curls still have some slip from leave-in conditioner or a curl cream.
A few things that help
- Use fingers or a wide-tooth comb, not a brush
- Keep a spray bottle nearby for sectioning
- Braid while the hair is damp if it tends to frizz
- Finish with a soft elastic to avoid breaking the curl pattern
I’d rather do curly braids on hair that’s slightly stretched than on hair that’s already puffed out. It gives a cleaner line.
20. The French Braid for Fine Hair
Fine hair needs a little help, and French braids are one of the best ways to give it shape. The braid pulls the strands together so the style looks fuller than a loose ponytail would, especially if you start with dry shampoo or a light texturizing mist.
The mistake people make is trying to braid too much hair at once. Fine hair gets overwhelmed by big sections and the braid starts to look thin at the edges. Smaller grabs keep the braid neat and make the stitches more visible.
What to do instead: braid snugly, then gently loosen the outer edges after securing the end. That tiny bit of widening can make the braid look twice as thick without making it messy.
This style is a good one for shorter hair, too, because fine hair often has enough slip that a smaller braid is easier to manage than a thick, heavy one.
21. The French Braid for Thick Hair
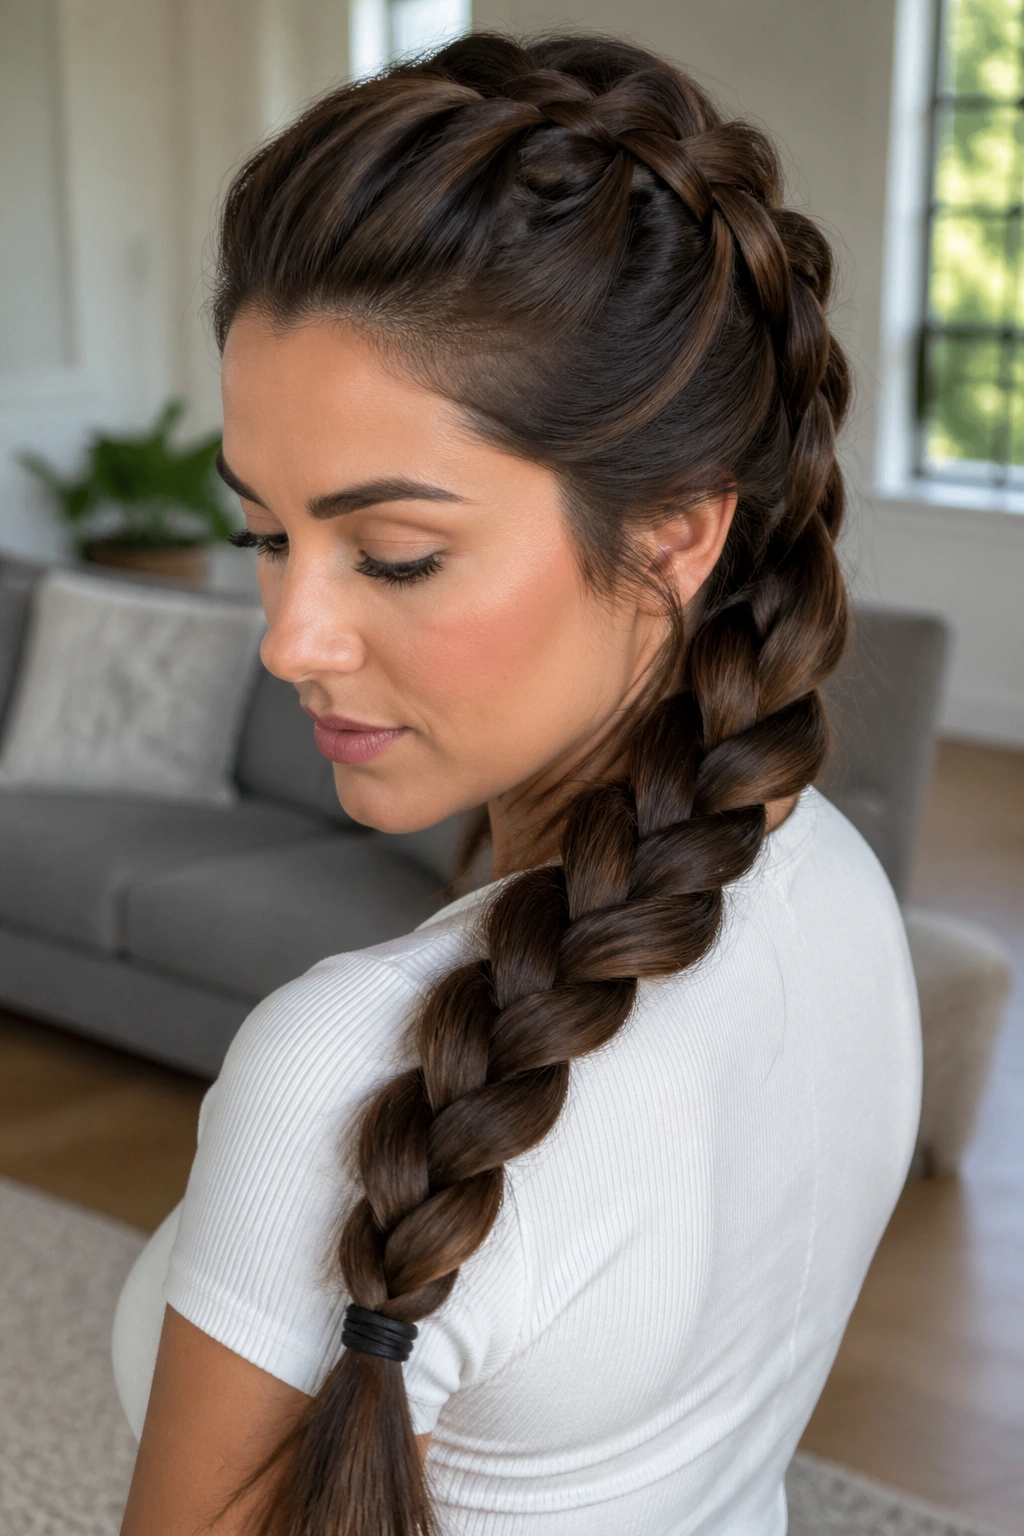
Thick hair is generous until you start braiding it. Then it turns into a lot of hair, fast. The good news is that French braids handle thickness well if you respect the volume and don’t try to wrestle it into tiny sections that fight back.
Use bigger grabs than you would on fine hair. If the sections are too small, the braid can feel overworked and the crown gets puffy from too much handling. A strong brush, a few section clips, and an elastic that can actually hold weight make life easier.
The style works on every length, but the experience changes. On shoulder-length hair, the braid sits dense and compact. On long hair, it becomes a heavy rope with real presence. Either way, don’t skip smoothing the roots first if you want a cleaner finish.
22. French Braid With a Ribbon Woven Through It
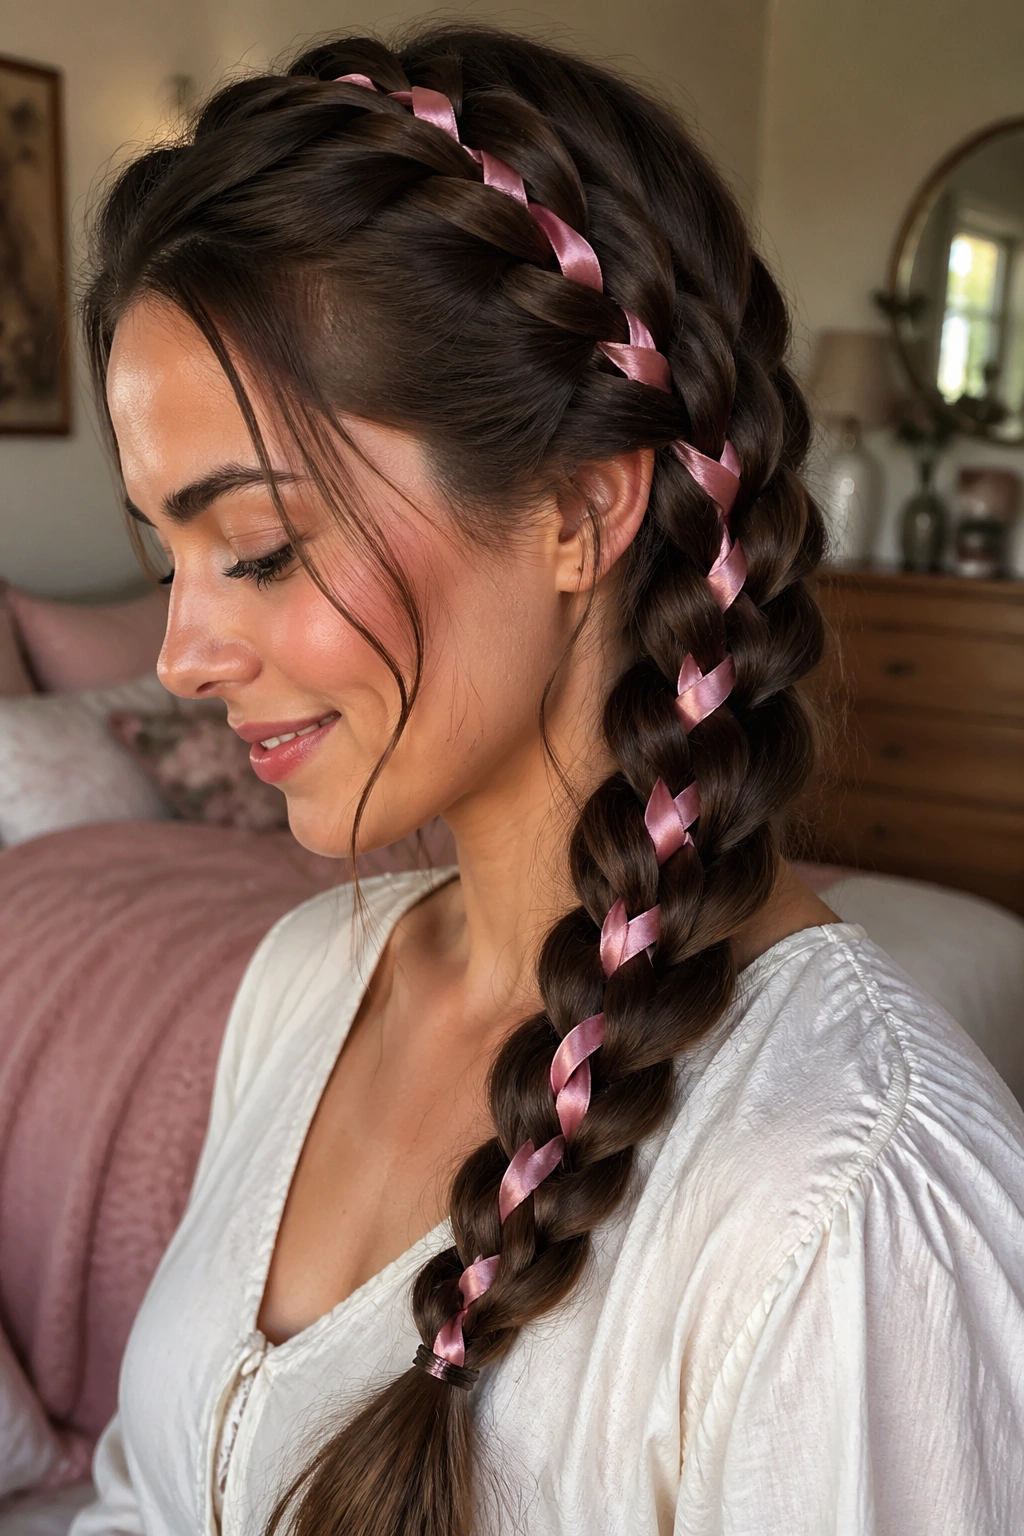
A ribbon turns a standard French braid into something a little more personal. You can thread it into the center section from the start or weave it alongside one strand as you braid. Either method gives color and texture without needing extra pins or ornaments.
This is a good choice for medium and long hair because the ribbon shows up better when there’s enough braid length to display it. Short hair can still use a narrow ribbon, but the effect is subtler. I like satin ribbon for soft looks and grosgrain for a slightly firmer line.
What makes it different
The ribbon changes the way the braid sits. It can make a braid feel dressier, more playful, or more deliberate, depending on the color and width. If you want the ribbon to stay visible, keep it pressed flat against the hair rather than twisting it too tightly.
A simple black ribbon on dark hair can be quietly elegant. Bright colors are louder. Pick your mood.
23. The Zigzag-Part French Braid
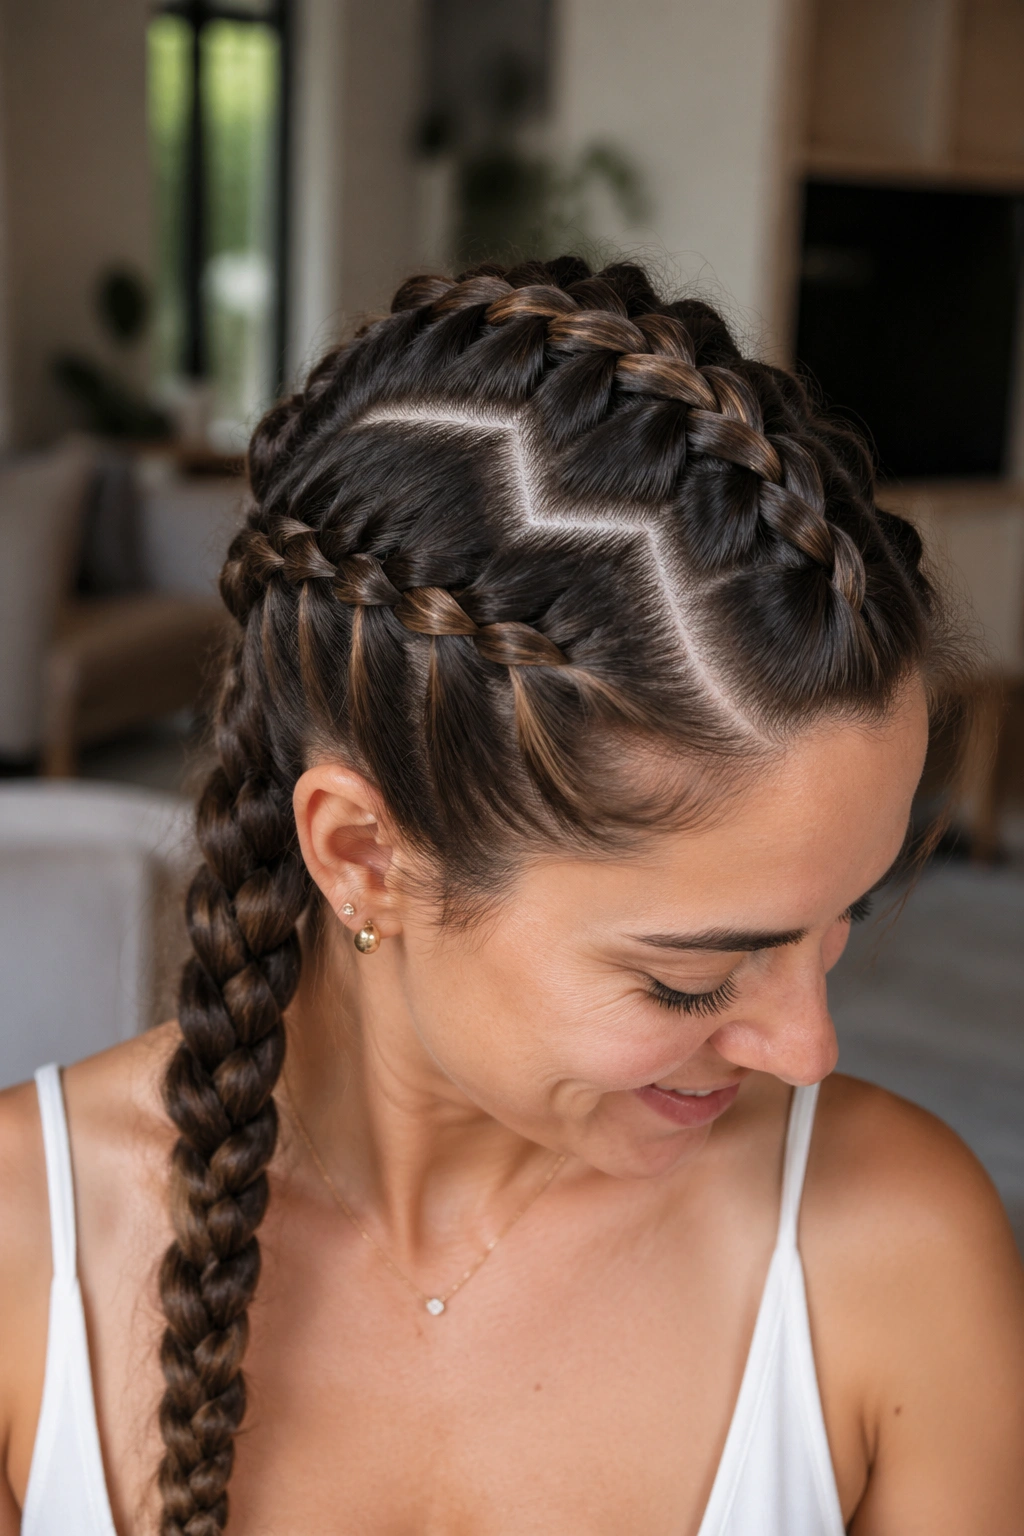
A zigzag part is the easiest way to make a braid look less ordinary before you even start braiding. Instead of drawing one clean straight line, you carve a sharp angled part across the crown, then French braid along it. The result feels a little unexpected without needing a complicated pattern.
This works especially well on shorter hair and shoulder-length cuts, because the zigzag gives the style enough personality to make up for less length. Long hair can handle it too, but the part becomes more of a detail than the main event.
Quick details
- Use the tip of a tail comb to draw the part
- Keep the angles loose enough to see from a few feet away
- Combine it with a side braid or twin braids for more contrast
- Smooth the part line with a little styling cream if the hair frizzes there
The braid itself can stay simple. The parting is the feature.
24. The Waterfall Accent French Braid

A waterfall accent braid gives you the look of a French braid without using every strand the whole way down. As you braid, you drop one section and replace it with a new piece, which creates the soft falling effect people love in this style. It’s more decorative than secure, but that’s the point.
This braid shines on medium and long hair, especially when the hair has some wave. It still works on shoulder-length cuts if you keep the braid close to the scalp and let the loose pieces blend into the rest of the hair. Short hair can wear a tiny waterfall accent near the front as a detail, not a full style.
If your hair is layered, a light spray before braiding keeps the drooped strands from puffing out. The goal is a clean cascade, not a frayed one.
25. French Braid Into a Low Chignon

A low chignon looks smoother when the top section is braided first. The French braid controls the crown, then the remaining hair twists into a knot at the nape. It’s a formal style, yes, but it also has a practical side: it keeps the ends tucked away and the neck clear.
Medium and long hair give you the easiest chignon shape. On shorter hair, the knot stays small and close to the head, which can still look elegant if you pin it neatly. The braid should stop just above the bun so the transition feels intentional.
My preference: keep the chignon slightly loose rather than pulled tight like a button. Too much tension can make the style look severe, and nobody needs that unless they want it.
A few hidden pins and a light mist of hairspray are enough. You do not need to lacquer it down.
26. Two Mini French Braids That Merge Into One Braid
This style starts with two narrow French braids near the temples and brings them together at the back into one braid or a ponytail. It’s a clever way to manage layers because the front sections are controlled separately before they join into one shape.
It works across lengths, but it’s especially nice on medium hair where the front pieces often fall out first. Short hair can use this as a partial style. Long hair gets a fuller, more dramatic merge that looks deliberate rather than sporty.
Why I like it
The style keeps the front tidy without covering up the hair’s natural shape. You get detail up front and a single clean finish in back. If the braid merge looks bulky, start the two front braids thinner. If it looks too small, widen the sections by a half-inch at the next try.
The point is balance. Not perfection.
27. The French Braid With a Wrapped Elastic Finish
A wrapped elastic finish hides the ugly part of most braids: the band at the end. After you secure the braid with a small elastic, take a tiny strand of hair from the tail, wrap it around the band, and pin it underneath. It’s a small move, but it makes the whole style look cleaner.
This works on nearly every length that can hold a braid at all. On short hair, the wrapped end may be tiny, which is fine. On long hair, the wrapped strand makes the finish feel polished instead of slapped together.
The important part is not to wrap too much hair. A thin strand hides the elastic better and keeps the end from getting bulky. If the pin shows, slide it into the underside of the braid where it disappears into the weave.
Tiny detail. Big difference.
28. The Milkmaid-Style French Braid Wrap
Can a French braid sit like a milkmaid crown without turning fussy? Yes, if you keep the braids low and pin them with a light touch. This style uses two French braids that wrap over the head and meet near the crown or tuck behind the ears, depending on how much hair you have.
Medium and long hair make the easiest wrap because the braids have enough length to travel across the head. Shorter hair can still do a mini version with flatter braids and extra pins. The goal is to keep the shape soft, not to force a perfect circle.
How to keep it from feeling stiff
Leave a little room at the front hairline. If the braid starts too tight, the style can pull the face upward in a way that feels dated. A few loose baby hairs soften the line, and they help if your hair is layered.
This is a good one for people who like braids but do not want a sporty finish.
29. A Diagonal French Braid Across the Back
A diagonal braid gives the back of the head more movement than a straight-down braid. Start near one temple or upper side of the head, then braid across toward the opposite shoulder so the line cuts the back at an angle. It feels less rigid and works well when your hair is layered or one side is shorter than the other.
I like this on shoulder-length and long hair because the diagonal line keeps the braid from looking bottom-heavy. On shorter cuts, it can still work if you accept a small finish and use a pin at the end.
What to notice while braiding
- Keep the angle consistent, or the line will wobble
- Use the ear as your guide for where to travel
- Stop the braid lower if the hair is thick
- Finish with a tucked tail if the ends are short
It’s one of those styles that looks casual from far away and thoughtfully put together up close.
30. The Messy Second-Day French Braid

Second-day hair is braid-friendly hair. The oils at the roots give the strands grip, and the slight roughness makes the braid hold without fighting every section. A messy French braid leans into that texture instead of trying to erase it.
This one is forgiving on every length because it does not depend on pristine parting or perfect symmetry. Short hair can do a loose crown braid or a side braid. Medium hair gets a soft, lived-in finish. Long hair gets that relaxed, slightly undone thickness that looks much harder to fake than it is.
The honest truth: this braid usually looks better when it is not too neat. Leave a few pieces out, tug the loops a little, and let the ends sit a bit imperfectly. That slight mess is the point.
A little dry shampoo at the roots can help if the hair is flat. Use it before you braid, not after.
31. The French Braid With a Tucked Tail Finish
This is the braid I reach for when I want the whole thing to feel finished without extra work. Braid down the back or side, stop when you run out of useful length, then fold the tail under itself and pin it flat so the end disappears into the base. It looks neat on short hair, controlled on medium hair, and almost sculptural on long hair.
The tucked finish is useful because it solves the one part of braiding people often dislike: the awkward end. No dangling tail. No elastic showing. Just a clean shape that sits against the head.
When to use it
- When your hair is too short for a long braid
- When you want a low-profile style for work
- When the ends are uneven and need hiding
- When you want a braid that stays tidy through the day
A tucked tail is not flashy. That’s why it works. It lets the braid do the talking and keeps the rest of the style out of the way, which is probably the point most mornings anyway.