Type 3 curls occupy that magical, sometimes frustrating middle ground in the hair world. They are springy, they are defined, and they have enough personality to change their mind halfway through a humid afternoon. While Type 4 hair offers incredible structural integrity for intricate sculptures and Type 2 waves provide effortless flow, Type 3 natural hair — spanning from the loose loops of 3A to the tight corkscrews of 3C — brings a unique blend of volume and stretch. This makes the halo braid more than just a style; it becomes a practical necessity for anyone looking to protect their ends while keeping that regal, face-framing aesthetic.
The beauty of a halo lies in its name. It sits like a crown, wrapping the head in a continuous circle of woven texture. For those with Type 3 hair, the natural “frizz” or “fuzz” of the curl isn’t a flaw — it’s a feature. It provides the grip needed to keep the braid from sliding, a common struggle for those with straighter textures. Historically, this style has served as a go-to for weddings, formal events, or simply surviving a week where you don’t have the energy for a full wash-and-go. It’s the ultimate “day four” hairstyle that somehow makes you look like you spent hours in a stylist’s chair.
Preparation is everything when working with ringlets and spirals. You aren’t just braiding; you are managing tension and moisture. Type 3 hair tends to shrink significantly, and if you braid it while soaking wet, the tension can become unbearable as the hair dries and retracts. Most seasoned braiders prefer working on stretched, damp, or lightly blown-out hair to ensure the halo stays symmetrical and the scalp remains comfortable. Whether you’re aiming for a sleek, polished look or a bohemian, ethereal vibe, the following variations offer a blueprint for every mood and occasion.
1. The Traditional Dutch Halo for 3A Ringlets
The Dutch braid is the foundation of the halo world. Unlike a French braid where sections cross over the middle, the Dutch technique involves crossing sections under. This results in a braid that sits on top of the hair, creating a 3D effect that shows off the definition of 3A curls. Because 3A hair has a wider circumference, this braid often looks lush and thick without needing any added extensions.
Why This Structure Works
By keeping the braid external, you allow the natural sheen of the 3A curl pattern to catch the light. The ringlets provide a natural “padding” inside the braid, making it look much larger than it actually is. It is a fantastic choice for those who want a clear, defined line that separates the crown from the rest of the head.
- Hold Level: Medium-high
- Best Tool: A wide-tooth comb for sectioning
- Ideal Prep: Use a light leave-in conditioner to prevent mid-braid tangles
- Maintenance: Smooth the edges with a silk scarf for 10 minutes after finishing
Pro tip: Don’t pull the sections too tight at the nape of the neck. Type 3 hair is prone to breakage in this sensitive area, so keep the tension firm but not restrictive.
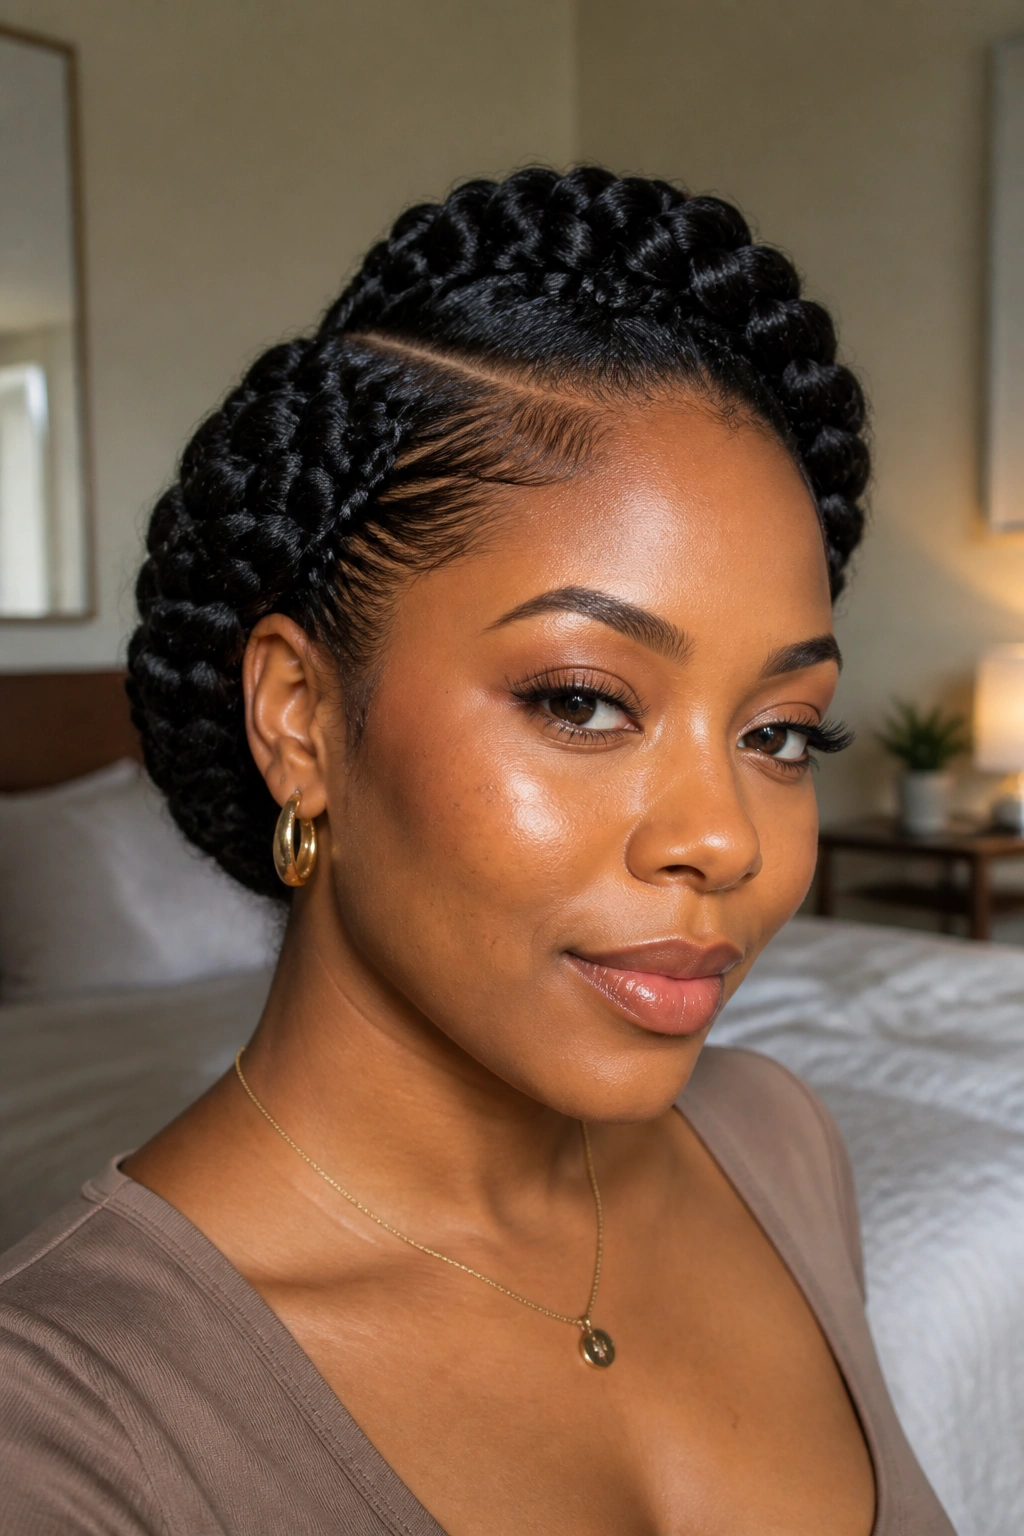
2. The Sleek Feed-In Halo for 3C Textures
When your curls are tighter, like the pencil-width spirals of 3C hair, you have incredible density to work with. A feed-in halo involves adding small amounts of braiding hair as you go, but for many Type 3 naturals, you can achieve this look using your own hair by simply “feeding in” more of your natural volume. This creates a graduated effect where the braid starts thin at the temple and grows into a thick, majestic crown at the back.
Type 3C hair has a lot of natural “shrinkage power.” To get that sleek, almost glass-like finish on the sides, you’ll want to use a botanical-based gel that provides hold without the crunch. This version of the halo is less about “boho” and more about precision. It is the kind of style that looks just as good in a boardroom as it does at a gala.
The key here is the transition. As you move around the curve of the head, your fingers must stay close to the scalp. If you lift your hands, you create gaps. Keeping your knuckles grazing the skin ensures the braid stays anchored.
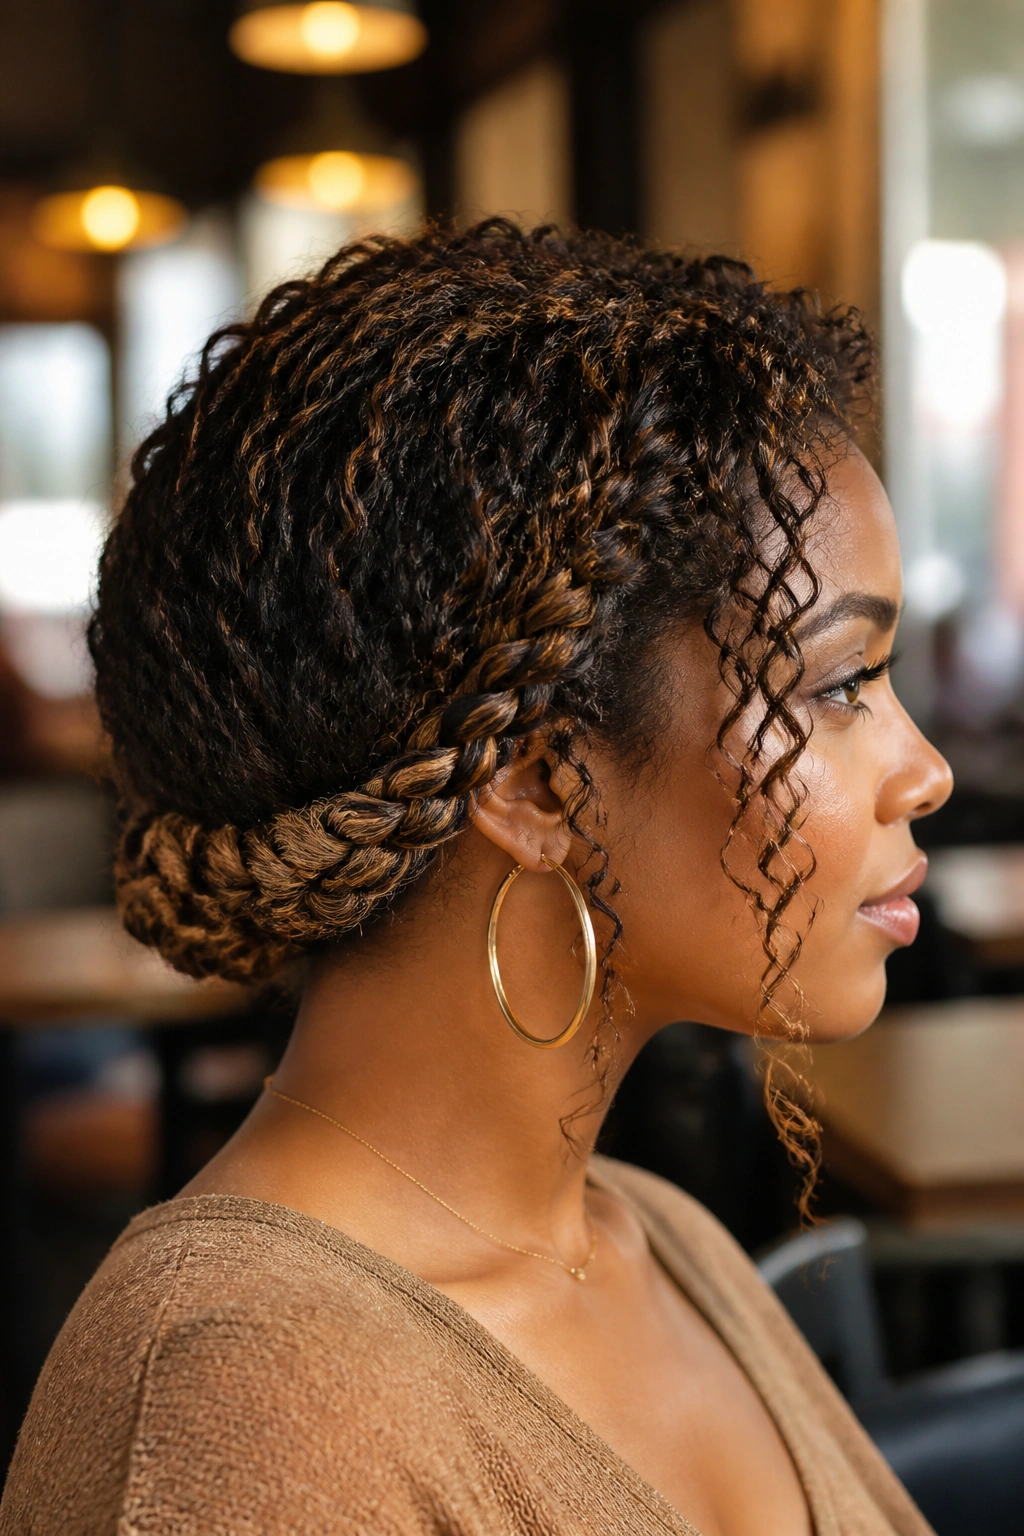
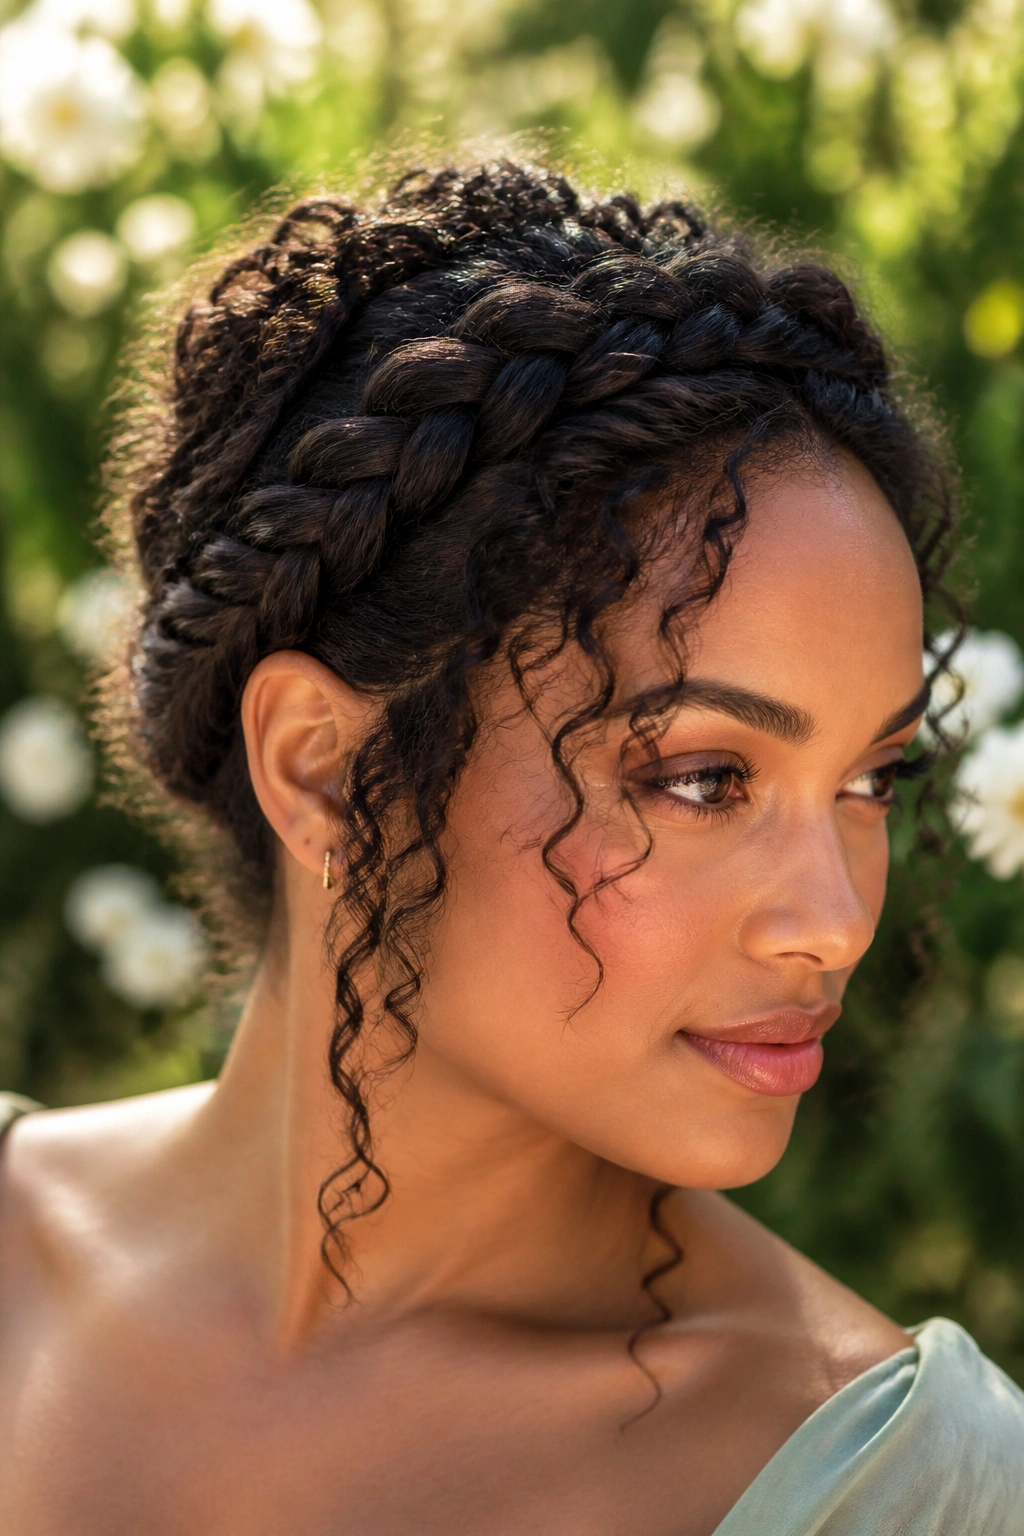
3. The Romantic Fishtail Halo with Face-Framing Curls
Is there anything more ethereal than a fishtail? While a standard three-strand braid is the default, the two-strand fishtail technique offers an intricate, woven appearance that looks much more difficult than it actually is. For Type 3 hair, the “messy” fishtail is a winner because the individual curls want to pop out of the weave, adding to the romantic aesthetic.
How to Style the Tendrils
- Begin the fishtail braid at one ear, wrapping it across the forehead.
- Intentionally leave out two or three “choice” curls at the temples and behind the ears.
- Apply a small amount of curl-defining cream to these loose strands to keep them from frizzing.
- Secure the end of the braid under the starting point with a U-shaped hairpin.
This style thrives on imperfection. If a few strands of your 3B curls escape the braid, let them. It adds a “lived-in” quality that makes the style feel personal and unforced. It’s a favorite for outdoor events where the wind might pick up, as the style actually looks better as it softens throughout the day.
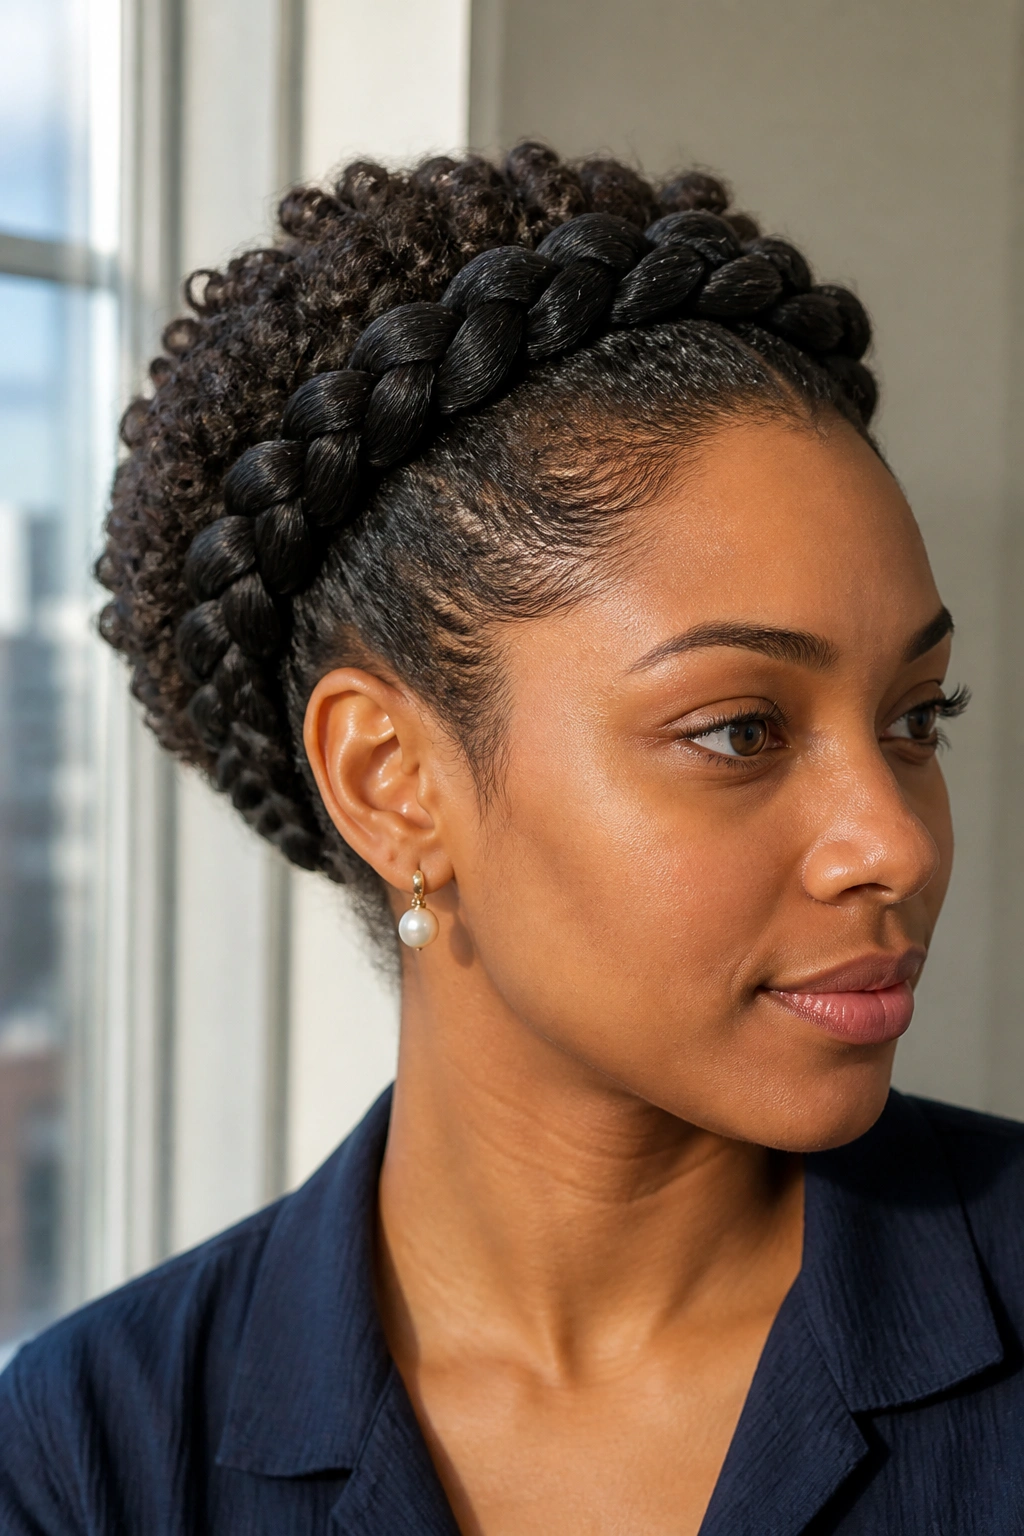
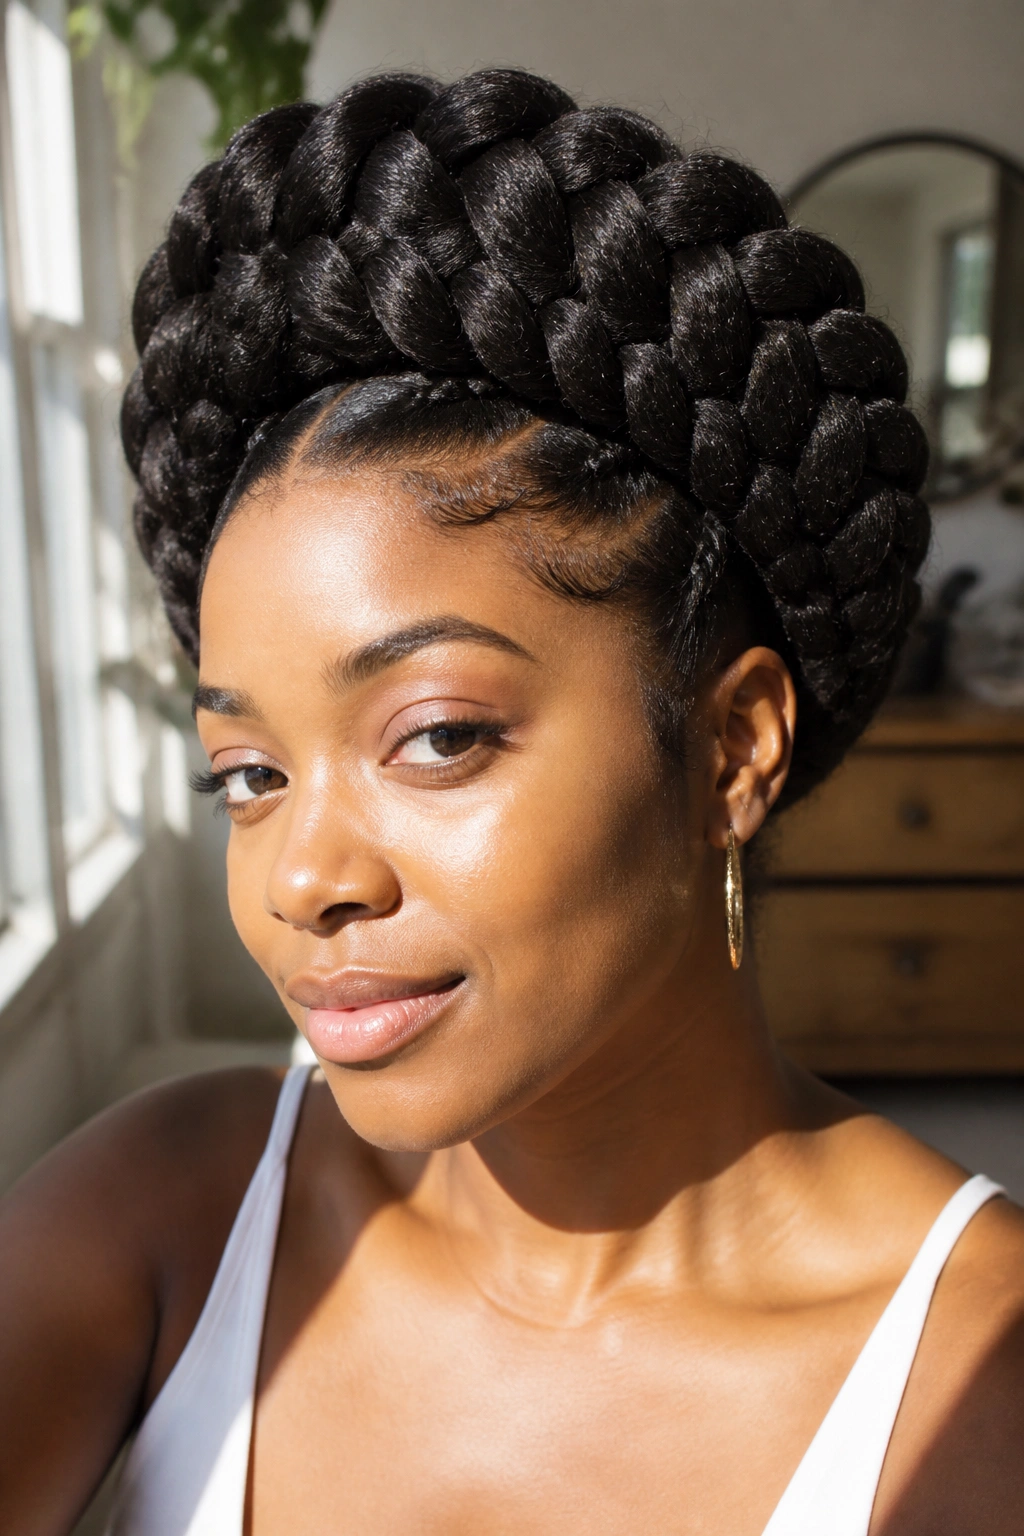
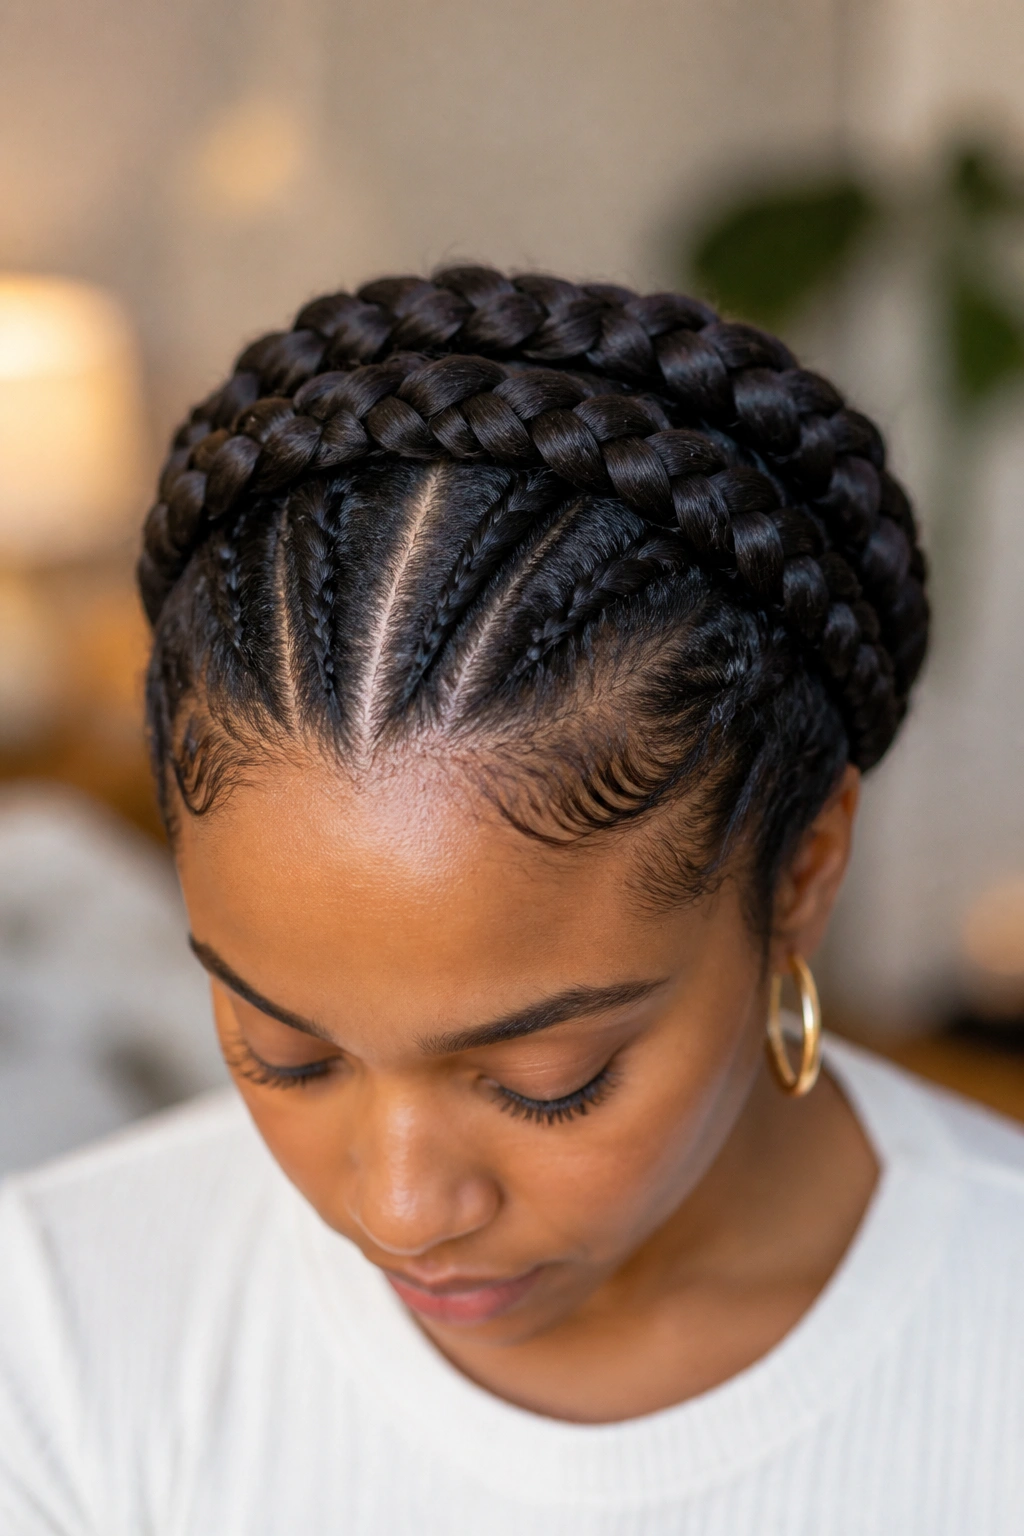
4. The Chunky Goddess Halo for Maximum Volume
Sometimes, bigger really is better. The Goddess halo uses large sections of hair to create one or two massive braids that dominate the head. If you have high-density Type 3 hair, this is your time to shine. This isn’t a style for those looking to hide their hair; it’s a celebration of mass and texture.
You’ll want to start with hair that has been stretched — either through a previous braid-out or a gentle blow-dry with a tension method. This gives you the length needed to wrap the braid all the way around without it feeling like it’s straining. Because the sections are so large, the “halo” effect is dramatic and bold.
A quick note on scalp health: Large braids can feel heavy. If you find the Goddess halo is pulling on your edges, try creating a “base” by flat-twisting the first inch of hair before transitioning into the large braid. This redistributes the weight and protects your hairline.
5. The Double-Row Halo Braid
Why have one crown when you can have two? The double-row halo involves parting the hair into two concentric circles. The inner circle is braided first, followed by the outer circle. This creates a tiered, architectural look that is incredibly sturdy and can last for several days longer than a single braid.
Who is this best for?
- Active Lifestyles: If you hit the gym or the pool often, the double-row offers more “anchor points,” meaning it won’t slip during a workout.
- Thinner Hair: If your Type 3 curls are on the finer side, two smaller braids often look fuller than one struggling large braid.
- Visual Interest: The “valley” between the two braids is a perfect place to tuck in small floral pins or decorative jewels.
Unlike the single halo, the double version requires a bit more focus on parting. Use a rattail comb to ensure your circular part is even. If the part is wonky, the whole style will feel off-balance. It’s worth the extra five minutes of mirror-work to get that line straight.
6. The Faux Halo Using Flat Twists
Let’s be honest: not everyone can Dutch braid behind their own head without their arms catching fire. If your braiding skills aren’t quite there yet, the flat-twist halo is your best friend. A flat twist involves two strands of hair instead of three, and it’s significantly easier to master when working blindly on the back of your head.
Flat twists on Type 3 hair actually look remarkably similar to braids because the natural curl pattern mimics the “links” of a woven braid. They also tend to lie flatter against the scalp, which can be more flattering for certain head shapes. The process is the same: start at one ear, work your way around, and pin the tail end.
The secret to a great flat-twist halo is “over-twisting.” You want to give the strands an extra turn as you move to ensure they don’t unravel. Since Type 3 hair is so springy, it wants to jump out of a twist more than a braid. A bit of setting mousse or a light-hold pomade on your fingertips will keep everything in its place.
7. The Reverse Halo Starting at the Nape
Most people start their halo at the front or the side, but starting at the nape of the neck creates a completely different silhouette. By beginning at the bottom and braiding upward toward the forehead, you create a “lifted” look that emphasizes the cheekbones and jawline.
This approach is particularly useful for those with a lot of “kitchen” hair — those short, curly baby hairs at the base of the neck that usually escape a traditional updo. By starting there, you catch them early and incorporate them into the structure of the braid.
The Science of the “Upward” Braid
- Tension Management: Braiding against gravity requires a different finger grip. Keep your elbows high.
- Volume Distribution: This method puts the thickest part of the braid (the beginning) at the back, which can feel more balanced for some.
- Visual Flow: The “point” of the braid ends up near the crown or forehead, allowing you to create a decorative “knot” or tuck.
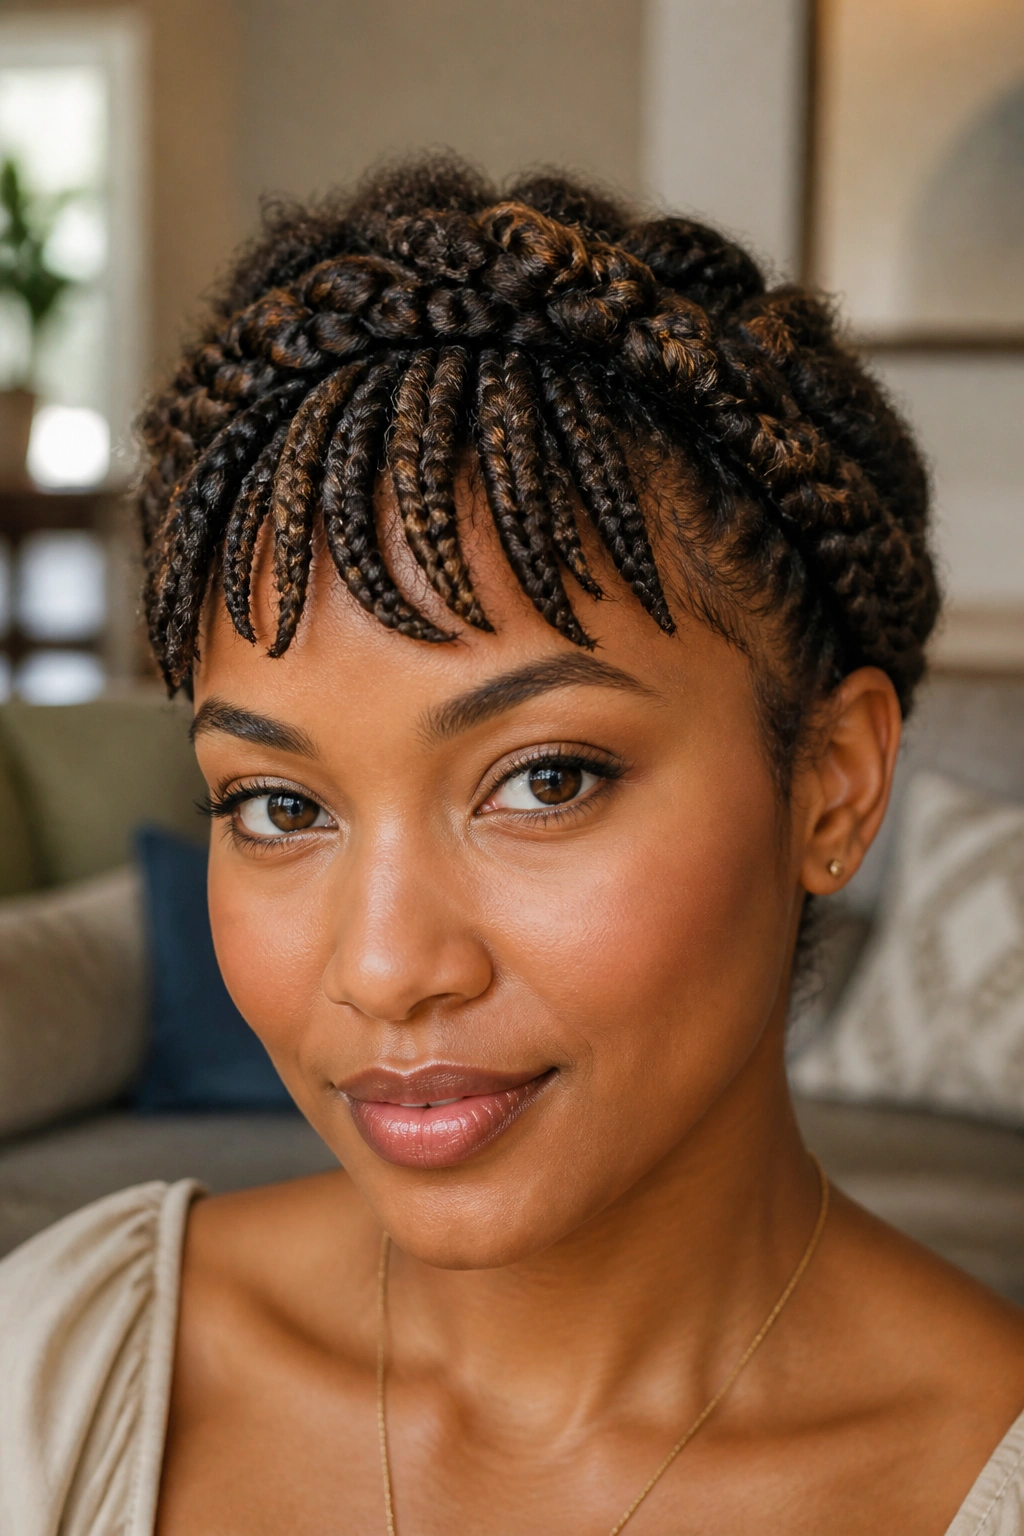
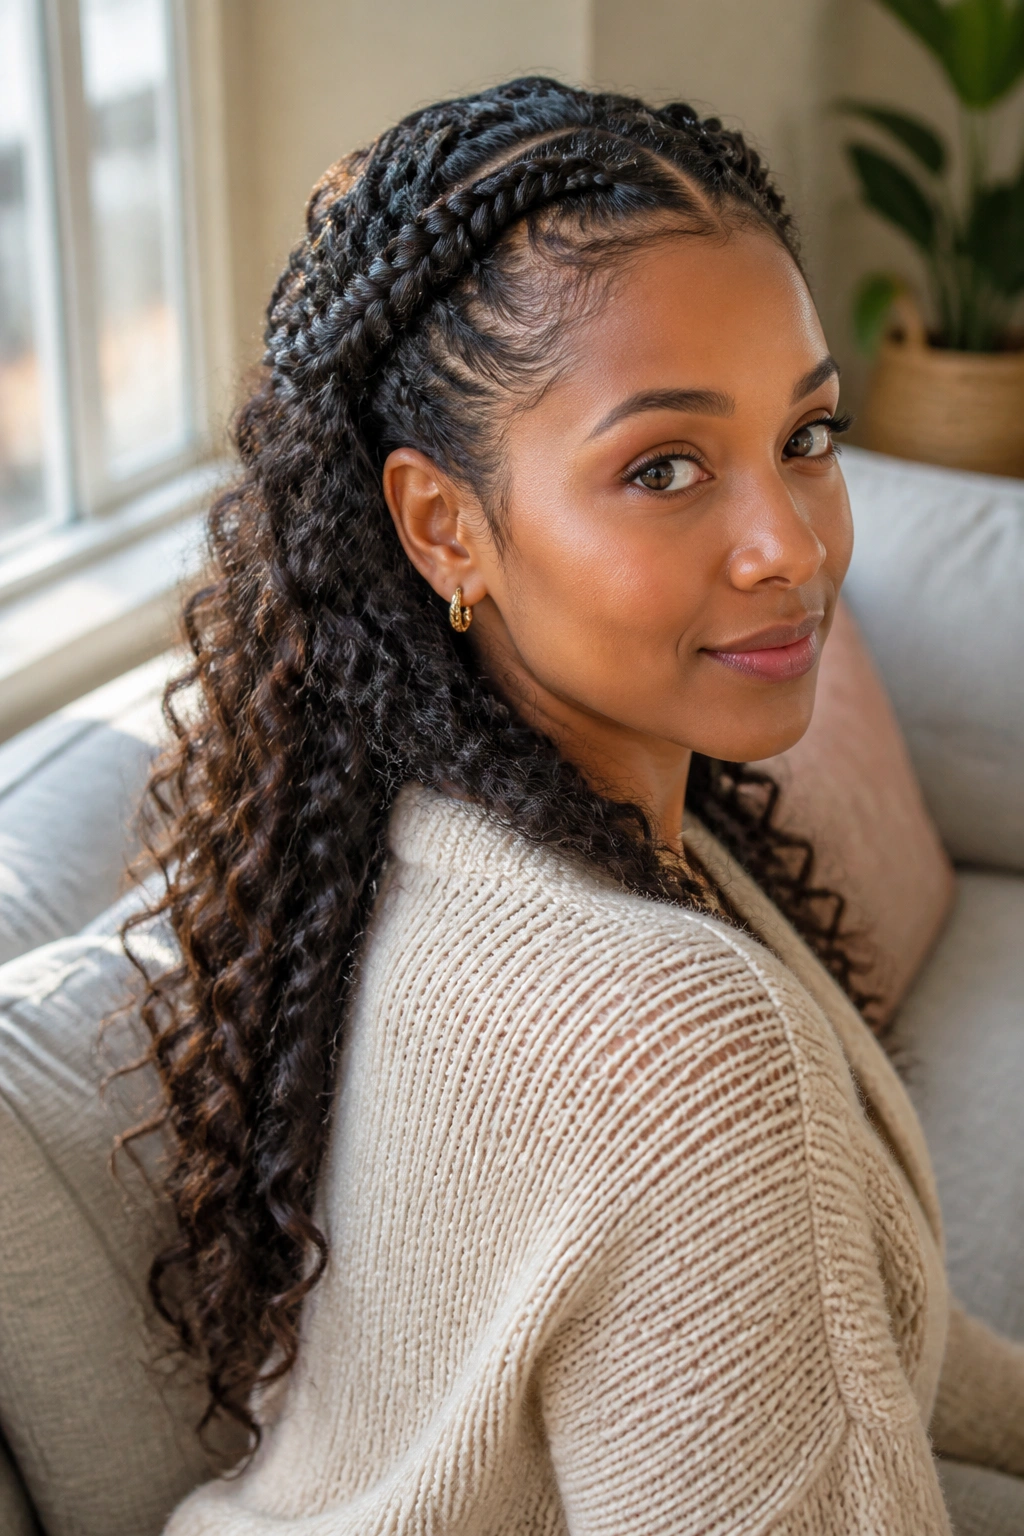
8. The Half-Up Halo with Cascading Curls
If you can’t bear to hide all your curls, the half-up halo offers the best of both worlds. You create a halo braid using only the top half of your hair, leaving the bottom half to flow freely down your back. This is the “Goldilocks” of Type 3 hairstyles — a little bit of structure, a little bit of wildness.
The key to making this look intentional rather than unfinished is the parting. You want a clean, horizontal part that runs from ear to ear. The braid should feel like it is “containing” the top section, while the bottom section is fluffed for maximum volume. This is a staple for 3B textures, where the curls have enough “bounce” to balance out the braided crown.
Expert advice: When you reach the end of the braid, don’t just pin it. Use a small, clear elastic and then hide the tail under the loose curls at the back. This makes the braid look like a seamless circle that has no beginning and no end.
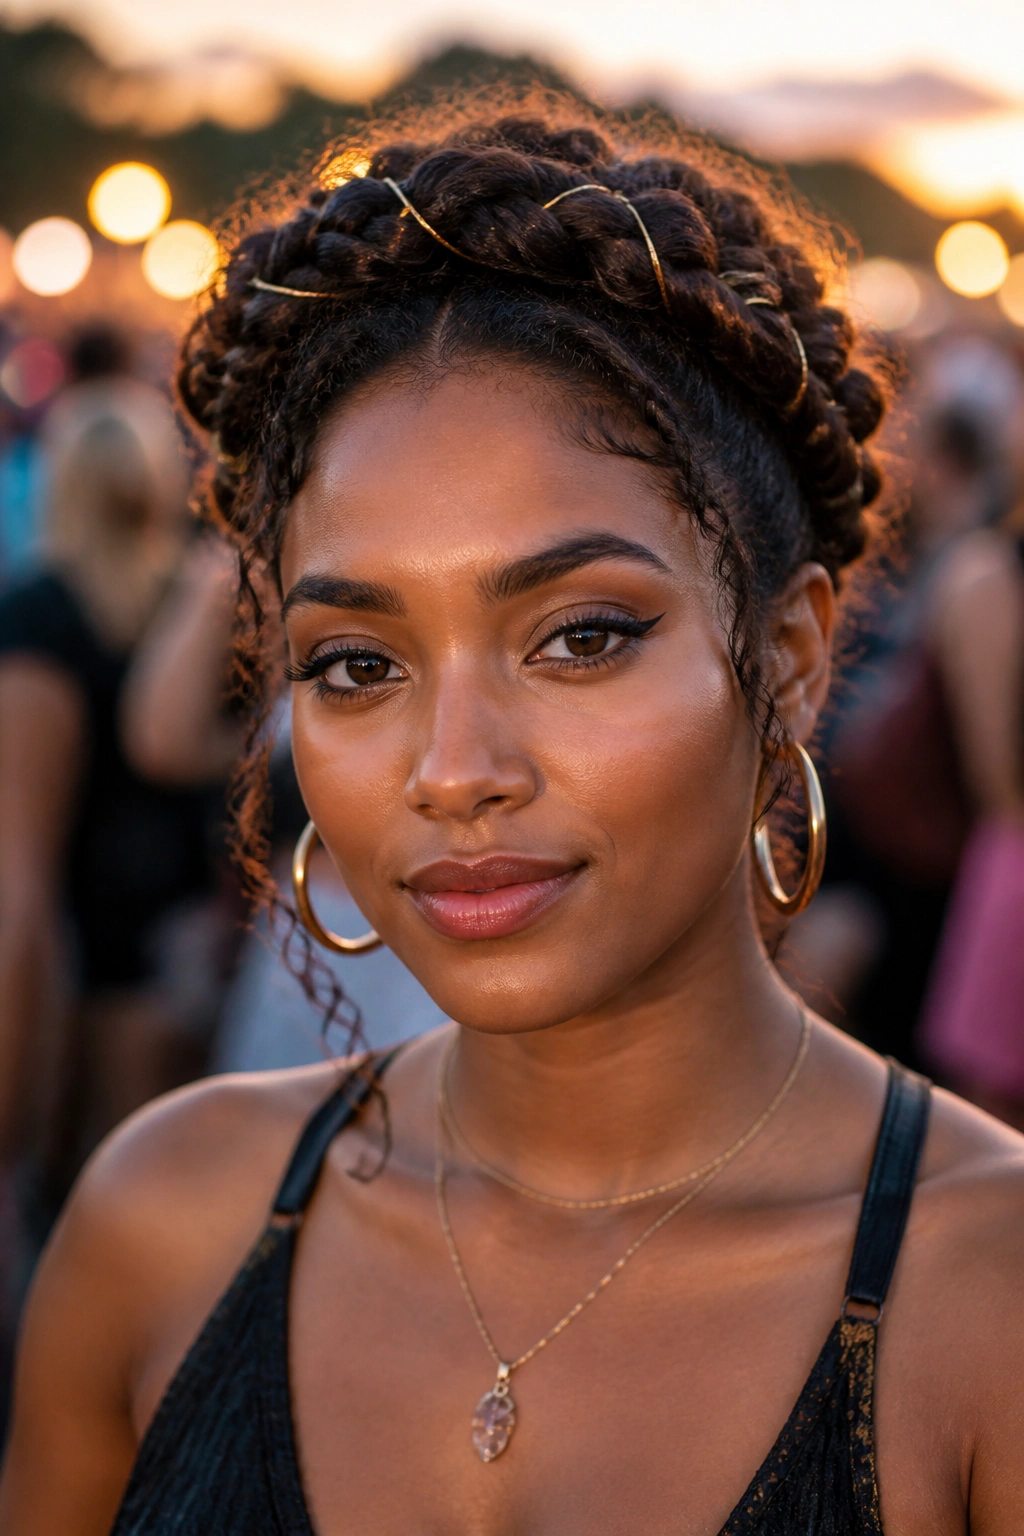
9. The Infinity Halo with Gold Wire Accents
Accessorizing a halo is where you can truly show off your personality. Gold wire or “hair string” is a popular choice because it can be threaded through the braid after it’s finished. On dark Type 3 hair, the contrast of metallic gold against the textured weave is stunning.
How to thread the wire
- Finish your braid and secure it.
- Take a piece of flexible hair wire (available at most beauty supply stores).
- Starting at the beginning of the braid, weave the wire over and under the “bumps” of the braid.
- Don’t pull it tight; let it sit loosely so it doesn’t compress your hair.
This look is very popular for festivals or holiday parties. The wire also serves a secondary purpose: it acts as a structural support, helping the braid hold its shape if your hair is particularly soft or prone to slipping.
10. The Deep-Side Part Halo
Most halos are symmetrical, but a side-parted halo adds a modern, edgy twist. By starting with a deep side part, one side of the halo becomes much thicker and lower, while the other side sits higher. It creates an asymmetrical “swoop” that is incredibly flattering for round or square face shapes.
This style requires a bit of planning. You’ll want to start braiding from the side with the most hair, following the hairline closely. When you get to the “thin” side, you may need to grab slightly larger sections to ensure the braid doesn’t disappear.
It’s a sophisticated look that breaks the traditional “Renaissance” vibe of the crown braid. If you’re wearing a one-shoulder dress or a bold pair of earrings, the side-parted halo is the perfect companion.
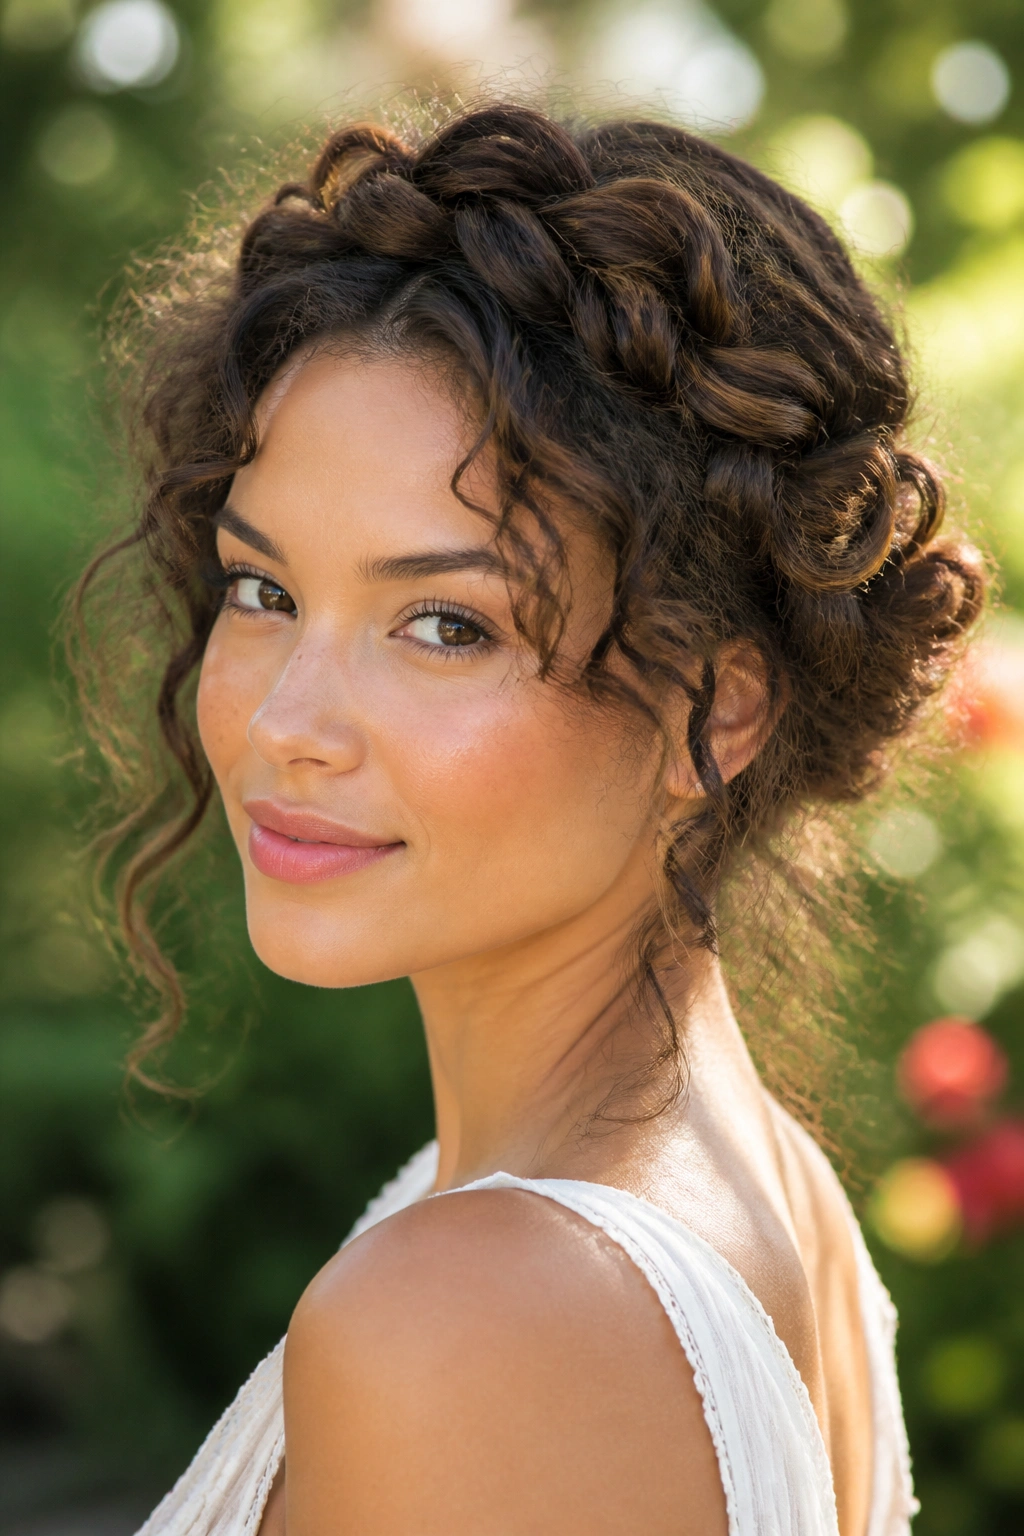
11. The “Messy” Boho Halo for 3A Waves
For those with 3A hair that leans more toward a “wavy-curly” hybrid, a tight, polished halo can sometimes look a bit stiff. The boho version is all about texture and softness. You braid the hair loosely, and once finished, you “pancake” the braid.
What is Pancaking?
Pancaking is the process of gently pulling at the edges of each braid loop to widen it. This makes the braid look flatter and much fuller. On 3A hair, this creates a soft, cloudy effect that looks incredibly romantic.
- Step 1: Complete the braid.
- Step 2: Secure it with pins.
- Step 3: Use your thumb and forefinger to lightly tug at the outer loops.
- Step 4: Mist with a light-hold hairspray to prevent it from unraveling.
This is a great “second-day” style. If your curls have lost some of their definition, the boho halo hides the frizz while using it to add volume to the braid itself.
12. The Micro-Halo for Fine Type 3 Hair

Not every halo needs to be a giant statement piece. If you have fine hair or prefer a more subtle look, the micro-halo is a beautiful alternative. This involves creating a very thin, delicate braid that sits like a piece of jewelry around the head.
Because the braid is small, you don’t need a lot of hair to achieve it. You can often leave the majority of your hair loose and just use a small section from behind each ear to create two braids that meet in the middle. It’s understated, elegant, and perfect for the office.
One thing to watch for with micro-braids on Type 3 hair is “tangle-back.” Because the sections are so small, the loose curls can easily get caught in the weave. Use a tiny bit of hair oil on your fingers to keep the sections separate and clean.
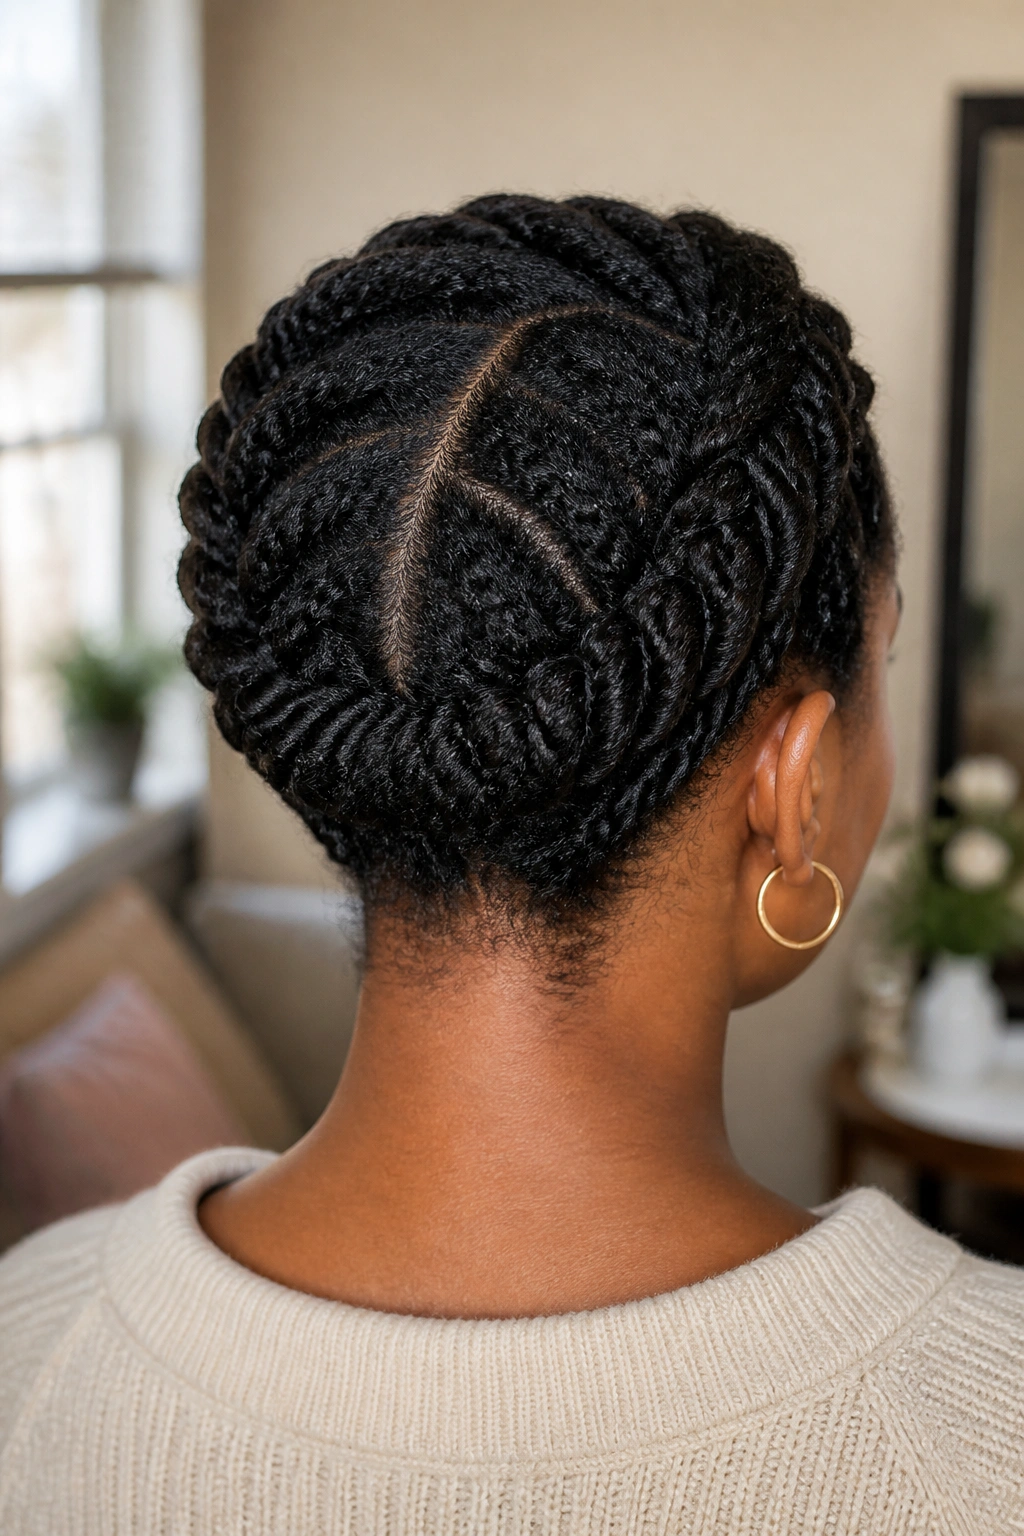
13. The Rope Twist Halo (Senegalese Style)
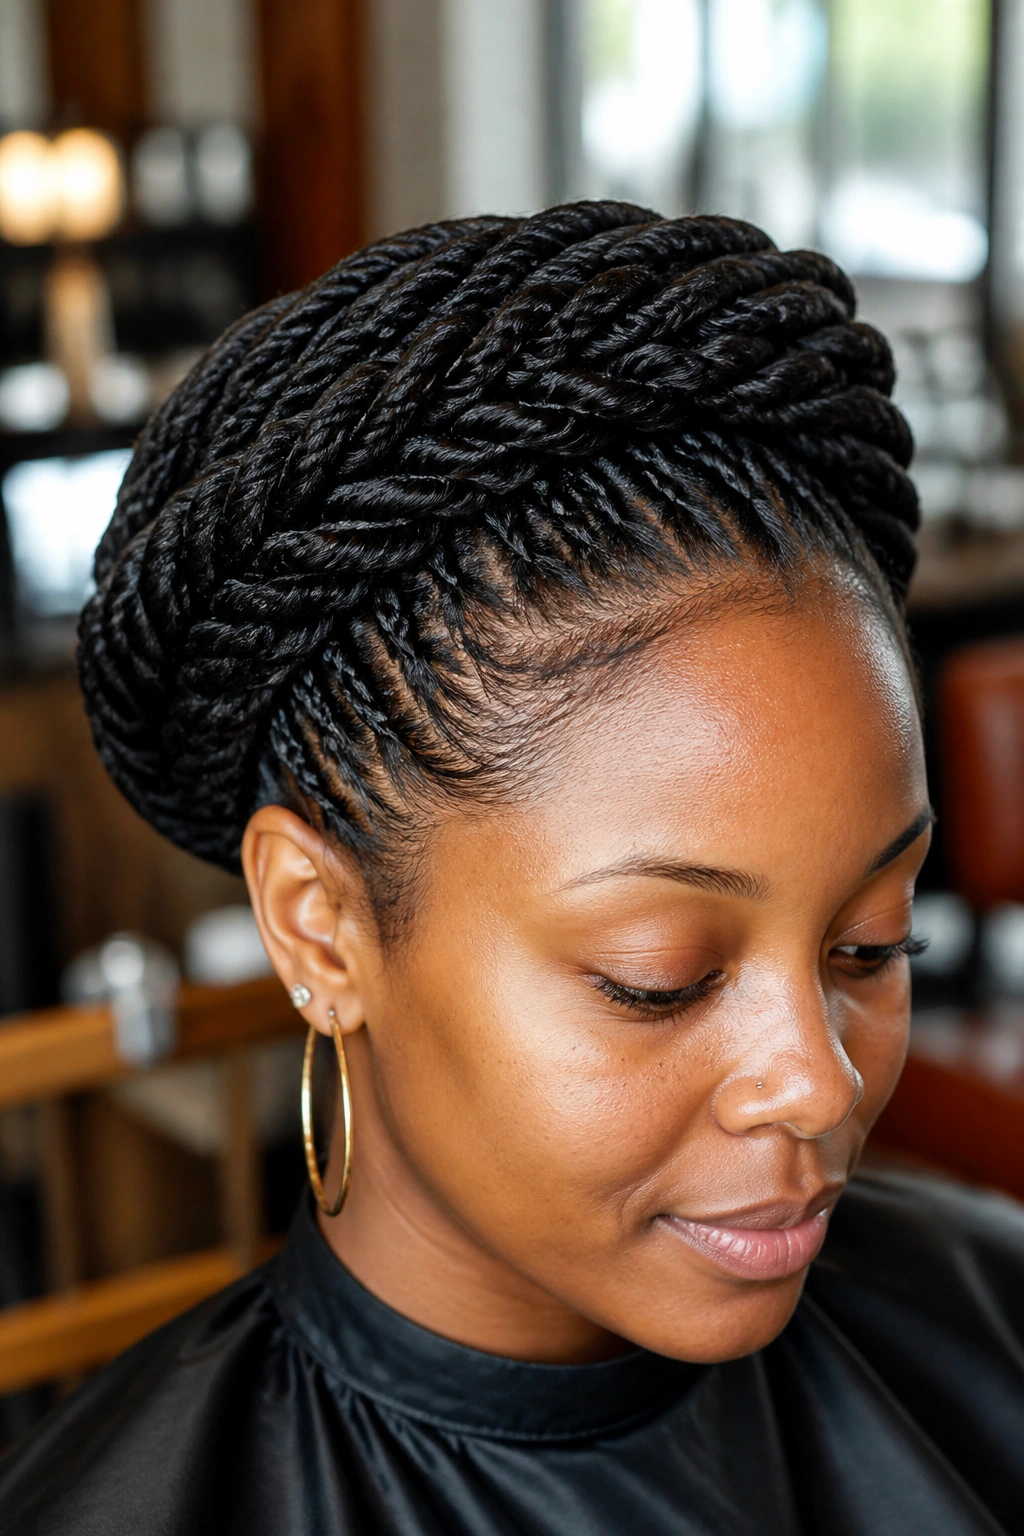
The rope twist is a two-strand technique where you twist each strand individually before twisting them together. This creates a dense, cord-like appearance that is very different from a standard braid. For those with 3C hair, the rope twist halo is incredibly durable.
The tension in a rope twist is higher than in a three-strand braid, which means this style stays “fresh” for longer. It has a very clean, graphic look. If you like the appearance of locs or twists but want a temporary style, the rope halo is a great middle ground.
Pro-tip: To keep rope twists from unraveling, you must twist both strands in the same direction but wrap them around each other in the opposite direction. This creates a mechanical lock that keeps the style tight.
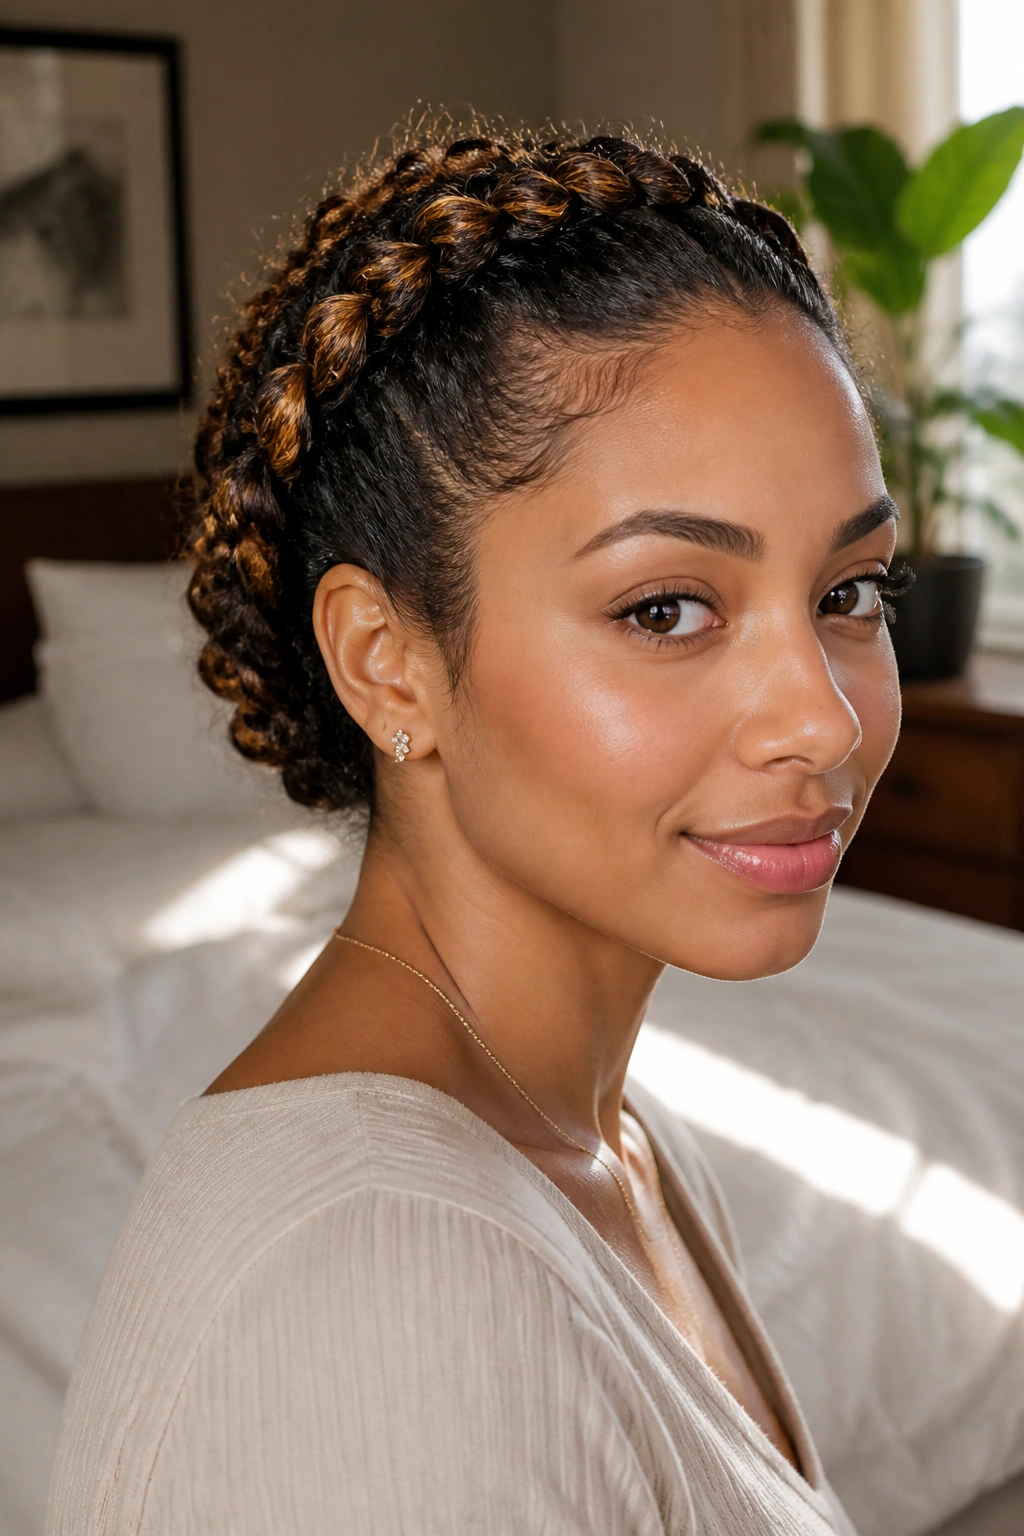
14. The Triple-Braid Crown
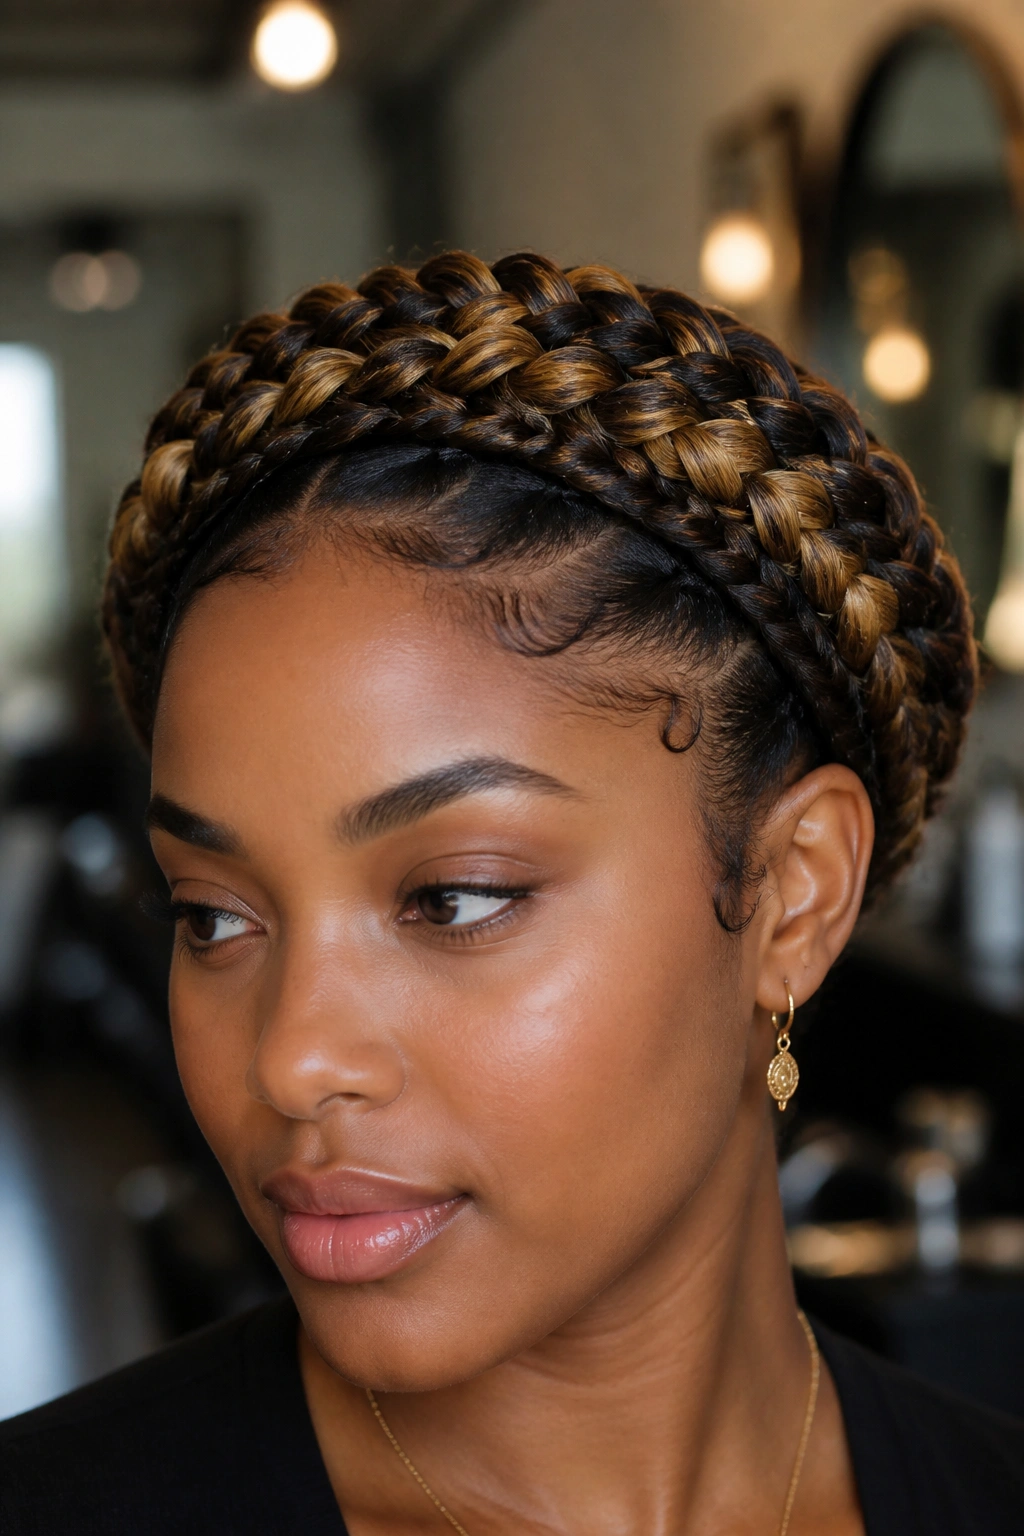
For the ultimate “wow” factor, the triple-braid crown involves three separate braids of varying sizes. Usually, you’ll have one large central braid flanked by two smaller braids. It’s a complex, royal look that requires a bit of time and patience.
This style is excellent for distributing the weight of very thick Type 3 hair. Instead of one massive braid putting pressure on the scalp, the three braids share the load. It also allows for more creativity with color—if you have highlights, the different braids will pick up different tones of your hair, creating a multi-dimensional effect.
15. The Halo with Braided Bangs
If you have a fringe or shorter layers in the front, don’t leave them out! Incorporating your bangs into the halo braid creates a seamless, polished look. This is also a practical way to keep hair out of your eyes during the summer or while working.
You’ll start the braid right at the forehead, picking up the shortest hairs first. This “pins” the bangs back into the structure of the braid. If your bangs are too short to reach the back, you can secure them with a tiny bit of edge control or a small, hidden bobby pin before the main braid passes over them.
16. The Zig-Zag Parted Halo

Why settle for a straight line when you can have a zig-zag? The part that separates the halo from the rest of your hair (or the part between two halo braids) doesn’t have to be boring. A zig-zag part adds a geometric, “cool-girl” element to a classic style.
Tips for a Clean Zig-Zag
- Use a metal-tipped rattail comb.
- Move the comb in a “Z” motion against the scalp.
- Clip one side of the hair down immediately so the sections don’t mix.
- Apply a bit of clear pomade along the part to make the zig-zag pop.
This is a subtle detail that people only notice when they get close, but it’s those little “extra” touches that make a hairstyle feel professional.
17. The Halo Braid with Tucked-In Scarf
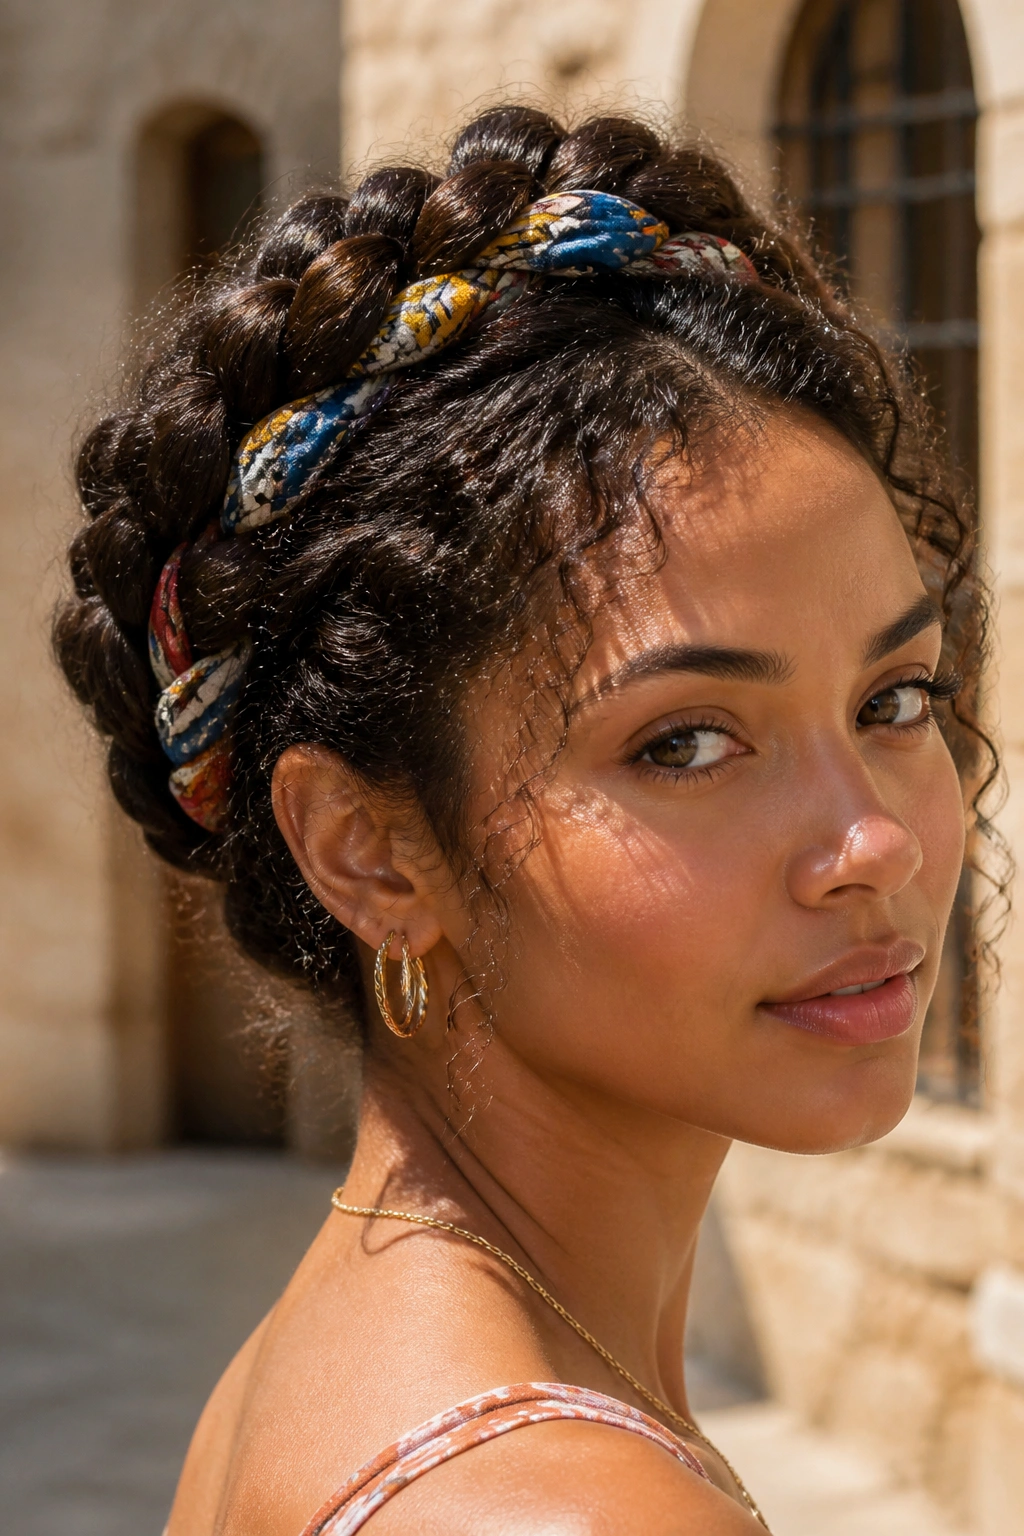
Silk scarves aren’t just for sleeping. Weaving a thin silk scarf into your halo braid adds color, texture, and protection. The silk reduces friction against your Type 3 curls, which can help prevent breakage.
You treat the scarf as one of the three strands of your braid. As you work your way around your head, the scarf pops in and out of the weave, creating a vibrant pattern. It’s a great way to coordinate your hair with your outfit, and it adds an instant “summer in the Mediterranean” vibe to your look.
18. The Low-Slung “Nape” Halo
While most halos sit atop the head like a crown, the low-slung version sits at the base of the skull, just above the neck. This creates a more relaxed, draped silhouette. It’s less “regal” and more “casual-chic.”
This version is particularly comfortable for those who suffer from headaches when their hair is pulled too high. Because it sits lower, the center of gravity is different. It’s a soft, beautiful look that pairs perfectly with a turtleneck or a high-collared coat.
19. The “Dutch-French” Hybrid Halo

Can’t decide between a Dutch and a French braid? Do both. You can start with a Dutch braid at the front for volume and transition into a French braid at the back for a smoother, flatter finish. This hybrid approach allows you to customize the “height” of the halo exactly where you want it.
Maybe you want the “bump” of the braid to be prominent near your face but subtle at the back. This technique gives you that control. It requires a bit of finger-dexterity to switch your grip mid-braid, but the results are worth the practice.
20. The High-Definition 3C Coiled Halo
If you have 3C hair, your curls are essentially tiny springs. A coiled halo involves “shingling” or defining each curl with gel before braiding. This results in a braid where you can actually see the individual coils woven together.
It is a time-consuming process, but it produces a level of detail that is unmatched. The braid looks almost like a piece of intricate rope. Because each curl is defined, the style stays incredibly neat and resists “fuzzing” for much longer than a standard braid.
21. The Butterfly Halo with Loosened Edges
The butterfly braid is characterized by its oversized, “winged” appearance. To achieve this on Type 3 hair, you braid very loosely and then pull specific strands out just a tiny bit — enough to create a “fringe” effect along the edges of the braid.
It’s a whimsical, airy style that looks like it belongs in a fairytale. On Type 3 hair, the natural texture provides the “fluff” needed to make the wings of the braid look full. It’s a great choice for weddings or photoshoots.
22. The Halo with Metallic Cuffs
Hair cuffs are small, clip-on rings that you can attach directly to the braid. They come in gold, silver, rose gold, and even colorful patterns. For a halo, placing these cuffs at regular intervals around the crown creates a structured, “warrior-princess” aesthetic.
They are incredibly easy to use. Once your braid is finished, just pry the cuff open, slide it onto a section of the braid, and pinch it shut. They also help to hide any “puffy” spots where you might have added hair or tucked in a tail.
23. The Bubble Halo
The bubble braid isn’t a braid at all — it’s a series of small ponytails that are fluffed out to look like bubbles. Creating a “halo” of bubbles around the head is a playful, modern take on the trend.
How to create a bubble halo
- Section your hair into a circle.
- Create a small ponytail at one ear using a clear elastic.
- Move an inch further and create another ponytail, incorporating the hair from the first one.
- Gently “fluff” the hair between the elastics to create a bubble.
- Repeat until you’ve circled the head.
This is a fantastic option for those who find traditional braiding difficult. It’s almost impossible to mess up, and it looks incredibly “high-effort.”
24. The “Waterfall” Halo
In a waterfall braid, you let one strand “fall” out of the braid as you go, creating a curtain of curls. For a halo, this means you have a crown braid around the top of your head, but your Type 3 ringlets are cascading down from underneath the braid itself.
It is a technically challenging style, but it is one of the most beautiful ways to show off both length and texture. The braid acts as a “frame” for the curls, making them the star of the show.
25. The Halo with Integrated Ribbon
Similar to the scarf method, but using a thin velvet or satin ribbon. This is a more delicate look, often used for holiday events or formal dinners. The ribbon adds a touch of “old-world” charm to the natural texture of Type 3 hair.
Choosing a ribbon color that is close to your hair color creates a subtle shimmer, while a contrasting color (like red on dark hair or white on honey-blonde hair) makes a bold statement.
26. The Protective Flat-Twist Halo for Sleep
Finally, the “utility” halo. This isn’t about looks; it’s about protection. Many Type 3 naturals use a quick flat-twist halo as a nighttime routine. It keeps the curls stretched and prevents matting while you sleep.
In the morning, you can either wear it as a style or “un-twist” it for a massive, defined braid-out. It’s the ultimate multi-tasker.
Maintaining Your Halo for Multiple Days
Once you’ve spent the time creating a beautiful halo, you want it to last. The biggest enemy of a Type 3 halo is “fuzz.” Because our hair is so prone to seeking out moisture in the air, the surface of the braid can become haloed (no pun intended) by a layer of frizz within hours.
To prevent this, “setting” the hair is non-negotiable. Once you finish braiding, apply a layer of foam mousse over the entire crown. Tie the hair down with a silk or satin scarf for at least 20 minutes. This “melts” the hair into place and creates a seal that resists frizz.
At night, never sleep on a cotton pillowcase. Your halo will be a disaster by morning. Stick to a silk bonnet or a silk pillowcase to keep the braids smooth. If you wake up with a few flyaways, don’t re-braid. Instead, use a clean mascara wand or a small toothbrush with a bit of edge control to smooth the stray hairs back into the weave.
The Best Products for Type 3 Halo Braids
When it comes to products, you want a balance of slip and hold. If a product is too watery, your curls will shrink and frizz. If it’s too heavy, the braid will look greasy and flat.
- Leave-in Conditioners: Look for “milky” textures rather than thick creams. These provide the slip needed to section the hair without weighing it down.
- Edge Control: For Type 3 hair, a water-based edge control is often better than a wax-based one. It provides a “firm” look that can be easily washed out without buildup.
- Hair Oils: A light oil like jojoba or almond oil is perfect for adding shine to the finished braid. Avoid heavy castor oil unless you are using it specifically for scalp health in the parts.
- Setting Mousse: This is the “glue” that holds everything together. Look for an alcohol-free version to avoid drying out your curls.
Wrapping Up
The halo braid is a testament to the versatility of Type 3 natural hair. It’s a style that respects the hair’s need for protection while allowing its natural beauty to take center stage. Whether you choose the precision of a 3C Dutch braid or the soft romance of a 3A boho fishtail, the halo is a reminder that your curls are, quite literally, your crown.
Don’t be afraid to experiment. The first few times you try to wrap a braid around the back of your head, it might feel clunky. Your arms might get tired. You might miss a section. But with Type 3 hair, the texture is on your side. It hides the little mistakes and turns “imperfections” into “volume.” So grab your comb, your favorite gel, and a handful of pins — your next favorite look is only a few twists away.