There is something almost rhythmic about the way a fishtail braid comes together. Unlike the standard three-strand braid that most of us learned in grade school, the fishtail feels more like weaving than plaiting. It is tactile, slightly intricate, and, honestly, a bit addictive once you find your flow. For those of us with long, layered hair, the fishtail isn’t just a stylistic choice; it is often a necessity. Layers are wonderful for movement and volume, but they can be a nightmare when you’re trying to keep a style looking neat. The tiny, cross-hatched structure of a fishtail actually does a better job of “trapping” those shorter layered ends than a traditional braid ever could.
If you have spent any time trying to manage hair that hits your waist but has face-framing layers that barely reach your chin, you know the struggle. A regular braid will often look like a porcupine by noon, with ends poking out at every turn. But the fishtail thrives on that texture. It embraces the “lived-in” look. In fact, a fishtail usually looks better four hours after you’ve finished it than it did the moment you stepped away from the mirror. It becomes soft, hazy, and undeniably romantic.
Over the years, I have experimented with dozens of variations of this specific braid. I’ve worn them to weddings, on long-haul flights, and during those humid summer days when the only goal is to keep hair off the neck. What I’ve learned is that the secret isn’t in the tightness of the weave, but in the preparation of the hair. Long layered hair needs a bit of “grip” to stay put. If your hair is too clean or too slippery, the fishtail will simply slide right out.
Because we are dealing with 27 specific ways to wear this style, we need to look at it from every angle—from the high-fashion sleekness of a runway look to the “I just woke up like this” bohemian vibe. Each version offers something different for your layers, whether you want to highlight them or hide them away.
Prepping Your Layers for a Lasting Hold
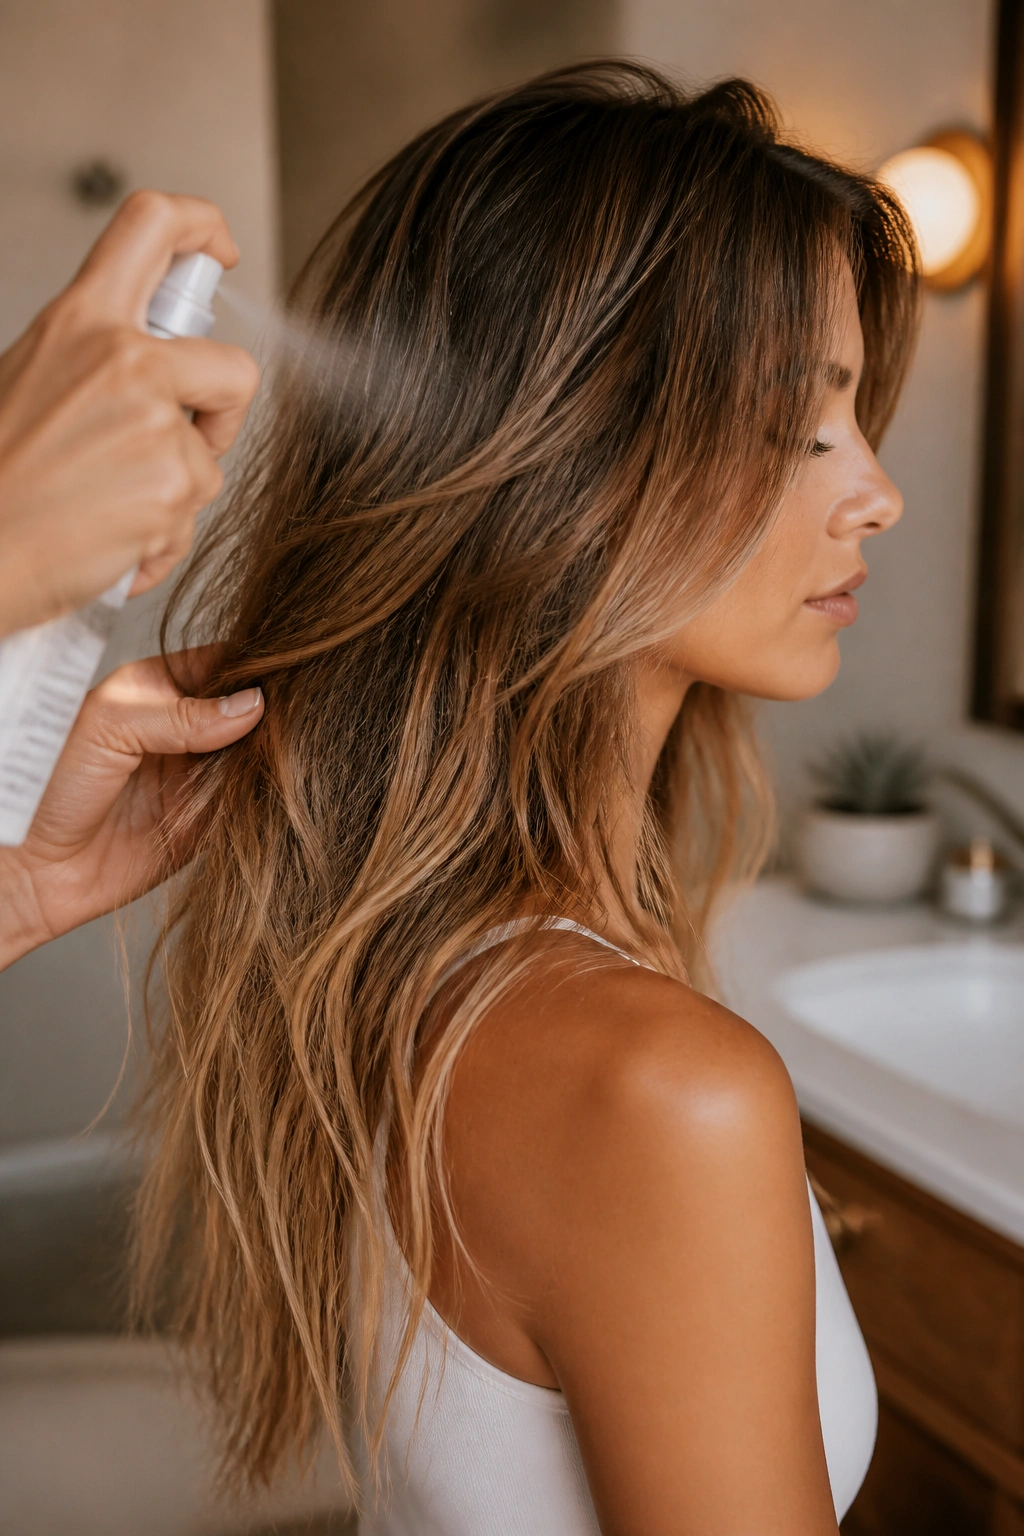
Before you even think about splitting your hair into two sections, you have to talk about prep. Silkiness is usually the goal for hair health, but for braiding, it is your enemy. If your hair is fresh from a wash and feels like a sheet of satin, your fishtail will likely be a flat, uninspired mess within twenty minutes. You need to create some friction between those strands.
A good texturizing spray or a light dusting of hair powder is non-negotiable. I personally prefer a dry sea salt spray because it mimics the texture hair gets after a day at the beach—salty, a little gritty, and perfectly “grabby.” When you apply this to long layers, it helps those shorter ends “hook” onto the longer sections of the braid.
If you have particularly stubborn layers that like to fly away, try working a tiny bit of hair wax or pomade through the mid-lengths and ends before you start. You don’t want to look greasy, so start with a pea-sized amount, rub it between your palms until it’s warm, and then lightly “rake” it through. This creates a cohesive “rope” effect that makes the actual weaving process much easier. It also gives the braid a beautiful, subtle sheen that catches the light without looking like you’ve used a whole bottle of hairspray.
The Essential Toolkit for Long Hair Braiding
Most people think you just need an elastic and a comb, but when you’re working with the weight of long hair, you need a bit more support. The sheer weight of hair that reaches the mid-back can pull a braid down, causing it to sag at the nape of the neck. To prevent this, you need the right tools in your arsenal.
What You Should Have on Your Vanity
- Clear Polyurethane Elastics: These are essential. They are small, nearly invisible, and they don’t slide down the hair like fabric-covered elastics often do.
- A Tail Comb: Not for combing through the hair, but for making those precise sections. A clean part can make a messy braid look intentional rather than accidental.
- Bobby Pins (Matte Finish): Standard shiny bobby pins slide out. Matte-coated pins have a slight texture that helps them stay anchored in the hair.
- A Large Hand Mirror: If you’re doing a back-braid or a crown, you need to see what’s happening behind you. Trusting your sense of touch is great, but a visual check is better.
- Boar Bristle Brush: This is perfect for smoothing the hair before you start, ensuring that you aren’t braiding knots into your style.
Pro tip: If you find that your elastics snap halfway through the day (a common tragedy for thick-haired girls), use two elastics at the end of your braid instead of one. It provides a “fail-safe” and adds a bit of extra tension to keep the weave tight.
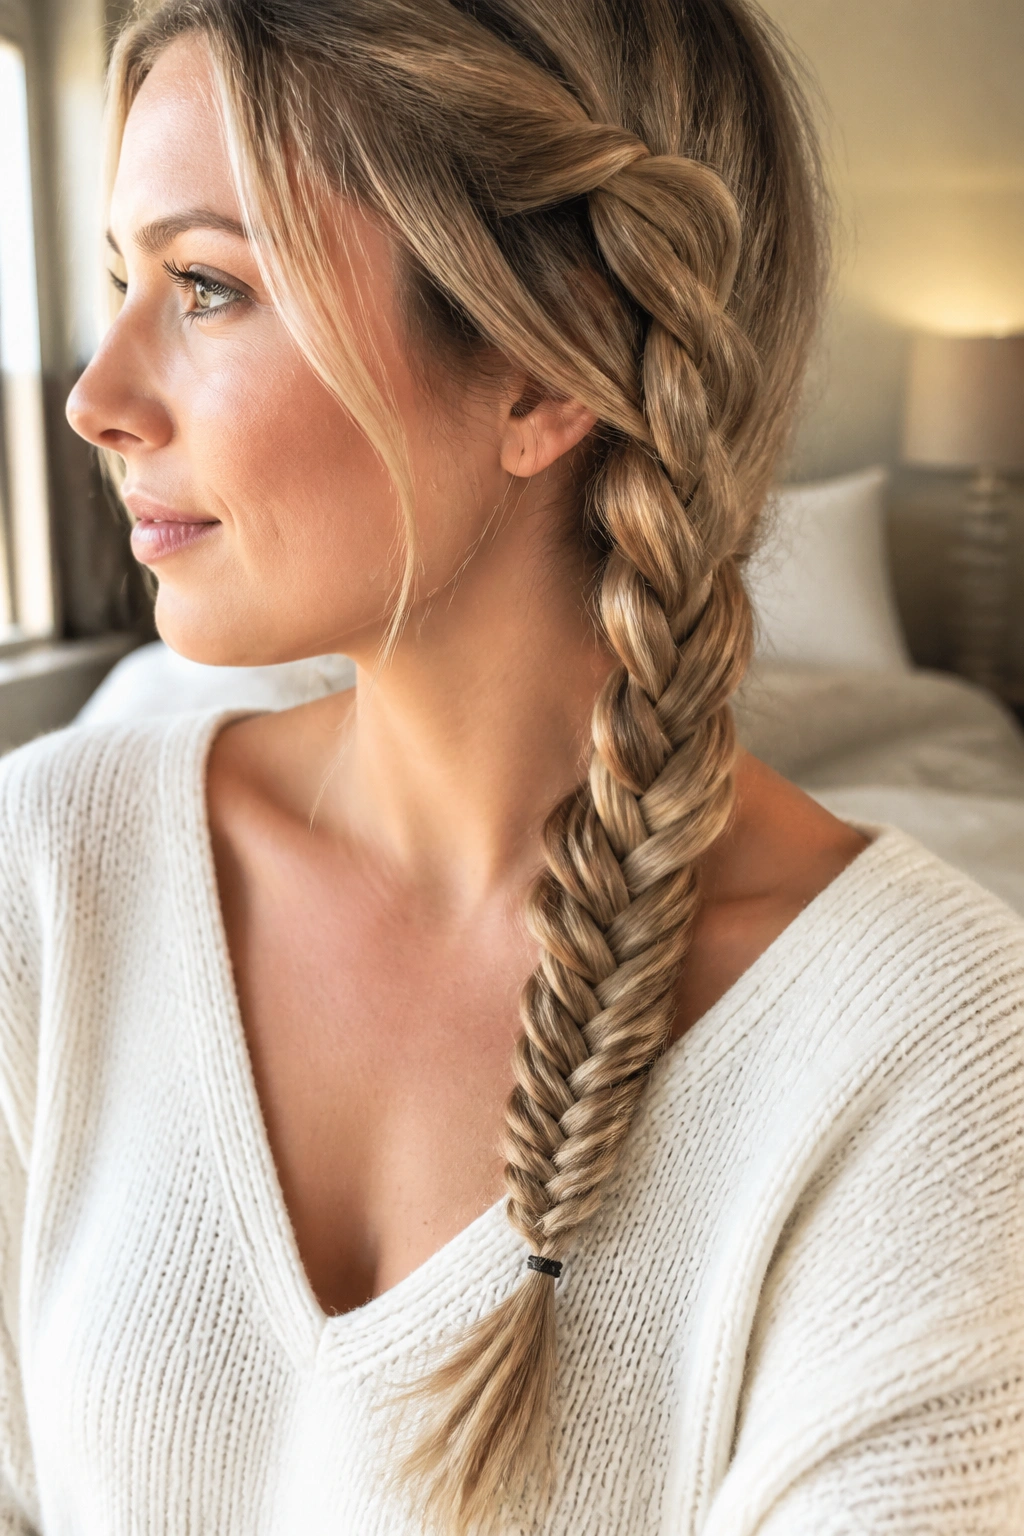
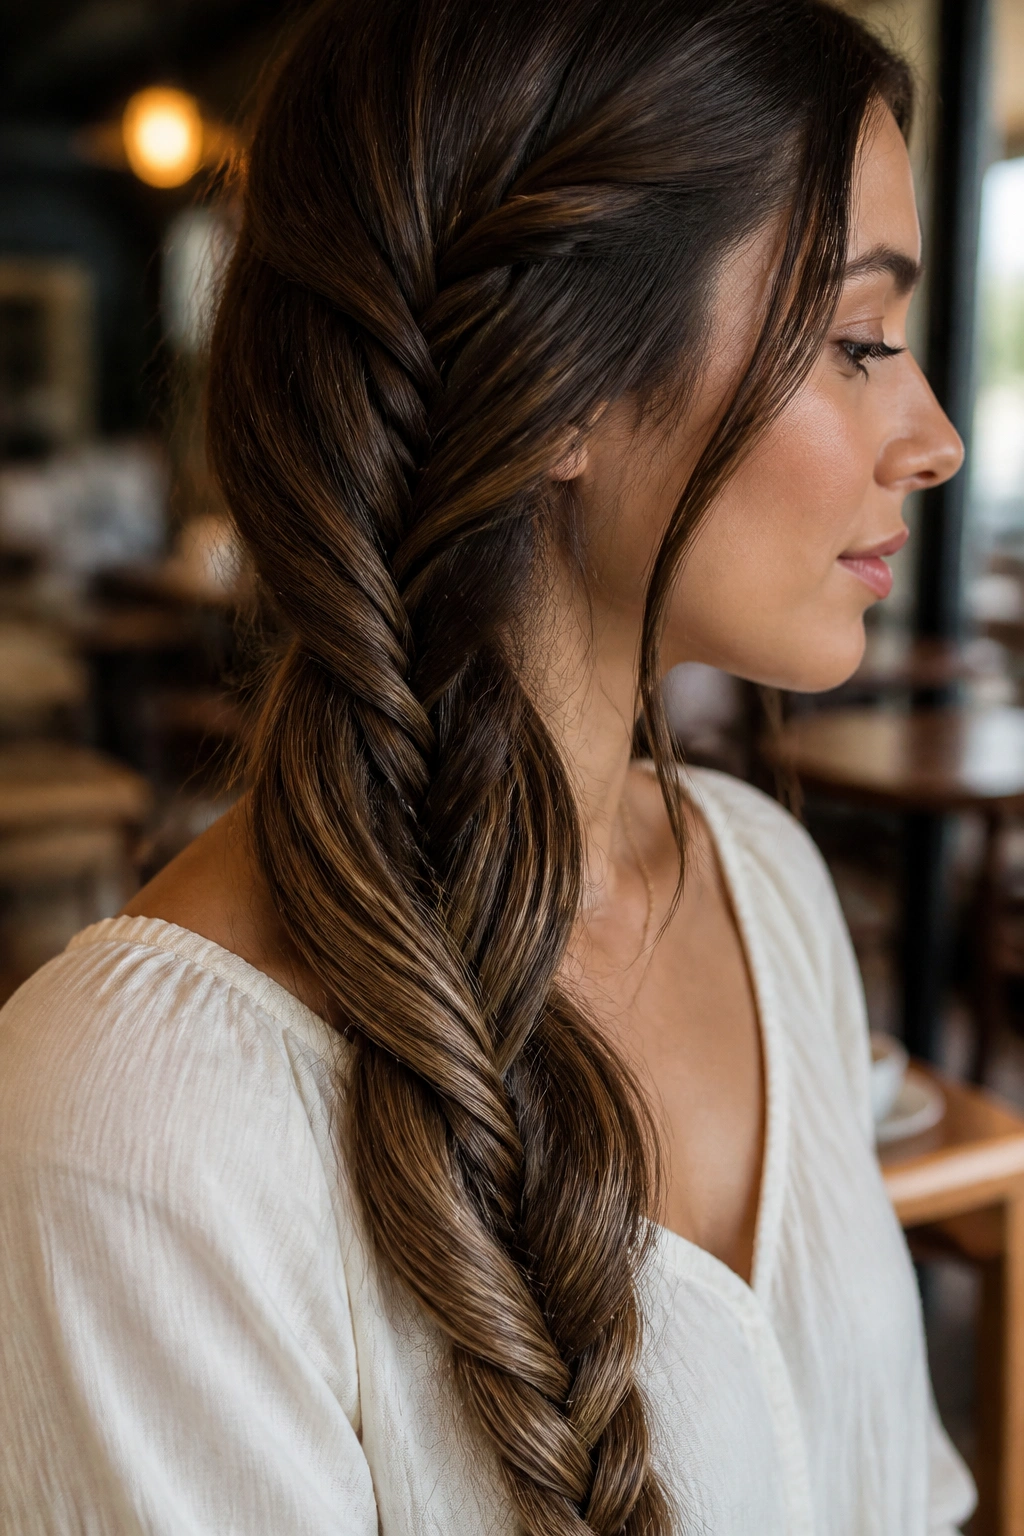
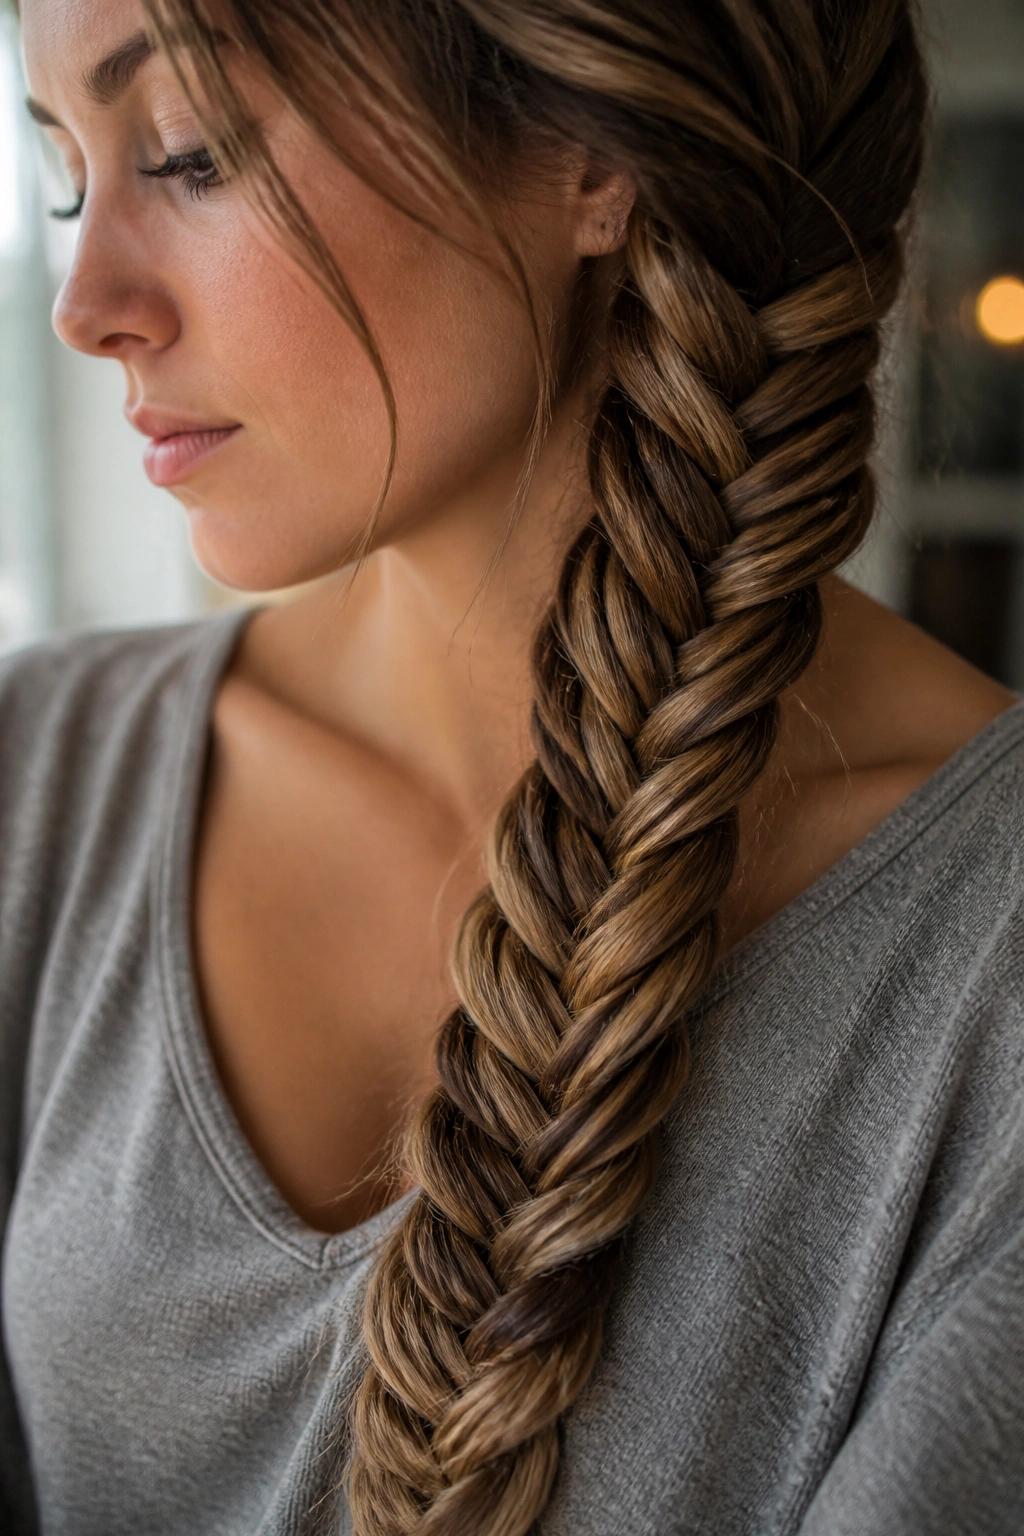
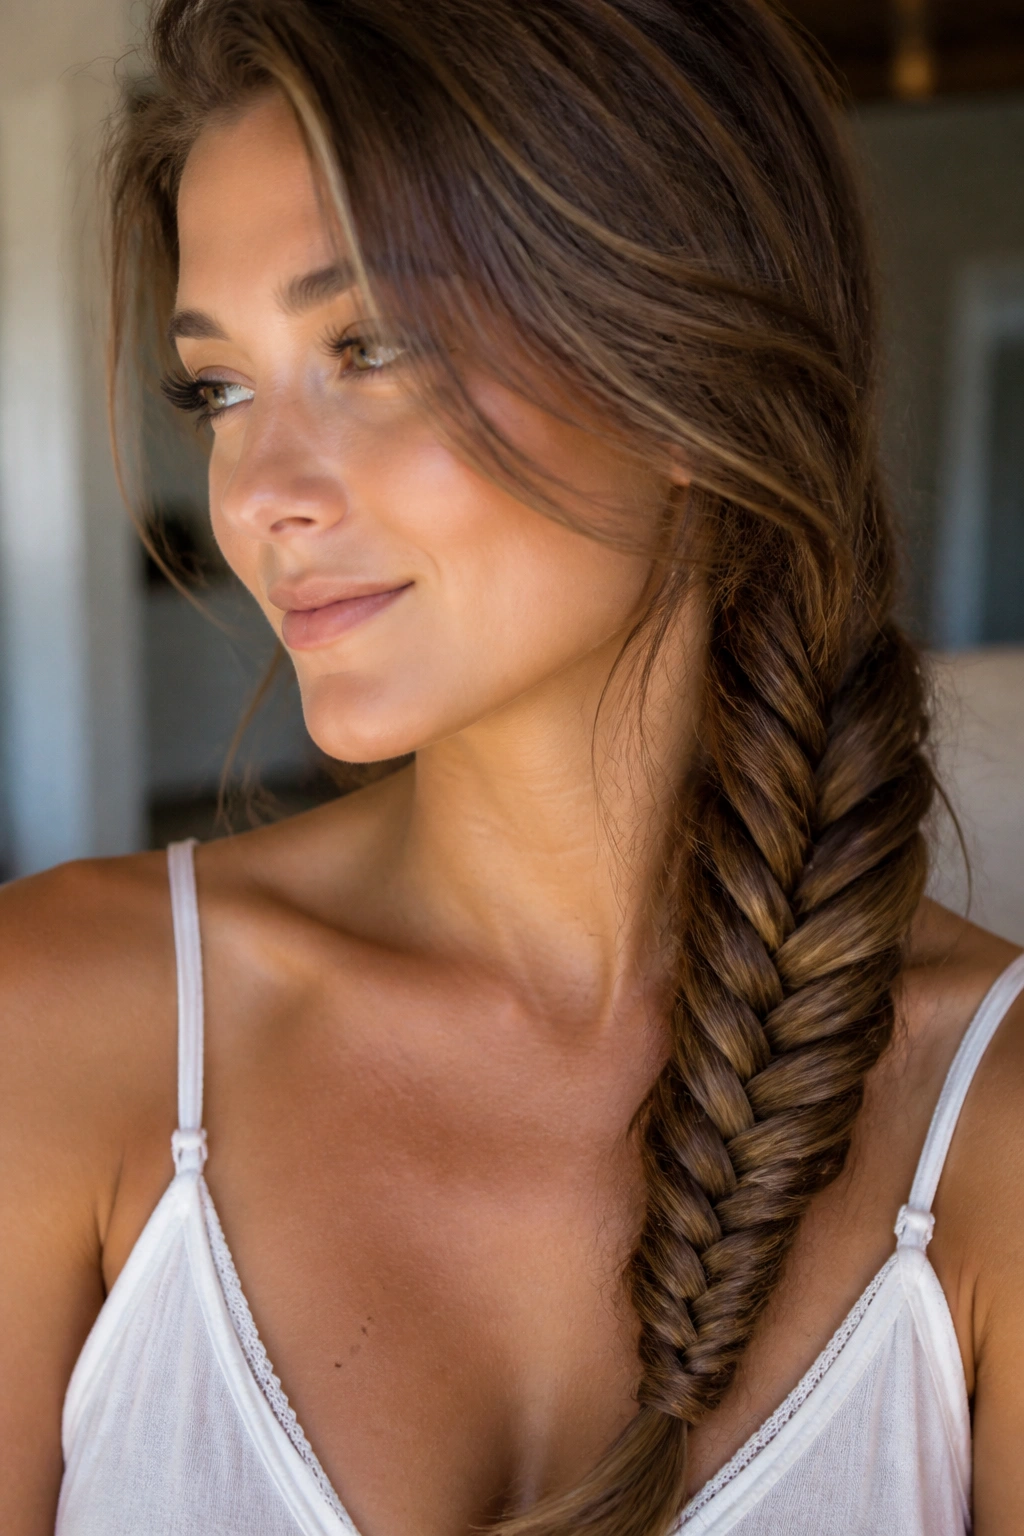
1. The Classic Side-Swept Fishtail
The side-swept version is the easiest entry point for anyone new to the fishtail. Because the hair is pulled over one shoulder, you can see exactly what you are doing in the mirror. It’s perfect for long layers because the face-framing pieces can either be tucked in or left out to soften the look.
Why It’s a Top Pick for Layers
This style allows the weight of the hair to rest on your shoulder rather than hanging down your back. For layered hair, this is great because it reduces the tension that usually causes shorter layers to pop out at the nape. You can start the braid just below the ear, leaving the top section loose and voluminous.
Quick Success Tips
- Pull all your hair to your “good” side and secure it with a temporary elastic.
- Braid the hair, then cut the temporary elastic away once you’ve secured the bottom.
- Use a light-hold hairspray to “tame” the hair along the side of your head.
- Leave out a few wispy bits around the ears for a softer appearance. Pro tip: If your hair is very long, don’t try to make the “turns” of the braid too small. Taking larger sections from the outside will make the process faster and give the braid a more modern, chunky look.
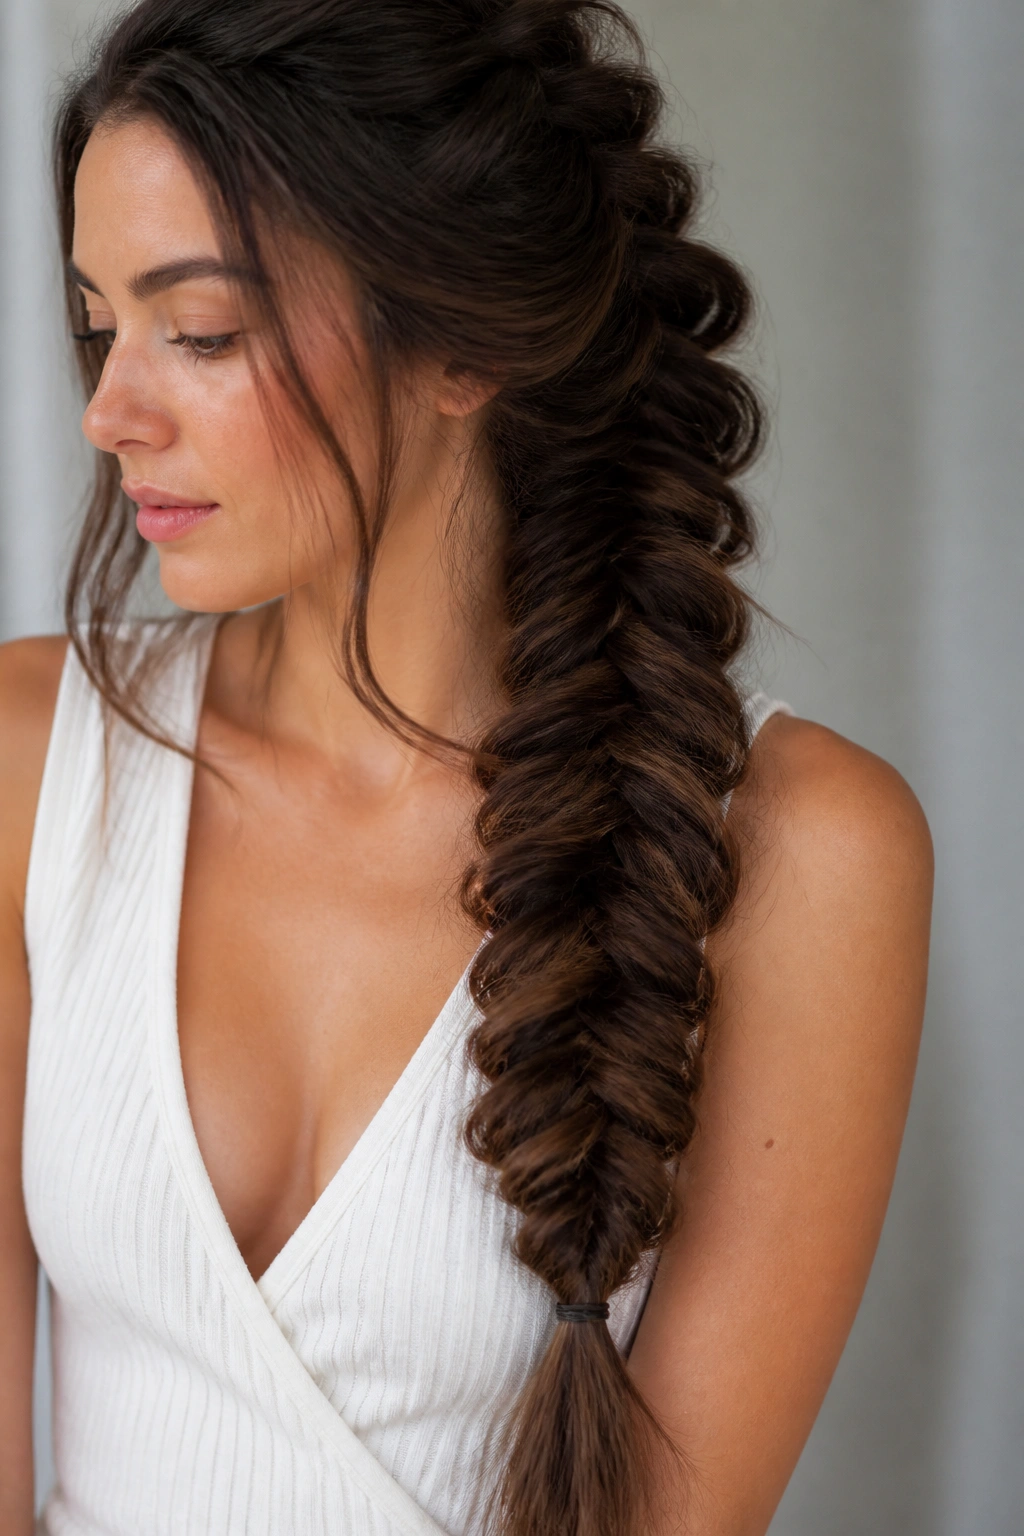
2. Panned-Out “Pancake” Fishtail
“Pancaking” is the act of gently pulling the edges of your braid outward to make it look three times as thick. For those of us with layers, this is a dangerous but rewarding game. If you pull too hard, the layers will fly out. If you do it just right, you get a braid that looks like it belongs on a Greek goddess.
The beauty of a pancaked fishtail lies in its sheer scale. It transforms a skinny, “tail-like” braid into a wide, flat ribbon of hair. This is particularly effective if your hair is long but fine. By widening the braid, you create the illusion of massive density. Start at the bottom of the braid and work your way up, using your thumb and forefinger to “tease” the outer loops of the weave.
If a few ends poke out while you’re doing this—don’t panic. That’s the hallmark of a human hand at work. You can either tuck them back in with a tiny bit of lash glue (an old pageant trick!) or simply embrace the fuzz. A little bit of texture makes the style feel more authentic and less like a plastic wig.
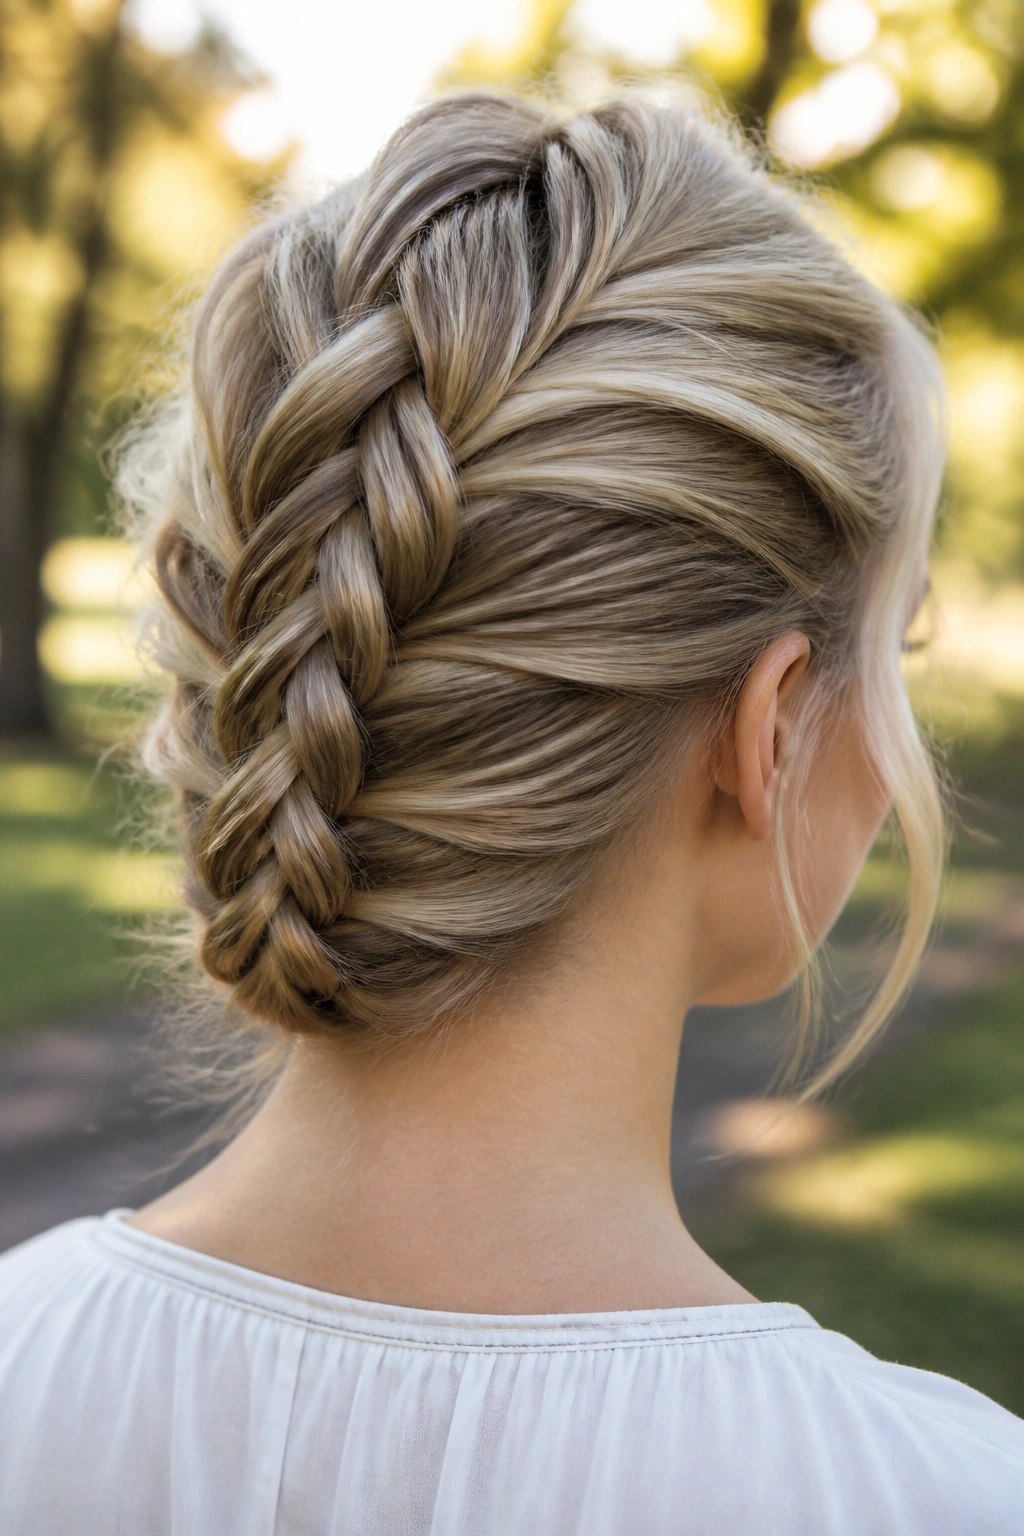
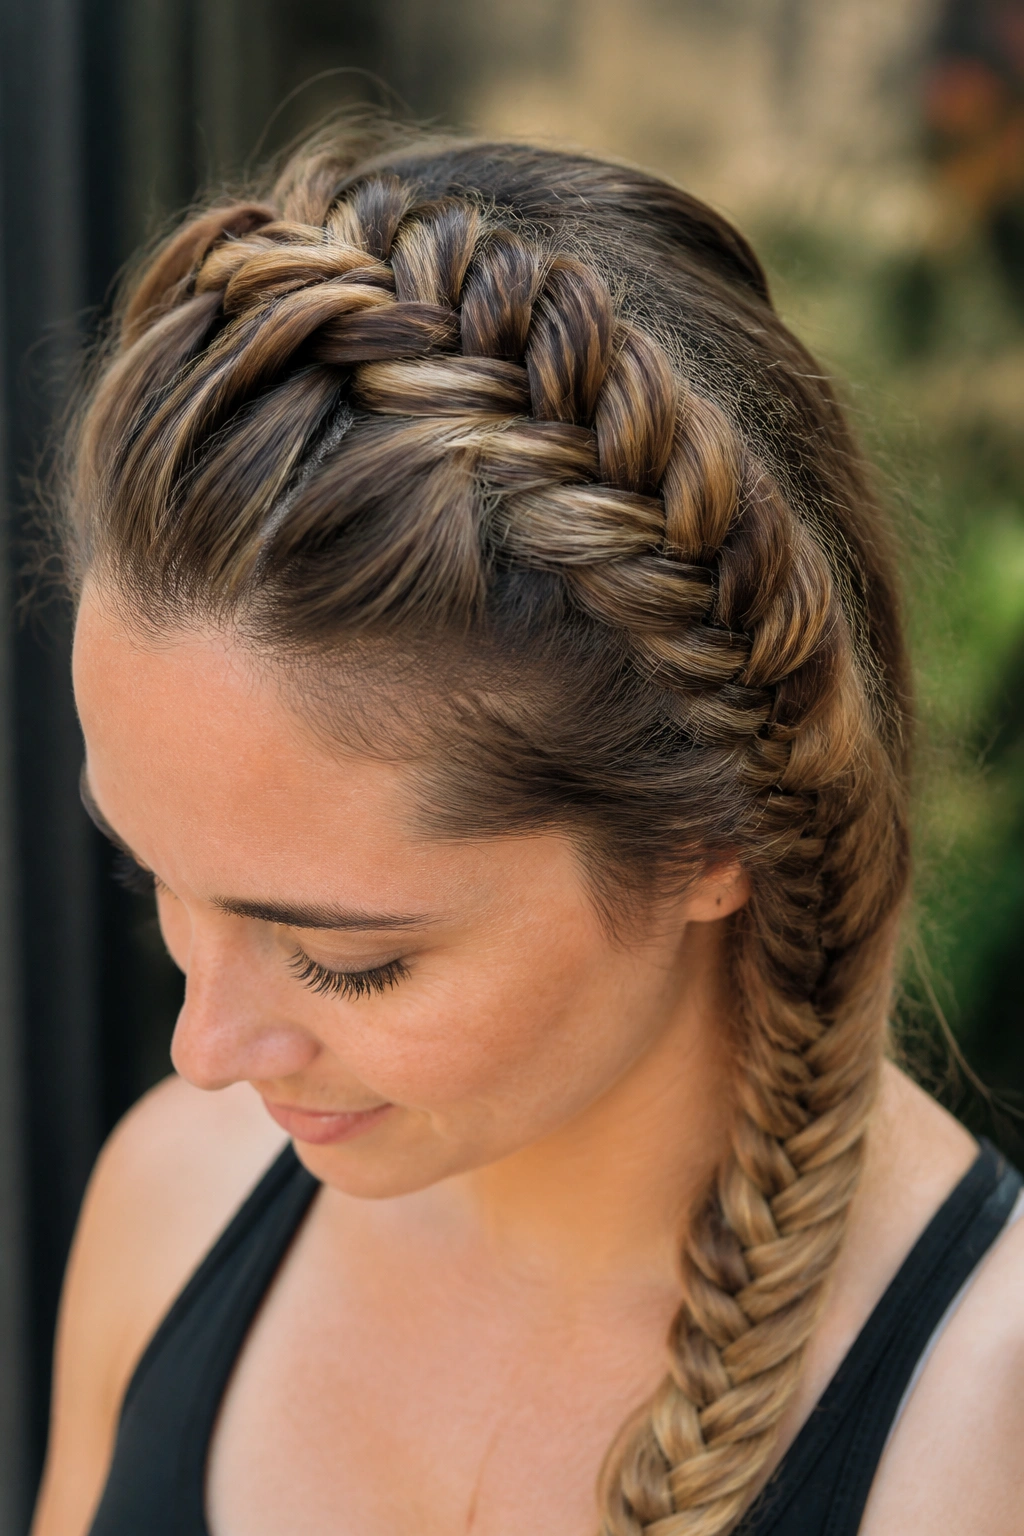
3. French Fishtail Braid
The French fishtail starts at the crown of the head rather than at the nape. It’s essentially a “built-in” braid that incorporates hair as you move down. For layered hair, this is the gold standard of security. Because you are picking up hair from the scalp as you go, the layers are pinned down by the weight of the braid itself.
How to Master the Tension
Is the French fishtail harder? In a word: yes. It requires more arm strength and better finger coordination. But the result is a braid that is incredibly secure and looks much more sophisticated than a standard hang-down style.
Step-by-Step Focus
- Start with a small section at the very top of your head, split into two.
- Cross a small piece from the outside of the right to the left.
- Cross a small piece from the outside of the left to the right.
- Now, before the next cross, pick up a new “slice” of hair from the side of your head and add it to the crossing strand. Pro tip: Keep your hands as close to your scalp as possible. The further away your hands move, the looser and “saggier” the braid will become.
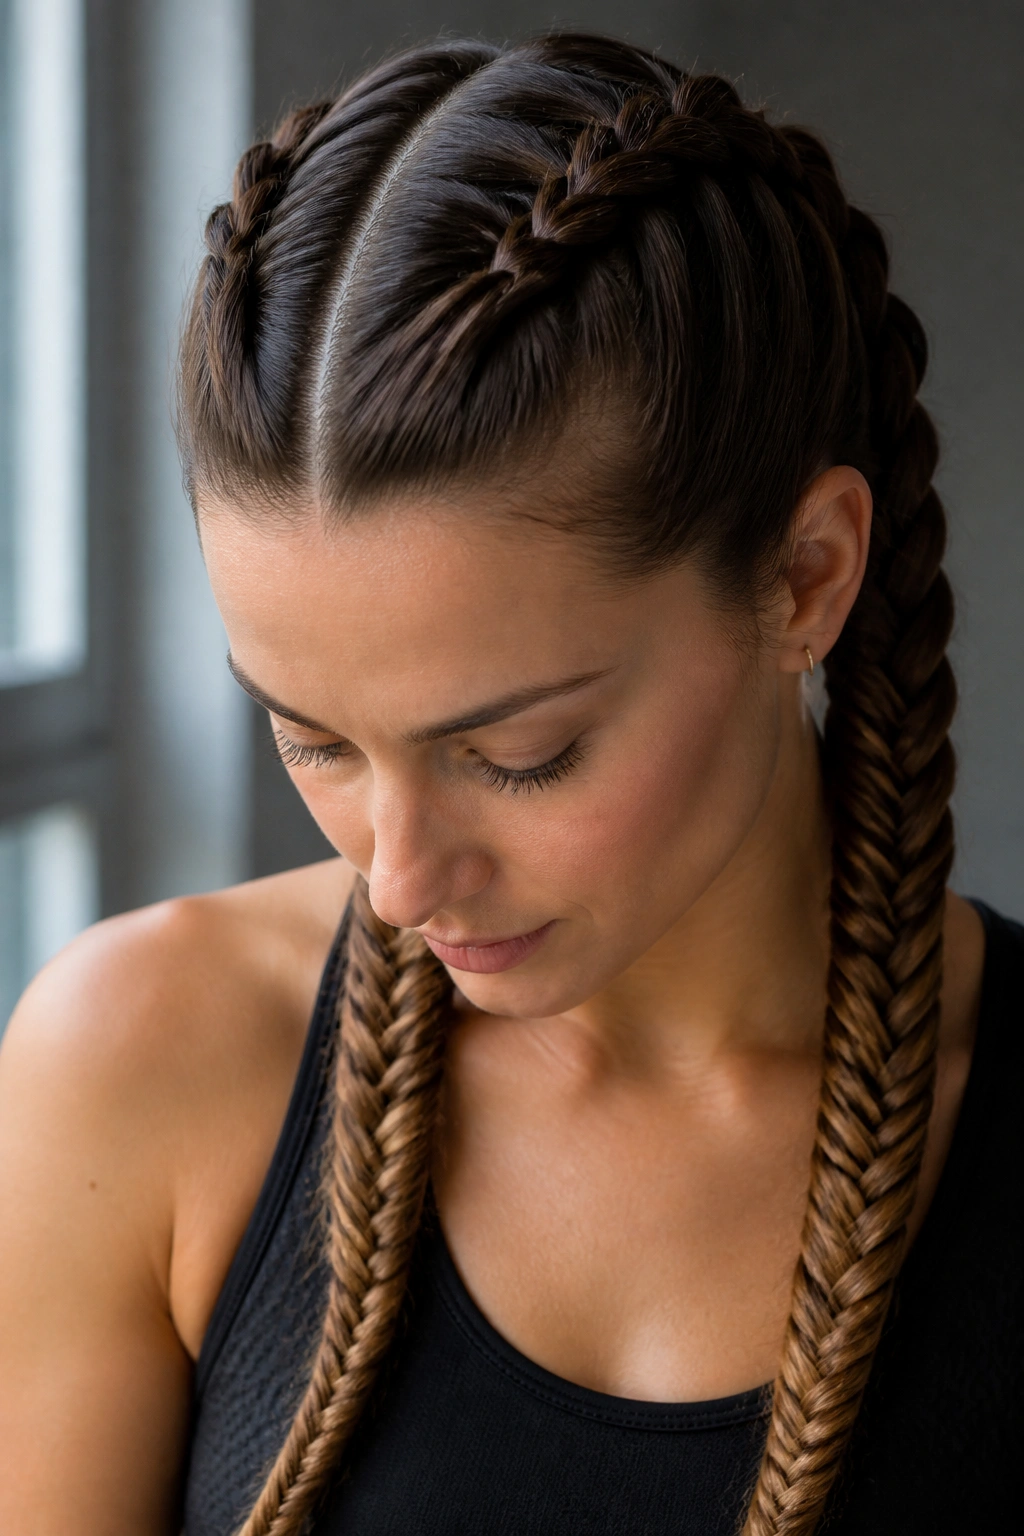
4. Double Boxer Fishtails
This is the ultimate “get things done” hairstyle. It’s athletic, it’s fierce, and it keeps every single hair out of your face. By splitting the hair down the center and creating two tight braids that hug the scalp, you effectively neutralize the “problem” of layers.
I remember wearing these on a three-day hiking trip. By day three, my hair still looked intentional. Unlike a single braid that can shift and loosen, the double-braid system distributes the weight of long hair evenly across the head. This prevents that “heavy” feeling that often leads to headaches by the end of the day. It also creates a very symmetrical, balanced look that works beautifully with high-neck tops or athletic gear.
- Symmetry is key: Use the tip of your nose as a guide for your center part.
- Tightness matters: For this specific style, a tighter weave looks more polished.
- The “Dutch” variant: Try crossing the strands under instead of over for a 3D effect that sits on top of the hair.
- Finish strong: Secure the ends with elastics that match your hair color for a “seamless” look.
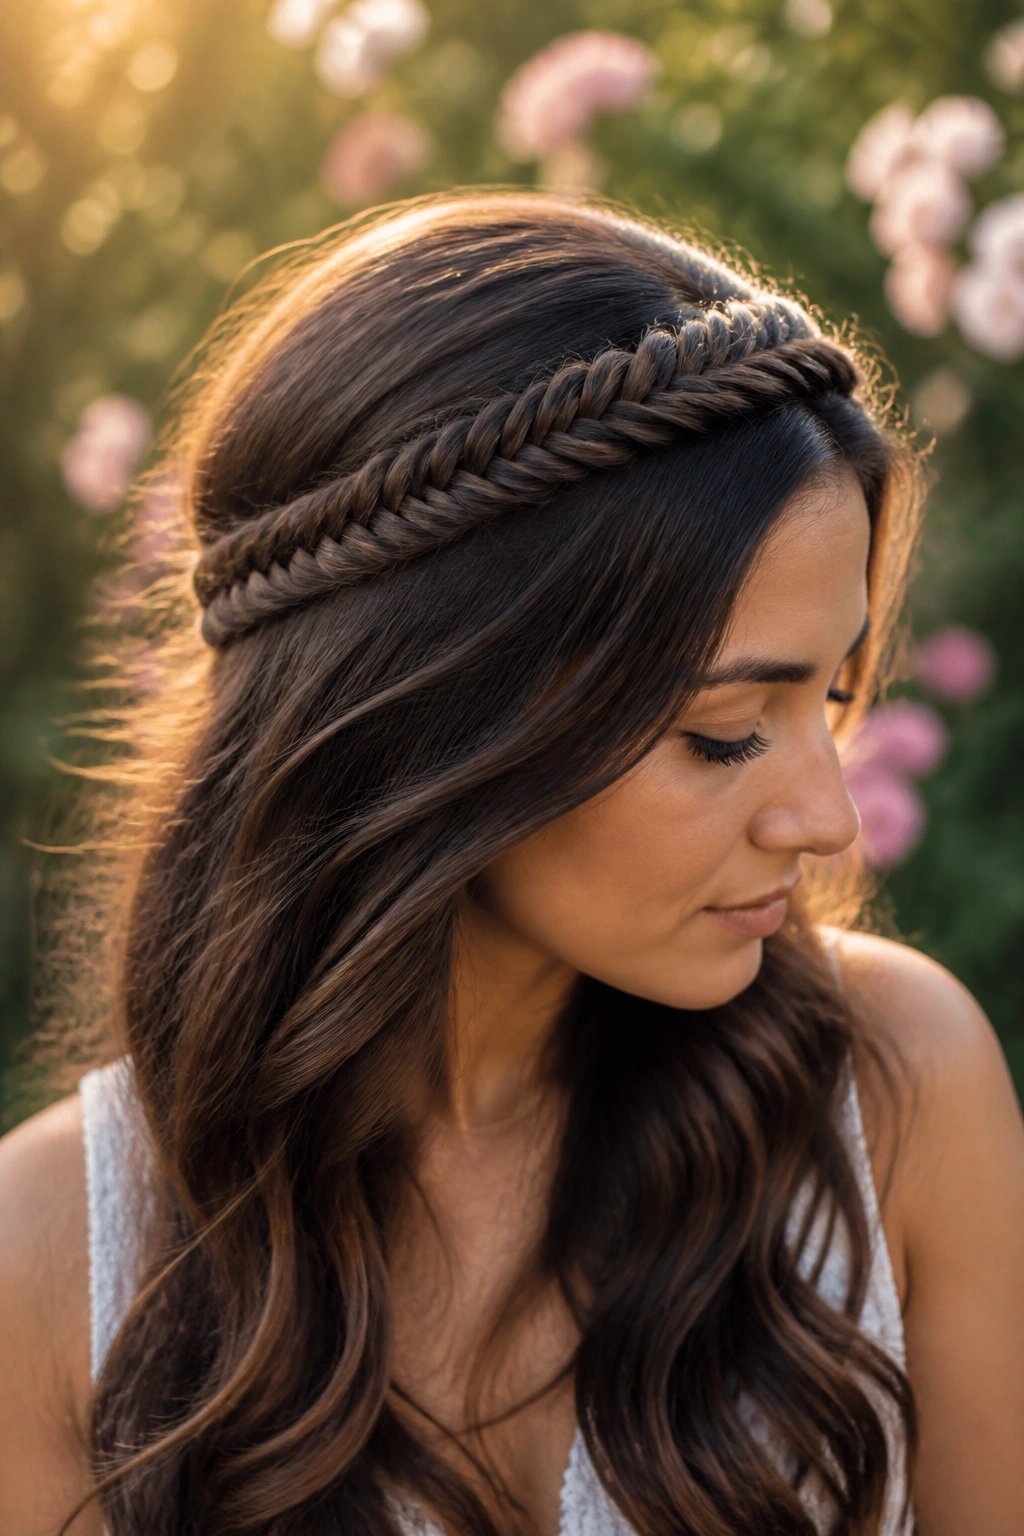
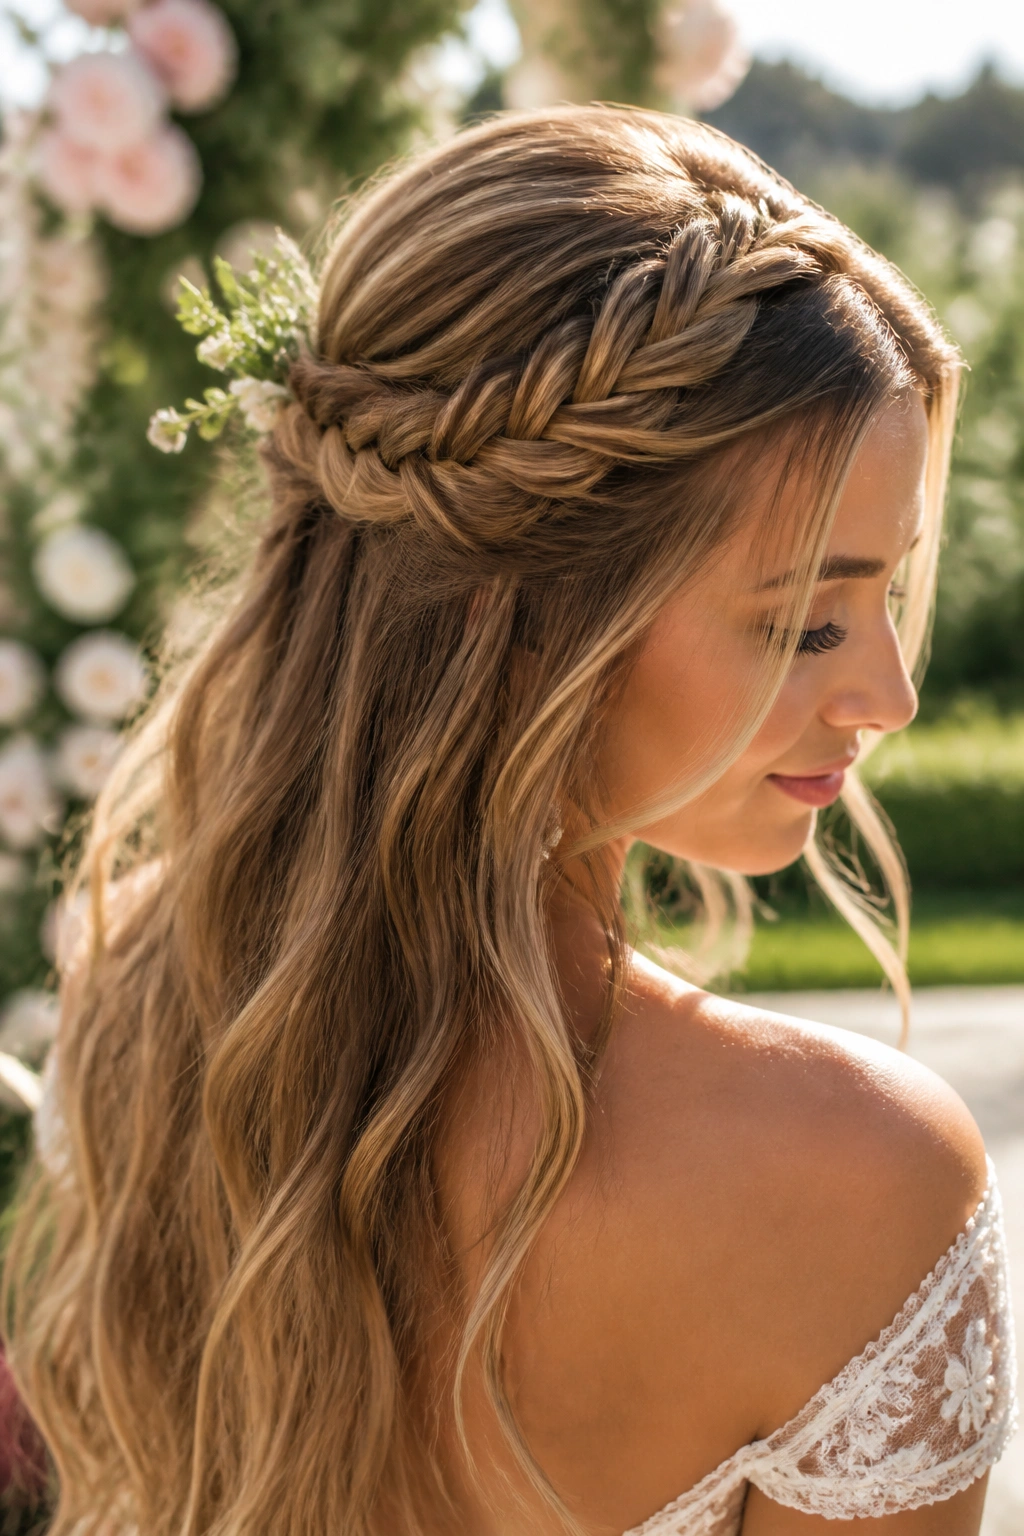
5. Half-Up Boho Fishtail
Sometimes you want the beauty of a braid without sacrificing the length of your hair. The half-up fishtail is the perfect compromise. It uses the top half of your hair—where the shortest layers usually live—and braids them into a crown-like structure, while the rest of your hair flows freely down your back.
This style is inherently romantic. It reminds me of something you’d see at a garden wedding or a summer festival. Because you aren’t braiding the entire mass of your hair, the braid itself can be quite delicate. You can even do two small fishtails from the temples and join them in the back with a decorative clip. The loose hair underneath provides a beautiful, soft backdrop for the intricate weaving of the braid.
If your layers are particularly short in the front, this is a great way to “pin” them back without using a dozen bobby pins. The braid acts as a natural headband. I like to finish this look by adding a few beachy waves to the hair that is left down. The contrast between the structured braid and the messy waves is visually stunning.
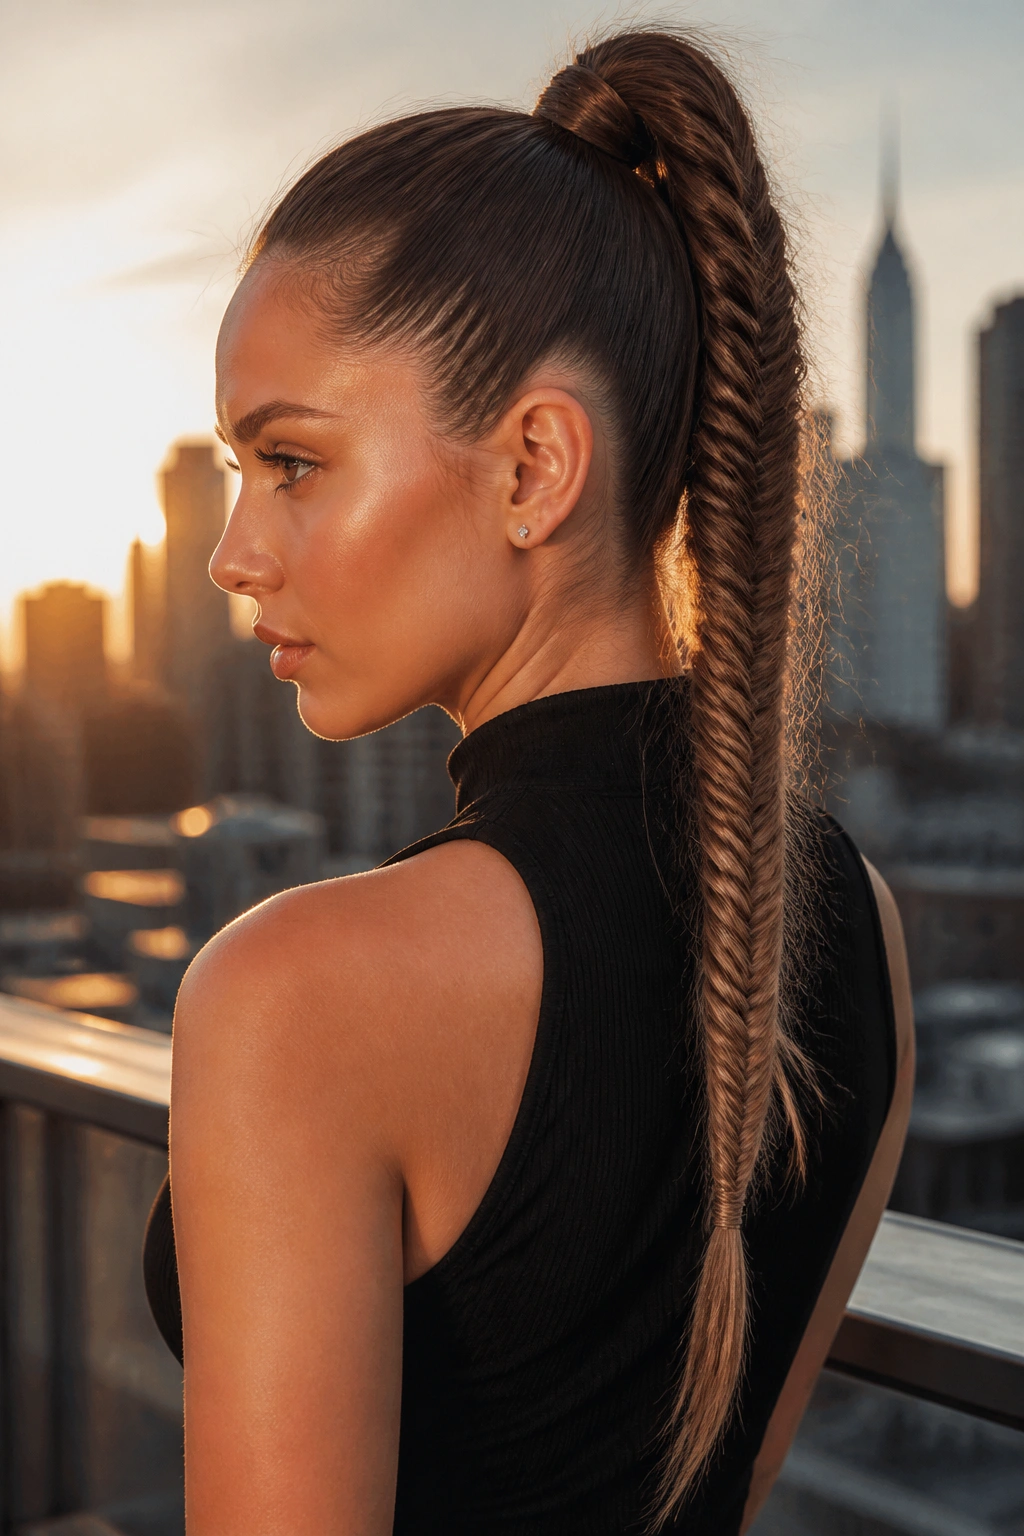
6. High Ponytail Fishtail
There is a specific kind of “cool factor” that comes with a high ponytail fishtail. It’s sleek at the top and intricate at the bottom. For people with long hair, this is a power move. It shows off the length and the health of your hair while keeping it completely controlled.
Why This Beats a Standard Pony
A standard ponytail can look a bit “basic” for a night out. By adding a fishtail to the tail of the pony, you add texture and interest. Moreover, the braid prevents your hair from tangling during the day—something that anyone with waist-length hair knows is a constant battle.
The Construction Method
- Secure your hair into a very high, very tight ponytail using a sturdy bungee-style elastic.
- Take a small strand from the underside of the pony and wrap it around the elastic to hide it.
- Braid the tail of the pony into a tight fishtail.
- Leave about two inches of “unbraided” hair at the bottom for a modern finish. Pro tip: If your pony feels like it’s sliding down, insert two bobby pins vertically through the elastic and into your hair. It acts as a “kickstand” to keep the ponytail upright.
7. Low-Slung Messy Fishtail
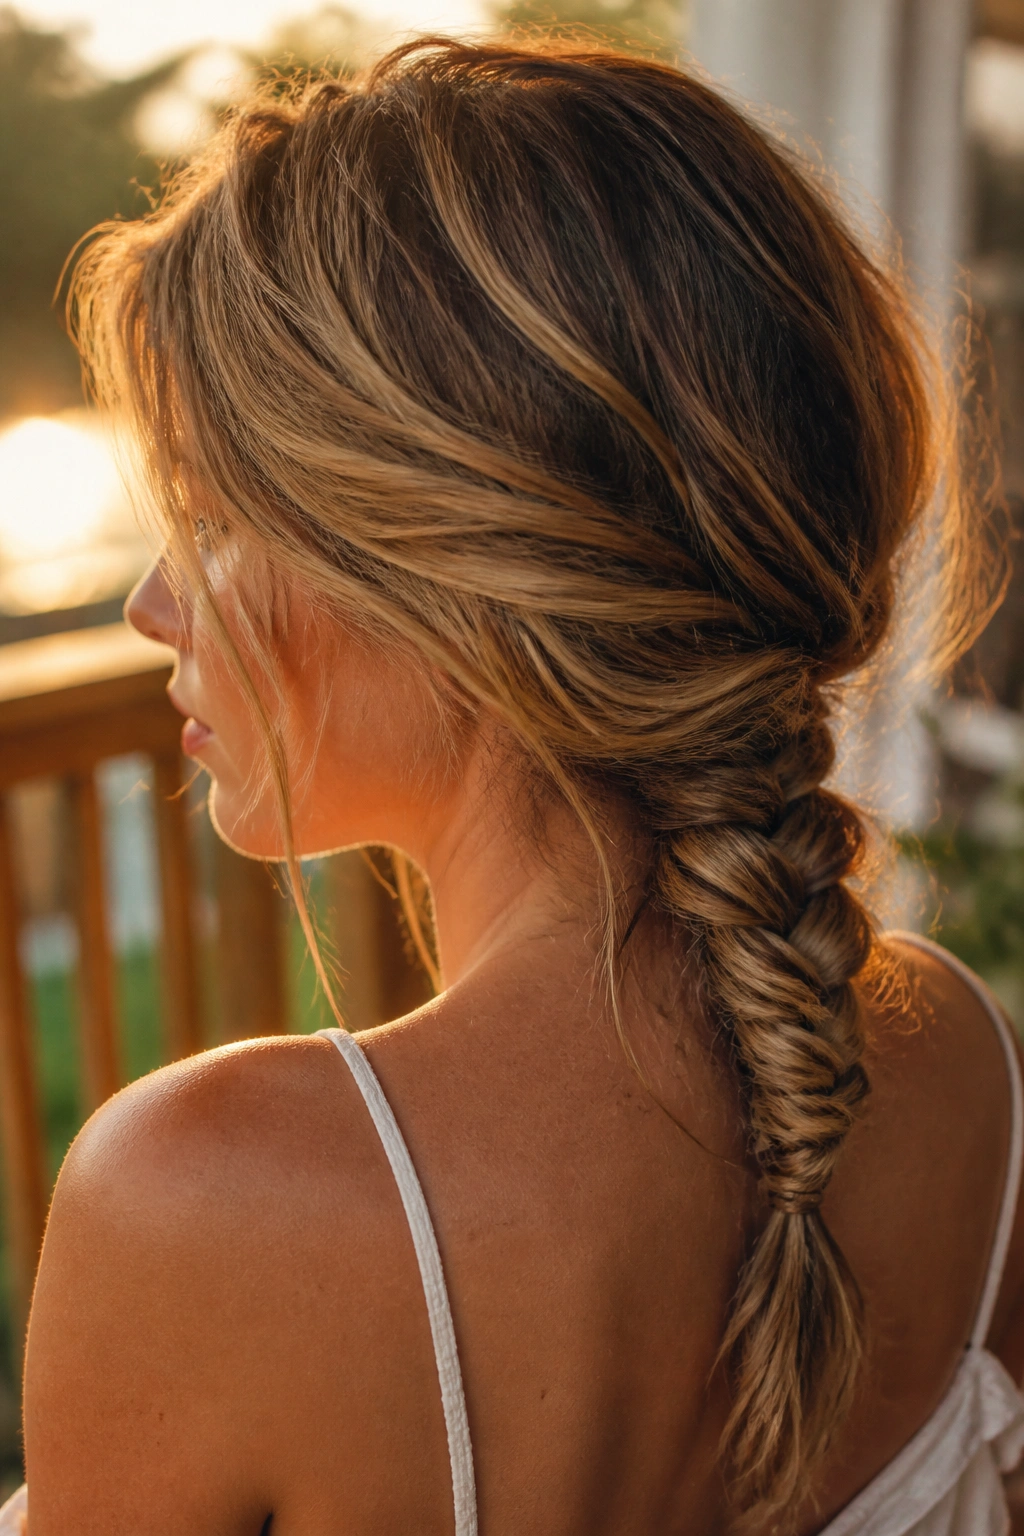
On the opposite end of the spectrum from the high pony is the low-slung, “I-don’t-care” fishtail. This is the ultimate “day-two” hairstyle. It works best when your hair already has a bit of texture from a previous style or some dry shampoo.
The Appeal of the Mess
This style is all about the layers. Instead of trying to hide the ends that poke out, you let them fly. It creates a soft, hazy silhouette that is incredibly flattering. It’s the kind of braid that looks like you did it while sitting on a porch at sunset. It’s effortless, but in a way that actually takes a little bit of intention.
How to Style It
- Gather your hair loosely at the nape of your neck.
- Don’t worry about a perfect part; in fact, a messy part is better.
- Braid loosely, taking varying sizes of hair for each cross-over.
- Once finished, use your fingers to “distress” the braid. Pull at it, shake it, and maybe even use a comb to back-comb the braid slightly for a “fuzzy” texture.
8. Waterfall-Fishtail Hybrid
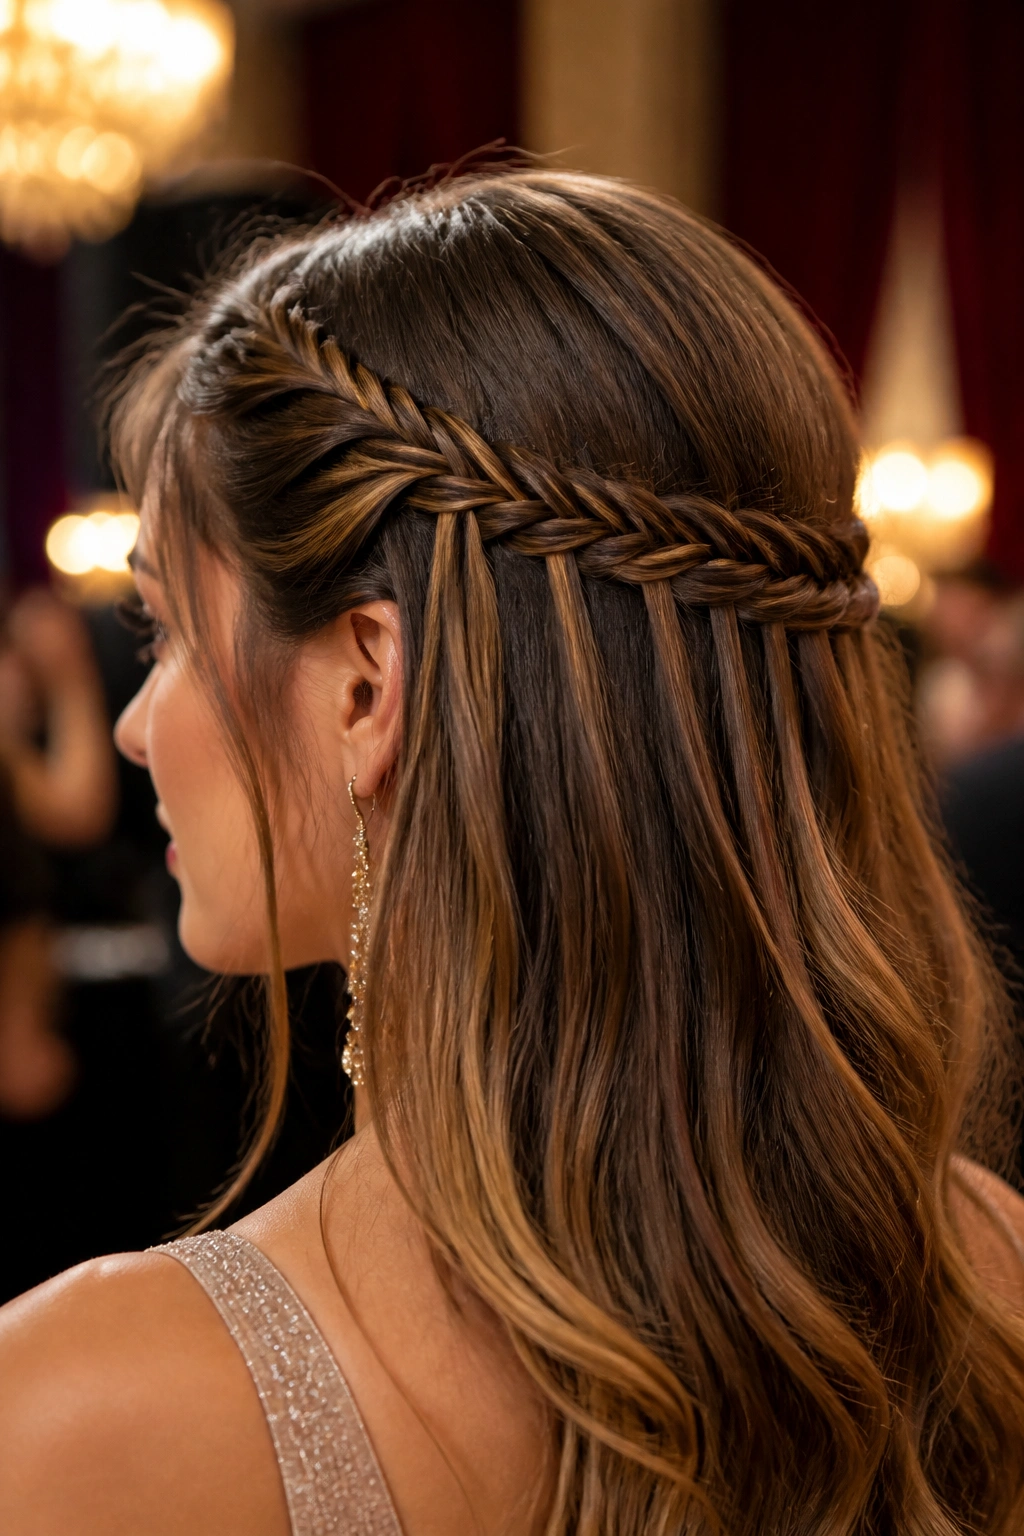
If you want to truly show off your braiding skills, the waterfall-fishtail is the way to go. A waterfall braid “drops” strands of hair as it moves across the head, creating a cascading effect. By using the fishtail technique for the main “chain” of the braid, you create a much more intricate look than the standard three-strand version.
This is a “special occasion” hairstyle. It takes time, and it definitely takes practice. But for long layered hair, it is a masterpiece. The “dropped” strands show off the different lengths of your layers, while the fishtail creates a solid horizontal line across the back of the head. It’s essentially a piece of jewelry made out of your own hair.
Because this style is so delicate, I recommend using a bit of hairspray on your fingers while you braid. It gives you just enough “tack” to keep the strands from slipping before you’re ready to drop them. When you finish the braid on the opposite side of your head, you can either tuck the end under the rest of your hair or continue it down into a regular fishtail.
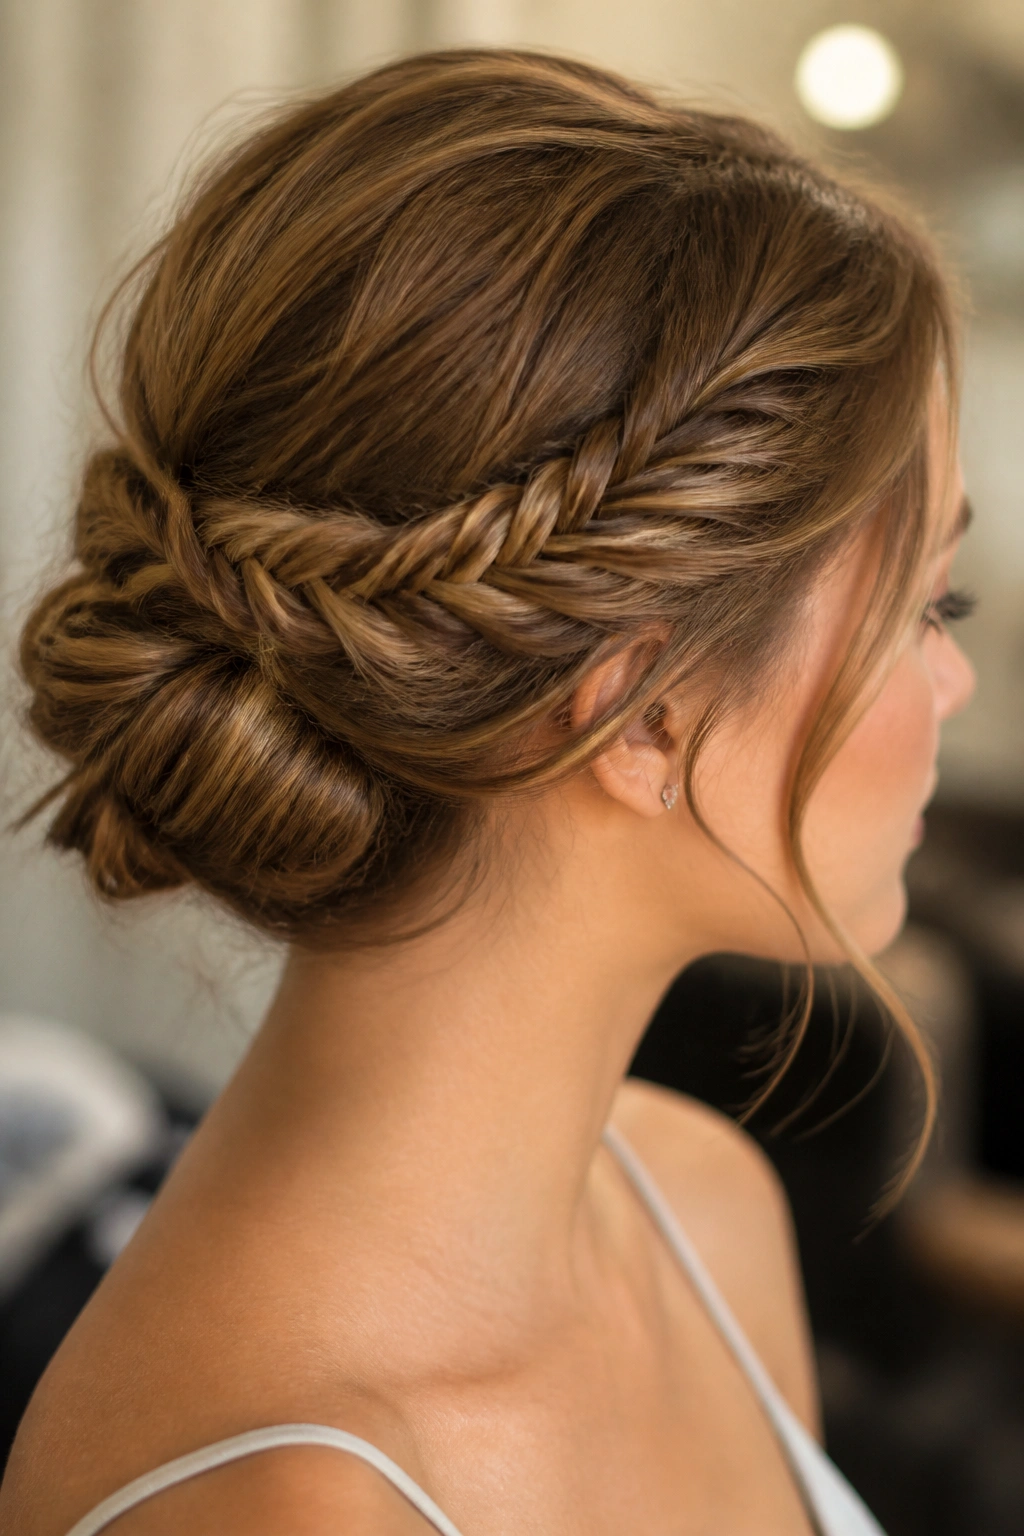
9. Fishtail Bun (The Coil)
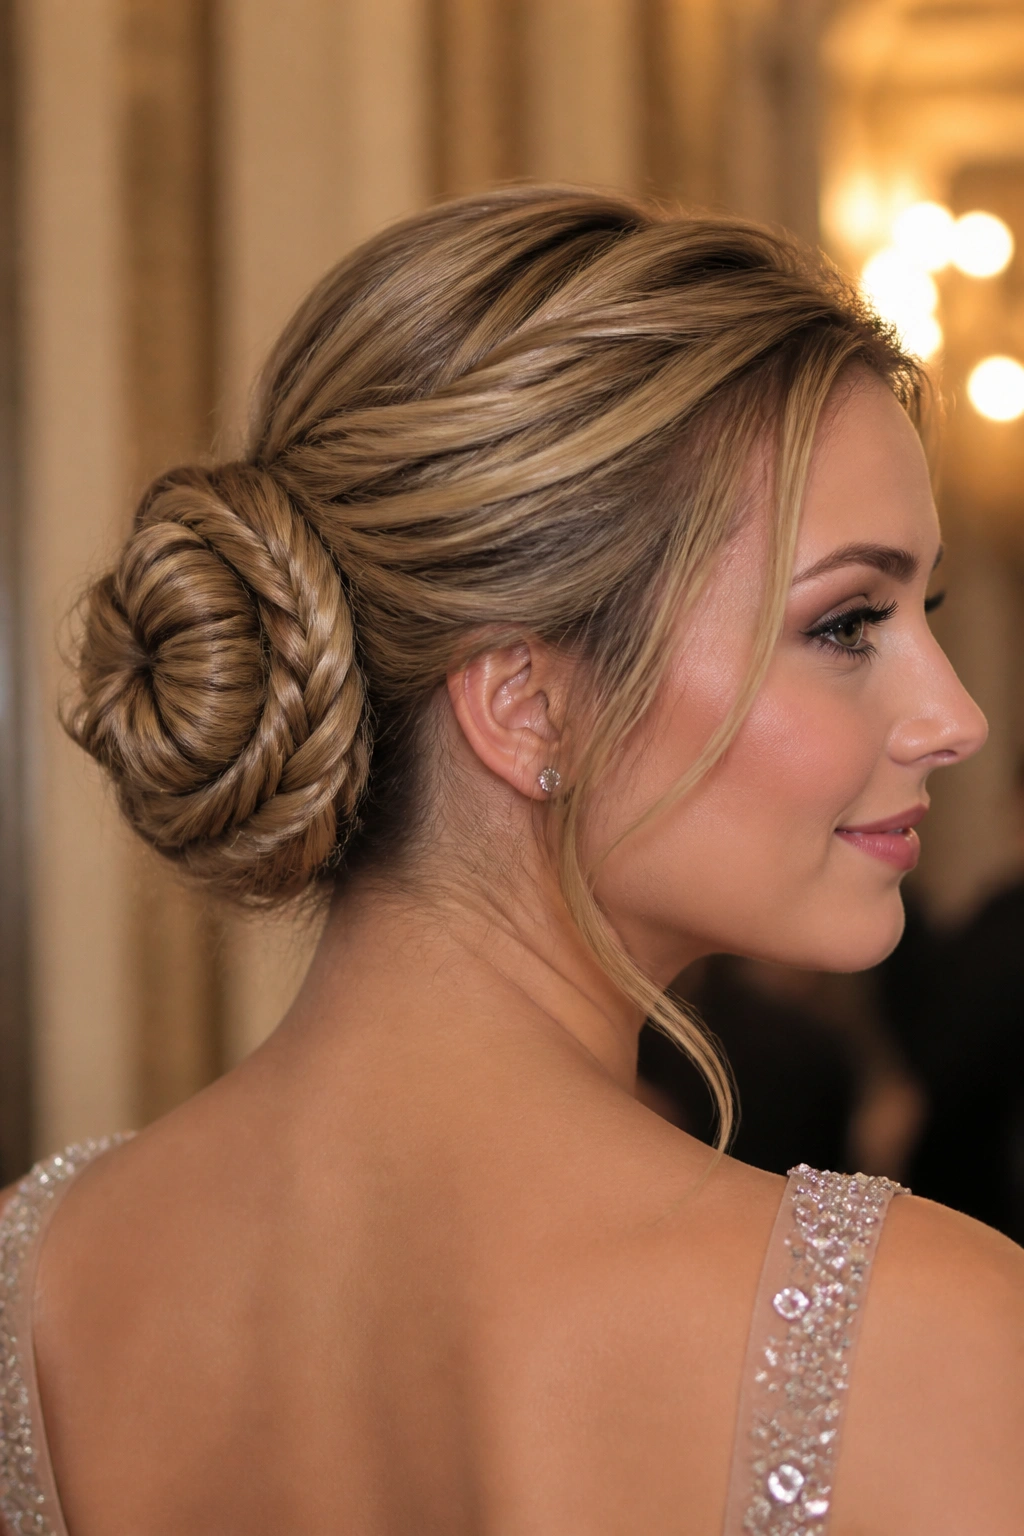
What happens when you take a long fishtail and roll it up like a cinnamon bun? You get one of the most sophisticated updos imaginable. The fishtail bun is a favorite for formal events because it looks far more complicated than it actually is.
When you braid your hair into a fishtail before pinning it into a bun, the “texture” of the bun becomes incredibly detailed. Instead of a smooth ball of hair, you have these beautiful, interlocking “Vs” that catch the light from every angle. For layered hair, the “tucking” process of the bun helps to hide all those pesky ends that might have been poking out of the braid itself.
- Start with a ponytail: It gives the bun a secure anchor.
- Braid to the very end: Don’t leave a long tail, or it will be hard to hide.
- Spiral carefully: Lay the braid flat against your head as you coil it.
- Pin as you go: Don’t wait until the end to use bobby pins. Pin every “half-turn” to ensure the bun doesn’t sag.
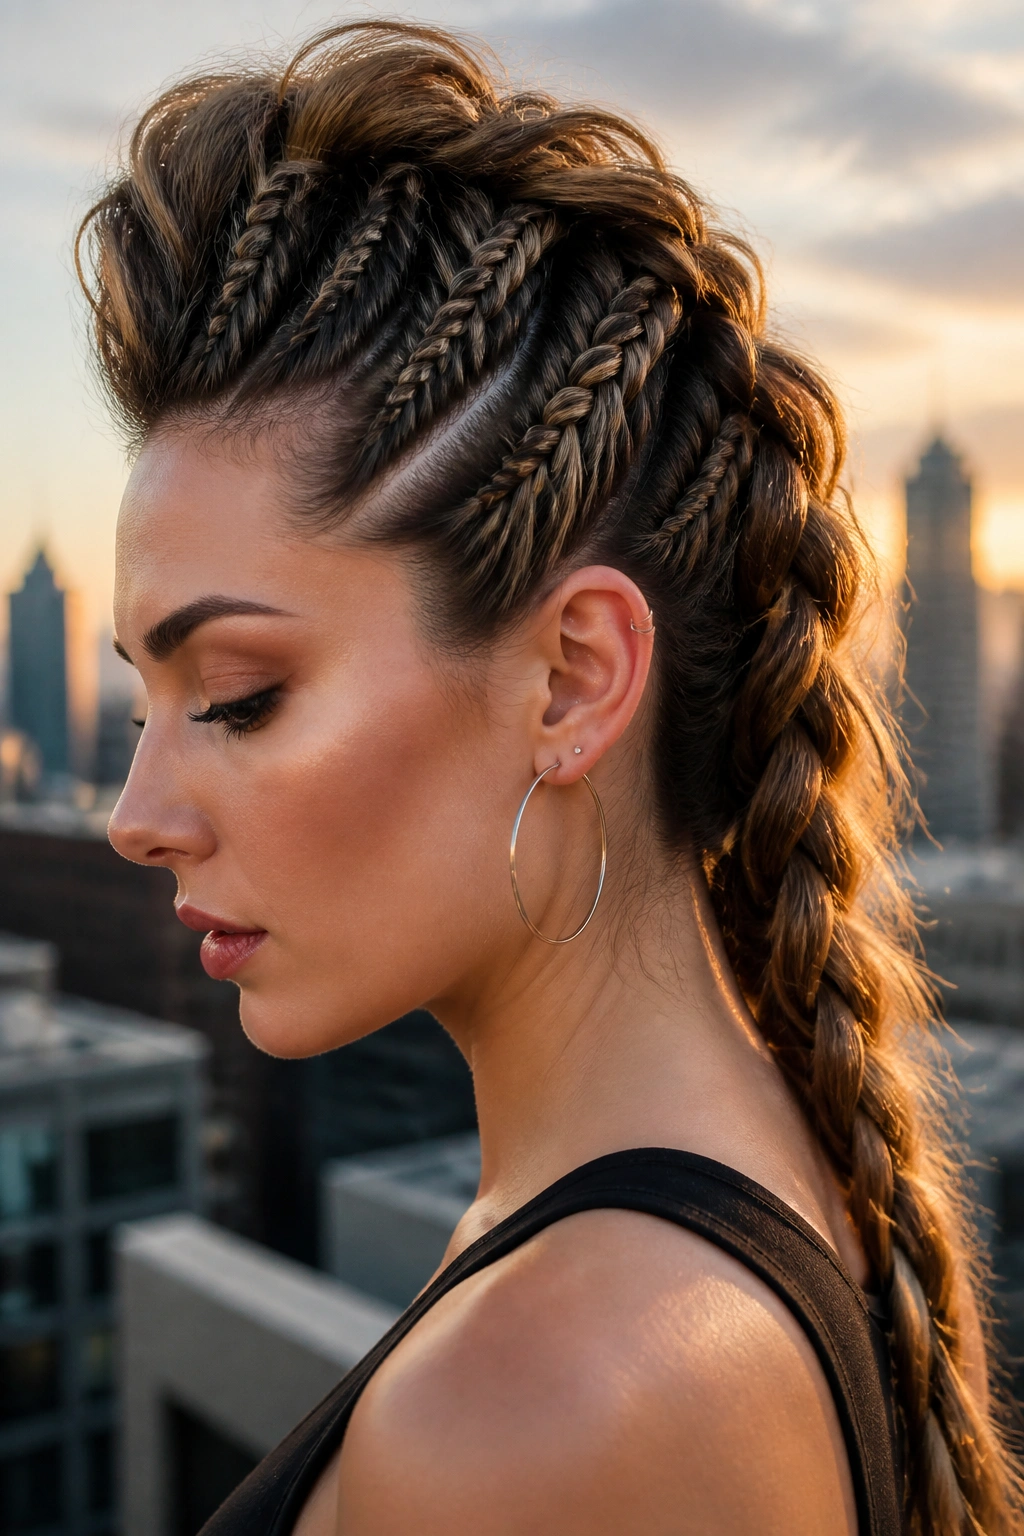
10. Mohawk Fishtail
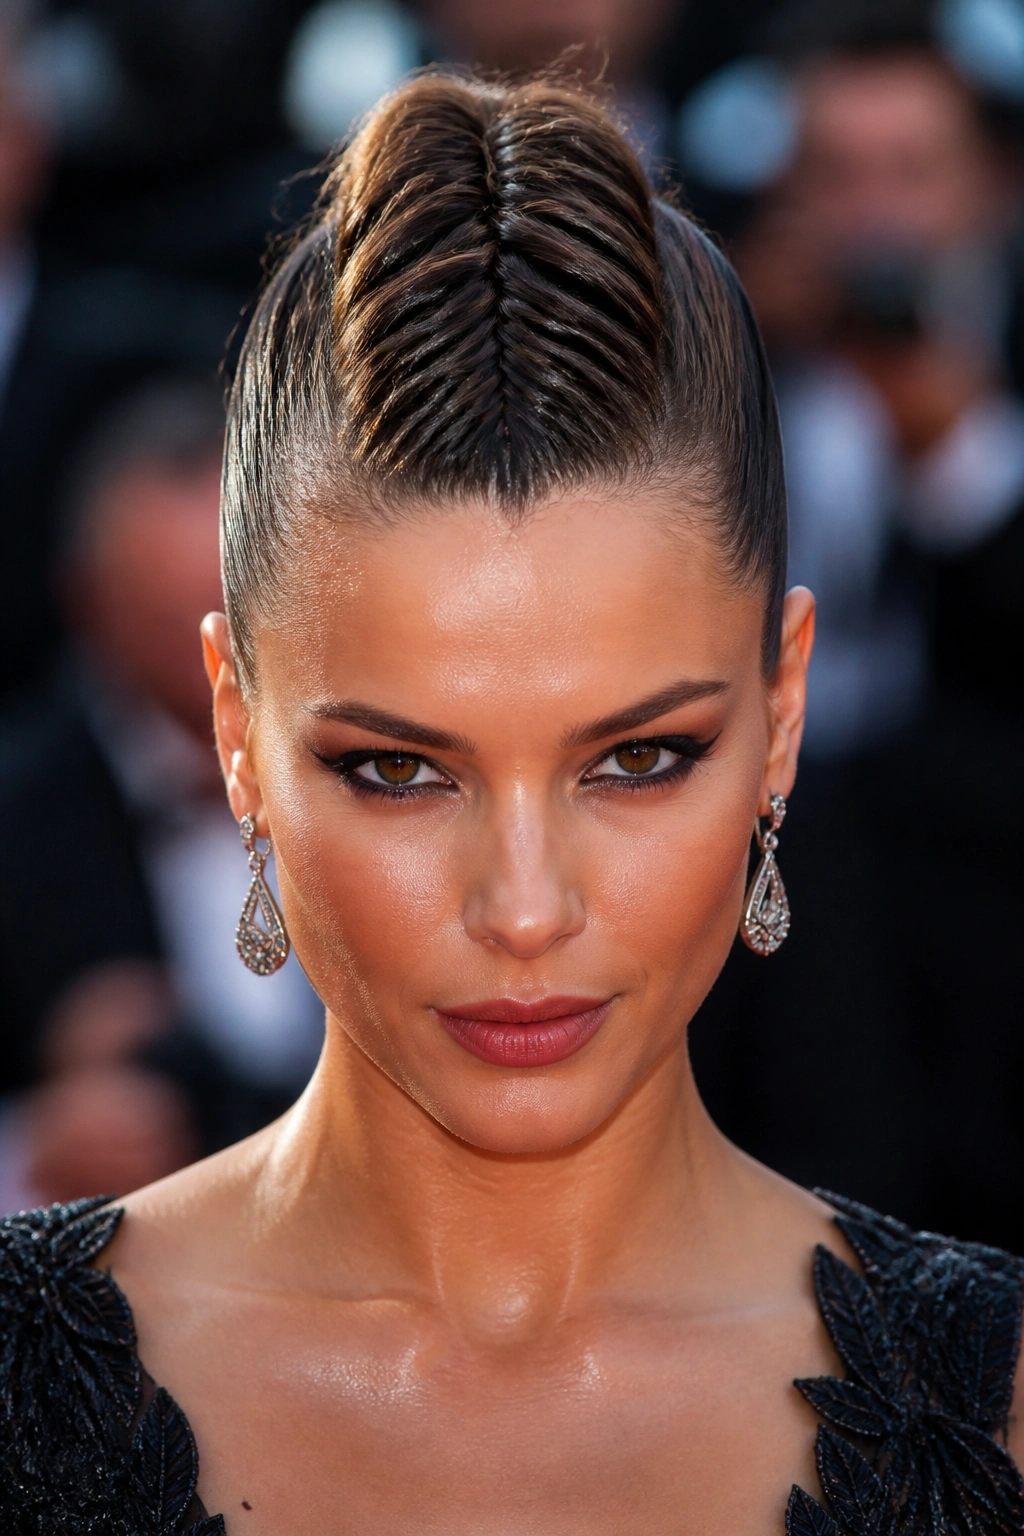
The Mohawk fishtail is for the girl who wants to stand out. It involves creating a thick, voluminous fishtail braid that runs right down the center of the head, from the forehead to the nape. The sides of the hair are pulled back tightly, creating the illusion of a shaved-side Mohawk without the commitment.
This style is a favorite among celebrities on the red carpet because it is both edgy and elegant. For long layers, the Mohawk braid is great because it gathers all the “top” layers into one central column. The height at the front is also very lengthening for the face, making it a great choice for those with rounder face shapes.
To get that “lift” at the front, back-comb the section of hair at your forehead before you start braiding. This creates a “pomp” effect that feeds directly into the fishtail. Keep the sides of your hair very sleek—use a bit of gel or heavy-duty hairspray to make sure they stay flat against your scalp.
11. Triple-Strand-to-Fishtail Transition
Sometimes, you just can’t decide. The transition braid starts as a standard three-strand braid at the top and “melts” into a fishtail halfway down. This is a very modern look that breaks up the visual monotony of a single braiding style.
I love this for long layered hair because the three-strand section at the top is very secure for those shorter face-framing layers. Once you get past the “danger zone” of short layers, you can switch to the more intricate fishtail for the bottom half of the hair where the length is consistent.
Why It Works
It’s like a visual gradient. The simplicity of the top makes the complexity of the bottom pop even more. It’s also much faster to do than a full-head fishtail.
The Switch-Over Technique
- Begin a normal braid.
- After about 3 or 4 “links,” merge two of the three strands together.
- You now have two main sections. Begin your fishtail weave from here.
- Pro tip: Use a small clear elastic at the transition point if you’re worried about it coming loose, though a skilled braider can usually do it “live” without help.
12. Wrapped Fishtail Headband
If you have very long hair, you can actually use your braid as a hair accessory. A wrapped fishtail headband involves braiding a long section of hair from behind one ear and wrapping it over the top of your head to the other side.
This is the ultimate “fairytale” hair. It looks incredibly intricate and feminine. For those with layers, the “headband” braid is usually made from the longer back sections of hair, which means you won’t have to worry about short ends popping out of the braid as it sits across the top of your head. It also keeps your hair out of your face in a way that feels much more special than a plastic headband.
Make sure you secure the “destination” end of the braid firmly behind your other ear. I usually use two bobby pins crossed in an “X” shape for maximum security. Then, I let the rest of my hair fall over the pins to hide them. It creates a seamless, circular look that is absolutely breathtaking.
13. Infinity Fishtail (The Figure Eight)
The infinity fishtail is a variation where you wrap a small strand of hair in a figure-eight pattern around two larger sections. It results in a braid that looks less like a “fish skeleton” and more like a woven basket or a piece of knitwear.
What Makes It Different
It has a different “geometry” than the standard fishtail. It’s denser and feels more structural. For long layered hair, this density is a huge plus because it really “locks” the hair in place. It’s much harder for a stray layer to escape an infinity weave because the wrapping strand acts like a constant barrier.
How to Get the Look
- Split hair into two large sections.
- Take a third, very thin “weaving” strand from the back.
- Wrap the thin strand over the right section, under and around it, then over the left section, and under and around it.
- Continue this figure-eight motion all the way down. Pro tip: You will eventually run out of your “weaving” strand. When that happens, just pick up a new thin strand from the back and continue.
14. Micro Fishtail Accents
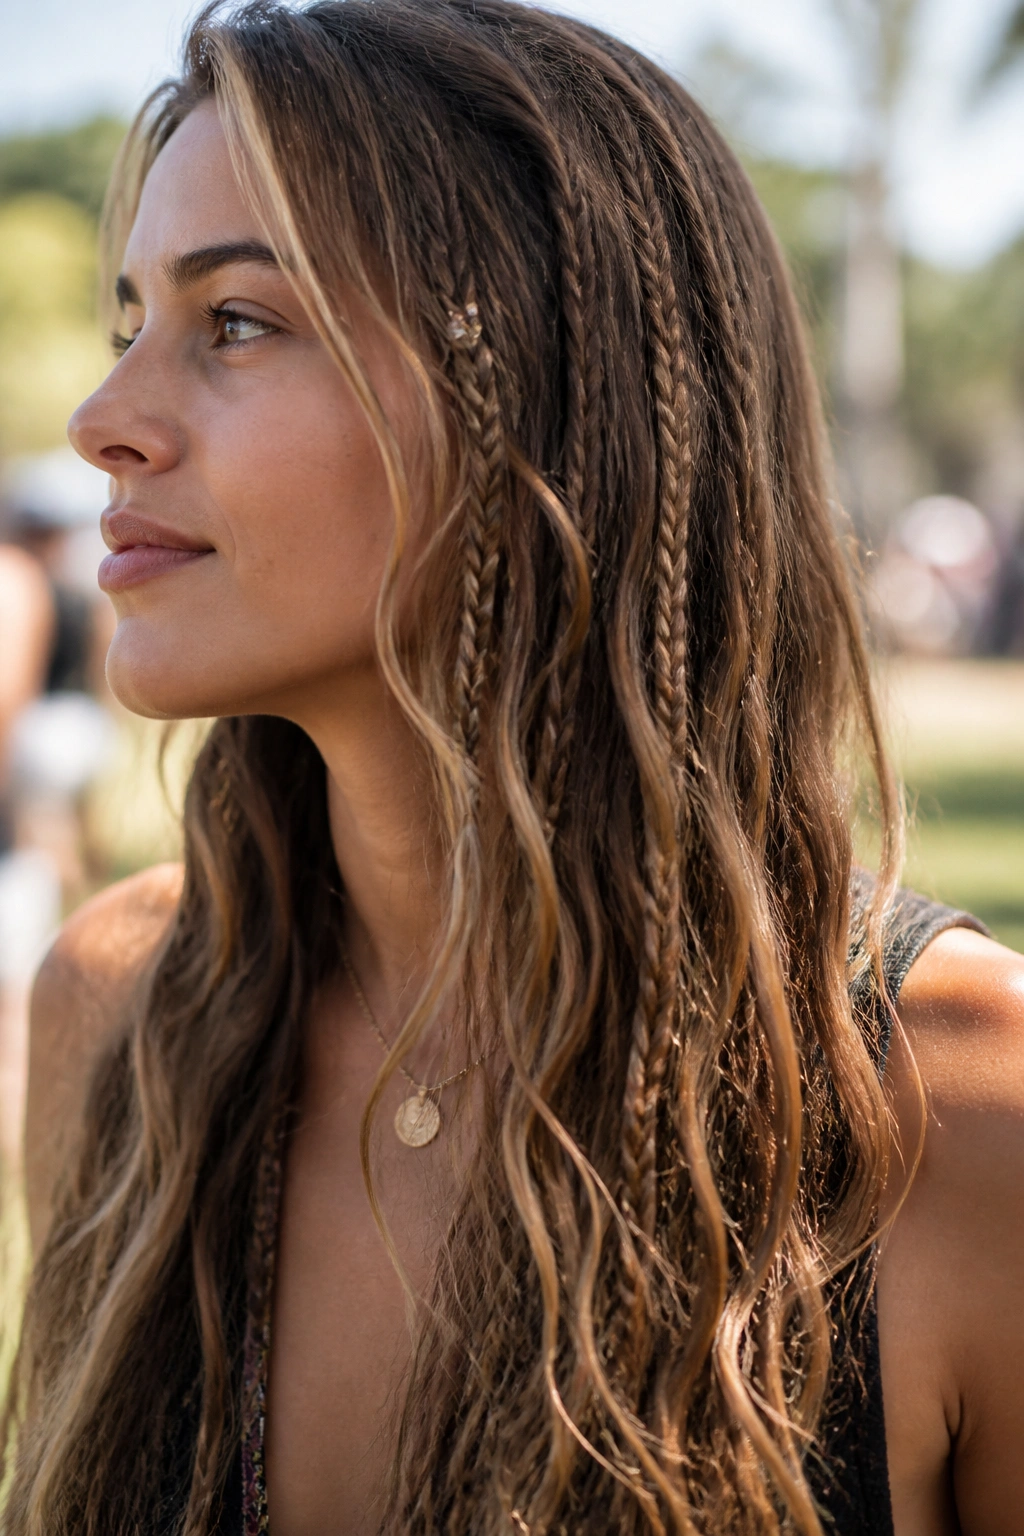
You don’t always need to braid your whole head to make a statement. Sometimes, three or four tiny “micro” fishtails hidden throughout your loose hair can create a “cool-girl” vibe that feels very effortless.
I see this a lot in “festival” styling. It’s subtle. Someone might not even notice the braids until they get close. It adds a layer of “discovery” to your hairstyle. Because these braids are so small, they are very quick to do—perfect for those mornings when you only have five minutes but want to look like you put in effort.
Use tiny, “nano” elastics for these. Standard elastics will look too bulky and ruin the delicate effect. I also like to “rough up” the micro braids once they are finished so they blend in with the texture of the loose hair. It shouldn’t look like a perfect little rope; it should look like it just happened.
15. Side-Pin Tucked Fishtail
This is a “faux” updo that is incredibly elegant. You create a side fishtail, but instead of letting it hang, you fold it back on itself and pin it against the back of your head.
It creates a “chignon” look but with the added texture of the fishtail. For long layered hair, this is a great “cheat” for a formal event. The length of your hair provides the volume needed for the “tuck,” and the layers add a bit of softness around the face. It’s secure, it’s polished, and it won’t move even if you’re on the dance floor all night.
- Braid loosely: A tight braid won’t “fold” as gracefully.
- Use “U-shaped” hair pins: They are better for “anchoring” a tucked braid than standard bobby pins.
- The “hidden” tail: Make sure you tuck the very end of the braid deep inside the fold so the elastic is never visible.
16. Bubble Fishtail Combo
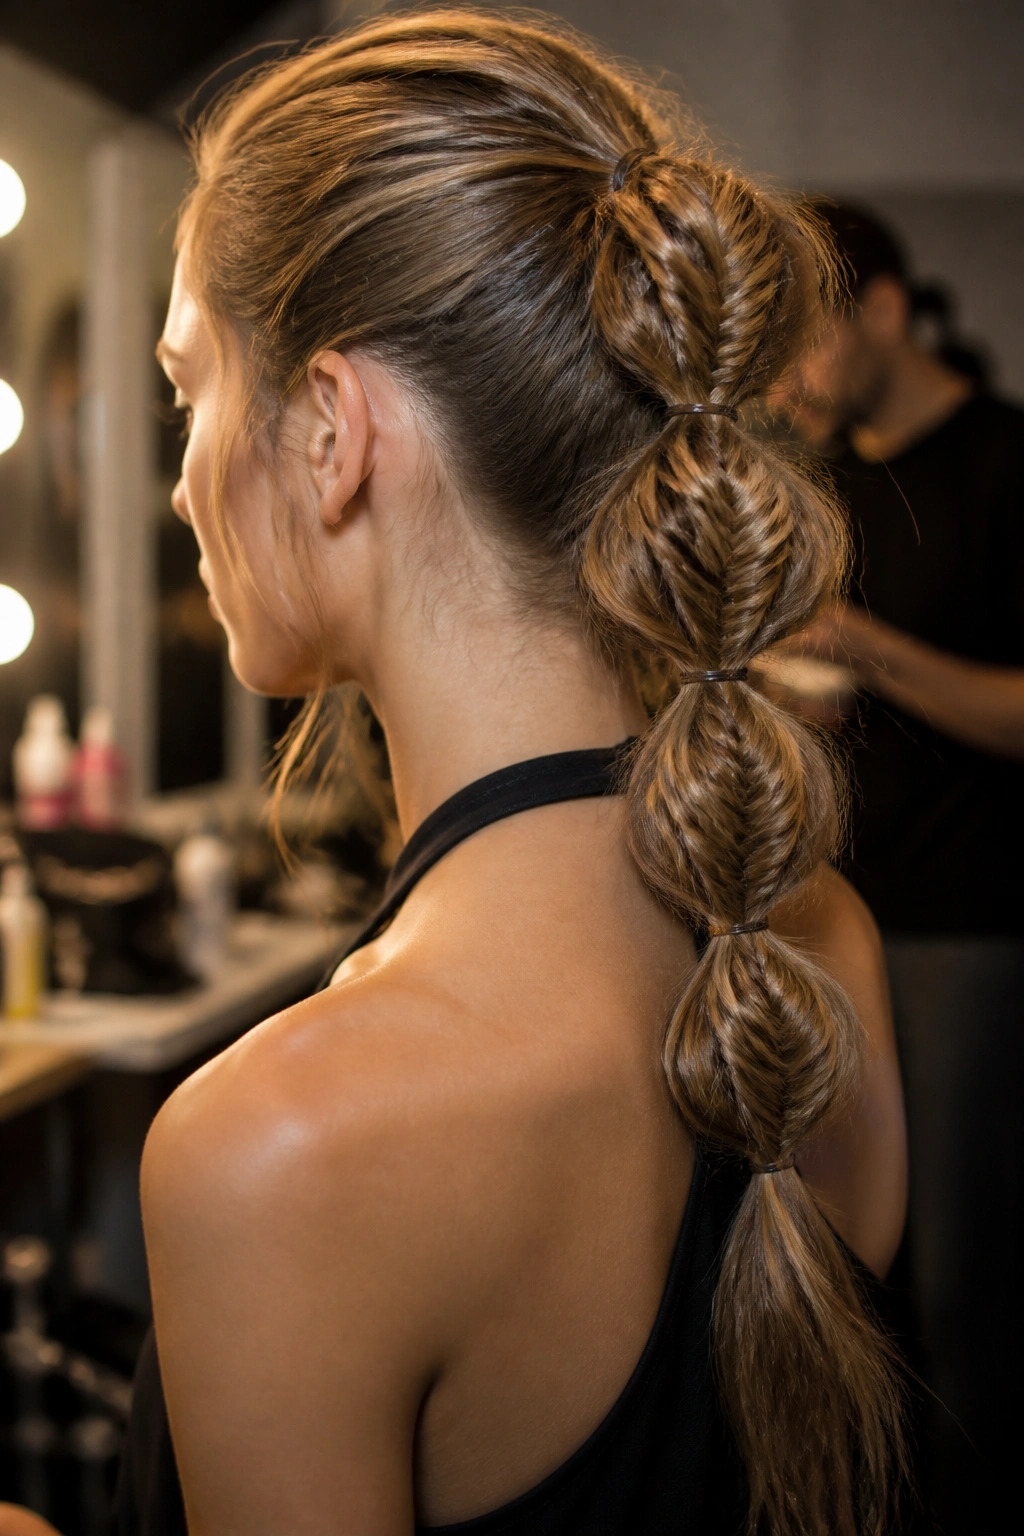
The “bubble” ponytail has been popular for a while, but combining it with a fishtail takes it to a whole new level. You create “bubbles” of hair using elastics every few inches, but inside each bubble, you weave a short section of fishtail.
This is a very architectural, high-fashion look. It looks like something off a Paris runway. For long hair, it’s a great way to “section off” the length so it doesn’t get tangled. Each bubble acts as a fresh start for your layers, making it much easier to manage the different lengths of your hair.
- Space them evenly: Use a comb or a ruler if you have to!
- “Poof” the bubbles: After you put the elastic in, pull the hair out to create a rounded “bubble” shape.
- The contrast: The smooth “poof” against the intricate “weave” of the fishtail is a great visual contrast.
17. Four-Strand Fishtail Variance
If you find the two-strand fishtail too easy, try the four-strand version. It is significantly more difficult to track, but the result is a braid that is almost “square” in its dimensions. It’s chunky, it’s heavy, and it’s incredibly impressive.
The four-strand fishtail looks less like a braid and more like a complex piece of macramé. For those with thick, long layered hair, this style is a great way to show off the sheer volume of your hair. It’s a “showstopper” braid that usually results in people asking, “How did you do that?”
I’ll be honest: your arms will get tired. But if you have a special event where you want your hair to be the main accessory, this is the one. Practice on a friend first to get the “rhythm” of the four sections before you try it on yourself.
18. Diagonal Back Fishtail
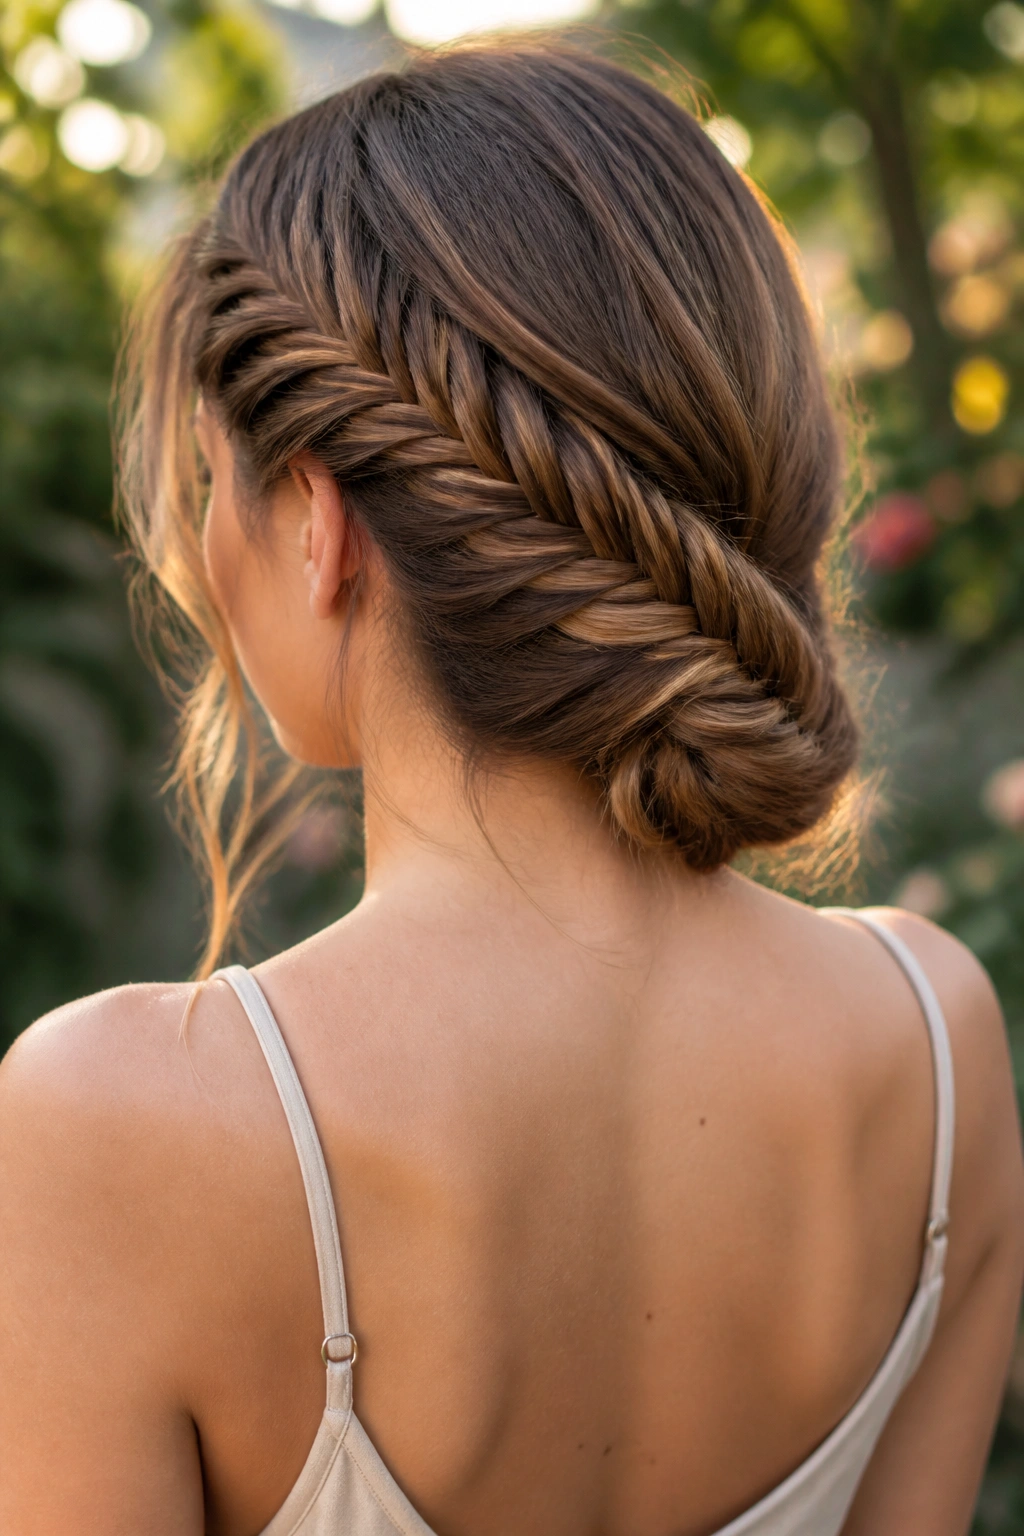
Instead of going straight down the back, the diagonal fishtail starts behind one ear and ends at the opposite nape. It creates a beautiful “swooping” line across the back of the head.
The Visual Movement
This style is all about movement. It looks great from the side, the back, and the front. For layered hair, the diagonal path allows the braid to pick up different layers at different heights, which creates a very balanced look. It also prevents the “sagging” that sometimes happens with a straight-back braid.
Execution Tips
- Start with a very small section and “feed” hair in as you move diagonally.
- Keep the tension consistent. If it’s tight at the start and loose at the end, the diagonal line will look “broken.”
- Pro tip: Finish with a side-pony or a side-bun for an extra touch of “asymmetrical” chic.
19. Fishtail with Ribbon Interweave
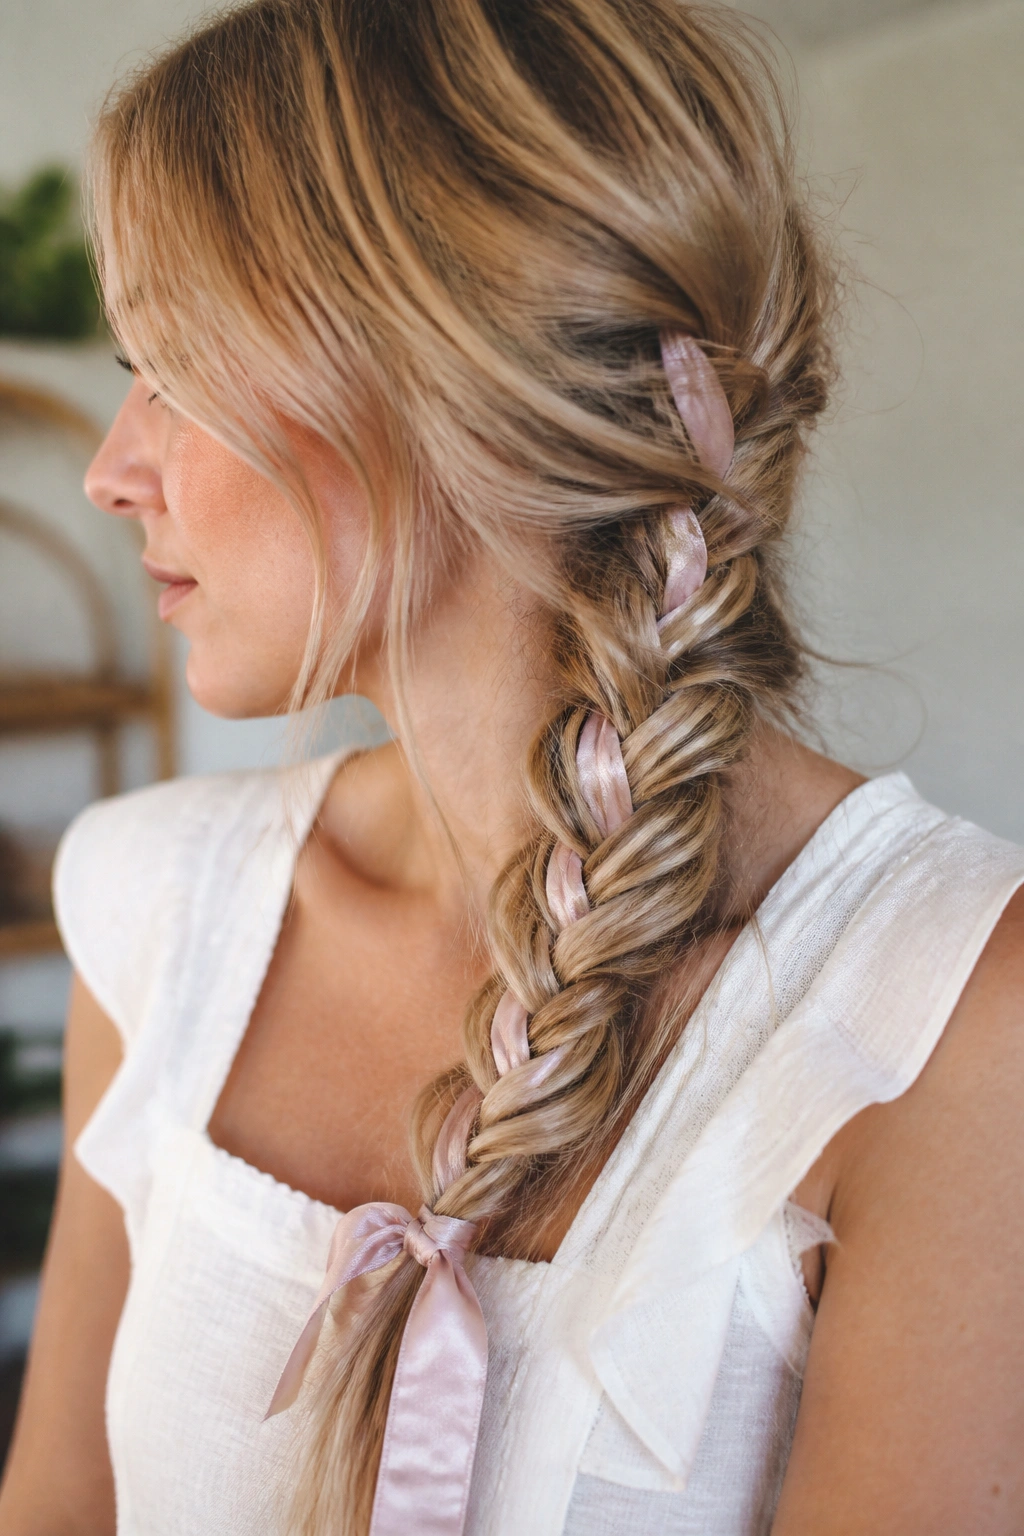
Adding a ribbon into your fishtail is a simple way to add a pop of color or to match your hair to your outfit. You simply treat the ribbon as part of one of your hair sections and weave it in just like the hair.
This is a very “vintage” look, reminiscent of Victorian-era styling but with a modern fishtail twist. For long layered hair, the ribbon actually provides a bit of extra “structure” that can help keep the braid together. It acts like a “spine” for the braid.
- Choose the right ribbon: A velvet or grosgrain ribbon has more “grip” than a satin one.
- Tie it at the start: Secure the ribbon to your initial ponytail or section so it doesn’t slide out halfway through.
- Let it dangle: Leave a little bit of ribbon at the bottom to tie into a bow for a feminine finish.
20. Faux-Hawk Fishtail
The faux-hawk fishtail is similar to the Mohawk version but focus on the “tail” itself being the star. You create three separate fishtails—one on the left, one on the right, and one in the center—and then braid those three braids together.
It is “braid inception.” The result is a massive, textured “rope” of hair that has incredible depth. For someone with very long hair, this is a great way to “compress” the length into something that feels manageable and stylish. It’s a very “strong” look that pairs perfectly with leather jackets or bold makeup.
21. Scarf-Integrated Fishtail
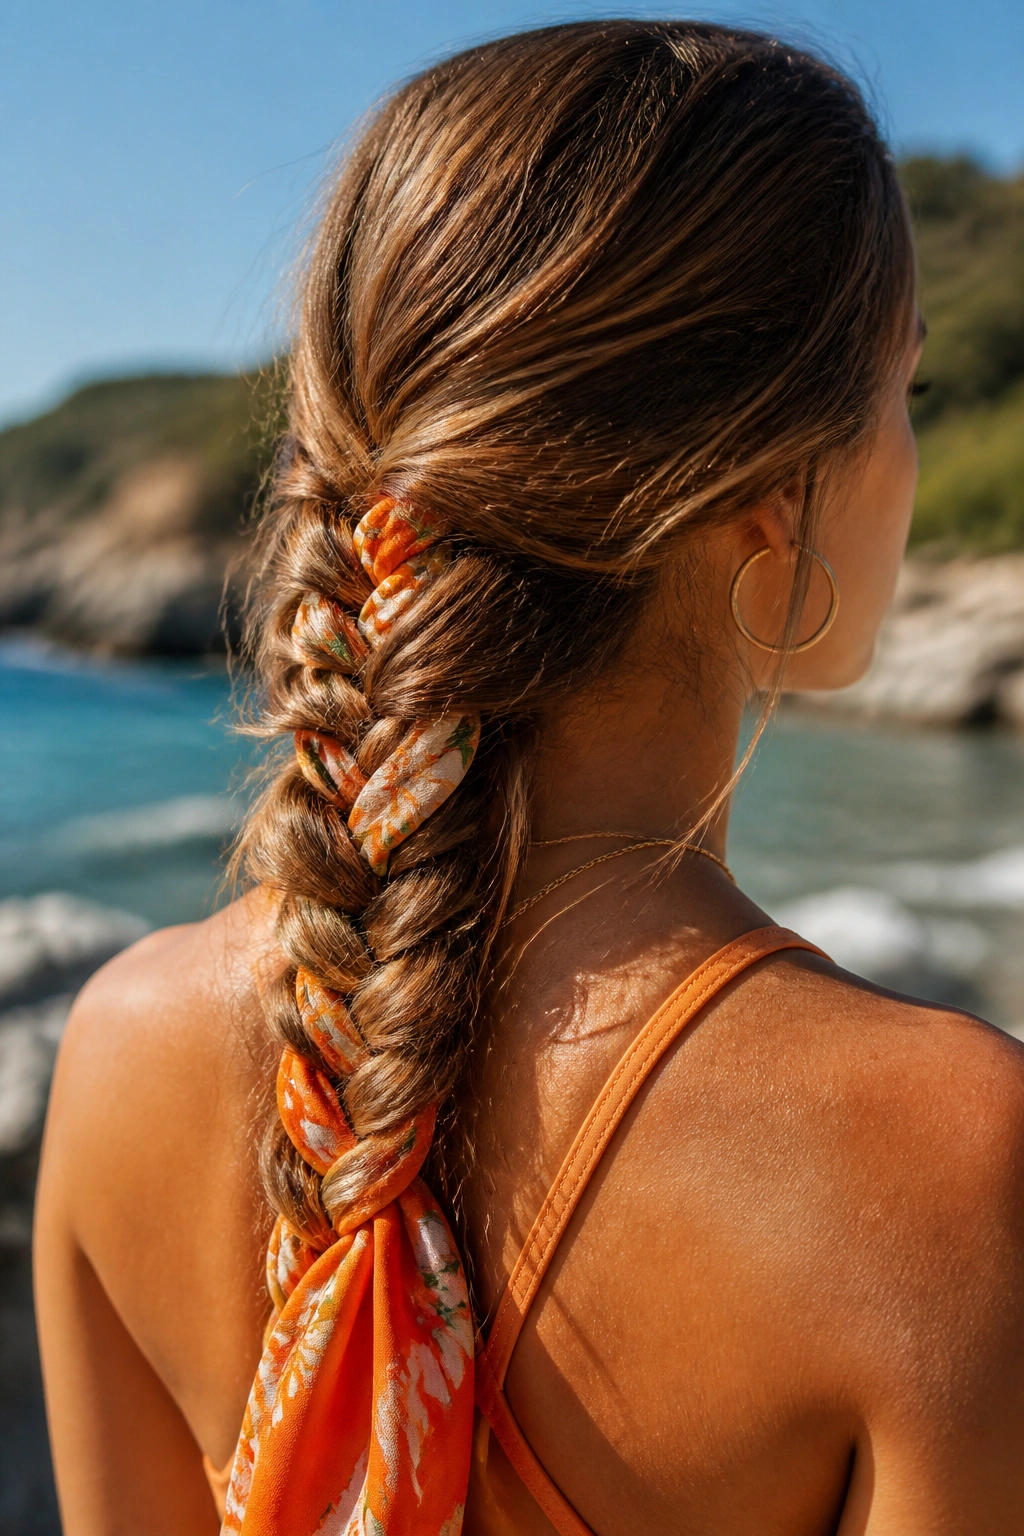
Similar to the ribbon, but on a larger scale. Using a silk scarf in your fishtail is the ultimate summer look. It adds bulk to the braid and protects your hair from the sun.
I love this for “beach days.” You can use a scarf that matches your swimsuit or a bright, patterned one for a bold statement. The silk of the scarf also helps to reduce friction on your long layers, which can prevent breakage and split ends.
- Fold the scarf: Make it into a thin strip before you start.
- Weight balance: Since the scarf has its own weight, make sure you secure the braid tightly at the top so it doesn’t pull on your scalp.
22. Reverse Fishtail (Upward)
The reverse fishtail starts at the nape of the neck and moves up toward the crown. It usually ends in a high bun or a “top knot.”
This is a “business in the front, party in the back” kind of style. From the front, you look sleek and professional. But when you turn around, there is this beautiful, intricate braid climbing up your head. For long layered hair, this is a great way to “sweep up” all the hair at the back of the neck that usually gets sweaty or tangled.
- Flip your head over: It is much easier to do this while hanging your head upside down.
- Gravity is your friend: Let the weight of the hair help you pull the sections tight.
- The bun finish: Use the remaining length to create a big, messy bun at the top of your head.
23. The “Mermaid” Wide Fishtail
The mermaid fishtail is characterized by its extreme width and its “feathery” edges. It’s achieved by taking very, very small sections of hair for the weave and then pancaking the braid to its absolute limit.
It looks like something out of a fantasy movie. It’s ethereal and soft. For long layered hair, the “feathery” look is actually enhanced by the layers, as the different lengths create a natural “fringe” along the edges of the braid.
24. Twisted Base Fishtail

Before you start the fishtail, you take two sections of hair and “rope twist” them for about two inches. Then, you transition into the fishtail.
This adds a bit of “sculptural” detail to the top of the style. It makes the braid look more “intentional” and less like you just threw it together. It’s a great way to handle face-framing layers because the twist “locks” them in before the braiding even begins.
25. Peek-a-Boo Hidden Fishtail
You leave most of your hair down but hide one or two small fishtails underneath the top layer of hair.
It’s a “secret” braid. It only shows when you move your head or when the wind blows. It’s a very subtle, sophisticated way to play with texture without committing to a full braided look.
26. Tapered Fishtail for Thinning Layers
If your layers make the bottom of your hair look much thinner than the top, the tapered fishtail is your best friend. You start with a very wide weave at the top and gradually make the “turns” smaller as you reach the thinner ends.
This creates a “cone” shape that looks very intentional rather than looking like your hair is “petering out.” It’s a clever way to use the natural “taper” of layered hair to your advantage.
27. The “Double-Layered” Fishtail
You create a small fishtail using just the top layers of your hair. Then, you take that braid and incorporate it into a larger fishtail using the rest of your hair.
It’s a “braid within a braid.” The visual complexity is off the charts. It shows off the different “tiers” of your layers and creates a hairstyle that is truly a work of art.
How to Handle Layered Ends That Poke Out
No matter how skilled you are, if you have layers, you will eventually have “sprouting” ends. This is just the reality of braiding hair of different lengths. But you don’t have to let it ruin your look.
The Fix-It Guide
- The “Hairpin” Tuck: Take a bobby pin, catch the stray end, and slide it into the center of the braid. It disappears instantly.
- Clear Mascara: This is a secret weapon for flyaways. The wand is perfect for “gluing” those tiny ends back onto the main body of the braid without making the hair look stiff.
- The “Messy” Embrace: Sometimes, the best thing to do is to pull a few more strands out. If the “sprouts” look deliberate, they become part of the aesthetic.
- Trimming: If you have one or two “dead” ends that are consistently ruined by split ends, a tiny “dusting” trim can make your braids look 100% healthier.
Keeping Your Braid Fresh Throughout the Day
Long hair is heavy, and movement is the enemy of a perfect braid. If you’re going to be out all day, you need to know how to “maintenance” your fishtail.
Mid-Day Refresh Tips
- Don’t over-touch: The more you fiddle with a fishtail, the more the layers will pop out. Set it and forget it.
- Carry “emergency” pins: Always have three bobby pins in your bag. They are the only thing that can save a sagging braid in a pinch.
- Dry Shampoo: If the top of your head starts to look flat or oily, a quick blast of dry shampoo can restore the volume and the “grip” that keeps the braid in place.
- The Silk Pillowcase: If you plan on wearing your braid to bed (a great way to get “heatless waves” the next day), a silk pillowcase is essential. It prevents the friction that turns a beautiful braid into a bird’s nest overnight.
The Bottom Line
A fishtail braid isn’t just a hairstyle; it’s a solution for the beautiful chaos of long layered hair. It’s a way to organize the different lengths of your strands into something that looks cohesive, intentional, and undeniably stylish. Whether you’re going for the sleek “High Pony” or the ethereal “Mermaid” look, the key is to remember that perfection is not the goal.
The real magic of the fishtail is in the texture. It’s in the way it catches the light, the way it softens over time, and the way it tells the world that you know how to handle your hair. It takes practice, yes. Your arms might get a little tired at first. But once you master the “over and across” rhythm, you’ll find yourself reaching for this style more than any other.
So, grab your texturizing spray, find a good light, and start weaving. Your layers will thank you for it. And remember—the messier it gets, the better it looks. That’s the beauty of the fishtail. It’s a braid that lives with you.