Messy wavy hair has become the gold standard of effortlessly chic hairstyling—that coveted “just-rolled-out-of-bed-but-make-it-intentional” look that somehow requires precision to pull off. The beauty of this trend is its contradictory nature: while it appears undone and casual, achieving those perfectly imperfect waves demands technique, product knowledge, and strategic styling choices. Whether you’re working with naturally wavy hair or creating waves from scratch, the range of options available lets you customize your look to match your personal aesthetic, face shape, and lifestyle.
The versatility of messy wavy hairstyles is what makes them so appealing. You can wear them down for a relaxed, bohemian vibe, pile them on top of your head in a textured bun, or anchor them to one side for an asymmetrical twist. These styles work across different hair lengths, textures, and colors—from short, choppy waves to long, flowing undulations that catch light and movement. What ties them all together is texture and dimension, the interplay of lighter and darker waves that creates visual interest without requiring a full highlight.
The key to nailing any messy wavy style is understanding that the “messiness” is actually deliberate styling. Product placement matters, the direction of your waves matters, and knowing which techniques work with your hair type matters most of all. From loose, romantic waves to tousled shag-inspired styles, these eighteen options showcase the full spectrum of what messy wavy hair can be.
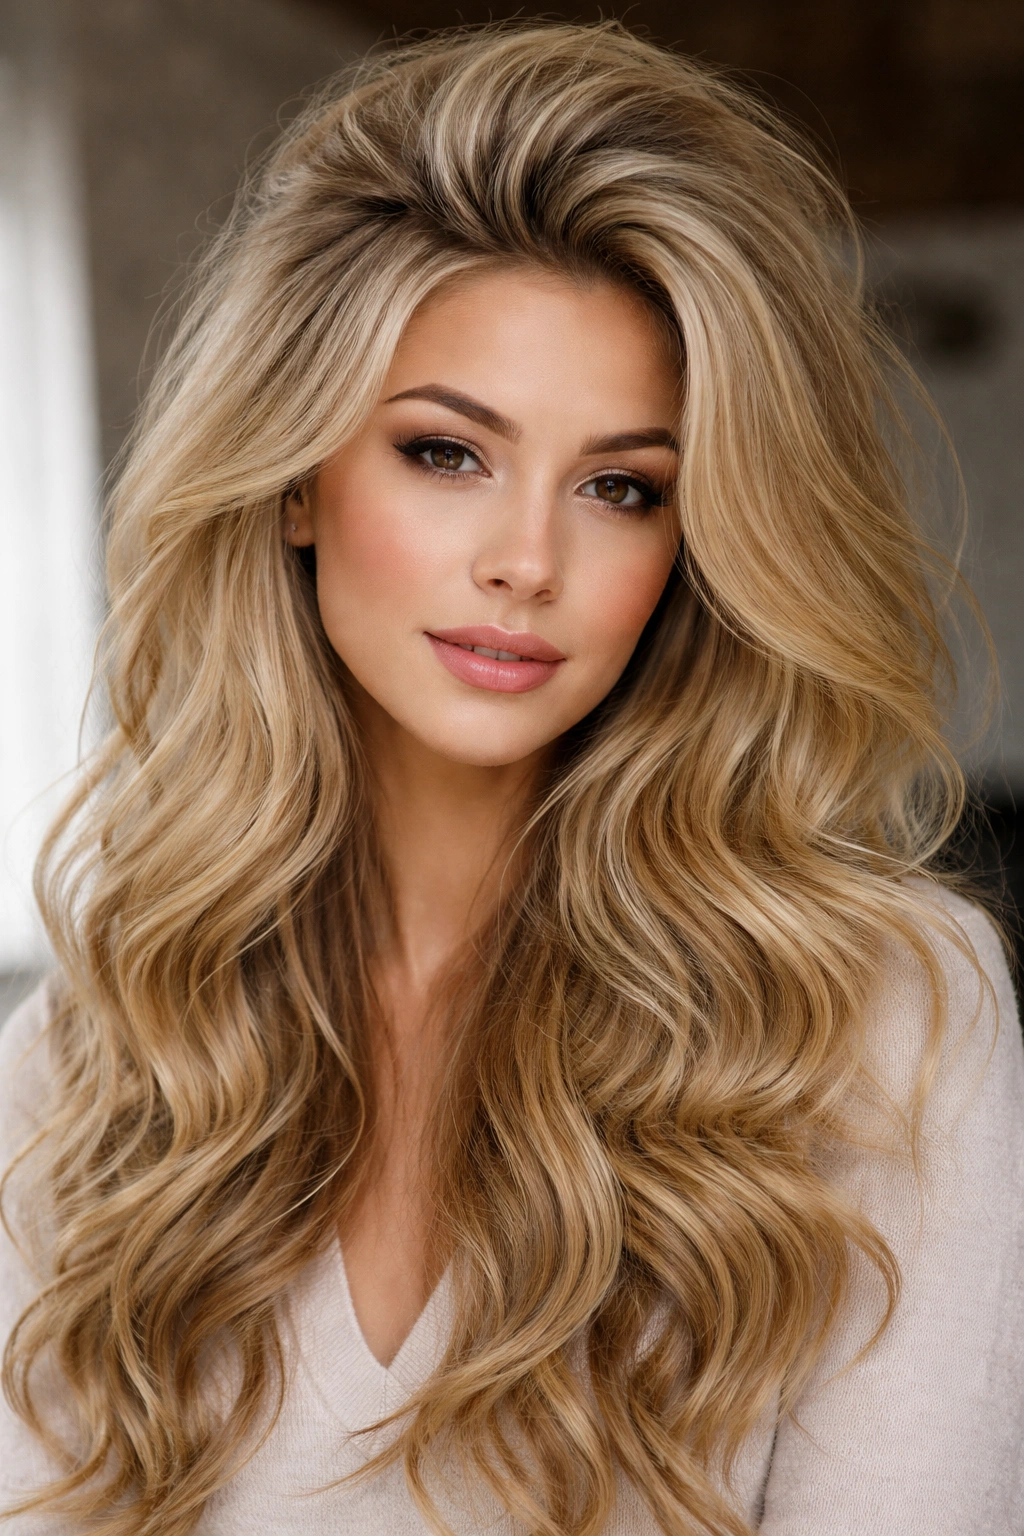
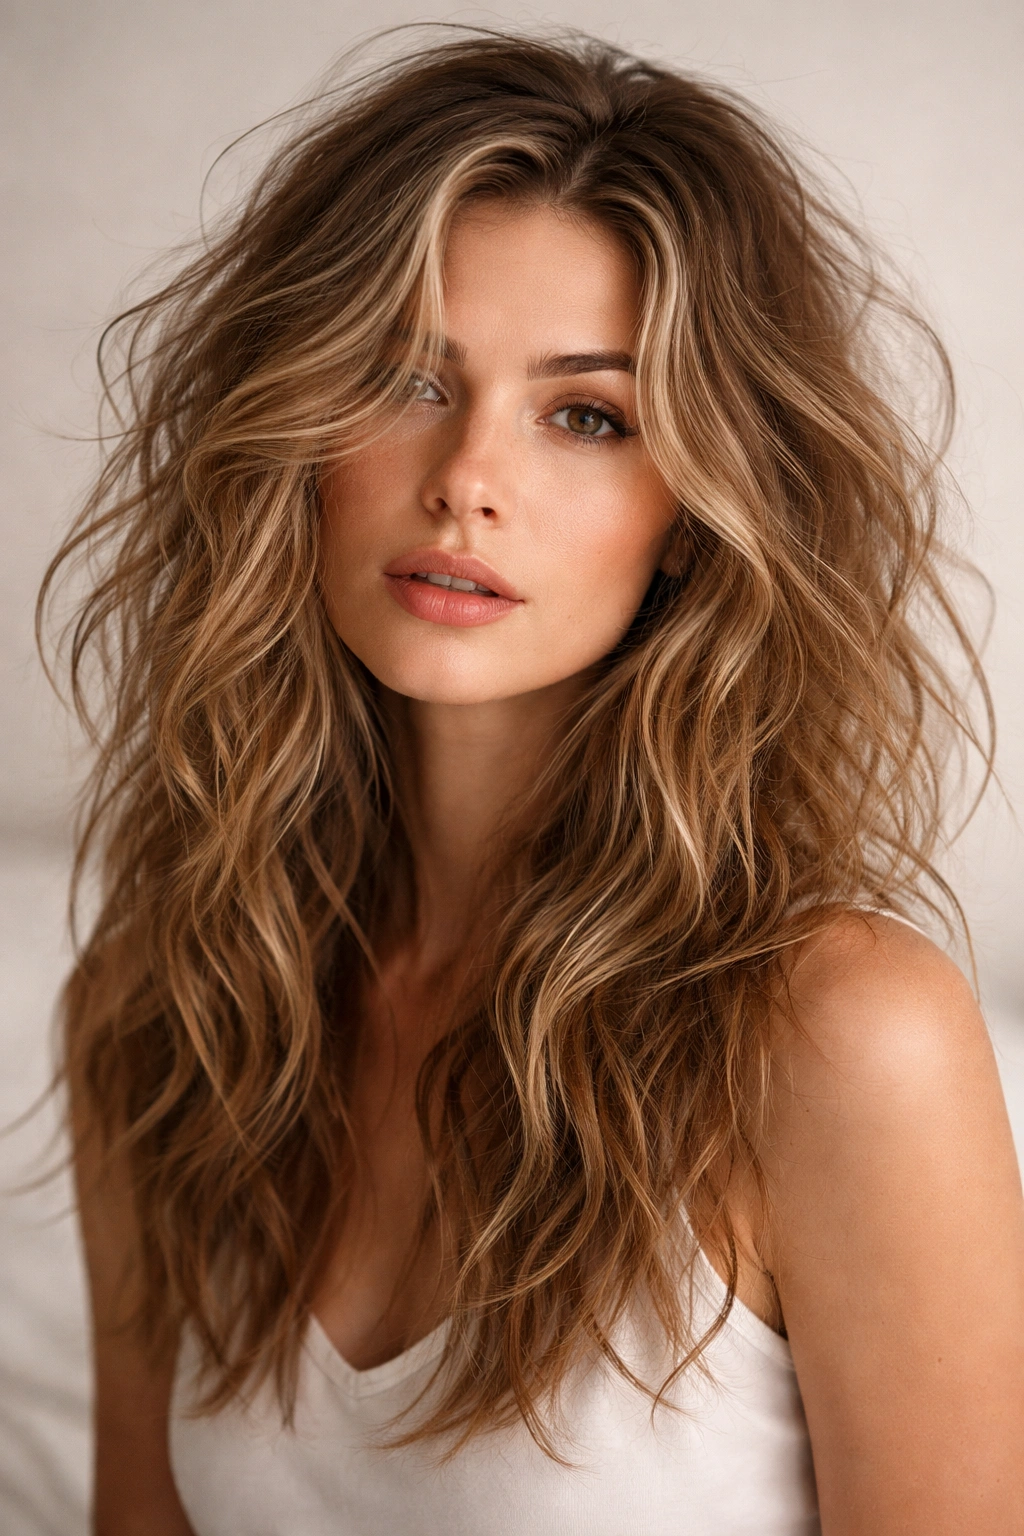
1. Long Flowing Waves with Layered Texture
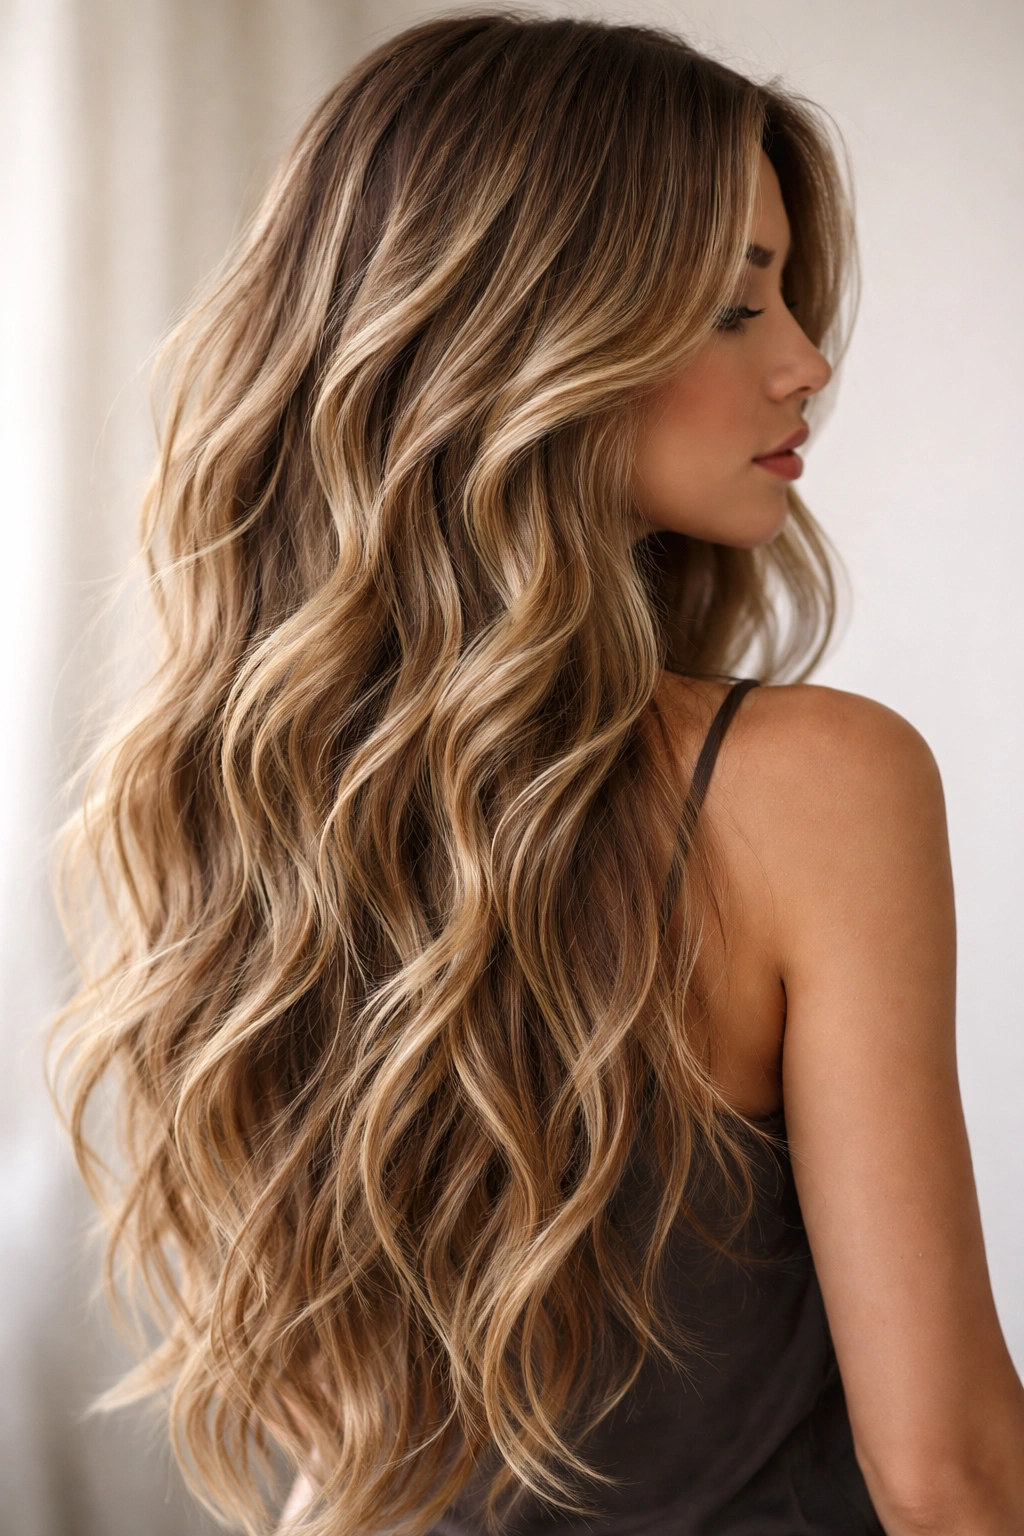
This is the foundation of the messy wavy movement—long, undulating waves that cascade down your back with subtle layering throughout. The waves should have movement and dimension rather than appearing perfectly uniform, with some sections catching light differently than others. The styling works best when you have at least shoulder-length hair, though it’s even more dramatic at bra-length or longer.
How to Create This Style
Start by applying a heat protectant spray to damp hair, then use a large-barrel curling iron (2 to 2.5 inches) to create waves in sections. Don’t aim for perfect curl consistency—instead, alternate the direction of your curls and vary how tightly you wrap each section. Leave the last 2 inches of each strand unrolled so the ends stay loose and natural. Once you’ve finished curling, run your fingers through the waves to break them up and let them fall naturally.
Styling Tips and Products
A texturizing spray applied to day-old waves keeps them from looking too polished. If you’re working with fresh waves, a light sea salt spray adds grit and makes the texture last longer. Dry shampoo is your secret weapon here—it absorbs oil and creates grip, helping waves hold their shape. Finish with a flexible-hold hairspray rather than something heavy, which would weigh down the movement and defeat the purpose of the soft, flowing effect.
2. Tousled Shag Waves with Choppy Layers
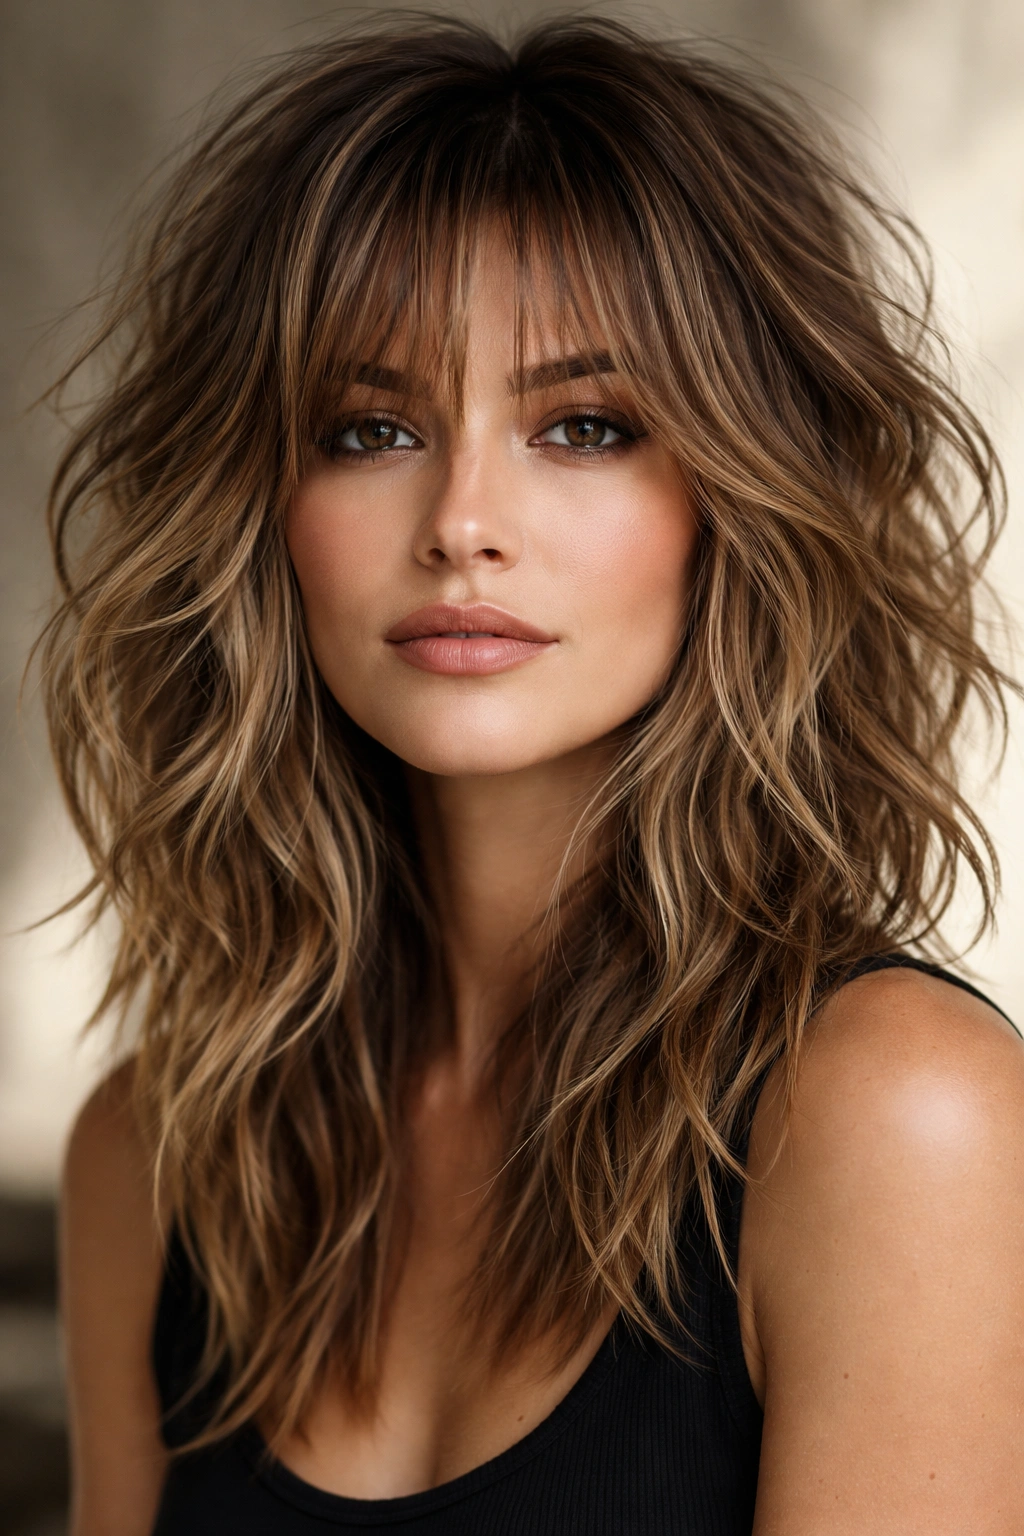
The shag cut has made a major comeback, and when paired with messy waves, it becomes undeniably cool. Choppy, uneven layers of varying lengths work with the waves to create a rock-and-roll aesthetic that reads as intentionally edgy rather than unkempt. The longer layers in front frame your face while shorter layers throughout add texture and movement.
Cut and Wave Technique
This style requires a skilled hairdresser who understands how to layer specifically for wave compatibility. Once you have the cut, creating waves means embracing the natural movement the layers already provide. Use a 1.5-inch barrel curling iron for tighter, more defined waves in the shorter sections, and a larger barrel for the longer pieces. The different wave sizes on different-length layers create the shag’s signature visual interest.
Maintenance and Styling
Shag waves actually get better with a couple days of texture buildup, so don’t feel pressured to wash daily. Use a texturizing mousse applied to damp roots, then blow-dry your hair with your fingers to encourage wave formation. Refresh waves on non-wash days with a dry texturizing spray and gentle finger tousling. A light hairspray keeps everything in place without creating the stiff, helmet-like effect that comes from heavy products.
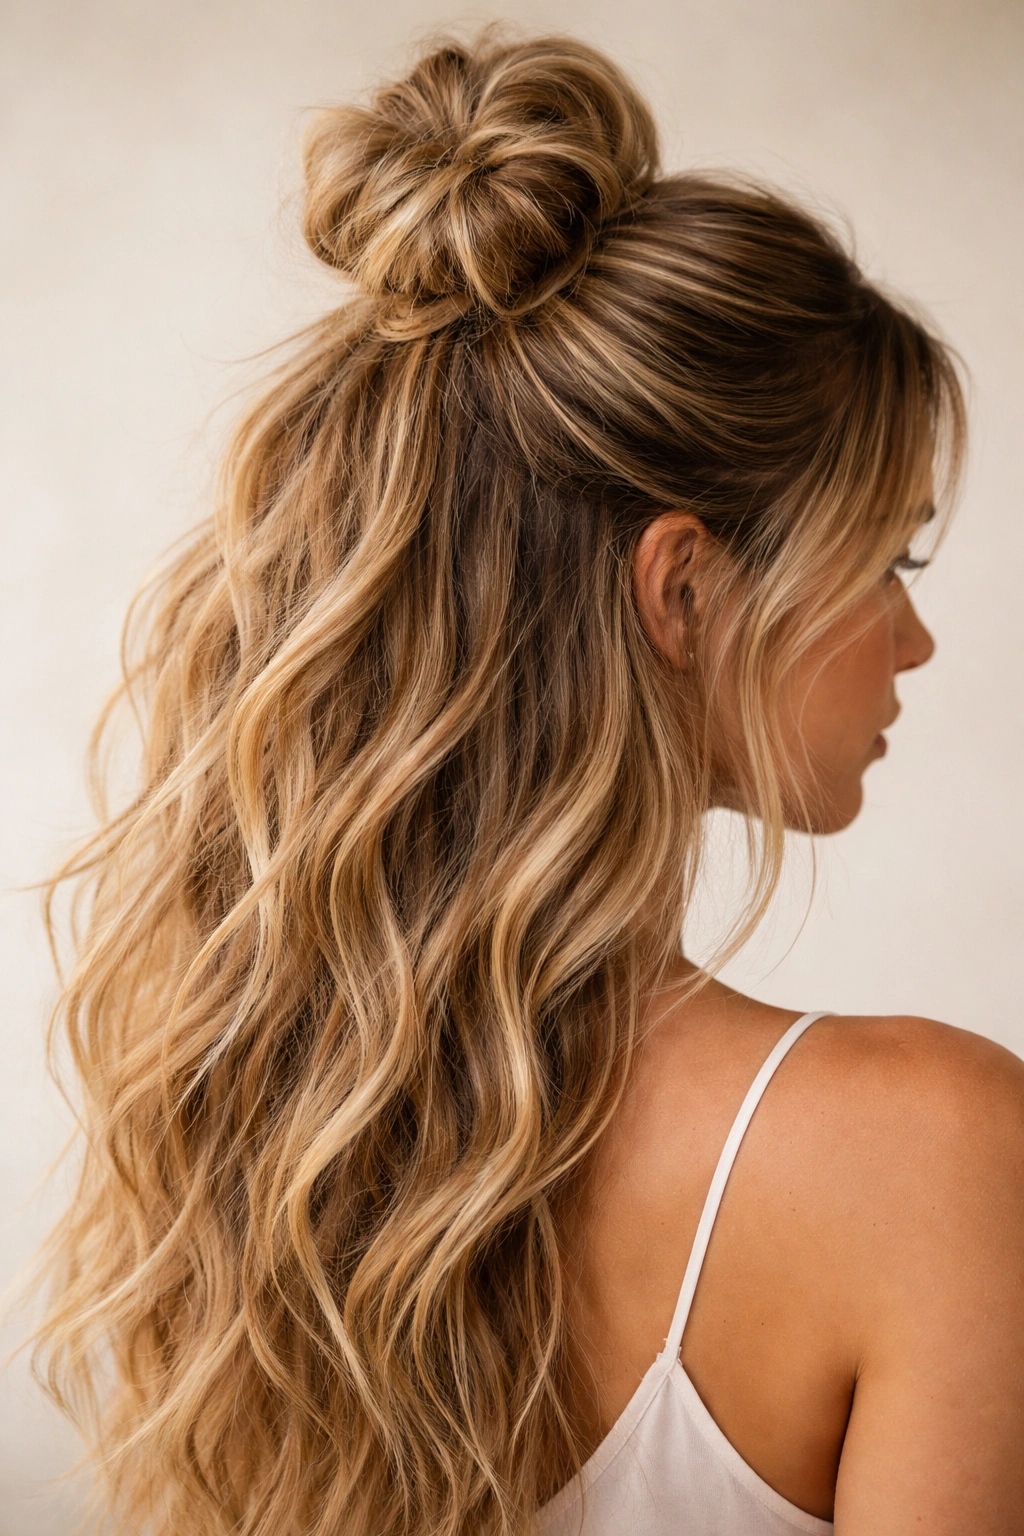
3. Half-Up Waves with Face-Framing
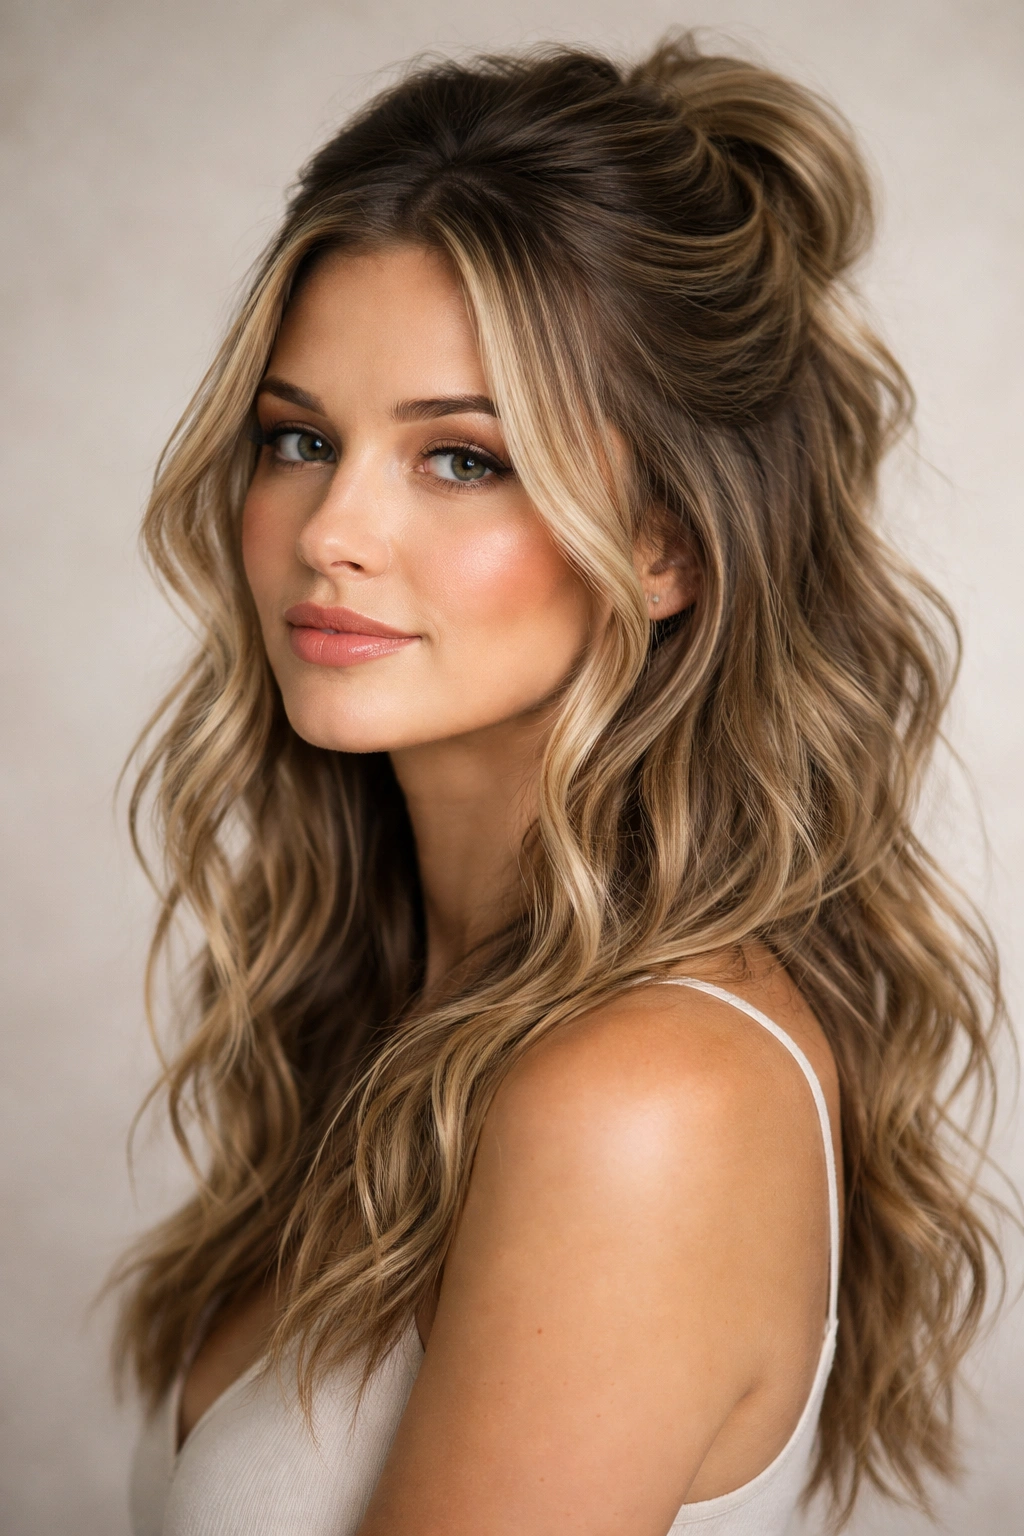
Taking the top half of your hair and securing it with a clip or elastic while leaving the bottom half down creates height and shows off both the waves and your face. This hybrid style works for days when you want your hair out of the way but still want to display texture and movement. The face-framing elements are crucial—pull a few pieces forward on each side to soften the crown and create dimension.
Technique for Maximum Impact
Start with fully-waved hair and flip your head upside down to apply texturizing spray to the roots. Once you flip back, the added volume will sit better. Gather approximately the top third of your hair (going from ear to ear), twist it very loosely, and secure with a clip. Leave two sections of hair unclipped on each side of your face—these create the softening frame. The contrast between the controlled top and the loose waves below is what makes this style visually interesting.
Why This Works for Different Hair Types
If you have naturally wavy hair, this style requires minimal effort beyond adding texture. For straighter hair types, you might need to curl sections, but the half-up element means you’re only working with about 50% of your hair. This makes it perfect for low-effort days when you don’t have time for a full styling routine. The style also works across different face shapes—the height at the crown is flattering on round faces, while the loose waves below balance angular features.
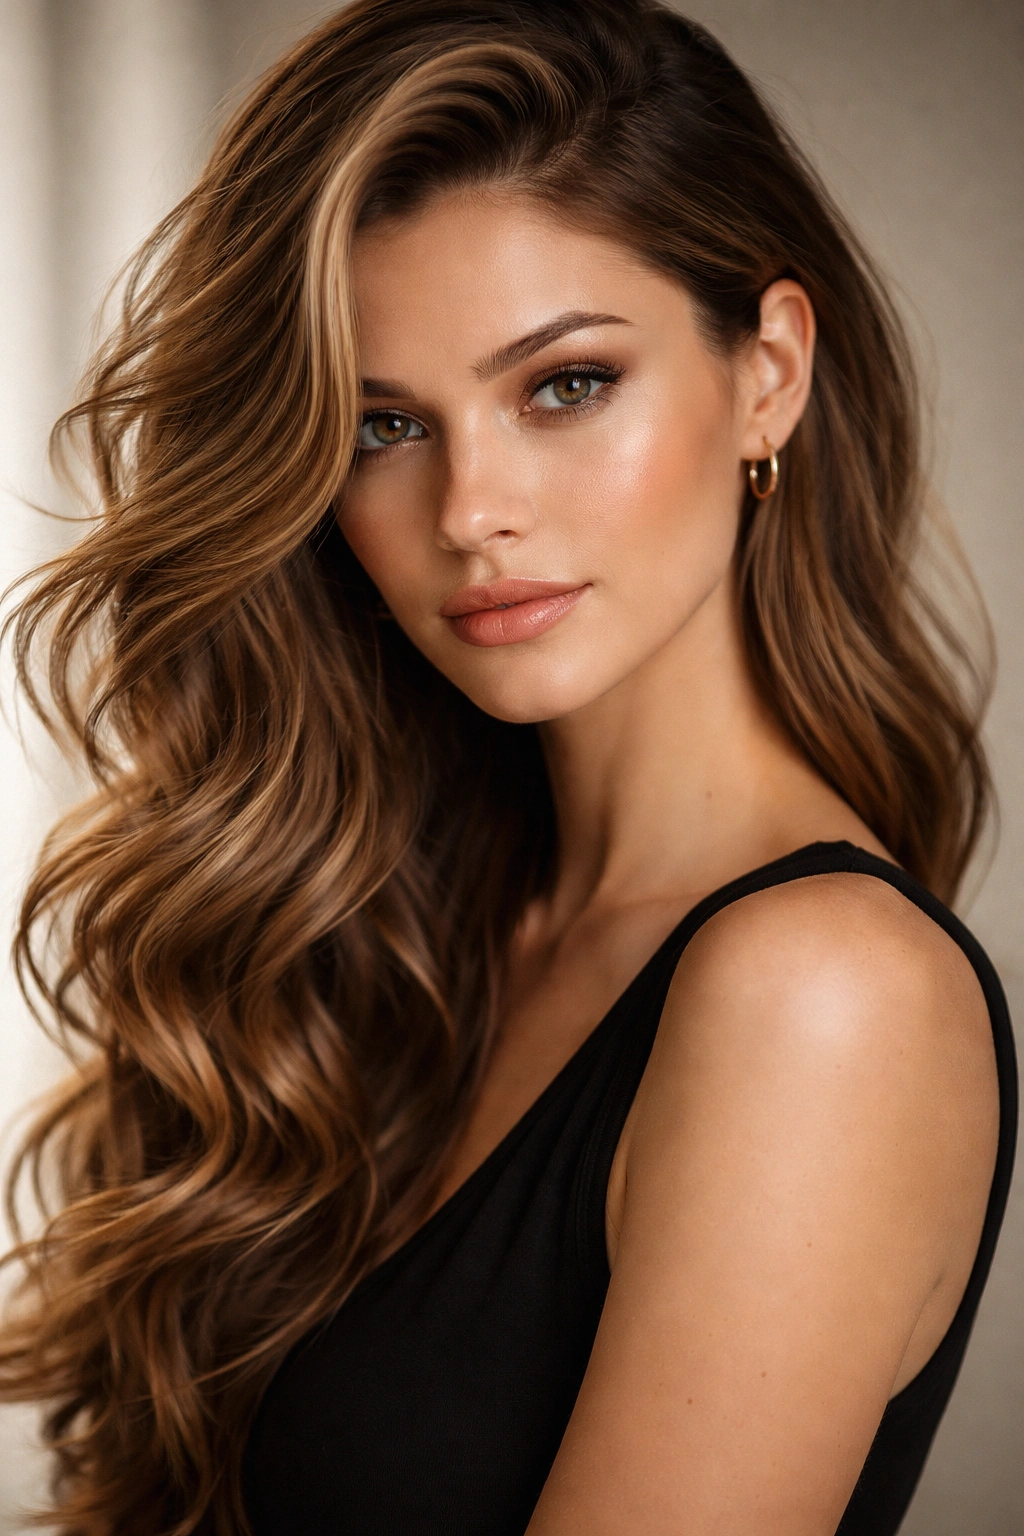
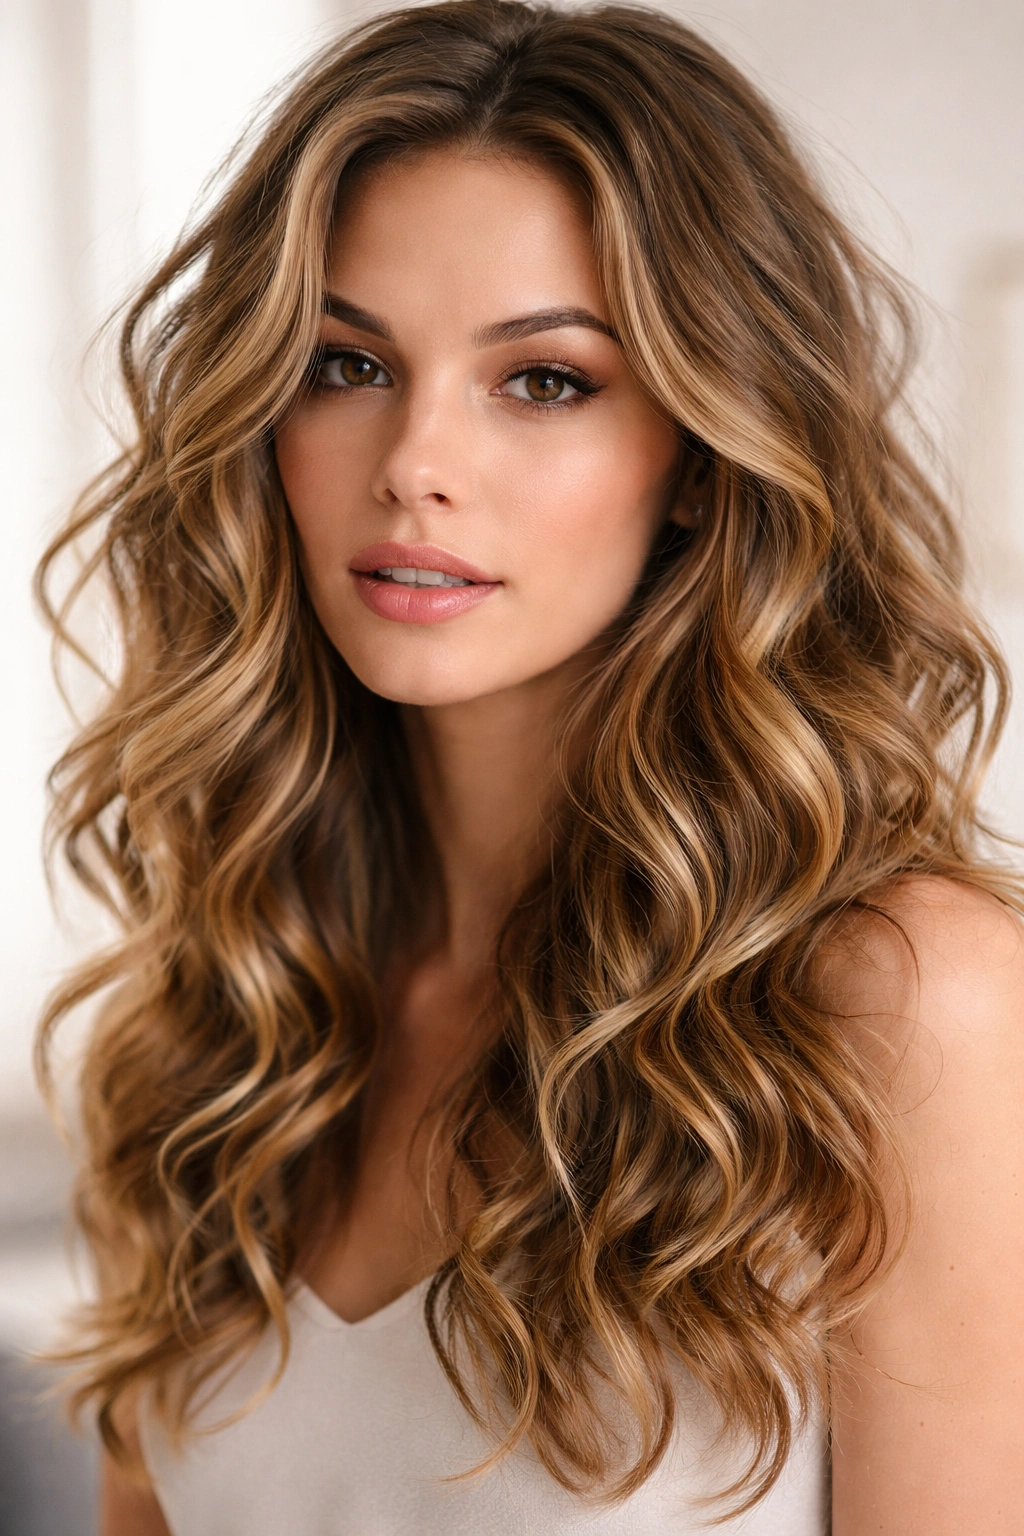
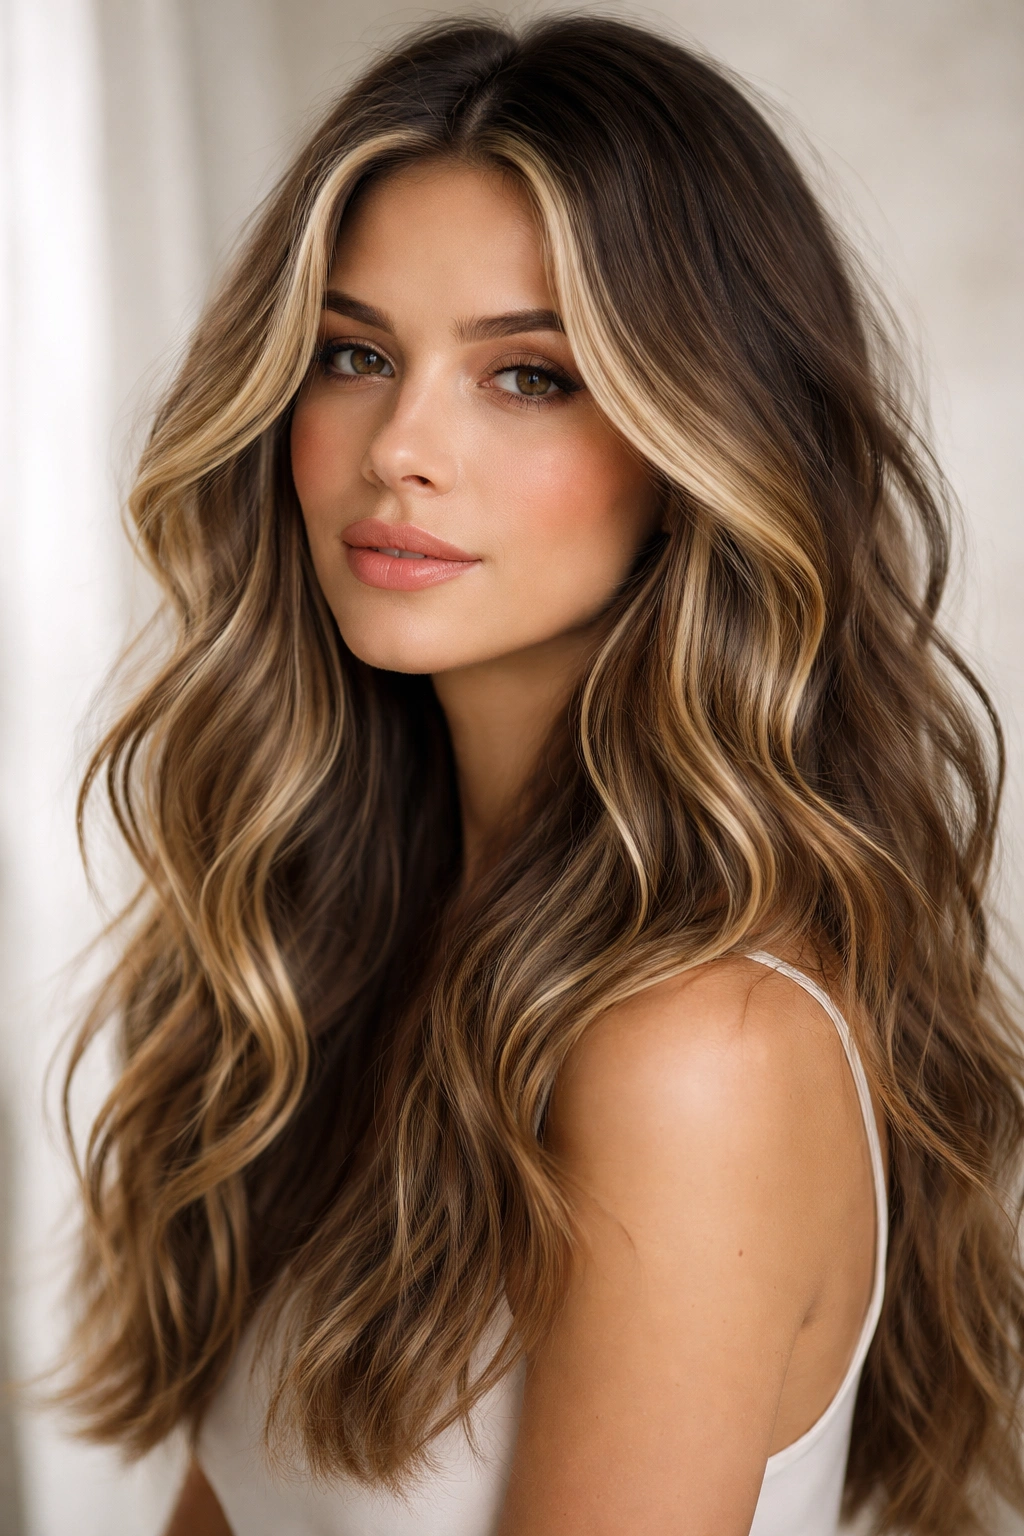
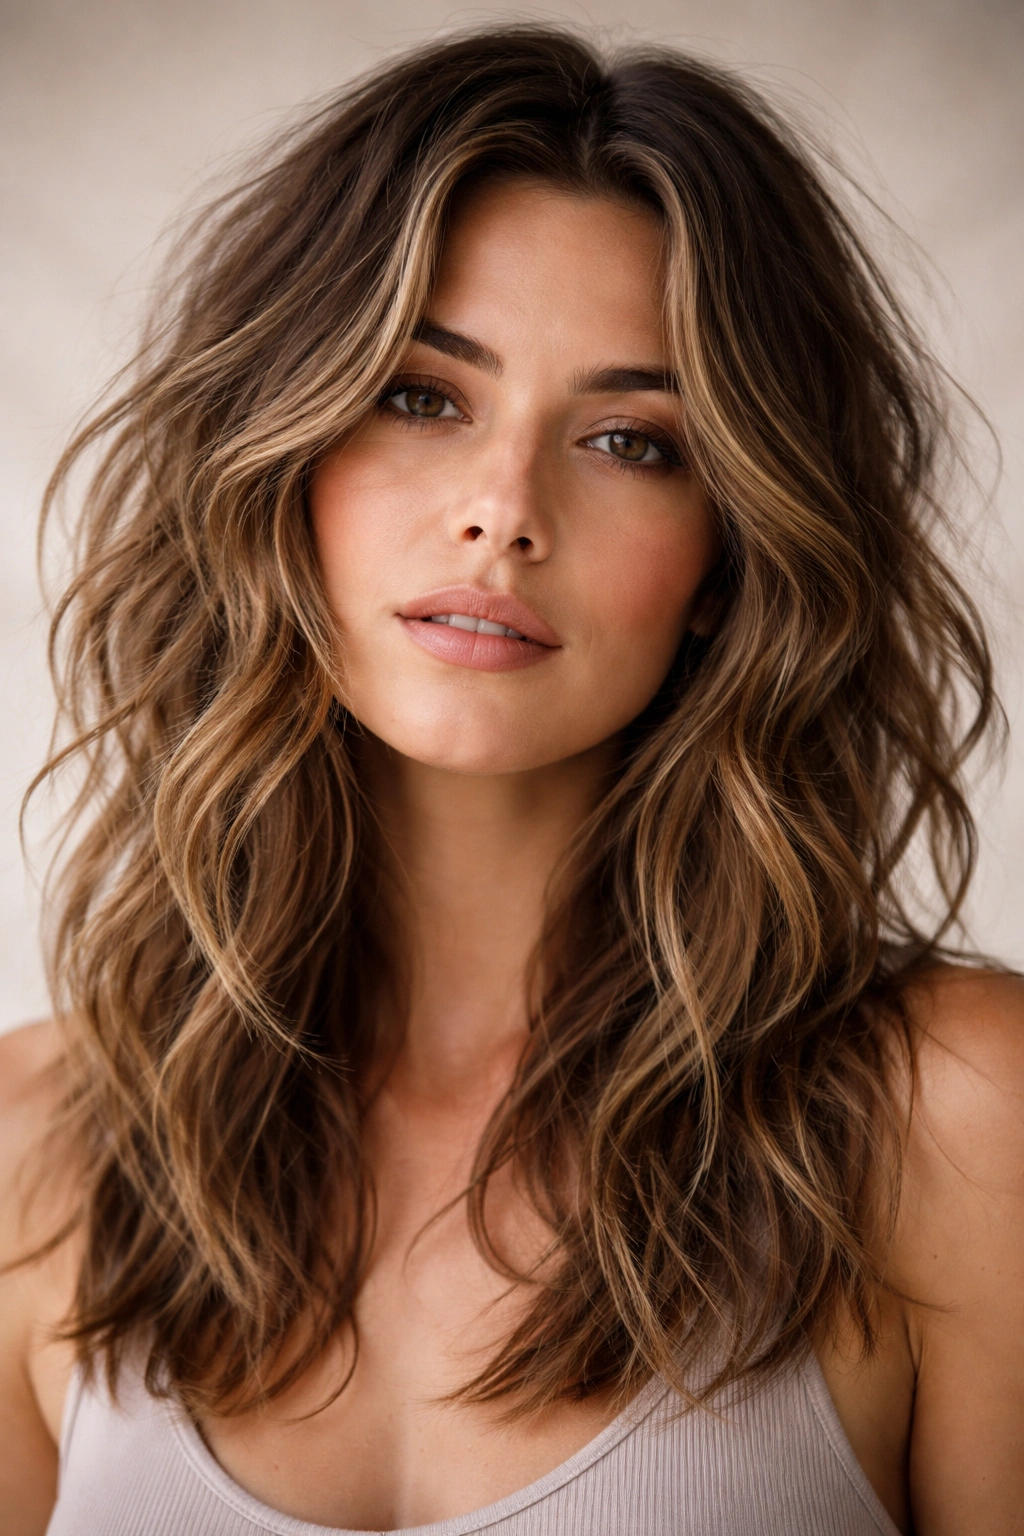
4. Textured Beach Waves with Highlights
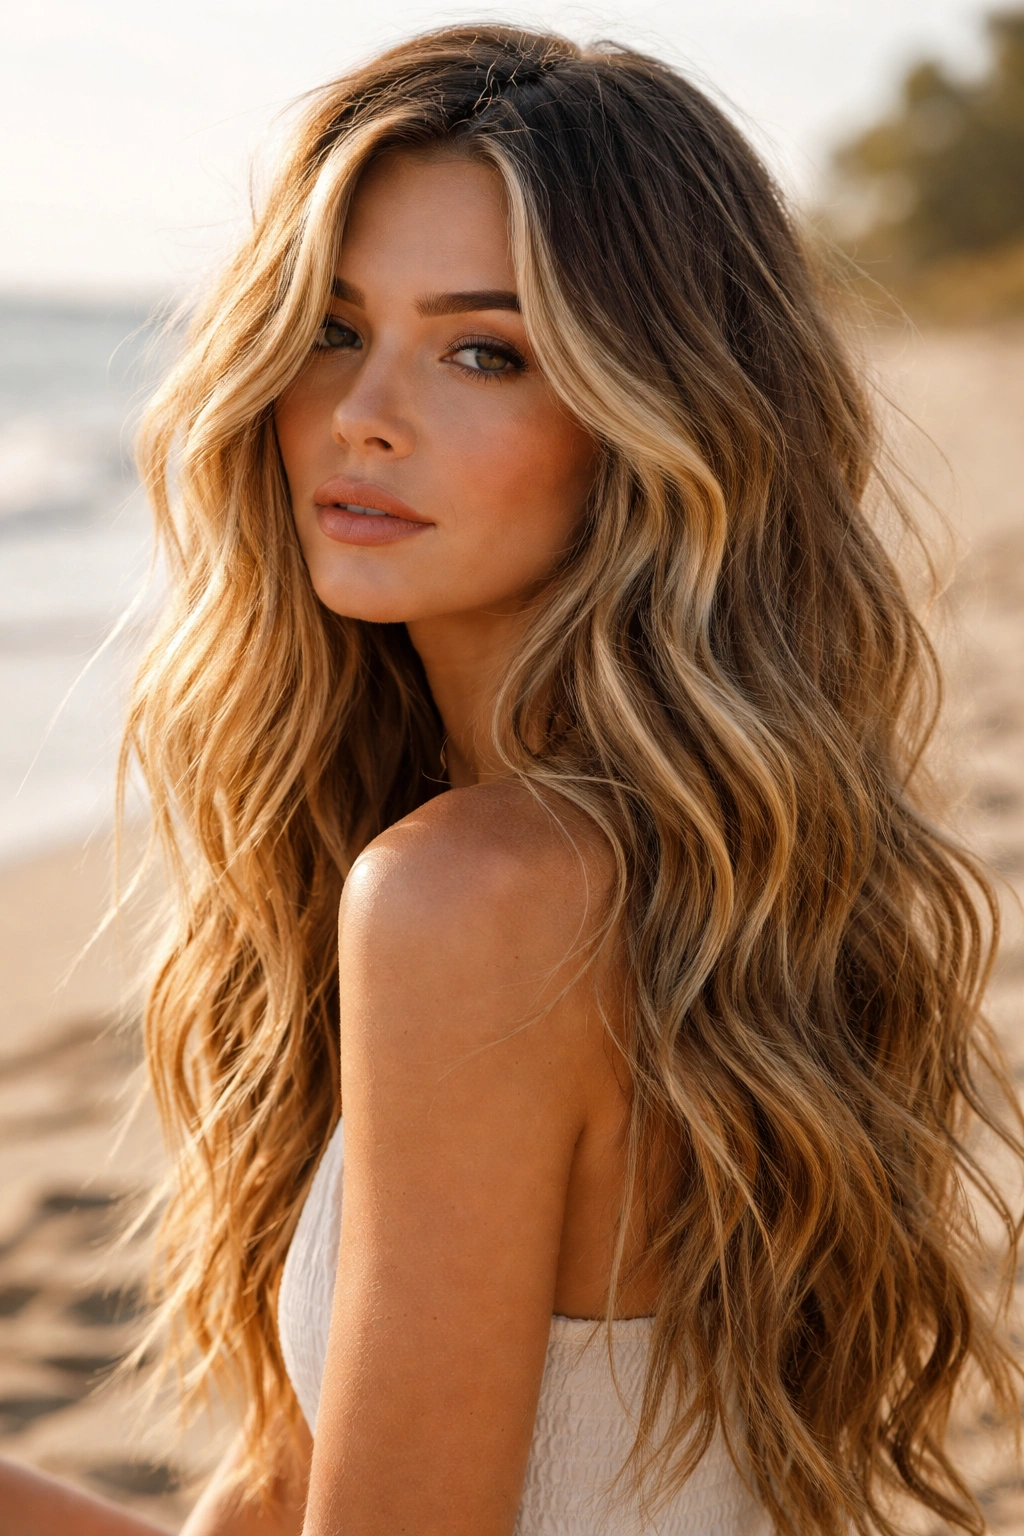
Beach waves should look sun-kissed and naturally dimensional, with lighter pieces running through darker base color to simulate the effect of time spent in the ocean and sun. The waves themselves are medium-sized and soft, more relaxed than defined curls. This style works best on medium to long hair and pairs beautifully with balayage or lived-in color techniques.
Creating the Wave Pattern
Use a 1.75 to 2-inch curling iron, curling sections in alternating directions to avoid a uniform spiral pattern. Work through the hair methodically but don’t stress about perfect consistency—slight variations are actually desirable. Once curled, run your fingers through immediately to break up the curls and create waves instead of ringlets. A texture spray applied before curling helps grip the hair and makes waves last longer throughout the day.
Color and Styling Synergy
The lighter color pieces throughout the hair catch light differently than darker sections, which makes the wave dimension more visible. Blonde ribbons through darker hair, caramel highlights on medium brown, or copper pieces on dark hair all create this effect. Style with a beach salt spray that adds grit and maintains movement. The combination of softly waved texture and light-catching color creates that effortless summery feel that works year-round.
5. Wet-Look Waves with Gel Definition
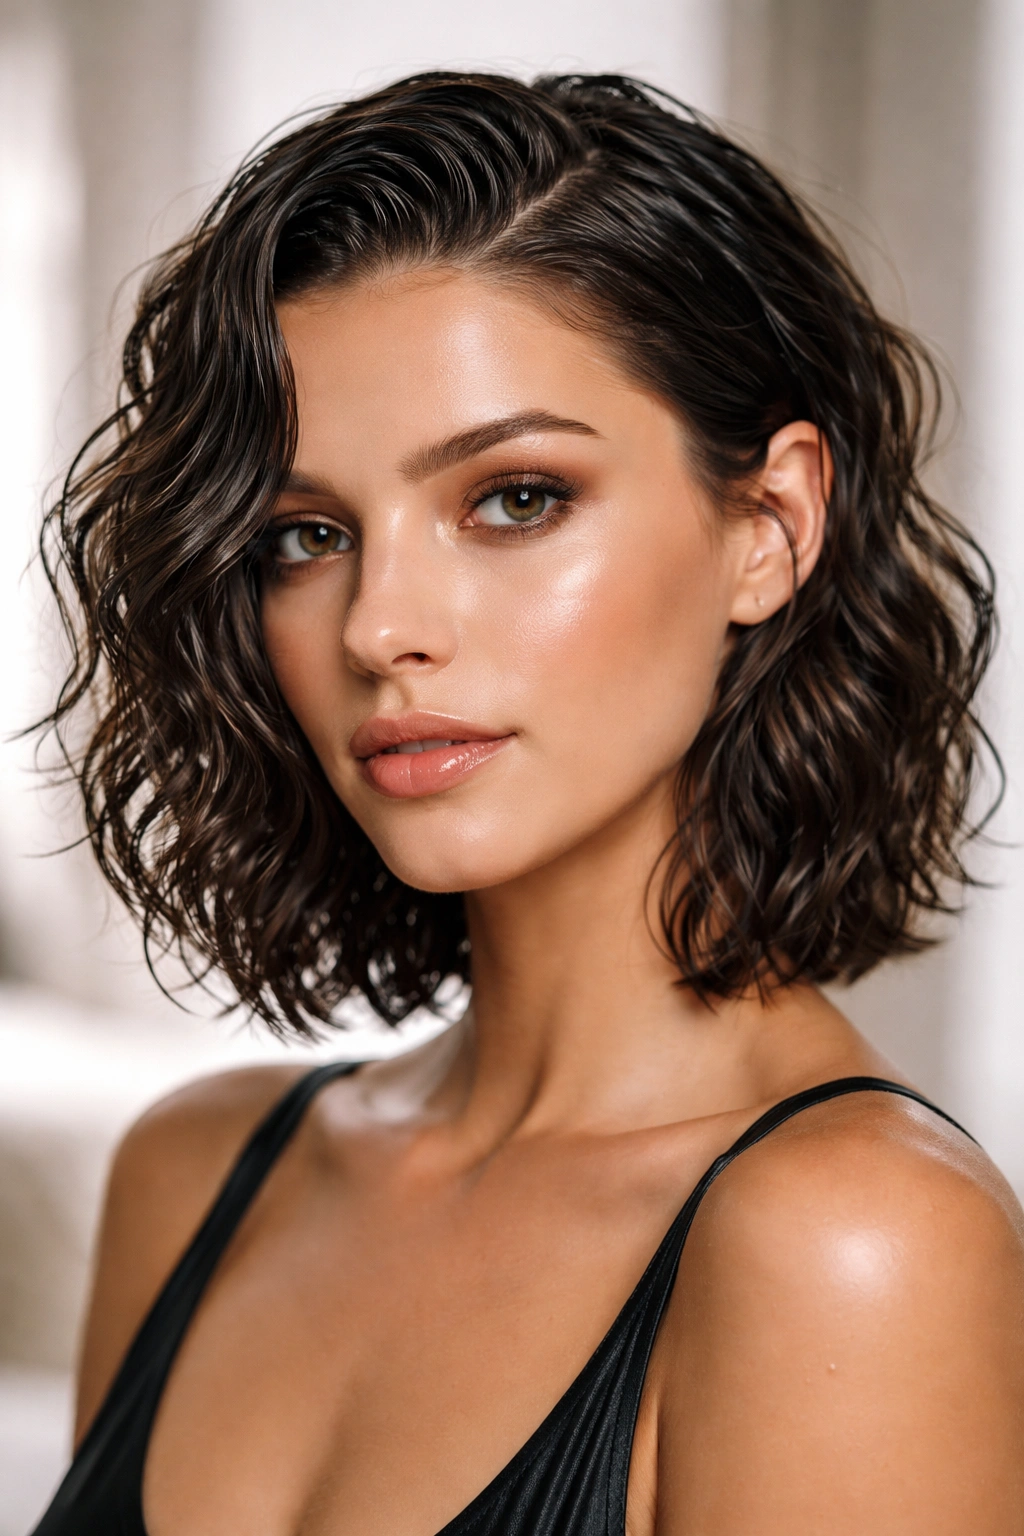
This style embraces shine and definition, creating waves that appear wet and glossy. Gel or pomade is applied to create separation between wave sections, making each curl distinct and visible. The overall effect is modern and polished while still maintaining the textured, piece-y quality that makes wavy styles feel contemporary. This works particularly well on shorter to medium-length hair.
Product Application for Maximum Effect
Start with damp hair and apply a flexible-hold gel or a lightweight pomade to smaller sections at a time. Use a curling iron or straightener to create waves, then while the product is still wet, use your fingers to piece out the waves and define the gaps between them. The gel will dry and hold the separated wave definition. This method gives you control over how much definition appears—light application creates subtle separation, while heavier application makes waves look almost sculptural.
Styling Variations
You can create larger, more fluid waves or tighter, more defined waves depending on your barrel size and how you apply the gel. Wet-look waves photograph beautifully and hold their shape well throughout the day. The shine draws attention to the color and dimension in your hair, so this style pairs well with highlights or complex color work. Use a flexible-hold product rather than something too stiff, which would make waves look immobile.
6. Side-Swept Waves with Soft Volume
All the wave texture is pulled to one side of your head, creating dramatic asymmetry and showing off your waves from a flattering angle. The opposite side is relatively smooth, allowing the waves to take center stage. This style creates the illusion of fuller hair on the swept side while keeping the overall look balanced and intentional.
Creating the Asymmetrical Effect
Start by blow-drying your hair to one side, encouraging your roots to set in that direction. Then apply waves to the sections that will be visible on the side you’re sweeping toward. Don’t curl the back-side hair as intensely—these waves can be softer or even slightly straighter to create contrast. Once you’ve waved everything, sweep the thicker wave section across and let it fall over to one side, anchoring it gently with a bobby pin behind your ear if needed.
Face-Shaping Benefits
This style works beautifully for most face shapes because the asymmetry is flattering rather than harsh. The movement draws the eye along your features, and the side you choose to sweep toward can be adjusted based on which side of your face you prefer. The volume created by the waves gives the illusion of width, making rounder faces appear more sculpted. Fine or thin hair looks fuller with this styling approach because all the volume is concentrated on one side.
7. Braided Crown with Waves Below
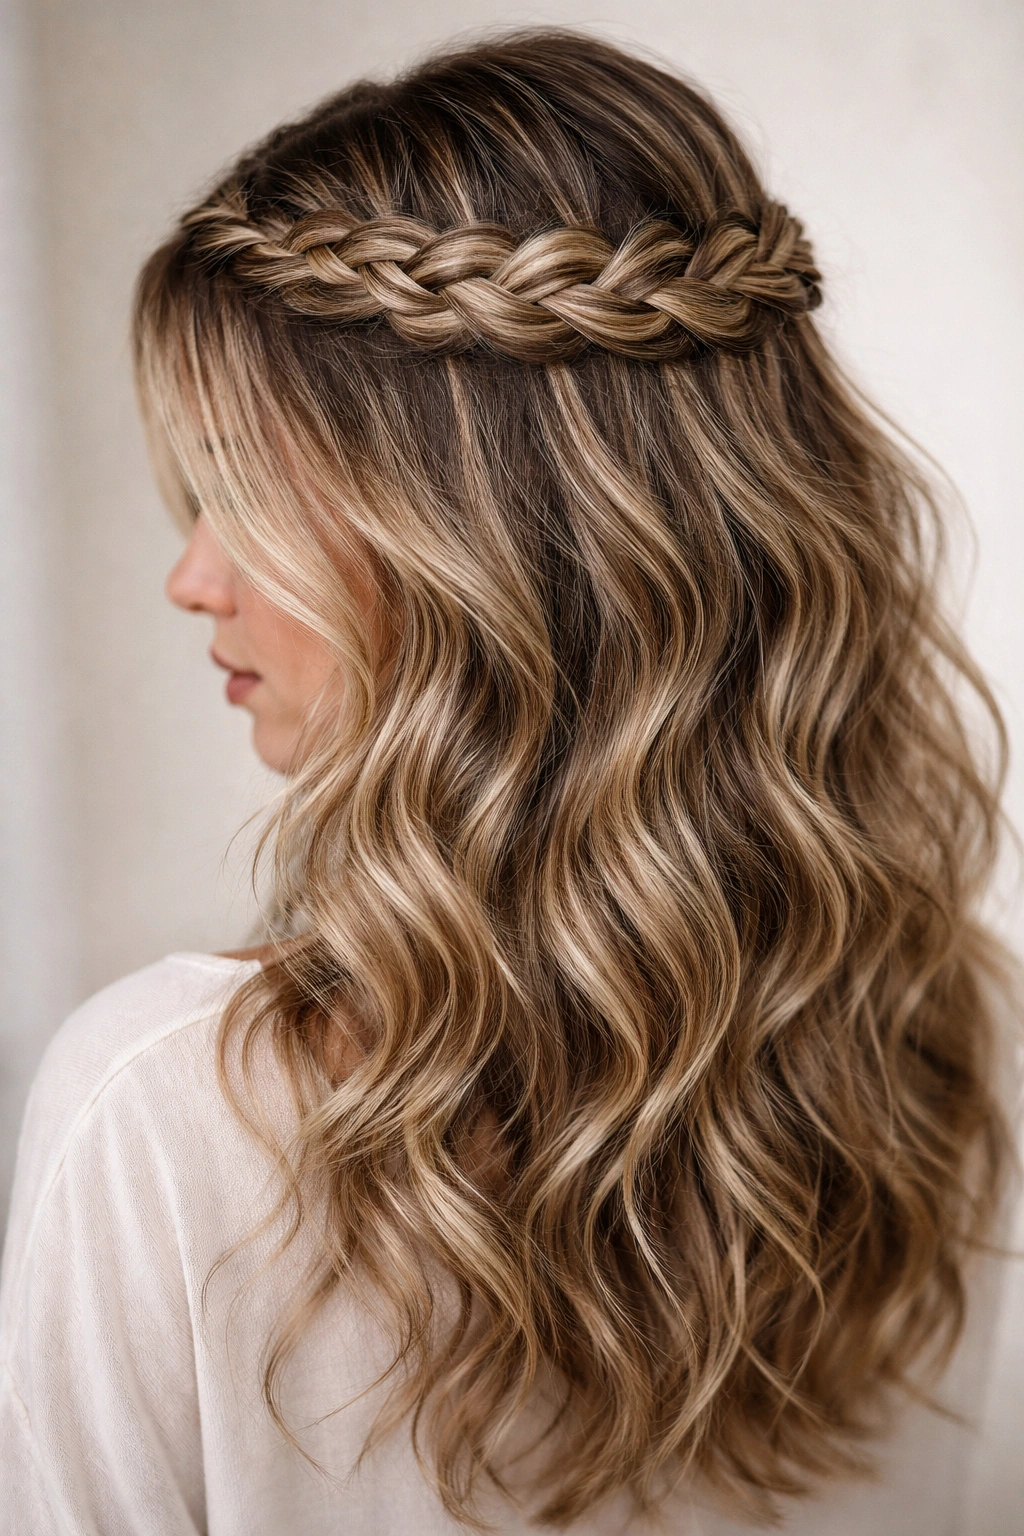
A soft braid encircles the crown of your head, anchoring messy waves that fall below. The braid acts as a crown or halo and contains the top section of hair, while the bottom waves remain loose and mobile. This style combines romantic, structured elements with the free-flowing quality that makes wavy styles appealing.
Braiding and Wave Integration
You’ll need at least shoulder-length hair to pull this off effectively. Start by creating a soft Dutch or French braid that begins at one temple, curves across the crown, and ends behind the opposite ear. The braid doesn’t need to be tight—a loose, textured braid looks better with the messy aesthetic. Once the braid is in, create waves in the loose hair below using a curling iron. The waves should be soft enough to fall naturally but textured enough to be visible.
Why This Style Works
The braid serves multiple functions: it keeps hair off your face, adds visual interest, and frames the waves beautifully. It’s perfect for transitioning between seasons or when you want an elevated everyday style. The combination of structured and loose elements appeals to people who like put-together hair but don’t want a formal look. This style works on various hair types and textures, though naturally wavy hair requires minimal additional styling.
8. Windswept Waves with Tousled Texture
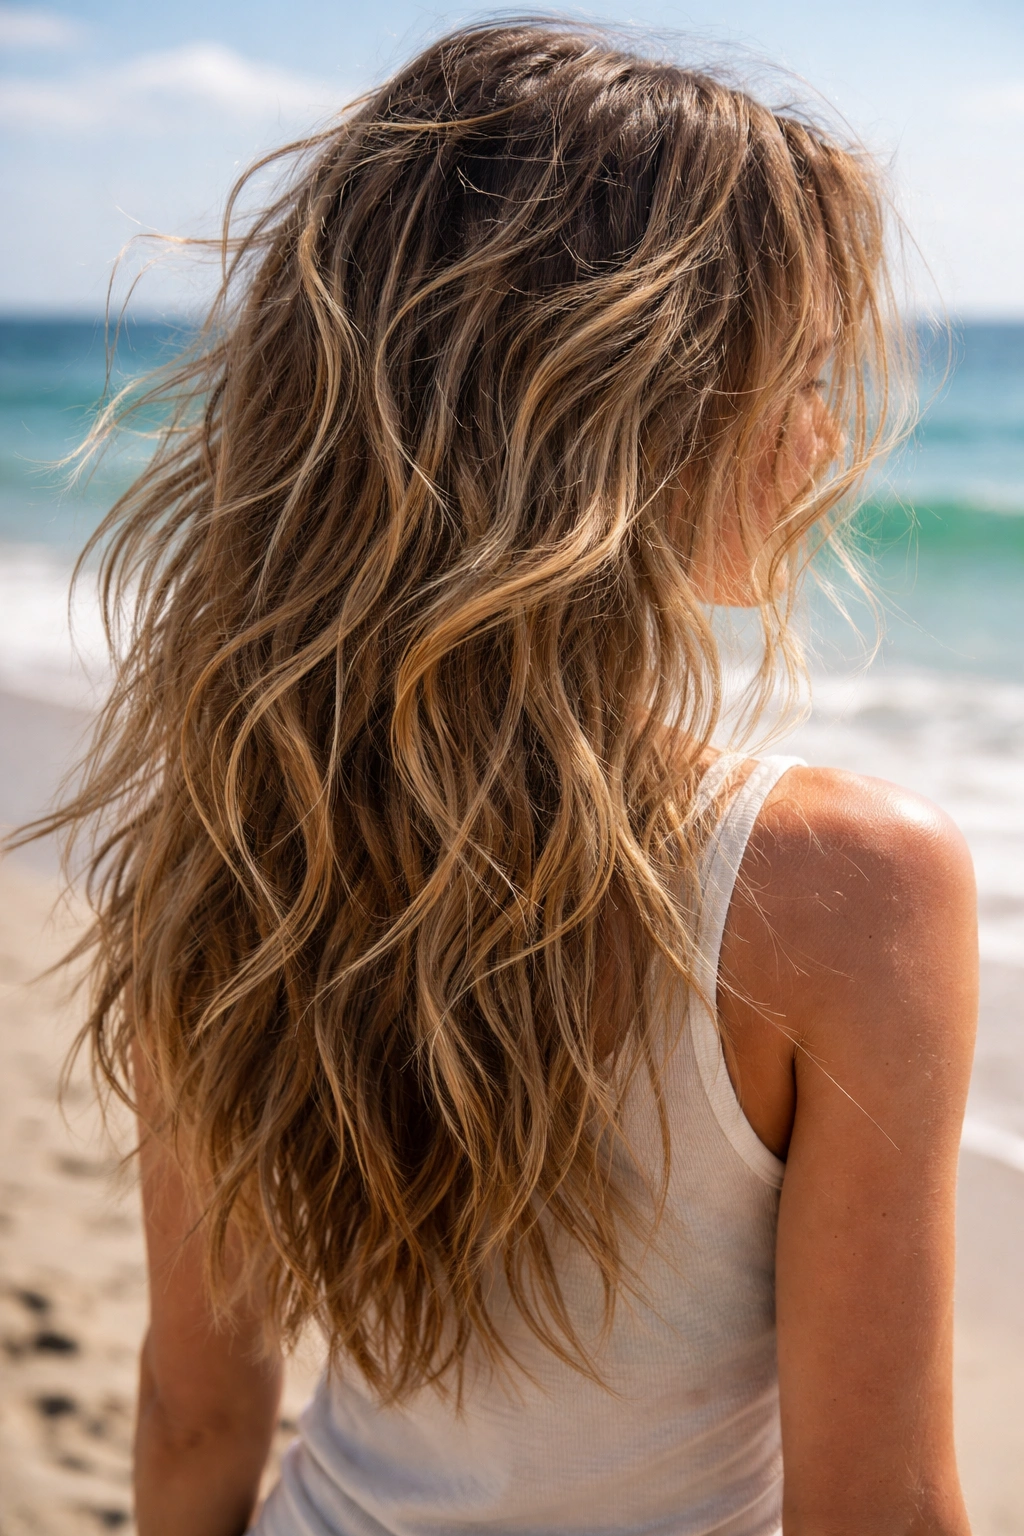
Imagine wind-blown waves that look like you’ve just stepped off a yacht or come back inside from a beach walk. Waves aren’t uniform or perfectly placed—they fall in natural-looking directions with some sections tousled and slightly messier than others. This style celebrates randomness and movement rather than symmetry or polish.
Creating Natural-Looking Texture
The key to windswept waves is avoiding any pattern or predictability. Curl sections in various directions, vary your barrel size, and intentionally mess up waves slightly before they fully cool. Use a texturizing spray while your hair is damp, then blow-dry with your fingers running through to encourage chaotic texture. Once your hair is dry, scrunch sections with your hands to break up the wave pattern further.
Styling Tricks for Authenticity
This is one of the few wave styles where imperfection is the actual goal, which means you can be less precious about how you style it. Finger-combing rather than using a brush creates a more lived-in look. Applying texture spray in sections and scrunching works better than applying it all at once. The overall effect should make someone think you naturally have textured hair, even if you’ve actually spent significant effort achieving the style.
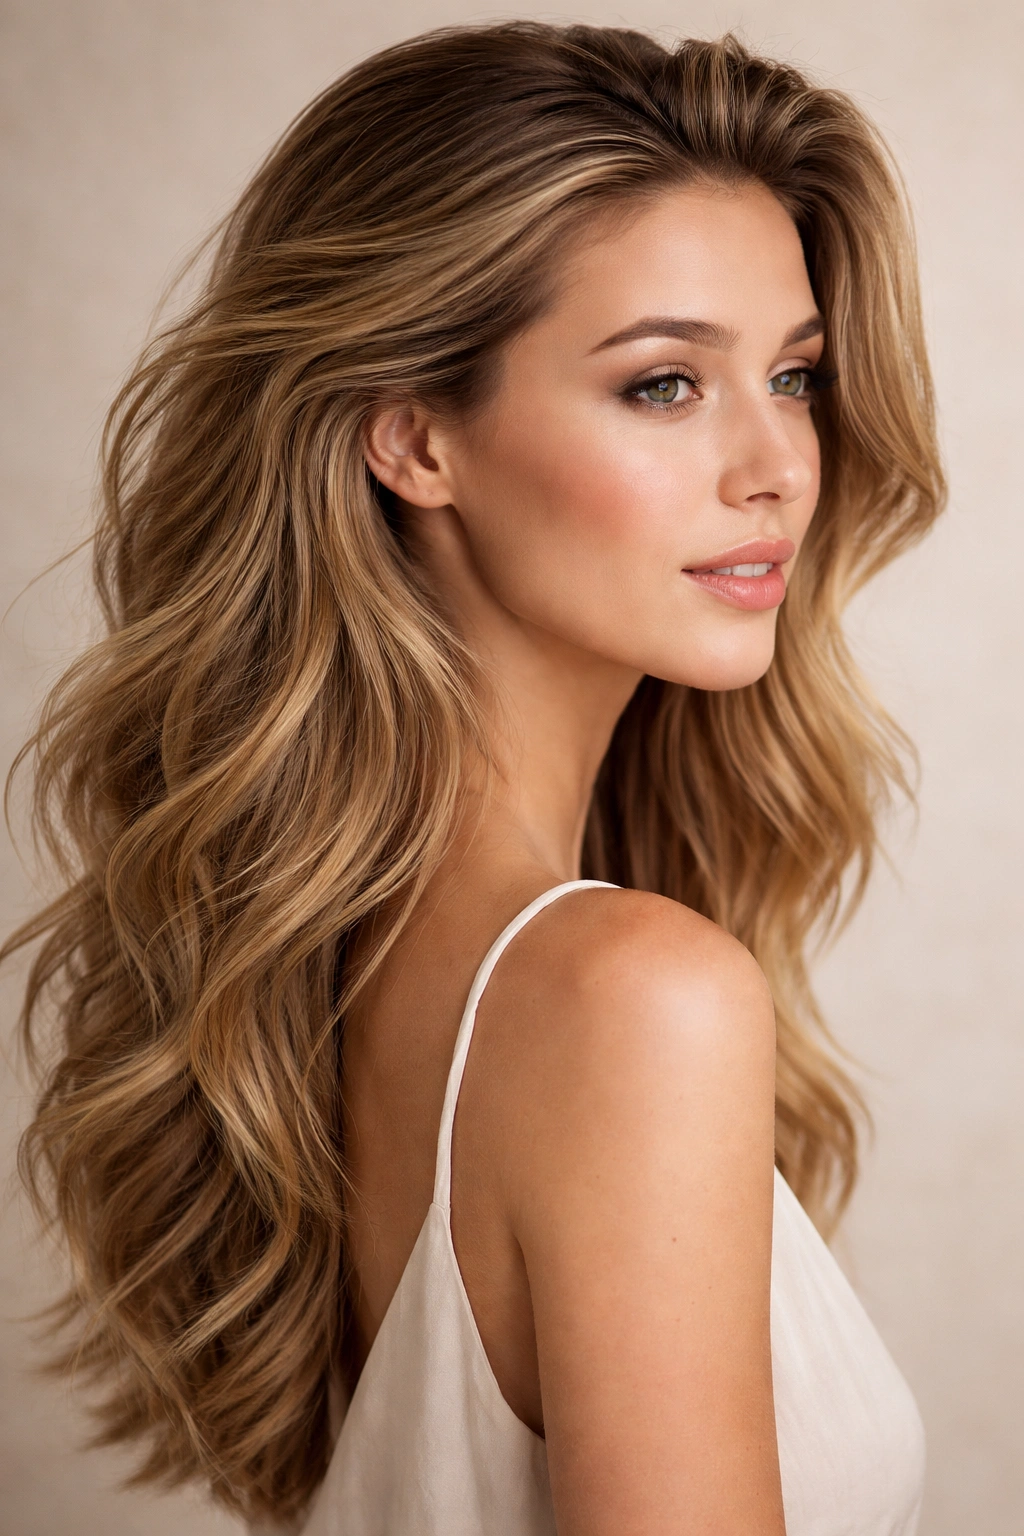
9. Voluminous Waves with Teased Crown
Maximum volume at the roots combined with soft, flowing waves creates a statement-making hairstyle. The crown is gently teased to create lift and height, while waves cascade down the back and sides. This style works best on longer hair and gives an undeniably glam-meets-relaxed vibe.
Teasing Technique for Natural-Looking Height
Start by blow-drying your hair upside down to boost volume naturally, then flip back upright. Take a section from the crown and gently backcomb it with a fine-tooth brush, teasing from the underside. Gently smooth the top layer with your brush to avoid looking unkempt. The teasing should be subtle enough that it’s not obviously ratted hair, but obvious enough to create noticeable lift. Finish by creating waves with a curling iron and running your fingers through for softness.
Maintaining Volume Throughout the Day
Use a volumizing mousse applied to damp roots before blow-drying for longer-lasting lift. A dry shampoo applied to the crown mid-day refreshes volume and texture. Don’t use too much hairspray initially, as this weights down your teased roots—a light mist is better than a heavy application. This style looks good even slightly disheveled, so don’t stress if some of the crown flattens slightly by evening.
10. Loose Spiral Waves with Defined Curls
These waves are tighter and more defined than loose beach waves but softer than tight curls—they’re spiral-shaped waves with visible ringlet quality. Each curl is distinct and separated from its neighbors, creating a voluminous, textured look. This style works on most hair lengths and types and reads as more deliberately styled than casual beach waves.
Curling Iron Technique
Use a 1.25 to 1.5-inch barrel and wrap each section of hair around the barrel smoothly without twisting. Hold the iron at a 45-degree angle—not straight up or laying flat. Leave each curl to fully cool before releasing it from the barrel, which helps the spiral set properly. Once all sections are curled and cooled, run your fingers gently through the curls to soften them and create waves rather than maintaining tight ringlets.
Product Choice and Styling
A light mousse applied to damp hair before blow-drying helps curls hold their shape longer. Once your spirals are in place, don’t use heavy products that will weigh down the curls. A flexible-hold hairspray maintains the wave pattern without stiffening it. This style benefits from being worn second-day when the spirals have loosened slightly and softened into more relaxed waves.
11. Textured Low Ponytail with Loose Waves
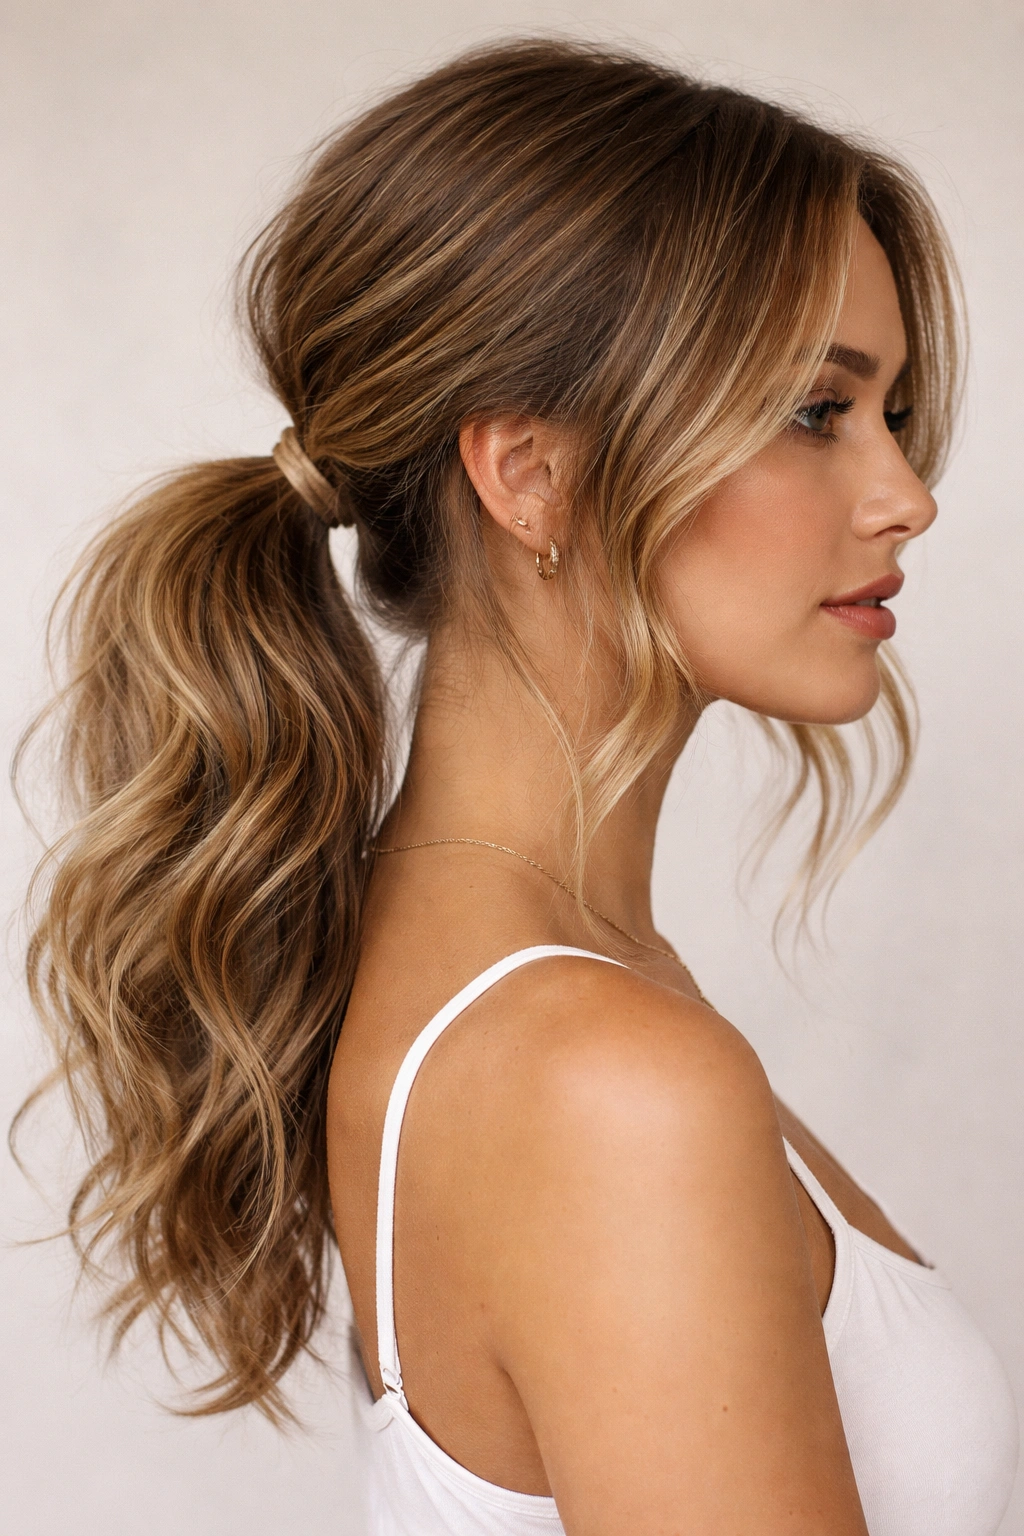
A low ponytail sits at the nape of your neck, and intentionally loose, textured waves are left undone around your face and throughout the tail. Rather than sleek and polished, this ponytail embraces the messy wavy aesthetic by keeping the texture visible. It’s polished enough for work or events but casual enough for everyday wear.
Building the Style
Start with fully-waved hair and gather it into a low ponytail at the base of your skull. Don’t aim for a smooth, sleek base—let some texture and flyaways show. Pull the elastic slightly away from your head to create volume, then gently pull out some of the waves from the ponytail to make it look intentionally undone. Leave face-framing pieces on each side that extend below the ponytail, creating softness around your face.
Customization Options
You can wrap a small section of hair around the elastic to hide it, or use a fabric-covered elastic for a softer look. Tease the ponytail gently before securing it to add volume and texture. Run your fingers through the entire ponytail to break up any wave uniformity. This style works beautifully with textured products like sea salt spray or dry shampoo applied before securing the ponytail.
12. Ribbon-Woven Waves with Accessories
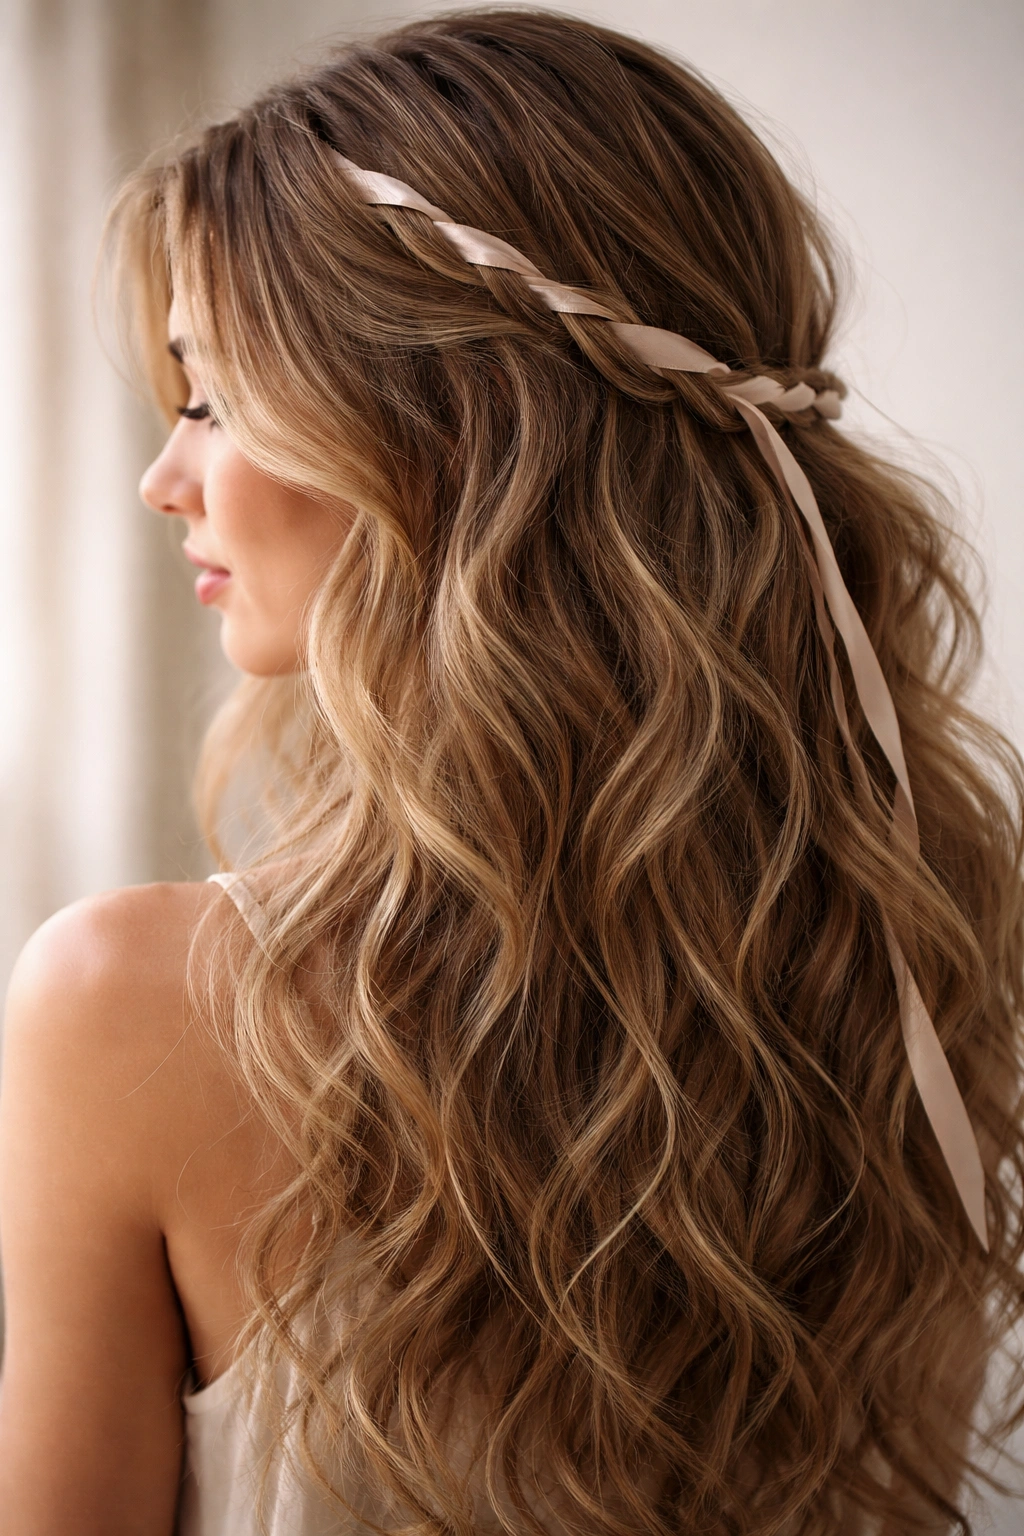
A delicate ribbon is woven through your wave sections, running from front to back or side to side. The ribbon acts as both a styling element and an accessory that draws attention to your wave texture. This approach adds visual interest and creates an intentional, styled appearance while maintaining the softness of messy waves.
Weaving Technique
This works best on hair with defined waves and moderate length. After creating your waves, take a thin ribbon and begin at one temple. Weave it over and under sections of your waved hair as you move toward the back of your head. Don’t pull the ribbon tight—let it sit loosely within your waves. You can end at the opposite temple, circle around to the back of your head, or create any pattern that appeals to you.
Material and Color Selection
Silk ribbons glide smoothly through hair without catching, and they look more luxurious than synthetic alternatives. Choose ribbon colors that complement your hair color or coordinate with your outfit. Metallic ribbons add glamour, pastels add sweetness, and neutral ribbons blend seamlessly. Thin ribbons disappear into your waves more, while thicker ribbons become more of a statement. This styling approach works for any occasion, from casual daily wear to special events.
13. Textured Top Knot with Cascading Waves
A deliberately messy, textured knot sits on top of your head, and soft waves spill out and cascade down the back. Unlike sleek top knots, this version embraces texture and looseness. The knot serves as an anchor while allowing maximum movement and wave visibility. This style works on any hair length and is perfect for active days when you want hair somewhat contained but still show texture.
Creating the Textured Knot
Begin with fully-waved hair and create texture spray through the crown area. Gather the hair high on top of your head and secure loosely with an elastic. Don’t aim for a neat, tight knot—let pieces stick out intentionally. Take sections of the knot and gently pull them to create an undone, textured appearance. Wrap a thin section of hair around the elastic to hide it and soften the crown area.
Finishing and Styling
Once your knot is in place, gently pull the wave sections that fall down your back to soften and separate them. The overall effect should look like someone with naturally wavy hair put it up loosely, not that you carefully controlled every element. This style holds well throughout the day and actually gets better as it loosens slightly. Add a small clip or delicate pins for extra security without adding visual bulk.
14. Waves with Face-Framing Highlights
Lighter, shorter-length waves are created specifically around your face, framing your features while longer waves cascade down your back. This approach creates dimension and draws attention to your face while showing off texture throughout your hair. It works beautifully with color work, as the lighter face-framing pieces catch light and movement differently.
Technique for Face-Framing Waves
Use a smaller barrel curling iron (1.25 inches) for the face-framing sections and a larger barrel for the back sections. This creates size contrast that adds dimension. Curl the face-framing sections more tightly and leave them for longer before releasing, so they hold tighter, bouncier waves. The longer back sections can be waved more loosely. Once everything is cooled, gently separate the face-framing waves to create softness.
Color Enhancement
This style pairs perfectly with dimensional color like balayage or highlights. Lighter pieces around the face catch light and make your complexion appear brighter. If you have monochromatic color, this styling approach still works—the tighter waves around your face simply create more texture in that area. The overall effect is flattering on most face shapes and adds instant dimension even without color change.
15. Swept-Back Waves with Soft Texture
Hair is swept back and away from your face, secured loosely at the nape, while soft waves flow down your back and over your shoulders. The front is smooth and off your face, creating an elegant, intentional appearance, while the back celebrates wave texture. This style balances polish with casualness beautifully.
Styling the Swept-Back Effect
Start with fully-waved hair and blow-dry while using a round brush to sweep hair back and away from your face. Once your hair is dry, gather the sides loosely at the back of your head and secure with a bobby pin or soft elastic. Don’t pull tightly—the back should remain soft and wavy, not slicked back. Allow waves to fall over your shoulder and back, creating visual movement from every angle.
Face-Shape Compatibility
This style is particularly flattering because it opens up your face by removing hair from your features. It works well with most face shapes and is especially suited to people with high cheekbones or strong jawlines. The soft texture at the back prevents the style from looking severe or overly styled. It’s perfect for professional settings where you want your hair managed but still textured and interesting.
16. Waves with Strategic Braids

Small, delicate braids are incorporated into your wave sections, usually pulled to one side or creating a crown effect. The braids don’t contain all your hair—they’re subtle accents that add complexity to the wave texture. This approach creates visual interest while maintaining the soft, wavy aesthetic.
Braid Placement Options
One popular approach is to create a thin braid on one side of your head, pulling a small section of hair, and let the braid sit within your overall wave structure. Another option is to create multiple very thin braids scattered throughout your waves, almost like you’ve randomly braided sections of your hair. A third approach is to braid just the front section of hair on one side, creating an asymmetrical detail.
Balancing Structured and Loose Elements
The key is maintaining enough visible wave texture so the overall effect doesn’t read as structured or formal. Choose braiding styles that are themselves somewhat loose and textured rather than tight and precise. This combines the romanticism of braided styles with the contemporary cool of messy waves. It works for any occasion and any hair length, though shoulder-length or longer hair shows off braids most beautifully.
17. Deep-Side-Part Waves with Volume
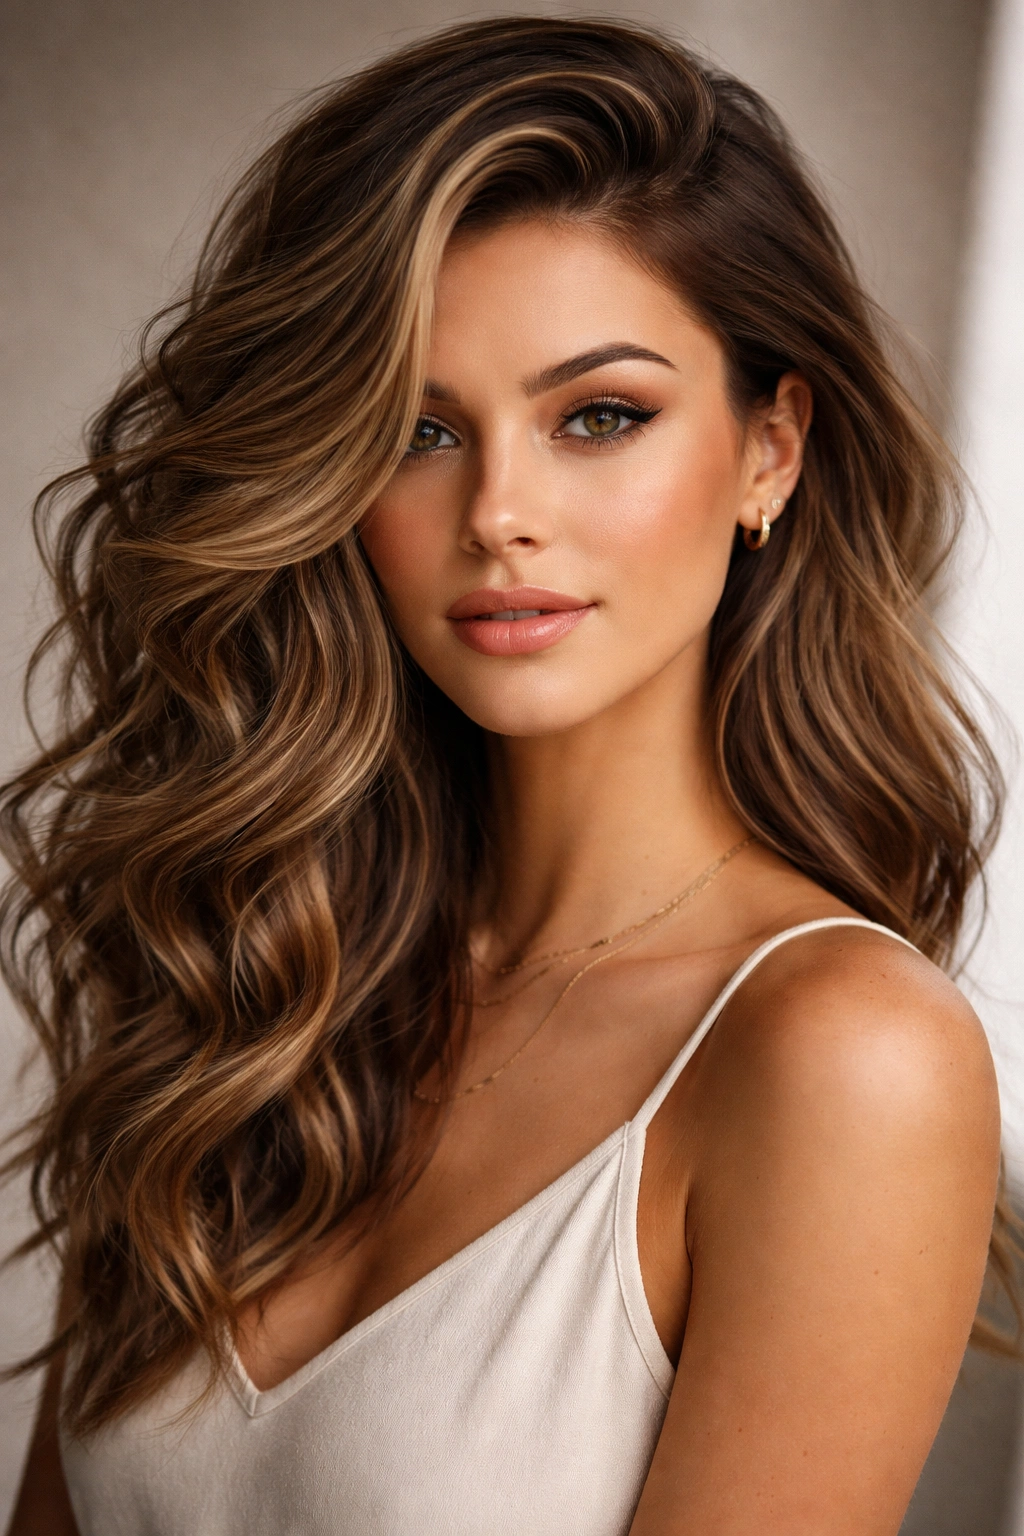
A deep side part creates dramatic asymmetry, and the side with more hair features prominent volume and wave texture. The waves on the fuller side are more voluminous and defined, while the smaller side is relatively smooth. This style creates the illusion of thicker hair and is incredibly flattering on most face shapes.
Creating the Asymmetrical Look
Part your hair deeply on one side—so that roughly 70% of your hair falls to one side and 30% to the other. Blow-dry the fuller side with your head tilted to encourage volume and movement. Create waves primarily on the fuller side, using a 2-inch barrel for bigger, bouncier waves. The smaller side can have softer waves or even be left relatively straight, creating contrast.
Volume Techniques
Apply volumizing mousse to the roots of the fuller side before blow-drying. Use a teasing brush at the crown to create subtle lift in the thicker wave section. A dry texturizing spray applied to this section before styling helps waves hold longer. The asymmetry creates visual movement that makes the style feel more current and intentional than a center part with equal waves on both sides.
18. Undone Waves with Messy Texture Throughout
This is the ultimate expression of the “I woke up like this” aesthetic—waves scattered throughout your entire head with varying degrees of definition, some tousled sections, and intentionally imperfect texture everywhere. There’s no particular pattern or structure; it’s simply waves and texture in a way that looks effortlessly beautiful. This requires the most confidence to pull off because the style depends on appearing undone.
The Art of Controlled Chaos
Start by applying a sea salt or texturizing spray to damp hair, which adds grit and grip. Blow-dry with your fingers rather than a brush, encouraging wave formation through movement. Use a curling iron to add waves, but don’t work section-by-section in an organized way—instead, randomly curl sections as you encounter them, varying barrel sizes and directions frequently. Once you’re done, run your fingers through your hair roughly, flip your head upside down and flip back, and let your hands create the texture.
Styling Products for Authenticity
A flexible-hold spray that allows movement is essential here. Heavy products will make the style look intentionally styled rather than naturally textured. Dry shampoo is your friend for creating grip and preventing hair from looking greasy. The overall effect should make someone unsure whether you’ve actually styled your hair or simply have naturally beautiful waves. This is the style that photographs best and works across all hair types, though it’s easiest on naturally wavy or textured hair.
Final Thoughts
Messy wavy hairstyles dominate the contemporary beauty landscape because they represent something we all aspire to: looking effortlessly beautiful without appearing to try too hard. The truth, of course, is that most of these styles require thoughtful technique, intentional product selection, and strategic styling choices. The payoff, though, is a look that works across multiple settings, suits various hair types and lengths, and genuinely makes people feel confident and attractive.
The beauty of having eighteen different approaches to messy waves is that you can rotate through styles based on your mood, your schedule, and what your hair needs on any given day. Some days call for the romantic elegance of flowing waves, while other days suit the rock-and-roll edge of a tousled shag. Some days you want waves secured in a ponytail or topped with a knot, while other days you want maximum movement down your back. The variety means you can keep your basic hairstyle the same and simply change how you style and texture it.
The key to mastering any of these styles is understanding your hair—its natural texture, how it responds to heat, which products help it hold waves longest, and what styling techniques work with rather than against your hair’s inherent qualities. Invest in quality tools like a curling iron with ionic technology and a good texturizing spray, because these fundamentals make every style easier to achieve and longer-lasting. Most importantly, remember that “messy” doesn’t mean careless—it means intentionally textured, effortlessly styled, and beautifully imperfect.