Small long knotless box braids with beads have a particular kind of charm. They move when you move, make a soft tap against earrings or a jacket zipper, and turn a plain outfit into something that looks finished without much fuss.
The knotless part matters more than people think. The braid starts with your own hair and the extension hair is fed in gradually, which usually gives a flatter base and less tugging at the scalp than a tight knot at the root. That’s a big deal when the braids are small and long, because small sections can feel delicate if they’re installed carelessly.
Beads change the mood fast. Clear beads look crisp, wooden beads feel softer, gold adds shine, and bead placement decides whether the look feels clean or crowded. A few beads on the lower third of the braid can be enough; pile them everywhere and the length starts working against you.
The versions below stay inside one lane: small braids, long length, and beads that actually make sense. Some are spare, some are dressy, and one or two are a little bolder than I’d wear on an ordinary Monday, which is exactly why they’re worth paying attention to.
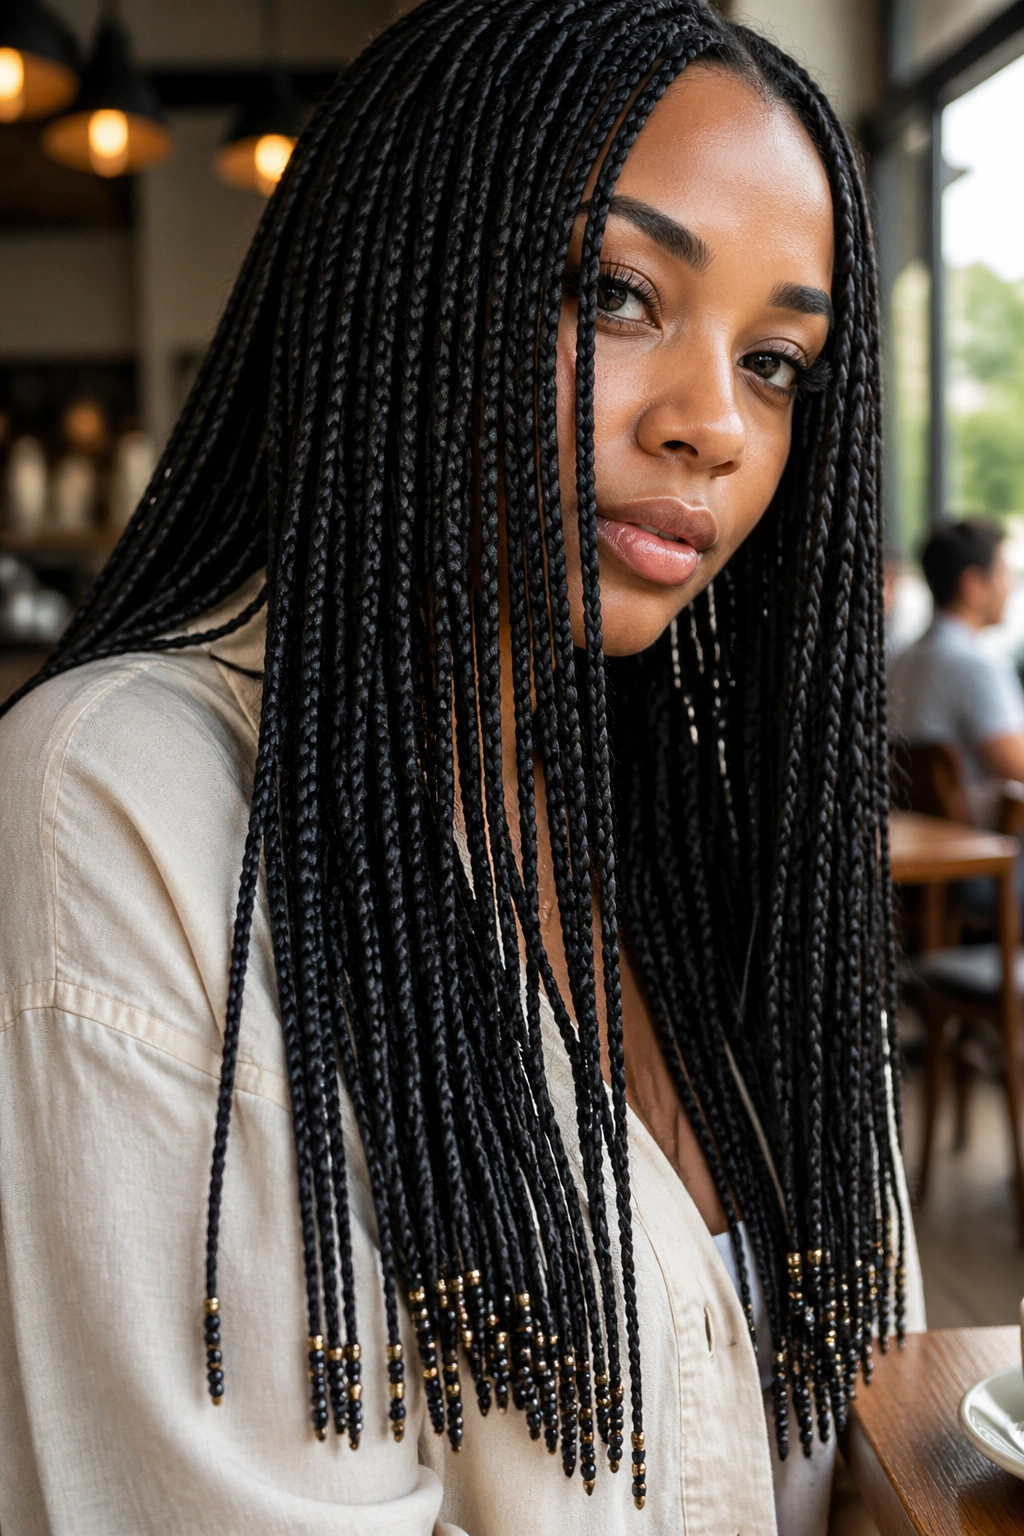
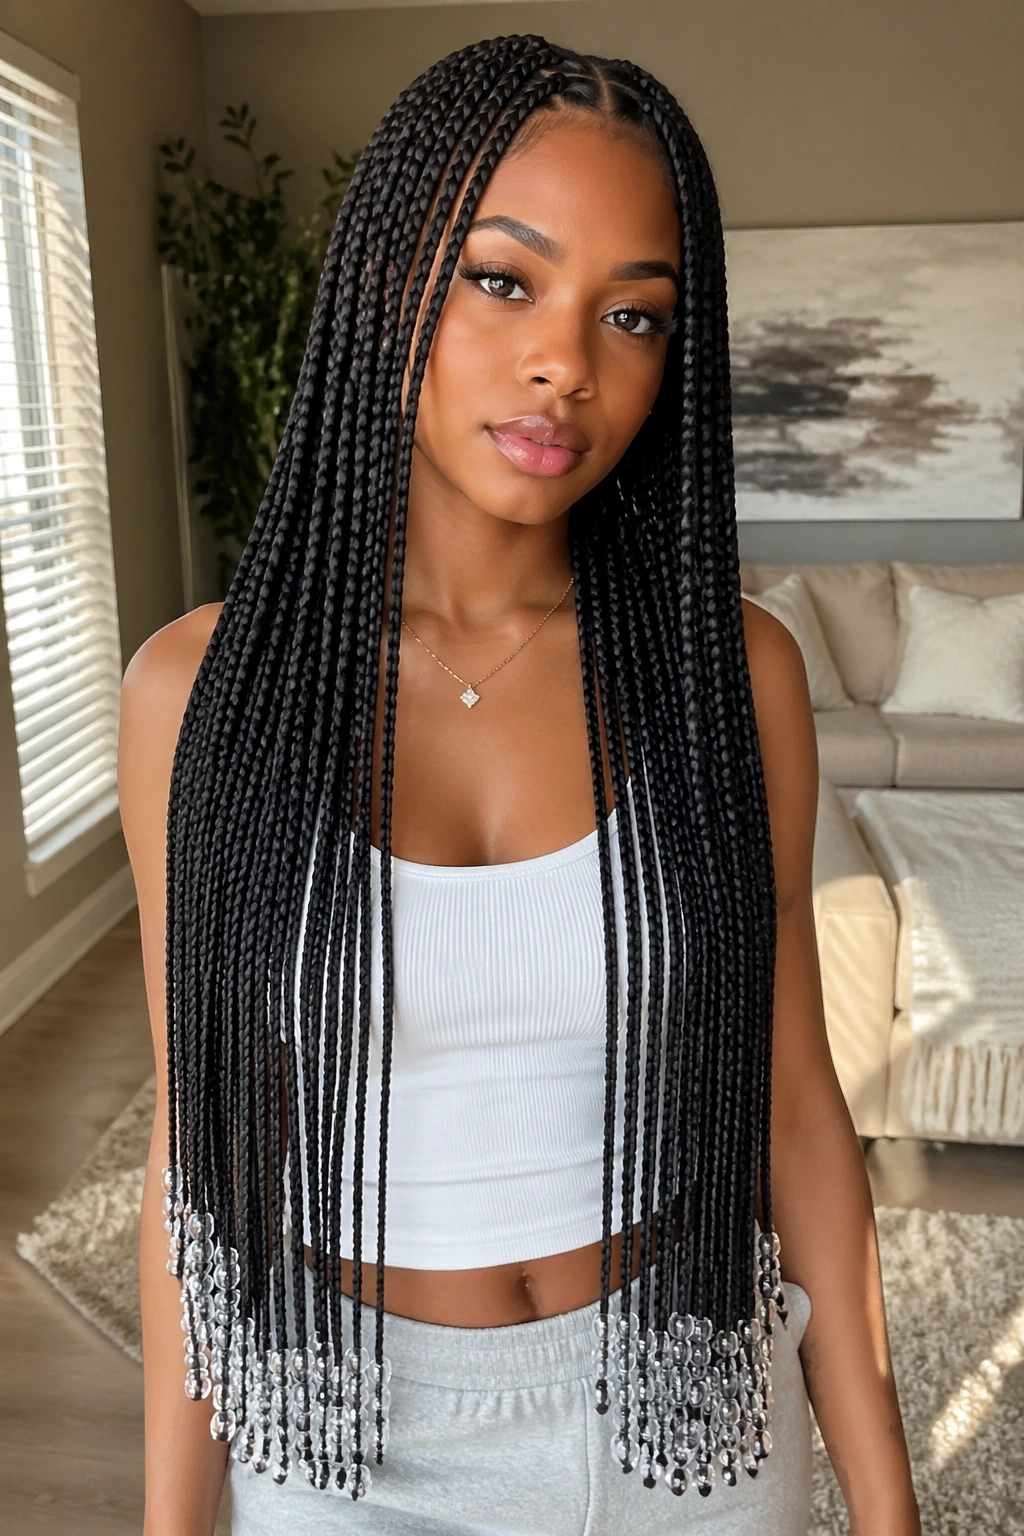
1. Small Long Knotless Box Braids with Clear Beads at Waist Length
Clear beads are the safest place to start if you want the style to feel sharp instead of busy. They don’t fight with your clothes, and they let the braid pattern stay visible, which matters more on small braids than people expect. Once the hair drops to waist length, the beads stop looking like an afterthought and start looking like part of the silhouette.
Why this version works
The cleanest place for clear beads is the last 1 to 2 inches of each braid. That gives you movement without loading the whole length with weight, and it keeps the braid itself from looking crowded near the ends. On long knotless braids, that balance matters.
A small bead size, around 6 to 8 mm, usually sits better than chunky beads on fine or medium braids. Bigger beads can swallow the braid, especially if the ends are thin and sealed neatly. If you want the look to feel polished, not childish, stop short of overfilling every braid.
- Best on: waist-length or lower-back-length braids.
- Best bead type: clear acrylic or lightly frosted acrylic.
- Best spacing: one bead stack on every braid, or every other braid if you want more air between them.
- Best parting: square parts if you want a classic grid, triangle parts if you want a softer finish.
Pro tip: let the beads sit where the braid starts to curve against your clothes. That’s where they show up most.
2. Gold Accents on Black Braids
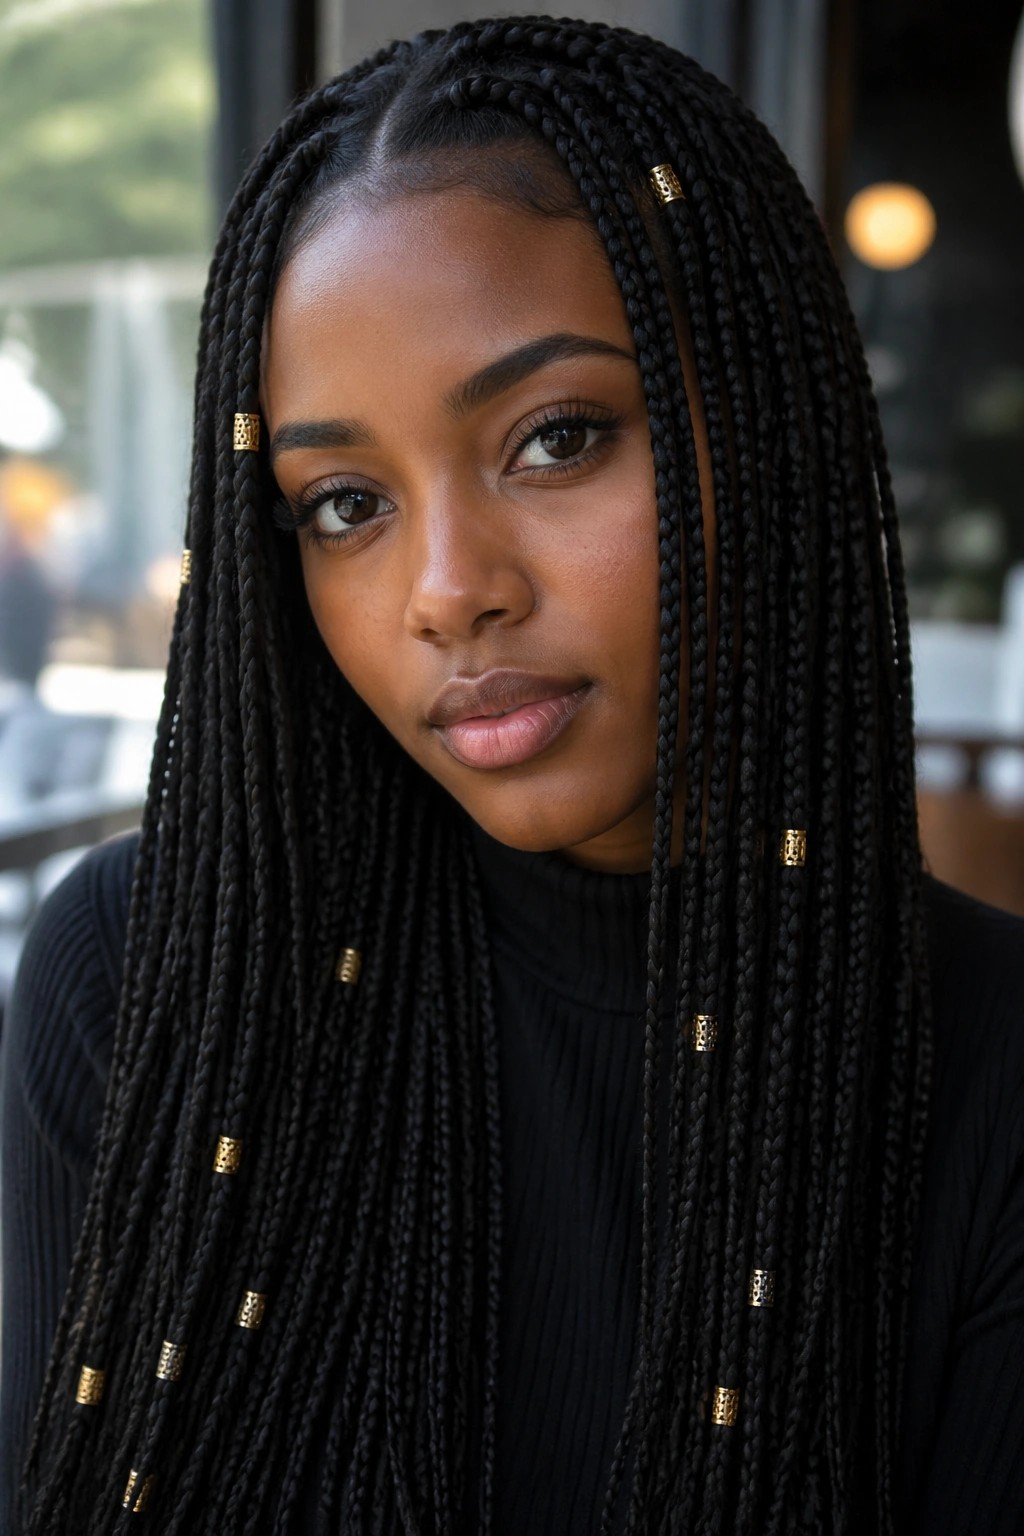
Gold changes the whole look with almost no extra work. Against black braiding hair, even a small gold bead or cuff picks up the eye fast, so you do not need many of them to make an impact. A few near the front rows, a few near the ends, and the rest left plain—that’s usually enough.
What I like about this version is the restraint. Too much gold turns the style loud in a way that starts to fight the clean lines of knotless braids. A small number of gold pieces feels sharper because the contrast is doing the heavy lifting, not the quantity.
This works especially well if you wear simple clothes: white tees, black tops, denim jackets, plain knits. The braids become the accessory. And if you like hoops or layered necklaces, gold beads make that whole set of details feel coordinated without trying too hard.
Use matte black braiding hair and mix in three to six gold pieces total if you want the finish to stay refined. Any more than that and the shine starts to take over.
3. Triangle Parts That Break Up the Grid
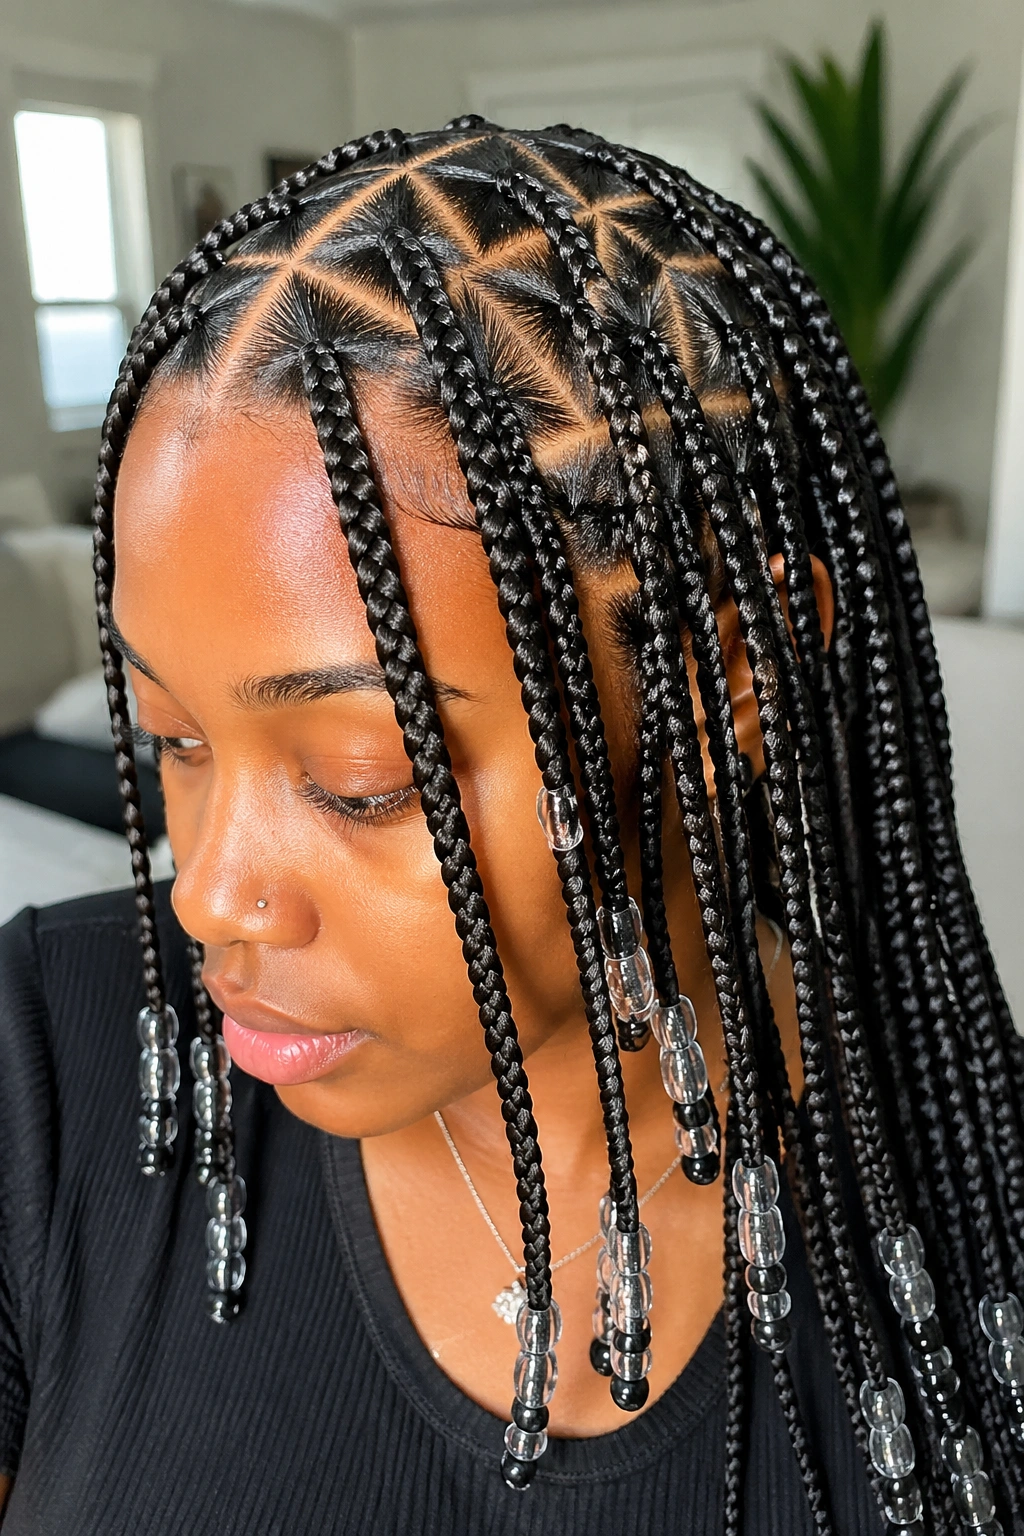
Why do triangle parts change the whole mood? Because they pull the style away from the stiff, straight-line look people expect from box braids. The braids are still small and neat, but the parting gives the scalp a softer geometry, which looks especially good when the braids are long and the beads move around.
What makes it different
With triangle parts, the sections near the hairline are a little more angular, so the top of the style feels less predictable. That matters when you’re adding beads, because the beads already create movement; the parting can either support that or make it feel flat. Triangle parts support it.
The best bead choice here is usually clear, smoke, or black. A busy color mix can fight the sharper parting, while a cleaner bead lets the shape do the talking. If the braids reach past the chest, keep the bead stacks low so the pattern of the parts stays visible at the roots.
How to wear it
- Ask for clean, narrow triangles around the front and sides.
- Keep bead placement even so the shape feels intentional.
- Let the lower lengths stay free of extra decoration.
A small detail, but it changes everything: when the parting is crisp, the beads look better by default.
4. Side-Swept Braids That End in a Bead Curtain
The first thing you notice is the sound. When long knotless braids are swept over one shoulder and the beads settle against a collarbone or sleeve, the whole style suddenly feels alive instead of static. It’s a little dramatic, yes. That’s the point.
The side-swept version works because it gives all that length a place to land. Rather than having the braids fall evenly down the back, the sweep creates a visible line from the crown to the shoulder, and the beads cluster at the edge of that line. The result is simple but strong.
- Best when the braids reach the ribcage or lower.
- Best with a deep side part or a clean off-center part.
- Best with medium-clear beads or small black beads if you want less shine.
- Best if you like one side of your face framed and the other side open.
I’d pick this style for a dinner, a concert, or any day when you want the braids to feel a little less formal. It looks even better if you wear one earring on the open side and keep the neckline simple.
5. Small Long Knotless Box Braids with a Half-Up Ponytail
A half-up ponytail is the easiest way to make long braids feel lighter without hiding the length you paid for. Pulling the top section up opens the face, keeps the crown tidy, and leaves the beaded ends free to move. It’s practical. It also looks good.
The trick is not pulling too much hair into the ponytail. You want enough lift to show the parting at the front, but not so much that the top feels stretched. A snug, coated elastic works better than a rough one, and if the braids are small, two or three wraps are usually enough.
I like this style because it gives you two moods at once. The top is controlled; the length still moves. That contrast is what makes it interesting, and it’s why the look works on days when you need the hair out of your face but don’t want a full bun.
Easy on busy mornings.
A few beads near the front rows make the ponytail look intentional rather than thrown together. Leave the back rows a touch lighter, and the whole style stops feeling top-heavy.
6. Tiny Beads Only on the Last Three Inches
Less is often better with very long braids. If the beads sit only on the last three inches, the style feels neat and grown-up without losing the little bit of sound and motion that beads bring. That’s a smart move if you wear headphones, glasses, or anything else that tends to tangle with hair.
Unlike full-length beading, this approach keeps the weight where it belongs: near the ends, not along the whole braid. On braids that reach the lower back or hips, that difference matters more than it sounds like it should. The whole head feels lighter, and the ends still look finished.
This version also grows out cleanly. The beads stay out of the root area, so the new growth at the scalp doesn’t have to compete with extra visual noise. If you’re the kind of person who likes neatness, not drama, this is a strong pick.
One bead per braid is enough here. Two if you want a little more movement, but I’d stop there. The point is the clean line, not the bead count.
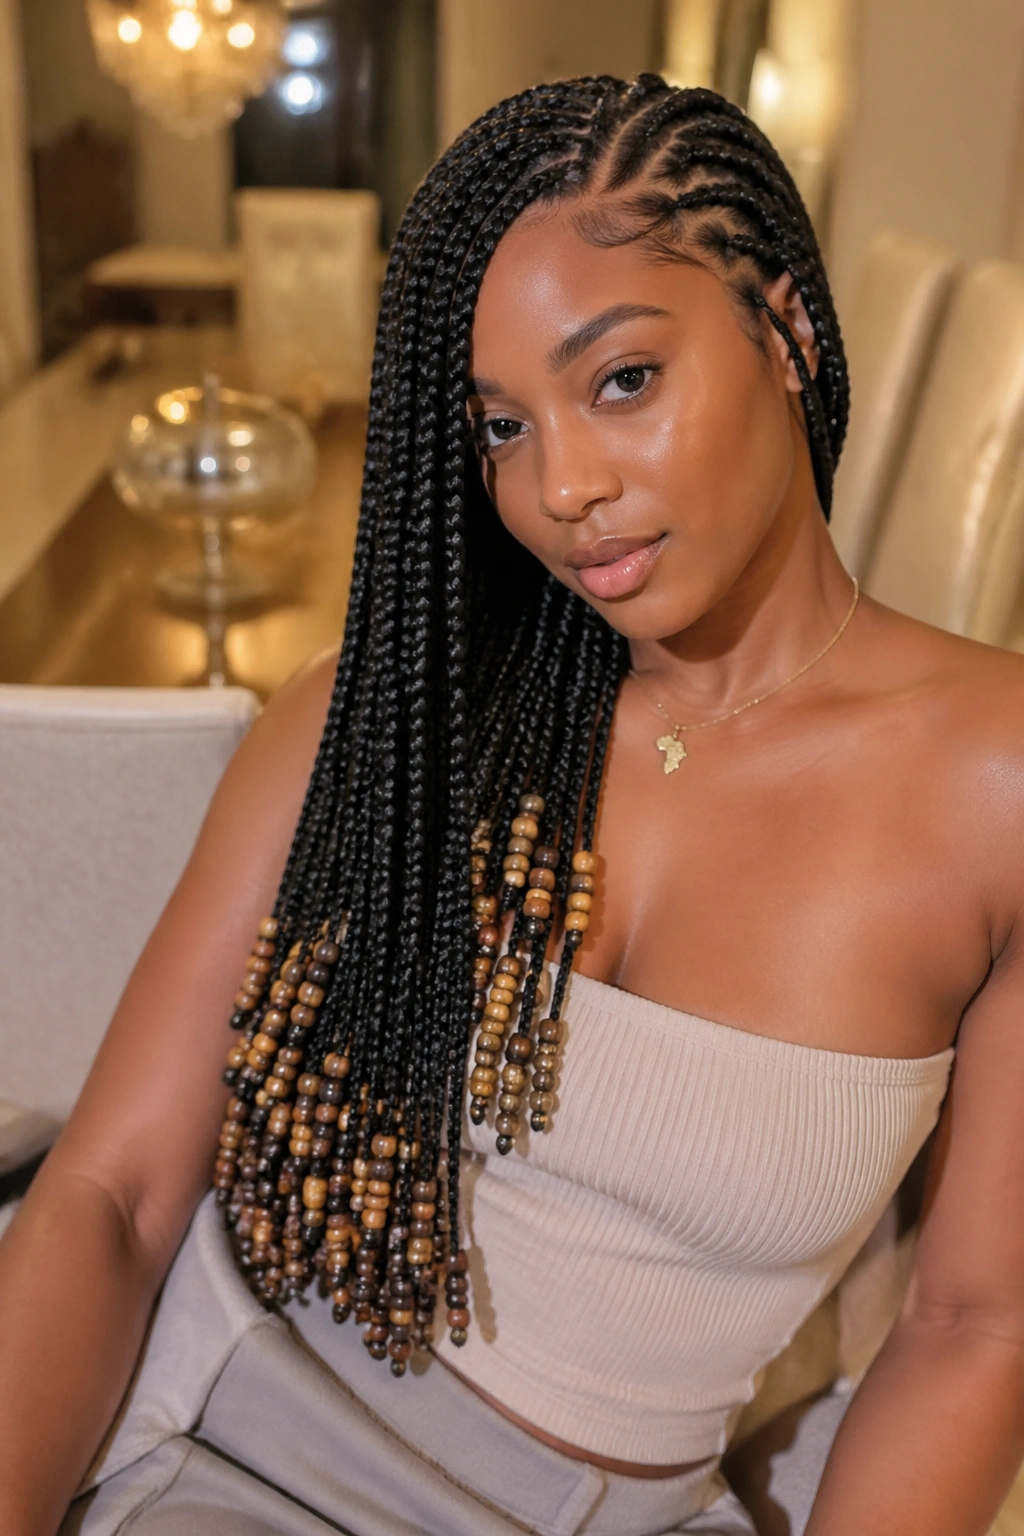
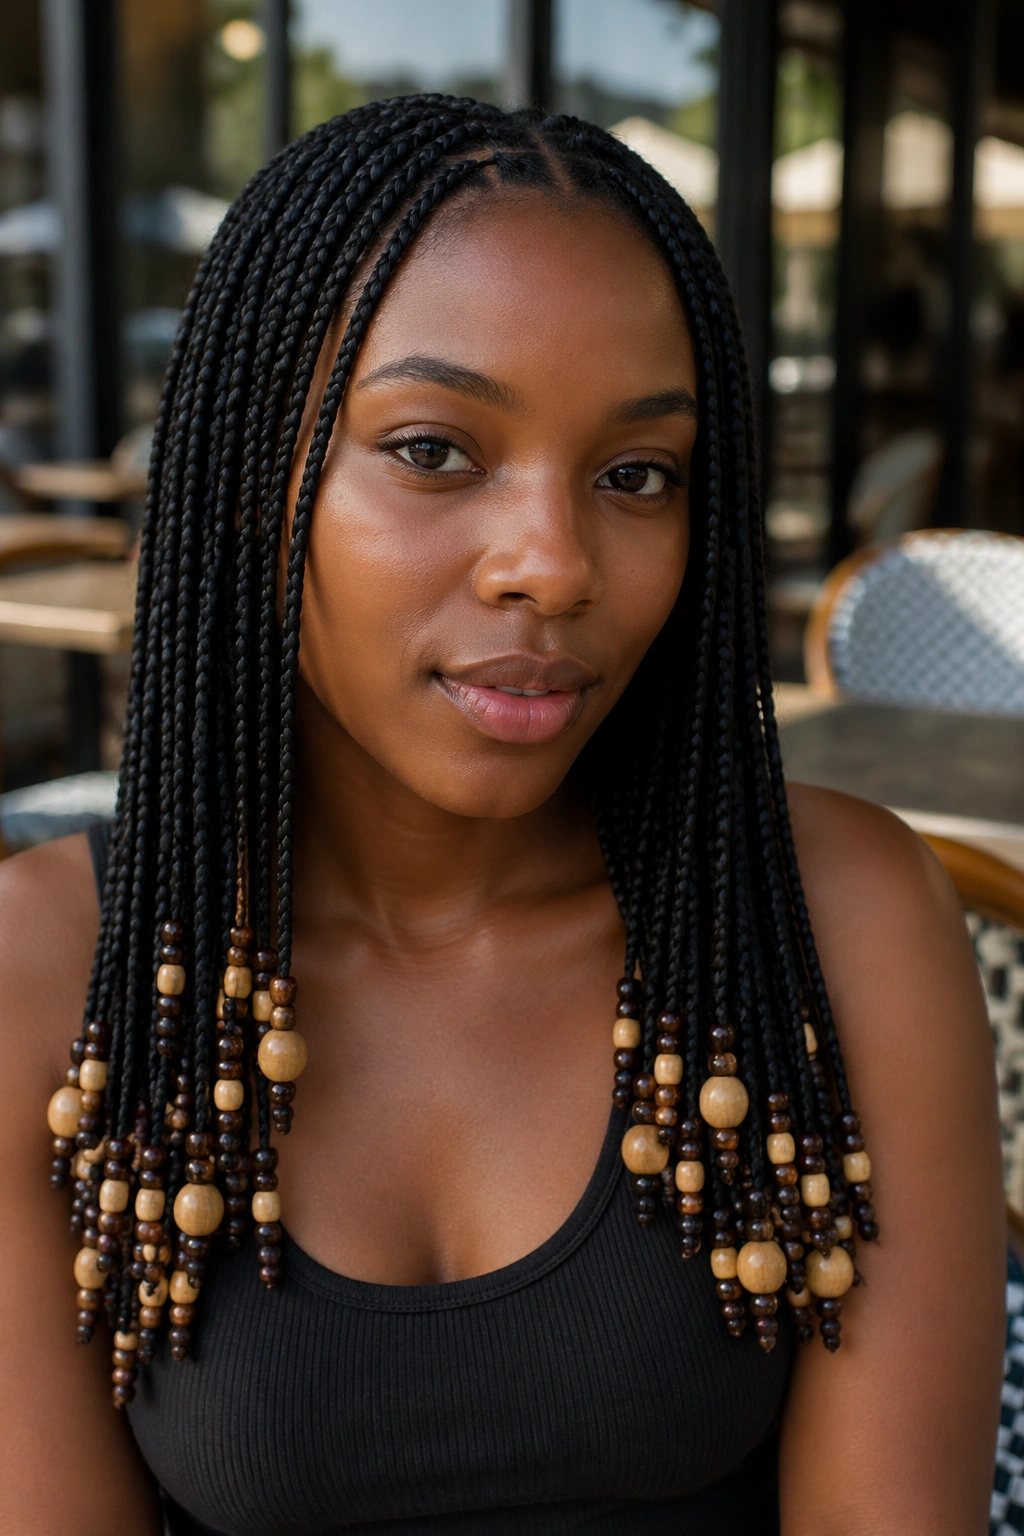
7. Amber and Honey-Toned Beads
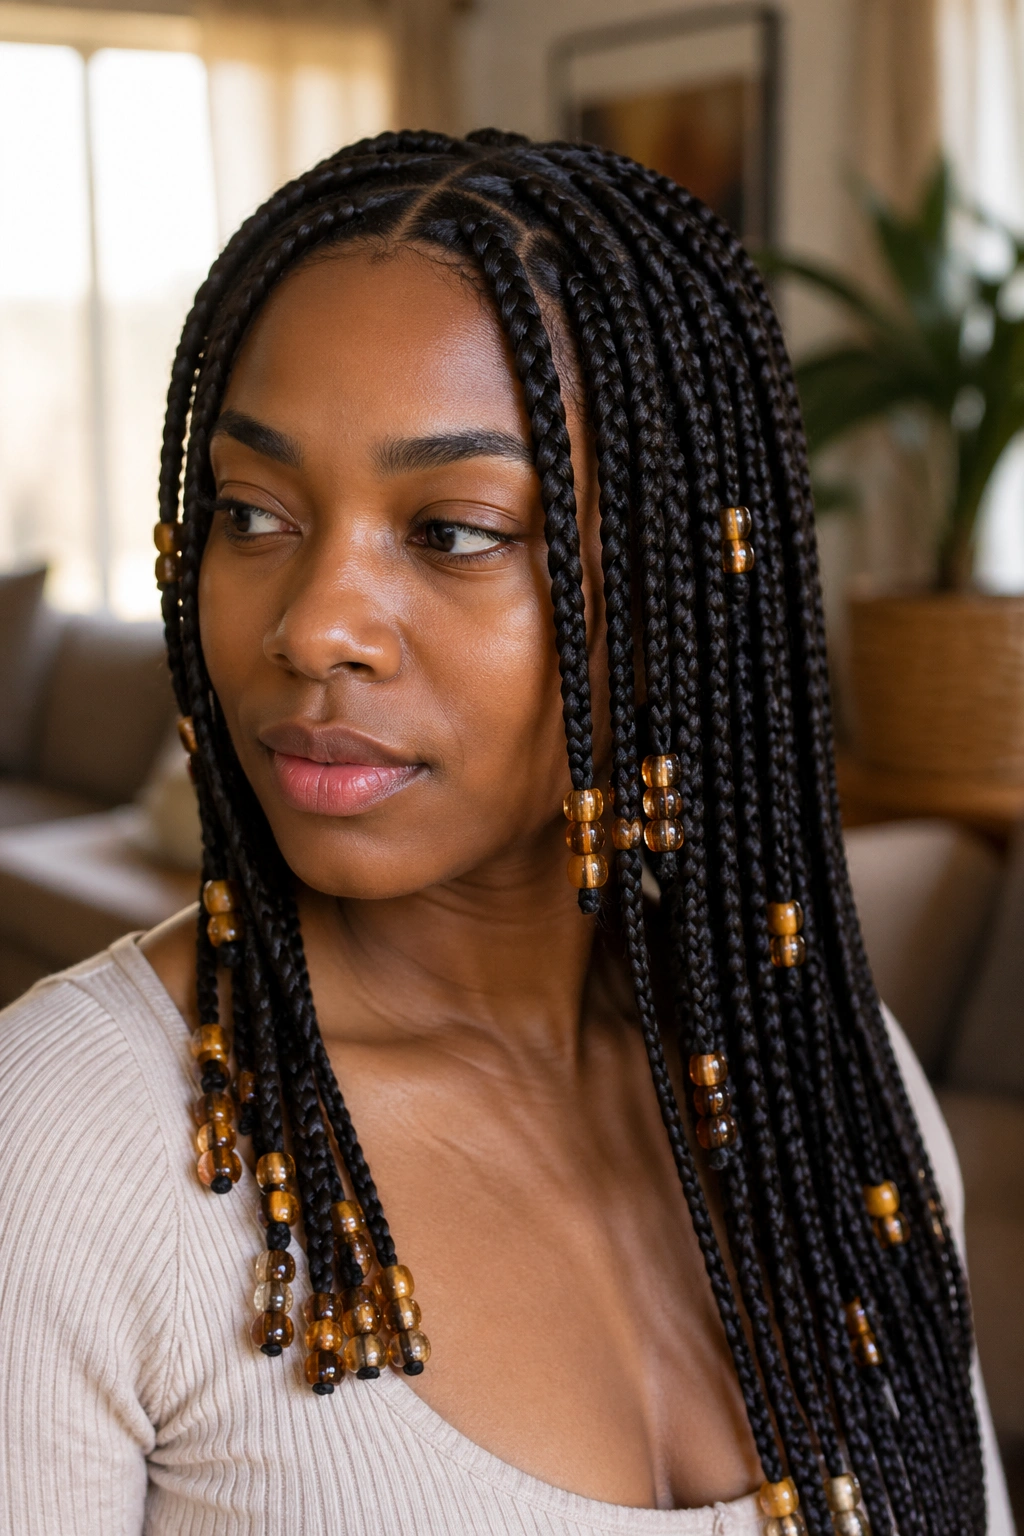
Warm-toned beads do something clear beads can’t: they soften the black braid and make the whole style feel warmer against the skin. Amber, honey, and light brown beads bring out the depth in dark braiding hair without shouting about it. They’re subtle in the best way.
What makes this version worth trying is the color shift. A mix of two warm shades keeps the ends from flattening into one tone, and that tiny bit of variation gives the braids more life. If the beads are all identical, the style can look a little too uniform. A small mismatch is better.
This is one of those choices that looks especially good with earthy clothes—camel coats, brown knits, olive tops, even plain beige tees. The beads do not need matching accessories to make sense, which is a relief. They carry enough warmth on their own.
If you want the style to stay calm, keep the bead stack short: two to four beads per braid, not a whole ladder. That keeps the color from taking over the length.
8. Wooden Beads for a Softer Finish
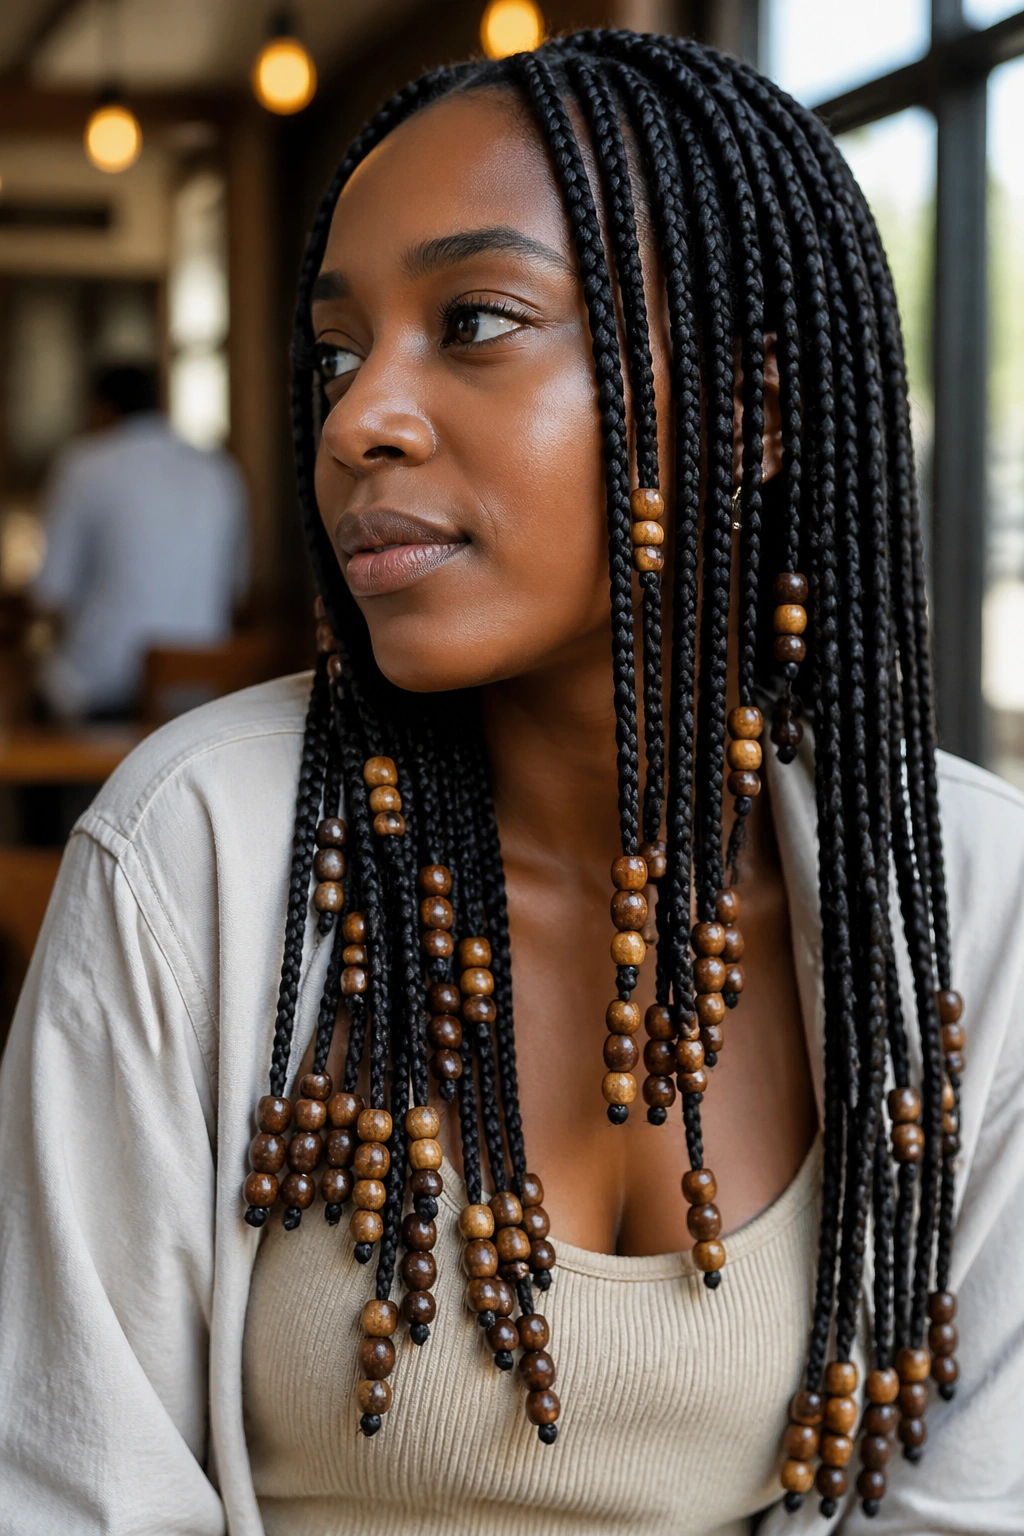
Why do wooden beads look calmer? Because they cut the shine and bring the focus back to the braid itself. Wood has a matte finish, so it doesn’t flash the way plastic can. On small long knotless box braids, that softness matters. The style stays decorative, but it doesn’t feel glossy or overworked.
What to watch for
Wooden beads can be heavier than they look, so size matters. I’d stay around 8 mm to 10 mm for small braids and keep the bead count modest on the longest pieces. If the braid is fine and the bead is too wide, the whole end starts to sag in a way that looks accidental.
The other thing to check is the hole finish. Rough edges can snag braid fibers, and that gets old fast. Smooth drilling is the difference between a bead that slides on and a bead that grinds against the hair.
This version suits people who like natural textures, linen clothes, leather jackets, and quieter accessories. It’s not the flashiest choice. It is one of the more grown-up ones.
9. Bead Clusters Instead of One Long Chain

Some people want the bead sound, not a whole curtain of hardware. That’s where clusters make sense. A cluster of two or three beads, separated by a short stretch of plain braid, gives the hair rhythm. It feels deliberate. It also keeps the ends from getting heavy.
The visual trick is spacing. If every braid ends in the same tight stack, the look becomes repetitive fast. But if a few braids have a cluster and the next few stay plain, your eye starts moving around the style instead of locking onto one pattern. That movement is what keeps it interesting.
How to use it
- Place the first cluster about 1 inch above the very end.
- Repeat the pattern every third or fourth braid.
- Keep the color family tight: clear with clear, amber with amber, or black with clear.
- Let one or two front braids carry the larger clusters so the face framing feels balanced.
This style works best when the braids are long enough to swing freely. If the hair is only mid-back length, the spacing can look cramped. On truly long braids, though, the clusters look intentional and a little playful without crossing into chaos.
10. Front-Row Accent Beads Only
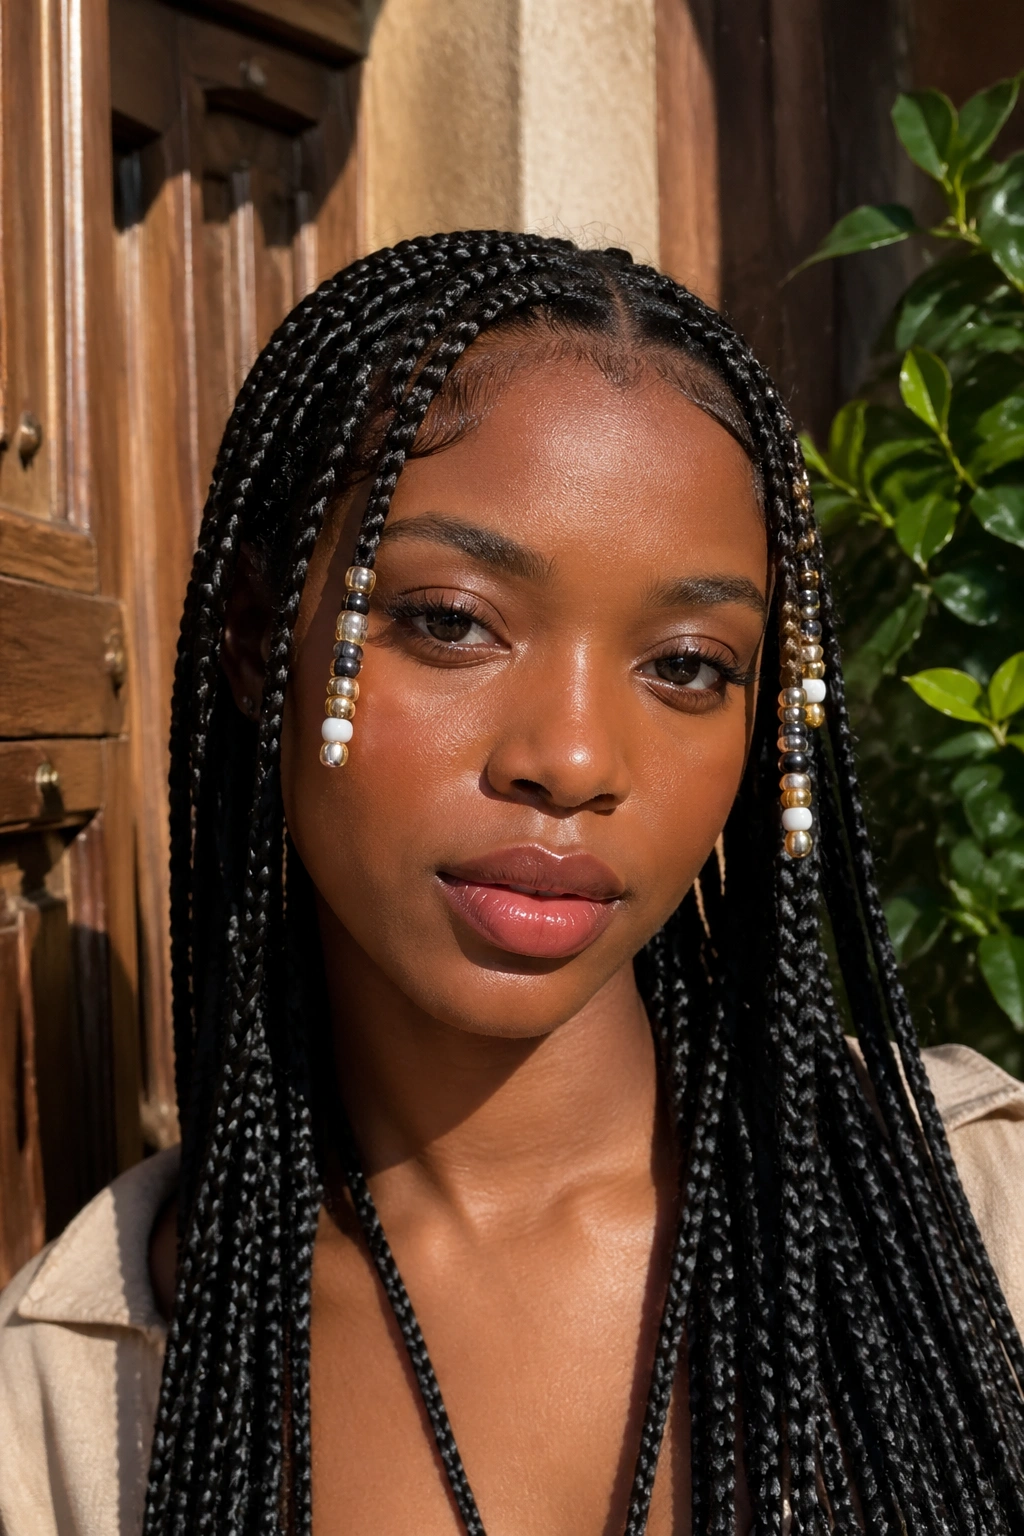
Accent beads in the front rows can do more than a full head of decoration. A few beaded braids near the face frame your features, draw attention to the parting, and leave the rest of the style cleaner. That’s a smart trade if you like the idea of beads but don’t want them everywhere.
The back staying plain is the whole point. It keeps the style light, which matters on long knotless braids where the ends already have enough movement. When the front carries the detail, the braid line at the sides and back stays easier on the eyes. No clutter. No overthinking.
I’d reach for this version if I were wearing statement earrings, a bold lip, or a neck scarf. The beads support the look instead of competing with it. They also work well if you wear glasses, because the front rows become part of the frame without crowding your temples.
A small note that helps a lot: keep the front beads slightly smaller than the ones at the ends. That tiny size difference keeps the face area from feeling top-heavy.
11. Mixed Bead Sizes on Uniform Small Braids
Uniform braids do not have to mean uniform beads. Mixing bead sizes—say, 6 mm, 8 mm, and 10 mm—adds a little rhythm without changing the braid pattern itself. The hair stays small and neat, but the ends stop looking copy-pasted.
What keeps this from looking messy is repetition. Use the same three sizes in a repeatable order, or keep one size dominant and the others as accents. If every bead is different with no plan, the style loses its shape fast. But a controlled mix feels thoughtful and a little more custom.
A simple way to place them
- Put the largest beads on the front rows and lower back rows.
- Use medium beads on the middle section.
- Save the smallest beads for the braids closest to the temples.
That distribution matters because the front of the style gets seen first, while the back carries more length and movement. The biggest beads don’t need to go on every braid. In fact, they shouldn’t. One or two per side is usually enough.
This is a good choice if you like detail and don’t mind a style that asks for a bit more attention. It’s not loud. It just has more going on.
12. Beads Placed Mid-Length Instead of at the Ends
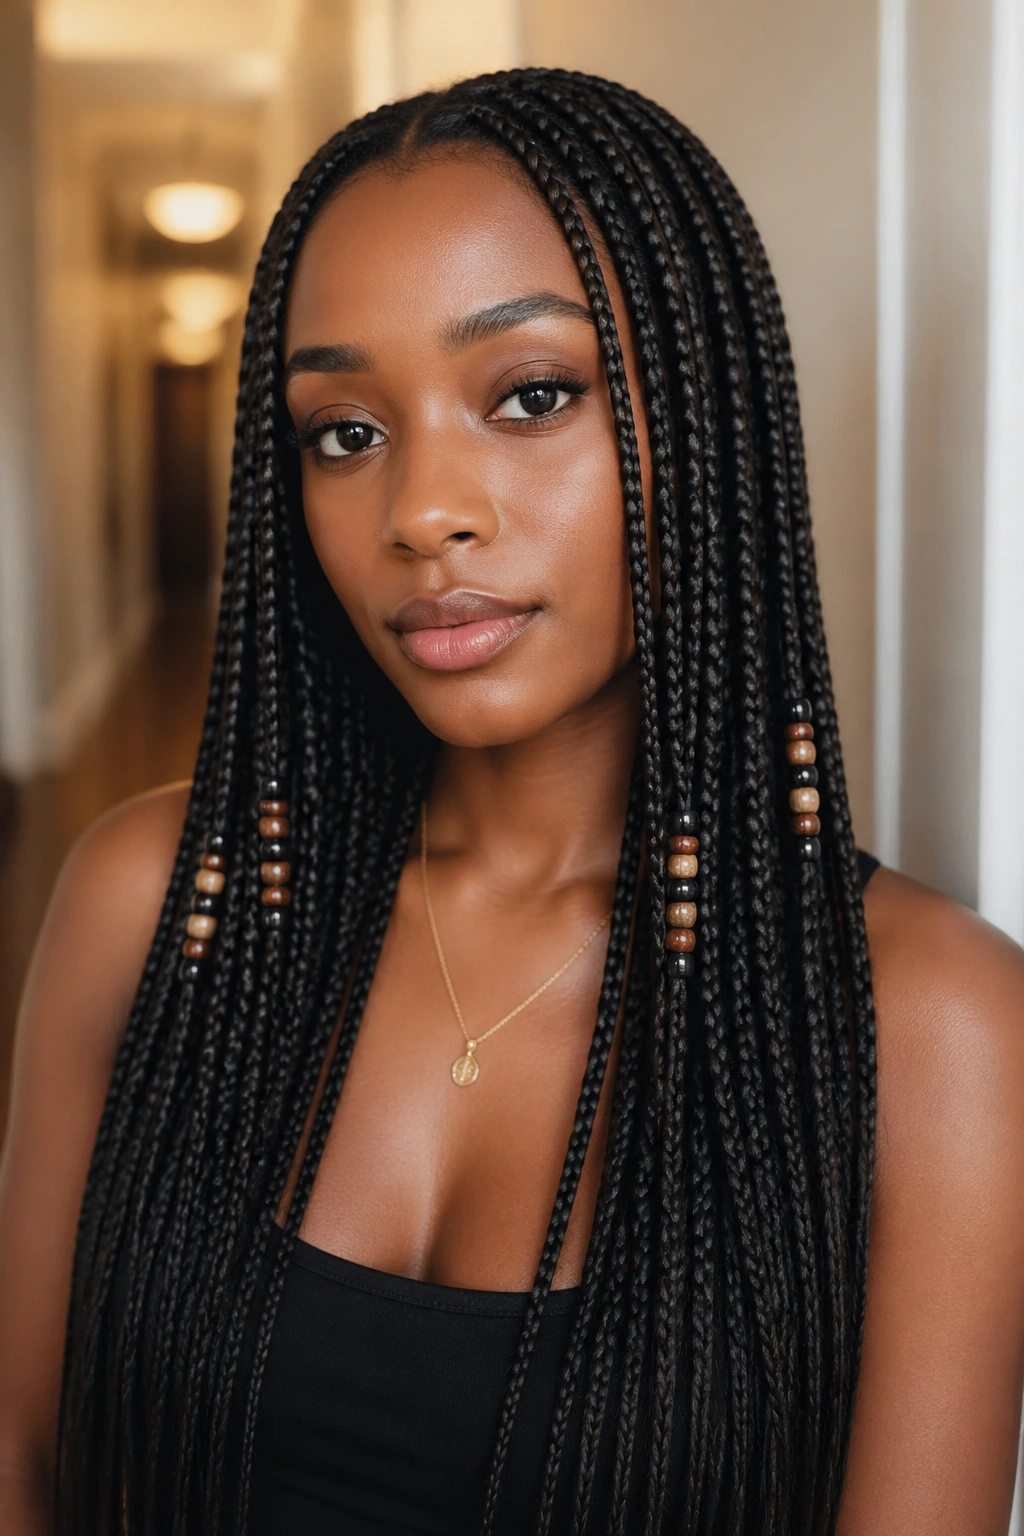
Beads do not have to live at the tips. Placing them mid-length gives the braid a more sculpted look, and on extra-long braids it can make the whole style feel lighter at the bottom. The ends stay free, which means less snagging on shirts, chair backs, and bags.
That placement also changes how the hair moves. Instead of the beads bunching at the very bottom, they travel with the length and show up earlier in the line of the braid. The eye catches them sooner. That matters if you want the accessories to be seen even when the ends are tucked under a coat or resting behind your shoulders.
This style works best when the ends are neat and sealed. If the tips are fuzzy or uneven, the contrast can look off. A clean finish matters because the beads are no longer hiding the ends; they’re sitting in the middle of the conversation.
I’d use this placement on braids that reach the waist or beyond. On shorter long braids, it can feel too crowded. On truly long ones, it looks sharp.
13. Curved Parts That Softly Frame the Face
Who said box parts have to stay straight? A slight curve near the temple can soften the whole front of the style without making it feel loose or messy. On long knotless braids with beads, that softness is a nice counterweight to all the length and motion.
The best thing about curved parts is that they let the braids frame the face a little more naturally. The lines aren’t as rigid, so the style looks gentler around the hairline. Beads can echo that curve by sitting a touch closer together on the front rows and more spaced out toward the back.
How to use it
Ask for the curve to stay subtle, not dramatic. You want enough bend to be visible, but not so much that the parting stops looking tidy. A good braider will use a rat-tail comb and keep checking the spacing as they move across the head.
This version is especially nice if you wear baby hairs or like a soft side edge. It gives the front of the hairstyle a little movement before the braids even start dropping down the shoulders. Small detail. Big payoff.
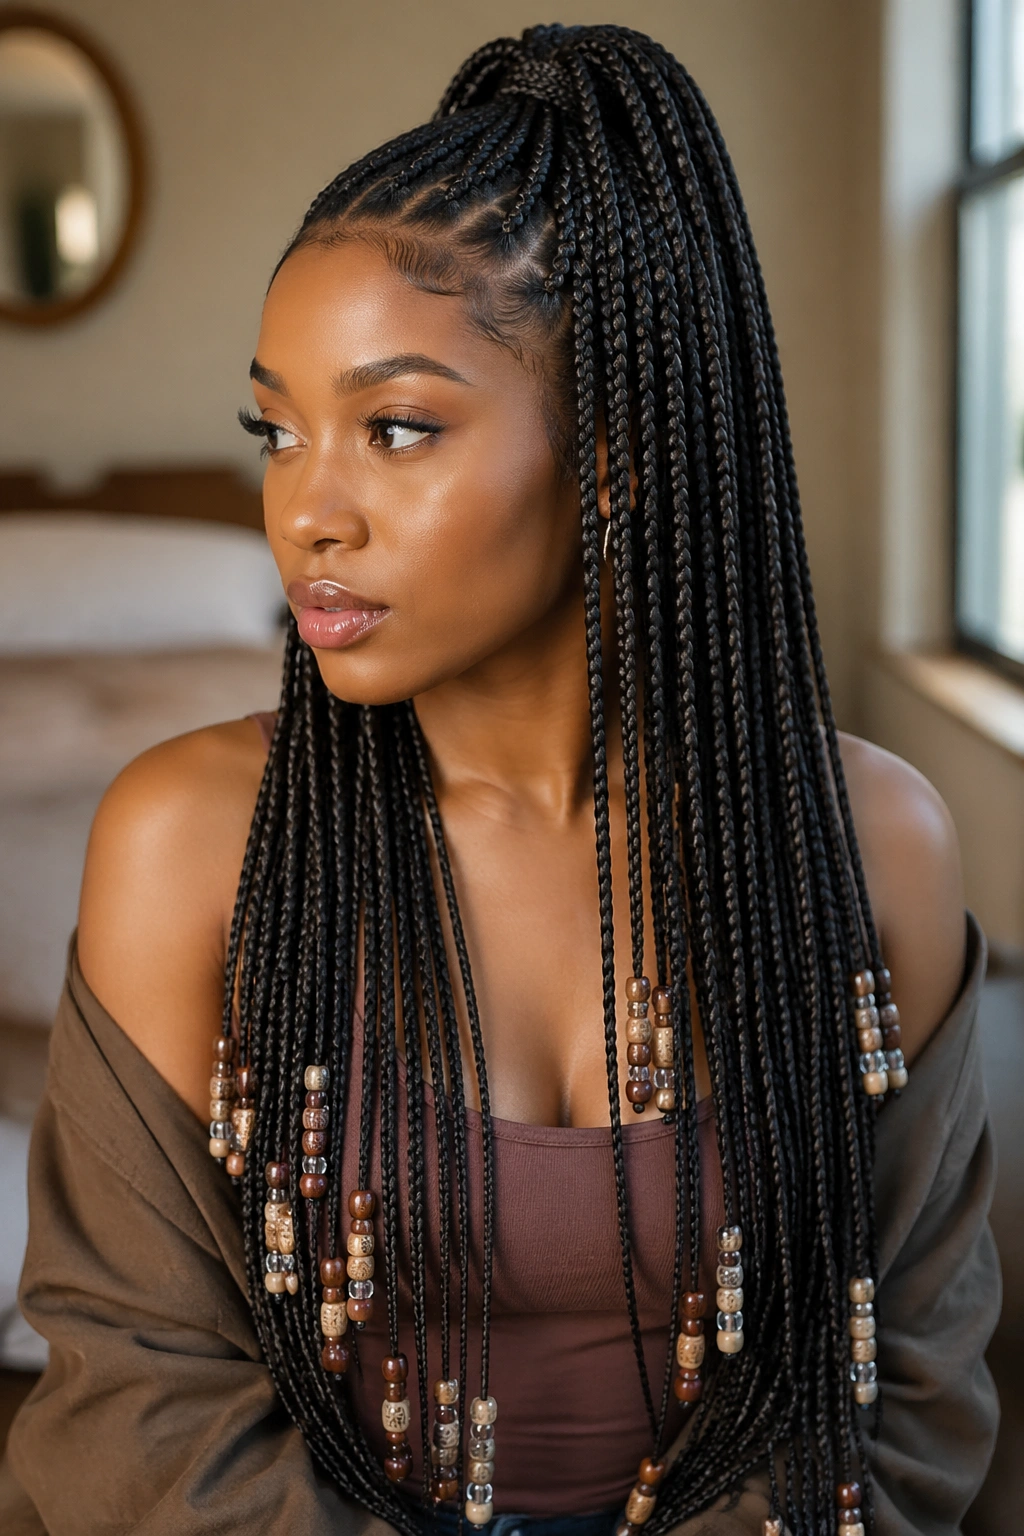
14. A High Bun with Beaded Length Left Out
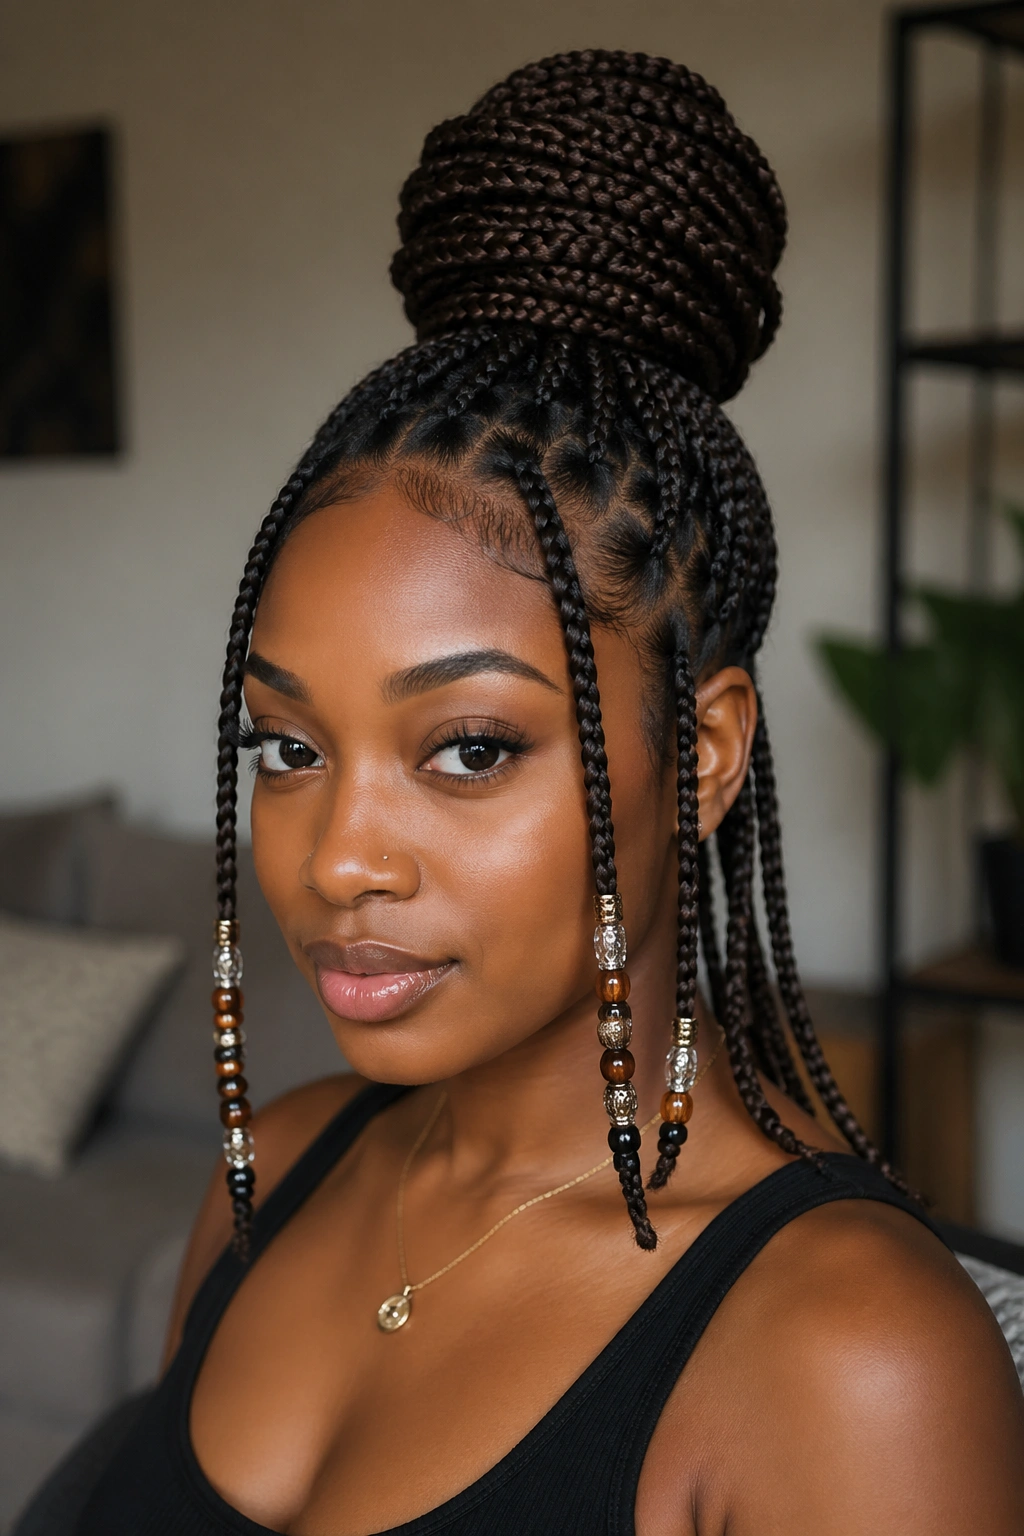
There’s something clean about gathering long knotless braids into a high bun and letting just a few beaded pieces hang loose. The crown looks tidy, the face stays open, and the hanging braids keep the whole thing from feeling too strict. It’s a useful style when you want control without losing the length.
The bun itself does not need to be massive. In fact, a smaller bun usually sits better because it keeps the weight centered. The beaded pieces around the face or down the back do the decorative work, so the bun can stay simple. A rough wrap or a padded bun maker is usually more trouble than it’s worth with braids this long.
A few details that help
- Leave 4 to 8 braids out so the beads are visible.
- Put the loose pieces near the temples or back center, not all on one side.
- Use one coated elastic to secure the bun without scraping the braid.
- Keep the bun loose enough that the roots do not feel pulled.
This is one of the best choices for active days, warm rooms, or any time you want hair off your neck but still want the beads to show.
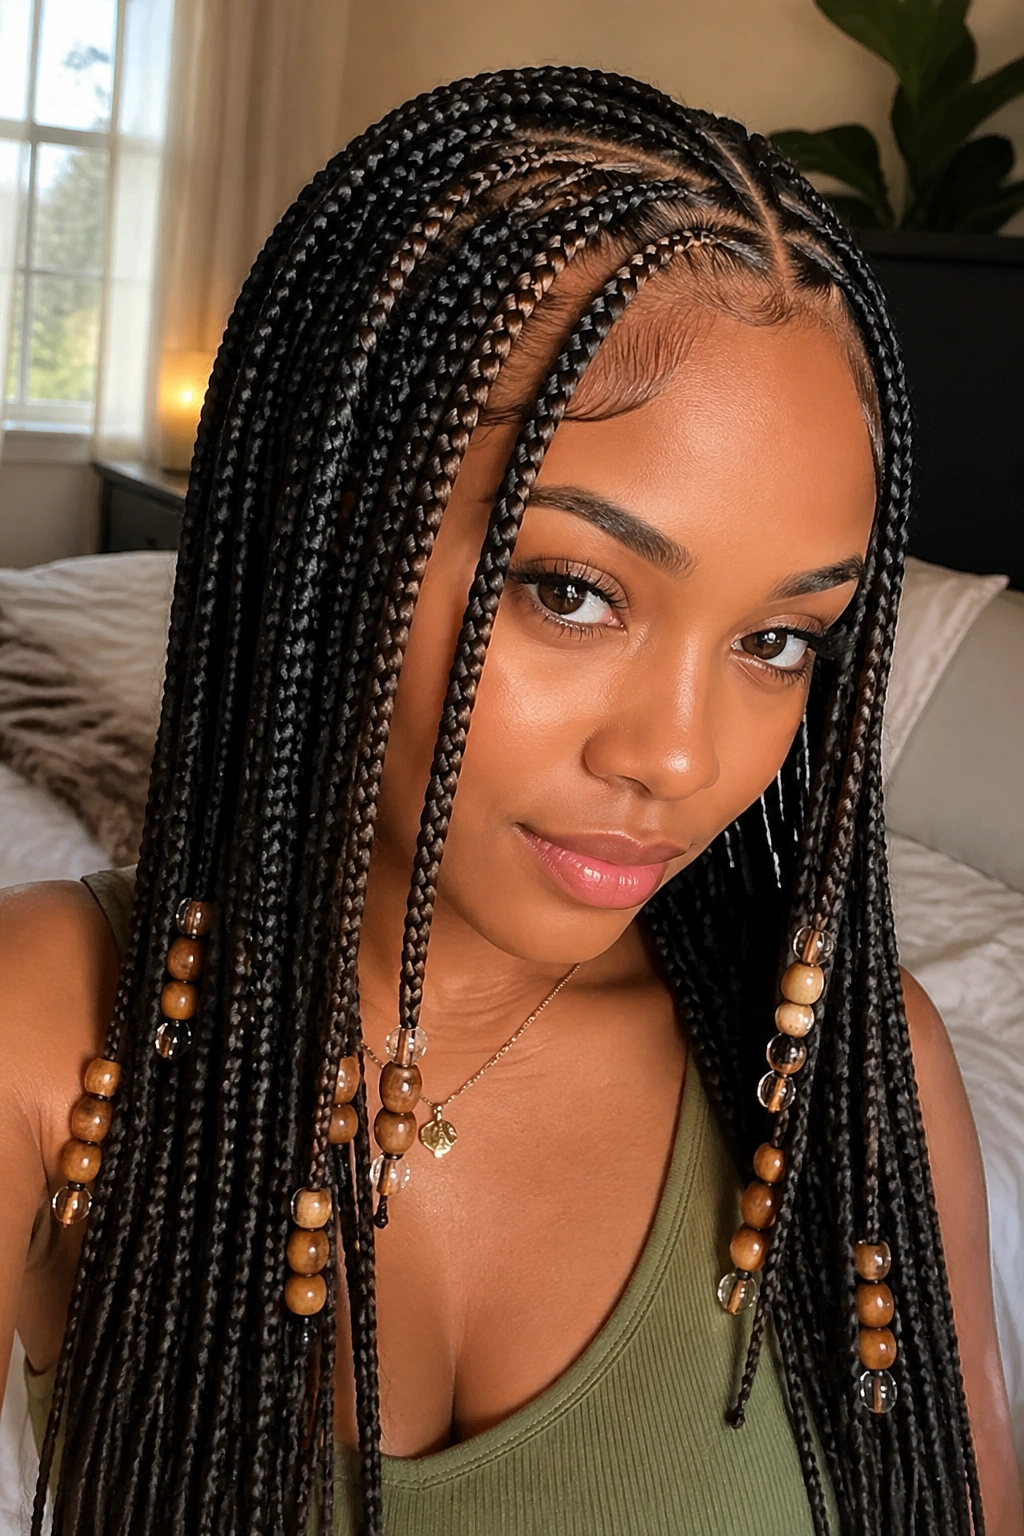
15. Small Long Knotless Box Braids with Sparse Beads for Everyday Wear
Sparse beading is the version I’d reach for most often. Not because it’s flashy. Because it lasts in the eye. A few beads spaced through the length keep the braids interesting while letting the actual braid work stay visible, and that matters on small long knotless box braids.
You do not need beads on every braid to make the style feel finished. Eight to twelve beads across a whole head can be enough if the placement is smart. Put a couple near the front rows, a couple near the lower back, and leave the rest plain. The negative space is part of the look.
That restraint also helps the style age better. When the braids start to soften a little at the roots, a lighter bead setup keeps the whole thing from feeling overdone. Heavy decoration can look tired once the first bit of new growth shows. Sparse beads are easier to live with.
A little restraint goes farther than a whole jar.
For me, that’s the version that makes the most sense when you want long knotless braids to feel easy, not fussy. It still has personality. It just does not shout for attention every time you move.