Small box braid ponytails have a sneaky reputation. People call them simple, then spend half the morning trying to get the base to sit flat, the part to behave, and the length to stop swinging into everything in reach. The truth is that a good ponytail on small box braids is part styling, part restraint, and a little bit of patience.
Tight is not the same as neat.
That’s the mistake I see most often. If the hairline gets pulled too hard, the style starts looking strained before you even leave the mirror. If the base is too loose, the ponytail droops and the whole thing loses shape. The sweet spot is somewhere in the middle: secure enough to hold, soft enough to move, with just enough polish at the crown to make the braids look intentional.
The nice thing about small box braids is that they give you room to play. The parting is already there. The texture already does some of the work. You can go high, low, side-swept, wrapped, beaded, half-up, or fully tucked, and the style still reads clean if the base is done well. A rat-tail comb, a few no-snag elastics, a soft brush, and a light touch with gel or foam are usually enough.
What follows is a set of ponytail ideas that actually make sense on small box braids — styles that hold, flatter, and don’t ask you to rebuild your whole head every five minutes.
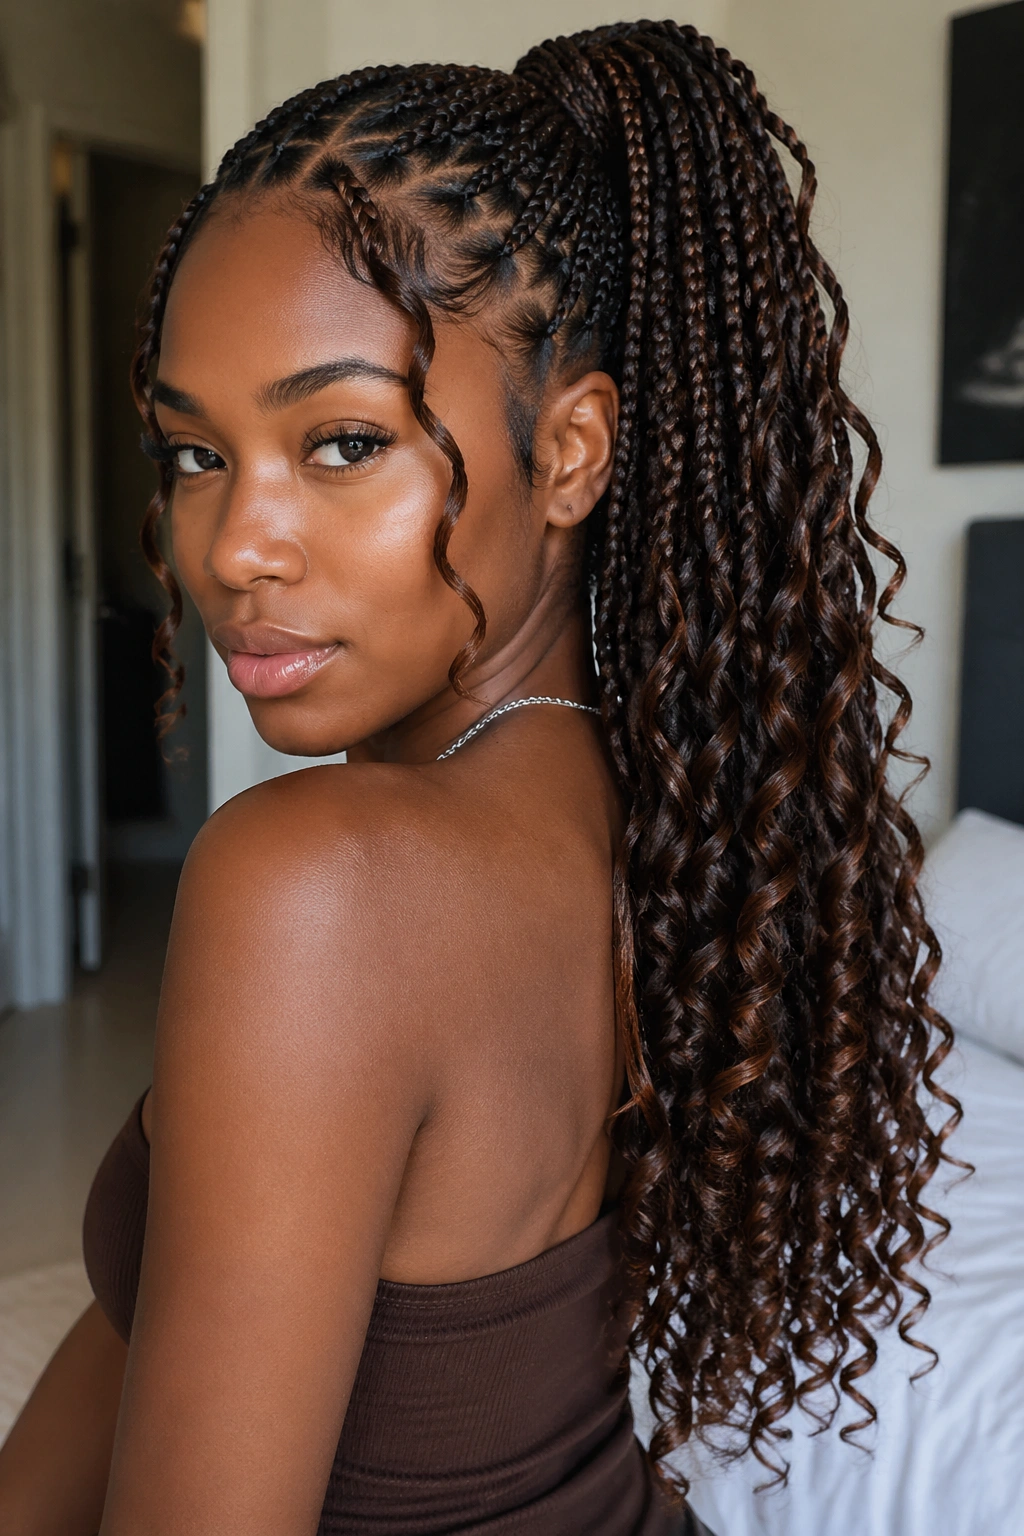
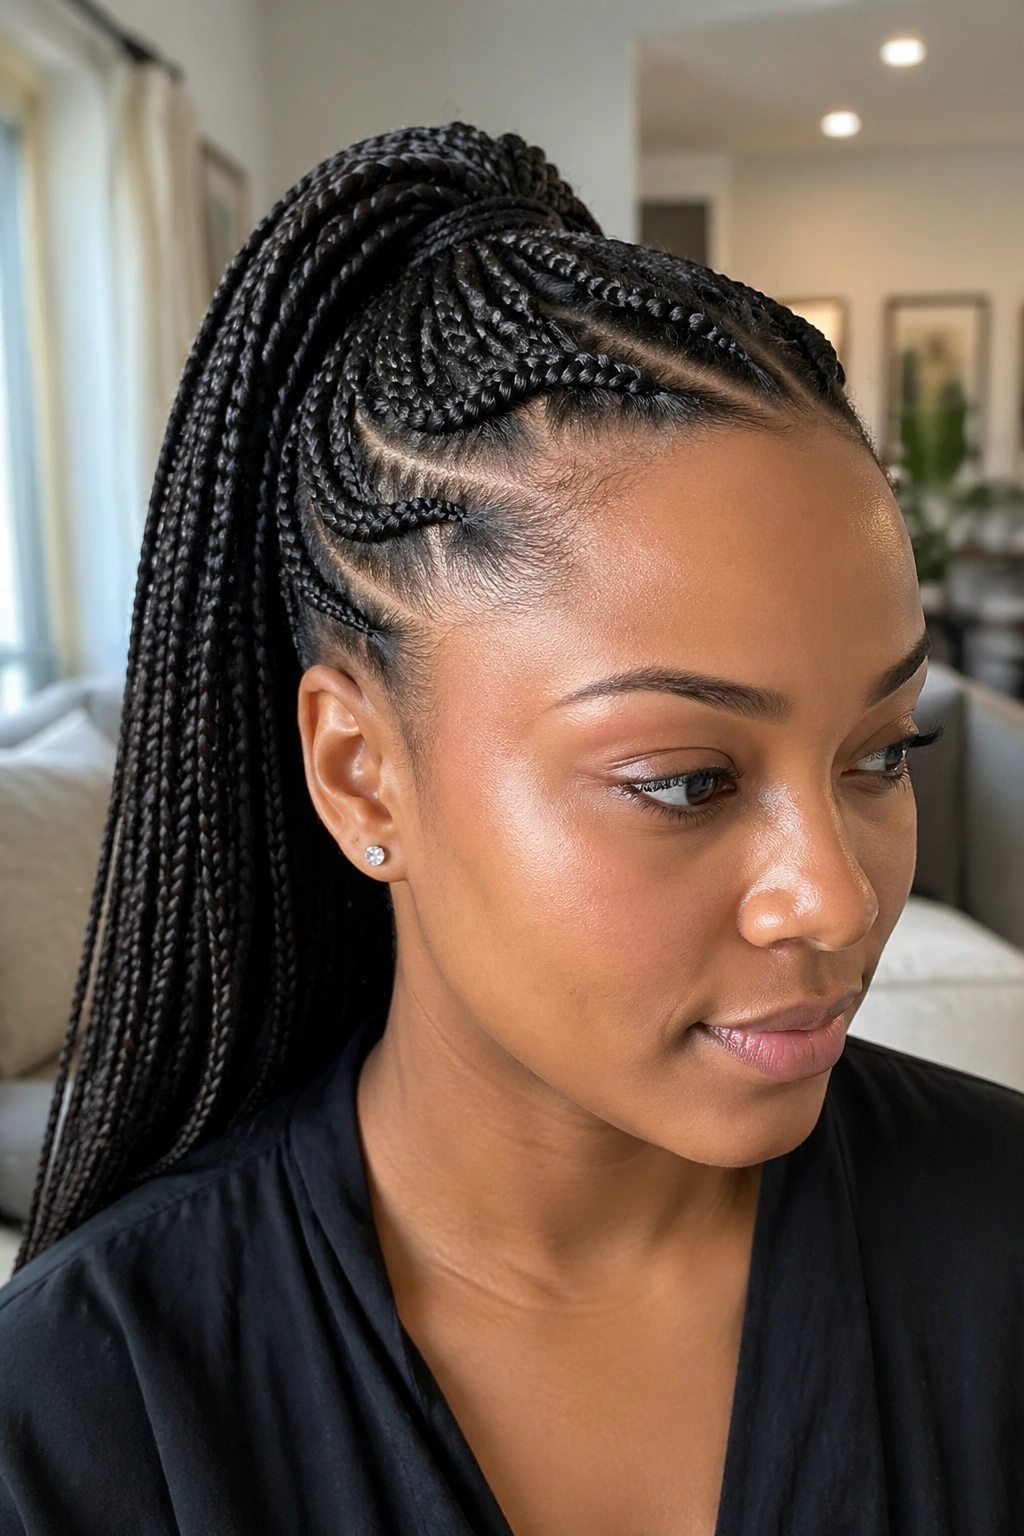
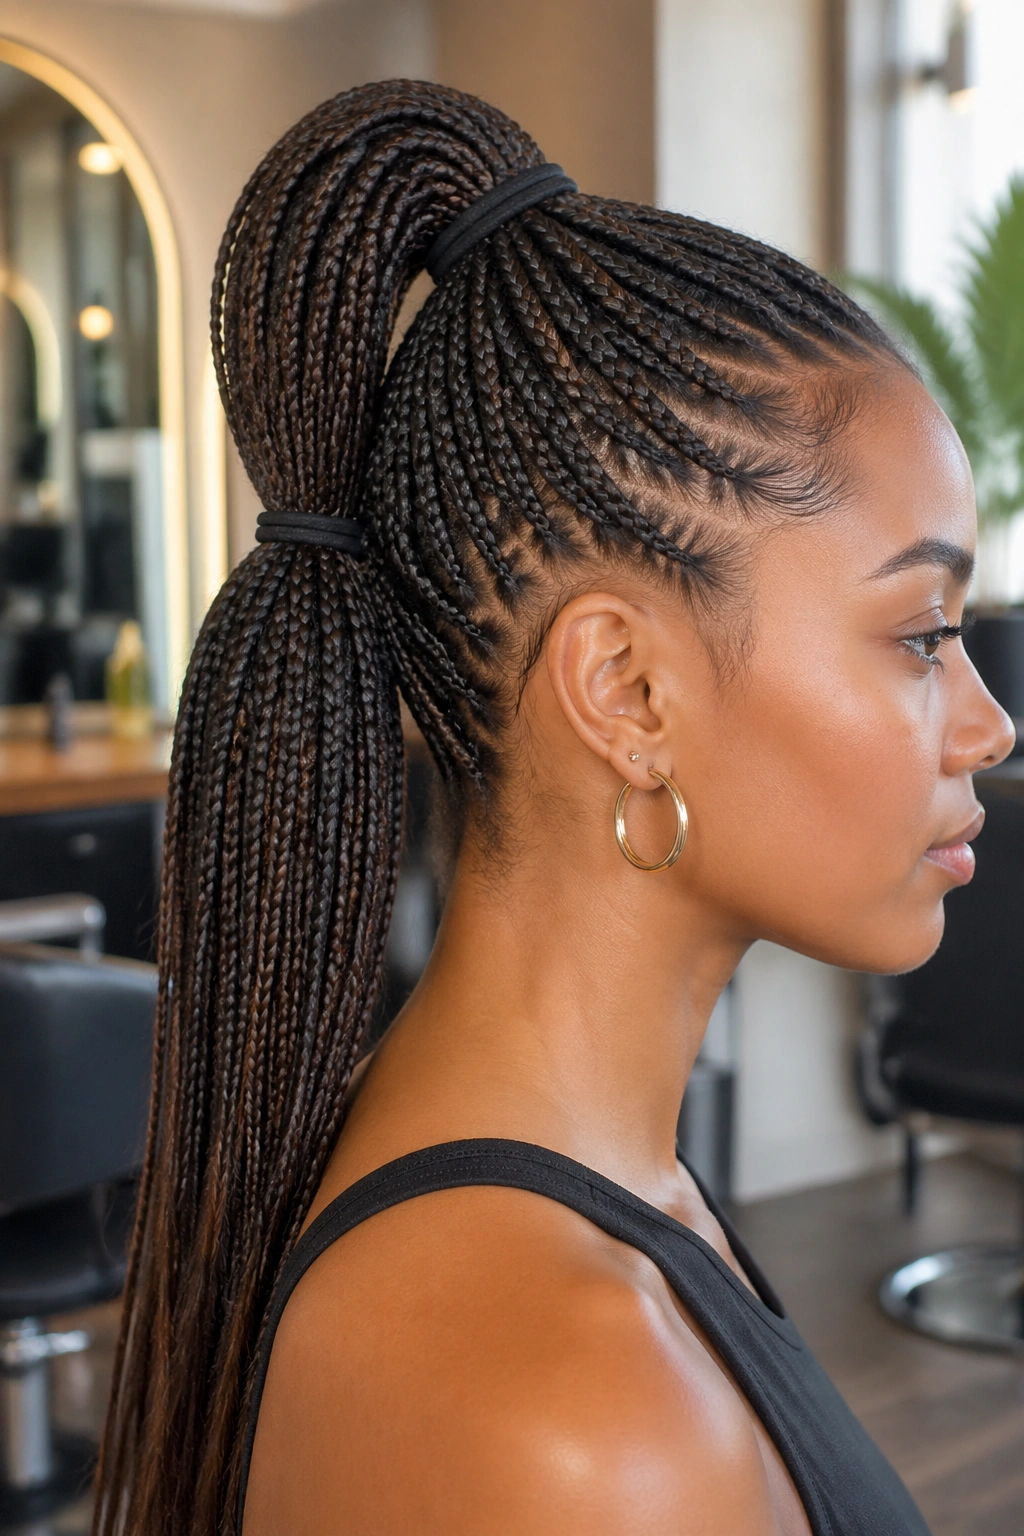
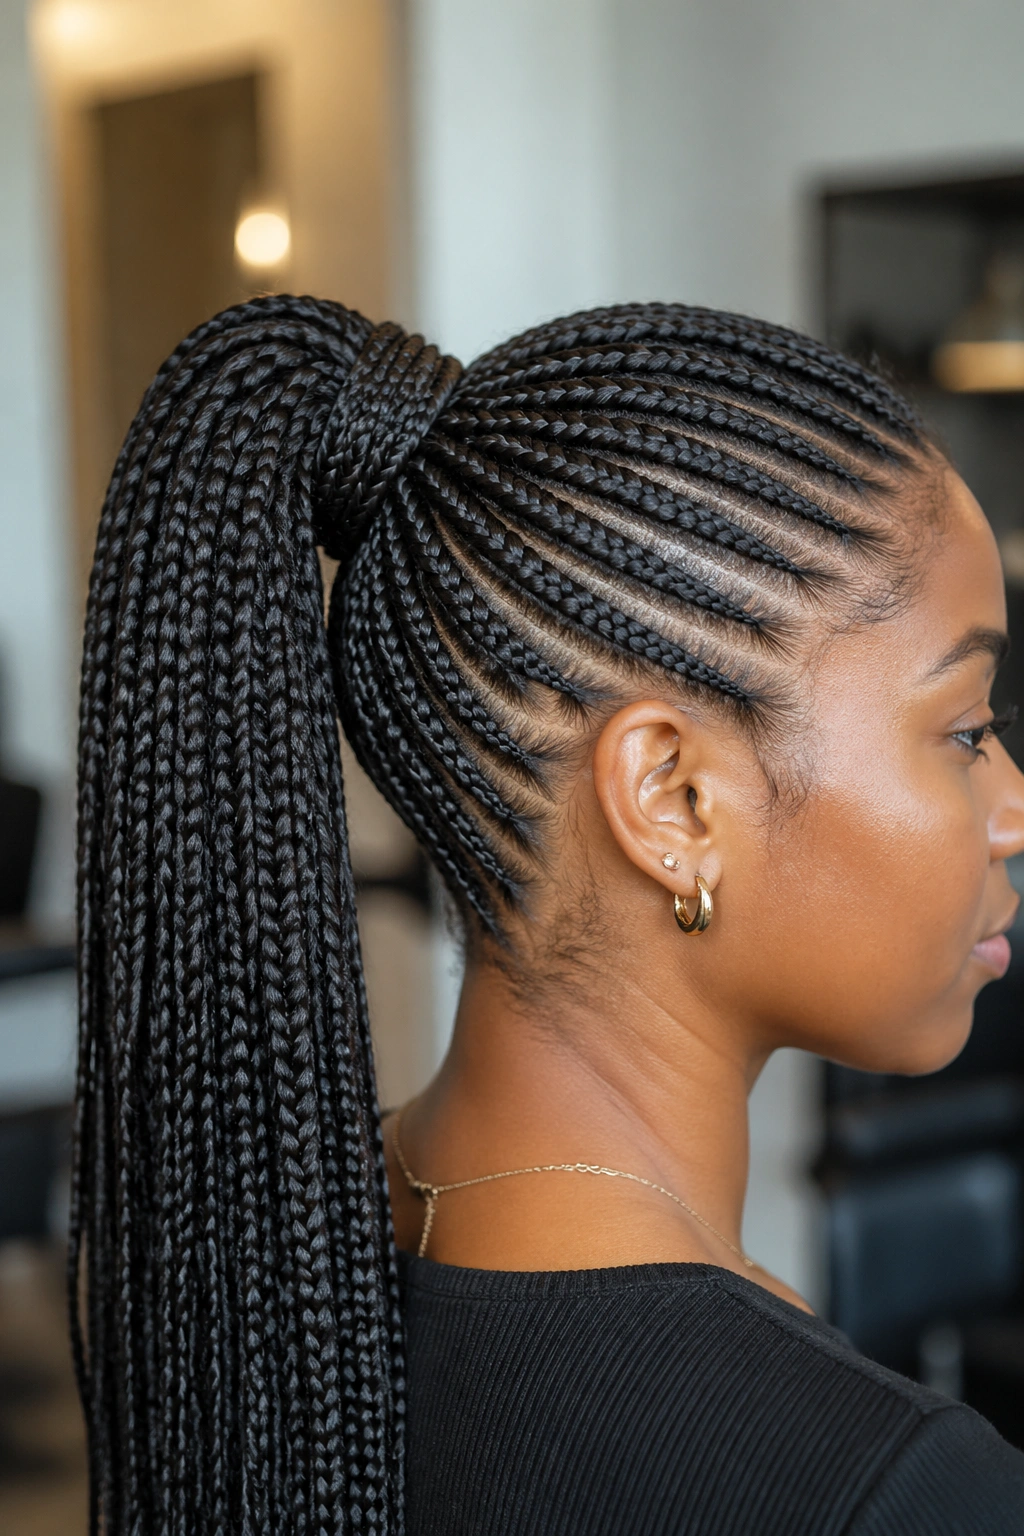
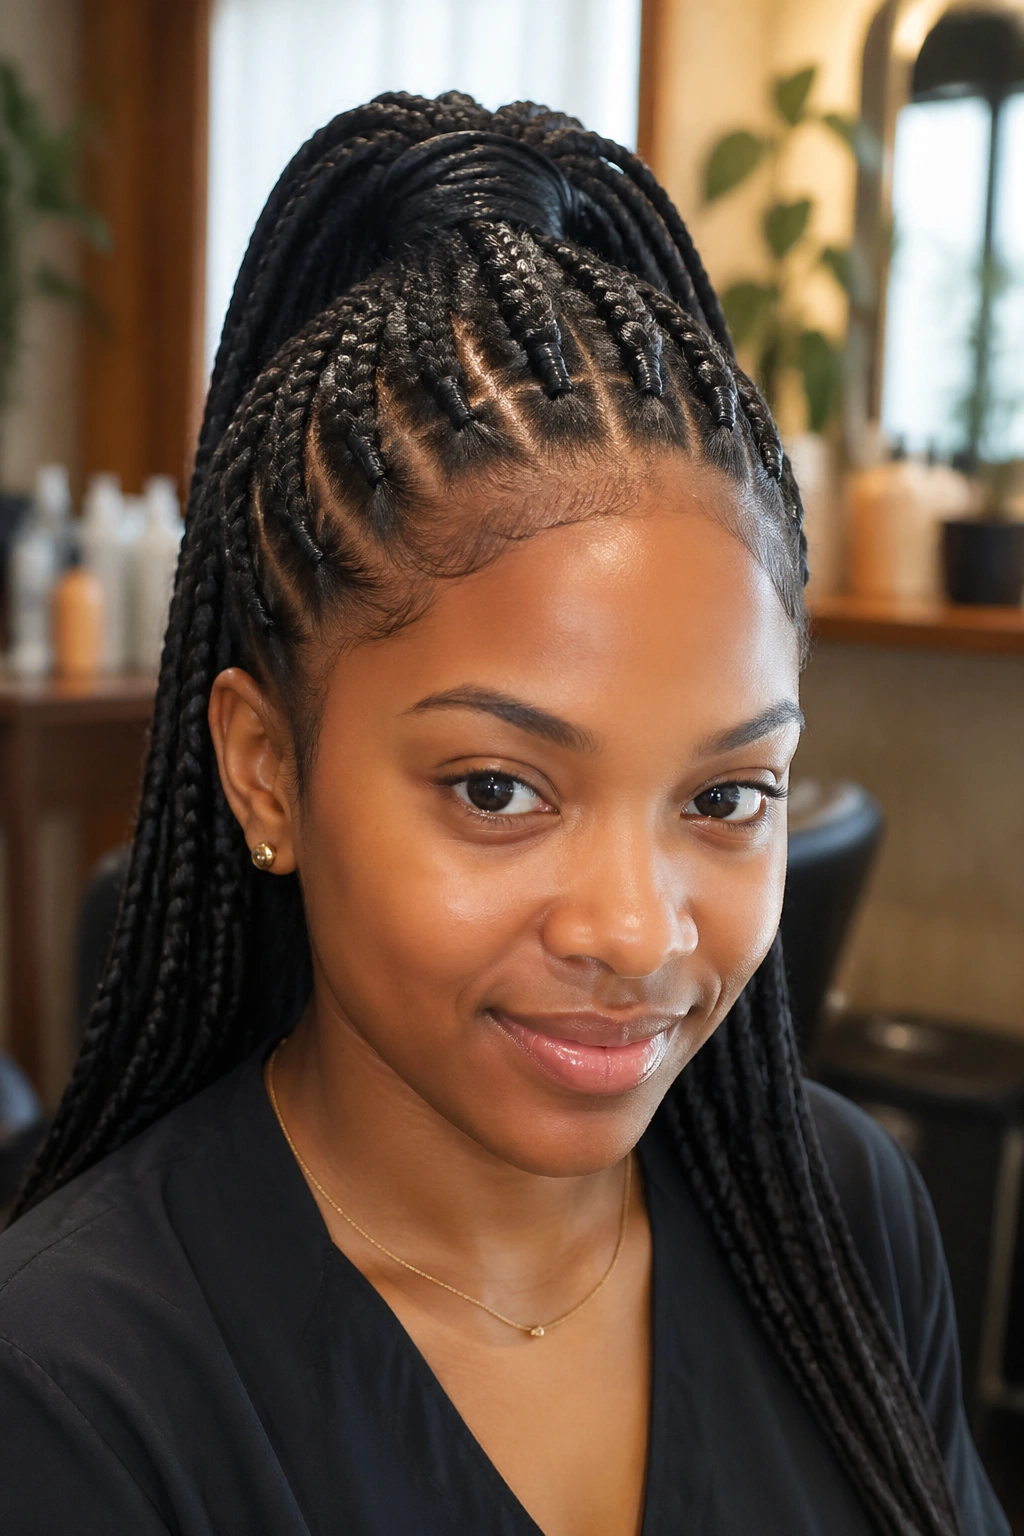
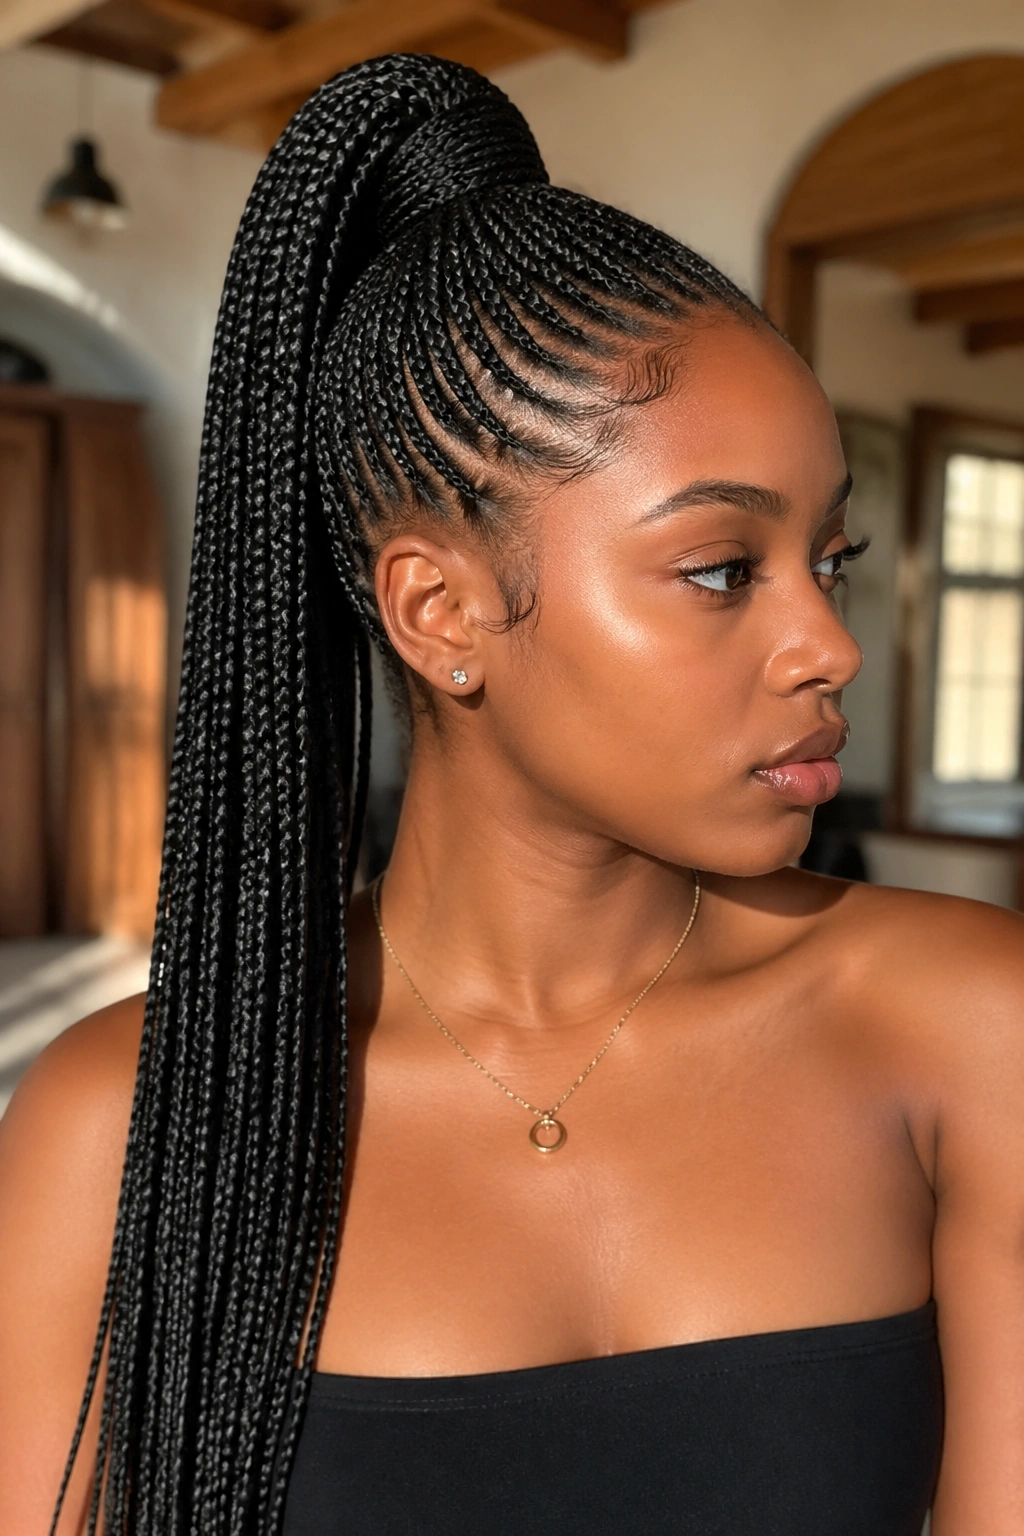
1. High Sleek Small Box Braid Ponytail
A high sleek ponytail is the one that gives the braids a lifted, crisp shape without needing a pile of accessories. Put the base at the crown, smooth the front only as much as needed, and let the length fall straight down the back or over one shoulder. The result is sharp, but not harsh. That matters.
What Makes the Shape Work
A high ponytail on small box braids looks best when the crown is flat and the sectioning is clean. I like to gather the hair from ear to ear, then brush the top layer upward with a soft bristle brush so the braids don’t fight the direction. A pea-sized bit of edge control on the hairline is enough; more than that starts to look heavy and shiny in a bad way.
- Use one strong no-snag elastic for the main hold.
- If the braid bundle is heavy, add a second elastic 1 inch below the first to share the weight.
- Wrap one braid around the base so the band disappears.
- Keep the ponytail slightly back from the very front hairline so the pull stays comfortable.
Best tip: if the style feels too tight at the crown, move it down by about 1 inch. That small shift changes everything.
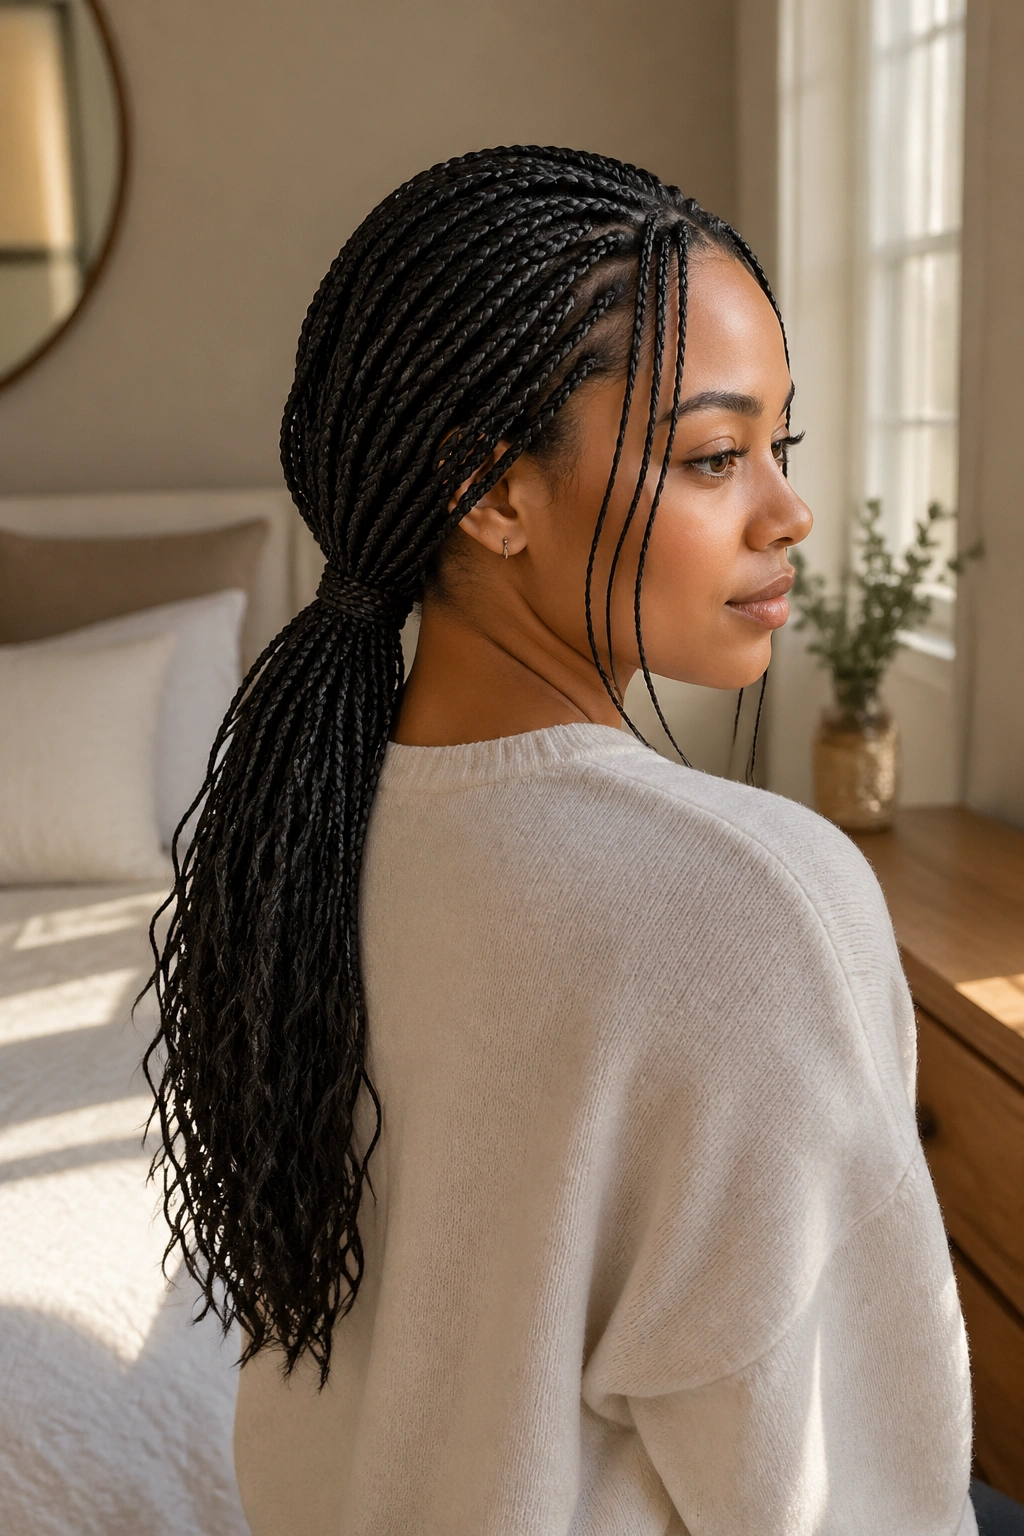
2. Low Nape Ponytail
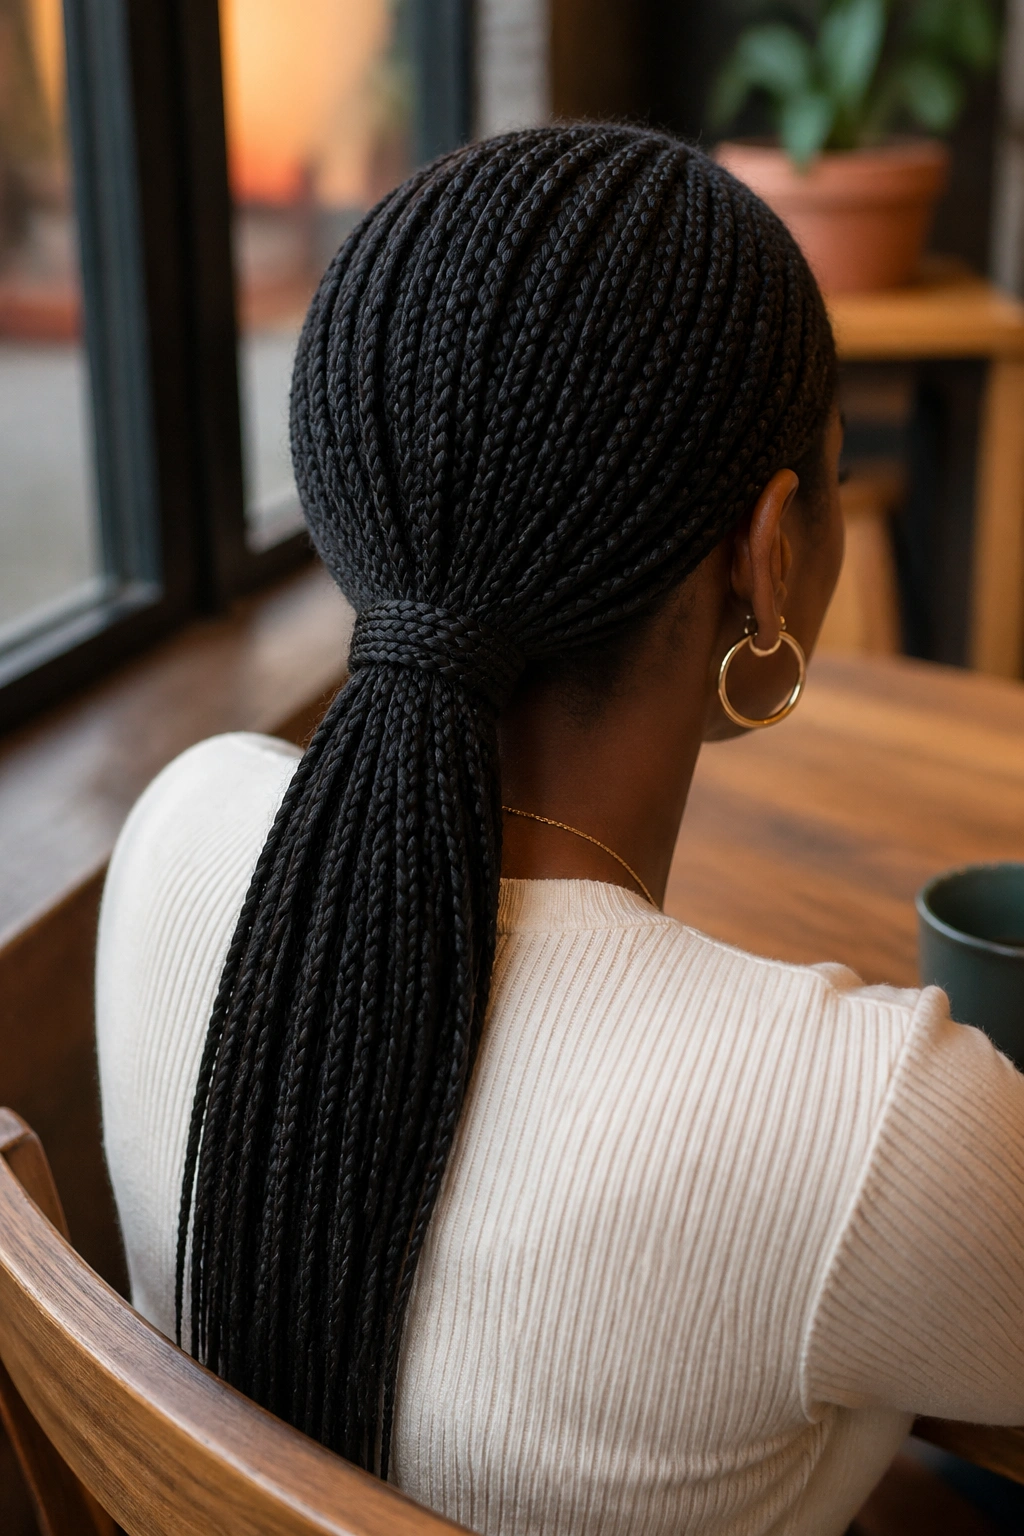
The low nape ponytail is the one I reach for when the braids have started doing their own thing. It sits quietly at the base of the neck, which means it works under collars, jackets, and seat belts without constant adjustment. There’s a reason people keep coming back to it. It behaves.
One braid wrapped around the base is enough here. You do not need a lot of product, and you do not need the crown plastered flat. In fact, a little softness at the top makes the style look better. If the braids are fresh and stiff, let the ponytail sit a half inch off the neck instead of hugging the skin too tightly. That gives the style room to settle.
Easy. And kind to your edges.
A low nape ponytail also makes long braids feel a little lighter. The weight drops lower, which usually feels better after a long day. It’s the sort of style that looks calm even when the rest of your outfit is doing the most. If you want polish without fuss, this is a dependable place to live.
3. Side-Swept Ponytail
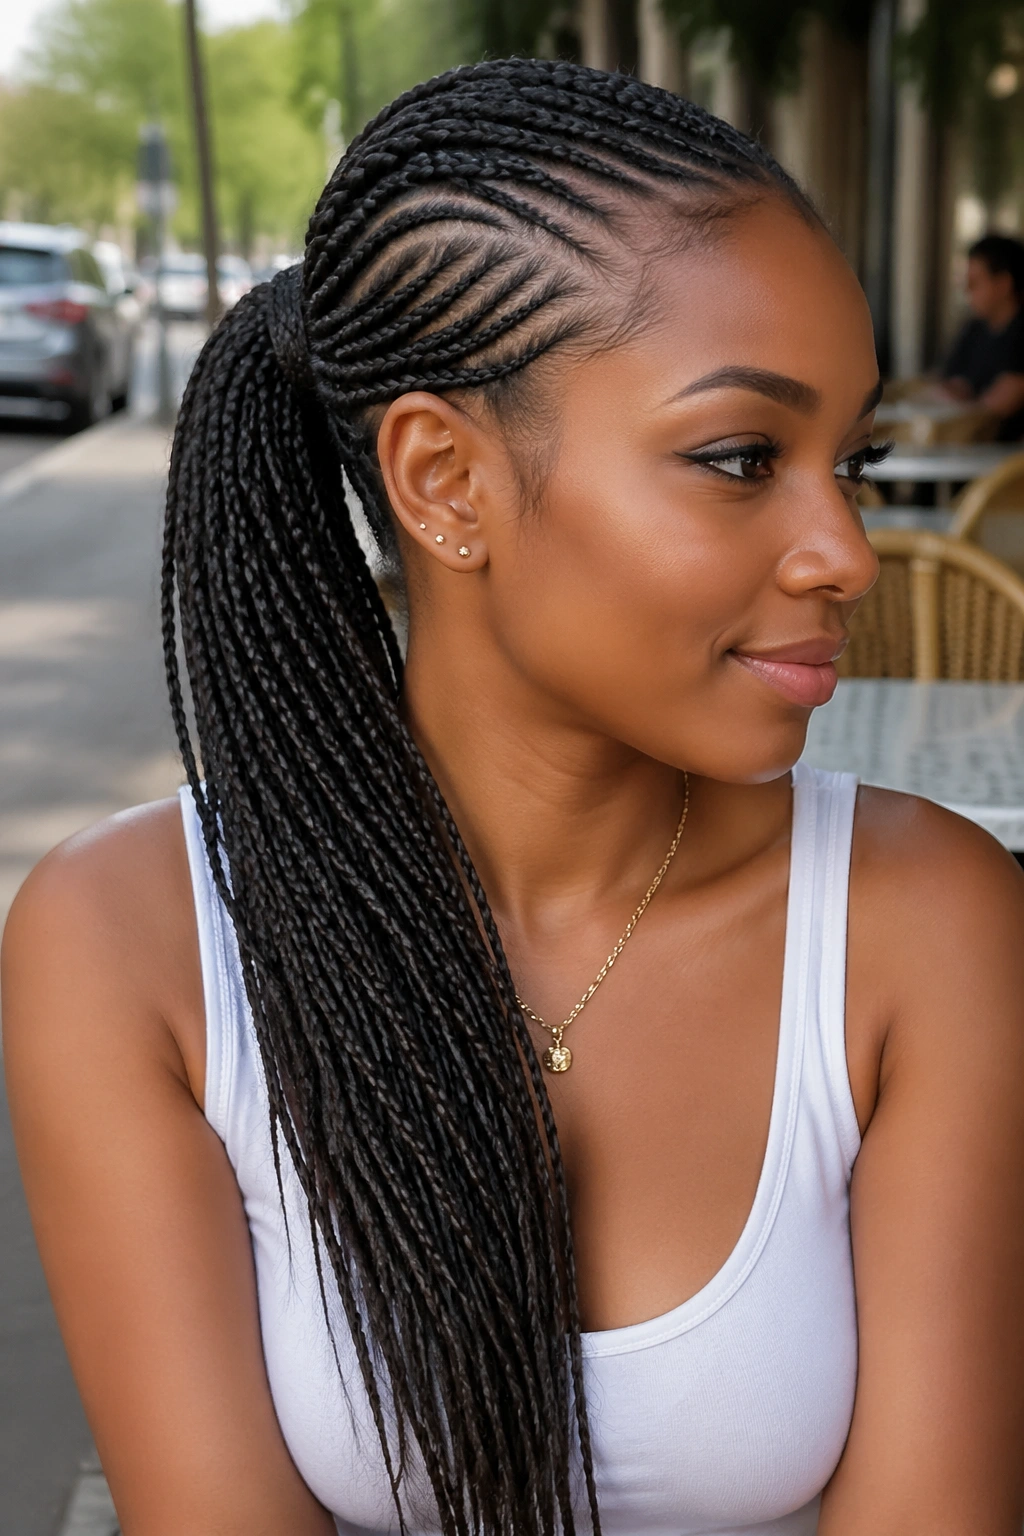
Why does a side-swept ponytail look softer than a center one? Because the weight shifts. The whole shape stops feeling rigid the second the ponytail leans to one side, and small box braids handle that slant beautifully.
How to Keep the Front Smooth
Start with a diagonal part from one temple toward the crown, then gather the braids just behind the heavier side of the face. You want the base to sit firm, but not centered like a school picture. A side-swept ponytail has a little attitude baked in, which is exactly why it works so well with box braids.
- Trace the part with a rat-tail comb before you gather anything.
- Keep the front smooth with a thin layer of gel, not a thick coat.
- Let the ponytail fall over the opposite shoulder for more motion.
- If the braid length is long, secure the tail with a second elastic halfway down so it does not drag.
This style is a good choice when you want earrings to show, or when a high ponytail would feel too severe. It also does a nice job of breaking up a strong jawline or a straight neckline. Small change. Big difference.
4. Bubble Ponytail
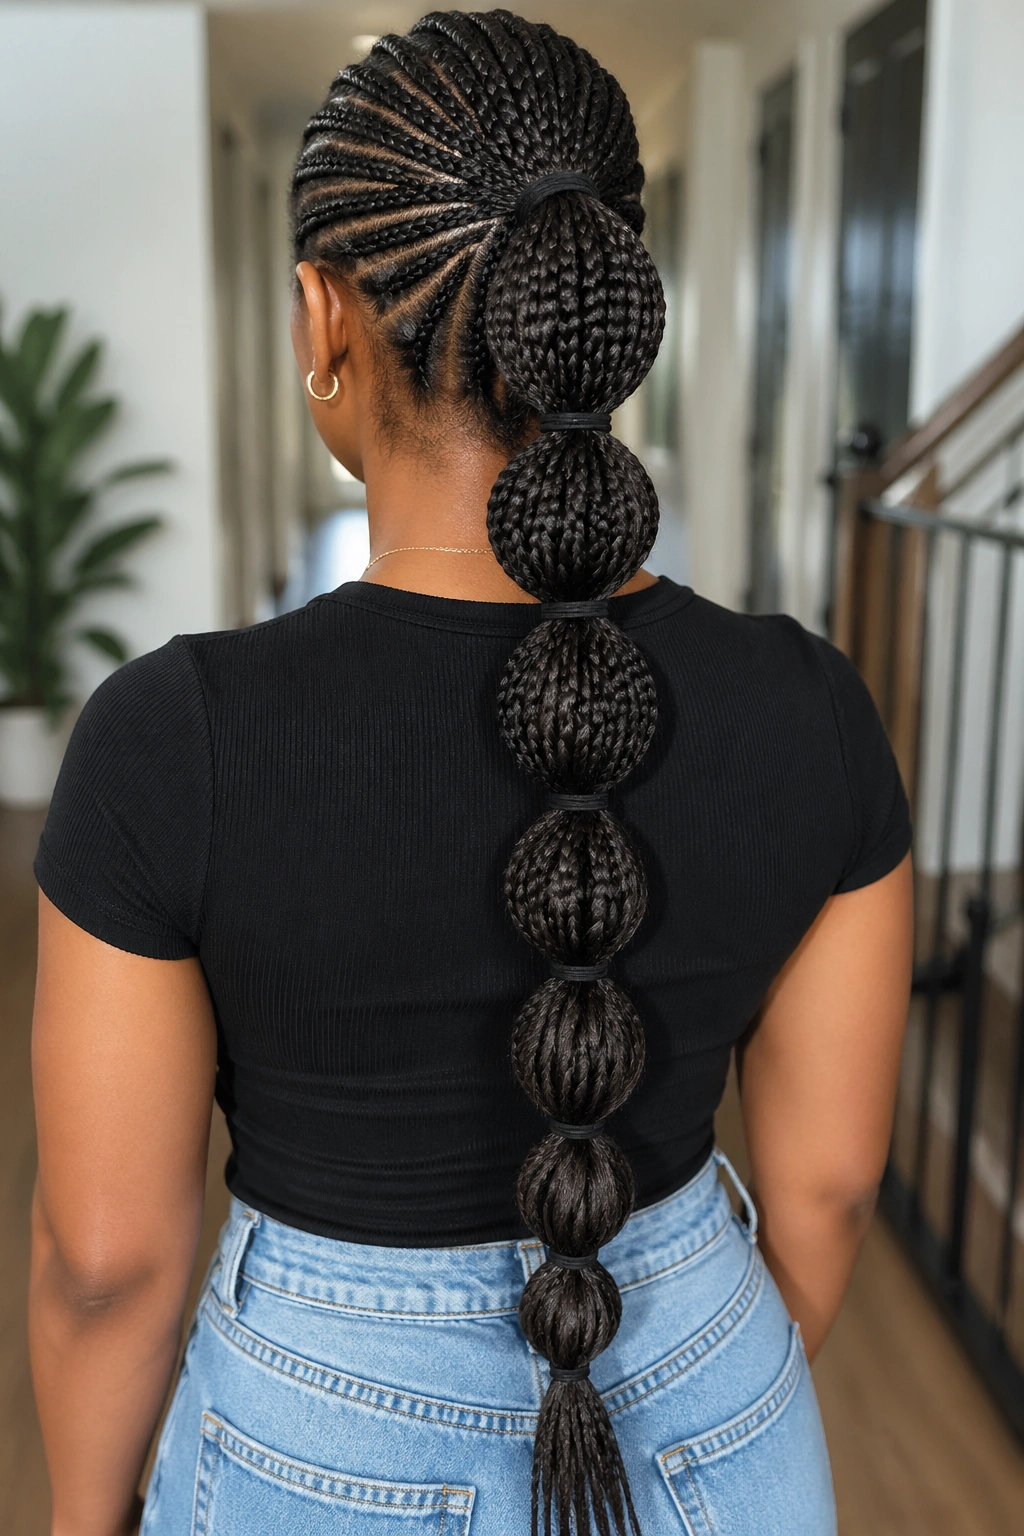
Bubble ponytails look playful, but on small box braids they also solve a practical problem: they keep a long tail from swinging into every doorway, zipper, and purse strap you own. I have always liked that mix of fun and usefulness. The style looks planned, not random, and that is harder to pull off than people think.
The Shape Comes From the Bands
Tie the ponytail first, then add clear elastics every 2 to 3 inches down the length. After that, gently puff each section between the bands with your fingers until the spaces look rounded. Don’t yank. You want volume, not frizz.
- Use 4 to 8 mini elastics depending on braid length.
- Keep the first band snug and the rest a little softer.
- Make each bubble roughly the same size for a clean finish.
- Stop puffing once the sections look full, not fuzzy.
The style works best when the braids are long enough to create at least three visible bubbles. Shorter braids can still do it, but the effect is more subtle. And if you over-fluff the sections, the braid pattern disappears. A little shape is enough.
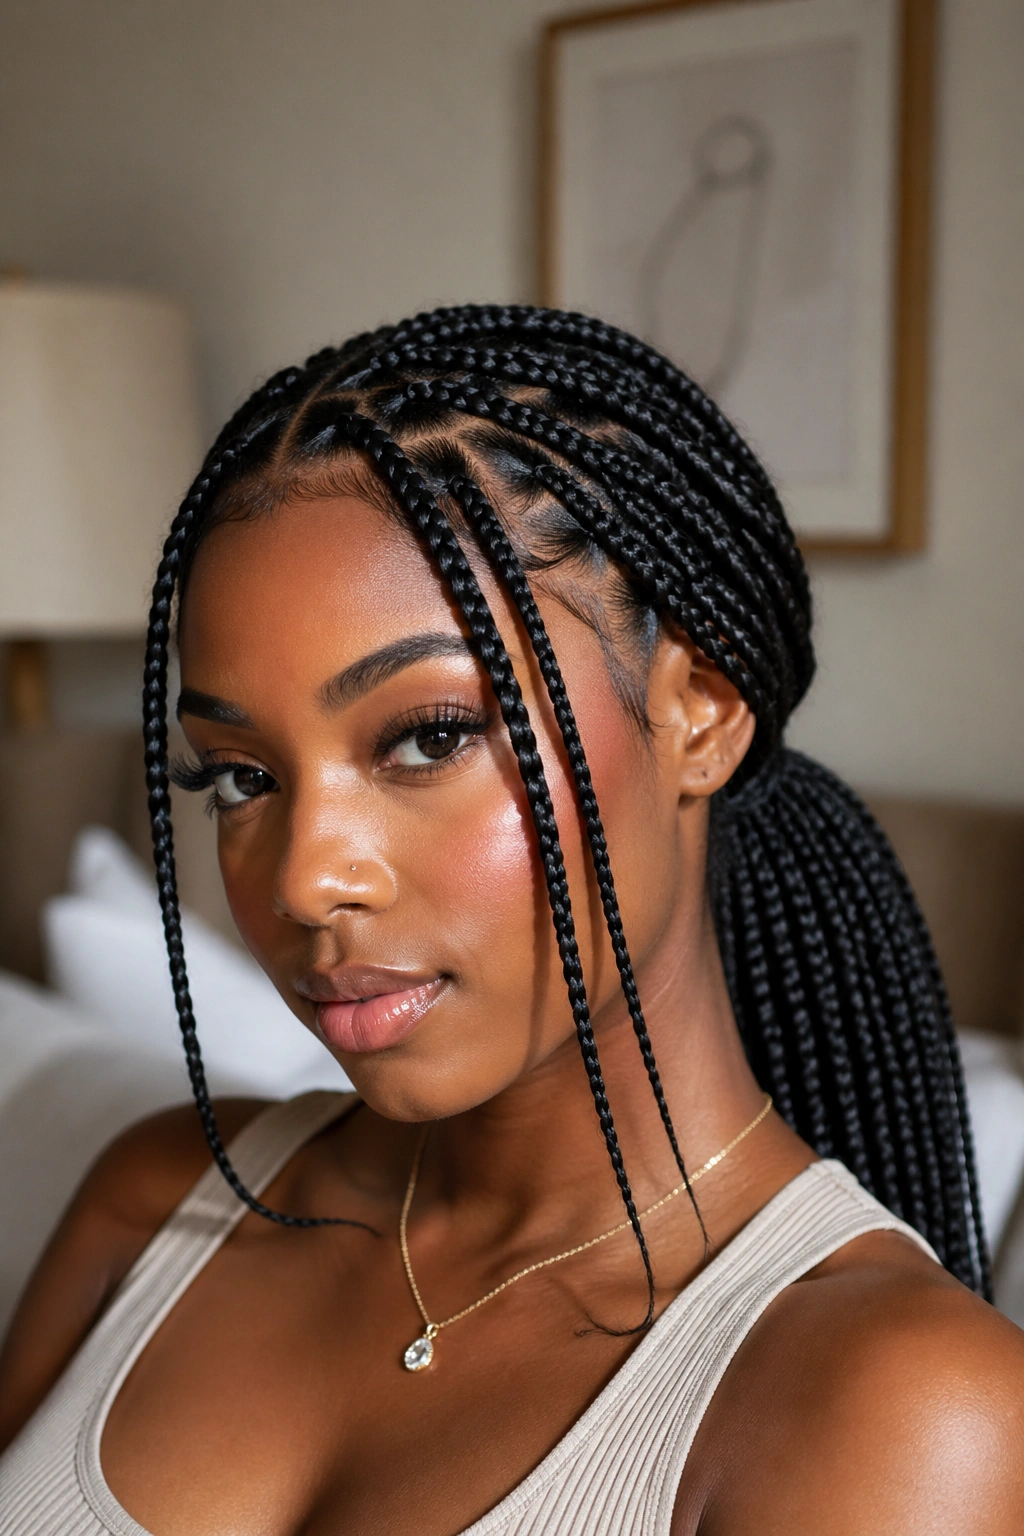
5. Half-Up Small Box Braid Ponytail

Half-up small box braid ponytails are the easiest way to show length without wearing all of it on your neck. That alone makes them worth keeping in the rotation. You get the lift at the top, the movement at the bottom, and a style that feels finished even when the braids are a little older.
The best half-up version usually starts from temple to temple. Pull the top section back, keep the bottom section loose, and smooth the crown only where it needs smoothing. I like this one for braids that have settled in a bit, because the lower section distracts from any minor puffiness at the roots. It also gives the face a cleaner frame without making the whole head feel tight.
If the braids are waist length, half-up is a relief. Seriously. You still get the drama of long braids, but the weight is spread out. That means less tugging, less neck heat, and fewer moments spent tossing the length over your shoulder.
A single wrapped braid at the base makes the top section look finished. Or don’t wrap it. The looser version has its own charm, especially when the parting is neat and the rest of the braids fall in a straight curtain behind the shoulders.
6. Wrapped-Base Ponytail
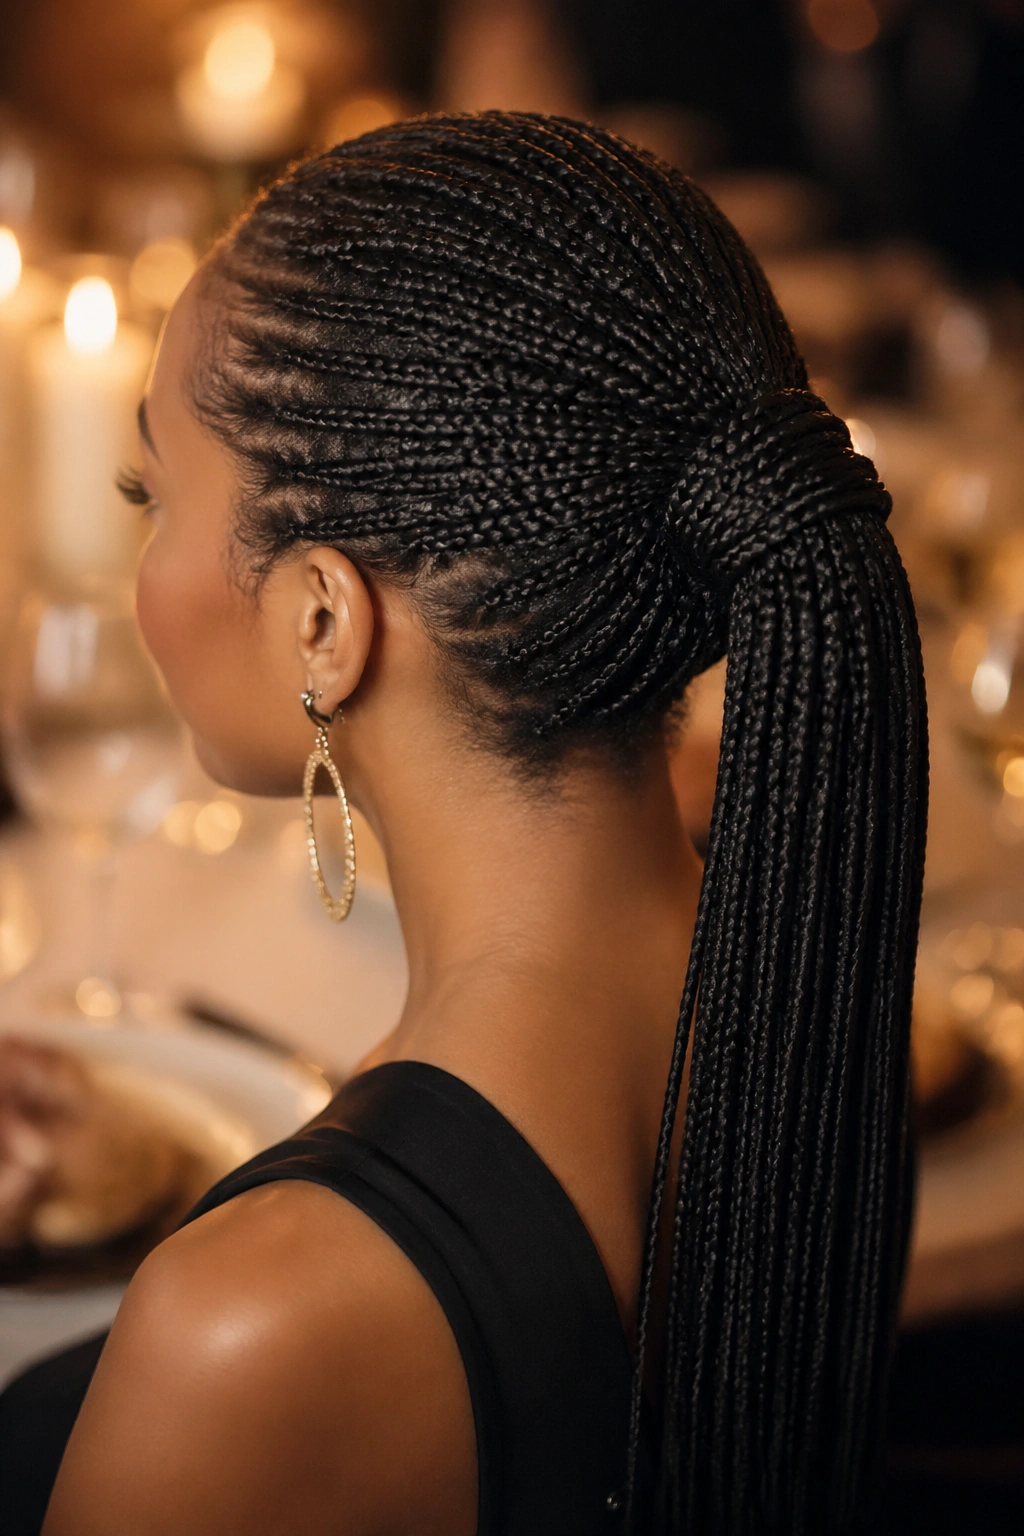
Unlike a ponytail held with a bare elastic, a wrapped base gives the whole style a cleaner edge. It hides the hardware. That’s the whole point. Once the band disappears, the braids look more deliberate and less like they were thrown up between errands.
The trick is to use a braid from underneath the ponytail so the wrap blends into the bundle. Circle it around the elastic one or two times, then tuck the end under the band or pin it discreetly underneath. A small bobby pin works, but only if it matches the braid color closely. Otherwise it announces itself, and nobody asked for that.
Wrapped bases work especially well on small box braids because the braid size makes the spiral look tidy instead of bulky. Bigger braids can make the wrap look thick. Small braids keep it neat.
I’d choose this style for dinners, photo days, or any moment when the ponytail needs to look finished from every angle. It is a small thing, but the base changes the whole mood.
7. Curly-End Ponytail
Curled ends change the whole mood of small box braid ponytails. Straight hanging lengths can look heavy, especially when the braids are long. Curled ends soften the line and make the ponytail move with a little more bounce.
If the ends were set with flexi rods or perm rods when the braids were installed, this style is easy. The ponytail already has shape waiting at the bottom. If not, a little mousse worked through the ends and a satin scarf wrapped around the tail for 15 to 20 minutes can help encourage a bend without making the braids stiff.
The key is not to overload the look with extra accessories. Curled ends already do a lot. A few cuffs or beads are enough if you want detail. Too much, and the style starts feeling crowded.
I like this one when the braids need a softer finish. It works especially well on medium-length braids, where the curl sits close enough to the shoulder to show off the shape without getting tangled in everything.
8. Double Pigtail Ponytails
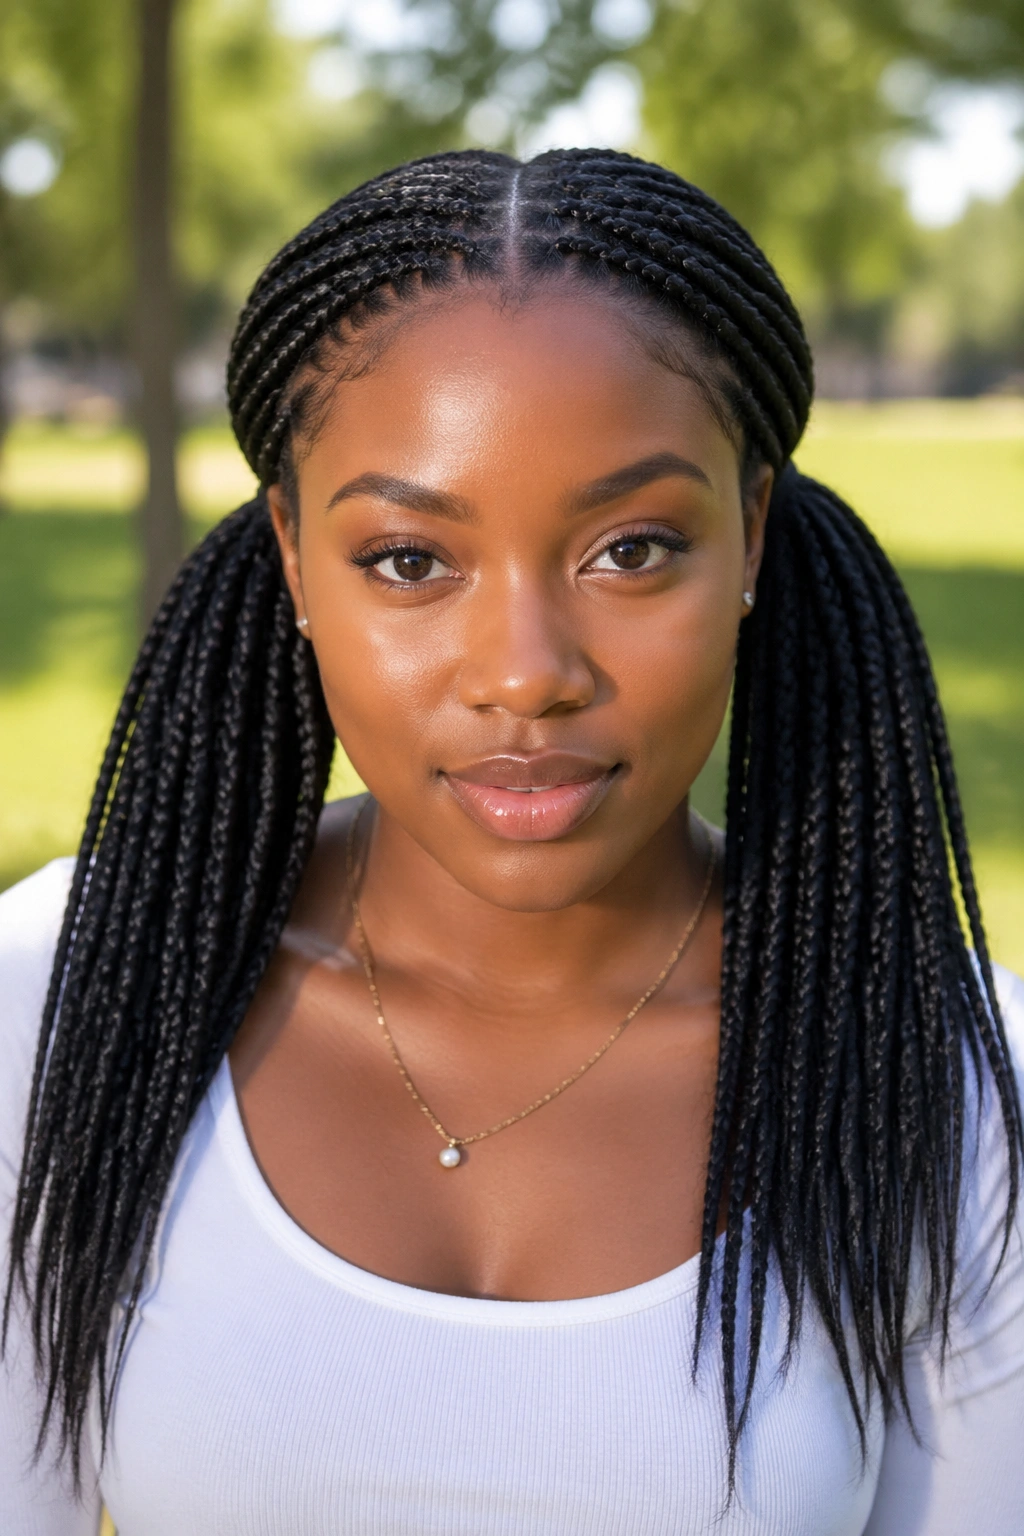
Can pigtails look grown and clean? Absolutely, if the part is straight and the two sides are even. On small box braids, double ponytails have a crisp, lively feel that does not tip into childish unless the parting is sloppy or the ties sit too high.
Where the Part Needs to Land
Use a center part that runs from the front hairline all the way to the nape. I like to check it in the back before I tie anything, because a line that drifts off by even half an inch shows fast. Then gather each side at the same height, either just behind the ears or a little lower if the braids are long.
- Make both ponytails the same size, even if one side feels fuller.
- Keep the base low if the braids are heavy.
- Use two small elastics on each side if one tie starts to slip.
- Leave the edges soft; too much gel makes the shape look stiff.
This style gives motion to the braids without sacrificing structure. It also works well when you want your hair off your face but do not want the weight of one big ponytail.
9. Twist-Back Crown Ponytail
If the front braids keep slipping out of the ponytail, two flat twists along the hairline fix the problem. That’s why this style is such a good one to keep around. It adds shape at the crown without asking for extra decoration.
Start by sectioning off a slim strip from each temple, then twist those sections back toward the crown before joining them into the ponytail base. You only need enough hair to make the twist visible; if the sections are too wide, the front starts looking crowded. Keep the rest of the braids smooth and gathered.
- Section about 1 inch from each temple.
- Twist each side back before tying the ponytail.
- Join the twists at the mid-crown with a covered elastic.
- Leave the tail loose so the overall shape still reads as a ponytail, not a bun.
This style is a good pick when you want a little more detail than a plain ponytail gives you, but not a full-updo. It feels polished without looking overworked.
10. Beaded Small Box Braid Ponytail
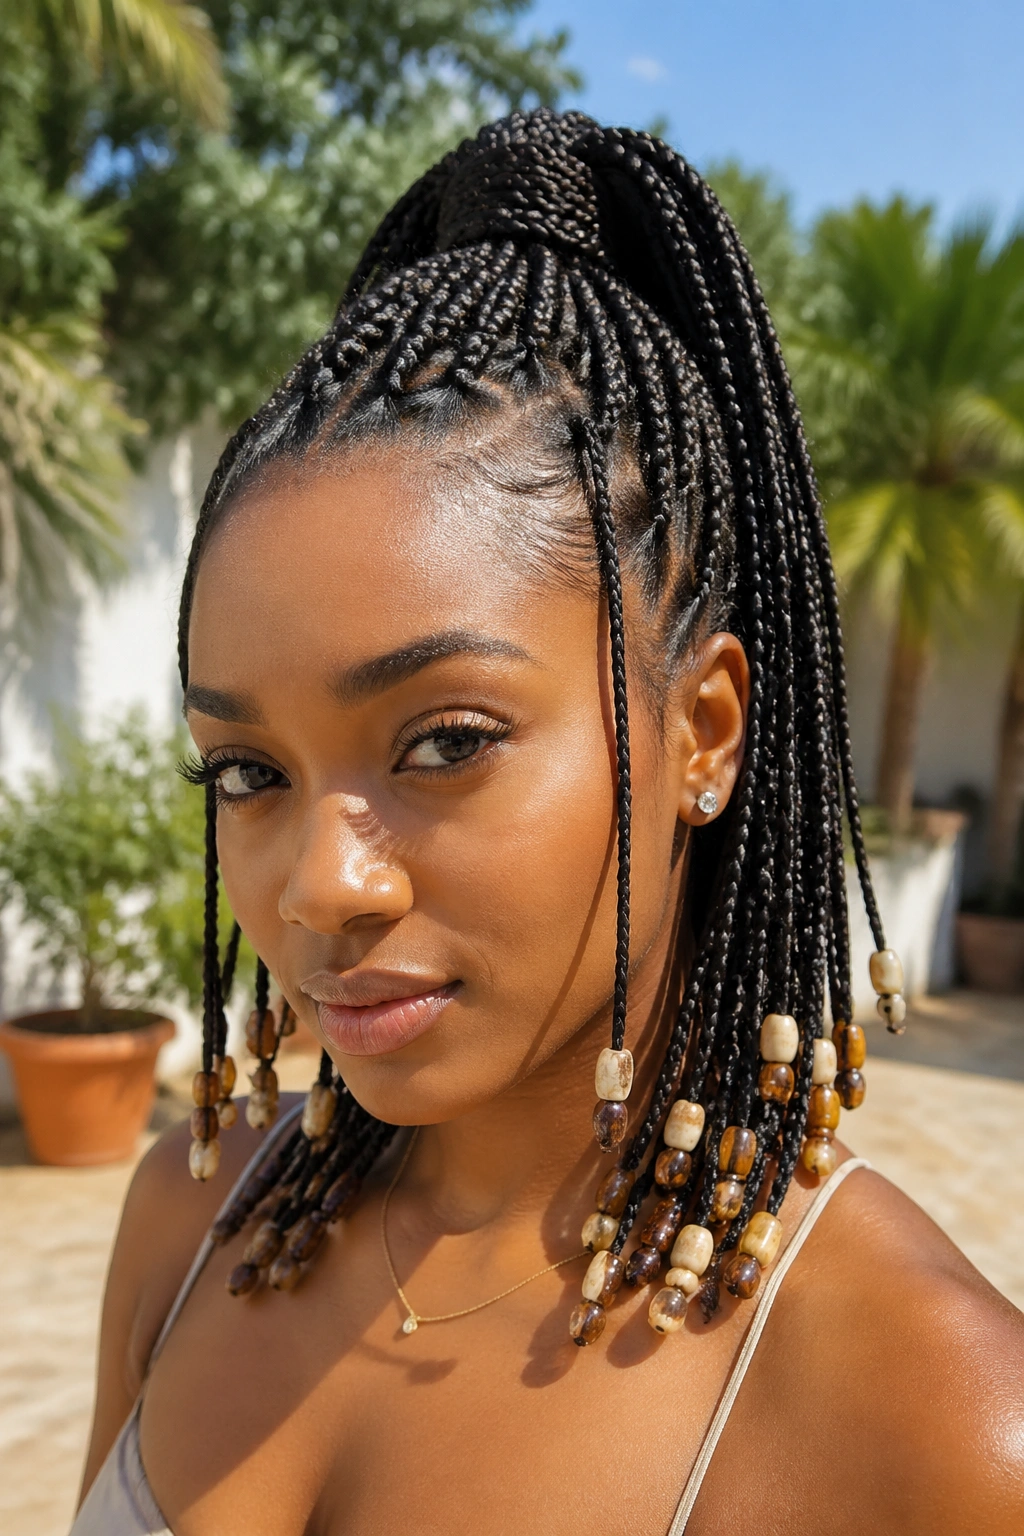
Beads change the sound of a ponytail as much as the look. A few small beads at the ends give the braids a little weight and a tiny bit of movement, which is especially nice when the ponytail is high or side-swept. Too many beads, though, and the style gets noisy in every sense.
I like using beads sparingly on small box braid ponytails. Three to five on each side is enough unless you want the whole tail decorated. Mix a few plain braids in with the beaded ones so the look doesn’t turn crowded. If the ponytail is high, use medium-size beads rather than oversized ones. Big beads can pull the tail downward and make the base work harder than it should.
Beaded ponytails are strong on their own. They do not need much help. A clean part and a simple wrap at the base usually do more for the style than adding another accessory. That’s the part people miss. The beads are the accent, not the whole sentence.
11. Zigzag-Part Ponytail
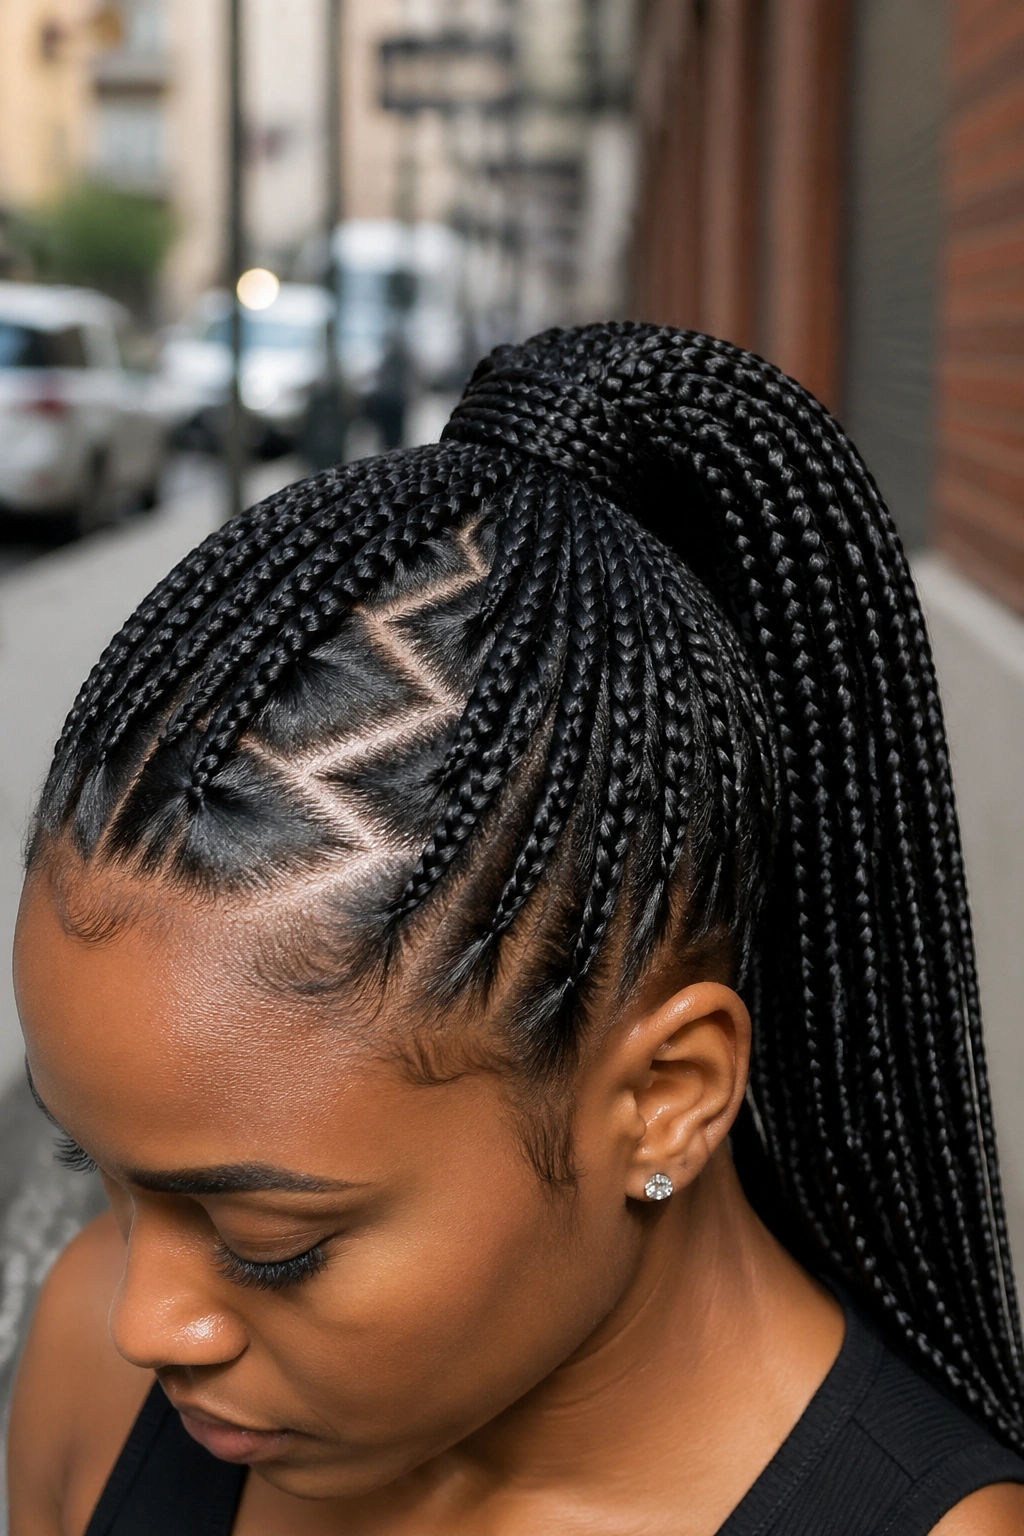
A zigzag part gives small box braid ponytails a sharper edge without changing the whole hairstyle. The pattern is visible right away, which makes even a simple low or mid ponytail feel planned. I like it when the braids themselves are neat and the parting gets to do the talking.
How to Get the Pattern to Show
Use a rat-tail comb and draw the zigzag in one steady pass. Do not keep going back over the line. That’s how the part gets fuzzy. Start at the front hairline, then angle the comb left and right in short diagonal moves until you reach the crown. Once the pattern is set, gather the ponytail low enough that the part remains visible.
- Keep each zigzag angle roughly the same size.
- Tie the ponytail at mid-head height so the pattern stays in view.
- Finish with a braid wrap if you want the base to look clean.
- Use only a light touch of foam near the part.
This is the style for someone who likes detail but does not want accessories crowding the braids. It does its work quietly.
12. Scarf-Tied Ponytail
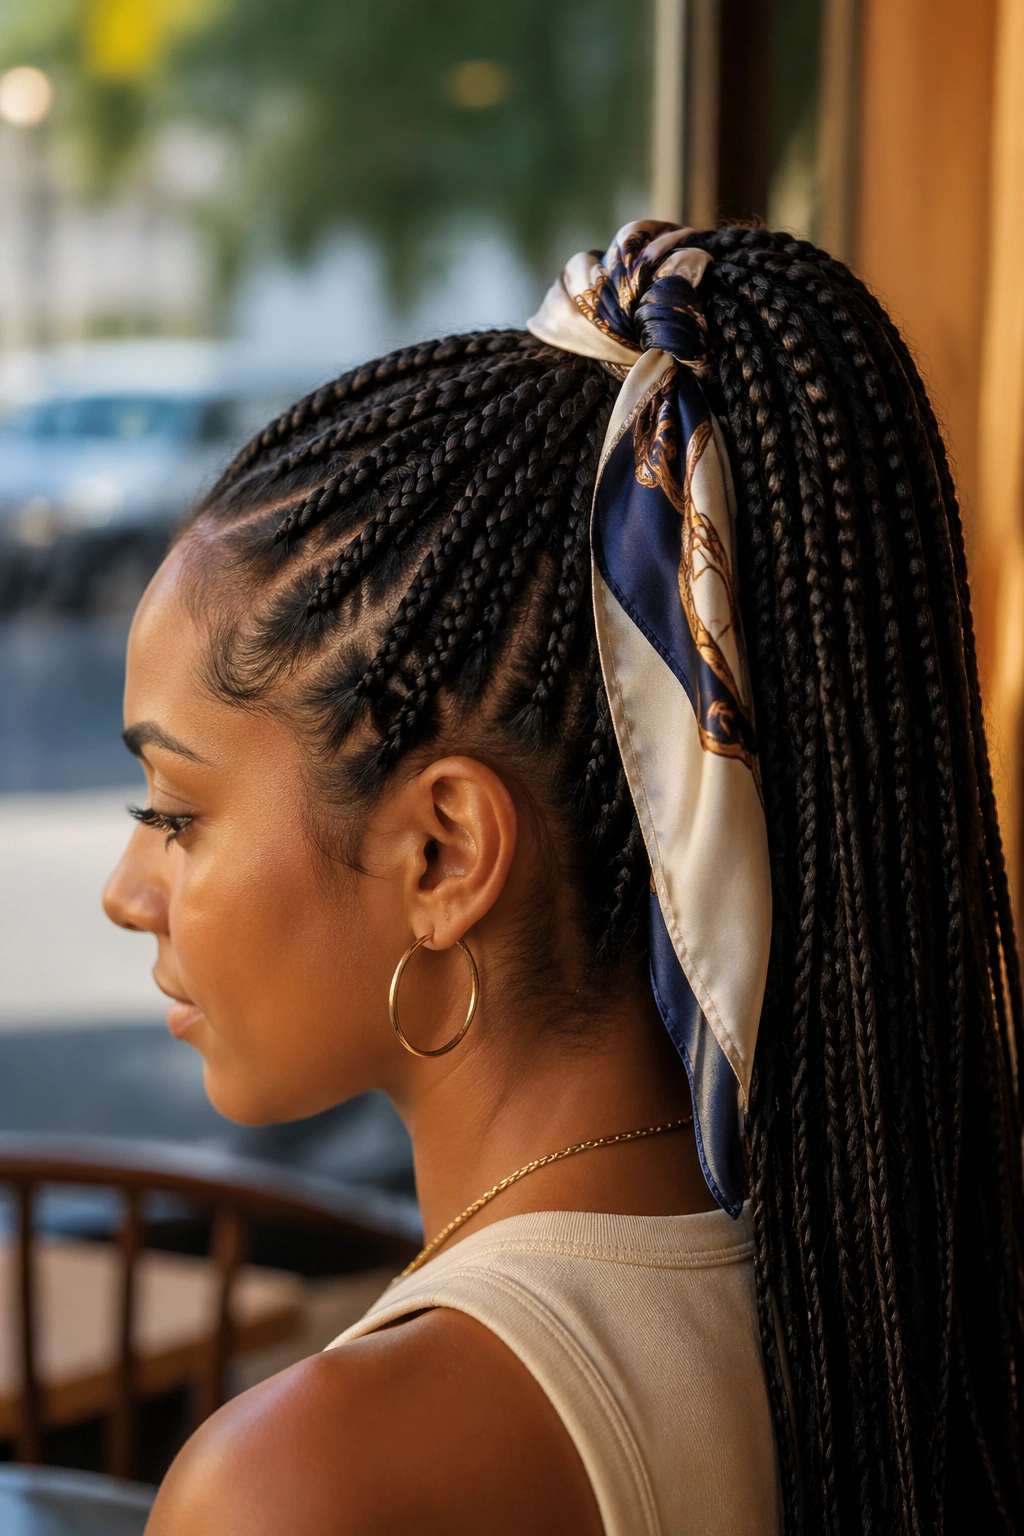
A scarf around the base can rescue braids that have started to puff at the roots. It can also turn a plain ponytail into something that looks planned instead of improvised, which is why I reach for it so often. A silk or satin scarf does a lot with very little effort.
Fold the scarf into a strip about 2 to 3 inches wide. Tie it around the ponytail base once, then knot it off to the side or under the tail so the knot does not press into the neck. If the scarf is printed, keep the pattern simple. Too much print fights the braids.
- Choose a scarf that is 1.5 to 2 inches wide when folded.
- Tie it over the elastic, not under loose hair.
- Keep the knot off-center for a softer finish.
- Use the scarf to cover frizz at the root, not to squeeze the ponytail tighter.
This style works well when the braids are a few days old and you want them to look intentional again. Not perfect. Intentional.
13. Asymmetrical Ponytail
Unlike a centered ponytail, an asymmetrical one puts the weight off to one side, which keeps the profile from feeling stiff. That small shift changes the whole line of the style. Small box braids take to it well because the texture already has enough movement to support the offset.
Place the base about 1 inch behind one ear rather than dead center at the back of the head. The ponytail can fall over the opposite shoulder or stay behind the neck, depending on how long the braids are. If the braids were trimmed unevenly, this style also helps hide that by making the tail feel chosen instead of matched.
It pairs nicely with one-shoulder tops, high collars, or earrings that need room to show. I would not make it too dramatic unless the rest of the outfit is plain. The ponytail itself already carries the idea.
The appeal here is simple: it breaks the symmetry without turning the hair into a project.
14. Stacked Ponytail
Stacked ponytails give small box braids more lift than a single tie ever will. That sounds like a small detail. It isn’t. When the braids are dense, one base can sag. Two tied points, one above the other, help the shape hold its height.
The setup is straightforward. Tie an upper ponytail first, then a second one just below it, about 2 inches apart. Let the upper bundle rest slightly over the lower one so the head looks taller and the base looks fuller. You can hide the lower tie with one wrapped braid if you want the finish to look cleaner.
This style works best when the braids are medium to long. If the length is too short, the stack can collapse into itself. If the braids are very heavy, the lower tie carries more of the load and keeps the front from pulling too hard.
It is not the softest option. It’s a little more structured than that. But if you want height without a harsh crown, stacked ponytails do the job well.
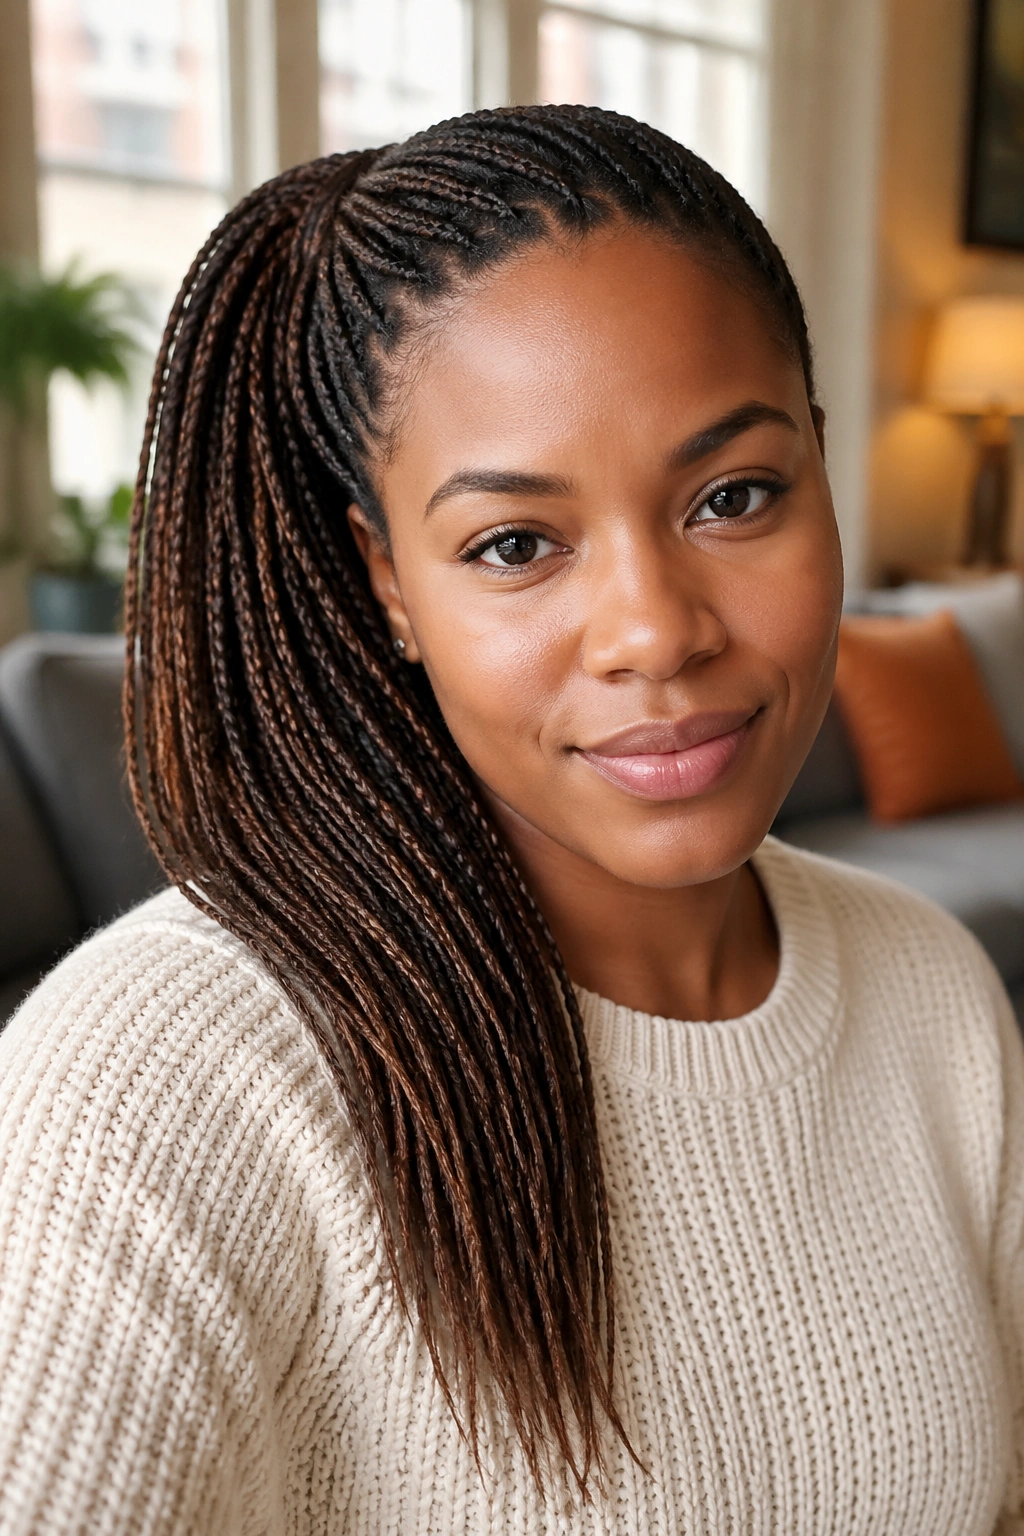
15. Face-Framing Ponytail
Do you want the face open but don’t want every braid pulled back? Leave a few braids out on purpose. That is the whole trick. A face-framing ponytail keeps the hairline cleaner while letting a couple of braids fall near the cheeks or temples.
How Much to Leave Out
For a neat look, leave one braid per side near the front. If you want a softer frame, use two slim braids per side, but stop there. More than that and the style starts to look unfinished. The point is choice, not accident.
Pull the rest of the braids back into a low or mid ponytail, then smooth only the sections that need smoothing. The loose front braids can stay straight or be tucked behind the ears later. That flexibility is nice. You can change the mood of the style without redoing anything.
This one works especially well when the braids are a little longer and heavier, because the front framing takes some of the visual weight off the back. It keeps the ponytail from looking like a block.
16. Low Loose Ponytail
The low loose ponytail is for days when you do not want your braids plastered flat. It sits at the nape like the low ponytail, but the crown keeps a little lift and the sides stay softer. The difference sounds minor. It changes the mood a lot.
I prefer this version when the braids are still settling and a sleek finish would feel too fussy. Instead of brushing every braid tight, use your fingers to gather the hair, then smooth the visible surface only. A touch of foam or a light mist of water is enough. Too much product steals the natural bend that makes the style look easy.
This style also feels kinder if you’ve had the braids in for a while and the roots need a break from heavy tension. It gives the hairline room to breathe. Not a lot. Enough.
The loose shape makes the ponytail feel lived in, in a good way. Clean, but not severe.
17. Rope-Wrapped Ponytail
If one braid wrapped around the base looks neat, two crossed braids look sturdier. That is why the rope-wrapped ponytail holds so well on small box braids. It gives the base a little more grip and a more finished edge, especially when the tail is long.
Take two thin braids from underneath the ponytail, twist them in opposite directions, then cross them around the elastic until the band is fully hidden. Tuck each end under the wrap or secure it with a tiny pin. The crossed wrap creates a cleaner line than a single spiral and tends to stay put a bit better when the ponytail moves around.
I like this version for thicker braids, because the extra wrap balances the weight. It is also a good choice when you want the ponytail to look deliberate from the back, not just from the front.
There’s nothing flashy here. That’s the appeal. It looks sturdy because it is.
18. Tucked-End Ponytail
What if you want a ponytail with less swing and more structure? Tucked ends are the answer. On small box braids, the style keeps the tail compact and stops the length from bouncing around when you walk.
When to Choose It
- The braids are long enough to hit your shoulders hard.
- You want less movement near the neck.
- The ends are frayed and you want them out of sight.
- You need a style that stays out of the way under a hood or scarf.
Gather the braids into a low or mid ponytail, then fold the tail back under itself and secure it with a second elastic or a discreet pin. The tucked shape should still show a little movement, but not the full length. If you cram too much hair into the fold, the base bulks up and the whole thing looks lumpy.
This style is more compact than elegant. That’s fine. Compact has its place.
19. Mini Ponytail Cluster
A mini ponytail cluster is what happens when one ponytail feels too plain and a full updo feels like too much work. You divide the braids into a few small ponytails across the crown or upper back of the head, then bring those sections together into one main tail. It breaks up the weight without losing the ponytail shape.
Each mini section should stay around 1.5 to 2 inches wide so the top doesn’t turn into a pile of random ties. Four sections usually feel right for small box braids, though three works if the braids are shorter. The effect is a little textured, a little architectural, and much more interesting than one flat bundle.
I like this style when the braids are dense and need help holding shape at the top. It spreads the tension around instead of loading everything into one point. That means less strain and a better silhouette.
It is not the quietest option. Good. Not every ponytail should be quiet.
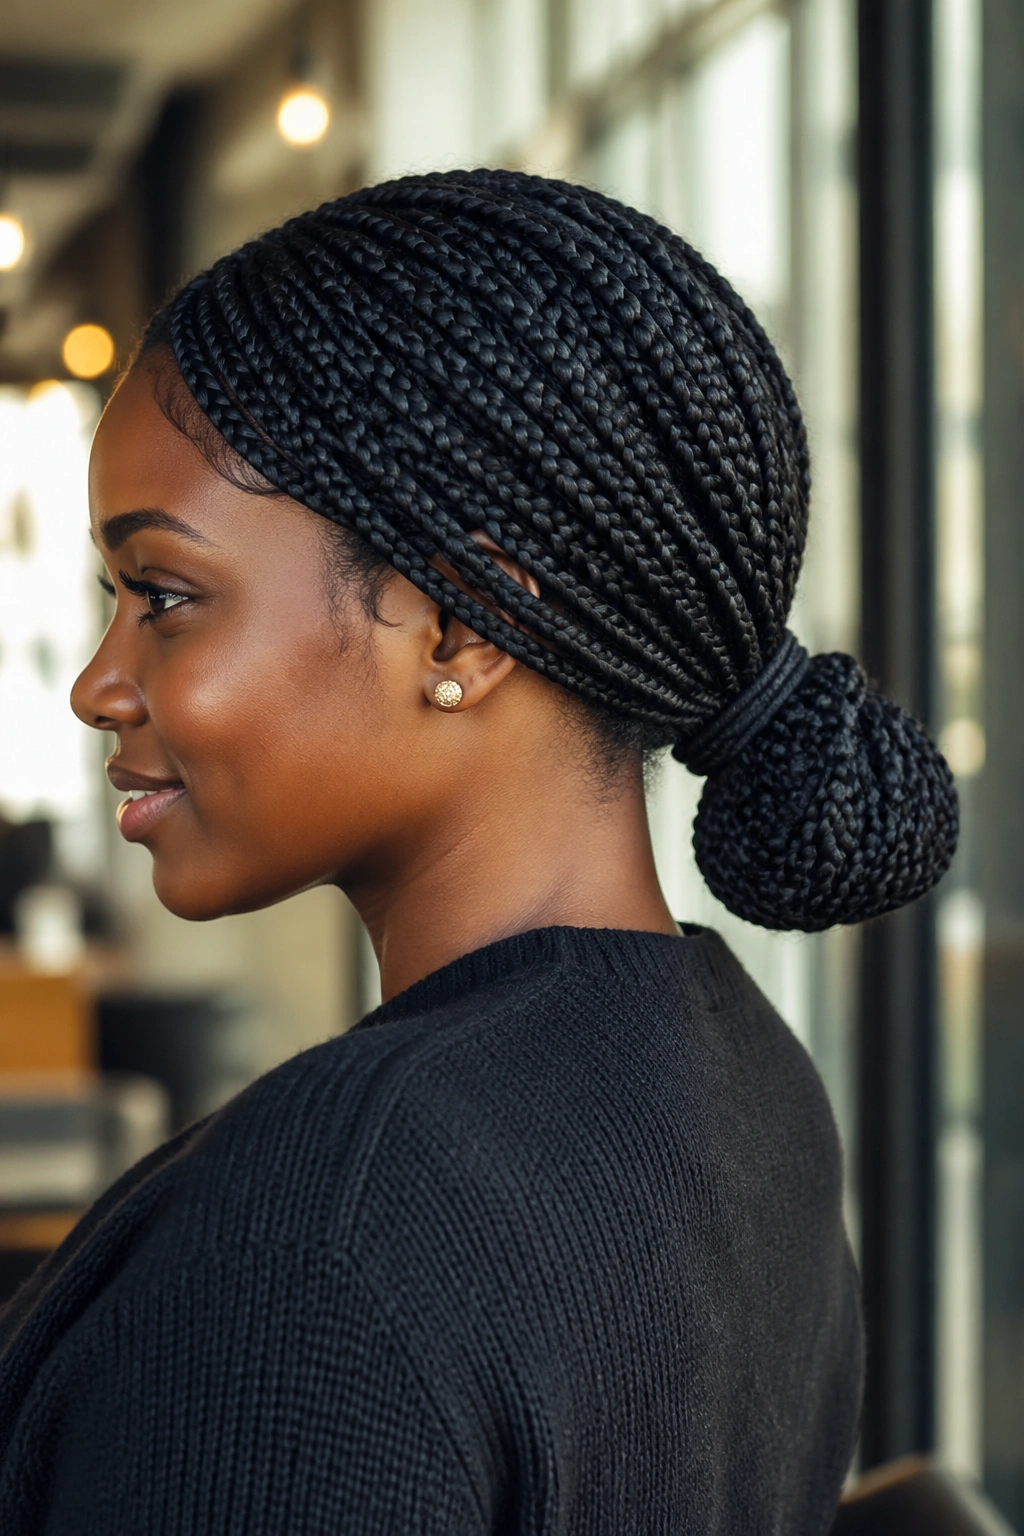
20. Formal Low Small Box Braid Ponytail
If you need one small box braid ponytail that can handle a long day and still look clean at the end of it, the formal low version is the one to keep ready. It is simple, low at the nape, and finished enough to work with a blazer, a dress, or just a plain tee that needs a little help.
The shape depends on restraint. Smooth the crown lightly, gather the braids low and centered, then hide the elastic with one wrapped braid. A thin layer of foam or edge gel at the hairline is enough to calm the flyaways. The goal is a surface that looks neat, not shellacked.
I also like this version because it doesn’t fight anything. Collars? Fine. Headphones? Fine. Long braids? Fine. If the tail needs extra support, a second elastic placed 1 inch below the first helps distribute the weight without changing the look.
This is the one I’d call the safest default. Not flashy. Not boring. Just dependable, which is rarer than people admit.