When straight hair catches the light, there’s something almost effortless about it—until you realize that creating a genuinely stunning ponytail requires more than just pulling your hair back and securing it with a band. The beauty of straight hair is that it holds shape beautifully, reflects dimension clearly, and gives you the canvas to create anything from polished and professional to playfully textured. But that same smoothness can sometimes read as flat or boring if you’re not intentional about the style you choose.
The truth is, straight hair is actually one of the most versatile textures for ponytail styling. You can achieve razor-sharp sleekness that feels runway-ready, or you can work texture and dimension into the style to create visual interest. The key is understanding which ponytail styles work best with your hair’s natural characteristics and what techniques make each one sing. A high ponytail looks entirely different on straight hair than it does on curly or wavy hair—you get clean lines, visual height, and the ability to showcase the full length without frizz.
If you’ve been defaulting to the same basic ponytail for months, it’s time to expand your repertoire. Below are fifteen distinct ponytail styles that work beautifully on straight hair, from the ultra-polished options perfect for work and formal events to the more relaxed versions that feel effortlessly chic on weekends. Each one comes with the specific techniques that make it work on straight hair specifically, because what works for one hair texture doesn’t always translate perfectly to another.
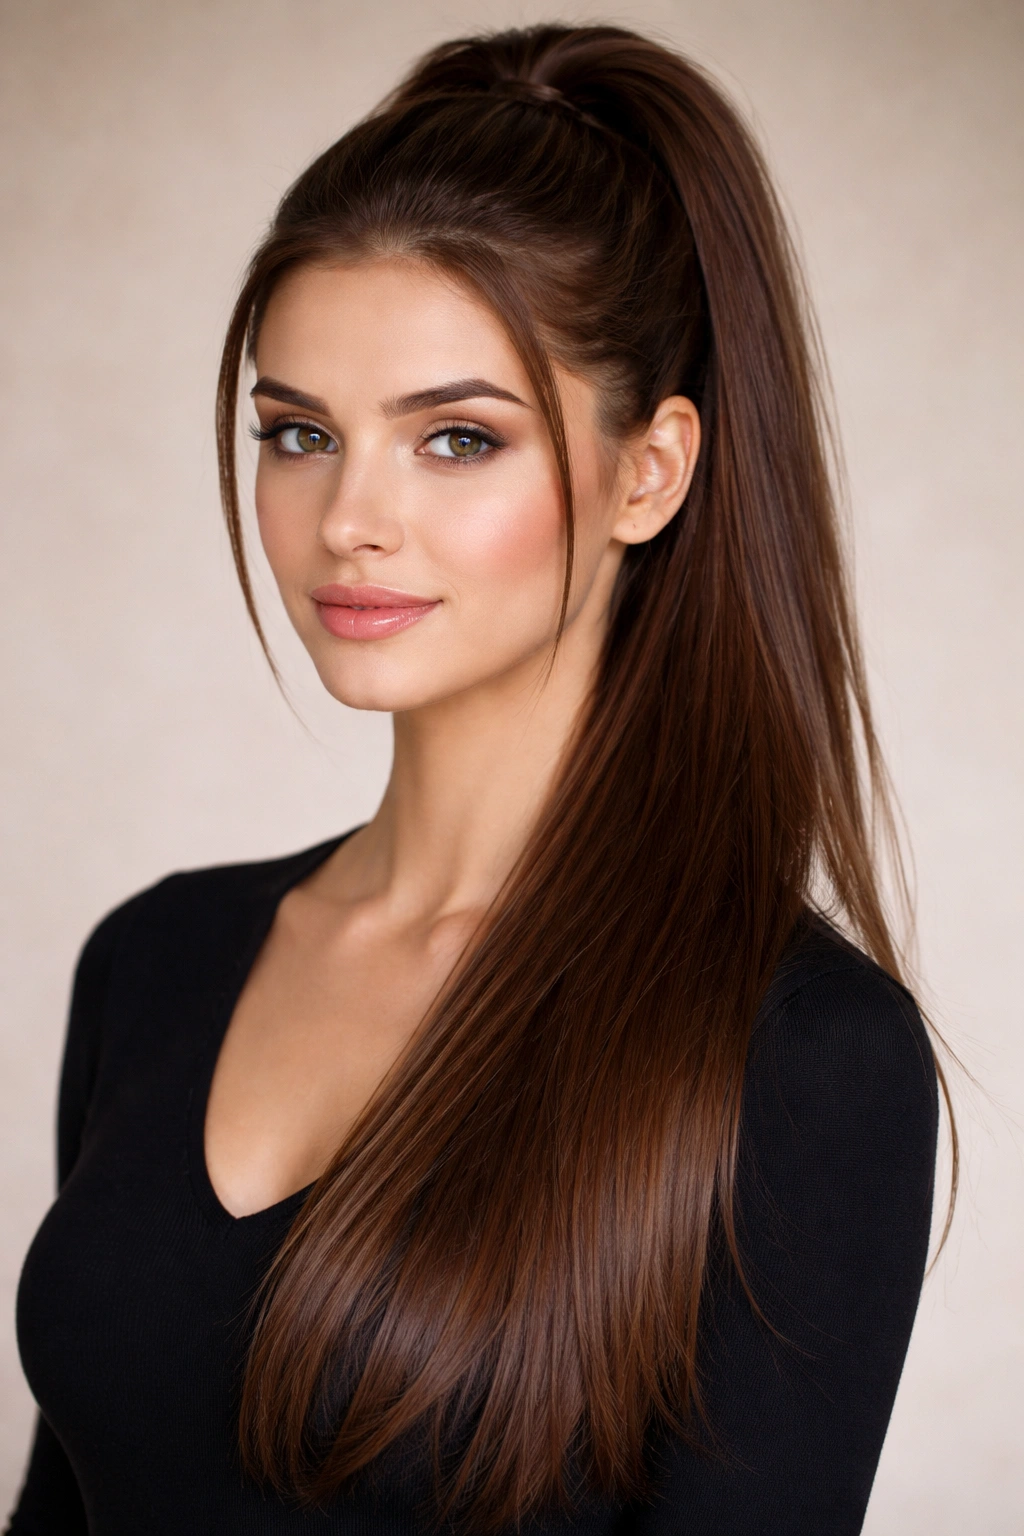
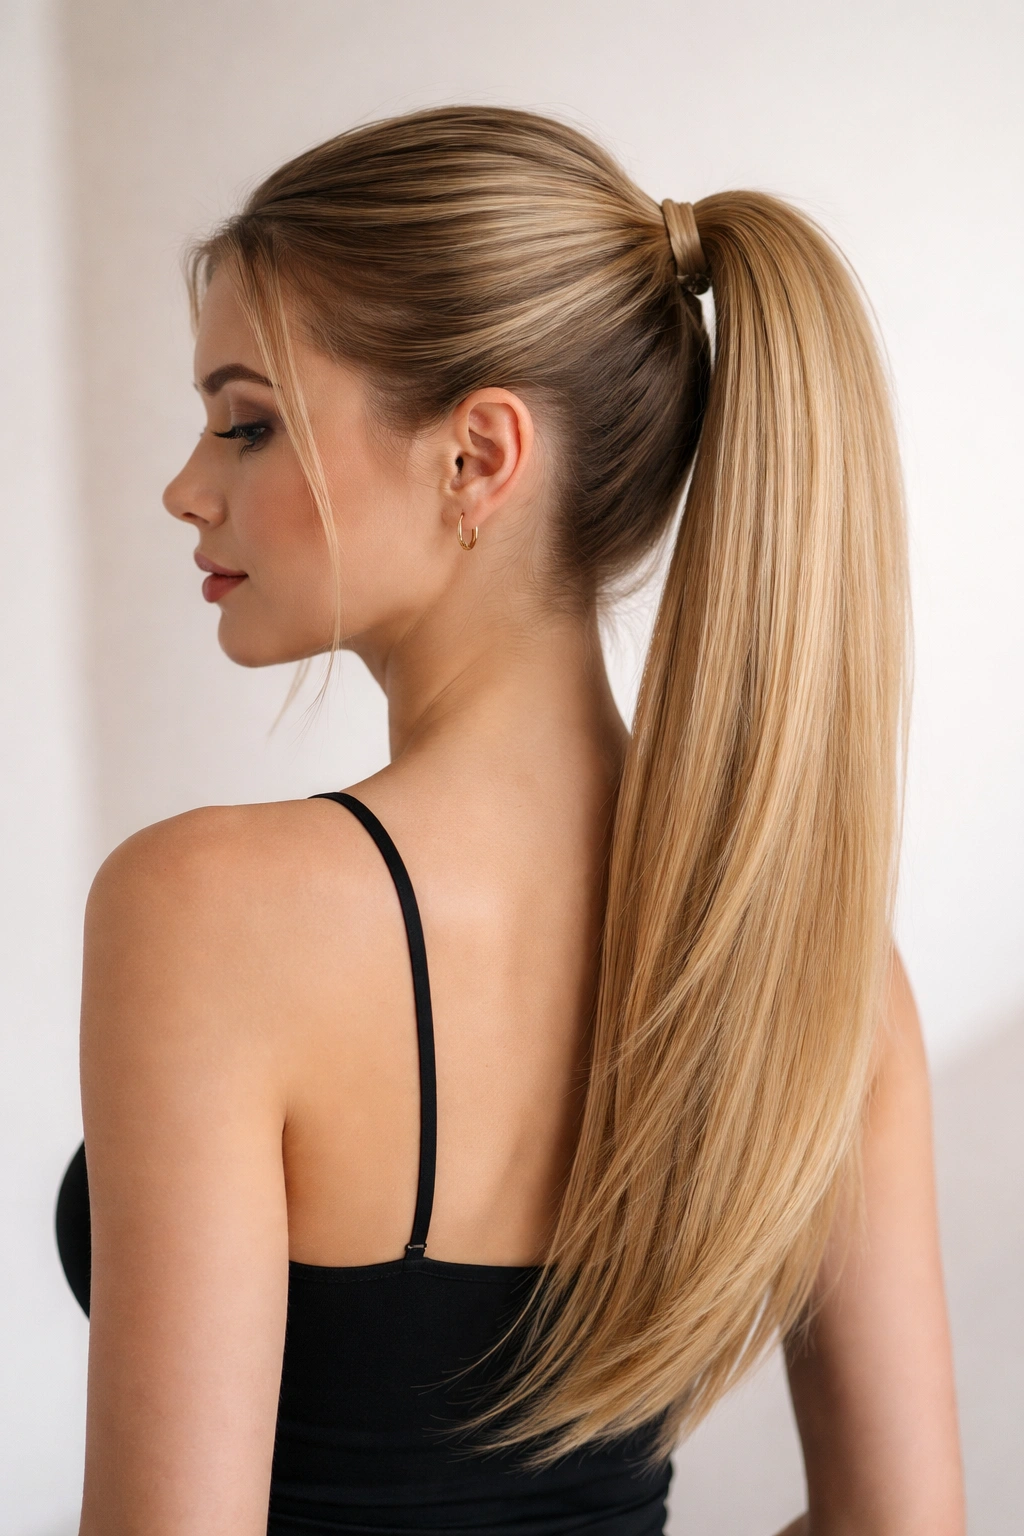
1. High and Sleek Ponytail

This is the ponytail that works everywhere—from the boardroom to the gym to an evening out. The high and sleek ponytail on straight hair is practically architectural in how clean it looks, with zero flyaways and a polished finish that screams intentional styling.
Why It’s a Go-To for Straight Hair
Straight hair gives you the ability to create an almost impossibly smooth base for this style. The hair naturally clings to itself without the frizz that can plague other textures, and you get that coveted mirror-shine finish that reads as immediately put-together. The high placement is flattering on most face shapes and makes an instant statement without requiring you to do anything elaborate.
How to Perfect It
- Brush your hair thoroughly starting from the ends and working up to prevent breakage and ensure maximum smoothness
- Apply a smoothing serum or lightweight hair oil to damp hair before blow-drying to enhance shine
- Blow-dry your hair straight using a paddle brush, directing the airflow downward for that glossy finish
- Use a fine-tooth comb to gather your hair at the crown, positioning it directly above the back of your head
- Secure with a sleek elastic band—silk or satin bands minimize breakage and won’t leave a crease
- Take a thin section of hair from the ponytail itself and wrap it around the base to conceal the elastic band
- Set with a light hairspray to control any potential flyaways without creating crunchiness
2. Low Ponytail with Face-Framing Layers

Where the high ponytail is all about graphic polish, the low ponytail with face-framing layers is about softness and movement. On straight hair, those face-framing pieces create a relaxed, intentional asymmetry that feels both current and flattering.
What Makes It Work on Straight Hair
The framing layers look clean and intentional on straight hair—not wispy or accidental, but genuinely styled. Because straight hair doesn’t naturally piece or separate the way textured hair does, you get defined, sleek face-frames that graze the cheek and create dimension around the face. The low placement keeps everything feeling effortlessly elegant rather than overly done.
Creating This Style Successfully
- Start with hair that’s been blow-dried smooth, with a side part already in place
- Gather your hair into a low ponytail at the nape of your neck, keeping it loose and relaxed
- Before securing, pull out two sections from the front of the ponytail—one from each side
- These face-framing pieces should frame the cheekbones and jawline, roughly one inch thick each
- Secure the ponytail with an elastic, then smooth the frame pieces with a small amount of smoothing serum
- If you want subtle waves in the frame pieces, use a 1-inch curling iron to create a single, soft wave—straight hair holds this beautifully
- Lightly backcomb the ponytail base for subtle texture without it looking messy
3. Bubble Ponytail
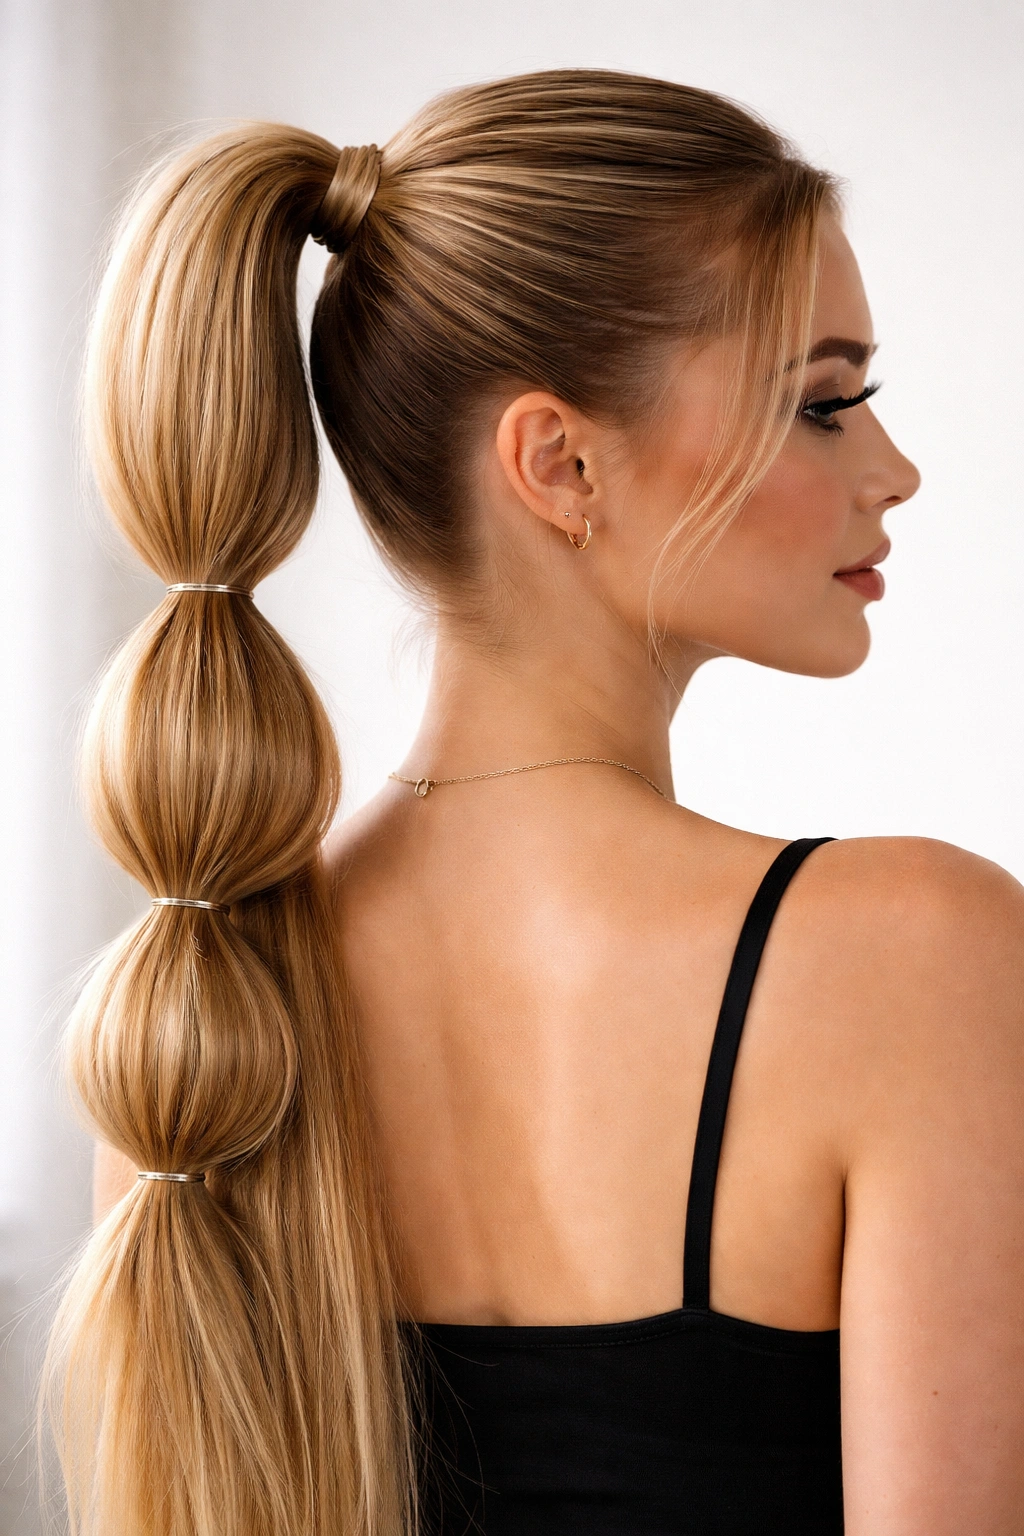
The bubble ponytail is pure visual drama, and on straight hair it reads as intentional and modern rather than playful. Each bubble is clearly defined, creating a fun rhythm down the length of your hair that feels contemporary and Instagram-friendly.
Why Straight Hair Is Ideal for Bubbles
When you’re dividing a ponytail into sections with elastics, the straight texture means each bubble sits perfectly defined—no awkward wisps escaping or sections that don’t lay flat. The hair has enough weight and smoothness to create distinct, even bulges between the elastics, which is exactly what this style needs to work visually.
The Technique That Actually Works
- Start with a high or mid-height ponytail, secured with an elastic at your preferred point
- Take the first elastic and position it about 2-3 inches down the ponytail from the base
- Gently tease the hair between the first and second elastic point to create a slight bulge
- Secure the second elastic, making sure it sits snugly against the teased section
- Repeat this process down the entire length of the ponytail, spacing each bubble evenly
- The key is teasing just enough to create shape without making it look dramatically fluffy—you want defined bubbles, not puffed-out sections
- Pull each bubble out slightly to emphasize it and make the style feel intentional rather than accidental
4. Sleek Side Ponytail
A side ponytail shifts the whole energy of a style. On straight hair, the movement of hair sweeping to one side creates drama and elegance without requiring any texture work. It’s the ponytail equivalent of a side part—immediately more interesting than center-aligned styling.
The Elegance Factor
Straight hair makes a side ponytail feel genuinely sleek and intentional. The hair sweeps smoothly to one side without the layering effect that can happen with shorter pieces or more textured hair. You get a clean line from your crown to the side, which is visually striking and instantly photographs well.
How to Execute It
- Blow-dry your hair smooth with a slight side part already established
- Brush all your hair to one side—typically left is more flattering, but this depends on your face shape
- Gather the ponytail at the bottom of that side, roughly at ear level
- The lower and more to the side you position it, the more dramatic and intentional the style feels
- Secure with a smooth elastic and wrap a small section around the base
- Use a smoothing serum on the swept side to eliminate any flyaways while enhancing shine
- For added drama, you can gently tease the top section of the ponytail base to create subtle height before smoothing it back
- This style pairs beautifully with a sleek curved edge along the face—use a small amount of edge control along your hairline for a polished finish
5. Textured High Ponytail
Here’s the insider secret: you can absolutely add texture to straight hair without curling your entire head. A textured high ponytail on straight hair creates the optical illusion of volume while maintaining that polished edge.
Adding Intentional Texture Without Fakeness
Texture on straight hair reads differently than texture on naturally textured hair—it looks purposeful and styled rather than natural. The contrast between the smooth base and textured ends is what makes this work visually. You’re not trying to hide that you’ve added texture; you’re celebrating it as an intentional styling choice.
The Technique for Believable Texture
- Start with your high ponytail gathered and secured as normal
- Divide the ponytail into 3-4 sections vertically, each roughly 2-3 inches wide
- Using a 1-inch curling iron or wand, loosely curl each section around the barrel, holding for just a few seconds
- Don’t aim for tight, defined curls—you want soft, loose waves that look effortless
- Let the curls cool for a few minutes before gently running your fingers through the ponytail to break up the curl pattern
- This breaks up the curl into piecier waves that look more intentional and less like curling-iron ringlets
- A light texturizing spray or sea salt spray applied before curling helps the texture hold longer without looking stiff
- The result is a ponytail with movement and dimension that still reads as sleek and polished
6. Low Messy Ponytail
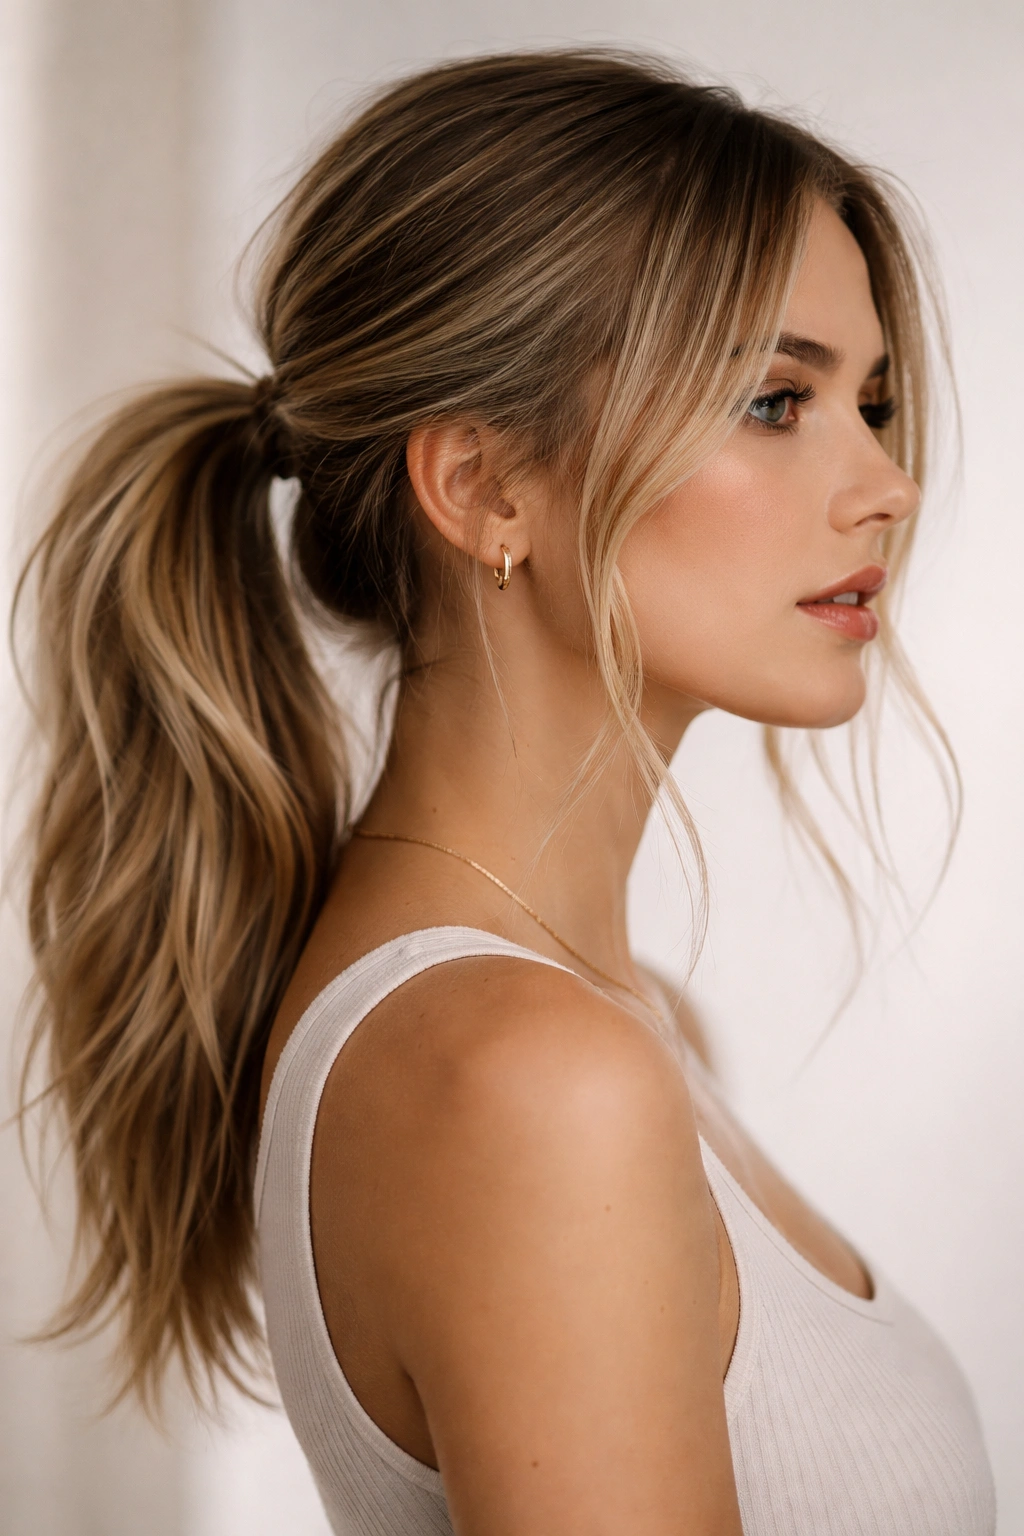
When people say “messy,” they often mean a careful orchestration of strategic pieces and softness. A low messy ponytail on straight hair is the perfect style for anyone who wants to look effortlessly put-together without the effort being obvious.
Making “Messy” Feel Intentional on Straight Hair
Messy styling on straight hair is all about precision—which pieces you pull out, how you position them, and how much texture you add. Because straight hair doesn’t naturally create the piecy, separated look that some textures do, you have to be intentional about creating that effect. The payoff is that it looks controlled and deliberate rather than like you just rolled out of bed.
Building the Casual-But-Styled Look
- Blow-dry your hair, creating subtle waves throughout using a medium-barrel curling iron if desired
- Gather hair into a low ponytail at the nape, keeping it slightly loose rather than pulled tight to the scalp
- Before securing, pull out 2-3 small pieces from around the crown area—one from each side and one from the top
- These pieces should frame the face and fall naturally at different lengths—resist the urge to make them perfectly even
- Secure the ponytail with an elastic, then gently tease the base of the ponytail to add subtle texture
- Take a few small sections from within the ponytail itself and gently pull them out to create a looser, piecier appearance
- Use a texturizing spray or light hairspray to hold everything in place without creating stiffness
- The key to making this work is the balance between control and abandon—it looks effortless, but every piece is intentional
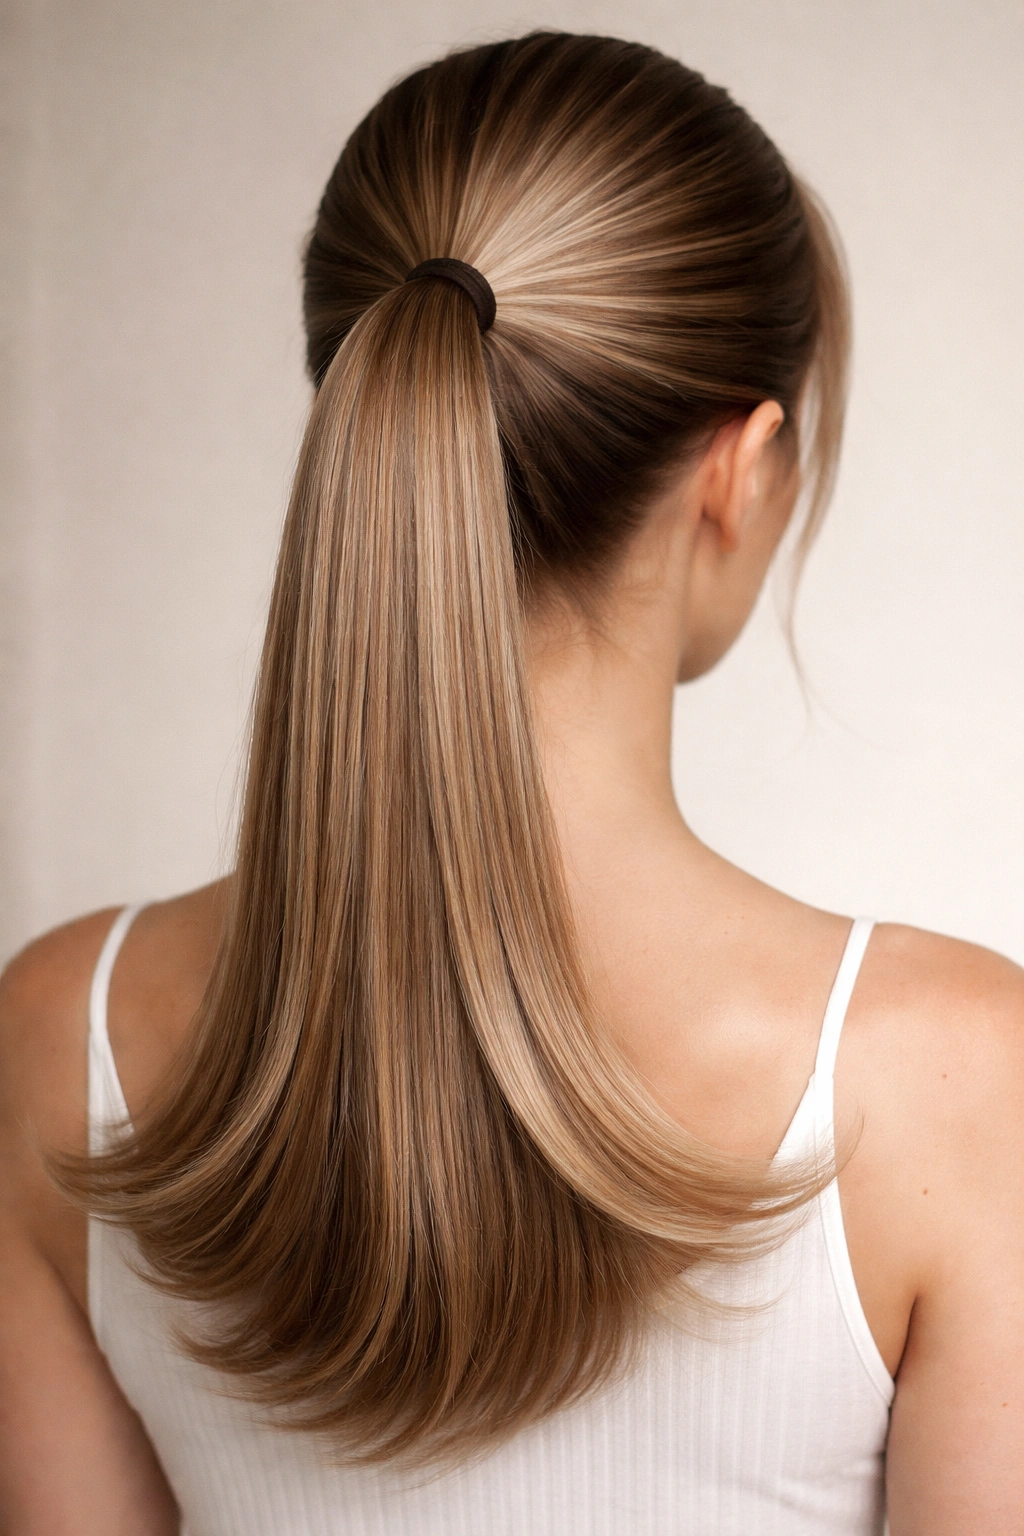
7. Half-Up Ponytail
The half-up ponytail is the style for when you want to showcase the length and shine of your straight hair while still keeping some back, and it’s genuinely versatile enough for work, casual wear, or dressier occasions depending on how you style it.
Why Straight Hair Shines in This Style
Half-up styling on straight hair lets you show off that glossy length while creating a polished silhouette from the front. The volume in the gathered section at the crown balances with the length below, creating a harmonious proportion that feels intentionally styled. You get the best of both worlds—face-framing capability and hair movement.
The Classic Half-Up Execution
- Brush your hair smooth and blow-dry completely straight if that’s the finish you’re going for
- Section off the hair at the crown, roughly from one temple to the other, dividing the top half of your head
- Gather this section into a ponytail at the crown, keeping it tight and smooth
- Secure with an elastic, then wrap a small section of hair around the base to conceal the elastic
- For a polished version, leave the lower half of your hair perfectly smooth and sleek
- For a more relaxed version, add subtle waves to the lower portion using a larger-barrel curling iron
- You can also pull out small face-framing pieces from the sides before securing the top section for additional softness
- This is also the perfect style for adding a bow, decorative clip, or elegant comb at the base of the half-up section
8. Sleek and Straight Low Ponytail with Defined Edges
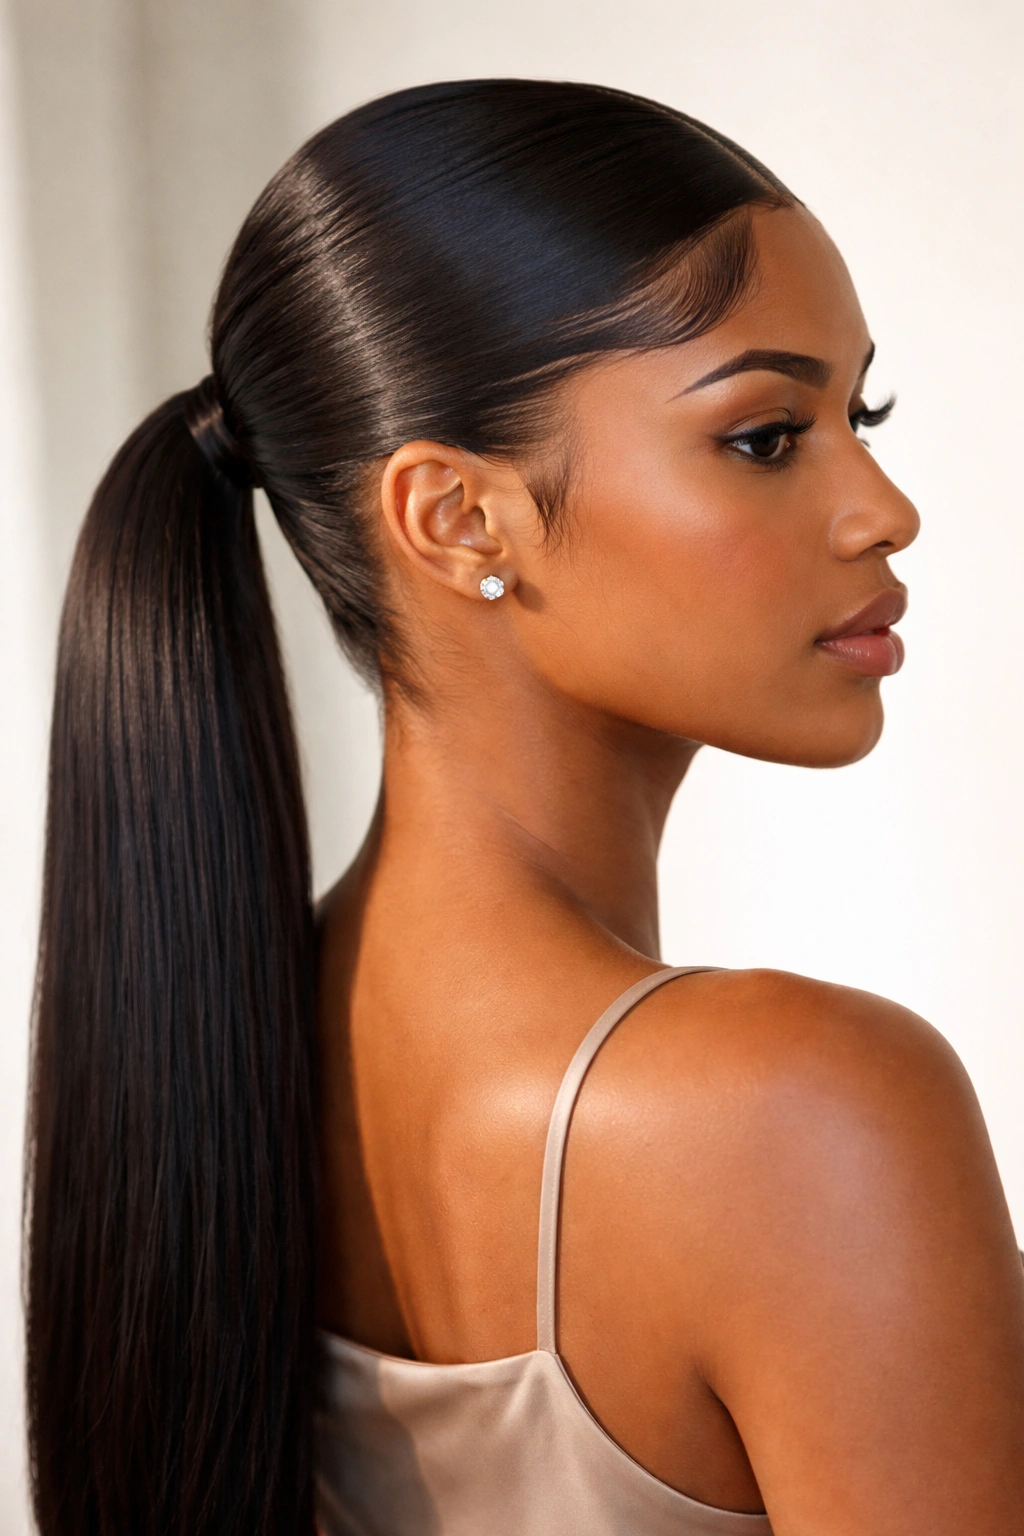
There’s something undeniably polished about a low ponytail where every element feels intentional and controlled. On straight hair, defined edges—particularly around the face and hairline—elevate the entire look from everyday to genuinely formal.
The Power of Edge Control
This style is all about the finish. You’re not adding texture or volume; you’re creating maximum shine and definition. Defined edges around the face and along the hairline communicate that you’ve thoughtfully styled your hair, even if the styling process itself was simple. It’s a trick that professional stylists use to make basic styles feel elevated.
Achieving Salon-Level Polish
- Start with freshly blow-dried, perfectly straight hair with a side part
- Apply a light smoothing serum to damp hair before blow-drying for maximum shine
- Brush your hair back into a low ponytail at the nape of your neck, gathering it smoothly against your head
- Secure with a satin or silk elastic that matches your hair color
- Wrap a thin section of hair from the ponytail around the elastic band to conceal it completely
- Use an edge control product along your hairline and around your face to smooth any flyaways—just a tiny amount creates definition without stiffness
- Apply this same product along your side part to create a sharp, polished line
- Finish with a light hairspray, focusing on the edges and face-framing area to maintain the polish throughout the day
- The ponytail itself should feel smooth and weighty, with a visible shine that reflects light
9. Braided Ponytail
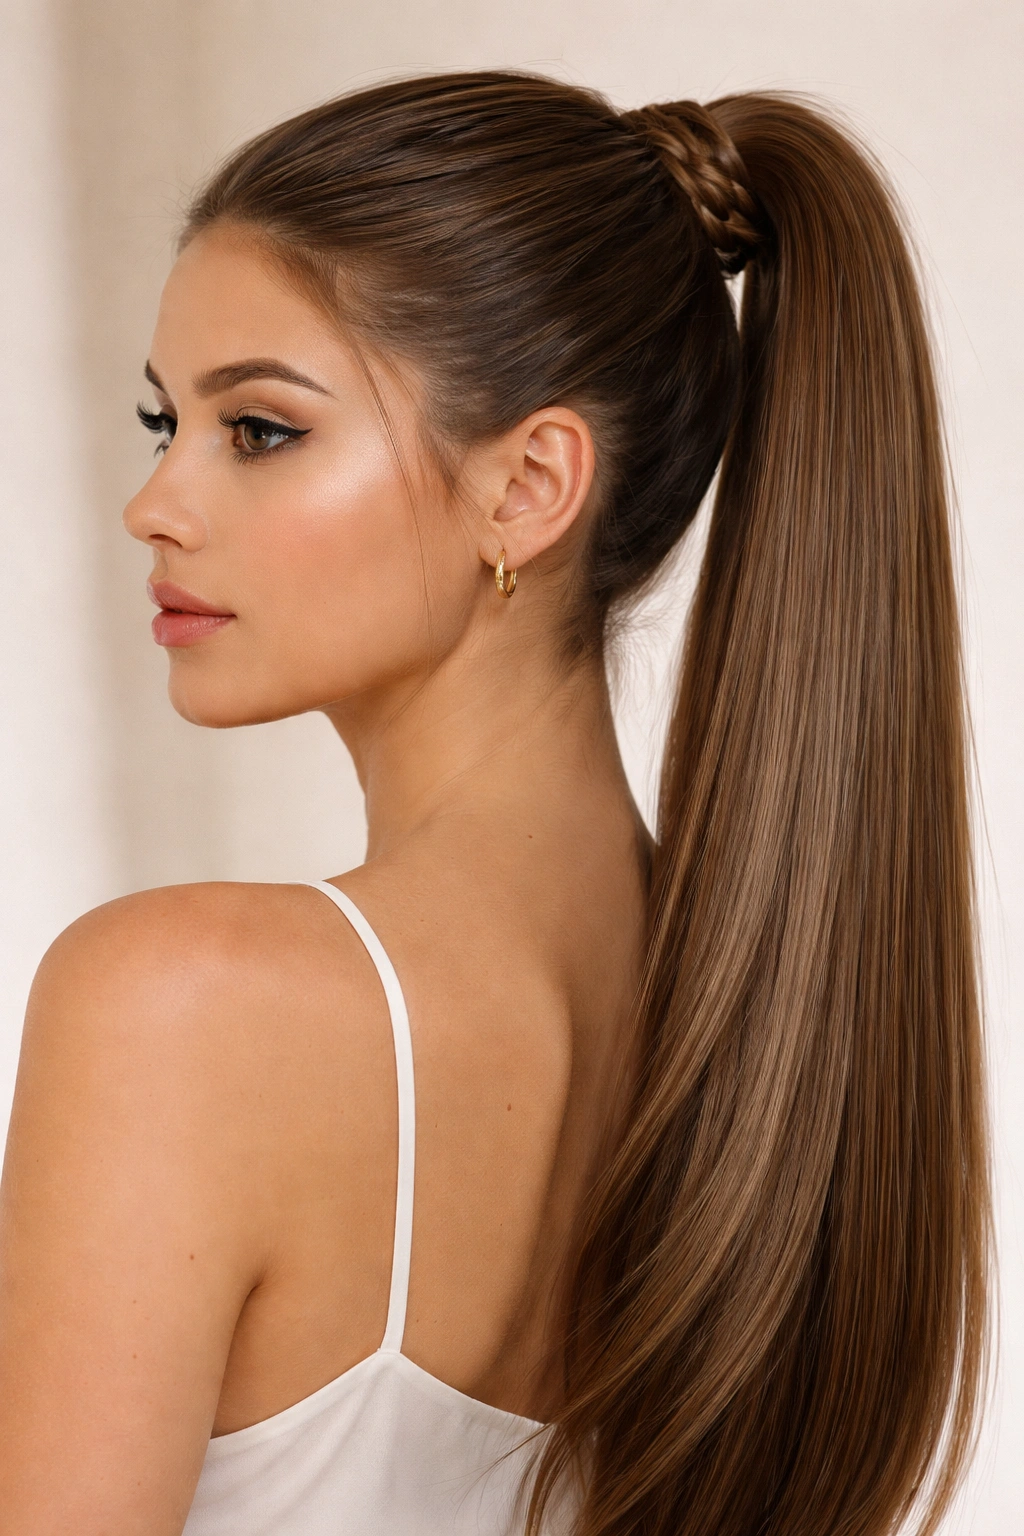
A braid incorporated into or running through a ponytail adds visual interest and texture while maintaining the sophistication that straight hair naturally provides. This works whether you’re braiding the entire ponytail length or incorporating a braid only at the base.
Why Braiding Works on Straight Hair
Braids are surprisingly clean and defined on straight hair—you can see every plait clearly, which makes the braid feel intentional and well-executed. The contrast between the smooth base and the textured braid is visually striking. Even a simple three-strand braid looks more polished on straight hair than on many other textures because the definition is so clear.
Two Approaches to Braided Styling
Base Braid Method:
- Gather your hair into a high or mid-height ponytail and secure it
- Take a small section from the base of the ponytail and divide it into three strands
- Braid this section around the elastic band, wrapping it in a circular motion to conceal the elastic
- Secure the end of this mini braid with a tiny elastic, then tuck the end under the main ponytail
- This approach is subtle and elegant, adding texture without overwhelming the style
Full-Length Braid Method:
- Create your ponytail at your preferred height
- Divide the entire ponytail into three sections
- Braid down the full length in a basic three-strand braid, keeping the braid relatively tight so it maintains its definition
- Secure the end of the braid with a small elastic that matches your hair color
- For added texture, gently pull the edges of each plait outward to make the braid slightly looser and fuller
- This method transforms a standard ponytail into something visually more intricate and detailed
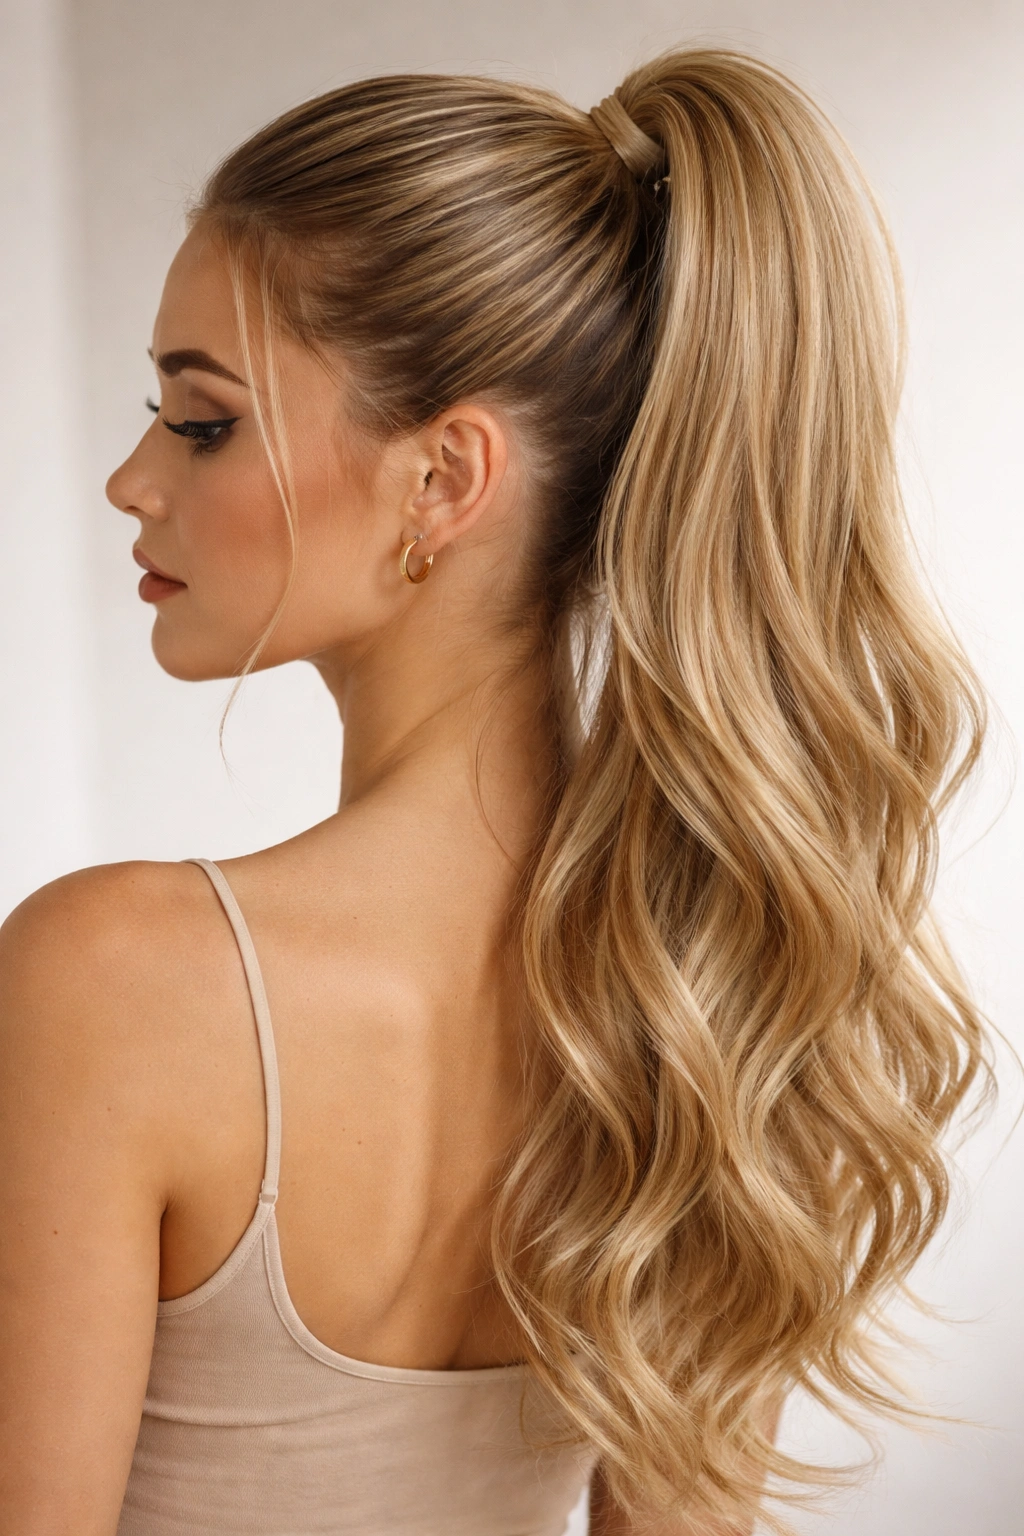
10. Voluminous High Ponytail
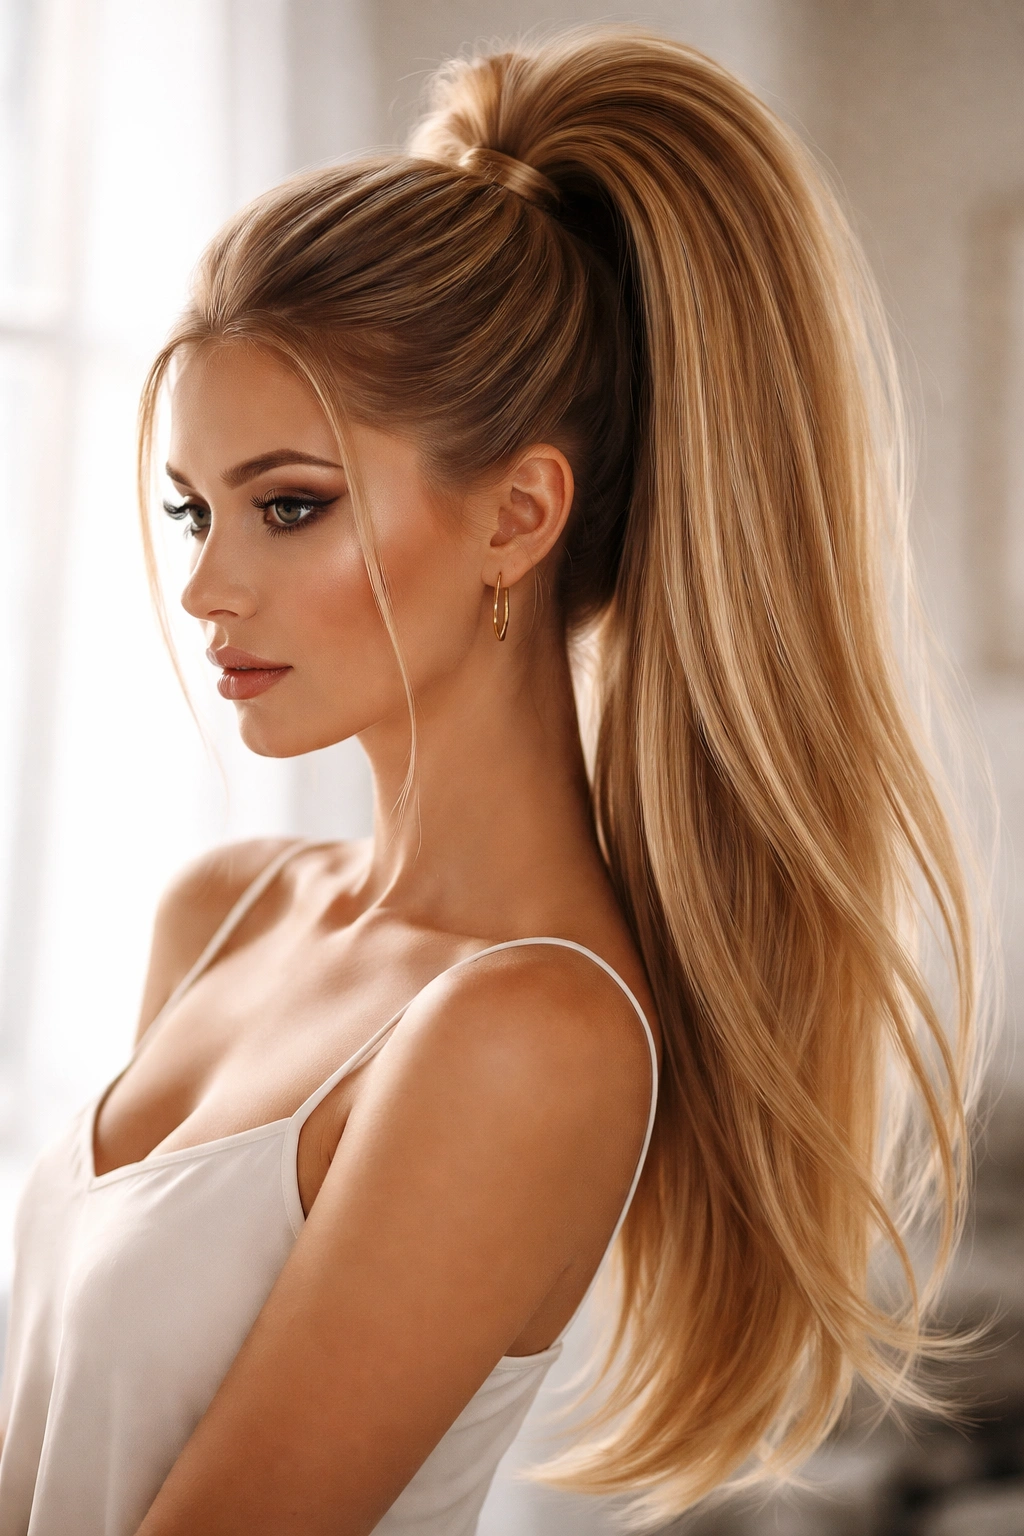
When you want maximum volume with straight hair, the game changes slightly—you can’t rely on naturally textured hair to create fullness. Instead, you strategically create volume through teasing and careful styling, resulting in a high ponytail that feels dramatically fuller.
Creating the Illusion of Volume on Straight Hair
Straight hair is actually perfect for volume styling because you have complete control over where that volume sits. You can tease the crown area to create specific height and thickness, then smooth the outer layer so it still looks polished. The result is a high ponytail that feels genuinely voluminous without looking frizzy or unkempt.
The Technique for Genuinely Full Ponytails
- Blow-dry your hair smooth as your base
- Section off the top quarter of your hair, from ear to ear across the crown
- Gently backcomb or tease this section, focusing on the crown area where you want maximum height
- Smooth the outer layer with a fine-tooth comb so the teased hair underneath isn’t visible
- This creates a sculpted volume that sits perfectly at the crown
- Gather this voluminous section plus the rest of your hair into a high ponytail
- Secure with a sturdy elastic—the weight of the volume means you need something secure
- Use a light hairspray to hold the structure without creating crunchiness or weighing down the volume
- You can also add subtle waves to the ponytail itself using a large-barrel curling iron for additional fullness perception
- The key is that the volume should feel sculpted and intentional, not accidentally frizzy
11. Asymmetrical Ponytail
An asymmetrical ponytail breaks the convention of center-aligned styling in a way that feels modern and intentional. On straight hair, the clean lines and lack of naturally occurring texture make an asymmetrical placement read as a deliberate styling choice rather than an accident.
Creating Modern Visual Interest
Asymmetry is trending across hairstyling because it’s more interesting to look at than perfectly balanced styling. When you place a ponytail off-center, you create movement and visual intrigue. On straight hair, this asymmetry is perfectly clear—there’s no visual confusion about whether it’s intentional or not.
How to Position and Style Asymmetrically
- Blow-dry your hair with a deep side part—deeper than you might typically go
- Brush all your hair toward the side where you’re placing the ponytail
- Position your ponytail not at the back center of your head, but shifted to one side—almost like a side ponytail, but positioned slightly higher
- The exact placement depends on your preference, but shifting it at least 2-3 inches off-center is what makes it read as asymmetrical rather than just slightly off
- Secure with a sleek elastic and wrap a section around the base for polish
- Smooth the hair on the opposite side of your head for maximum contrast—this emphasizes the asymmetry
- You can add texture only to the ponytail itself, leaving the rest of your hair sleek for additional visual contrast
- The beauty of this style is that it photographs exceptionally well and works for everything from casual to formal occasions
12. Sleek Ponytail with Wrapped Base Detail
Sometimes the most elegant styling comes from thoughtful details rather than complicated techniques. A perfectly executed wrapped base—where a thin section of hair is wrapped around the elastic—elevates the entire ponytail and makes it look like you visited a professional stylist.
The Power of Finishing Details
The wrapped base detail might seem like a small thing, but it’s what separates a polished, intentional ponytail from an unfinished one. It conceals the elastic band completely, creating a seamless line from your hair to the ponytail. It’s the kind of detail that screams “I know what I’m doing with my hair.”
Perfecting the Wrapped Base
- Create your ponytail at whatever height you prefer—high, mid, or low
- Secure it with a smooth elastic
- Before you do anything else, take a thin section of hair from underneath the ponytail (about ½ to ¾ inch thick)
- Hold this section separate and wrap it around the elastic band, going around the circumference of the ponytail
- The section should go around at least once, and ideally you want the wrap to go all the way around and then overlap slightly at the back
- Use a small bobby pin—slightly behind where the ends of the wrapped section overlap—to pin it into place
- Make sure the bobby pin is positioned so the wrapped hair covers it completely
- This creates a finished, polished look that instantly makes your entire ponytail appear more professionally done
- For extra security and a smoother finish, you can apply a small amount of lightweight hairspray to the wrapped section
13. Straight Hair with Curved Ends Ponytail
Here’s an elegant trick: creating subtle outward curves at the ends of a ponytail that are curved away from the body. This creates a more flattering shape and makes straight hair feel less severe or blunt-ended.
The Subtle Styling Choice That Changes Everything
A straight ponytail that ends in a completely blunt, straight line can look a bit heavy or severe. Adding subtle outward-curved ends—almost like a gentle C-shape—creates a softer, more elegant silhouette. The effect is subtle enough that it doesn’t look like you’ve added texture, but noticeable enough to make a real visual difference.
How to Create the Curved Ends
- Create your ponytail at your preferred height and secure it
- Use a 1.25-inch curling iron or wand to lightly curl the very ends of the ponytail
- Hold each section of hair around the barrel for just a few seconds, then release—you’re not creating tight curls, just a subtle bend
- The curves should bend outward and away from the body, creating a gentle C-shape rather than curling inward
- After curling all the ends, let them cool for a minute to set the curve
- Run your fingers through gently to break up any ringlet-like curl patterns
- A light hairspray helps set these curves so they hold through the day
- The result is a ponytail that feels slightly softer and more refined than a perfectly straight one, without looking textured or curly
- This works beautifully with both polished and casual ponytail styles
14. Minimalist Bun Ponytail Hybrid
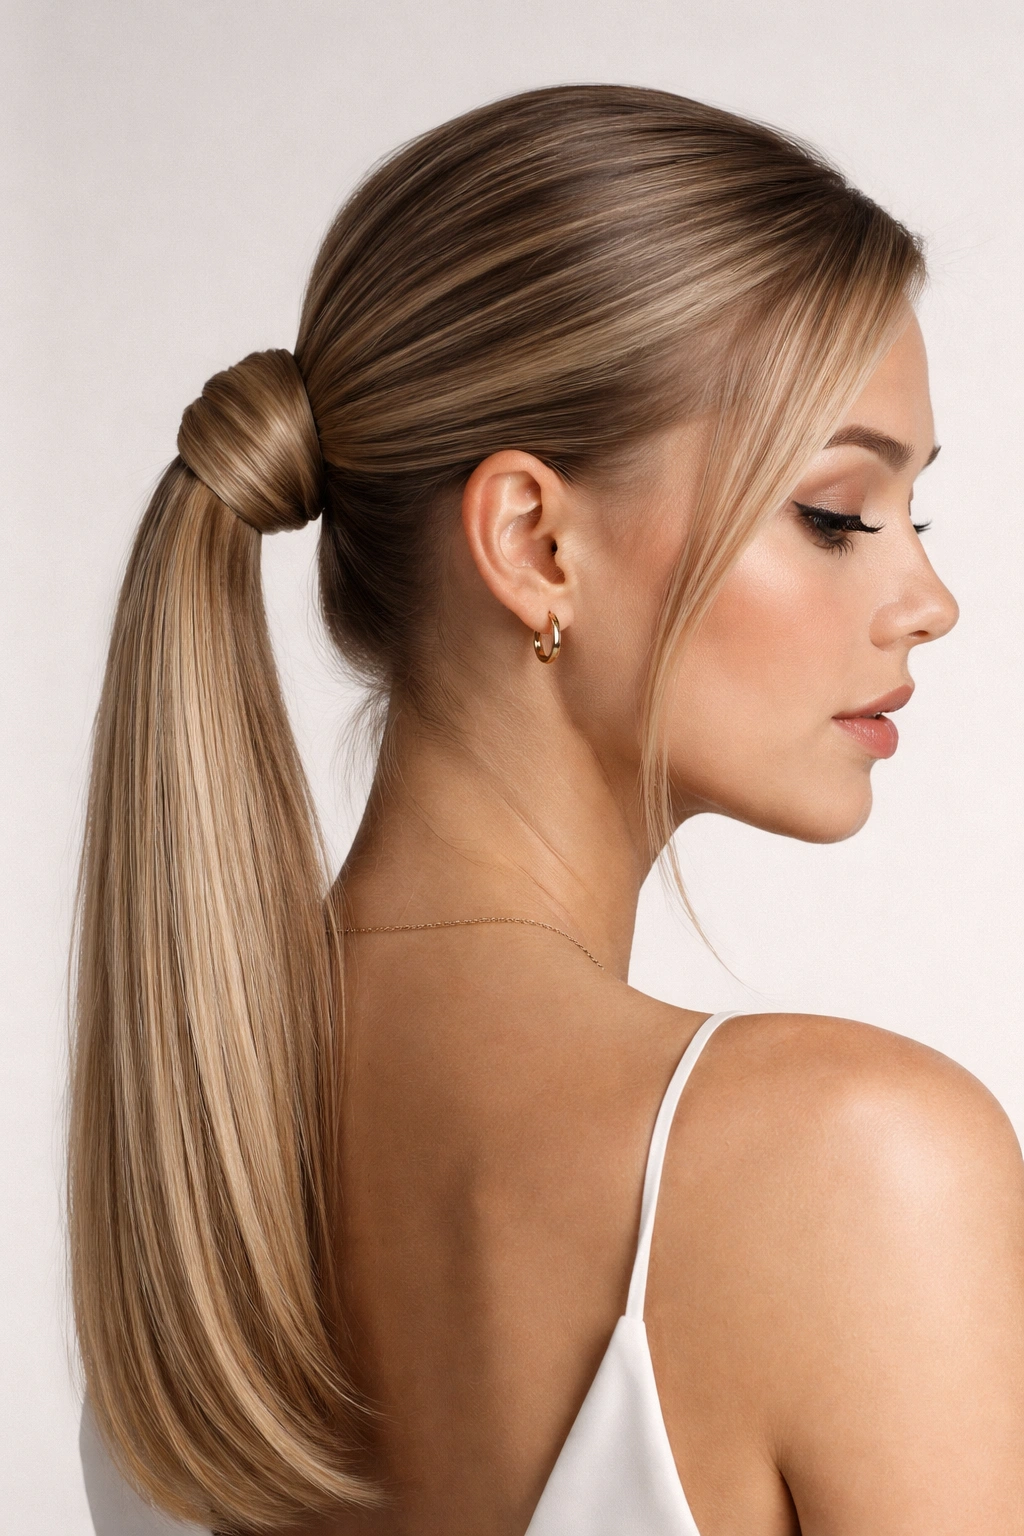
Not quite a bun, not quite a ponytail, this hybrid style combines the elegance of a bun with the simplicity and speed of a ponytail. On straight hair, the clean lines and lack of stray pieces make this feel intentionally styled rather than like you couldn’t decide between two styles.
The Appeal of the Hybrid Approach
This style bridges the gap between a relaxed ponytail and a formal bun. It has the ease of a ponytail but the polished sophistication of a bun. On straight hair, you get clean definition without the bulk that sometimes happens when you try to create a fully formed bun with lots of hair.
Creating the Hybrid Style
- Gather your hair into a high or mid-high ponytail and secure it
- Divide the ponytail into two sections
- Loosely twist each section, wrapping it around the base of the ponytail
- As you’re twisting, gradually wind the twisted sections around the elastic base, creating a soft, sculptural shape
- Secure the ends with bobby pins, positioning them so they’re not visible from the front or sides
- The result is something between a bun and a ponytail—looser and more relaxed than a traditional bun, but more sculpted than a standard ponytail
- Pull out a few small pieces from around the face for softness, but keep the overall style structured
- This works beautifully for occasions where a full bun feels too formal but a plain ponytail feels too casual
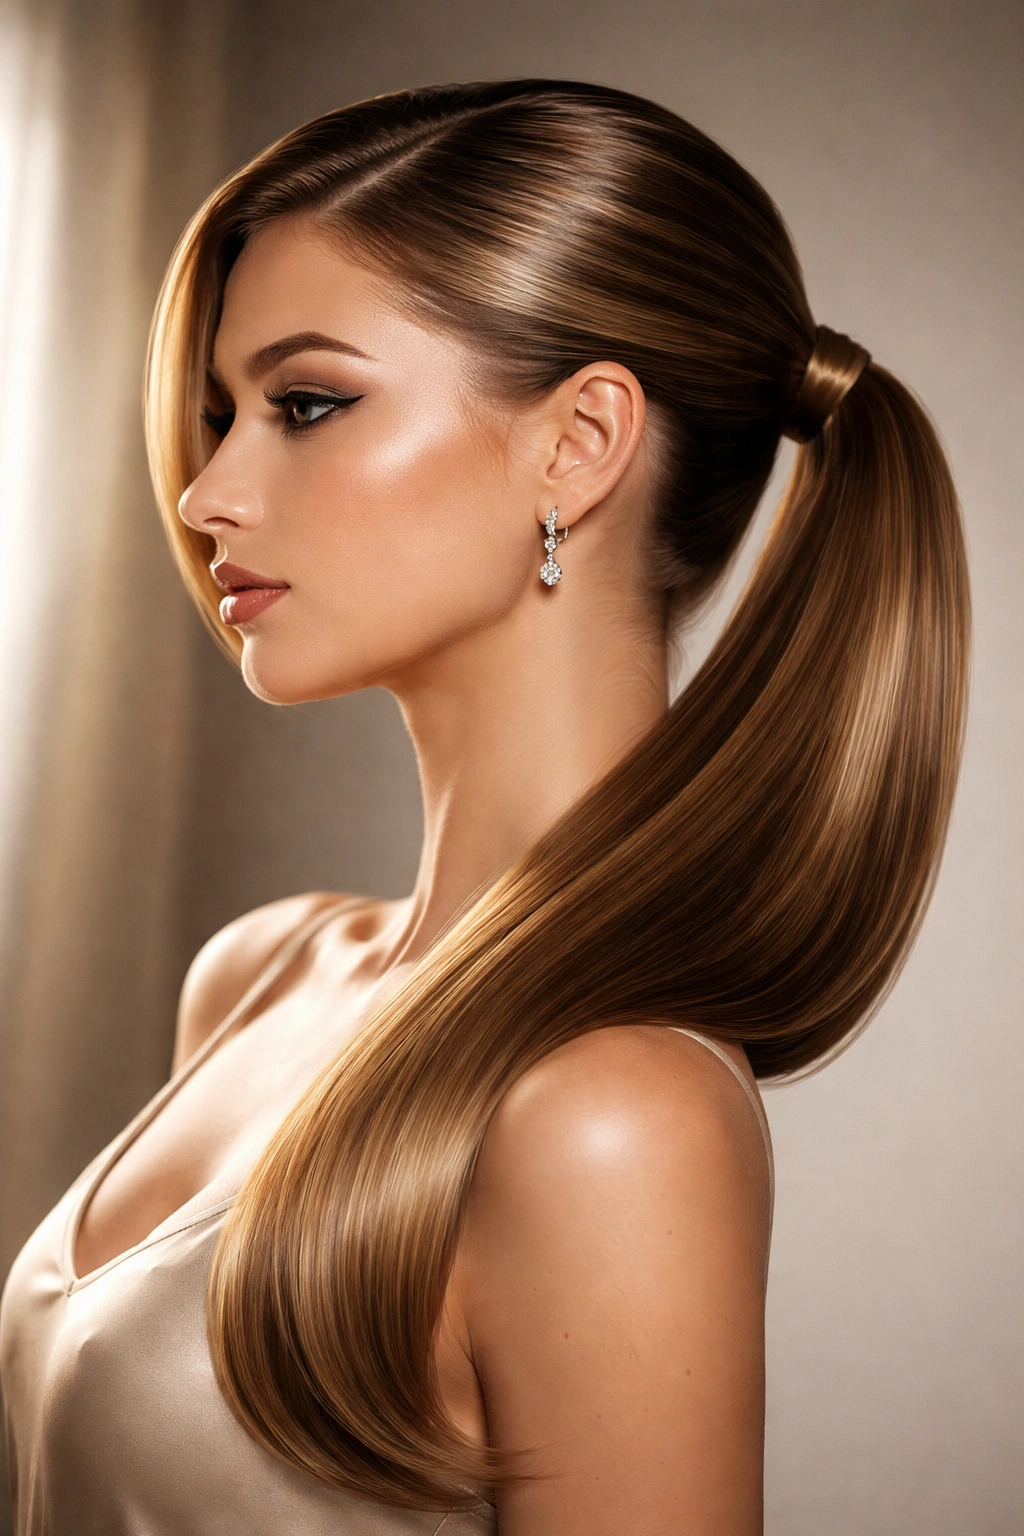
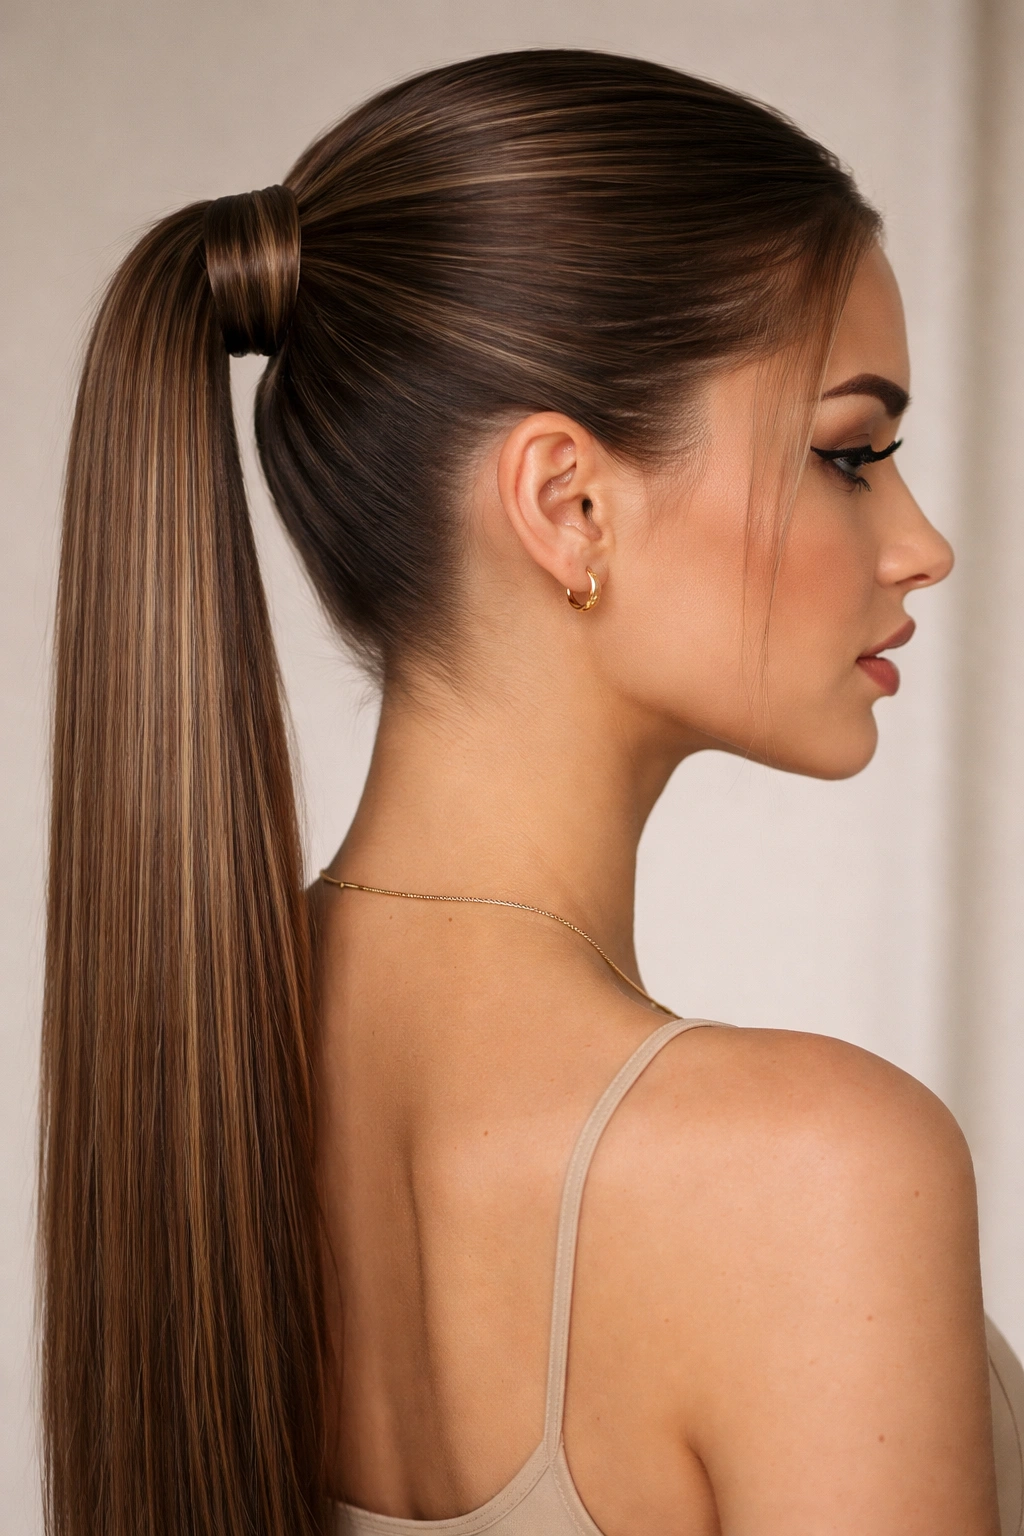
15. Long and Sleek Statement Ponytail
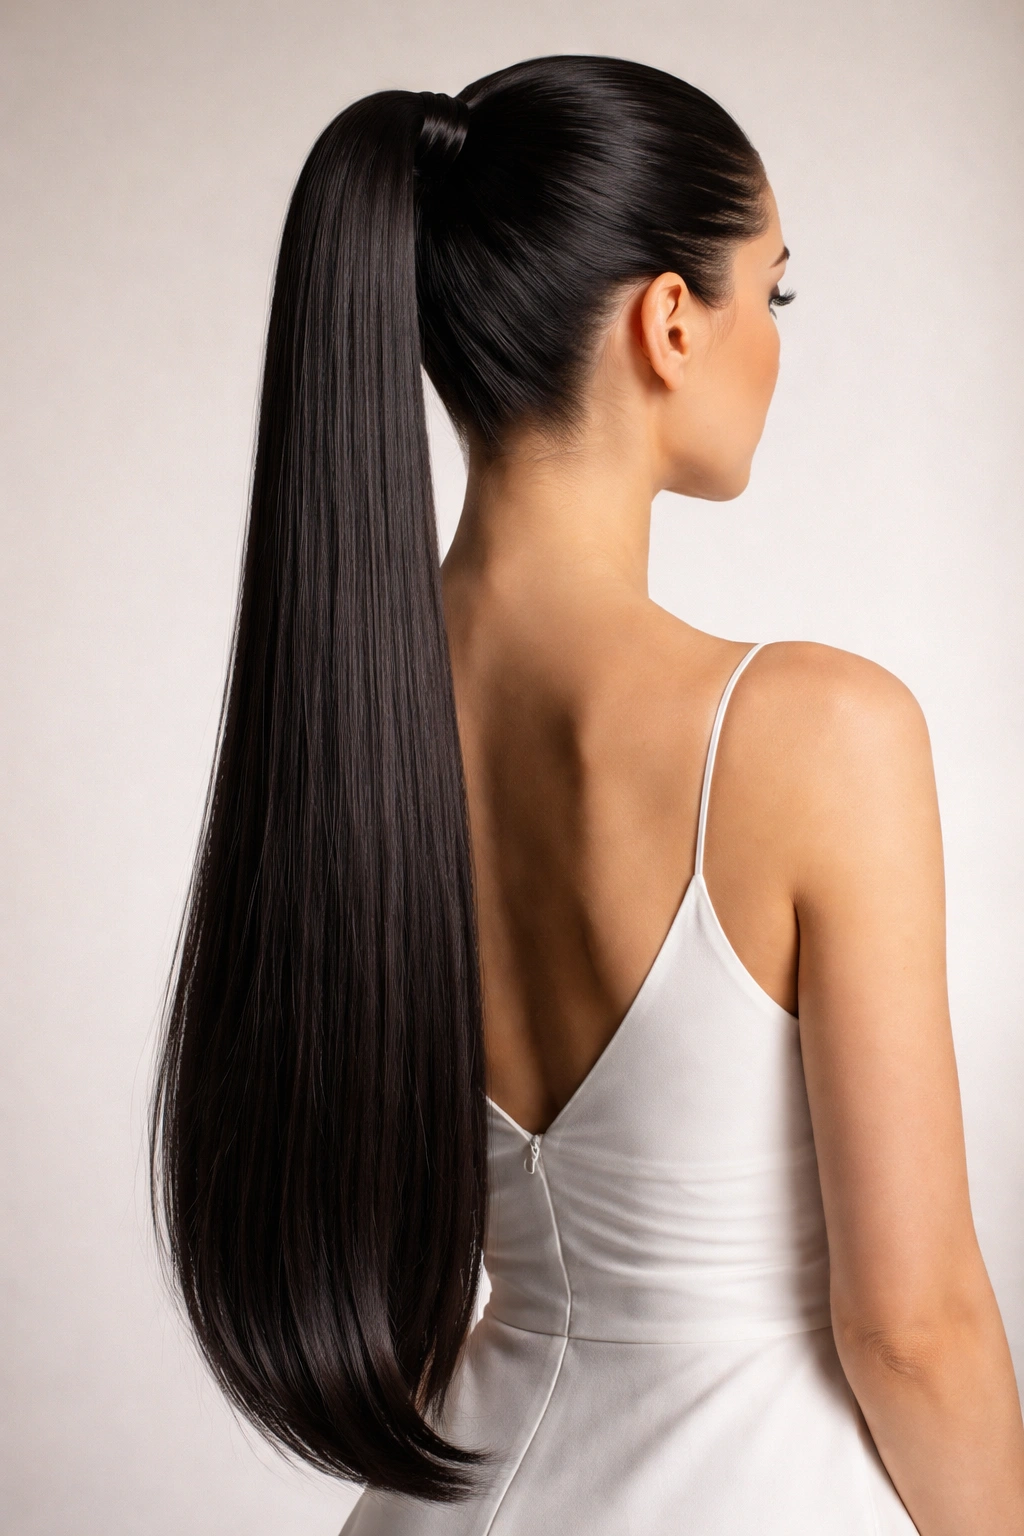
This is the ponytail for when you want to make an impact. A long, sleek statement ponytail on straight hair is essentially a celebration of length, shine, and polish. It’s the kind of ponytail that says “I know I have great hair and I’m showing it off.”
Why This Works as a Statement Style
There’s something inherently powerful about a long ponytail. It elongates your silhouette, showcases the length and health of your hair, and reads as intentional and confident. On straight hair, all that length is even more striking because you get that consistent shine and movement all the way down.
Making It Genuinely Statement-Worthy
- Start with your healthiest, shiniest hair possible—this style is all about hair quality
- Blow-dry using a smoothing product and a paddle brush, directing the airflow downward for maximum shine
- Create a center part for the most flattering, balanced appearance
- Gather your hair into a high or mid-high ponytail, depending on your preference for balance and face-framing
- Secure with a sleek elastic in a color that matches your hair
- Wrap the base with a thin section of hair to conceal the elastic
- Apply a lightweight shine serum or hairspray with luminizing properties to enhance the gleam
- The ponytail should feel weighty and substantial—the full length of your hair gathered together
- Resist the urge to add texture or waves; the power of this style comes from the sleek, straight finish
- This is the perfect ponytail for occasions when you want to feel confident and polished, whether that’s a formal event, a professional setting, or just a day when you want to feel genuinely good about how you look
Key Takeaways
The beauty of styling straight hair is that you have a perfectly smooth canvas to work with—no frizz battles, no undefined texture to work around, just the ability to create exactly the ponytail you envision. Whether you’re drawn to the polished simplicity of a sleek high ponytail, the playful movement of a bubble ponytail, or the intentional asymmetry of an off-center style, straight hair gives you the technical foundation to execute any of these looks beautifully.
The real secret isn’t about having the “best” hair type—it’s about understanding what works with your specific hair and committing to the small details that transform a basic ponytail into something genuinely stylish. A wrapped base, thoughtful face-framing pieces, the right product to enhance shine, strategic placement off-center—these details are what separate a ponytail you do because you need to pull your hair back from one you create because it makes you feel confident and put-together.
Start with one or two of these styles that match your lifestyle and preferences. Practice the technique enough times that it becomes automatic. Then branch out to another style when you’re ready. You’ll quickly develop an instinctive understanding of which ponytails work best with your face shape, hair thickness, and personal style—and that’s when ponytail styling stops feeling like a chore and becomes another tool in your everyday confidence toolkit.