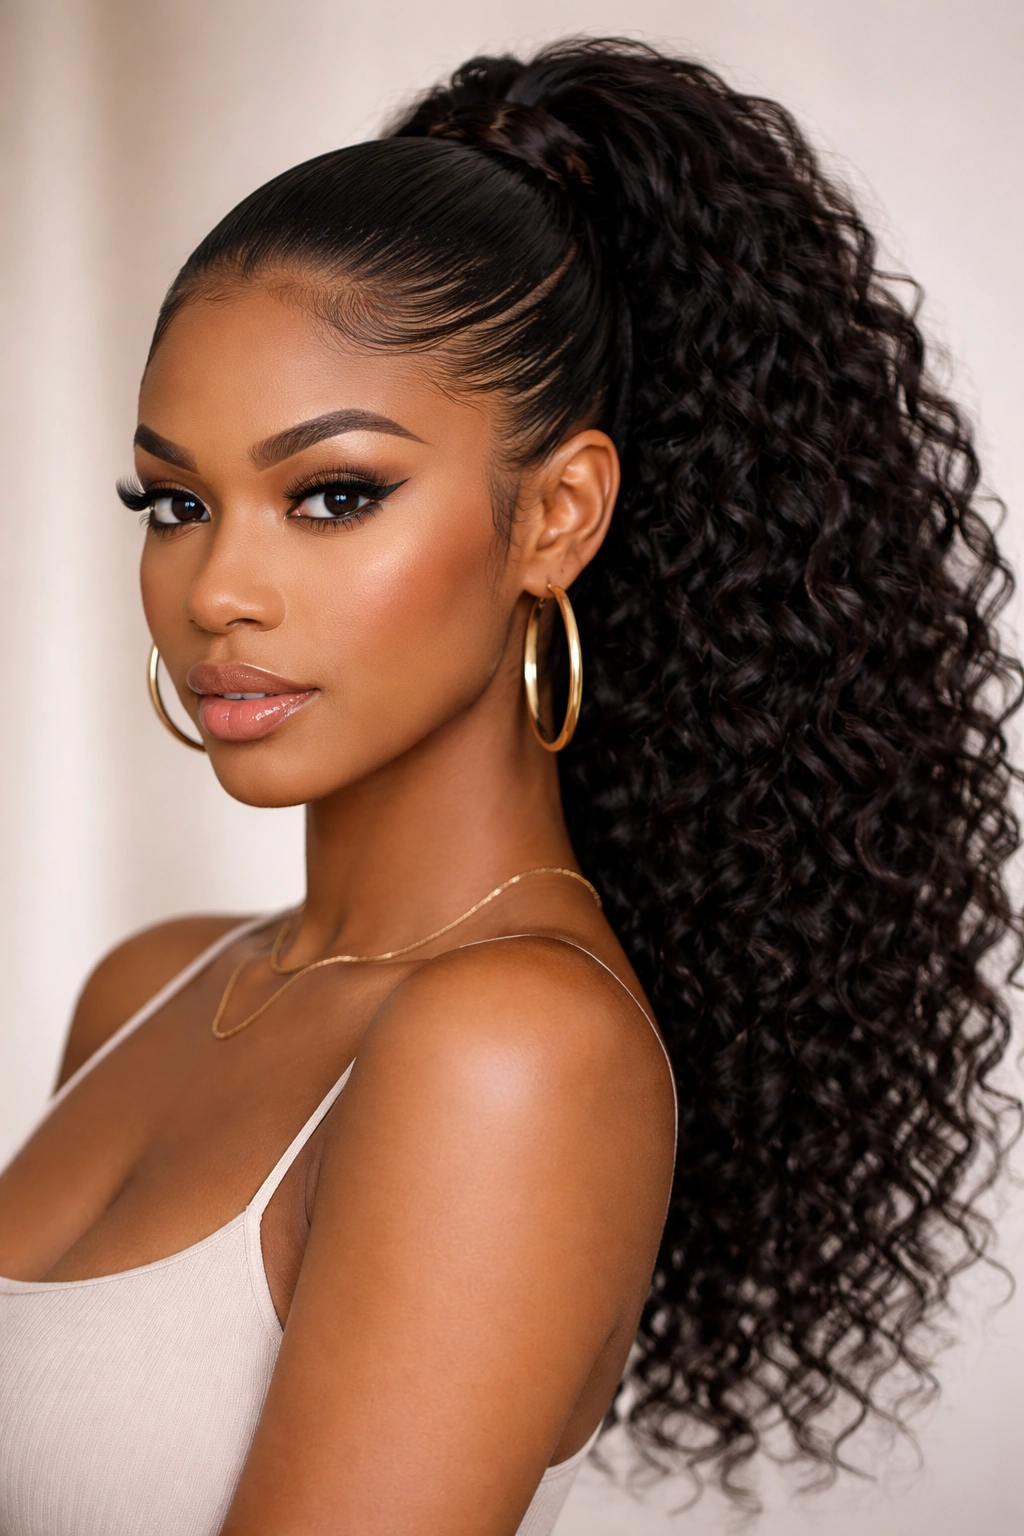
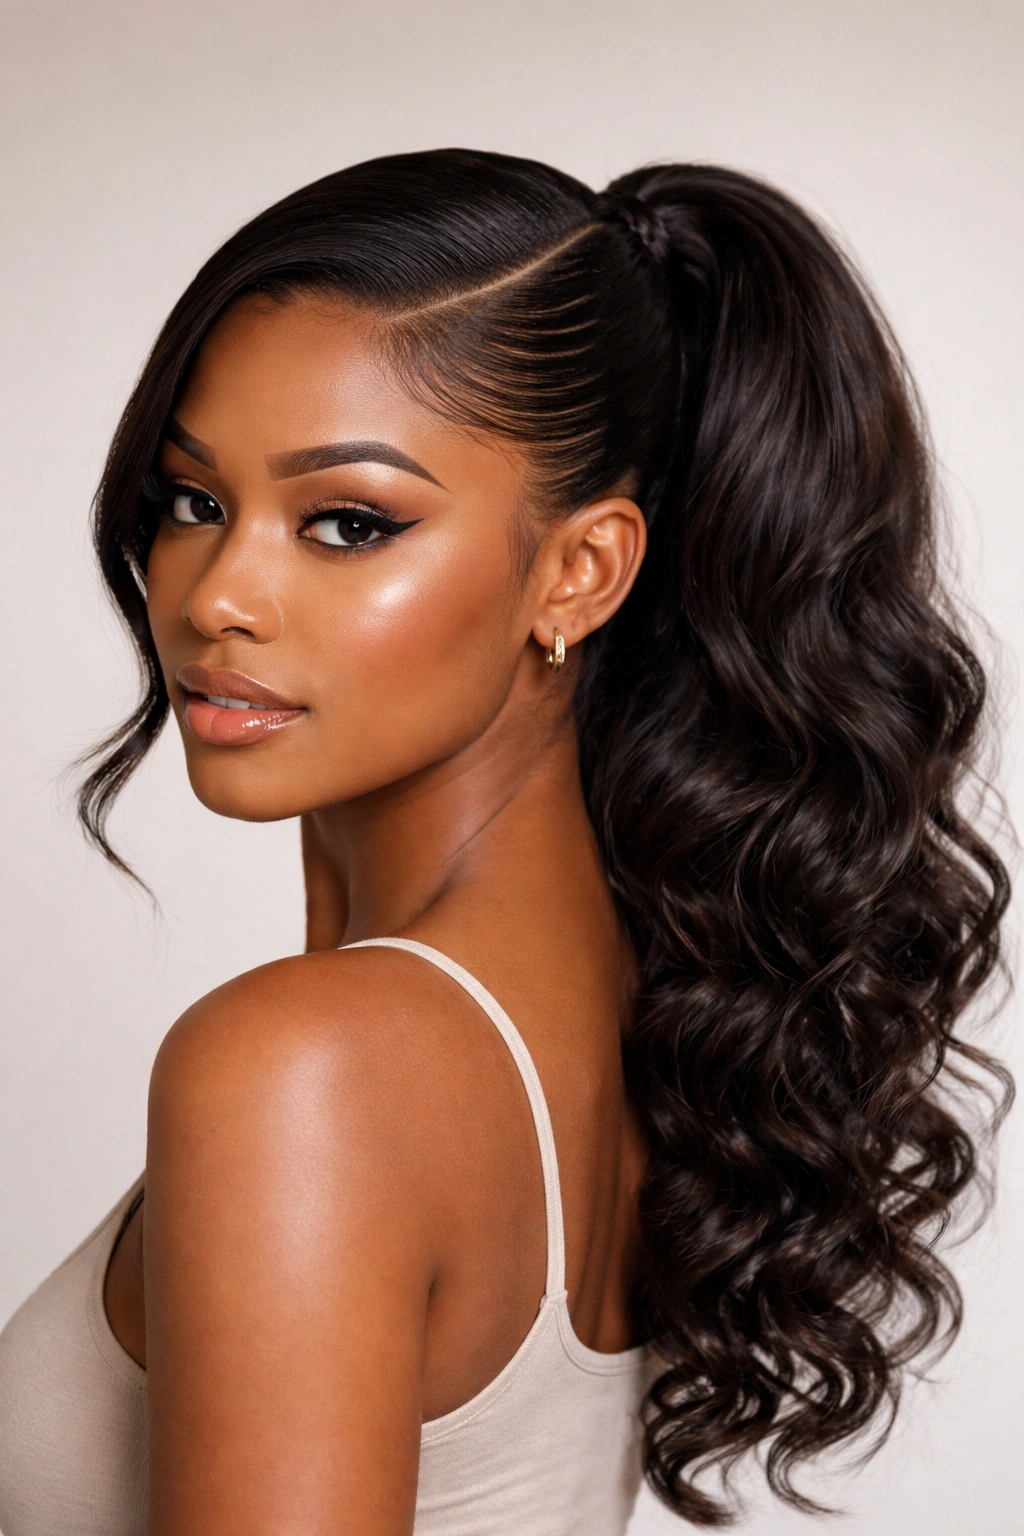
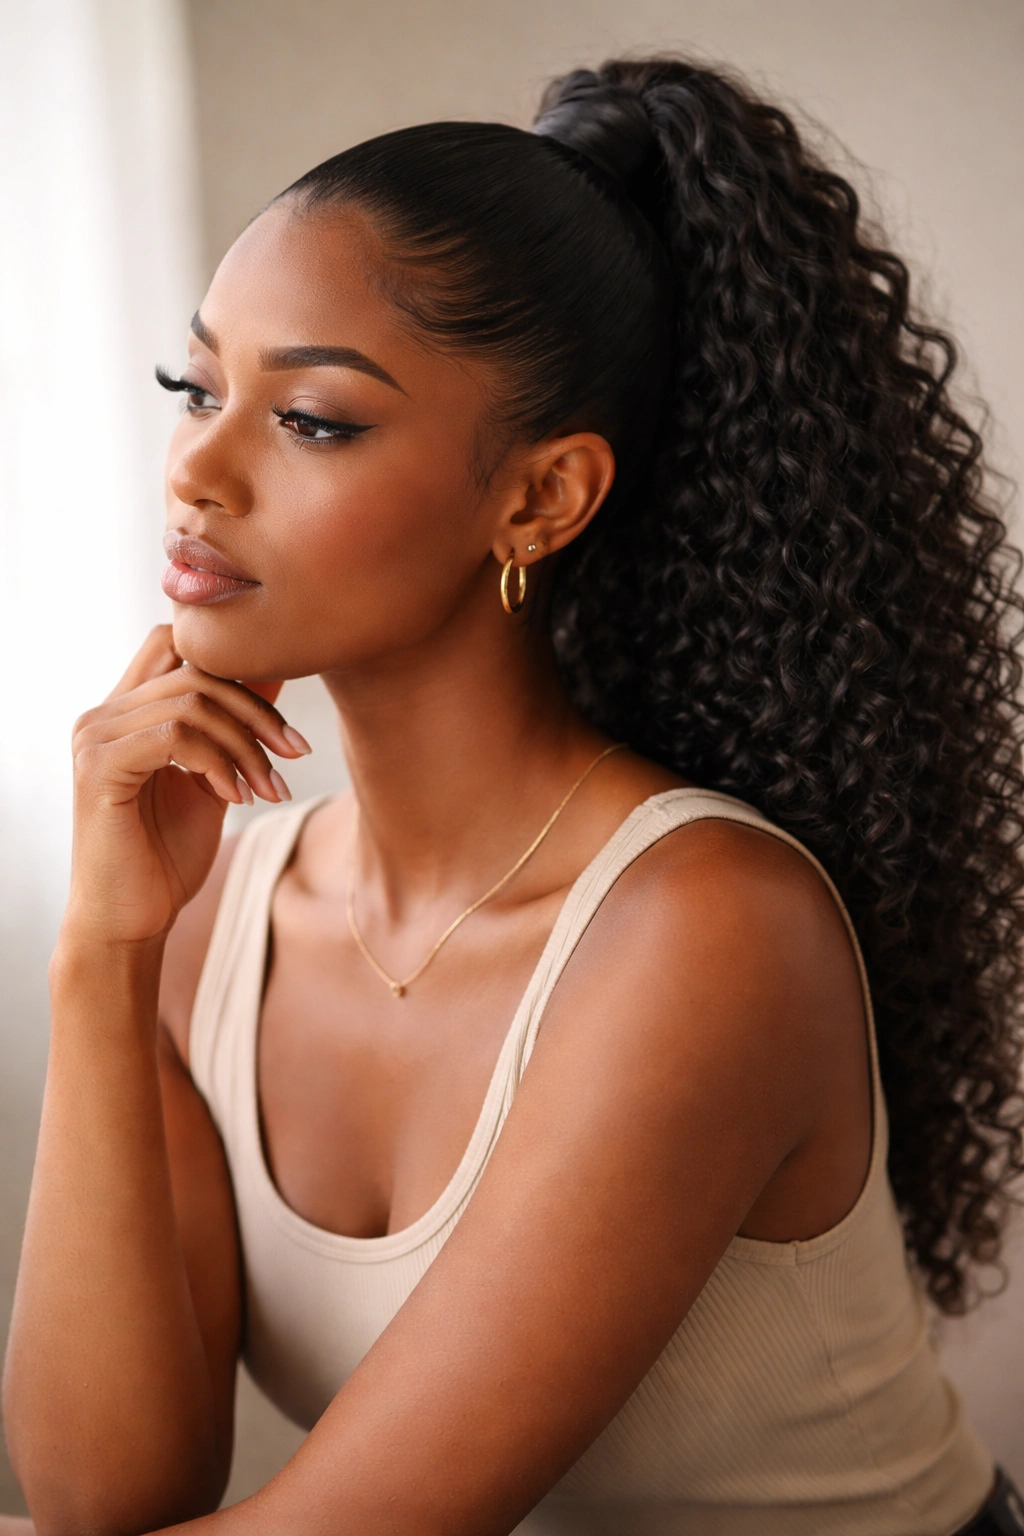
Curly hair and sleek ponytails might seem like they’re at odds, but the truth is that weave ponytails have completely changed the game for people with textured hair. The magic lies in how weaving creates structure and grip on curly strands, giving you that polished, put-together look without the damage that comes from constantly straightening or fighting against your natural texture. A good weave ponytail works with your curl pattern rather than against it, using tension and technique to create definitions and hold that looks intentional rather than forced.
The styles I’m sharing here aren’t just about looking sleek—they’re about celebrating your curls while achieving that smooth, styled appearance you might be craving. Each one uses different weaving techniques, base placements, and finishing touches to give you completely different vibes, whether you’re heading to the office, a formal event, or just a day where you want your hair to feel polished without the stress. The good news? Most of these styles hold beautifully throughout the day and night, so you’re not constantly fussing or re-twisting.
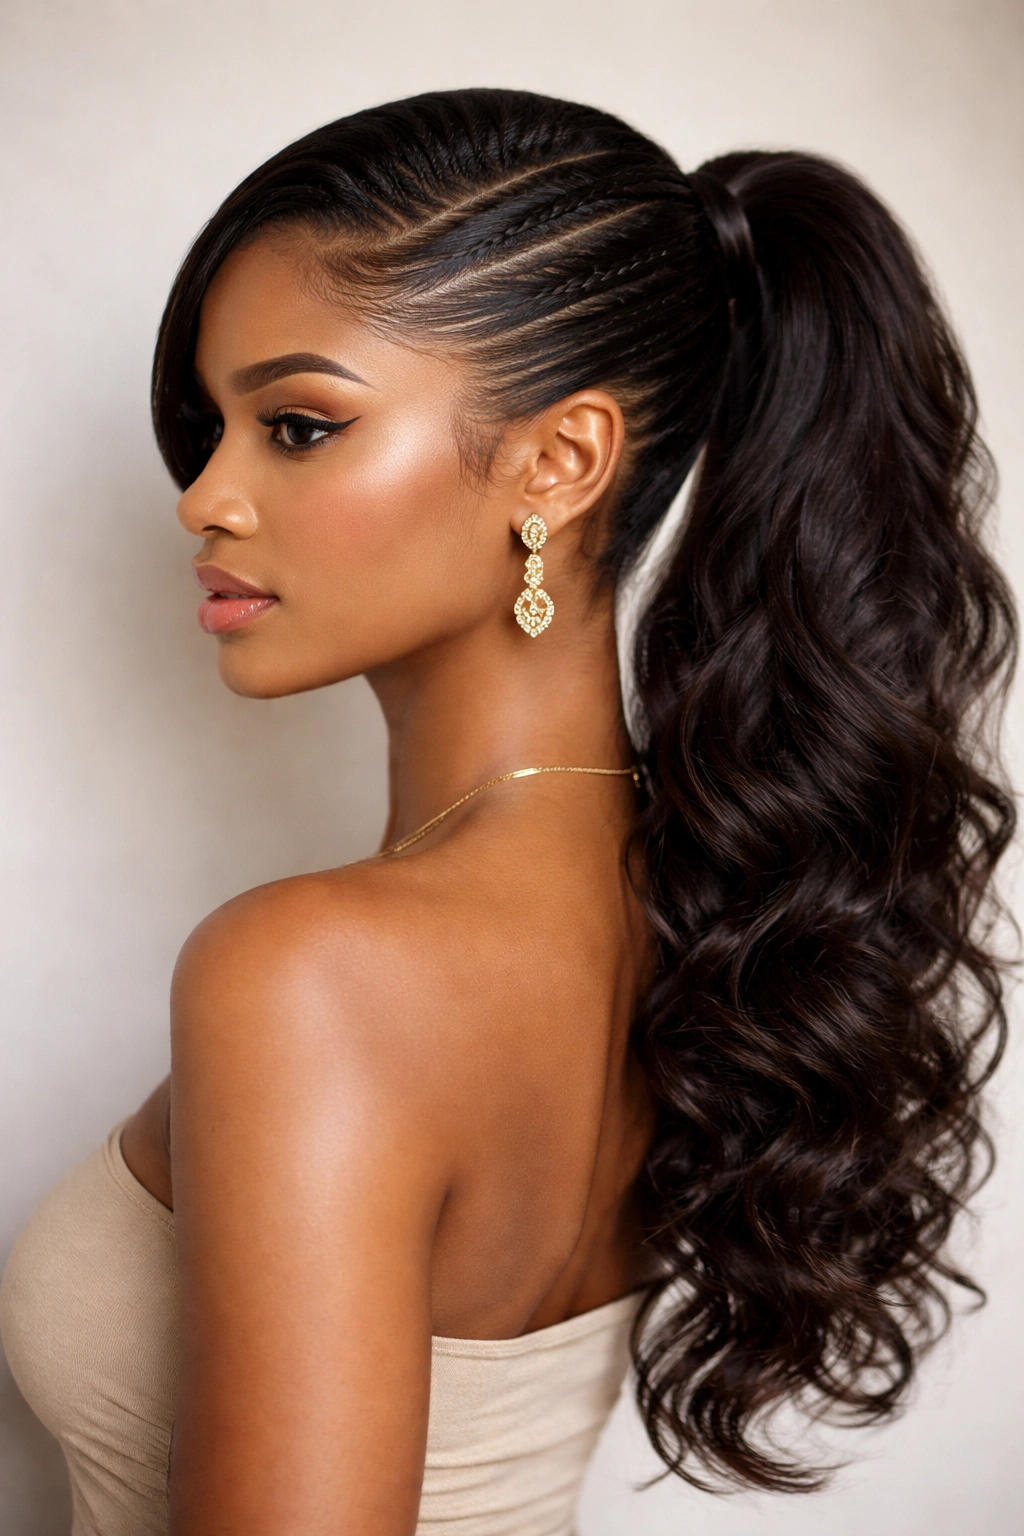
1. The Sleek High Weave Ponytail with Face-Framing Layers
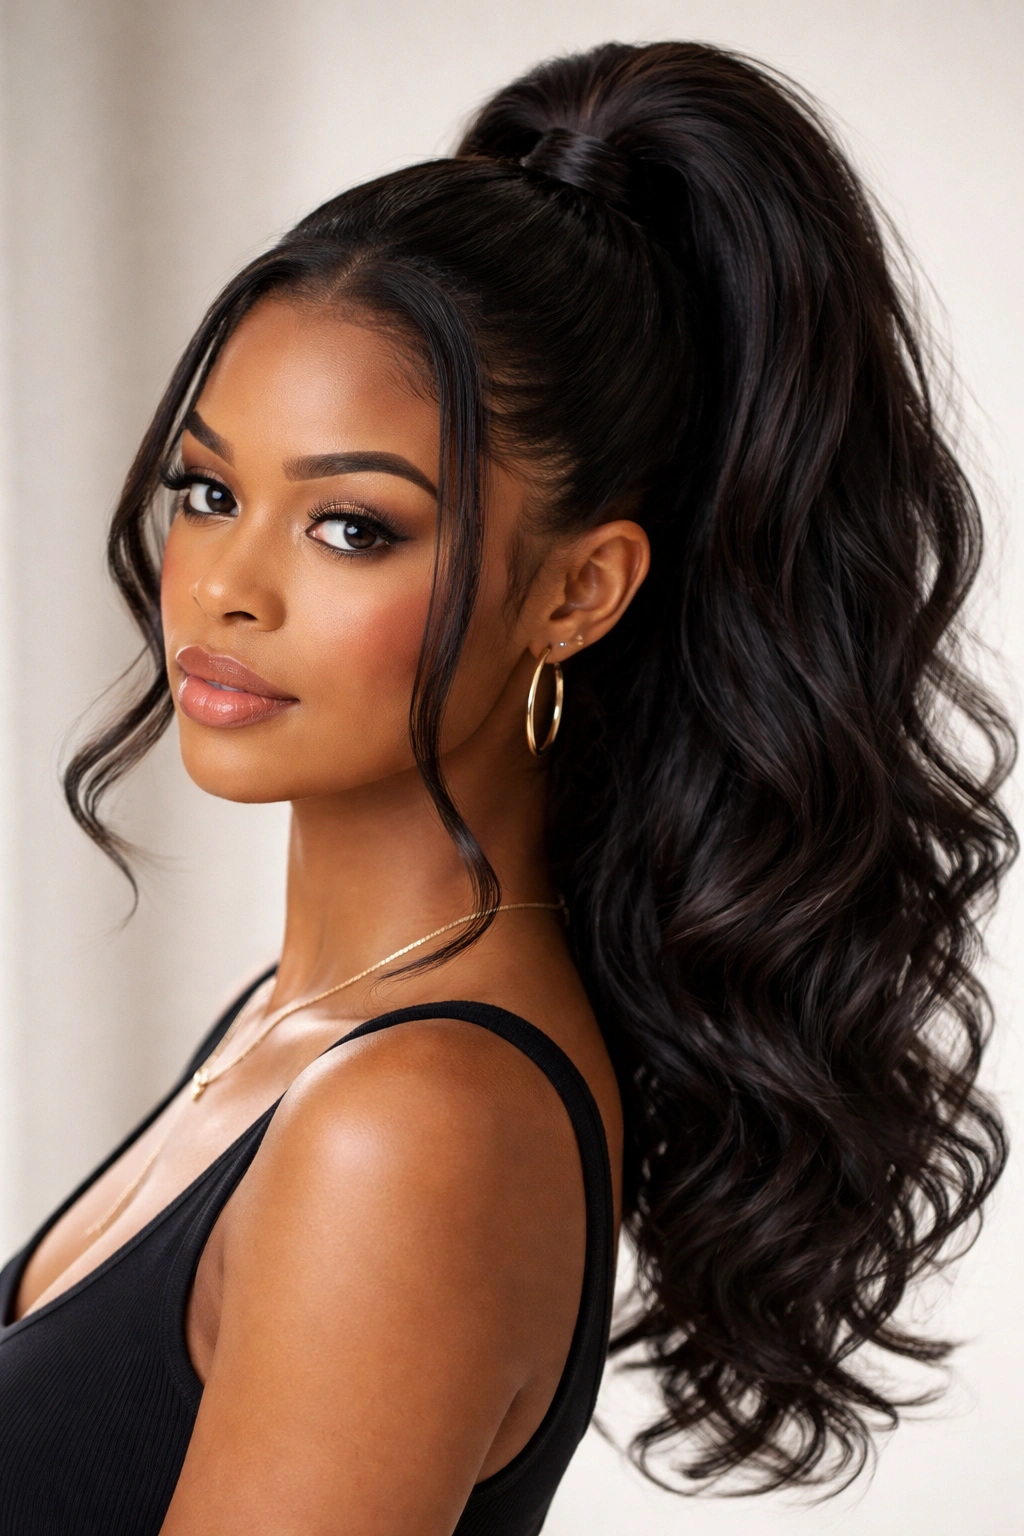
This is the elevated everyday look that works whether you’re at brunch or a work meeting. You create a tight weave pattern that starts at the crown and travels straight back, then gather everything into a high ponytail that sits right at the top of your head. What makes this version special is the intentional face-framing pieces you weave loosely around your hairline—they soften the overall look and prevent that severe, overly pulled appearance that high ponytails sometimes have.
Why This Works Beautifully for Curly Hair
The weaving creates enough grip that your ponytail stays put even if you’re moving around all day, and the texture of the weave actually complements curly hair rather than looking out of place. High ponytails draw attention upward, which makes them perfect if you want to emphasize your facial features or show off that fresh haircut.
How to Build This Look
- Start with damp or lightly dampened curls brushed back smoothly
- Apply a lightweight smoothing cream or gel to your hairline and the sections you’ll weave
- Begin weaving from your left ear toward the crown, using three sections of hair and creating a tight, even pattern
- Continue weaving toward the opposite side, creating a slight arch over your crown
- Bring those face-framing pieces forward gently before securing the main ponytail
- Gather the weaved base and any remaining curls into an elastic at your crown
- Wrap a section of hair (or a decorative cord) around the elastic base to conceal it
Pro tip: Use a fine-tooth comb only on your hairline where you’re weaving—this prevents frizz while keeping the sides smooth and defined.
2. The Wrapped-Base Low Weave Ponytail
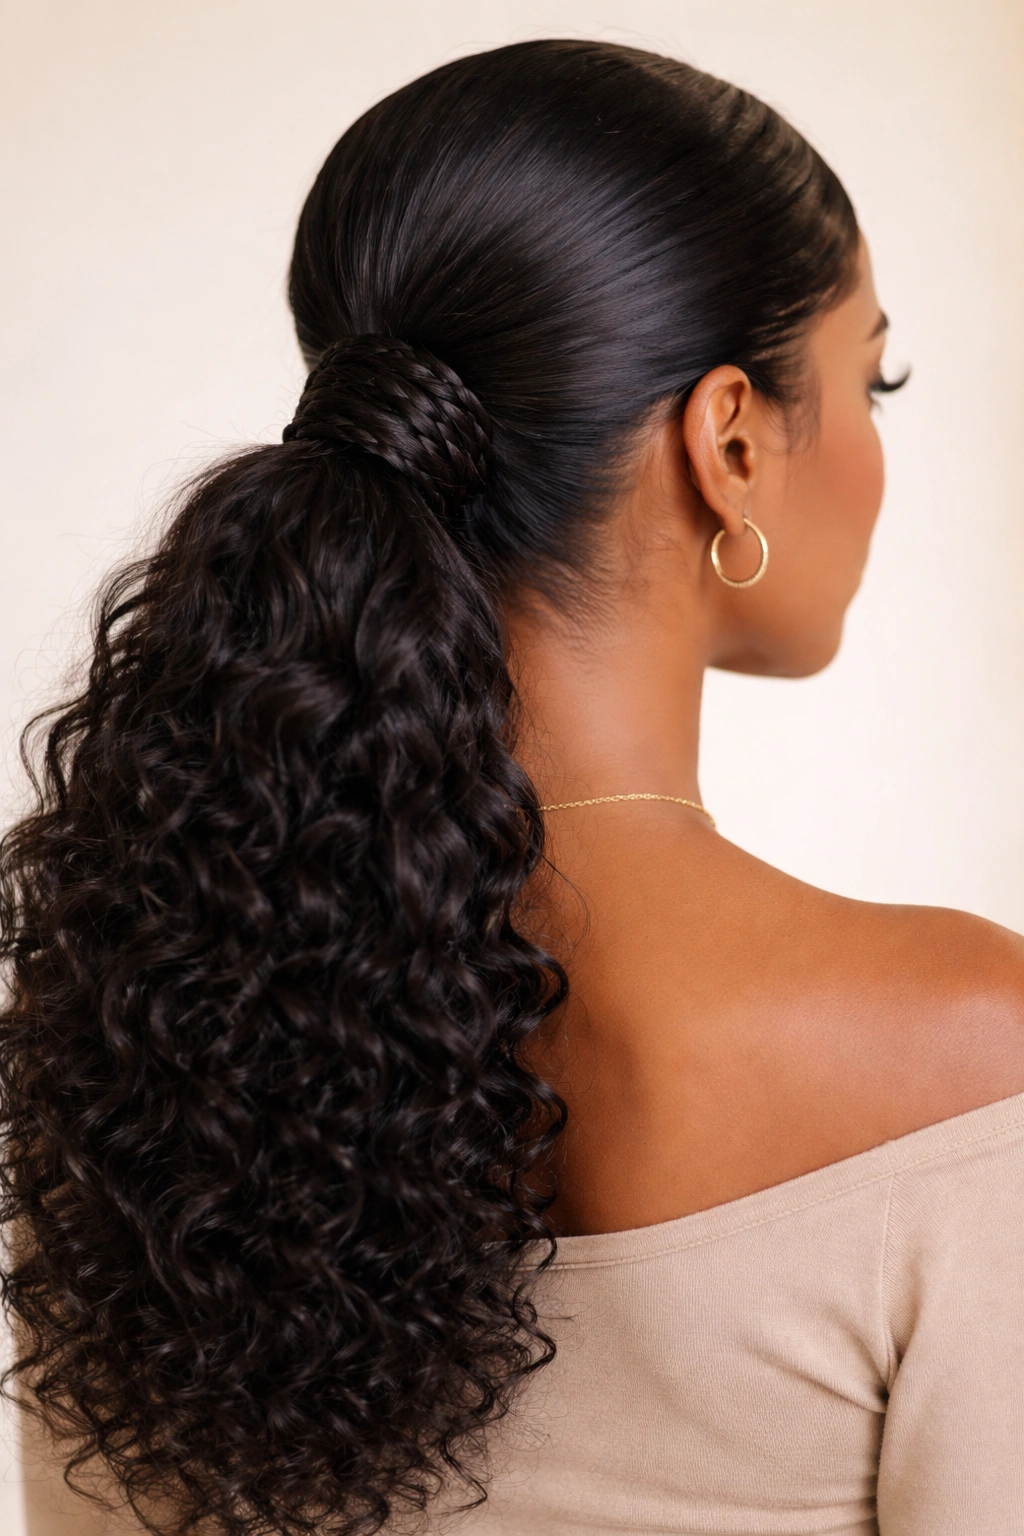
If high ponytails make you feel too severe, this style delivers all the polish with a more relaxed energy. The weave starts at your nape and creates a textured pattern up the back of your head, but instead of pulling everything to the crown, you gather it into a lower ponytail positioned at the base of your neck. The finishing move is wrapping a thick section of braided hair or faux locs around the base, which adds visual interest and completely transforms the look.
The Magic of the Lower Placement
Lower ponytails feel sophisticated and are honestly much easier to maintain throughout the day—there’s less tension on your hairline, which matters a lot if you’re protecting your edges. This placement also photographs beautifully from behind and reads as intentionally stylish rather than purely utilitarian.
Step-by-Step Technique
- Gather your curls and apply smoothing product to the sections you’ll weave
- Begin at the nape of your neck with a three-strand weave, keeping it relatively loose compared to the high style
- Weave upward toward the crown, adding hair as you go and maintaining consistent tension
- Once you’ve woven most of your hair, secure the remaining loose curls into a ponytail at your nape
- Take a small section from the ponytail itself and create a two-strand twist or mini braid
- Wrap that twist around the elastic base, pinning it securely underneath
Worth knowing: This style is brilliant for second-day curls because the weave hides any flatness and the lower placement makes the ponytail feel intentional rather than like you’re just putting your hair up.
3. The Bubble Weave Ponytail With Ribbons
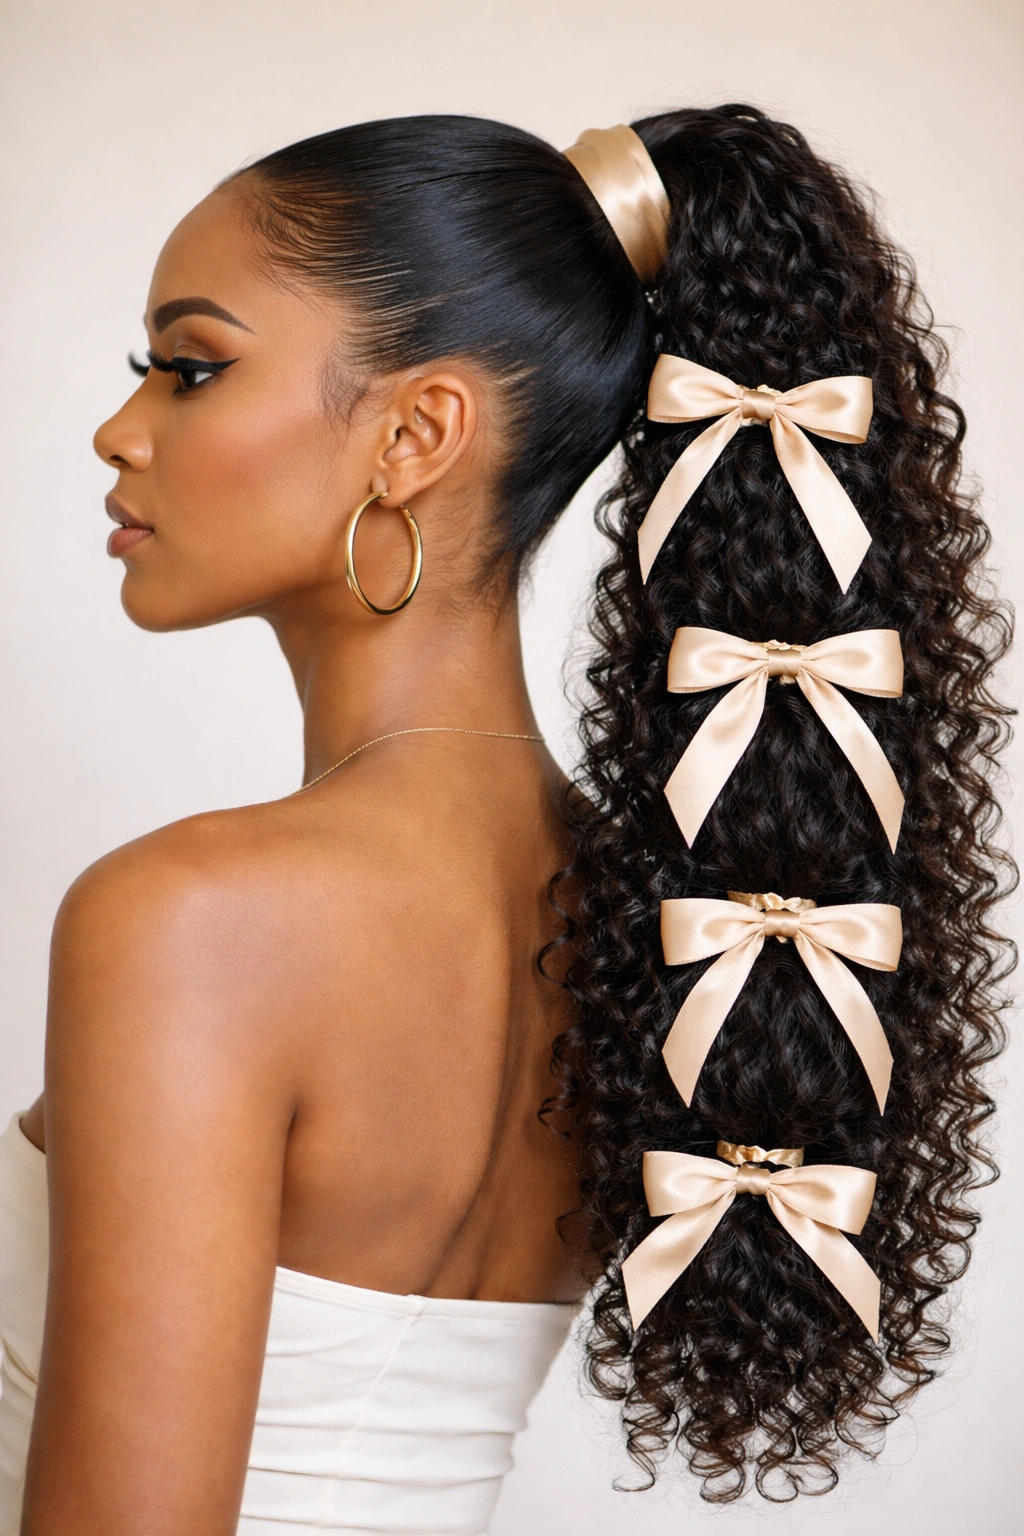
This one brings serious personality and works especially well if you want something that feels playful but still thoroughly put-together. You weave a base pattern, secure the ponytail, then create “bubbles” by sectioning the ponytail and cinching it at intervals with decorative ribbon or thin elastics. The bubbles catch light beautifully and add texture and dimension in a way that feels completely different from a straight ponytail.
Why Bubbles Transform the Look
The bubble technique instantly makes a ponytail feel more intentional and styled—it’s not something you do by accident, which signals effort in the best possible way. The spacing also prevents the whole style from feeling too heavy or pulling on your scalp for hours.
Creating the Bubbled Effect
- Weave your base using the same technique from the wrapped-base style, creating a secure foundation
- Gather hair into a ponytail and secure with a clear elastic
- Measure out equal sections along the length of the ponytail—usually 2 to 3 inches per bubble
- Wrap a decorative ribbon or thin elastic tightly around the hair at your first marked point, cinching to create the bubble effect above it
- Repeat this process down the entire length of the ponytail, keeping spacing consistent
- If using ribbons, you can tie them in small bows at each cinch point for extra flair
Pro tip: Use satin ribbon instead of elastic alone—it adds luxury and the smooth texture prevents friction that might disturb your curl pattern.
4. The Sleek Braided Crown With Weave Ponytail
This is the style that makes people ask “how long did that take you?” because it looks like serious hair artistry, even though it’s surprisingly manageable once you understand the technique. You create a crown of braids around your head, then gather everything—braids, loose curls, and all—into a sleek weave ponytail at the back. The braids act as both decoration and structural support, making the whole style incredibly stable.
Why Double Structure Works
The braids around your crown add architectural interest while also functioning as the first layer of grip for your ponytail. This means your actual ponytail can be slightly looser and more elegant because the braids are doing much of the heavy lifting structurally.
How to Execute This Style
- Part your hair from ear to ear across the crown, creating a front section and a back section
- Create two Dutch braids starting at each ear, braiding toward the back and slightly toward the center
- Let these braids form a crown shape across the top of your head
- At the back of your head, begin weaving the remaining loose hair, incorporating the ends of your braids into the weave pattern
- Continue weaving until you’ve incorporated most of your curls into an organized pattern
- Gather everything into a low or mid-height ponytail at the nape or slightly above
- Wrap a thin section of hair around the elastic base for a finished appearance
Real talk: This style requires patience and decent weaving skill, but it’s worth practicing because it looks incredibly polished and the braids provide so much security that your ponytail will last all day without slipping.
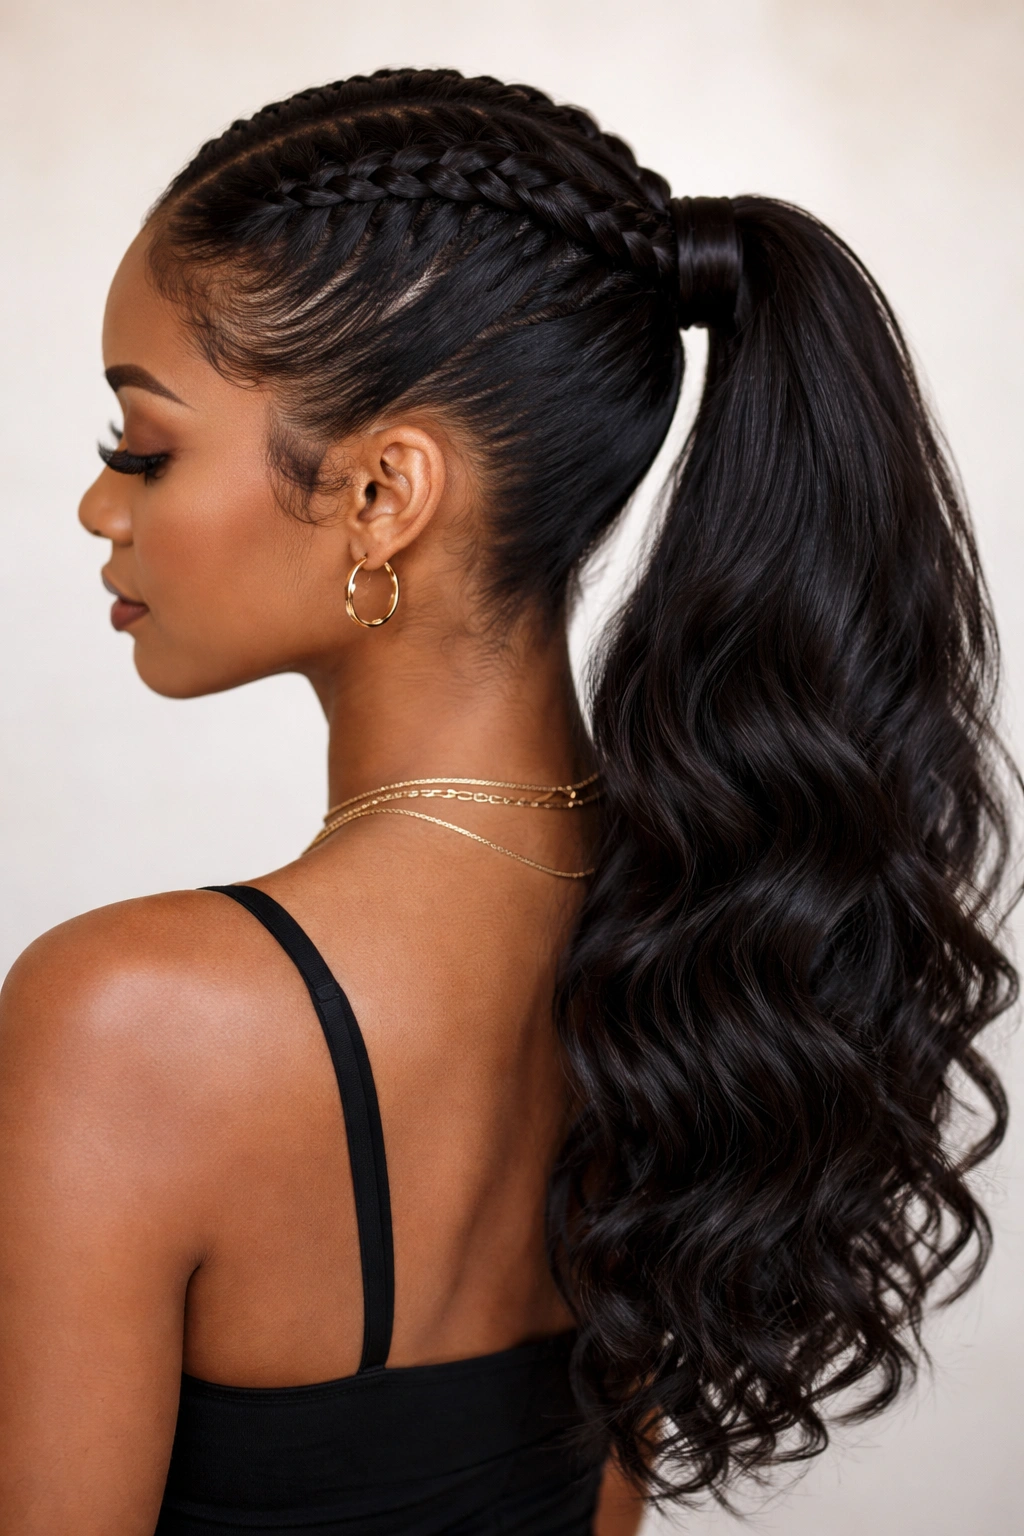
5. The Side Sweep Weave Ponytail
Side-swept styles have a naturally glamorous energy, and this weave version amplifies that with texture and movement. Instead of creating a centered weave pattern, you start from one side and create a diagonal or sweeping weave that travels toward the opposite side of your head, then gather everything into a ponytail positioned slightly off-center. The asymmetry immediately reads as intentional and fashion-forward.
The Asymmetrical Advantage
Side-swept styles highlight one side of your face and can be incredibly flattering—they’re also perfect for days when your texture is slightly uneven or you want to draw attention away from one side. The weaving on the visible side creates beautiful definition and texture.
Building the Side Sweep
- Start with your curls dampened and smoothed back with product
- Begin your weave on one side of your head—let’s say the left—starting near your temple
- Weave in a diagonal pattern that travels from that starting point toward the opposite ear
- Keep the weave slightly looser than a face-framing style, allowing some texture to show through
- As you approach the back, allow some curls to remain loose on the opposite side for balance
- Gather your weaved section and the remaining loose curls into a ponytail positioned at the back, slightly offset from center
- You can secure this ponytail high, mid-height, or low depending on the overall vibe you want
Insider note: This style photographs beautifully from an angle, making it perfect if you’re heading somewhere you might be taking photos or want something that’s visually interesting from the side.
6. The Double Bun Weave Ponytail

This is where playfulness meets sophistication—you create a weave base that’s split into two sections, each gathered into its own high bun at the crown. It’s a style that works for festivals and casual events, but if you style it with elevated pieces or metallic accessories, it reads as completely intentional and fashion-forward, not juvenile.
Why Two Buns Feel Intentional
Double buns feel deliberately styled rather than like you’re just putting your hair up—there’s an artistry to the split and the symmetry. This style also works beautifully with some curls left loose or slightly pulled out of the buns for a softer, more romantic version.
Creating Matching Buns From a Weave
- Create a center part from your hairline straight to the nape of your neck
- On one side, create a weave pattern that curves slightly toward one ear, starting from the crown area
- Repeat on the opposite side, creating a mirrored weave pattern
- Once you’ve woven each side, gather the weaved sections into high ponytails positioned symmetrically on either side of your crown
- Twist or braid each ponytail, then wrap it around itself to create a compact bun
- Secure each bun with bobby pins, tucking any flyaways back into the bun base
Pro tip: Leave a few curls loose around your face and at the nape for a softer, less severe version—this style can read as too sleek if every single strand is controlled.
7. The Sleek Center-Parted Weave Ponytail with Locs

If you’ve been considering locs or already have them, this style weaves your natural curls with synthetic or human-hair locs, creating a ponytail that has incredible visual interest and texture. The locs add weight and structure while your natural curls show through and blend, creating a style that’s both sleek and deeply textured.
Blending Natural Hair With Locs
This approach lets you experiment with length and volume without committing fully to locs—you can take them down whenever you want. The combination of your curl pattern with the smooth uniformity of locs creates a really striking visual effect.
Technique for Mixing Hair Types
- Center part your curls from your hairline to the nape
- Section your hair into the portions you’ll weave, and choose which sections will incorporate locs
- Begin weaving your curls on one side, adding a loc into your weave pattern as you work
- The loc weaves right into your three-strand pattern, adding dimension to the actual braid
- Continue this process on both sides, spacing your locs symmetrically
- Gather everything into a ponytail at the base of your neck or slightly higher
- The locs will naturally position themselves around the ponytail, creating texture and movement
Worth knowing: This style works especially well if you’re dealing with very thick or very textured curls—the locs add weight that helps everything sit together more smoothly.
8. The Twisted Underside Weave Ponytail

This is a more textured, dimensional take on the weave ponytail—instead of traditional three-strand weaving, you create two-strand twists on the underside of your hair while the top stays loose and curly. When you gather it all into a ponytail, the twists create beautiful visual interest and the underneath structure keeps everything secure without looking overly controlled on top.
The Beauty of Hidden Structure
By weaving or twisting on the underside, you maintain the fullness and curl definition on top while getting all the security and polish from the underneath work. This is honestly genius if you want a ponytail that looks effortless rather than constructed.
How Underside Twisting Works
- Section the hair at your nape and back of your head into manageable pieces
- On those back sections, create two-strand twists by taking two strands and twisting them around each other
- These twists should travel upward and slightly toward the sides, creating a subtle pattern
- Allow the hair on top of your head to fall naturally curled and loose
- Once you’ve twisted the underside sections, flip your head forward and gather everything into a ponytail
- The twists will position themselves underneath, visible when you move but not dominating the front view
Pro tip: This works beautifully with slightly damp hair because the twists hold better and your curls on top will feel more defined and springy.
9. The Slicked-Back Weave Ponytail With Volume
Sometimes you want that completely slicked-back, sculpted appearance—this version uses heavy-hold gel and weaving on the sides while keeping serious volume and curl at the crown and throughout the ponytail itself. It’s the style that works for performances, parties, or days when you want maximum impact.
Balancing Sleek With Volume
The key is understanding that slicked-back doesn’t have to mean pulled-tight or sparse. You can have a completely smooth, sculpted hairline and crown area while the actual gathered portion of your hair is full, bouncy, and curly. The contrast between the two is actually what makes this style so striking.
Building Maximum-Volume Ponytail
- Apply a strong-hold smoothing gel to your hairline and the sections you’ll sculpt back
- Use a fine-tooth comb to smooth hair straight back, working in sections and creating clean lines
- Create a subtle weave or twist pattern on the sides as you work the hair back toward the crown
- Gather everything into a ponytail, but don’t make it too tight—you want volume and movement
- The curls in your gathered ponytail should be as springy and full as possible, contrasting with the sculpted top
- You can leave some pieces loose around your face for an even softer contrast
Real talk: Heavy-hold products are your friend here, but look for formulas designed for curly hair—some heavy-duty gels can leave buildup or white residue on dark hair.
10. The Curved Weave Ponytail With Deep Side Part
This final style uses a deep side part and a curved weave pattern that follows the natural arch of your head shape. Rather than a straight-back or diagonal weave, the pattern curves and moves, which creates dynamic visual interest and works beautifully with curly hair texture.
Why Curves Complement Curls
Straight lines and angular patterns can sometimes feel at odds with curly hair texture—curves work with it instead. A curved weave pattern mirrors the movement of your curls and creates a cohesive, unified look rather than making your hair feel like it’s being forced into a shape it doesn’t naturally want.
Creating a Graceful Curved Pattern
- Start with a deep side part, sweeping more hair to one side than the other
- Begin your weave from that deeper side, starting near the temple area
- Instead of weaving in a straight line, allow the weave pattern to curve gently as it travels toward the back
- The curve should be subtle but visible—think of it as following the natural arc of your head shape
- As you work, maintain consistent tension and even section sizes to keep the curve symmetrical and intentional
- Gather everything into a ponytail positioned at the back, either centered or slightly offset to match your part
- Leave a few pieces loose around your face to echo the movement of the weave
Insider note: This works beautifully with natural texture and you don’t need heavy products—even with just a light leave-in conditioner, the curved pattern shows up clearly and looks intentional.
Final Thoughts
Weave ponytails aren’t just a protective style or a practical way to manage curly hair—they’re a canvas for creativity and self-expression. Each of these ten styles gives you a completely different energy depending on what you’re doing and how you want to feel. The beautiful thing about weaving is that once you understand the basic three-strand pattern and how to adapt it, you can mix and match these techniques, adjust placements, and create variations that feel entirely your own.
What matters most is finding the style that makes you feel confident and beautiful. Some days you’ll want maximum polish with that slicked-back look, and other days you’ll want playful bubbles or a romantic side sweep. The wonderful part is that with your curls and a solid weave technique, you have all the tools to create something stunning, regardless of which direction you choose. Start with whichever style speaks to you most, practice the weaving pattern, and remember that your curls are your strength—the weave is just there to organize and celebrate them.