There’s nothing quite like pulling your hair back and instantly feeling polished, put-together, and ready to tackle the day. The ponytail is the ultimate shortcut—it works on second-day hair, disguises a missed wash day, and transforms you from rumpled to refined in seconds flat. Whether you’re rushing out the door, heading to the gym, or pivoting from work to evening plans, you don’t need to spend half your morning styling.
The beauty of the humble ponytail is its versatility. It’s not just one look—it’s a whole collection of styles that range from sleek and professional to playful and textured. The best part? Every single one takes about five minutes, sometimes less once you’ve done them a couple of times. You don’t need heated tools, fancy products, or advanced braiding skills. A few bobby pins, a reliable hair elastic, and maybe some dry shampoo or texturizing spray are honestly all you need.
These 15 ponytail styles are designed to work on different hair lengths, textures, and occasions. Some are perfect for the office, others are ideal for casual weekend plans, and a few blur the line between sporty and elegantly dressed up. The key is learning the techniques that work with your specific hair—because what works beautifully on thick, wavy hair might need a slight adjustment if you have fine, straight hair, and that’s completely fine. These guides include those real-world tweaks so you can nail every style.
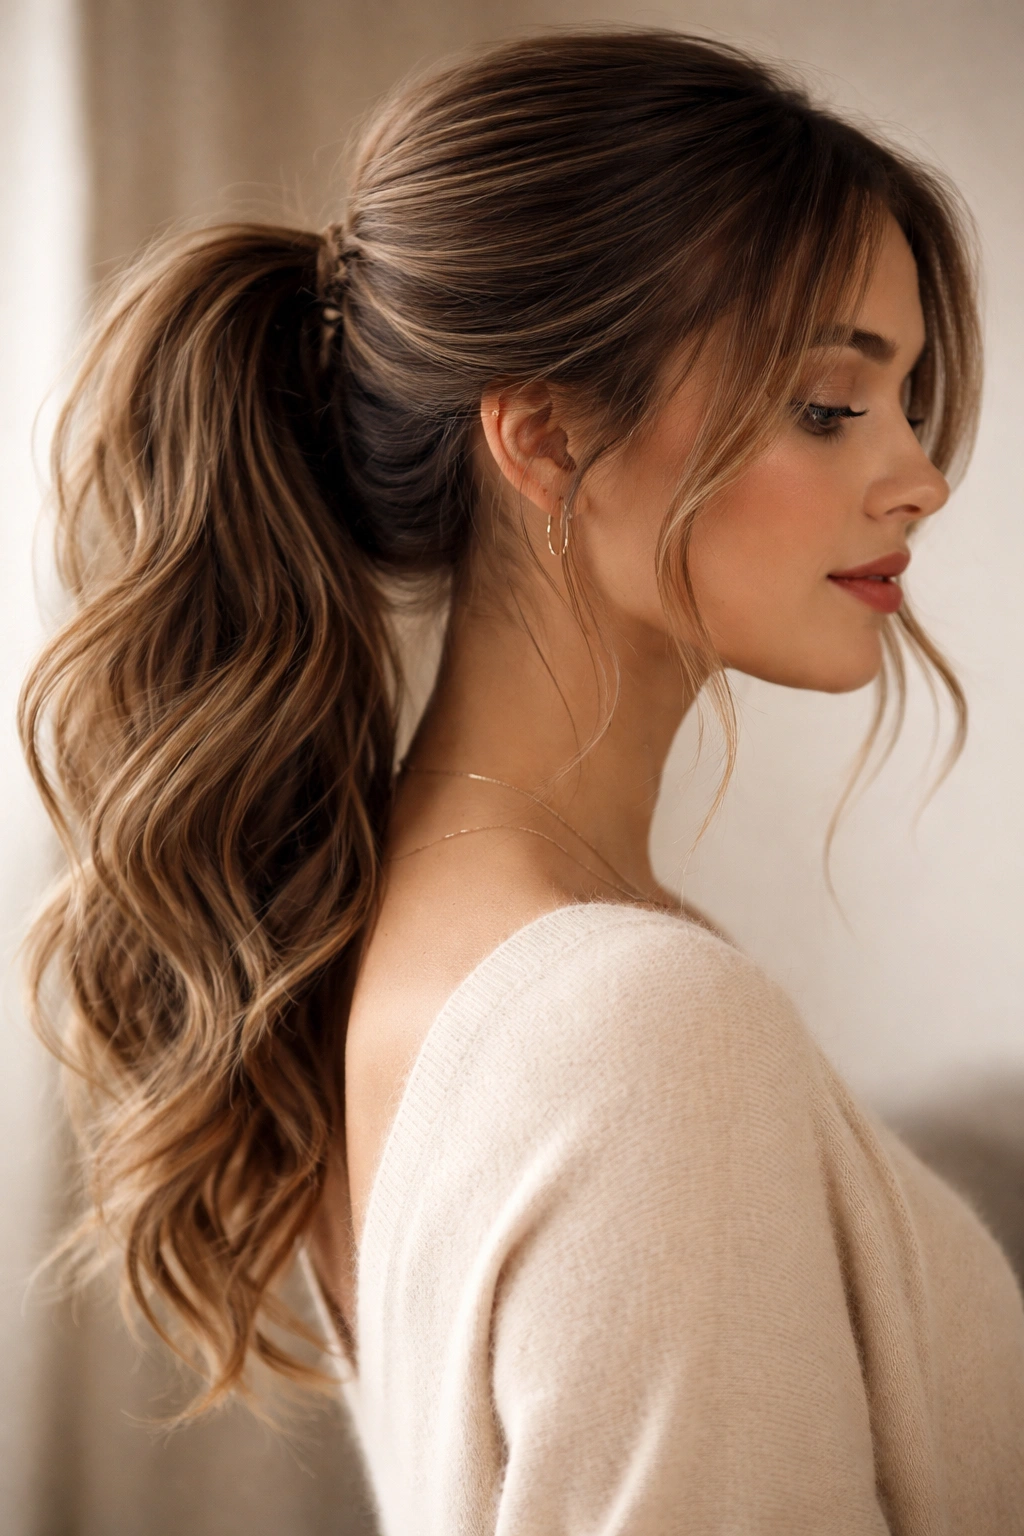
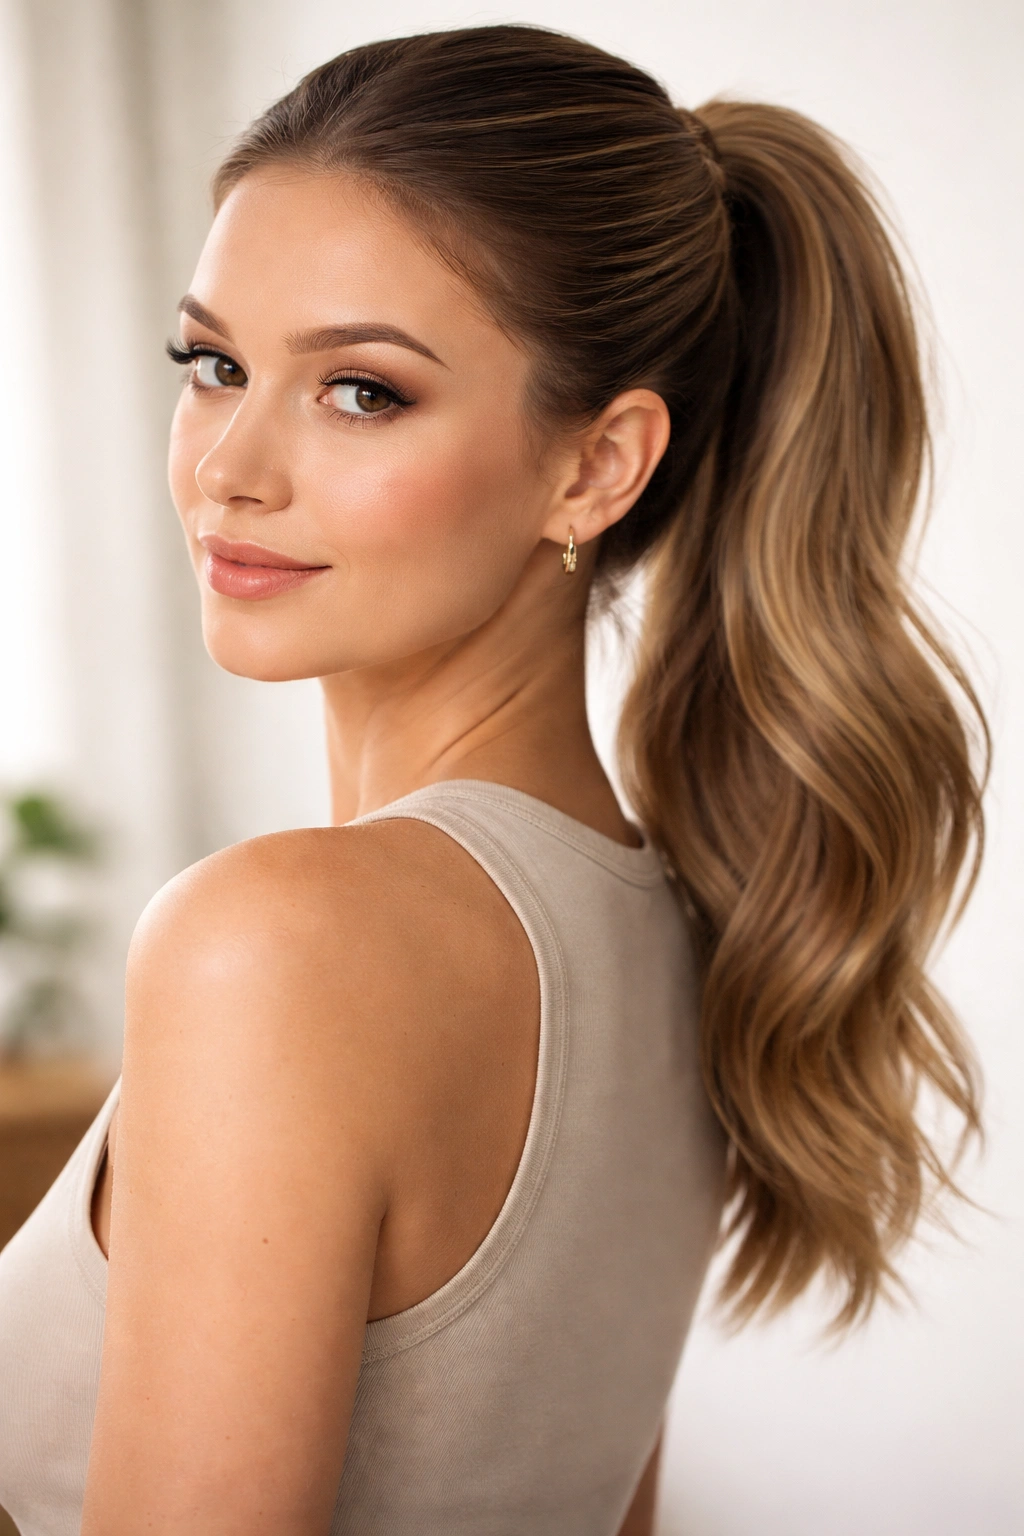
1. Classic High Ponytail
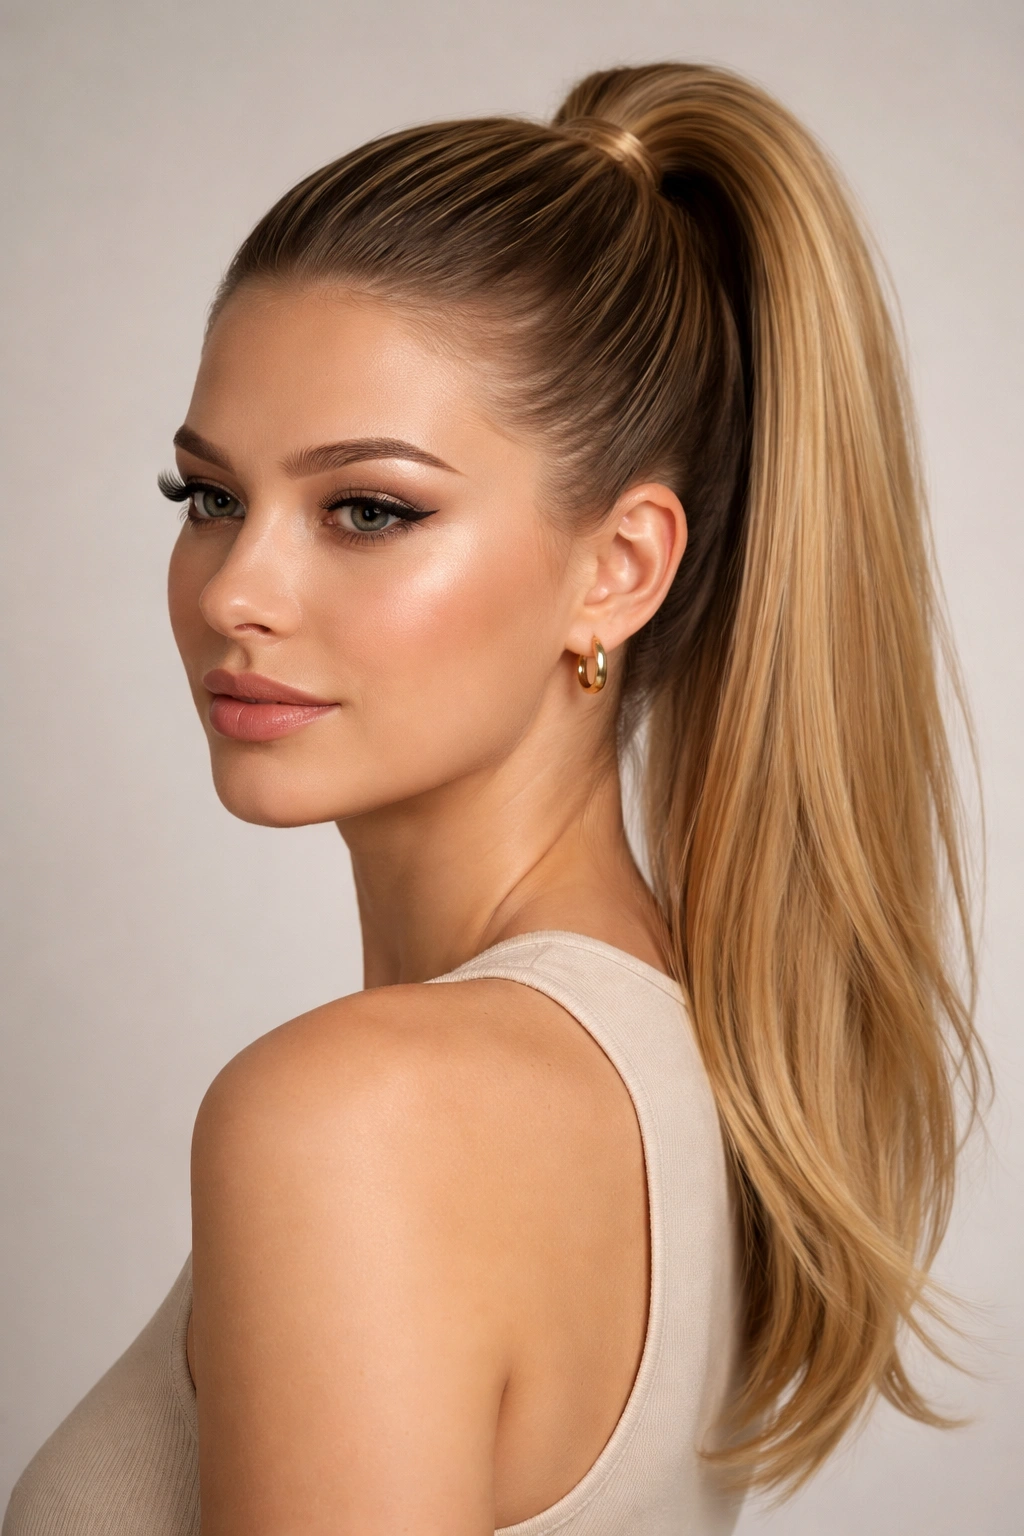
The classic high ponytail is the foundation of fast styling. It’s clean, it’s professional, and it works exactly the same way whether you’re prepping for a job interview or a casual Friday. The magic is in how you position it and how much polish you add at the base—and yes, there are easy tricks to make it look expensive rather than just “threw hair up.”
Why This Works So Fast
A high ponytail requires just three steps: brush, gather, and secure. There’s no layering, no complex technique, no braiding to learn. The speed comes from the simplicity, but the finished look depends entirely on whether you take two extra seconds to smooth the sides. When you secure the hair high on the back of your head—roughly where the crown sits—it automatically elongates your face and creates a lifted, intentional appearance. That’s why this style feels polished even when it’s genuinely effortless.
How to Create It in Under 5 Minutes
- Brush your hair straight from roots to ends, working out any tangles. If your hair is second-day and needs texture, skip the brushing or use a wide-tooth comb instead.
- Gather your hair at the crown, holding it in your hands about 2-3 inches back from your hairline. Position it slightly higher than the very top of your head—this small positioning change makes an enormous visual difference in how lifted you’ll look.
- Secure with a sturdy elastic, wrapping it around twice if your hair is fine or medium-thickness, and three times if you have very thick hair.
- Smooth any flyaways with a small dab of gel, a smoothing balm, or even a damp fingertip along the hairline and sides.
- Add an optional second elastic about 1-2 inches below the first one—this creates a subtle, intentional segmented look that reads as more fashion-forward than a single elastic.
Pro tip: If you have baby hairs or a wispy hairline, smooth those down first with a tiny amount of edge control product or gel before gathering the main ponytail. It takes 10 extra seconds but completely changes how polished the overall style looks.
2. Low Sleek Ponytail
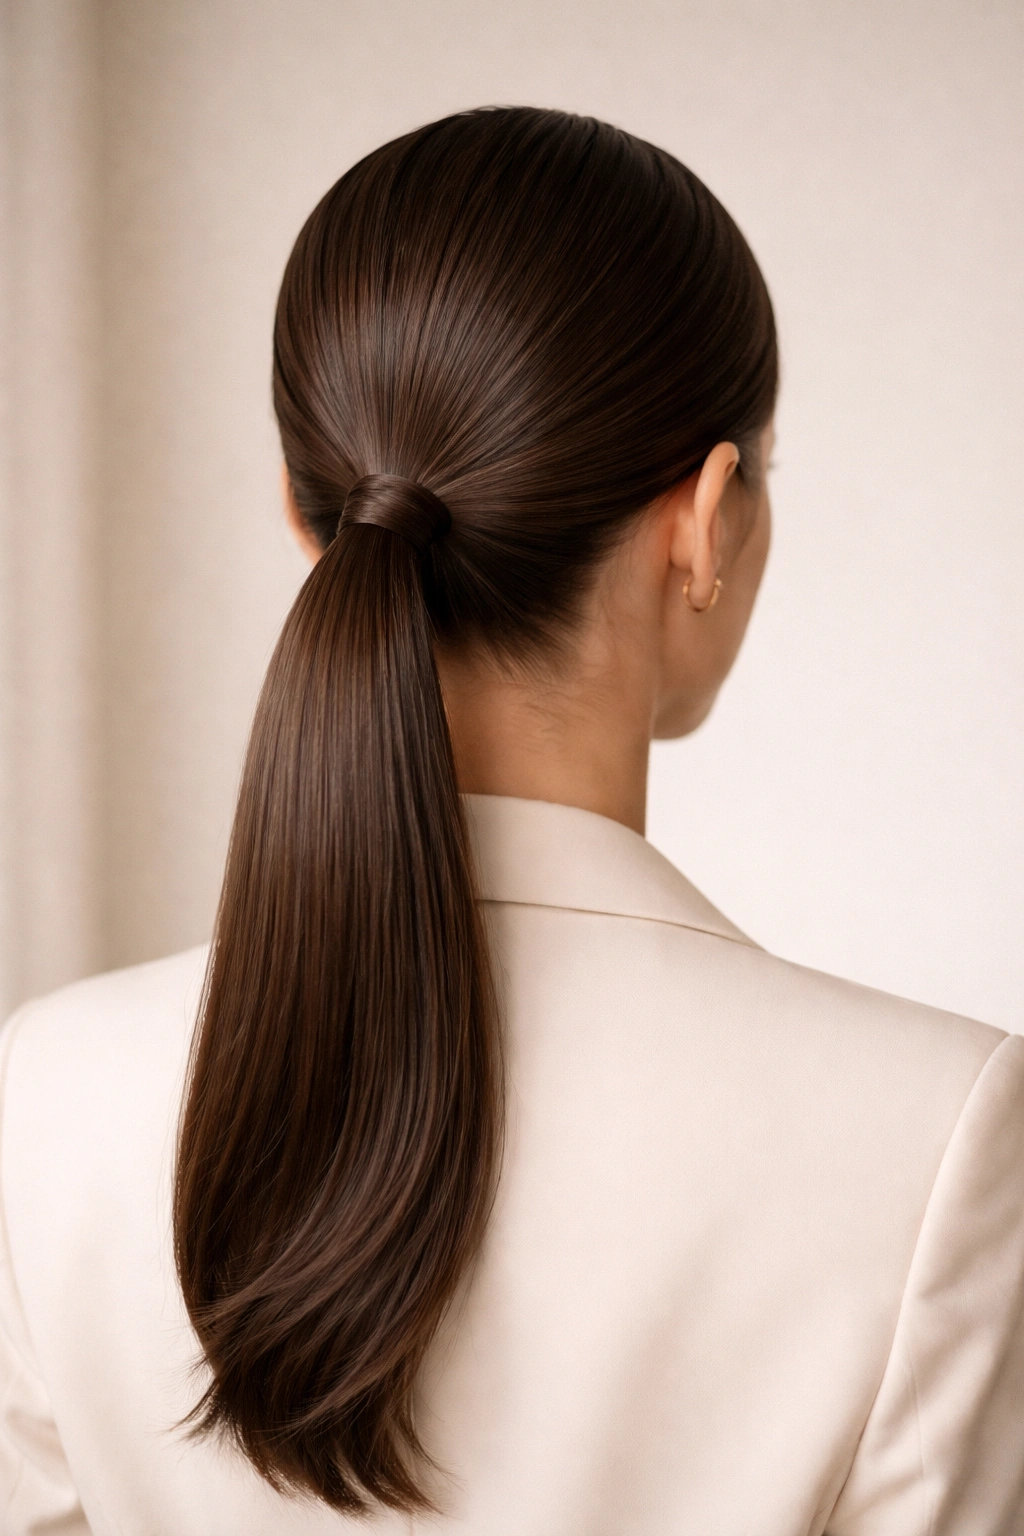
The low sleek ponytail is your secret weapon for looking put-together when you honestly didn’t try very hard. It sits at the nape of your neck, which is inherently more sophisticated than a high ponytail, and the sleekness adds a layer of intentionality that reads as mature and professional. This style also works beautifully when you’re transitioning from work to an evening out—same hair, completely different vibe depending on what you wear with it.
Why This Particular Style Reads as Polished
Positioning matters here. A low ponytail sits lower than you might instinctively place it—right at the base of your skull, almost where your neck begins. This lower placement automatically makes you look more refined because it frames your face and elongates your neck. The sleekness is what prevents it from looking casual or undone. When every piece is smoothly tucked back without texture or volume, it signals intentionality and control.
Creating a Sleek Low Ponytail in Minutes
- Start with damp or slightly dampened hair—use a spray bottle if your hair is completely dry. Damp hair is infinitely easier to smooth than bone-dry hair.
- Brush your hair straight and comb through from scalp to ends to eliminate flyaways.
- Apply a smoothing serum or lightweight oil to your palms and run your hands over the surface of your hair, focusing on the top layer and sides. This creates shine and keeps everything locked in place.
- Gather your hair at the nape of your neck using both hands, smoothing as you go. Hold it taut.
- Secure with a small, strong elastic positioned right where all your hair comes together. Wrap it three times for security.
- Tuck any stray pieces behind your ears before smoothing them into the main ponytail with a fine-tooth comb or gel.
Worth knowing: If you have lots of texture or curl, you can still create a sleek low ponytail by blow-drying your hair straight first, or by using a flat iron on just the crown and sides while leaving the length wavy or curled. The key is sleekness at the scalp where it matters most.
3. High Textured Ponytail
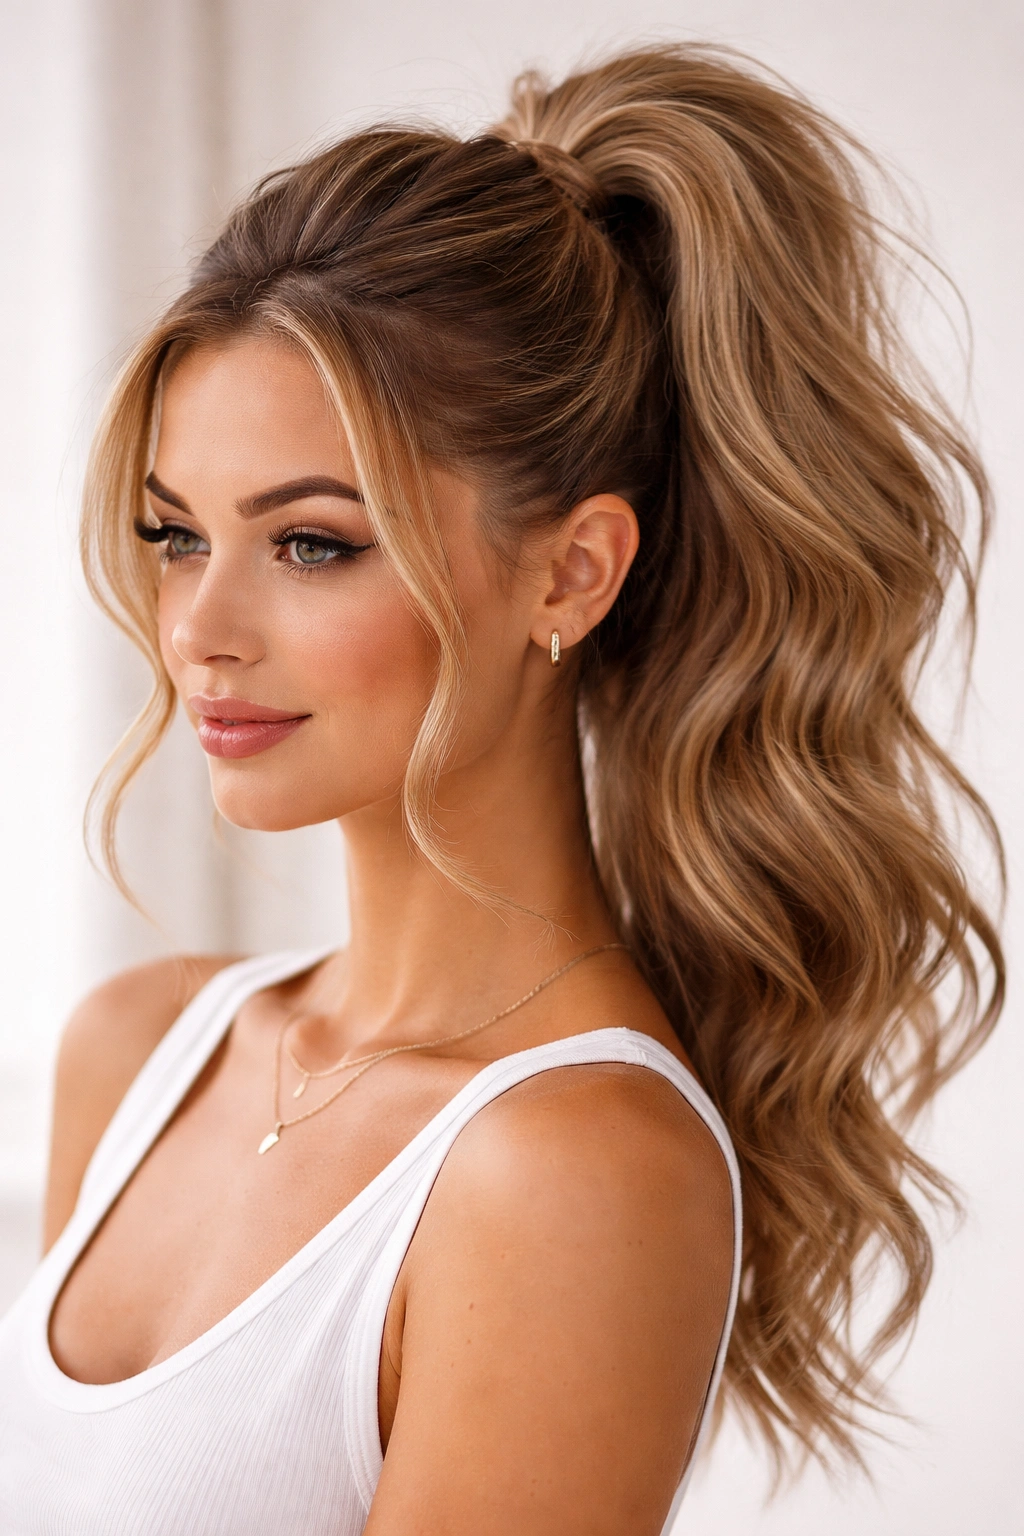
A textured high ponytail is the quick-fix version of an expensive-looking style. It takes advantage of whatever natural texture or waves you already have, cranks up the volume at the crown, and finishes with an undone-but-intentional vibe that reads as effortlessly cool. This is perfect when your hair has natural body or waves, or when you’ve been wearing it wavy or curly and want a fast way to style it that doesn’t look sloppy.
What Makes This Different From the Classic High Ponytail
The core difference is texture and volume. Instead of brushing your hair smooth, you’re leaving waves, curls, or natural texture intact, and you’re amplifying volume at the crown using a teasing technique or by blow-drying hair with your head tipped upside down. The result looks like you spent actual effort on styling, when really you just gathered what you already had and shaped it strategically. For textured or curly hair, this style takes literally zero heat styling or additional texture creation—you’re just harnessing what’s there.
The Fast Technique for Maximum Texture and Height
- If your hair is wavy or curly, leave it as-is. If it’s straight and you want texture, flip your head upside down and blow-dry your crown area while scrunching with your hands—this creates instant lift and movement.
- Tease your crown gently using a back-combing technique: take a section of hair at the crown, hold it straight up, and comb backward toward your scalp using small, quick strokes. Do this to 2-3 sections around the crown, then smooth the top layer lightly with your comb so it looks intentional, not matted.
- Flip your head upright and brush the sides smooth while leaving the crown textured and full.
- Gather hair at a high position at the crown, about 2-3 inches back from your hairline, and secure tightly with an elastic that matches your hair color.
- Release a few face-framing pieces by gently pulling out 2-3 small sections from around your face—this softens the look and prevents it from reading as too severe.
Pro tip: Use a fabric scrunchie or a silk hair tie instead of a traditional elastic for this style. It’s gentler on textured hair and actually looks more intentional and expensive than a plastic elastic.
4. Bubble Ponytail
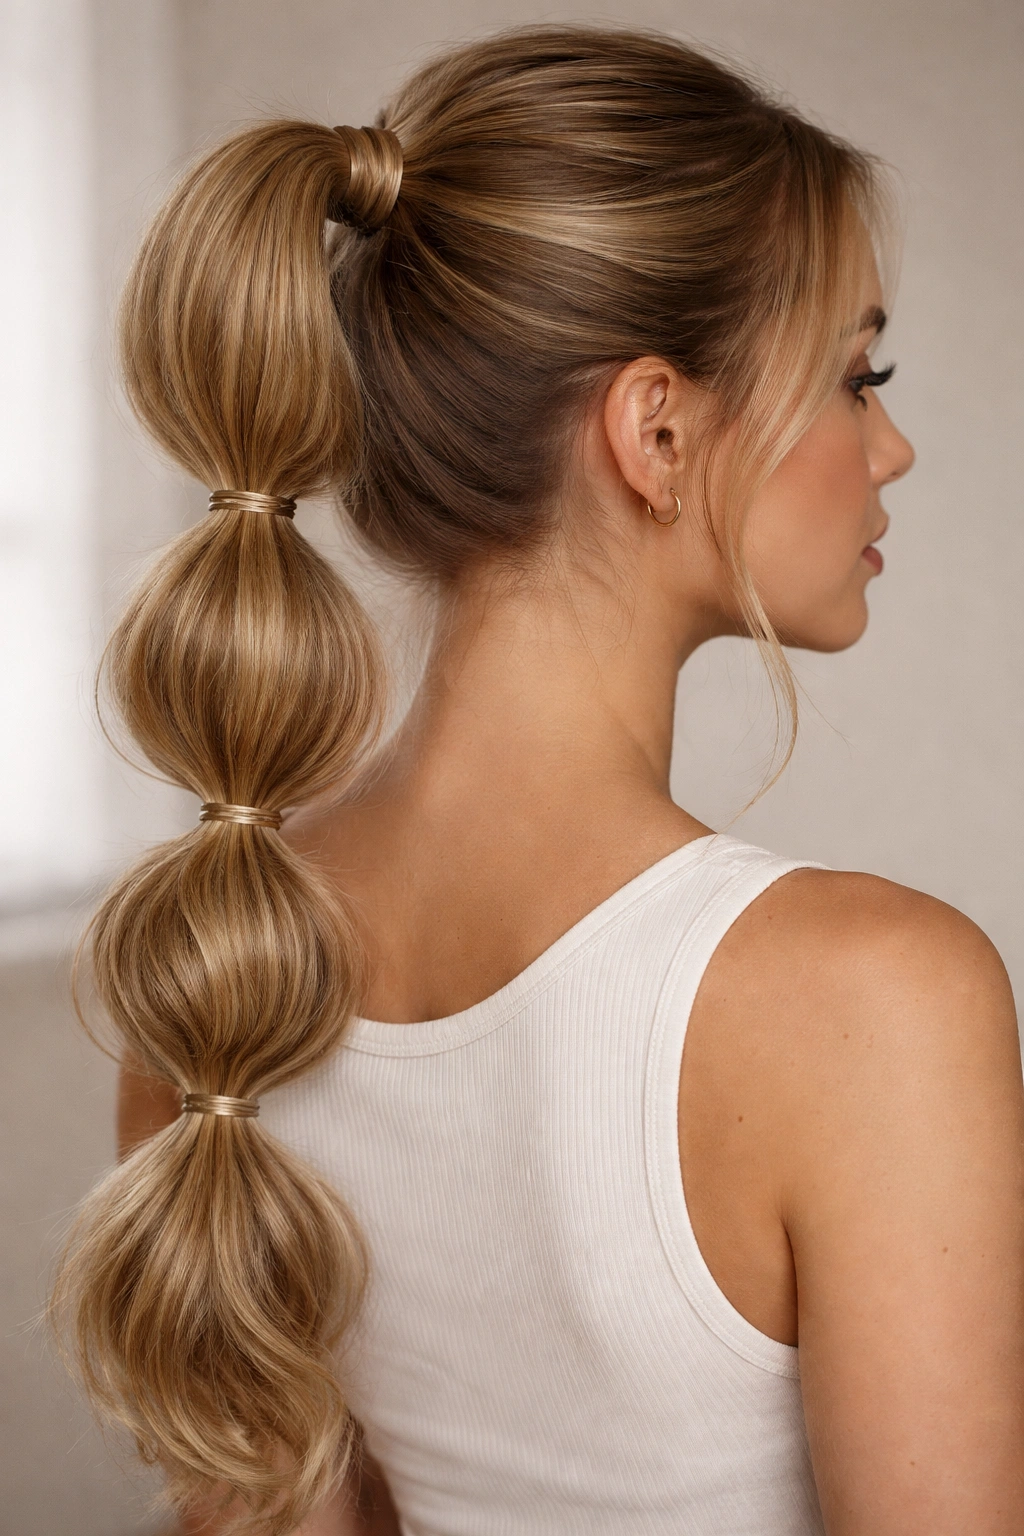
The bubble ponytail—also called a stacked ponytail or segmented ponytail—looks complicated and takes about four minutes once you understand the technique. It’s genuinely playful without being childish, works on almost any hair length as long as it’s long enough to gather, and reads as creative and fashionable. It’s become widely popular because it photographs beautifully and works for everything from casual hangouts to date nights.
Why This Style Works on Everyone
The segmentation creates visual interest and makes your ponytail look fuller and more voluminous than it actually is. Because you’re creating sections with multiple elastics, each section puffs out slightly, creating a bubble effect. This works regardless of your hair density—if you have fine hair, the sections might be tighter, but they’re still visible; if you have thick hair, the bubbles are dramatic and obvious. The technique also works on all hair types, from straight to coily.
How to Create the Bubble Ponytail Quickly
- Gather your hair into a high ponytail and secure with an elastic. Hold this first elastic in place.
- Place your second elastic about 2-3 inches below the first one. Before you tighten it, gently push the hair section between the two elastics upward and outward to create a subtle puff—this is your first bubble.
- Continue placing elastics every 2-3 inches down the length of your ponytail, creating a puff between each pair by pushing the hair outward and securing loosely.
- Make the last section your final bubble, securing at the very end of your hair length.
- Adjust the bubbles by pulling them gently outward on all sides. They should look round and full, not flat.
Real talk: The bubbles look best when they’re similar in size, so try to space your elastics equally. If your ponytail is shorter, space them 2 inches apart. If it’s very long, 3-4 inches works better. You can also make the bubbles progressively larger as you go down, which creates a more intentional, fashion-forward look.
5. Half-Up Ponytail
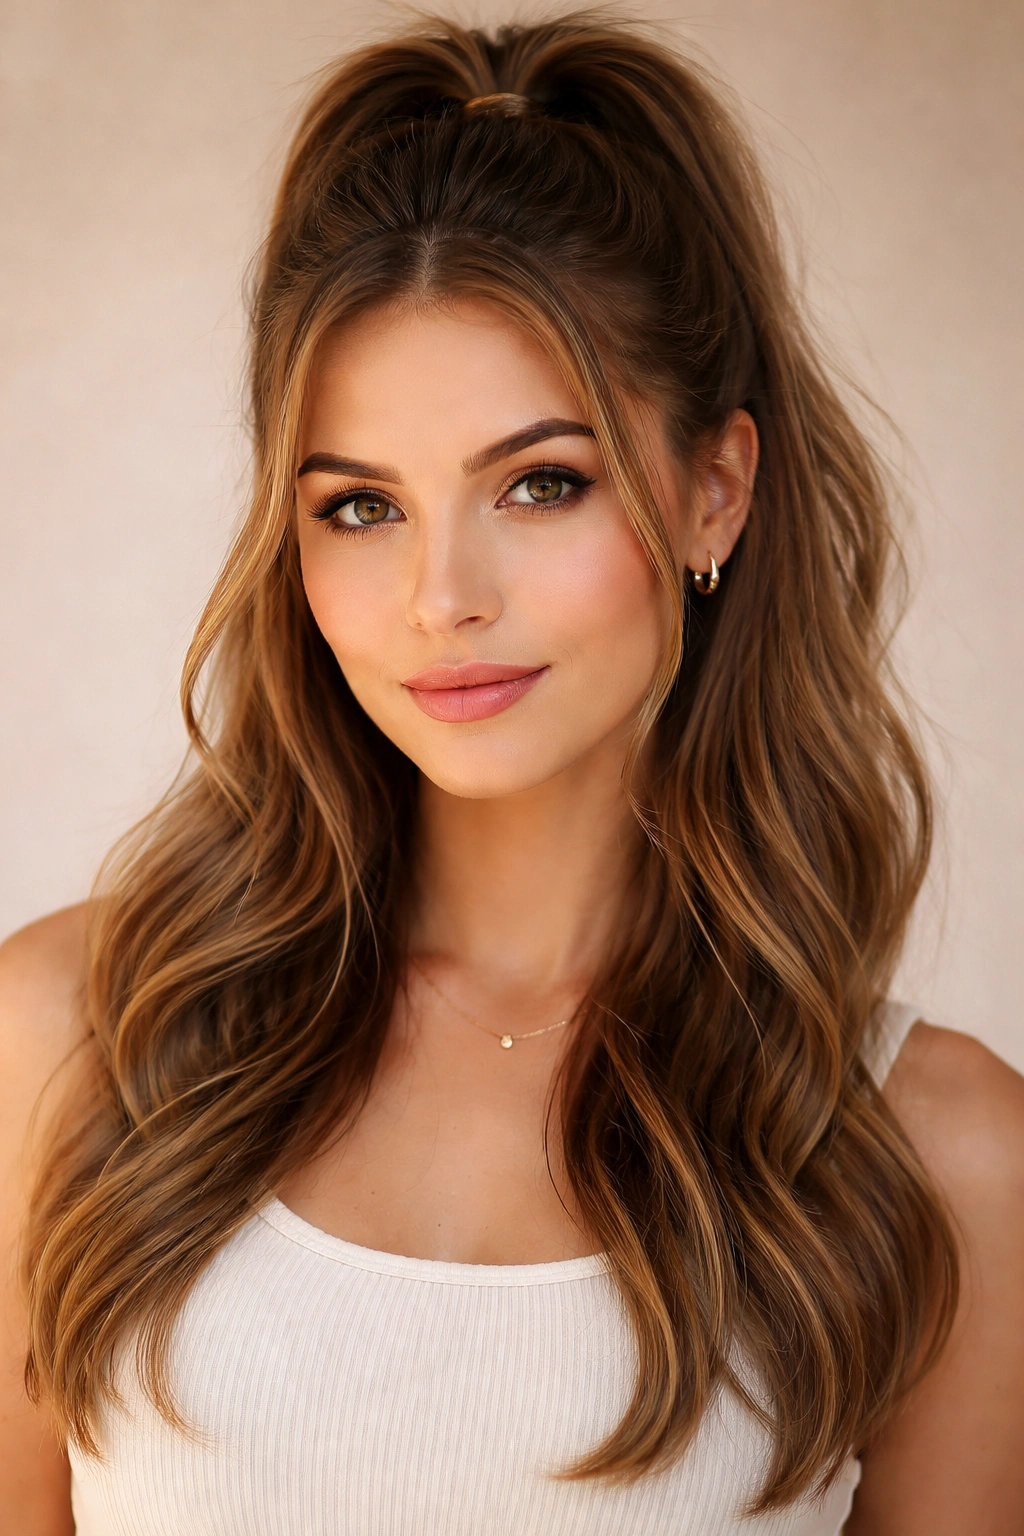
The half-up ponytail is the Goldilocks of quick styles—it’s not quite a full ponytail and not quite wearing your hair down, which means it works for days when you want your hair off your face but not completely committed to an updo. It’s perfect for the office, for casual weekend plans, for dates, and honestly for anywhere you want to look polished without appearing overdressed.
Why Half-Up Is So Versatile
This style works on every hair length from shoulder-length up, and it flatters almost every face shape because it opens up your face while still framing it with loose hair. The half-up also accommodates different hair textures beautifully—you can wear it sleek and smooth, or with loose waves and texture, and it reads as intentional either way. It’s also probably the fastest style on this list to actually create, taking usually under three minutes once you have the basic steps down.
The Fastest Technique for a Polished Half-Up
- Brush your hair and run your fingers or a brush through to smooth any tangles.
- Create a horizontal part about an inch above the crown, running from ear to ear across the back of your head. The section above this line is what you’ll be gathering into your half-up.
- Gather this top section using both hands, smoothing as you gather, and pull it back gently to a position slightly higher than the center of the back of your head. Keep your hands holding this section.
- Secure with an elastic right where your hands are, wrapping it tightly enough that it won’t slip but not so tight that it’s pulling uncomfortably. You can use a clear elastic to keep it invisible, or match your hair color.
- Release the front sections from behind your ears if you want more face-framing, or leave them as-is if you prefer a sleeker look.
- Gently pull at the sides of the gathered section to create a slightly undone texture that reads as intentional rather than basic.
Pro tip: You can add a second elastic an inch below the first one for extra security and a more intentional, segmented look. Some people like to twist the gathered hair section once before securing it—this creates a rope effect that’s genuinely prettier and takes about 10 extra seconds.
6. Messy Bun Ponytail
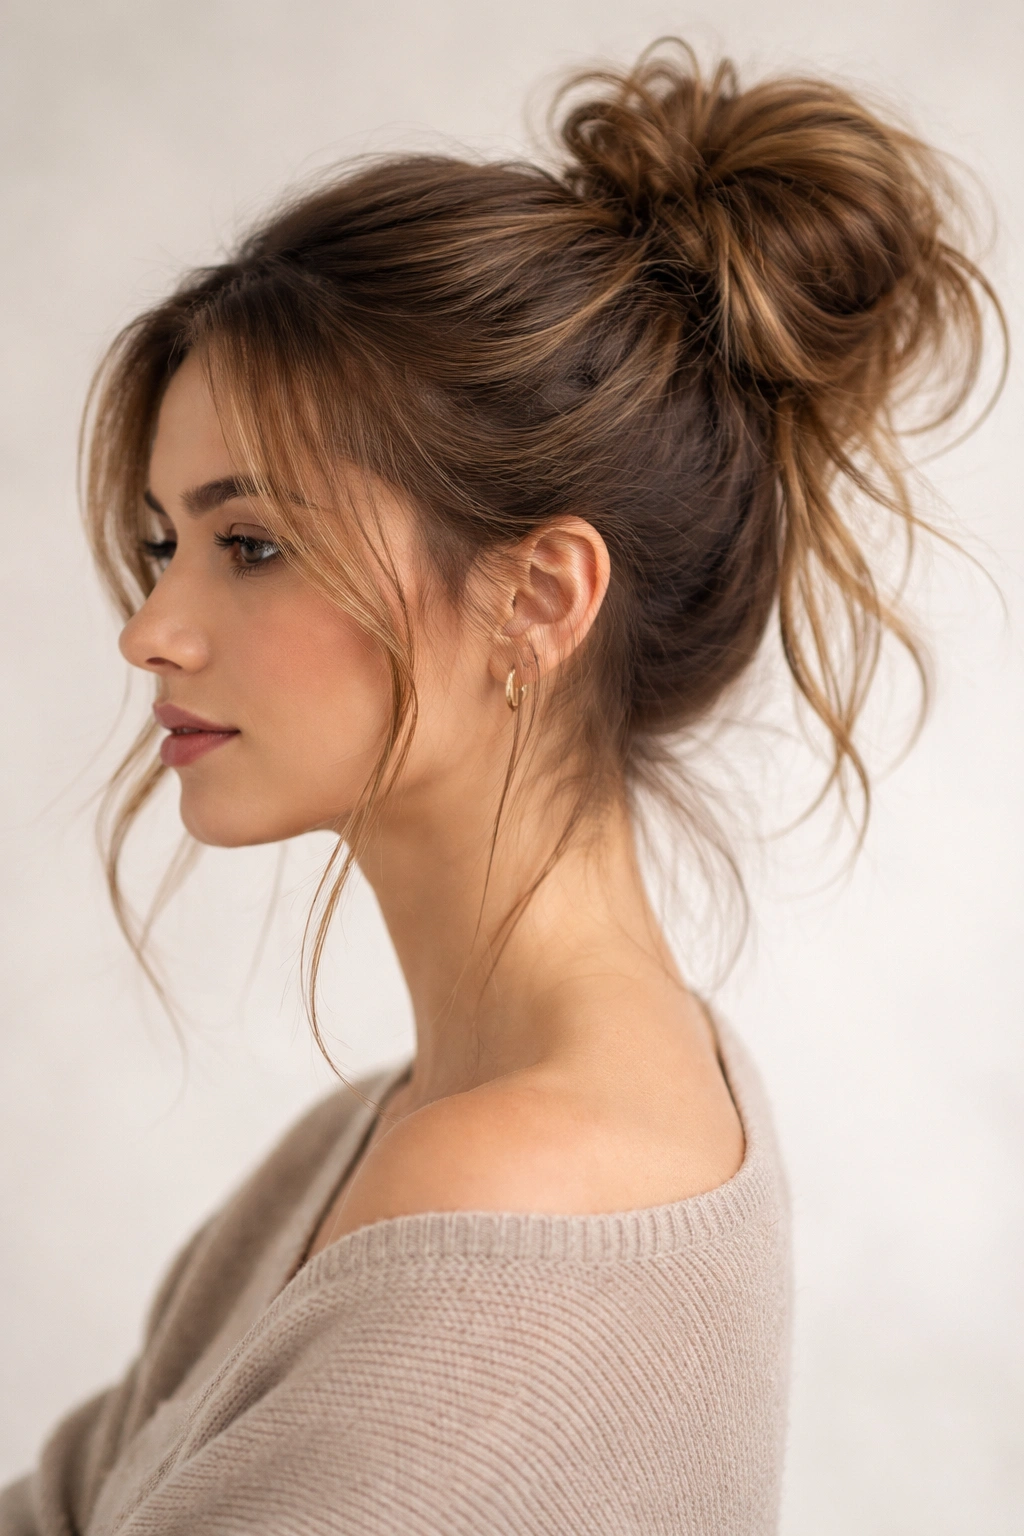
The messy bun ponytail is the ultimate “I woke up like this but actually tried a little bit” style. It’s higher than a traditional bun, which makes it look fresher and more youthful, and the intentional messiness signals that you know about fashion and texture. This works perfectly on second-day hair, textured hair, or any hair that’s been curled—in fact, the more imperfect your hair is, the better this style looks.
What Actually Makes a Messy Bun Ponytail Work
The secret is the balance between messiness and shape. You want texture and loose pieces, but you want your actual bun to have structure and definition so it doesn’t just look unkempt. The height matters too—a high messy bun is automatically more modern and flattering than a low one. This style also benefits from texture at the scalp, so if your hair is bone-straight and you want to create this, a quick tease at the crown makes the difference between “messy” and “just didn’t brush my hair.”
Creating a Messy Bun Ponytail in Minutes
- Tease your crown gently using a back-combing technique on 2-3 sections if you want extra height and texture. Skip this if your hair is already textured or wavy.
- Gather your hair at a high ponytail position and secure with an elastic. This is your base.
- Twist the length of the ponytail around your index and middle fingers, wrapping it into a loose rope.
- Coil this twisted section around the base of your ponytail, tucking the ends underneath and securing with bobby pins inserted into the bun. You want it to sit about 2-3 inches above where your ponytail elastic is.
- Pull out face-framing pieces gently from around your hairline and ears—these loose pieces are what make it look intentionally messy rather than just sloppy.
- Loosen the bun slightly by gently pulling at different sections to make it look fuller and less tight. It should appear soft and undone.
Worth knowing: This style works best on second or third-day hair that has some natural grip and texture. If your hair is freshly washed and slippery, use a texture spray or dry shampoo before starting—it gives your hair more grip so the bun stays secured longer.
7. Sleek Low Bun Ponytail
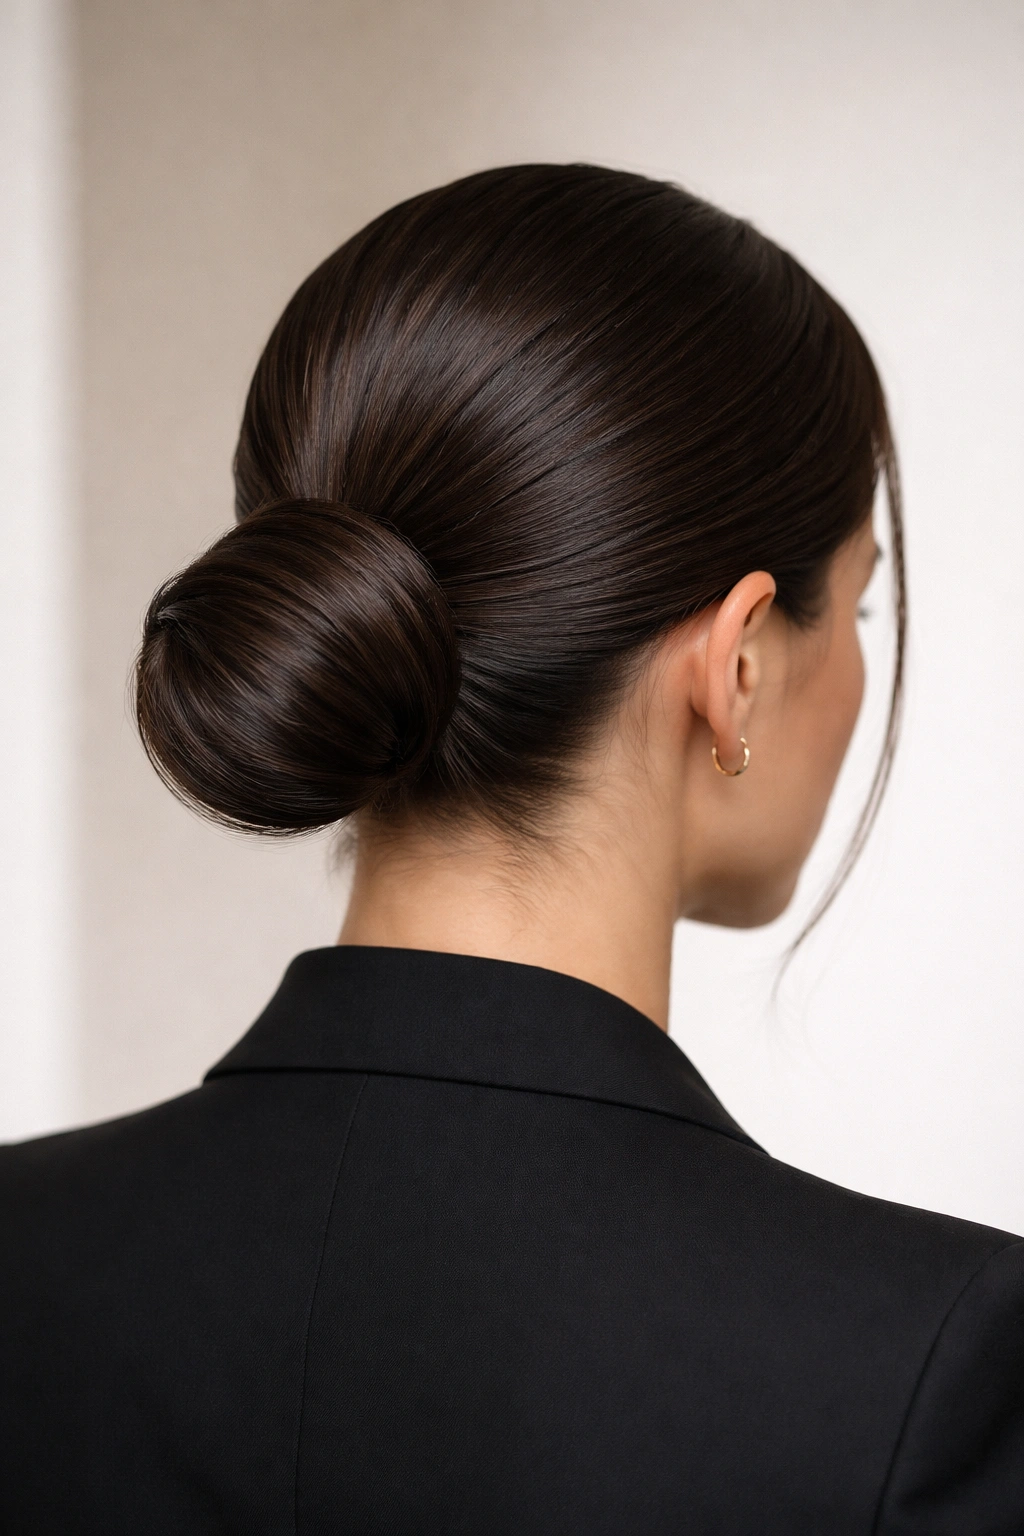
The sleek low bun is the formal cousin of the messy bun—it’s elegant, it’s sophisticated, and it works for literally everything from professional meetings to formal events. The lower placement and the sleekness combined create an instantly polished appearance that says “I have my life together.” This style is actually faster than you’d think because the sleekness eliminates the need for teasing, fluffing, and loose pieces.
Why This Style Is Genuinely Timeless
A sleek low bun has been a sophisticated choice for decades because it’s flattering, it’s practical, and it never looks sloppy or casual. The low placement sits naturally on the nape of your neck, which is the most flattering spot for most face shapes. The sleekness means no stray pieces, no flyaways, and no “undone” texture—it reads as intentional, controlled, and professional. This is the bun style that works for job interviews, formal dinners, and literally any scenario where you want to look polished.
The Fast Method for a Sleek Low Bun
- Start with damp or dampened hair if you can. Damp hair is so much easier to smooth than completely dry hair.
- Apply a smoothing serum or cream to your palms and run your hands over your hair to create shine and smoothness on the surface.
- Brush your hair back into a low ponytail positioned at the nape of your neck, smoothing as you gather. Hold this section tightly in one hand.
- Secure with an elastic wrapped around the base of your ponytail multiple times for security.
- Twist the length of your ponytail around your index and middle fingers, creating a tight rope.
- Coil this twisted ponytail around the base at the nape of your neck, tucking the ends underneath and securing with bobby pins and/or a second elastic. Smooth the surface of the bun with your fingers so it sits flat.
- Finish with a light hairspray to keep any flyaways in place and ensure the style lasts all day.
Real talk: If you have very slippery hair, use pomade or a smoothing balm with actual hold before you start. It keeps everything locked in place and prevents the bun from shifting throughout the day.
8. Twisted Ponytail
The twisted ponytail takes your standard high or mid-level ponytail and adds just enough detail to make it look intentional and special. Instead of just gathering and securing, you twist the sections as you gather them, creating a rope effect. It’s slightly more sophisticated than a straight ponytail and reads as creative without being complicated. Most importantly, it literally takes 30 extra seconds, and it absolutely works on all hair types and textures.
Why This Single Detail Changes Everything
A twist creates visual interest and texture immediately. Your eye moves along the twisted sections instead of just seeing a smooth gathered ponytail. The twist also has the practical benefit of holding flyaways and shorter pieces in place, so it actually looks neater and more controlled than a completely straight ponytail. Plus, twisted sections look intentional and fashionable—they signal that you know about styling even though you barely spent any extra time.
How to Create a Twisted Ponytail in Moments
- Brush your hair straight and smooth out tangles.
- Take two sections of hair from above each ear, roughly 2 inches wide each. These will become your twisted side sections.
- Twist each section tightly toward the back of your head. You’re literally twisting the hair like you’d twist a rope.
- Bring these twisted sections to the back and secure them together with an elastic at your chosen ponytail height—high for a playful look, mid-level for versatile, or low for sophistication.
- Smooth down your front and sides so your face-framing is neat, and gently pull at the twisted sections to loosen them slightly if you want a softer look.
- Optional: create a second twist by taking hair from the back of one side and twisting it toward the center, then doing the same on the other side and incorporating it into your main ponytail for extra detail.
Pro tip: If you want extra texture in your twisted sections, curl your hair before starting, or create the twists on textured, wavy hair rather than perfectly straight hair. The texture within the twist adds visual interest and makes it look more dimensional.
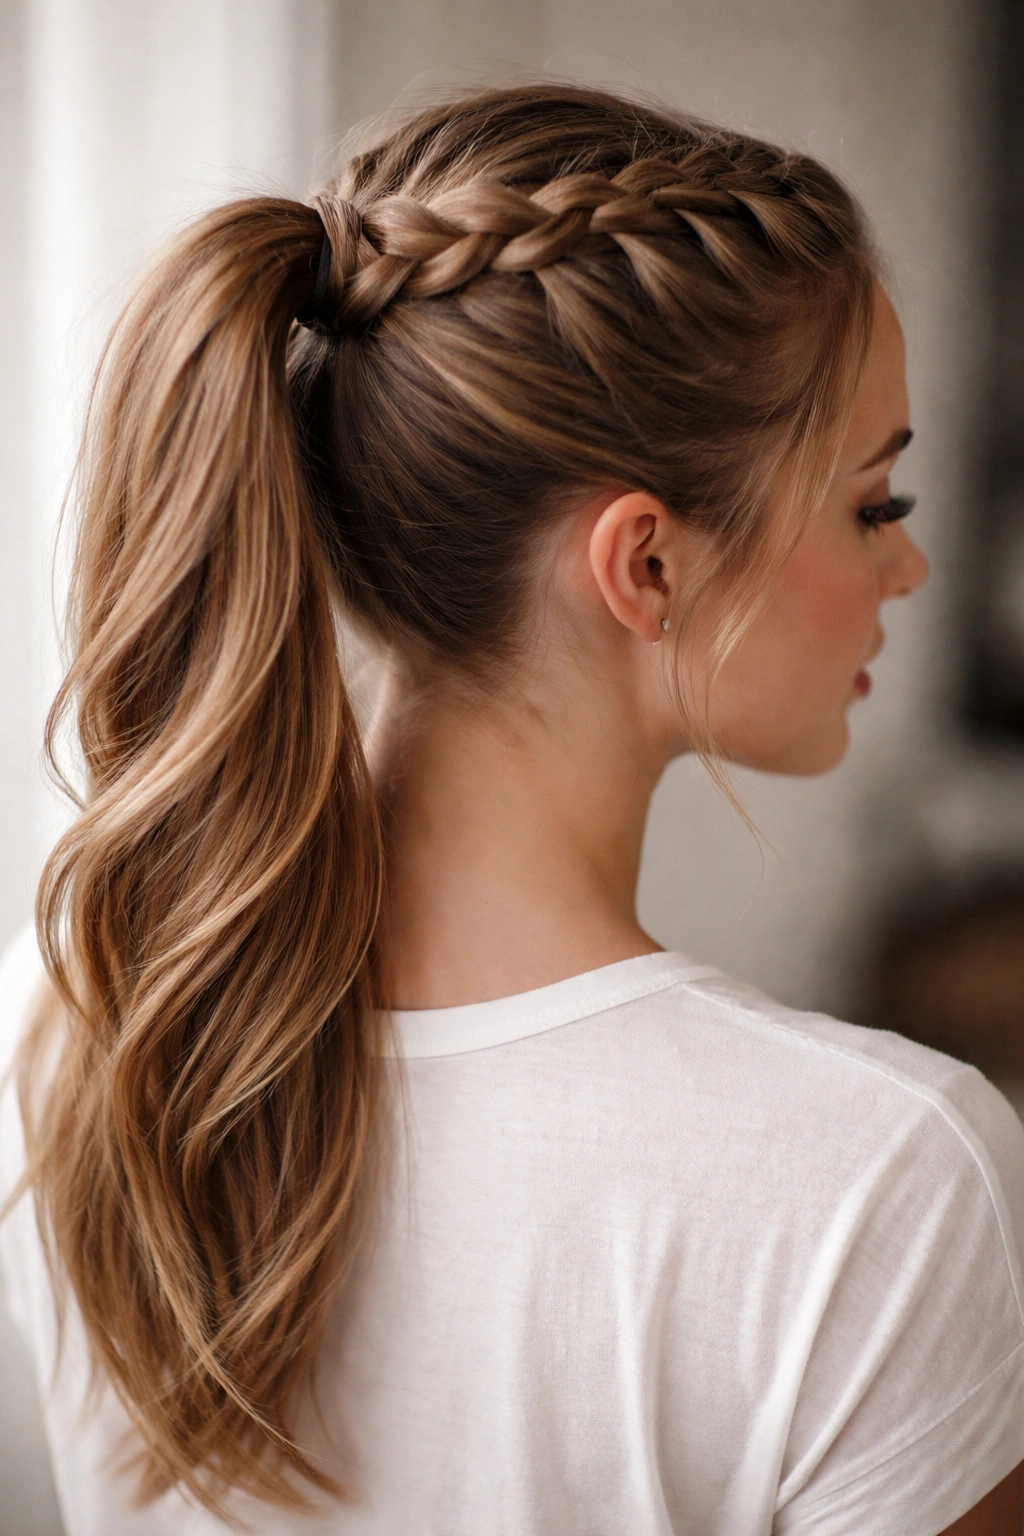
9. Braided Wrap Ponytail
The braided wrap ponytail takes a standard high ponytail and wraps a small braid around the base—a detail that immediately elevates the entire style. This works beautifully on all hair types and all ponytail textures. The braid can be loose and textured, or tight and polished, depending on your mood and occasion. From a distance, it just looks like a pretty ponytail. Up close, it’s clear you put thought into it.
What This Detail Communicates
A braid around the base of a ponytail signals that you know about hair styling and you care enough to add intentional details. It also serves a practical purpose—the braid wraps around the elastic, hiding it completely, which automatically makes your ponytail look more finished and expensive. This small detail transforms a basic five-minute ponytail into something that looks salon-done.
Creating a Braided Wrap Ponytail Quickly
- Gather your hair into a high ponytail and secure tightly with an elastic.
- Take a small section of hair from the underside of your ponytail—about the thickness of a pencil. This becomes your braid.
- Begin a three-strand braid using this section. If you’re confident, you can do a loose, textured braid. If you prefer tighter control, a neat, tight braid looks intentional and polished.
- Wrap the braid around the base of your ponytail, working clockwise or counterclockwise, covering the elastic completely.
- Secure the end of the braid to the base of your ponytail using bobby pins inserted underneath so they’re invisible from above. Tuck the braid end under the wrapped braid and pin it.
- Optional: gently pull at the braid to loosen it slightly if you want a softer, more textured look.
Worth knowing: If you can’t braid or you’re short on time, you can achieve a similar effect by twisting a small section of hair from your ponytail around the base instead of braiding. A twist is actually faster than a braid and looks nearly identical from most angles.
10. Voluminous Teased Ponytail
The voluminous teased ponytail is for days when you want maximum drama and height. Teasing your crown creates serious lift and fullness, and when you combine that with a high ponytail, you get a style that reads as bold, young, and fashion-forward. This works especially well if you have medium or thick hair, though fine hair can absolutely work with teasing—you just need a lighter touch and a good texturizing spray.
Why Teasing Creates Such Visible Difference
Teasing, or backcombing, creates texture at the scalp that gives your hair grip and volume. When you tease multiple sections around your crown and then smooth the top layer, you create a beautiful base that shows lift and fullness. Combined with a high ponytail, this creates the visual impression that you have significantly more hair than you actually do. It’s a legitimate styling technique, not cheating—professional stylists use teasing as a foundation for volume all the time.
The Fast Teasing Technique for Maximum Height
- Section your crown into roughly 4-5 sections, dividing the area from your forehead hairline back to the very top of your head.
- Take the first section and hold it straight up away from your scalp. Using a back-comb or teasing brush, comb backward toward your scalp using small, quick strokes. Do this 3-4 times per section, then move to the next section.
- Tease all 4-5 sections, building texture at the roots of each.
- Gently smooth the top layer of your hair using a soft brush or your fingers. You want the teased section to show underneath but the top to look neat. Smooth downward toward the roots, not upward.
- Flip your head upside down for 30 seconds to let the teased texture set, then flip back.
- Gather your hair at a high ponytail position and secure with a strong elastic. The teased base gives you a built-in lift that keeps your ponytail from lying flat.
- Tease the ponytail itself lightly if you want extra fullness, or leave the length smooth for contrast with the textured crown.
Pro tip: Use a texturizing spray or dry shampoo before teasing if you have slippery or fine hair. It gives your hair grip so the teasing holds longer and doesn’t fall out immediately.
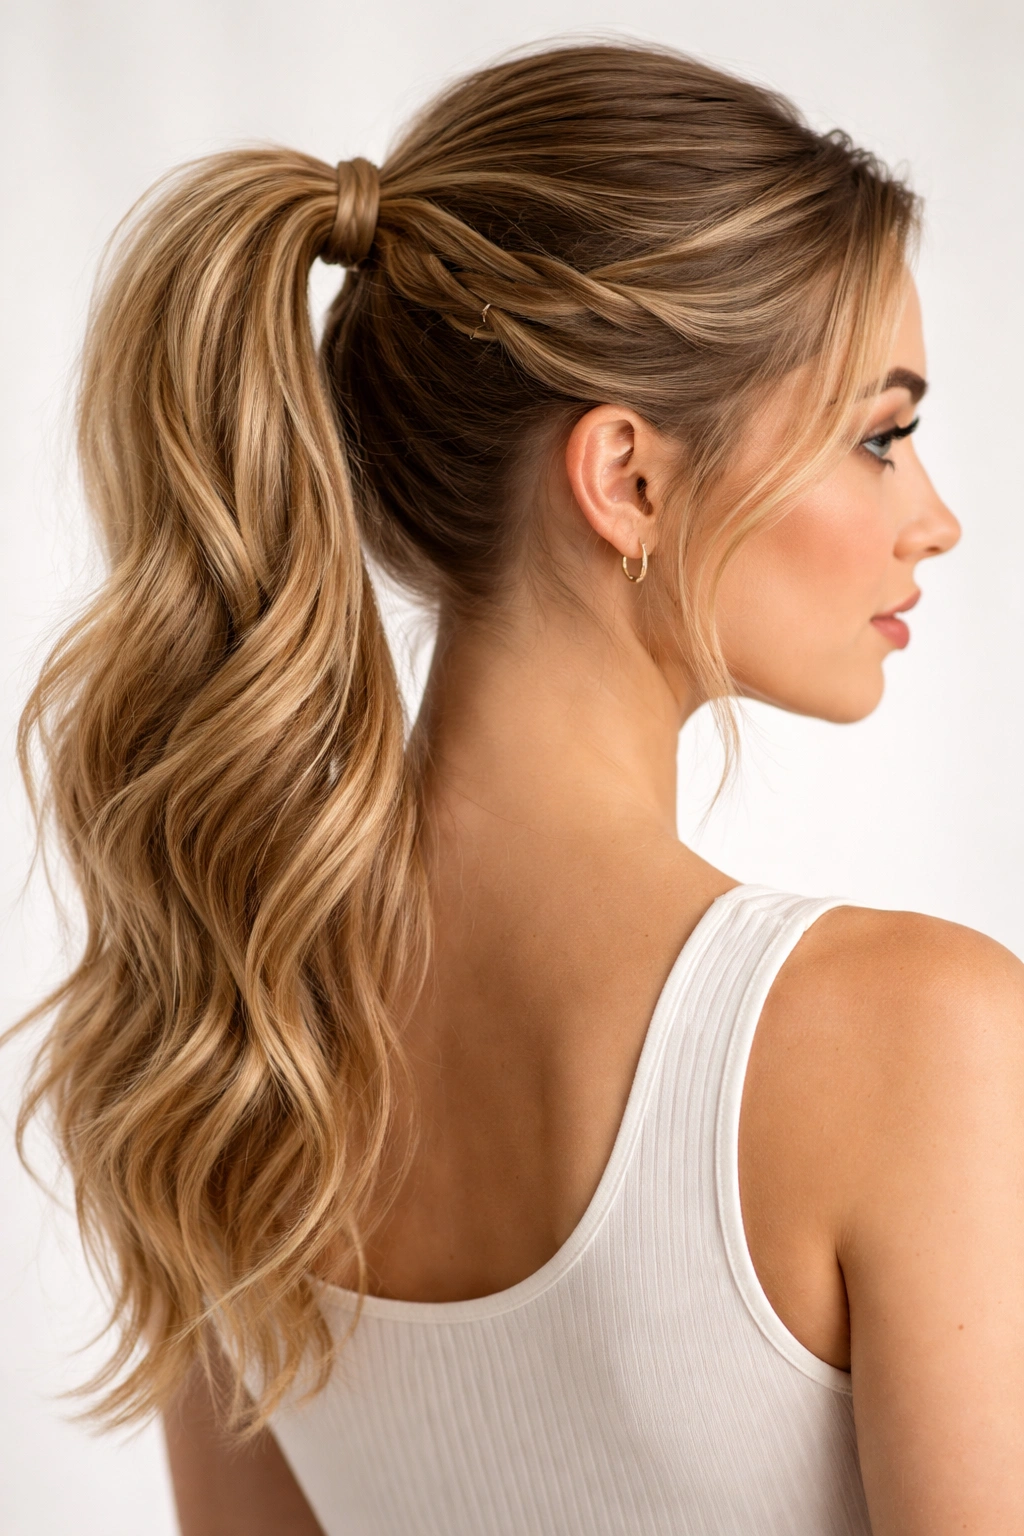
11. Sleek Side Ponytail
The sleek side ponytail is a genuinely chic alternative to a center ponytail. By positioning your ponytail to one side instead of center-back, you create an asymmetrical, fashion-forward look that flatters most face shapes and works for everything from casual to dressy. The sleekness keeps it professional, while the side positioning keeps it interesting.
Why Side Positioning Creates Such a Different Vibe
A side ponytail automatically looks more intentional and stylish than a center one because it’s slightly unexpected. Positioning asymmetrically catches the eye and creates visual interest. The side ponytail also frames your face differently—it can showcase one side of your face and create a different silhouette. Combined with sleekness, it reads as polished and deliberately styled rather than just “hair pulled back.”
Creating a Sleek Side Ponytail in Minutes
- Brush your hair smooth and work out all tangles using a fine-tooth comb.
- Apply a smoothing serum or light oil to your palms and run your hands over your hair to create shine.
- Create a deep side part by running a comb from one temple diagonally back toward the opposite side of your head. This part becomes part of your finished look, so place it deliberately.
- Brush the hair on the larger side of your part back and over to the opposite side of your head. You’re gathering all your hair toward one side.
- Secure your ponytail at the lower side of your head—roughly at ear level or slightly lower, on the side where you’ve gathered your hair.
- Smooth any flyaways with gel or a smoothing product, making sure your part is clean and your gathered side is sleek.
- Optionally, add a small braid from your deep part area back toward your ponytail for extra polish and detail.
Real talk: The sleeker you keep your scalp and part, the more intentional this style looks. This is a great occasion to use edge control or smoothing balm to keep every piece in place.
12. Bouncy Curled Ponytail
The bouncy curled ponytail is for when you want texture, movement, and femininity without looking overly formal. You curl the length of your ponytail while keeping your crown smooth and gathered, which gives you volume and bounce where it matters. This style works beautifully for dates, for nights out, or for any occasion where you want to look polished but relaxed.
What Makes Curled Texture Work With a Ponytail
Curls at the ends of a ponytail create movement and playfulness that a straight ponytail can’t achieve. The curls catch the light and create visual interest as you move. Because the crown is still neat and gathered, it doesn’t read as informal or casual—the curled length provides the style and personality. This is one of the fastest ways to add glamour to a ponytail without spending ages on styling.
The Fastest Method for Bouncy Curled Ends
- Gather your hair into a ponytail at your chosen height—high, mid, or low—and secure with an elastic. Make sure your crown is smooth and neat.
- Divide your ponytail into 4-6 sections, depending on your hair thickness and how many curls you want.
- Curl each section using a 1.5-inch curling iron. Wrap the section around the barrel, hold for 3-5 seconds, and release. Curl away from your face for curls that frame your face, or all in one direction for uniformity.
- Let your curls cool for 30 seconds before touching them. They’ll hold their shape better once they’ve cooled.
- Gently run your fingers through the curled sections to soften the curls and make them look more natural and bouncy rather than perfectly spiral-shaped.
- Finish with hairspray to keep your curls in place throughout the day.
Pro tip: If you don’t have a curling iron or you want a faster method, you can braid your ponytail while it’s slightly damp, leave it braided for 30 minutes or longer, then unbraid and fluff. The braid texture creates natural waves and curls without heat.
13. Slicked Back High Ponytail

The slicked back high ponytail is bold, clean, and genuinely chic. By slicking every piece back tightly against your scalp, you create clean lines and showcase your face frame completely. This style reads as confident and intentional, and it works beautifully on all face shapes because the extreme sleekness is so obviously intentional styling rather than accident.
Why Slicked Back Is Actually Sophisticated
A completely slicked back style might sound severe, but when executed with intention and paired with the right attitude, it reads as fashion-forward and editorial. The sleekness creates beautiful, clean lines from your hairline all the way back. It also makes you look fresh-faced and highlights your eyes, cheekbones, and face shape—perfect if those are your best features. This style works equally well on its own or as a base for adding a decorative elastic, braid wrap, or even a hair accessory.
Creating a Slicked Back High Ponytail
- Apply edge control, pomade, or a smoothing gel generously to your scalp and the length of your hair. Don’t be shy—you need enough product to smooth everything back flat.
- Use a fine-tooth comb to comb your hair straight back from your face, smoothing as you go. Comb from your forehead hairline straight back toward the crown.
- Gather all your hair at a high point on the crown and hold it tightly in both hands, combing any flyaways back as you gather.
- Secure with a tight elastic, wrapping it two or three times depending on your hair thickness.
- Smooth down any flyaways at your hairline using a small amount of gel and your fingers or a fine-tooth comb.
- Optional: wrap a small braid or twist around the base of your ponytail (as described in #9) for a more polished, intentional finish.
Worth knowing: This style is most effective when you use enough product and enough tension to truly slick everything back. Half-slicked looks like you forgot to finish getting ready, but fully slicked reads as intentional. Make sure your edges are absolutely smooth—this is where product really matters.
14. Romantic Loose Ponytail
The romantic loose ponytail is undone without being sloppy. You gather your hair just enough to get it off your face, but you leave it loose and textured, with plenty of face-framing pieces. This style works beautifully on wavy or curly hair, and it reads as effortlessly beautiful and approachable. It’s perfect for dates, for casual gatherings, or for any situation where you want to look polished but not overdressed.
What Makes This Style Feel Romantic Rather Than Just Messy
The secret is intentionality and face-framing. You’re deliberately leaving pieces out around your face and temples, not just failing to pull your hair back completely. The loose sections should be soft and wavy or curly, not straight and stiff. Your main ponytail should be secure and neat at the base, even if the length is textured and undone. This balance between control at the scalp and looseness at the length is what creates the romantic vibe.
How to Create a Romantic Loose Ponytail
- Create loose waves or curls throughout your hair using a curling iron, waves from a braid overnight, or your natural texture. You want soft movement, not perfectly tight curls.
- Leave a piece of hair down on each side of your face, roughly 1-2 inches wide. These become your intentional face-framing pieces.
- Gather the rest of your hair gently toward the back of your head at a low or mid-ponytail height. You’re being deliberate but loose—not pulling tightly.
- Secure with a soft elastic (fabric, silk, or velvet work beautifully here) at your base.
- Gently tuck your face-framing pieces behind your ears if they’re bothering you, or leave them down framing your face—whichever feels right.
- Let the length of your ponytail be textured and loose. Pull at different sections gently to make it look full and undone rather than tight.
Real talk: This style looks best when your hair has actual texture, so if you have straight hair and you want to create this look, curl or wave your hair first. Straight hair in this “loose” style can read as limp rather than romantic.
15. Dutch Braid Ponytail
The Dutch braid ponytail is technically two techniques combined—a Dutch braid that transitions into a ponytail. It looks complicated and takes maybe six minutes once you understand the technique, which means it reads as creatively styled without actually consuming your morning. The Dutch braid (which is an inside-out braid that sits on top of your hair rather than tucked inside) creates beautiful texture and detail that immediately elevates a standard ponytail.
Why This Combination Works So Well
A Dutch braid creates visual texture and detail, and when it transitions into a ponytail, it looks intentional and creatively styled. The braid draws attention and creates visual interest, while the ponytail portion keeps your hair off your face and provides practical functionality. This style works on all hair types and works especially well on second-day or textured hair where the braid creates beautiful dimension.
The Technique for a Dutch Braid Transitioning Into a Ponytail
- Create a Dutch braid starting at the crown of your head. To create a Dutch braid: take a small section of hair at the crown and divide it into three strands. Cross the left strand under the middle, then cross the right strand under the middle—this is opposite the over-crossing of a regular braid. As you continue, add small sections from either side of your braid to each strand before crossing.
- Continue braiding straight back toward the back of your head, adding hair as you go. You want your braid to run roughly down the center of the back of your head.
- Once your braid reaches the back of your head, transition into a ponytail by gathering all remaining hair (including the braided section) into an elastic at your base.
- Gently pull at sections of your braid to loosen it and make it look fuller and more textured if you want a softer look, or keep it neat if you prefer a more polished appearance.
- Secure your ponytail firmly and smooth any flyaways.
Pro tip: If Dutch braiding feels too complicated, you can create the same visual effect by doing a regular three-strand braid instead. The texture and detail are similar, and the transition into a ponytail works exactly the same way. Don’t stress about the braid style—the ponytail looks great either way.
Final Takeaway
The magic of the five-minute ponytail is that it doesn’t require special skills, expensive tools, or even that much time. What it does require is understanding a few fundamental techniques—gathering, securing, teasing for volume, twisting for detail, braiding for texture—and then mixing and matching these basics to create 15 completely different looks. Once these techniques become automatic for you, you’ll find yourself reaching for ponytails constantly because they’re just so fast and so reliable.
The styles that take the absolute longest are the ones with braids or multiple twists, and those are still legitimately under five minutes. Most of these styles come together in 90 seconds to three minutes once you’ve practiced them once or twice. The time investment early on pays off forever because these are the styles you’ll return to again and again—on rushed mornings, on gym days, on work days, and on date nights. That versatility is where the real value lives.
The best part about having multiple ponytail styles in your back pocket is how differently your whole appearance can feel depending on which one you choose. Your same hair, your same face, your same outfit reads completely differently when you’ve chosen a sleek low bun versus a bouncy curled high ponytail versus a romantic loose ponytail. That’s the power of styling—it’s not about changing who you are, but about expressing different sides of yourself depending on your mood and what the day requires.