If you’ve ever scrolled through natural hair inspiration and found yourself captivated by the intricate beauty of bantu knots, you’re not alone. These sculptural, coiled knots aren’t just stunning to look at—they’re incredibly versatile, protective, and work beautifully when styled into a ponytail. Whether you’re looking for a polished updo that turns heads or a protective style that lets your hair rest and thrive, bantu knot ponytails offer endless possibilities for natural hair.
What makes bantu knot ponytails so special is how they combine the protective benefits of a gathered style with the textural interest and dimension that bantu knots bring. Unlike traditional ponytails that can create tension on your hairline, bantu knot ponytails allow you to gather your hair loosely while creating gorgeous, defined coils throughout. They work across different hair types, textures, and densities—from loose waves to tightly coiled curls. Plus, they’re a style you can wear for multiple days, and they even create beautiful texture when you unravel them afterward.
The best part? You don’t need a ton of hair products or fancy tools to create a striking bantu knot ponytail. A few bobby pins, some water or light styling cream, and a bit of patience are all you need to transform your natural hair into a work of art. Whether you’re getting ready for work, heading to a special event, or just wanting to switch up your everyday look, these ten styles will inspire you to pick up those knots and create something beautiful.
1. Classic Bantu Knot Ponytail
The classic bantu knot ponytail is where many people start, and for good reason—it’s timeless, elegant, and works for almost everyone. This style keeps your hair gathered in a high or mid-level ponytail while you create individual bantu knots along the length, giving you defined texture with a polished finish. The knots sit neatly within the ponytail, creating visual interest without overwhelming your overall look.
Why This Style Works So Well
The classic version strikes the perfect balance between protective and easy to manage. Each knot is wound around your finger to create that signature coiled effect, and because they’re anchored in the ponytail base, they stay in place without requiring tons of product or constant re-securing. This style looks good whether your knots are tight and defined or slightly looser and more relaxed, so there’s room to adjust based on how you’re feeling that day.
How to Create This Look
Start by gathering your hair into a ponytail at your desired height using a clear elastic. Section the ponytail into workable pieces—roughly 8 to 12 sections, depending on how many knots you want and how thick your hair is. Taking one section, wrap it around your finger (or two fingers if you prefer larger knots) while moving toward your scalp, then secure the base with a bobby pin. Repeat with each section until you’ve worked through the entire ponytail. The whole process takes about 15 to 20 minutes once you get the rhythm down.
Pro Tip
Apply a light styling cream or curl-defining gel to each section before winding it. This helps the knots hold their shape longer and gives them more definition when they’re fully formed. If you’re not worried about them lasting multiple days, water alone is fine—many people actually prefer the more natural, less rigid look that comes with minimal product.
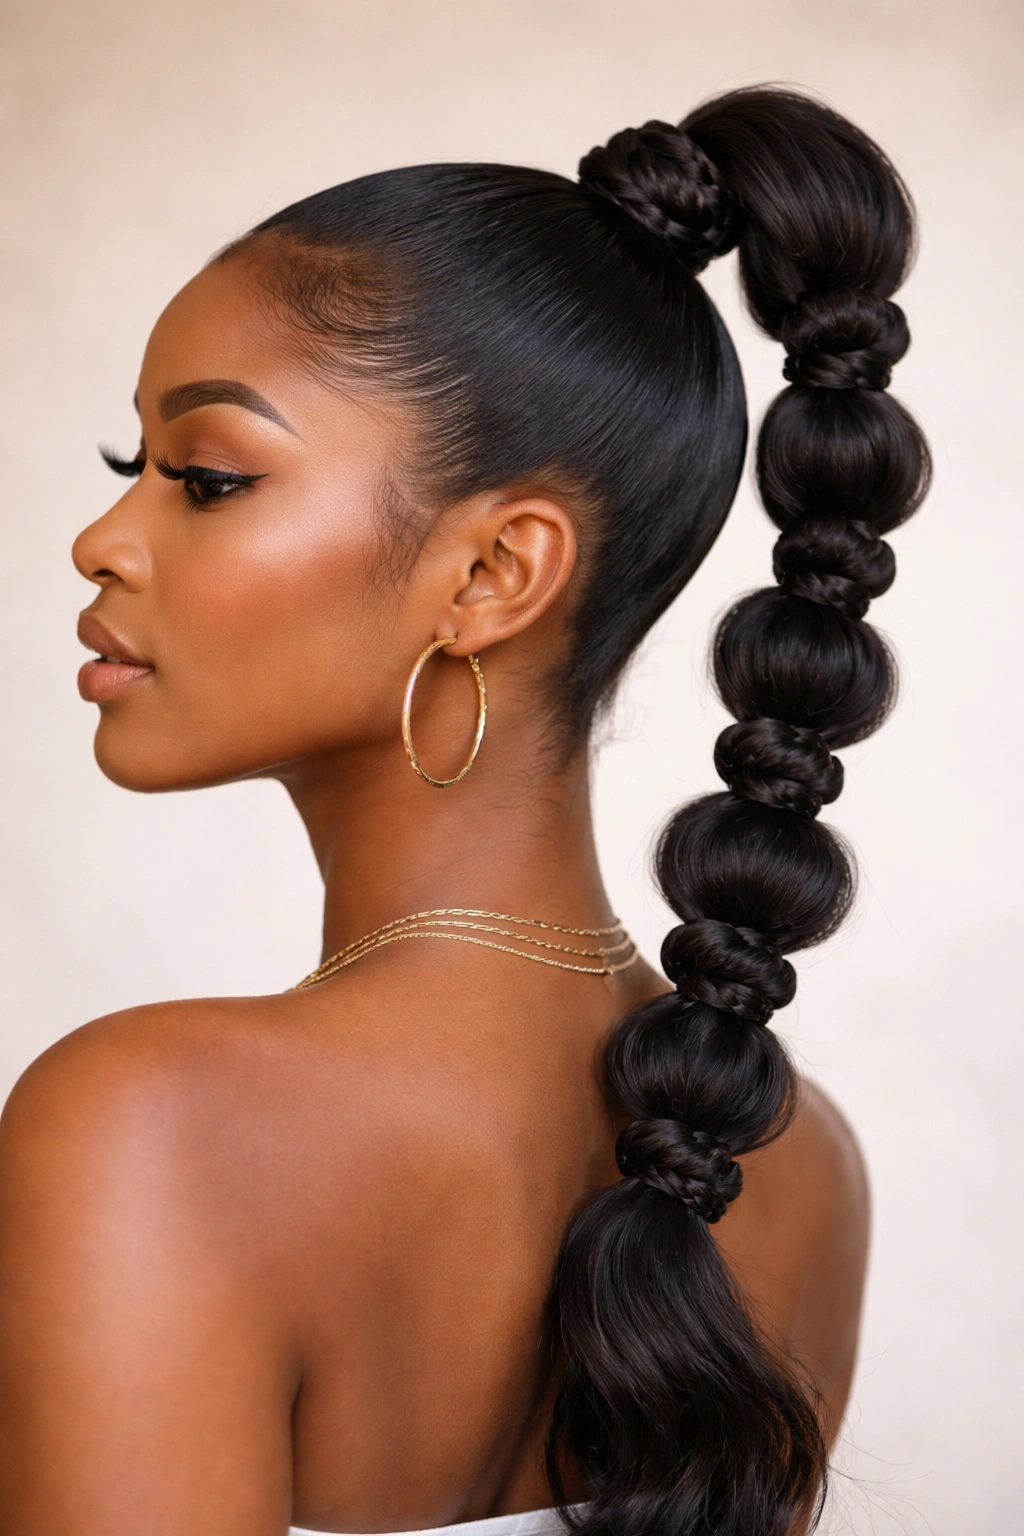
2. High Bantu Knot Ponytail with Kink Pattern
For a style that makes a serious statement, try pulling your bantu knot ponytail high on your head and focusing on creating tightly wound knots that form distinct kink patterns when unraveled. This version is bold, modern, and absolutely stunning for events, date nights, or whenever you want to feel extra confident. The height of the ponytail combined with the tight definition of the knots creates a look that’s both powerful and feminine.
The Visual Impact of Going High
A high ponytail automatically lifts your face and elongates your neck—add intricate bantu knots to that equation, and you’ve got a style that demands attention. The kink pattern (the crimped texture you get when you unravel the knots) adds an extra layer of dimension and movement that catches the light beautifully. Even if you’re only planning to wear the ponytail for one day before unraveling it, the effort you put in pays off tenfold in terms of how polished and intentional you look.
Creating Tight, Defined Knots
This style is all about precision. Work with smaller sections than you might for a looser knot, and wrap each section tightly around your finger (or a smaller tool like a crochet hook if you want even more control). Wind from the end of the section all the way down to the base, keeping tension consistent throughout. You want the knots to feel snug enough that they won’t unravel, but not so tight that they cause discomfort or pull on your roots.
Best Occasions for This Look
This version absolutely shines at weddings, job interviews, dates, or any time you want to look polished and intentional. The high placement and defined knots read as “I put thought into this,” even though the style is quite protective and low-maintenance once it’s done.
3. Side-Swept Bantu Knot Ponytail
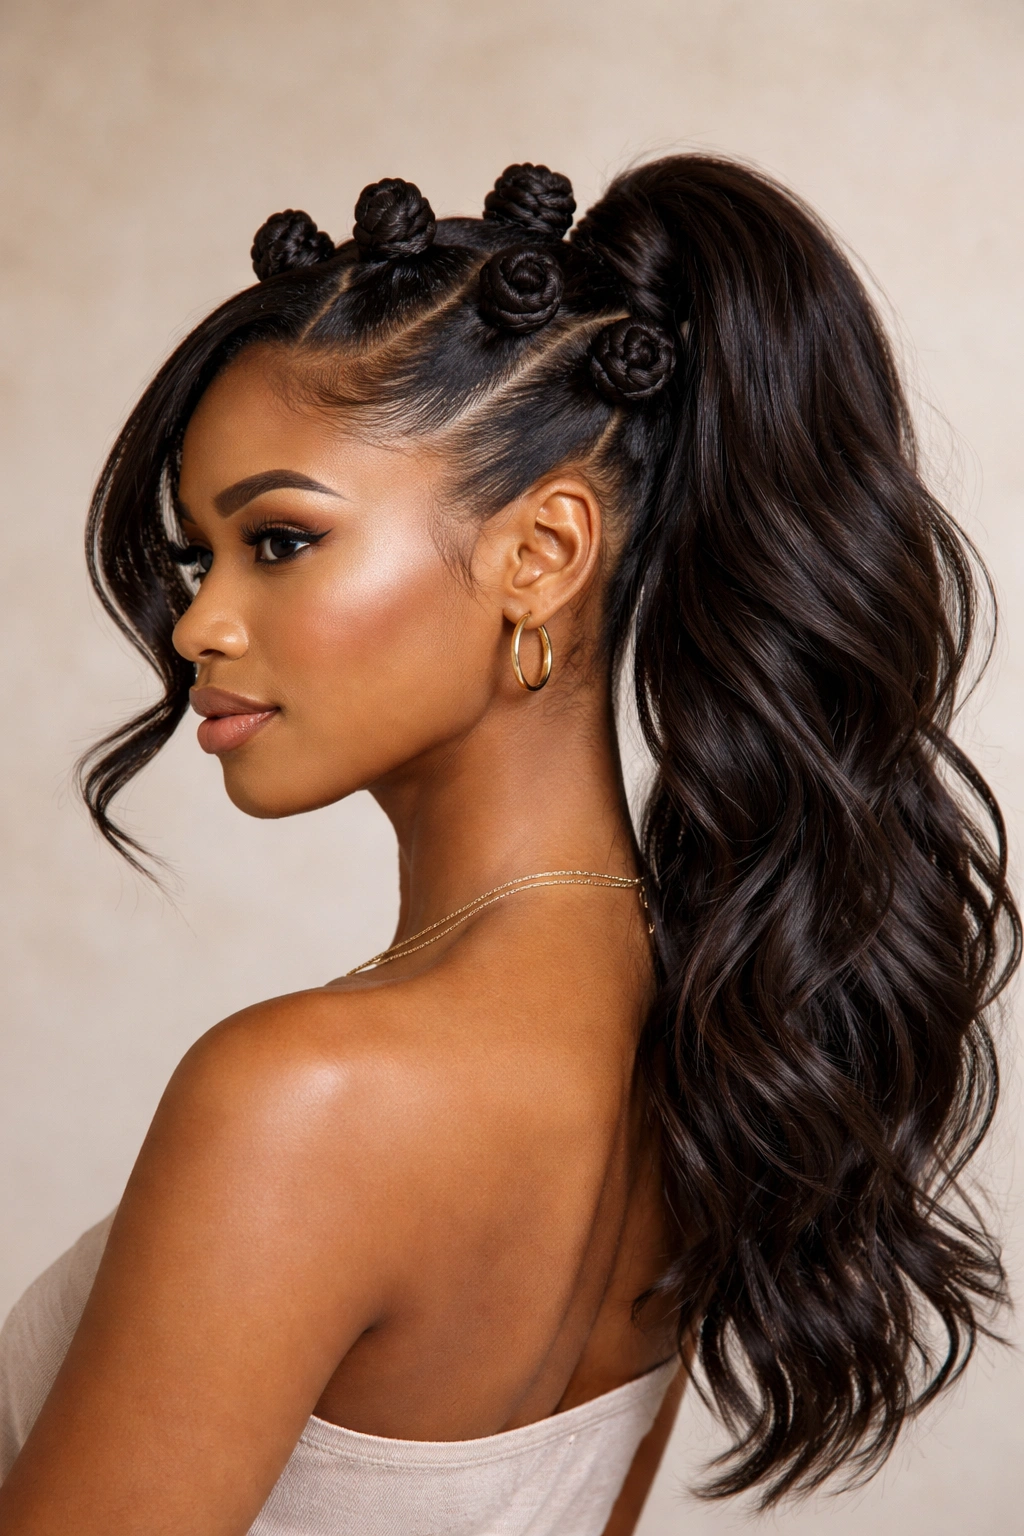
If you want to break away from the traditional centered ponytail, a side-swept version offers a playful, romantic alternative that feels both casual and carefully styled. This style gathers your hair to the side of your head and creates bantu knots within that off-center ponytail, creating asymmetrical visual interest and an effortlessly cool vibe. It’s perfect for those days when you want to look polished but not overly formal.
Why Off-Center Works
A side-swept ponytail naturally shows more of your face and creates an angle that’s flattering from almost every direction. When you add bantu knots to that side-swept placement, you’re drawing the eye along the contour of your head, which creates a really attractive silhouette. This version is also great for showcasing your edges and revealing more of your natural hairline if that’s something you want to highlight.
Placement Tips for Best Results
Gather your hair about 2 to 3 inches to one side, so it’s noticeably off-center but not pulled so far that it looks accidental. From there, create your bantu knots as you normally would within the ponytail base. The asymmetry makes this style feel more intentional and artistic—like you’re following a deliberate creative vision rather than just throwing your hair up. You can sweep your knots down toward your back, or let them cascade in different directions for a more organic feel.
Styling Variations Within This Category
Some people love adding face-framing braids that lead into the side ponytail, creating a more elaborate style. Others prefer to keep the sides smooth and let the knots do all the textural talking. You can even create larger, looser knots on one side and smaller, tighter ones on the other for an ombré effect—the possibilities really are endless.
4. Double Bantu Knot Ponytails
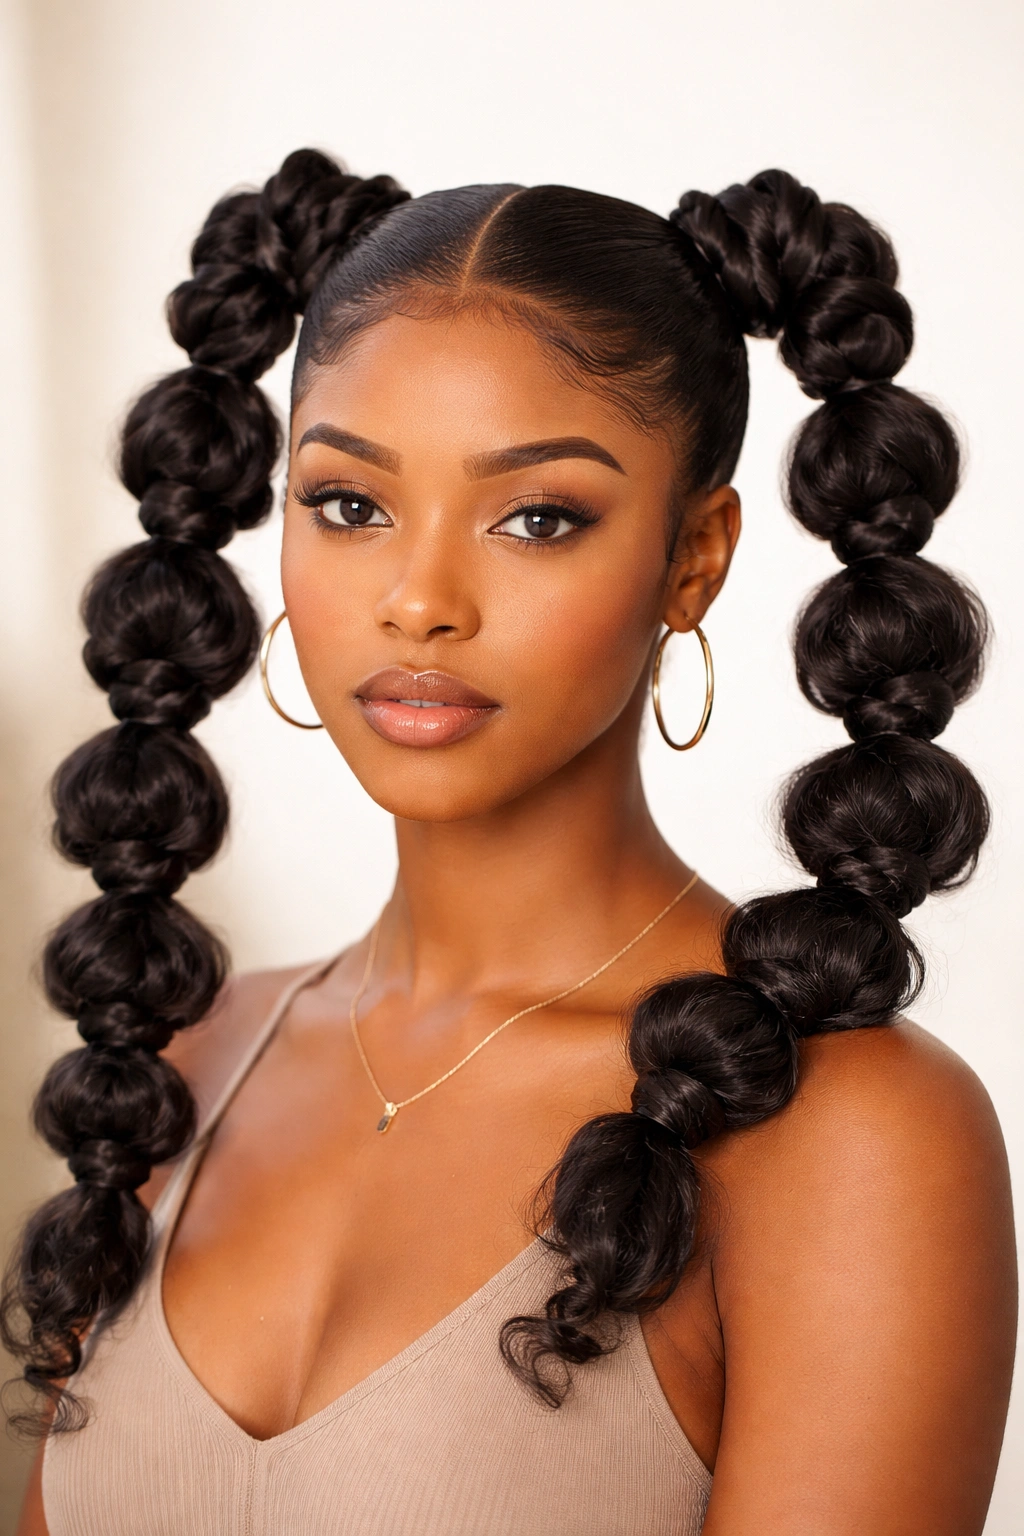
Double ponytails aren’t just for kids—when you create them with bantu knots, they become a seriously trendy, youthful style that celebrates your hair’s texture and volume. This version splits your hair into two separate ponytails (typically positioned high on either side of your head) and then creates individual bantu knots within each one. The result is playful, eye-catching, and perfect for standing out without looking costume-y.
Creating Two Balanced Ponytails
The key to double bantu knot ponytails is making sure each side is balanced and symmetrical. Do a middle part from your hairline all the way down your center, then gather each side into its own ponytail using a clean elastic. Take your time here—uneven parts will be obvious once the knots are in place, so it’s worth spending an extra minute to get it right. You can position them high (crown area), mid-level (around your ears), or even low (near your nape) depending on the vibe you’re going for.
Knot Placement and Density
Once each ponytail is secured, you can create knots at different densities in each one. Some people prefer knots all the way down; others do them just in the top section and leave the rest of the ponytail smooth. You might create 5 knots per side or 12—it really depends on how much texture you want and how much time you have. Smaller knots look more refined and age-appropriate if you’re an adult, while slightly larger knots look more casual and fun.
Who This Style Suits Best
Double bantu knot ponytails look amazing on people with medium to thick hair density. If your hair is finer, you can still absolutely rock this style—just be strategic about knot placement and consider using slightly thicker sections so the knots read clearly. This is also an excellent protective style because you’re distributing the tension across two ponytails rather than one, making it gentler on your hairline and scalp overall.
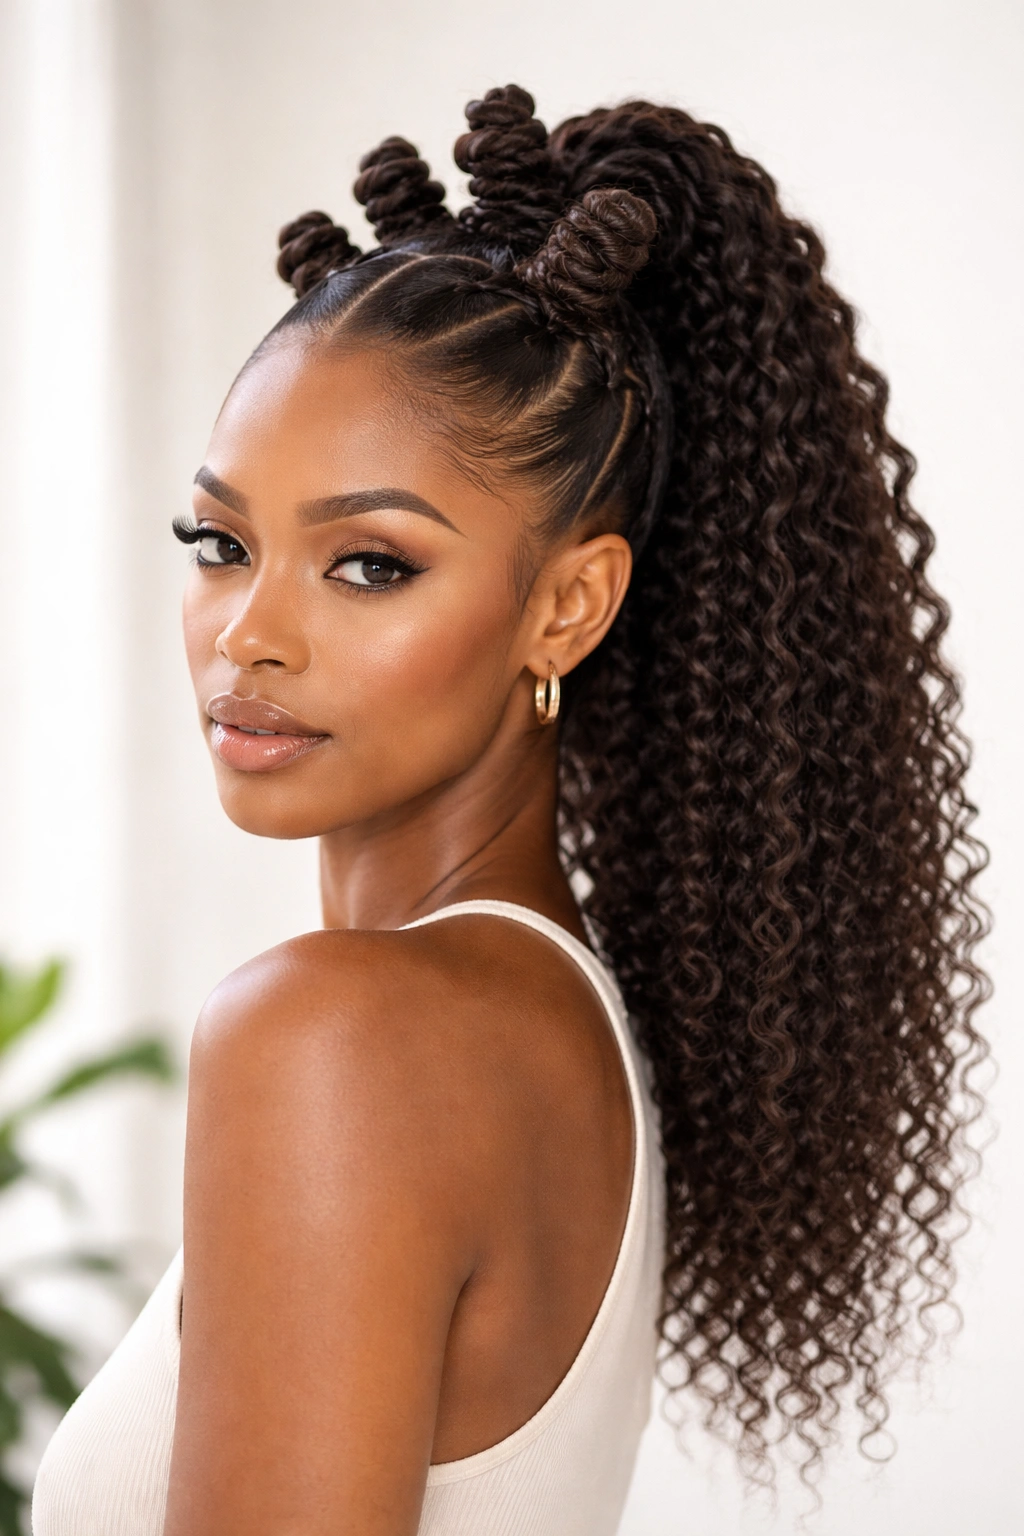
5. Bantu Knot Ponytail with Braided Base
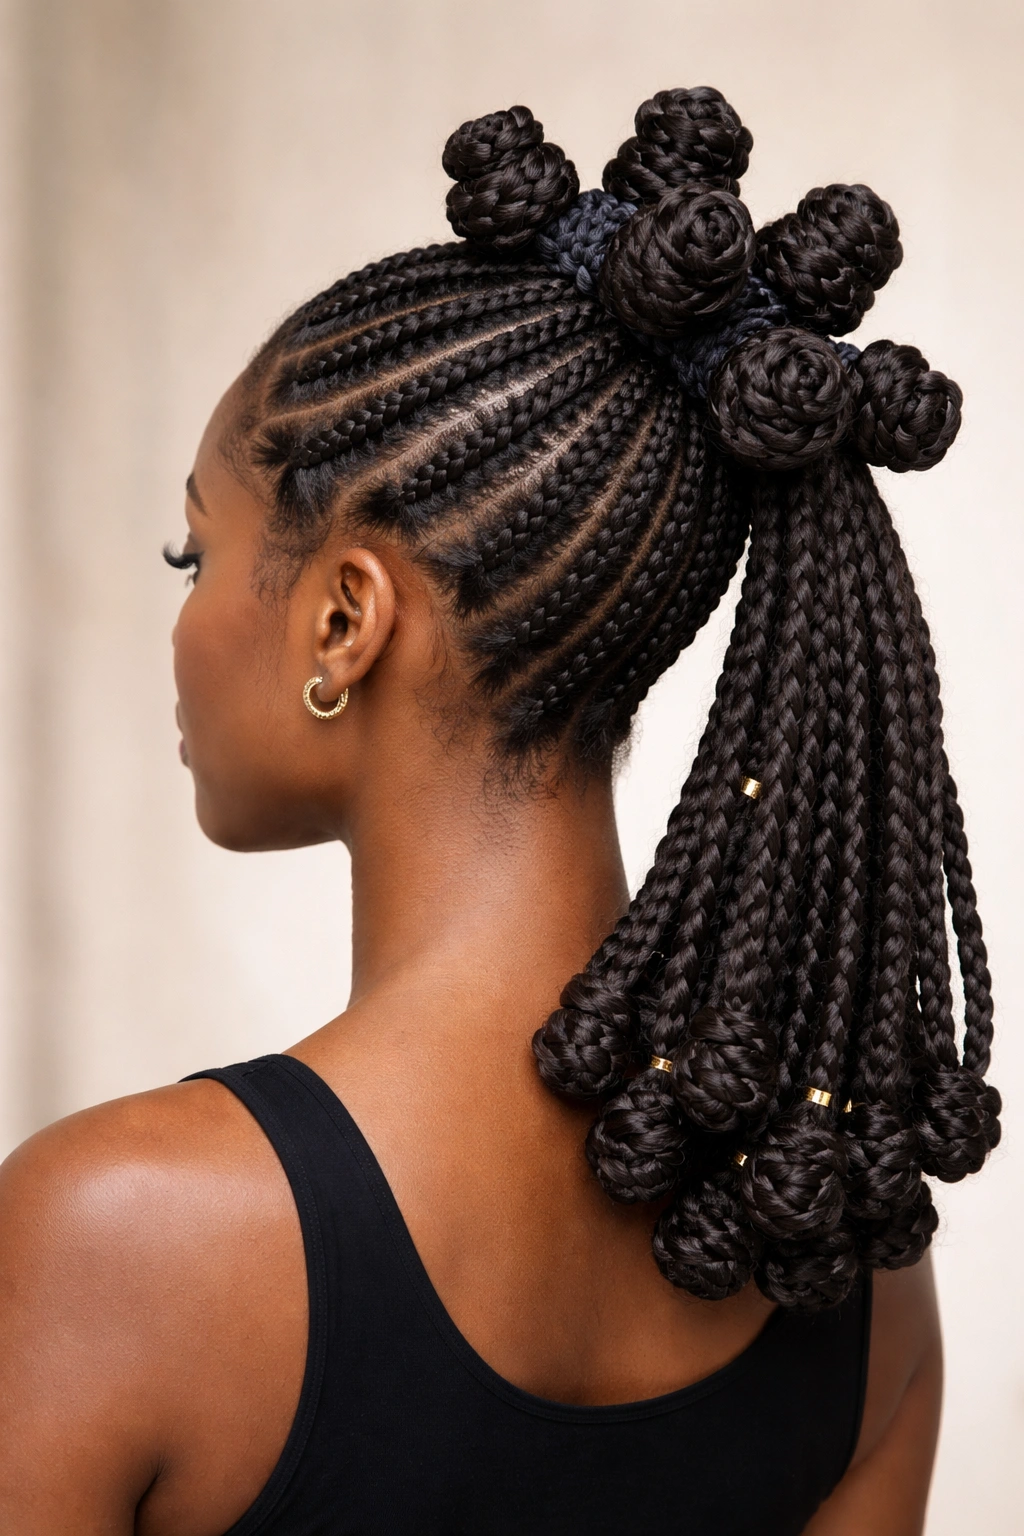
For a more intricate, designed-looking style, create a braided base that leads into your bantu knot ponytail. This version starts with cornrows, twists, or regular braids running back from your face and into a central ponytail, where you then create the knots. The combination of braids plus knots creates incredible depth and texture, and it’s an excellent protective style that can last for a week or more.
Building the Foundation with Braids
Start with 2 to 4 braids (depending on how much hair you have) that run from your edges or temples back toward the crown. You can do cornrows for a sleek, defined look, or regular braids for something slightly looser and more casual. Once your braids reach the back, gather them together with the rest of your unbraided hair to form your ponytail base. The braids anchor everything beautifully and create a smooth transition from the front of your head to the textured knots in back.
Creating Knots That Flow Naturally
The knots in this style work best when they start where your braids meet the ponytail. This way, you’ve got smooth braids leading the eye forward and defined knots creating interest at the back. Because the braids are already holding tension and structure, your knots can be slightly looser or larger without the whole style falling apart. This actually makes the style a little faster to create and easier to maintain over multiple days.
Best Styling Outcomes
This combination is absolutely gorgeous for natural events, graduations, or any occasion where you want to show off technical skill and precision. The braids-to-knots progression feels elevated and intentional, and because both components are protective (braids secure your roots, knots protect the length), your hair is well cared for while looking incredible.
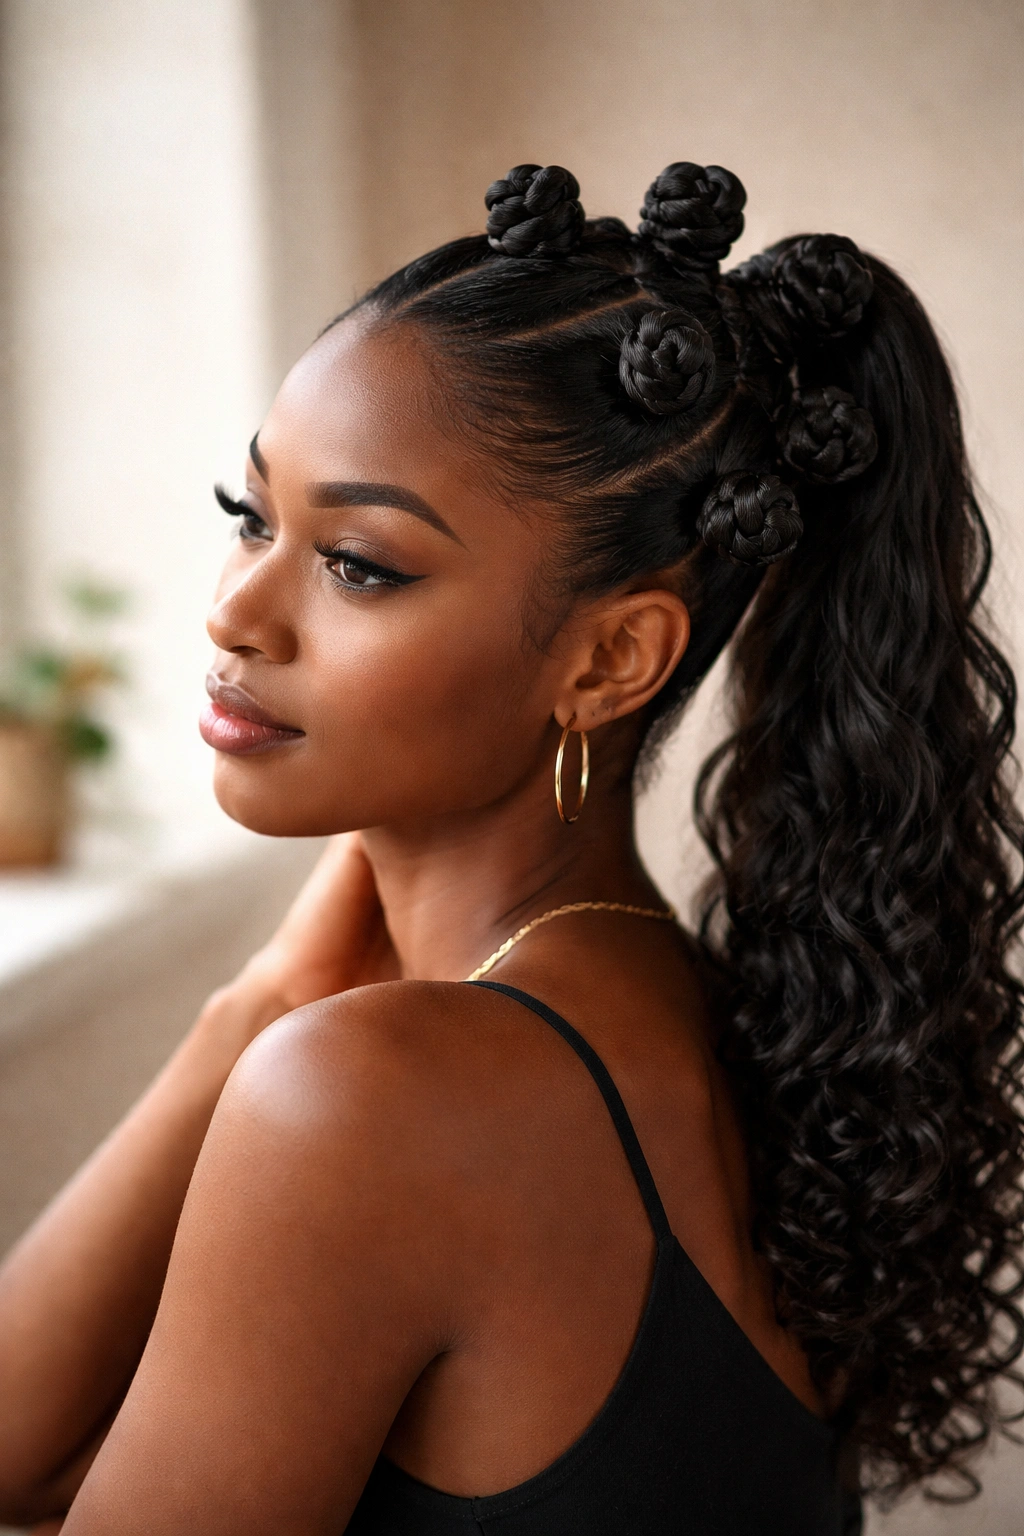
6. Low Bantu Knot Ponytail with Texture
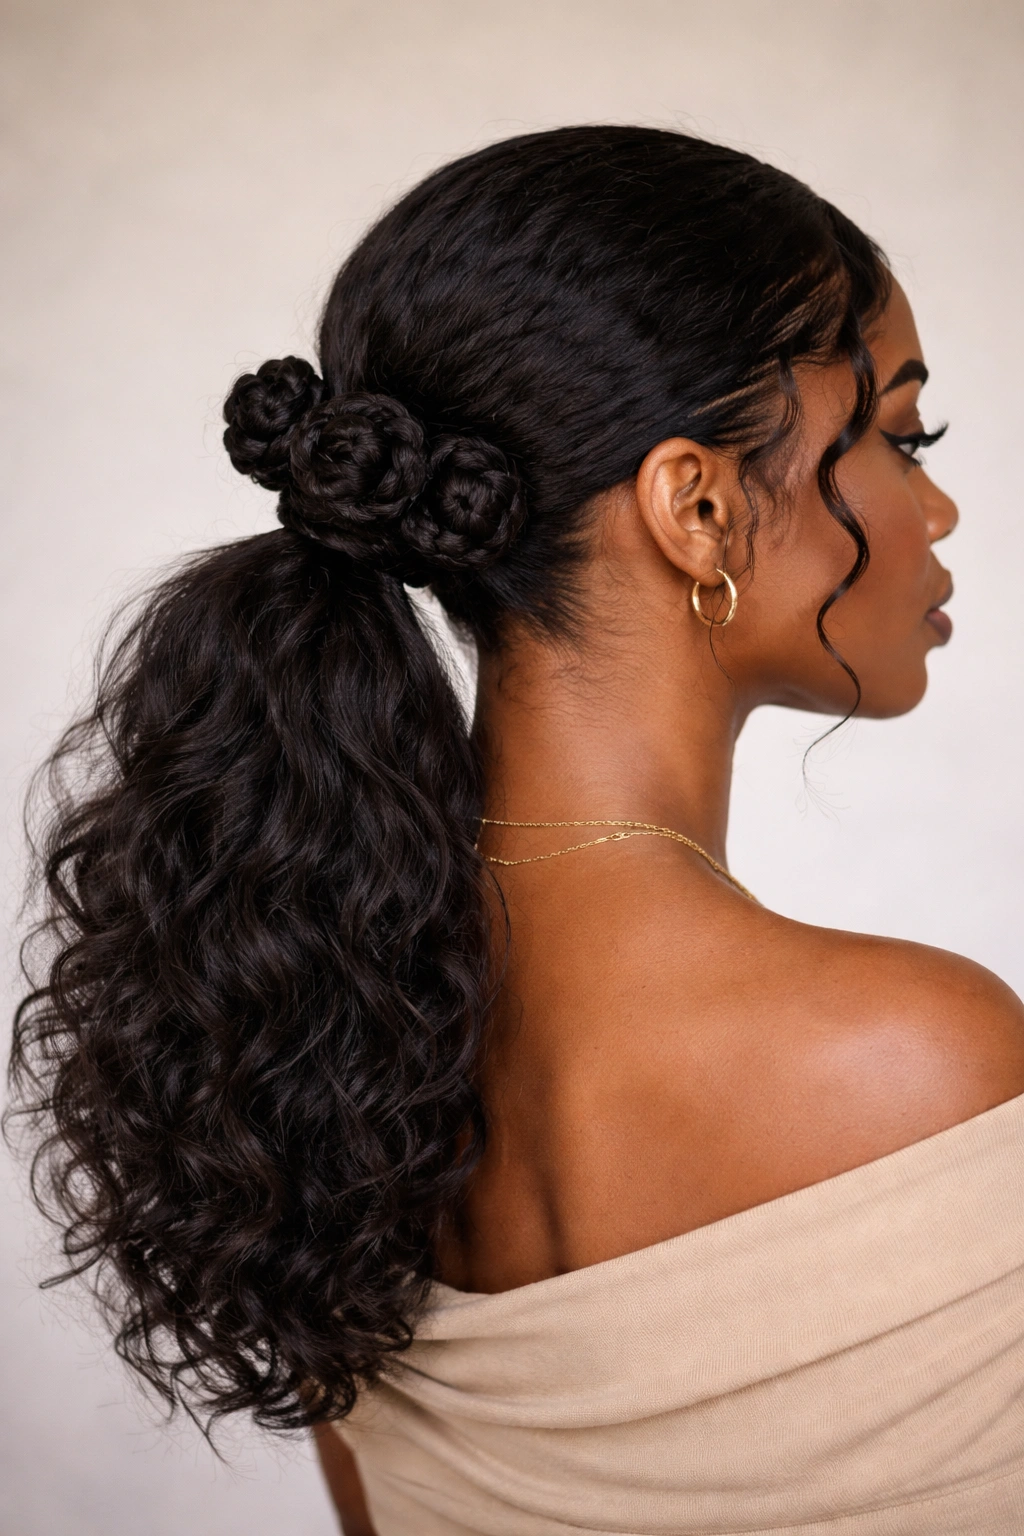
A low, loose bantu knot ponytail is the definition of effortless elegance. This version gathers your hair low on your head (around your nape or lower) and creates somewhat larger, looser bantu knots throughout, giving you a soft, textured look that’s incredibly wearable for work, casual hangouts, or everyday life. It’s comfortable, doesn’t pull on your edges, and looks polished without being overdone.
The Comfort Factor of Low Placement
Low ponytails are genuinely more comfortable than high ones if you spend a lot of time sitting, working at a computer, or just want to feel relaxed throughout the day. Your hair isn’t pulling backward with as much force, and the weight is distributed closer to your neck and shoulders. Adding looser bantu knots to this placement creates a style that looks intentional and beautiful while still letting you move naturally and comfortably.
Creating Knots with the Right Amount of Texture
For this style, you want knots that are defined enough to read clearly, but not so tight that they look stiff or feel restrictive. Wrap each section around two fingers instead of one, which gives you a larger knot diameter. Wind with medium tension—not loose enough to unravel, but not so tight that you’re creating tension on your scalp. The result is a softer, more romantic version of the bantu knot ponytail that suits almost any hair type and texture.
Styling This for Work and Professional Settings
Because it’s low and relatively understated, this version reads as polished and professional without being overly trendy. Pair it with a neutral outfit and minimal jewelry, and you’ve got a hairstyle that works in conservative environments while still celebrating your natural texture and creative flair. It’s also a great option if you’re not ready to fully commit to elaborate hair styling but want to try a more textured look.
7. Bantu Knots Cascading Ponytail
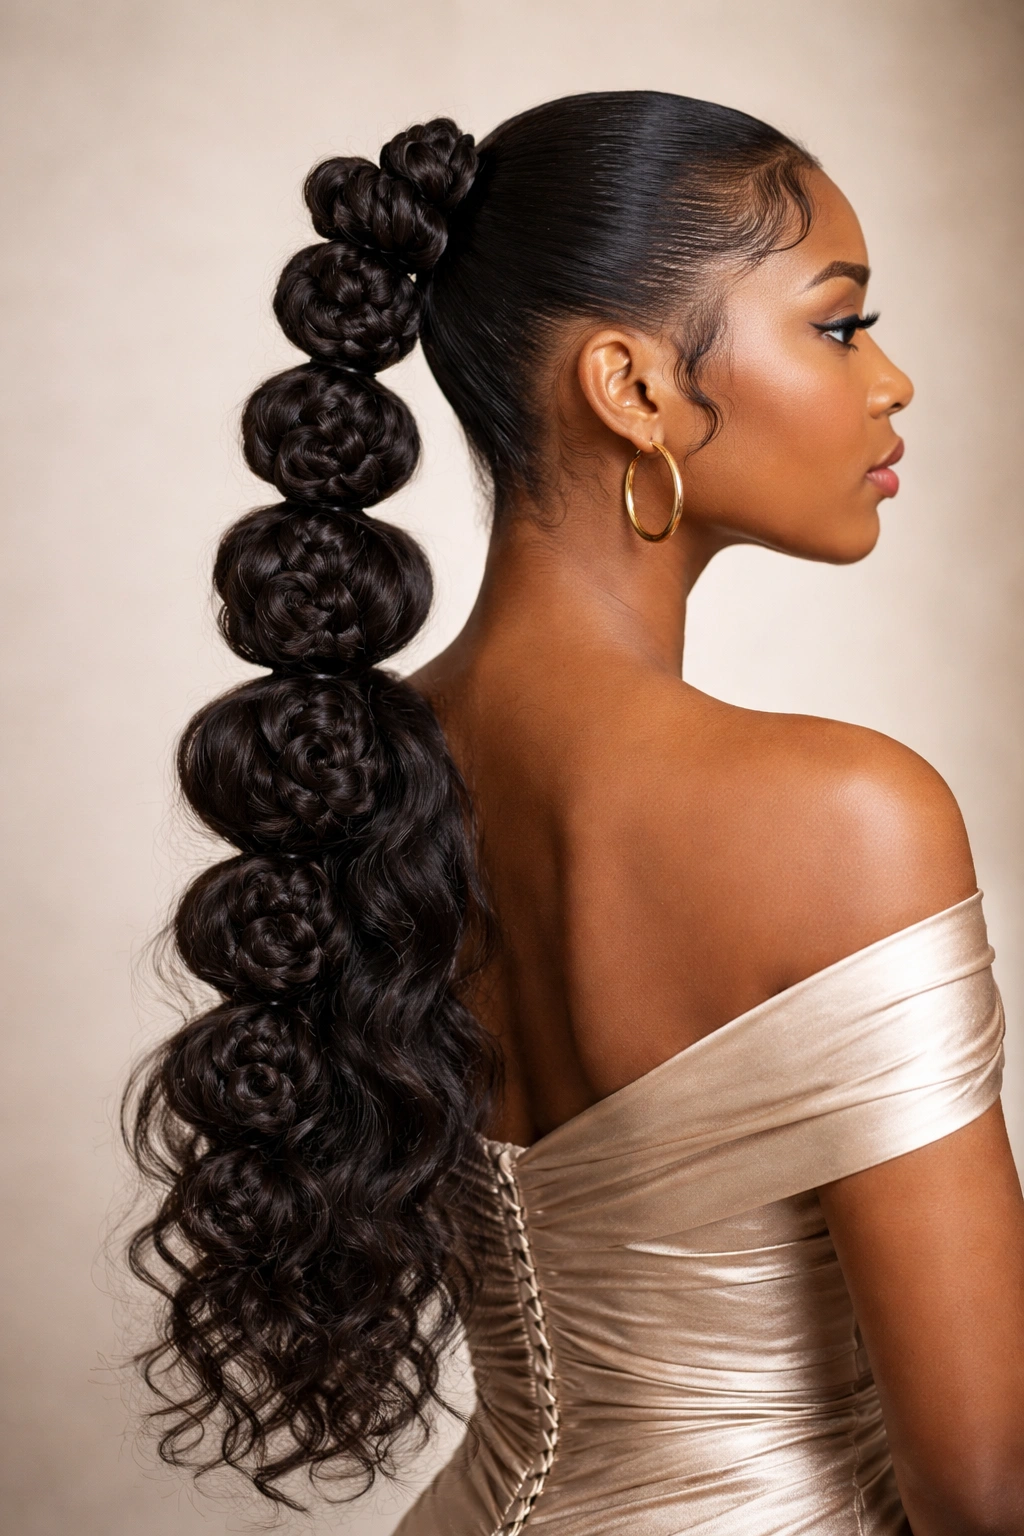
For something truly show-stopping, create a cascading ponytail where the bantu knots start high and flow down your back like a waterfall. This version uses strategic ponytail placement and knot sizing to create a dramatic, textured effect that looks complex but is actually surprisingly manageable. It’s perfect for special events or any time you want to feel absolutely stunning.
Understanding the Cascading Effect
A cascading bantu knot ponytail works by creating a smooth beginning (your actual ponytail base) and then allowing the knots to progress downward in a way that creates visual flow. Think of it as texture that builds and evolves as it travels down your back. You might start with tighter knots closer to your head and gradually go looser toward the ends, or vice versa, depending on the specific effect you’re after.
Sizing and Spacing for Maximum Impact
The key to cascading is varying your knot sizes as you move down the ponytail. Start with your smallest knots at the top (they’re closer to your head and benefit from definition), then gradually increase knot size as you move down. This creates a natural visual progression that’s deeply satisfying to look at. Space the knots so there’s a bit of smooth ponytail hair visible between them—this breathing room prevents the style from looking too matted or heavy.
Making It Work for Your Hair Type
This style shines on people with medium to thick hair density and significant length. If your hair is fine, focus on fewer, larger knots spaced further apart so each one reads clearly without getting lost. If your hair is very curly or coily already, looser knots work beautifully because the natural curl pattern adds to the cascading effect. Test this style with your own hair before committing to wearing it to an event—everyone’s hair behaves a bit differently, and what cascades beautifully on one person might need adjusting for another.
8. Twisted Bantu Knot Ponytail
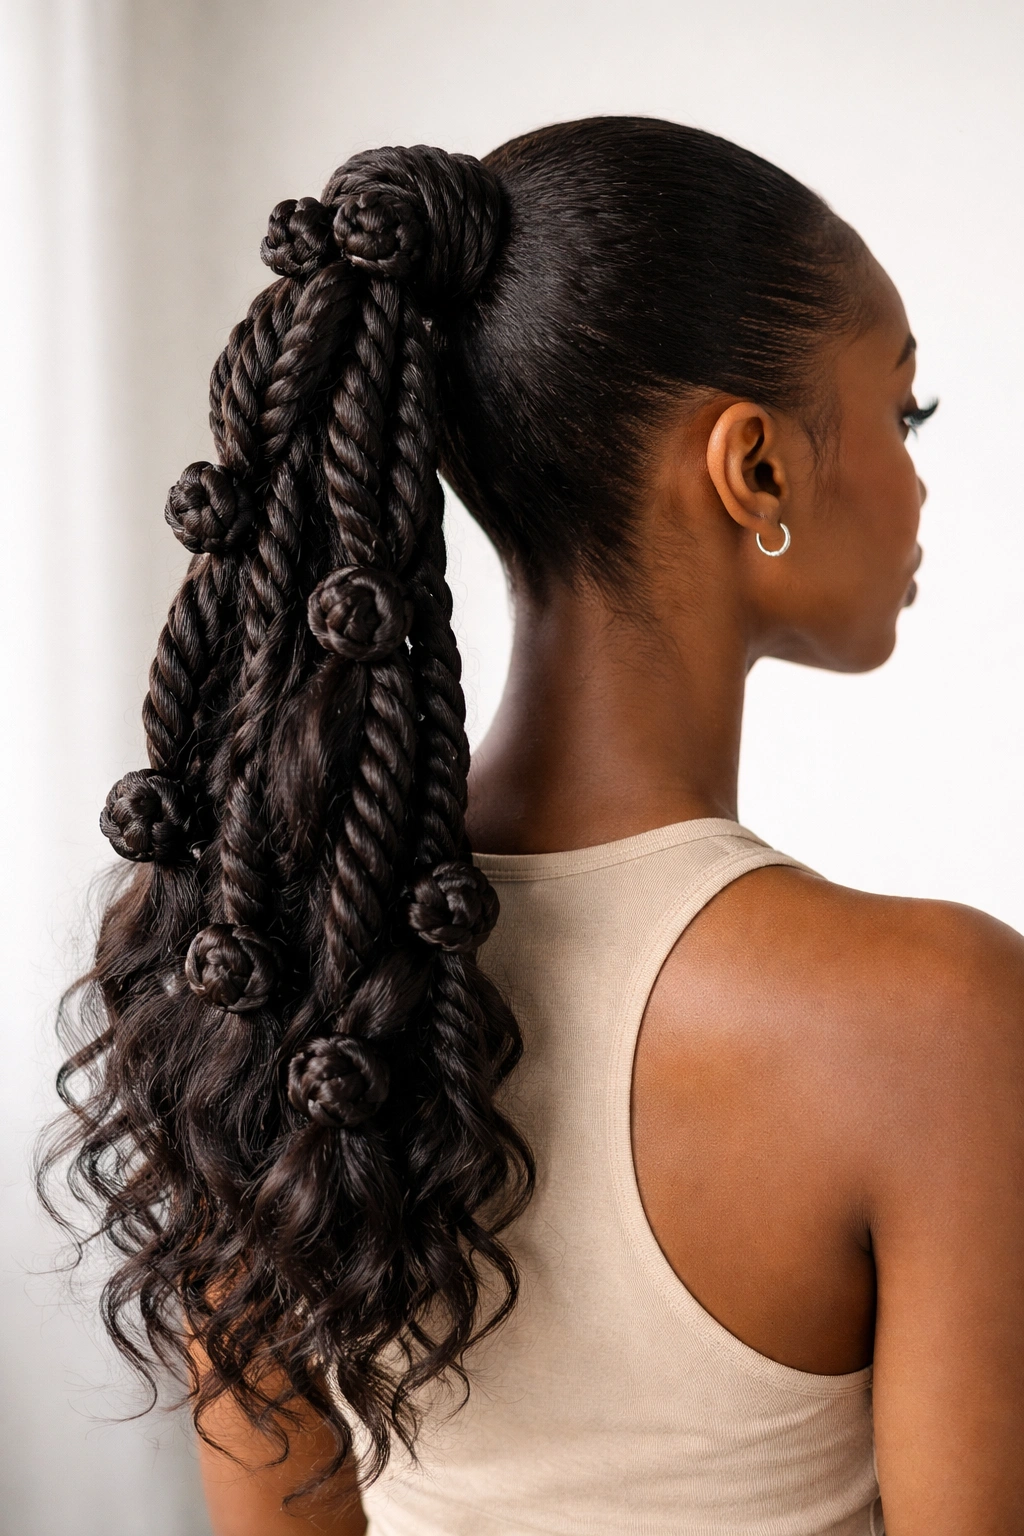
Combine the visual interest of twisted hair with the texture of bantu knots by creating a hybrid style: gather your hair into a ponytail, create several twists running through that ponytail, and then add bantu knots to the sections between your twists. This creates multiple layers of texture and dimension that look incredibly intentional and creative. It’s a wonderful way to add complexity to a basic ponytail.
Balancing Twists and Knots
Start by gathering your hair into your desired ponytail placement. Then, divide that ponytail into sections. Create a two-strand twist with every other section, which means you’ll have alternating twists and untwisted sections. Once your twists are secured at the bottom with bobby pins, create a bantu knot in each of the untwisted sections. The result is a checkerboard pattern of texture that’s mesmerizing to look at.
The Technical Skill This Requires
This style definitely falls into the intermediate category—you’re managing multiple techniques at once, and you need to keep them all coordinated so they look intentional rather than chaotic. The payoff is absolutely worth it though, because people will genuinely be impressed by the level of detail and the multiple textures you’ve created. It’s a style that looks like you spent two hours on it (even if you managed it in 30 minutes).
Styling Outcome and Wearability
Twisted and knotted styles hold up beautifully over multiple days, especially if you secure everything tightly at the base of each bun or knot. You can sleep on this style, and it only gets more interesting as the twists and knots set in further. This is also an excellent protective style that keeps your hair ends tucked away and minimizes manipulation, so your hair gets a genuine break while you’re rocking a fabulous look.
9. Bantu Knot Ponytail with Accessories
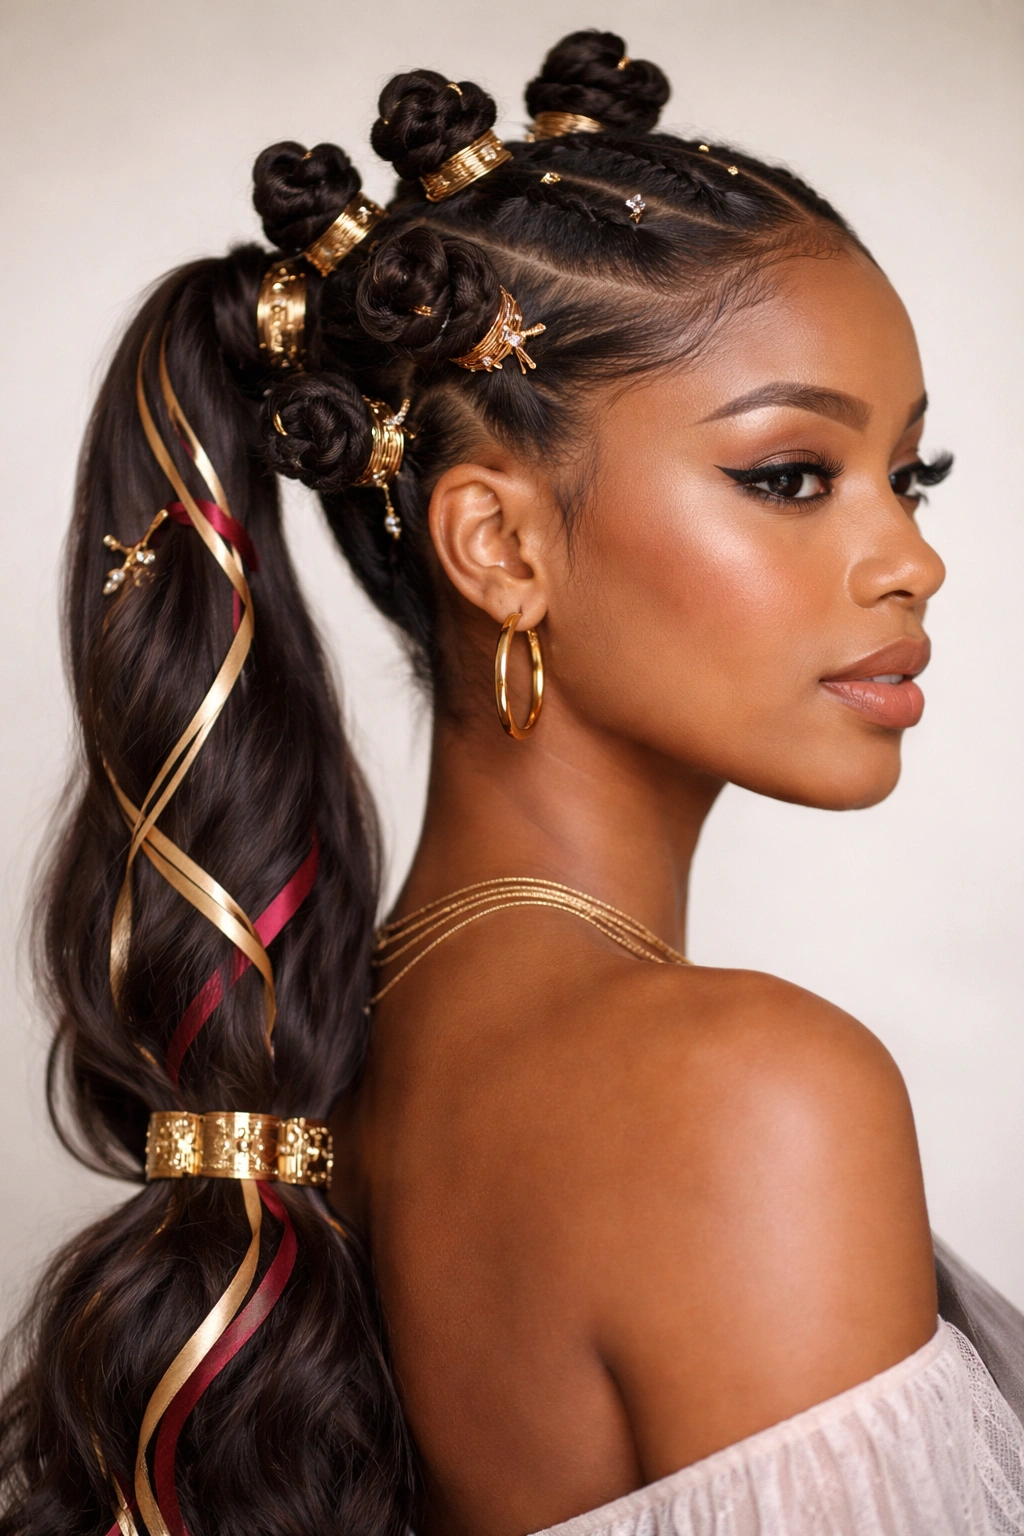
Elevate your bantu knot ponytail by adding carefully chosen accessories that complement your knots and enhance the overall look. This might mean wrapping metallic thread around each knot, adding decorative bobby pins at the base of your ponytail, threading ribbon through sections, or using hair cuffs and rings. Accessories transform a classic style into something that feels personalized and special.
Choosing the Right Accessories for Your Style
Think about the occasion and your outfit when selecting accessories. For work, consider subtle options like gold or silver bobby pins positioned strategically at your ponytail base. For events or casual hangouts, you can be bolder: try wrapping coordinating embroidery thread around each bantu knot, or use decorative hair clips throughout. The goal is enhancement, not distraction—your natural hair and the texture you’ve created should still be the star of the show.
Application Techniques That Look Professional
If you’re wrapping thread around knots, position it about halfway down each knot and wrap it 3 to 5 times, securing the ends where they won’t show. With bobby pins, place them strategically (like in an X pattern at the base) rather than scattered randomly, which looks more intentional. Hair cuffs work beautifully when you use one or two at the very base of your ponytail, drawing attention to the gathered starting point. The key is making sure whatever you add looks like a deliberate styling choice, not an afterthought.
Seasonal and Occasion Variations
In warmer months, metallic or jewel-toned threads look fresh and fun. During cooler months, rich jewel tones or metallics still work, or you might add cozy textures like velvet ribbons. For events, coordinate your accessories with your outfit—if you’re wearing gold jewelry, add gold details to your hair. If you’re in neutrals, unexpected pops of color in your accessories make a modern statement.
10. Bantu Knot Ponytail with Volume and Length
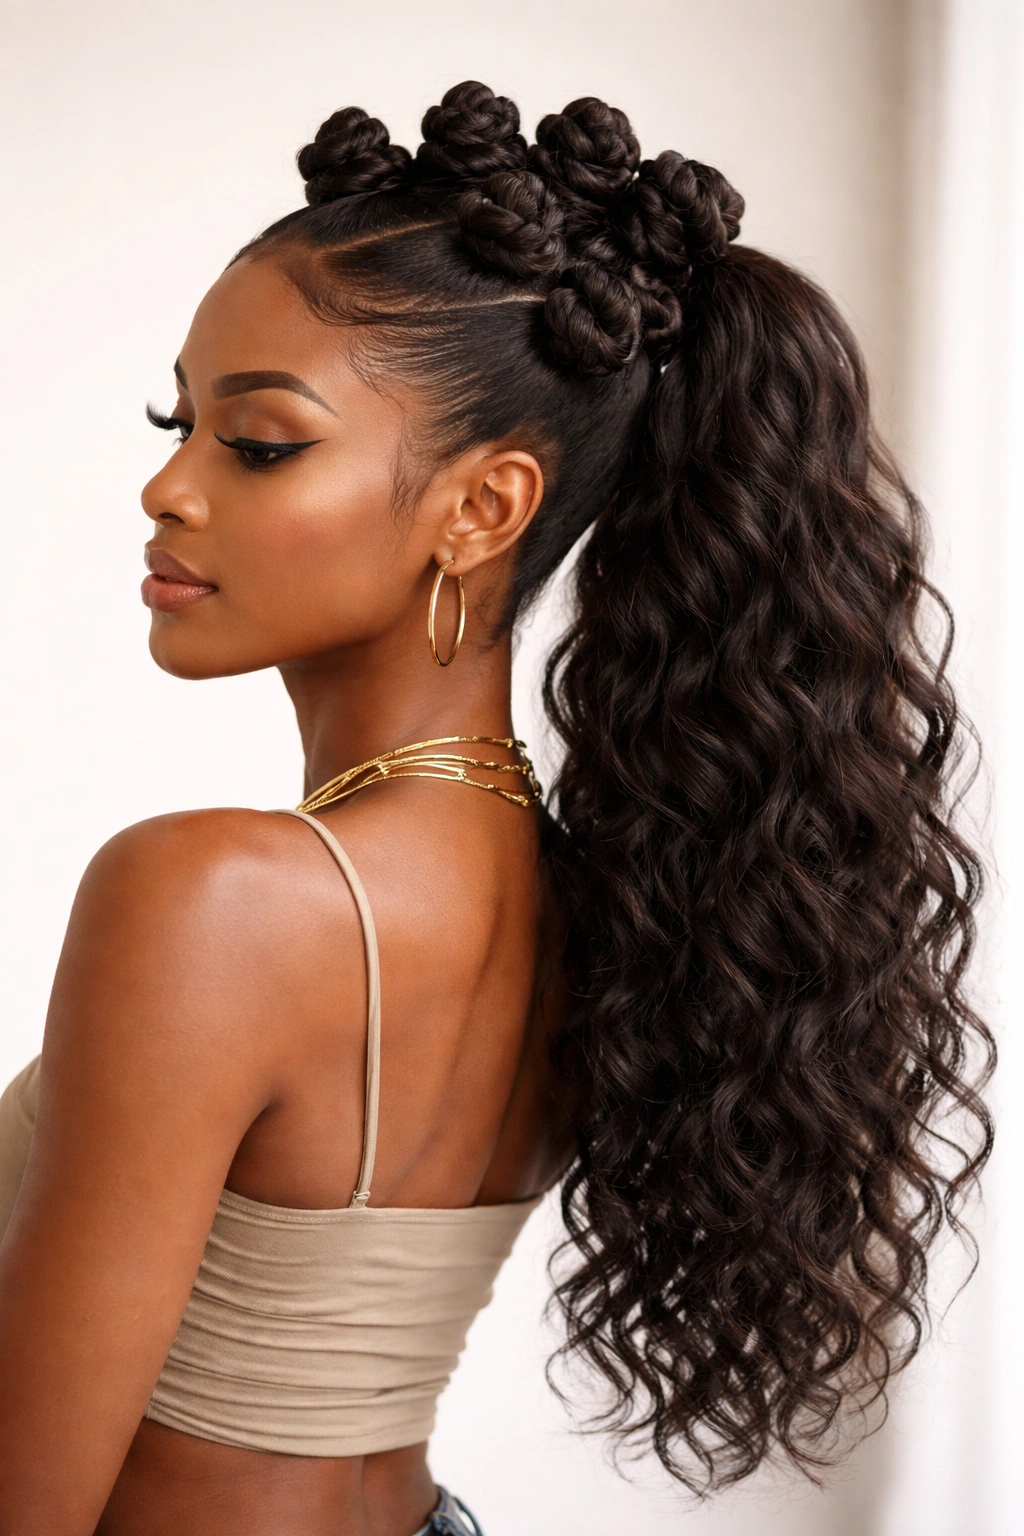
Create a voluminous, statement-making bantu knot ponytail by using extensions or by strategically styling to maximize the natural volume of your hair. This version works especially well if you have medium to thick hair density and significant length—the combination of length and multiple knots creates a visual impact that’s truly striking. It’s the kind of style that makes people do a double-take when you walk past.
Building Volume Through Strategic Knot Placement
Instead of spacing knots evenly throughout your entire ponytail, cluster them more densely in the upper sections and gradually space them further apart as you move down. This creates visual weight at the top (which reads as volume) and allows the bottom portion to show off your length. Alternatively, you can create knots only in the top half of your ponytail and leave the bottom completely smooth and flowing—this also emphasizes length while keeping knot texture visible.
Working with Extensions if You Want Extra Drama
If you want maximum volume and length without waiting years to grow your hair, consider adding braided or latch-hooked extensions to your ponytail before creating your knots. Extensions add instant thickness and length, which means your knots will be larger and more visually impactful. Make sure the extensions match your hair texture reasonably closely so the combined style looks intentional rather than obviously extended. Glueless options tend to blend most naturally with natural hair.
Maintaining Volume Over Multiple Days
A voluminous bantu knot ponytail looks incredible on day one, but the volume can flatten slightly over time as you sleep and move around. To maintain that fresh look, refresh your ponytail base every couple of days by slightly loosening and re-tightening your elastic—this brings the volume back up. You can also lightly mist with water and reshape knots with your fingers to restore their perkiness. With proper care, this style can easily last 5 to 7 days.
Final Thoughts
Bantu knot ponytails are so much more than just a protective style—they’re an expression of creativity, a celebration of natural texture, and a genuinely fun way to switch up your look while keeping your hair healthy. Whether you go for a classic version, embrace the drama of cascading knots, or add your own unique spin with accessories or braids, you’re tapping into a hairstyle that’s both beautiful and meaningful.
The wonderful thing about these styles is that they reward experimentation. Your first attempt might not be perfect, and that’s completely okay—every time you create bantu knots, you’ll get a little faster and develop more intuition about what looks good with your specific hair texture and face shape. You’ll start to notice which knot sizes work best for you, which placements feel most comfortable, and how long each variation realistically lasts in your hair.
Most importantly, enjoy the process of creating these styles. Put on music you love, grab a friend to chat with while you work, or settle into the meditative rhythm of winding each knot. Your natural hair is beautiful, and these styles are just one gorgeous way to show it off while keeping it protected and thriving.