A bridesmaid’s hairstyle needs to strike a delicate balance—it should look polished and intentional enough to complement the bride’s day, yet feel comfortable enough to stay put through a ceremony, endless photos, dancing, and celebrating. Ponytails have become the go-to solution for this exact reason. They’re elegant without requiring the same level of maintenance as an intricate updo, they photograph beautifully from every angle, and they work with nearly any hair texture, length, or thickness.
The key to choosing the right bridesmaid ponytail lies in considering a few practical factors: the formality of the wedding, whether the bridesmaids’ dresses have open backs or higher necklines, the hair type you’re working with, and how the style will photograph in outdoor or indoor lighting. A sleek, sculpted ponytail reads entirely different from a soft, romantic version—and both can be equally appropriate depending on the overall wedding aesthetic. The style you choose will ultimately set the tone for how polished and cohesive the bridal party appears.
Below are fifteen distinct ponytail styles that work beautifully for bridesmaids, each with detailed instructions on how to achieve it, styling tips, and honest insight into when and why each style shines.
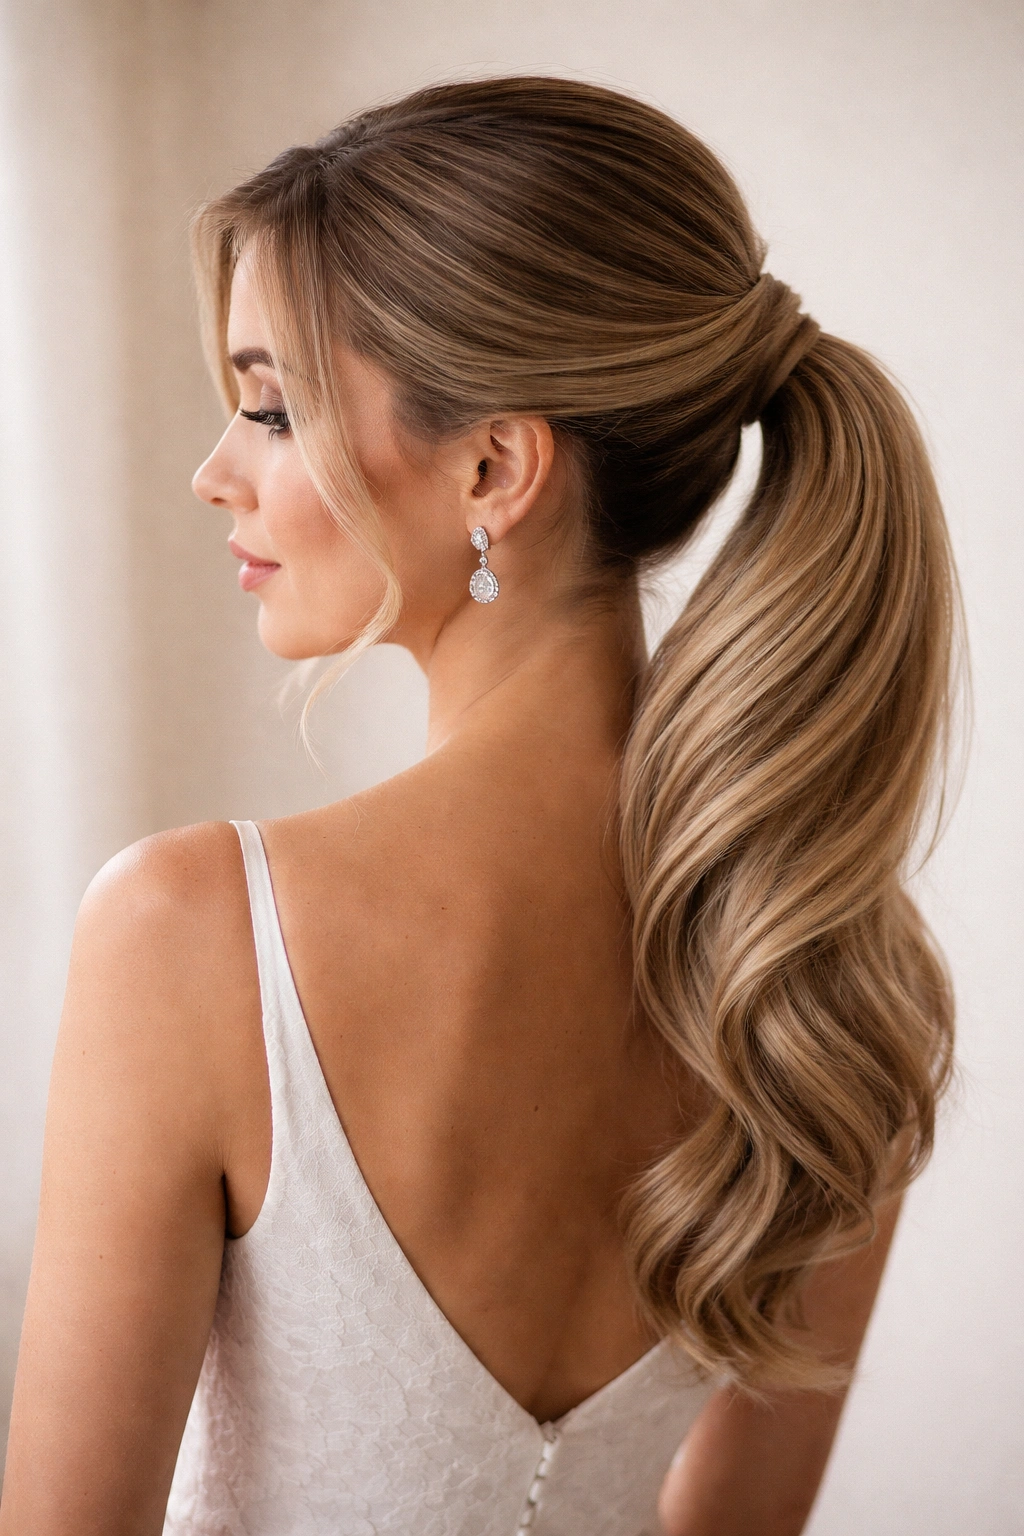
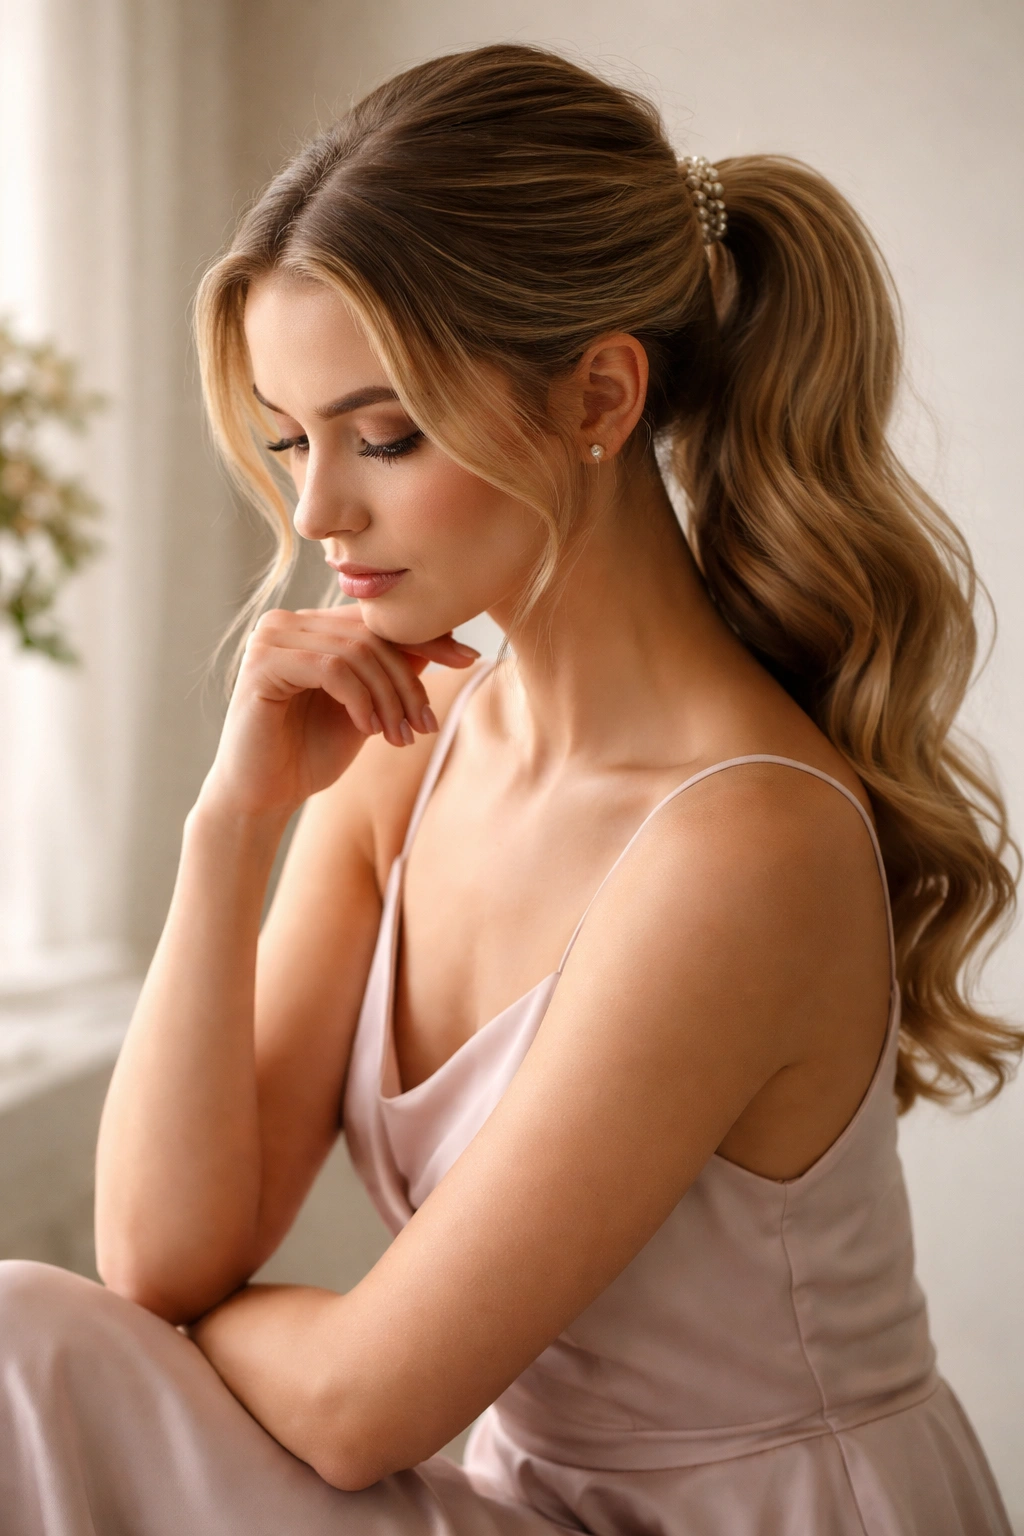
1. The Classic High Ponytail
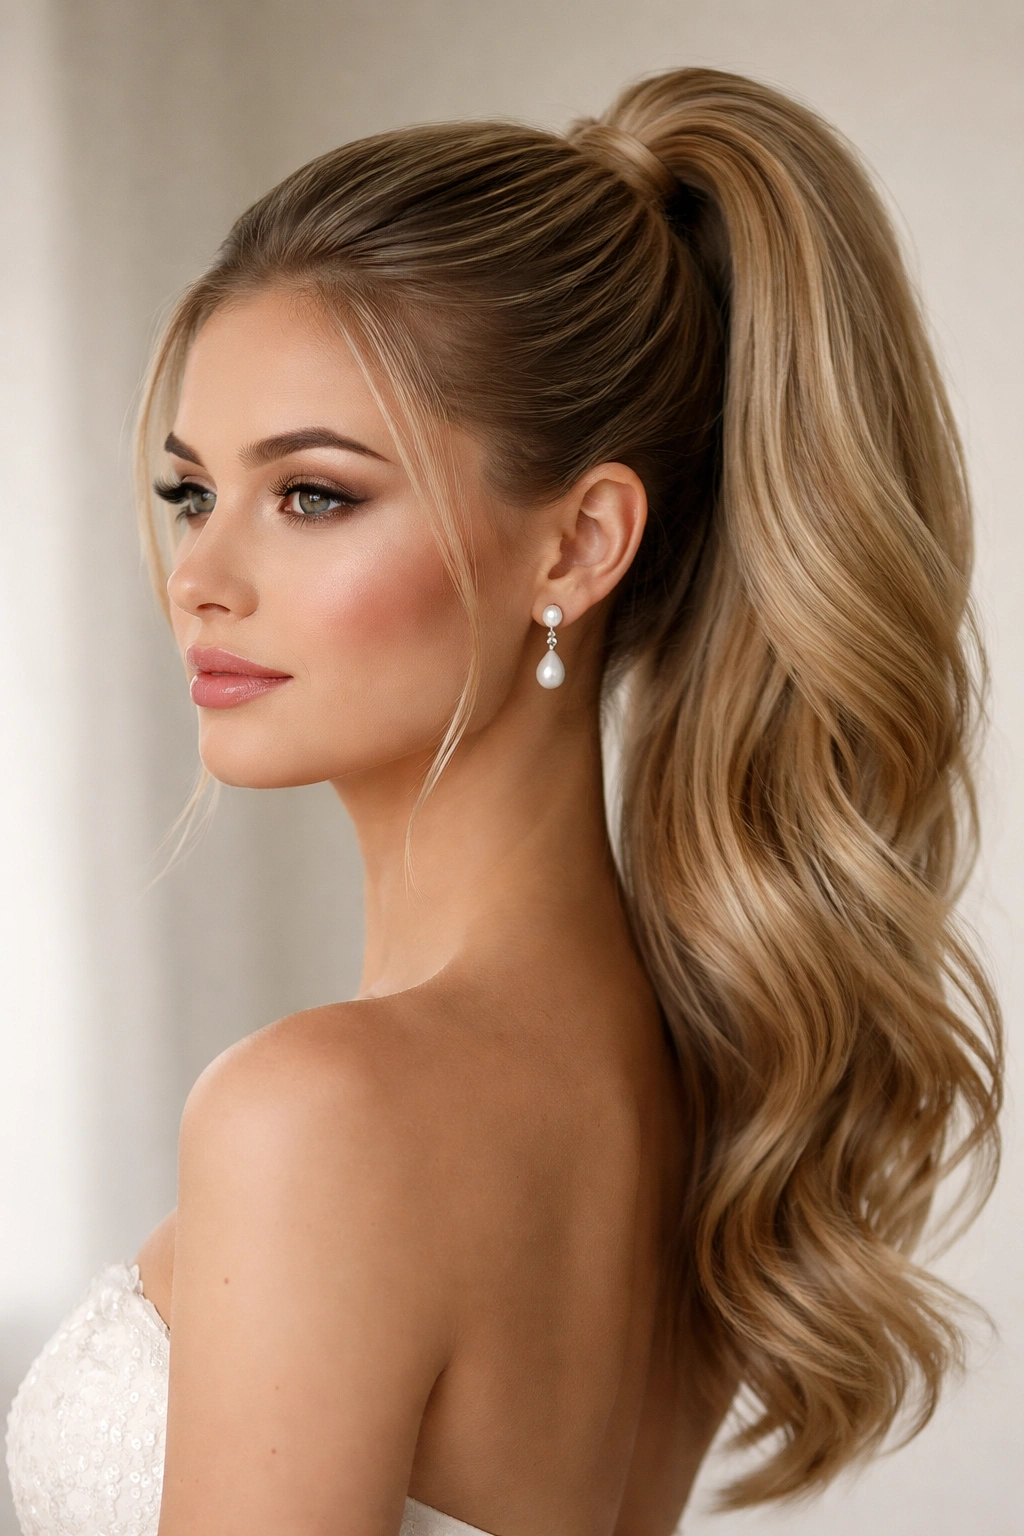
This is the foundation that works for nearly every wedding aesthetic, from ultra-formal black-tie affairs to garden celebrations. A true classic high ponytail sits at the crown, lifting hair away from the face and neck entirely, which is especially flattering in photographs and keeps hair secure throughout a full day of events.
Why It Works for Bridesmaids
The high ponytail reads formal and intentional without requiring hours of styling time. Because the hair sits high and away from the shoulders, it works beautifully with strapless, sweetheart, or open-back dresses—and it photographs cleanly from any angle, including when the bridesmaids stand behind the bride. The elevated position also creates an instant sense of refinement and polish that’s genuinely difficult to achieve with hair down.
How to Create It
Start with clean, dry or lightly damp hair. Apply a volumizing mousse to the roots if you’re working with fine hair, then blow-dry with a round brush to create body and movement. Use a fine-tooth comb to smooth the surface while leaving subtle texture at the crown. Gather hair at the very top of the head—imagine a point directly above the center of your head—and secure with a elastic band. Don’t pull too tightly; bridesmaids will be wearing these for 8+ hours. Smooth any flyaways with a light hairspray and a soft brush. Optional: take a small section of hair from the ponytail and wrap it around the elastic band, securing the end with a bobby pin tucked underneath for a refined, seamless finish.
Pro Tips
Tease gently at the crown before securing the ponytail to add lift and dimension that photographs beautifully without looking overdone. If the ponytail feels too tight after an hour, it’s too tight—adjust immediately. For bridesmaids with thin hair, try a textured spray before creating the ponytail; it adds grip and makes the style hold better throughout the day without additional tension on the scalp.
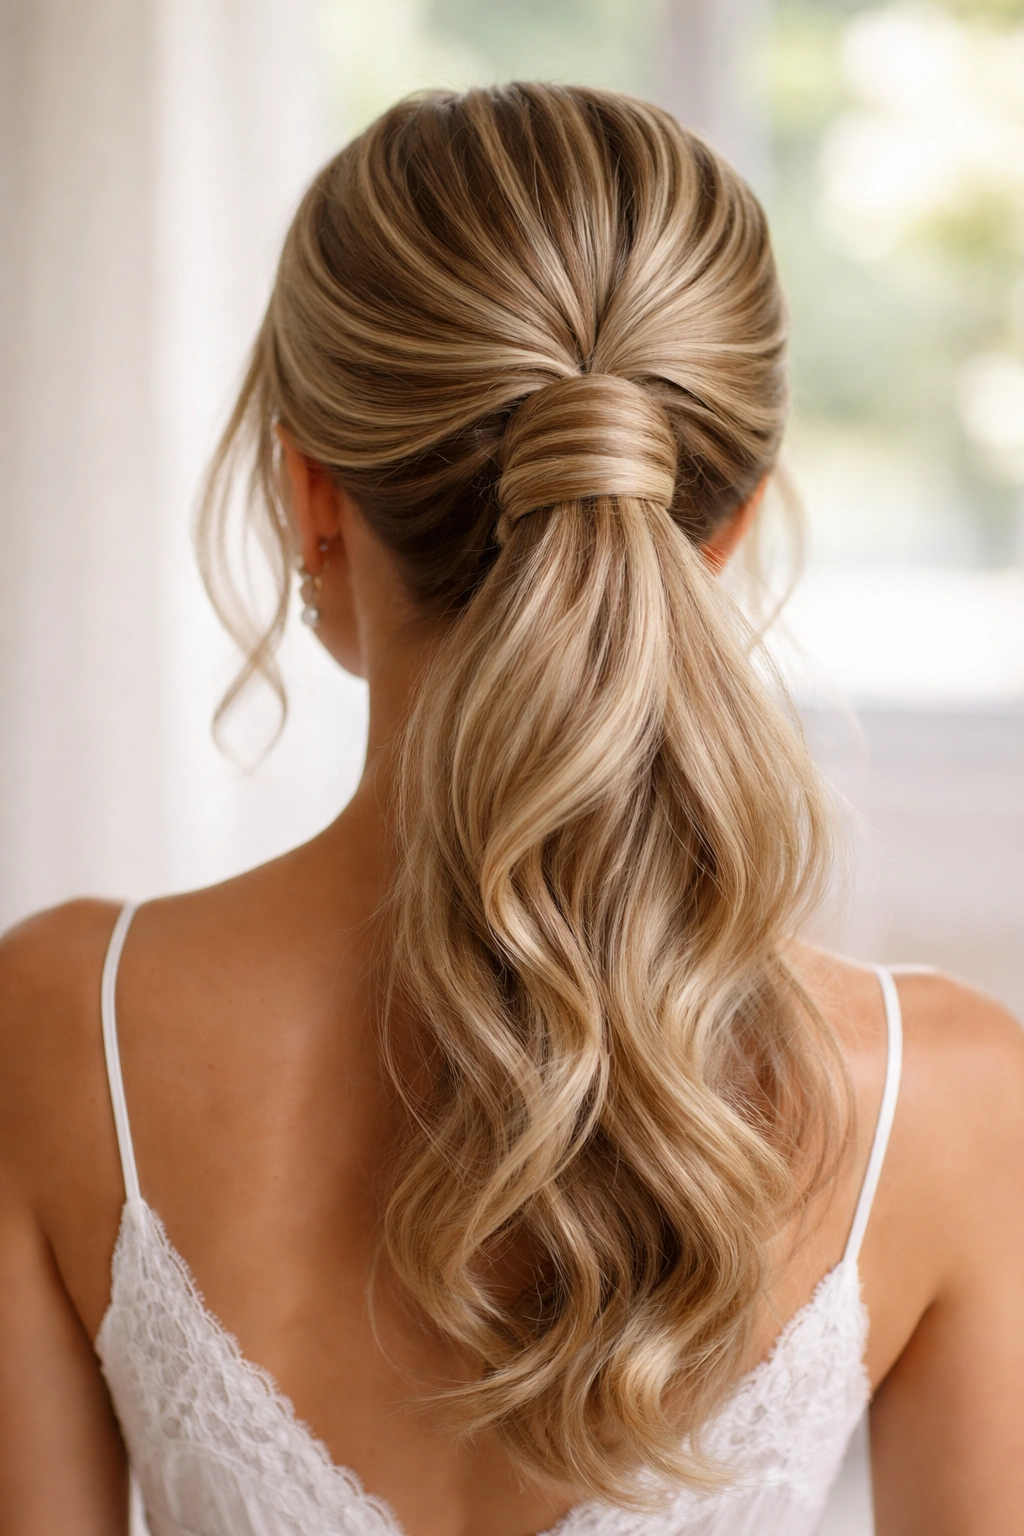
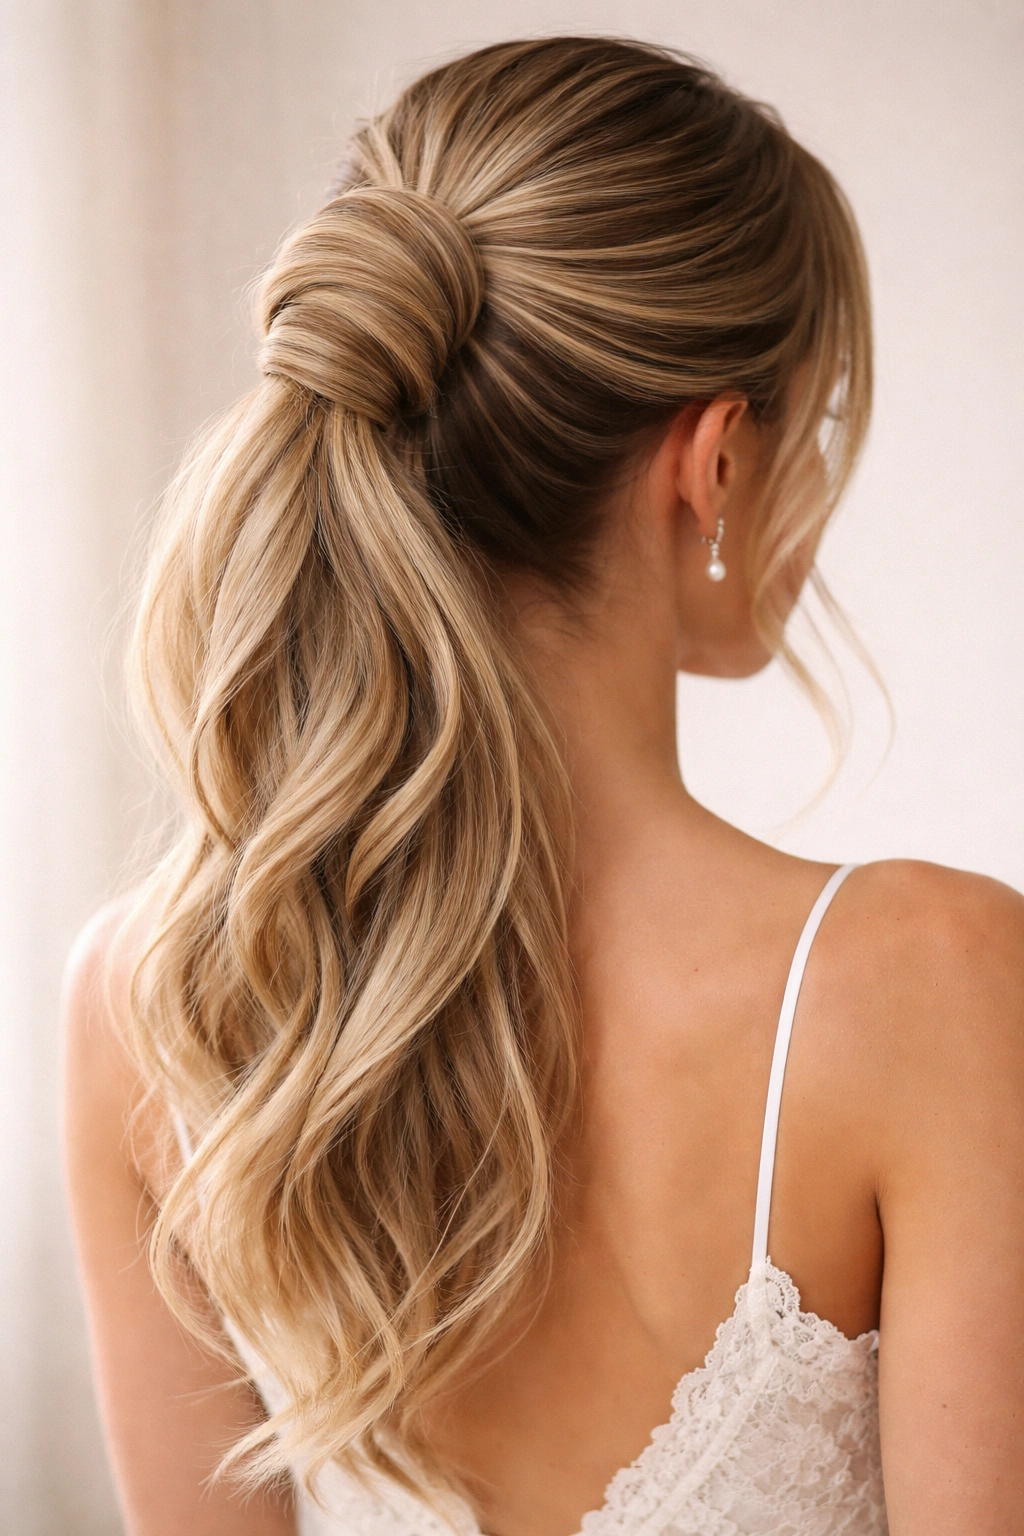
2. The Romantic Half-Up Ponytail
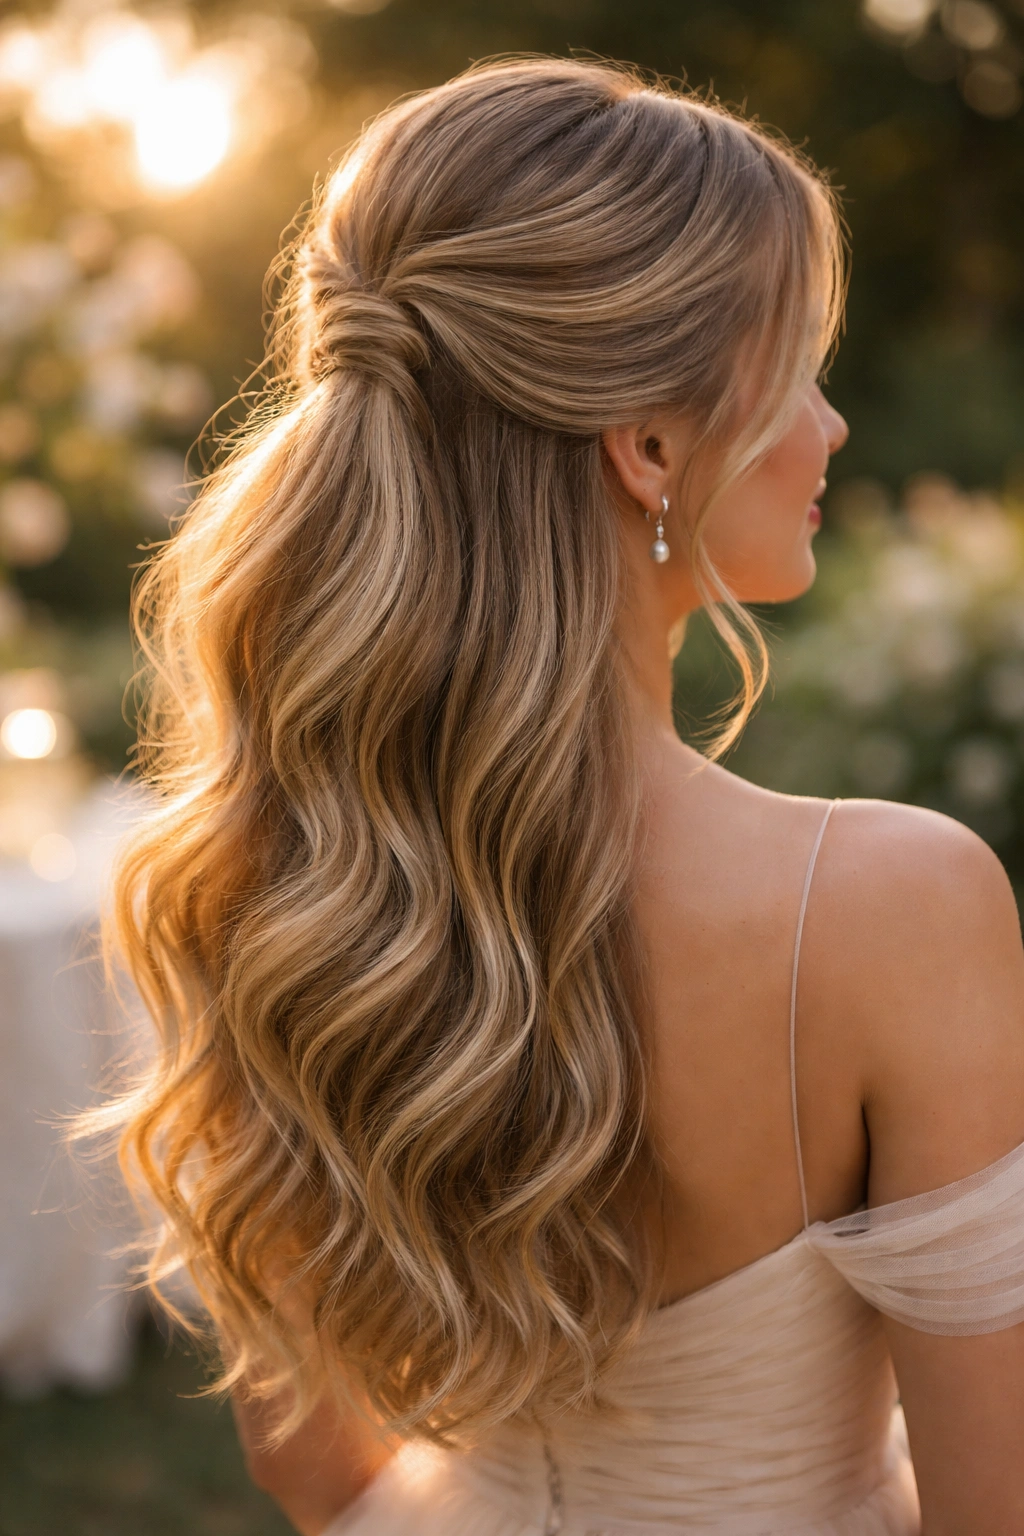
This softer style keeps hair partially down while gathering the top section into a ponytail, creating movement and dimension while still keeping hair off the face. It’s particularly flattering for bridesmaids with longer hair and works well with both modern and traditional wedding aesthetics.
Why It Works for Bridesmaids
The half-up ponytail balances structure with softness—it looks intentional and styled without feeling severe or overly formal. Because some hair remains down, it creates a romantic, garden-party quality that’s especially beautiful in outdoor ceremonies. The style also flatters most face shapes, as the pulled-back section frames the face without completely exposing it, and works well whether the dress has a high or low neckline.
How to Create It
Start with hair that has natural texture—either from overnight braids, a texture spray applied to dry hair, or a light wave created with a curling iron. Section the hair by taking approximately one-third from the top and sides of the head. Secure this section loosely at the back of the crown with an elastic band, leaving the bottom third flowing freely down the back and shoulders. For a softer finish, gently pull and massage the secured section to create subtle texture and dimension—you want it to feel effortless, not tightly controlled. Optional: take a small strand of hair from the half-up section and wrap it around the elastic band, or add a delicate hair clip or decorative comb at the base of the ponytail.
Pro Tips
Use a texturizing spray on dry hair 15-20 minutes before styling; it gives you grip and prevents the half-up from slipping down as the day progresses. If you want the style to feel fuller and more dimensional, tease very lightly at the crown of the half-up section before securing. For fine hair, try a thin, seamless elastic band and avoid pulling tightly—the weight of hair alone will hold the style if secured properly at the base of the skull rather than at the very top of the head.
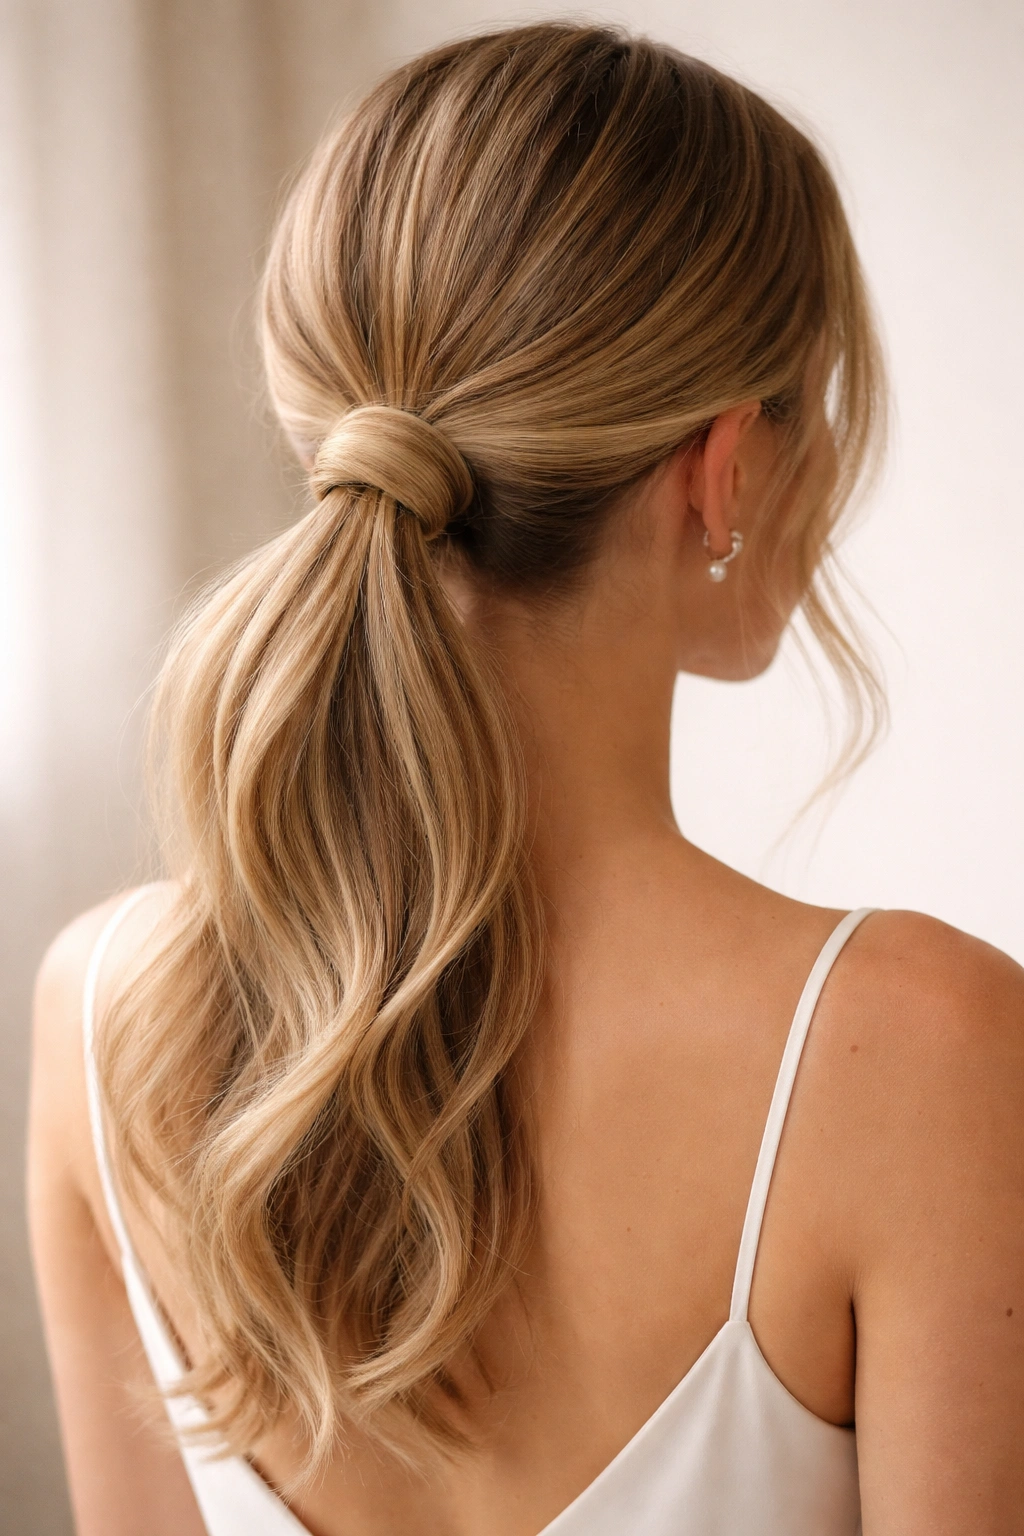
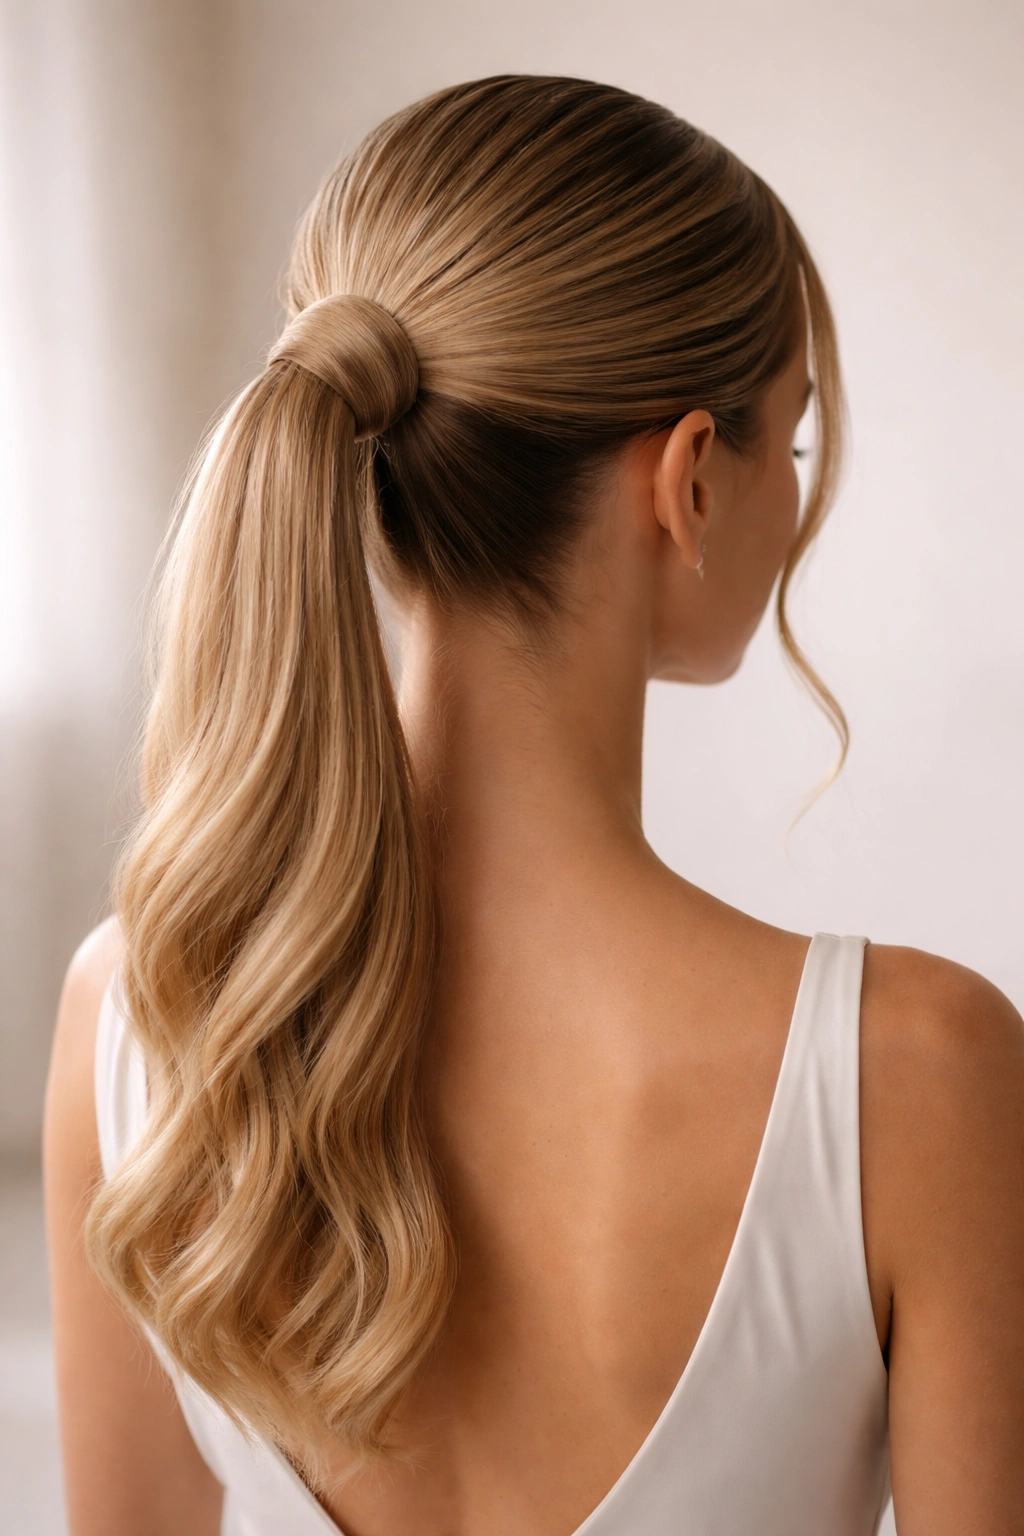
3. The Sleek Low Ponytail
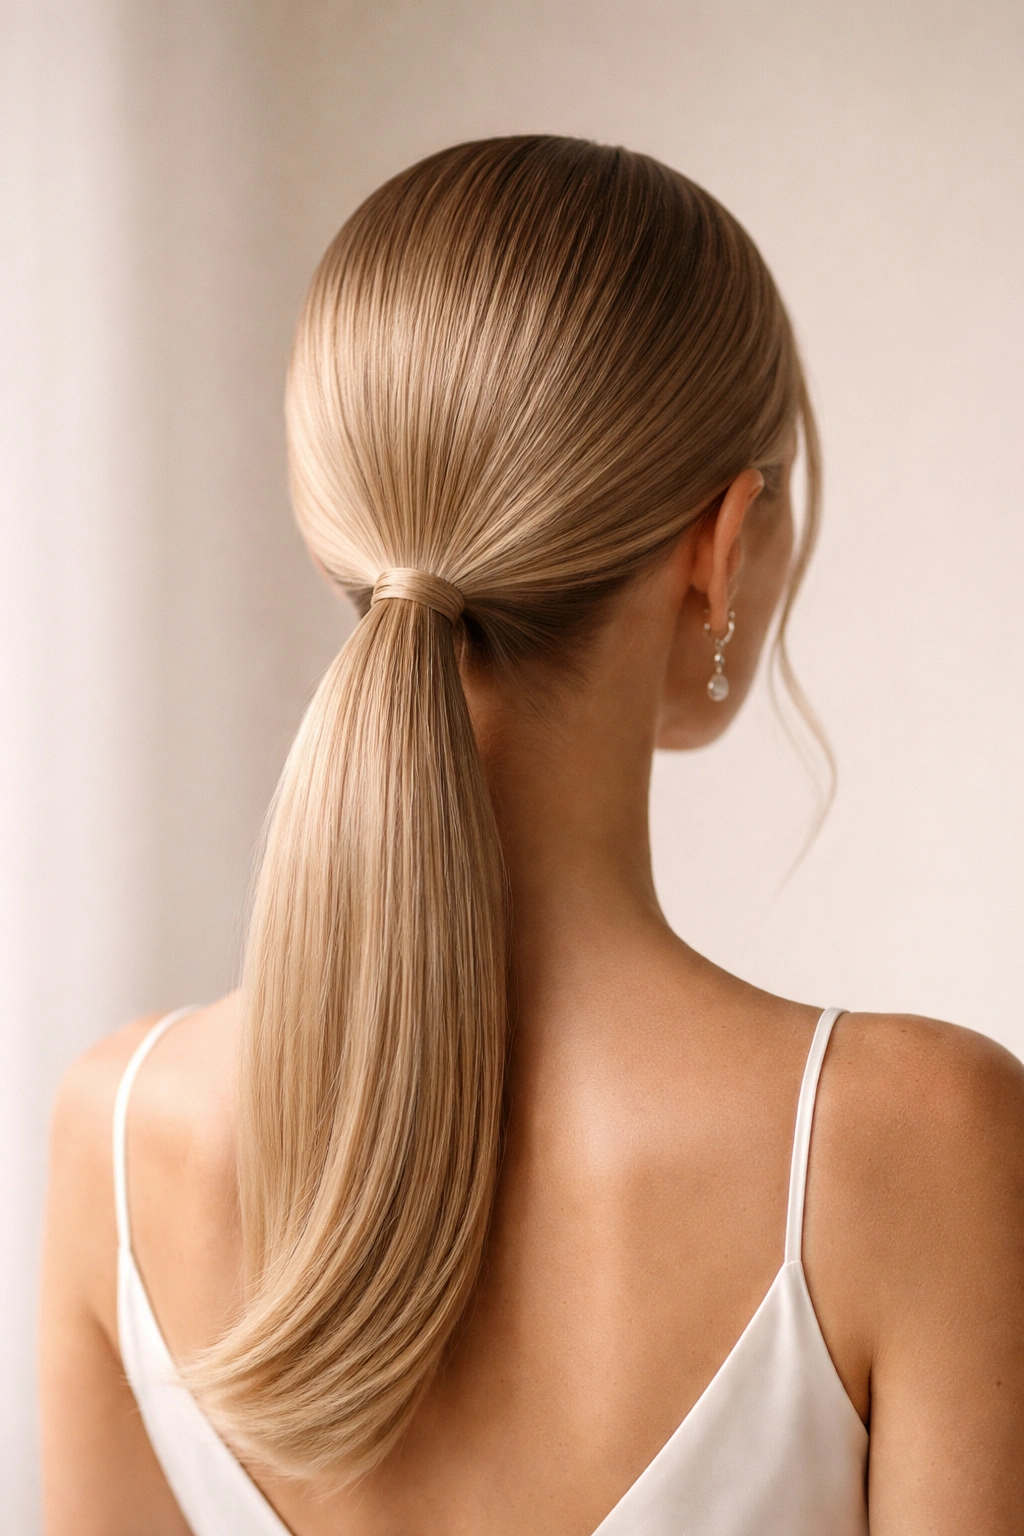
A low ponytail positioned at the nape of the neck creates an understated elegance that feels modern and sophisticated. This style works especially well for weddings with contemporary or minimalist aesthetics, and it’s incredibly comfortable to wear for long periods.
Why It Works for Bridesmaids
The sleek low ponytail is polished without demanding attention—it lets the bride remain the focal point while keeping bridesmaids’ hair neat and unified. The low placement creates an elongated line through the neck and shoulders, which is flattering in photographs and works beautifully with high-necked, long-sleeved, or structured dresses. This style also tends to be more comfortable for long days because there’s no tension at the crown, and it’s less likely to shift or slip as the day progresses.
How to Create It
Begin with completely smooth, straight hair. Use a blow-dryer with a paddle brush to create a perfectly smooth base, applying smoothing serum before drying for maximum shine. Once dry, use a fine-tooth comb to brush hair straight back and gather it at the nape of the neck—approximately where your collar would sit. Secure with a smooth, polished elastic band (velvet-covered bands show less and feel softer on the hair). Smooth any flyaways with a light hairspray applied with a soft brush. The key to this style is absolute smoothness—every piece of hair should be sleek and uniform. If desired, wrap a small strand of hair around the base of the ponytail and secure with a bobby pin for a finished, seamless look.
Pro Tips
Invest in a smoothing serum or light oil to apply before blow-drying; it creates genuine shine and ensures the style looks polished rather than flat. If you’re working with naturally curly or textured hair, a smoothing cream or light relaxer applied before blow-drying makes this style infinitely more achievable. For a more refined appearance, use a fine-tooth comb to gently smooth the ponytail base and create a perfectly clean line. If the style feels too severe, add a delicate decorative element like a pearl comb or thin metallic clip at the base.
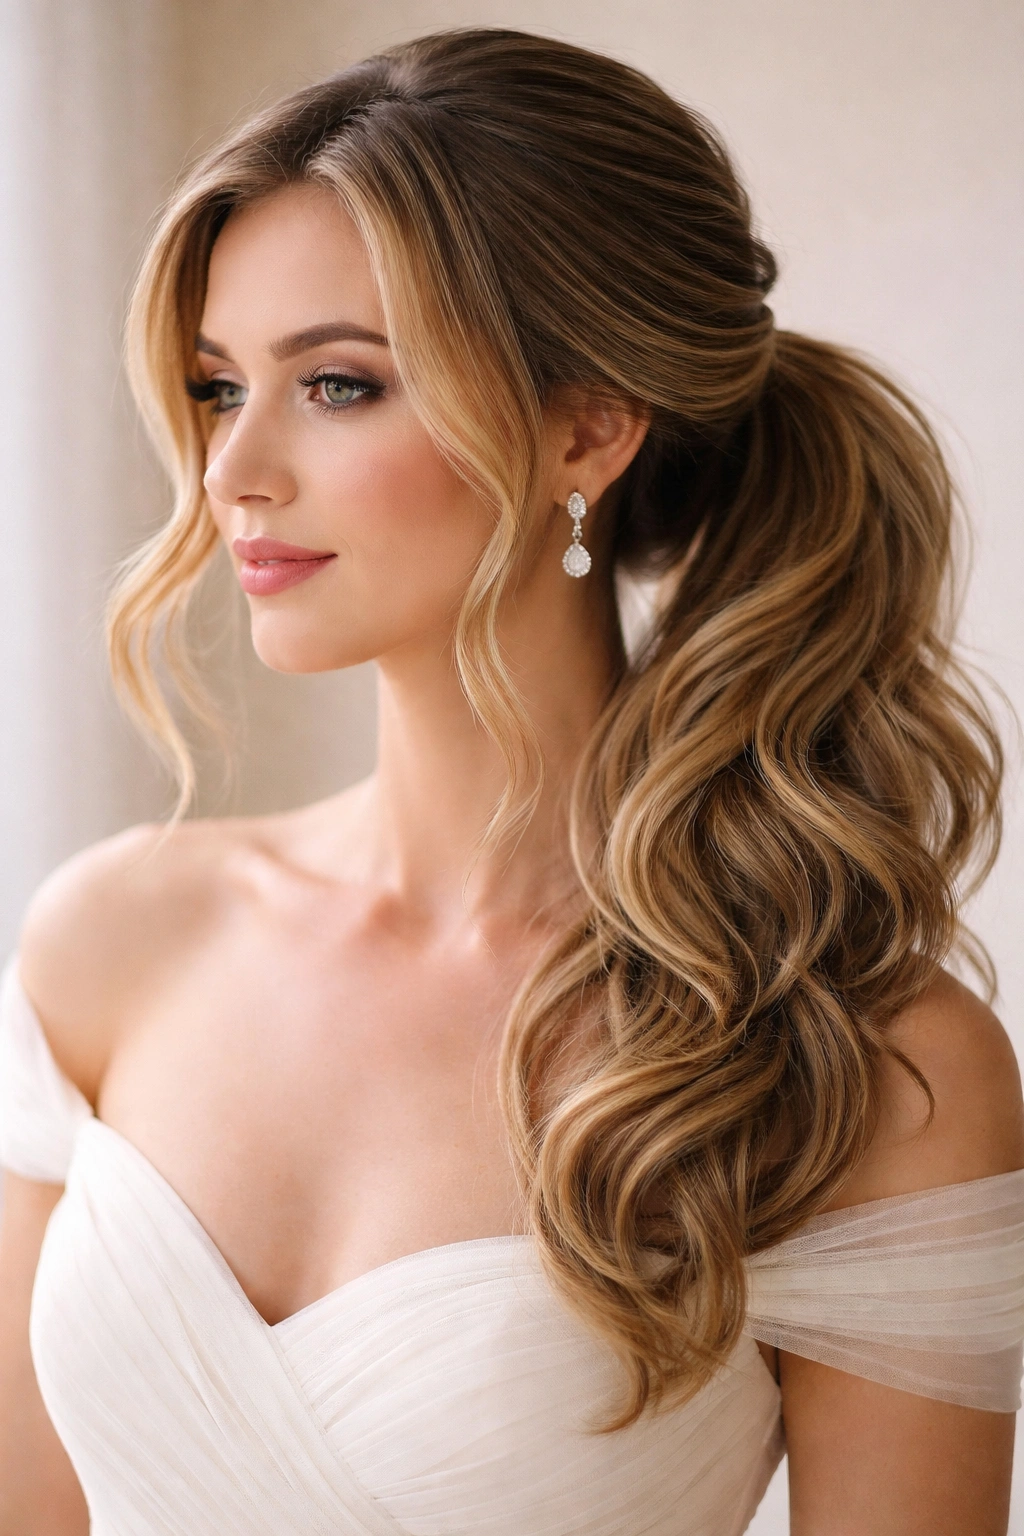
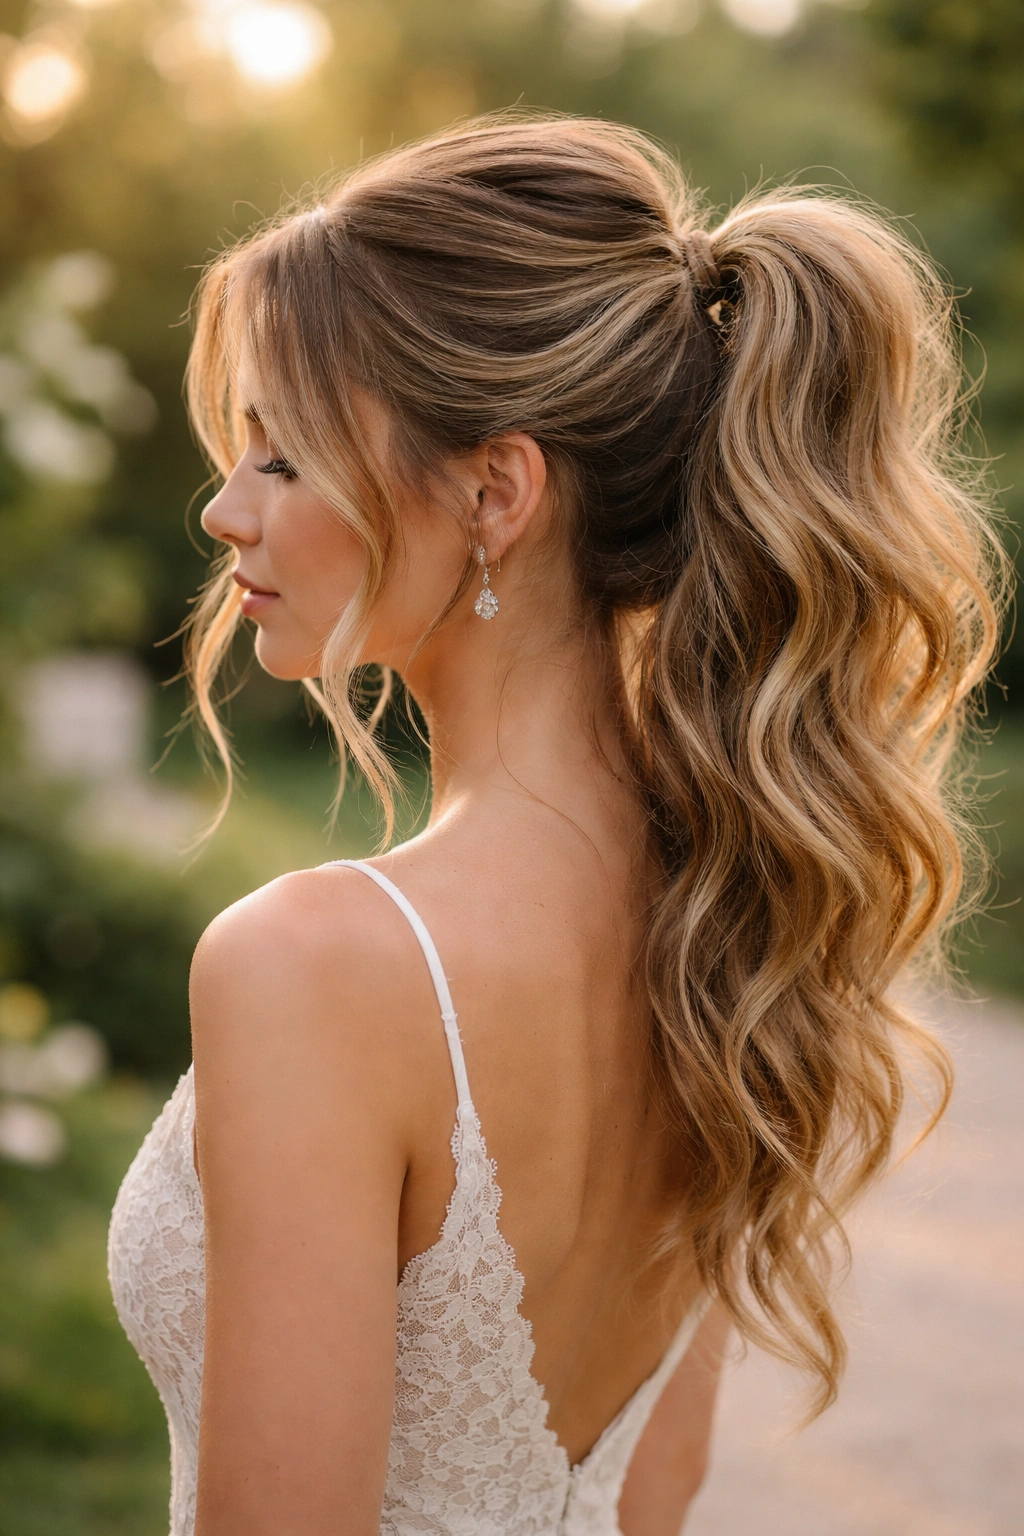
4. The Textured High Pony with Volume
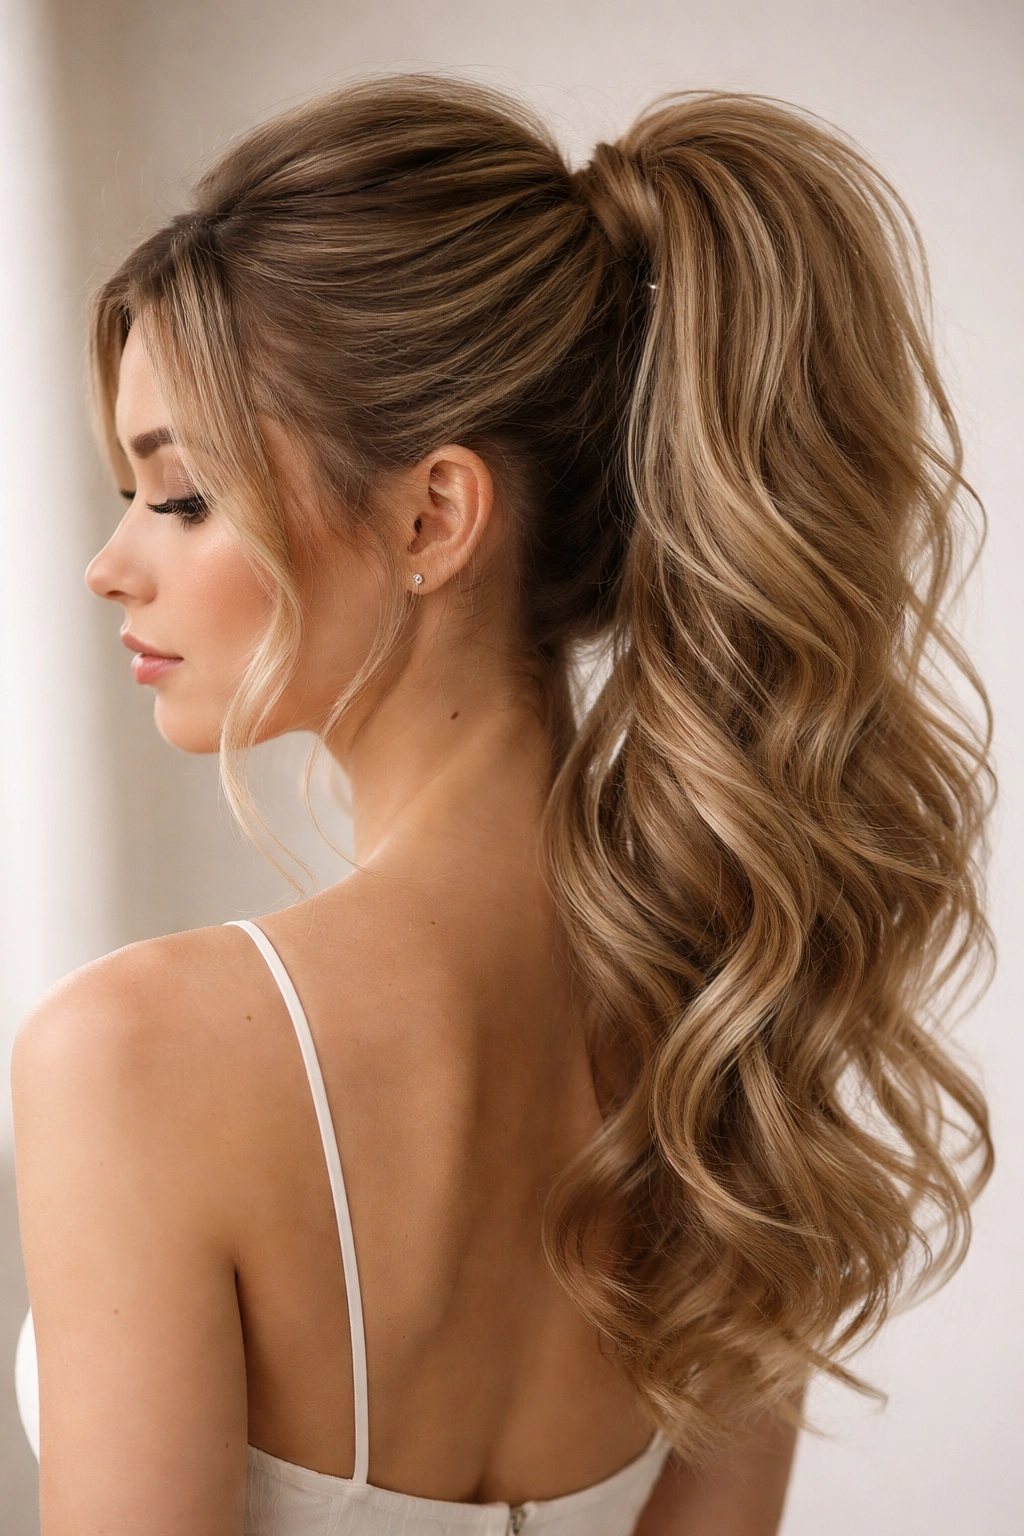
This style combines the formality and polish of a high ponytail with intentional texture and dimension, creating visual interest without sacrificing structure. It’s ideal when you want a style that looks professionally done but still feels effortless and romantic.
Why It Works for Bridesmaids
The textured high pony photographs beautifully, creating depth and movement that a completely sleek ponytail sometimes lacks. The added dimension makes the style look more intentional and modern, and the volume at the crown is incredibly flattering in photos. This style works well with varied hair textures, and the added volume helps fine hair look fuller and bridesmaids with thicker hair look polished rather than heavy.
How to Create It
Begin by creating gentle waves or texture throughout the hair using a 1.25-inch curling iron—curl sections away from the face, and cool each curl before releasing. Once all sections are curled, run your fingers through the curls gently to soften and separate them. At the crown, tease very lightly with a fine-tooth comb to create subtle lift, then brush over the top layer smoothly to hide the teasing. Gather the hair at the crown into a high ponytail, securing with an elastic band. Gently pull and massage sections of the ponytail to encourage the texture and create a fuller, softer appearance. Secure any flyaways with a light hairspray.
Pro Tips
The secret to this style is balancing structure with softness—you want the crown smooth but the overall ponytail full and dimensional. Use a flexible hold hairspray rather than a super-strong one; you want the texture to move naturally throughout the day. If you’re creating this style the morning of the wedding, curl the hair the night before and sleep in loose braids to set the texture without heat damage. For extra hold, use a texturizing spray before creating the ponytail, especially if you’re working with slippery or fine hair.
5. The Twisted Wrap Ponytail
This style involves twisting sections of hair around the base of a simple ponytail, creating a detailed, intricate appearance that’s actually quite straightforward to execute. It’s especially stunning in close-up photos and adds elegant dimension to a classic ponytail.
Why It Works for Bridesmaids
The twisted wrap makes a basic ponytail feel significantly more special and intentional without requiring complicated techniques. It works with any hair length, texture, or volume level, and it photographs beautifully in both wide and close-up shots. The wrapped section adds visual interest at the nape of the neck and is especially flattering for bridesmaids wearing strapless or open-back dresses.
How to Create It
Start with hair styled as you would for a classic high ponytail—smooth crown with a gathered high ponytail secured with an elastic band. Divide the ponytail into two or three thick sections. Take the first section and twist it loosely, then wrap it around the base of the ponytail, securing the end with a bobby pin tucked underneath. Repeat with the remaining sections, overlapping the twists slightly as you work around the ponytail base. Gently massage and fluff the twisted sections to create soft, full wraps rather than tight, sleek ones. Secure any loose ends with bobby pins and smooth the entire base with a light hairspray.
Pro Tips
Work with damp or textured hair rather than completely dry hair; texture gives the twists grip and prevents them from unraveling throughout the day. If a twist comes loose during the day, a quick bobby pin adjustment takes 15 seconds. For a softer, more romantic appearance, create loose, intentionally imperfect twists rather than tight, controlled ones. This style works beautifully with delicate hair accessories placed at the base—consider a pearl comb, decorative clip, or small fresh flower placed in the twisted section.
6. The Braided Crown Ponytail
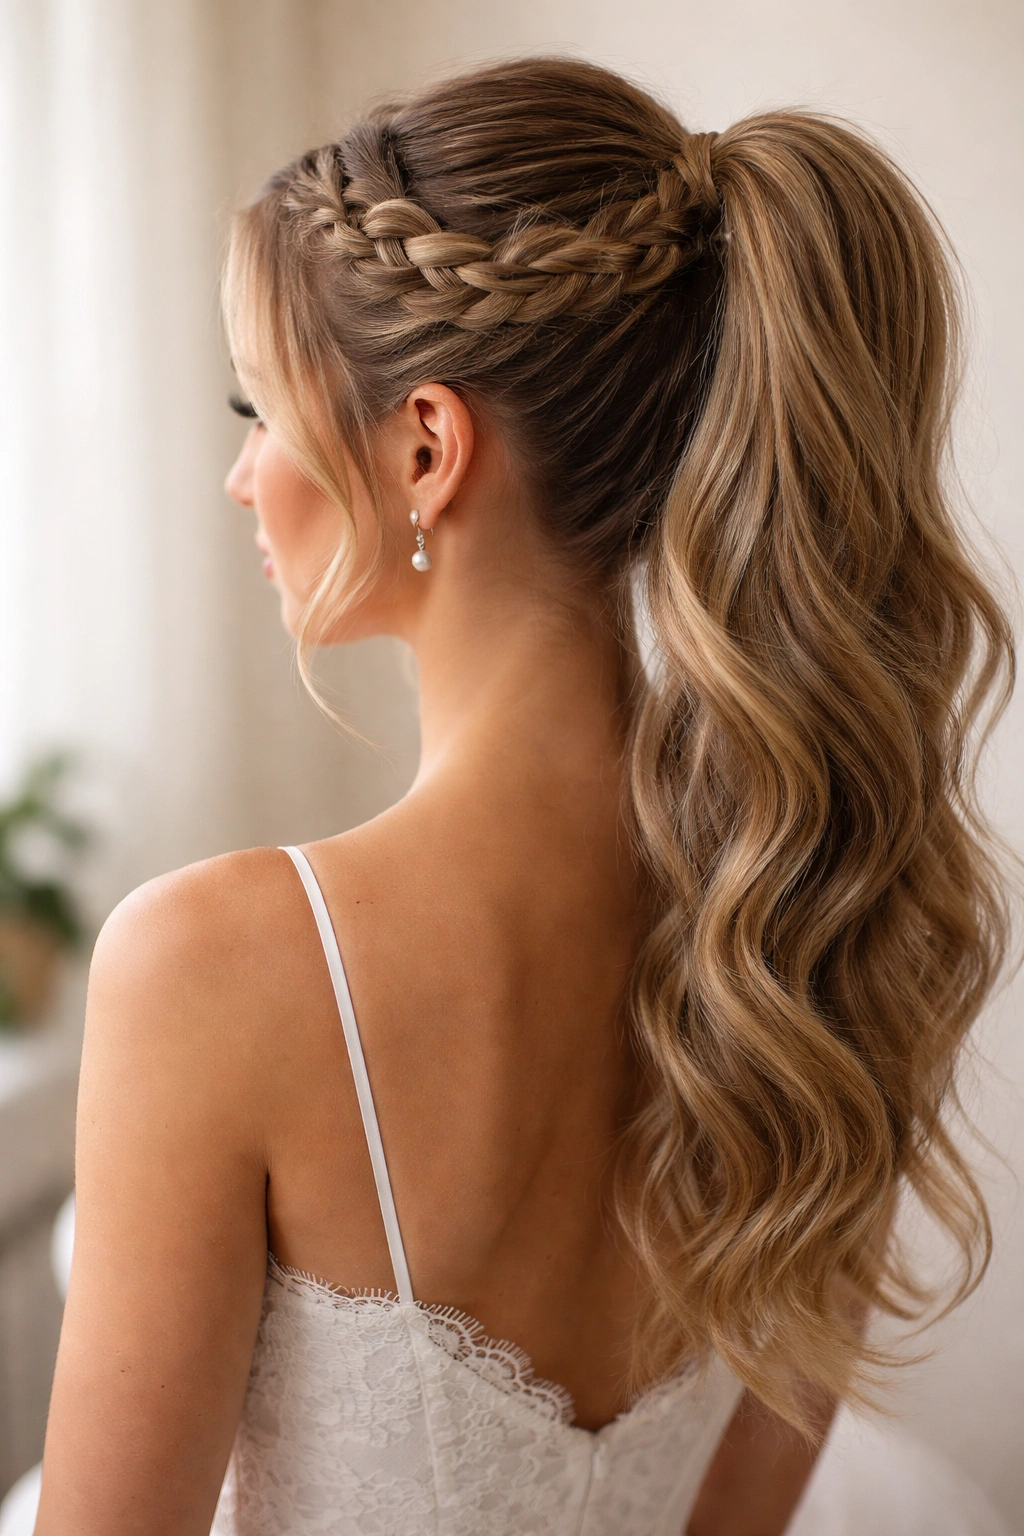
A braid starts at one side of the head and wraps around toward the back, where it joins a high or mid-level ponytail. This style combines movement and structure, creating an elegant, bohemian-leaning aesthetic that’s both special and practical.
Why It Works for Bridesmaids
The braided crown creates visual interest and dimension without requiring bridesmaids to sit still for hours while their hair is being styled. The braid keeps hair off the face and neck while maintaining softness and movement. This style is exceptionally romantic and works beautifully for garden, outdoor, or barn weddings, and the braided element photographs stunningly from every angle.
How to Create It
Begin with textured or slightly damp hair. Starting at the temple on one side of the head, create a loose, three-strand braid, gradually picking up sections as you braid toward the back of the head—this is essentially a Dutch braid or crown braid that wraps partway around the head. Once the braid reaches the back (typically around the ear level), secure it temporarily with a small elastic. Gather the remaining hair plus the end of the braid into a high ponytail at the crown, securing everything together with an elastic band. Gently massage and pull the braid to loosen it and create a softer, fuller appearance. Optional: wrap a small strand of hair around the base of the ponytail to conceal the elastic band.
Pro Tips
Loose, intentionally imperfect braids look more romantic and modern than tight, controlled braids. Create the braid the night before and sleep in it, then unravel it in the morning for pre-set waves that make the braid look even fuller. If you’re worried about the braid unraveling throughout the day, use a light hairspray as you braid, working in small sections. For bridesmaids with very fine or slippery hair, a texturizing spray applied before braiding gives significantly better grip.
7. The Bubble Ponytail
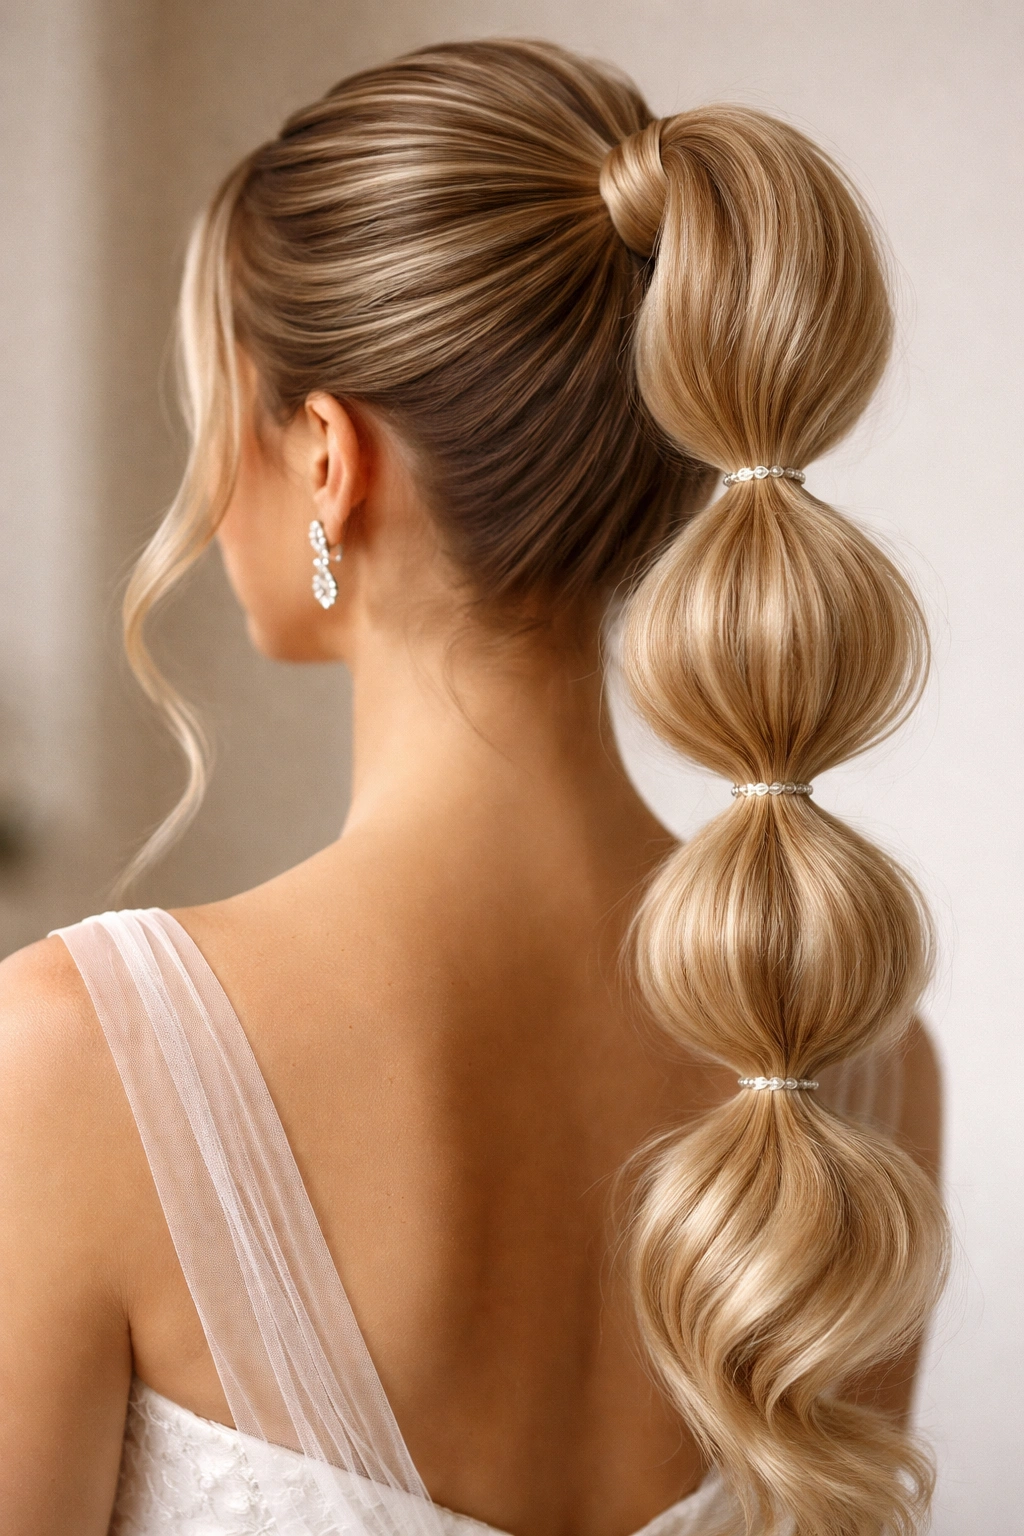
This playful, dimensional style involves dividing a ponytail into sections and securing each section with small elastic bands at intervals down the length, creating a bubble or pouf effect. It’s youthful and modern, and works especially well for younger bridesmaids or less formal weddings.
Why It Works for Bridesmaids
The bubble ponytail is instantly eye-catching and photographs beautifully, especially in close-up or detail shots. The style feels current and intentional without being difficult to achieve or maintain. It works on various hair lengths and textures, and the multiple sections distribute weight evenly, making it more comfortable than a single tight ponytail for long-wearing.
How to Create It
Create a high or mid-level ponytail secured with an elastic band. Divide the ponytail into sections—typically four to six sections depending on ponytail length. At the first section line, secure with a small elastic band. Gently pull each section of hair outward slightly to create a bubble shape. Move down to the next section and repeat, securing with another elastic band and then pulling the hair outward to create another bubble. Continue down the entire length of the ponytail. Fluff each bubble outward gently; the style should look full and dimensional, not tight.
Pro Tips
Use clear or matching-colored elastic bands; they’re less visible and the style looks more polished. If you want the bubbles to be more pronounced, use smaller elastic bands placed closer together. This style works best on hair that’s been textured or curled beforehand; straight hair can look a bit flat in the bubbles. For bridesmaids with long, thick hair, the bubbles create a gorgeous dimensional effect; for those with fine hair, space the bubbles wider apart to avoid looking too sparse.
8. The Sleek Braid-In Ponytail
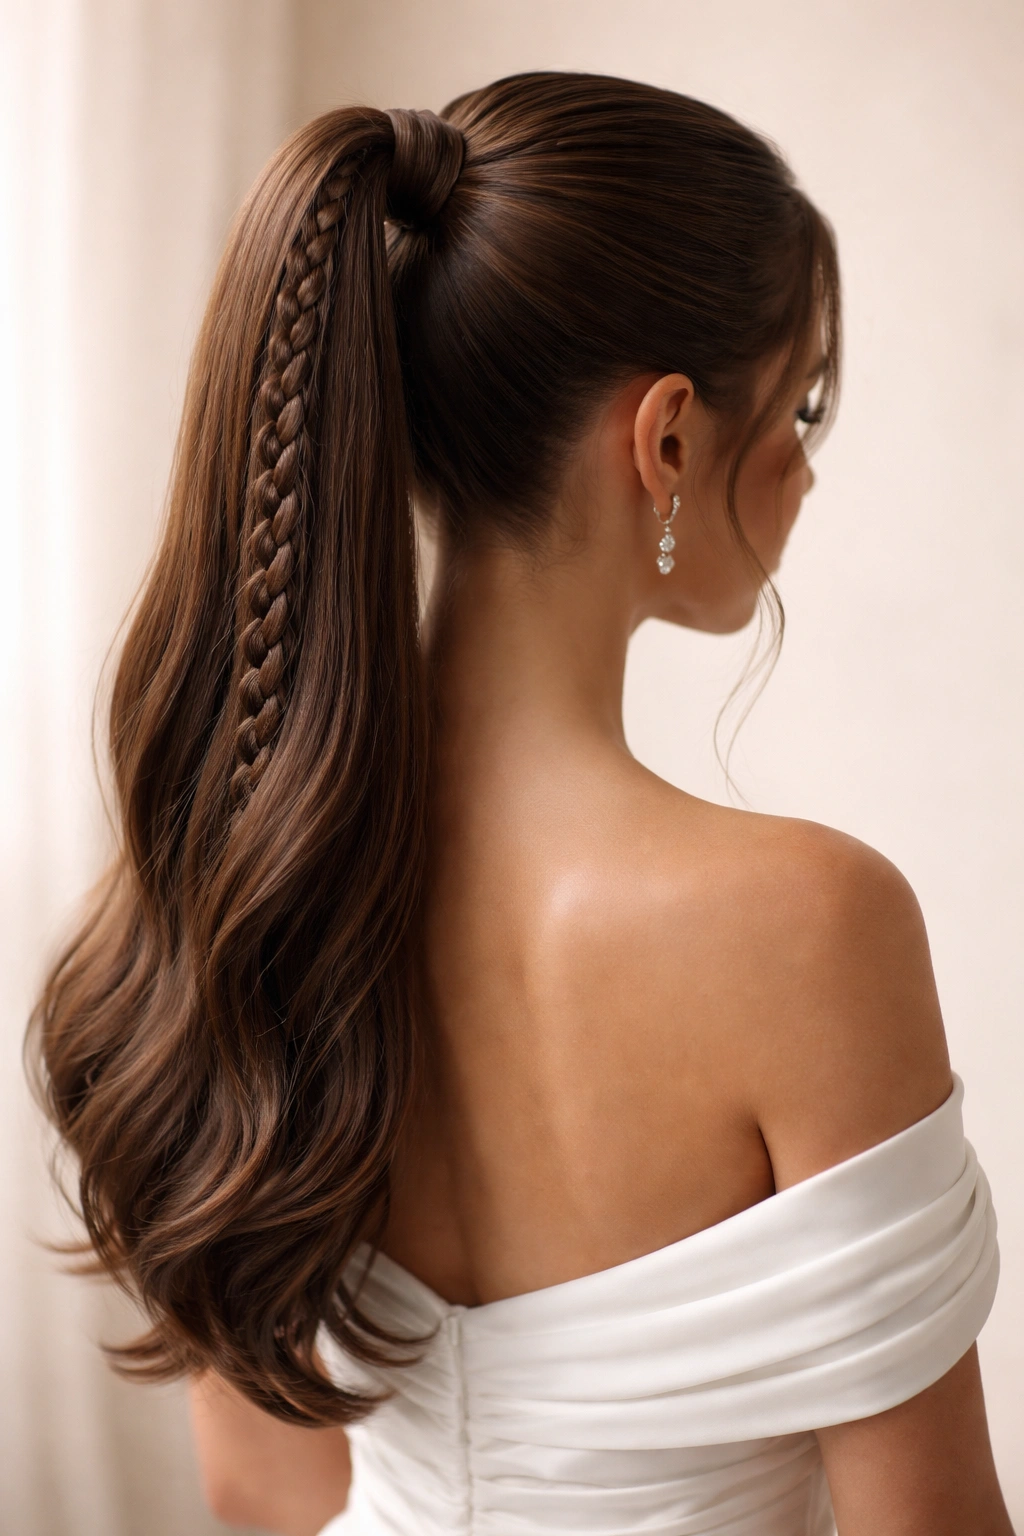
A braid is braided directly into the ponytail itself, creating a detailed, textured center that adds visual interest while maintaining a sleek, polished exterior. This style is sophisticated and modern, perfect for contemporary weddings.
Why It Works for Bridesmaids
The braided element adds elegance and detail while the sleek exterior maintains polish and formality. This style photographs exceptionally well in close-ups and works beautifully for bridesmaids wanting something beyond a standard ponytail without committing to a full braided style. The braid is contained within the ponytail, so it won’t unravel throughout the day, and the overall effect is refined and intentional.
How to Create It
Create a high or mid-level ponytail and secure with an elastic band. Divide the ponytail into two or three sections. Take the center section and braid it loosely from the base to the end. Wrap the braided section back around itself or coil it at the base of the ponytail, securing the end with bobby pins. For a more dramatic effect, you can braid multiple sections and layer them. Smooth the exterior of the ponytail with a fine-tooth comb and light hairspray for a polished finish.
Pro Tips
This style is best created with hair that’s been lightly textured; completely sleek hair can make the braid look too tight and formal. Create the braid intentionally loose, then gently massage it to create even more softness and dimension. For maximum visual impact, use a contrasting texture or color (if applicable) in the braided section—for example, if the exterior ponytail is sleek, make the interior braid noticeably textured.
9. The Side Ponytail
A ponytail positioned to one side of the head rather than centered at the crown or nape creates a distinctly romantic, playful aesthetic. This style works beautifully for less formal weddings and is exceptionally flattering for most face shapes.
Why It Works for Bridesmaids
The side ponytail has an inherently soft, romantic quality that reads beautiful in photographs and feels approachable rather than overly formal. The off-center placement frames the face gracefully and works well with dresses that have asymmetrical details or lower necklines. This style is ideal for bridesmaids who want something special but not severe, and it’s comfortable to wear for extended periods.
How to Create It
Create soft waves throughout the hair using a curling iron, then gently run your fingers through the waves to soften and separate them. Gather the hair to one side—typically the right side, though the left works equally well depending on face shape—at approximately ear level or slightly lower. Secure with an elastic band. Let some hair fall loose around the face and shoulders for softness. Gently massage and pull the ponytail to create fullness and dimension. Secure flyaways with a light hairspray.
Pro Tips
The key to a beautiful side ponytail is intentional softness—every element should feel romantic and slightly undone. Use a textured spray before styling to give hair grip and prevent slipping. For bridesmaids with longer hair, gather the ponytail lower (around chest level) for maximum romantic effect. Adding a delicate hair accessory on the side where you gathered the ponytail—a clip, comb, or fresh flower—enhances the look beautifully.
10. The Looped Ponytail
This style involves creating a ponytail but not pulling all the hair completely through the elastic band—instead, you create a loop or curl of hair at the base, with the ends of the ponytail left to fall loose below. It’s sophisticated and unexpected, with a distinctly modern feel.
Why It Works for Bridesmaids
The looped ponytail feels current and intentional without being trendy in a way that dates quickly. It works beautifully for contemporary or artistic weddings and photographs differently from standard ponytails, creating visual interest and dimension. The style is surprisingly comfortable and secure once properly set, and it works on various hair lengths and textures.
How to Create It
Create a high or mid-level ponytail as you normally would, but when pulling the hair through the elastic band, leave approximately 4-6 inches unsecured, creating a loop or curl of hair. Secure the loop in place with bobby pins tucked discreetly underneath. The loose ends below can be curled, left straight, or braided depending on your preferred aesthetic. Secure flyaways and shape the loop with light hairspray until it holds the shape you want.
Pro Tips
Practice this style before the wedding day; the loop should feel deliberate and polished, not accidental. The angle and height of the loop dramatically changes the overall appearance—experiment with different heights to find what’s most flattering. For extra security, use multiple bobby pins and a flexible-hold hairspray rather than a super-strong one. This style looks especially beautiful with a decorative element (clip, comb, or flowers) placed at the base of the loop.
11. The Curved Ponytail
Rather than gathering hair straight back, this style curves the hair to one side before securing, creating an elegant diagonal line that’s flattering and interesting. It’s a subtle variation on the classic ponytail that reads beautifully in photographs.
Why It Works for Bridesmaids
The curved ponytail offers the polish and structure of a classic style with added sophistication and visual interest. The curved line is inherently flattering and works with various face shapes and dress necklines. The style photographs beautifully from the side and back, creating dimension without requiring complicated techniques.
How to Create It
Create a smooth base as you would for a sleek ponytail. Rather than gathering straight back, angle the ponytail slightly to one side—approximately a 15-30 degree angle—as you gather and secure. The curve creates a diagonal line from one side of the head to the center-back. Smooth the entire style with a fine-tooth comb and light hairspray. Optional: wrap a small strand around the base to conceal the elastic band.
Pro Tips
The curve should feel subtle and intentional, not extreme. Use a strong-hold hairspray to maintain the curve throughout the day, especially if you’re working with slippery or fine hair. This style is particularly flattering for bridesmaids with longer hair; the curve becomes more visible and graceful the longer the ponytail is.
12. The Multi-Twisted Ponytail
Similar to the twisted wrap ponytail, this style involves creating multiple twists around the base of a ponytail, but with more twists and a more complex, intricate appearance. It’s a statement style that photographs beautifully and feels special without being difficult to achieve.
Why It Works for Bridesmaids
The multi-twisted ponytail elevates a basic style into something remarkable and photograph-worthy. The multiple twisted elements create significant visual interest and dimension, and the style works beautifully for bridesmaids wanting something noticeably special. Each twist adds texture and softness, making the overall appearance romantic and intentional.
How to Create It
Create a high ponytail as a base. Divide the ponytail into five to seven sections (more sections create more visual interest). Take each section and twist it loosely, then wrap or coil it around the base of the ponytail, securing each with a bobby pin. Gently massage and pull each twisted section to create softness and fullness. The twists should overlap and layer around the base, creating a dimensional, intricate appearance. Secure the entire base with light hairspray to hold all elements in place.
Pro Tips
Work with textured or slightly damp hair; smooth hair makes twists more difficult to execute and less visually interesting. Each twist should feel loose and romantic, not tight and controlled. For maximum visual impact, ensure the twists are slightly different in tightness and thickness, creating an artfully arranged rather than mechanical appearance. This style pairs beautifully with hair accessories placed within or around the twisted sections.
13. The Messy Romantic Ponytail
This style intentionally embraces texture, movement, and a slightly undone quality, creating a romantic, bohemian aesthetic. It’s perfect for outdoor, garden, or less formal weddings and photographs beautifully in natural light.
Why It Works for Bridesmaids
The messy romantic ponytail feels effortless and beautiful rather than overly styled, which many bridesmaids find more comfortable and flattering. The style works with various hair textures and lengths, and it’s especially flattering for bridesmaids with naturally wavy or curly hair. The slightly undone quality photographs beautifully in natural light and pairs well with garden, barn, or beach wedding aesthetics.
How to Create It
Create soft, intentional waves or texture throughout the hair using a curling iron, then run your fingers through the waves to separate and soften them. Gather the hair into a ponytail at the crown or slightly to one side—don’t make it perfectly smooth; let some texture and pieces fall loose around the face and neck. Secure with an elastic band, and intentionally leave wisps of hair framing the face. Gently massage and pull the ponytail itself to create fullness and a slightly tousled appearance. Use a flexible-hold hairspray rather than a strong one; you want the style to feel moveable and natural.
Pro Tips
The key is intentional imperfection—every element should feel deliberate, not careless. Create texture the night before using braids or a curling iron, then refresh with a texturizing spray the morning of the wedding. Don’t worry about completely smooth edges or perfectly sleek appearance; the beauty of this style lies in its softness and movement. Fresh flowers, delicate clips, or ribbon work beautifully with this romantic aesthetic.
14. The Sleek Mirror-Wrap Ponytail
This sophisticated style involves wrapping a section of hair around the base of a sleek ponytail in a way that mirrors or echoes the shape of the ponytail itself. It’s refined and intentional, perfect for formal weddings.
Why It Works for Bridesmaids
The mirror-wrap is elegant and polished without feeling overly complicated. The wrapped section adds subtle detail and dimension that reads beautifully in photographs, especially close-ups. This style works beautifully for formal black-tie or ultra-elegant weddings, and it’s comfortable to wear for extended periods.
How to Create It
Create a high, sleek ponytail with a smooth crown and polished finish. Take a small section of hair from the ponytail (or use an additional small section if you prefer) and wrap it carefully around the base of the ponytail, mirroring the natural curve and shape of where the ponytail gathers. Secure the wrapped section with bobby pins tucked completely out of sight. The wrapped section should look intentional and seamless, as if it’s part of the natural ponytail rather than added on. Smooth any flyaways with light hairspray.
Pro Tips
This style requires careful execution and practice; take time to position the wrap perfectly. Use bobby pins that match your hair color for complete invisibility. For a more dramatic effect, use a thicker section for the wrap; for subtle elegance, use a very thin section that creates a delicate line.
15. The Cascading Curl Ponytail
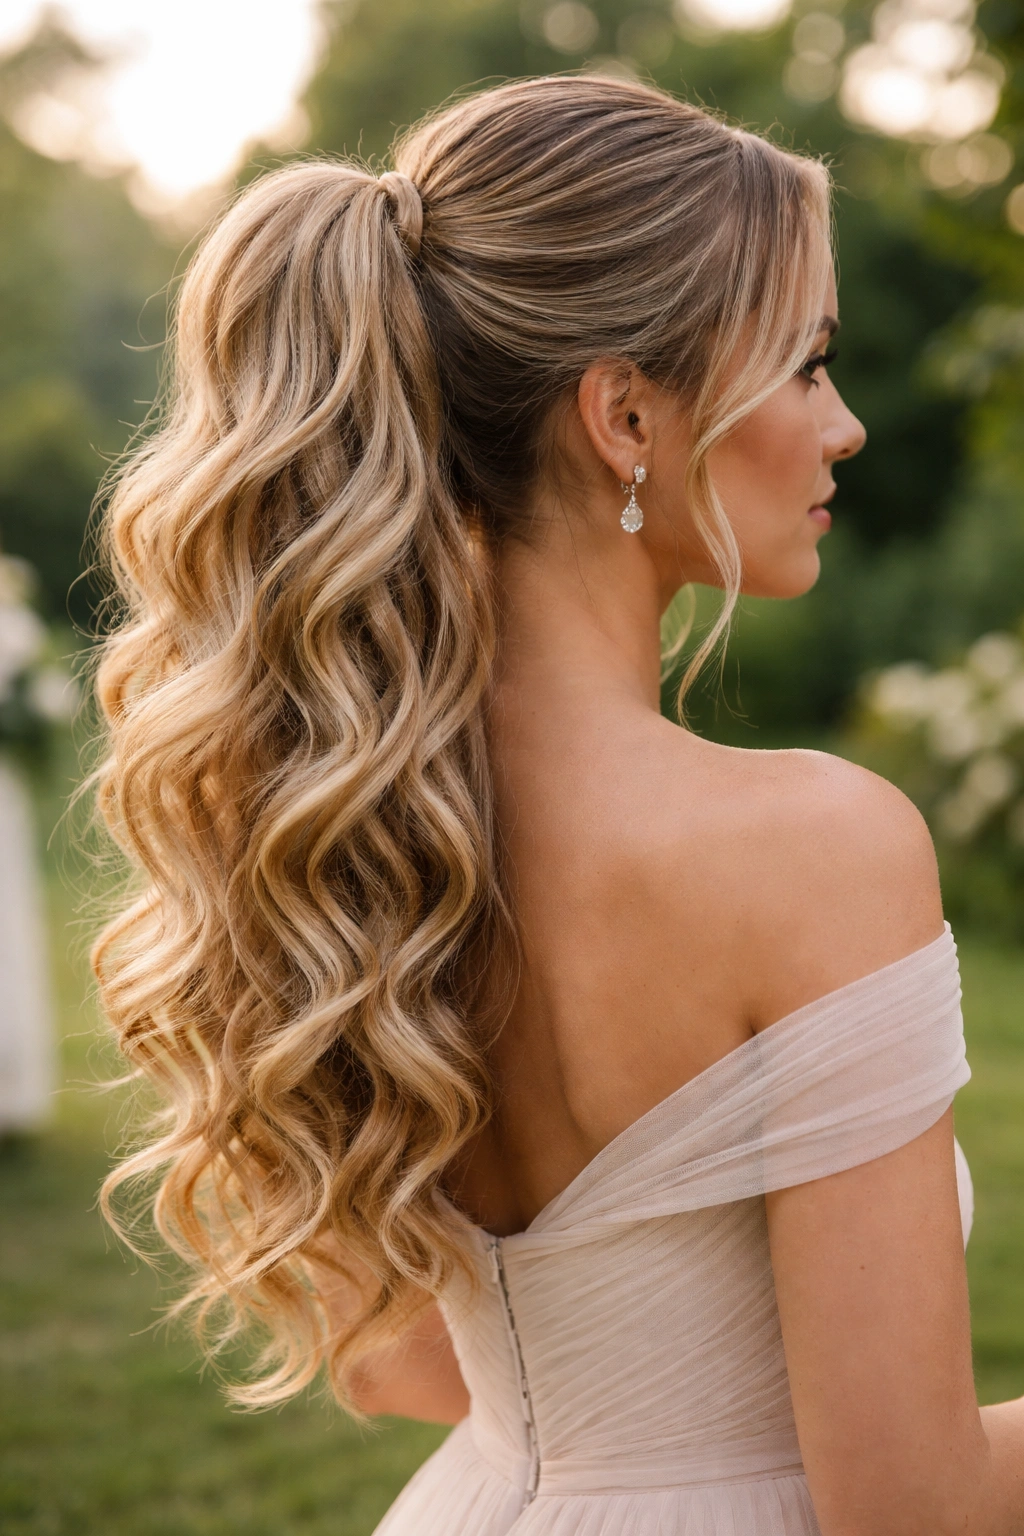
This style combines a gathered ponytail base with intentionally loose, flowing curls that cascade down from the base, creating movement, dimension, and a decidedly romantic appearance. It’s a showstopper style perfect for bridesmaids wanting maximum impact.
Why It Works for Bridesmaids
The cascading curl ponytail photographs stunningly from every angle, creating drama and beauty without requiring bridesmaids to wear their hair up all day (the curls flow down, creating movement and visual interest while still keeping hair partially pulled back). The style works beautifully for longer hair and is especially flattering in outdoor or natural light photography.
How to Create It
Create a high ponytail and secure with an elastic band. Take sections of the ponytail and curl them loosely using a 1.25-inch curling iron, curling away from the face. Once all sections are curled, cool the curls slightly, then release them gently. The curls should fall and cascade from the base of the ponytail, creating the impression of waves and movement flowing downward. Gently run your fingers through the curls to soften and separate them. Use a light hairspray to hold the style without making it feel stiff or controlled.
Pro Tips
The beauty of this style lies in effortless-looking movement—the curls should feel loose and romantic, not tightly coiled. Create the curls away from the face to ensure they frame the face beautifully as they cascade downward. This style works best on hair that’s been freshly curled; curls created the night before will relax and lose definition. For maximum longevity, use a flexible-hold hairspray and avoid touching the curls throughout the day—the more you leave them alone, the longer they’ll maintain their shape.
Final Thoughts
Choosing the right bridesmaid ponytail ultimately comes down to matching the style to the wedding’s overall aesthetic, considering the bridesmaids’ hair types and comfort levels, and ensuring the style can be executed reliably and maintained throughout a full day of celebrating. The fifteen styles above cover a spectrum from classic and formal to romantic and bohemian, giving you plenty of options regardless of your wedding’s specific vibe.
The best approach is to consult with your bridesmaids early, show them photos of a few styles you’re considering, and ideally schedule a trial run with your hairstylist before the wedding day. This gives everyone confidence that the chosen style will photograph beautifully, feel comfortable, and hold up through the entire celebration. Remember that bridesmaids are wearing these styles for 8+ hours—comfort and security matter just as much as beauty.
Whatever style you choose, the most important element is ensuring that each bridesmaid feels confident and beautiful in it. A bridesmaid who feels comfortable and secure in her hairstyle will naturally photograph better, feel more confident, and genuinely enjoy the day. The style is ultimately secondary to the person wearing it—choose something that lets each bridesmaid shine while creating visual unity across your bridal party.