Feed-in braids have become a go-to protective styling technique for anyone seeking a polished, put-together look with edges that stay neat and controlled. Unlike traditional box braids or cornrows, feed-in braids create a seamless appearance where new hair is gradually incorporated into the braid as you move down the section, resulting in a softer, more refined finish. When you combine this technique with a ponytail—securing the braided section into a high, mid-level, or low ponytail—you get a hairstyle that’s both elegant and practical. The beauty of feed-in braid ponytails lies in their versatility: they work on all hair types, last anywhere from one to three weeks depending on how well you maintain them, and offer enough style variation that you can switch up your look without completely redoing your hair.
The “neat edges” aspect is what separates a casual feed-in braid from a polished, editorial-quality style. Neat edges mean your hairline is smooth and controlled, without stray hairs poking out or an unkempt appearance around your face and temples. This requires proper sectioning, appropriate tension during the braiding process, and finishing touches like edge control and smoothing. Whether you’re getting braids done at a salon or creating them yourself at home, understanding the different ways you can position, shape, and style feed-in braids into ponytails will help you communicate exactly what you want and troubleshoot common issues. The 10 styles covered in this article showcase different ways to manipulate feed-in braids for maximum neatness while exploring variations in placement, number of braids, and final ponytail positioning.
Each of these styles has proven itself effective for maintaining clean edges over weeks of wear, and each offers a distinct aesthetic—from sleek and minimal to intricate and eye-catching. Whether you’re looking for something you can wear to work, a weekend style, or a protective look that lasts through travel and activity, you’ll find options here that fit your lifestyle and preferences.
1. Sleek Center Feed-In Braid Ponytail
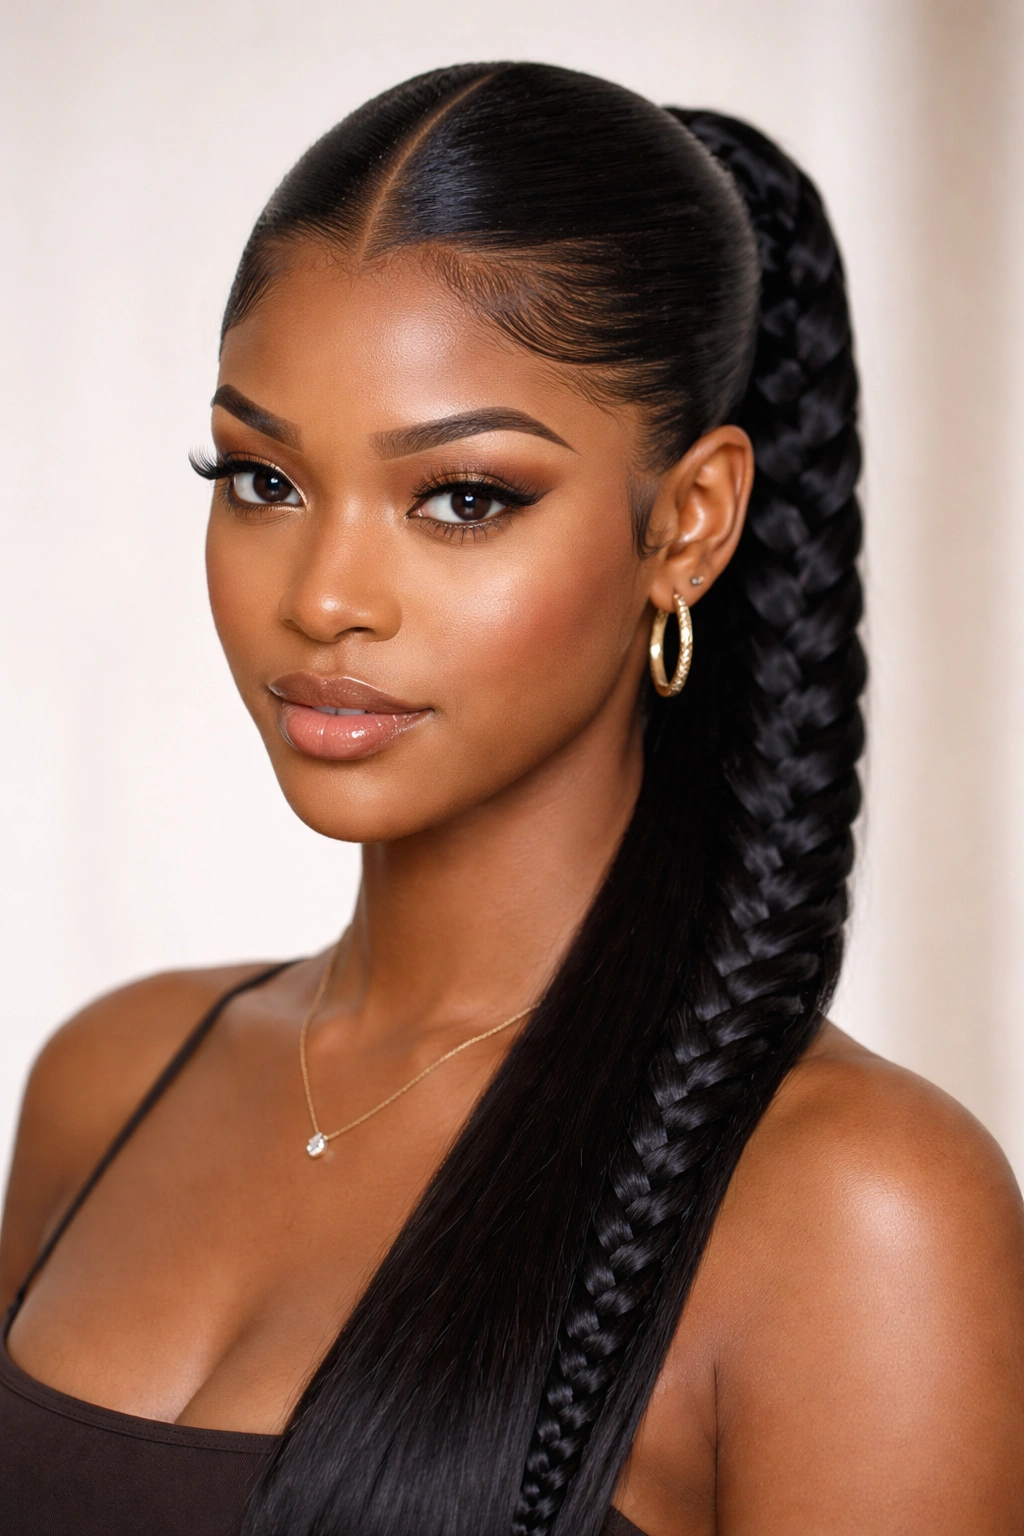
The sleek center feed-in braid ponytail is the foundation style that many people start with when they’re learning the technique. A single feed-in braid runs down the center of your head from your forehead or hairline back to the nape of your neck, where it then flows into a low or mid-height ponytail. The entire look is characterized by extreme neatness—smooth edges on both sides, a taut braid, and a ponytail secured at the base with minimal flyaways. This style works because it creates visual balance, draws the eye straight up the center of the face, and requires just one braid, making it faster to create and easier to maintain than styles with multiple braids.
Why This Style Creates the Neatest Edges
The single braid down the center is inherently the easiest placement to keep perfectly smooth and controlled. You’re working with just one section, which means you can focus all your attention on maintaining consistent tension and incorporating hair evenly. The braid itself acts as a frame, and because there’s nothing competing with it for attention, any slight imperfection is less noticeable than it would be in a multi-braid style. Additionally, since the braid is centered, the remaining hair on both sides naturally lays flat and smooth—you’re not fighting against hair that’s been sectioned in multiple directions.
What to Know Before Getting Started
- Best for: Straight, wavy, and textured hair types; works on all hair lengths from shoulder-length and longer
- Tension level: Medium to firm—tight enough to last several weeks, but not so tight that it causes tension headaches or hairline damage
- Styling time: 20-40 minutes, depending on your hair thickness and braid experience
- Edge maintenance: Daily application of lightweight edge control along your hairline and around the ponytail base keeps everything looking polished
- Longevity: Typically lasts 2-3 weeks without significant unraveling; touch-ups around the ponytail elastic may be needed after week two
Pro tip: When creating the center part for this style, use a rattail comb and make your part wider than you think you need—a part that’s at least ½ inch wide gives you plenty of hair to work with and makes the braid appear fuller and more intentional.
2. Double Feed-In Braid High Ponytail
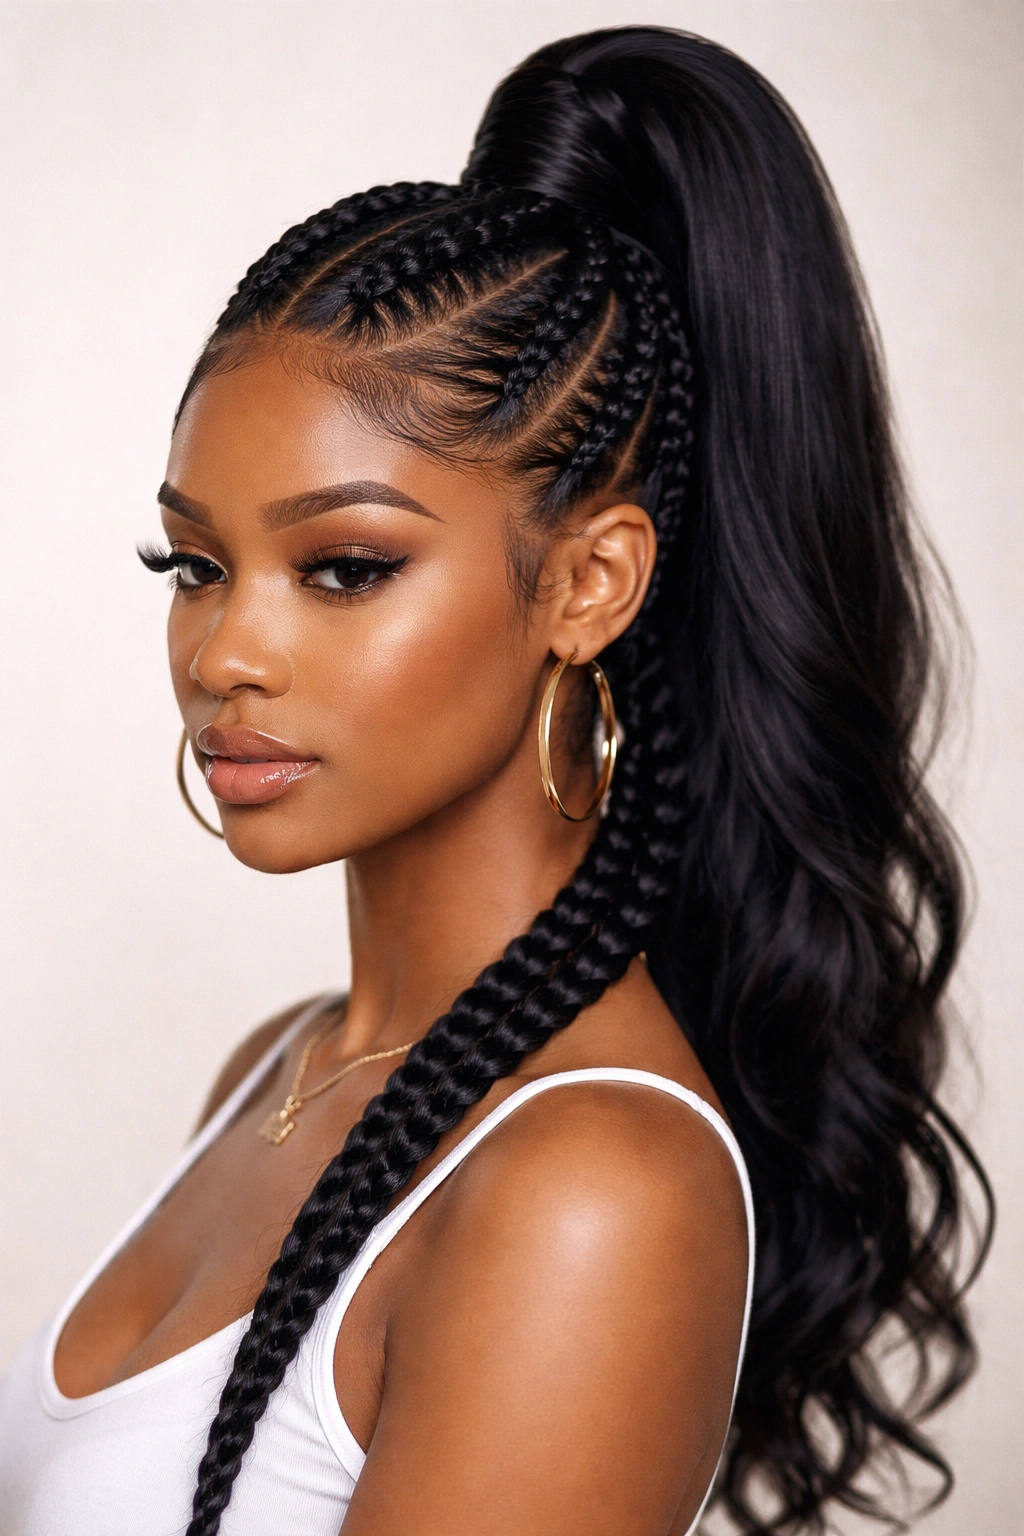
Two feed-in braids frame the face symmetrically, one on each side of the head, and meet at the crown where they’re secured into a high ponytail. This style creates a stunning, almost sculptural effect that feels more elaborate than the single-braid version but is surprisingly manageable once you understand the technique. The two braids don’t have to be identical in thickness or tension—many people prefer one slightly thicker and one slightly thinner for an intentionally asymmetrical, modern look. The high ponytail positioned at the crown makes this style ideal for showing off your face and drawing attention to your features, and the double-braid arrangement adds visual interest and dimension.
Why Double Braids Equal More Design Impact
When you use two feed-in braids instead of one, you’re creating a natural frame around your face that’s more dynamic and sculptural. The symmetry is satisfying to the eye, and the repetition of the braid pattern on both sides creates a cohesive, intentional look. From a practical standpoint, two thinner braids are often easier to manage than one thick braid because they’re lighter and place less tension on any single section of your hair. The high ponytail position amplifies the visual impact—it creates height and elongates the face, and the braids essentially form a crown that draws the eye upward and inward.
Critical Details for Success
- Sectioning method: Part your hair down the center from your hairline to the nape, then create a secondary part from each temple back toward the top of your head, forming two clean sections
- Braid placement: Start each braid at the temple, feeding in hair as you move back and upward toward the crown—the braids should angle slightly inward as they progress
- Ponytail height: Position the elastic at the crown, roughly where the two braids meet naturally—too low and the braids won’t have enough support; too high and your edges will look unbalanced
- Edge control essential: Because you have two hairlines to manage, this style requires careful edge work; apply control to both temples, your center part, and behind your ears
- Matching tension: For a cohesive look, try to match the tension between the two braids as closely as possible
Worth knowing: Many people find that starting with a Dutch braid (braiding on top of the hair rather than underneath with traditional feed-in technique) for the first 2-3 inches, then switching to the feed-in method, creates a cleaner, more polished transition at the front.
3. Layered Feed-In Braid with Wrapped Edges
This style incorporates multiple feed-in braids at different levels of the head—typically a braid across the front/crown area and one or two braids positioned lower on the back of the head—all feeding into a single low ponytail. What makes this style distinctive is the “wrapped edges” finish: the hair around the ponytail elastic is wrapped with a strand of loose hair, thread, or yarn to create a decorative, seamless finish that makes the base of the ponytail look polished and intentional. The layered braid arrangement creates depth and visual interest, while the wrapped edges elevate the entire style from casual to carefully curated.
How Layering Adds Dimension and Cleanliness
By using multiple braids positioned at different heights, you’re creating visual layers that catch light differently and make your ponytail appear fuller and more textured. This arrangement also distributes the weight more evenly across your head, which means less overall tension and a more comfortable wearing experience over time. The wrapped edges technique is transformative—instead of a simple elastic holding your ponytail, you have a deliberate design element that says “this is intentional.” It keeps stray hairs contained and adds a finished, polished quality that takes the style from everyday to special-occasion ready.
Technique Breakdown for Flawless Results
- Front braid: Create a feed-in braid from your hairline back, but instead of extending all the way to the nape, tuck the end of this braid into the ponytail section
- Back braid(s): Position one or two additional feed-in braids lower on the head, perhaps around the mid-back area, and likewise feed them into the final ponytail
- Securing the ponytail: Use a clear elastic initially to gather all the braid ends and loose hair into your desired ponytail height and position
- Wrapping technique: Take a ½-inch section of hair from your ponytail or use a coordinating thread or yarn, wrap it around the elastic 2-3 times, and tuck the end underneath the wrap or secure it with a small bobby pin
- Edge smoothing: Apply edge control generously before wrapping so that the wrap sits on completely smooth, controlled hair
Insider note: If you’re using thread or yarn for wrapping, choose colors that either match your ponytail perfectly or create an intentional contrast—gold thread on dark hair or silver on light hair can elevate the look from protective style to fashion statement.
4. Side-Swept Feed-In Braid Ponytail
Instead of a center part or symmetric placement, the side-swept version features a feed-in braid that begins at one side of your head and travels diagonally backward, creating an asymmetrical, fashion-forward aesthetic. The braid sweeps across and back, and the ponytail is secured off-center—either at the back of your head or toward the side, depending on how dramatic you want the sweep to be. This style is exceptionally flattering because the diagonal line of the braid creates an elongating effect, and the asymmetry adds sophistication and edge. Side-swept braids are also incredibly practical for keeping hair off your face on one side while maintaining volume and movement on the other.
The Visual Power of Asymmetry
Asymmetrical styles have a built-in interest factor that symmetric styles sometimes lack. Your brain finds the slight off-balance quality intriguing, and it signals that the wearer is confident enough to move away from traditional bilateral symmetry. From a practical standpoint, a side-swept braid is exceptionally good at keeping hair off your face and neck—it’s especially useful if you have a side part naturally or if you’re going to be working out, traveling, or spending time in weather that would make a traditional center-parted style challenging. The sweep also creates an elegant line from one side of your head to the other, drawing the eye in a flattering direction.
Making the Sweep Graceful and Neat
- Starting point: Begin your braid at the temple on one side, right at your hairline or slightly behind it
- Directional angle: As you braid backward, angle the braid slightly diagonally rather than straight back—this creates the “sweep” effect
- Braid pathway: The braid should travel from temple back toward the nape, or from temple back toward the crown, depending on where you want your final ponytail positioned
- Edge work: The side where the braid begins needs especially careful edge control because it frames your face; the opposite side should also be smoothed back with control
- Ponytail positioning: If the braid sweeps to the back, your ponytail sits low and centered or slightly to one side; if the braid sweeps toward the crown, the ponytail can sit high and off-center for maximum impact
Pro tip: This style pairs beautifully with a deep side part—create your deep part first, use edge control to smooth the smaller side completely, then begin your feed-in braid from the larger side of your part.
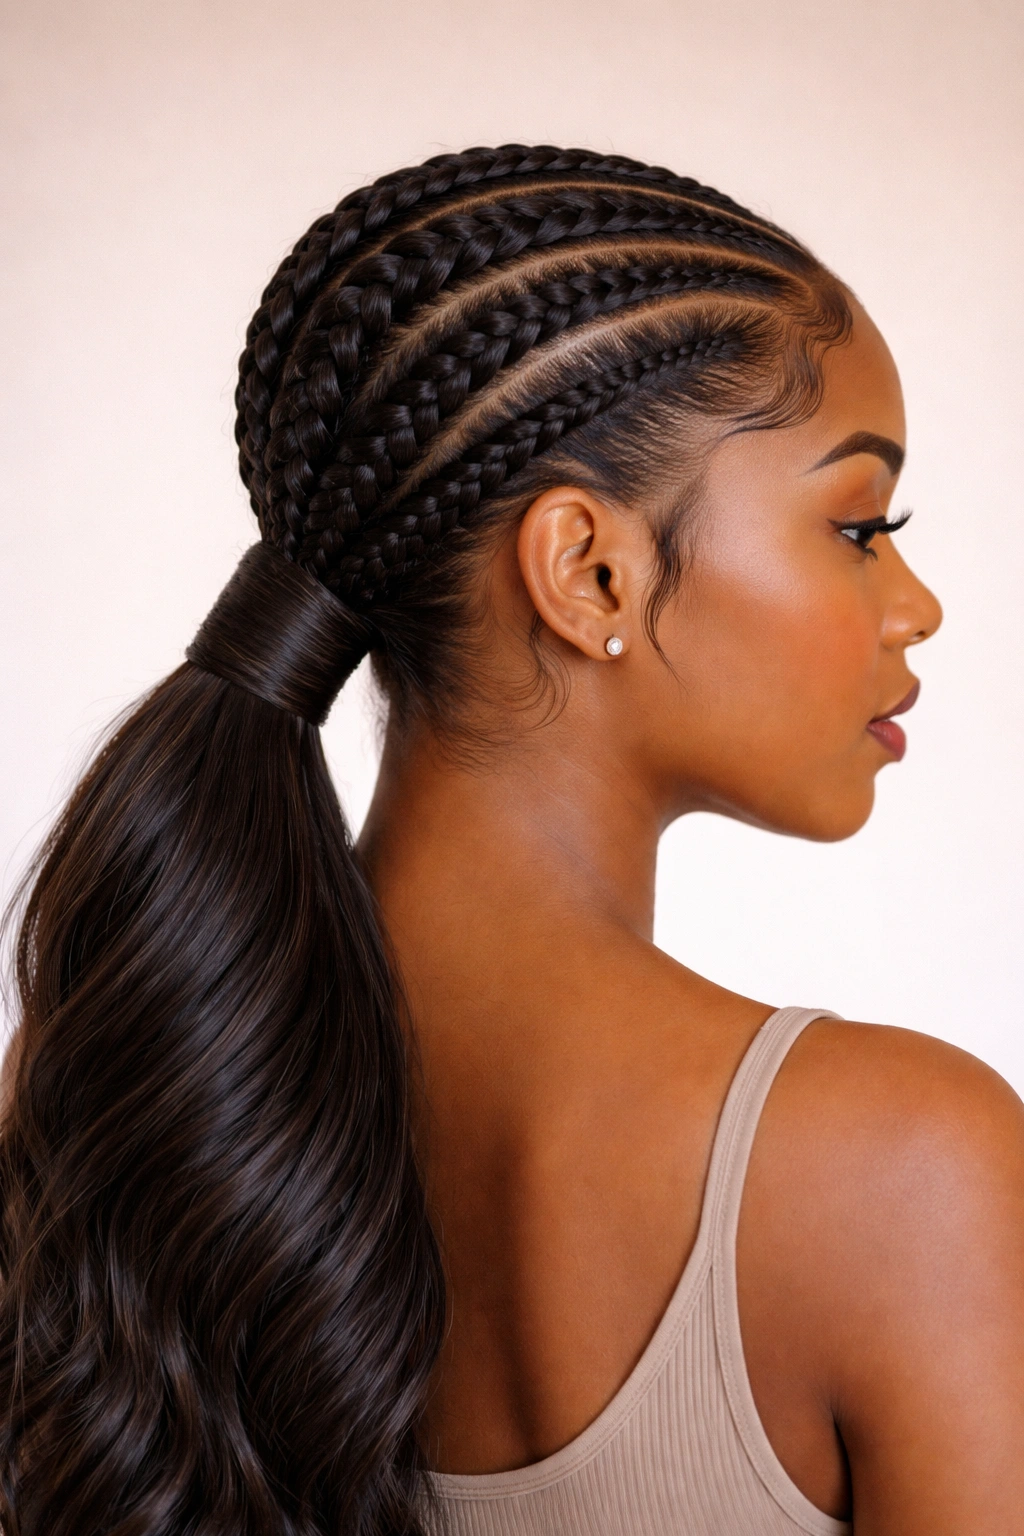
5. Curved Feed-In Braid Ponytail
Rather than traveling in a straight line from front to back, a curved feed-in braid follows the natural contours of your scalp, creating an elegant arc that flows from your hairline, curves around the side of your head, and feeds into a ponytail at the nape or crown. The curve can be gentle and subtle, or more pronounced and dramatic, depending on how much you angle the braid as it progresses. This style is exceptionally beautiful when photographed from the side or back, as the curve of the braid mirrors the curve of your head and creates an almost sculptural quality. The curved pathway also distributes tension more evenly because you’re not pulling hair straight back in one rigid direction.
Why Curved Braids Feel Softer and More Intentional
A curved braid is inherently more forgiving of slight imperfections because the curve itself is the design—minor bumps or uneven sections read as part of the intentional shaping rather than mistakes. Curved lines are also psychologically softer and more flattering than stark straight lines; they echo the natural curves of the face and neck. From a comfort standpoint, a curved braid distributes the pulling force across a larger area of your scalp, which means less tension headaches and less stress on your hairline. The curve also creates visual flow and movement, making even a tightly pulled protective style feel elegant and intentional rather than stark.
Mapping Your Curve for Best Results
- Starting point: Begin at your hairline on one side, perhaps at the temple or center-front area
- Mid-point: As you move backward, gradually shift the braid to the side of your head—if you started at center-front, move toward the right or left temple as you progress
- End point: The curve should complete at the back of your head, either at the nape or toward the crown, depending on your ponytail positioning preference
- Feed-in timing: The beauty of this style is that you can feed in hair gradually throughout the entire curve, creating a braid that appears to flow seamlessly from your hairline all the way to your ponytail
- Edge maintenance: Because you’re creating a curved path, your edges need careful daily control along the entire curve—not just at the start and end
Worth knowing: Curved braids are significantly easier to create if you practice on someone else first or use a mirror system that lets you see the back and sides of your head while braiding; the curve is difficult to judge if you can only see what’s directly in front of you.
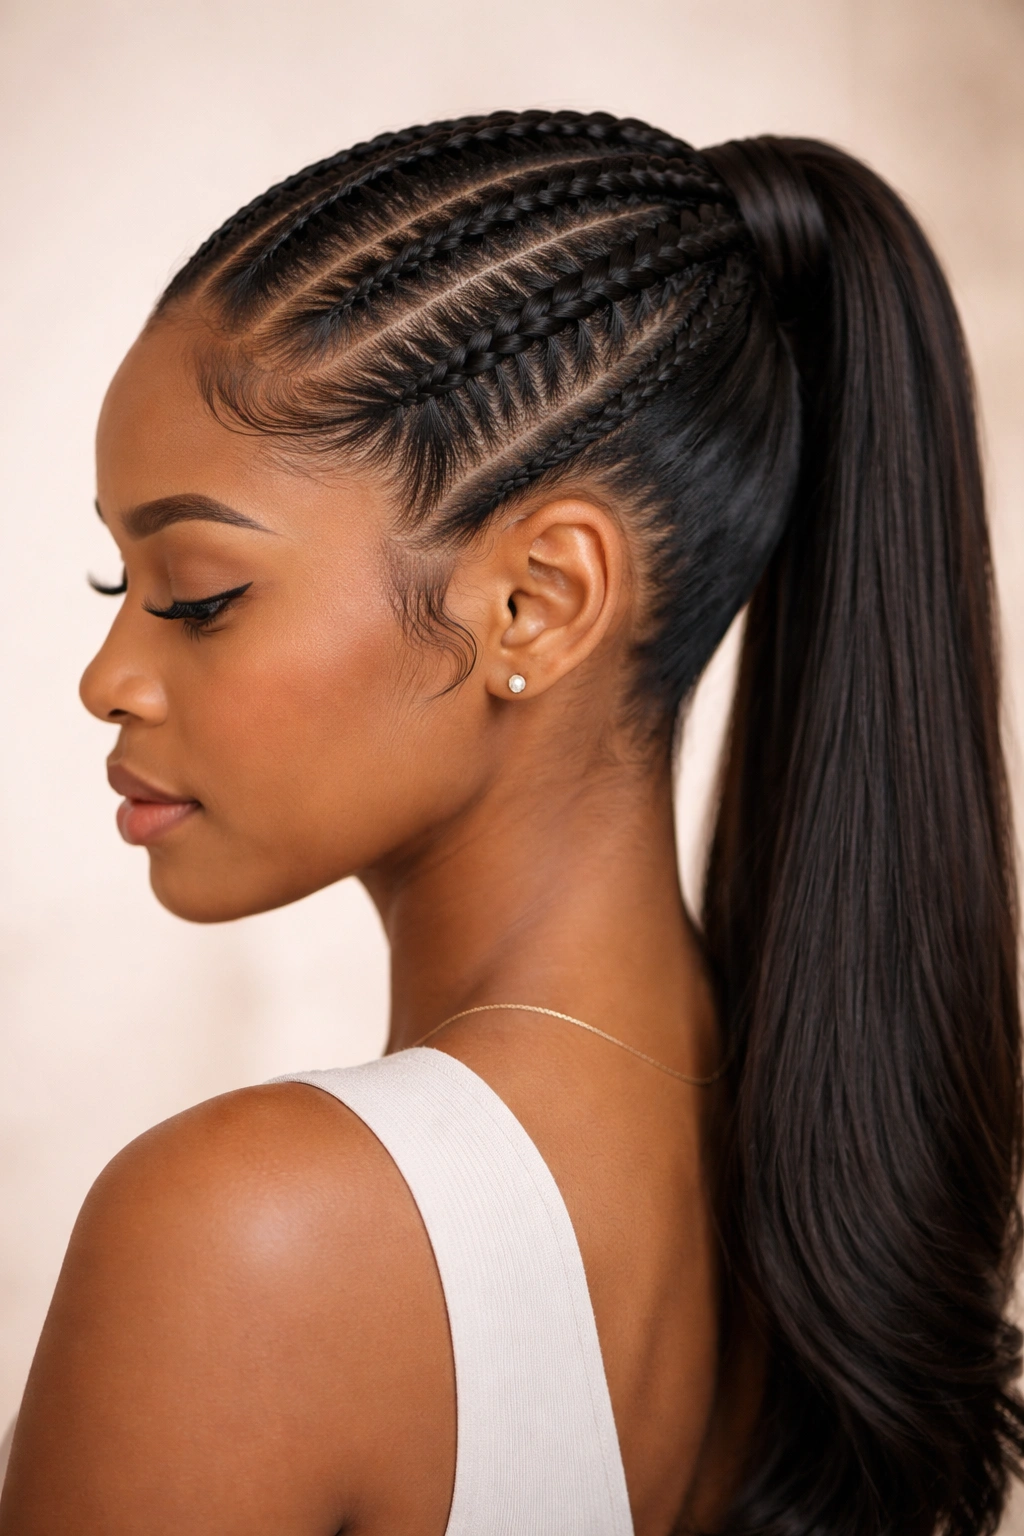
6. Crown Feed-In Braid Ponytail with Swooped Front

This elegant style features a feed-in braid that starts at one temple, travels along the top-back of your head (creating a crown effect), and meets at a high or mid-height ponytail at the crown or back of your head. What makes this version special is the “swooped front”—the section of hair in front of and around the braid is left loose and smooth, creating a soft frame around your face that contrasts beautifully with the structured braid. This style balances the polished, controlled look of a feed-in braid with the softness and femininity of loose waves or straight hair framing your face. It’s sophisticated enough for professional settings but soft enough for casual or date-night wear.
Why Braids Plus Swooped Loose Hair Equals Maximum Impact
The combination of a structured braid and loose, flowing hair creates a visual and tactile contrast that’s more interesting than either element alone. The braid signals polish and intention, while the loose hair softens the look and adds movement. This styling approach is also incredibly versatile—you can wear your loose front hair straight, wavy, crimped, or with soft curls, completely changing the vibe of the style without re-braiding. The braid keeps everything in place and tidy while the loose hair gives you the benefit of showing your hair’s length and texture. Many people find this style is the sweet spot between “protective styling” (which can sometimes feel severe) and “everyday styling” (which sometimes feels less polished).
Construction and Styling Steps
- Loose section: Leave a section of hair loose across the front and sides of your head—this typically extends from temple to temple and should be at least 2-3 inches wide at the front
- Feed-in braid start: Begin your feed-in braid at one temple, just at the edge of where your loose section ends
- Braid pathway: Travel the braid along the top-back of your head, roughly following where a crown or tiara would sit
- Ponytail positioning: Complete the braid and gather it into a high or mid-height ponytail, leaving your loose front section completely separate
- Loose hair styling: Style your loose front section according to your preference—curl it, wave it, straighten it, or leave it as-is—it won’t affect the braid
- Edge work: Apply edge control to your hairline and temples, keeping the loose section smooth and polished
Pro tip: This style looks especially beautiful if you straighten or smooth your loose front section before securing the ponytail—it creates a clean line between the polished, loose front and the braided back.
7. Zigzag Feed-In Braid Ponytail
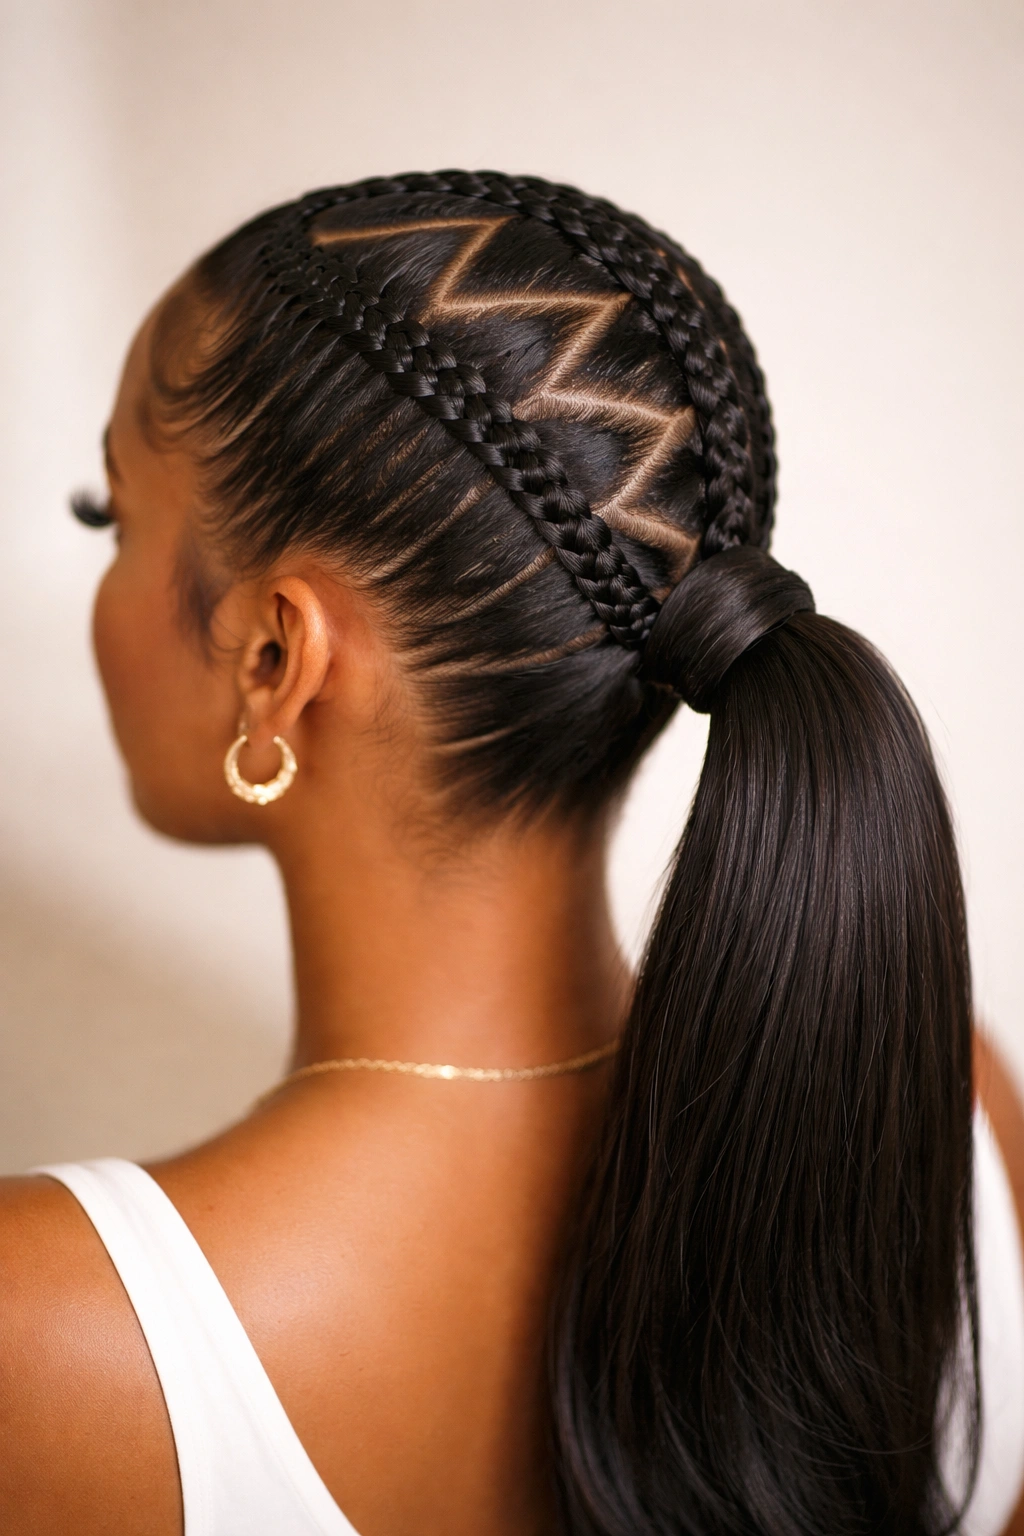
A zigzag feed-in braid follows a path that moves side-to-side across your head as it progresses from your hairline toward the nape, creating an eye-catching geometric pattern. Rather than traveling straight back or in a simple curve, the braid moves toward the right, then toward the left, then toward the right again, creating a zigzag or lightning-bolt effect when viewed from above. This style is bold and fashion-forward—it makes a statement and looks absolutely stunning in photographs. The zigzag pattern also has a practical advantage: because the braid travels across more of your scalp, it distributes weight more evenly and can accommodate thick, voluminous hair without looking bunchy or tight.
The Drama of Geometric Braid Patterns
Geometric patterns are inherently eye-catching because they break away from the predictable straight-back or gentle-curve pathways that most people expect. A zigzag pattern says “I’m intentional about my style and not afraid to be bold.” The pattern also creates visual movement—your eye follows the zigzag line, which creates a dynamic quality even though the overall style is completely stationary. From a technical standpoint, zigzag braids require more skill and planning than simpler patterns because you need to maintain consistent angles and anticipate where your braid will end up as you move it side to side. The payoff is absolutely worth the extra effort.
Executing a Clean, Symmetrical Zigzag
- Pattern planning: Before you begin braiding, mentally map out or even lightly mark where your zigzags will go—a good pattern might be: 1 inch center, 1.5 inches to the right, 1.5 inches to the left, 1.5 inches to the right, etc.
- Section management: To maintain clean edges and neat sections, be intentional about which hair you’re incorporating into the braid at each angle change—you’re essentially turning the braid as you progress
- Tension consistency: The biggest challenge with zigzag braids is maintaining consistent tension throughout the direction changes—practice on braiding hair or a friend before attempting on yourself
- Feed-in technique: Use the feed-in method continuously throughout, which means you’ll be adding small amounts of hair consistently as you change directions
- Ponytail endpoint: Your zigzag will end at your nape or low-back area, where all the braid strands feed into the final ponytail
Insider note: If you’re attempting a zigzag braid for the first time, practice with braiding hair first—it gives you the ability to see exactly what’s happening without the pressure of working on your own scalp, and you can disassemble and retry sections without damage.
8. Bubble Ponytail with Feed-In Braid Detail
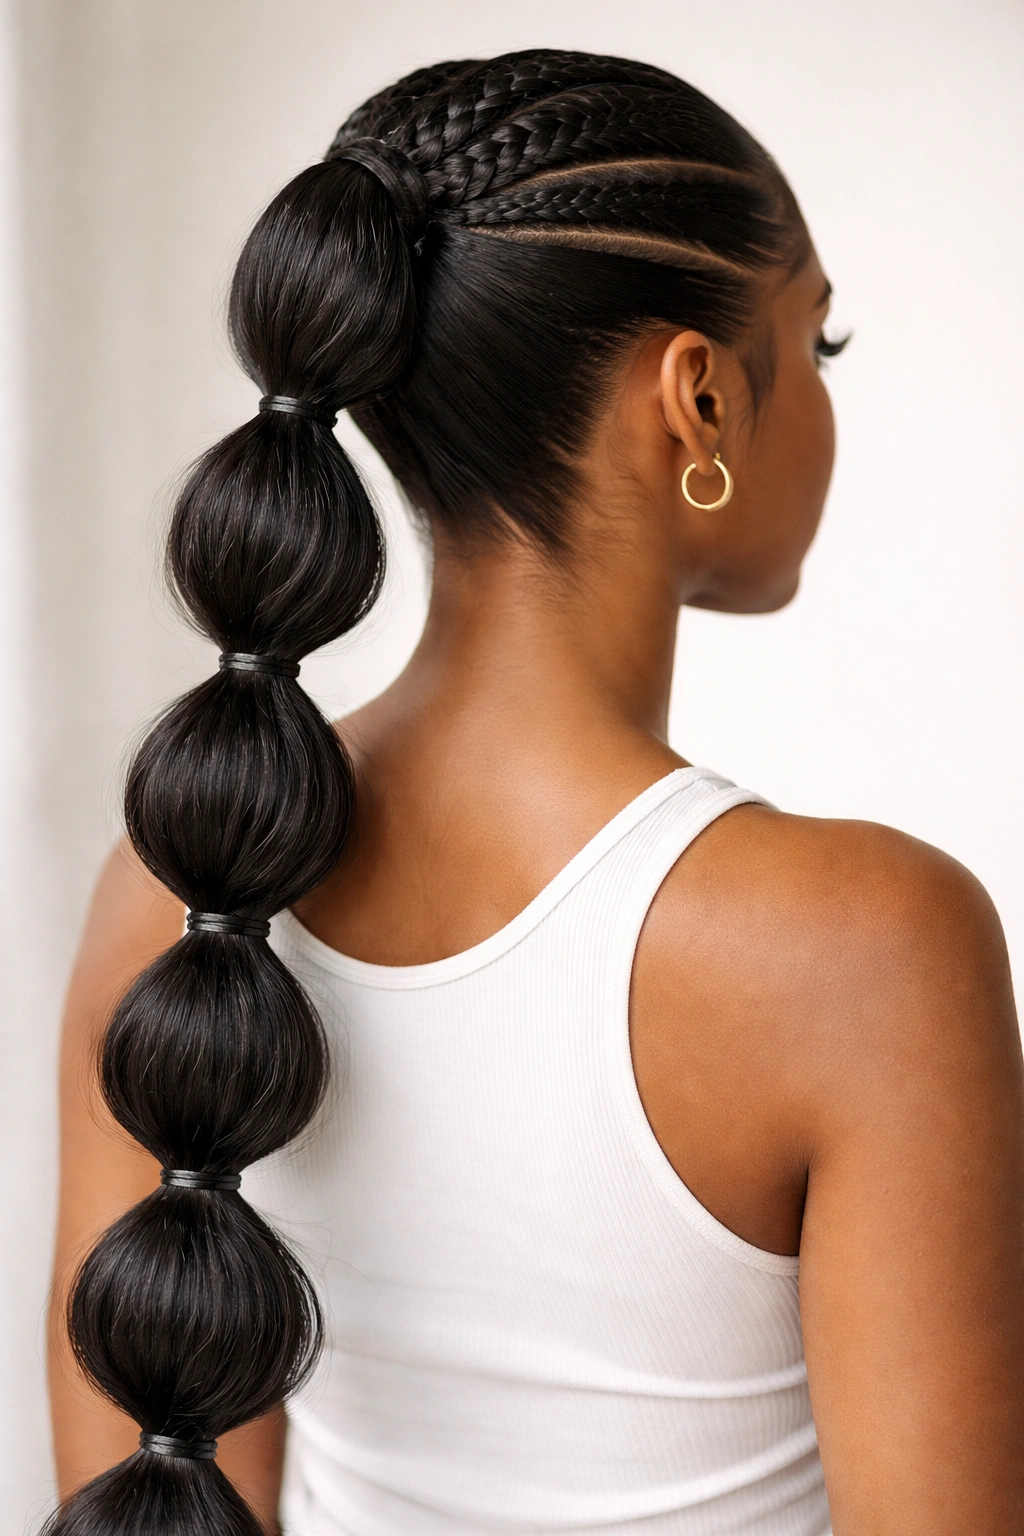
This playful style combines a feed-in braid (usually positioned down the center or to one side) with a “bubble ponytail”—a technique where you use multiple small elastics to create a series of puffs or bubbles down the length of your ponytail. The feed-in braid sits at the top, securing your hair and creating a polished, neat beginning, while the bubbles below add texture, visual interest, and a youthful, fun quality. The contrast between the structured, neat braid and the playful bubbles makes this style feel modern and fashion-forward. It’s perfect for people who want the protective, long-lasting benefits of braiding but also want their style to feel a bit more dynamic and less serious than a traditional braided ponytail.
Why Bubbles Add Personality to a Classic Braid
Bubble ponytails have become increasingly popular because they solve several style problems simultaneously: they make thin hair appear fuller, they break up the monotony of a single-length ponytail, and they add visual movement and texture without requiring curling or heat styling. When you pair bubbles with a feed-in braid, you get the best of both worlds—a polished, professional-looking braid that shows off your styling skills, combined with a fun, contemporary ponytail element that shows you’re current with trends. The bubbles also serve a practical purpose: they help secure your ponytail and prevent it from slipping or sliding down as you wear the style.
Creating Perfectly Even, Polished Bubbles
- Braid foundation: Start with a clean, neat feed-in braid that extends to where you want your ponytail to begin—this might be the nape, the mid-back, or wherever feels right for your hair length
- Initial elastic: Secure the end of your braid and any loose hair you’re incorporating into a low elastic—this forms the base of your bubble ponytail
- Bubble measurements: For even, proportional bubbles, measure approximately 2-3 inches down from your first elastic and secure a second elastic around the ponytail, creating your first bubble
- Repeated pattern: Continue placing elastics 2-3 inches apart along the entire length of your ponytail, creating evenly-spaced bubbles
- Fluffing the bubbles: After all elastics are in place, gently pull and fluff each bubble section to make it appear fuller and more textured
- Concealing elastics: Use small bobby pins, decorative hair clips, or strands of hair wrapped around each elastic to hide the elastics and make the style look more intentional
Pro tip: Clear elastics make bubble ponytails look more polished than colored elastics because they’re less visible, but if you want the elastics to be decorative, metallic or jeweled elastics can turn this into a special-occasion style.
9. Twisted Feed-In Braid into Ponytail
For a sleeker, more sophisticated variation on the traditional feed-in braid, try incorporating twists alongside your braids or replacing the braid entirely with twisted sections that feed into your ponytail. A twisted feed-in works similarly to a traditional feed-in braid—you gradually incorporate hair from your scalp as you move backward—but instead of creating three-strand braids, you’re creating two-strand twists. This technique creates a thinner, more refined line than a traditional braid, and the twisted texture photographs differently—it catches light in subtle ways and appears more delicate and ethereal. Twisted feed-ins work beautifully on all hair types and are especially stunning on textured and curly hair where the twist creates a defined, sculptural effect.
The Refined Elegance of Twisted Details
Twists have an inherent delicacy that three-strand braids sometimes lack. They’re thinner and more refined, creating a line that’s softer and more subtle. A twisted feed-in is also technically a bit easier than a braided feed-in because you’re only managing two sections of hair instead of three, which means fewer moving parts and a lower chance of things getting tangled or unraveling. Twists also have a slightly different aesthetic—they feel more modern and less traditional than braids, making them a great choice if you want protective styling that doesn’t look like a classic protective style. The twisted texture also blends beautifully with curly and textured hair, creating a seamless transition between your fed-in twist and your loose curls in the ponytail.
Mastering the Two-Strand Twist Feed-In
- Section creation: Part off a clean section where you want your twist to begin—this might be your center, one side, or any other position you prefer
- Twist initiation: Start with two small sections at your hairline and begin twisting them together—this is exactly like a regular two-strand twist
- Feeding in hair: As you move backward, incorporate a small section of hair into one of your two twist strands at each step, alternating which strand you add to
- Twist trajectory: Continue your twisted feed-in all the way to the back of your head, incorporating hair gradually until you reach your desired ponytail starting point
- Securing the ponytail: Once your twist reaches your ponytail point, gather both twist strands along with any remaining loose hair and secure with an elastic
- Finishing touches: Apply edge control to any flyaways and smooth your ponytail base for a polished, completed look
Worth knowing: Twisted feed-ins can feel looser than braided feed-ins, especially as the style ages—if you want your twist to remain taut throughout its wear time, you might need to re-twist the top inch or two every few days for maintenance.
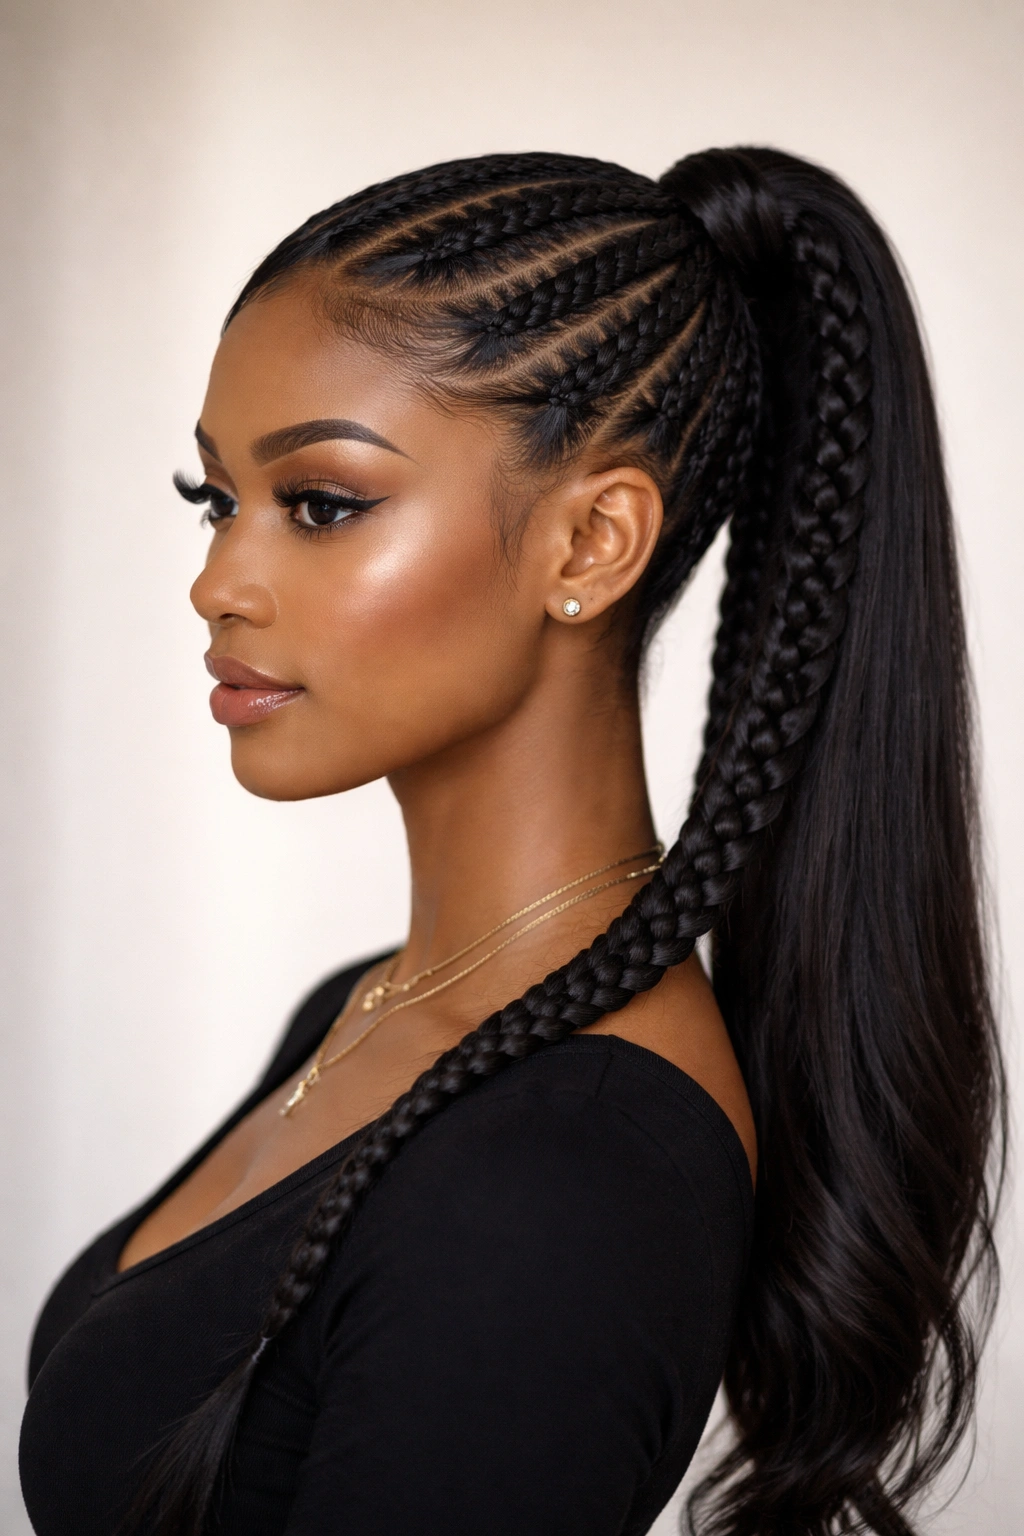
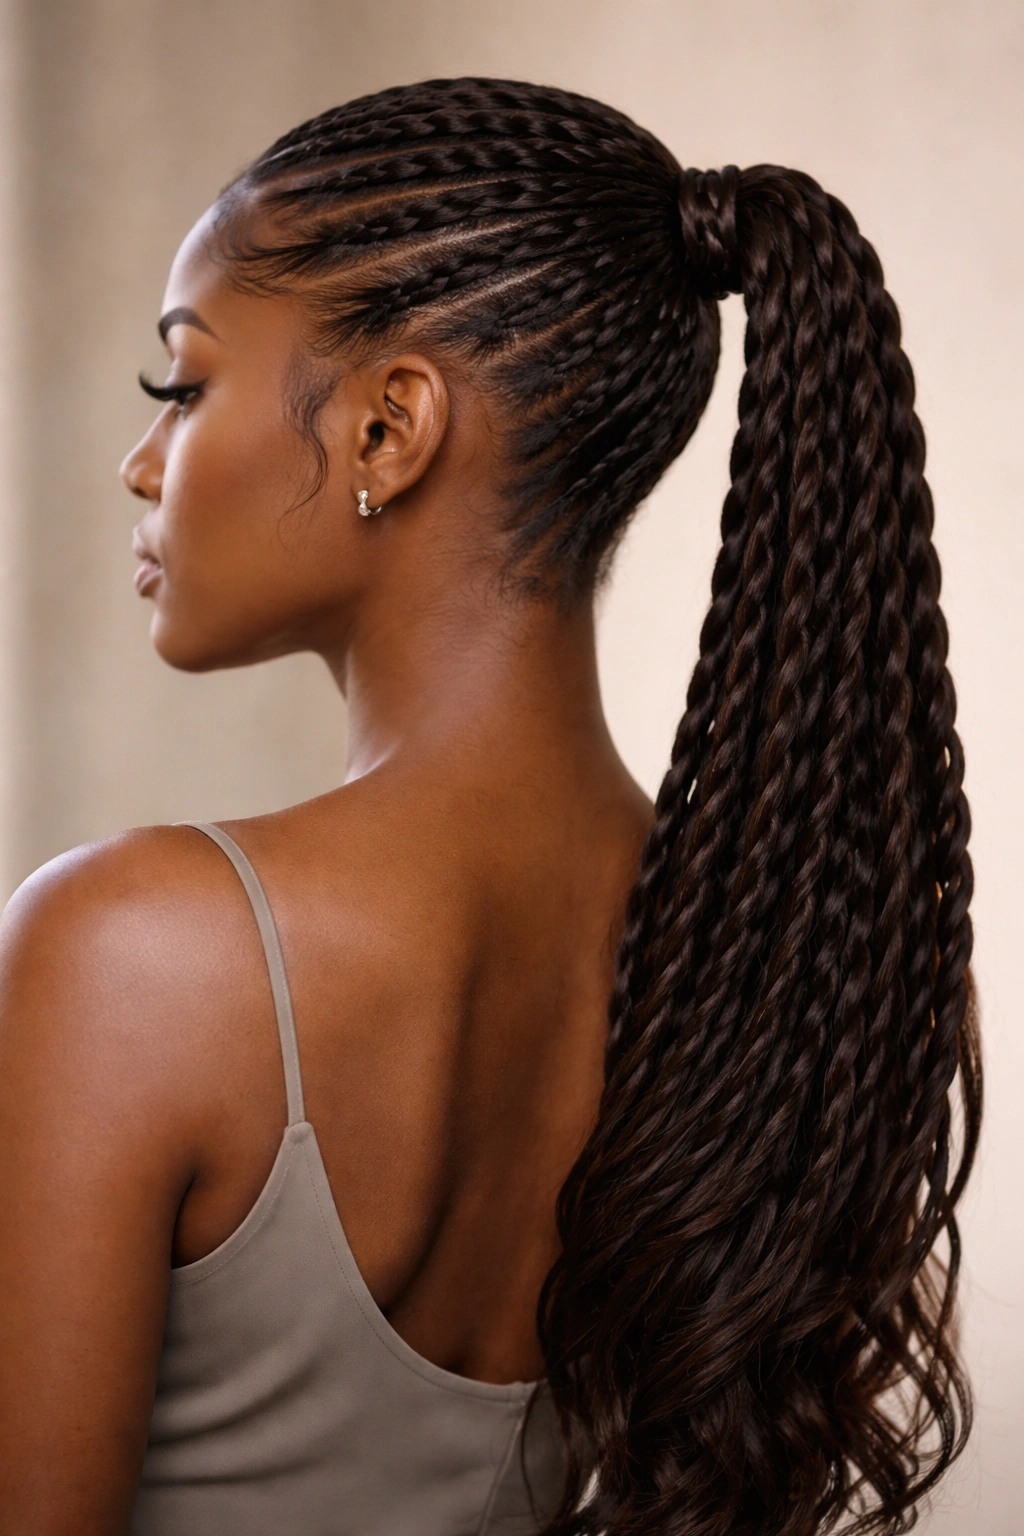
10. Staggered Feed-In Braid Ponytail

The staggered version uses multiple feed-in braids that don’t all start at your hairline at the same time and don’t all feed into the ponytail at the same point. Instead, one braid might start at your center-front hairline and travel down the middle of your head, while a second braid starts higher up on one side and feeds in at a slightly different angle, and a third braid might begin at your temple. The braids are positioned at different starting points and end at slightly different areas, creating a complex, layered, three-dimensional effect that’s absolutely gorgeous. This style requires more skill and planning than simpler versions, but the result is a sophisticated, editorial-quality look that shows off your braiding expertise.
The Complexity That Creates Haute Couture Results
Staggered braids are the most advanced version of feed-in braids because they require you to think in three dimensions—you’re not just considering the path from front to back, but also the depth created by multiple braids at different levels. The staggered arrangement creates visual complexity and sophistication that reads as “high-effort, professional styling” rather than a simple protective style. This approach also allows you to work with thicker hair by distributing the weight across multiple braids rather than concentrating it in one or two thick braids. Staggered braids are perfect for special occasions, fashion editorials, or for anyone who wants to showcase their styling skills and isn’t afraid of a little extra work.
Planning and Executing Staggered Braids
- Design mapping: Before you start, sketch out or mentally map exactly where each braid will begin and end—you need a clear plan or the staggered effect won’t read as intentional
- Starting points: Your braids might start at your center-front, your temples, your sides, or a combination of locations—the key is that they don’t all start in the same place at the same time
- Feed-in paths: Each braid will travel a slightly different path, incorporating hair from different areas of your scalp
- End points: Instead of everything feeding into one centered ponytail, your braids might end at slightly different points along the back of your head before being gathered into the final ponytail
- Sectioning precision: This style requires careful, clean sectioning because you’re working with multiple sections that need to relate to each other spatially
- Ponytail gathering: Once all braids reach their designated paths, gather every strand into a single ponytail using a firm elastic
Pro tip: Staggered braids look most polished when you vary the thickness of your braids intentionally—you might have one thick braid down the center and two thinner braids flanking it, or three equally thick braids distributed across your head, depending on your artistic vision.
Final Thoughts
Feed-in braid ponytails with neat edges represent the intersection of protective styling and intentional fashion—they allow you to keep your hair healthy while creating looks that are genuinely beautiful and thoughtfully designed. The 10 styles covered here showcase the enormous range of possibilities within this single technique, from the simplicity of a centered braid to the complexity of staggered, multi-layered arrangements. Each style serves different occasions, face shapes, hair types, and personal aesthetics, which means you can find versions that feel authentically like you rather than forcing yourself into a style that doesn’t fit your vision.
The most important thing to remember is that neat edges aren’t accidental—they’re the result of careful sectioning, appropriate tension, and consistent maintenance. Whether you’re getting braids done professionally or creating them yourself, approaching the style with intentionality about edge placement and edge control will transform your result from good to exceptional. You might start with the sleek center braid or the elegant crown braid, then work your way toward more complex styles like zigzags or staggered arrangements as you build confidence and skill.
Clean, well-executed feed-in braids also tend to last longer and look better throughout their wear time than hastily done versions. Taking the extra time to get your sections clean and your edges smooth at the beginning pays dividends over the weeks you’re wearing the style—your edges will remain neat, your braids will stay intact, and you’ll actually enjoy looking at your hair in the mirror every single day.