Medium-length hair strikes that perfect balance—long enough to create gorgeous movement and texture, short enough to manage without spending an hour styling every morning. Wavy hairstyles in this length range offer incredible versatility because waves work beautifully whether you’re dressing them up for a special event or keeping them casual for everyday wear. The key is choosing a style that complements your face shape, matches your lifestyle, and works with your natural hair texture or your willingness to style regularly.
Wavy medium hairstyles have become a go-to choice for people who want dimension and personality without committing to curls or maintaining pin-straight lengths. Whether your waves are naturally part of your hair texture or you create them with styling tools, the medium length gives you enough canvas to experiment with layering, texture, and movement. This article walks through 15 distinct medium wavy hairstyles—each with its own character, styling approach, and maintenance reality. Some work best with heat tools; others require minimal daily effort. Some suit thick, dense hair while others shine on finer textures. By the end, you’ll understand how to achieve each look, who it flatters most, and whether it’s realistic for your routine.
1. Beachy Waves
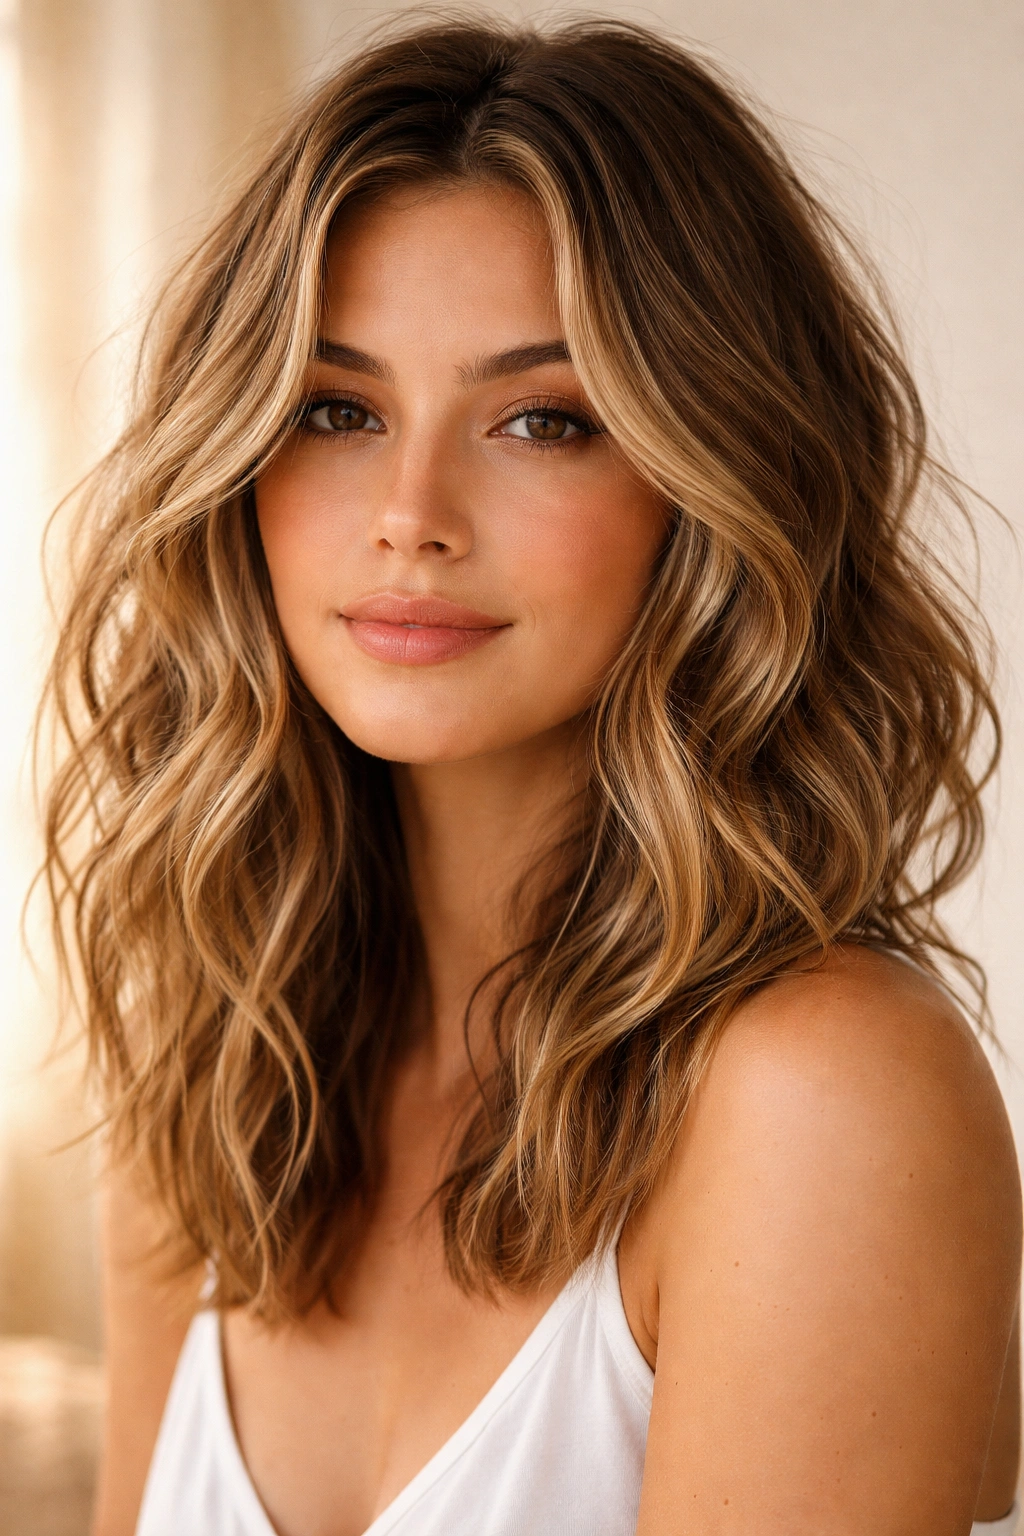
Beachy waves are the relaxed, effortless-looking style that somehow takes intention to pull off properly. This look features loose, undefined waves that cascade through medium-length hair without a strict pattern—think salt-spray texture without the actual ocean. The waves start roughly at chin level and loosen as they travel down, creating that “just got back from the beach” vibe that works year-round, regardless of season.
Why This Style Works
Beachy waves flatter most face shapes because the loose, undulating texture creates softness without clinging to the face. The undefined nature of the waves means imperfection is actually the goal—there’s no harsh line or precise curl pattern to maintain, which takes pressure off. If you have naturally wavy or curly hair, beachy waves are essentially your hair’s default look with a little enhancement. Even fine or straight hair can achieve this through styling, and the effect looks deliberately chosen rather than like your hair just got messy.
How to Create and Maintain Beachy Waves
- Use a sea salt spray on damp hair and scrunch gently as your hair air-dries, or blow-dry with a diffuser attachment for faster results
- Curl sections of dry hair with a 1-inch curling iron, wrapping the iron away from your face, then immediately run your fingers through to break up the curl pattern
- Sleep on slightly damp hair in a loose braid to wake up with soft, natural-looking waves
- Refresh waves between washes using a texturizing spray or dry shampoo to enhance grip and movement
- Apply a light finishing spray to keep the waves in place without making hair feel stiff or sticky
Pro tip: The messy, undone quality of beachy waves actually hides second-day hair really well, making this a low-maintenance option if you’re not washing daily.
2. Tousled Lob
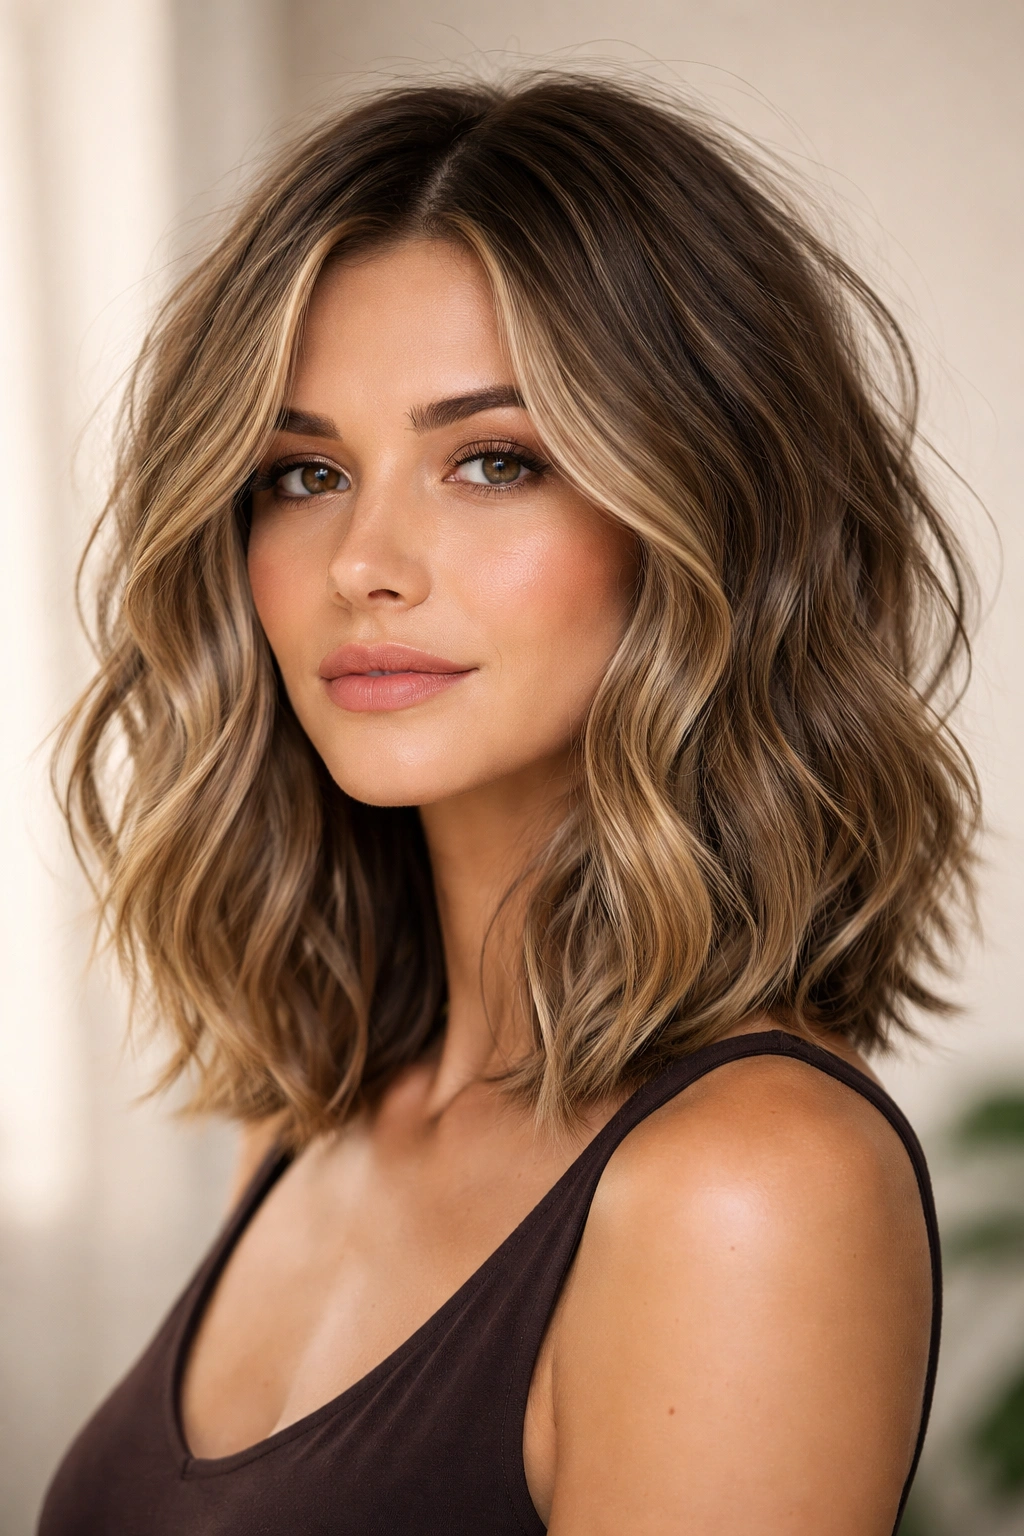
A tousled lob—a shoulder-length bob with textured, deliberately disheveled waves—combines the structure of a shorter cut with the movement of longer hair. The cut itself typically hits right at or slightly below the collarbones, with layers throughout that encourage texture. When styled with soft waves, this becomes a polished-but-playful hairstyle that reads as intentional, not sloppy.
Why This Style Stands Out
The lob with tousled waves walks the line between put-together and relaxed, which makes it adaptable to nearly any setting. The layering built into the cut means waves actually hold better and look more dynamic than they would in a blunt, one-length cut. This style photographs beautifully and suits people who want their hair to be noticeable without being dramatic. Face-framing layers in a tousled lob are especially flattering because they create movement right where it softens facial features.
Styling and Maintenance Reality
- Blow-dry with a round brush to smooth the base, then curl sections with a 1.25-inch barrel curling iron
- Alternate curl direction (away from face, then toward face) to create that tousled, unfixed quality
- Use texturizing spray or dry shampoo to enhance the volume and grip of your waves
- Run your fingers through curls once they cool to break them apart and create the intentionally messy effect
- Style works well on slightly textured or second-day hair, which actually improves the look
- Refresh waves with a curling iron daily if you want full, defined movement; light waves can last 2-3 days
Worth knowing: This cut needs professional maintenance every 6-8 weeks to keep the layers sharp and the shape from looking overgrown.
3. Layered Waves
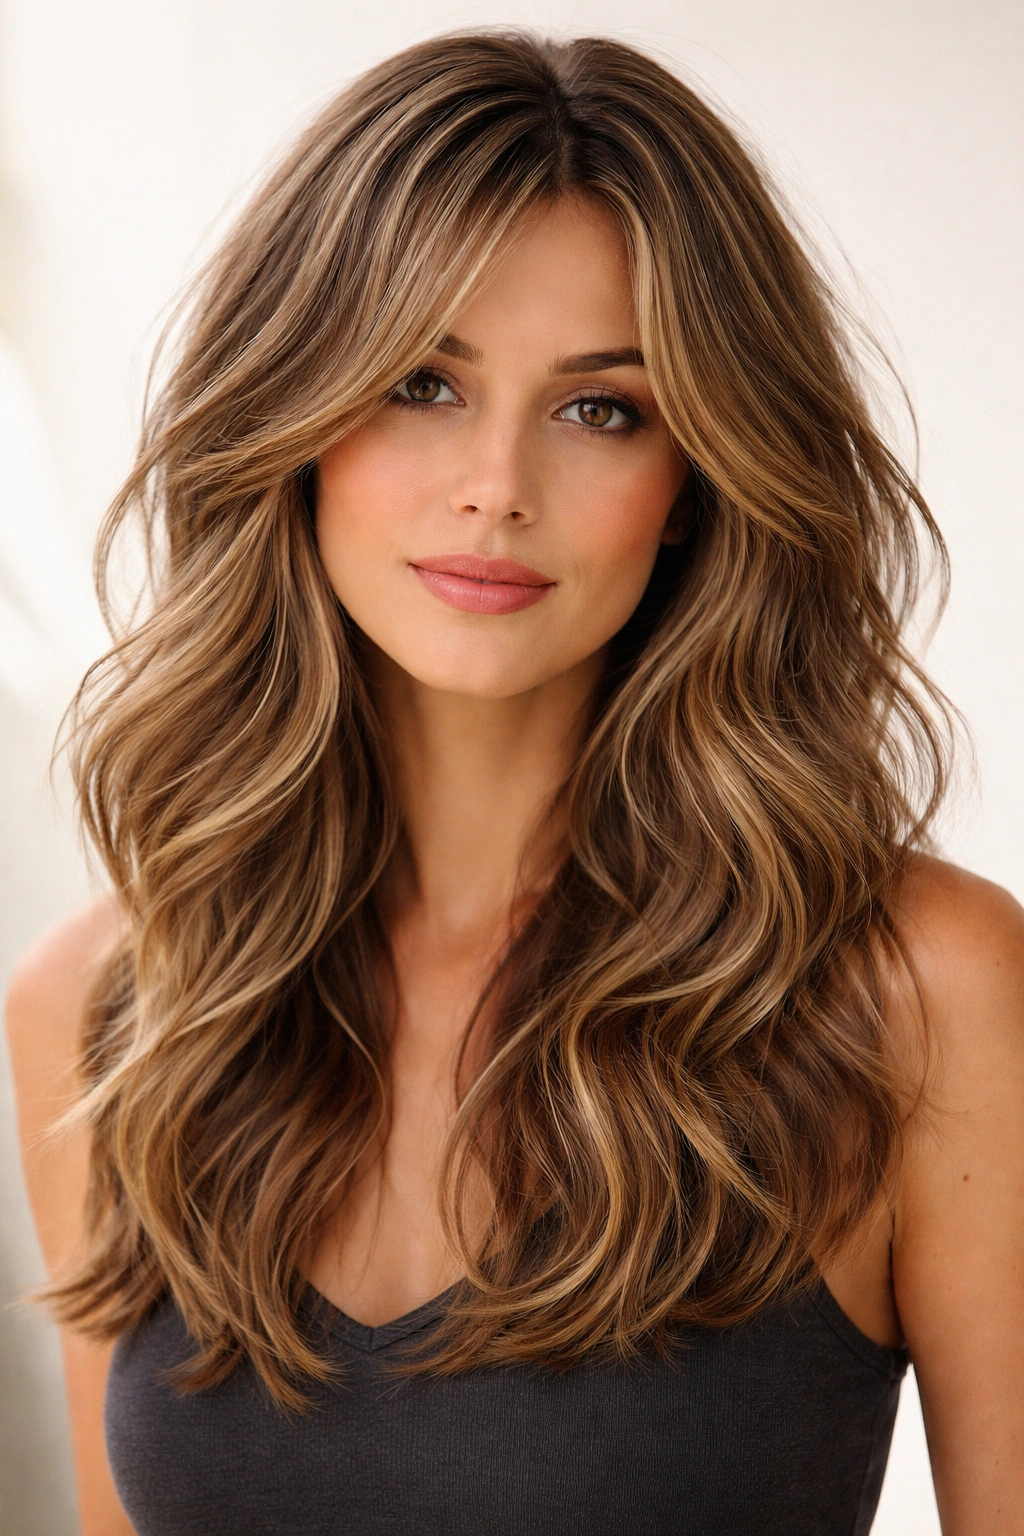
Layered waves maximize movement and dimension through intentional, varied-length layers throughout the hair. Rather than one uniform wave pattern, a heavily layered cut creates shorter, choppier pieces at the crown for volume and longer, smoother sections underneath. When styled with waves, these different lengths interact with each other to create a multidimensional texture that feels fluid and contemporary.
What Makes Layered Waves Dynamic
Strategic layering actually makes hair look fuller and more voluminous, even if you have finer or thinner hair. The shorter layers at the crown catch light differently than longer layers below, creating visual depth. Each layer holds its own wave pattern slightly differently, which creates that coveted texture without a uniform, “done” appearance. This style is especially effective on people with straight or naturally limp hair because the layers give you something to work with.
Creating Layered Waves
- Ask your stylist for choppy layers with shorter pieces around the crown and longer pieces in the back
- Blow-dry sections with a round brush to smooth the base and create volume at the roots
- Curl alternating sections with a 1-inch curling iron to emphasize the layered texture
- Use a styling cream or mousse applied to damp roots before blow-drying to build hold
- Scrunch and piece apart curls once cool to enhance the choppy texture
- This style looks best with some daily effort—air-drying alone won’t create the dimensional wave pattern
Insider note: If you have wavy hair naturally, layering actually enhances your waves and reduces the need for styling tools.
4. Textured Shag
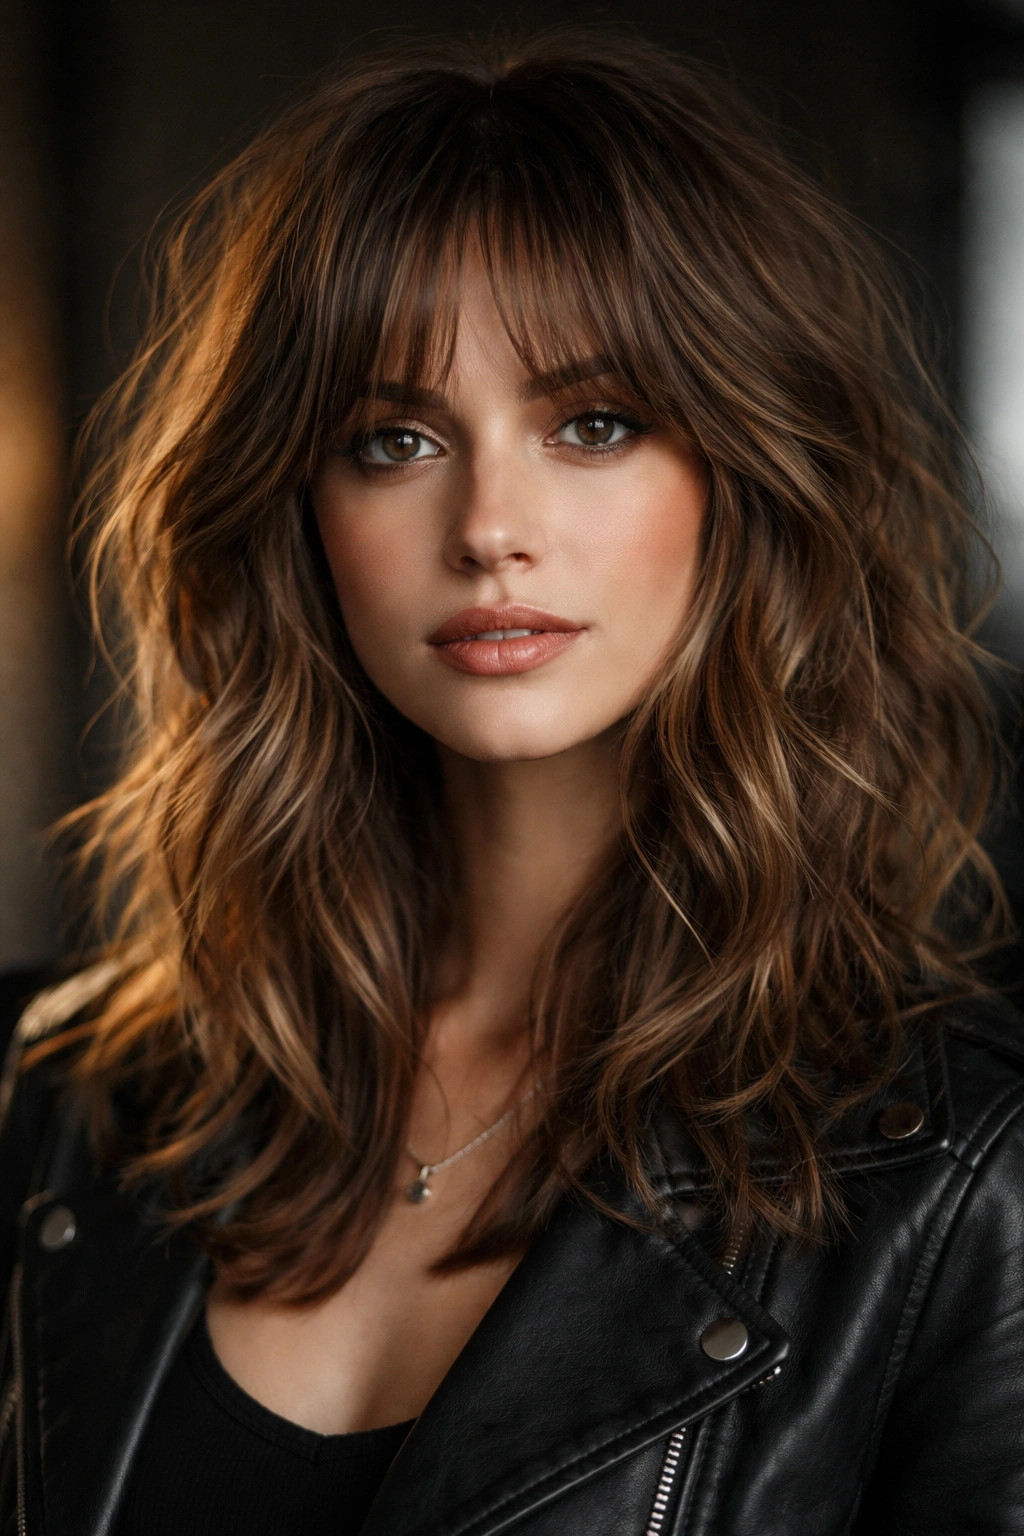
A shag hairstyle is essentially multiple layers of varying lengths, choppy and intentionally informal, creating a rock-and-roll edge when combined with waves. Modern shags avoid the severe, spiky look of vintage versions and instead lean into soft, touchable texture with pieces that frame the face and move independently. When you add wavy texture to a shag cut, the result is edgy but wearable, dramatic but not overwhelming.
Why Shags Have Made a Comeback
The textured shag works beautifully on medium-length hair because there’s enough length to create movement while the layers prevent heaviness. The cut itself creates built-in movement that looks good even without styling—air-drying a shag often produces results you’d have to work hard to achieve with other cuts. This style signals personality and isn’t trying to be conventional, which appeals to people who want their hair to say something about who they are.
How to Style a Textured Shag
- Work a texturizing cream through damp hair and either air-dry or blow-dry with a diffuser
- Curling isn’t always necessary because the cut’s layers create movement naturally
- Add waves with a curling iron if you want more definition, focusing on the underneath layers
- Use a light-hold styling spray to encourage pieces to stay separated and textured
- Finger-comb rather than brush, which breaks up texture and creates a shaggy rather than smooth effect
- This cut looks intentionally undone, so imperfection is actually part of the aesthetic
Pro tip: Shags can look scraggly if the layers get too blunt, so maintenance every 4-6 weeks matters more than with other cuts to keep the texture looking intentional.
5. Soft Waves with Curtain Bangs
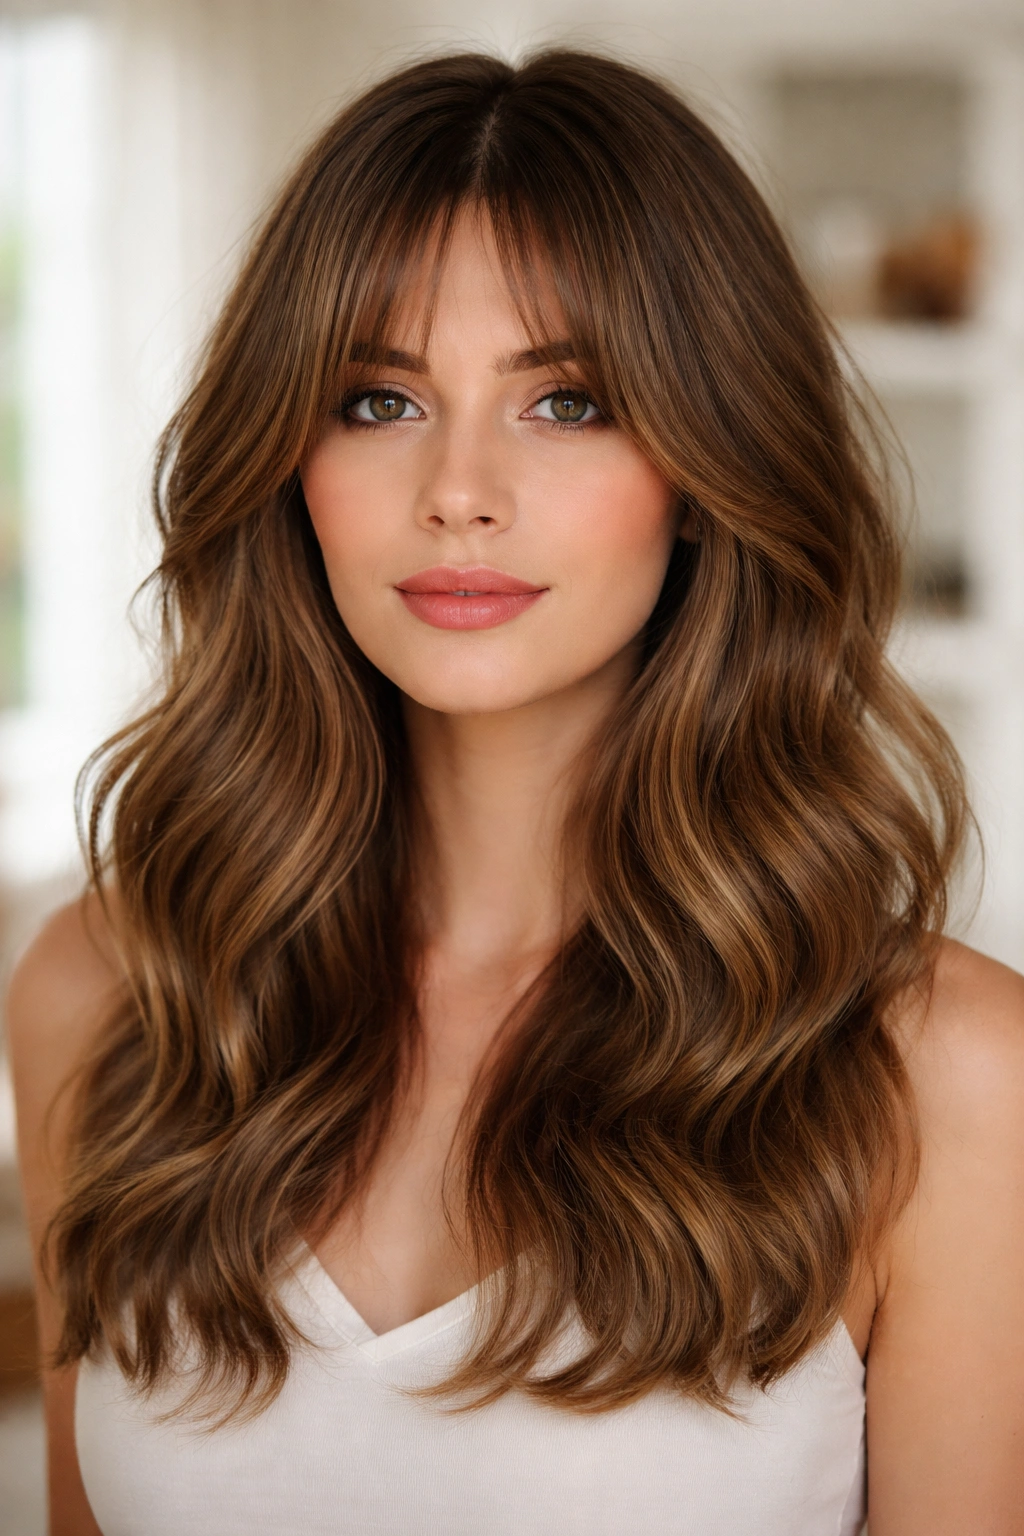
Curtain bangs—longer, face-framing pieces that part in the middle and sweep away from the face—combine beautifully with soft waves for a ’70s-inspired look that’s sophisticated rather than costume-y. The bangs create a focal point and instantly soften the face, while waves throughout the rest of the hair provide movement and texture. This combination works especially well for people who want their hairstyle to feel romantic or vintage without looking dated.
Why Curtain Bangs and Waves Pair So Well
Soft waves work with the natural movement of curtain bangs instead of fighting against it, creating a cohesive, intentional look. The waves throughout the hair echo the movement created by the bangs, which makes the whole style feel unified. Curtain bangs add visual interest to the face while waves keep the overall effect from feeling too structured or severe. This style flatters most face shapes because the face-framing pieces work on round faces, oval faces, and angular faces—the waves just soften the effect differently depending on your features.
Styling Soft Waves with Curtain Bangs
- Blow-dry curtain bangs with a round brush, directing them away from the face and slightly backward
- Curl the rest of your hair with a 1.25-inch curling iron, working in sections and alternating direction
- Use a smooth, lightweight styling cream to encourage the bangs to cooperate and avoid frizz
- Refresh bangs daily even if the rest of your hair is fine; they frame your face and need to look intentional
- Sleep on braids or a silk pillowcase to maintain wave texture without disturbing the bang placement
- This look requires consistent daily styling to keep the bangs from falling flat or flipping inward
Worth knowing: If you’re not committed to styling curtain bangs regularly, they can quickly start looking messy rather than intentional—this isn’t a wash-and-go style.
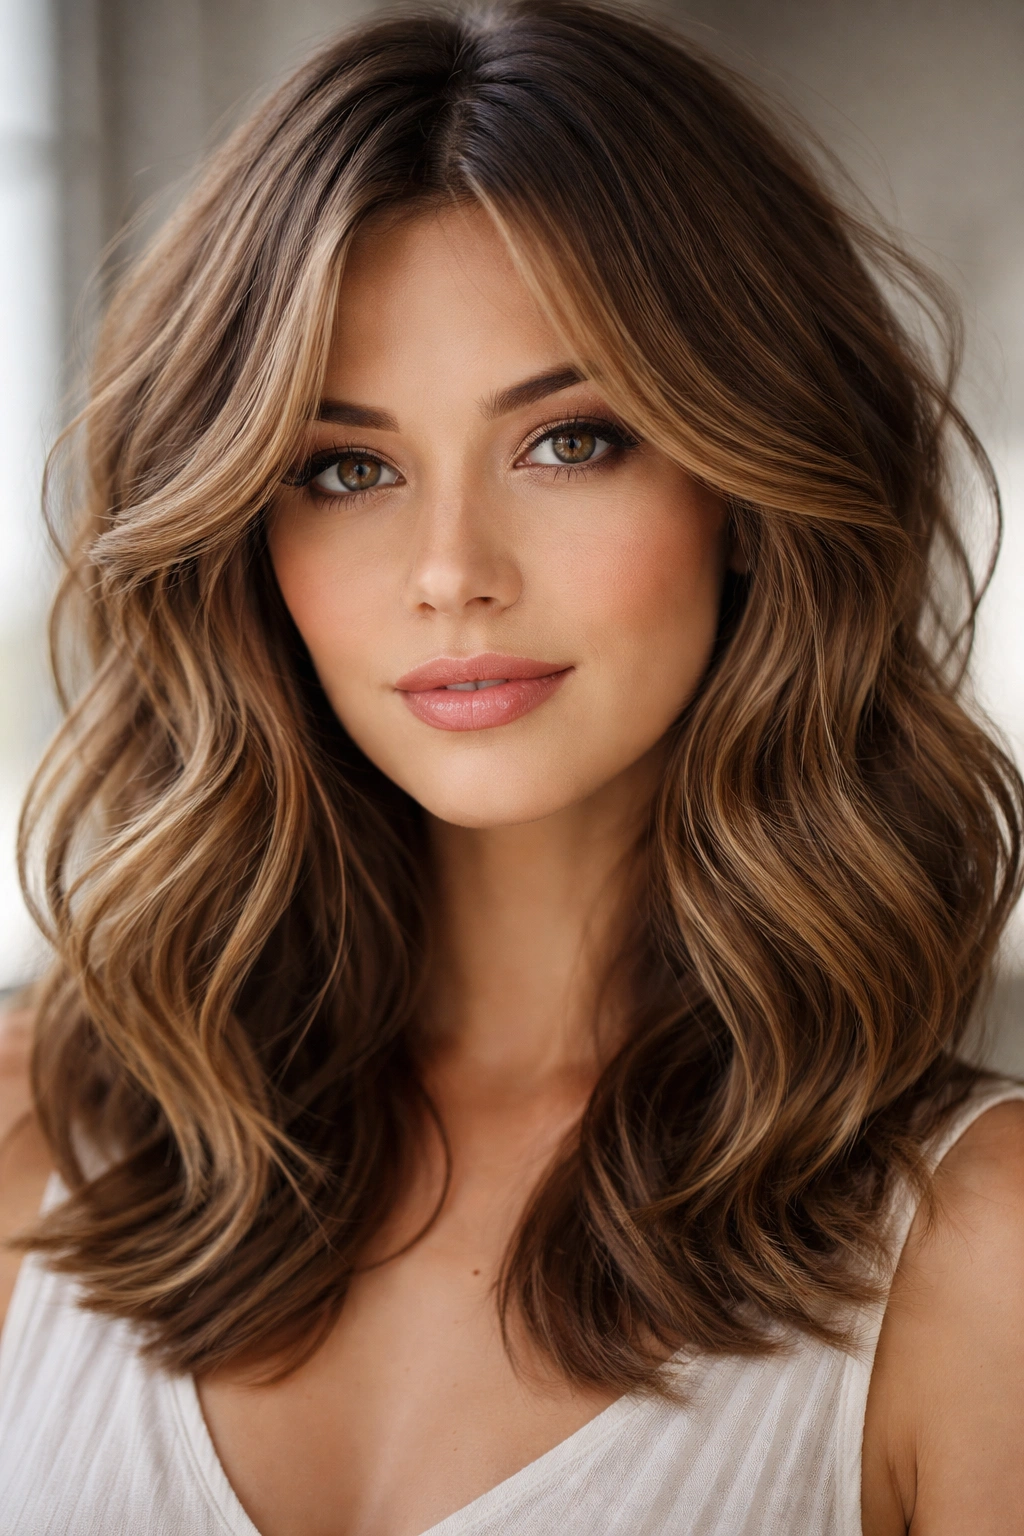
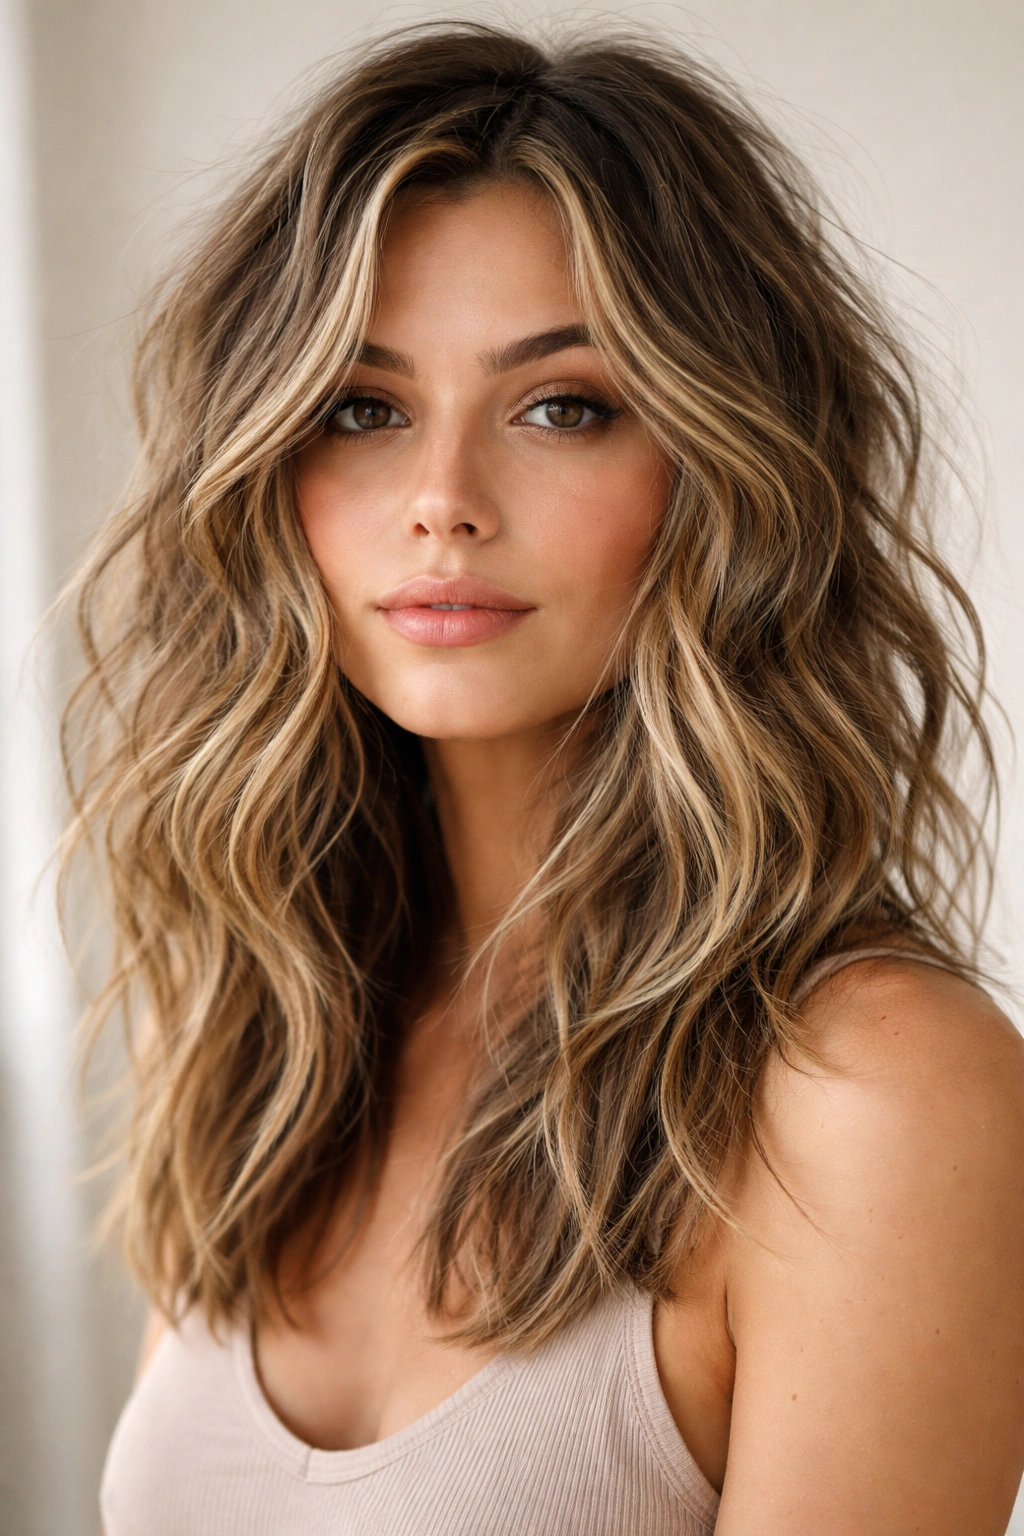
6. Choppy Waves with Highlights
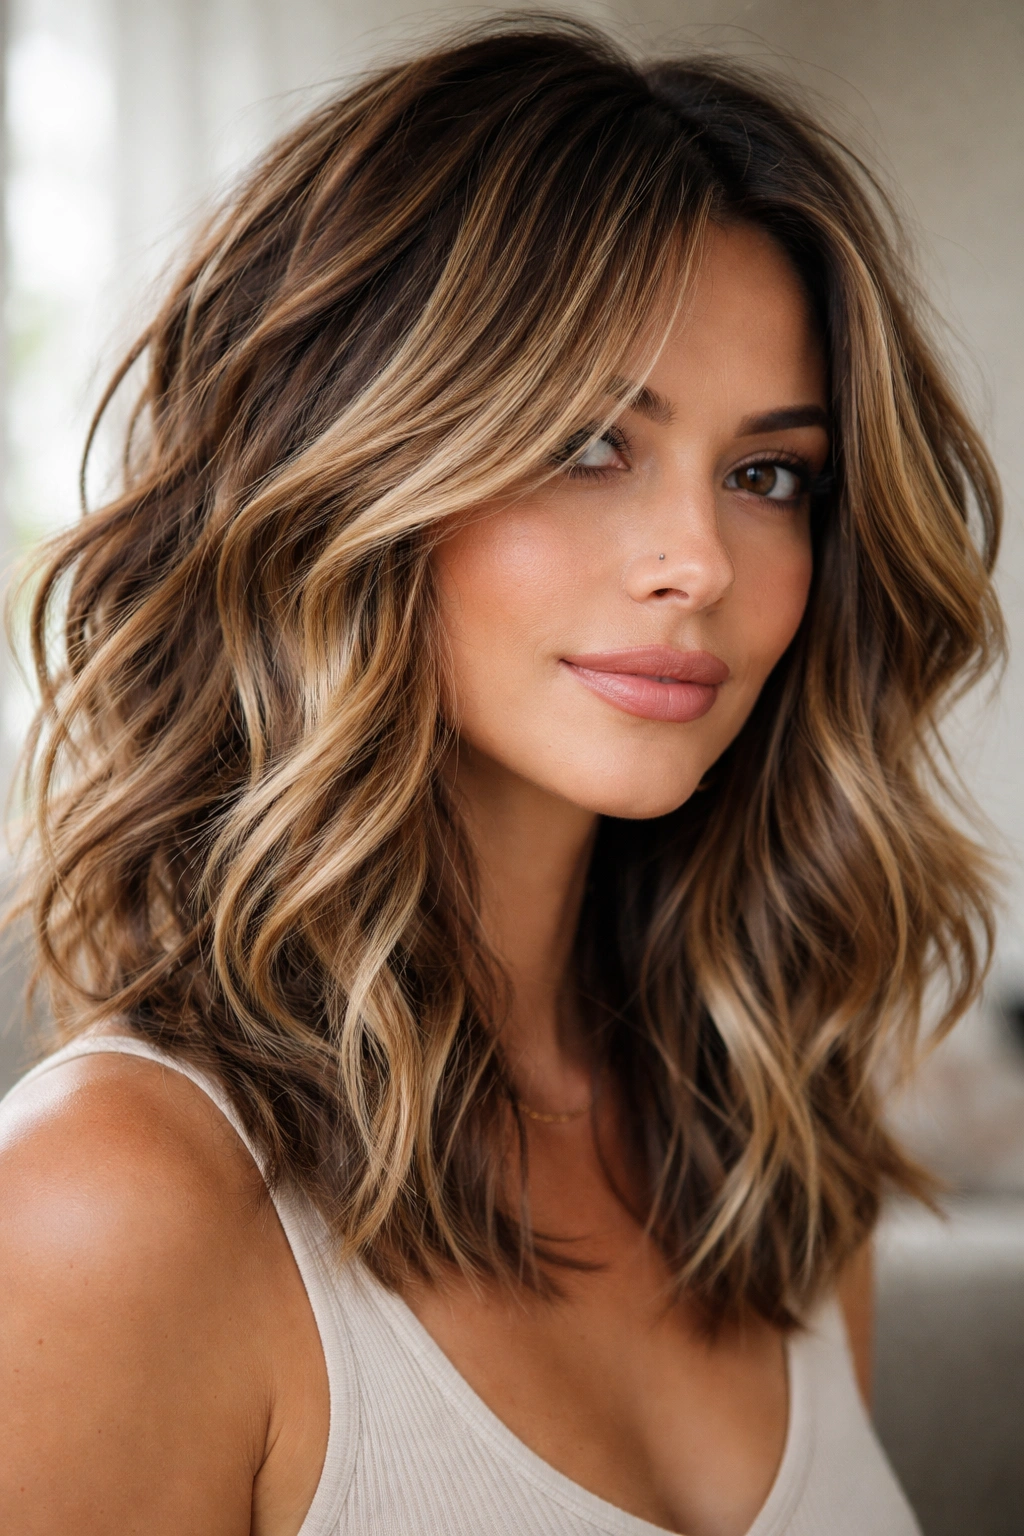
Choppy waves combined with strategically placed highlights create visual dimension through both cut and color. The choppy layers catch and reflect light differently depending on how the hair moves, and when highlights create lighter tones within those layers, the effect is dimensional and dynamic. This combination updates the classic “frosted tips” idea into something sophisticated, and the movement of waves shows off color variation much more effectively than straight hair.
What Makes Highlights and Waves Work Together
Waves create natural shadow and light as they move, and highlights amplify this effect by adding actual color variation into the mix. If your natural hair is a medium to dark tone, placing highlights in the shorter, choppy layers at the crown and around the face creates lift and brightness where it flatters. The interplay between wave movement and color variation makes hair look fuller and more textured than solid color alone. This style photographs beautifully and catches light in real-life settings—hair looks more dynamic and polished.
Achieving This Look
- Start with a choppy, layered cut designed to move and catch light
- Ask your colorist for highlights through the shorter, choppy layers and around face-framing pieces
- Balayage or hand-painted placement looks more natural and blends better as hair grows than foil highlights
- Style waves with a curling iron to maximize the interaction between color and movement
- Use a color-safe, hydrating shampoo because highlights require more moisture
- Deep conditioning treatments help highlighted hair stay shiny and prevent dryness
- The interaction between waves and highlights looks best with consistent, polished styling
Pro tip: This combination works especially well on naturally textured or wavy hair because the color sits naturally within the wave pattern.
7. Romantic Vintage Waves
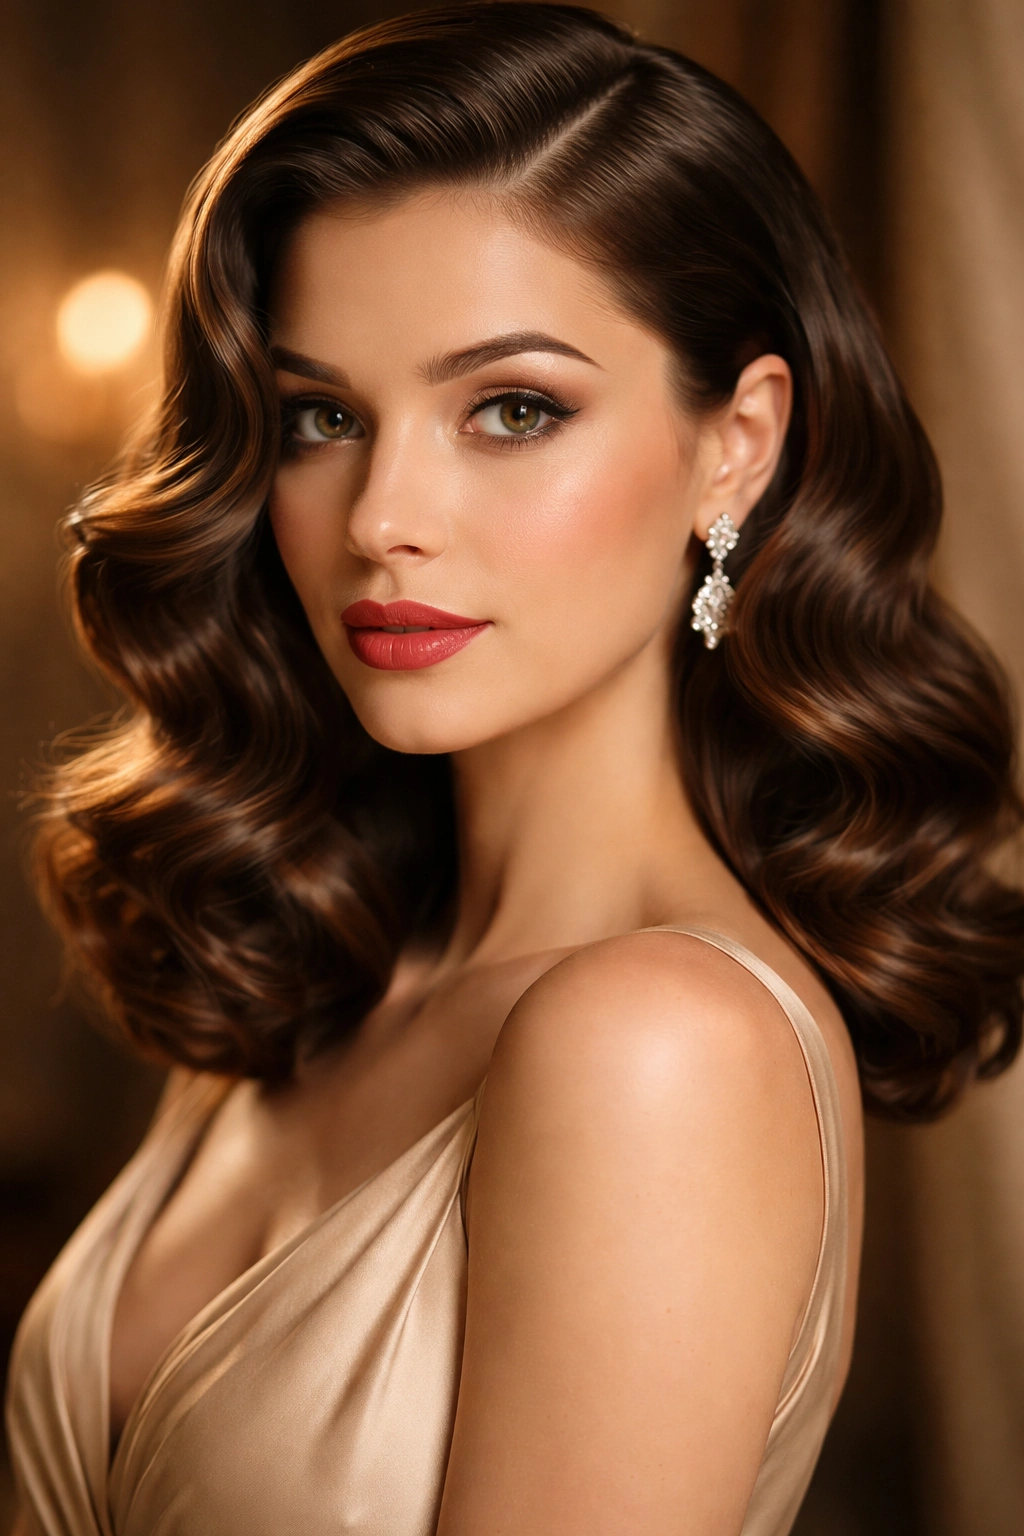
Romantic vintage waves are the carefully crafted, feminine waves that look like they came straight from a 1940s Hollywood starlet or a romantic film. These are defined, precise waves with clear peaks and valleys, typically set with a light hold that allows them to move softly but maintains their shape. There’s nothing accidental about this look—it’s intentional, polished, and unapologetically feminine.
Why Romantic Vintage Waves Feel Timeless
This style flatters nearly every face shape and skin tone because the soft, face-framing movement is inherently flattering. The precise wave pattern reads as sophisticated and intentional without looking overdone or costume-y. Vintage waves work beautifully in professional settings, at special events, or anywhere you want hair that looks genuinely beautiful and well-cared-for. The style has longevity too—it’s been flattering for decades and continues to be relevant.
Creating Romantic Vintage Waves
- Blow-dry hair smooth and straight as a base for precise wave setting
- Section hair into 2-inch subsections and curl each with a 1.5-inch curling iron, holding each curl for a full 10 seconds
- For true vintage styling, use large pin curls or roller-set hair while damp and let it dry completely
- Once curls cool, gently unwind them and finger-comb or brush softly to create waves rather than ringlets
- Use a light hairspray that holds without flaking or feeling stiff
- This style takes 20-30 minutes of daily styling to maintain the precise wave pattern
- This is absolutely a special-occasion look rather than everyday wear for most people
Worth knowing: The longer you hold curls or keep them in rollers, the longer-lasting the waves will be, so vintage-wave experts often curl while their hair is quite damp and let it fully dry.
8. Undone Waves
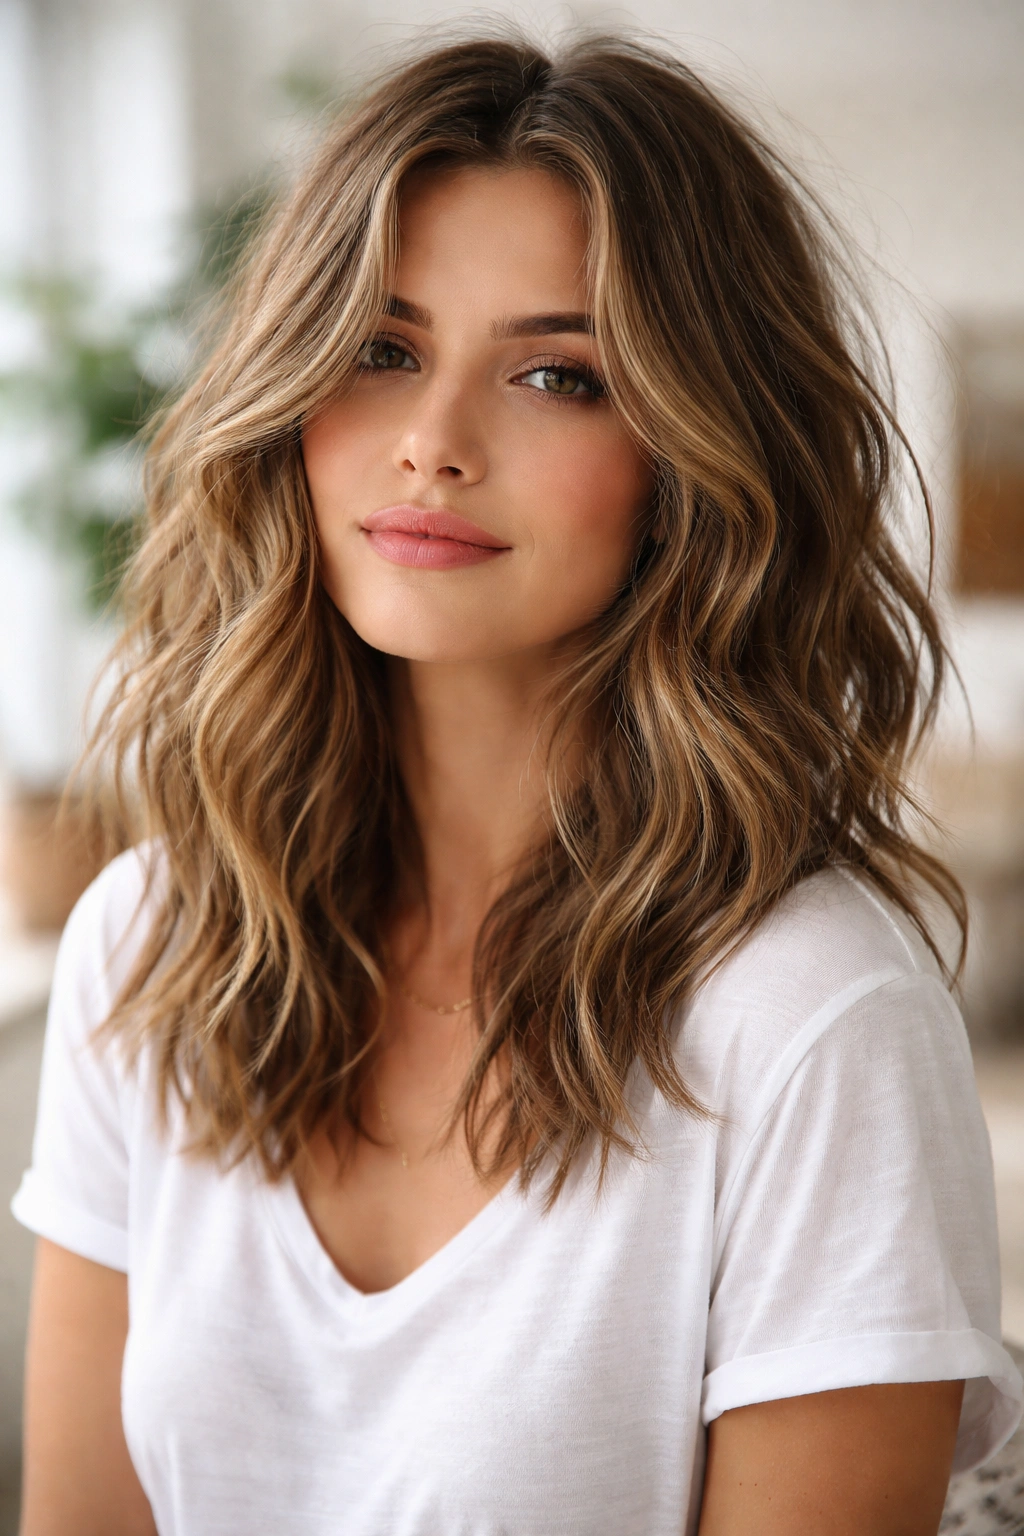
Undone waves are deliberately imperfect—pieces that fall at slightly different angles, waves that aren’t consistent, texture that looks like you didn’t try. The paradox is that this casual, unfinished aesthetic requires intentionality to achieve. This look works beautifully on medium-length hair because there’s enough length to show movement without so much length that the style looks sloppy.
The Appeal of Looking Like You Didn’t Try
Undone waves read as effortless and confident because they signal that you’re not overly concerned with perfection. This style flatters people who work in creative fields or prefer a more relaxed aesthetic. The imperfection actually makes hair look more interesting—consistency can sometimes feel boring, while variation catches the eye. For people who naturally have some waviness in their hair, undone waves are often just their hair with minimal effort, making this surprisingly low-maintenance.
Styling for the Undone Effect
- Work a light texturizing spray or dry shampoo through damp or dry hair
- Curl random sections with a 1-inch curling iron, not in a consistent pattern
- Leave some sections uncurled so the waves look unintentional
- Don’t brush through curls—just run your fingers through to create piece-y texture
- Use a light-hold spray that doesn’t make hair feel stiff
- This style actually looks better if not every wave is perfect or matching
- Air-drying after applying texturizing spray often gives you the right casual texture
Insider note: If you have any natural wave pattern in your hair, undone waves might be your hair’s default look with minimal styling required.
9. Face-Framing Waves
Face-framing waves focus movement and texture specifically around the face, where they have the most impact on how your features appear. Shorter, face-framing layers are cut in deliberately, and these pieces are styled with slightly tighter or more defined waves than the rest of the hair. The result is that your face is surrounded by soft, flattering movement while the back and length of your hair can be more casual.
Why Face-Framing Works
Face-framing waves create an instant softening effect because they sit right where they can catch light and create shadow around your features. This technique is especially flattering for people with angular or prominent features because the waves add softness. If you have a longer, narrower face, face-framing waves create width and draw focus inward. The strategic placement means you can use styling effort where it shows most rather than styling all your hair consistently.
Creating Face-Framing Waves
- Ask your stylist for shorter, choppy layers specifically around your face and temples
- Blow-dry these pieces with a round brush, focusing on creating volume and movement at the roots
- Curl face-framing layers with a 1-inch or 1.25-inch curling iron, wrapping the iron to direct waves away from the face
- Curl other hair loosely for texture, but face-framing pieces can have more defined waves
- Apply a volumizing mousse at the roots before blow-drying to give face-framing pieces more lift
- Use a light hairspray to keep face-framing pieces in place throughout the day
- This style looks best with daily styling of at least the face-framing layers
Pro tip: If you have fine or thin hair, focusing your styling effort on face-framing layers means you’re not weighing down the entire head—just the pieces that matter most.
10. Bouncy Waves
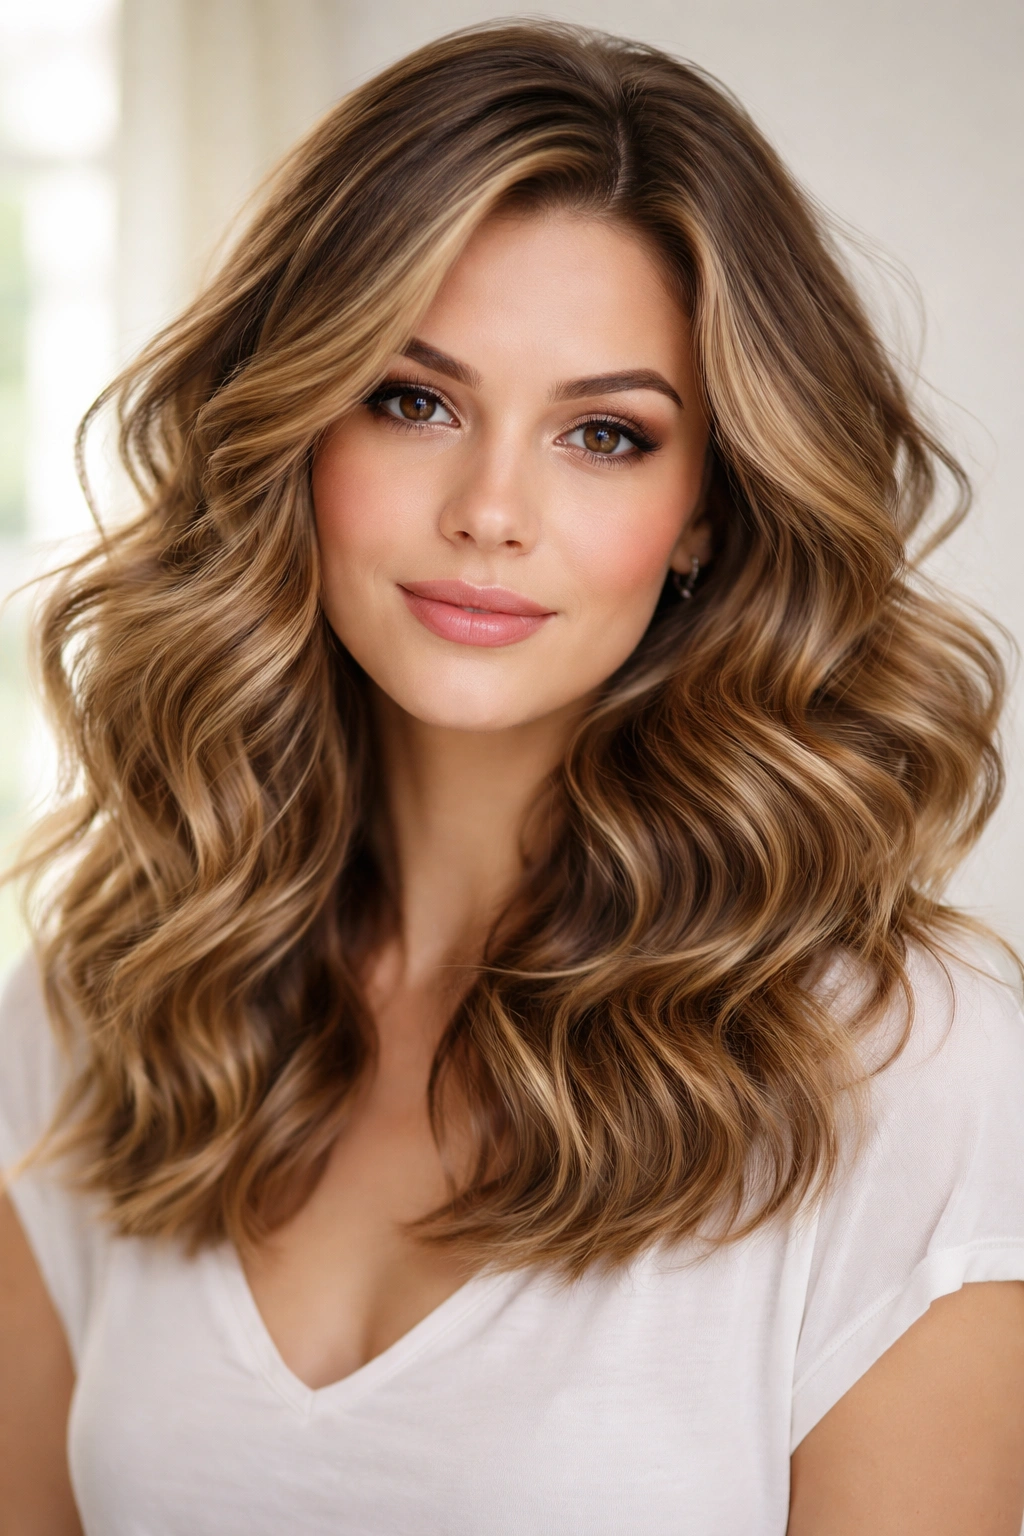
Bouncy waves are energetic, spring-like waves with movement and lift—the opposite of flat or limp hair. This style features definite wave structure with height at the roots and consistent bounce throughout the length. Bouncy waves read as youthful, healthy, and full of life, and they work beautifully at any age when the overall look is polished rather than costume-y.
What Creates Bounce in Waves
Bounce comes from a combination of technique: hot tools create stronger waves that last longer, volumizing products at the roots create lift, and the right curl direction amplifies movement. Bouncy waves typically require heat styling rather than air-drying alone—you’re actively creating and setting the curl pattern. If you have fine or thin hair, bouncy waves are especially flattering because they create visual fullness and movement. If you have thick or dense hair, bouncy waves showcase the volume you naturally have.
How to Create Bouncy Waves
- Apply a volumizing mousse to damp roots and blow-dry to lock in lift
- Use a 1-inch curling iron and hold each curl for 8-10 seconds for a strong curl base
- Curl away from the face on one side of your head, toward the face on the other, for natural dimension
- Immediately run your fingers through cooled curls to create waves rather than ringlets
- Use a light hairspray that holds bounce without flaking
- Sleep in braids or on a silk pillowcase to refresh bouncy waves the next day
- This style looks best with styling every day or every other day
Worth knowing: The tighter you curl and the longer you hold the curl, the longer bounce will last—curling looser gives you bounce that might fall out by evening.
11. Textured Waves with Beads or Accessories
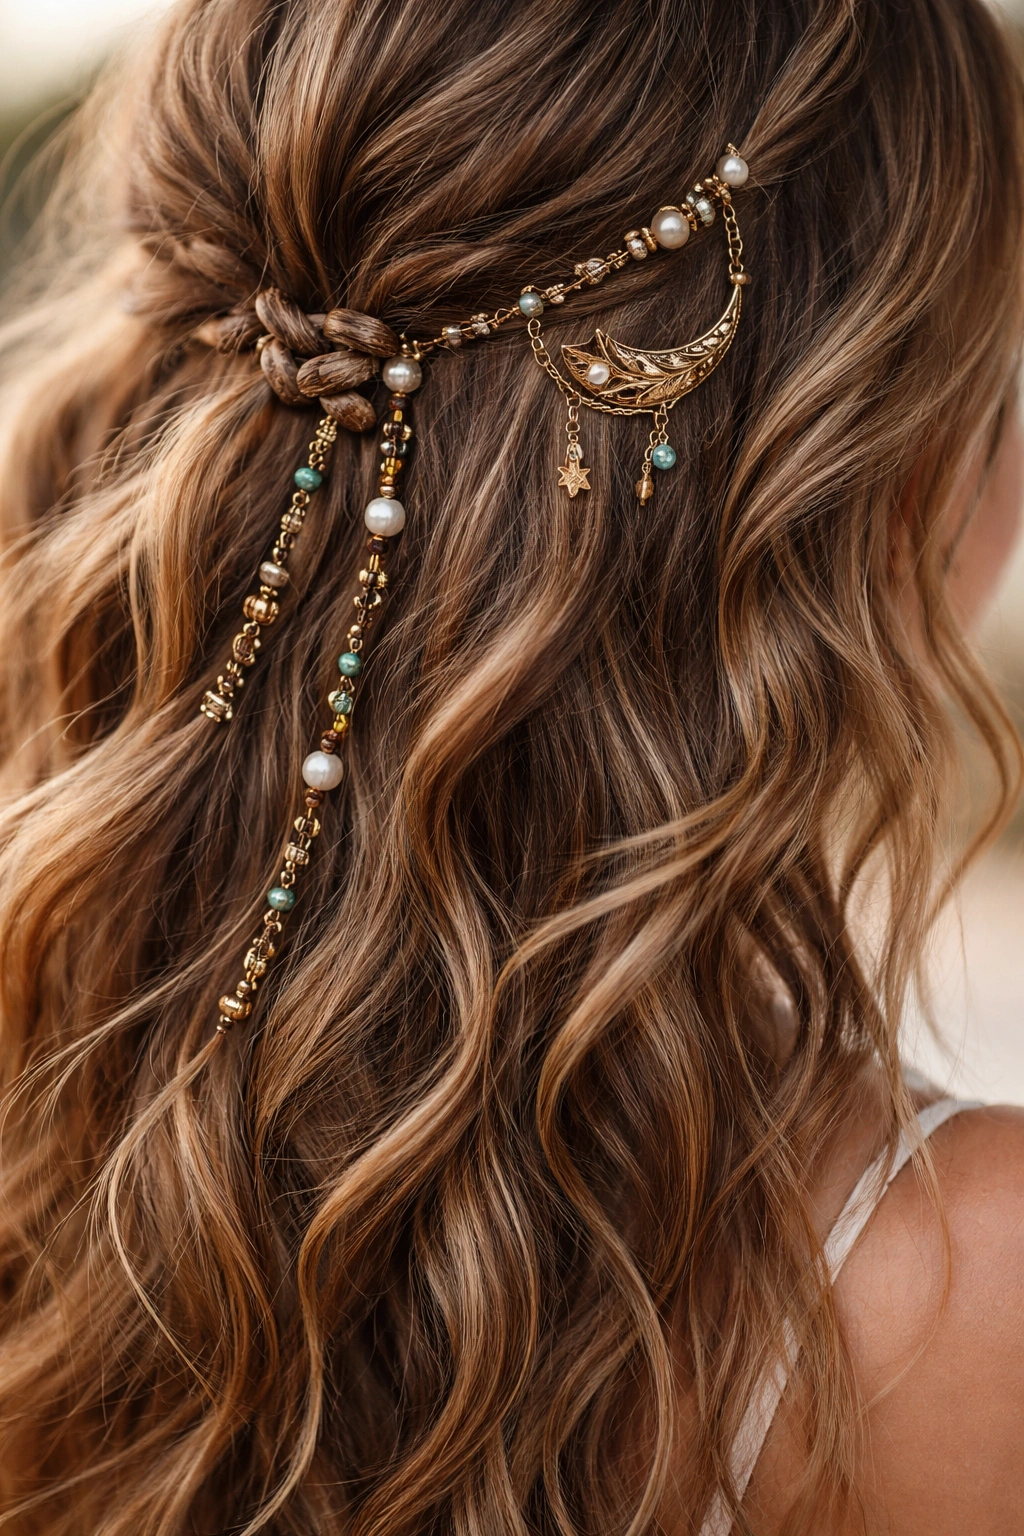
Textured waves combined with beads, clips, or other hair accessories create a boho, artistic vibe that’s become increasingly popular. The waves provide the texture base, and accessories add focal points and personality. This look works especially well on people who love expressing themselves through their styling and aren’t afraid of a slightly more dramatic approach.
The Style Impact of Hair Accessories
Beads woven into sections of hair or scattered throughout add weight and visual interest to waves. Metal clips, claw clips, or decorative pins can be functional and aesthetic at once. Accessories draw the eye to specific parts of your hair and break up solid wave patterns into more interesting sections. Incorporating accessories means your styling can change based on mood or occasion—the same waves look different with different accessories.
Incorporating Accessories into Textured Waves
- Style your base waves first using your normal method—heat styling or air-drying with product
- Add beads by wrapping small sections of hair, sliding beads down onto the wrapped sections, and securing
- Use decorative clips or pins to section and hold pieces, or place them strategically for visual interest
- Metallic accessories (gold, silver, rose gold) change the vibe—gold feels warmer and more bohemian; silver feels cooler and more modern
- Smaller accessories scattered throughout feel more intentional than one large statement piece
- This style reads as personal and artistic, so there’s room for your own aesthetic choices
- Accessories should be secure enough not to slip or fall during the day
Insider note: This style works beautifully with medium-length hair because the length gives you room to section and accessorize without looking overcrowded.
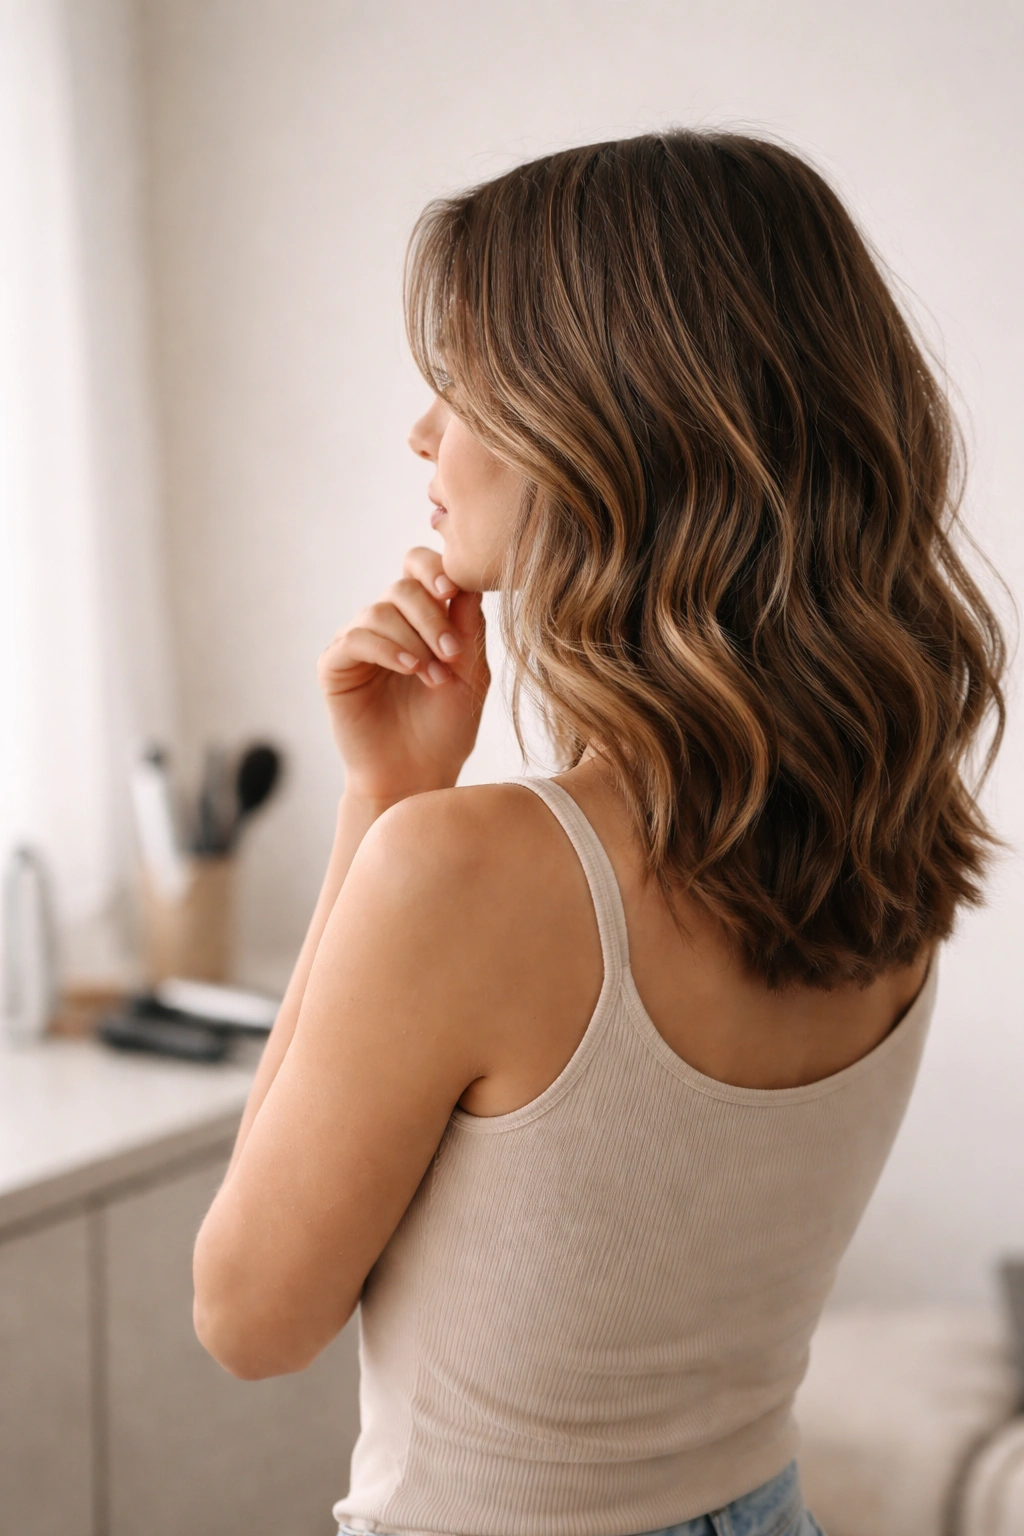
12. Half-Up Wavy Style
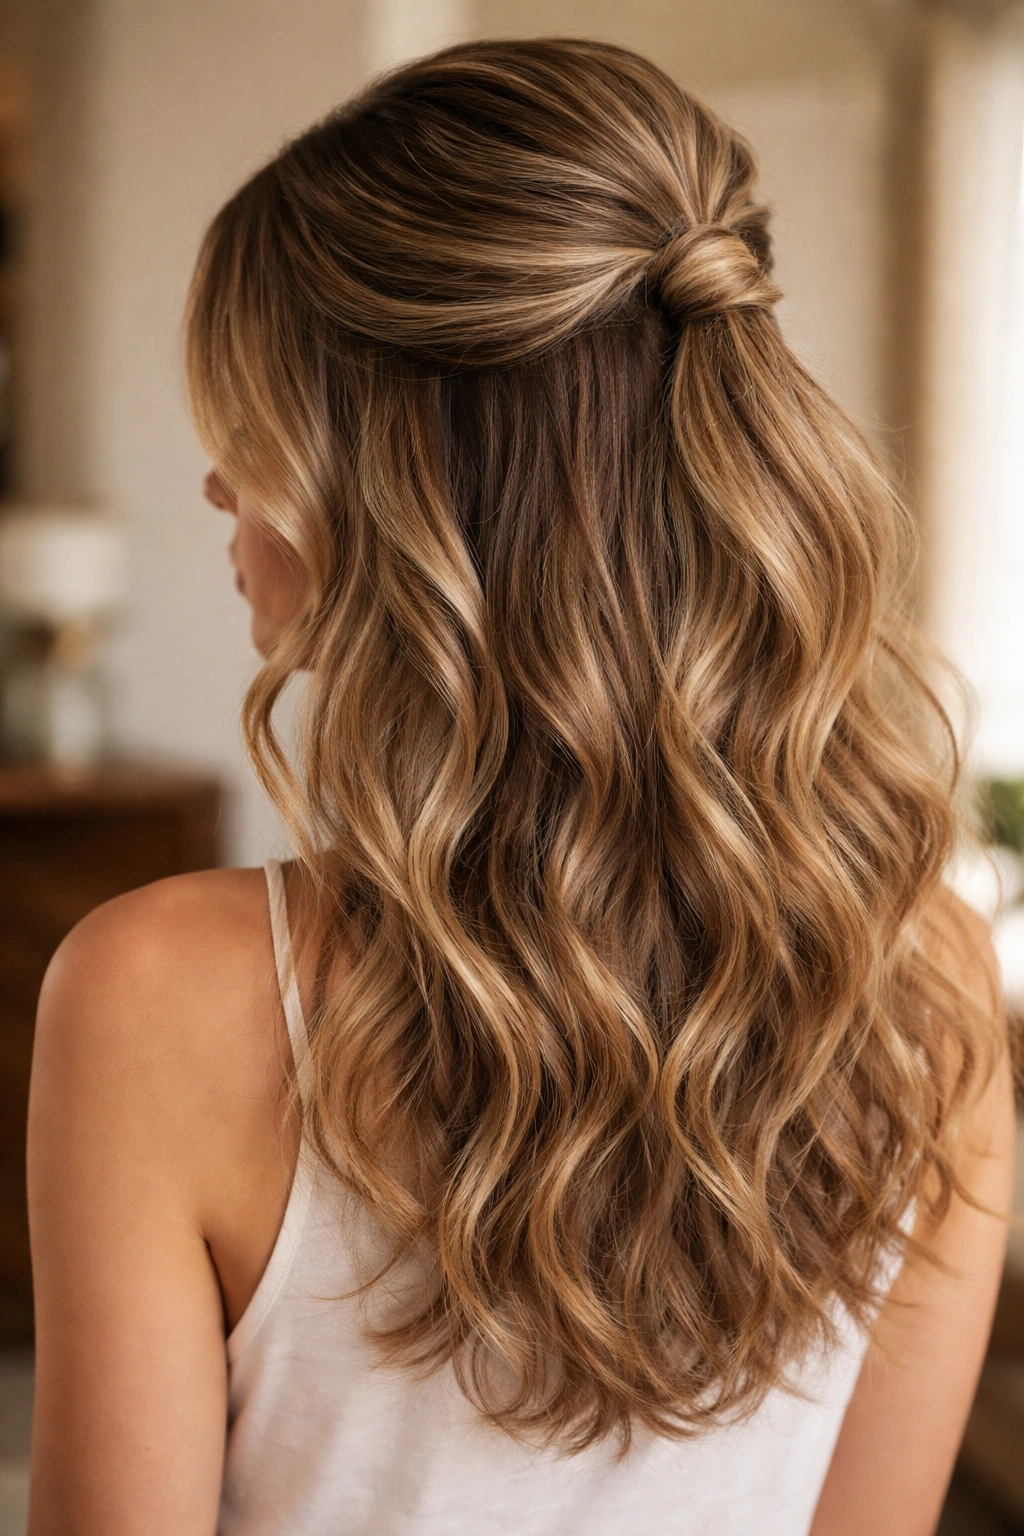
A half-up wavy style—hair mostly down with sections from the crown gathered back and secured—combines the fullness and movement of down hair with the sophistication of an updo. Waves throughout the hair enhance the movement, and the gathered sections keep hair out of your face while maintaining a relaxed, intentional aesthetic. This style works beautifully for work, casual outings, or events where you want something more polished than completely down.
Why Half-Up Waves Work
The half-up style elongates your face by opening up your forehead and creating height at the crown. Waves throughout the down section add movement and interest. This style accommodates different hair lengths and textures well because the structure is flexible—you can gather thin or thick hair, short or longer sections, depending on what works for your hair. It reads as more intentional than hair entirely down but more casual than a full updo, making it adaptable to many settings.
Creating a Half-Up Wavy Style
- Curl or wave your entire head first so everything has consistent texture
- Section hair from ear to ear across the crown, creating a horseshoe shape
- Gather this crown section into a ponytail or bun at the back of the crown
- Secure with a hair tie, bobby pins, or a decorative clip
- Pull a few small pieces from the secured section to create face-framing softness
- Smooth the gathered section with a brush if you want polish, or leave it slightly textured and loose
- Let waves flow from where the gathered section starts down the back and sides
- This style takes 15-20 minutes depending on how much styling you’re doing first
Pro tip: A small, low bun at the base of your half-up gathers feels more sophisticated and intentional than a high ponytail in this style.
13. Wet-Look Waves
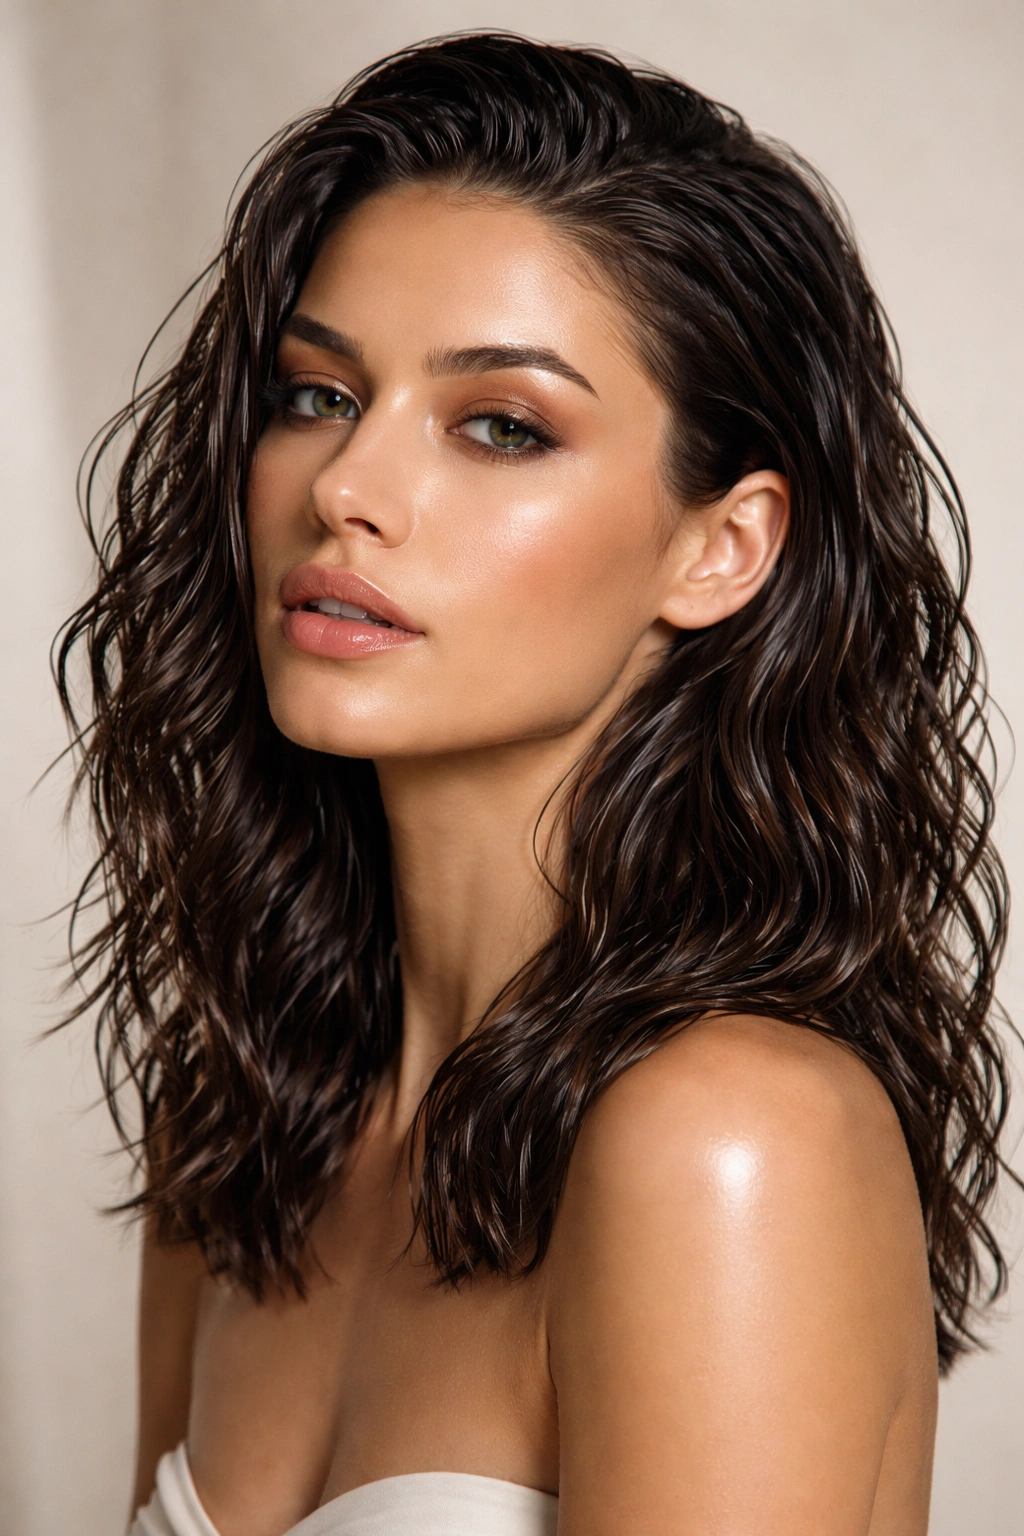
Wet-look waves appear shiny and slick, as though your hair is literally wet, but the structure is actually waves created with styling. This look combines smooth, defined waves with a glossy product finish that catches light dramatically. Wet-look waves are bold and attention-getting, working especially well on people with darker hair where the shine and definition show more clearly.
What Wet-Look Waves Communicate
This style reads as intentional, artistic, and fashion-forward—it’s not trying to blend in or look natural. The high-shine finish draws attention and makes a statement about your styling and confidence. On medium-length hair, wet-look waves have somewhere to move and show off—the length is long enough for the waves to be dramatic but short enough that the style doesn’t feel heavy. This look photographs beautifully and translates well to video or film.
Creating Wet-Look Waves
- Use a lightweight gel or mousse as your base product for hold
- Blow-dry with these products in your damp hair to create your wave foundation
- Curl sections with a curling iron to create defined waves
- Once curls cool, run your fingers through them very slightly—less than you would for other waves
- Apply a high-shine styling product like a glossing serum or lightweight oil over top
- The shine is crucial to the look, so use a product that’s genuinely shiny, not matte
- Smooth sections with your fingers or a fine-tooth comb to emphasize the slick quality
- This look requires daily styling and product application
Worth knowing: Wet-look waves work best on darker hair; on blonde or lighter hair, the glossy product can look greasy rather than intentional.
14. Spiral Waves
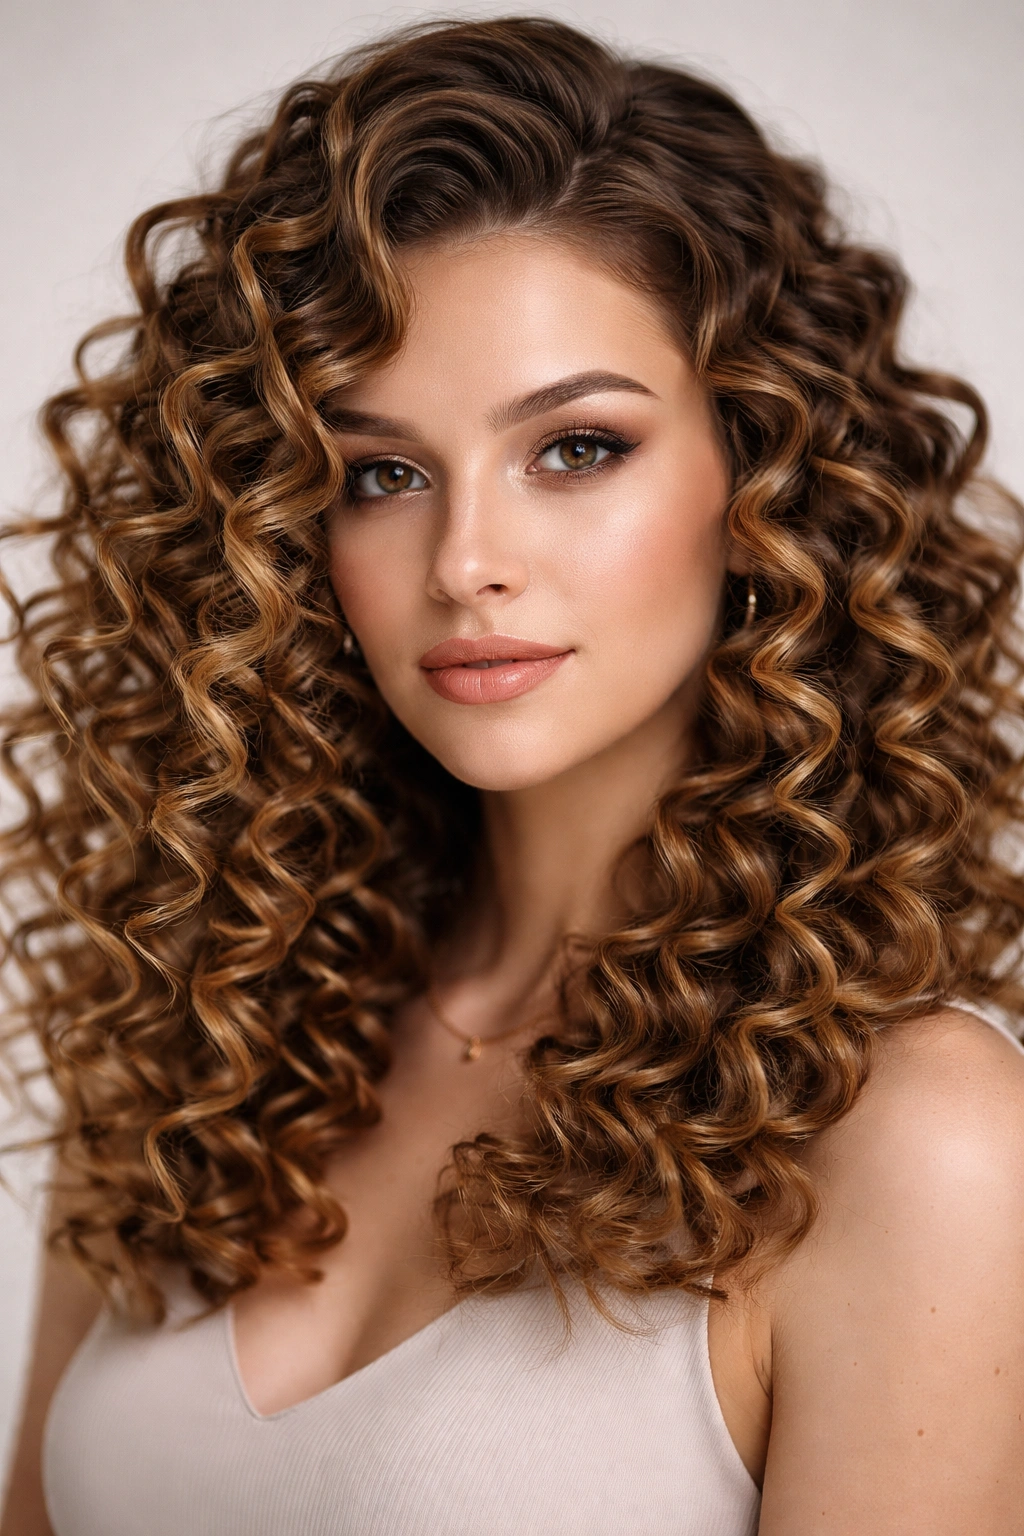
Spiral waves feature corkscrew-like curls that are more defined and bouncy than soft waves but more intentional than full ringlets. The spiral pattern winds in consistent directions, creating geometric, almost structured movement. This style works beautifully on people with naturally textured hair and also translates well when created with heat styling on straighter hair types.
The Visual Impact of Spiral Waves
Spiral waves create maximum movement and dimension because each curl reflects light individually. The structured yet bouncy quality reads as energetic and youthful. Unlike loose waves that might fall flat or lose shape, spirals maintain their pattern throughout the day. This style suits people who love their hair to be noticeable and aren’t going for understated or minimalist aesthetic.
Creating Spiral Waves
- Apply a curl-enhancing cream or mousse to damp hair at the roots and throughout
- Blow-dry using a diffuser attachment to enhance natural texture or begin creating shape
- Curl sections of hair with a 0.75-inch to 1-inch curling iron, wrapping the entire length
- Hold each curl tightly to the iron for 10-12 seconds so the spiral sets
- Wrap curls around the iron in the same direction throughout your head for consistency
- Let curls cool completely before releasing to set the spiral pattern
- Use a light hairspray to hold the spiral structure
- Sleep on braids or a silk pillowcase to preserve spiral waves
- This style looks better with daily refreshing of curls
Insider note: Tighter spirals hold longer than looser ones, so if your spirals are falling flat by afternoon, try wrapping more hair around the iron and holding longer.
15. Messy Textured Waves
Messy textured waves prioritize dimension and varied texture over a consistent wave pattern. Pieces of different lengths (created through layers) interact with waves in different ways, creating an intentionally chaotic, artistic effect. This look is modern and effortless-seeming, working beautifully on people who embrace imperfection as an aesthetic choice.
Why Messy Texture Works
This style celebrates individuality and personality because nothing about it is standardized or predictable. Messy textured waves work on most hair types and textures because the inherent “imperfection” is the whole point. People with naturally wavy or textured hair often achieve this look with minimal effort. Even if you’re heat-styling, the mess creates an interesting visual that’s more forgettable than perfect waves can be.
Styling Messy Textured Waves
- Apply a texturizing spray, sea salt spray, or lightweight texture cream to damp hair
- Blow-dry with a diffuser on low heat or air-dry for the most natural texture
- Curl random sections with a 1-inch curling iron if you want more defined texture
- Don’t curl everything consistently—leave some sections wavy and some pieces straighter
- Work your fingers through your hair to break up any cohesive wave pattern
- Use a matte-finish texturizing spray rather than glossy products to enhance the intentionally messy quality
- This style looks best when not overworked—restraint is actually part of the appeal
Pro tip: Messy textured waves look better in the second or third day after washing, when your natural oils have built up a bit and products are less fresh in your hair.
Final Thoughts
The beauty of choosing a medium wavy hairstyle is that you’re working with a length that’s genuinely versatile—long enough to showcase texture and movement, short enough that styling is manageable and maintenance doesn’t consume your life. Whether you’re drawn to carefully crafted romantic waves, deliberately undone texture, or something in between, there’s a medium wavy style that matches your lifestyle, face shape, and personal aesthetic.
The key to success with any of these styles is honest assessment of how much daily styling you’re willing to commit to. Some styles, like beachy waves or undone texture, work beautifully on second-day hair and require minimal daily effort. Others, like romantic vintage waves or bouncy styles, demand consistent heat-styling and product application. Neither approach is wrong—they’re just different commitments. Find the style that excites you visually and then make sure it’s realistic for how you actually spend your mornings.
Your medium wavy hairstyle should feel like an extension of who you are, not a project you dread maintaining. The right cut and style makes mornings easier because your hair works with you rather than against you. Consider consulting with a stylist who specializes in wavy, textured hair—they’ll understand how to cut and advise based on your specific hair type and texture rather than just following a picture. The perfect medium wavy style is out there waiting, and now you have the knowledge to find it.