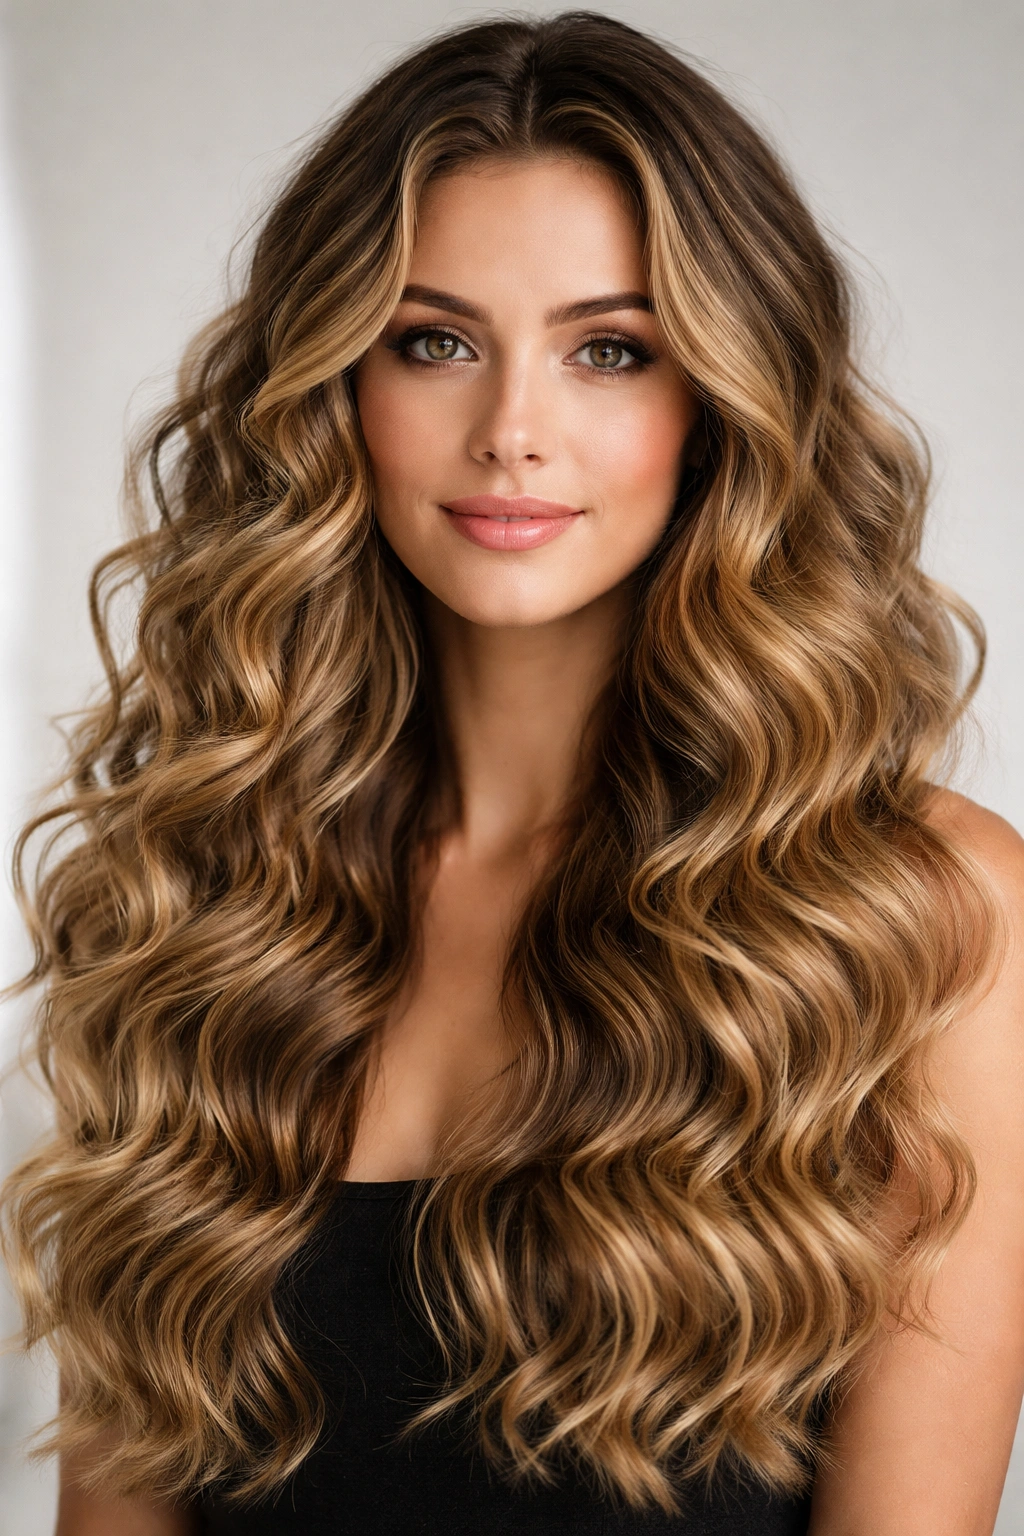
Wavy hair has this magical quality—it sits perfectly between effortlessly casual and polished put-together, making it endlessly versatile for any occasion or face shape. Whether your waves are naturally textured or you’re creating them with styling tools, the range of possibilities is genuinely exciting. The key is finding the right wavy hairstyle that complements your hair type, lifestyle, and personal aesthetic, because what looks stunning on someone else might need tweaking to feel authentically you.
The beauty of wavy hairstyles is that they’re low-pressure in a way that tighter curls or stick-straight hair sometimes aren’t. Waves forgive minor styling mishaps, work beautifully whether you brush them out for softness or scrunch them for definition, and look intentional even on days when your styling efforts are minimal. From beachy, undone texture to sculpted waves with serious shape, there’s a wavy hairstyle out there that’ll make you excited to style your hair.
Let me walk you through fifteen wavy hairstyles that deserve a spot in your hair rotation. Some require heat tools and deliberate technique, others lean into your natural texture, and a few hit that sweet spot of looking effortless while still feeling special. The ones that catch your eye—those are the ones worth committing to trying.
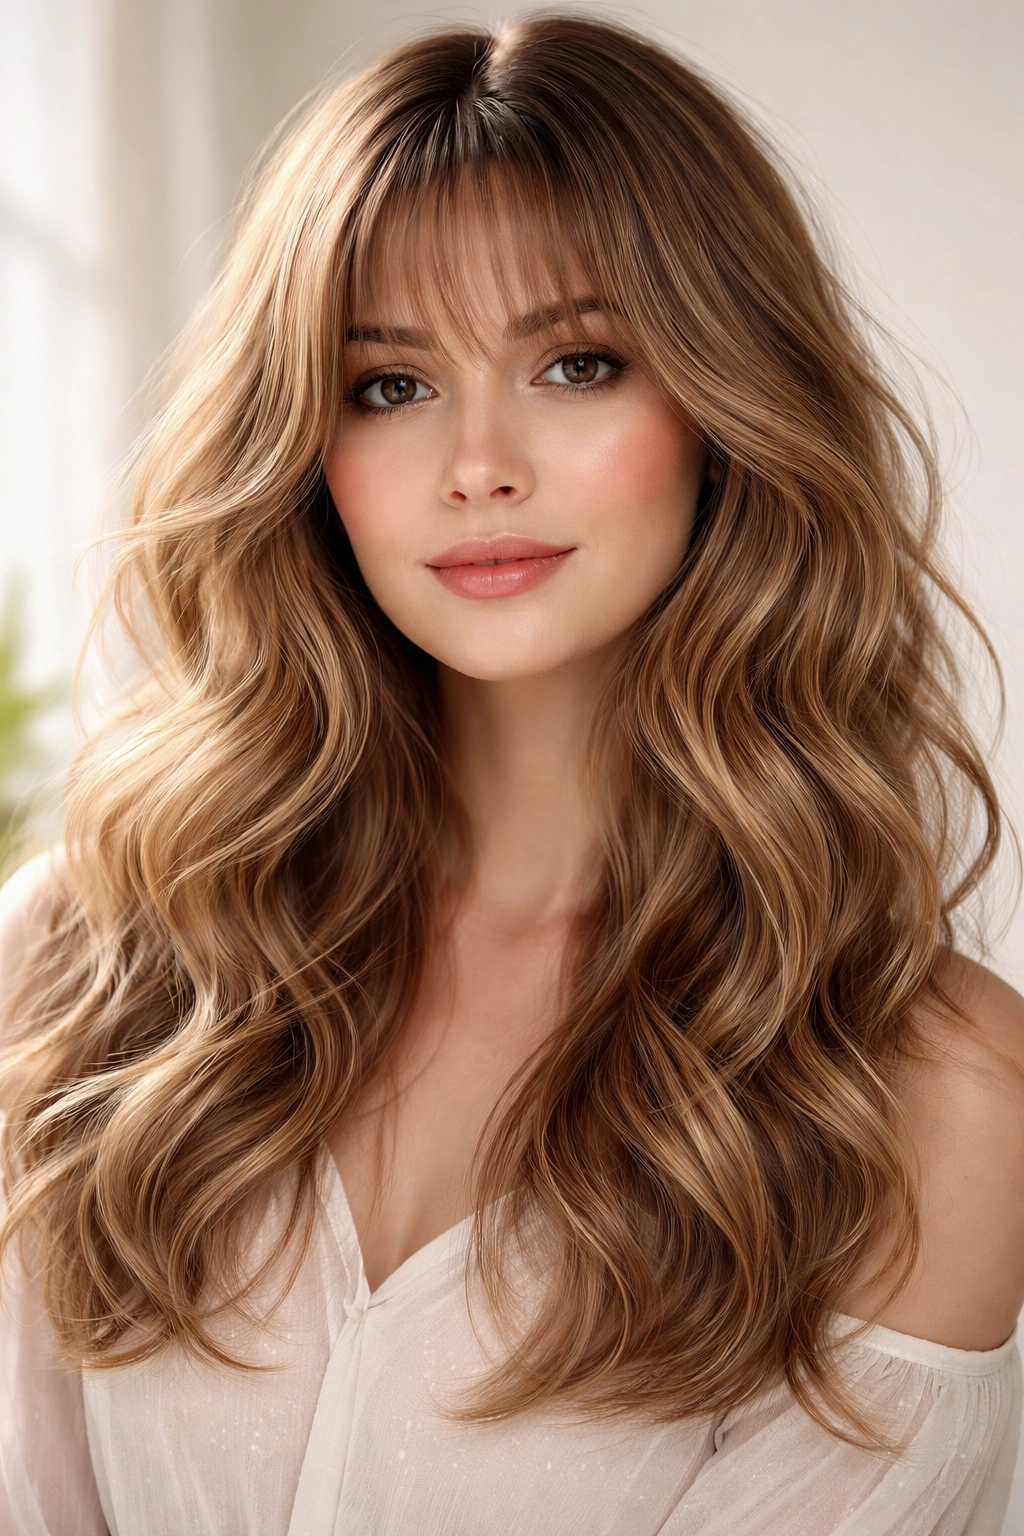
1. Beachy Waves with Face-Framing Layers
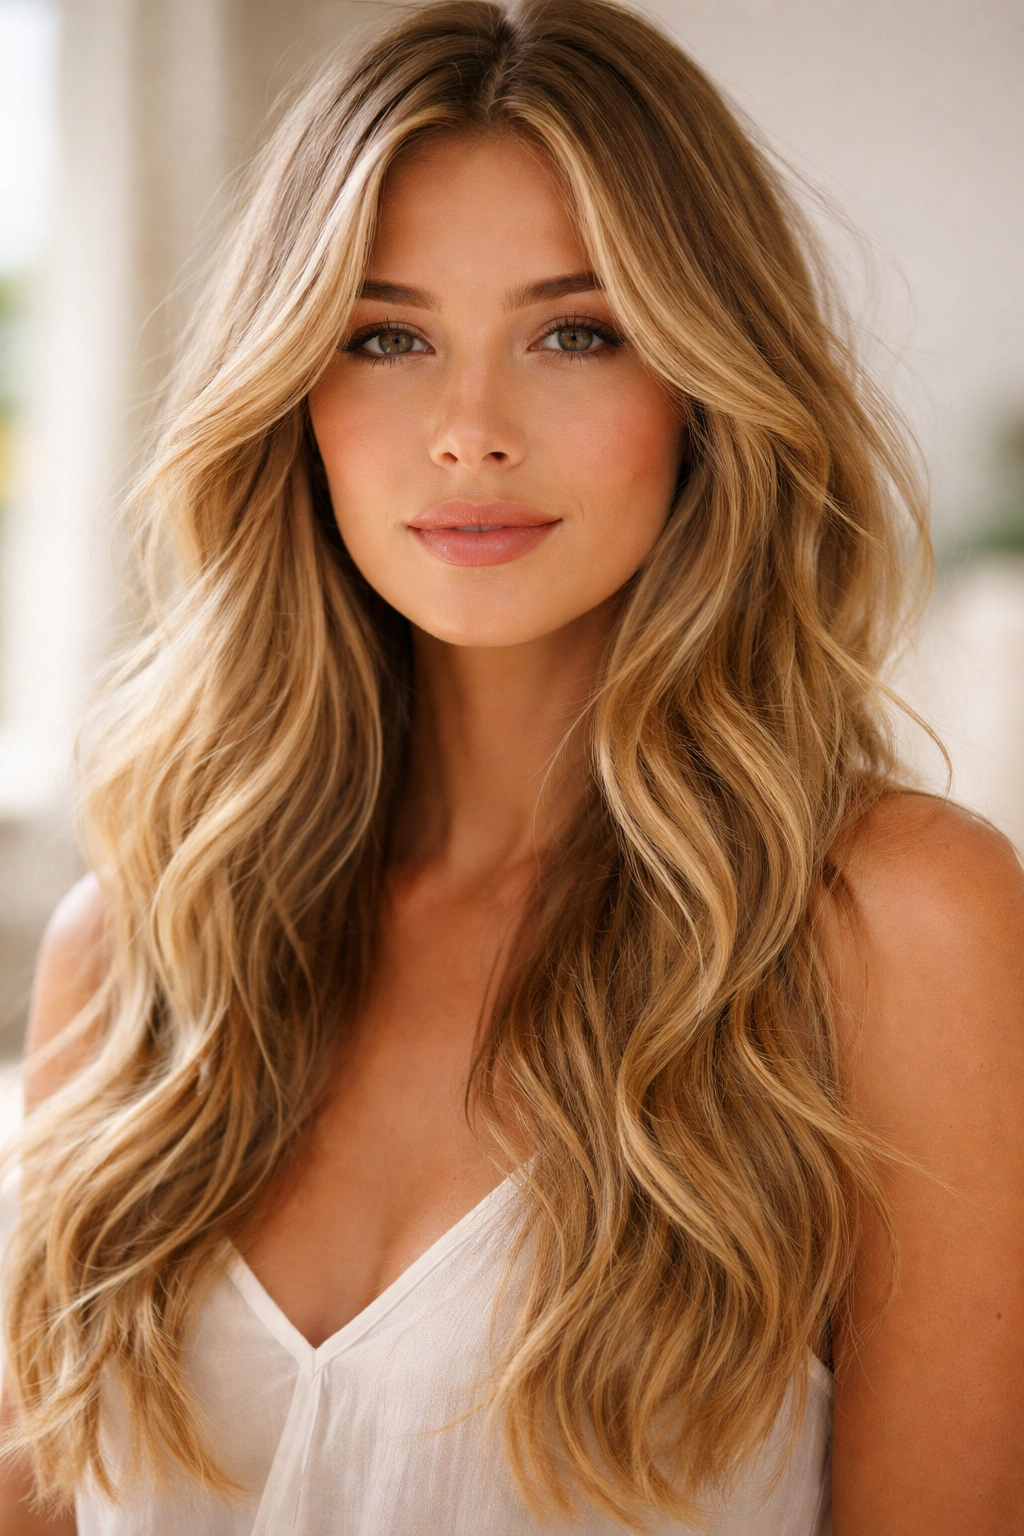
Beachy waves are the wavy hairstyle that feels like you just came back from the coast, all soft and undone without looking unkempt. Face-framing layers amplify this effect by adding movement around your cheeks and temples, creating dimension that even out larger face shapes and add softness around angular features. This combination works on shoulder-length hair all the way down to waist-length lengths, and it’s genuinely forgiving on most hair types.
Why This Style Absolutely Works
The magic of beachy waves with face-framing layers is that you get visual interest without requiring precision. The shorter, frame-hugging pieces move independently from the rest of your hair, creating a natural, lived-in quality that actually hides imperfections rather than highlighting them. This is the hairstyle that looks better on day two or three of styling than it does fresh.
What You Need to Know
- Face-framing layers should start around your cheekbone or slightly above—too short and they look disconnected, too long and they don’t actually frame anything
- The underneath layers of your hair should have more wave or curl than the top layers for that effortless-looking texture gradient
- This style needs a texturizing product (sea salt spray, texturizing paste, or a lightweight mousse) to define waves and prevent them from falling flat
- Beachy waves look intentional with warmer, honey-blonde or caramel tones, but work beautifully on any base color
- Sleeping in loose braids, using a sea salt spray before bed, or diffusing waves with a blow dryer will extend your styling between wash days
Pro tip: Don’t get face-framing layers that are too short—aim for them to hit at least jaw-length so they have enough weight to wave naturally rather than just flip out sideways.
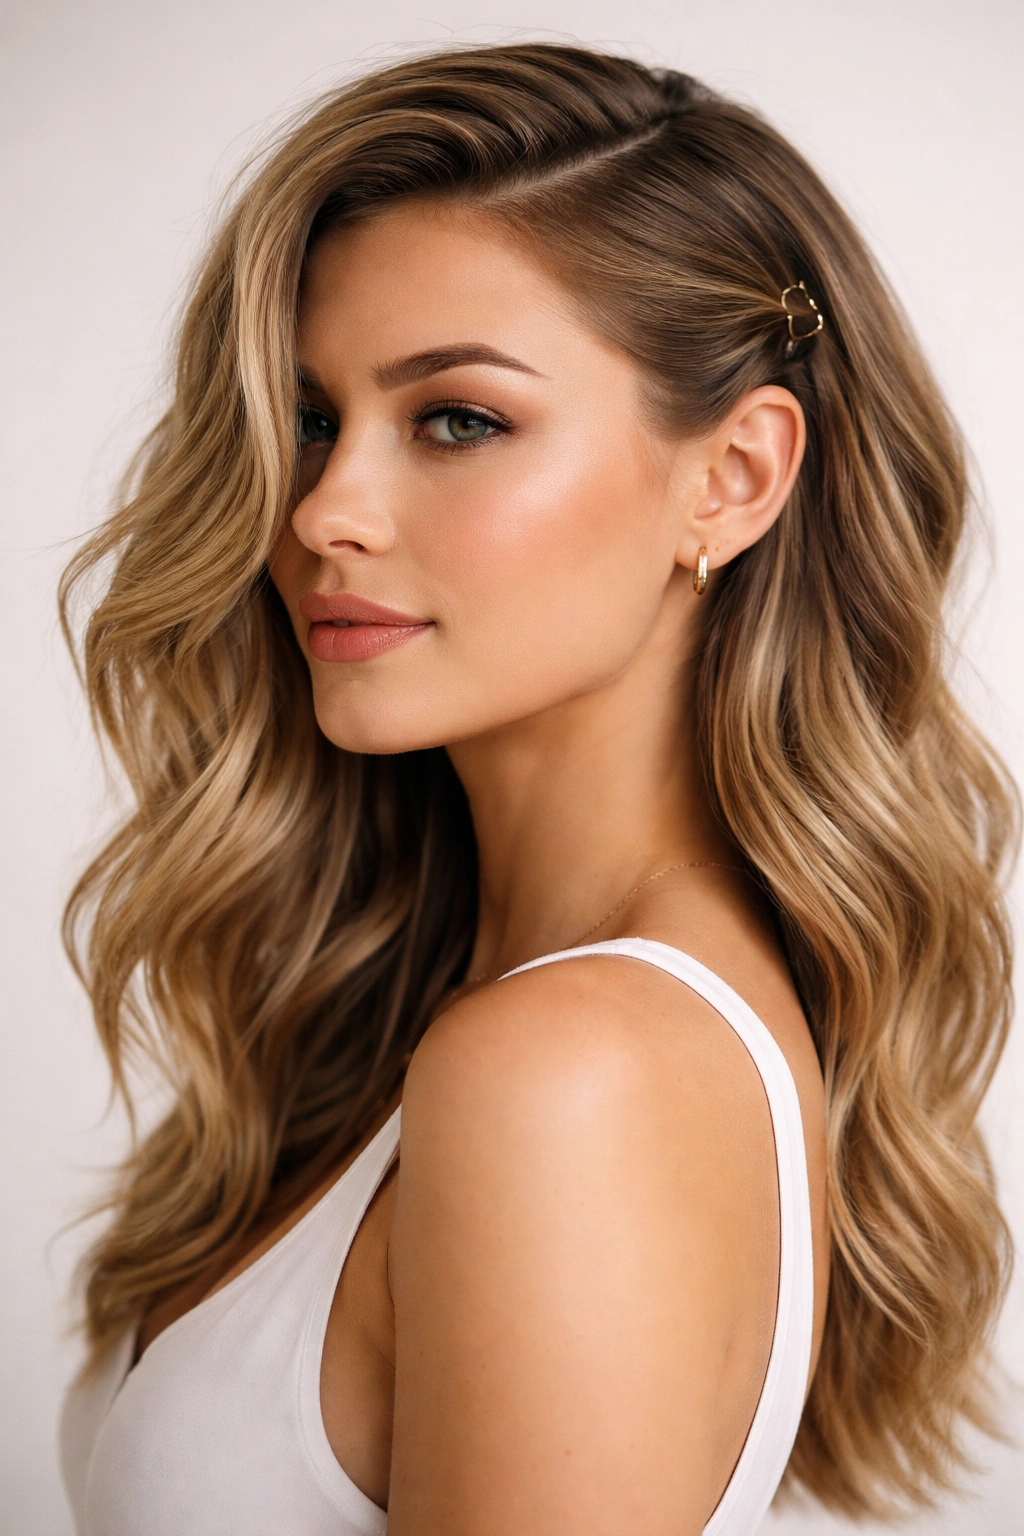
2. Sleek Side-Part Waves
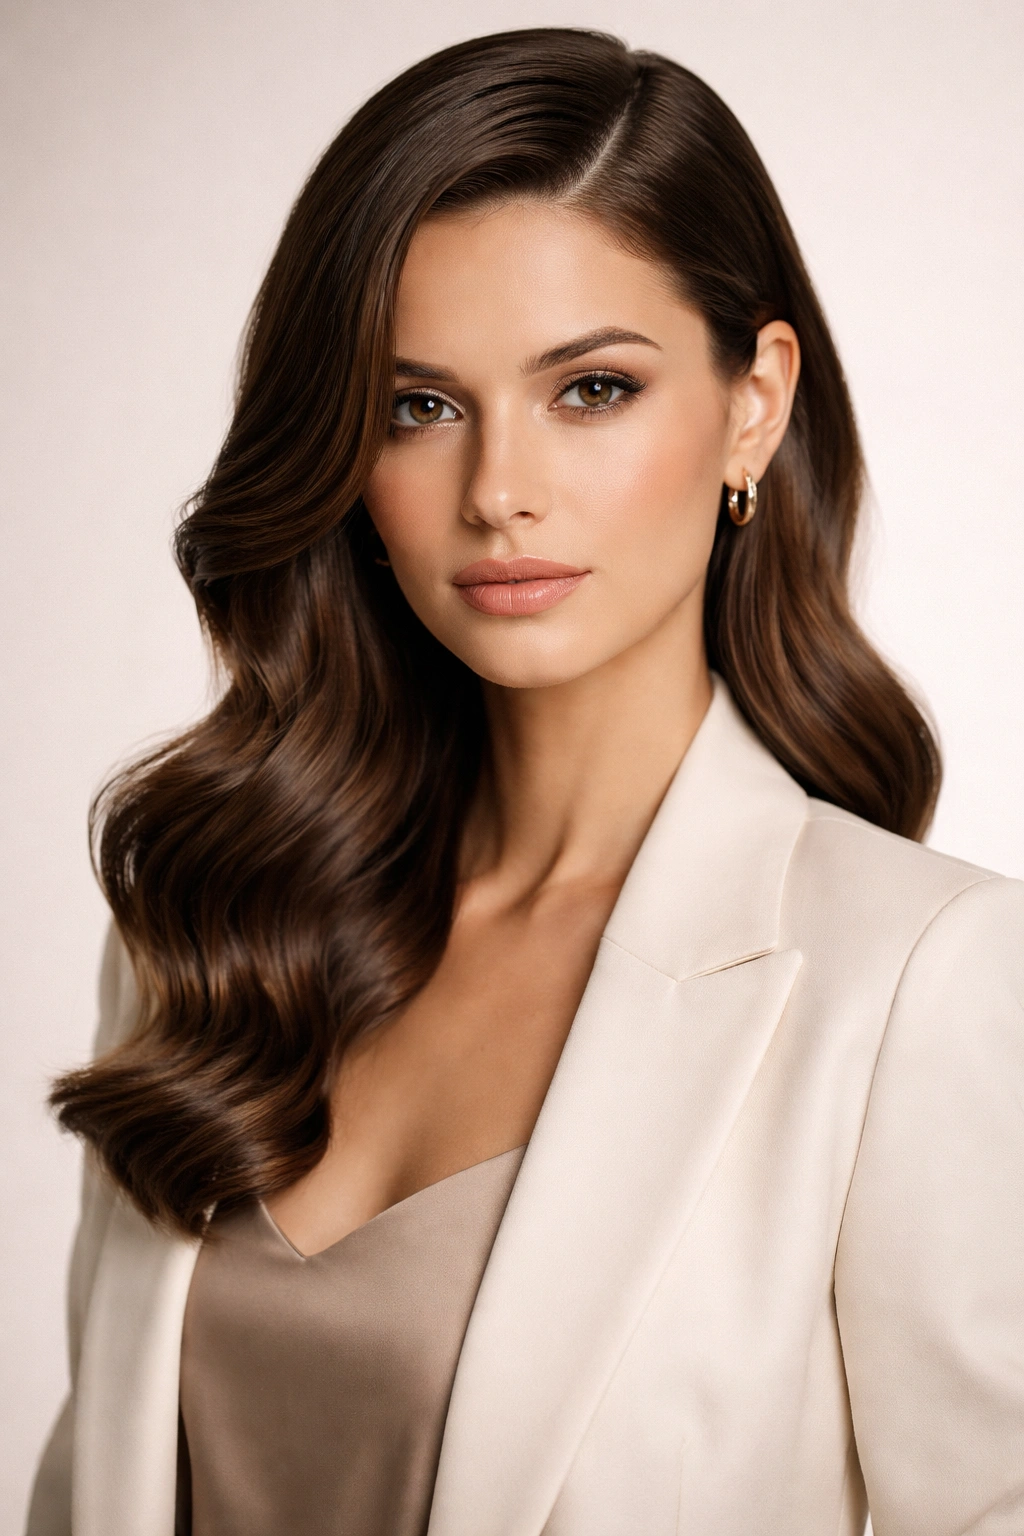
Side-part waves are wavy hairstyles with serious polish, ideal when you want your waves to look intentional and sculpted rather than casual. A deep side part creates asymmetry that’s inherently flattering, while uniform waves across your head from roots to ends read as sophisticated. This style works beautifully for work environments, events, or any time you want waves that feel elevated.
What Makes the Side Part Essential
The depth of your side part matters more than most people realize. A dramatic side part—creating a clear line that separates roughly 60% of your hair from 40%—creates visual balance for most face shapes and adds instant polish. The waves should be consistent in size and direction, all moving in the same direction down the head (toward the smaller side of the part, typically) for a cohesive, intentional look.
How to Execute This Style
- Start with either a 1.25-inch curling iron or a flat iron to create waves, depending on whether you prefer looser or tighter definition
- Section your hair into four quadrants and wave each section separately, keeping wave direction consistent
- Waves should be roughly 1-2 inches wide—thinner waves read as tighter curls, thicker waves read as softer bends
- Use a flexible hold hairspray that won’t make waves feel stiff or crunchy
- A side-part wave style lasts longer if you pin it while it cools (using bobby pins clipped parallel to the scalp) before removing them once the hair has fully cooled
Worth knowing: This hairstyle photographs beautifully and feels especially elevated on longer hair (mid-back length or longer), though it works on shoulder-length hair too.
3. Tousled Waves with Volume at the Crown
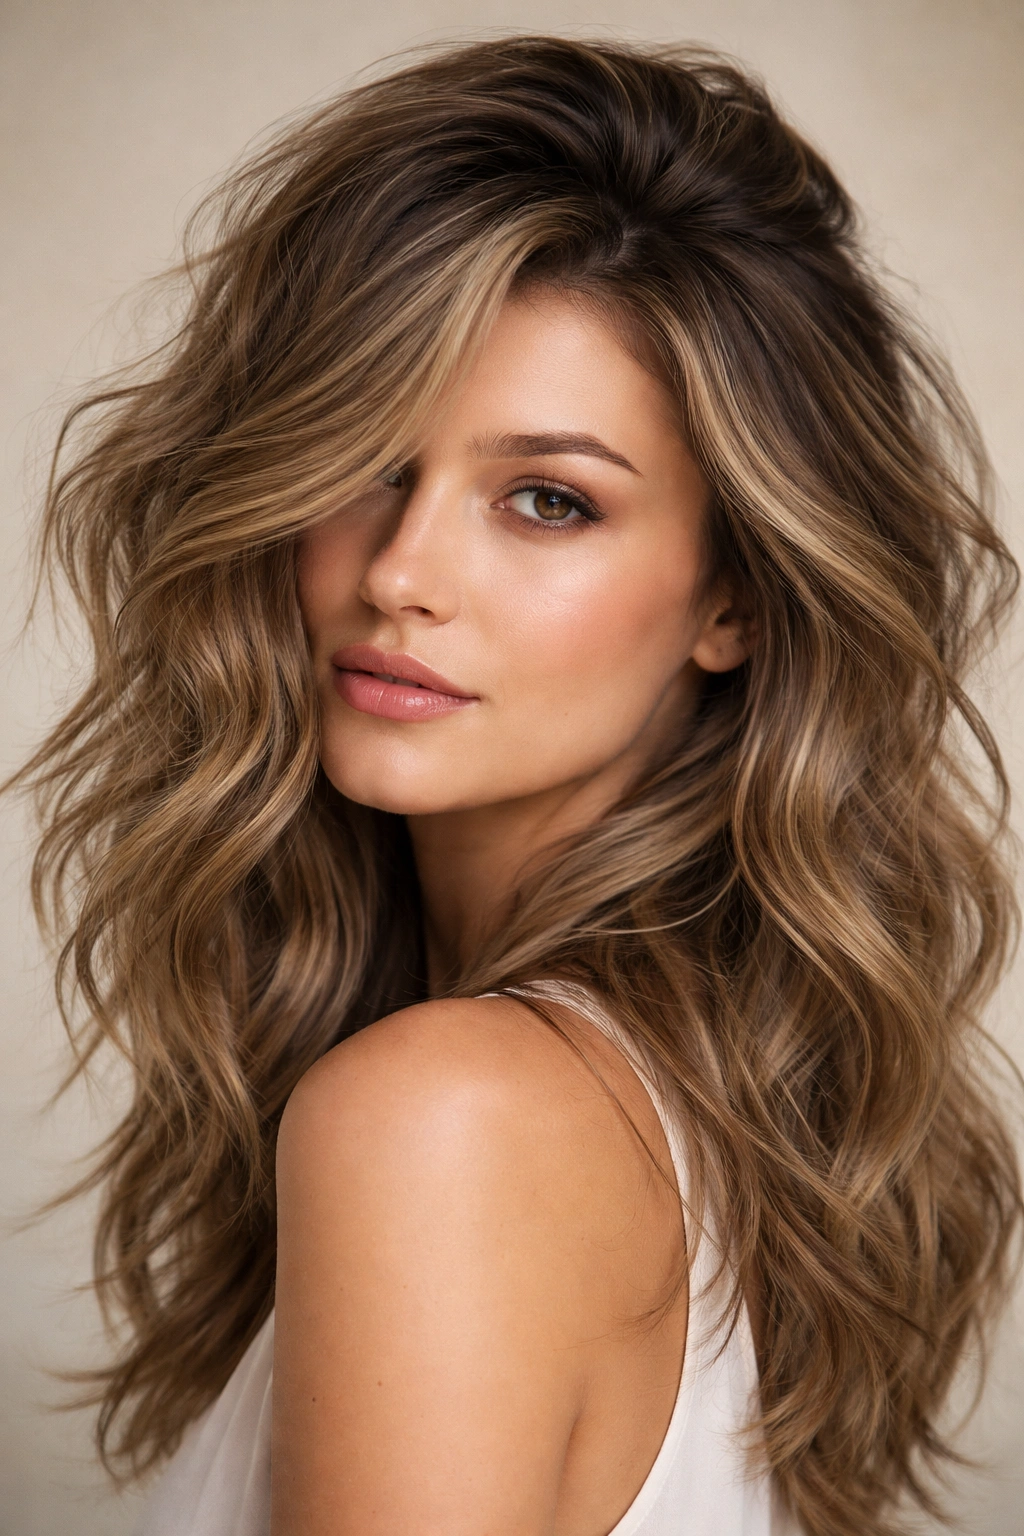
Tousled waves are textured, deliberately undone, and full of dimension—this is the wavy hairstyle equivalent of “I woke up like this,” except you actually put thought into it. Volume at the crown elongates your face and makes even fine hair appear fuller, which is why this combination is so flattering. These waves have personality and movement in every direction rather than being uniformly shaped.
The Secret Behind This Textured Look
Tousled waves need both product and technique to look authentic. A texturizing spray or dry shampoo at the roots creates grip for your styling tools and helps waves hold their shape longer. You’re aiming for waves that move and flip in slightly different directions rather than all bending the same way—this is what creates that lived-in, intentional-looking texture.
Creating Genuine Tousle
- Apply texturizing spray or dry shampoo to damp hair before blow-drying, concentrating on the roots and mid-lengths
- Use a round brush or your fingers to blow-dry sections upward and backward, creating lift rather than smoothness
- Create waves with a curling iron or flat iron, but vary the direction slightly—not every wave needs to curve the same direction
- Use your fingers to break apart and separate waves once they’ve cooled, rather than leaving them intact
- A texturizing cream or light pomade run through your fingers and loosely scrunched into the waves adds final definition without looking product-heavy
Insider note: This style actually improves with a little bit of bedhead, making it perfect if you’re not aiming for pristine styling each morning.
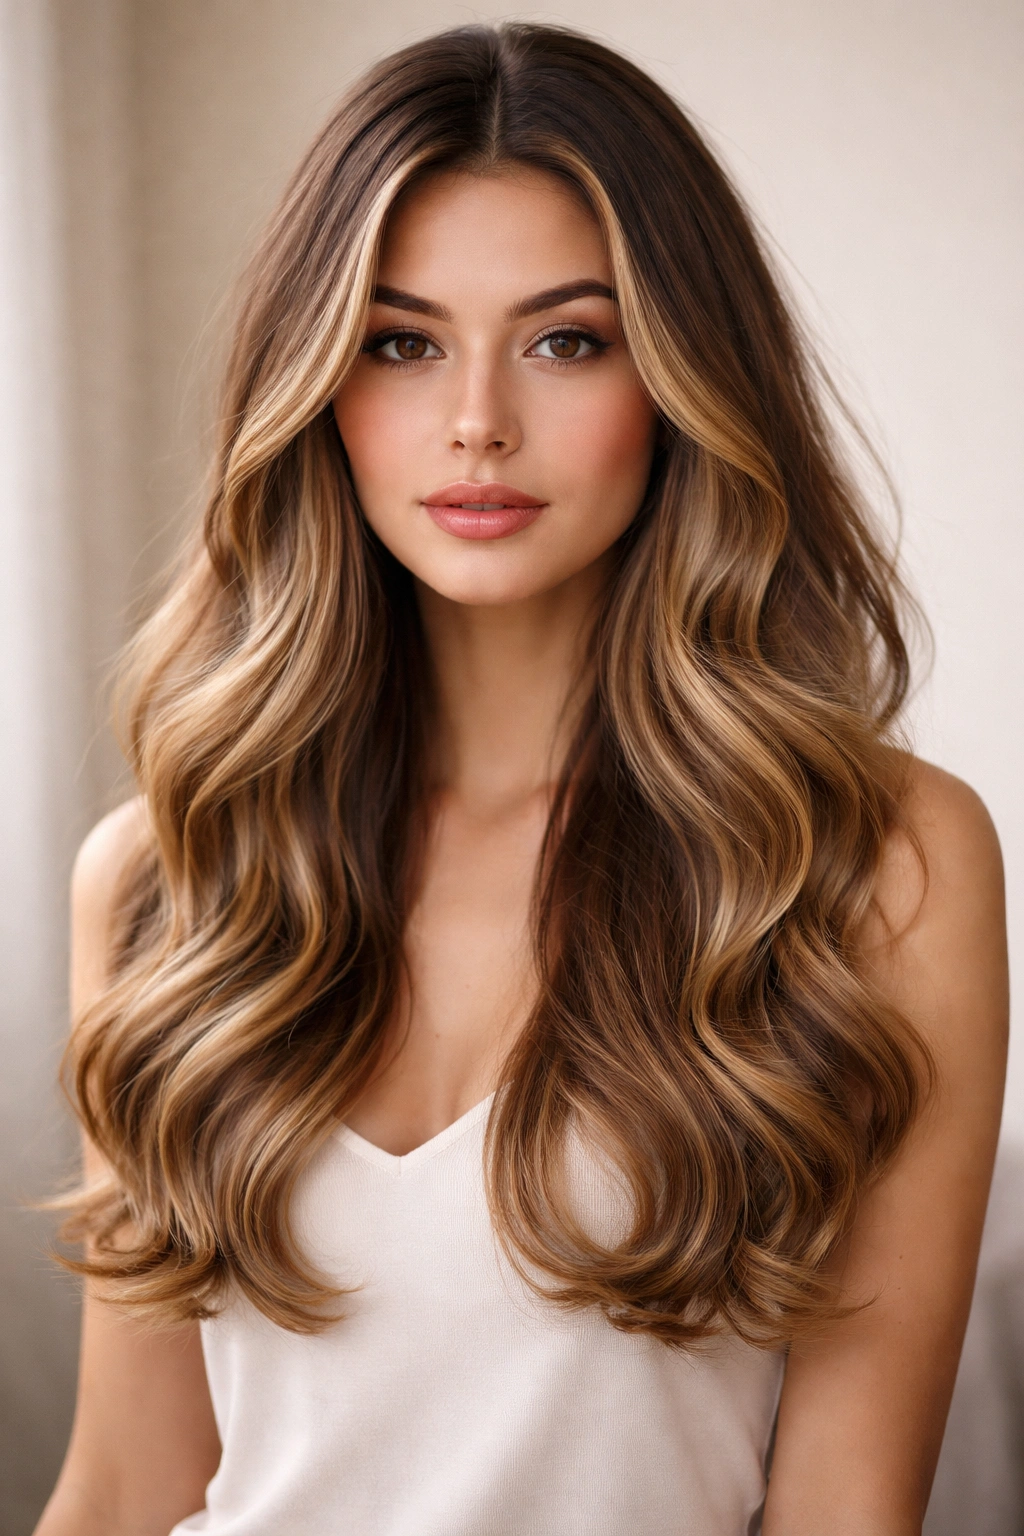
4. Long Waves with a Center Part
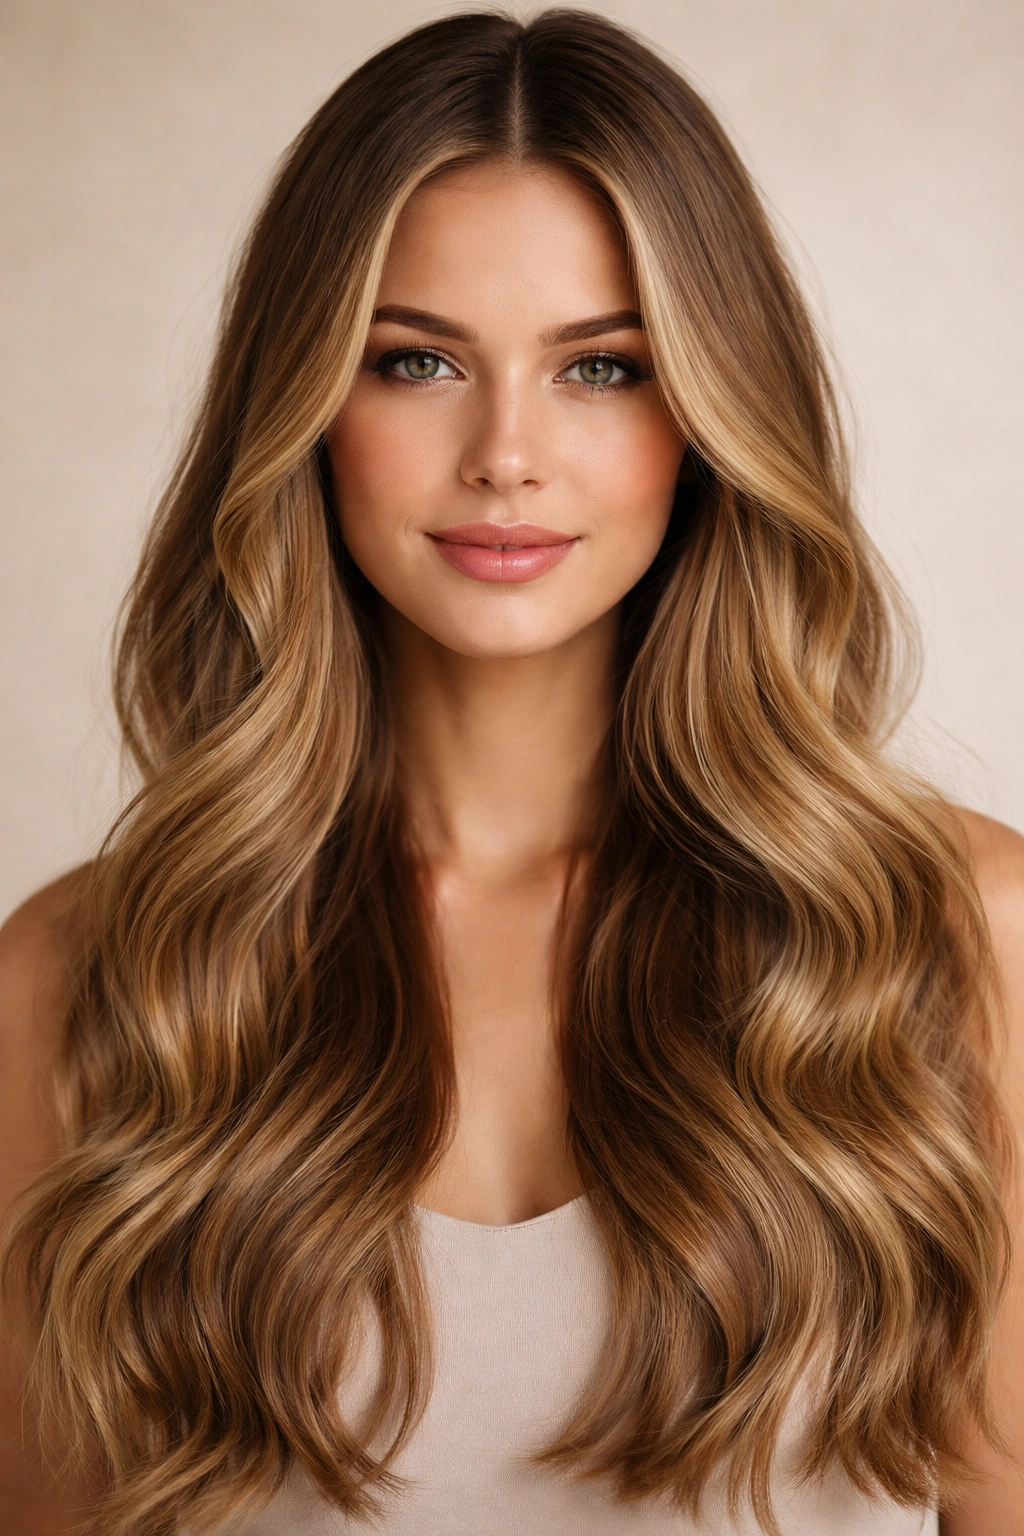
Center-part waves are having a major moment, and for good reason—they’re symmetrical, flattering on most faces, and feel both modern and timeless simultaneously. When your hair is wavy and flowing down the center, it creates a naturally elongated appearance and frames your face evenly. This is the wavy hairstyle that feels polished without requiring precision styling.
Why Center Parts Elevate Waves
A dead-center part creates visual balance that’s inherently calming and flattering. When paired with consistent waves that flow down both sides of your face, you get a look that’s sophisticated without being fussy. The waves should start closer to the roots on this style rather than just waving the ends, because flat roots make the whole look feel limp.
Getting This Right
- Create volume at the roots by blow-drying your hair with a round brush, concentrating on lifting hair up and away from the scalp
- Make your part by clipping hair on either side back, then using a rattail comb to create a perfectly straight line from your forehead to the nape of your neck
- Create waves that start around mid-length rather than just at the ends—this keeps the whole style looking full and intentional
- Waves should be relatively consistent in size for this style to feel polished (roughly 1.5 inches wide)
- This style looks especially beautiful on longer hair (past shoulder-length), though it works on any length
Real talk: Center parts are more flattering on some face shapes than others—if you’ve never tried one, experiment before committing to this as your signature style.
5. Textured Waves with a Half-Up Twist
Half-up styles give you the best of both worlds: enough hair down for movement and waves, plus the polish of hair partially secured. Adding a twist instead of a traditional ponytail or bun makes this wavy hairstyle feel less utilitarian and more intentional. This is perfect for active days, gym sessions, or any time you want waves visible and styled but partially contained.
Why the Twist Matters
A half-up twist is more forgiving than a half-up bun and creates a softer silhouette than a traditional ponytail. Twisting two sections of hair from either side of your head and securing them creates asymmetrical movement and visual interest. The waves in the lower half of your hair remain fully visible and mobile, bouncing with movement rather than sitting static.
Styling This Look
- Create textured waves throughout your hair first using your preferred method (curling iron, flat iron, or natural texture)
- Section off a 2-inch section of hair from each temple area
- Twist each section loosely, wrapping it backward and around the back of your head, meeting at the nape
- Secure with a bobby pin or small elastic, leaving the twisted sections slightly loose and dimensional
- Pull gently on the twisted sections to loosen them slightly, creating a fuller, less polished appearance
- The lower-half waves should have movement and texture, not be perfectly uniform
Pro tip: This style works beautifully whether your hair is freshly styled or one or two days old—the casual texture actually enhances the look.
6. Hollywood Waves with Serious Shine
Hollywood waves are the wavy hairstyle for when you want undeniable glamour. These are sculpted, consistent, perfectly-sized waves usually worn with a side part, finished with high-shine products that make hair look luminous. This is the style you see on red carpets and in vintage photographs, adapted for modern life. It requires more effort than casual waves but looks absolutely stunning.
The Hollywood Wave Formula
Hollywood waves are roughly 2 inches wide, perfectly consistent, and usually spiral downward in the same direction. The shine is crucial—this isn’t a matte, textured wave but a polished, reflective finish that photographs beautifully and catches light. These waves work best on longer hair where they have space to make their full arc.
Achieving This Polished Look
- Start with smooth, healthy hair—this style shows every flaw in your hair’s condition, so deep conditioning beforehand is essential
- Use a 1.5-inch curling iron, working in consistent sections and curling away from your face
- Pin each curl while it cools (this sets the wave shape permanently)
- Once completely cool, remove pins and brush out slightly using a paddle brush, creating smooth waves rather than distinct ringlets
- Apply a shine spray or light hair oil focused on the lengths and ends—avoid roots which will look greasy
- A side part swept dramatically to one side completes the look
Worth knowing: This style lasts longest on hair that’s not freshly washed (day two or three is actually ideal) because some natural oil helps the waves hold their shape.
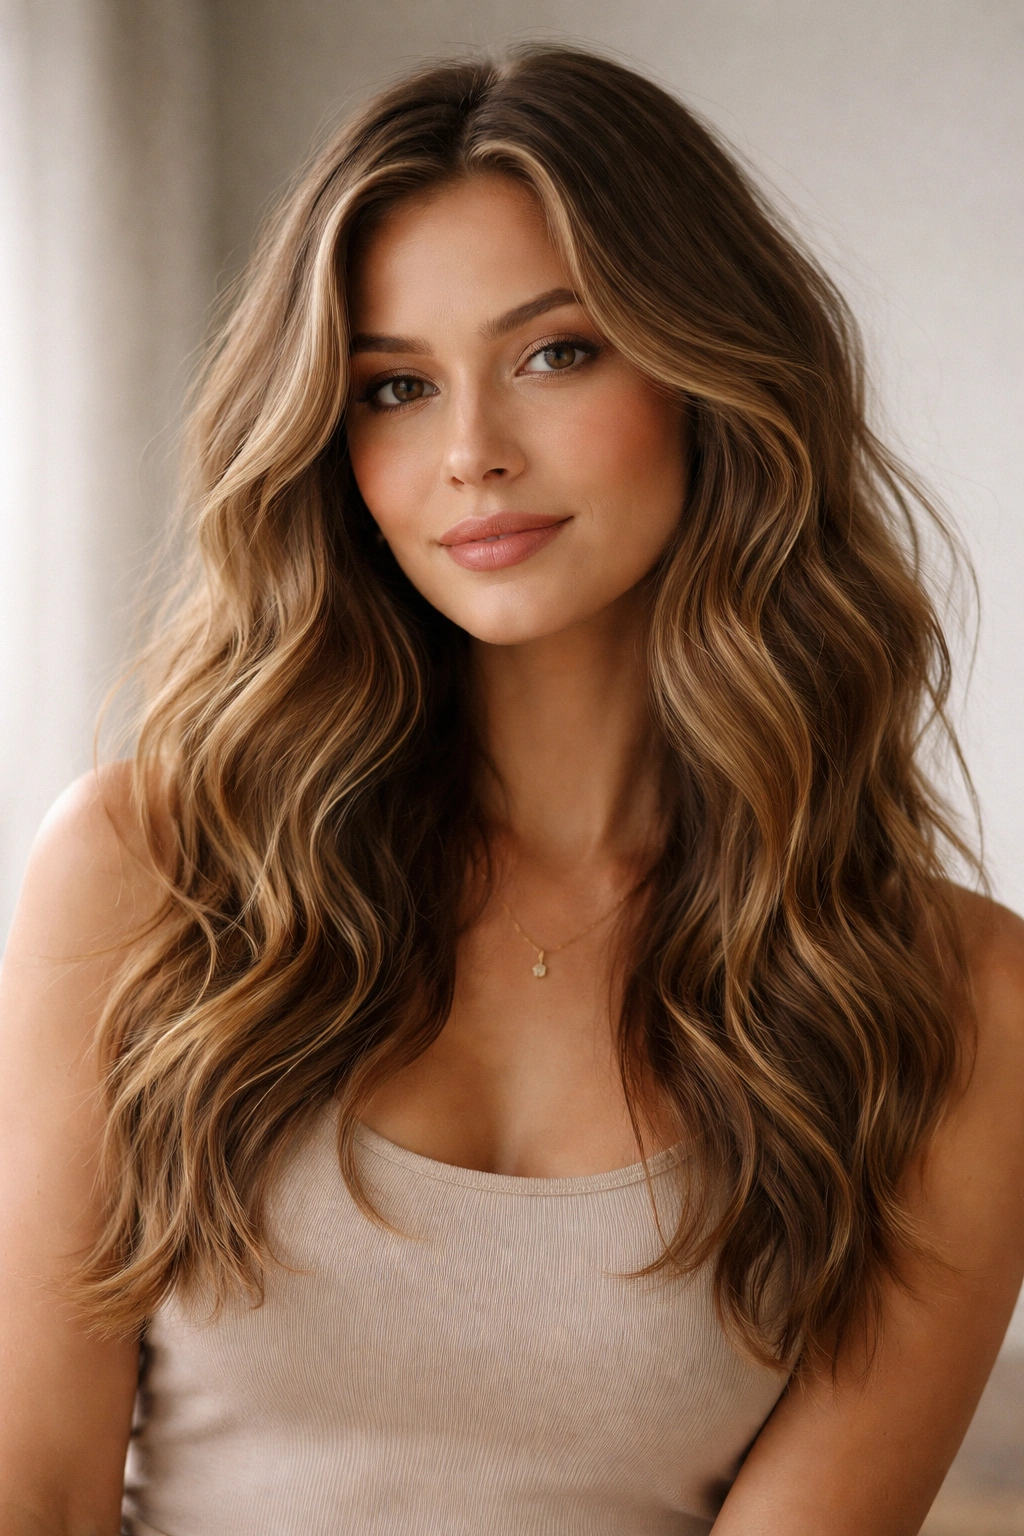
7. Lived-In Waves with Face-Framing Pieces
Lived-in waves are textured and dimensional, deliberately imperfect, and usually longer in length. Face-framing pieces that are slightly shorter than the rest of your hair add softness and movement around your face. This wavy hairstyle feels effortless and approachable while still looking intentionally styled.
Why This Texture Works
The term “lived-in” describes waves that look like they’re moving naturally, bending in slightly different directions, with some areas more wavy than others. This isn’t lazy styling—it’s actually more challenging to create than perfect Hollywood waves. The face-framing pieces create softness that’s flattering on most faces and add visual interest through dimension.
Creating Authentic Lived-In Texture
- Create waves throughout using a curling iron or flat iron, but intentionally vary the wave size and direction slightly
- Waves should range from about 1.5 to 2.5 inches wide rather than being uniform
- Face-framing pieces should fall roughly to your cheekbones and have slightly more texture than the rest of your hair
- Use texturizing spray or dry shampoo to add grip and help waves hold without looking product-heavy
- Run a texturizing cream through your fingers and scrunch gently into waves to break them apart and create more movement
- This style looks better if you resist over-styling—aim for intentional-looking texture rather than pristine, polished waves
Insider note: This hairstyle actually looks better after sleeping on it or going through a day of normal activities, because movement makes it look more authentically textured.
8. Waves with Hidden Undercut or Shaved Side
For something more fashion-forward, wavy hairstyles with hidden undercuts or shaved sides add unexpected edge while keeping your styling options open. When your hair is worn down in waves, the undercut stays completely hidden. When you pull your hair up or style it differently, that hidden detail adds attitude. This works beautifully on medium to long hair.
The Undercut Strategy
A hidden undercut means the back or sides of your head (usually hidden by longer hair on top) are clippered very short or shaved, creating dramatic contrast without being obvious in everyday styling. This gives you a double identity—polished and wavy when worn down, edgy when partially pulled back. The contrast makes this wavy hairstyle feel intentional and bold.
Working With This Texture Contrast
- An undercut works best with shoulder-length hair or longer, so the top layers have enough length to cover the shaved areas
- The longer hair on top should have waves or movement to complement the edge of the undercut
- You can style waves down and smooth for a completely conventional look, or pull sections back to reveal the undercut for edge
- The shaved or clippered area should be maintained every 3-4 weeks to keep the contrast sharp
- This style pairs beautifully with side-part waves or textured waves worn to one side
Worth knowing: This isn’t a commitment you need to be nervous about—the undercut grows out evenly and doesn’t damage your hair, and you can always let it grow back if you change your mind.
9. Soft Waves with Wispy Bangs
Wispy bangs paired with soft waves create a romantic, feminine wavy hairstyle that works beautifully on most face shapes. The bangs are long and delicate, blending seamlessly with face-framing layers rather than creating a harsh line. This style has become increasingly popular and pairs especially well with textured waves.
The Wispy Bang Formula
Wispy bangs should hit somewhere between your eyebrows and eyelashes (depending on your face shape and preference) and should have movement rather than being blunt. They’re typically shorter in the center and longer toward the temples, creating a feathered effect. When paired with soft, textured waves, bangs create a cohesive look rather than feeling like a separate style element.
Styling This Romantic Combination
- Wispy bangs work best when the rest of your hair has texture and movement—blunt, straight bangs on straight hair can look harsh, but wispy bangs with waves feel balanced
- Create soft waves throughout your hair using a larger curling iron (1.5 inches or larger) or a flat iron
- Bangs should wave slightly along with the rest of your hair rather than being completely straight
- You can style bangs by twisting them gently through your fingers while blow-drying, creating a curved shape
- Longer face shapes benefit most from wispy bangs, which add horizontal line and softness
- This style requires trims every 4-6 weeks since bangs grow noticeably and change the whole look
Pro tip: Wispy bangs look intentional and soft, never scraggly or unkempt—maintain them regularly so they feel like a polished choice rather than an accident.
10. Textured Waves with Undercut Detail at the Nape
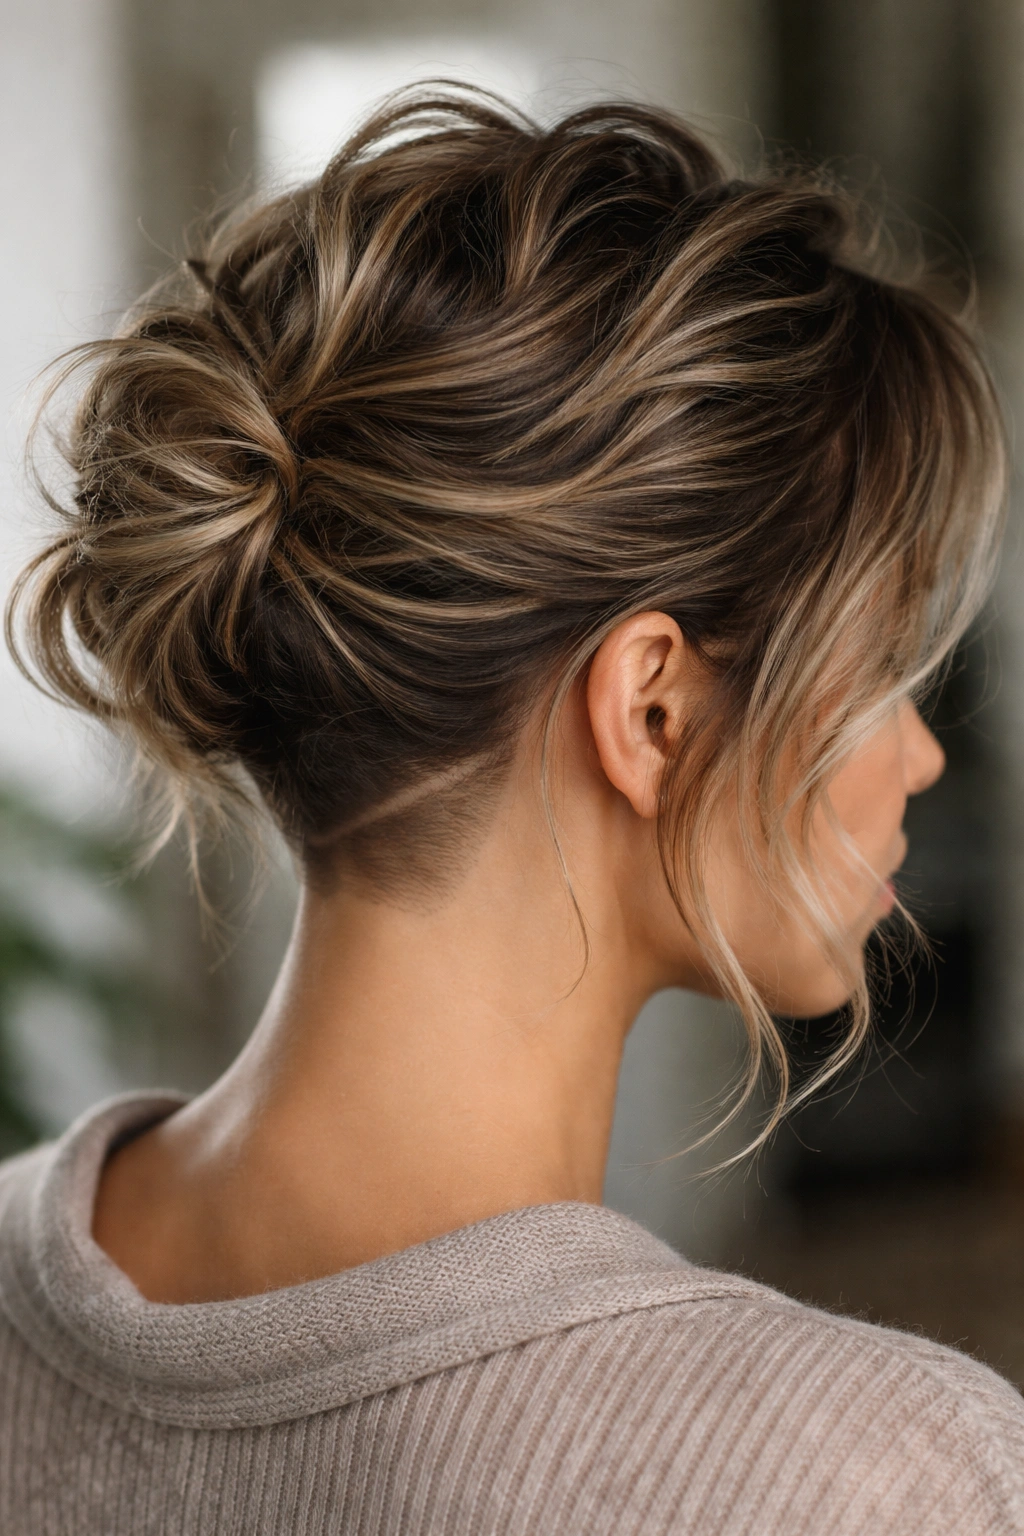
Similar to hidden undercuts but positioned specifically at the nape of your neck, this wavy hairstyle detail adds sculptural interest. A small, shaved or clippered nape detail is visible when your hair is in certain styles (like pulled back or in a bun) but hidden when waves are worn down. This is a more subtle alternative to full undercuts while still adding edge.
Why the Nape Detail Works
The nape is a small enough area that it’s not as commitment-heavy as a full undercut, but it still creates visual interest and is clearly intentional. This detail pairs beautifully with textured, voluminous waves worn down, creating contrast between the soft texture and the sharp line of the nape design. When you wear your hair up, it becomes a conversation-starting detail.
Styling Around This Element
- A nape detail works with any wave style—beachy waves, textured waves, side-part waves
- The detail can be as simple as a 1-inch shaved line at the center back, or more elaborate patterns if you’re feeling adventurous
- Wear your waves down to completely hide the detail, or style hair partially up (half-up, ponytail, or bun) to showcase it
- The shaved area requires maintenance every 4-6 weeks to keep it sharp
- This detail pairs especially well with longer waves that move and shift to reveal it unexpectedly
Real talk: This is a detail-oriented choice—it signals that you put thought into your style, which makes the rest of your styling feel more intentional too.
11. Dimensional Balayage with Textured Waves
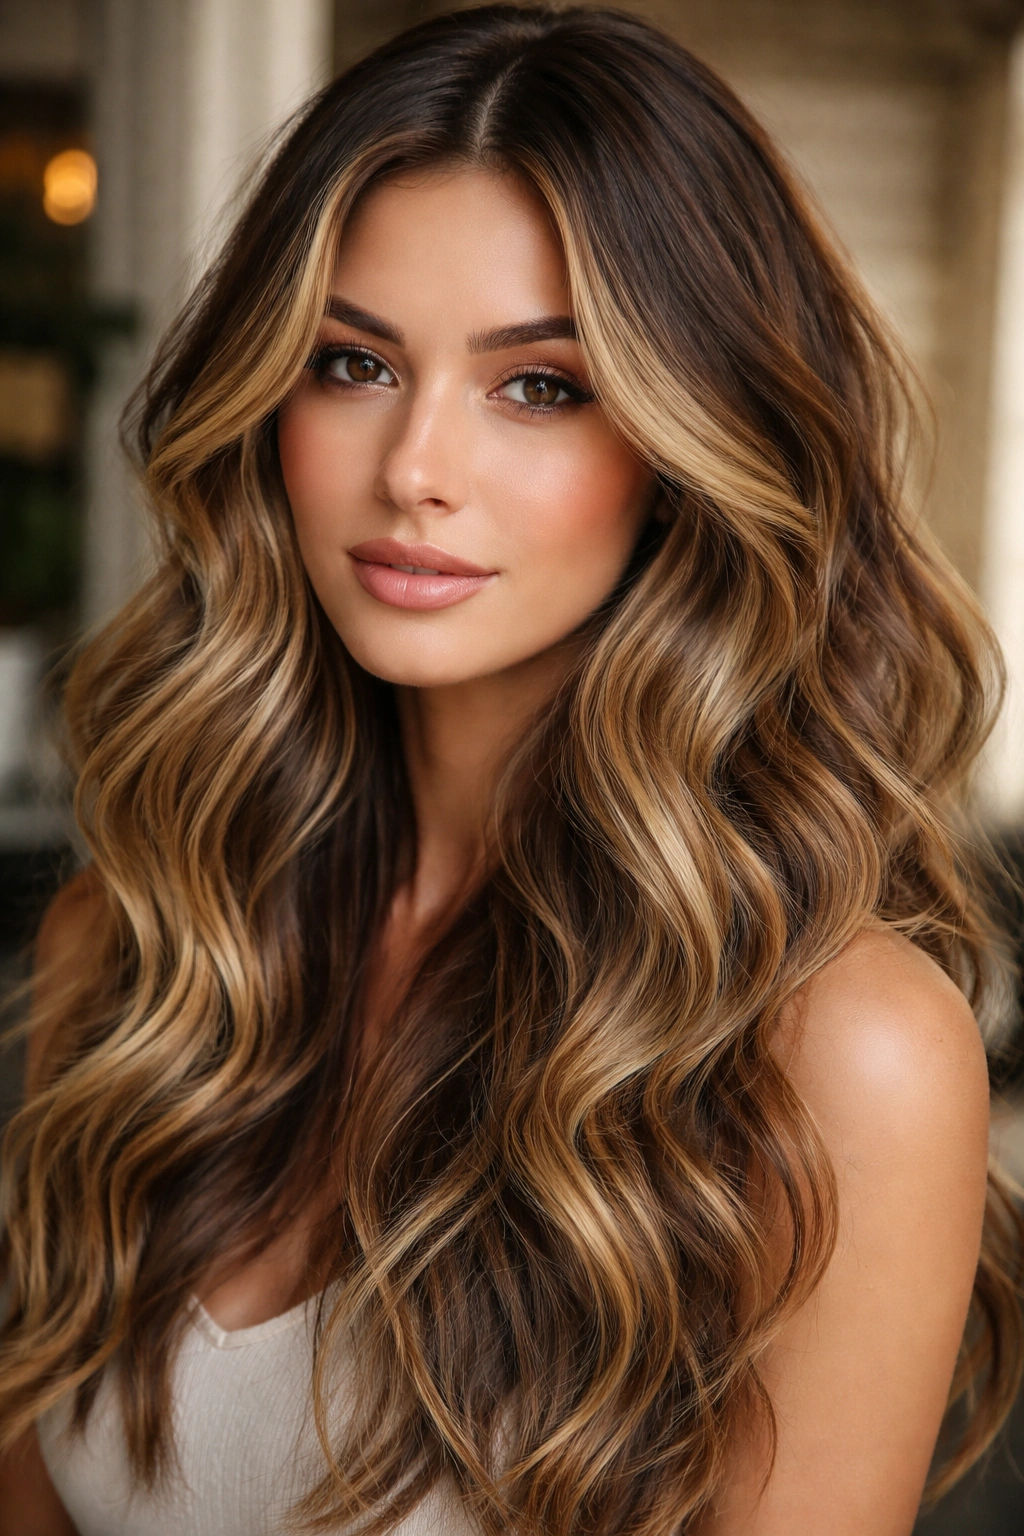
While this technically involves color, the combination of dimensional balayage and textured waves is such a powerful wavy hairstyle that it deserves its own mention. Balayage (hand-painted highlights) creates movement and depth that becomes visible through waves, whereas the same color on straight hair might go unnoticed. The texture of waves and the movement of color work together.
How Color and Texture Enhance Each Other
Textured waves refract light differently at different angles, making dimensional color visually pop in a way that straight hair doesn’t allow. Lighter pieces woven throughout (especially around face-framing sections) catch light more dramatically when they’re moving and waving. This combination creates a hairstyle that looks expensive, intentional, and dynamic.
Maximizing This Effect
- Balayage works best on waves when highlights are placed strategically around your face and throughout the mid-lengths and ends
- Textured waves should be consistent enough that color placement shows clearly, but textured enough that each strand catches light separately
- Deeper root color (like a balayage or rooted blonde) grounds the style and makes waves appear fuller
- This combination works beautifully on any base color but creates especially dramatic effect on medium to darker tones with lighter highlights
- The style requires commitment to maintain—root touch-ups every 6-8 weeks and regular deep conditioning to keep highlighted hair healthy
Worth knowing: Textured waves actually make your hair look healthier than straight styles, so this is a brilliant option if you’ve had color damage and want to disguise it while your hair recovers.
12. Sleek Waves with a Low Ponytail
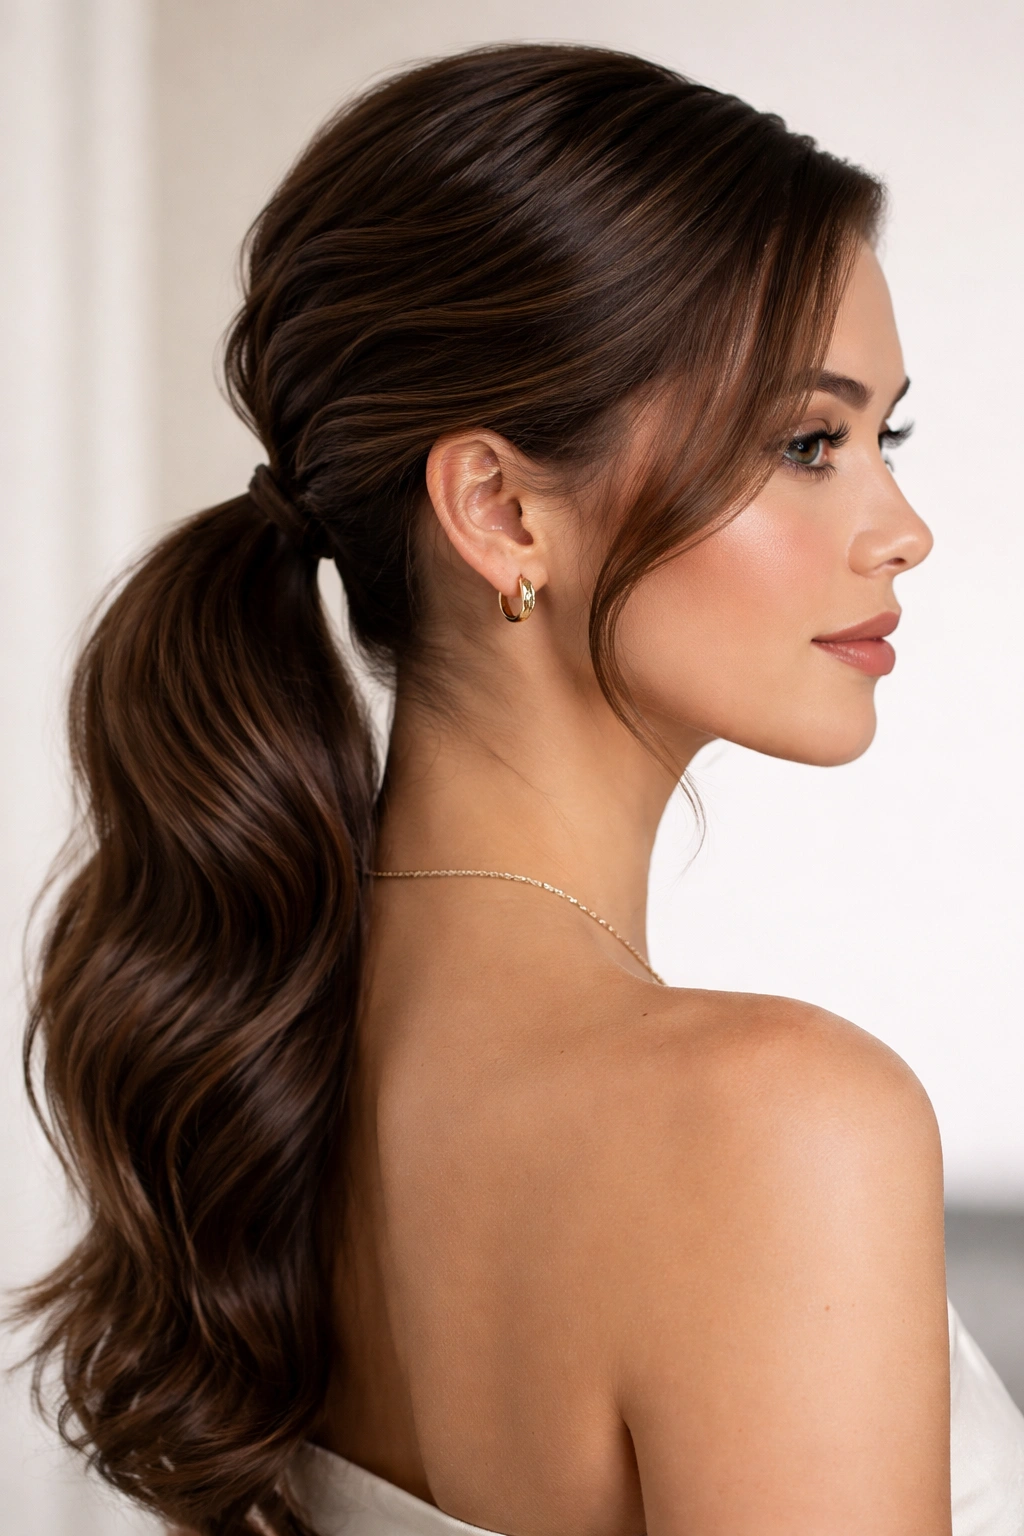
This wavy hairstyle bridges casual and polished by combining smooth, sculpted waves on top with a low ponytail that keeps hair controlled. It’s perfect for days when you want the visual interest of waves without loose hair in your face. The contrast between the smoothness of the top section and the texture of the ponytail adds dimension.
The Sleek Wave and Ponytail Strategy
Sleek waves typically use a curling iron or flat iron to create smooth, controlled waves in the top two-thirds of your head, while the ponytail sits low (around the nape area) and contains the remaining hair. The ponytail itself can be wavy, textured, or even braided, creating a finished look that’s structured but still dynamic.
Creating This Hybrid Style
- Blow-dry your hair straight or relatively smooth, then create waves using a curling iron, concentrating on the top and mid-sections
- Smooth wave ridges slightly with a paddle brush or your fingers so they look polished rather than distinct ringlets
- Create your low ponytail around the nape area (at the base of your neck) and secure tightly with an elastic
- You can leave the ponytail wavy, straighten it, braid it, or curl it—each variation changes the final look
- A face-framing wave on each side of your face softens the sleekness and adds balance
- This style works especially well for work environments or events where you need a more controlled look
Pro tip: This combination actually makes your face appear more lifted than either style alone, which is why it’s so flattering on most face shapes.
13. Spiral Curls That Fall Into Waves
Spiral curls are tighter waves, created with smaller curling irons or spiral curling tools, then gently brushed or separated to relax them into looser waves. This wavy hairstyle splits the difference between curls and waves, giving you defined texture without the commitment of permanent waves. It’s romantic, dimensional, and works beautifully on most hair types.
The Spiral-to-Wave Technique
Spiral curls created with a 1-inch curling iron or curling tool, pinned while they cool, then gently brushed out, create waves with incredible dimension and hold. The brushing-out step is crucial—it prevents your style from looking like tight ringlets while maintaining the wave structure. This creates a hairstyle that reads as wavy rather than curly.
Executing Spiral Waves
- Create small sections of hair (roughly 1 inch wide) and curl each one using a curling iron held vertically
- Pin each curl while it cools, or let curls cool naturally while you work through the rest of your hair
- Once completely cool, brush through gently using a paddle brush, starting at the ends and working upward
- Your goal is to smooth out the curl formation while maintaining the wave structure underneath
- A light texturizing spray helps waves maintain their shape without looking frizzy
- This style lasts 2-3 days and actually improves on day two as waves relax slightly into softer definition
Insider note: This is the perfect compromise style if you love the look of waves but your hair seems to fall flat by the end of the day—the brushed-out spiral curl technique creates waves with incredible staying power.
14. Asymmetrical Waves with One Side Pinned
Asymmetrical styling creates visual interest and is incredibly flattering on most face shapes. One side of your hair is waved and worn down while the other side is pinned back (using bobby pins, a clip, or a twist) and creates a dramatic, purposeful look. This wavy hairstyle works beautifully for events, dates, or any time you want to feel especially put-together.
Why Asymmetry Feels So Deliberate
Asymmetrical styles automatically read as intentional and fashion-forward because they’re not default—they require an active styling choice. One side of your face becomes the focal point, which is flattering when you understand which side of your face you prefer to emphasize. Pairing asymmetry with waves creates a sophisticated, dynamic look.
Creating Asymmetrical Impact
- Create textured waves throughout your entire head first
- On one side, gently pin sections back using bobby pins, a small clip, or by creating a soft twist
- The pinned side should feel intentional rather than accidental—you can show a small amount of the pinned section or hide it completely, depending on effect
- Leave loose waves flowing down the other side and over your shoulder
- This style is especially striking when the pinned side reveals a contrasting color, undercut detail, or shaved nape
- The loose waves on the visible side should be your most polished waves—these are the focus
Worth knowing: This style photographs beautifully and is especially striking at events or in professional photos because asymmetry creates dynamic visual interest.
15. Loose Waves with Soft Curled Ends
This wavy hairstyle focuses on length and flow, with waves that start at mid-length and become slightly more pronounced curls toward the ends. It’s romantic, elongating, and incredibly flattering on long hair. This style has a modern ease about it—it doesn’t look overly styled, yet clearly benefits from intentional technique.
Why Curled Ends Enhance Waves
The primary waves start around mid-length and become slightly tighter curls toward your ends, creating a natural-looking texture gradient. This prevents the dreaded straight ends that can make waves look incomplete, while maintaining the movement and flow that wavy hairstyles provide. The curled ends also protect your hair from looking wispy or stringy.
Achieving This Textured Gradient
- Create loose, soft waves using your preferred method (curling iron, flat iron, or air-drying with wave-enhancing products)
- Focus wave-creation in the mid-lengths first, keeping roots relatively straight for volume and movement
- When you get to the bottom 3-4 inches of your hair, curl slightly more tightly to create a subtle curl gradient
- Let all curls cool completely before running your fingers through for a soft, blended effect
- Use a light texturizing product to enhance natural waves rather than make them look crunchy or product-heavy
- This style works best on hair that’s mid-back length or longer, where the curl-ends detail is fully visible
Pro tip: This combination looks especially beautiful on lighter, longer hair where the wave and curl detail is fully visible, but works on any length or color—it just shows more prominently on lighter tones.
Final Thoughts
Wavy hairstyles offer the perfect balance of effortlessness and intentionality, and there’s genuinely something for every face shape, hair type, and lifestyle in this list. The most important thing isn’t selecting the “best” wavy hairstyle—it’s choosing the one that excites you and feels authentic to how you want to present yourself.
Your hair type matters more than you might think when choosing your style. Fine, thin hair gravitates toward textured waves and volume at the crown that make hair appear fuller. Thick, coarse hair can handle sculpted waves, hidden undercuts, and more dramatic styles without looking overwhelming. Wavy or naturally curly hair has options ranging from enhancing what you already have to creating entirely new wave patterns.
Don’t be afraid to try multiple styles before settling on your favorite. Your first attempt at Hollywood waves might not be perfect, and that’s okay—styling is a skill that improves with repetition. Start with the styles that excite you most, and give yourself grace as you develop the technique. Your best wavy hairstyle is the one you’ll actually style consistently, so choose based on how much maintenance you genuinely want to commit to, not just how stunning the finished look is.