Whether you’re heading to a cocktail party, wedding reception, or night out with friends, wavy hair can instantly elevate your entire look. Waves work because they sit perfectly between polished and effortless—they catch the light, frame your face beautifully, and hold up well throughout an evening of movement and celebration. The magic of party waves is that they work with nearly every face shape, hair texture, and dress code, and they photograph remarkably well under party lighting.
The challenge most people face isn’t whether waves will work—it’s figuring out which style matches the vibe they’re going for and, more importantly, how to actually create and maintain those waves through the whole night. Not all waves are created equal, and a style that looks stunning in a photo might feel too casual for a formal gala, or conversely, too intricate for a relaxed garden party.
This guide walks you through fourteen distinct wavy hairstyles, each suited to different party atmospheres, hair types, and styling skill levels. You’ll discover techniques that work whether you’re using a curling iron, braiding method, or heat-free approach. More importantly, you’ll understand the specific hold products, styling tricks, and maintenance tips that keep your waves looking fresh from the moment you arrive until the last dance.
1. Classic Hollywood Waves
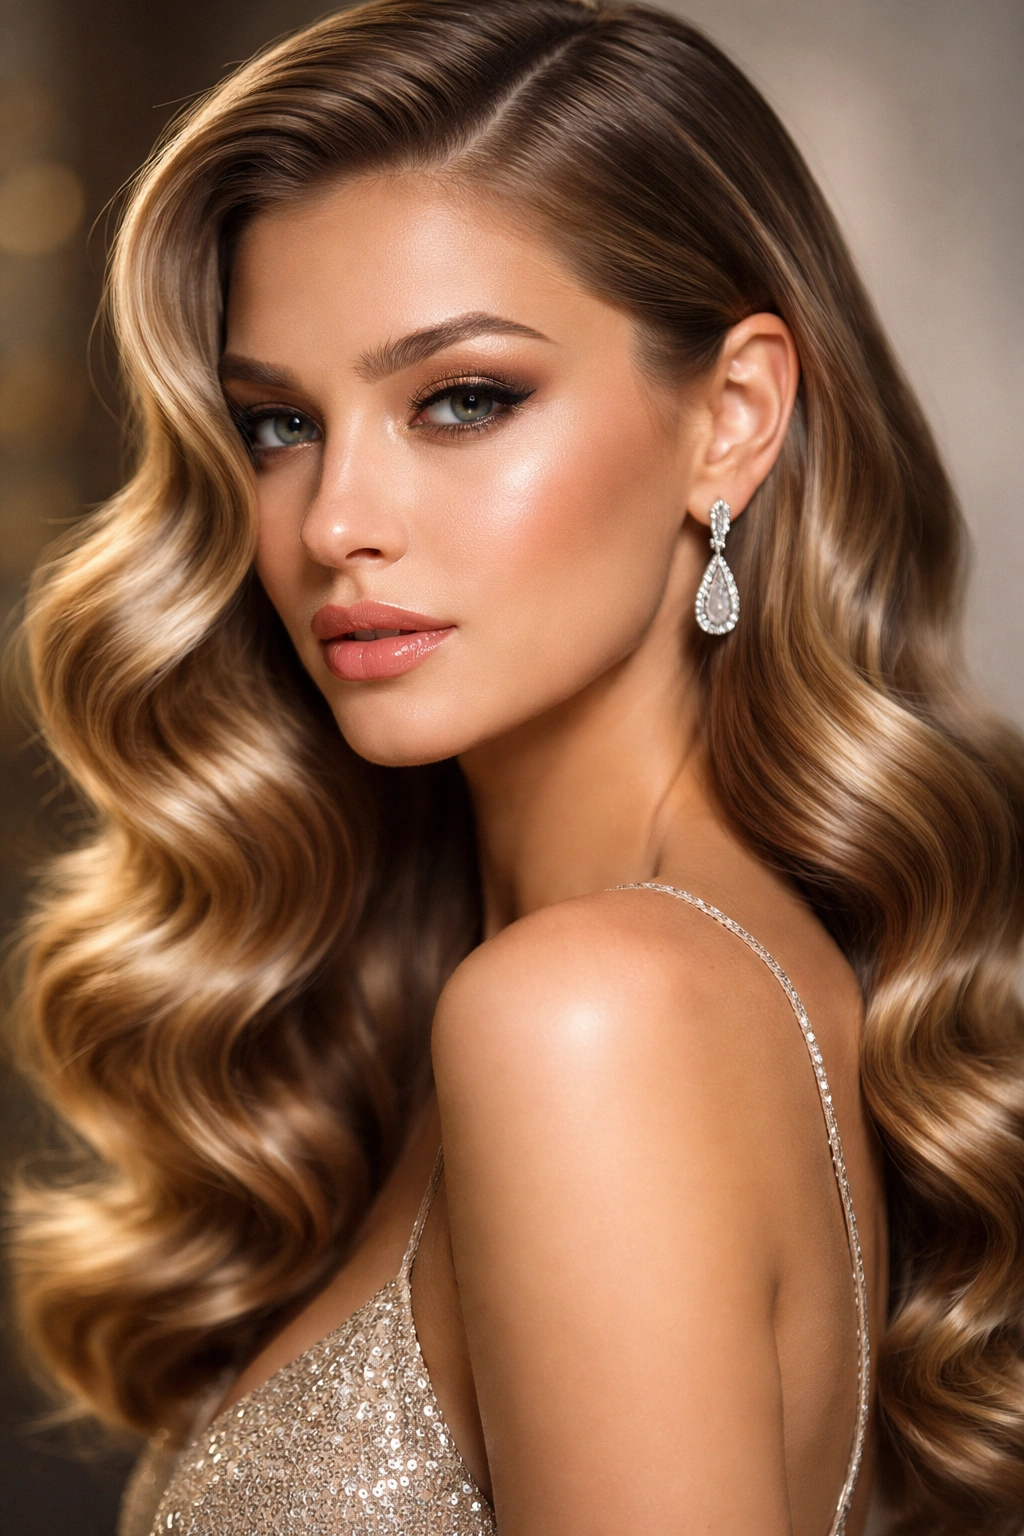
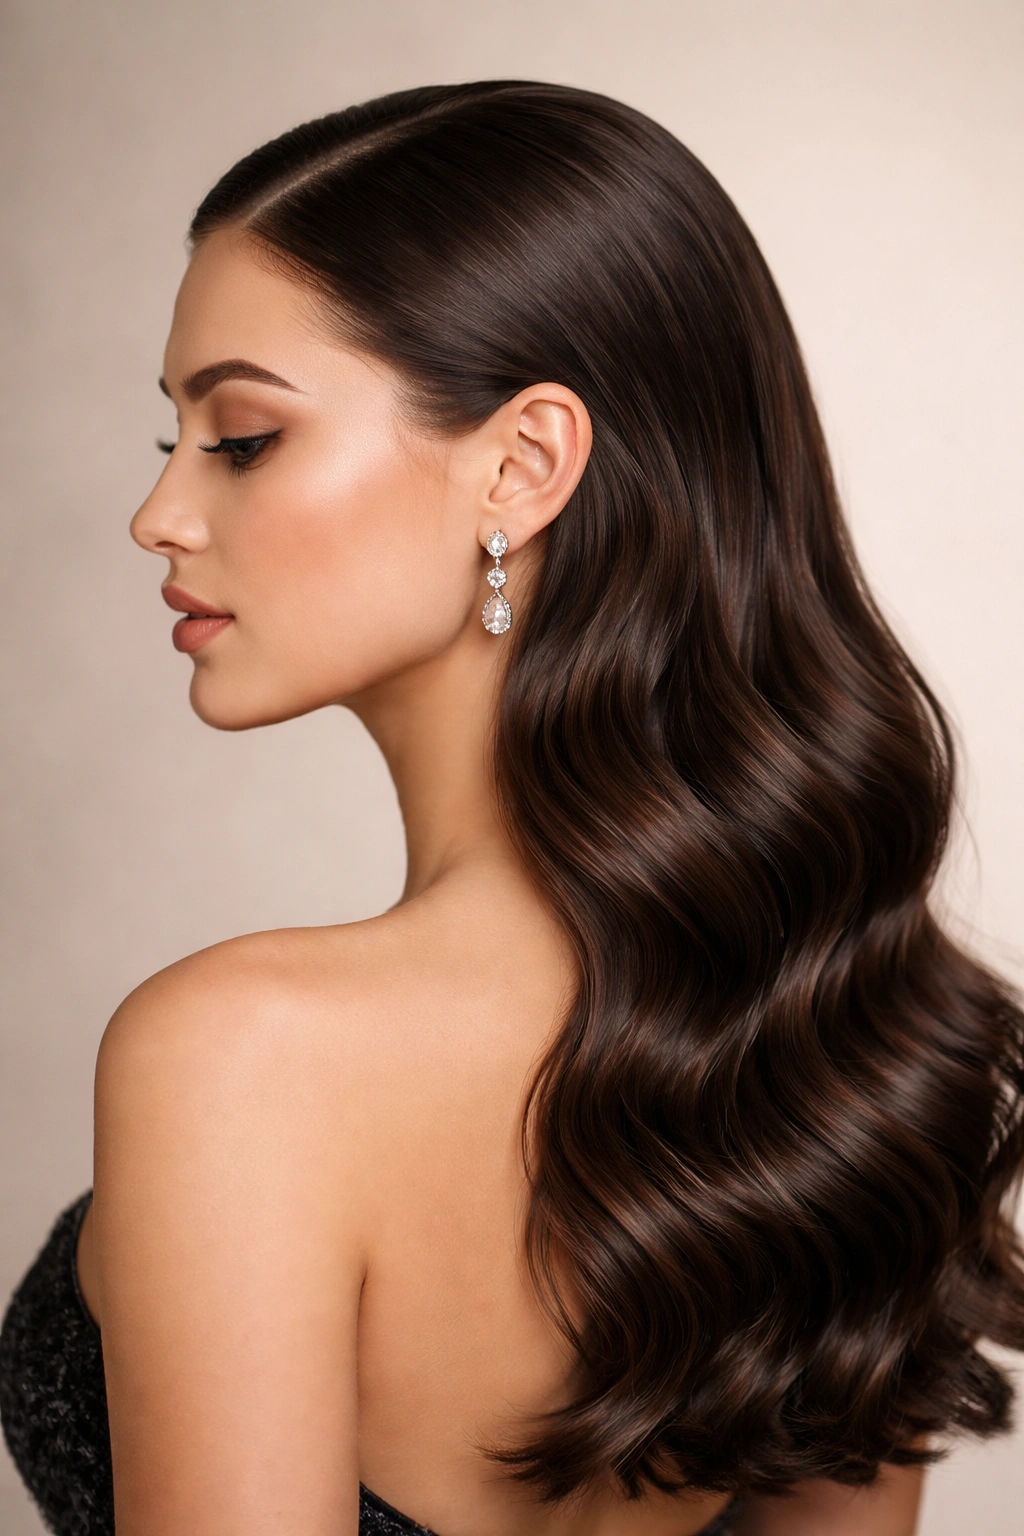
Hollywood waves are the gold standard for glamorous evenings—they’re instantly recognizable, deeply romantic, and perfect when you want to feel like you just stepped off a red carpet. These waves are defined by smooth, sculpted S-curves that look almost sculptural, with deep definition between each wave and lots of shine and shine. The key difference between Hollywood waves and other wavy styles is the precision and the dramatic depth; each wave is deliberate and visible, creating that iconic vintage-inspired look.
How to Achieve Classic Hollywood Waves
Start with dry or slightly damp hair and apply a volumizing mousse to the roots, blow-drying your hair with a large paddle brush to create a smooth base. Section your hair into four to six thick sections, clipping each away as you work. Using a 1.5-inch curling iron, wrap each section away from your face, holding for 8-10 seconds before releasing. Once all sections are curled, let the curls cool completely—this is crucial for longevity.
After the curls have cooled, gently brush through them with a wide-tooth comb or paddle brush, breaking up the curls into smooth waves. The brushing is what transforms ringlets into those signature flowing waves. Finish with a light hairspray that holds without stiffening or flaking.
Why This Style Works for Parties
These waves last for hours and actually improve as the night goes on—the brushed-out curls settle into deeper, more relaxed waves. They’re sophisticated enough for black-tie events yet fun enough for cocktail parties.
Quick Styling Facts
- Takes 30-45 minutes to style from start to finish
- Best on shoulder-length hair or longer
- Works beautifully with a side part or middle part
- Pairs perfectly with updos (pin half back) or let fully down
- Holds best with volumizing mousse plus flexible-hold hairspray
Pro tip: Wrap each curl around the barrel away from your face for a forward-flattering frame rather than random directions.
2. Loose Beachy Waves
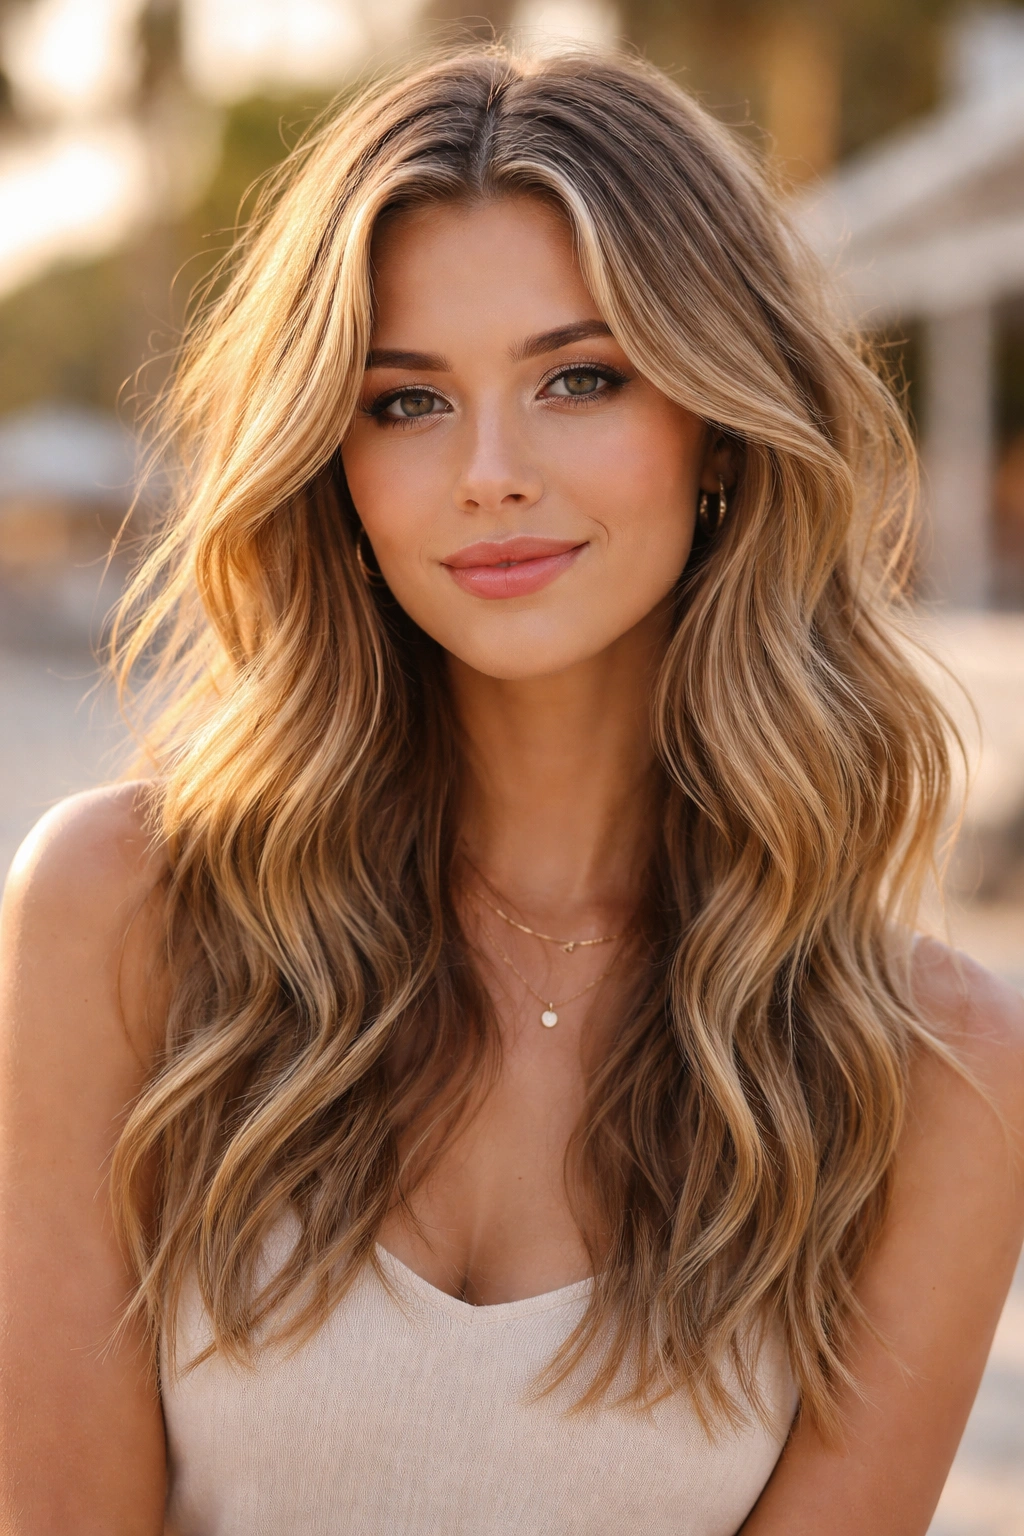
Beachy waves bring an effortless, sun-kissed vibe to parties where you want to look polished but not overdone. These waves are softer and messier than Hollywood waves—they have movement and texture rather than structured definition. The beauty of beachy waves is they look intentional even when they appear slightly undone, which is exactly what makes them work for everything from beach weddings to casual evening gatherings.
Creating Authentic Beachy Waves
For heat-free beachy waves, braid damp hair into two or three loose, loose braids before bed, then unravel them in the morning and tousle with your fingers. Alternatively, use a 1.25-inch curling iron but curl randomly in different directions—some away from the face, some toward it, some mid-shaft rather than from root to tip. The randomness is what creates that organic, natural look.
Spray damp hair with sea salt spray, scrunch it gently as it dries, and avoid brushing once the waves have formed. This keeps the texture intact rather than smoothing it into polished waves. Add texturizing spray or dry shampoo to the mid-lengths and ends for even more dimension and grip.
Why Beachy Waves Suit Casual Parties
They’re incredibly forgiving if they fall slightly flat during the night, they work on almost every hair type, and they pair beautifully with minimal accessories. A flower crown, delicate clips, or nothing at all all look perfect with this texture.
Quick Styling Facts
- Takes 15-25 minutes with heat, or overnight with braiding method
- Works on any hair length from shoulder-length to very long
- Best with a deep side part or middle part
- Looks great with half-up styles, low ponytails, or fully down
- Holds through movement and dancing without stiffening
Worth knowing: Beachy waves actually look better the next day after settling, so you can style them earlier and let them improve as the evening progresses.
3. Textured Side-Swept Waves
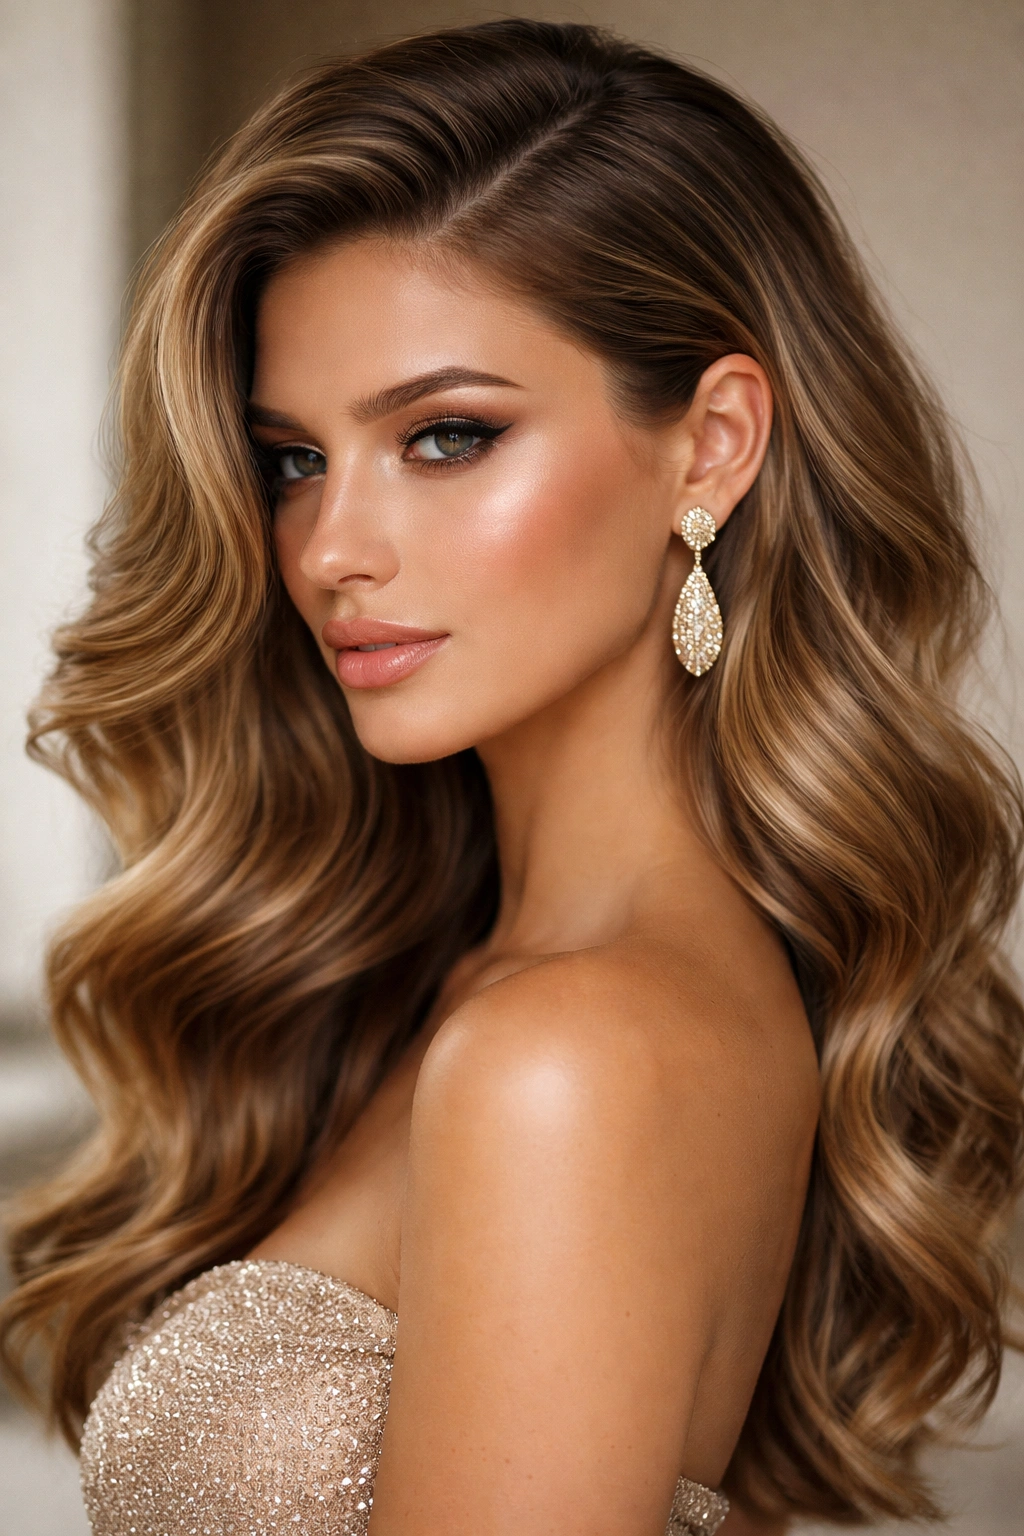
This style combines the elegance of waves with the flattering geometry of a deep side part, where one side is fully swept over and pinned or tucked, while waves cascade down the other side. The asymmetry is incredibly flattering on most face shapes—it creates definition on one side while letting hair flow freely on the other. This works especially well for people who feel their waves look too similar on both sides or want a more dramatic, fashion-forward appearance.
Styling Textured Side-Swept Waves
Start with voluminous waves created using your preferred method—curling iron, braids, or sea salt spray. Once waves are set, deeply side-part your hair, sweeping one side completely to the back. You can tuck that side behind your ear, pin it with bobby pins hidden under the overlying waves, or use a decorative clip. The waves on the opposite side should flow freely over the shoulder and down the back.
Use texturizing spray on the side that’s swept back to give grip to the pins and prevent slipping throughout the night. A light hairspray applied before pinning keeps everything secure without looking wet or stiff.
Why This Works for Evening Events
The asymmetry feels intentional and polished, perfect for cocktail parties, dinners, or events where you want to look put-together without appearing overdone. It’s also practical—one side is secured, so if you’re in a crowded room or sitting at a table, your hair won’t constantly fall in your face.
Quick Styling Facts
- Best on thick or medium-weight hair
- Works beautifully with formal dresses or structured outfits
- Takes 25-35 minutes total styling time
- Pairs well with statement earrings (the ear on the swept side is exposed)
- Holds throughout a full evening with proper pinning
Insider note: Use 2-3 thin bobby pins crossed over each other rather than one thick clip—this distributes tension and prevents breakage while holding better throughout the night.
4. Deep Wave Half-Up Style
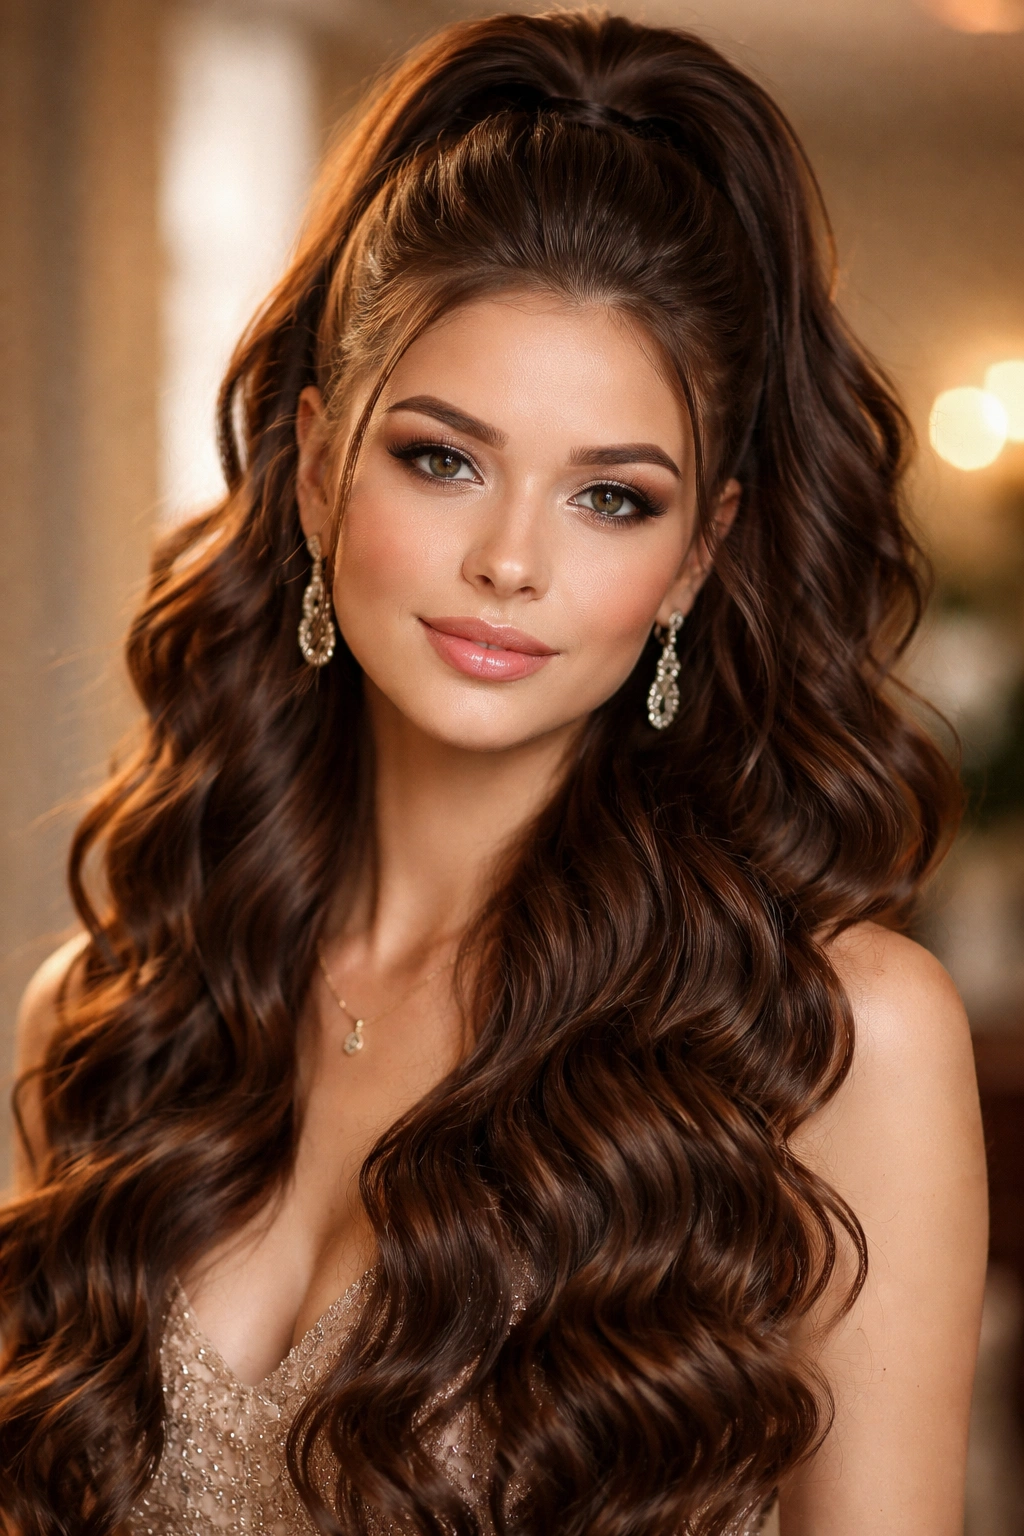
A half-up, half-down style with deep, dramatic waves combines two trending elements perfectly: the polished look of a partial updo with the movement of flowing waves below. This hybrid style works beautifully because it keeps hair off your face and neck (great for dancing or if you tend to get hot) while maintaining the romantic, flowing feel of waves. It’s sophisticated enough for weddings yet fun enough for birthday celebrations.
Building Deep Wave Half-Ups
Create deep waves first using your preferred method—curling iron, braiding, or heat-free technique. Once waves are fully formed and cooled, use a fine-tooth comb to gently brush the top layer of your hair (from the crown area) to smooth it slightly. Take a section from ear to ear across the back of your head and gather it into a ponytail at the crown, securing with an elastic.
To add dimension and prevent the updo from looking flat, gently tease the gathered section at the crown before securing, then smooth the surface layer with a fine comb. Wrap a small piece of hair (taken from within the ponytail) around the elastic base to hide it, securing with bobby pins. The waves below fall freely, creating soft movement.
What Makes This Style Party-Perfect
It solves the problem of hair constantly falling into your face during mingling or dancing, while still delivering the glamour and movement of wavy hair. The gathered section at the crown photographs beautifully and creates a flattering frame for most face shapes.
Quick Styling Facts
- Requires hair at least shoulder-length (longer is easier)
- Takes 25-30 minutes to fully style
- Works on all hair types from fine to thick
- Pairs beautifully with drop earrings or updos with delicate jewelry
- Can be adapted for very formal or casual parties
Pro tip: Curl your hair slightly tighter in the top sections (crown area) before securing the half-up, since you’ll gently brush out the top layer—this ensures enough definition remains after smoothing.
5. Spiral Curls with Wave Detail
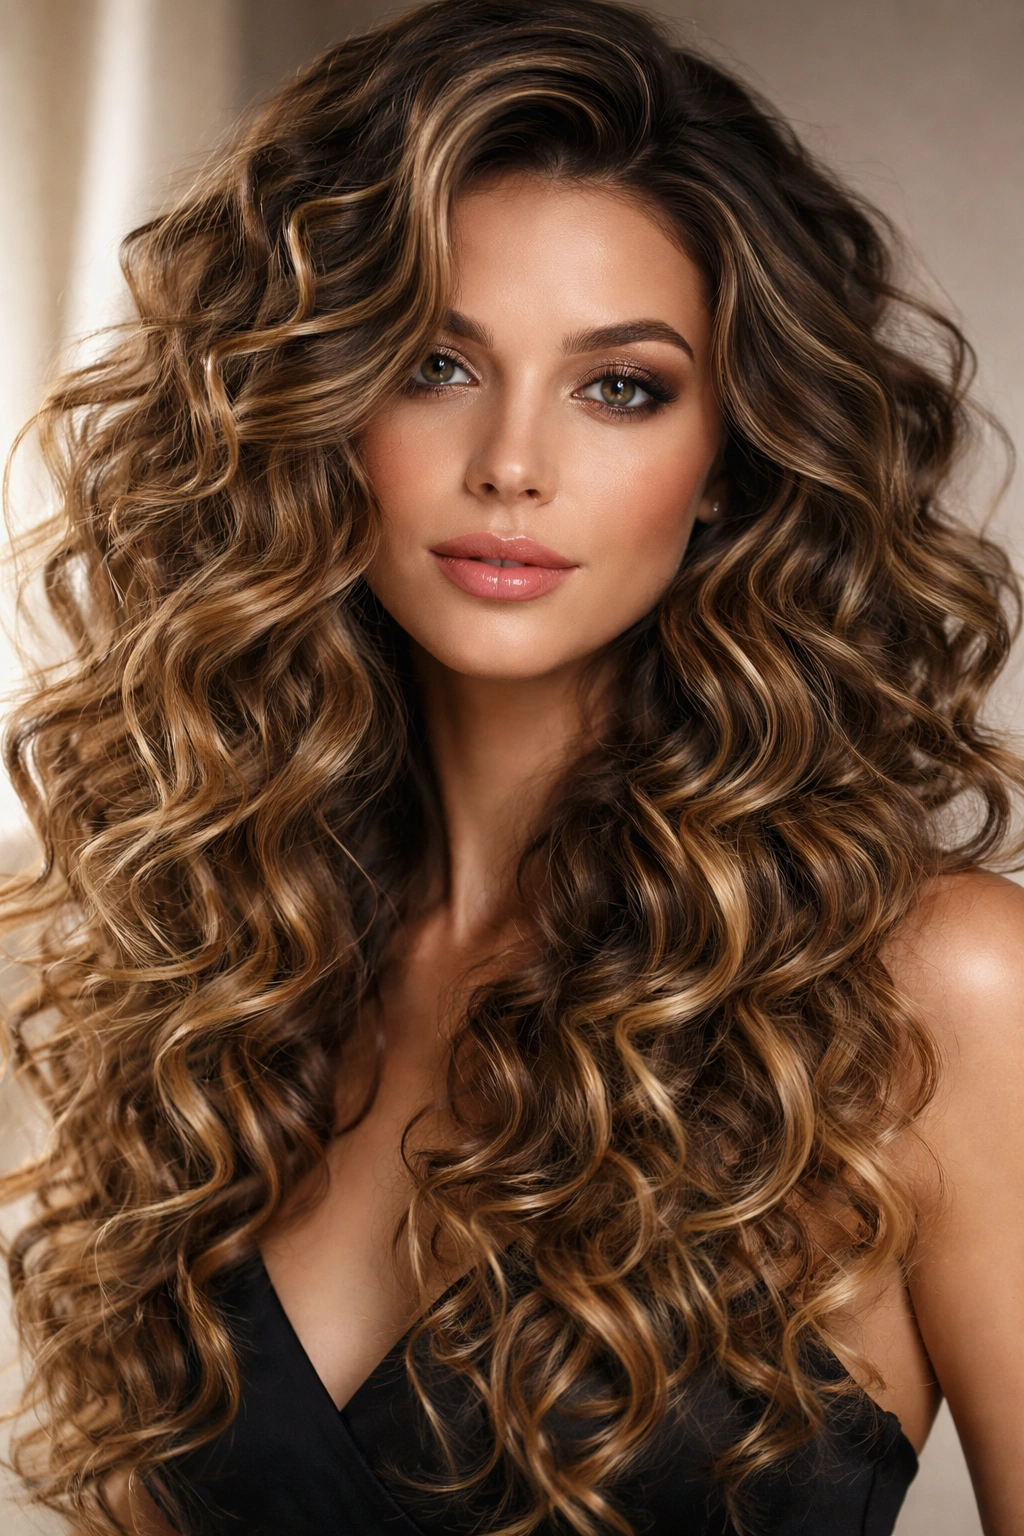
This style layers two textures: tight spiral curls that provide shape and hold structure, combined with looser wave detail throughout for a more modern, fashion-forward look. The combination prevents the style from looking too costume-like or overly curly, while still delivering serious volume and glamour. This works beautifully for people who want maximum impact and don’t mind spending time on styling.
Creating Spirals with Wave Detail
Use a curling iron in a smaller diameter (0.75 to 1 inch) to create tight spiral curls by wrapping hair around the barrel vertically, moving from roots to ends. Once all hair is curled, let cool completely. Rather than fully brushing out the curls (which would destroy them), use your fingers to gently separate the spirals into waves, breaking up the defined curl pattern while keeping the texture and volume intact.
The key is using restraint with the finger-combing—you’re not aiming for smooth waves but rather textured, voluminous waves with spiral undertones. Finish with a strong-hold hairspray to maintain the volume and texture throughout the night.
Why This Works for Party Settings
The combination of textures creates incredible dimension and visual interest, especially under party lighting. It photographs beautifully and stands out without appearing costume-like or overly formal.
Quick Styling Facts
- Takes 35-45 minutes, mostly because of the curling process
- Best on medium to thick hair
- Requires patience and a heat-proof brush for the finger-combing step
- Looks fantastic with minimal accessories (let the texture be the statement)
- Holds beautifully for 8+ hours without touch-ups
Worth knowing: Smaller barrel curling irons take longer but create tighter spirals; if you’re short on time, use a 1.25-inch barrel and accept slightly looser spirals in exchange for faster styling.
6. Wet-Look Waves
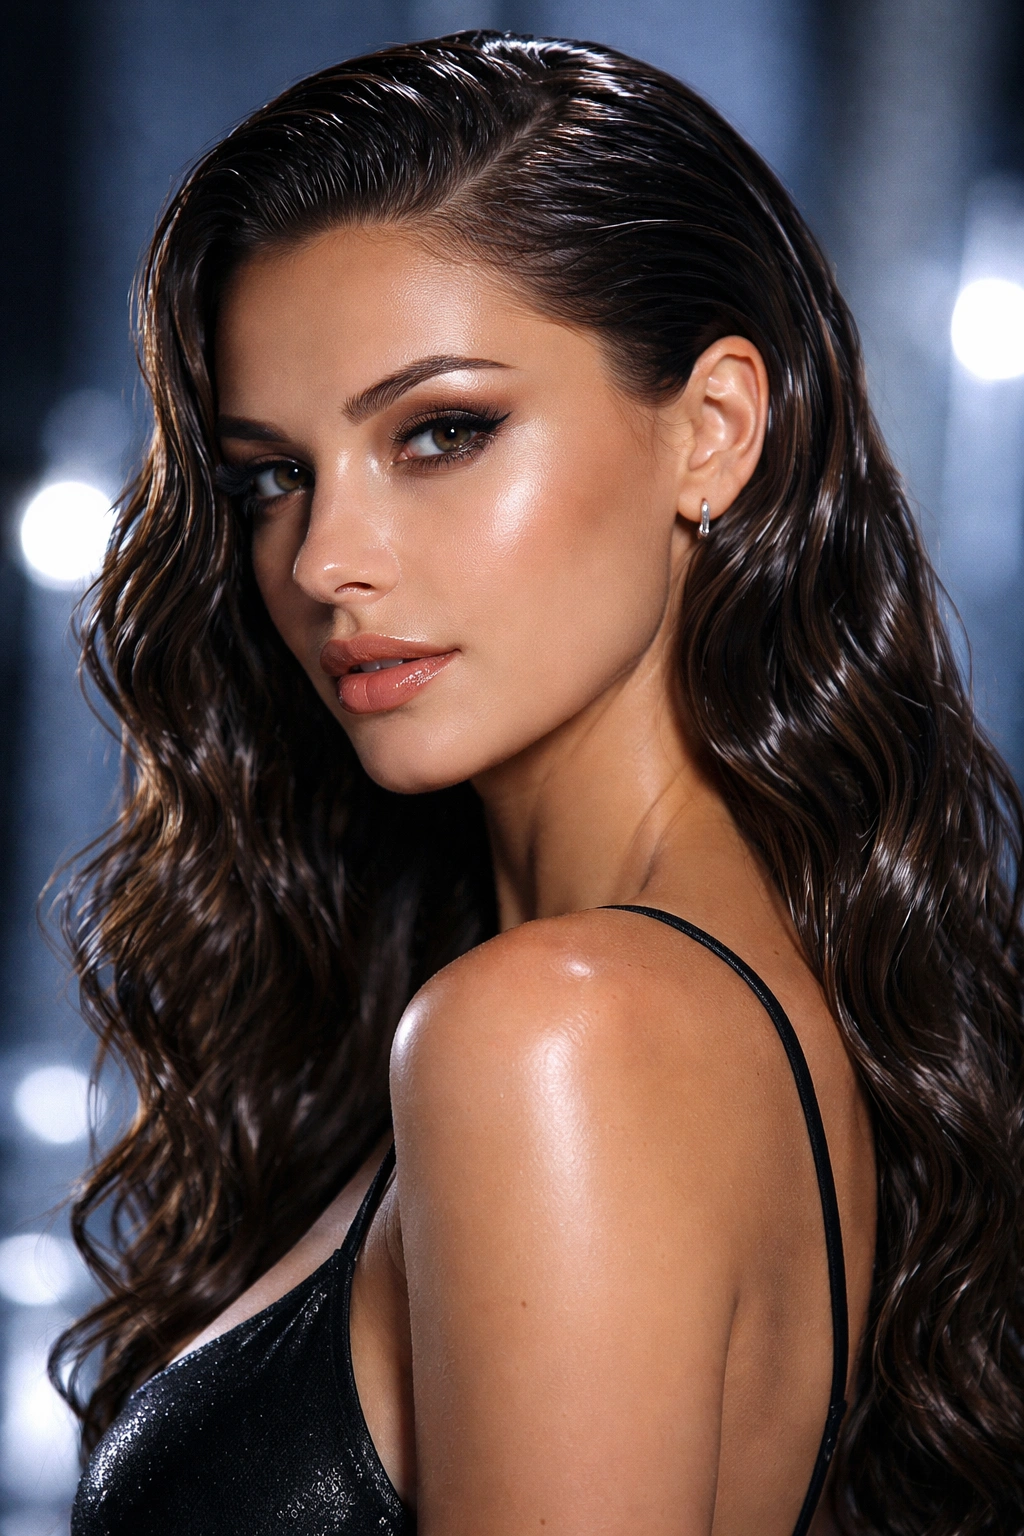
Wet-look waves are a trend-forward, sophisticated style where waves have a glossy, almost damp appearance created by using gel or wet-look products rather than traditional dry hairspray. The effect is modern, sleek, and incredibly chic—perfect for parties with a fashion-forward vibe or for people who prefer a polished, almost sculptural wave. These waves have definition and precision while maintaining a shiny, reflective finish rather than a matte appearance.
Achieving Wet-Look Waves
Apply a strong-hold gel or wet-look product to damp hair, then blow-dry with your fingers to create direction and rough shape. Use a 1.25-inch curling iron to create waves, curling sections and holding each for 10-12 seconds. Work with smaller sections than usual—the product weight requires this for proper hold. Once all sections are curled, cool fully, then apply a wet-look finishing spray or serum.
The key is layering products: the gel base provides hold and that glossy look, while the finishing spray locks everything in place without reducing shine or adding matte texture. Don’t brush out these waves—leave them relatively intact for that sculpted appearance.
Why This Style Stands Out at Parties
Wet-look waves feel modern, editorial, and intentionally polished. They photograph stunningly under party lighting (which accentuates the shine), and they hold their shape perfectly even during dancing or sitting.
Quick Styling Facts
- Takes 25-30 minutes with proper product application
- Works best on darker hair or hair with natural shine
- Requires strong-hold gel (not lightweight products)
- Pairs beautifully with sleek, minimalist clothing or structured party wear
- Holds for 6-8 hours without significant fade
Pro tip: Apply wet-look product only to the mid-lengths and ends, avoiding the roots, so hair doesn’t look greasy while the waves appear glossy and intentional.
7. Braided Wave Combination
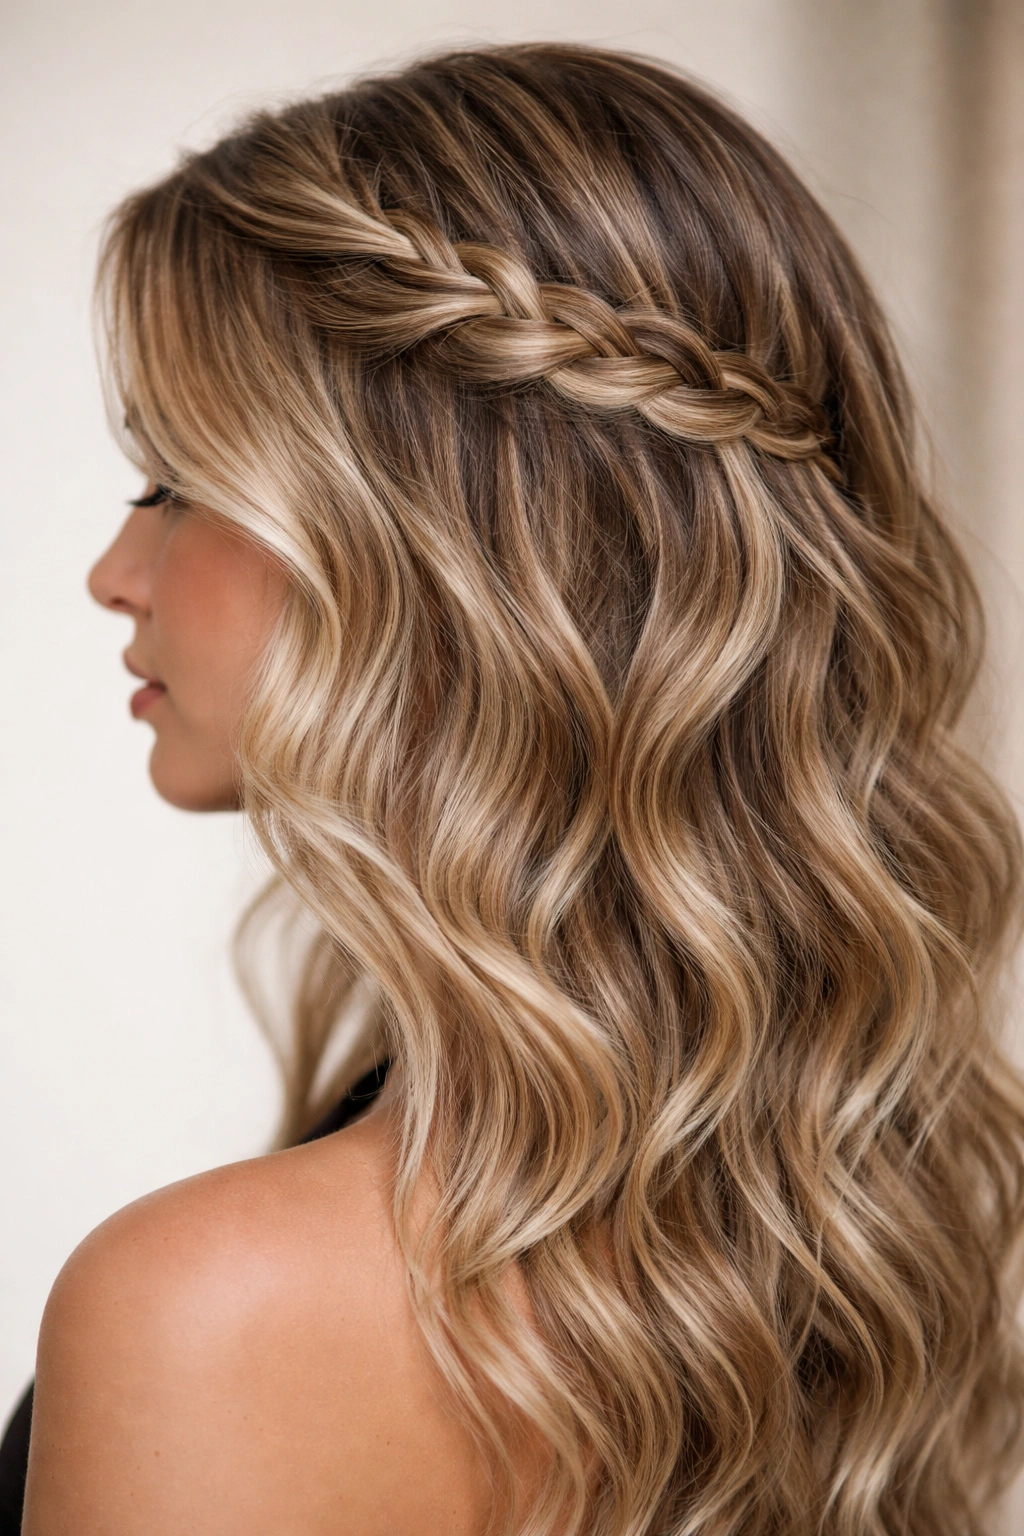
Incorporating braids into your wavy style adds texture, visual interest, and a touch of whimsy without sacrificing sophistication. This could mean a Dutch braid woven through loose waves, French braids framing the face with waves below, or even braided sections interspersed with unbraided waves. The combination feels effortlessly polished and works beautifully for garden parties, bohemian-themed events, or any setting where you want something more intricate than plain waves but less formal than a full updo.
Building Braided Wave Styles
Start by creating loose waves throughout your entire head using your preferred method. Once waves are formed, choose your braiding placement: a Dutch braid on one side from temple to ear; French braids on both sides that meet at the back; or a single long braid down one side of the head incorporated into the waves.
Create the braid by working slowly and leaving it slightly loose and textured rather than tight and sleek. Gently tousle the braid as you work to blend it with the surrounding waves. Secure the braid with bobby pins hidden under surrounding hair, or let it naturally flow into the waves below.
What Makes This Style Work for Parties
The combination of structured braids and flowing waves feels intentional and special without being overly formal or taking hours to complete. It’s particularly flattering for people who want movement and femininity with a touch of uniqueness.
Quick Styling Facts
- Takes 30-40 minutes depending on braid complexity
- Works on all hair lengths from shoulder-length up
- Best with slightly thicker or textured hair (fine hair can look limp in braids)
- Pairs beautifully with bohemian, garden, or cocktail party settings
- Holds through the entire evening without needing touch-ups
Worth knowing: Slightly damp or textured hair (from sea salt spray) braids much more easily than perfectly smooth hair and actually looks better in this style—imperfection is the point.
8. Voluminous Crown Waves
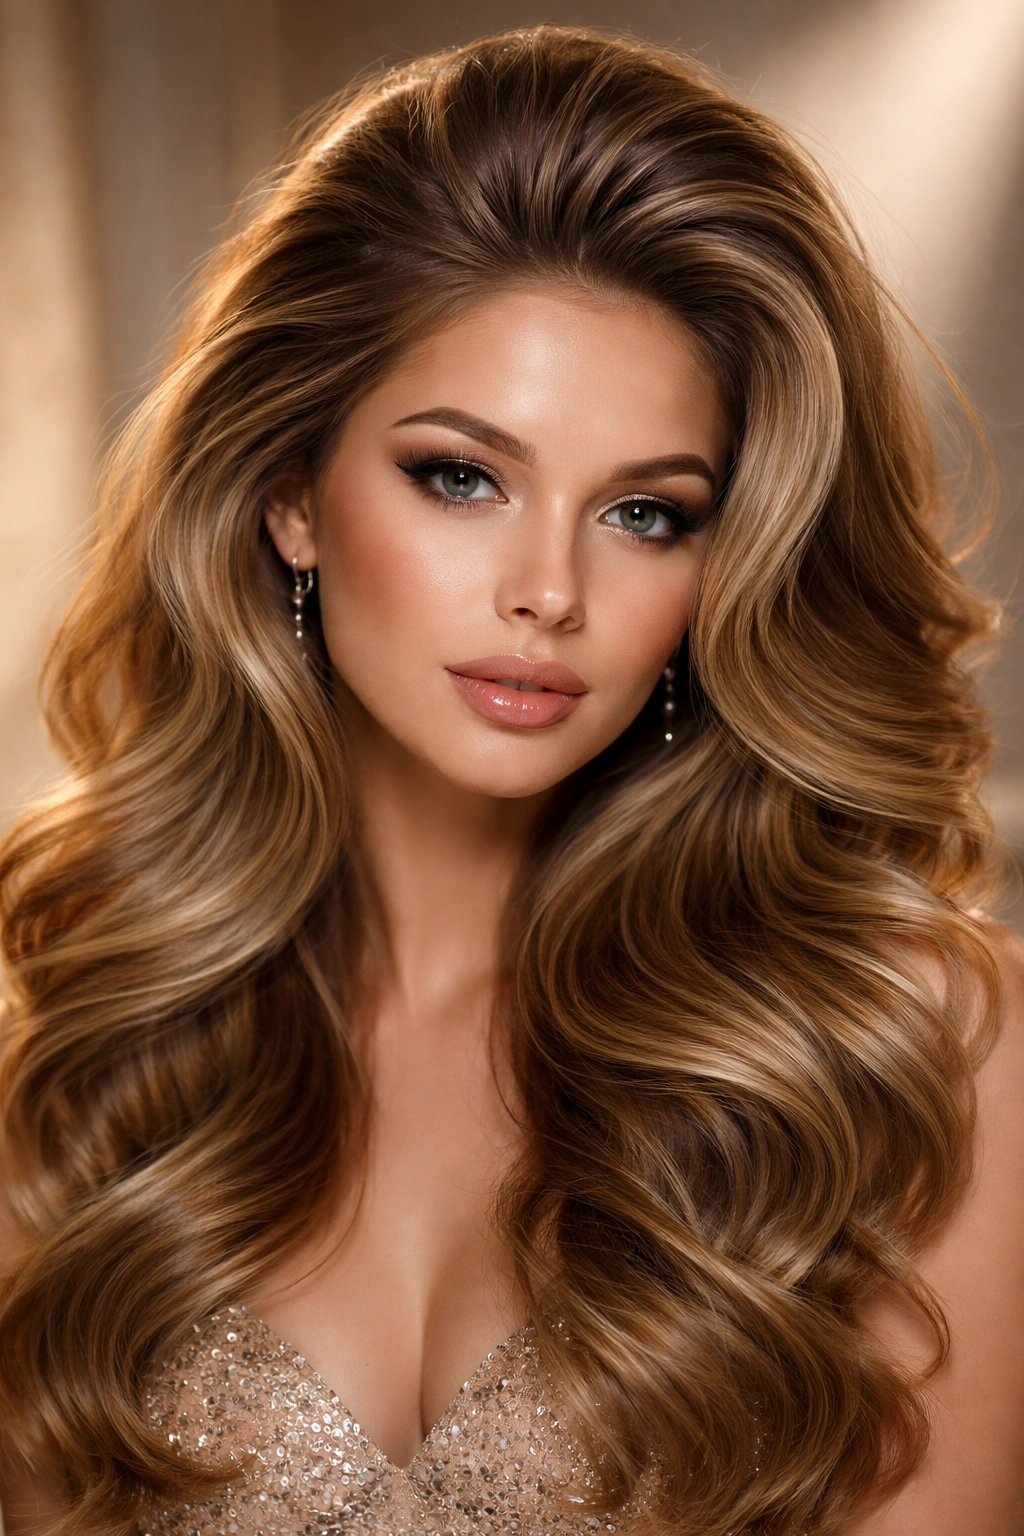
This style focuses on creating maximum volume at the crown and top of the head, with waves that flow down and diminish slightly in volume toward the ends. The effect is incredibly flattering because the volume frames the face beautifully and creates a sense of movement that draws the eye upward. This works exceptionally well for people who feel their faces benefit from frame-lifting hairstyles or who simply love the drama of big, voluminous waves.
Creating Crown Volume with Waves
Blow-dry your hair with a large round brush, focusing on lifting the roots straight up and away from the scalp at the crown. Use a volumizing mousse on damp roots before blow-drying to build extra foundation volume. Once your base is dry with lifted roots, use a large-barrel curling iron (1.5 inches or larger) to create waves, focusing on curling the crown and upper sections first and holding those curls longer (10-12 seconds) for deeper definition.
The lower sections of your hair can have looser, less defined waves since they’ll naturally fall and relax. After all sections are curled and cooled, gently brush through the top layers only (the crown section) to smooth and blend the waves, leaving the lower sections more textured.
Why Crown Volume Flatters at Parties
The lifted crown creates instant face-flattering proportions, prevents hair from appearing to weigh you down, and creates dramatic movement when you dance or move. These waves photograph beautifully from all angles.
Quick Styling Facts
- Takes 30-35 minutes total
- Works on all hair types when done with proper volumizing products
- Best with a middle or deep side part (both flatter face-lifted hair)
- Pairs beautifully with backless or off-shoulder dresses (shows off the volume)
- Lasts 6-8 hours without additional product
Insider note: Tease gently at the crown area before curling if you have fine hair, then smooth the surface layer—this creates the illusion of volume without making your hair look matted.
9. Sleek Low Waves
Sleek low waves offer a sophisticated, almost futuristic take on the classic wavy look. The top of the head is brushed smooth and polished, while waves begin lower, around ear level, and continue through the lengths and ends. This creates an elegant contrast between the smooth crown and textured waves below. It’s perfect for people who want waves without the volume, or who prefer a more minimalist, high-fashion aesthetic.
Styling Sleek Low Waves
Blow-dry your hair smooth and straight with a paddle brush, focusing on making the crown and upper sides completely sleek with no texture or frizz. Once the top is smooth, use a straightening iron for extra polish if needed. Then, using a 1.25-inch curling iron, begin creating waves at approximately ear level, curling sections and holding for 8-10 seconds.
Work from ear level down through all the lengths and ends, creating consistent waves. Leave the top section completely unwavy. Smooth the top gently with a flat iron if needed to maintain sleekness, then finish with a flexible-hold hairspray that won’t make the waves feel stiff or crunchy.
What Makes This Style Party-Appropriate
The sleek crown feels polished and intentional, while the waves add movement and prevent the style from feeling severe. It’s particularly flattering with structured party wear, minimalist jewelry, and sophisticated settings.
Quick Styling Facts
- Takes 20-25 minutes with a flat iron for smoothing
- Works best on medium to thick hair (fine hair may show the transition too obviously)
- Pairs beautifully with sleek updos using the lower waves
- Creates an incredibly polished, high-fashion silhouette
- Lasts 5-7 hours depending on hair texture
Pro tip: Smooth the transition line between sleek and wavy using a blow dryer on cool setting after you’ve curled the lower section—this helps the sections blend rather than creating an obvious dividing line.
10. Boho-Inspired Waves

Boho waves are romantic, soft, and ethereal—think flowing, textured waves with a deliberately undone, natural quality that somehow still looks carefully constructed. These waves incorporate softer textures than Hollywood waves, more freedom and movement than sleek waves, and often pair beautifully with accessories like flower crowns, decorative clips, or woven headbands. This style works beautifully for garden parties, outdoor weddings, or any event with a relaxed, romantic vibe.
Creating Boho Waves
Use the overnight braid method or salt spray technique for the most authentic boho texture. Braid damp hair loosely into two or three braids, sleep on them, then unravel and finger-comb in the morning. Alternatively, apply sea salt spray to damp hair and scrunch as it air-dries or blow-dries, creating natural-looking texture without defined waves.
If using a curling iron, curl sections loosely using a 1.5-inch barrel, holding each curl only 5-6 seconds rather than the 10-12 seconds used for more defined waves. Once curled, immediately brush through the entire head with a wide-tooth comb, breaking up the curls completely into soft, flowing waves. The result should look effortlessly wavy rather than deliberately styled.
Why Boho Waves Work for Relaxed Parties
They feel romantic and approachable—beautiful but not intimidating. They pair perfectly with natural makeup and minimal jewelry, or with bold statement pieces and bohemian accessories.
Quick Styling Facts
- Takes as little as 10-15 minutes if using the braid method overnight
- Works beautifully on all hair types
- Actually improves as the day progresses (waves deepen and settle)
- Pairs perfectly with flower crowns, delicate clips, or no accessories
- Can be left fully down or incorporated into loose updos or half-ups
Worth knowing: Boho waves look best when slightly touchable and slightly undone—if you over-style or over-product, they lose the effortless vibe that makes this style special.
11. Zigzag Waves Pattern
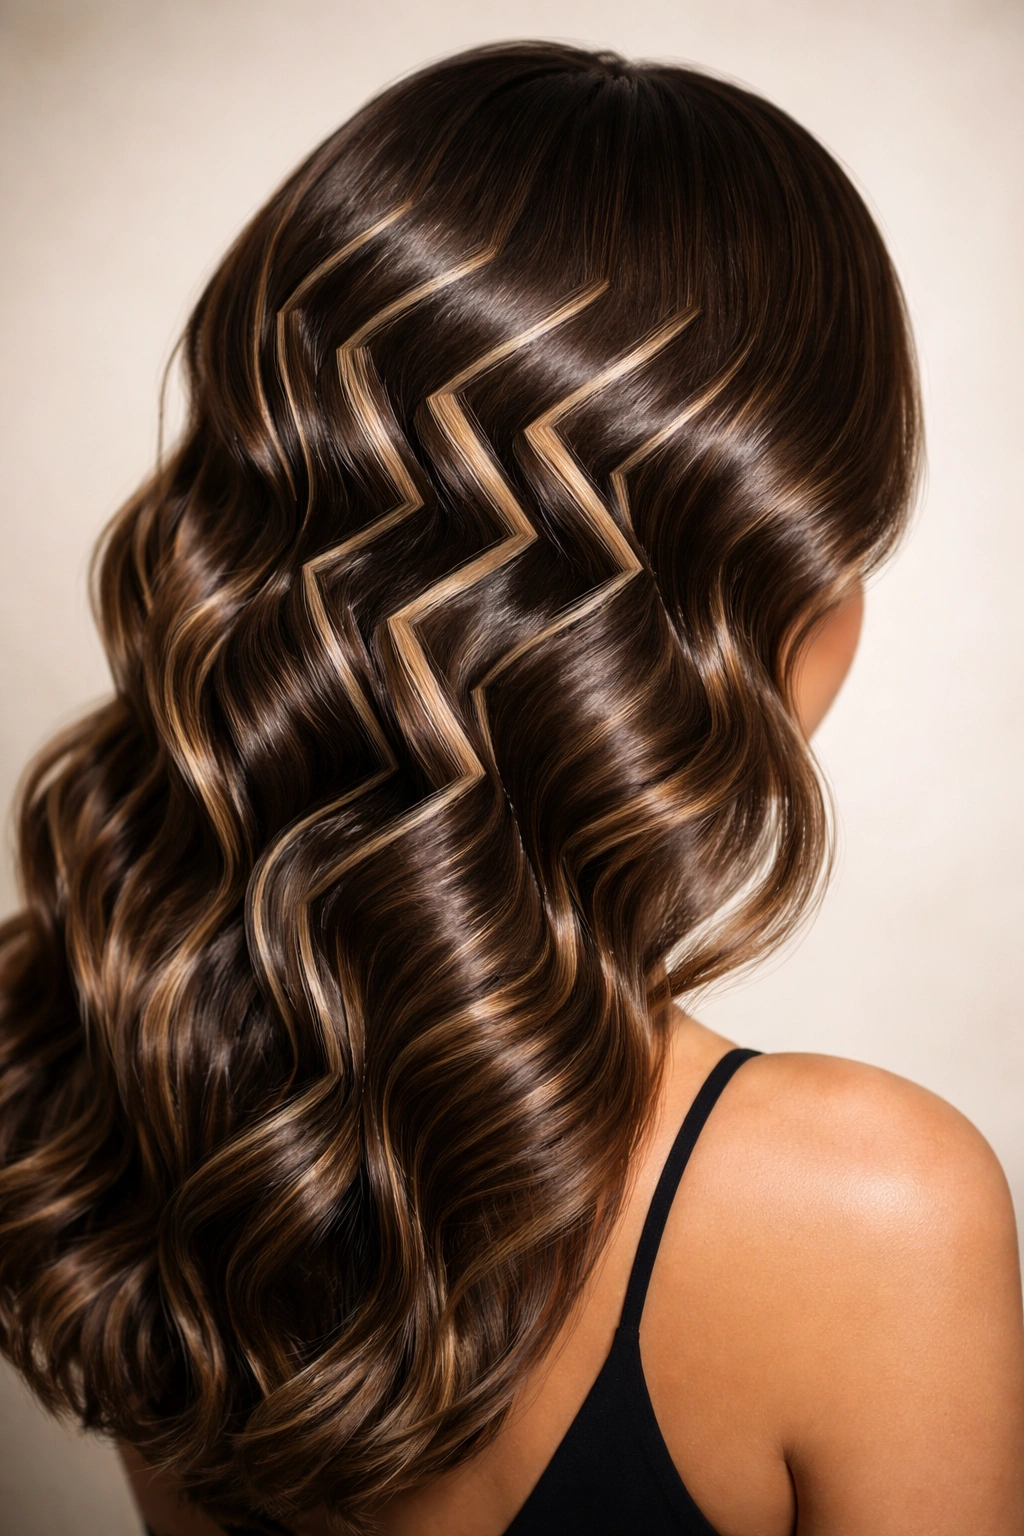
Zigzag waves are a bold, graphic take on traditional waves where the wave pattern follows a sharp, deliberate zigzag formation rather than smooth S-curves. This creates an almost art-deco or mod aesthetic that’s incredibly striking and modern. These waves require more precision during styling but deliver serious visual impact, making them perfect for people who want to stand out and aren’t afraid of something more unconventional.
Creating Zigzag Waves
Section your hair into four to six vertical sections. Using a straightening iron, create sharp zigzag patterns by angling the iron first one direction, then immediately switching direction as you move down the section, creating a sharp Z-shape rather than a smooth wave. Hold each angle for 3-4 seconds before switching.
Alternatively, use a root-lift comb or zigzag-patterned styling tool (these exist specifically for this purpose) with a blow dryer. The key is creating intentional, sharp angles rather than smooth curves. Once the zigzag pattern is set and cooled, you can leave it textured or smooth it slightly with a light hand.
What Makes This Style Stand Out
It’s undeniably fashion-forward and creates an incredible visual impact, especially in photos. It works beautifully for people with straight or wavy natural hair who want something completely different from traditional waves.
Quick Styling Facts
- Takes 25-30 minutes with a straightening iron
- Works on all hair types from fine to thick
- Requires more precision than standard waves
- Pairs best with modern, edgy, or bold party outfits
- Holds for 5-6 hours before beginning to relax into smoother waves
Pro tip: Use a straightening iron with ultra-thin plates (0.5 inches or less) for sharper angles; thicker plates create less defined zigzags.
12. Mermaid Waves
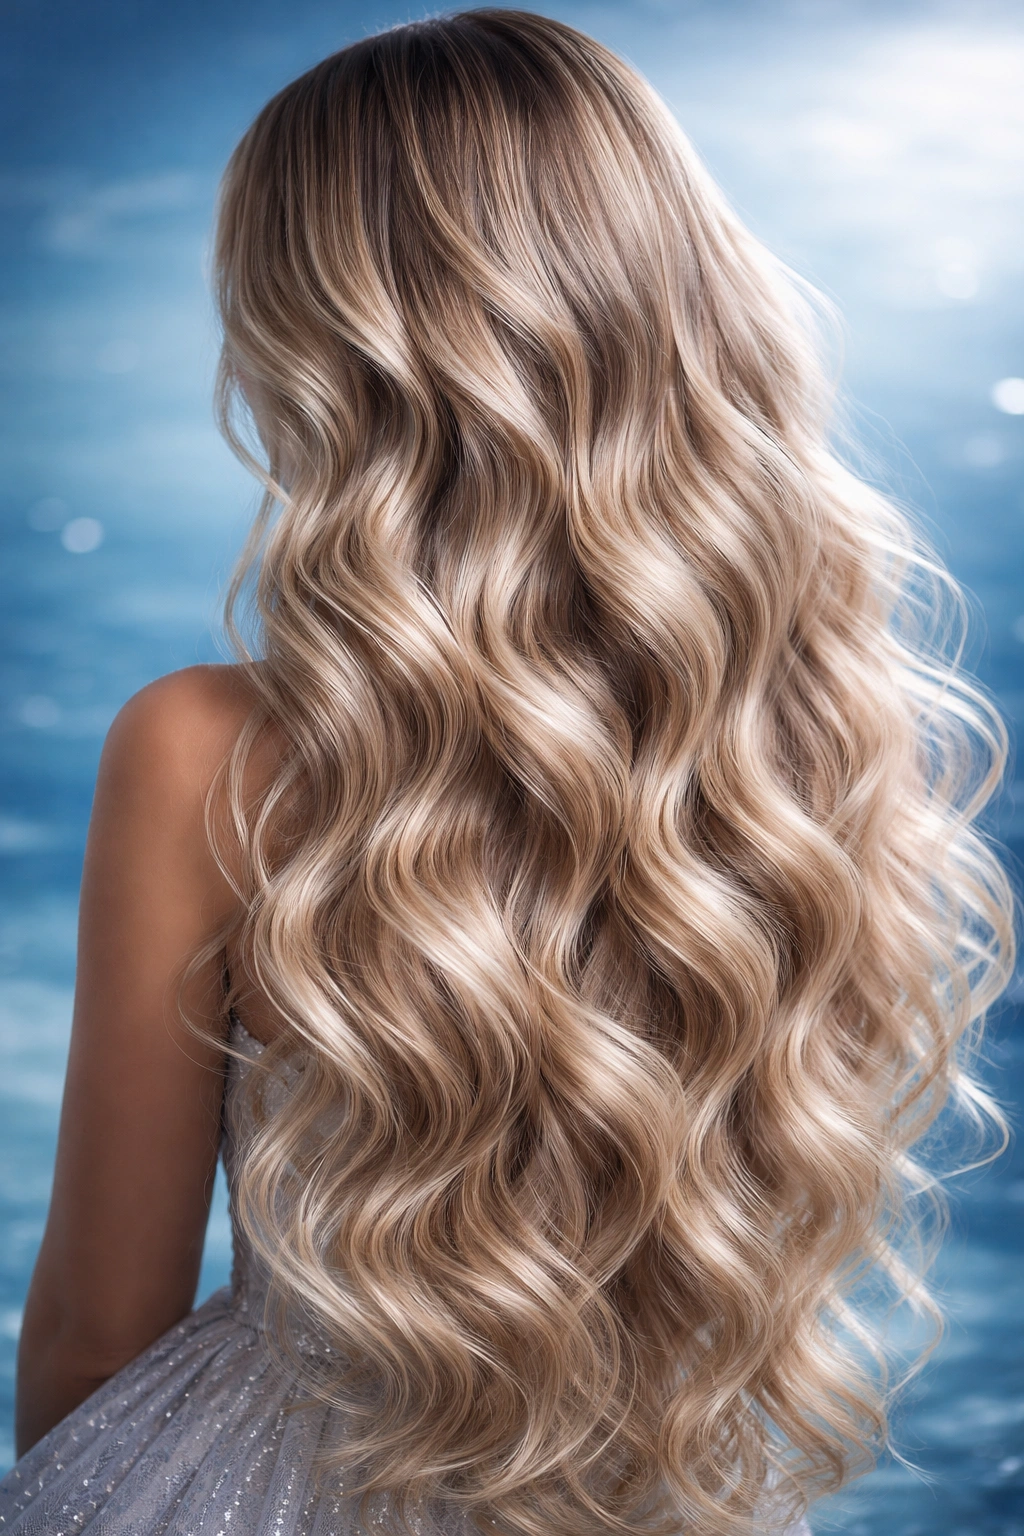
Mermaid waves are all about creating a cascading, undulating wave pattern that looks like waves of water flowing down your hair—multiple distinct wave sections that flow seamlessly into each other, creating a truly oceanic effect. These waves are bouncy, voluminous, and playful, perfect for people who love the idea of waves but want something more dynamic and exaggerated than traditional styles. This works beautifully for costume parties, festive celebrations, or anyone who wants maximum movement and visual impact.
Creating Mermaid Waves
Start with voluminized, blow-dried hair. Using a 1.5-inch curling iron, create waves by curling vertical sections, but vary the depth and direction deliberately—curl some sections away from the face, some toward it, some with loose waves, some with tighter curls. The randomness in direction and tightness is what creates that organic, undulating water effect.
Don’t brush out these curls once they’re set. Instead, gently finger-comb them just enough to separate the curls and create flow without destroying the definition. You want visible waves with lots of dimension and movement. Use a volumizing or texturizing spray to enhance the effect and keep waves bouncy throughout the night.
Why Mermaid Waves Work at Parties
They’re visually spectacular, incredibly fun, and deliver the “wow” factor on the dance floor. They photograph beautifully and photograph even better in motion.
Quick Styling Facts
- Takes 35-45 minutes due to the detailed curling process
- Works best on medium to thick hair (fine hair may look thin with this volume)
- Best worn fully down to show off the wave pattern
- Pairs beautifully with sparkly, fun, or ocean-inspired party wear
- Lasts 6-8 hours with proper products
Insider note: Use a clarifying shampoo before styling this look to remove product buildup, which can weigh down the waves—you want maximum bounce and movement.
13. Finger Waves Vintage Style
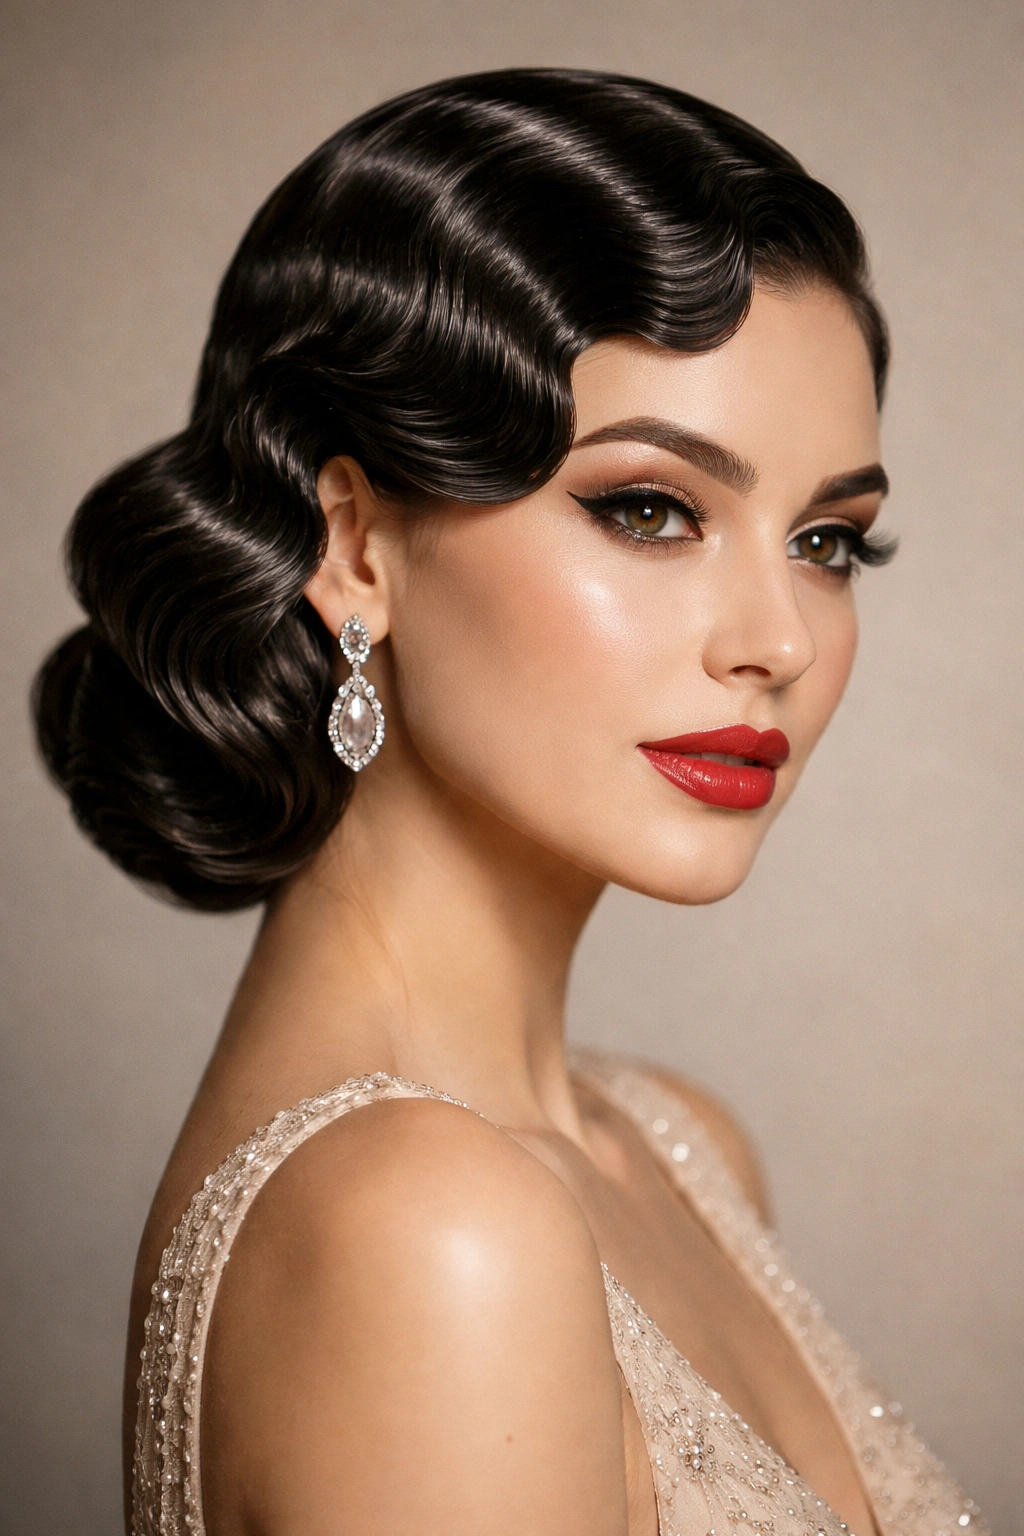
Finger waves are a classic 1920s-inspired style that’s experiencing a major resurgence. Unlike loose modern waves, finger waves are sculpted, precise, and architectural—they’re created by pinching the hair into deep curves using only your fingers and a comb, then setting those curves while damp. The result is incredibly elegant, graphic, and photo-worthy. This works beautifully for people who love vintage aesthetics or who want something completely unique and conversation-starting.
Creating Finger Waves
Apply a light gel to damp hair and use a fine-tooth comb to sculpt deep wave patterns by creating pinches and curves. Use your index and middle fingers to hold each curve in place while you smooth the section with the comb. Move down the head section by section, creating consistent, deep waves. Once the pattern is established, allow hair to fully air-dry (or use a cool blow-dryer setting) while holding the finger waves in place with clips.
Once completely dry, gently release the clips and smooth any frizz with the comb. The waves should be stiff and hold their shape perfectly. If they’re too stiff, apply a tiny bit of flexible-hold hairspray rather than additional gel.
What Makes Finger Waves Party-Perfect
They’re instantly recognizable, deeply elegant, and feel like you’ve stepped out of a different era. They photograph beautifully and pair perfectly with vintage-inspired party wear or as a modern twist on classic evening attire.
Quick Styling Facts
- Takes 30-40 minutes including drying time
- Best on medium to thick hair with some natural wave or texture
- Requires a fine-tooth comb (plastic combs work better than metal)
- Looks best paired with minimalist jewelry and vintage-inspired makeup
- Lasts all evening without needing touch-ups
Worth knowing: Finger waves work best on hair that’s not freshly washed (second-day hair is ideal) because product grips better and holds the waves more securely.
14. Soft Romantic Waves
Soft romantic waves are the epitome of feminine, effortless elegance—waves that are visible and intentional but incredibly soft, touchable, and romantic rather than dramatic or bold. These waves flow gently rather than cascading dramatically, and they maintain a delicate, almost dreamy quality throughout the night. This style works beautifully for weddings, formal dinners, or any event where you want to look absolutely beautiful without appearing overdone.
Creating Soft Romantic Waves
Use a large-barrel curling iron (1.5 to 2 inches) and curl each section gently, holding for only 6-8 seconds. The larger barrel and shorter hold time create loose, soft waves rather than tight curls. After curling, wait for all sections to cool, then gently brush through with a large paddle brush to blend the waves into soft, continuous movement.
Apply a lightweight, flexible-hold hairspray that provides hold without stiffening the waves. You want the waves to move and flow naturally when you move, not feel rigid or crunchy. A light texturizing spray can enhance dimension without adding texture that would compromise the softness.
Why This Style Works for Elegant Parties
These waves are universally flattering, work with any dress code from casual to black-tie, and photograph beautifully in any lighting. They’re elegant without being severe, romantic without being costume-like.
Quick Styling Facts
- Takes 20-25 minutes total styling time
- Works on all hair types and lengths
- Pairs beautifully with minimalist or ornate jewelry (works either way)
- Best worn fully down to show off the soft movement
- Lasts 5-6 hours and actually improves as waves relax
Pro tip: Curl your hair toward your face on both sides rather than randomly—this creates a flattering frame while maintaining the soft, romantic quality.
Final Thoughts

Wavy hair transforms a party look from ordinary to memorable, and the right wave style amplifies your confidence and presence in the room. The beauty of having fourteen distinct options is that regardless of your hair type, the vibe you’re trying to create, or how much time you have available, there’s a wavy style that fits perfectly.
The most important thing to remember is that your chosen style doesn’t need to be complicated to be effective—sometimes soft, romantic waves are infinitely more impactful than the most intricate finger waves, depending on the setting and what makes you feel most like yourself. Start with whichever style resonates with you aesthetically, practice it once or twice before the actual party, and don’t hesitate to adapt and adjust based on how your specific hair responds to products and heat.
The techniques, products, and timing tips covered here give you a complete toolkit for creating waves that last all night, photograph beautifully, and make you feel absolutely gorgeous. Choose your style, commit to the process, and enjoy the compliments that follow.