Braided ponytails are deceptively versatile—they look intricate enough to impress, yet they’re surprisingly manageable once you know which technique works best for your hair’s unique texture, thickness, and density. Whether your hair is fine and prone to slipping, thick and resistant, coiled and fragile, or somewhere in between, there’s a braided ponytail style engineered specifically for how your strands behave. The secret isn’t finding one “perfect” braid—it’s understanding how different braiding methods interact with different hair types, and knowing which combinations create styles that actually hold, look polished, and feel comfortable to wear all day.
The real challenge most people face isn’t learning to braid. It’s figuring out which braid stays put in fine hair without looking thin and stringy, which one works on thick curls without requiring thirty bobby pins, and which one actually looks intentional rather than like you’re desperately trying to hide a bad hair day. Each braiding technique—Dutch, French, fishtail, rope, halo—creates a completely different visual effect and behaves completely differently once it meets your specific hair texture. A loose, romantic fishtail braid can look ethereal on straight hair but may disappear entirely into thick, coily strands. A tight Dutch braid can anchor fine hair beautifully but might feel too severe on delicate waves.
This guide walks through fifteen distinct braided ponytail styles, each paired with specific guidance for the hair types where it genuinely excels. You’ll learn not just how to create each style, but why it works for certain textures, what to watch for as you’re braiding, and exactly how to adapt each technique if your hair doesn’t quite match the “ideal” type. By the end, you’ll have concrete options for every morning, every hair type, and every occasion—from casual everyday wear to styles that hold beautifully through workouts, events, and unpredictable weather.
1. Classic Dutch Braid Ponytail
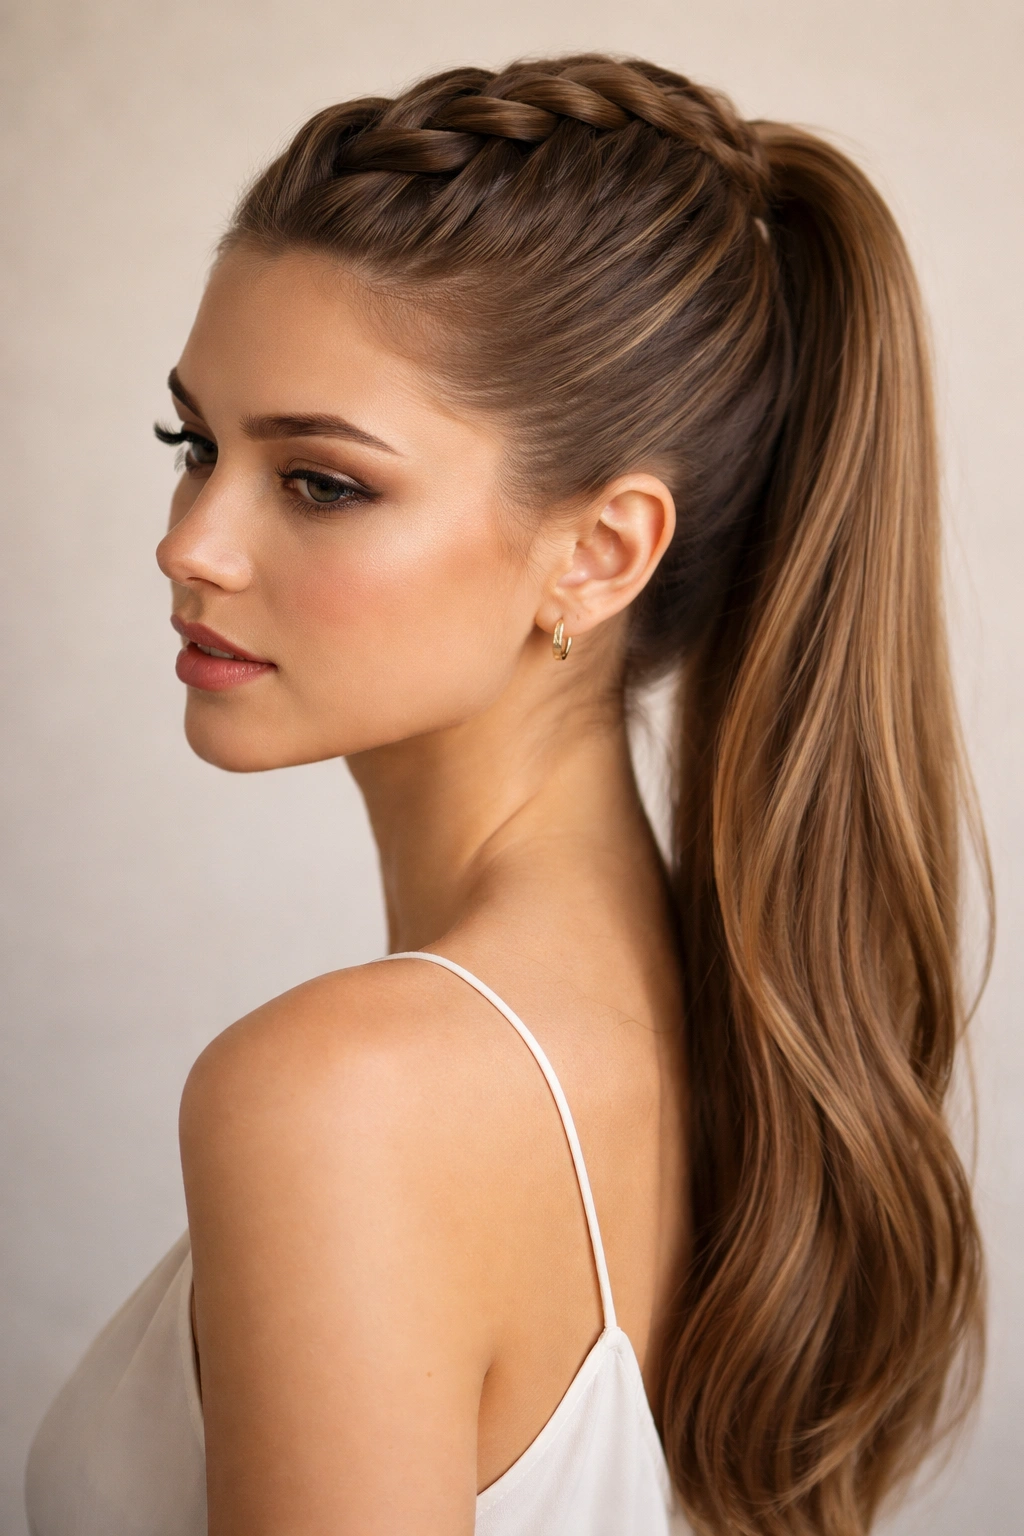
The Dutch braid—braiding over instead of under, which makes the braid sit on top of the hair and appear bolder—creates a graphic, sculptural effect that works beautifully on straight to wavy hair types where definition and contrast matter. Start by sectioning three even strands at the crown, then cross each strand over the middle section while adding a thin piece of hair from the sides. The over-braiding creates that dimensional look where the braid appears to pop off the scalp.
Why This Works Best for Straight and Lightly Wavy Hair
Dutch braids require hair that holds tension without slipping and strands that stay distinct and visible. Straight and gently wavy textures show off the braid’s architecture perfectly—you can see every strand crossing, which is the whole visual point. The braid stays secure without needing excessive bobby pins because the straight hair naturally grips and holds each section. On wavy hair, this style creates a polished, intentional look that reads as high-effort without being complicated.
How to Execute It
Begin with slightly textured hair—if your hair is too slippery, add a light texturizing spray or dry shampoo at the roots and mid-lengths to give yourself grip. Divide hair into three sections at the crown and cross the right section over the center, then the left over the center. As you work down, pick up a thin section of hair from the right side and add it to the right section before crossing over, then repeat on the left. Work the braid down to the nape, then secure it with a small elastic. Gather all hair into a low ponytail, pulling out a few face-framing pieces if you want softness.
Styling Tips and Tricks
- After finishing the braid, gently pull the edges outward to widen and loosen the braid slightly—this creates a softer, more romantic look even though the braid is technically “tight”
- For extra polish, wrap a thin section of hair from the ponytail around the elastic to hide it completely
- Dutch braids look sharpest when the rest of your ponytail is smooth and sleek—blow-dry straight if needed, and use a fine-tooth comb to smooth any flyaways before braiding
2. French Braid Ponytail
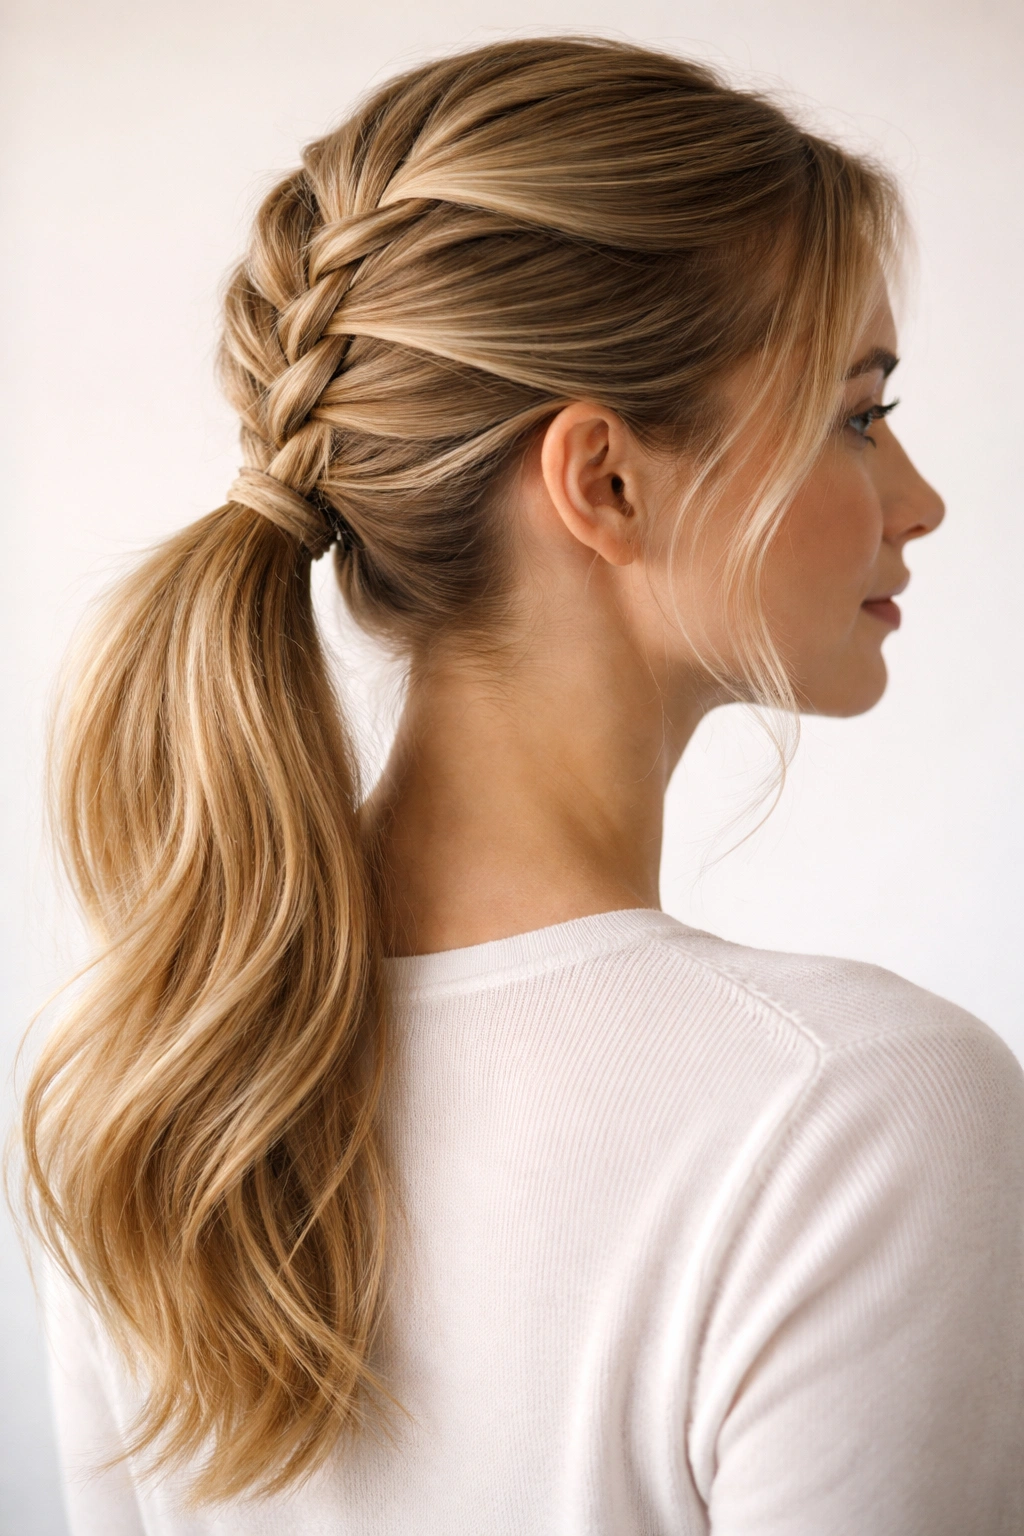
The French braid differs from the Dutch only in direction—you cross strands under the center section, which makes the braid sit slightly flatter against the scalp and look more integrated into the hair. This creates a softer, less graphic appearance than the Dutch version, making it ideal for anyone who wants braid texture without the bold sculptural statement.
Best for Fine and Thin Hair
Fine hair benefits tremendously from the French braid’s underbraid technique because the braid appears fuller and more substantial than it actually is—the weaving actually creates the illusion of more volume. The gentle tension of French braiding also helps keep fine strands organized without creating gaps or visible scalp, which is a constant battle with finer textures. Fine-haired people often feel like braids don’t work for them, but French braids are often the turning point.
The Key Technique Difference
Section three strands at the crown. Cross the right strand under the center, then the left under the center—this is the only difference from Dutch braiding, but it completely changes the visual result. As you work down, pick up thin sections from the sides and fold them under. The underbraid creates a smooth, nested appearance. Once you reach the nape, secure with a small elastic and gather into your ponytail.
Tips for Fine Hair Specifically
- Use a sea salt spray or volumizing mousse before braiding—this gives fine strands more grip and makes the braid appear fuller
- Work with slightly damp hair rather than completely dry; wet hair is slippery but completely dry fine hair can feel flyaway-prone
- Braid loosely—tight braiding on fine hair can make it look thinner. A gently undone French braid actually looks fuller and more intentional
- After securing, gently tease the braid from underneath with a fine comb to add subtle texture and fullness
3. Fishtail Braid Ponytail
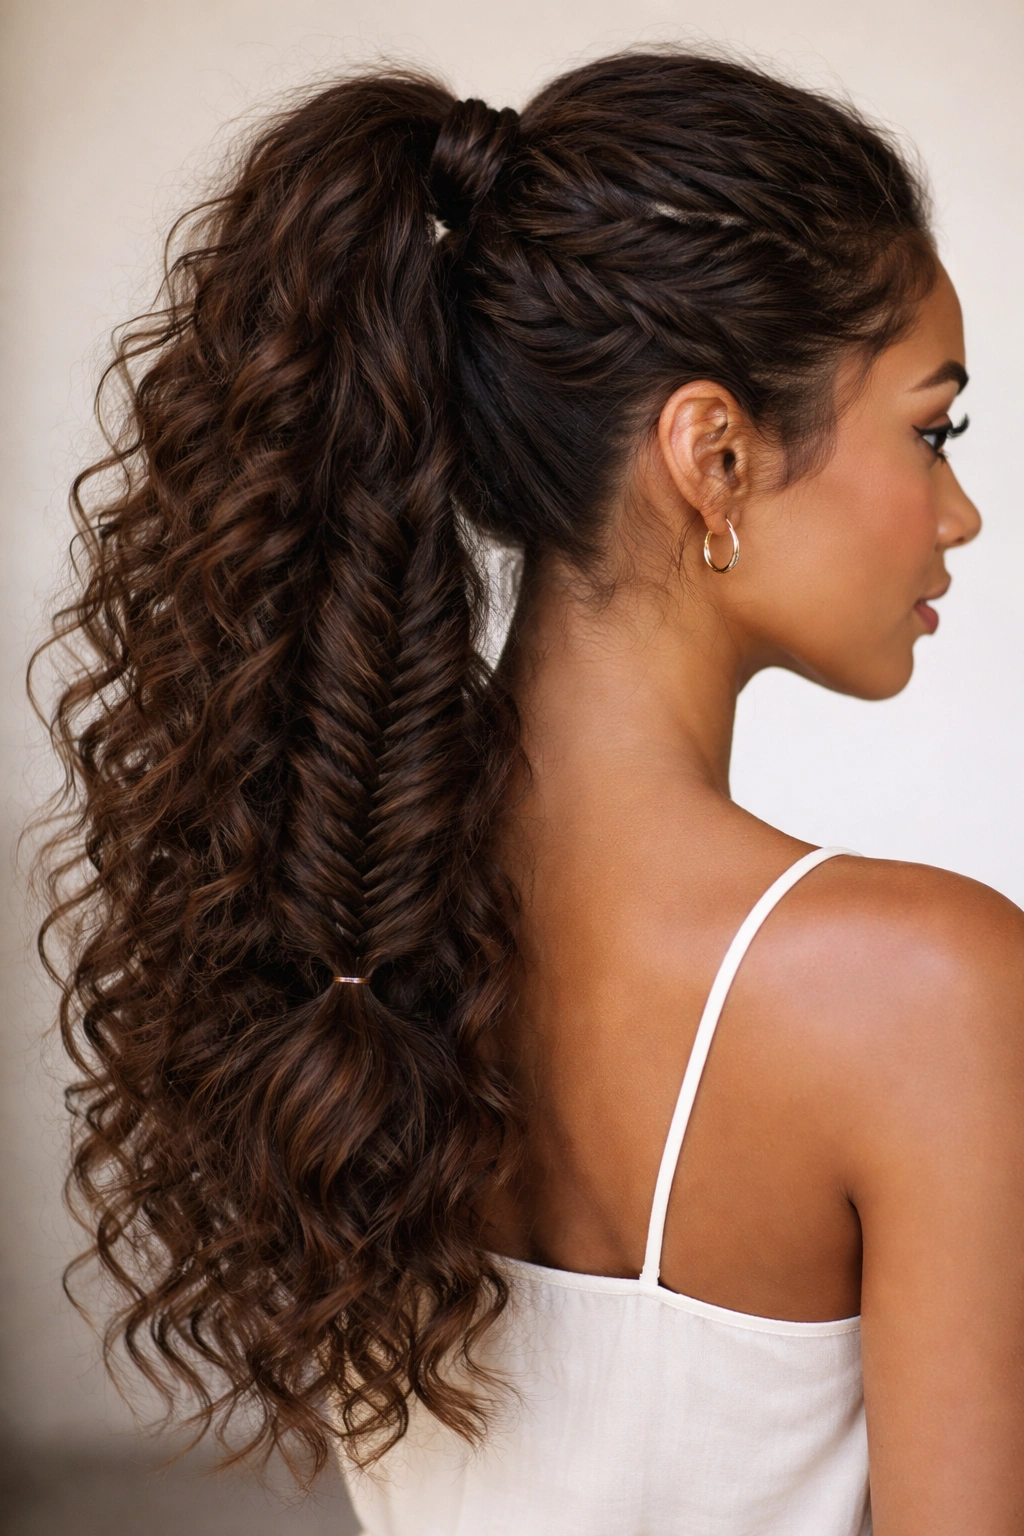
The fishtail braid uses only two working sections instead of three, creating an intricate, woven appearance that looks far more complicated than it actually is. Start by dividing hair into two sections, then pick up a small piece from the outside of the left section, cross it over to the center, and pick up a small piece from the outside of the right section and cross it over. The alternating tiny sections create that distinctive fishtail pattern.
Why Fishtail Works on Thick and Curly Hair
Fishtail braids are deceptively forgiving on thick and coily hair because the braid’s intricate weaving actually anchors all those individual strands in place beautifully. The pattern itself is so detailed that small wispy pieces or undefined curls actually add to the look rather than detracting from it. Additionally, fishtail braids want to look slightly loose and romantic—they’re not meant to be tight and polished—so the natural texture of curly or very thick hair becomes an asset rather than a problem.
Step-by-Step Execution
Divide hair into two equal sections. Pull a small strand from the outer edge of the left section and cross it over to join the right section. Then pull a small strand from the outer edge of the right section and cross it to the left. Continue this alternating pattern all the way down—the key is keeping each added piece very thin, which creates the characteristic fishtail appearance. Once you reach the end, secure with a clear elastic.
Customizing for Your Hair Texture
- On thick hair, use thicker starting sections and slightly larger grab sizes so the braid doesn’t take an eternity—you’re adapting the ratio, not changing the technique
- On curly hair, work with hair that has some hold already (scrunched with product, or second-day curls) so the braid doesn’t immediately unravel
- Fishtail braids look intentionally undone, so resist the urge to tighten them—loosen and widen the braid after finishing for that romantic, effortless effect
- The ponytail itself can be gathered loosely to match the braid’s undone aesthetic, or kept sleek for contrast
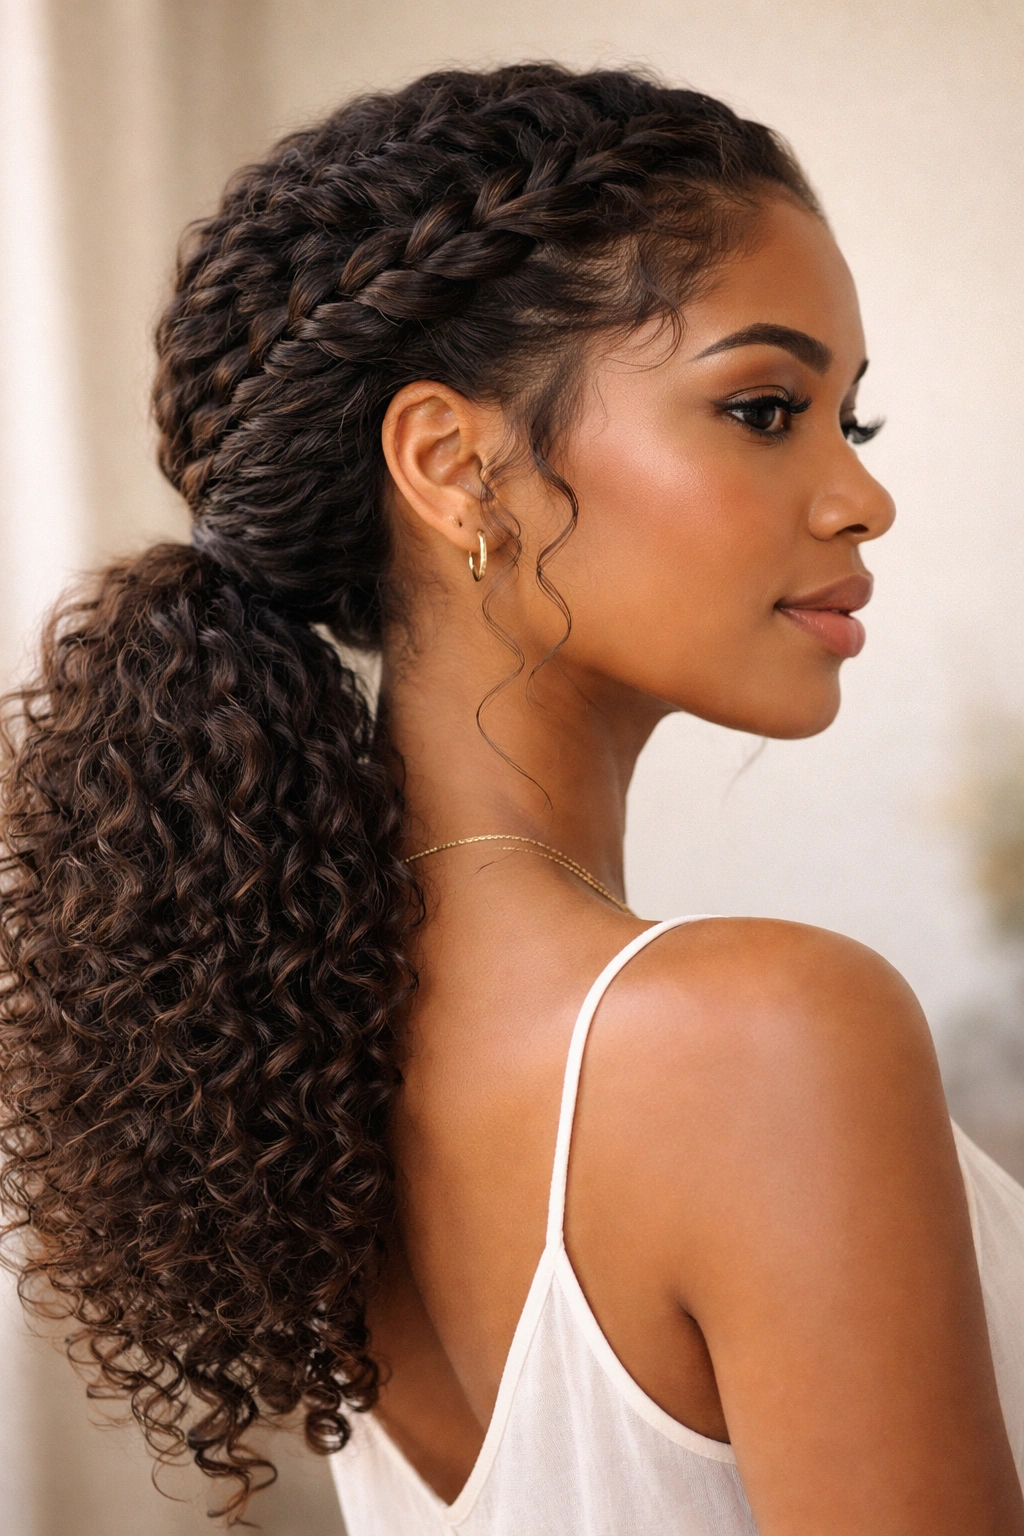
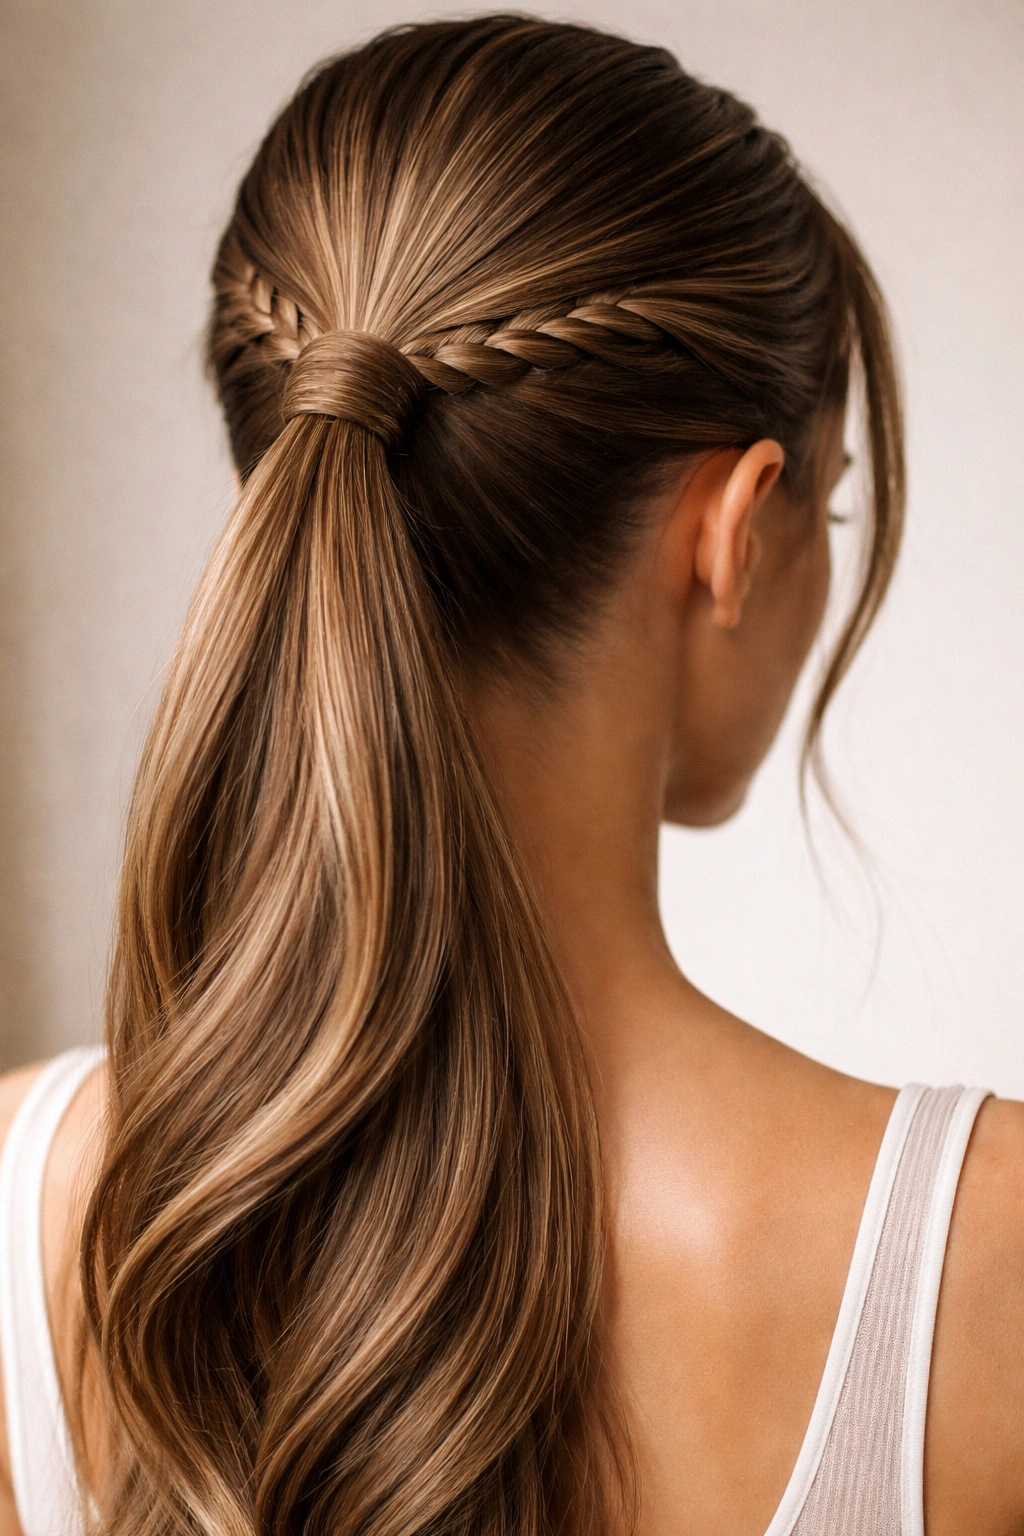
4. Crown Braid Ponytail
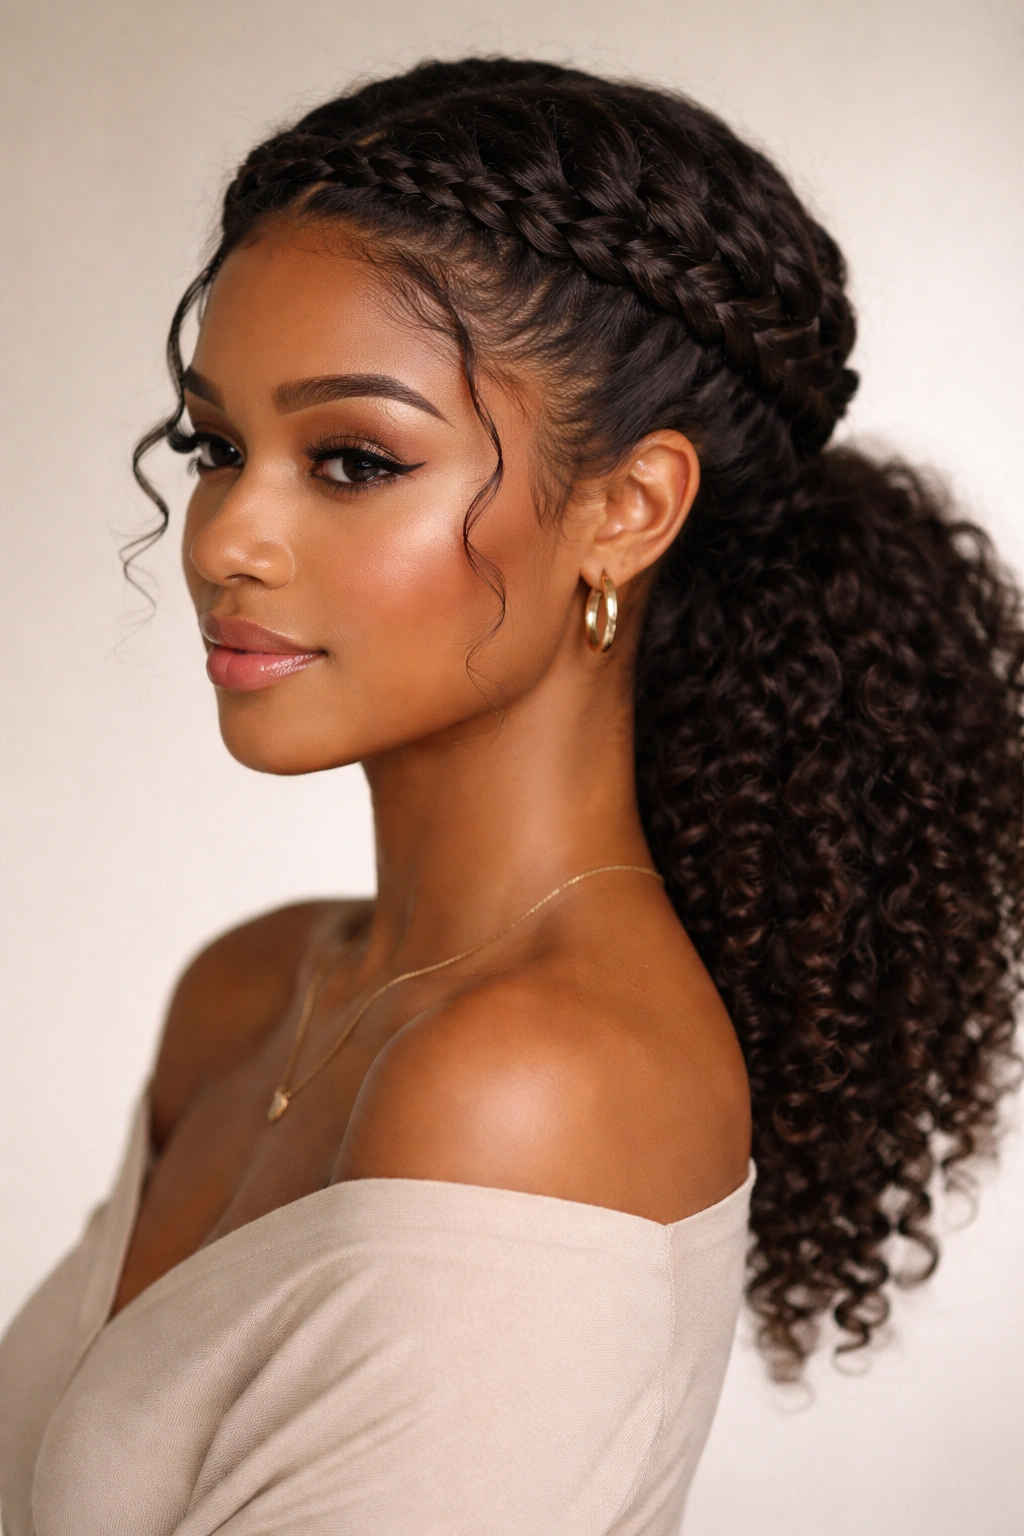
A crown braid wraps from one side of the head to the other, framing the face and creating a halo effect before the hair is gathered into a ponytail. This style starts at one ear, braids across the back of the head using the French or Dutch technique, and finishes at the opposite ear, where all hair—braided and unbraided—flows into a low ponytail.
Perfect for Curly and Coily Hair
Crown braids are phenomenal on curly hair because they control the top section without flattening or damaging the curls underneath. The braid sits as a decorative band across the crown while the rest of the curly hair remains in its natural texture—you get definition and control exactly where you need it without compromising the curl pattern. For coily hair, crown braids also create a polished, intentional style that reads as high-effort even though most of the hair is untouched.
How to Map and Execute a Crown Braid
Start by determining your braid line—usually from temple to temple, arcing across the crown. Begin at one temple with three strand sections and braid using either the French or Dutch technique, picking up hair only from above the imaginary braid line. This keeps the braid narrow and defined. As you work to the opposite ear, the braid essentially wraps around the back of the head like a crown. Secure the braid end with a small bobby pin, then gather all hair (including the braided section) into a low ponytail.
Styling Considerations for Different Hair Types
- On curly hair, apply curl cream or defining gel to the braid section before starting—this helps keep curl definition in the braided area while maintaining texture elsewhere
- On straight hair, a crown braid can look sleek and polished or loose and romantic depending on whether you finish it tight or gently pull it undone
- Face-framing pieces left out of the braid add softness and prevent the style from feeling too severe
- The ponytail can be braided, twisted, or left loose—whatever matches the vibe you’re going for
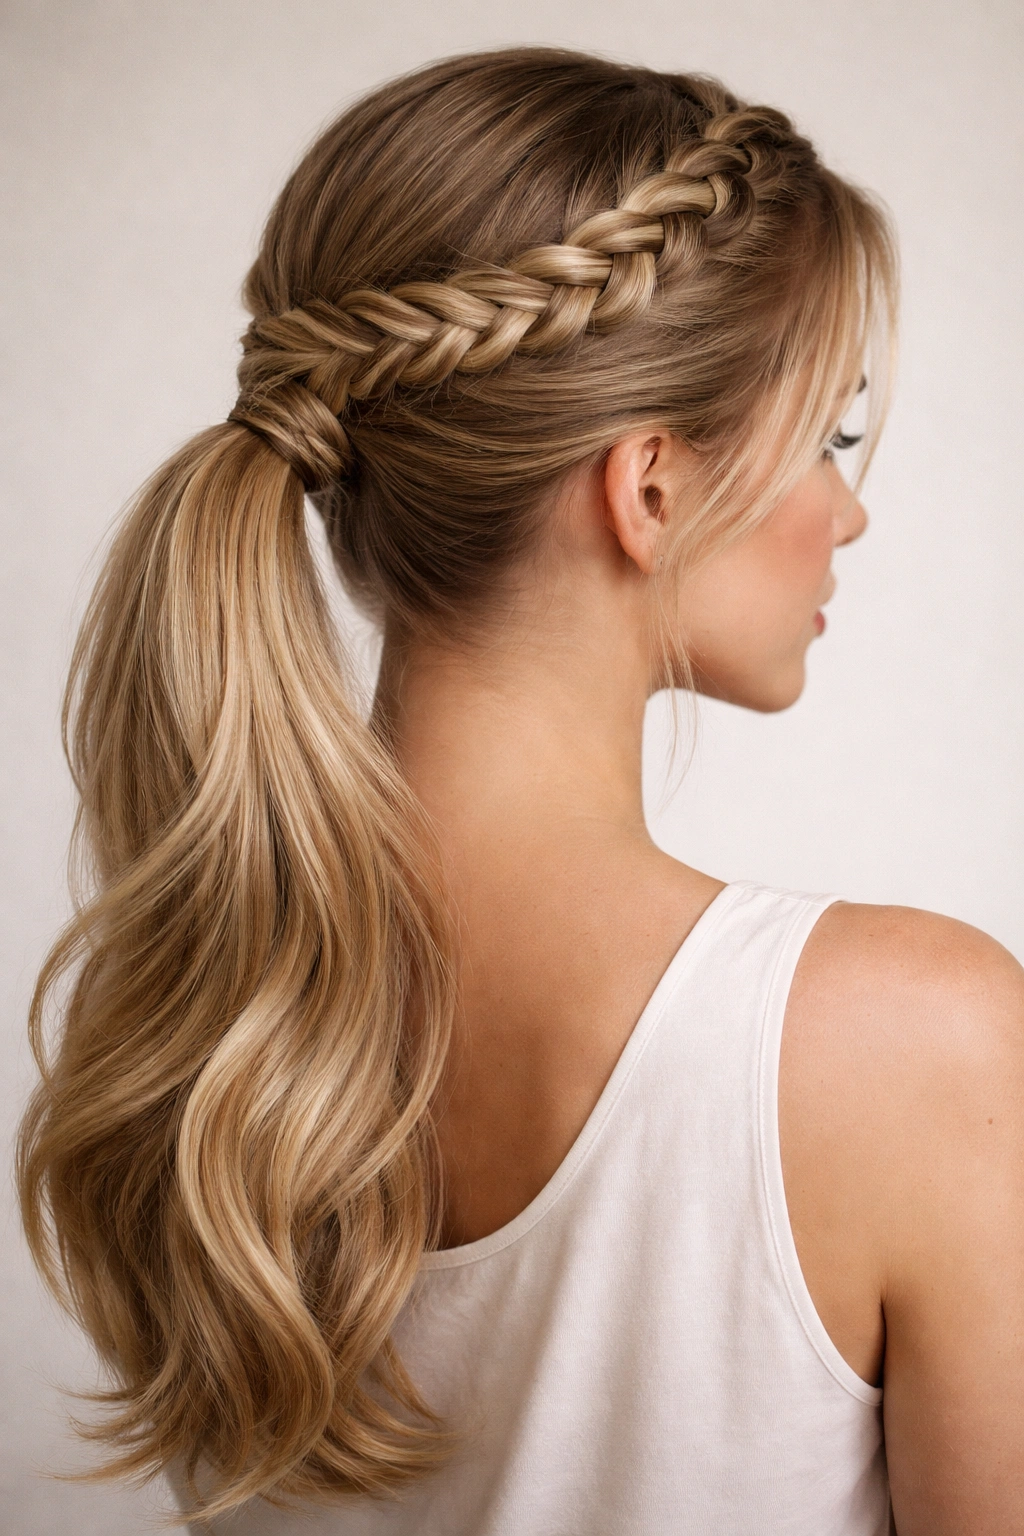
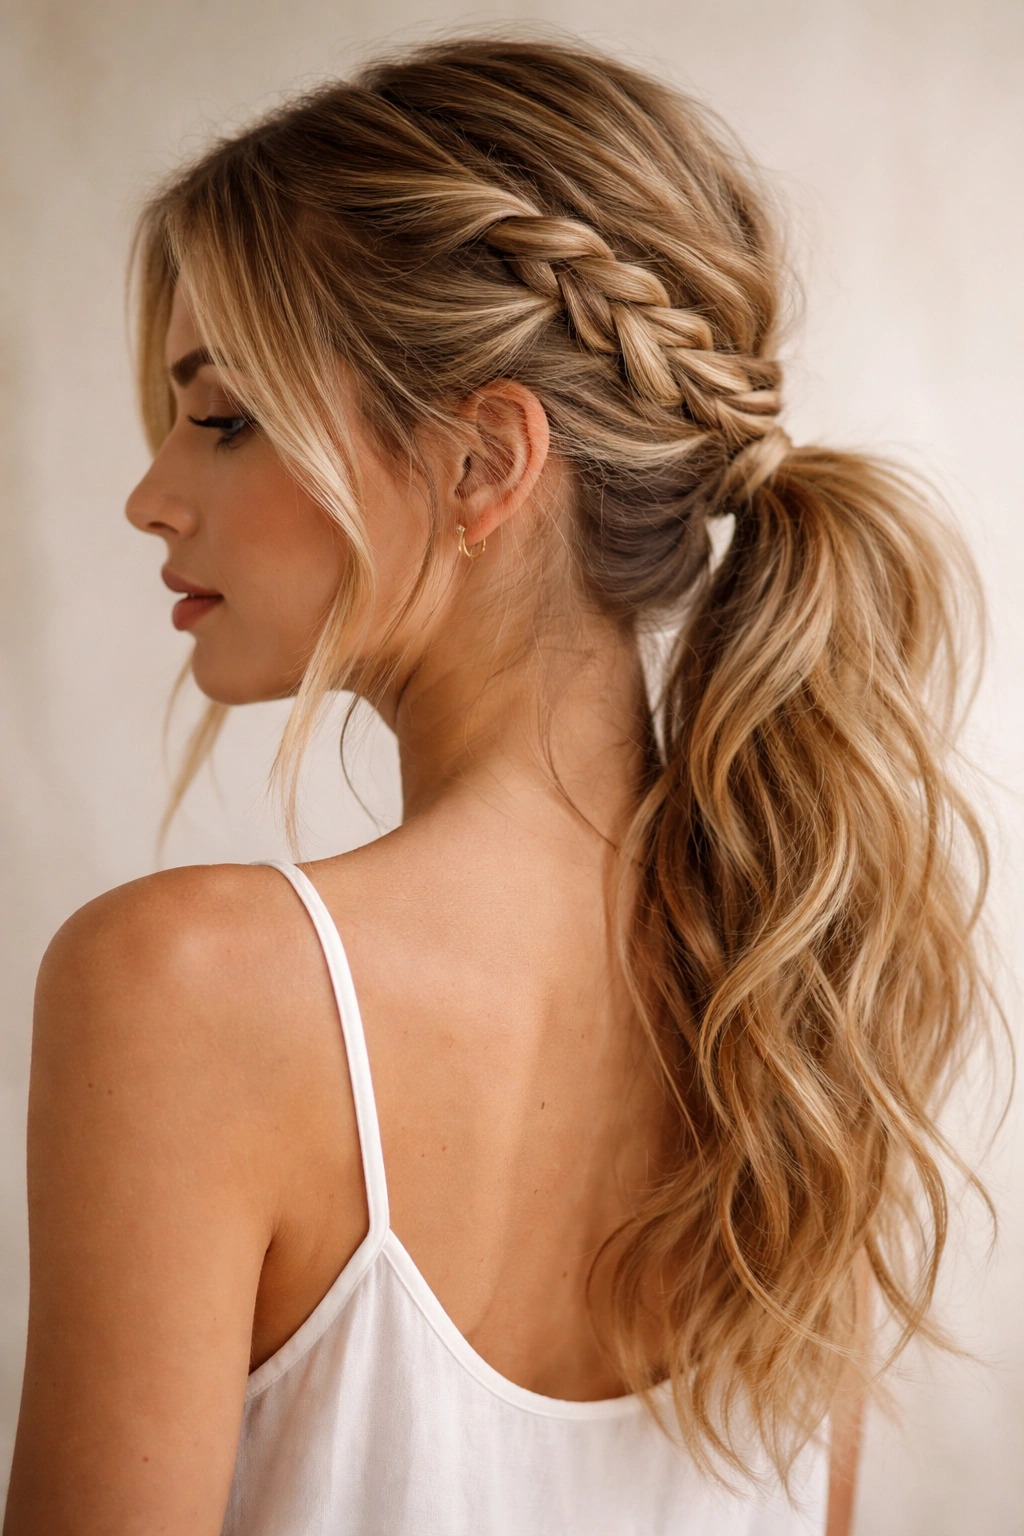
5. Loose Textured Braid Ponytail
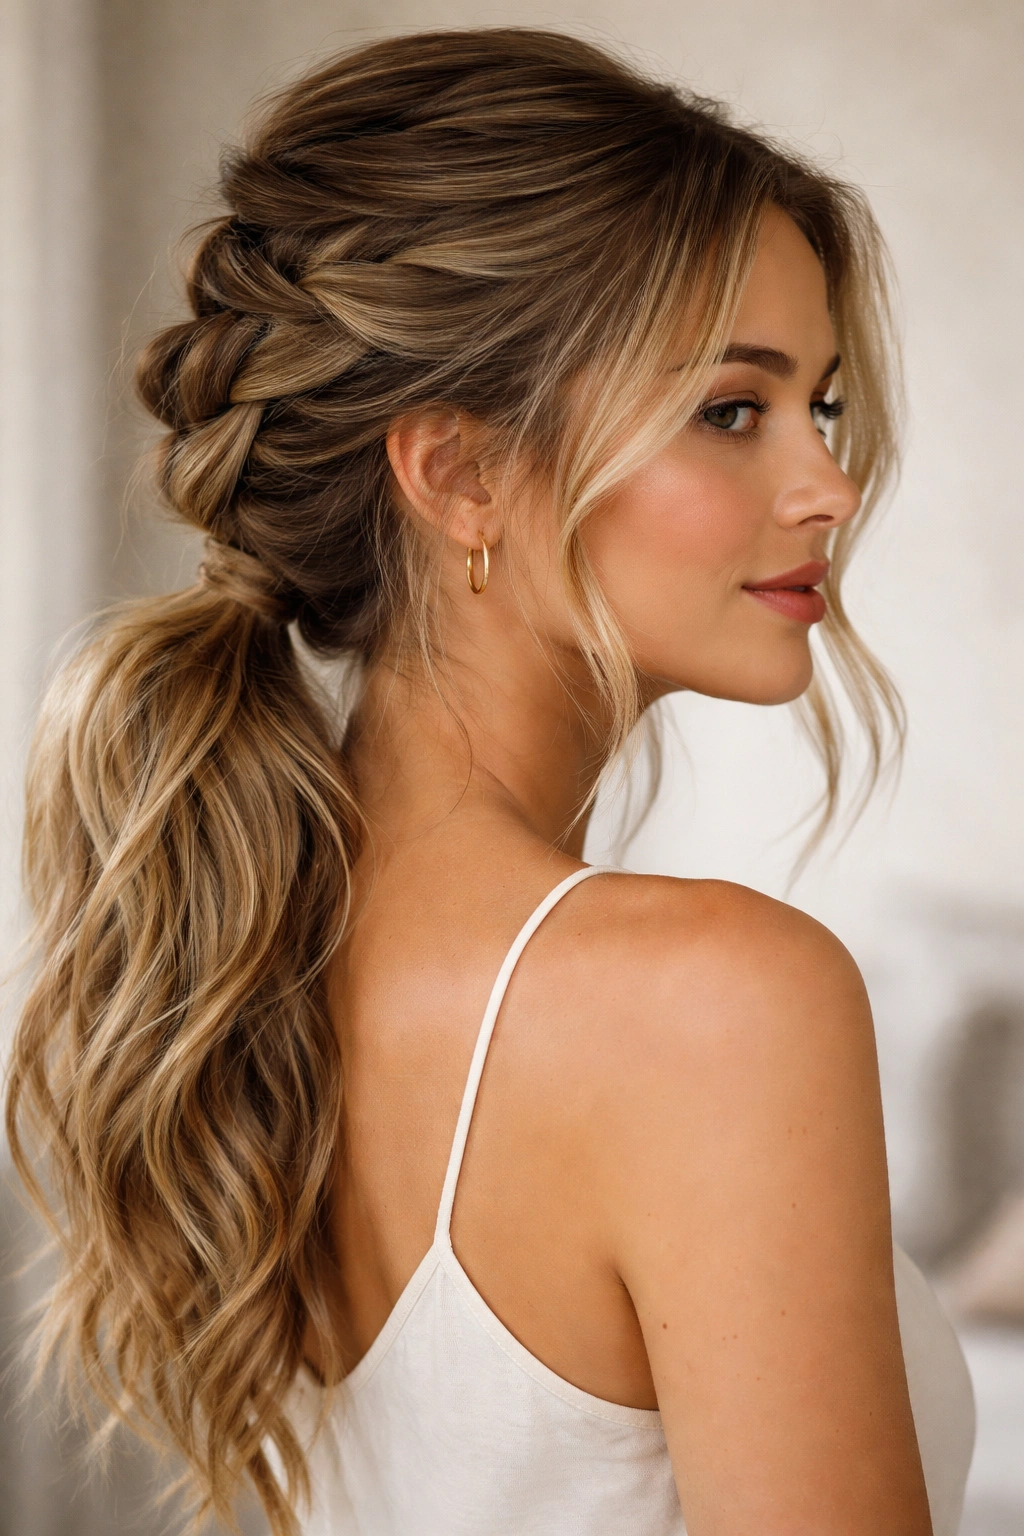
A loose, textured braid is less about technique and more about intention—you’re deliberately creating a relaxed, undone appearance by braiding very loosely and then pulling the braid wider and more textured after it’s complete. This style works universally well across almost all hair types because loose braids are forgiving and benefit from, rather than fight against, natural texture.
Why Loose Braids Work on Every Hair Type
A loosely executed braid doesn’t require hair to hold dramatic tension, so it doesn’t matter if your hair is fine, slippery, thick, or curly—the loose structure accommodates any texture. Fine hair doesn’t disappear because the braid is supposed to look relaxed anyway. Thick hair doesn’t become unmanageable because you’re not trying to control it tightly. Curly hair adds dimension and visual interest to a braid that’s meant to look undone. The loose approach is actually the most realistic for everyday wearing because nobody can maintain a tight braid all day without it looking uncomfortable and severe.
The Loose Braid Technique
Use any braiding method—French, Dutch, fishtail—but braid significantly looser than you normally would. Imagine your hands are moving slowly and deliberately, not efficiently pulling sections tight. Once you’ve completed the braid and secured it with an elastic, gently pull the outer edges of the braid outward and slightly downward. Work your way along the entire length, widening each section and creating texture. The braid should nearly double in visual width by the time you’re done. This gentle pulling is what transforms a basic braid into a romantic, intentional-looking style.
Adapting Loose Braids for Your Hair Type
- On straight hair, loose braids look romantic and effortless; consider adding texture with a sea salt spray beforehand
- On wavy hair, loose braids blend seamlessly with your natural texture; the style looks intentional rather than fighting against your waves
- On curly hair, loose braids become even looser and more romantic as the curls expand throughout the day—embrace this evolution
- On very fine hair, pulling the braid too aggressively might expose scalp; be gentler and more selective about which sections you pull
6. Zig-Zag Braid Ponytail
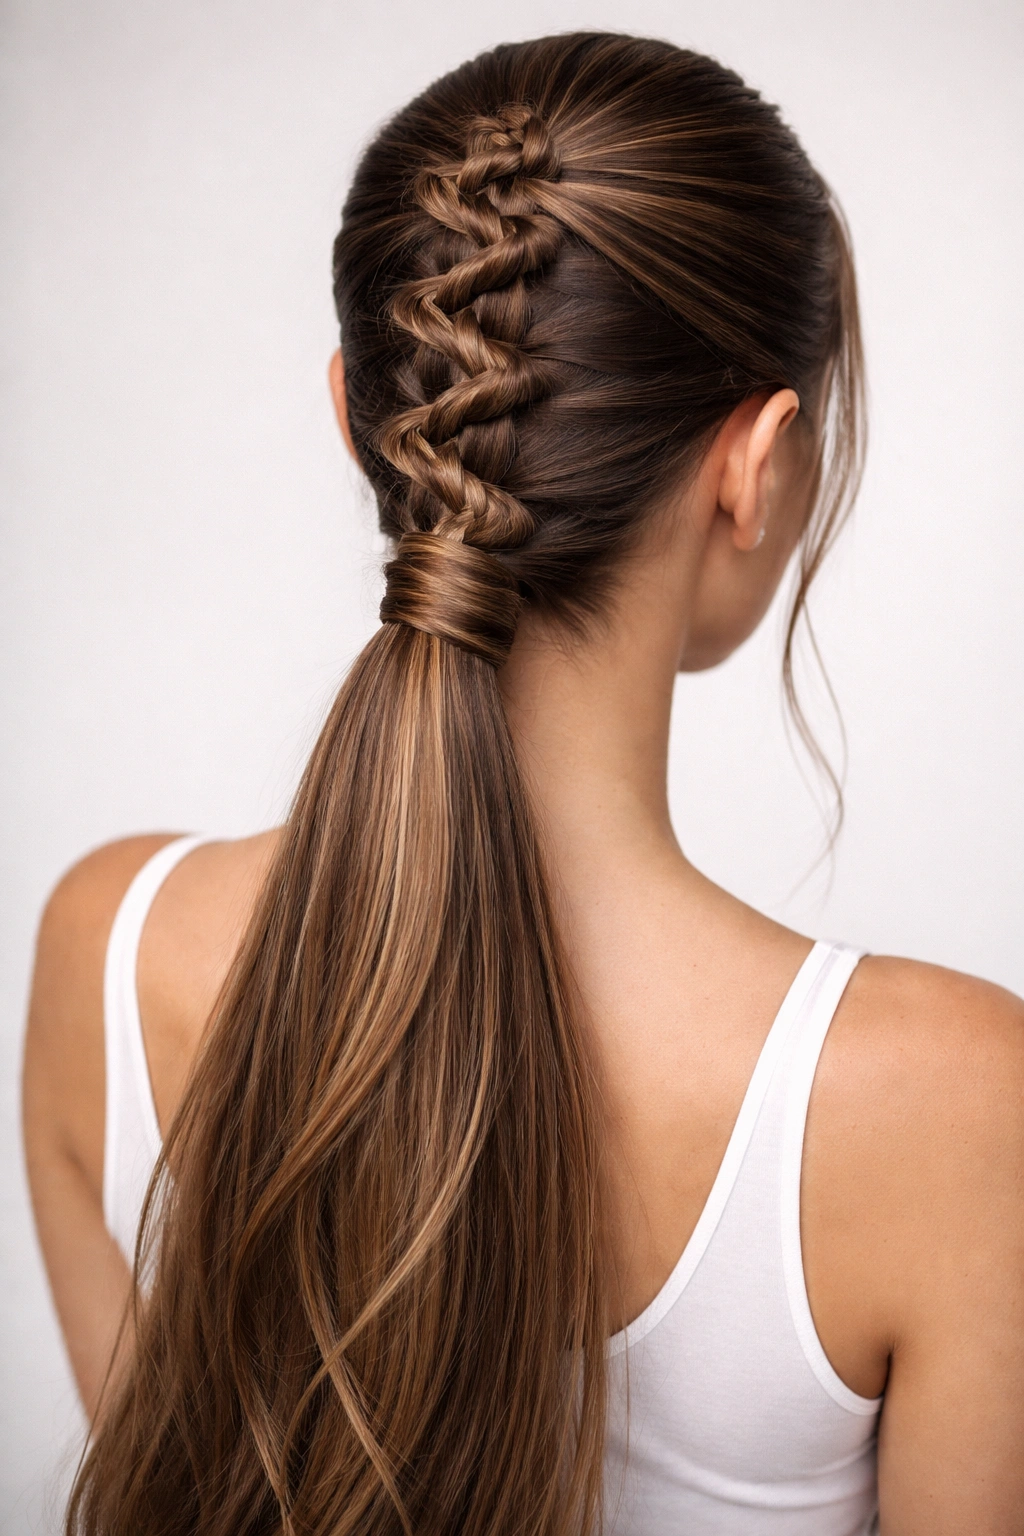
A zig-zag braid changes direction as it travels down the head instead of creating one straight line—it might go from center to right, then right to left, then left to center, creating a serpentine pattern. This style is visually striking and works particularly well on longer, straighter hair where the geometric pattern is clearly visible.
Best for Long, Straight to Wavy Hair
Zig-zag braids show off their full visual impact on hair long enough to see the complete pattern—typically shoulder-length or longer—and on straighter textures where the braid definition remains crisp and clear. The straight-to-wavy texture shows the pattern without excessive frizz or blur, and the regular texture means the braid maintains consistent tension and appearance throughout its length. On shorter hair or very curly hair, the zig-zag pattern gets lost.
How to Create the Zig-Zag Pattern
Start with a center-part French or Dutch braid that begins at the crown. Instead of going straight down the back, angle the braid toward the right side as you work down. Once you’ve traveled about three to four inches to the right, change direction and angle the braid back toward the center and then toward the left. Continue alternating directions every few inches. This requires planning—you’re essentially mapping the path before you braid—but the technique is just regular braiding with intentional directional changes.
Securing and Finishing
- Once the zig-zag reaches the nape, you’ll have the braid tail positioned slightly off-center; secure it with a small elastic
- Gather all hair into a ponytail, allowing some straight hair to flow around the secured braid for balance
- The finished zig-zag ponytail looks best when the braid contrast is clear, so keep the rest of the ponytail sleek and smooth
- You can gently widen the braid slightly for texture without losing the geometric pattern definition
7. Double Dutch Braid Ponytail
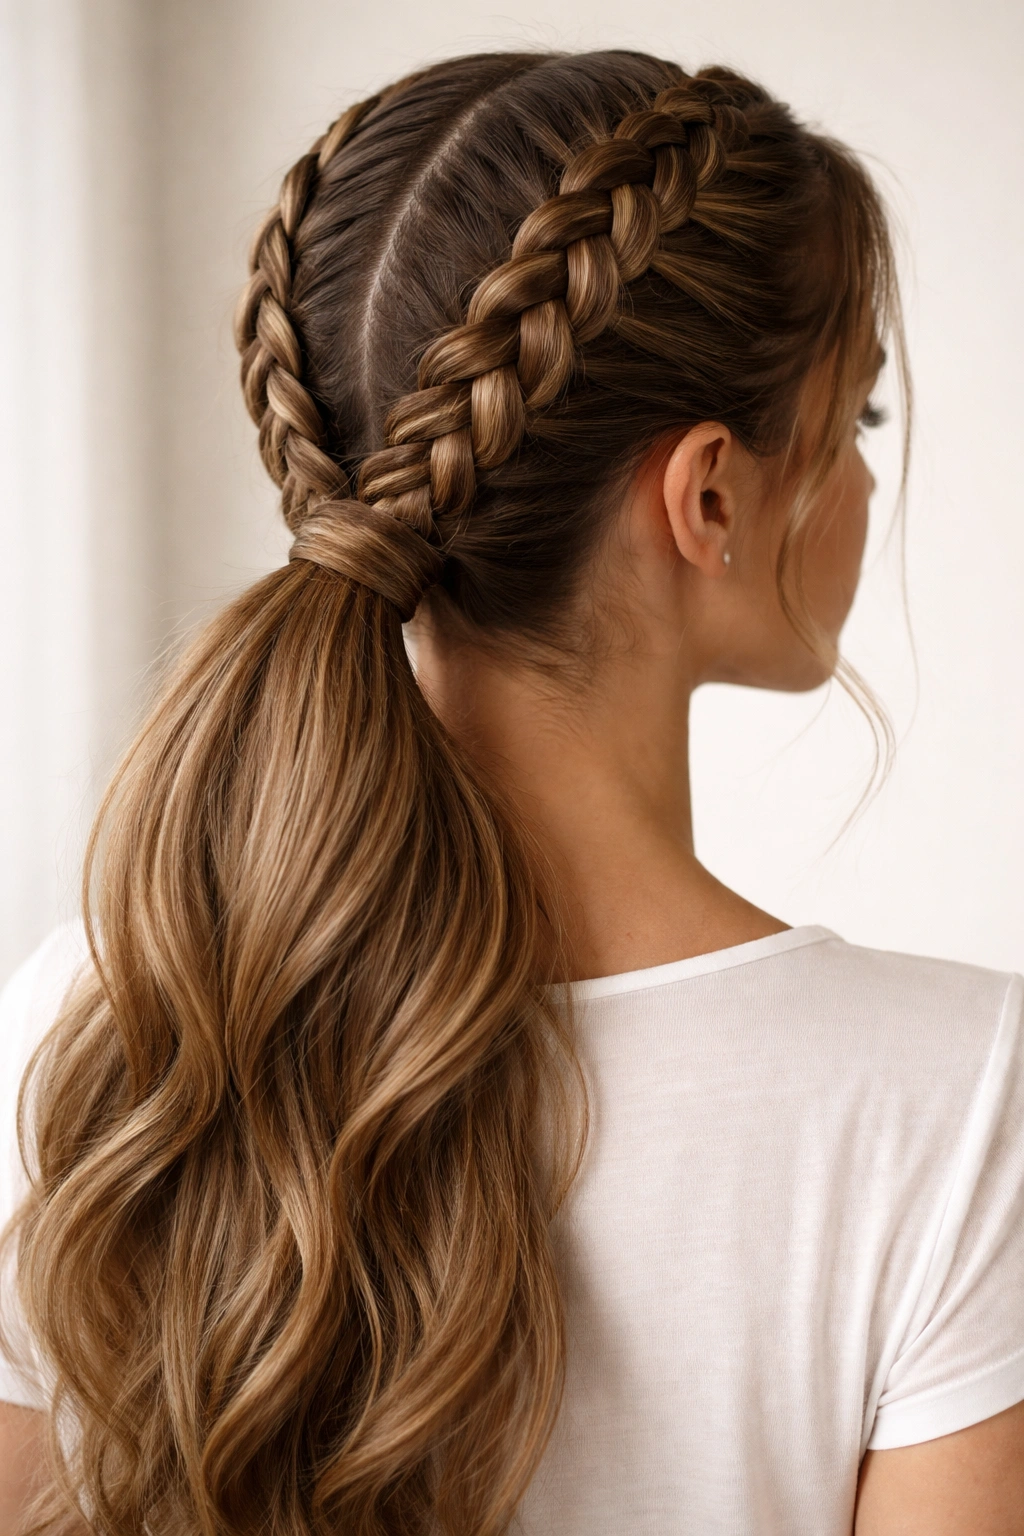
Two parallel Dutch braids create symmetry and visual interest while distributing your hair across two braids instead of one, making the style more secure and better suited to thicker or heavier hair that might stress a single braid. Start each braid at the temples or part your hair down the center and braid each side separately.
Why Double Braids Excel on Thick and Heavy Hair
Thick hair, when gathered into a single braid and ponytail, can feel heavy and tight at the base, causing discomfort and potential breakage. Dividing that hair into two braids distributes the weight and tension, making the style more comfortable and more secure. Each individual braid is thinner and easier to manage than one massive braid. Additionally, the symmetrical appearance of double braids reads as intentional and high-effort, even though you’re actually making the styling easier on yourself.
Execution: Center Part Method
Part hair down the center from forehead to nape. Create a French or Dutch braid on each side, starting each braid at the temple and working down to the nape. Secure each braid separately with small elastics. Then gather all hair—both braids and the unbraided hair at the sides—into a low ponytail. You can wrap a small section of hair around the base to hide the elastic.
Customizing the Look
- Double Dutch braids have a sporty, athletic vibe; keep the ponytail sleek and pulled back for that aesthetic
- Double French braids look softer; you can leave a few face-framing pieces out or gently loosen the braids for a more romantic feel
- You can tighten the braids for a sleek look or loosen them significantly for a relaxed vibe—the double structure is forgiving either way
- On very thick hair, this is genuinely easier than managing one single massive braid
8. Bubble Ponytail with Braids
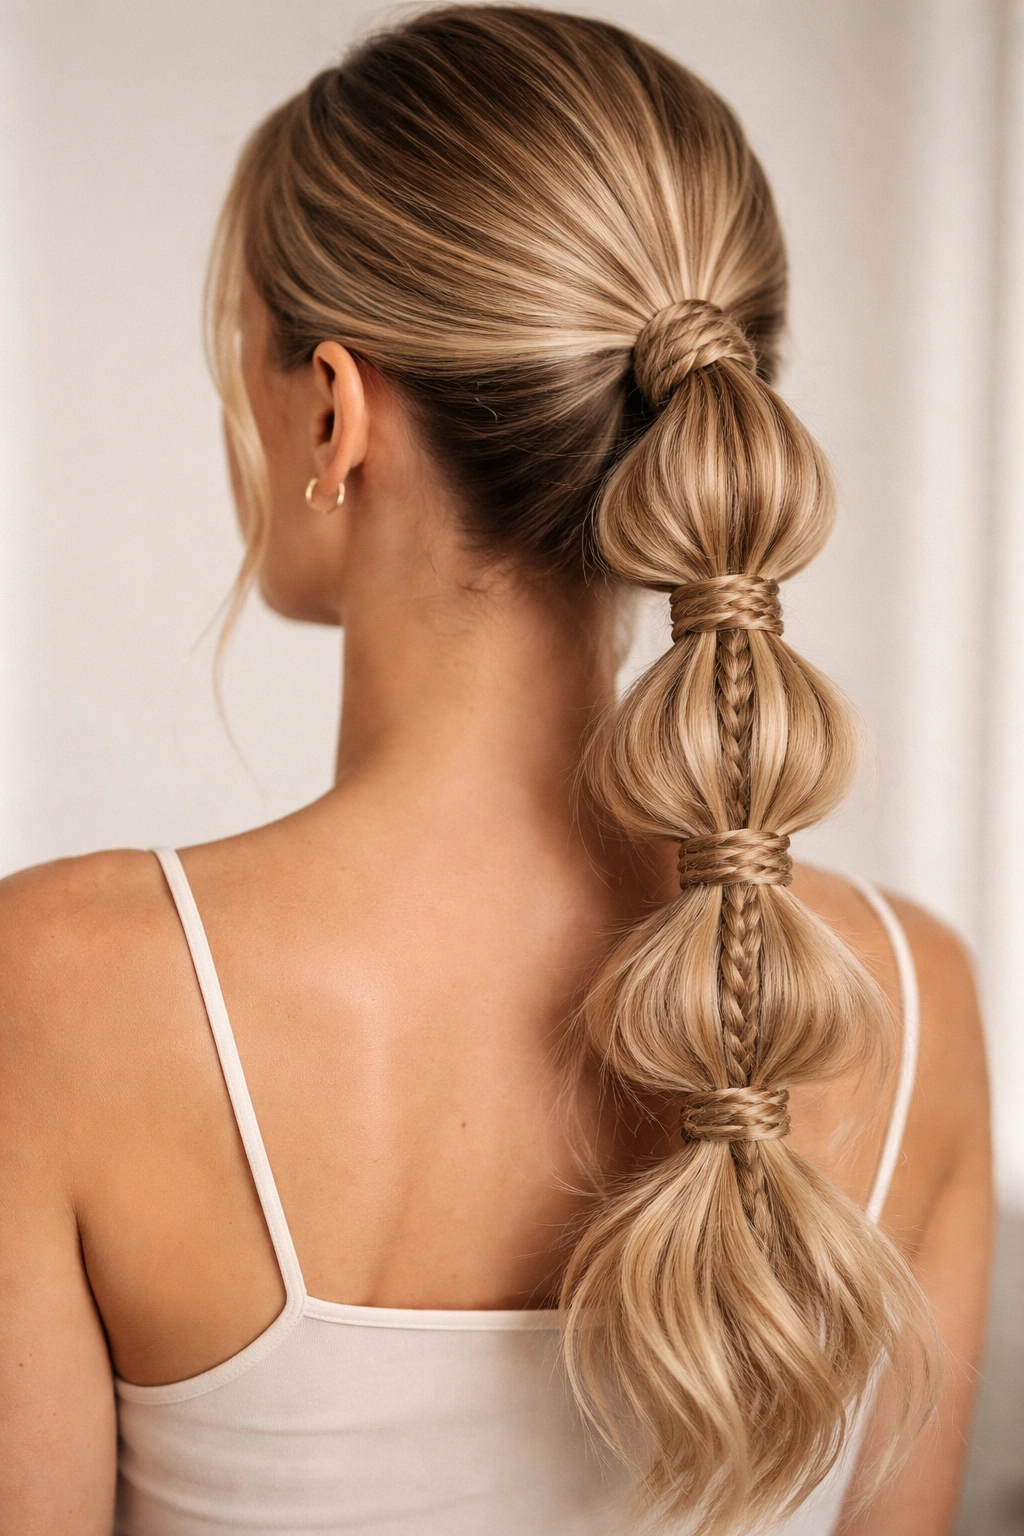
A bubble ponytail is a segmented style where you use multiple small elastics spaced down the length of the ponytail to create distinct bubble sections. Integrating braids means sections of hair between the bubbles are braided, creating visual texture and interest while the elastics create structure and hold.
Ideal for Fine Hair and Thin Ponytails
Bubble ponytails look fullest and most intentional on fine hair because the elastics and braided sections create dimension and visual weight in hair that otherwise might look thin. The segmentation prevents the fine hair from looking like one thin, stringy tail. The braided sections add visual substance, and the elastic-defined bubbles create an architectural structure that makes fine hair look more voluminous than it actually is.
How to Create the Style
Gather hair into a low ponytail and secure with an elastic. About two inches down, add another small elastic, creating your first bubble. Between that elastic and a new one placed two inches below, loosely braid the ponytail hair (two sections twisted together works beautifully here). Above the next elastic, stop braiding and let the hair bubble naturally. Alternate between braided sections and bubble sections all the way down the ponytail. The result is texture, dimension, and a style that looks significantly more voluminous than a plain ponytail.
Styling Tips
- Use small, clear elastics so they’re less visible; you want the braids and bubbles to be the focus
- On fine hair, don’t make the bubbles too tight or too large; smaller bubbles with gently braided sections between them looks most polished
- Gently pull each bubble to fluff and widen it slightly after securing; this adds volume
- This style works well for second-day hair where some texture already exists
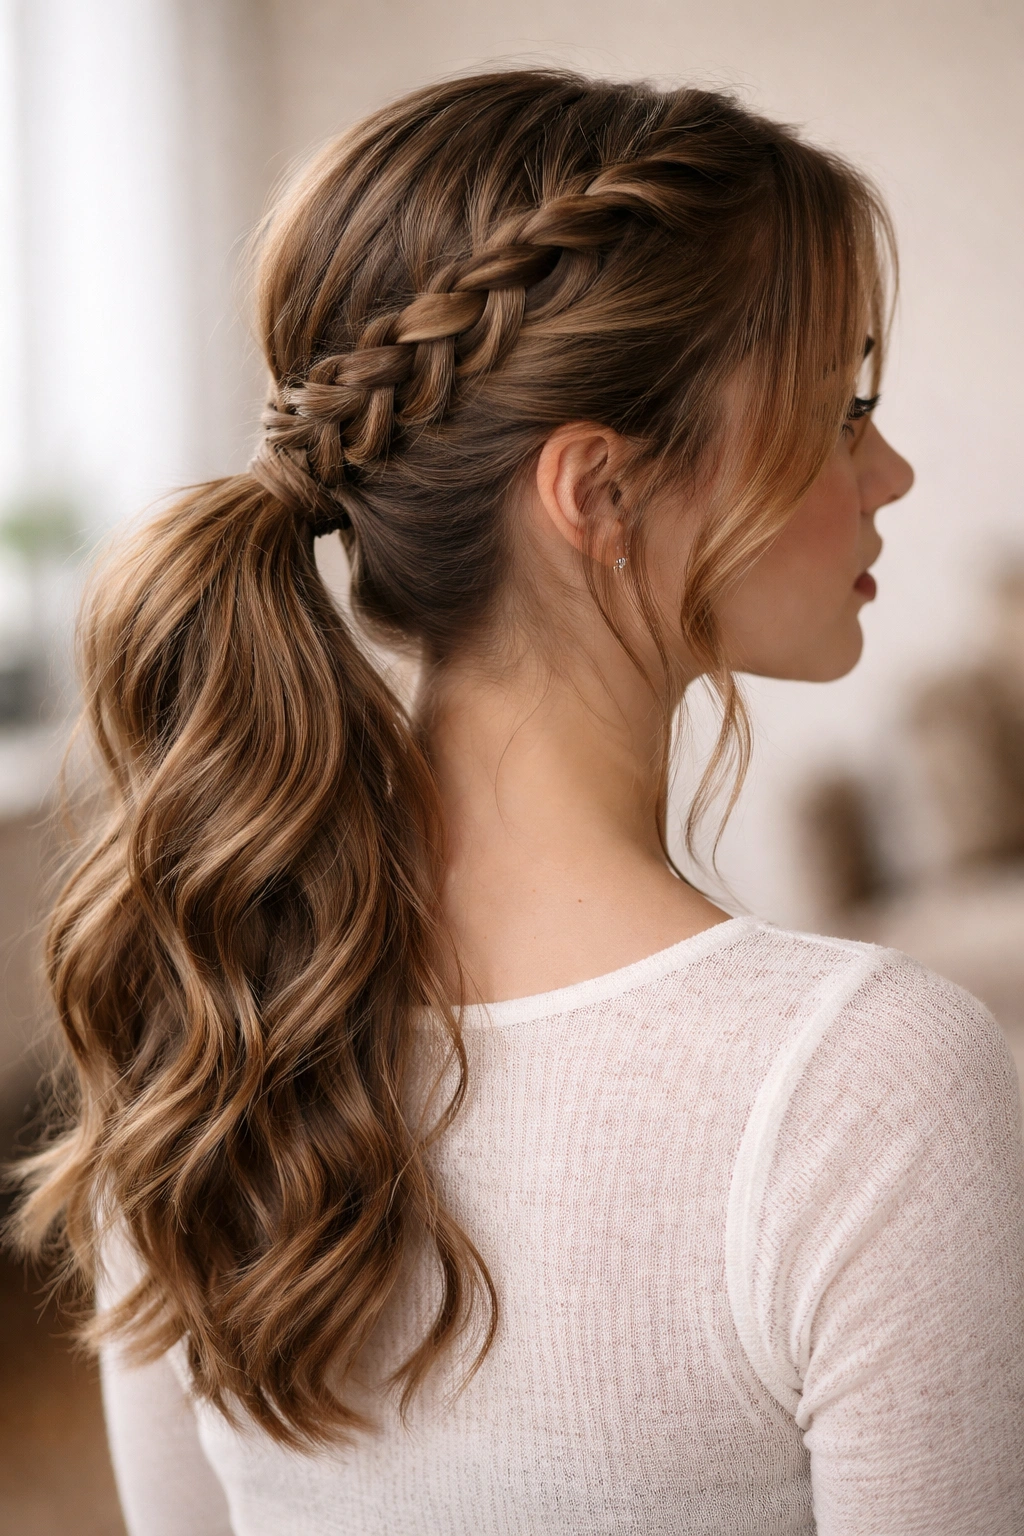
9. Side Sweep Braid Ponytail
A side sweep braid begins at the crown and travels diagonally down one side of the head, creating an asymmetrical, romantic appearance before flowing into a low side ponytail. This one-sided approach works beautifully on almost all hair types but particularly shines on curly hair where the asymmetry feels intentional and artistic rather than lopsided.
Perfect for Curly and Textured Hair
Side sweep braids on curly hair are stunning because the asymmetry balances and frames curls beautifully, and the braid itself becomes a sculptural element that anchors the style while letting the natural curl pattern shine underneath and around it. The off-center ponytail complements curls in a way centered styles often don’t. On textured hair, side-swept styles feel artistic and intentional rather than like you’ve just pulled your hair to one side haphazardly.
Execution Steps
Start with a small three-strand French or Dutch braid at the crown, positioned slightly off-center toward your desired side. As you braid down, continuously angle the braid toward that side, picking up hair only from above the braid line. You’re essentially moving the braid diagonally across the back of the head. Once you reach the nape on your chosen side, secure the braid with a small elastic. Gather all hair—including the braid—into a low side ponytail at the base of that side braid.
Adapting for Your Hair Type
- On straight hair, a side sweep braid is romantic and soft; leave some face-framing pieces out
- On wavy hair, the asymmetry of a side sweep complements and showcases the waves beautifully
- On curly hair, embrace the full texture; the braid and curls together create visual interest
- The ponytail can rest at the shoulder or lower depending on your hair length and the vibe you’re going for
10. Halo Braid Ponytail
A halo braid completely circles the head like a crown, starting and finishing at the same point—usually at the nape—before all hair flows into a low ponytail. This romantic, ethereal style works across most hair types but requires hair long enough that the braid can wrap the circumference without running out of length.
Best for Long, Straight to Wavy Hair
Halo braids work best on hair at least to the lower back, because you need enough length for the braid to wrap and still have hair left for the ponytail. Straight to wavy textures showcase the halo braid’s graceful arc beautifully; the braid remains defined and clear around the whole head. On very short hair, the style isn’t practical. On very curly hair, the halo can disappear or blur into the surrounding texture.
Creating the Halo
Start with a side-part French or Dutch braid at one temple, working around the back of the head horizontally rather than down the back. Pick up hair continuously as you work around the perimeter, maintaining consistent tension so the braid wraps smoothly around the head. Complete the circle by finishing the braid at the opposite temple from where you started. The braid endpoint will be positioned near your other ear. Secure the braid end with a bobby pin, then gather all hair—including the full halo—into a low ponytail at the nape.
Styling Variations
- For a romantic, ethereal look, gently widen and loosen the halo braid after securing; pull at the edges to create texture
- For a sleek, polished look, keep the braid tighter and smooth; the halo becomes a defined architectural element
- Leave a few face-framing pieces out for softness
- The ponytail itself can be sleek, braided, waved, or curled depending on the overall vibe
11. Waterfall Braid Ponytail
A waterfall braid is deceptively intricate-looking but actually quite manageable. You braid down one side of the head using a French braid technique, but instead of continuously incorporating hair, you occasionally release a section, allowing it to “waterfall” down while you pick up new hair from the side. The released strands cascade down alongside the braid.
Excellent for Medium-Length Wavy Hair
Waterfall braids showcase beautifully on medium-length wavy hair because the “waterfall” strands blend seamlessly with your natural wave pattern, creating dimension and visual interest. The braid itself remains defined while the cascading pieces add romantic movement. On hair that’s too short, the waterfall effect doesn’t read clearly. On hair that’s stick-straight, you lose the flowing dimension. On very thick or curly hair, the individual waterfall strands can disappear into the overall mass of hair.
The Waterfall Technique
Start with a three-strand French braid on one side of the head, just behind the ear. Braid three sections over and under normally, incorporating hair from the hairline. After braiding two or three crosses, release the original bottom strand, letting it cascade down freely—this is your first “waterfall” piece. Pick up new hair from the hairline to replace the released strand and continue braiding. Repeat this release-and-replace pattern every two to three inches down the side. The finished braid looks like regular sections of braid with strands flowing out between them.
Finishing and Customizing
- Secure the braid end with a bobby pin, positioning it near the ear on the opposite side
- Gather all hair into a ponytail, allowing the waterfall strands to flow around and frame your face
- Waterfall braids look best slightly loosened and with the cascading pieces gently pulled or waved for movement
- This style is particularly stunning on shoulder-length hair where the waterfall strands reach your collarbone
12. Boxer Braid Ponytail

Boxer braids are two tight Dutch braids running parallel down the back of the head, typically pulled tight against the scalp for a sleek, athletic appearance. Both braids feed into a single or double ponytail at the nape, creating a sporty style that holds incredibly well through activity.
Perfect for Fine Hair and Active Lifestyles
Boxer braids are the go-to for anyone with fine hair who wants a braid that actually holds through activity—two thin braids stay secure far better than one thicker braid, and the tight Dutch technique maximizes grip and tension. The style is also ideal for anyone doing sports, workouts, or outdoor activity because the braids don’t loosen or slip. Fine-haired people who’ve struggled with braids falling apart should try boxer braids tight enough that they feel secure; this is the configuration that actually works.
Step-by-Step Execution
Part hair down the center from forehead to nape, creating two equal sections. Create a tight Dutch braid on each side, starting each braid at the temples and working straight down to the nape. For maximum hold on fine hair, keep the braid as close to the scalp as possible and pull each cross tightly. Secure each braid with a small elastic. Then gather both braids and any unbraided hair at the nape into a low ponytail, or separate them into two distinct pigtail-style ponytails.
Customizing Boxer Braids
- For fine hair, keep boxer braids tight; loose boxer braids can look wispy and defeated
- You can pull the braids slightly undone after securing for a softer look, but they’re traditionally sleek
- The single ponytail version (gathering both braids into one low pony) looks polished and put-together
- The double ponytail version reads as more playful and youthful
- Boxer braids can be worn with the ponytail sleek or curled, textured, or waved
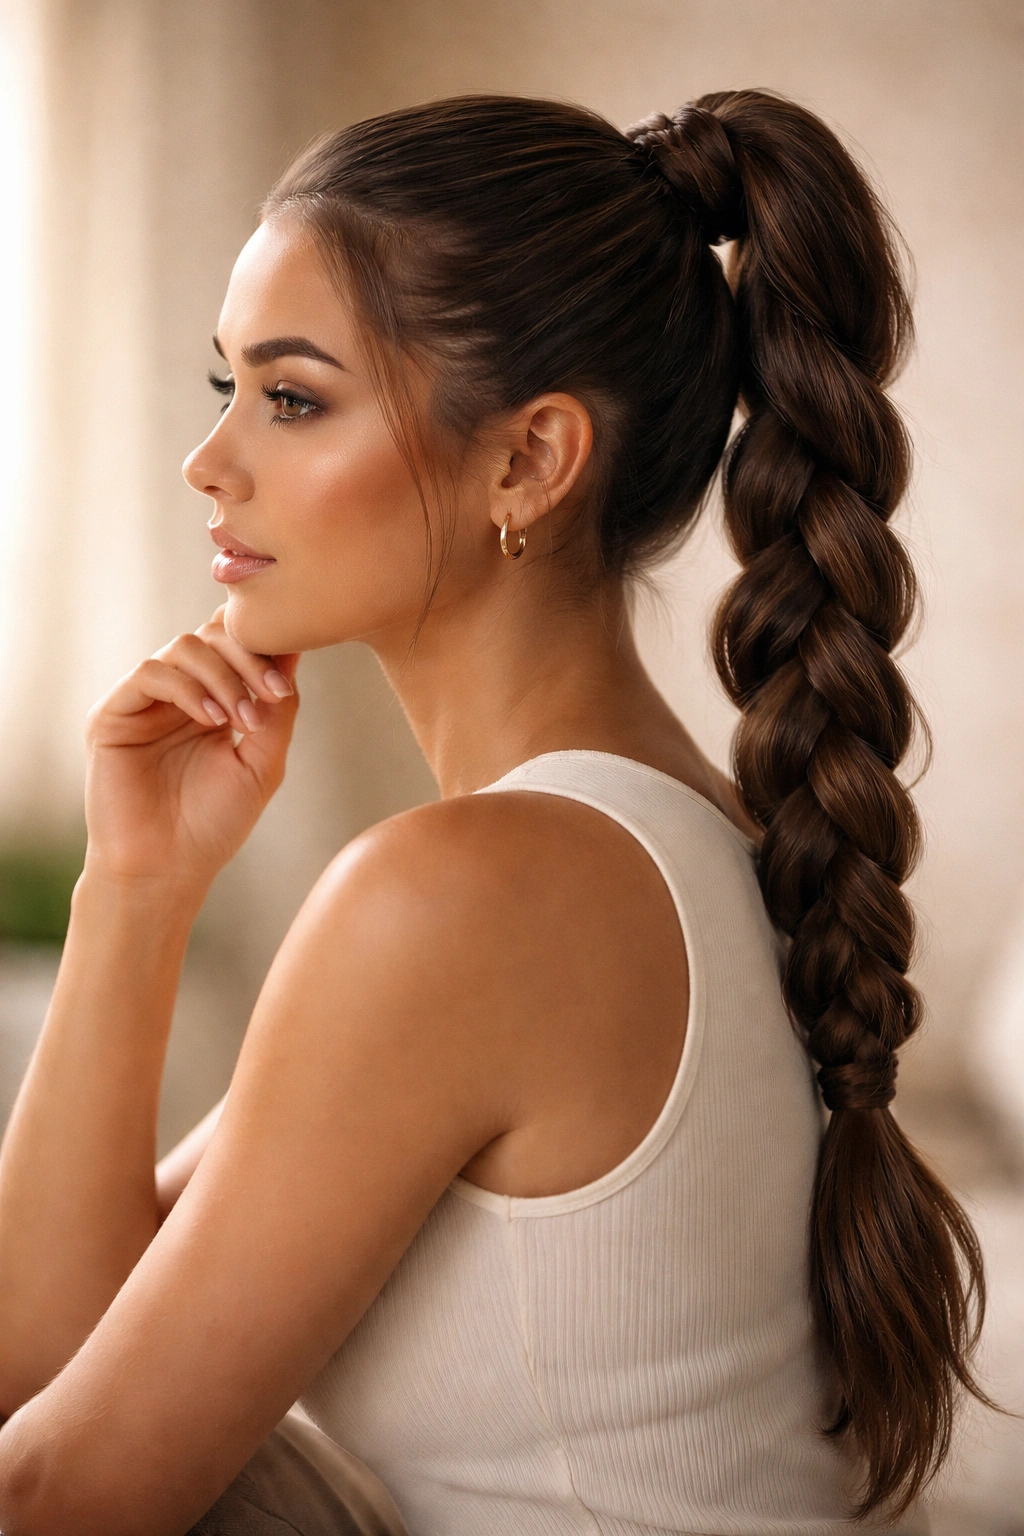
13. Rope Twist Ponytail
A rope twist is technically not a braid but rather two sections of hair twisted around each other, creating a spiraled appearance that’s surprisingly strong and secure. Two rope twists (one on each side) feed into a ponytail, creating visual interest and hold without requiring three-section coordination.
Great for Straight Hair and Anyone New to Braiding
Rope twists are perfect for people who find traditional braiding intimidating or physically difficult—twisting two sections around each other is simpler and requires less dexterity than managing three sections. The visual effect is similar to a braid but achieved with a simpler technique. On straight hair, rope twists create a defined, sculptural appearance. For beginners or people with dexterity limitations, rope twists are often the gateway into textured ponytail styles.
How to Execute a Rope Twist
Start by sectioning hair at the temple, creating two equal sections. Twist the right section clockwise while twisting the left section counter-clockwise (opposite directions is the key). As you twist, wrap the right twist around the left twist, creating a rope effect. While twisting, incorporate new hair from the hairline into each section—this is what makes the rope follow the head. Continue this twist-and-wrap motion all the way down to the nape. Secure with a small elastic.
Creating a Dual Rope Twist Ponytail
Create rope twists on both sides of the head, then gather both twists and all hair into a low ponytail. The symmetry looks intentional and polished. You can do single side-swept rope twist ponytails for a more asymmetrical feel. Rope twists look best on straight to wavy hair where the twist definition stays crisp and visible throughout the day.
14. Messy Undone Braid Ponytail
A messy, undone braid is intentionally imperfect—you’re aiming for that effortless-looking style that actually took thought to create. Using a loose French or Dutch braid with deliberately pulling-apart sections, you create a textured, romantic style that reads as intentionally relaxed rather than hastily thrown together.
Works on Every Hair Type
Messy undone braids are remarkably forgiving because imperfection is literally the goal. Fine hair doesn’t need to look full because loose texture is the vibe. Thick hair doesn’t need to be controlled tightly because looseness is the point. Curly hair gets to be curly; the curl texture adds to the undone aesthetic rather than fighting it. This is the braided ponytail style for people who’ve said “braids just don’t work on my hair type”—because the loose, intentionally imperfect approach actually works universally.
Achieving the “Intentionally Undone” Look
Use a loose French or Dutch braid but don’t worry about perfection—let small pieces escape, don’t stress about even tension, and embrace imperfection. Once the braid is complete and secured, gently pull the outer edges outward and even slightly downward, creating visible texture and looseness. Work your way down the entire braid length. Pull sections that aren’t even secured—just grab and pull to create the undone effect. This pulling is what transforms an acceptably loose braid into a deliberately romantic, effortless-looking style.
Customizing for Your Hair Type
- On fine hair, be gentle with the pulling; a lightly textured undone braid looks intentionally romantic
- On thick or curly hair, you can pull more aggressively; the texture can handle it and actually looks better with significant texture added
- Add small wispy face-framing pieces by gently tugging them out of the braid
- The ponytail itself should match the vibe—slightly loose and relaxed if you’re going full undone aesthetic
15. Thin Woven Braid Ponytail
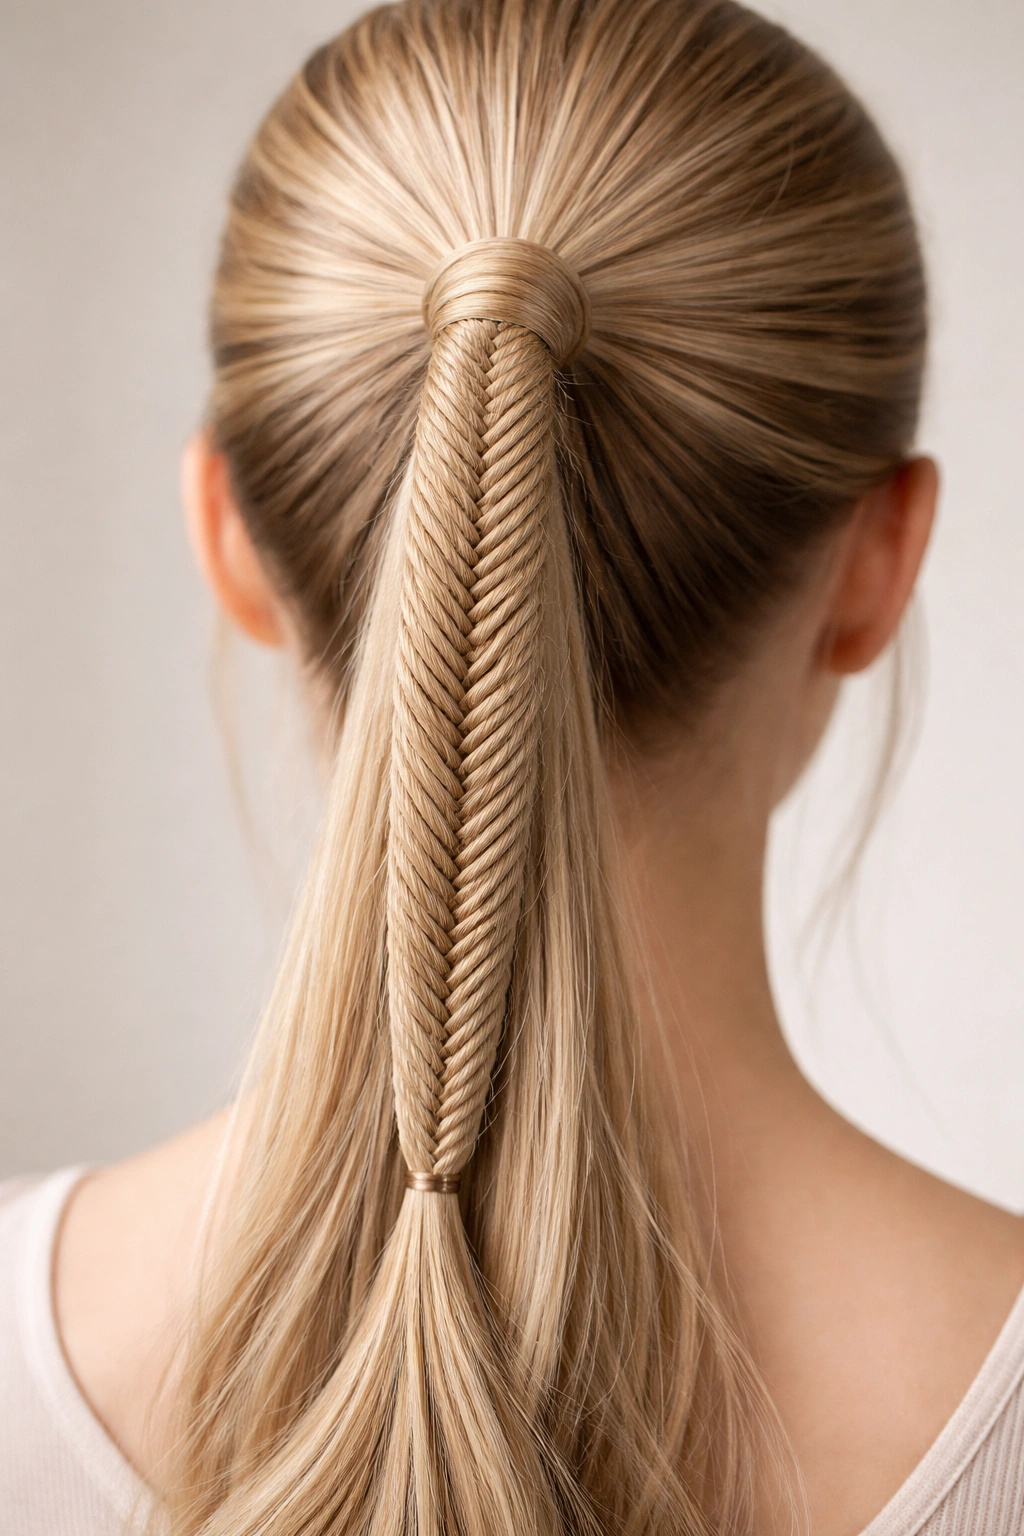
A thin woven braid uses the fishtail technique but with very tiny grab sizes, creating an intricate, detailed braid that looks complex even though the underlying technique is actually simpler than a traditional three-section braid. This style is particularly flattering on fine hair because the detailed weaving creates the illusion of volume and density.
Ideal for Fine and Thin Hair
Thin woven braids are genuinely transformative on fine hair because the detailed fishtail weaving actually makes fine strands appear fuller, denser, and more substantial. The intricate pattern draws the eye and creates visual interest that makes fine hair look intentionally styled rather than sparse. The braiding technique itself is easier on fine hair than a traditional braid because you’re using smaller, more manageable sections—fine hair actually cooperates better with fishtail patterns than with heavy three-section braiding.
Executing a Thin Woven Fishtail
Divide hair into two sections. Using very small grab sizes—much smaller than you would for a standard fishtail—pull a tiny piece from the outer edge of the left section and add it to the right section. Then pull an equally tiny piece from the outer edge of the right section and add it to the left. The smaller your grab sizes, the more intricate and detailed the final braid looks. Continue all the way down to the nape, then secure with a small elastic. The finished braid should look remarkably detailed and intricate.
Styling the Woven Braid Ponytail
- Gently widen the braid after securing for a softer, more romantic appearance without losing the detail definition
- On fine hair, resist the urge to loosen it too much; you want to preserve the intricate pattern while still looking intentional
- Gather all hair into a low ponytail, perhaps wrapping a small section around the elastic to hide it
- This style works beautifully on second-day hair where you already have some texture; start with textured hair for best results
- Thin woven braids work on all hair types but are most visually striking on fine hair where the detail truly stands out
Final Thoughts
The right braided ponytail isn’t about finding a universal style that works on everyone—it’s about understanding how different braiding techniques interact with your specific hair type, length, and texture, then choosing the combination that makes you feel confident and looks genuinely polished. Whether you’re working with fine hair that needs visual density, thick hair that requires distributed weight and tension, curly hair that deserves both control and freedom, or straight hair that showcases braid definition beautifully, one of these fifteen styles is designed specifically with your needs in mind.
Start by identifying where your hair type falls—fine and thin, thick and coarse, straight and sleek, wavy, curly, or coiled—then try the styles recommended for that texture first. You’ll likely find that those combinations work immediately because they’re designed around how your hair actually behaves. As you gain confidence, branch out to styles from other categories; you might discover that a technique you thought wouldn’t work actually does when you adapt it slightly or use it with different products.
The most important insight is that braiding is genuinely a skill that improves with repetition, and most “I can’t braid” situations aren’t actually inability—they’re just unfamiliarity. Pick one style and practice it three or four times before deciding it’s not for you. Your hands will develop the muscle memory, you’ll discover tricks that make it easier, and you’ll find the rhythm that works specifically for your hand size, hair thickness, and coordination style. By your fourth attempt at a Dutch braid or fishtail, it’ll feel noticeably easier. By your tenth attempt, it’ll feel automatic. Start there, and soon you’ll have a rotating roster of braided ponytail styles that work beautifully on you.