



Round faces are often beautifully balanced, but finding a hairstyle that complements your features rather than emphasizing width can feel tricky. The right short afro hairstyle doesn’t just look great — it can subtly elongate your face, add dimension, and draw attention upward, creating the visual effect of a more sculpted profile. The key is understanding which cuts, textures, and styling techniques work with your face shape rather than against it, and honestly, that’s where most guides fall short by treating all afro textures and face shapes the same way.
What makes a short afro hairstyle work specifically for round faces comes down to a few core principles. You want height at the crown to lengthen the vertical line of your face, you want strategic tapering on the sides to avoid adding width, and you want texture and definition that creates visual interest and movement rather than a solid, blunt shape. The thickness and texture of your hair, your personal style, and how much styling effort you’re willing to invest all factor in, but there are absolutely cuts that will make you feel more confident and flattering in your own hair.
The good news is that short afros offer incredible versatility. You can rock them sleek and sculpted, textured and wild, with clean lines or soft edges, adorned with pins and jewelry or completely natural. Because short hair requires regular maintenance and intentional styling to look its best, choosing a cut that naturally complements your face shape means you’ll spend less time fighting your hair and more time feeling genuinely beautiful. Let’s walk through the styles that actually work, with the specific reasons why they’ll flatter your round face and how to ask for them (or create them) in a way that delivers real results.
1. High-Top Fade with Tapered Sides
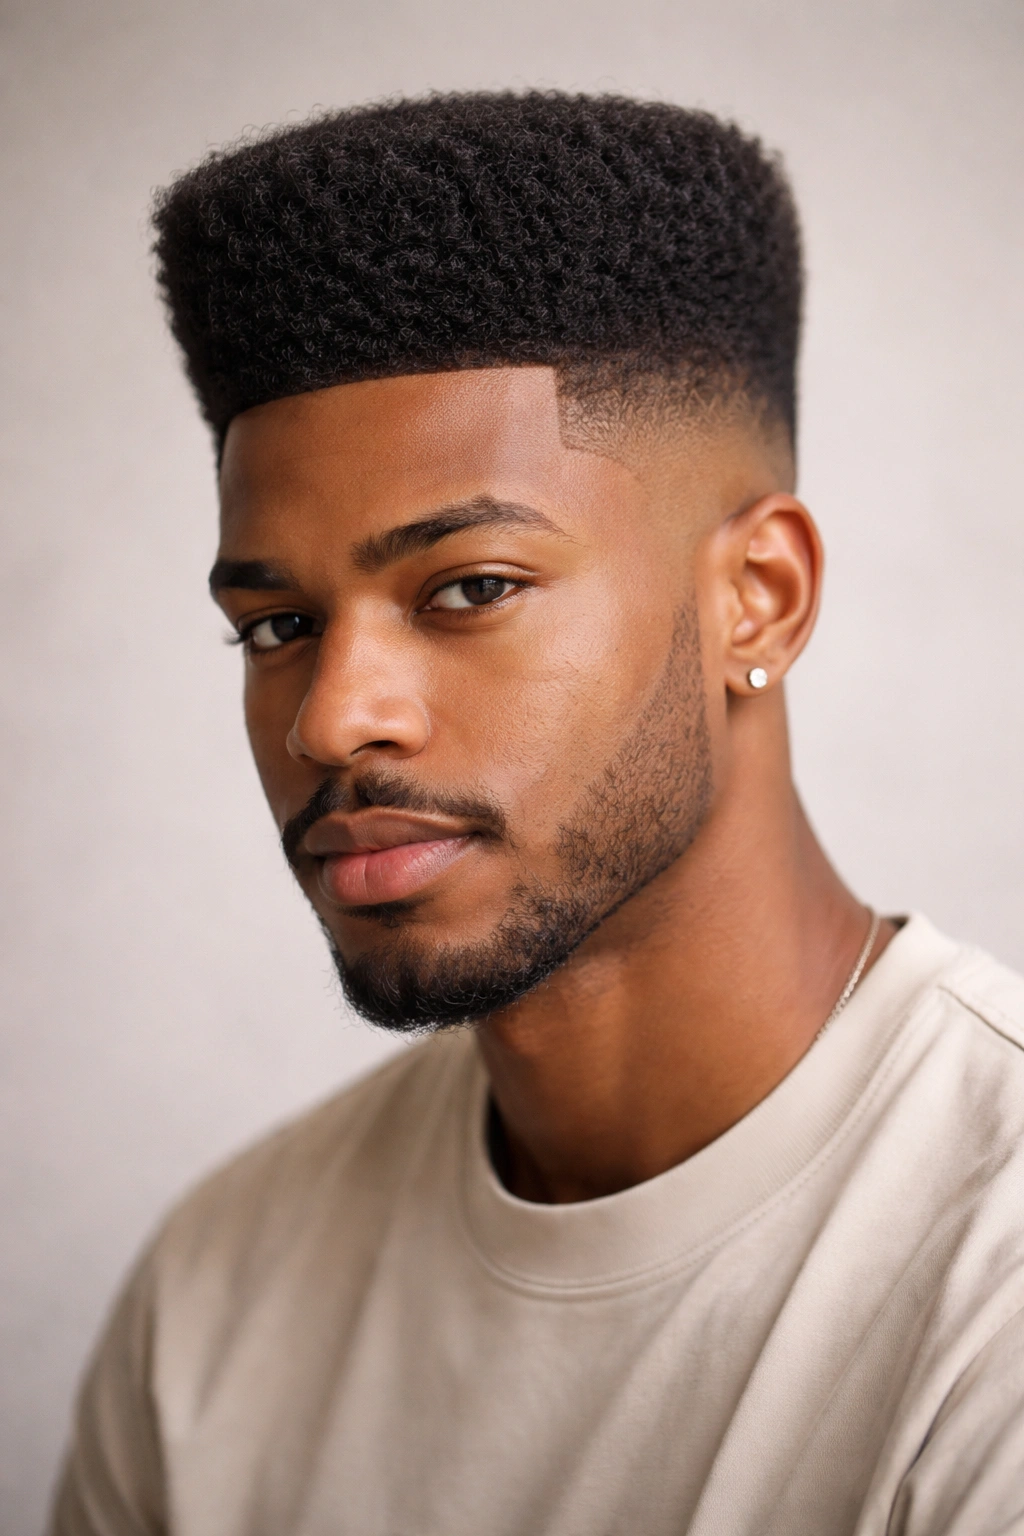
A high-top fade creates serious vertical elongation on round faces because the height is concentrated directly above your head, drawing the eye upward and stretching the visual line of your face. This cut features closely cropped or faded sides that gradually taper from shorter at the edges to longer on top, where the hair stands up or out depending on your preference and styling. The contrast between the short fade and the fuller top is what makes it so effective for round face shapes — it minimizes width at the sides while maximizing length at the crown.
Why It’s Flattering for Round Faces
The high-top fade works because it creates strong vertical lines while the tapered sides prevent adding bulk where you don’t need it. Round faces benefit enormously from height and definition at the crown, and this cut delivers both. The fade also adds an architectural quality that makes your face look more structured and defined, even though it’s a relatively simple geometric shape. Styling your top upward or outward (depending on your texture and preference) further enhances the lengthening effect.
How to Style and Maintain It
- Keep the fade tight with regular trims every 2-3 weeks, since the sides will grow out and lose definition quickly
- On top, your natural texture or a twist-out creates the lift you need — you don’t need to force it unnaturally tall
- Use a light pomade or edge control on the tapered sides to keep them smooth and defined
- The fade looks sharp with minimal styling, but adding height on top with your fingers while the hair is still damp sets the texture beautifully
Pro tip: Ask your barber to taper gradually rather than drop the fade sharply — a gradual fade looks more sophisticated and blends better with longer top hair.
2. Textured Pixie Cut with Volume on Top
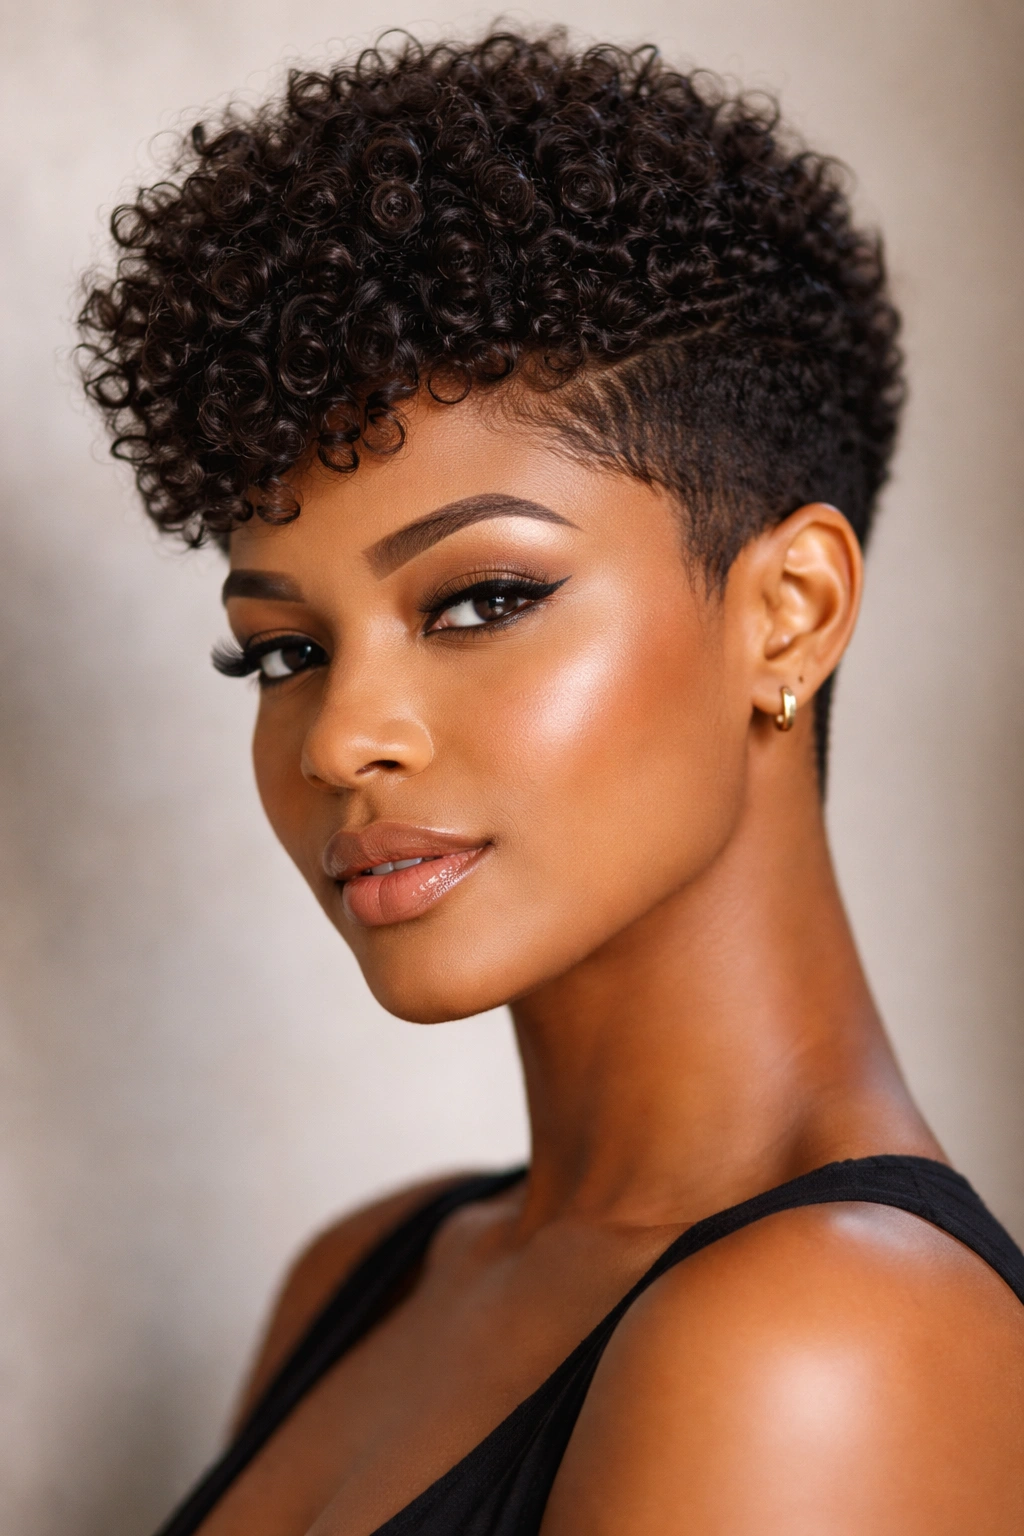
A textured pixie cut is short everywhere, but the magic for round faces lies in how the texture is distributed — you want maximum volume and definition on top with carefully tapered sides that don’t puff out. This isn’t a blunt, uniform pixie; it’s a style where individual curls or coils stand at different lengths, creating visual interest and height rather than a flat, round shape. The texture itself becomes the design, and when cut correctly, it naturally elongates your face.
Why Round Faces Love This Style
Because round faces need height and vertical movement, a textured pixie with volume concentrated at the crown does exactly that. The varying lengths of the curls create dimension that a blunt cut can’t achieve, and the taper on the sides ensures you’re not widening your face. The key is making sure the stylist understands that you want definition and separation between curls, not a solid, rounded shape. When each curl is distinct and stands independently, your face automatically looks longer.
Styling Secrets for Maximum Flattery
- Wash and condition with a lightweight moisturizer that doesn’t weigh down your texture
- Apply a leave-in conditioner and curl cream or gel while hair is soaking wet
- Use your fingers to arrange curls as they dry, encouraging them to stand upward and outward rather than lying flat
- A light touch of edge control on the sides keeps the taper clean and sharp
- You can wear it wet and curly for maximum volume or dry it out for a softer, more blended look
Worth knowing: Regular trims every 4-6 weeks keep the shape intentional and prevent the style from becoming a shapeless puff.
3. Asymmetrical Tapered Cut with Longer Curls on Top
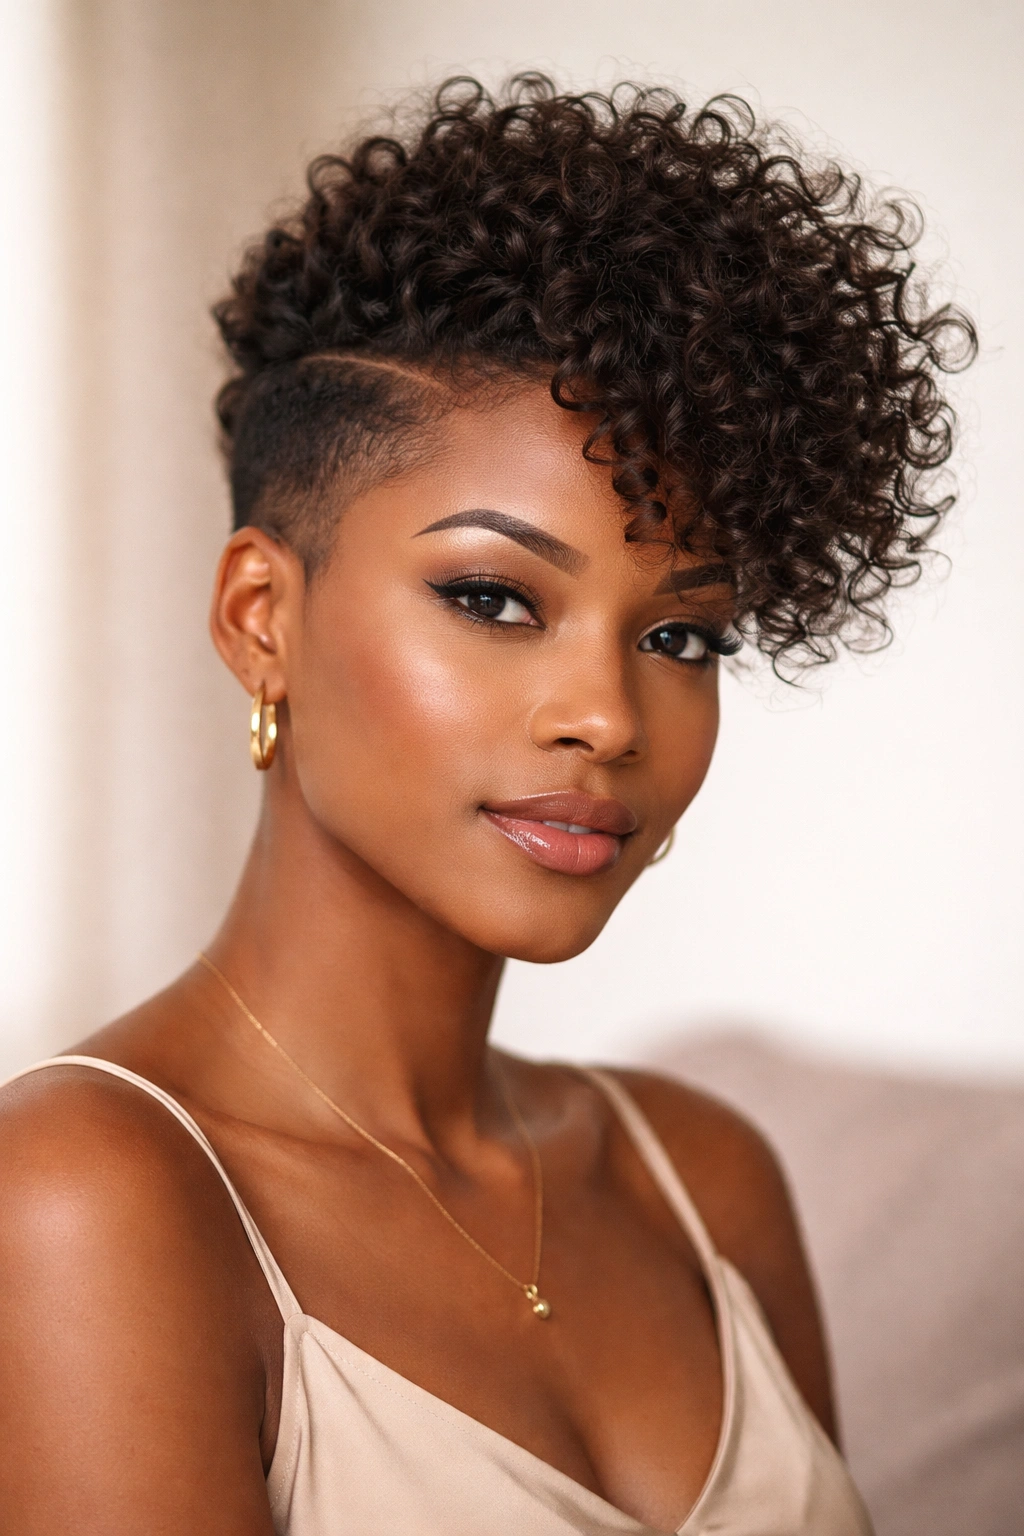
An asymmetrical cut deliberately plays with proportion by keeping one side shorter and more tapered while leaving more length and volume on the other side, with the longest pieces at the crown and front. This imbalance might sound counterintuitive for round faces, but asymmetry actually breaks up the symmetrical roundness of your face shape, making it look less predictable and more dimensional. The longer curls on top create that essential height, while the uneven sides add visual interest that distracts from face width.
Why Asymmetry Works Against Roundness
Round faces are, by definition, symmetrical — the same width all the way around. An asymmetrical cut disrupts that visual symmetry, automatically making your face shape appear less round. The longer curls at the crown still provide the elongation you need, but the contrast between sides adds an edgy, sophisticated quality. It’s a bolder choice than some other cuts, but it’s genuinely flattering and shows serious personal style.
Creating the Look Without Looking Chaotic
- Work with a stylist who understands texture and asymmetry — this isn’t a cut you can do at home
- Ask for one side to be tapered short and the other to have more length, with the longest pieces framing your face
- The taper should be gradual on the shorter side, not a dramatic fade, to keep the asymmetry sophisticated rather than extreme
- Style curls upward and forward on the longer side for maximum face-framing and height
- Use curl cream and finger-coiling to define and arrange individual curls intentionally
Quick tip: This style works best with regular maintenance — asymmetry loses its impact when it grows out unevenly, so plan for trims every 4-5 weeks.
4. Coil-Out with Clean Fade Sides
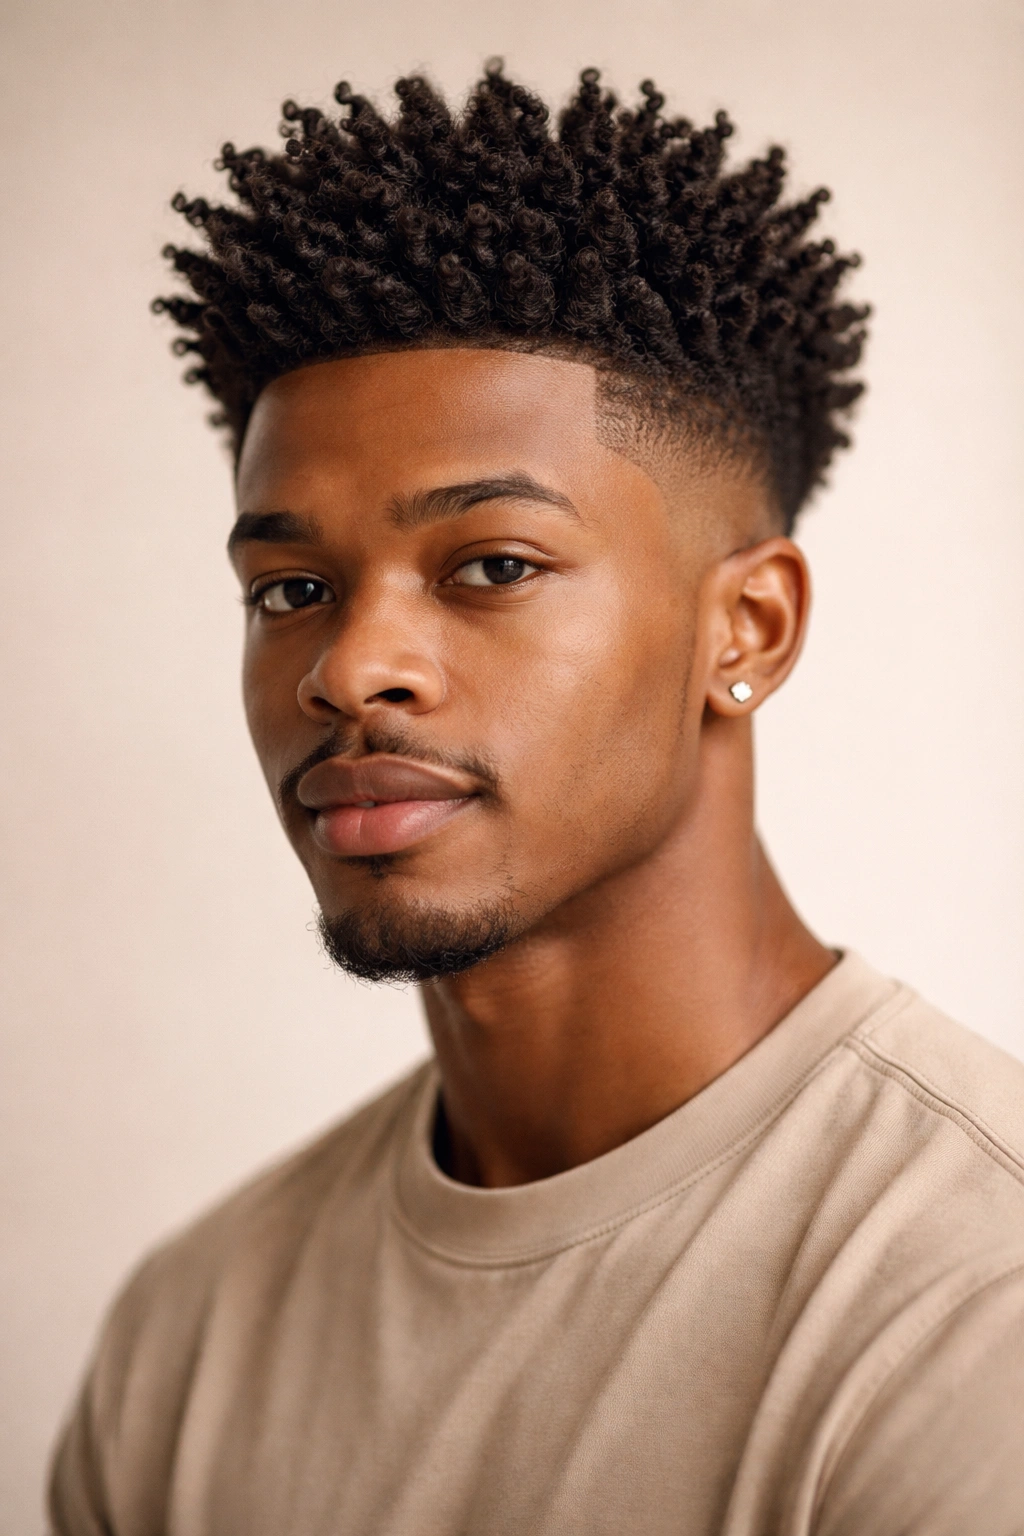
A coil-out involves tightly coiling damp hair around a finger or tool, letting it dry, and then gently unraveling each coil to create defined, bouncy spirals. When paired with a clean, tight fade on the sides, this creates a stunning contrast — the defined coils have serious vertical dimension while the faded sides stay sleek and sculpted. This style celebrates your natural texture while using clean geometry to flatter your face shape.
Why Defined Coils Elongate Round Faces
Each individual coil creates its own vertical line, and when you have dozens of them, your face is surrounded by vertical visual lines that stretch upward. This is one of the most effective optical illusions for elongating round faces. The coil-out texture also creates separation and definition that prevents any blunt, rounding effect — every curl is distinct, emphasizing height and movement rather than width.
Achieving Picture-Perfect Coil-Outs
- Coil damp hair in small, tight sections — smaller coils create more defined spirals and more vertical lines
- Let hair dry completely (overnight is ideal, or use a diffuser attachment on low heat)
- Gently unravel each coil with your fingers while the hair is still slightly damp for the most definition
- Use a light curl cream before coiling to define and hold the pattern
- The fade sides need touching up every 2-3 weeks to maintain that sharp contrast
Insider note: If your coils feel dry or frizzy when unraveled, apply a tiny bit of light oil or serum to your hands before unraveling — this adds shine without flattening the definition.
5. Low-Fade Taper with Crown Definition
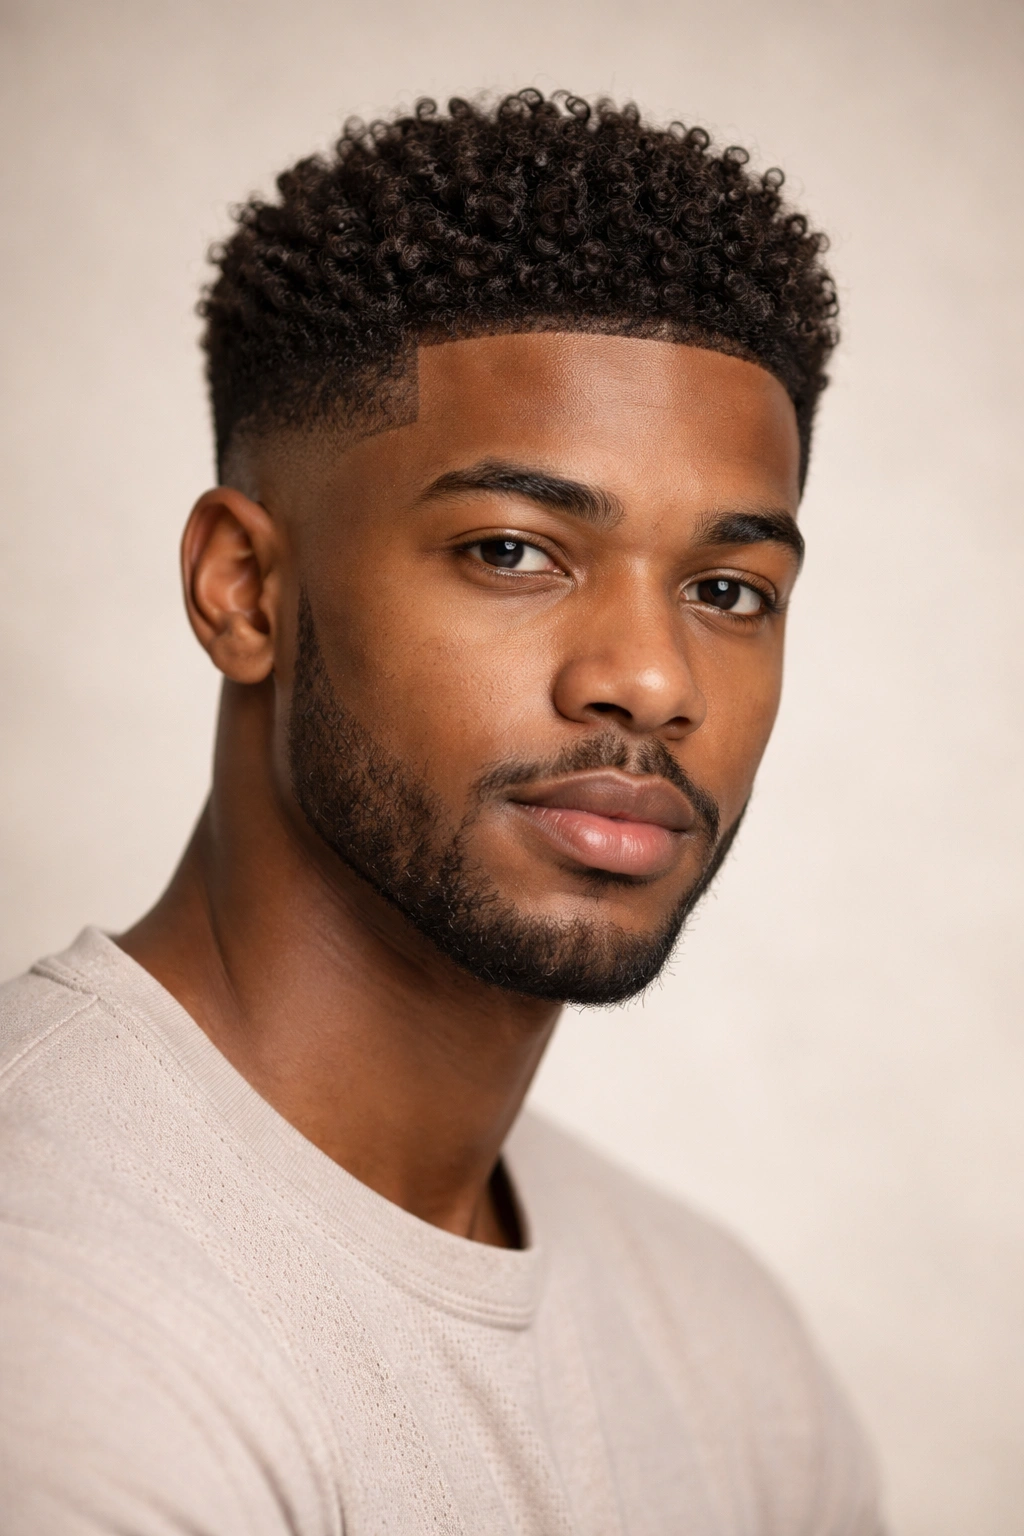
A low-fade taper keeps most of your hair length intact but gradually shortens it from mid-head down to the sides, creating a tapered effect that’s less severe than a high fade. The real flattery for round faces comes from intentional definition and height at the crown, where you want the longest, fullest, most defined curls. This approach is perfect if you’re not ready to go ultra-short or if you prefer a less dramatic contrast between sides and top.
Why a Low Fade Preserves Your Hair While Flattering Your Face
Because the fade starts lower, you keep more length throughout, which gives you styling flexibility and a softer overall appearance than a high fade. The taper still minimizes width on the sides while the crown focus creates vertical elongation. It’s a Goldilocks option — not too short, not too long, but sculpted enough to flatter a round face shape. The gradual transition also blends better with textured hair, creating a more cohesive look.
Styling a Low-Fade Taper for Maximum Impact
- Define curls at the crown using a curl cream or gel applied to soaking-wet hair
- Use your fingers or a wide-tooth comb to encourage curl formation and upward direction
- Let hair air-dry or diffuse-dry to maintain texture and shape
- The tapered sides can be smoothed with edge control or left textured for a softer look
- Refresh curls between wash days with a spray bottle of water and lightweight product
Real talk: This style requires less frequent trims than a high fade (every 4-6 weeks instead of 2-3), since the lower taper grows out less noticeably.
6. Frohawk with Sculpted Sides
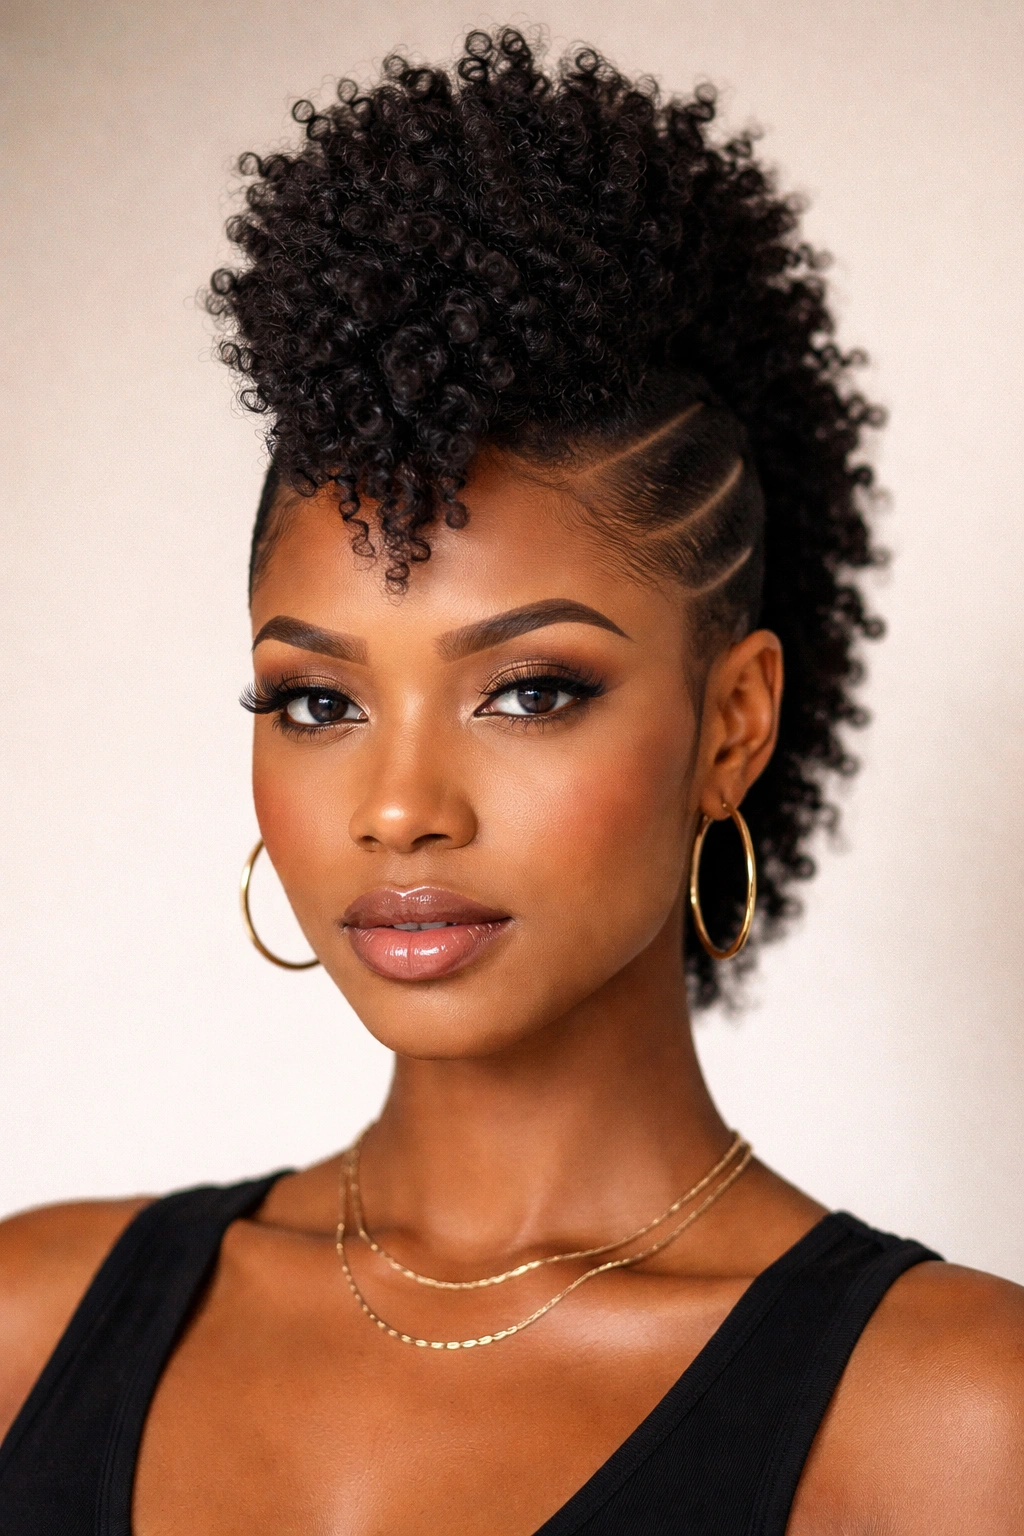
A frohawk gathers and stands the hair from front to back into a defined ridge or column down the center of your head, like a reverse Mohawk but fully textured rather than shaved. The sides are closely tapered or faded, creating dramatic contrast and dimension. For round faces, the frohawk is genius because the central ridge creates an unbroken vertical line down the middle of your face, which is an incredibly powerful visual tool for elongation.
How a Frohawk Redefines Round Face Proportions
The vertical line running down the center literally divides your face in half, immediately making it appear less wide and more structured. Combined with the tapered sides, this style uses geometry to completely transform how your round face appears. It’s bold and statement-making, perfect if you have the confidence and the hair density to pull it off. The style also draws attention to your eyes and forehead rather than your cheeks and jawline, which is exactly where you want the focus on a round face.
Creating and Maintaining a Stunning Frohawk
- Wash and condition, then apply a styling gel or cream to damp hair
- Brush or comb hair from the sides toward the center, creating a defined ridge
- Let the center ridge dry while hair at the sides is smoothed downward and secured with product
- The sides need fading every 2-3 weeks to keep the contrast sharp
- You can wear your frohawk loose and textured or sleek and controlled depending on your preference and the occasion
Pro tip: If you’re new to the frohawk, ask your stylist how to style it at home — the initial cut creates the potential, but your daily styling determines whether it looks intentional or accidental.
7. TWA (Teeny Weeny Afro) with Elevated Crown
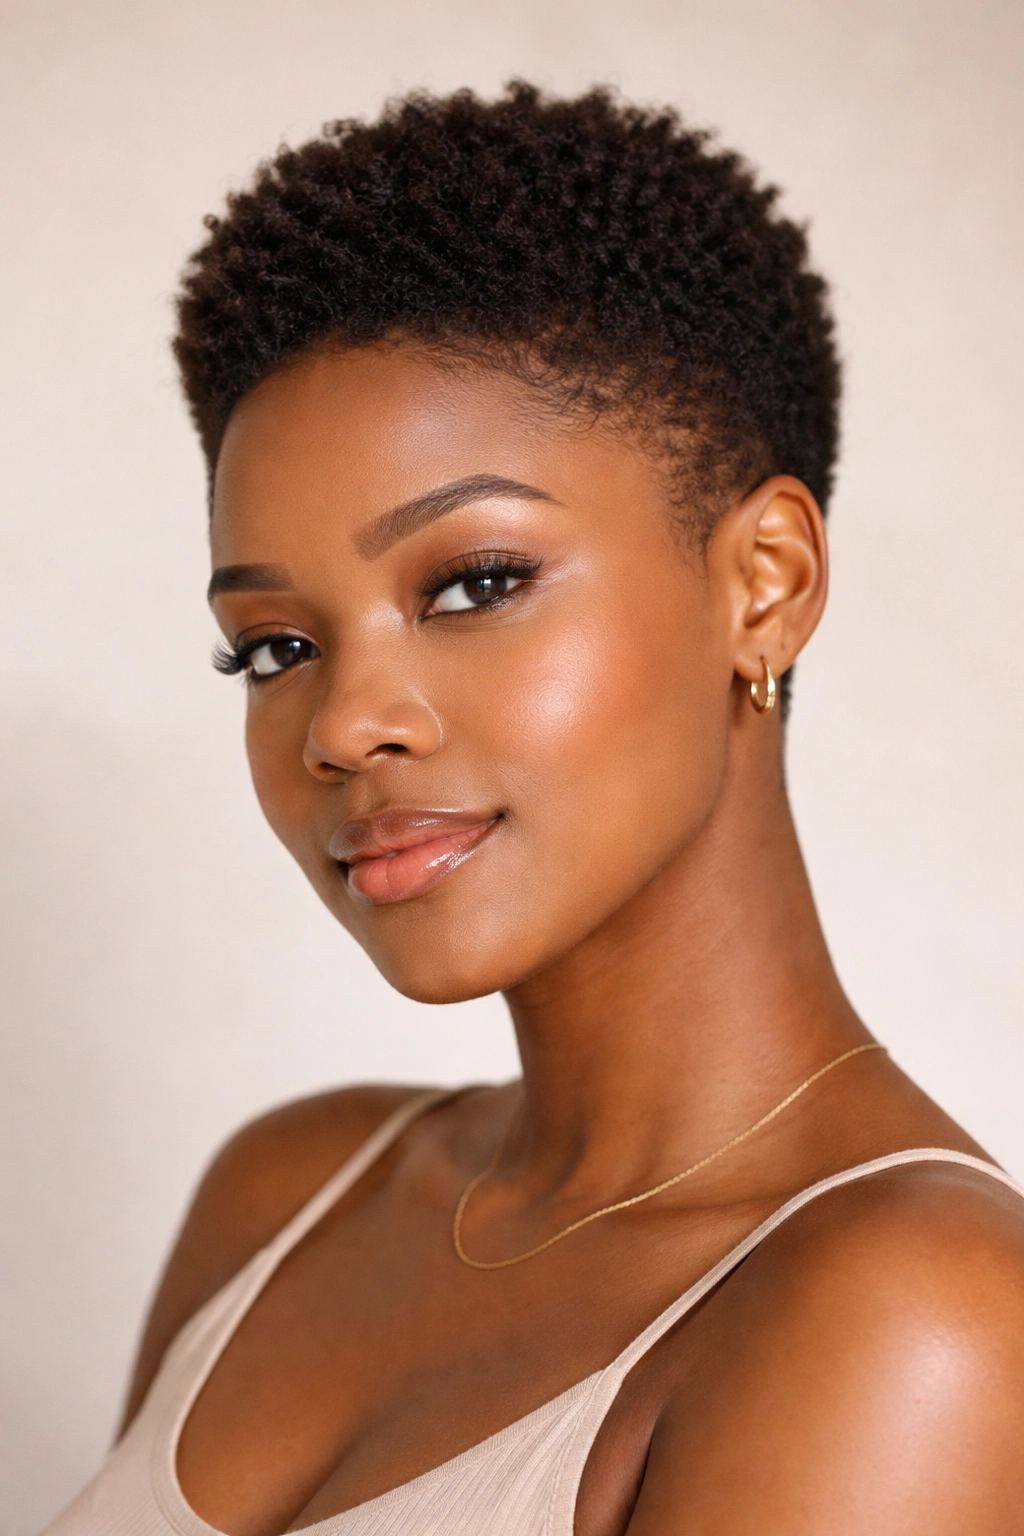
A TWA is simply very short natural hair, usually all one length, that hugs your head close. For round faces, the magic happens when your stylist cuts the crown slightly longer than the rest, creating elevation right where you need it. This is different from a blunt, uniform TWA; it’s a TWA with intention and dimension. The slightly longer crown hair, when textured and defined, creates just enough height to elongate your face while keeping everything else simple and wearable.
Why TWA Works Better Than You’d Think for Round Faces
A completely blunt, uniform TWA can actually emphasize roundness because it hugs your head in all directions equally. But a TWA with crown elevation changes that equation entirely. The extra length at the crown (even if it’s only a quarter-inch longer) combined with intentional definition creates the vertical line you need. It’s a minimalist, low-maintenance style that still flatters your face shape when cut with intention.
Styling Your Elevated-Crown TWA
- Keep hair moisturized with a good leave-in conditioner and lightweight curl cream
- Use your fingers or a fine-tooth comb to create definition and separate curls while hair is still damp
- The crown should dry slightly fluffier than the sides — this happens naturally if you encourage it while styling
- Edge control on the sides keeps them smooth and sculpted without extra bulk
- This style truly requires minimal daily effort and no blow-drying or hot tools
Worth knowing: A TWA with crown elevation needs trims every 6-8 weeks to maintain that intentional shape and prevent it from becoming a uniform, unflattering puff.
8. Shaggy Layers with Texture and Movement
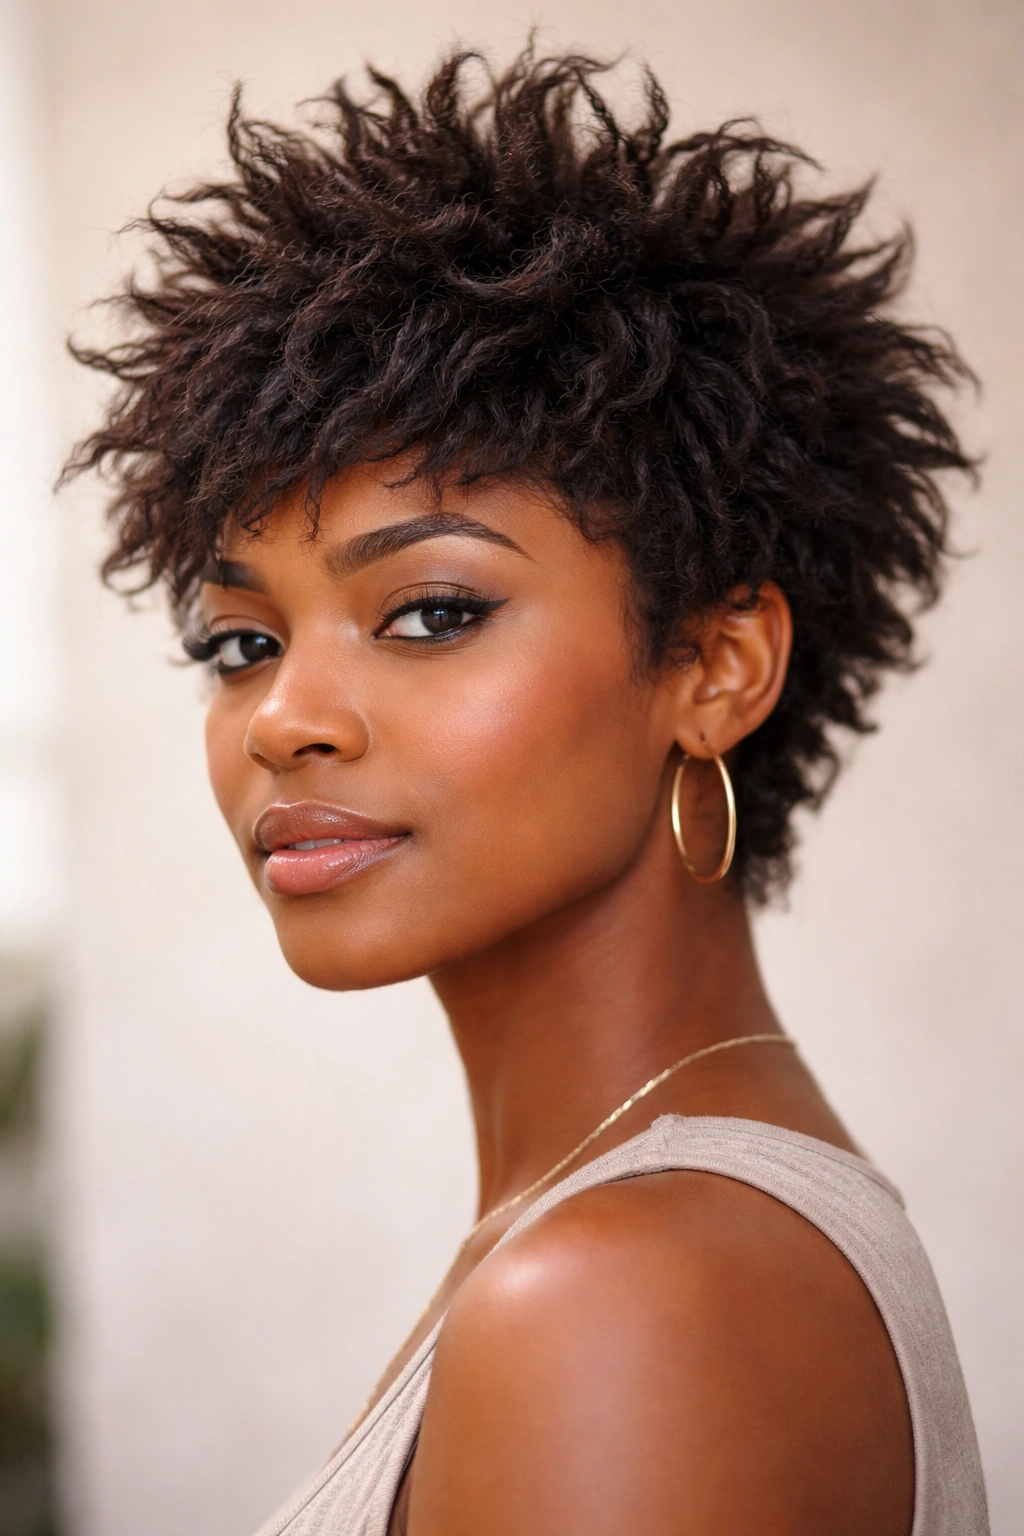
Shaggy layers throughout short hair create multiple lengths and movement, giving your head an organic, lived-in shape rather than a geometric one. The varying lengths mean your silhouette is less uniformly round — it’s broken up by peaks and valleys. Layering also adds movement and flow, which naturally draws the eye upward and creates visual elongation. This style feels modern and effortless while being genuinely flattering for round faces.
Why Layers Disrupt Roundness
When every hair is the same length, your head can read as a single, round shape. Layers break that visual unity by creating different lengths that stand at different angles. This means light and shadow play across your head differently, making it appear less perfectly round. The upward movement of layered hair is also flattering, especially if you style layers at the crown to stand upward rather than lie flat.
Getting and Maintaining Great Layers
- Ask your stylist for layers throughout, not just on the ends — this creates the textured, dimensional effect you want
- Shorter layers on top and slightly longer underneath create the volume and height you need
- Style with curl cream or gel on damp hair, scrunching upward to encourage height at the crown
- Use a diffuser attachment while blow-drying if you want to speed up drying and set the texture
- Layers need trimming every 6-8 weeks to maintain definition and prevent them from growing into a shapeless puff
Quick fact: Shaggy layers work best with natural texture — if you have looser waves or curls, layers will separate beautifully; if you have tight coils, make sure your stylist understands how to layer textured hair without creating a frizzy mess.
9. Clean-Lined Box Braids in a High Bun
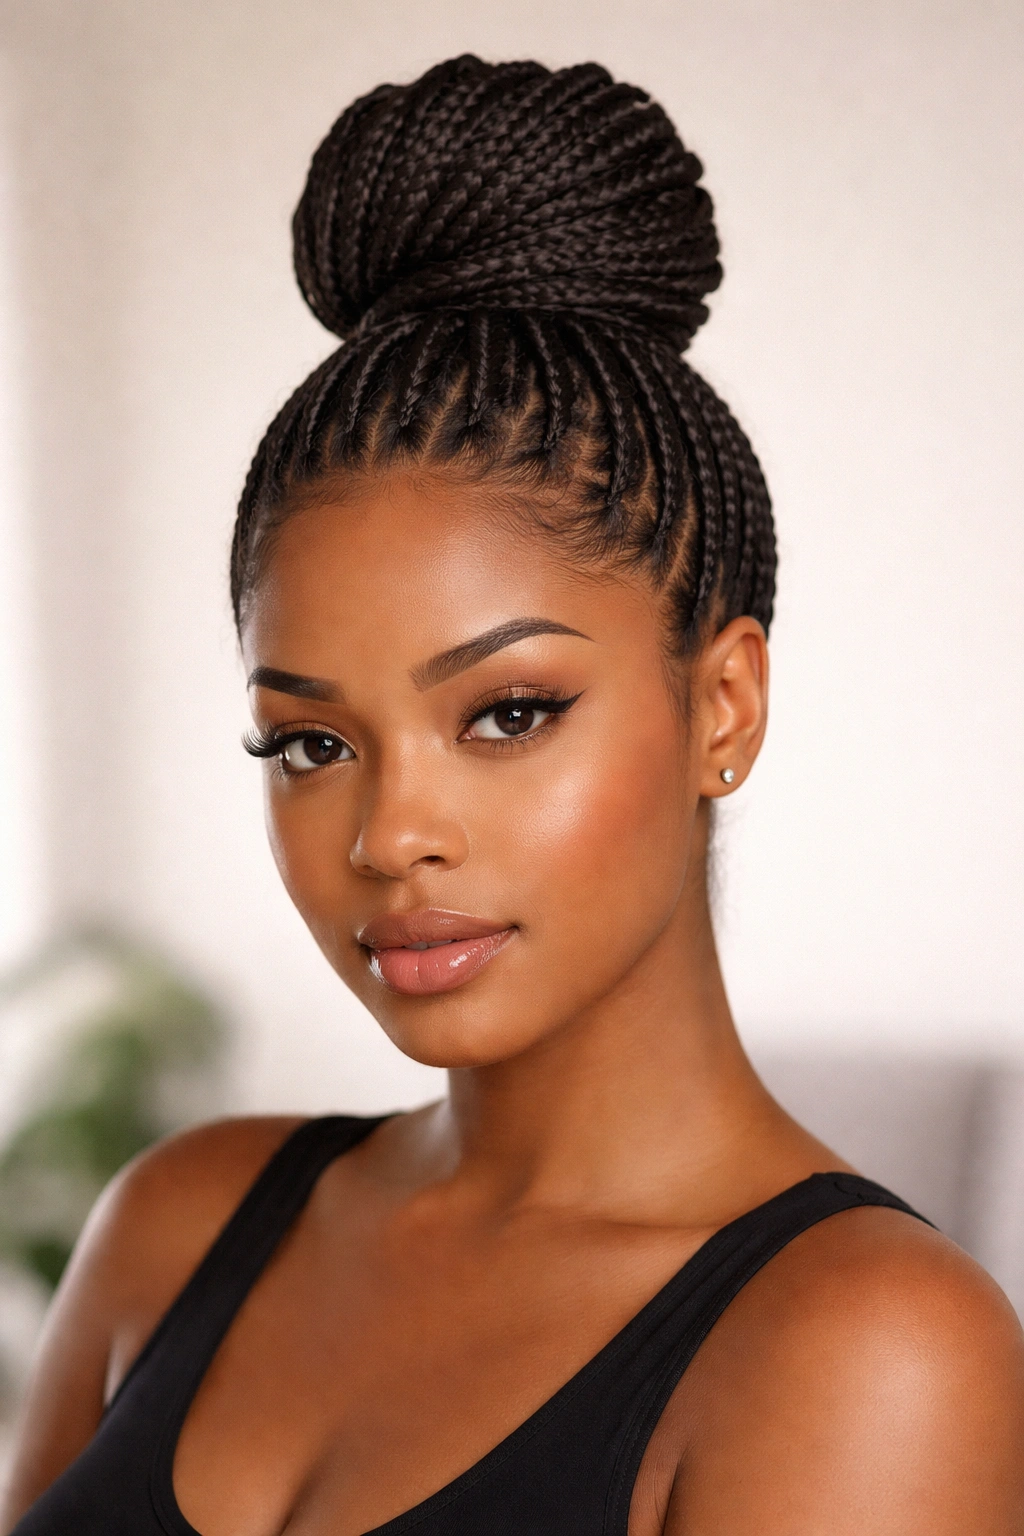
While box braids are technically a protective style rather than a cut, the way you style them matters enormously for round faces. Gathering them into a high bun or ponytail at the crown creates instant vertical elongation and draws all attention upward, away from the width of your face. The braids themselves create clean, defined lines that add structure and prevent any soft, rounding effect. This is one of the most flattering ways to wear short braids if you have a round face.
Why High Styling Elongates Round Faces Dramatically
By gathering hair up and away from your face, you create negative space that makes your face appear longer and more sculpted. The vertical line from your face up to the bun is a powerful visual element that stretches your proportions. Box braids also have defined, linear qualities — they’re not soft and rounded, they’re structured and intentional. When you gather them high, you’re using both the visual weight and the geometric properties to your advantage.
Achieving the Most Flattering Braided Look
- Keep braids fairly small and neat — thick, chunky braids can look overwhelming on smaller frames
- Gather them into a bun at the very crown of your head, not at the back like a traditional low bun
- Leave a few face-framing braids loose if you want softness, or tuck everything in for a sleek, sculptural look
- Add minimal jewelry or beads to the bun for visual interest
- This style keeps hair off your face, making your face appear longer and more defined
Pro tip: If your braids feel heavy or cause tension headaches, that’s a sign they’re too thick or pulled too tight — ask your braider for smaller, lighter braids that still look beautiful but won’t damage your hairline.
10. Blunt Taper with Defined Curl Pattern
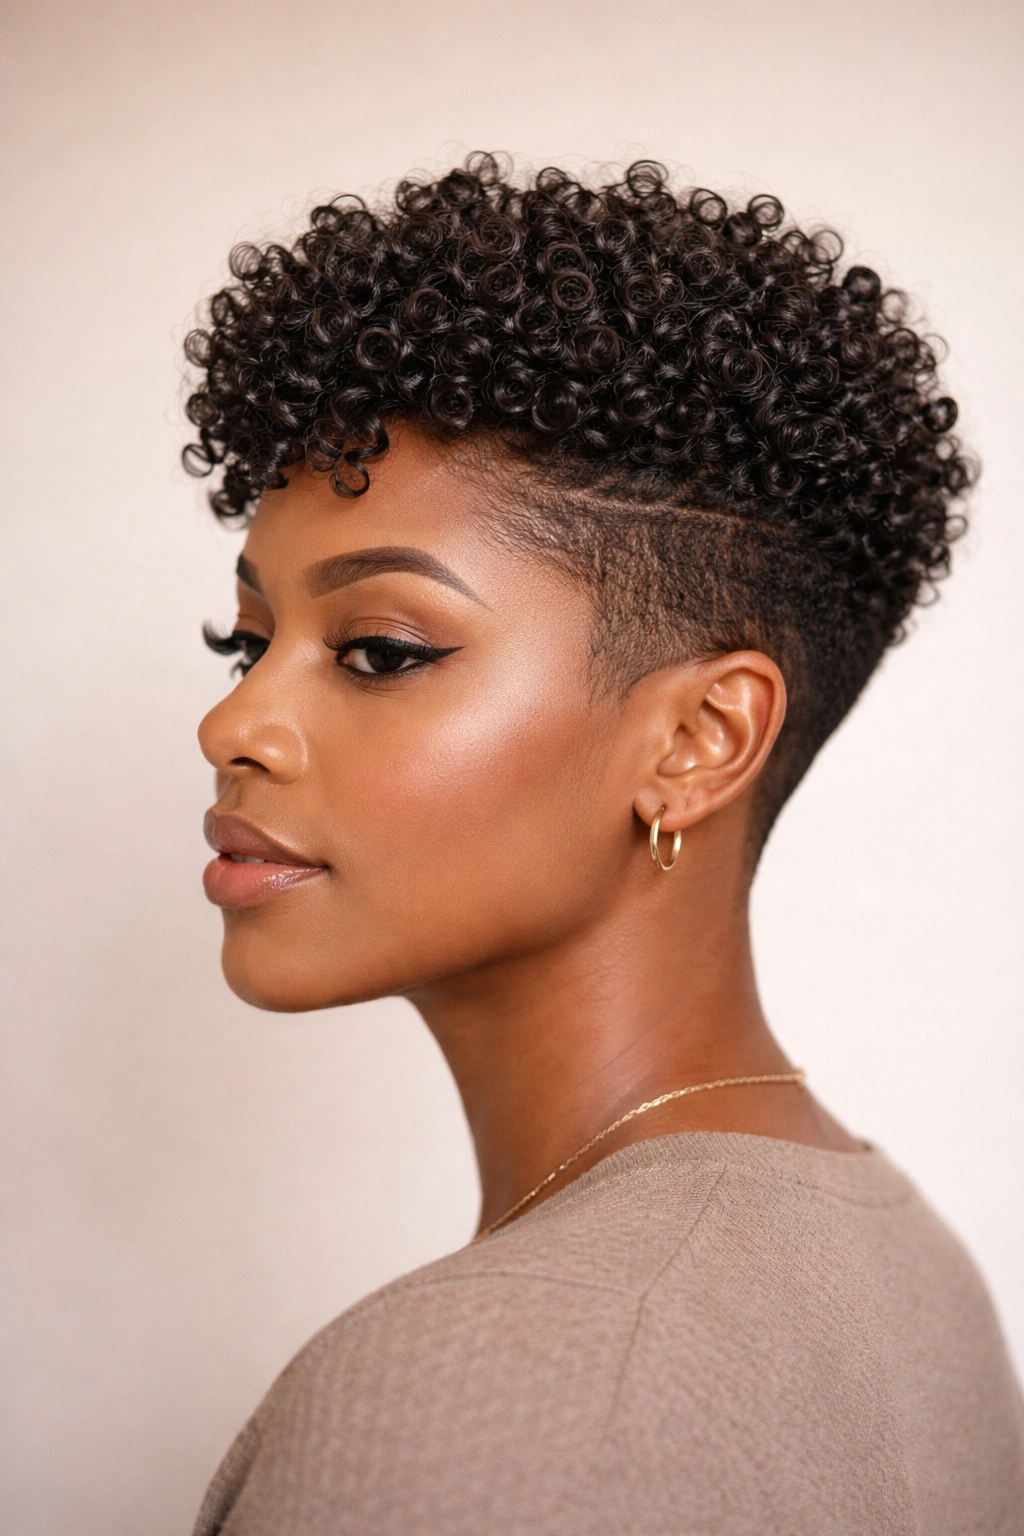
A blunt taper is exactly what it sounds like — a defined line where your hair suddenly goes from a certain length to much shorter, creating sharp geometry. For round faces, the secret is pairing that blunt taper with extremely defined curls or coils on top so you’re getting both the height (from the length) and the vertical visual lines (from defined curl definition). The blunt line creates structure while defined curls create dimension.
Why Blunt Geometry Works With Texture
A blunt edge is bold and architectural — it’s the opposite of soft and rounded. When paired with very defined, separated curls, you’re creating a style that emphasizes shape and structure rather than softness. The defined curls also ensure that you’re not getting a solid, blunt shape that could emphasize roundness; instead, you’re getting a sculpted silhouette made up of intentional, individual elements. This combination is sophisticated and genuinely flattering.
Creating Definition at the Blunt Line
- Ask your stylist to create a clean, blunt line on the tapered sides while the top remains textured
- Define curls using a curl cream or gel on soaking-wet hair, applying it to individual sections
- Curl each section around your finger or a tool and let it dry completely before unraveling
- The contrast between the sharp blunt line and the soft, defined curls is what makes this style work
- Use edge control on the tapered line to keep it crisp and intentional
Real insight: Blunt tapers grow out visibly, so plan for trims every 3-4 weeks if you want to maintain that sharp definition. If you prefer a lower-maintenance style, ask for a gradual taper instead of a blunt line.
11. Styled Twist-Out with Height at Crown
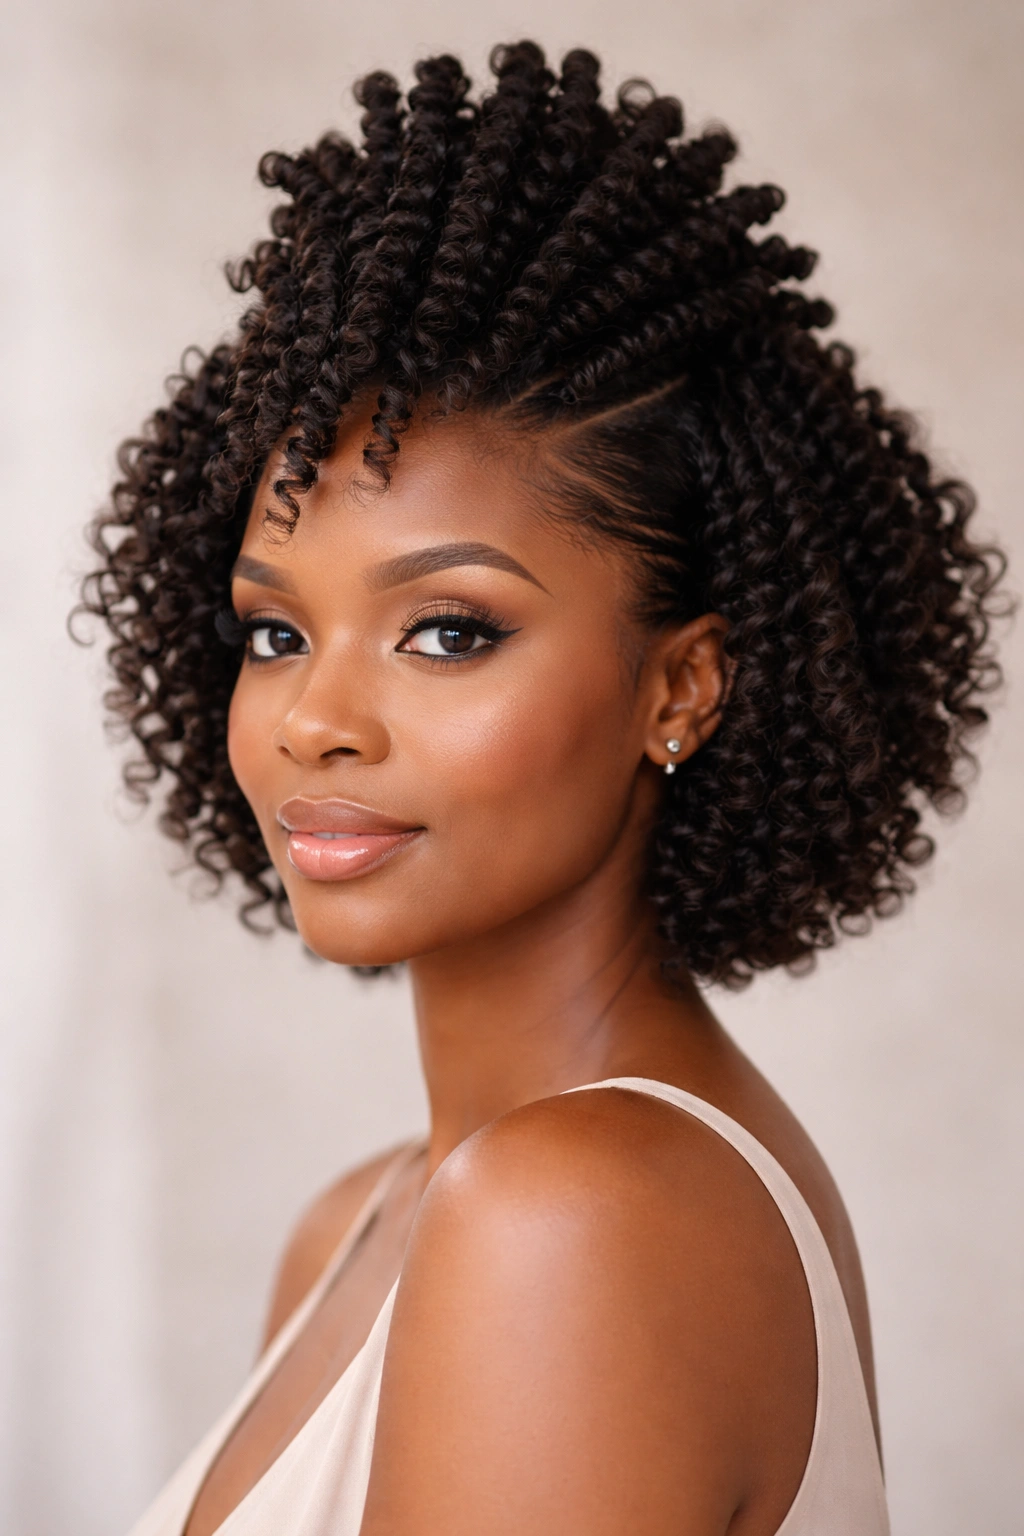
A twist-out involves twisting sections of damp hair together, letting them dry, and then untwisting them to reveal soft, defined waves or coils depending on your natural texture. For round faces, the key is concentrating the longest twists and creating the most definition at your crown, so you get maximum height right where you need it. The soft texture of a twist-out creates movement and visual interest rather than a solid, round shape.
How Twist-Outs Create Elongation Through Soft Structure
Unlike the sharp geometry of some cuts, a twist-out creates soft, organic structure. The untwisted waves or coils have their own natural direction and flow, and when you have the most of them at your crown, they create an invisible vertical line. The softness also means this style is incredibly versatile — you can style it sleek by smoothing hair down, or you can encourage height and movement by separating twists and fluffing your crown.
Mastering the Twist-Out for Your Face Shape
- Divide damp hair into sections and apply a curl cream to each section
- Twist two strands of hair together from root to end, making twists smaller at your crown if you want more definition and height
- Let hair dry completely (overnight is ideal)
- Untwist gently while hair is still slightly damp for the most definition
- Separate and fluff twists at the crown to create height; smooth them at the sides to minimize width
- Refresh between wash days with a spray bottle of water and lightweight product
Worth knowing: Twist-outs work best on textured hair — if you have very loose waves, the untwisted result will be soft waves rather than defined coils, but it’s still beautiful and still creates the movement you need.
12. Undercut with Full Crown
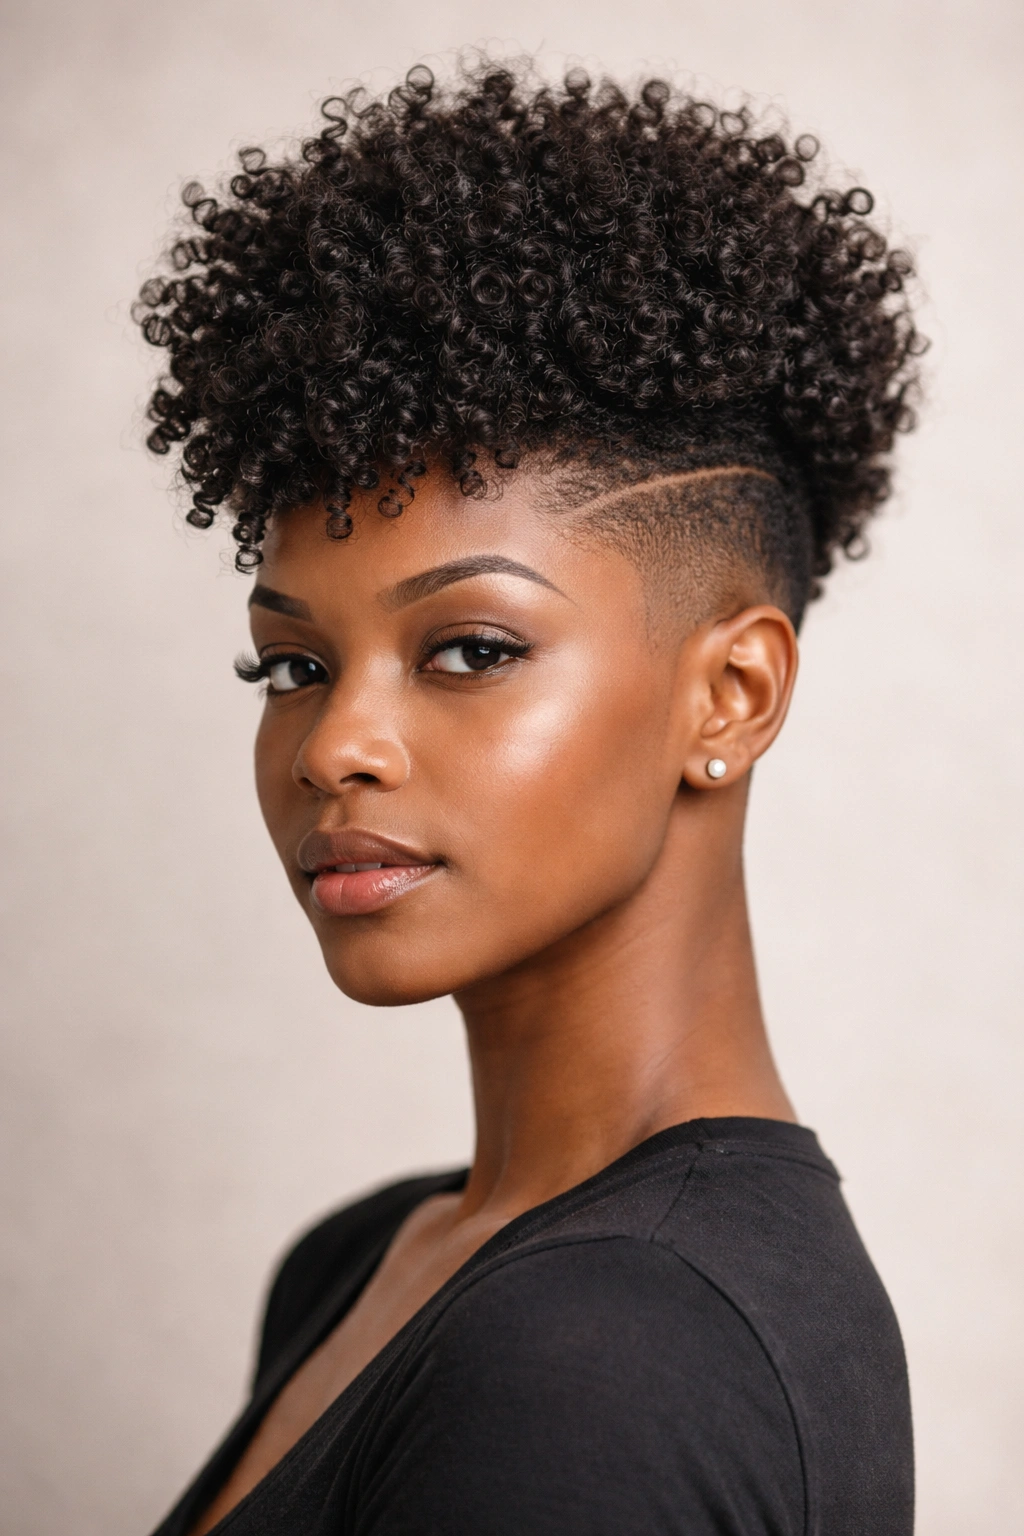
An undercut shaves the back and sides very closely while keeping the top and crown significantly longer, creating maximum contrast and drama. The shaved sections are completely removed, creating the most extreme taper possible, while the crown remains full and thick. For round faces, this is a bold choice that creates sharp visual geometry while preserving the length and volume you need at the top where it flatters you most.
Why an Undercut Redefines Round Face Shape
An undercut is the opposite of soft and rounded — it’s sharp, architectural, and dramatic. By removing hair from the back and sides entirely, you’re not just minimizing width, you’re eliminating it. The contrast between the shaved sides and the full crown is so extreme that it completely changes how your face appears. The eye is drawn to the contrast and to the crown, making your face appear longer and more defined.
Styling and Maintaining an Undercut
- The undercut needs touching up every 2-3 weeks to maintain that sharp contrast — hair grows in visibly
- The crown should have defined curls or texture to maximize height and visual interest
- You can style the crown smoothly over the undercut for a sleek look, or with lots of height for a bold, statement style
- Edge control keeps the undercut line crisp where the hair transitions from shaved to longer
- This style requires confidence and commitment to the high-maintenance nature of keeping undercut lines sharp
Real talk: An undercut is a big commitment because the frequent maintenance and the bold aesthetic require you to really want this style. If you’re unsure, start with a high fade instead, which offers similar visual benefits with less extreme maintenance.
13. Defined Coil-Set with Fluffy Crown
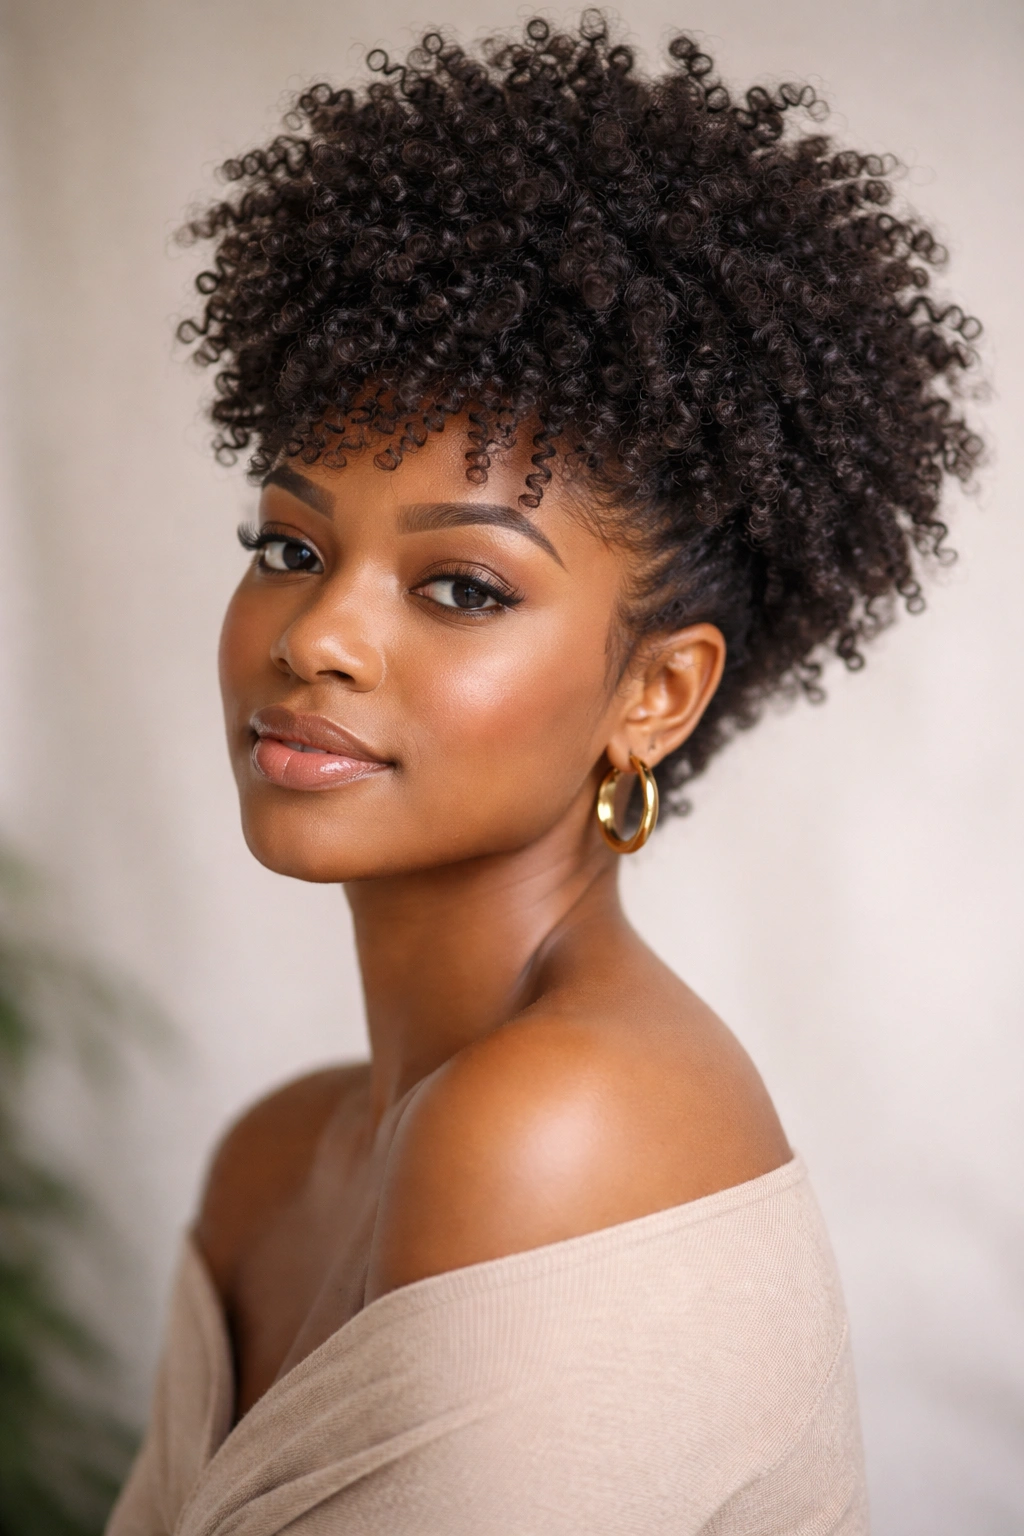
A coil-set involves coiling sections of damp hair and letting them dry, similar to coil-outs but often done with slightly less tension. This results in fuller, fluffier coils that have soft definition rather than super-tight spirals. The real magic for round faces happens when you coil-set your crown sections a bit more loosely than your side sections, creating intentional volume and softness where you want elongation and less bulk where you don’t.
Why Fluffy Coils Work Better Than Tight Coils for Round Faces
Tight, dense coils can sometimes look heavy and can emphasize roundness if all the density is uniform around your head. Fluffy coils, especially when you have more of them at the crown, create height and lightness. The fluffiness also creates visual texture that makes your silhouette appear less uniform and round. The key is making the crown fluffier than the sides so you’re still directing visual attention upward and minimizing side width.
Achieving Fluffy, Defined Coils
- Apply a leave-in conditioner and light curl cream to damp hair
- Coil sections loosely around your finger, especially at the crown — looser coils create fluffier results
- Let hair dry completely (overnight is ideal, or use a low-heat diffuser)
- Gently separate coils with your fingers while hair is still slightly damp for more fluff
- The crown coils will naturally be fluffier and more voluminous; the side coils can stay tighter for definition
- Refresh coils between wash days with a spray bottle and light product
Quick tip: If your coils feel heavy or look flat, you might be applying too much product — start with less and add more if needed. Light products work better for fluffy coils than heavy creams or gels.
14. Cut and Color Definition with Side-Swept Style
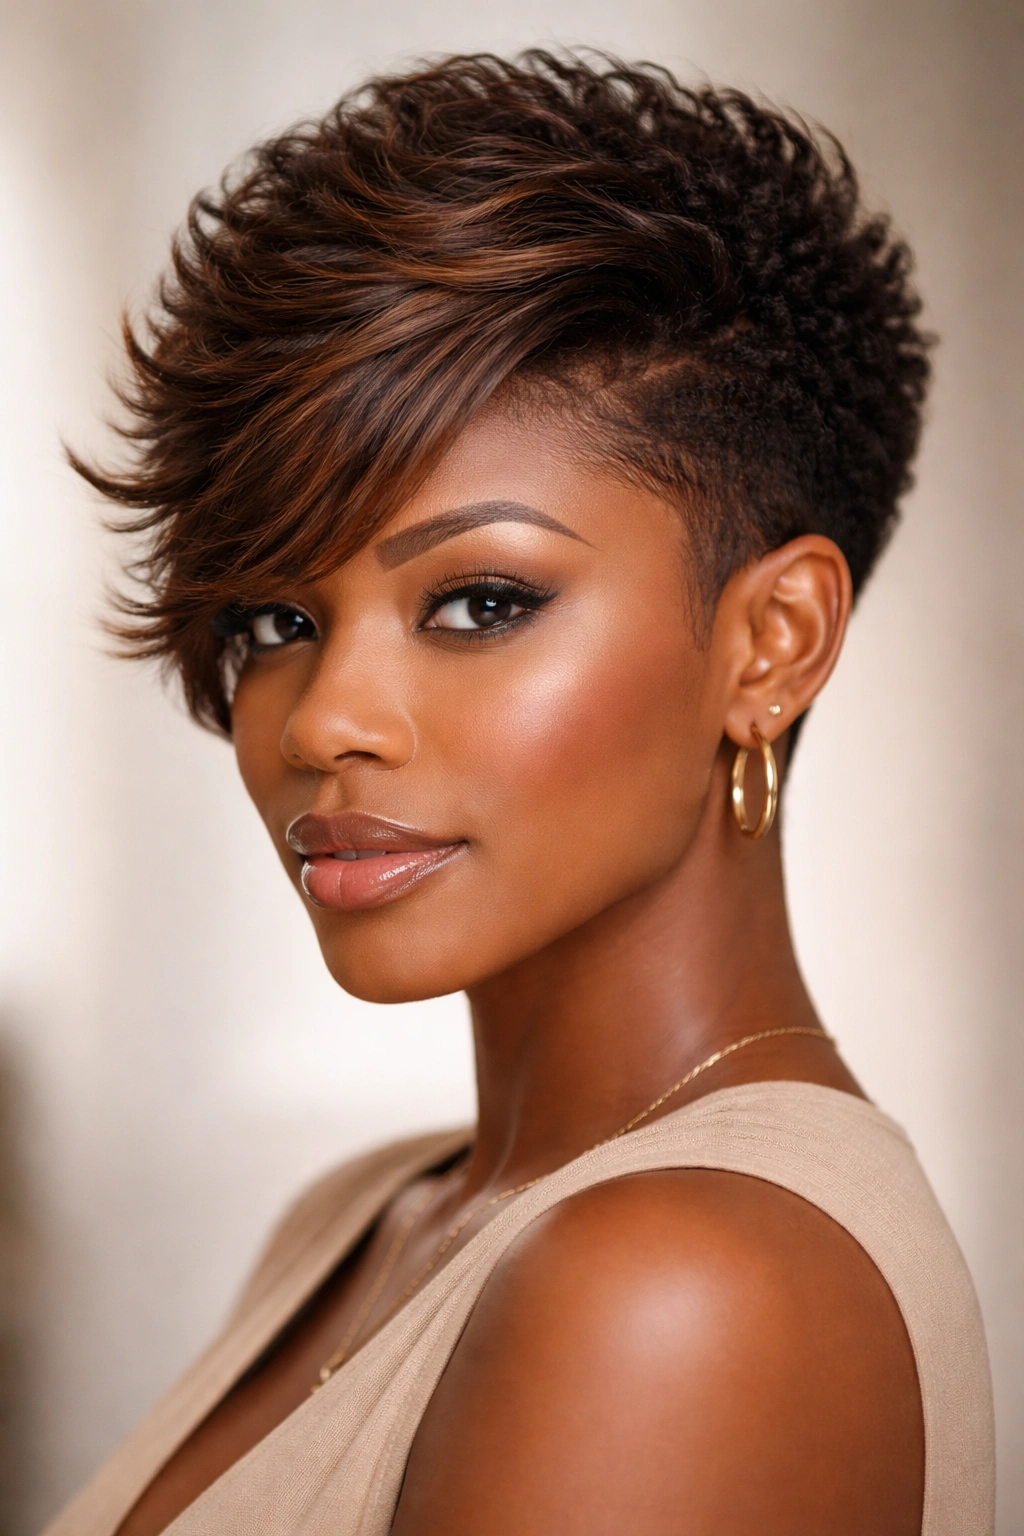
While cut and color are technically two different elements, for round faces, combining a sculptural cut with strategic color or texture variation can be incredibly flattering. For example, a short cut with side-swept styling (where hair is brushed and styled to fall toward one side, creating an off-balance, face-framing effect) combined with subtle color blocking or highlights that emphasize the crown and face-framing pieces draws attention exactly where you want it. The asymmetry and movement create elongation while the visual interest prevents a round appearance.
How Asymmetry and Movement Elongate
Side-swept styling creates an asymmetrical silhouette that disrupts the perfect symmetry of a round face. The hair falling to one side creates a diagonal line across your face that’s visually elongating. If you add color variation (highlights at the crown, lowlights on the sides, or contrasting dimensional color), you’re adding another layer of visual interest that makes roundness less apparent. The movement created by side-swept styling also draws the eye across rather than around your face.
Creating a Side-Swept Sculptural Style
- Ask for a cut with slightly longer pieces on one side that can sweep across or behind your ear
- Shorter, tapered pieces on the other side keep that side sleek
- Define curls throughout with curl cream or gel on damp hair
- Style your hair to sweep toward the longer side, using fingers to encourage the direction
- If you add color, concentrate highlights or lighter tones at the crown and face-framing pieces
- Edge control keeps tapered sides smooth while allowing movement in the longer pieces
Insider note: Side-swept styling works best when the longer side is just long enough to frame your face without completely covering it — you want to show your beautiful face shape while using the sweep to create flattering lines and asymmetry.
Final Thoughts
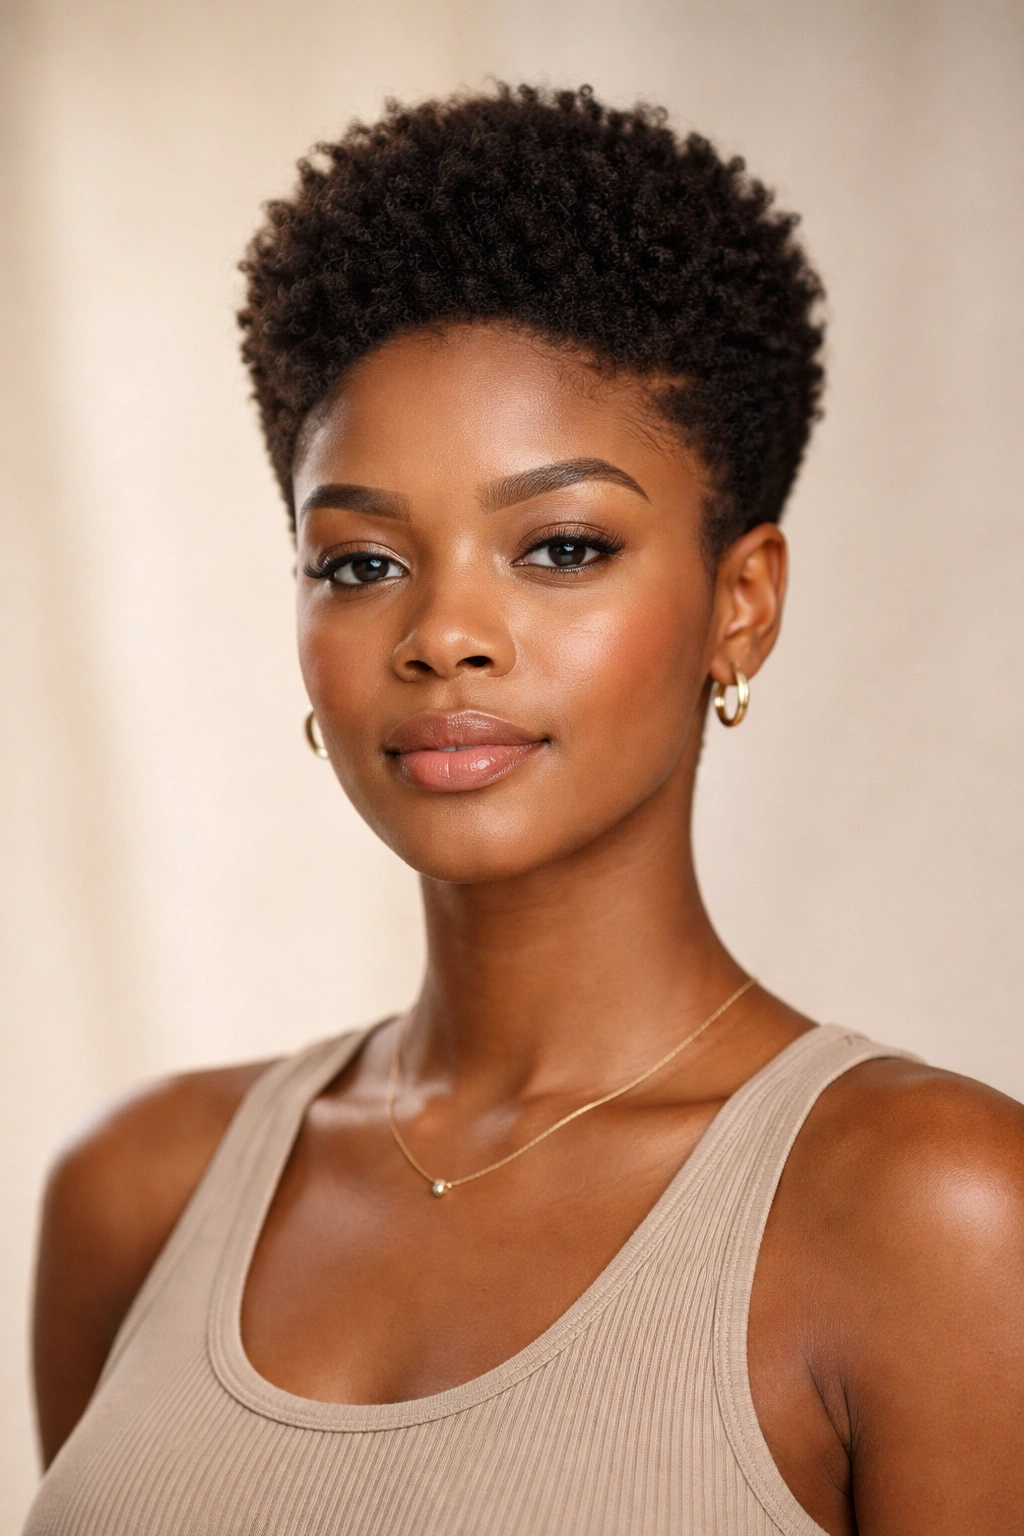
The right short afro hairstyle for a round face comes down to understanding two core principles: you need height and vertical elongation at the crown, and you need to minimize bulk on the sides. Every style in this guide uses at least one of these strategies, and many use both. The specific cut, texture, color, and styling you choose depend entirely on your personal style, your hair texture, how much maintenance you’re willing to do, and how bold you want to go.
What matters most is finding a stylist who understands both textured hair and face shapes — someone who will listen when you explain your round face and ask what will actually flatter you, rather than just giving you the trendiest cut they’re excited about. Bring photos of styles you love, but more importantly, explain to your stylist why you love them: is it the height? The clean lines? The texture and definition? The asymmetry? That information will help them translate your preferences into a cut that works specifically for your hair and your face.
Most importantly, remember that the best hairstyle is one that makes you feel confident and beautiful. These styles all have the geometry and visual principles to flatter round faces, but you won’t feel amazing in a style that doesn’t match your personal aesthetic or your lifestyle. If you’re someone who loves bold, sculptural styles, go for an undercut or frohawk. If you prefer soft, low-maintenance looks, a textured pixie or TWA with crown elevation will serve you beautifully. Your round face is genuinely an asset — these cuts just help it shine the way it deserves to.
