



There’s something undeniably powerful about a perfectly executed afro puff—that crown of beautiful, voluminous texture sitting right at the top of your head. Add braids to the mix, and you’ve got a hairstyle that’s equal parts protective, playful, and polished. Whether you’re looking for something quick for the gym, a style that lasts all week, or a look that takes you from casual to evening-ready, braided afro puffs offer incredible versatility while keeping your natural hair safe and healthy.
The beauty of braided puff styles lies in their adaptability. You can keep things simple with a single braid wrapped around the base, or get creative with multiple braids woven throughout. These styles work on various hair lengths and textures—from tightly coiled curls to looser waves—and they’re equally effective whether your hair is natural, transitioning, or freshly moisturized. Beyond the aesthetic appeal, braided puffs protect your ends, reduce breakage, and allow your hair to rest in a low-manipulation style while still looking intentional and put-together.
The key to making braided puff styles work for your hair is understanding the difference between tension (which should be gentle), product choice (which should moisturize), and braid technique (which determines how long the style lasts). A well-done braided puff can comfortably last three to seven days, giving you multiple wear options from a single styling session. Let’s explore eight stunning variations that range from simple everyday looks to more intricate styles that showcase your braiding skill.
1. The Classic Crown Braid Puff
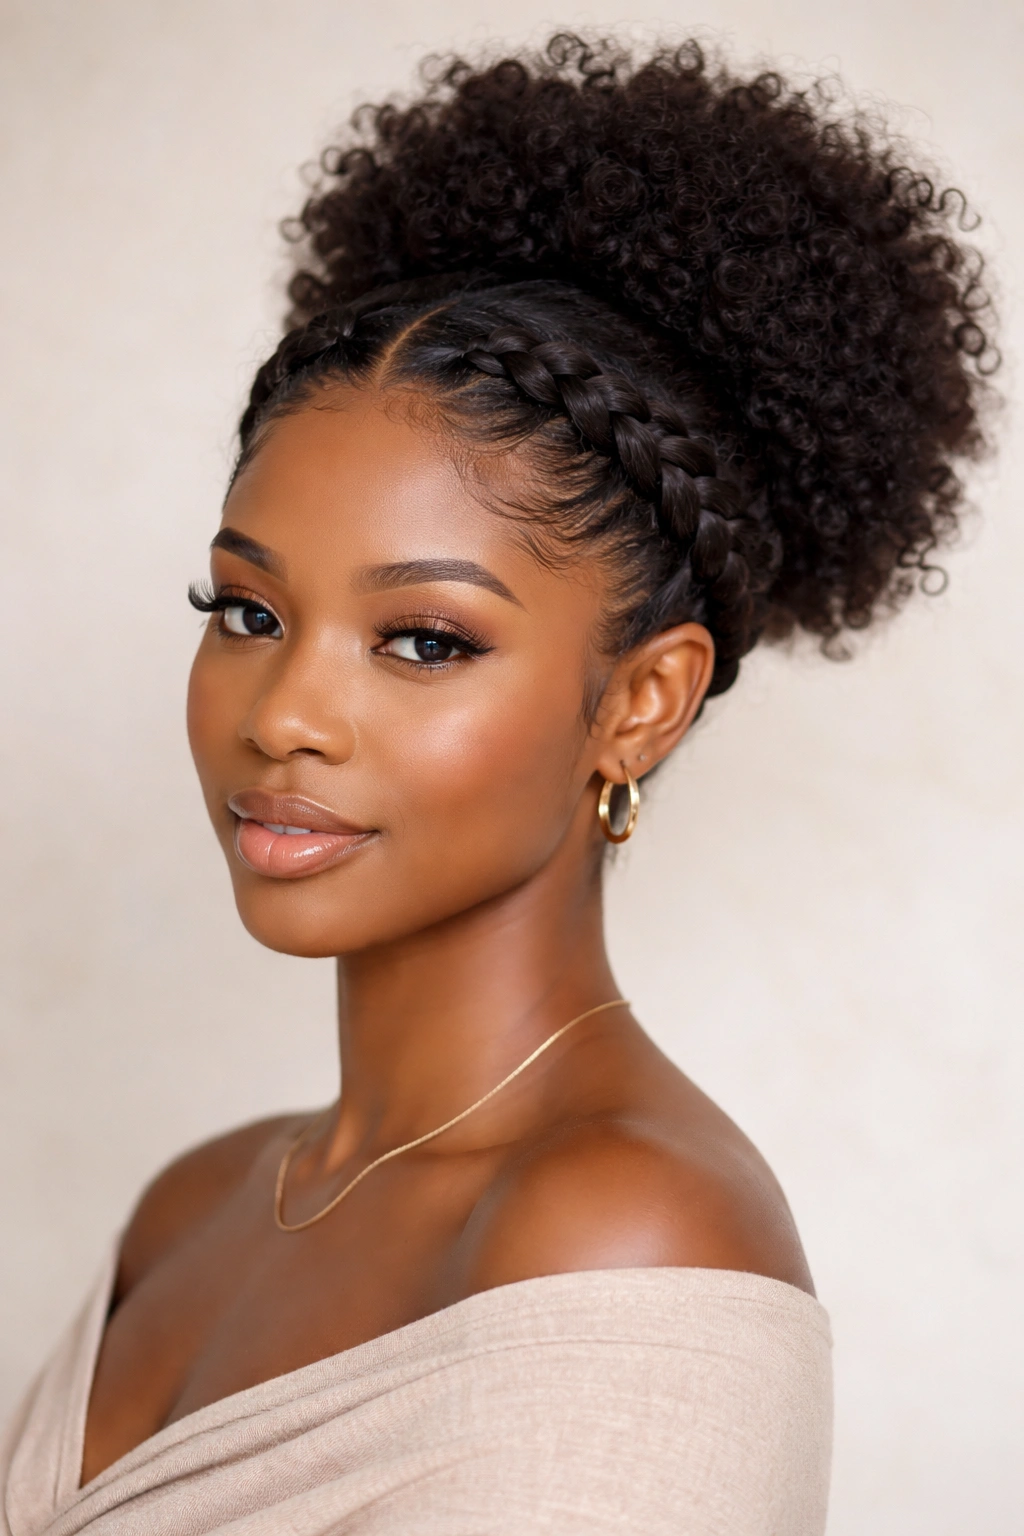
This is the style that started it all—clean, elegant, and deceptively simple in concept though it requires some technique to execute smoothly. The classic crown braid puff features a single Dutch braid or cornrow that begins at one temple, wraps around the head like a crown, and ends at the opposite temple or back. All your hair is gathered into a puff at the crown or top of the head, with the braid becoming a beautiful frame that sits right against your scalp.
What Makes This Style Stand Out
The crown braid creates an intentional, polished look that works in professional settings, casual outings, and even date nights. It keeps hair off your face while celebrating the texture of your puff, and the braid itself becomes a design feature rather than just a practical element. The technique also distributes weight evenly across your scalp, reducing tension on any one area and making this one of the gentler protective styles available.
How to Create a Perfect Crown Braid Puff
Start with moisturized hair: Use a leave-in conditioner or lightweight oil to prepare your strands. Damp (not soaking wet) hair braids more smoothly and holds style longer.
Section and braid: Part your hair down the middle, then take a triangular section at your temple. Begin a Dutch braid (reverse braid where strands go under rather than over), adding hair as you move toward the back of your head. The braid should sit roughly where a crown would sit on a tiara.
Gather into a puff: Once you’ve braided as far back as you want the braid to go, secure it with a small elastic or bobby pin. Gather all remaining hair—including the tail of the braid—into a ponytail at the crown.
Fluff and finish: Gently separate and fluff the puff to create volume. You can tease underneath with a fine-tooth comb for extra lift if desired. Use bobby pins to secure any flyaways and smooth down the edges if you’re going for a sleek look, or leave them textured for a more casual vibe.
Pro tip: Braid tighter than you think you need to—the braid will loosen slightly over the course of a few days, and tight braids last longer without unraveling. However, braid should never cause discomfort or pull aggressively at your edges.
2. The Two-Braid High Puff
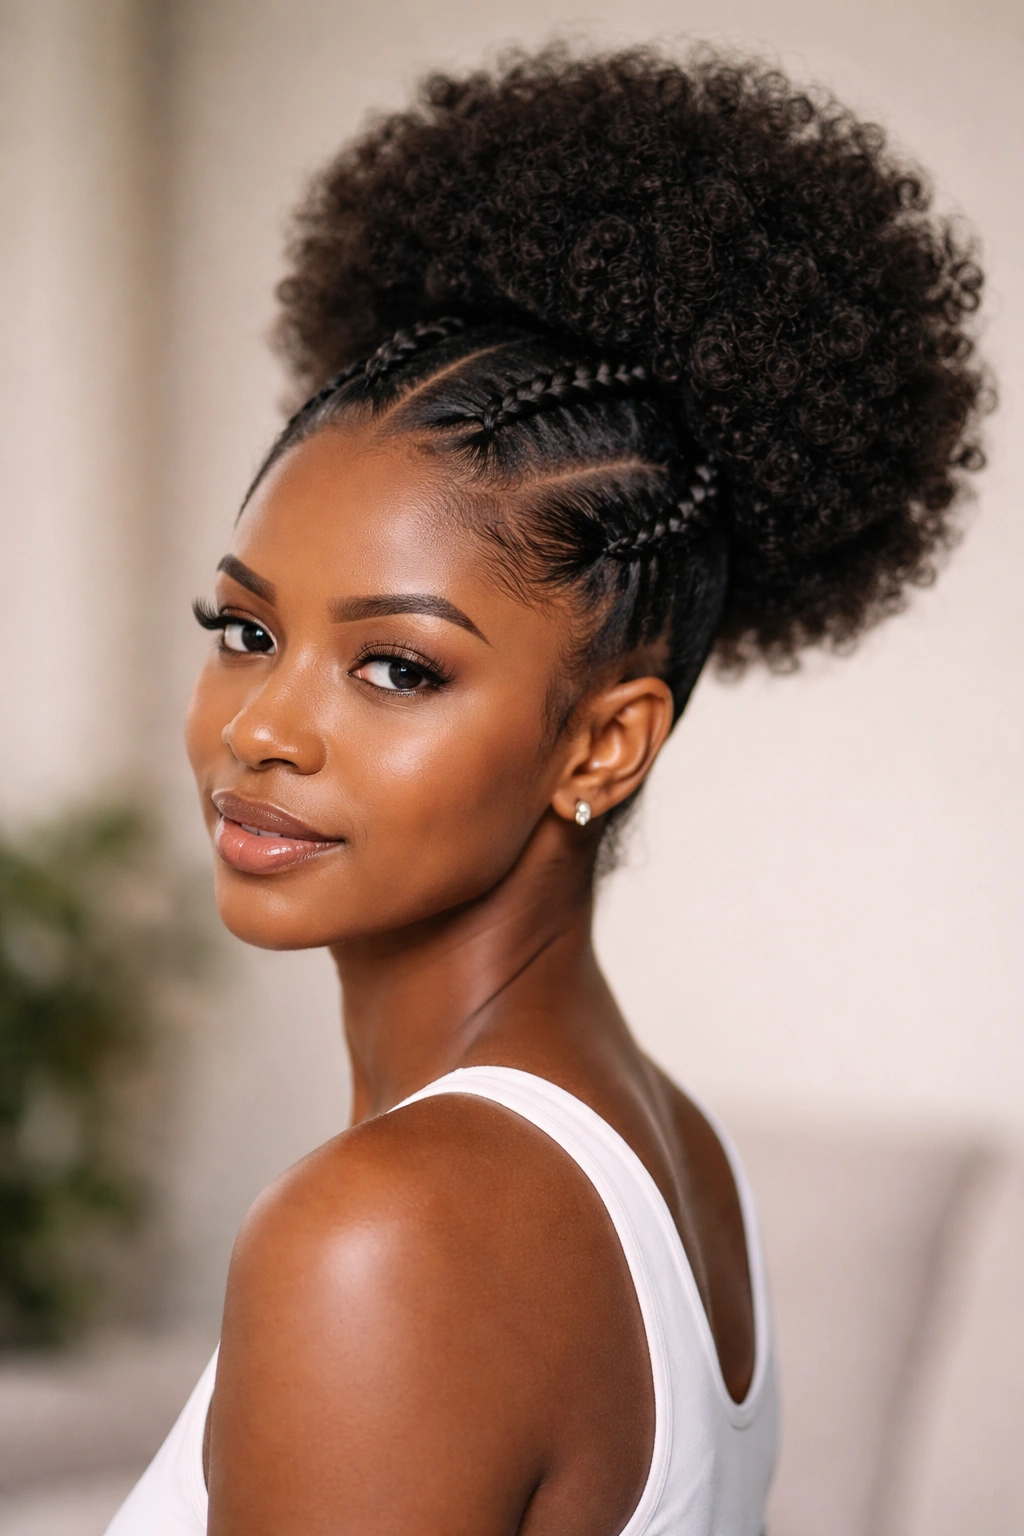
For those who want more dimension and visual interest, the two-braid high puff doubles the braiding work but creates a dramatically different aesthetic. This style features two symmetrical braids that begin at the front near the hairline and curve back toward the crown, where all hair is gathered into a voluminous high puff. It’s playful, youthful, and surprisingly easy to maintain once you nail the braid placement.
Why It Works So Well
Two braids create a balanced, symmetrical look that naturally appeals to our sense of visual harmony. The style is forgiving—if one braid isn’t perfectly executed, its twin helps distract from any imperfections. This style also works beautifully on hair of varying lengths because the puff can sit at different heights depending on where your shortest hair ends. It’s a favorite for active lifestyles because the braids secure hair away from your face while looking intentional rather than purely functional.
Key Techniques for Success
-
Braid placement matters: Begin your first braid at the temple (roughly where your sideburn would be). The braid should angle back and inward, meeting the second braid at or near the crown. This angle is what gives the style its flattering shape.
-
Keep tension even: The most common mistake is making one braid tighter than the other. Use the same hand position and braiding speed for both braids to ensure they match.
-
The puff connection: When you reach the puff area, don’t bind off the braids completely. Instead, incorporate the braid tails directly into your puff by keeping them loose and mixing them with the rest of your gathered hair. This creates a seamless blend rather than bulky knots at your puff base.
-
Volume creation: The high puff works best when you create a sturdy base. Use a strong hair tie or claw clip to anchor your puff, then gently backcomb or tease at the base before settling your puff into place. This prevents the puff from slipping down as the day goes on.
Worth knowing: This style can last up to five days if you sleep on a silk or satin pillowcase and lightly re-fluff each morning. The pillowcase prevents friction that would otherwise cause the braids to fray and the puff to lose definition.
3. The Feed-In Braid Puff
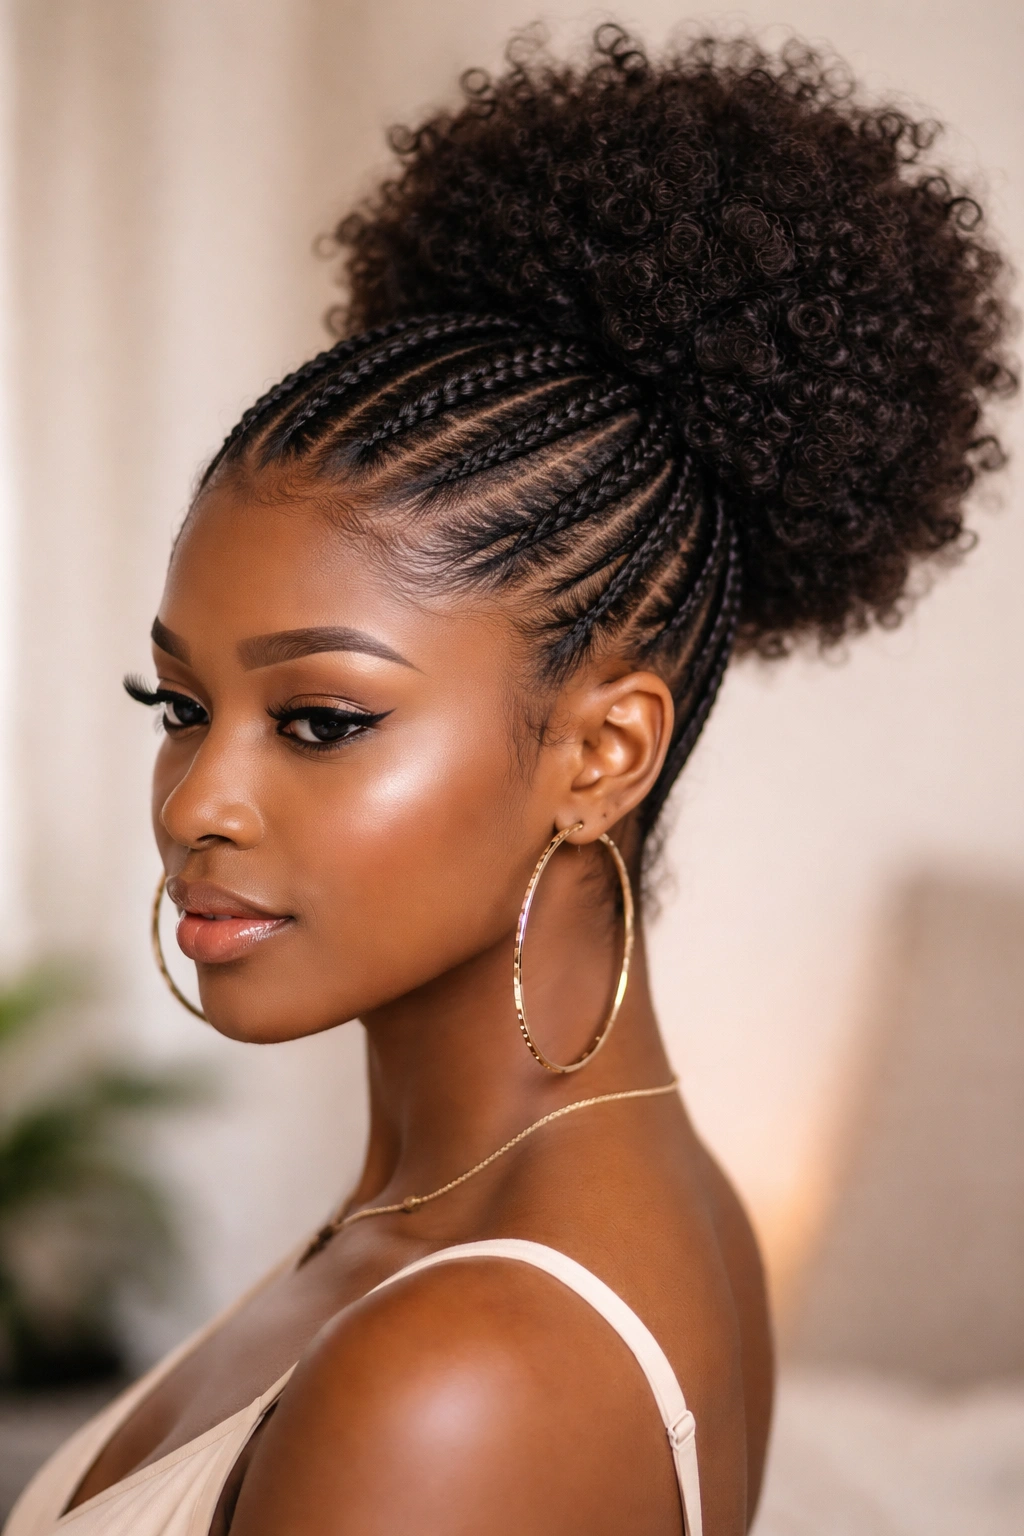
Feed-in braids (also called hand-fed braids) add hair gradually as you braid, creating thinner, more delicate braids that look intricate and intentional. When used in a puff style, feed-in braids can cover much or all of your head, with sections of hair feeding into braids that ultimately gather into a puff. This is the style that looks like you spent hours braiding when you actually created something relatively quick.
What Makes Feed-In Braids Special
Feed-in braiding creates the illusion of complexity without requiring a dramatic amount of extra time once you master the technique. Because braids are thinner and more numerous, they distribute weight evenly across your entire scalp, making this an excellent protective option if you’re concerned about tension alopecia or hair loss. The style also photographs beautifully—the intricate braid pattern is visible and flatters in photos in a way that simpler styles sometimes don’t.
The Feed-In Technique Explained
Feed-in braiding is about adding hair gradually rather than taking a large section and braiding it. Start with a small three-strand braid at your hairline, using only a small amount of hair at first. As you move down and back, add small sections of hair to each strand of your braid from the hair around it. This creates a braid that gradually incorporates more hair as it progresses.
The key difference from standard box braids or cornrows is that you’re only adding to one or two strands at a time, not collecting hair all around as you go. This requires more focus and concentration than other braiding styles, but the result is a braid that appears to be floating on top of your head rather than sitting flat against it.
Practical tip: Feed-in braids are easier to execute if your hair is damp and coated with a lightweight styling cream or mousse. The moisture makes hair slippery enough to move smoothly through the braid without catching on knots or tangles, and the product helps individual strands stay grouped together.
4. The Cornrow-to-Puff Transition
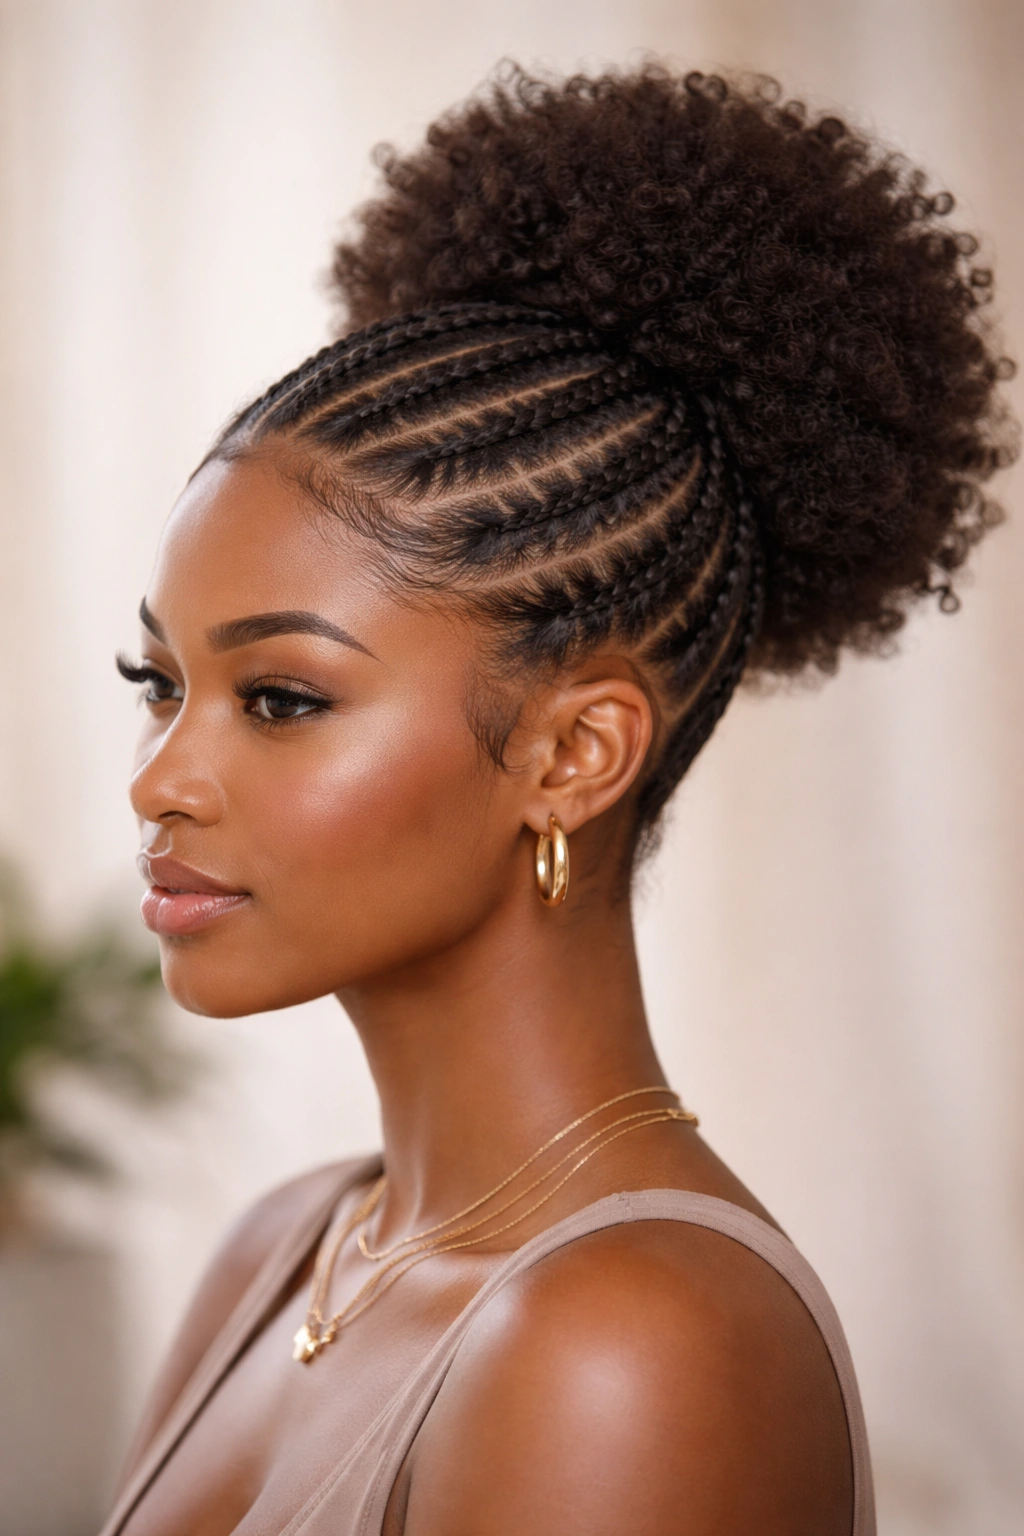
This style acknowledges that sometimes you want the protective benefits of cornrows with the fun, trendy look of a puff. You can cornrow the entire back and sides of your head, leaving a section at the crown loose to gather into a puff, or create two or three cornrows that all feed into a central puff. It’s part structured braiding, part soft texture, and completely on-trend.
Design Flexibility
The beauty of this style is that you control how much cornrowing you want to do. You can keep it minimal—just three cornrows that feed into the puff—or go elaborate with cornrows that cover your entire head. The style adapts to your comfort level with braiding and how much time you want to invest. Some people prefer thicker cornrows for a bolder statement, while others go with many thin cornrows for a more intricate appearance.
Creating the Hybrid Look
Begin by deciding your puff placement—will it be centered at the crown, slightly off-center, or even positioned at the back of your head? Everything else flows from that decision. Cornrow away from the puff area in whatever pattern you choose, making sure all cornrows ultimately direct hair toward your designated puff location. The cornrows don’t necessarily need to connect perfectly—they just need to visually lead the eye toward the puff as the focal point.
Once you’ve cornrowed as much as you want, gather all remaining hair into your puff area. You’ll have both loose hair and the tails of cornrows mixing together in the puff, which creates wonderful texture and visual interest. The contrast between the structured, linear cornrows and the soft, rounded puff is what makes this style so visually striking.
Styling insight: This works especially well if you add a pop of color through hair chalk, colored threads woven into the cornrows, or even bright-colored hair clips at the puff base. The defined cornrows provide a perfect canvas for showcasing these accent colors.
5. The Spiral Braid Puff
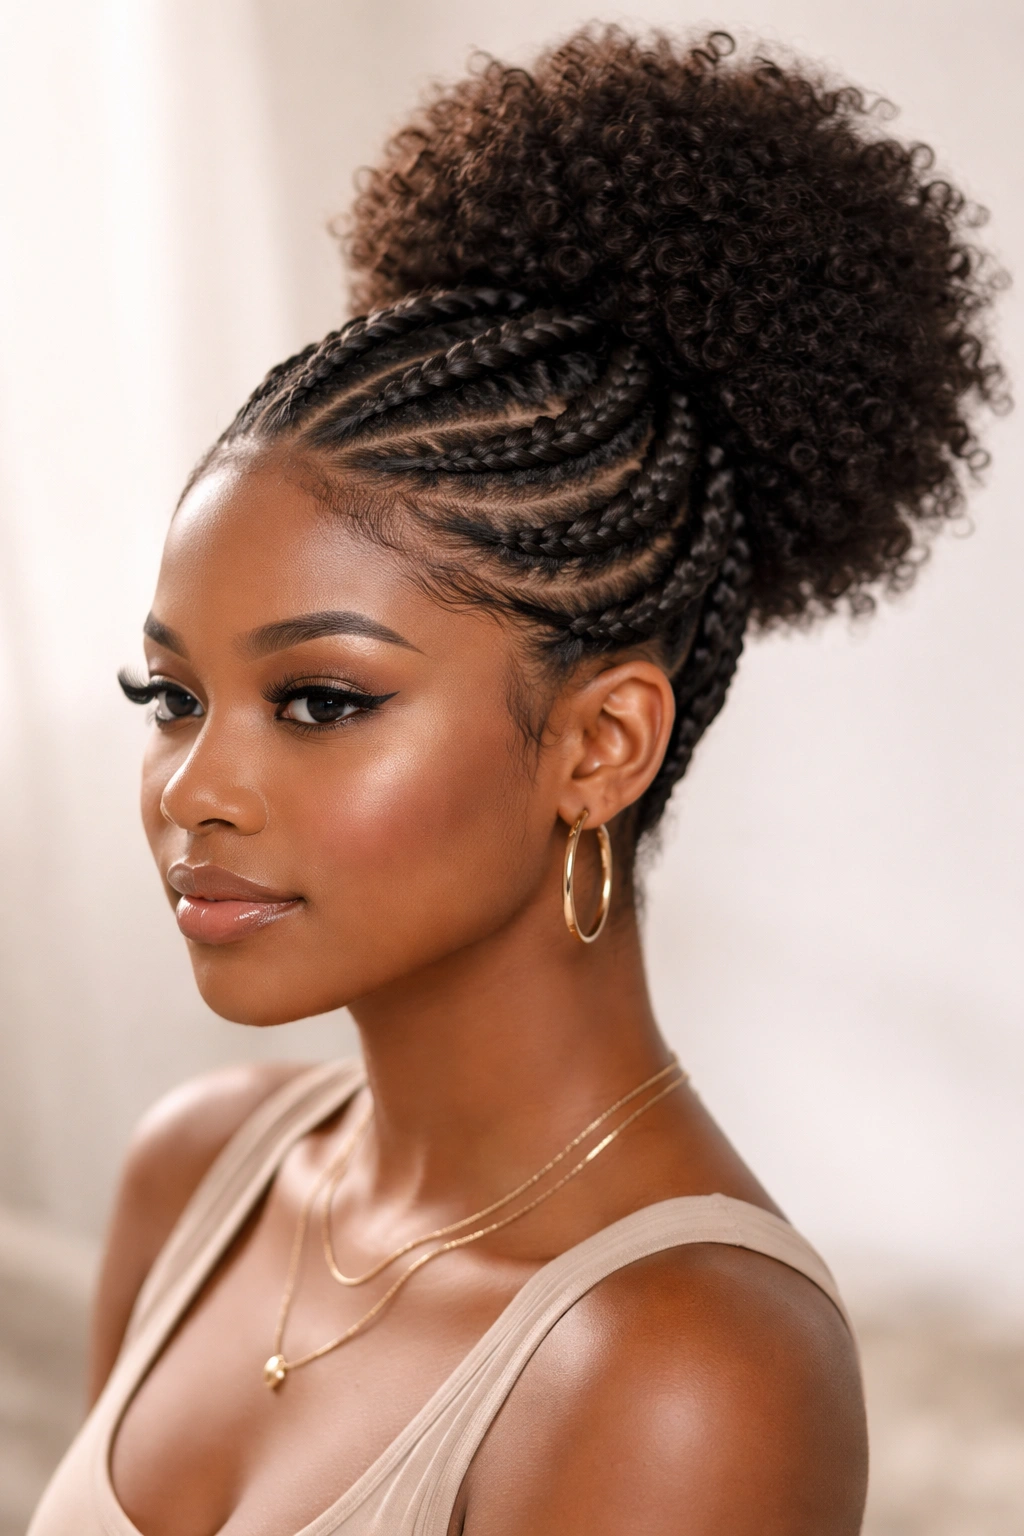
Spiral braids (also called corkscrew braids) create a completely different texture and visual effect than traditional three-strand braids. Rather than strands going over and under each other, spiral braids twist around each other, creating a rope-like appearance. One or more spiral braids feeding into a puff create an unexpectedly elegant look that catches light beautifully and has a more delicate, almost ethereal quality.
Why Spiral Braids Are Worth Learning
Spiral braids are actually easier to execute than standard braids once you understand the motion—it’s a simple twist rather than the coordination required for a three-strand braid. They’re also more forgiving of slightly uneven tension because the twisting motion naturally accommodates variation. The visual result is striking enough that this style works for everything from gym sessions to more formal occasions.
The Spiral Braid Technique
Divide a section of hair into two strands (not three). Twist strand one around strand two, then twist strand two around strand one, continuing the alternating twist all the way down. It’s literally just two strands wrapping around each other in a spiral motion. If you want the spiral to be more defined and rope-like, twist each individual strand tightly before you begin the two-strand twist. If you want it looser and more textured, use looser individual twists.
You can create one dramatic spiral braid that wraps around the side of your head into a puff, multiple thinner spiral braids, or combine spiral braids with traditional braids in the same style. The versatility is genuinely impressive once you start experimenting.
Essential tip: Two-strand twists are much easier to do on slightly damp, product-coated hair than completely dry hair. A light spritz of water and a bit of styling cream make the process significantly smoother.
6. The Braided Side Puff
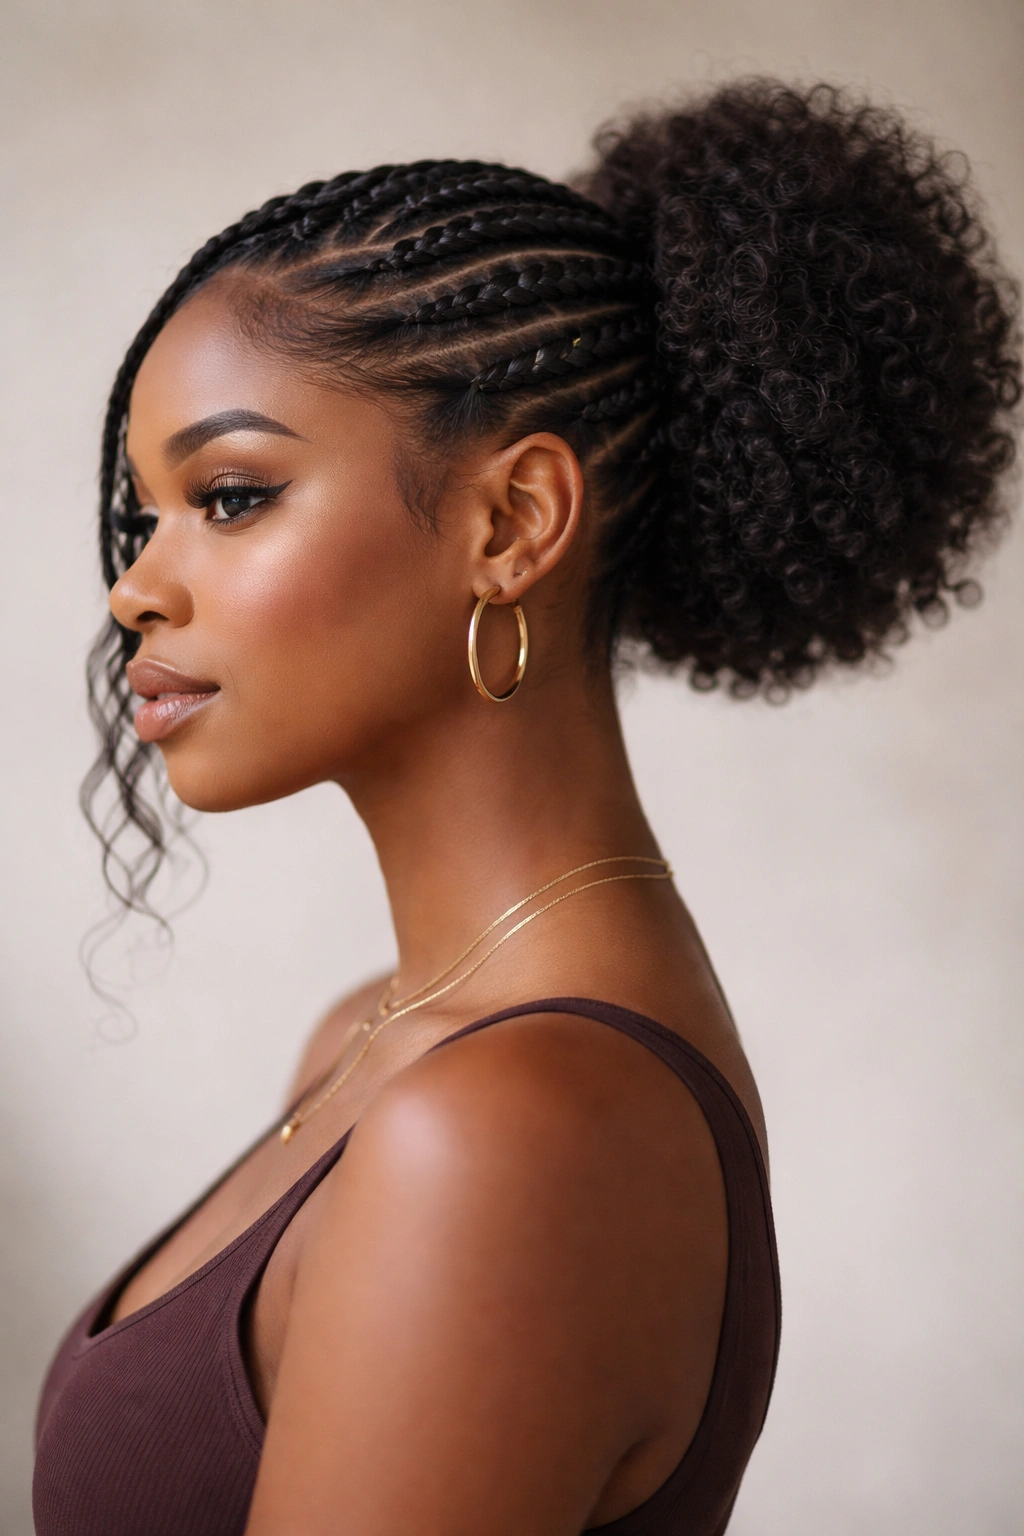
Not all puffs sit centered at the crown—a braided side puff shifts the focal point to the side or back of your head, creating an off-balance look that’s trendier and more modern than the traditional high puff. This style features braids that curve toward a puff positioned at the side temple area, back of the head, or even at the nape of your neck. It’s surprisingly sophisticated and works beautifully as a transition between fully protective styling and loose, wearing-your-hair-down.
The Modern Appeal
Side puffs photograph exceptionally well and create flattering angles that complement different face shapes. Because the puff is off-center, this style also feels less “little-kid” and more deliberately fashion-forward, making it an excellent choice if you’re looking for a protective style that also reads as trendy and intentional. The off-balance composition actually feels more modern to contemporary eyes than the symmetrical centered puff.
Positioning and Execution
Decide exactly where you want your puff—this determines where your braids should lead. If you want the puff at your right temple, braids should curve from the back and sides toward that point. If you want the puff at the nape of your neck, braids should angle downward and back. This deliberate direction is what makes the style look intentional rather than accidental.
You can use two or three braids leading toward the puff, or cover more of your head with multiple smaller braids all converging toward your chosen puff location. The braiding pattern itself becomes more visible and important in this style since the puff is smaller and more off to one side. Consider patterns that feel balanced even though nothing is centered—diagonal braids, curved braids, or radiating braids all work beautifully.
Design consideration: A side puff looks even more striking if you leave one section of hair slightly out, creating a partial side-swept effect. You can sweep this section across or leave it framing your face for an intentionally undone quality.
7. The Chunky Twisted Puff
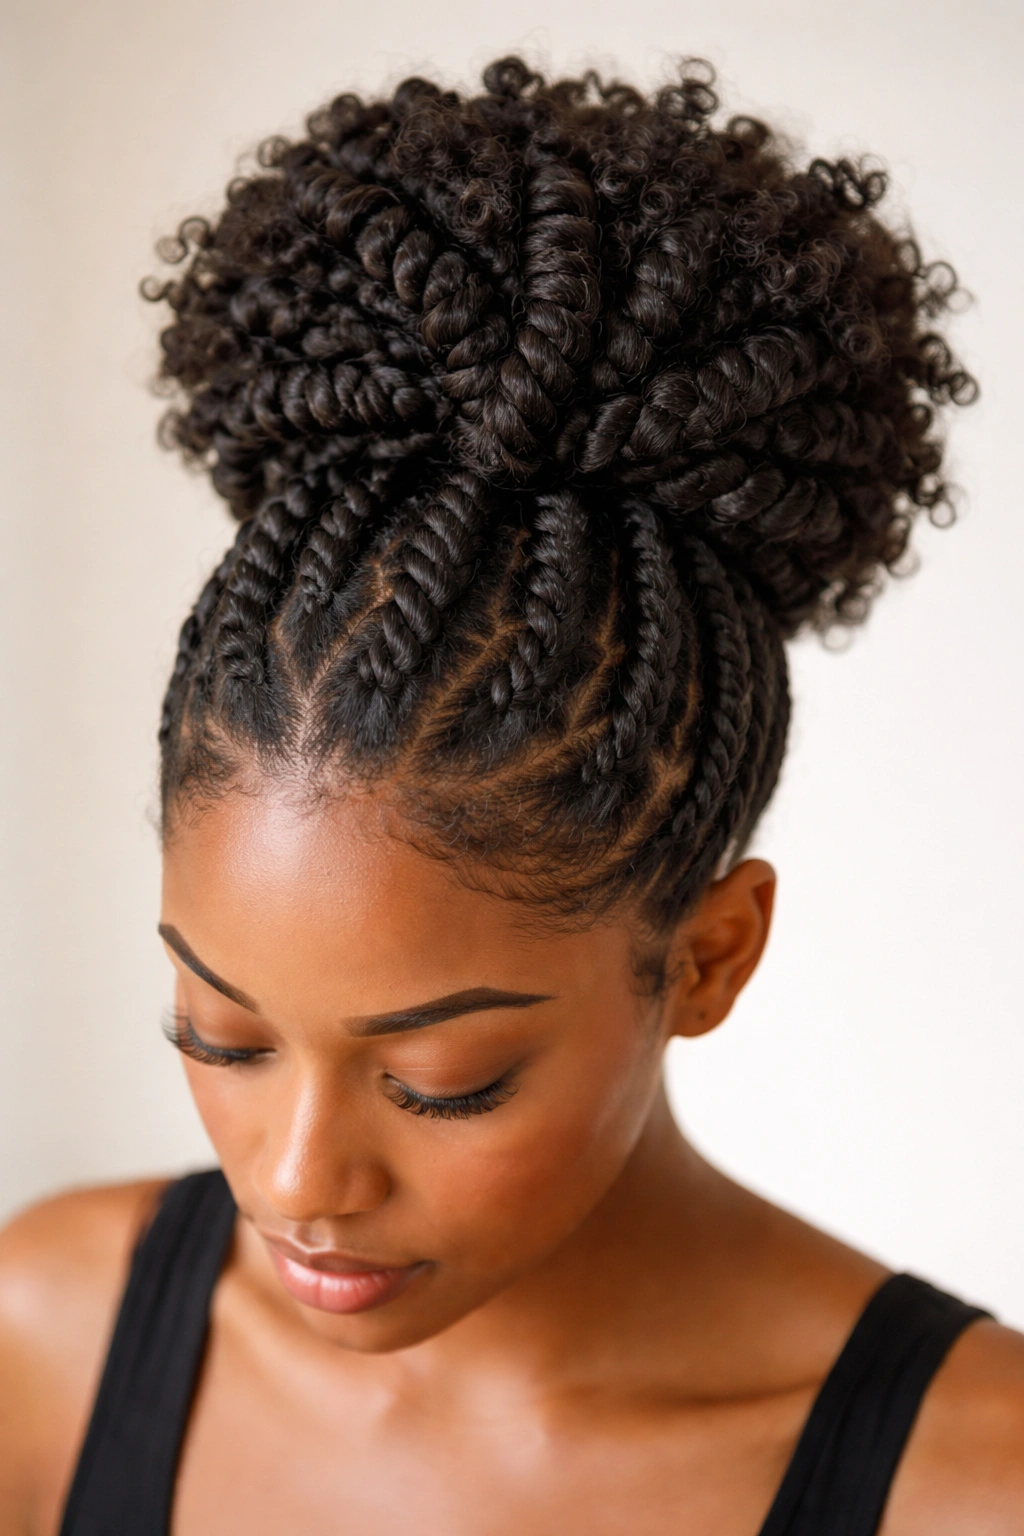
If traditional braids feel too intricate or time-consuming, chunky twists offer a faster alternative that still looks intentional and stylish. This style features thick two-strand twists (thicker than spiral braids but still using the two-strand twist technique) that either wrap around into a puff or feed multiple twists into a central puff. It’s the fastest braided puff option and arguably the most protective because the twists can be quite secure.
Speed Without Sacrificing Style
Chunky twists can be completed in a fraction of the time required for traditional three-strand braids, making this ideal if you’re short on time but don’t want to sacrifice the protective, polished look. You can create this style in thirty minutes or less once you’ve done it a couple times, and the twists last up to a week with proper care. Despite the speed, the result looks completely intentional and well-executed.
Creating Chunky Twists
Section your hair into however many twists you want (usually between two and five for a puff style). Take the first section and divide it into two strands. Twist strand one around strand two, then twist strand two around strand one, moving down the entire length. The thicker your initial sections, the quicker the process and the more dramatic the twisted look.
Once all twists are complete, you can either wrap them around the base of a puff, twisting them around each other as they go, or gather them all into a puff together. Both approaches work beautifully. The gathered puff approach creates more volume and a fluffier appearance, while the wrapped approach creates a more sculptural, intentional look.
Time-saver: If you’re doing this for bed or want minimal styling effort, you can create chunky twists at night and puff them the next morning. The twists won’t fully set, but they’ll have enough texture and hold that fluffing them into a puff takes seconds rather than minutes.
8. The Multi-Braid Statement Puff
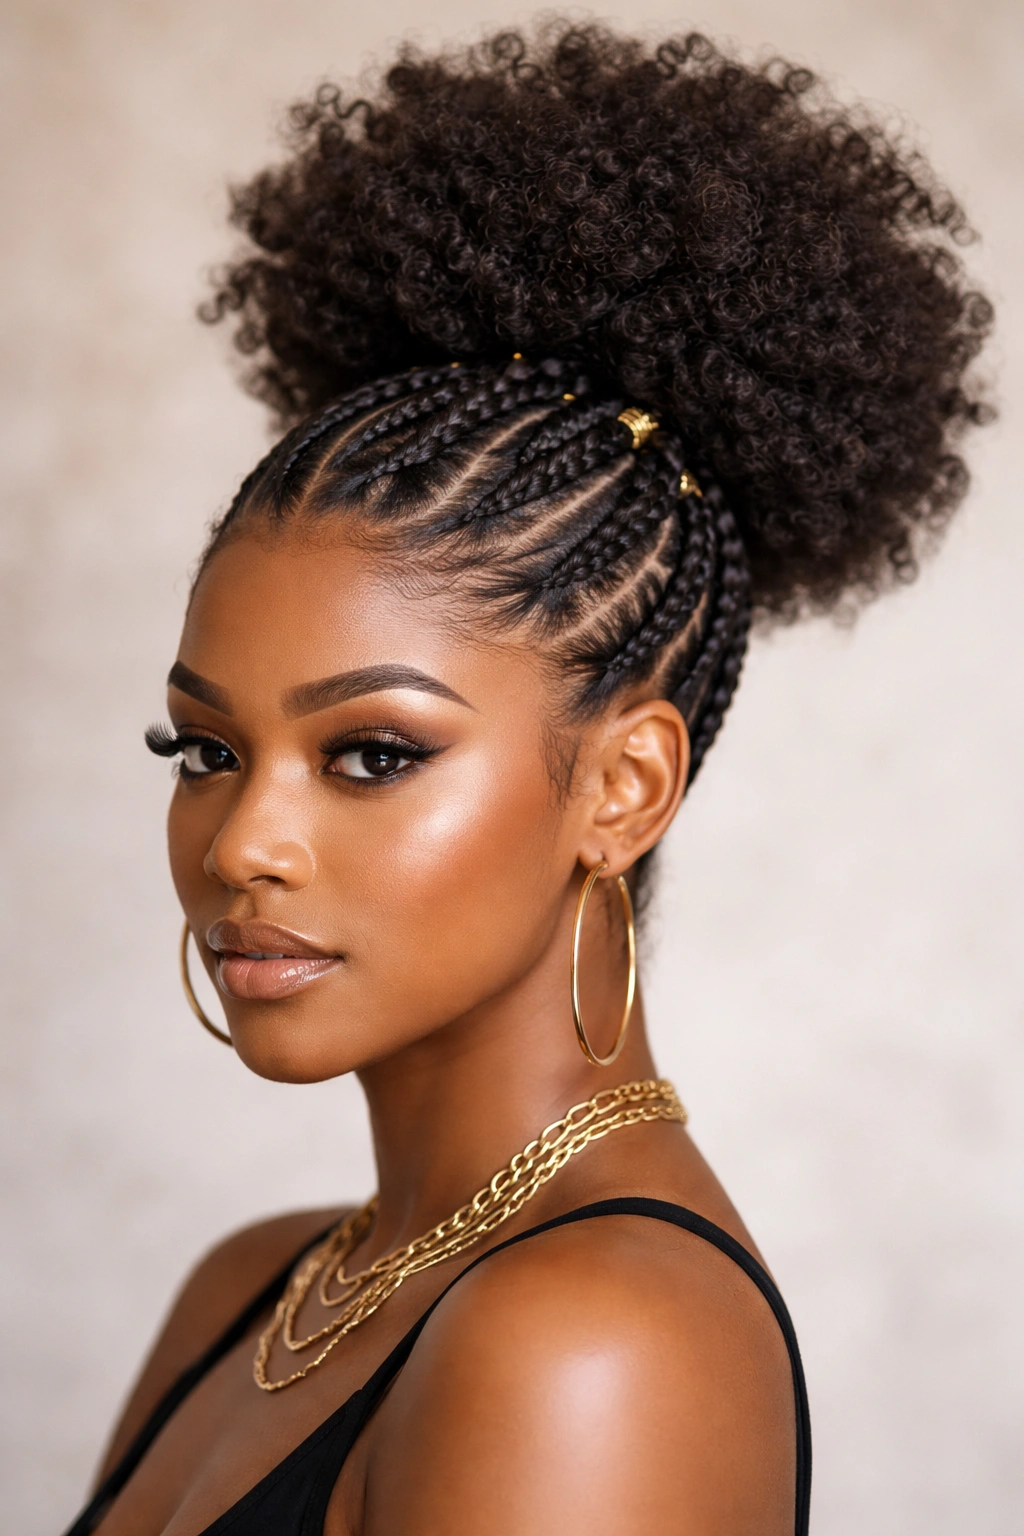
For those ready to commit serious time and create a showstopping look, the multi-braid statement puff combines five or more braids of varying thicknesses and styles, all converging into one glorious, textured puff. This might mean a mix of cornrows, feed-in braids, and regular three-strand braids, each pattern complementing the others and creating an intricate, almost sculptural appearance. This is the style that makes people stop you on the street and ask for your stylist’s contact information.
The Creative Vision
There’s essentially no limit to what you can create here. You might have thick cornrows framing your face, medium three-strand braids at the sides, and thin feed-in braids covering the back—all meeting in a puff that sits gloriously at the crown. You might use contrasting sections of braids, varying thicknesses strategically, or create a pattern that feels random but is actually carefully planned.
The key is that each braid should feel intentional and contribute to the overall design. This isn’t braiding everywhere just to braid—it’s a deliberate artistic choice. The multi-braid statement puff is the style that best showcases your braiding skill and personal aesthetic vision.
Execution Tips
Plan your design: Sketch or envision your pattern before you start. Where will thick braids go? Where will thin ones? How do you want them to curve and flow? Having a clear mental (or actual) picture makes execution much smoother.
Start strategically: Begin with the sections you find most challenging. If you’re less confident with feed-in braids, do those first while you’re fresh and focused. Save simpler sections for when fatigue sets in.
Consistency matters: Even though you’re using varied braid styles, maintain consistent tension throughout. A slack feed-in braid next to a super-tight cornrow will look unfinished even if both are technically well-executed.
Take your time: This is genuinely an all-day or multi-hour project. Plan accordingly and set aside time when you’re not rushed. The result is worth the investment, and rushing this style shows in the final product.
Creative additions: Multi-braid puffs are the perfect canvas for beads, clips, or colored thread woven into the braids. These small touches can elevate the style from beautiful to absolutely stunning.
Final Thoughts
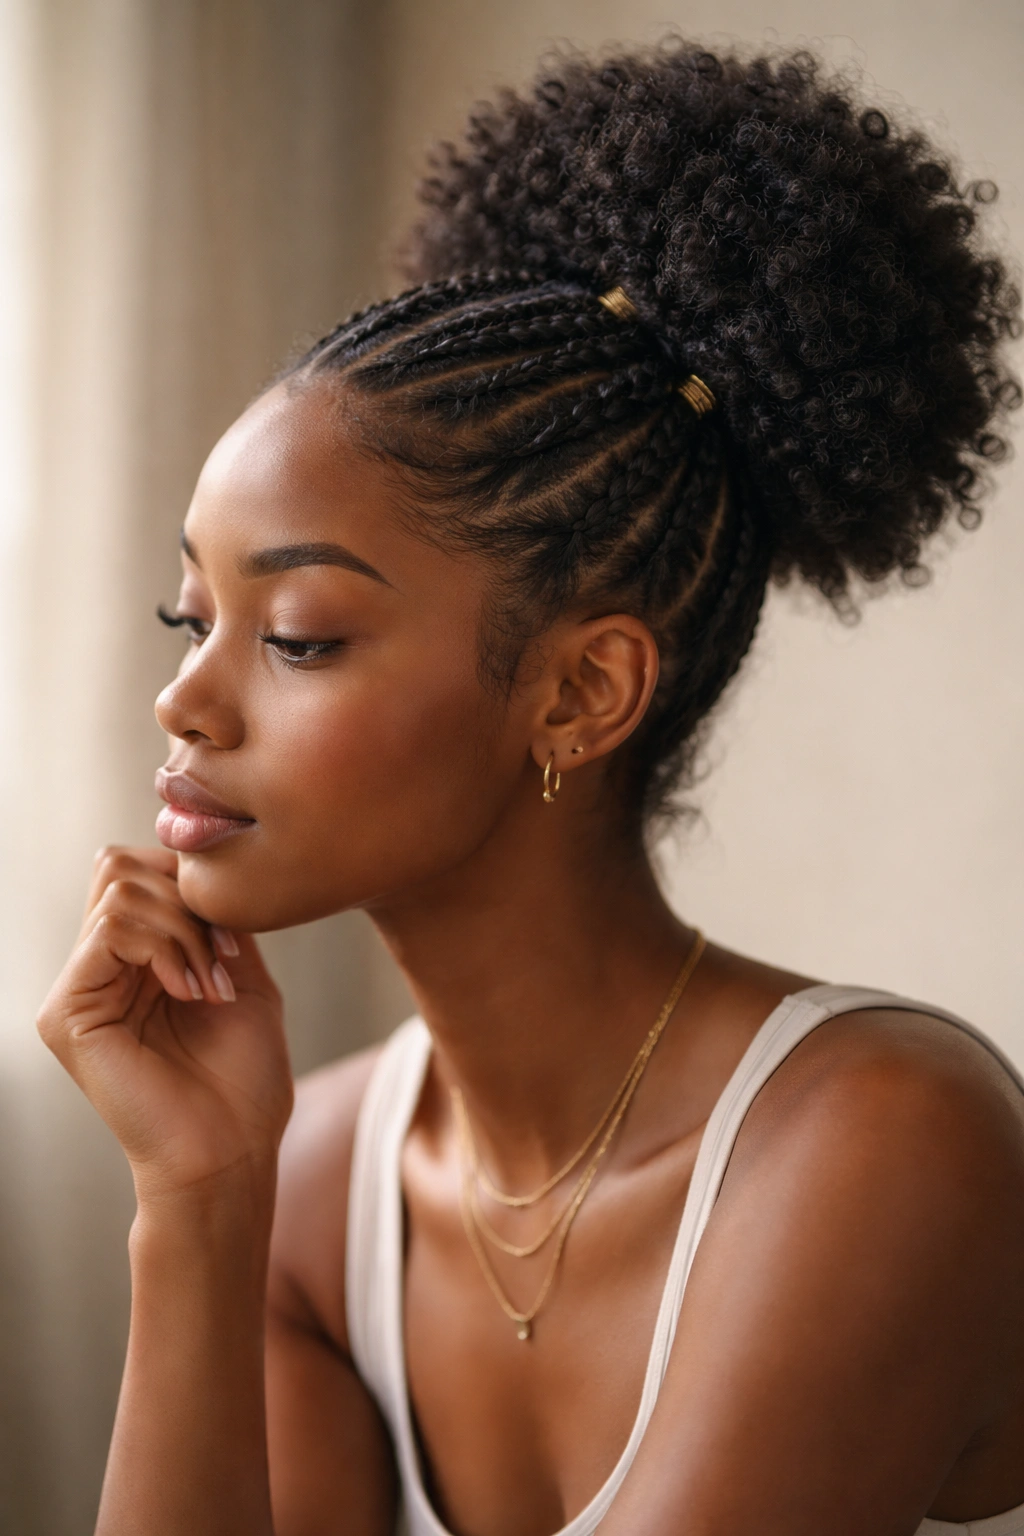
Braided afro puffs represent the perfect intersection of protective styling and personal expression. Whether you choose the timeless elegance of a single crown braid, the playful symmetry of two braids, or the intricate artistry of a multi-braid statement style, you’re giving your hair a break from daily styling while maintaining a look you can feel genuinely proud to wear.
The most important thing to remember is that tension should never be painful—ever. Protective styling is meant to protect your hair, not damage it. If something feels too tight, loosen it immediately. Your comfort and your hair’s health always come first, and no style is worth sacrificing either. Start with whichever style feels most doable to you, practice it until you feel confident, and then branch out to others. Each style you master builds skill that makes the more complex styles more achievable.
Braided puffs also have a wonderful social and cultural significance within Black communities and communities of color that practice protective styling. Wearing your hair in these styles is a celebration of natural texture, a nod to heritage, and a powerful statement of self-love. You’re not just creating a hairstyle—you’re participating in a tradition of creative self-expression and hair care that honors your roots while being entirely modern and current. That matters, and your puff should reflect the confidence and pride that comes with that realization.
