Wavy hairstyles have become one of the most versatile and stunning options for Black hair, offering a beautiful middle ground between straight and curly textures that’s both natural-looking and glamorous. Whether you’re working with your natural hair texture or creating waves through styling, there’s an incredible range of styles that can complement different face shapes, hair lengths, and personal aesthetics. The beauty of waves lies in their adaptability—they work for casual everyday looks, professional settings, and special occasions alike.
What makes wavy hairstyles so appealing for Black hair is how they enhance the hair’s natural movement while maintaining its volume and texture. Waves can be created through various techniques including roller sets, twist-outs, braid-outs, heat styling, or working with your natural hair pattern. The key to getting waves that actually last and look intentional is understanding the right technique for your specific hair type, the products that will hold your style, and how to refresh or maintain it between wash days.
If you’ve been searching for new ways to style your hair that feel both chic and manageable, wavy hairstyles offer endless possibilities. From soft, romantic waves to bold, defined ripples, each style brings its own character and can be adapted to suit your personal style. Let’s explore thirteen stunning wavy hairstyles that work beautifully on Black hair.
1. Loose Waves with Natural Texture
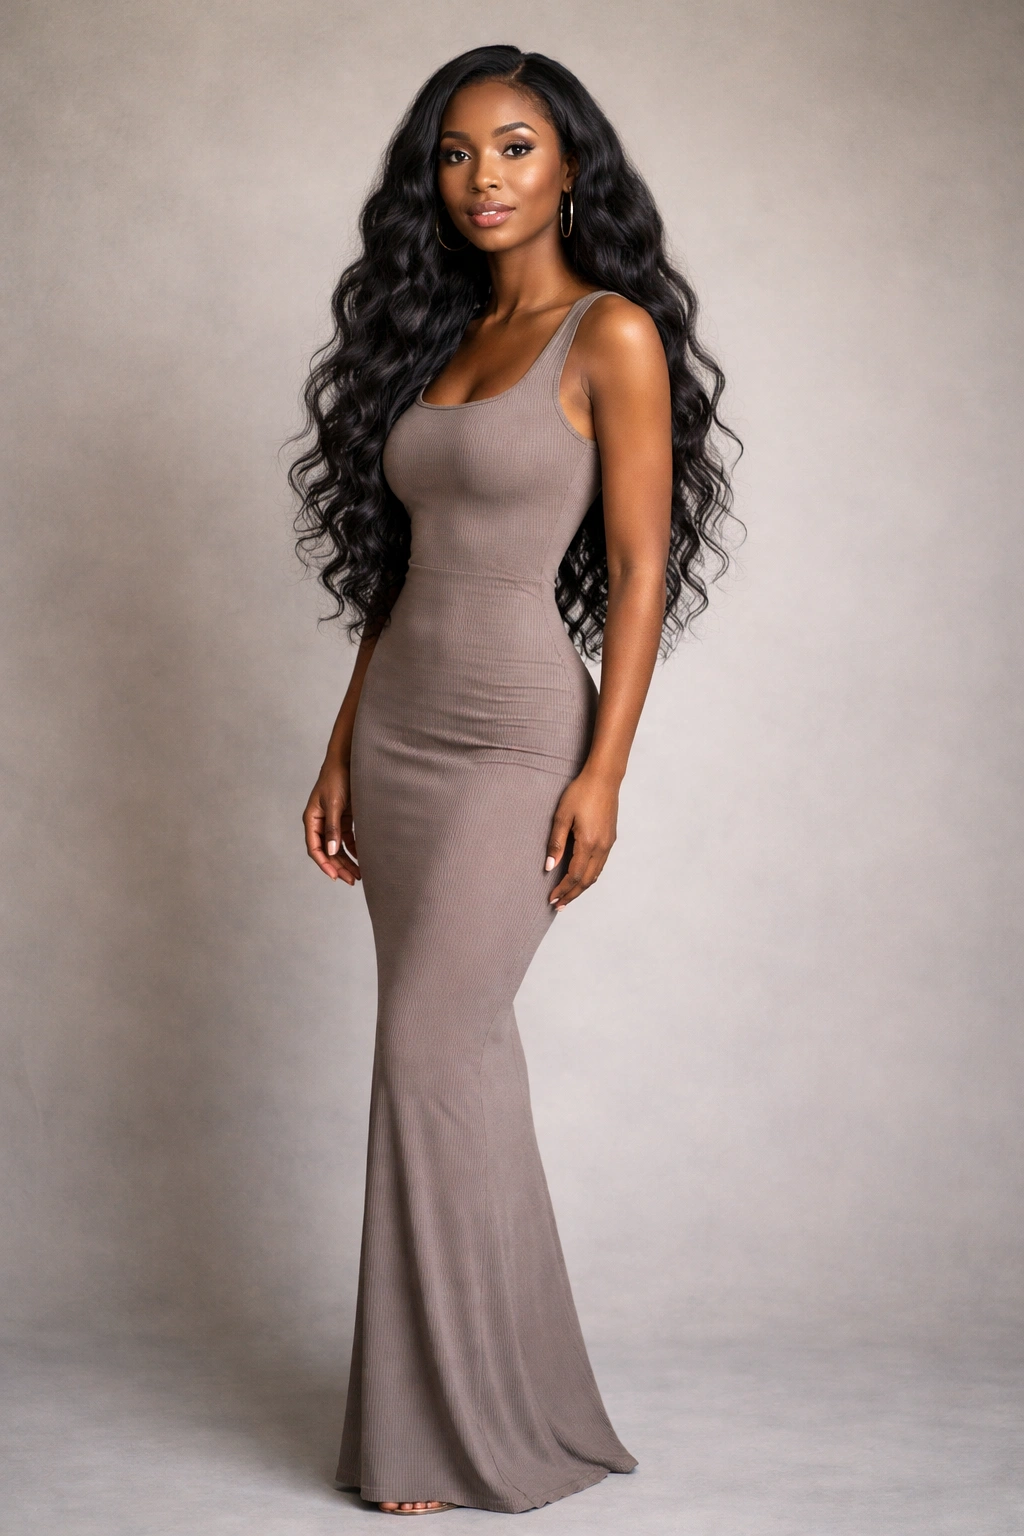
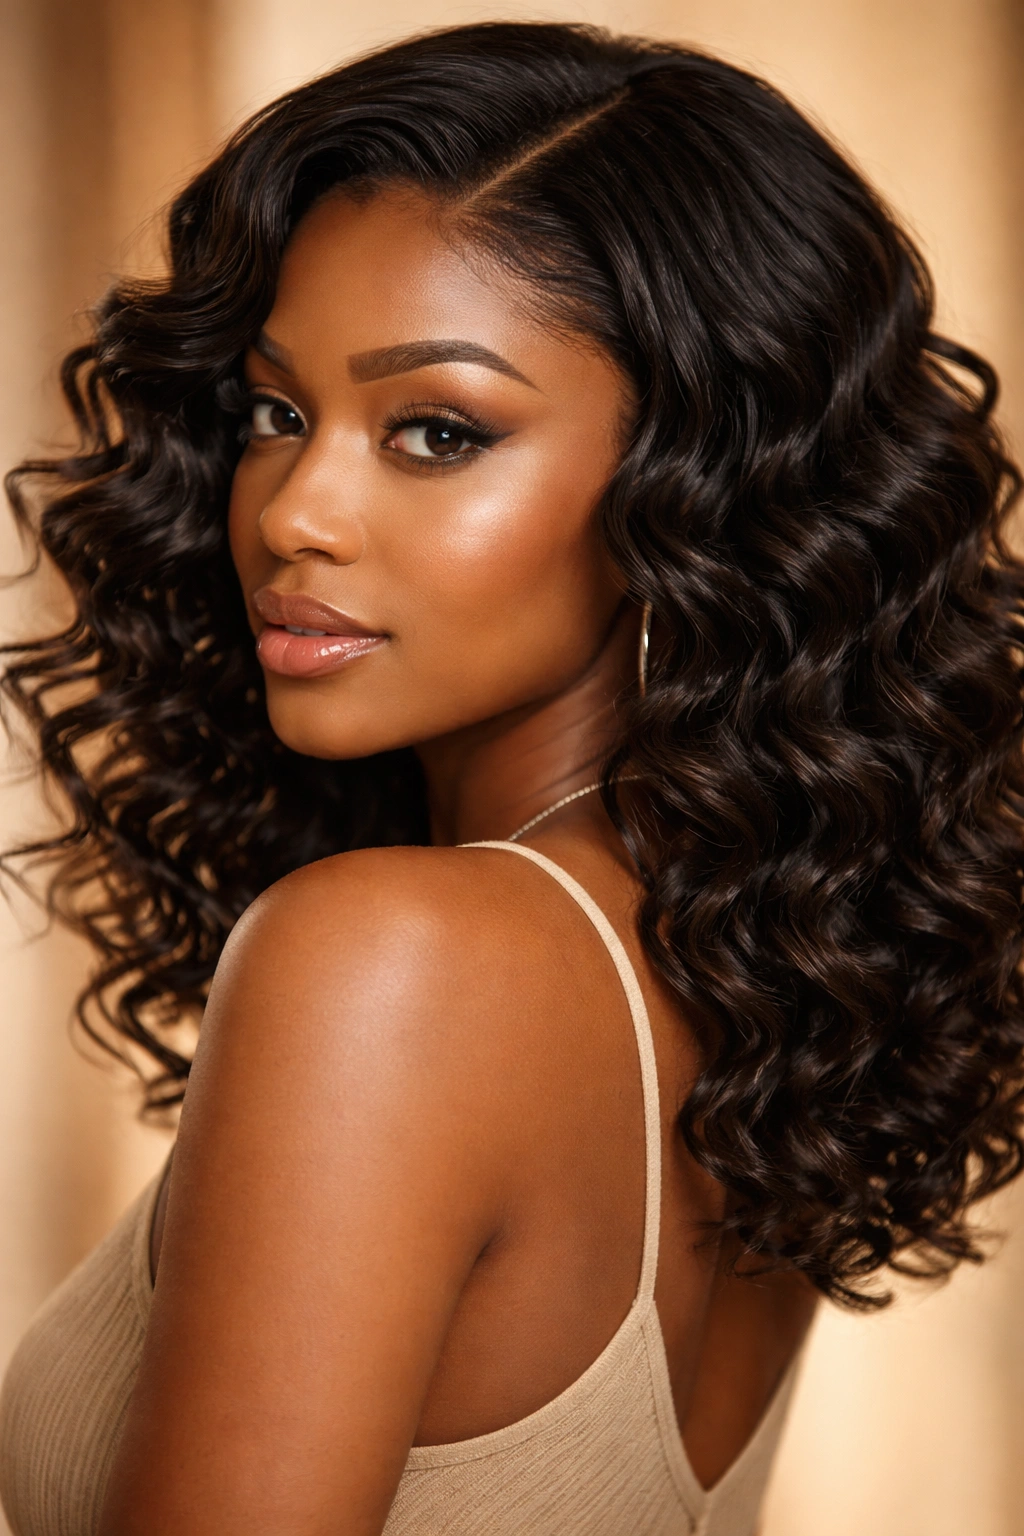
Loose waves represent one of the most effortless and wearable wavy styles, creating soft movement throughout your hair while still honoring your natural texture. This style works best when you start with damp hair and use medium to large tools—whether that’s braids, rollers, or a curling iron—to create gentle, flowing curves that fall naturally down your back. The beauty of loose waves is that they don’t require perfection; slightly undone texture actually adds to the appeal.
How to Create Loose Waves
The easiest method is to braid damp hair into large sections before bed, then unravel in the morning for soft waves that lasted overnight. Alternatively, you can wrap sections around a large-barrel curling iron or flexi-rods for 15-20 minutes, working in sections and paying special attention to the roots for movement throughout. For a heat-free option, try moisture-rich braiding creams mixed with a lightweight oil to ensure the waves hold without frizz.
Best Products and Styling Tips
- Use a leave-in conditioner as your base to keep moisture in and prevent dryness
- Apply a curl-defining cream or gel to damp sections before braiding or rolling
- Finish with a light hairspray to hold waves without making them stiff or crunchy
- Sleep on a silk or satin pillowcase to preserve waves overnight—cotton pillowcases absorb moisture and create frizz
- Refresh waves on day two by lightly misting with water and applying more styling cream to the roots
This style typically lasts three to five days with proper maintenance, making it ideal for busy schedules. The loose wave pattern flatters most face shapes and looks equally polished whether you wear it down or partially pinned back.
2. Textured Beach Waves
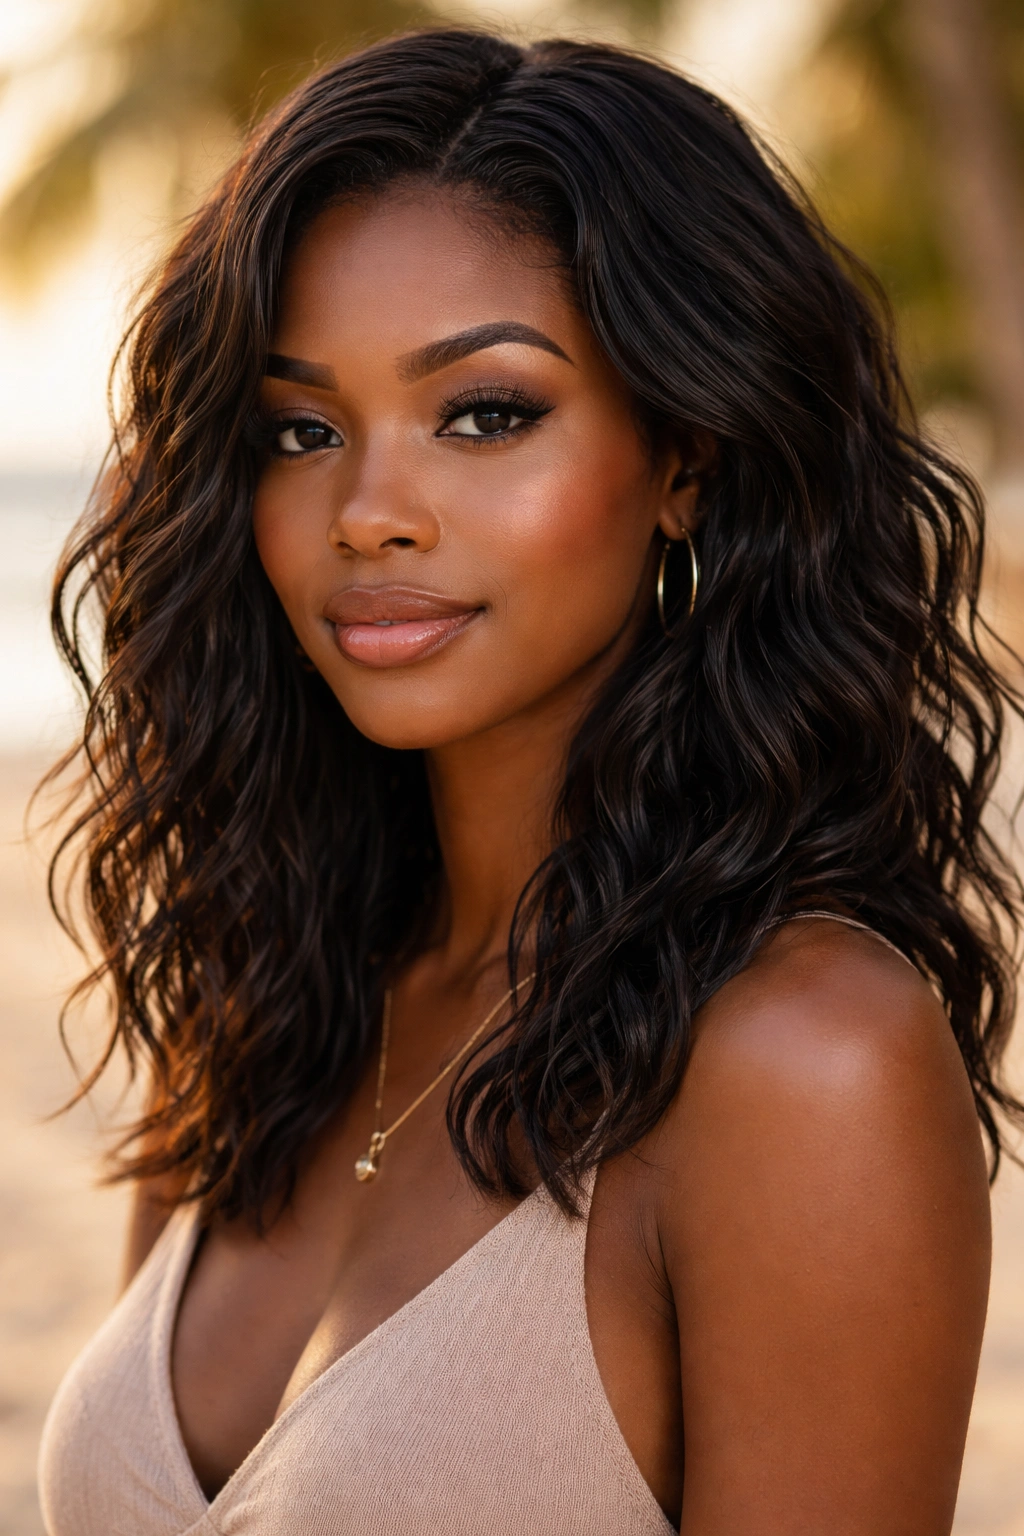
Beach waves on Black hair create an incredibly summery, carefree vibe while celebrating the natural texture and movement of your hair. Unlike loose waves, beach waves have more deliberate texture and definition throughout, with a slightly tousled, wind-swept quality that feels both relaxed and intentional. This style works particularly well on medium to longer hair lengths and pairs beautifully with moisture-rich, textured products that enhance rather than smooth the waves.
Creating That Authentic Beach Wave Texture
The key to beach waves is working with products that separate and define rather than clump. Start with damp hair and apply a texture spray or texturizing product designed for Black hair—these often contain ingredients like sea salt and oils that enhance wave pattern without drying. You can then either rough dry your hair while scrunching sections upward, or use a diffuser attachment on your blow dryer set to low heat. Alternatively, create waves by braiding sections while damp, then unraveling and separating with your fingers.
Products That Deliver Real Beach Wave Results
- A lightweight sea salt spray for texture and definition without crunchy feeling
- Curl creams with shea butter or coconut oil to nourish while defining waves
- A texturizing mousse applied to roots for grip and volume
- Edge control on a smaller scale to define individual waves and add shine
- Light hairspray or texture spray to keep everything in place without weighing hair down
Beach waves actually look better when they’re slightly imperfect, so don’t stress about making every wave identical. The playful, undone quality is exactly what makes this style work.
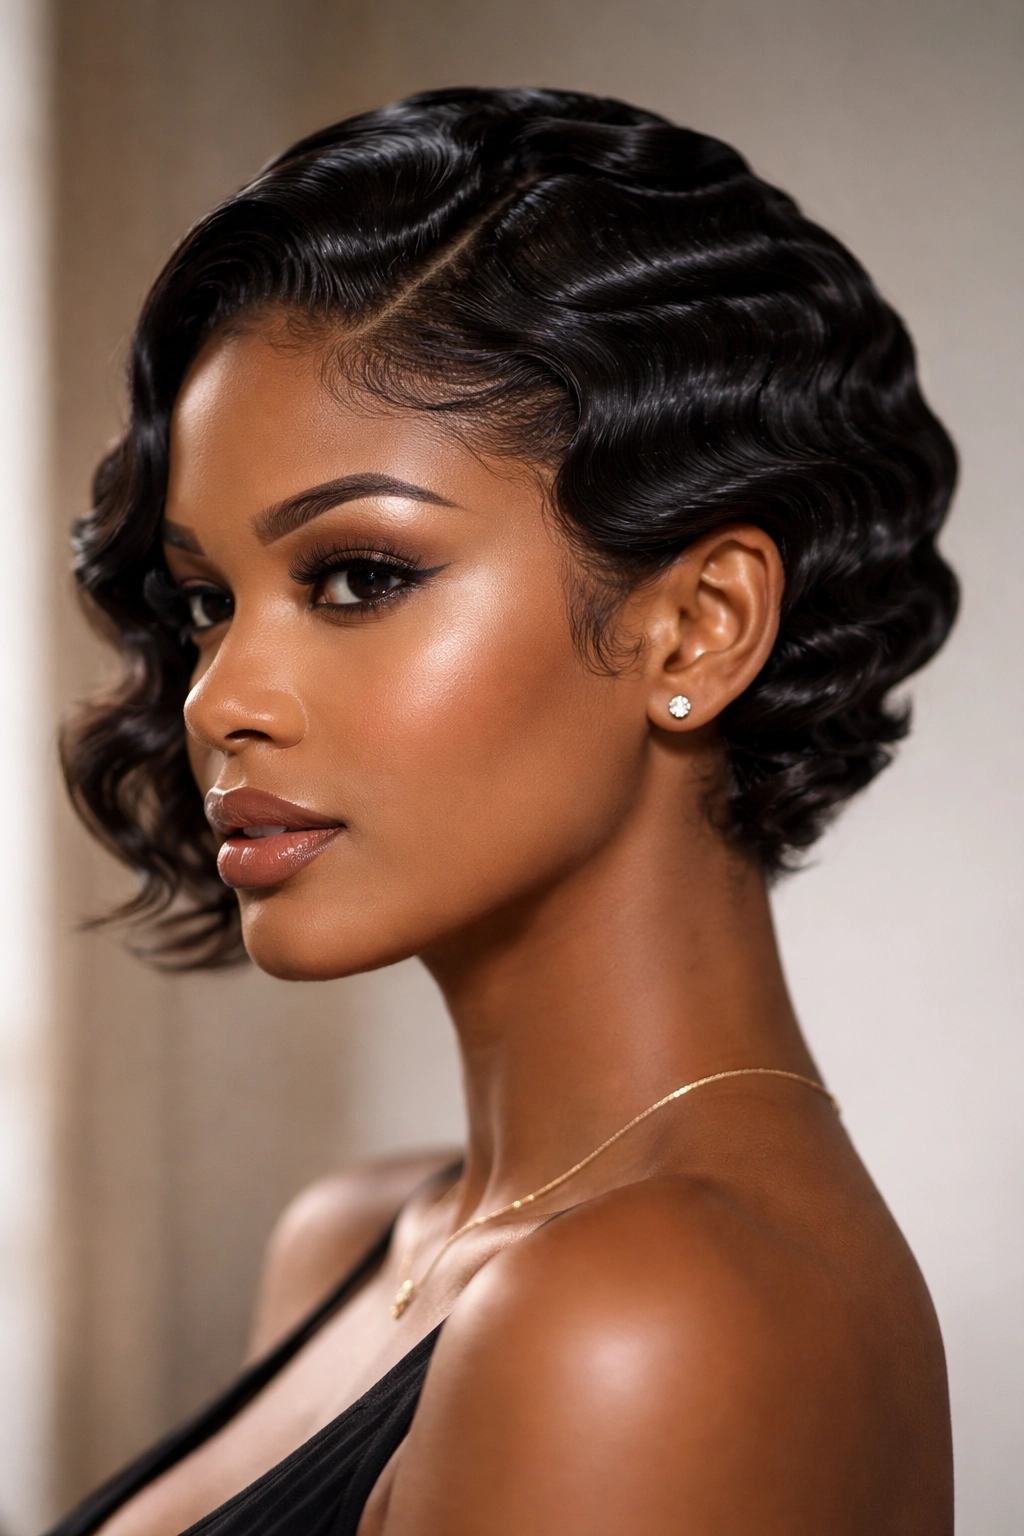
3. Defined Finger Waves
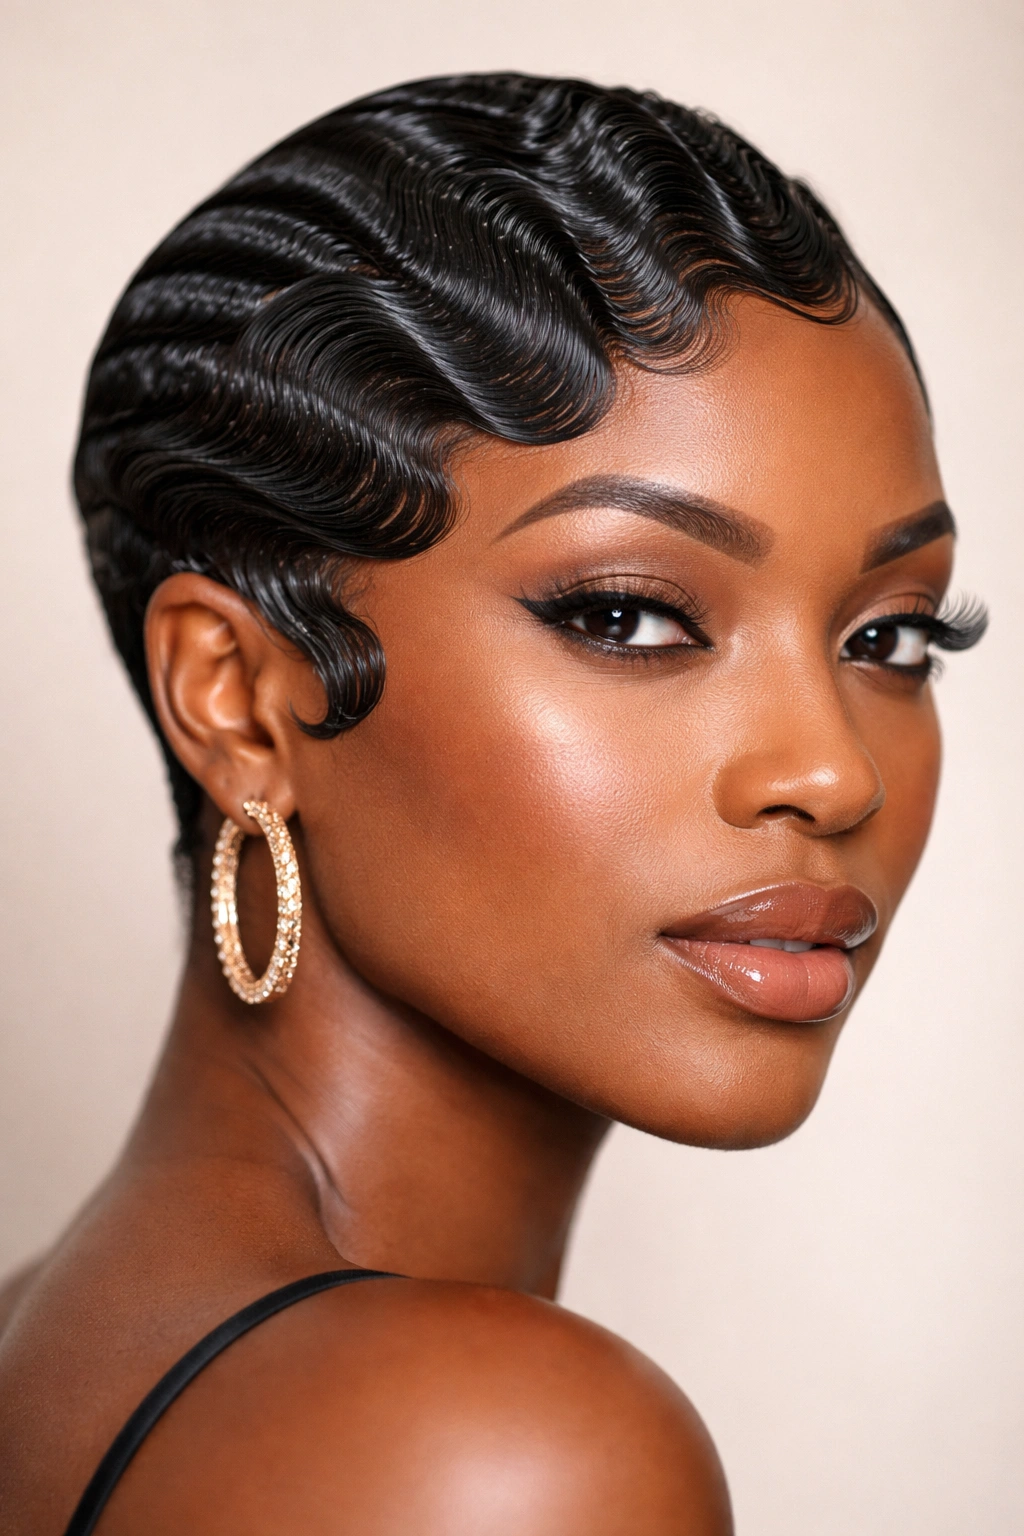
Finger waves are a classic, retro-inspired wavy style that’s been worn for generations and has experienced a major resurgence in recent years. Unlike looser wave styles, finger waves feature distinct, sharp ripples that run through the hair in a very intentional pattern—typically two or three waves per side. This style is incredibly striking and works best on shorter to medium-length hair where the wave pattern can really show.
The Technique Behind Perfect Finger Waves
Creating finger waves requires precision and the right products. Start with clean, damp hair and apply a firm-hold gel or wave cream throughout. Using your fingers and a fine-tooth comb, create the first wave by directing hair in one direction, pinching and holding it there while the product dries. Then create the next wave by directing hair in the opposite direction. The key is keeping each wave sharp and defined by holding it in place as it dries. You can use wave clips to hold the pattern while air-drying or blow-drying on low heat.
Products and Tools You’ll Need
- A strong-hold gel or wave pomade specifically formulated to create lasting definition
- A fine-tooth comb for creating precise wave patterns
- Wave clips to hold sections in place while drying
- Optional: a wave brush if you prefer using a brush instead of your fingers
- A light hairspray to set the waves once they’re completely dry
This style is perfect for date nights, professional events, or any occasion where you want your hair to make a statement. Plan for 30-45 minutes of styling time, and know that the longer you let the product dry while holding the wave pattern, the longer your waves will last.
4. Soft Coils with Wave Pattern
This style beautifully blends coils with waves, creating a textured look that’s somewhere between curly and wavy—perfect if your natural hair is already textured and you want to enhance its wave pattern without smoothing it down. Soft coils with wave definition maintain the integrity of your natural curl pattern while adding intentional movement and shape. This works wonderfully on 3c to 4a hair types that already have natural curl or coil texture.
Enhancing Your Natural Coil Pattern
Rather than creating waves from scratch, this technique works with your natural texture. Apply your regular moisturizing products—leave-in conditioner, curl cream, and gel—to soaking wet hair, then use a twist-out or braid-out method to define the pattern. After unraveling your twists or braids, gently separate the coils with your fingers to enhance the wave and coil blend, creating a style that’s fuller and more defined. The key is using enough product to define without creating clumps, and timing—removing your twists or braids when hair is 80-90% dry (not soaking wet, not completely dry) gives you the best wave-coil blend.
Product Formula for Definition Without Flattening
- Leave-in conditioner as your base moisture layer
- A curl-defining cream with shea butter or argan oil for hold and shine
- Gel for additional definition and frizz control
- Oil (such as coconut, jojoba, or argan) to seal in moisture and add shine
- Lightweight hairspray only if needed to combat humidity
This style can last five to seven days with proper refreshing and sleeping on a silk or satin pillowcase. It’s genuinely low-maintenance once the initial styling is done.
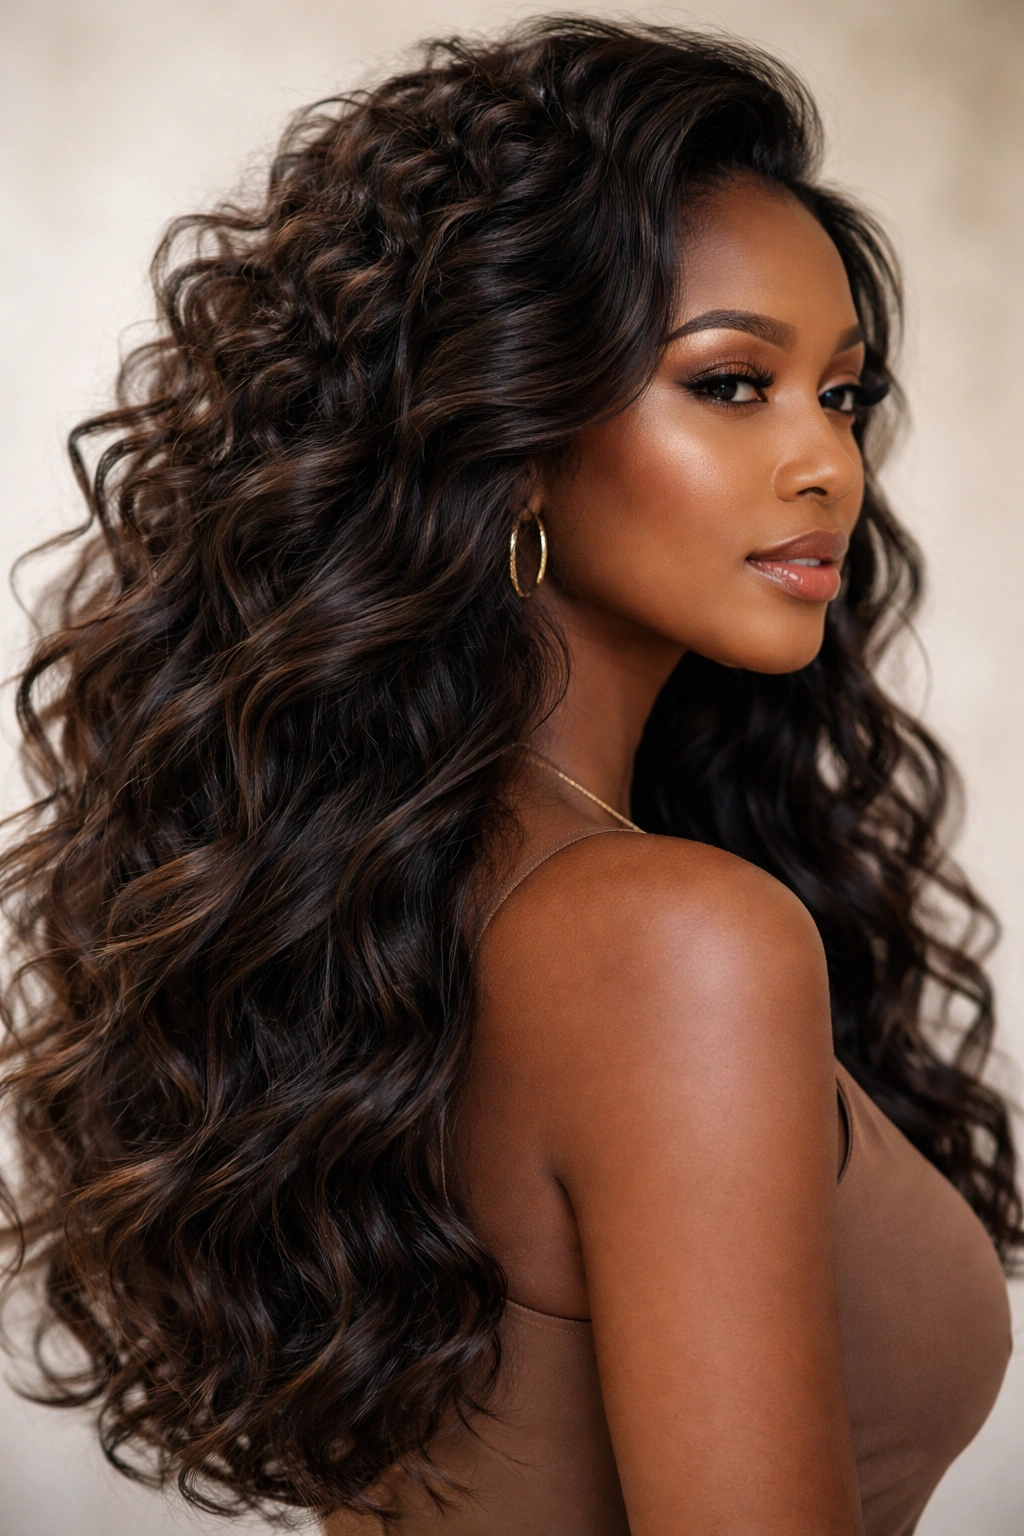
5. Bouncy Spiral Waves
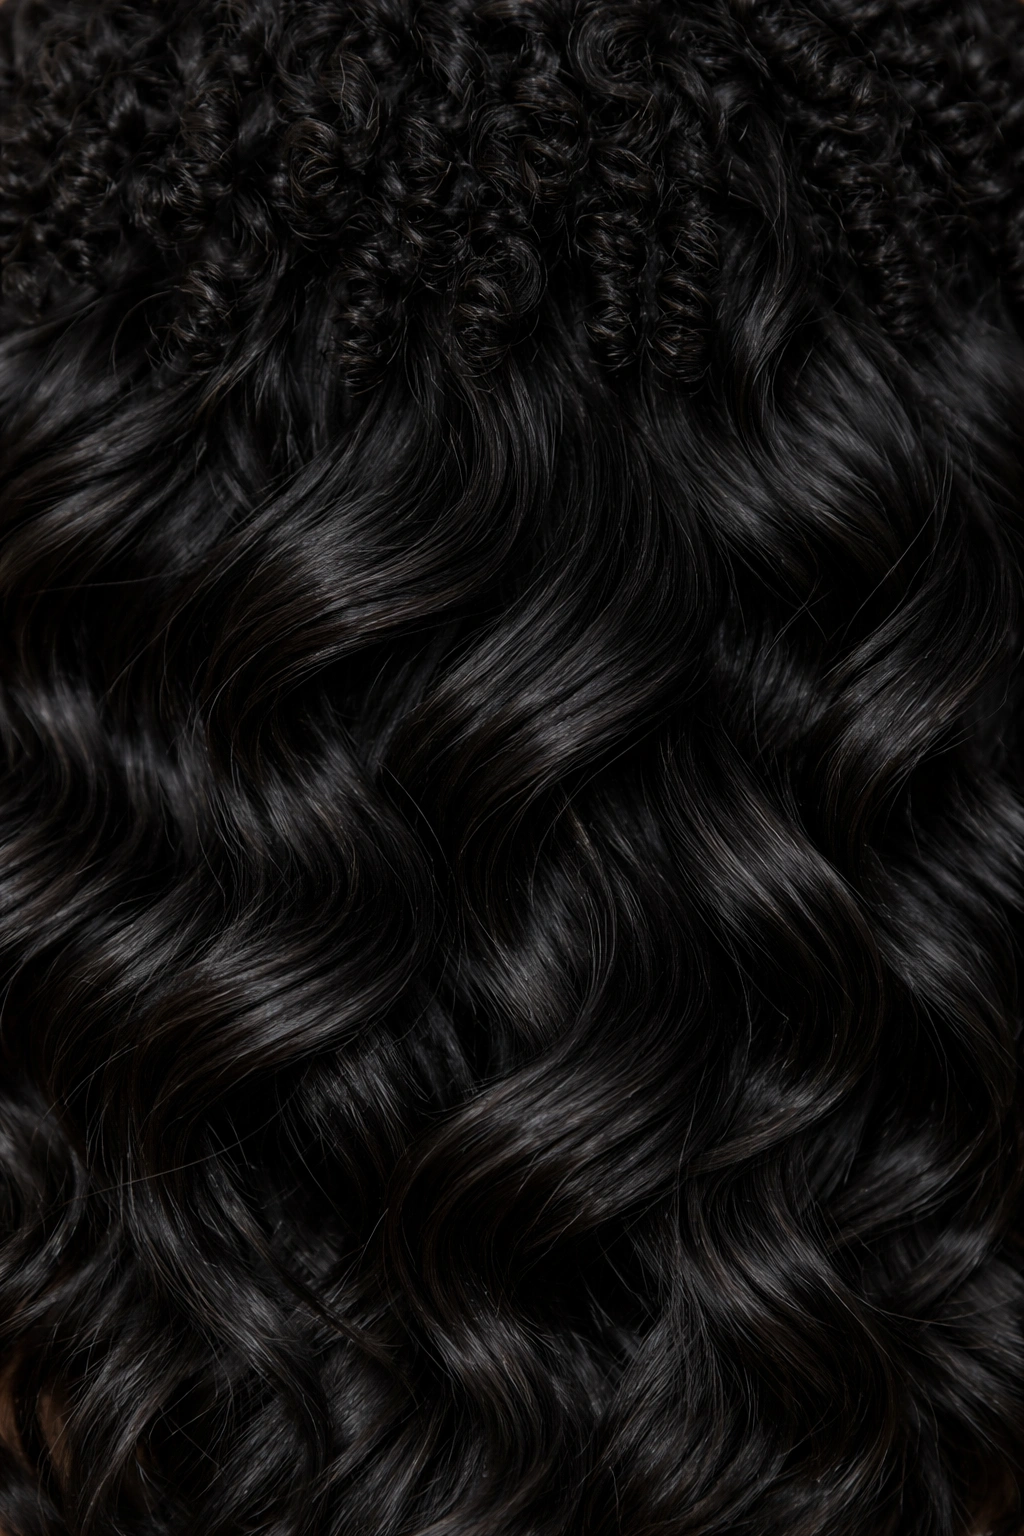
Bouncy spiral waves create a voluminous, energetic look with tight, springy waves that have serious movement and personality. This style features more pronounced spirals than loose waves, creating definition that bounces and moves as you walk. It’s an excellent choice if you want your waves to be noticed, and it works beautifully on shoulder-length hair or longer where the spirals have room to cascade.
Creating Bouncy Spirals That Actually Hold
The secret to bouncy, defined spirals is using small to medium-sized flexirods or curlformers while your hair is damp. Wrap each section of hair firmly around the rod, starting from the roots and spiraling down to the ends, then let it dry completely (either air-dry overnight or use a blow dryer on low). When you remove the rods, don’t unravel the spiral immediately—let your hair cool completely first, which helps the curl set. Once the spirals cool, gently unwind them and separate with your fingers for a more textured, natural look rather than a uniform, plastic-looking spiral.
Products That Create Long-Lasting Spirals
- Curl cream or styling mousse applied to damp hair before wrapping
- A holding gel with flexibility so spirals don’t feel stiff or crunchy
- Protein-rich products if your hair tends toward dryness, as tightly wound spirals benefit from extra protein
- Lightweight oil to separate spirals and add shine without weighing them down
- Flexible hairspray to hold shape without making spirals rigid
Bouncy spiral waves typically last four to six days, depending on how much you manipulate them. Sleeping on silk or satin and using a pineapple or bonnet technique (gathering hair at the crown while sleeping) helps extend the style.
6. Tousled Shag Waves
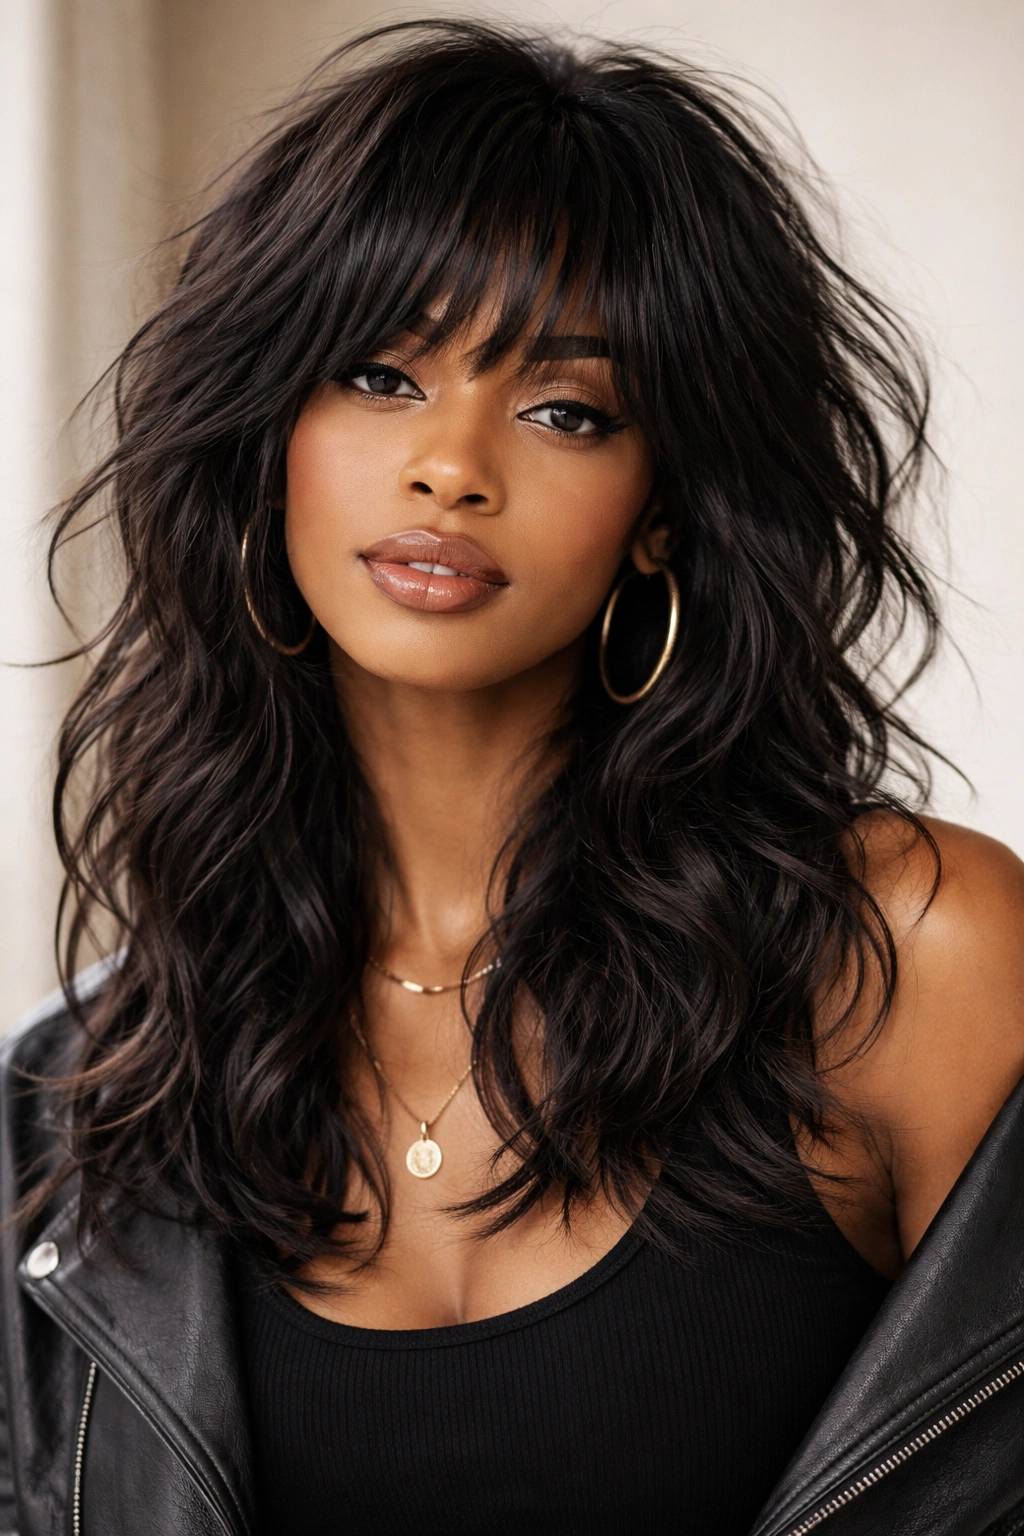
A tousled shag with waves brings rock-and-roll edge to your look, featuring choppy layers and textured, deliberately undone waves that create volume and movement throughout. This is the perfect style if you want waves with personality and don’t mind having a slightly messier, more artistic vibe. Shag waves work beautifully on shorter to medium-length hair where the layers can move and show properly.
Styling Tousled Shag Waves for That Lived-In Look
Start with clean, damp hair and apply your usual moisturizing base products plus a texturizing product or texture spray. Blow-dry with a diffuser, scrunching upward and encouraging the layers to move in different directions rather than all flowing the same way. The goal is to create a slightly messy, undone aesthetic—think less “perfectly styled” and more “I woke up like this.” You can also use a curling iron or wand to add wave to individual sections, but the shag works best when waves aren’t too uniform or perfect.
Creating Volume and Movement in Layers
- Use lightweight products that won’t weigh down shorter layers
- Apply more product to roots to create volume and lift
- Use a volumizing mousse before blow-drying for extra body
- Blow-dry roots against their natural direction for maximum lift
- Use a medium-barrel curling iron on individual layers to add gentle wave and texture
- Finish with a texture spray or light hairspray for grip without weight
The beautiful thing about shag waves is that they actually look better when they’re slightly imperfect and move naturally. Plan to restyle every two to three days, but the maintenance is relatively minimal.
7. Sleek Waves with Defined Parts
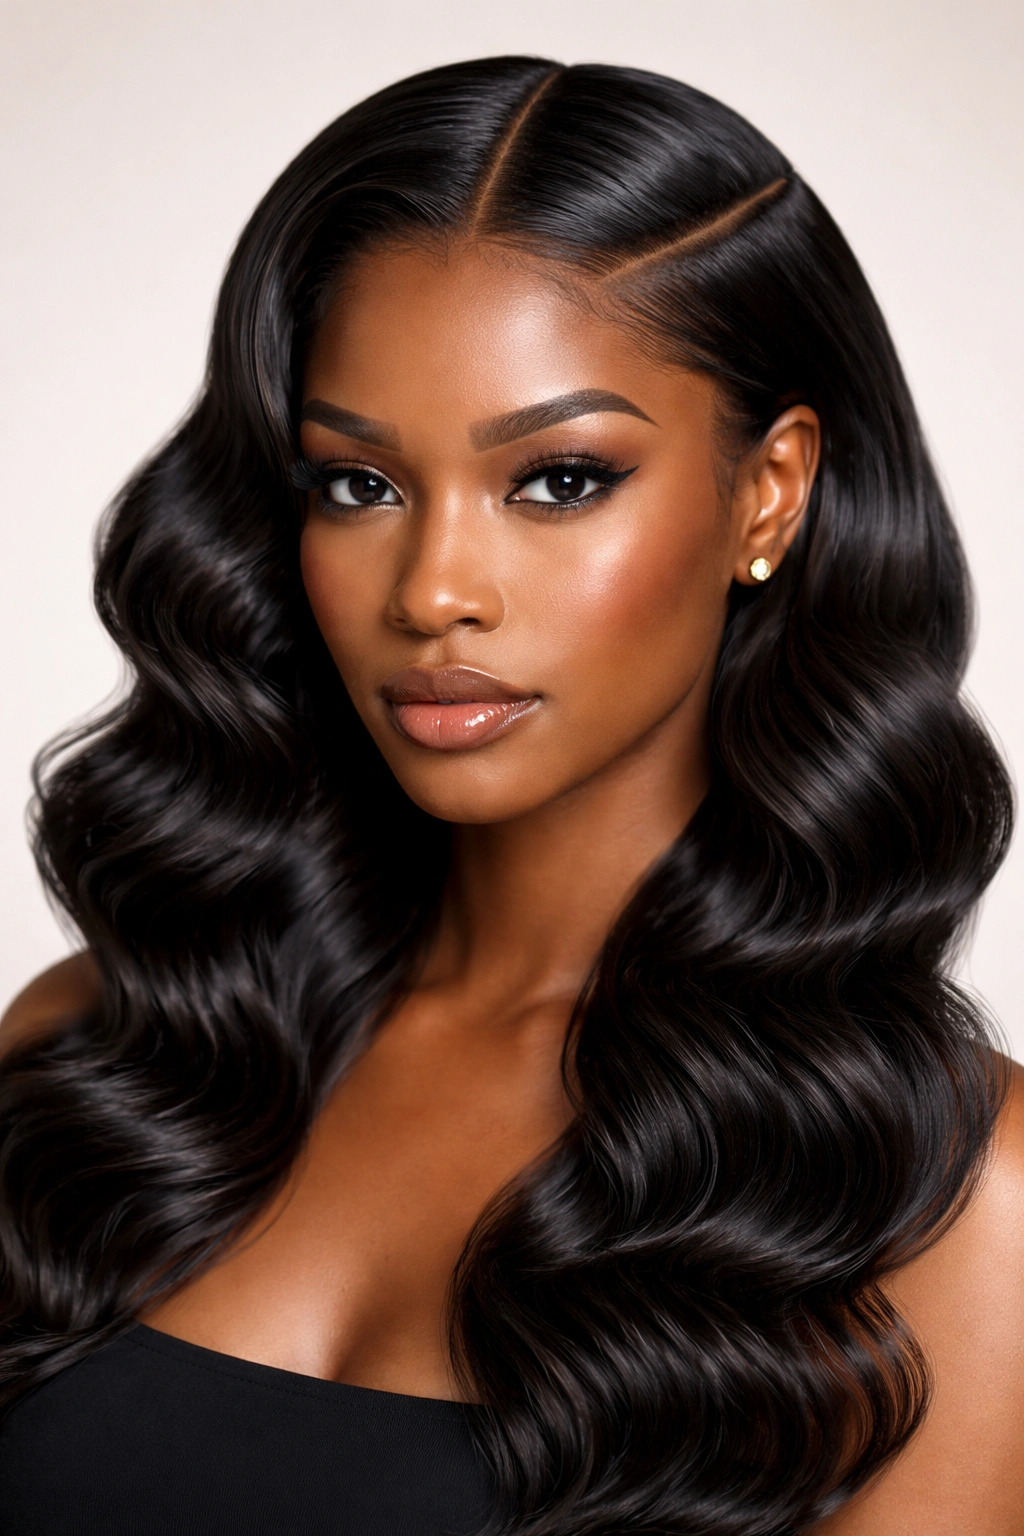
This sophisticated style combines sharp, sleek waves with clean, graphic parting for a polished, professional look that’s stunning for business settings, formal events, or any time you want waves to look intentional and refined. The sleekness comes from using smooth, nourishing products that add shine without frizz, while the defined waves are sharp and precise rather than soft and romantic.
Achieving That Polished Sleek Finish
The key is starting with extremely clean hair and using smoothing products before creating your waves. Apply a smoothing cream or styling milk to damp hair, then blow-dry smoothly using a paddle brush to create a sleek base. Once your foundation is smooth, create your parts with a rattail comb, making sure your lines are sharp and clean. Then add waves using a large-barrel curling iron or by setting with flexi-rods, taking each wave section and ensuring it’s smooth and shine-forward, not frizzy or dull.
Product Combination for Sleek Waves
- Smoothing serum or anti-frizz oil applied to damp hair
- Styling milk or lightweight smoothing cream for shine and smoothness
- Edge control to define your parts crisply and keep edges smooth
- Shine spray or light oil to amplify glossiness
- Flexible hairspray (not matte finish) to hold waves without dulling shine
This style reads as extremely polished and professional, and the sharp parts make waves feel intentional rather than accidental. It’s perfect for job interviews, presentations, or anywhere you want to look refined and put-together.
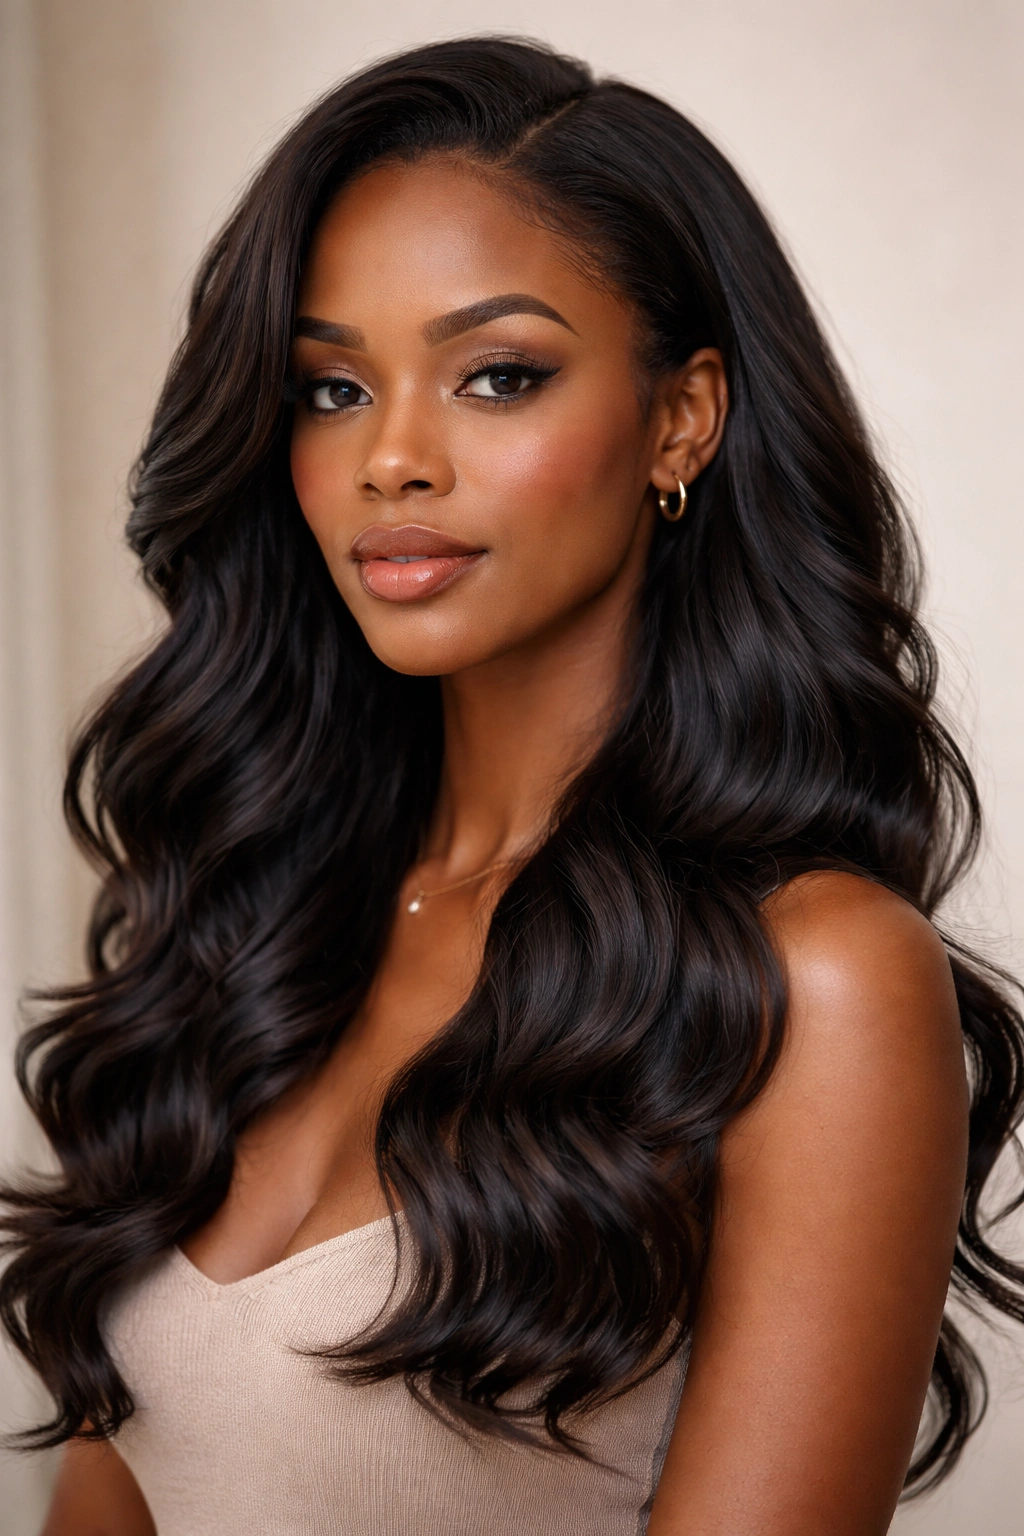
8. Voluminous Waves with Layered Texture
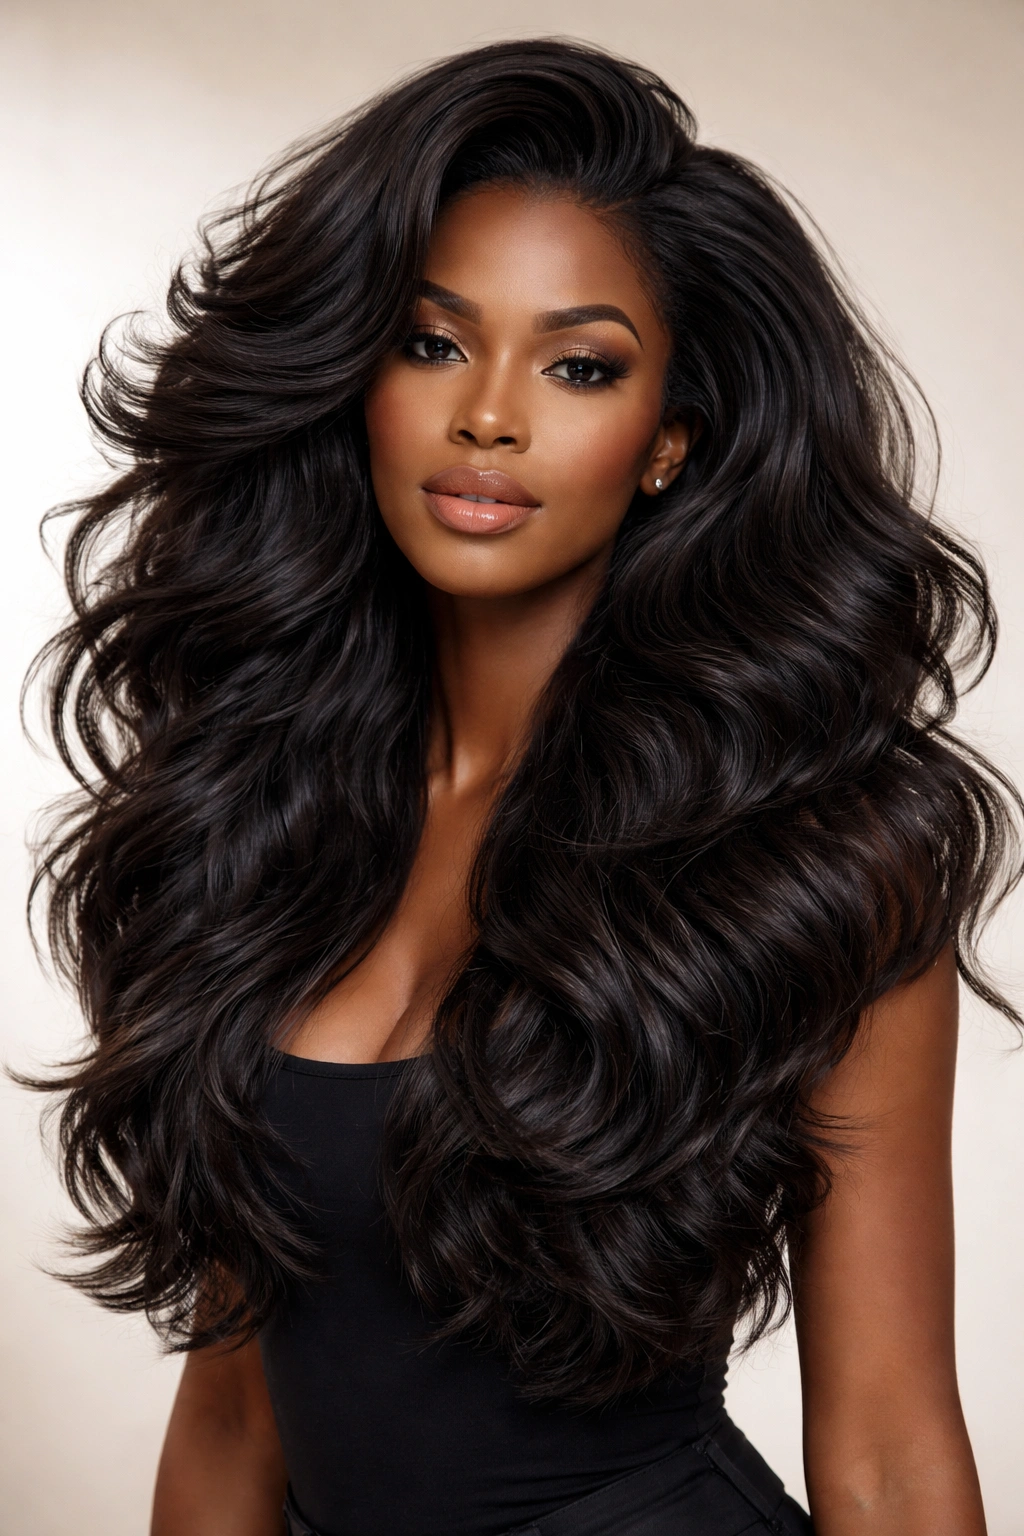
Voluminous waves create maximum body and presence, with fullness throughout that makes your hair look thicker and longer. This style works best on longer hair and features waves that lift away from your head rather than lying flat, creating an enviable silhouette. If you want waves that truly transform your appearance and create presence, this is your style.
Building Genuine Volume Into Your Waves
Start by blow-drying with a volumizing mousse or volume spray applied to roots, rough-drying while lifting sections upward at the root. Then create your waves using large or medium flexirods positioned to lift away from the scalp rather than following the natural curve of your head. This directional placement creates the lift that makes waves look voluminous. Alternatively, use a blow-dry brush on a low setting while directing sections upward and allowing them to cool in that lifted position.
Creating and Maintaining Maximum Volume
- Use a volumizing mousse or foam product on roots before blow-drying
- Apply a texturizing product to add grip and hold volume longer
- Use a root-lifting spray to add thickness where you need it most
- Blow-dry roots in the opposite direction from where you want the volume
- Cool-shot your hair (using cool air on your blow dryer) after styling to set the volume
- Sleep in a high pineapple or bonnet to preserve height
Voluminous waves create a genuinely glamorous look that works for special occasions, nights out, or any time you want to feel especially beautiful and confident.
9. S-Wave Pattern
The S-wave is a geometric, sculptural style featuring tight S-shaped waves that run uniformly through your hair, creating a very intentional, artistic look. This pattern is incredibly striking and works best on shorter to medium-length hair where the S-pattern can be clearly seen. It’s a more avant-garde choice compared to traditional waves, but it’s stunning for those who want waves that are undeniably sophisticated.
Creating Perfect S-Wave Patterns
Creating S-waves requires precision and patience. Apply a strong-hold gel or wave pomade to clean, damp hair, then use a wave brush or fine-tooth comb to create the first wave direction, holding it until it begins to dry. Then reverse direction for the next S, creating a clear alternating pattern. The pattern works best when you use clips to hold each S in place while everything dries—this ensures the pattern sets rather than relaxing back to its natural wave. Plan for 45 minutes to an hour of drying time for a crisp S-wave pattern.
Tools and Products for S-Wave Mastery
- Strong-hold wave gel or pomade formulated specifically for wave patterns
- A wave brush with firm bristles to create and hold precise patterns
- Wave clips to hold each S in place while drying
- Fine-tooth comb for precision if you prefer combs to brushes
- Moisturizing cream underneath the gel to prevent dryness
- Light hairspray once completely dry to seal the pattern
The S-wave pattern is bold and makes a statement. It’s perfect for anyone who wants waves that are unmistakably intentional and artistic rather than naturally flowing.
10. Beachy Textured Waves with Highlights
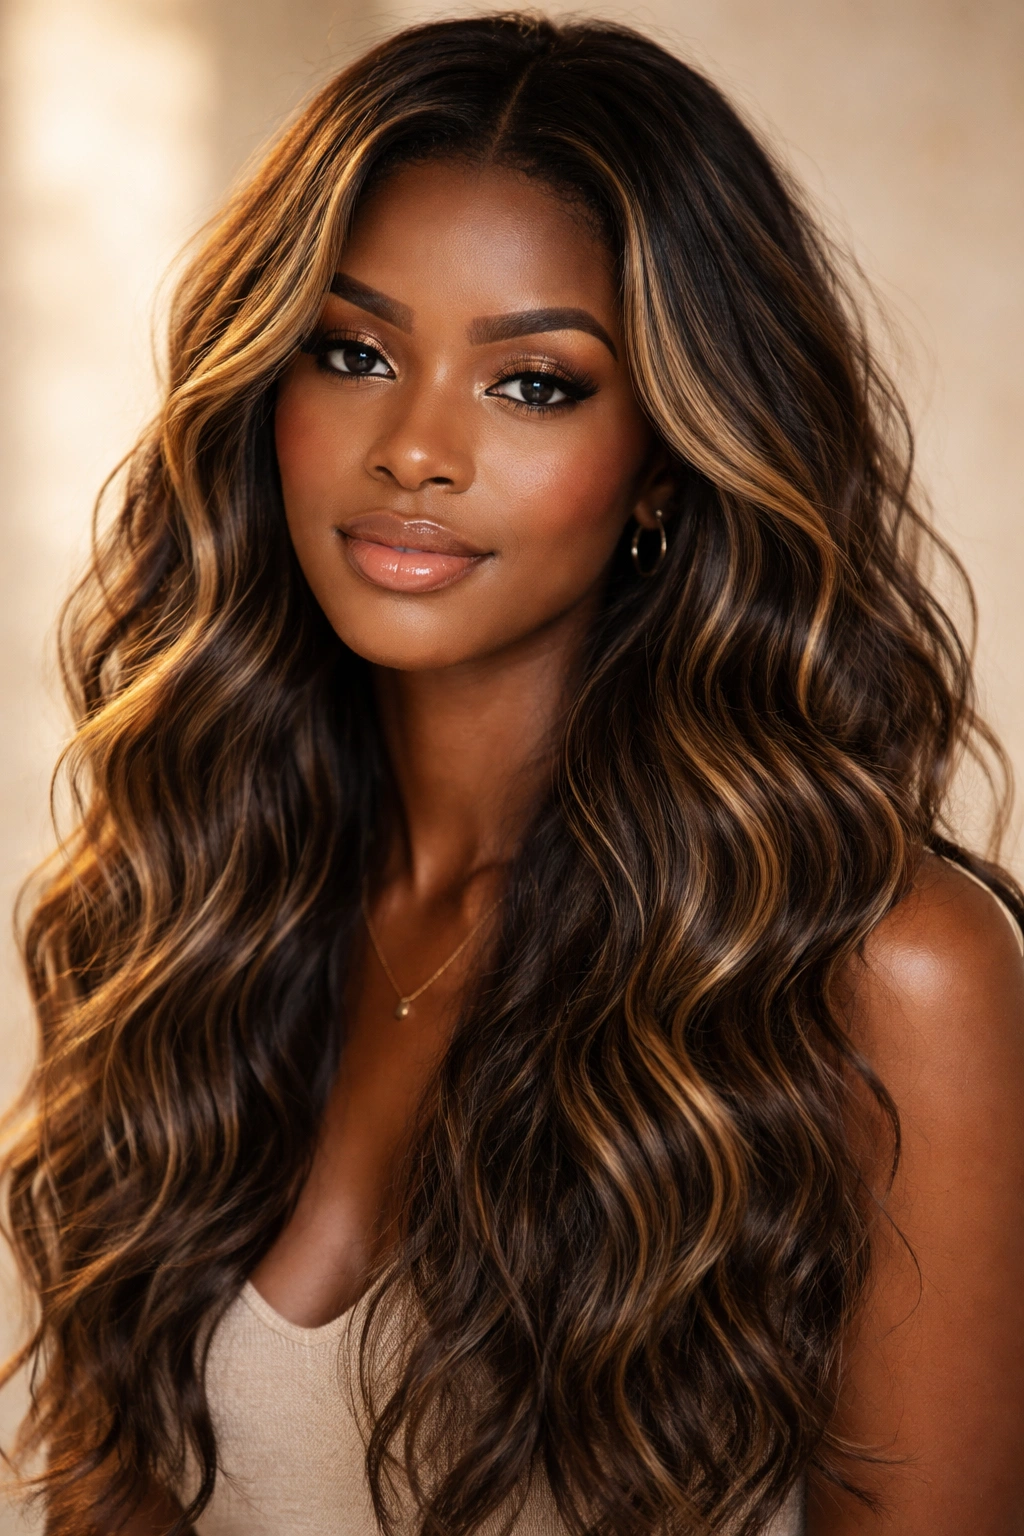
This style combines soft, flowing waves with strategically placed highlights or color that adds dimension and enhances the wave pattern. The color literally helps your waves show—lighter highlights catch the light and make waves appear more defined and textured. Even if you’re not ready to color your entire head, a few well-placed pieces in a lighter shade completely transforms the three-dimensionality of your waves.
Styling Waves to Show Off Color and Texture
The key here is using texturizing products that separate and define rather than clump, so each wave strand is distinct and catches light from different angles. Apply a texture spray or sea salt spray to damp hair and rough-dry with a diffuser, scrunching upward to encourage separation and movement. You can also braid damp hair and unravel for soft waves that showcase color beautifully. The motion and separation of textured waves makes color way more visible than smoothed-down waves would.
Maximizing Color and Texture Together
- Use lightweight, separating products that don’t seal waves together
- Apply a texture spray that adds grip and definition
- Rough-dry with a diffuser rather than smooth blow-drying
- Use a shine spray or light oil to make color and texture gleam
- Consider face-framing highlights that draw attention to your waves
- Avoid heavy products that would clump waves and dull color
This style is especially striking with rich browns, coppers, golds, or caramels that create gorgeous contrast against darker natural hair. The waves and color work together to create a multidimensional, sophisticated look.
11. Soft Curls Blended with Waves
This style beautifully merges curls and waves, creating a look that’s somewhere between defined curls and loose waves—perfect if you love both textures and want an option that honors your natural curl pattern while adding intentional wave movement. The blend creates dimension and interest without requiring perfectly uniform waves or defined curls; instead, you get a gorgeous, textured combination.
Blending Curls and Waves for a Textured Look
Start with your regular curl and wave routine—apply leave-in conditioner, curl cream, and gel to soaking wet hair. Use a twist-out, braid-out, or roller set method and leave it on for longer than usual (8+ hours or overnight) to allow the pattern to fully set. When you unravel, separate some sections to create tighter curls, while leaving other sections as looser waves—this creates the beautiful blend. You can also finger-coil some sections for more defined curls while leaving others as waves for that intentional mixed texture.
Product Strategy for Mixed Curls and Waves
- Leave-in conditioner as your moisture base
- Curl cream with enough hold to define both waves and curls
- Gel for edge definition and frizz control without crunchy feeling
- Moisturizing oil to separate and define without clumping
- Lightweight hairspray only if needed
This style actually looks better when it’s not perfectly uniform—the whole aesthetic is about celebrating multiple textures coexisting beautifully. It’s genuinely low-maintenance once you’ve mastered your routine.
12. Two-Tone Wavy Style
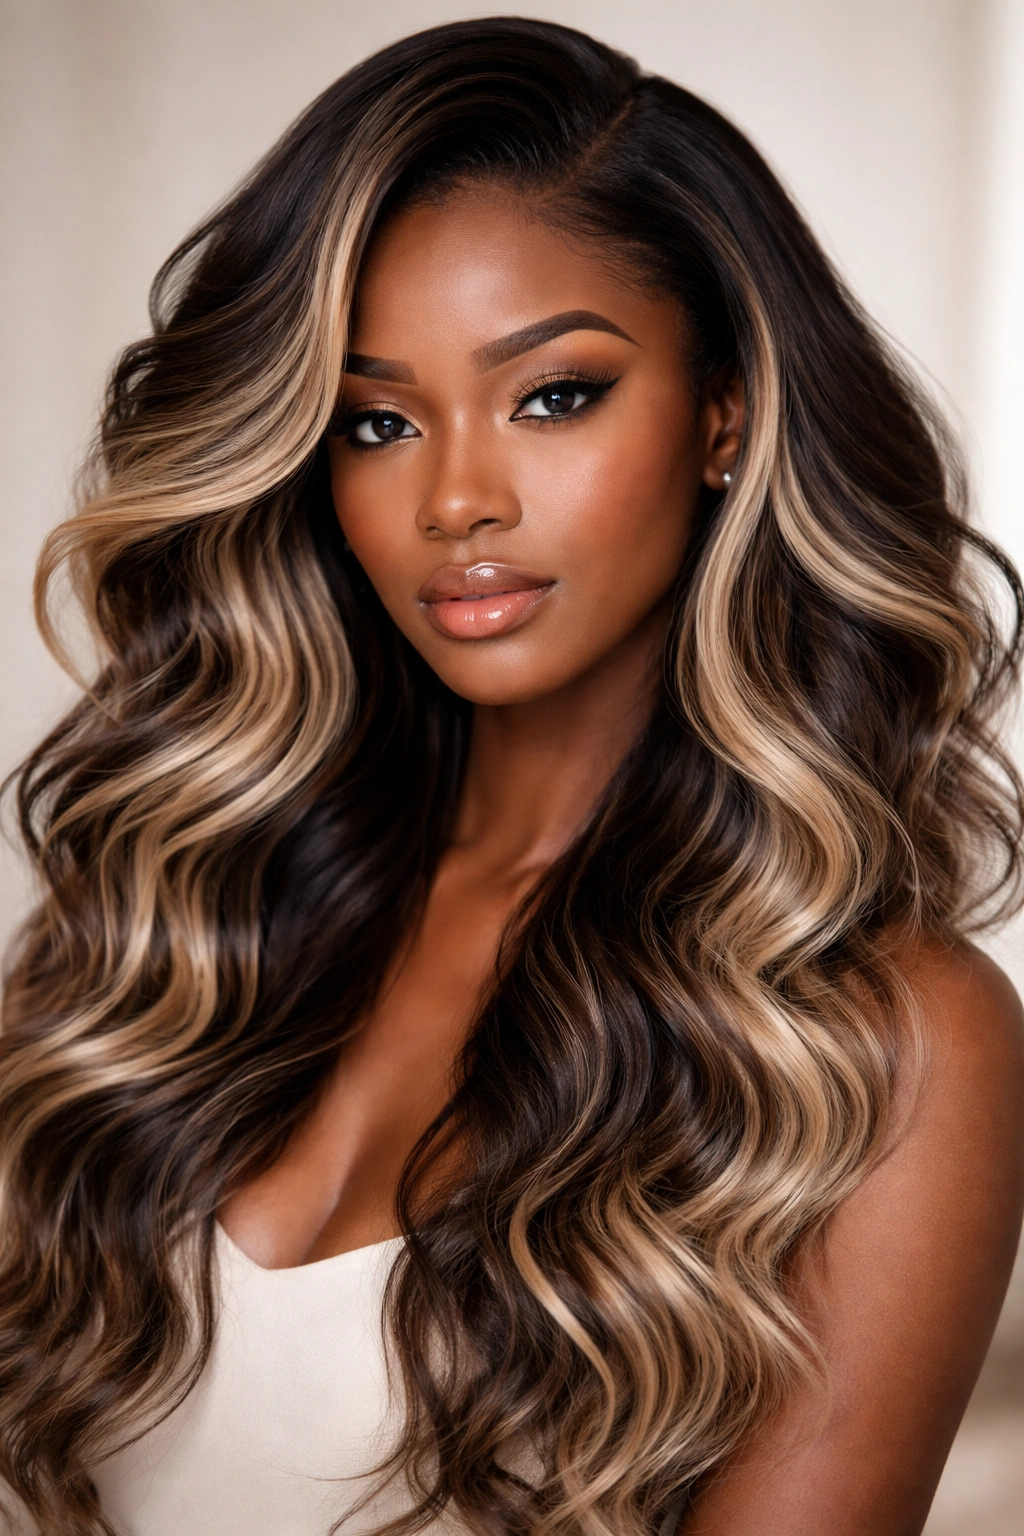
A two-tone wavy style features contrasting color (think natural dark roots with lighter lengths, or two completely different shades) combined with soft, flowing waves that showcase both colors beautifully. The wave texture makes the color transition more dynamic and interesting than it would be on straight hair. This is a bold, fashion-forward choice that creates serious visual impact.
Styling Waves to Maximize Color Contrast
The key is using textured styling rather than smooth, sleek waves. Apply a texture spray or texturizing mousse to damp hair, then blow-dry with a diffuser or use a braid-out method for soft waves that show both your colors as you move. The separated, textured wave pattern makes color layers visible; every movement reveals new angles of your color blocking. Avoid heavy products that would smooth everything down and make your color blend together rather than contrast.
Product and Styling Approach
- Use lightweight products that separate waves instead of clumping
- Apply a texture spray to emphasize wave definition and color visibility
- Blow-dry with a diffuser or use a braiding method for naturally textured waves
- Use a light shine spray to make both colors gleam
- Avoid anything that would smooth or blend your colors together
- Plan refreshing every three to five days to keep waves textured
Two-tone waves create an incredibly modern, fashion-forward look that works especially well on shoulder-length or longer hair where both colors have room to show.
13. Cornrow Waves Pattern
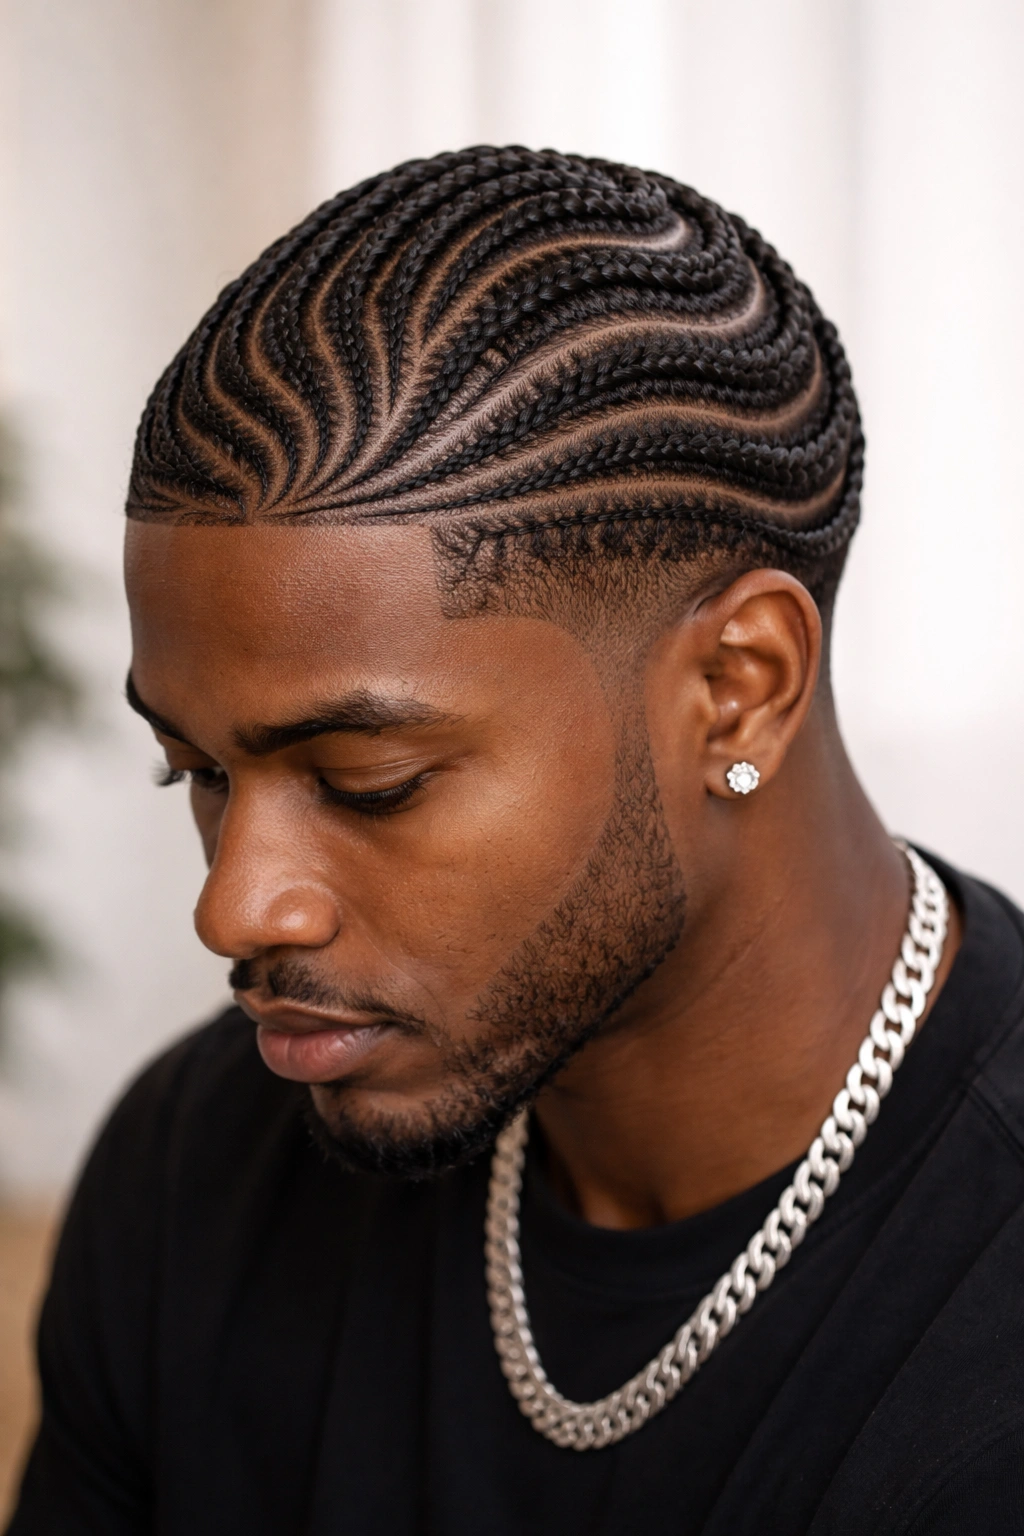
Cornrow waves combine cornrows and waves for a protective style that’s also absolutely stunning—braids create defined wave patterns throughout your hair while protecting your edges and ends. This style showcases your natural hair texture while creating intentional, beautiful wave patterns. It’s perfect for anyone wanting a protective, long-lasting style that still looks polished and intentional.
Creating Cornrow Waves That Maximize Pattern
The magic of this style is in how you cornrow. Rather than braiding straight back in parallel lines, create cornrows that curve and follow a wave pattern, so the braids themselves create beautiful S-curves or wave shapes across your head. Start your braids at an angle rather than straight, and curve them as you move toward the back. When you release the braids after wearing them for three to seven days, they leave wave imprints in your hair that last for several days even after you take the braids down.
Maximizing the Wave Pattern After Release
- Leave cornrows in for at least three to five days so waves set completely
- When releasing braids, spray hair lightly with leave-in conditioner or water
- Use a light oil or edge control to separate sections and define waves
- Let waves air-dry rather than using heat, which can relax the pattern
- Sleep on silk or satin to preserve wave patterns overnight
- Refresh with water spray and light product on day two or three
Cornrow waves are genuinely two styles in one—a protective style while you wear the braids, and beautiful waves once you release them. It’s an incredibly practical choice that looks beautiful and keeps your edges protected.
Final Thoughts
Wavy hairstyles offer incredible versatility for Black hair, whether you’re working with your natural texture or creating waves through styling techniques. Each of these thirteen styles brings something different to the table—from sleek and sophisticated to tousled and carefree, from protective to purely glamorous. The best style for you depends on your hair length, texture, daily routine, and what makes you feel most confident.
What’s most important is choosing a style that genuinely works with your hair type and lifestyle, and using products specifically formulated for Black hair that actually nourish rather than dry out. Waves don’t have to be complicated—starting with good moisture, the right products, and consistent technique makes maintaining any of these styles manageable. Whether you’re trying waves for the first time or looking for a fresh take on a style you already love, there’s absolutely a wavy style here that will make you feel beautiful and celebrated.