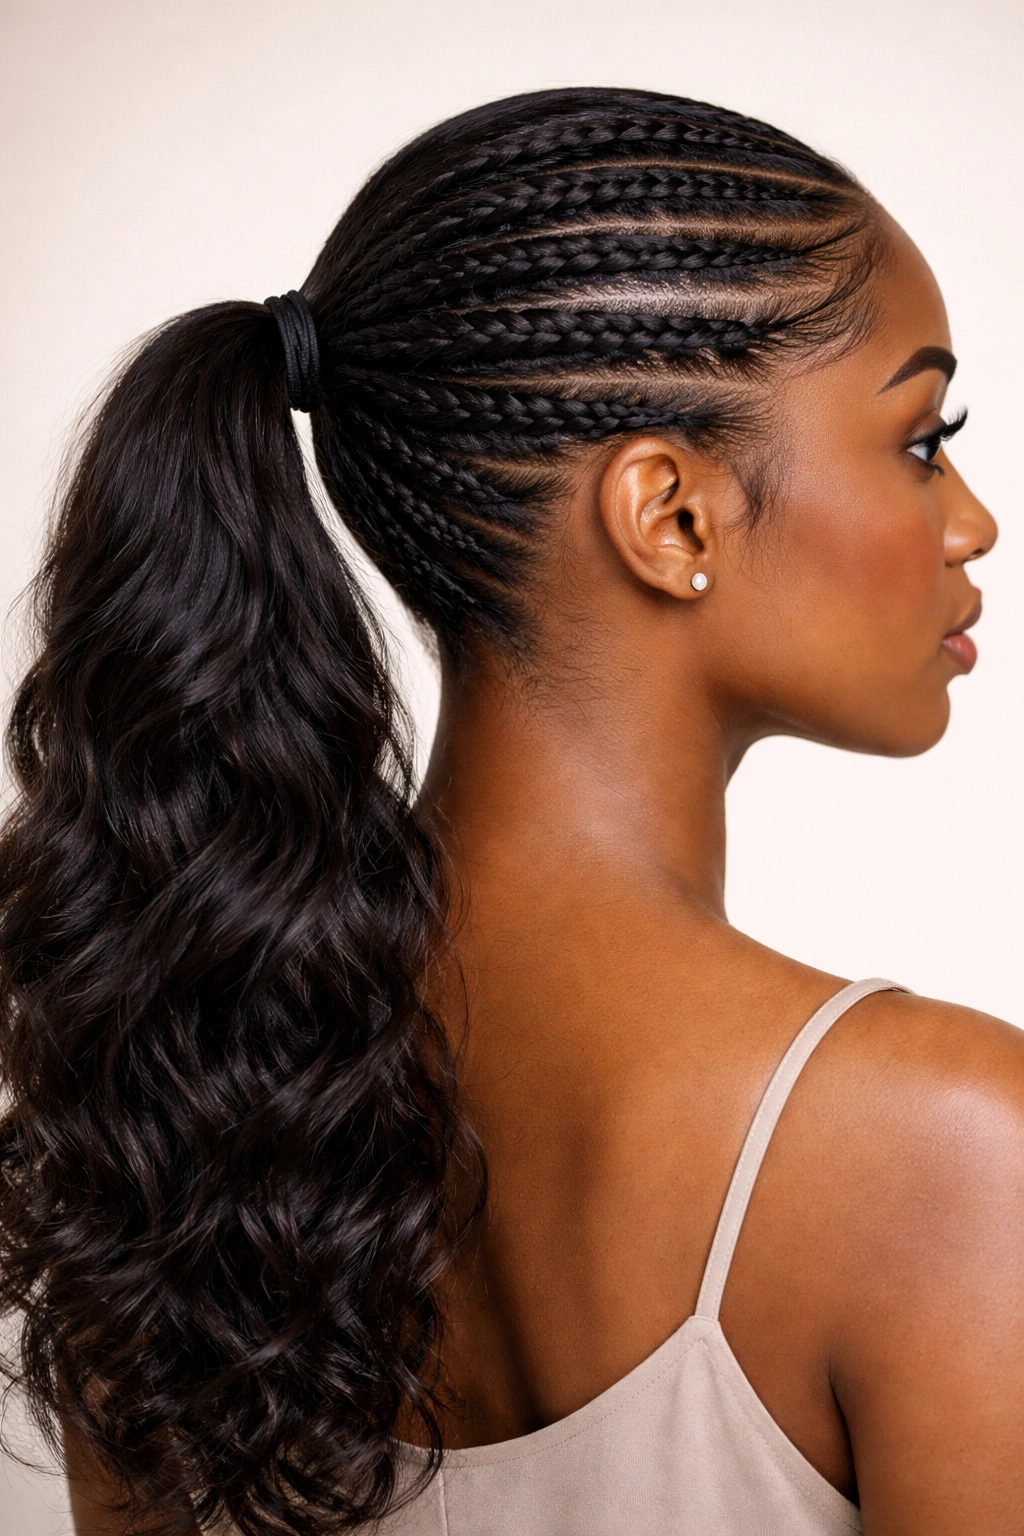
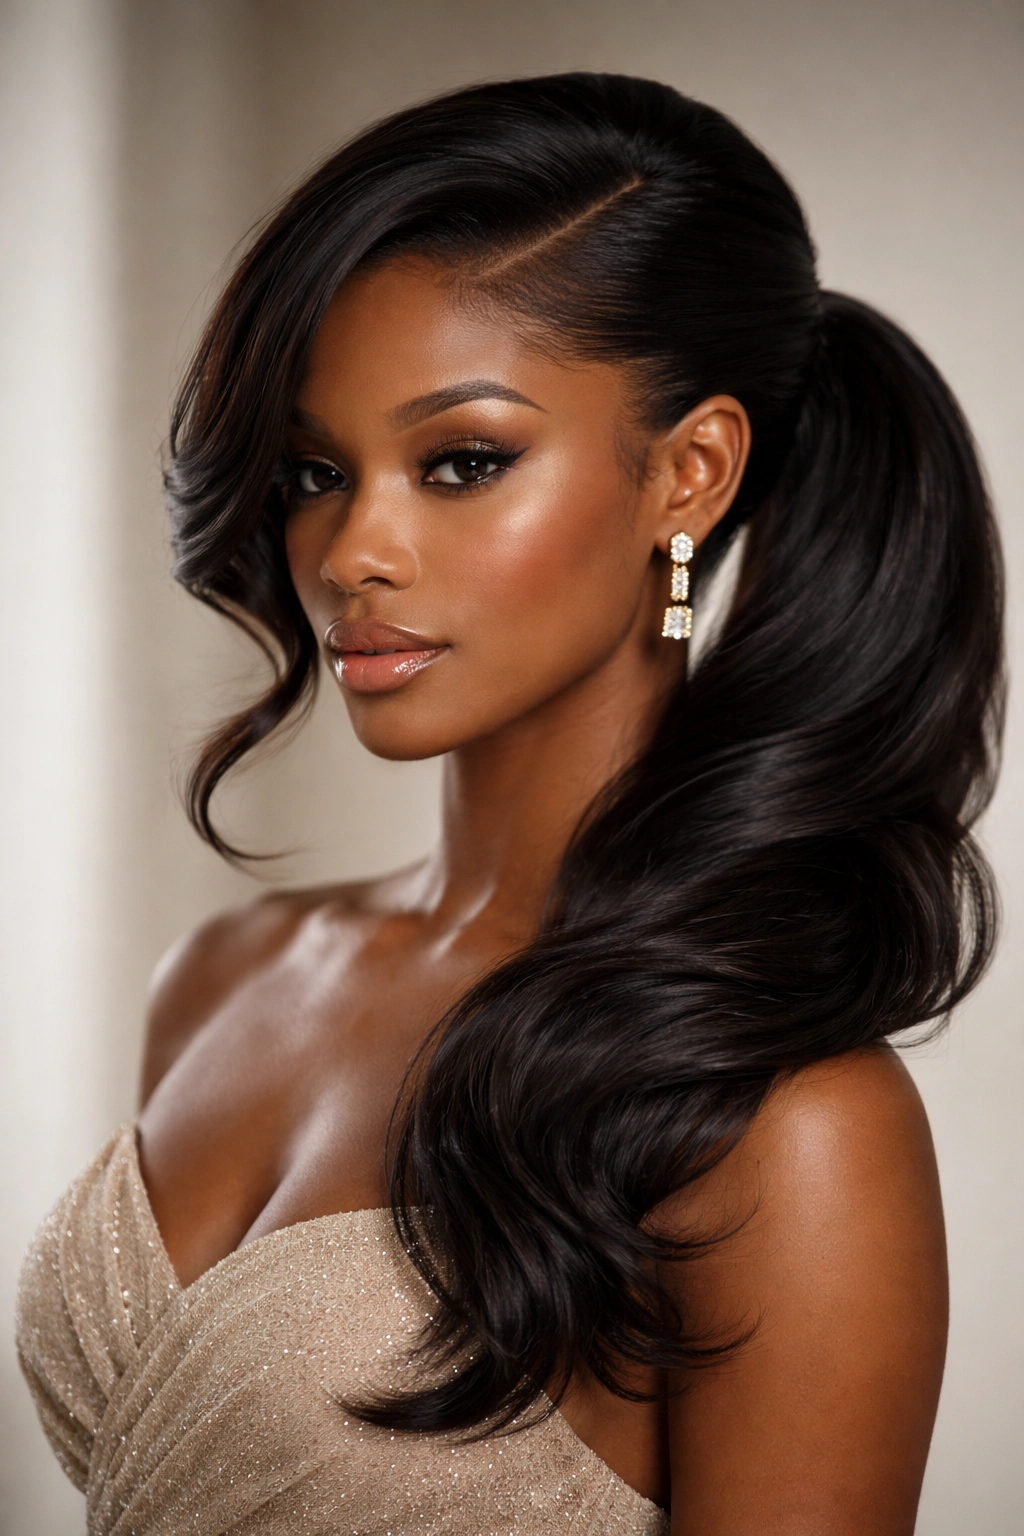
When it comes to versatile, polished hairstyles that work for any occasion, updo ponytails are an absolute game-changer for Black women. Whether you’re heading to the office, attending a special event, or just wanting to keep your natural hair protected while looking effortlessly chic, there’s an updo ponytail style that fits your vibe. The beauty of this category is the sheer range—from sleek and sophisticated to intricate and textured, updo ponytails let you express your personal style while keeping your hair secure and off your face.
What makes updo ponytails so brilliant is their adaptability across different hair textures and lengths. You can wear them with coils, locs, twists, braids, or bone-straight hair. They work whether you’re rocking shoulder-length locks or hair flowing down your back. Plus, they’re practical—they protect your ends from environmental damage, reduce daily manipulation, and honestly, they just look polished. You can style an updo ponytail in under ten minutes on a rushed morning, or spend time perfecting intricate details for a more formal event.
The key to pulling off updo ponytails successfully is understanding how to work with your natural hair texture rather than fighting against it. Black hair has unique characteristics—moisture needs, curl patterns, scalp sensitivity—and when you honor those qualities while styling, the results are stunning and sustainable. Throughout this guide, you’ll find styles ranging from sleek and minimal to textured and ornate, giving you plenty of inspiration to rotate through your styling lineup.
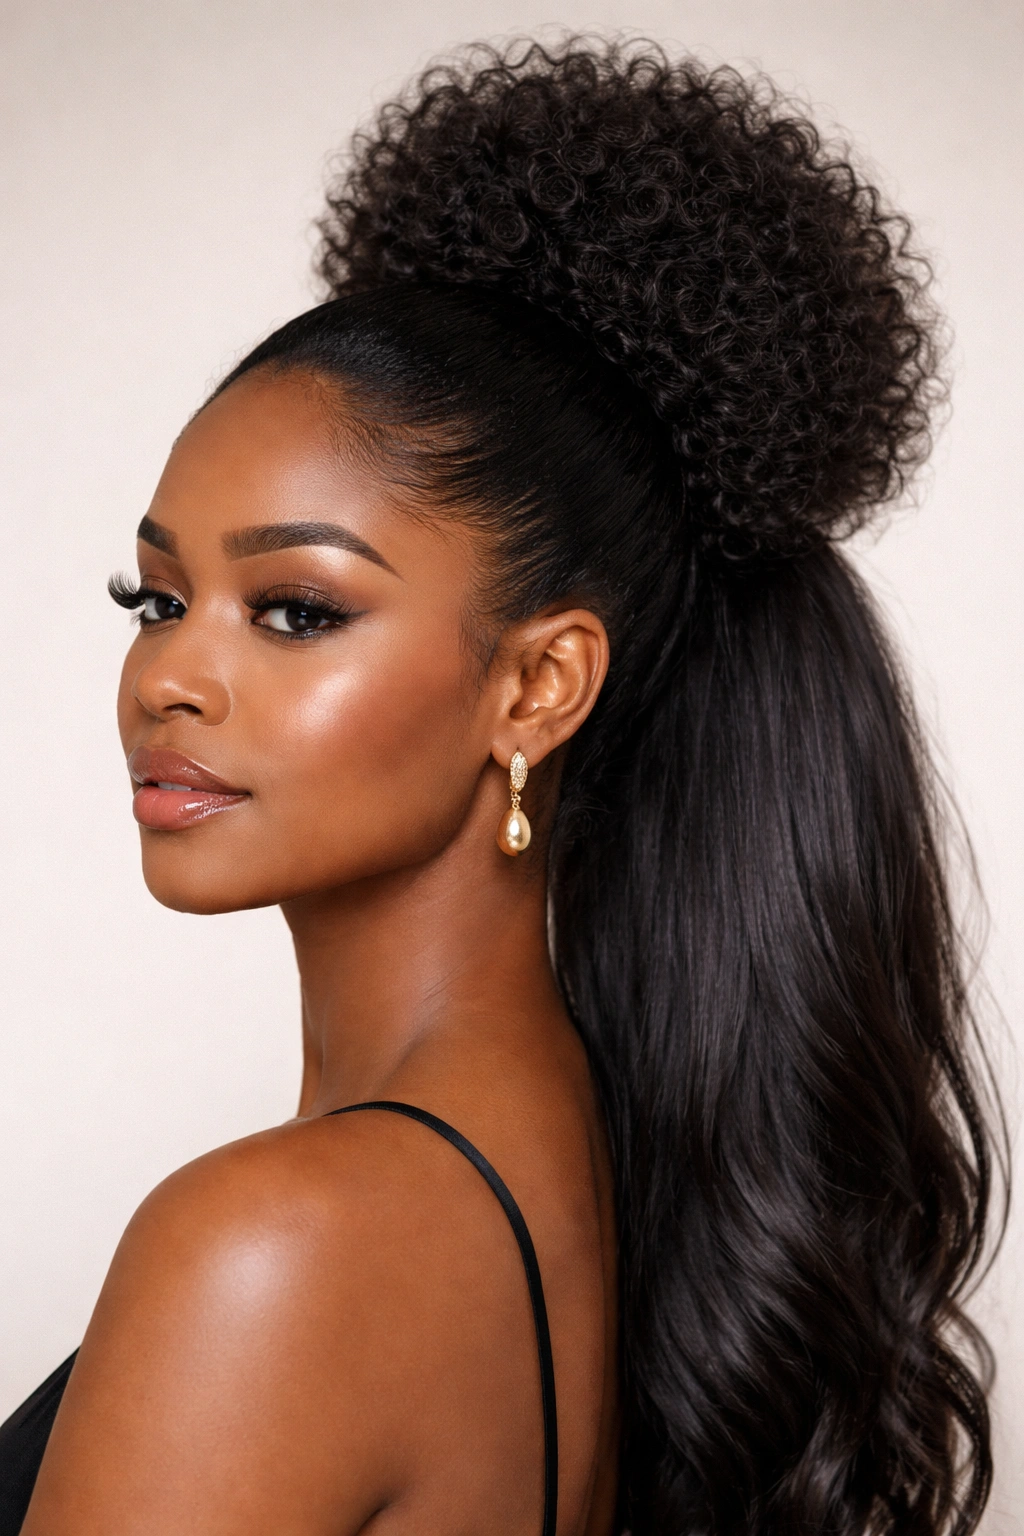
1. High Sleek Ponytail with Natural Texture
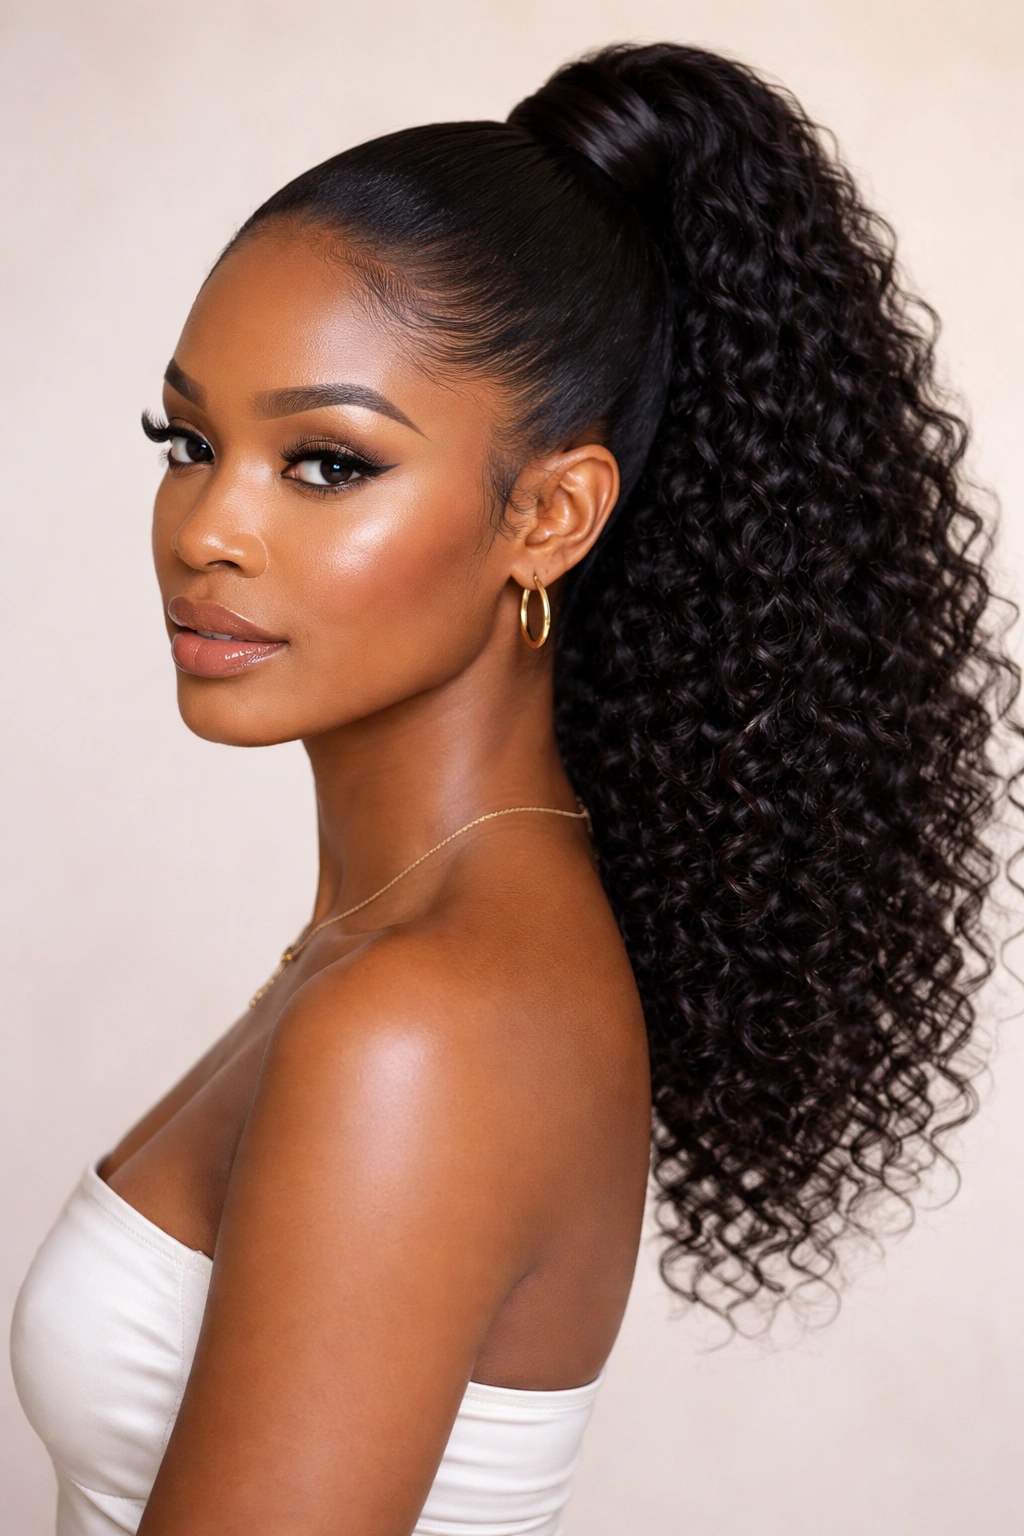
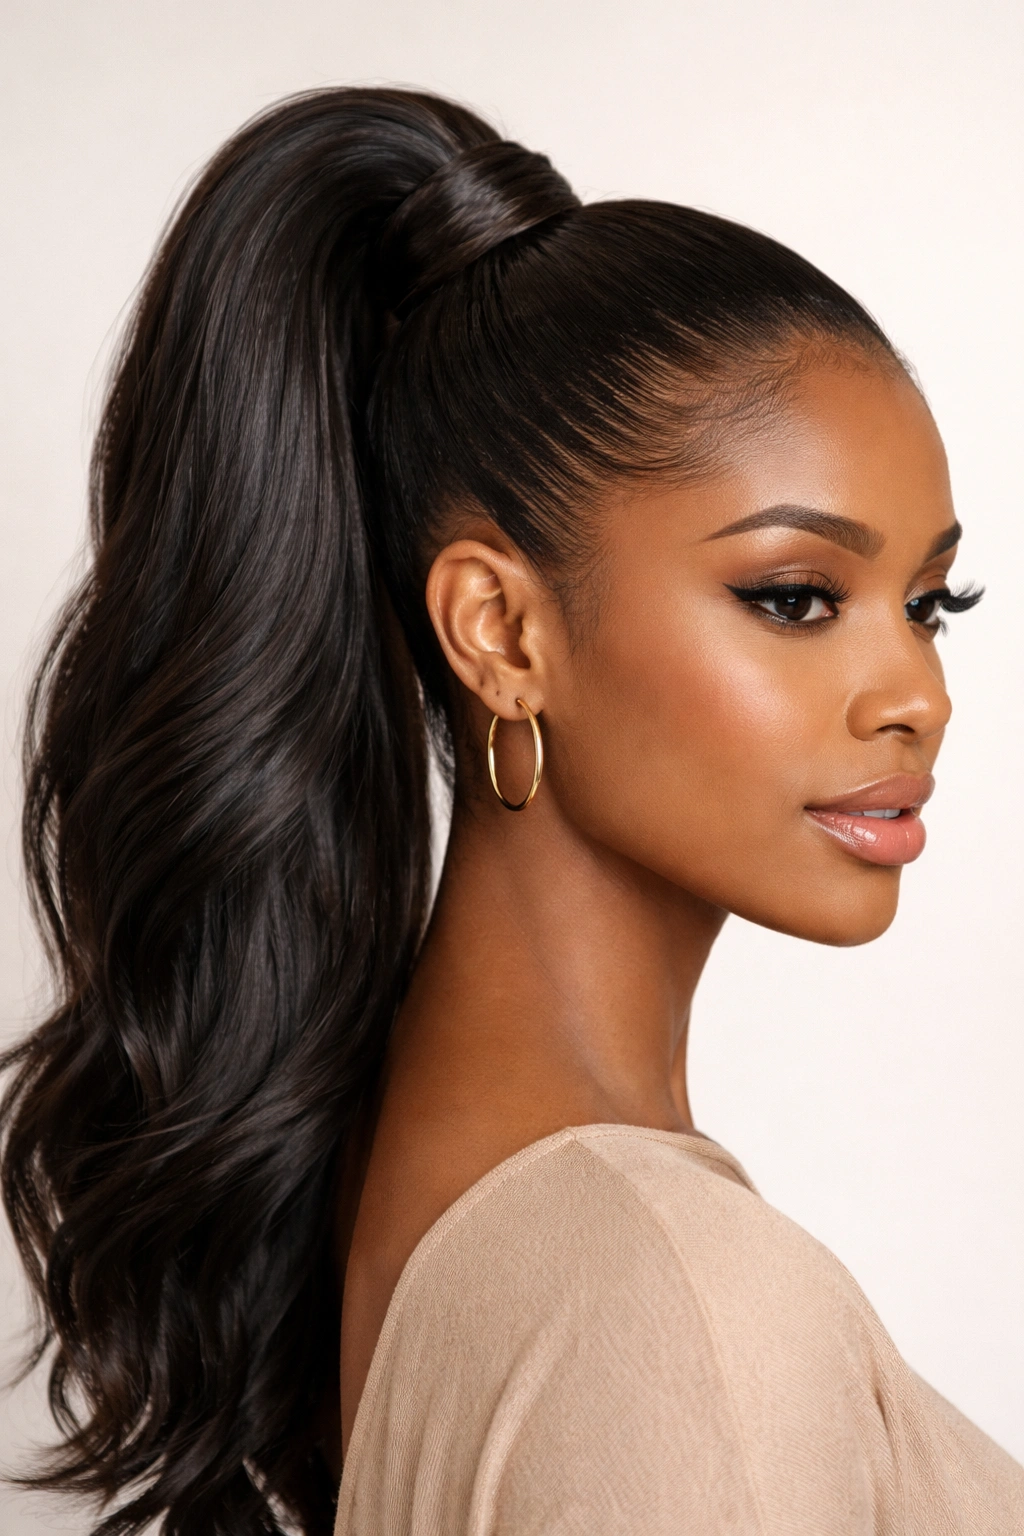
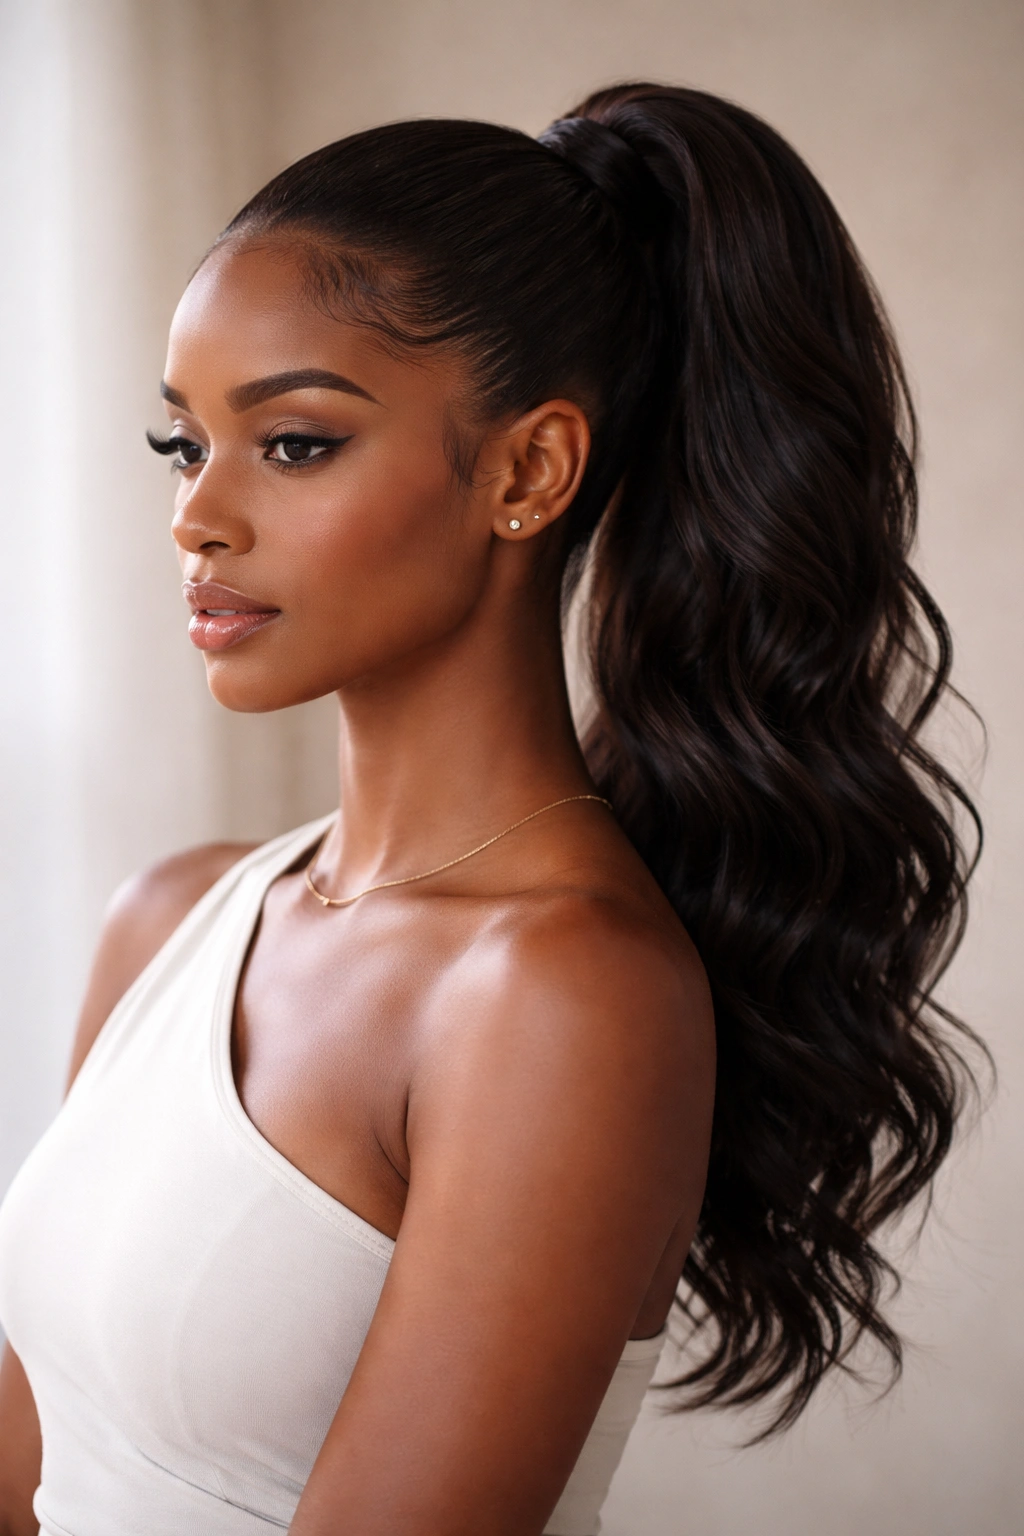
This is your go-to power move—a high ponytail that sits at the crown of your head, pulling everything back clean and tight while celebrating your natural curl or wave pattern. The elevated placement instantly lifts your face, elongates your neck, and screams confidence. What makes this version special is that you’re not fighting your texture; you’re enhancing it. Your coils, waves, or curls get to shine fully in the tail itself while the front stays smooth and sculpted.
How to Create That Polished Look
Start with a base of moisturized hair—apply a leave-in conditioner or light oil to keep everything hydrated. Using a fine-tooth comb or your fingers, smooth the front sections, side parts, and crown area down toward where you want your ponytail base to sit. The tighter your grip here, the sleeker your finish. Once you’ve secured the base with a strong elastic, gently smooth any flyaways with a finishing gel or edge control cream. Don’t aim for absolute flatness unless that’s your specific vision; a little texture can actually look more intentional and modern.
Why This Works for Everyday Styling
- Creates an instantly polished silhouette that works from casual to professional settings
- Protects most of your hair while letting your texture be the star of the show
- Surprisingly quick to style once you have the base down
- Works beautifully with your natural curl pattern, coils, or waves without requiring heat styling
- Excellent for extending your wash day—refresh your edges with edge control and you’re good for days
Pro tip: Apply a light oil or curl-defining cream to the ponytail itself before you style it. This adds shine, reduces frizz, and keeps your curls or coils looking defined throughout the day.
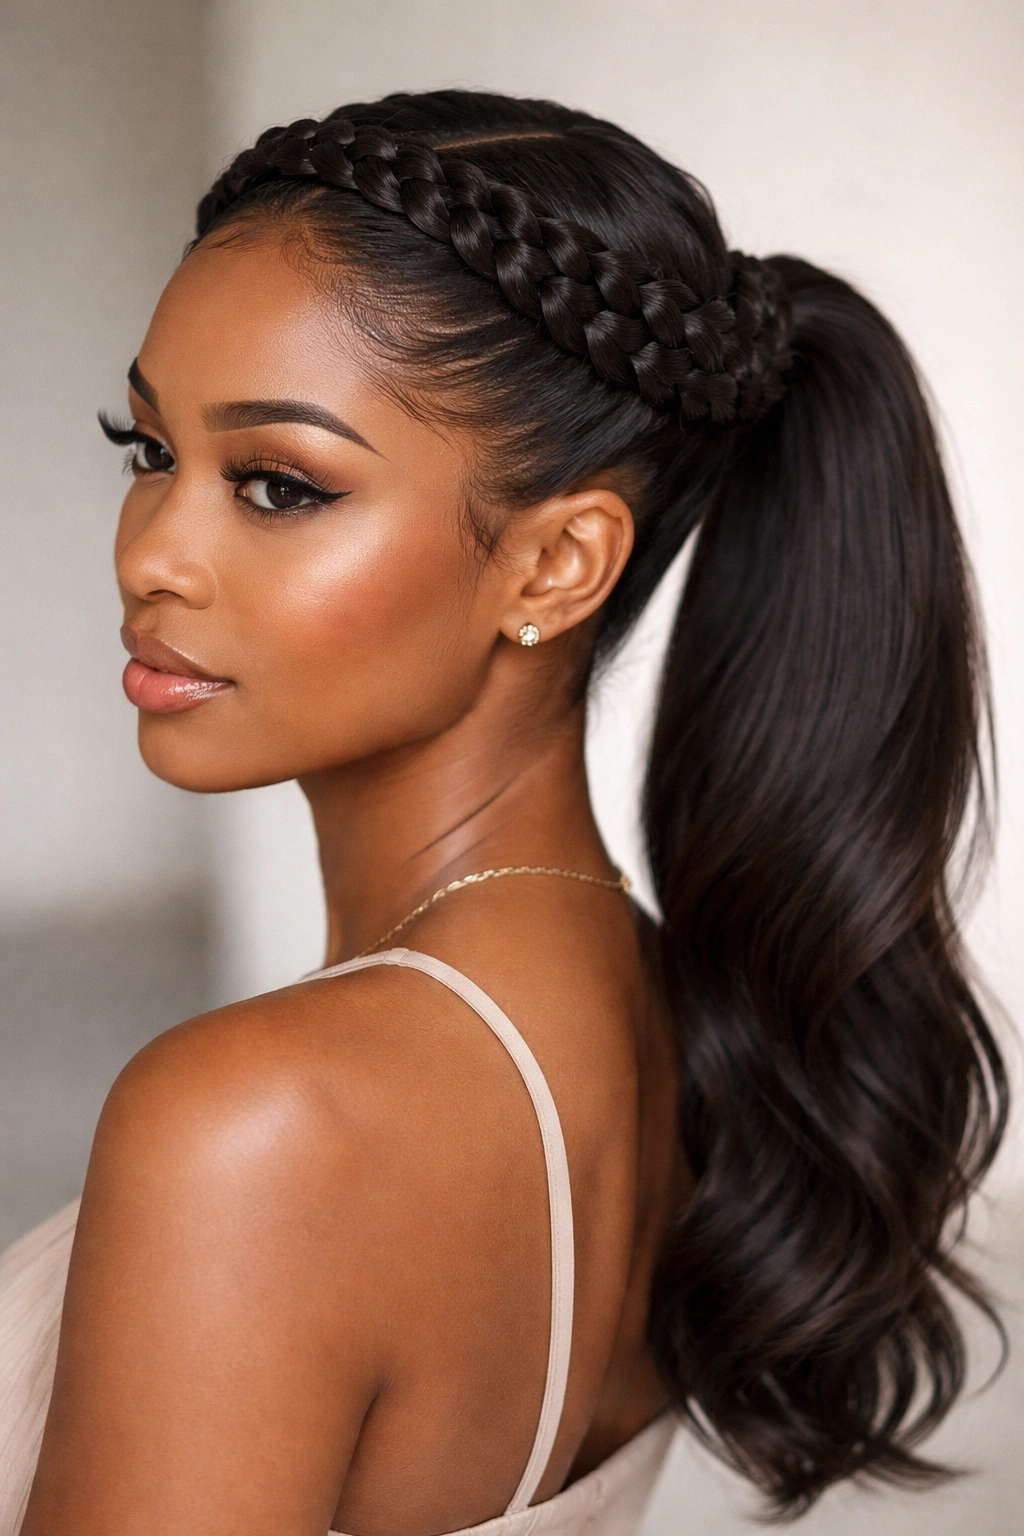
2. Braided Crown Updo Ponytail
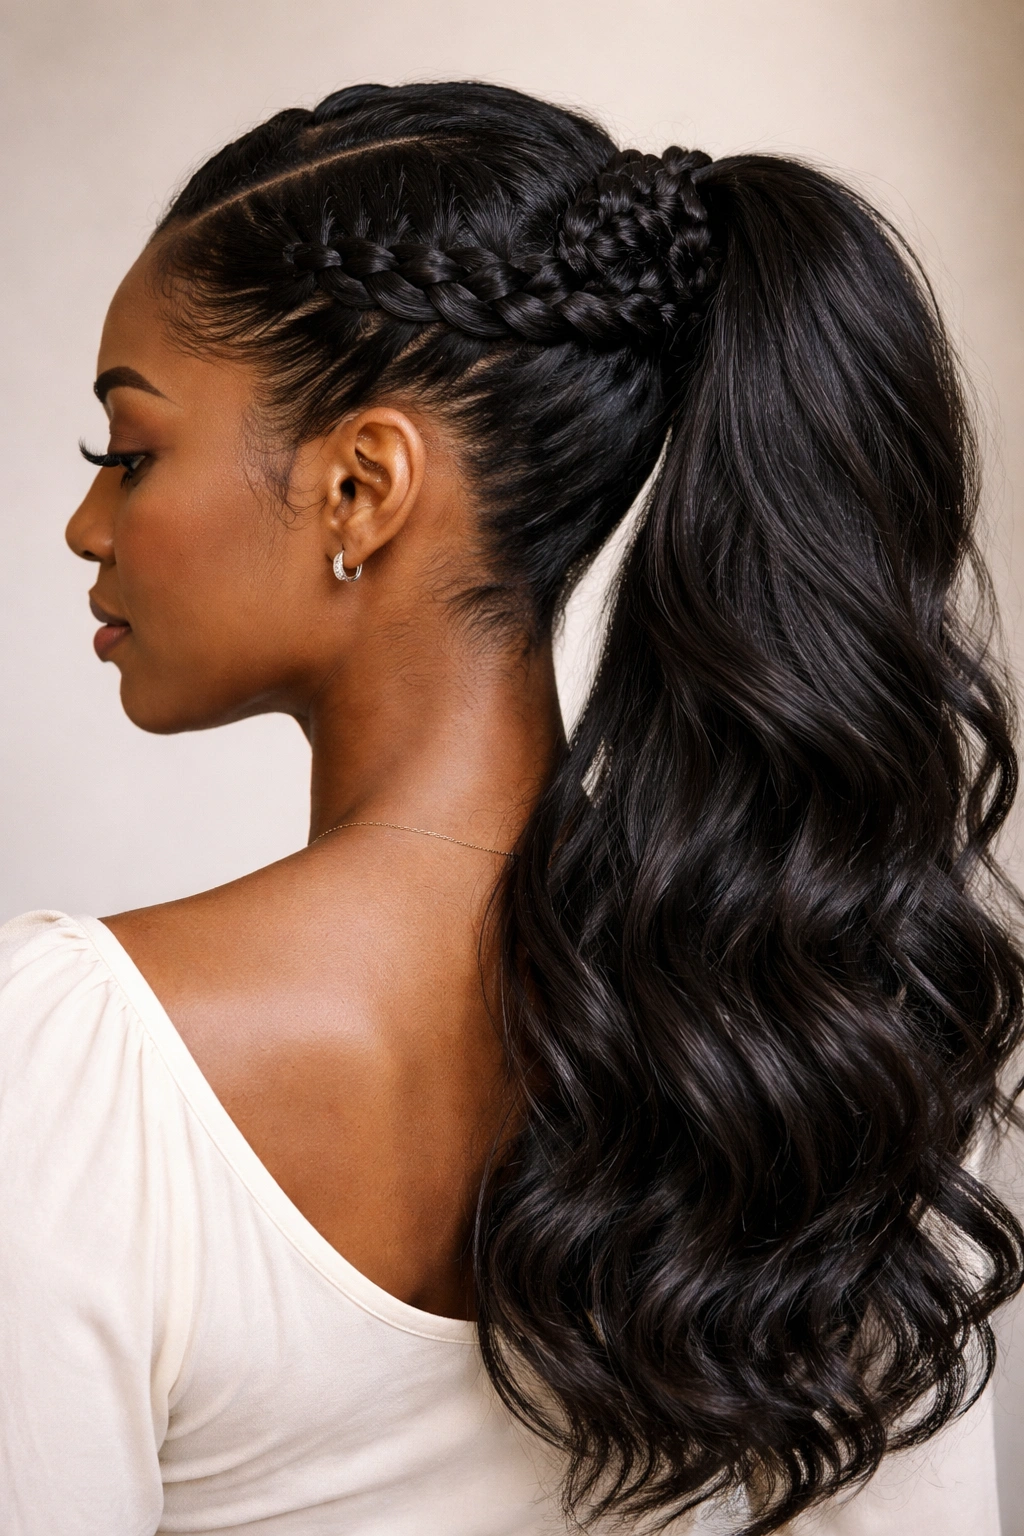
This style combines intricate braiding with a high ponytail, creating a romantic, detailed look that turns heads. You’re essentially creating a decorative crown around the back of your head using two or more braids, then securing the rest of your hair into a ponytail at the base where those braids meet. It’s the kind of style that looks like you spent hours on it, but once you get the technique down, it’s surprisingly efficient.
Mastering the Crown Braid Technique
Part your hair down the middle or on one side—this is your foundation. Take a small section at one ear and begin a three-strand braid moving toward the opposite side. The trick is to braid fairly close to the scalp and to keep the braid relatively loose so it reads as soft and intentional rather than tight and severe. Some people do a single braid across the back; others do two symmetrical braids. Both look stunning. Once your braid (or braids) are complete, twist or braid the remaining hair into your ponytail base and secure everything with a strong elastic.
Elements That Make This Style Stand Out
- The braiding adds textural interest and dimension that pure sleekness can’t match
- It’s sophisticated enough for weddings, date nights, or professional events
- The crown placement is incredibly flattering for different face shapes
- You can incorporate hair accessories like cuffs or clips where braids meet the ponytail
- Works with natural texture, two-strand twists, or even straightened hair
Worth knowing: If your braids feel too tight the first time, practice loosening them slightly. You want them secure enough to hold throughout the day, but loose enough that they look graceful and don’t pull uncomfortably on your hairline.
3. Twisted Wrap High Ponytail
Two-strand twists wrapped around the base of your ponytail create visual interest and dimension while looking incredibly polished. Instead of a simple elastic, you’re using your own hair twisted around the base to create a chic, finished look. This style works whether your twists are fresh and separated or a few days old with texture. The wrapped base elevates even the most casual ponytail into something intentional and styled.
Building Your Twisted Base
Gather your hair into a high ponytail and secure it loosely with an elastic first. Then, take a thin section of hair from the underside or back of the ponytail and split it into two strands. Twist these two strands around each other tightly, wrapping the twist around the ponytail base like you’re wrapping a ribbon around a present. Secure the end of the twist with a bobby pin underneath the ponytail where it won’t show. Do this once, twice, or three times around the base depending on how thick your sections are and how much coverage you want. The result is a polished, finished base that looks intentional and fashion-forward.
Why the Wrapped Base Makes a Difference
- Completely hides the elastic and creates a seamless, finished appearance
- Adds visual texture and dimension without extra styling time
- Can be done with sections from your ponytail or with additional hair if you want maximum coverage
- Works beautifully with different hair densities and textures
- Instantly elevates a simple high ponytail into something that looks salon-done
Insider note: If you’re worried about the wrapped section coming loose, lightly mist it with hairspray before pinning. This keeps the twist secure without making your hair feel crunchy.
4. Low Wrapped Ponytail with Baby Hairs
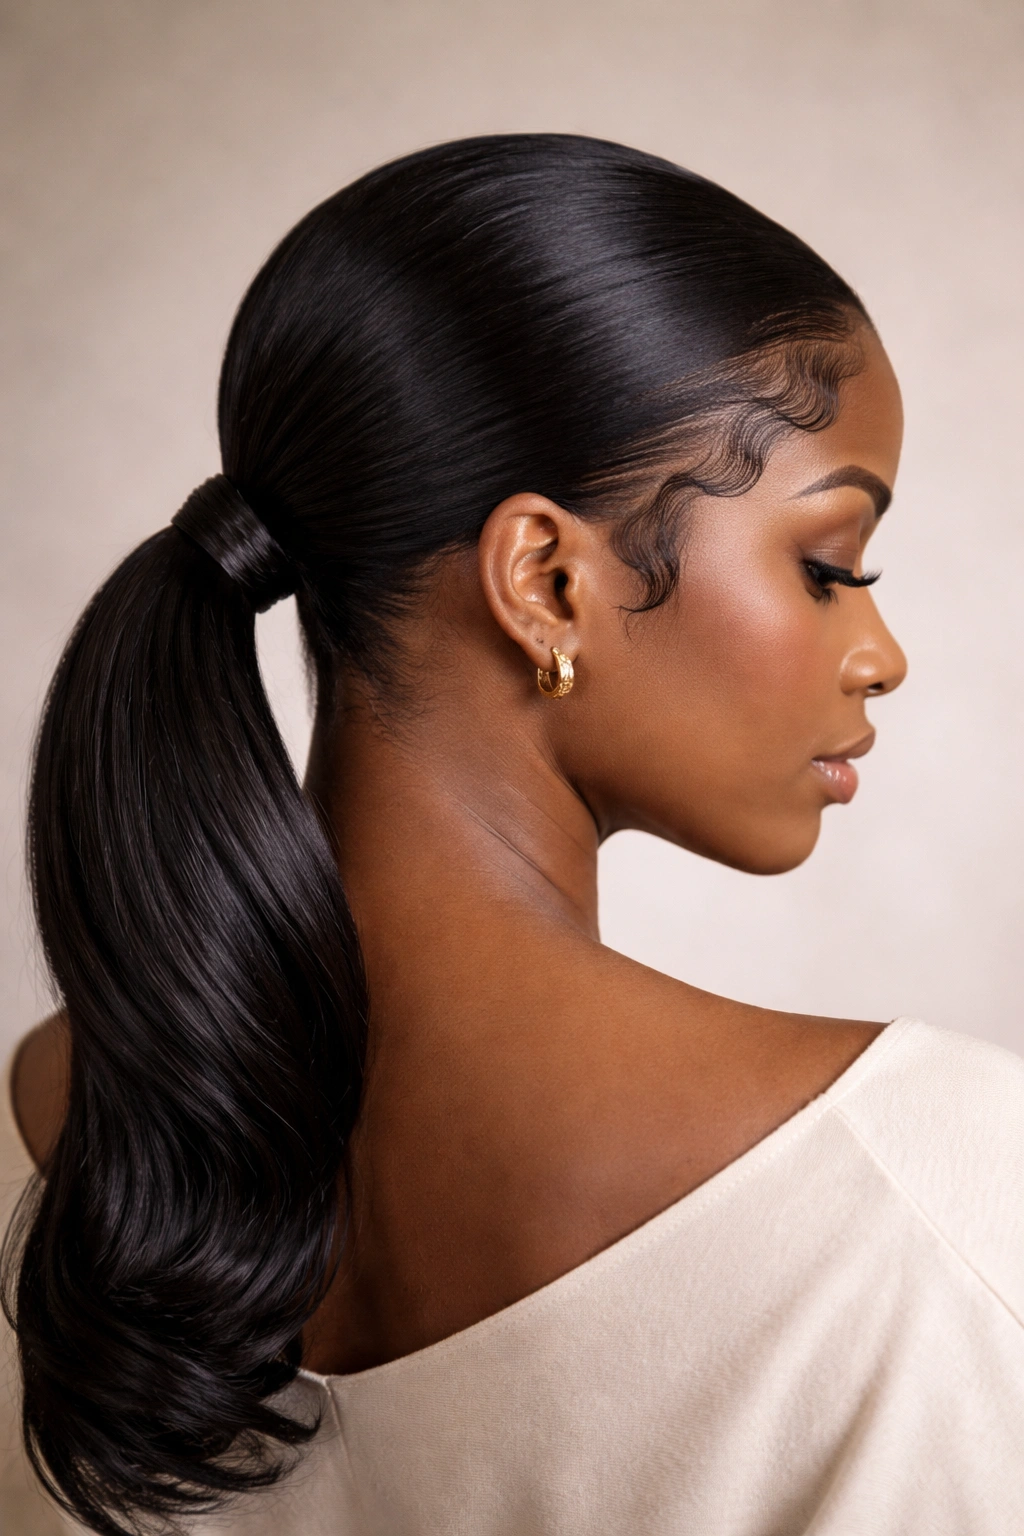
There’s something undeniably elegant about a low ponytail positioned at the nape of your neck, especially when it’s paired with smooth, defined baby hairs framing your hairline. This style reads sophisticated and modern while being surprisingly easy to maintain. The lower placement also means less tension on your hairline, making it a gentler option if you’re protective of your edges or dealing with any hairline sensitivity.
Perfecting Your Low Placement and Edge Control
Gather your hair at the nape of your neck—aim for a spot where your two ear lobes would meet if you drew a line across the back of your head. This is your sweet spot for a truly low ponytail. Smooth everything back securely but without pulling hard at your hairline. Now for the baby hairs: use a fine-tooth comb or even a toothbrush to smooth them, then apply edge control cream in the direction you want them to lay. You can create a sleek pattern framing your face, define individual curls, or do whatever makes you feel most beautiful. The key is intentionality—these framing hairs should look purposeful, not accidental.
The Versatility of a Low Ponytail
- Can be dressed up for formal events or worn casually on a regular day
- Gentler on your hairline than high ponytails, especially if you have sensitivity
- Pairs beautifully with statement earrings since your neck and ears are more visible
- Works across different hair lengths and textures
- The low placement naturally showcases your face and features
Quick pro tip: Let your edge control dry for a minute or two before styling your baby hairs. It’ll hold better and give you more control over where those hairs fall.
5. Bubble Ponytail Updo
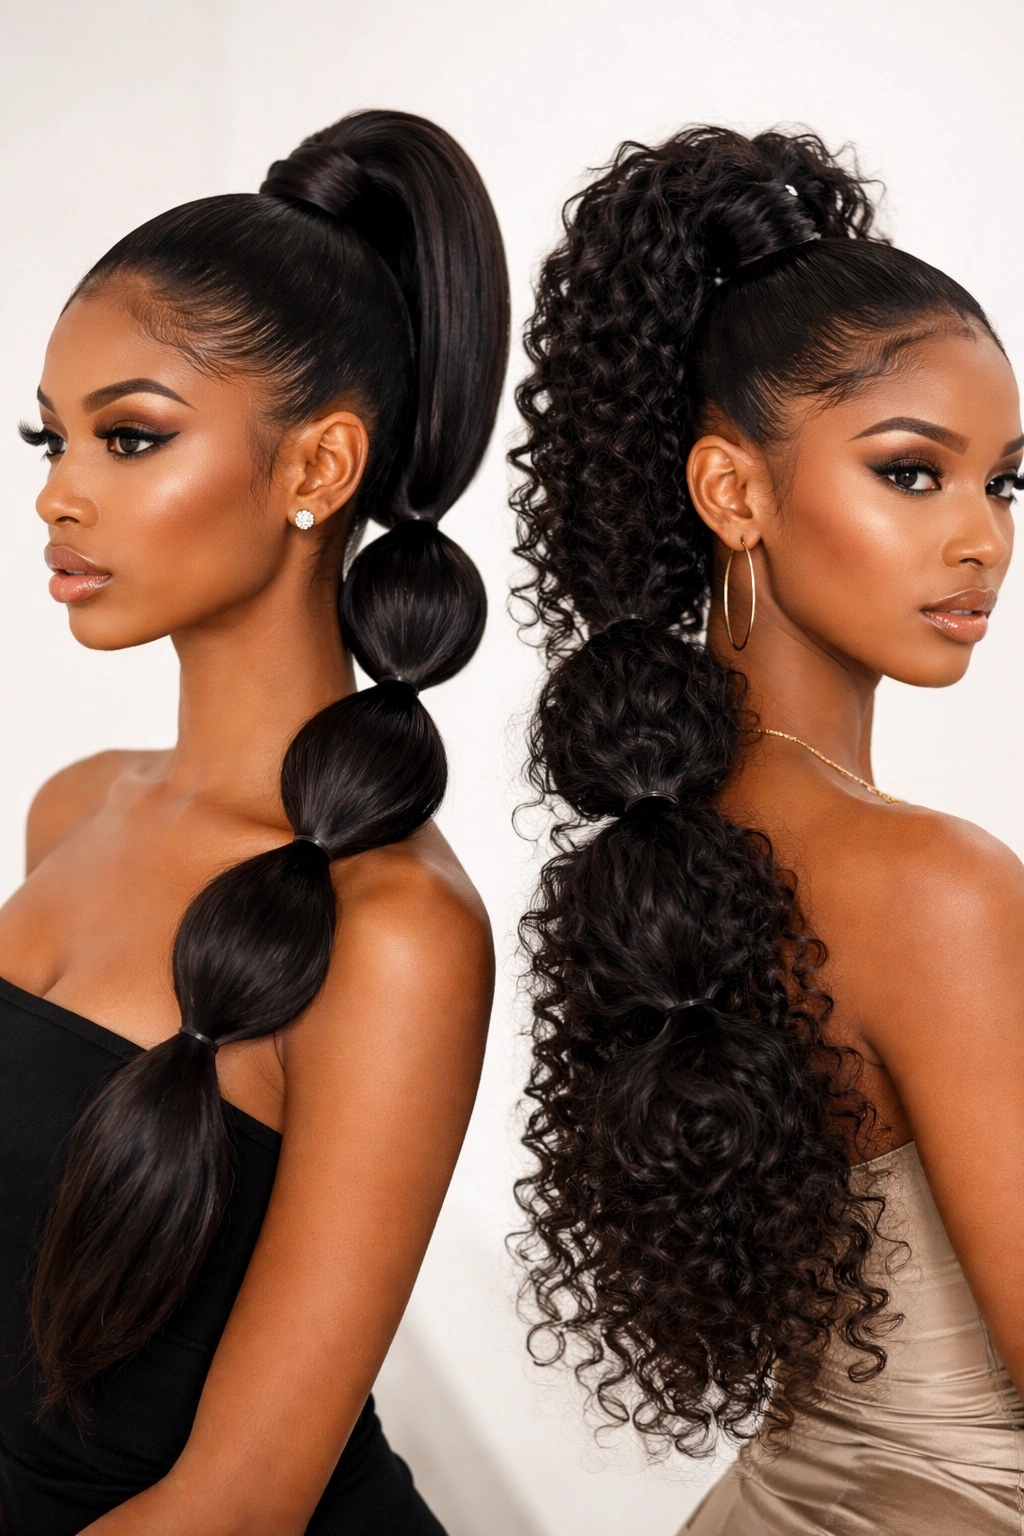
The bubble ponytail is playful, trendy, and surprisingly easy to execute. You’re essentially creating stacked sections within your ponytail using multiple elastics, making each section “bubble” out with texture. It works beautifully on straightened hair, but it’s equally stunning on natural curls or coils—each texture reads differently and equally gorgeous. This style is perfect when you want something that feels a bit more fashion-forward and less corporate.
Creating Your Bubble Sections
Start with a high or mid-height ponytail secured with a clear elastic. Now, take a second elastic and place it about two inches down from your first elastic, essentially trapping a section of hair between the two elastics. Gently push the hair between the elastics upward so it puffs out—this is your first bubble. Continue adding elastics every two to three inches down your ponytail, puffing out each section as you go. Depending on your hair length, you might create three, four, or five bubbles. Each one should be full and defined, not flat.
What Makes Bubble Ponytails So Appealing
- The stacked elastics create visual movement and dimension
- Easy to customize—use fewer, larger bubbles for a subtle look or many small bubbles for more drama
- Works beautifully as a statement style for social events, parties, or just when you want to feel extra
- Can incorporate colorful elastics for an even bolder statement
- The texture works with both smooth and textured hair for different effects
Styling wisdom: Clear elastics look less visible than colored ones, but if you’re using colored elastics intentionally as part of your design, stack them symmetrically for a polished look. The asymmetry can work, but it needs to feel intentional.
6. Halo Braid Ponytail
Imagine a braid that circles around your entire head like a crown, with a ponytail hanging freely below—that’s your halo braid ponytail. This style is romantic, intricate, and absolutely shows that you put thought and care into your styling. The halo creates a soft, ethereal frame for your face while the ponytail hangs long and free beneath it. It’s stunning for special occasions, photo days, or whenever you want to feel particularly put-together.
Executing the Halo Braid Technique
Start by sectioning off a small triangle of hair at the front of your head—this is your starting point. Begin braiding at one temple area, taking three strands and crossing them over each other while gradually incorporating more hair as you braid. Your goal is to braid around the back of your head like you’re creating a halo, eventually meeting up where you started. Once your halo braid is complete, gather all remaining hair into a ponytail at the nape of your neck and secure it with an elastic. You can tuck the loose end of your halo braid into the ponytail base or leave it slightly visible for a softer look.
Why Halo Braids Look So Striking
- Creates a complete, intentional frame around your face and head
- The contrast between the detailed braid and the flowing ponytail is visually stunning
- Genuinely romantic and sophisticated—perfect for weddings, date nights, or formal events
- Works beautifully on different hair textures, from coils to straight hair
- Takes patience to master but becomes easier with practice
Pro tip: Practice this style first on a day when you don’t have time pressure. Once you do it a few times, you’ll develop muscle memory and it becomes much faster. Don’t expect perfection on your first attempt—halos are a technique that improves with repetition.
7. Curved Ponytail with Clip
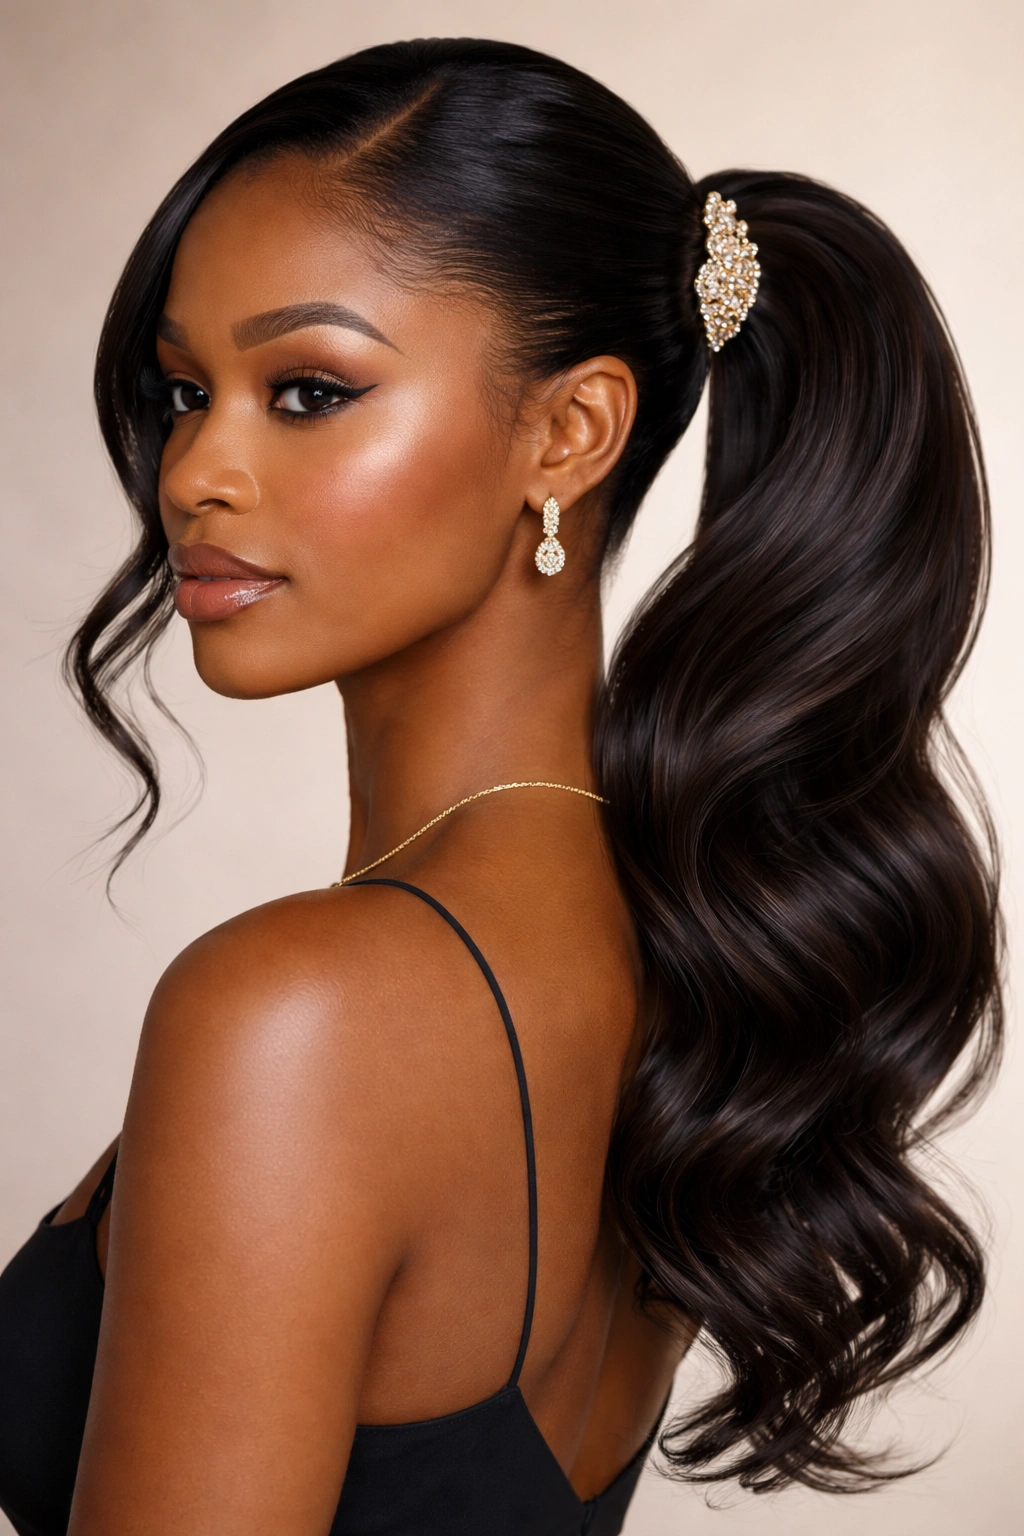
A curved or sculpted ponytail placement—where your ponytail sits slightly off to one side or curves gently rather than sitting perfectly centered—paired with a beautiful clip creates a modern, editorial look. This style works especially well if you want to show off an interesting clip or brooch. The curve gives you movement and visual interest while the clip adds a finishing touch that elevates the entire style.
Positioning Your Curved Ponytail
Instead of gathering your hair straight back into a centered ponytail, angle it slightly—maybe to one side or pulled back at a gentle diagonal. Secure it with an elastic, then take a decorative clip (a metal cuff, a claw clip, a gold geometric piece, whatever speaks to your style) and position it around the base of your ponytail to hide the elastic and add that editorial polish. The clip becomes a design element, not an afterthought. You can position it at the very base where the elastic is, or slide it slightly down the ponytail for a different visual effect.
Styling Elements That Make This Work
- The curved placement feels modern and intentional, not like a default centered ponytail
- A beautiful clip instantly transforms the look from simple to styled
- Gives you a way to add jewelry-like elements to your hair styling
- Works beautifully with both casual and formal outfits depending on your clip choice
- Creates visual asymmetry that reads as contemporary and fashion-conscious
Worth noting: Heavier clips can slide down over time, so position yours slightly higher than you think you want it. As it drifts throughout the day, it’ll land where you originally intended.
8. Flat Twisted Ponytail
Flat twists are a protective styling staple, and when you incorporate them into a ponytail updo, you get both protective benefits and a gorgeous, intricate look. Instead of regular braids, you’re creating two-strand twists that sit flat against your scalp, leading back to a ponytail. The twists add texture and visual interest while keeping your edges smooth and defined. This style works beautifully on natural hair and is gentler than some other updo options.
Creating Flat Twists Leading to Your Ponytail
Part your hair down the middle or on one side to create your base pattern. Starting at one side of your hairline, take two thin strands of hair and twist them around each other while simultaneously bringing them back toward where you want your ponytail base to sit. Feed new hair into each strand as you twist backward, much like you would with a flat braid. Your goal is to keep these twists lying flat against your scalp. Once you’ve twisted back to your ponytail point, release those two strands and add them to your ponytail base. Repeat on the other side. Secure the whole ponytail together with an elastic.
The Protective and Aesthetic Benefits
- Flat twists are gentler on your hairline than some other updo styles
- They provide protective styling while still looking intentional and beautiful
- The twists add texture and visual interest throughout the entire updo
- Works on different hair densities and is excellent for natural hair
- The style holds well throughout the day without constant re-smoothing
Insider secret: If your twists feel uneven the first time, keep practicing. The tension and angle take practice to master, but once you nail it, flat twists become one of your go-to quick styles.
9. Side Swept Ponytail Updo
This style pivots away from centered ponytails entirely, creating a dramatic, fashion-forward look where your ponytail starts at one side and sweeps across the back of your head. It’s asymmetrical, it’s chic, and it feels editorial. The side placement means more of your neck and one side of your face are exposed, which is actually flattering for many face shapes. It’s the kind of style that photographs beautifully.
Achieving a Perfect Side Sweep
Create a deep side part—really dramatic, not subtle. Smooth the hair from that side back and around, gathering it at a point on the opposite side of your head, creating a gentle sweep across the back. Your ponytail base might sit behind your opposite ear rather than at the nape of your neck. Secure it with a strong elastic and smooth the front sections. You can leave the swept hair relatively loose and textured, or smooth it sleek—both look stunning. Some people add a braid along the sweep path for additional detail; others keep it simple. The key is that your ponytail positioning creates visual movement from one side of your head to the other.
Why This Asymmetrical Style Works So Well
- The asymmetry reads as intentional and modern, not accidental
- Exposes more of your neck and one side of your face, which is flattering
- Works beautifully for photo moments and special events
- Photograph differently than centered styles, creating visual interest
- Pairs beautifully with statement earrings on your exposed ear
Pro tip: If your hair doesn’t naturally want to stay swept, use a light hairspray along the sweep path. This keeps everything in place without making your hair feel stiff.
10. Puffed Top Ponytail
This style creates volume and texture at the crown with a smooth, polished ponytail flowing from below. You’re essentially doing a mini puff at the very top of your head, then gathering everything into a ponytail from that puff point downward. It works beautifully on natural textured hair and creates a look that feels both modern and protective—the puff showcases your texture while the ponytail keeps everything secure and tidy.
Building Your Textured Crown
Gather the hair at the very top of your head—just the crown section—and secure it loosely with an elastic. Gently tease and fluff this section to create volume and texture; you’re not going for tight, you’re going for full and defined. Once you have your puffed crown, take all the remaining hair (including the hair from that puffed section) and gather it lower, usually at the nape or mid-back, creating your main ponytail base. Secure this with another elastic. You now have your puffed top sitting above your ponytail, creating a two-level silhouette.
The Appeal of the Puffed Crown
- Creates beautiful volume at the crown, which is flattering for most face shapes
- Showcases your natural texture in an intentional, styled way
- The two-level effect is visually interesting and modern
- Protects your ends while keeping your crown texture visible and celebrated
- Works beautifully with different curl patterns and hair densities
Quick note: The tightness of your puff affects how defined it looks. Looser puffs feel softer and more natural; tighter puffs look more sculpted and intentional. Choose based on the vibe you’re going for.
11. Goddess Braided Ponytail
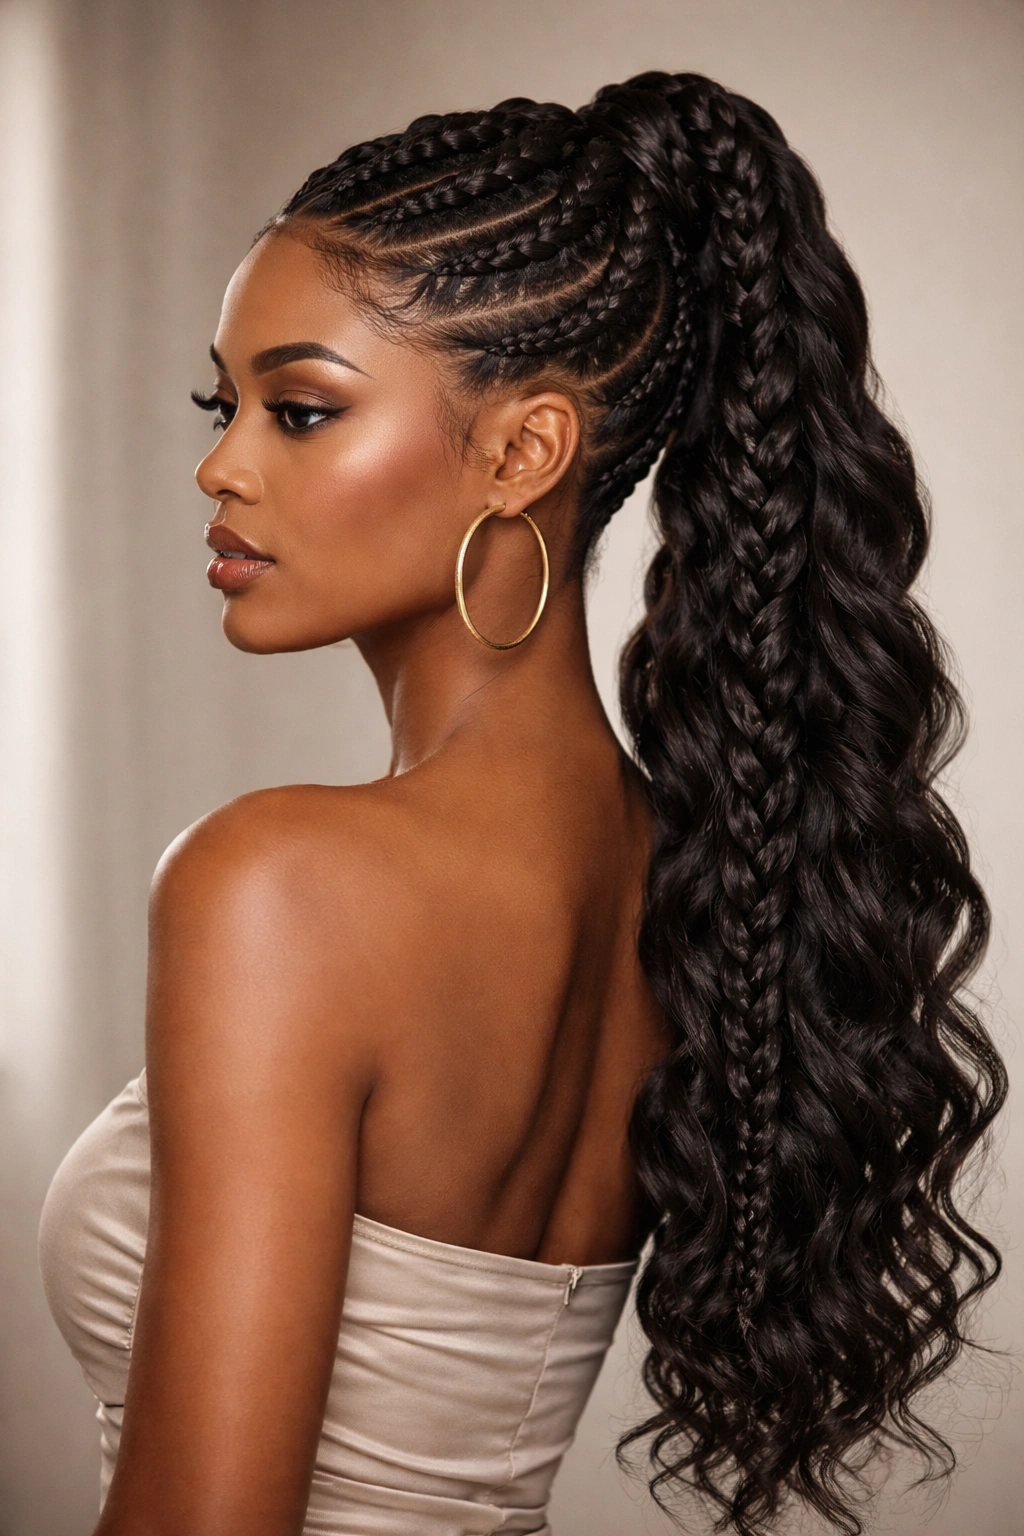
This is the updo ponytail for when you want maximum impact and intricate detail. You’re creating one or more thick, luxurious braids that flow from your scalp down into your ponytail. The braids are meant to be seen—they’re not hidden underneath; they’re a featured element of the entire style. Think goddess, think glamorous, think like you’ve been styled by a professional. This style works beautifully on longer hair and makes a serious statement.
Creating Your Goddess Braids
Rather than starting braids at the hairline and working backward like you might with cornrows, you’re creating thicker, more dimensional braids that start at or near the crown and flow downward. You might do a single thick braid down the center back, or two symmetrical braids flanking the sides, or even multiple smaller goddess braids woven together. The braids are loose enough to read as soft and luxurious, not tight and severe. As you reach the nape of your neck, release the braid ends and gather all of your hair into a ponytail, either tucking the braid ends into the ponytail or letting them blend seamlessly.
Elements That Make This Style Goddess-Level
- The braids are dramatic, visible, and undeniably the feature of the look
- Works beautifully with longer hair and creates obvious visual impact
- Perfect for special events, performances, or whenever you want to feel absolutely stunning
- Pairs beautifully with delicate jewelry or hair accessories
- The loose braids feel romantic and intentional rather than severe
Styling wisdom: Loose goddess braids hold better when your hair has a bit of product in it—try a light mousse, curl cream, or leave-in conditioner. This gives the braids something to grip and keeps them looking defined.
12. Sleek Bun-Style Ponytail
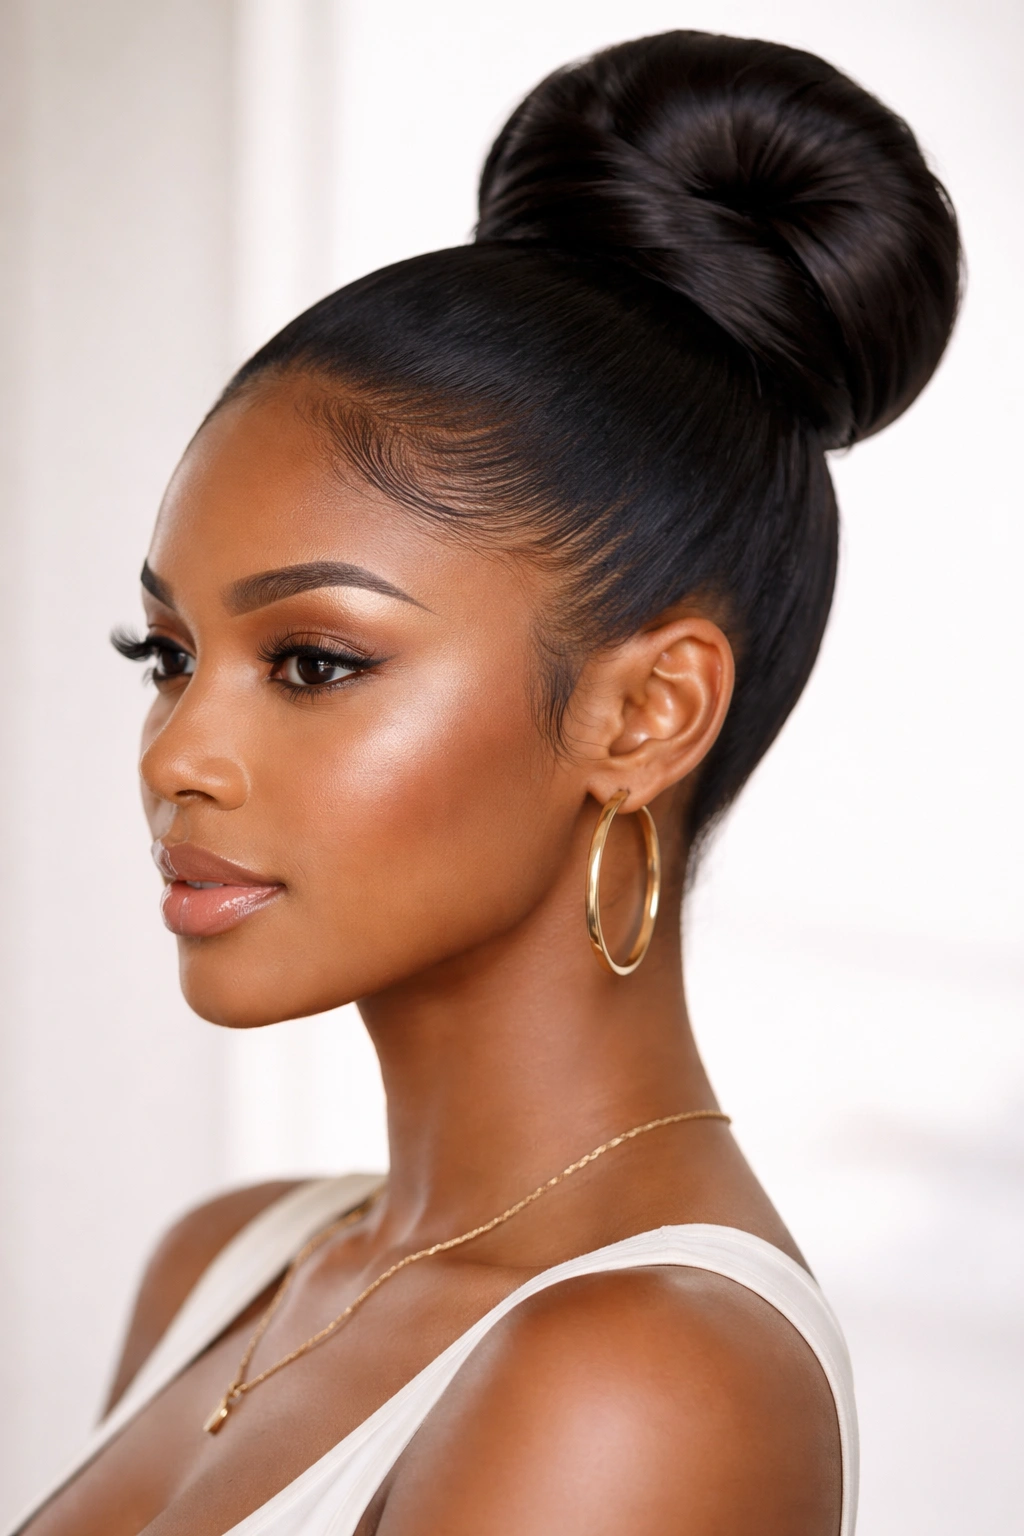
This style takes your high ponytail and wraps it into a bun at the very crown of your head, creating an elevated, polished look that’s perfect for professional settings, formal events, or when you simply want to feel put-together. Unlike traditional buns that sit at the back of your head, this bun-style ponytail sits higher, creating a more sculpted, intentional silhouette. It’s sleek, it’s sophisticated, and it’s surprisingly easy to execute.
Building Your Crown Bun
Gather your hair into a high ponytail at the crown of your head and secure it with a strong elastic. Now, take that ponytail and gently twist it, or if you prefer, braid it loosely. Once twisted or braided, wrap it around the base of your ponytail to create a bun shape, securing the ends with bobby pins. You can keep this very sleek and tight, or leave it slightly textured for a softer feel. Some people prefer wrapping without twisting first, which creates a slightly puffier, more relaxed bun. Others love the definition that comes from a pre-twisted wrap.
Why This Bun-Ponytail Hybrid Works Beautifully
- Incredibly polished and professional—perfect for work or formal events
- Keeps all your hair secured and off your face completely
- The high crown placement is flattering and elongating
- Quick to execute once you have the technique down
- Works with different hair lengths and textures
Worth knowing: If your ponytail feels too short to wrap into a bun, use a hair donut or padding underneath to create the bun shape. You can hide this completely inside your wrapped hair for a fuller-looking bun.
Tips and Tricks for Mastering Your Updo Ponytail Game
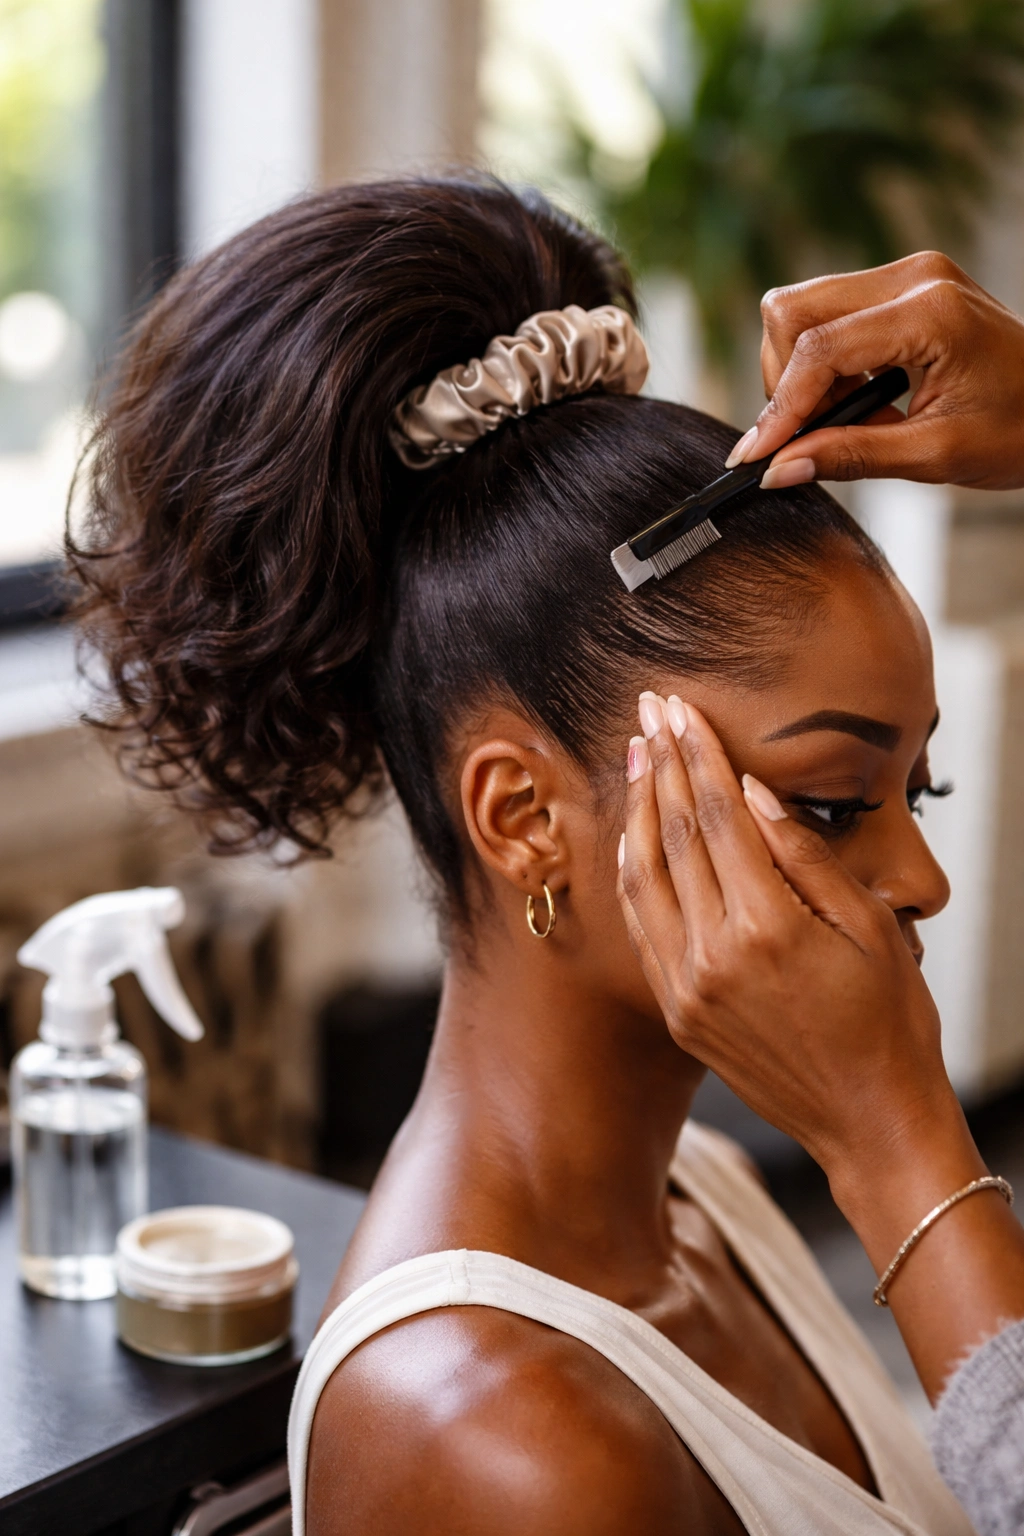
The difference between an okay updo ponytail and a stunning one often comes down to a few key details that seem small but make enormous impact. First, start with clean, moisturized hair—this foundation matters more than you’d think. Your edges behave differently when your hair is hydrated, elastics hold better, and your overall style looks fresher. That doesn’t mean you need to wash your hair immediately before styling; you can use a light spray bottle to dampen your hair and refresh it even days after washing.
Second, invest in quality elastics. Cheap elastics snag your hair, create breakage, and loosen throughout the day. Look for silk or satin-covered elastics designed specifically for textured hair, or even better, seamless elastics that won’t create creases. You’ll notice an immediate difference in how your ponytails look and feel.
Third, master the art of edge control. A polished updo ponytail lives or dies by your edges. Keep your baby hairs smooth and defined, using whatever edge control product works best with your hair—whether that’s a gel, cream, or butter. Apply it intentionally, let it dry for a moment, then style. This transforms your entire look from “casual” to “I got dressed on purpose.”
Fourth, don’t skip the finishing spray. Once your updo is complete, lightly mist it with hairspray to set everything in place. This prevents flyaways, keeps your ponytail looking fresh throughout the day, and means you’re not constantly re-smoothing throughout your hours. You want something light enough that your hair doesn’t feel crunchy, just enough to lock everything in.
Finally, practice makes perfect. Some of these styles might feel complicated the first time, but by your third or fourth attempt, they become second nature. Your hands learn the motions, you understand the tension that works best for your hair, and suddenly you’re creating styles that would’ve taken you an hour on day one in just fifteen minutes.
Final Thoughts
Updo ponytails are far more than just practical protective styling—they’re a way to express yourself, feel confident, and celebrate your hair on your own terms. Whether you’re reaching for a sleek high ponytail on a Monday morning or spending time perfecting a goddess braid for a special occasion, you’re engaging in an act of self-care and creativity. The styles in this guide give you options across the spectrum: from professional and minimal to intricate and statement-making, from gentle on your edges to proudly textured.
The real magic happens when you pick a style that resonates with how you’re feeling that day. Some days call for sleek and polished; other days you want maximum texture and detail. Some days you want to protect your hair while other days you want to celebrate it on full display. The fact that updo ponytails can do all of these things makes them an endlessly valuable addition to your styling rotation.
As you explore these styles, remember that your hair is unique to you. What works perfectly for your friend might need tweaking for your hair texture, density, or length. That’s not a problem; it’s an invitation to adapt and make these styles your own. Take inspiration from what you’ve read here, but then get creative with variations that work specifically for your hair and your lifestyle. That’s when your updo ponytail game becomes truly unstoppable.