A perfectly sleek ponytail is one of those hairstyles that looks effortlessly polished—until you realize exactly how much technique, product knowledge, and attention to detail actually goes into making it look that way. The difference between a sleek weave ponytail that sits flat against the scalp and one that bulges or frizzes isn’t magic; it’s the result of understanding your weave type, using the right tools, and following a deliberate process from start to finish.
If you’ve ever wondered how some people achieve that impossibly smooth, gravity-defying ponytail that lays perfectly flat without looking pulled too tight, you’re not alone. The secret lies in combining a few key techniques: proper weave preparation, precision hair smoothing methods, strategic product application, and styling choices that work with your weave texture rather than against it. Whether you’re rocking a full-coverage weave or a partial install, there’s a sleek ponytail style that will work with your hair and make you feel confident.
What makes weave ponytails different from natural-hair styles is that you’re working with hair that has already been trained to sit in a specific pattern, and the way the weave lays directly affects how the ponytail will look. A weave that hasn’t been properly maintained or that’s beginning to shift will create lumps and bumps that no amount of smoothing product can fix. That’s why understanding not just how to create each style, but why each technique matters, transforms you from someone who struggles with weave ponytails into someone who can create them consistently.
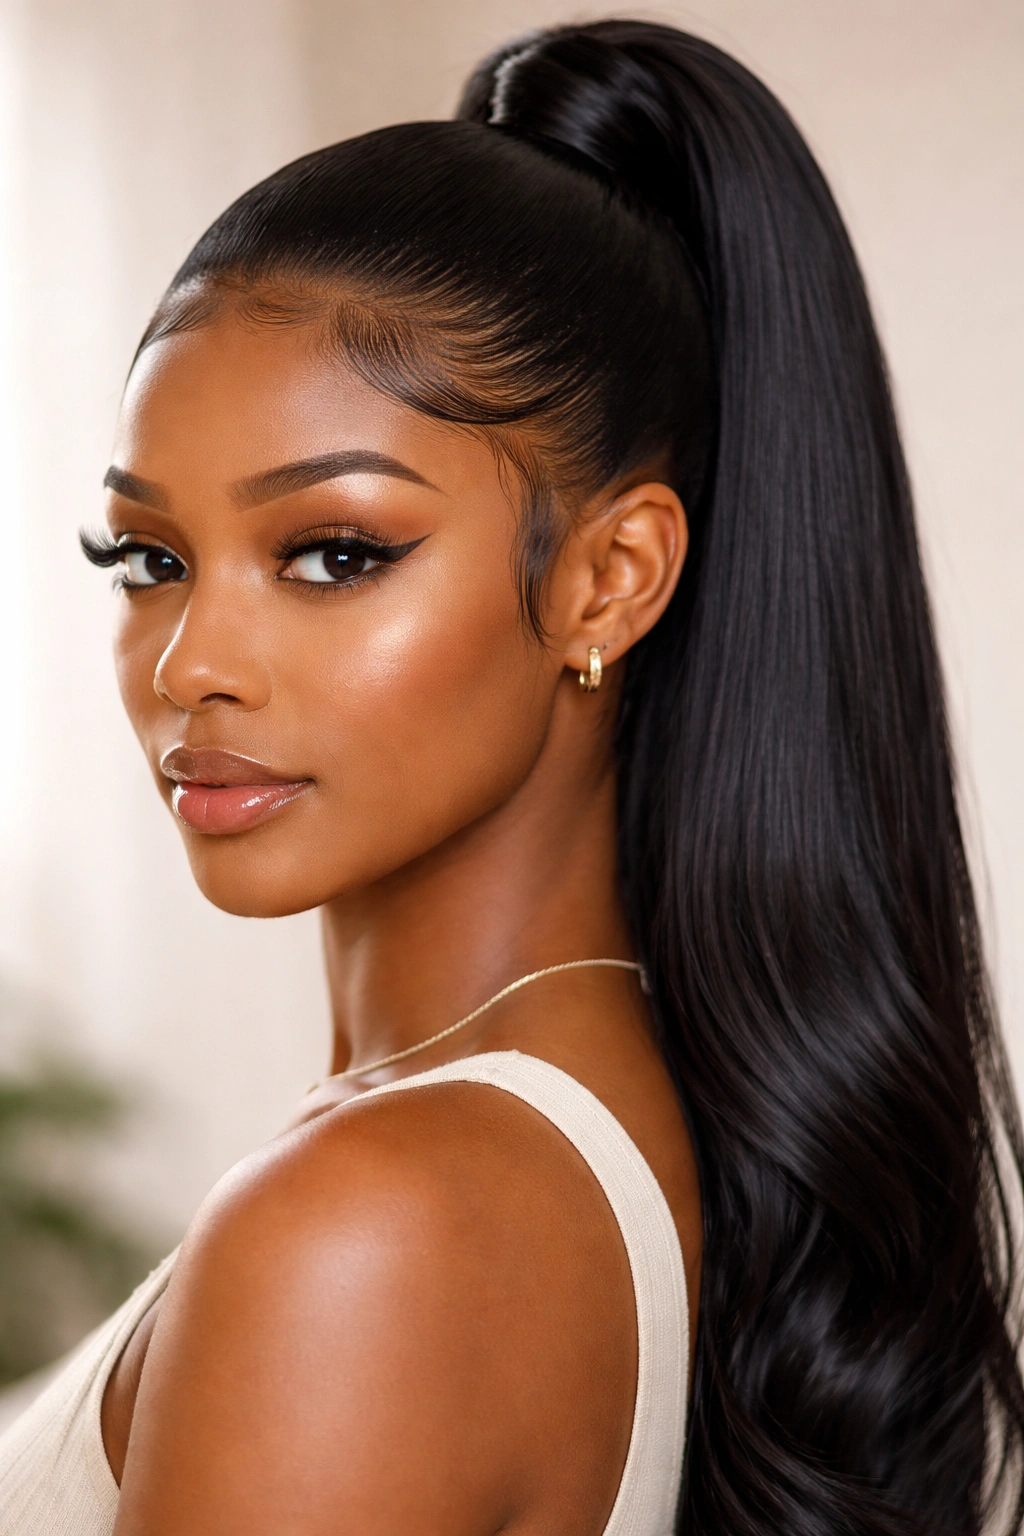
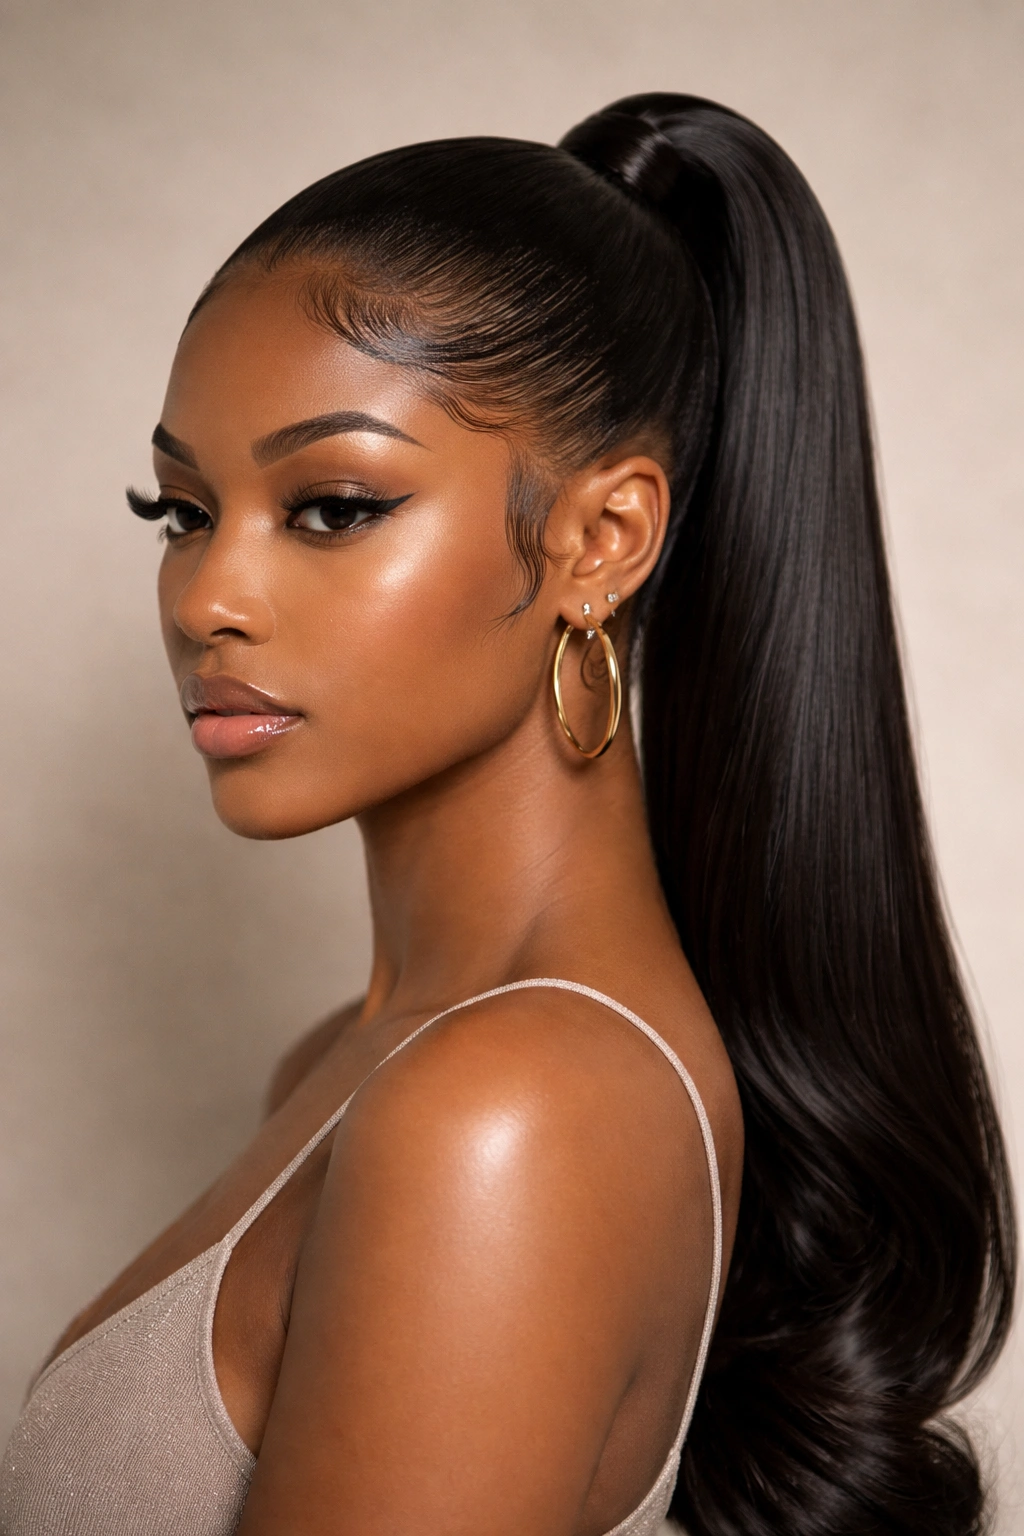
1. Classic High Sleek Weave Ponytail
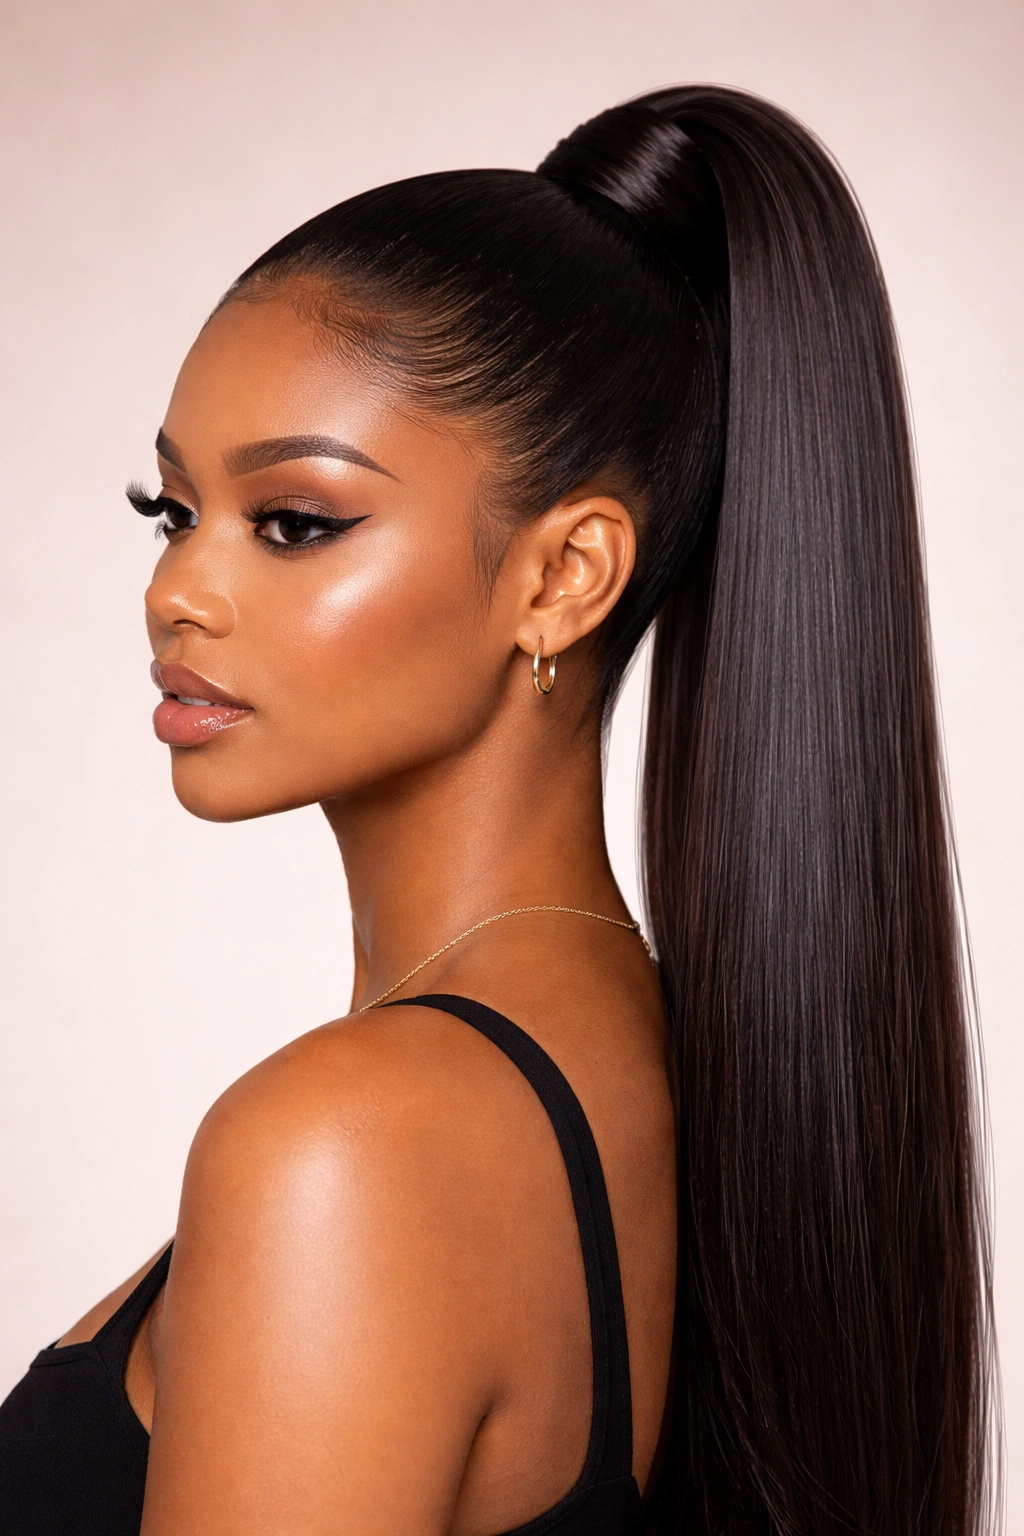
The classic high sleek ponytail is the foundation of polished hairstyling—it’s the style you see on everyone from professional athletes to corporate executives, and for good reason. This style pulls all your hair straight back and up, creating an elongated face shape and an undeniably elegant silhouette. The key to making it lay flat rather than poofing at the crown is in how you section, smooth, and secure the hair.
The Technique That Creates Zero Bumps
Start by sectioning your hair into four quadrants using a fine-tooth comb and clips to divide the scalp. Begin smoothing from the front hairline, working your way back toward the crown with a combination of smoothing cream and a brush. The crucial step most people skip is using a hard-hold gel on a fine-bristle brush to push the hair in the direction you’re combing, then immediately sealing it down with a smoothing iron set to a medium temperature. This two-step approach—gel plus heat—creates a flat, sleek base that won’t puff up throughout the day, even in humidity.
Once the entire scalp is smooth, gather all the hair at your desired height and secure with a small elastic. Wrap a small section of hair from the ponytail around the elastic to hide it, then bobby pin that wrapped section in place. This final detail is what transforms a basic ponytail into a polished style that looks intentional.
The Pro Setup
- Apply smoothing cream to damp hair and blow-dry while stretching the hair taut with a round brush
- Use a fine-tooth comb with hard-hold gel to lay the hair in the direction of your ponytail
- Follow with a smoothing iron on each section for a permanently flat result
- Use a small, seamless elastic to minimize bulk where the ponytail gathers
- Wrap and pin a 1-inch section from the ponytail around the elastic for a finished look
- Finish with a light hairspray to tame flyaways without creating buildup
This is the ponytail that works for any occasion, any face shape, and any age. It’s timeless precisely because it’s so clean and intentional.
2. Low Sleek Weave Ponytail with Hidden Hair Tie
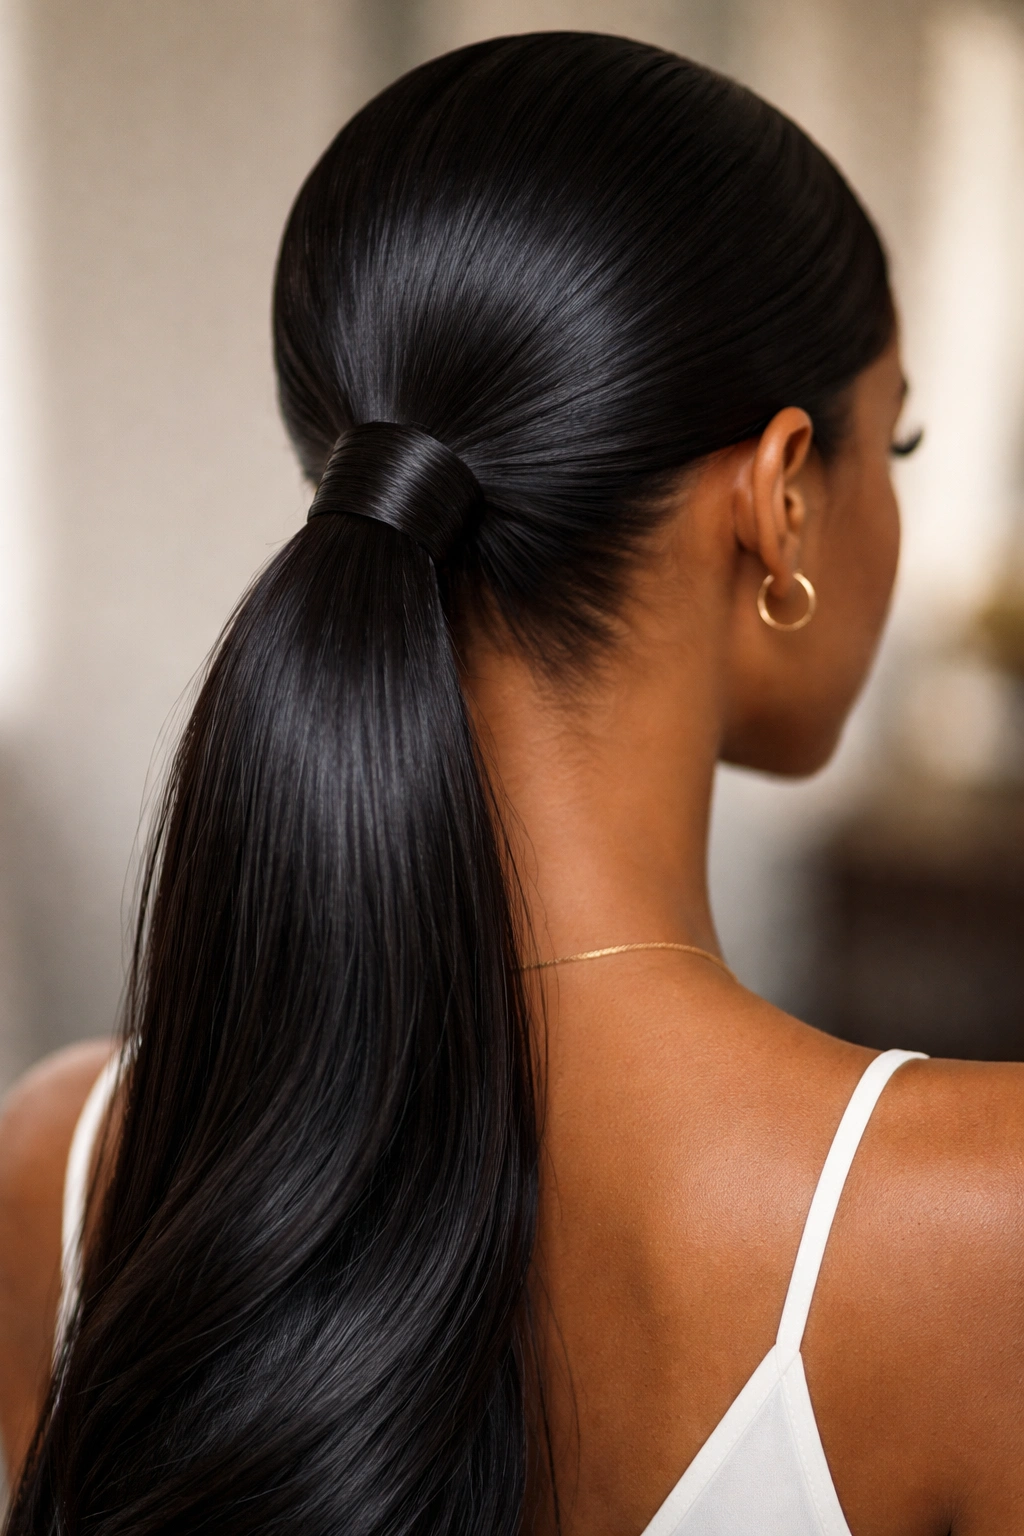
The low ponytail has an entirely different energy from the high ponytail—it feels sophisticated, relaxed, and intentionally curated rather than high-impact. Positioned at the nape of the neck, a low sleek ponytail becomes almost architectural when done correctly, creating clean lines that frame your face and draw attention upward. The hidden hair tie variation makes it feel even more refined, as if the ponytail is simply staying in place through sheer styling prowess rather than visible mechanics.
Building Invisibility Into Your Style
The secret to a low ponytail that lays flat is starting with an extremely sleek base that covers a larger area of the scalp. Rather than sectioning into four quadrants like a high ponytail, divide your hair into six sections for a low style, giving yourself more control over the sides and the back of the head separately. Smooth the front and sides first, applying smoothing cream and using your blow-dryer on a cool setting to set each section.
Once you’ve gathered the hair low, the hidden hair tie trick involves using a small, clear elastic that blends with your hair color, then covering it completely with a wrapped section. The wrapped section should be thick enough—at least 1.5 inches—that it fully obscures the elastic when you’re viewing the style from any angle. Pin the wrapped section securely with two or three bobby pins that match your hair color, and smooth any texture irregularities with a fine-bristle brush and a dab of edge control product.
The Styling Steps That Make It Stay
- Divide hair into six sections and apply smoothing cream to damp hair
- Blow-dry each section separately using a round brush to create tension
- Use a smoothing iron on any remaining texture
- Gather hair low, just at the nape, and secure with a small, clear elastic
- Take a 1.5-inch section from the ponytail and wrap it around the elastic, fully covering it
- Secure the wrapped section with bobby pins that match your hair color
- Apply a minimal amount of edge control to the wrapped section for a polished finish
The beauty of this style is how it photographs—the wrapped section creates a defined, intentional look without any visible hardware.
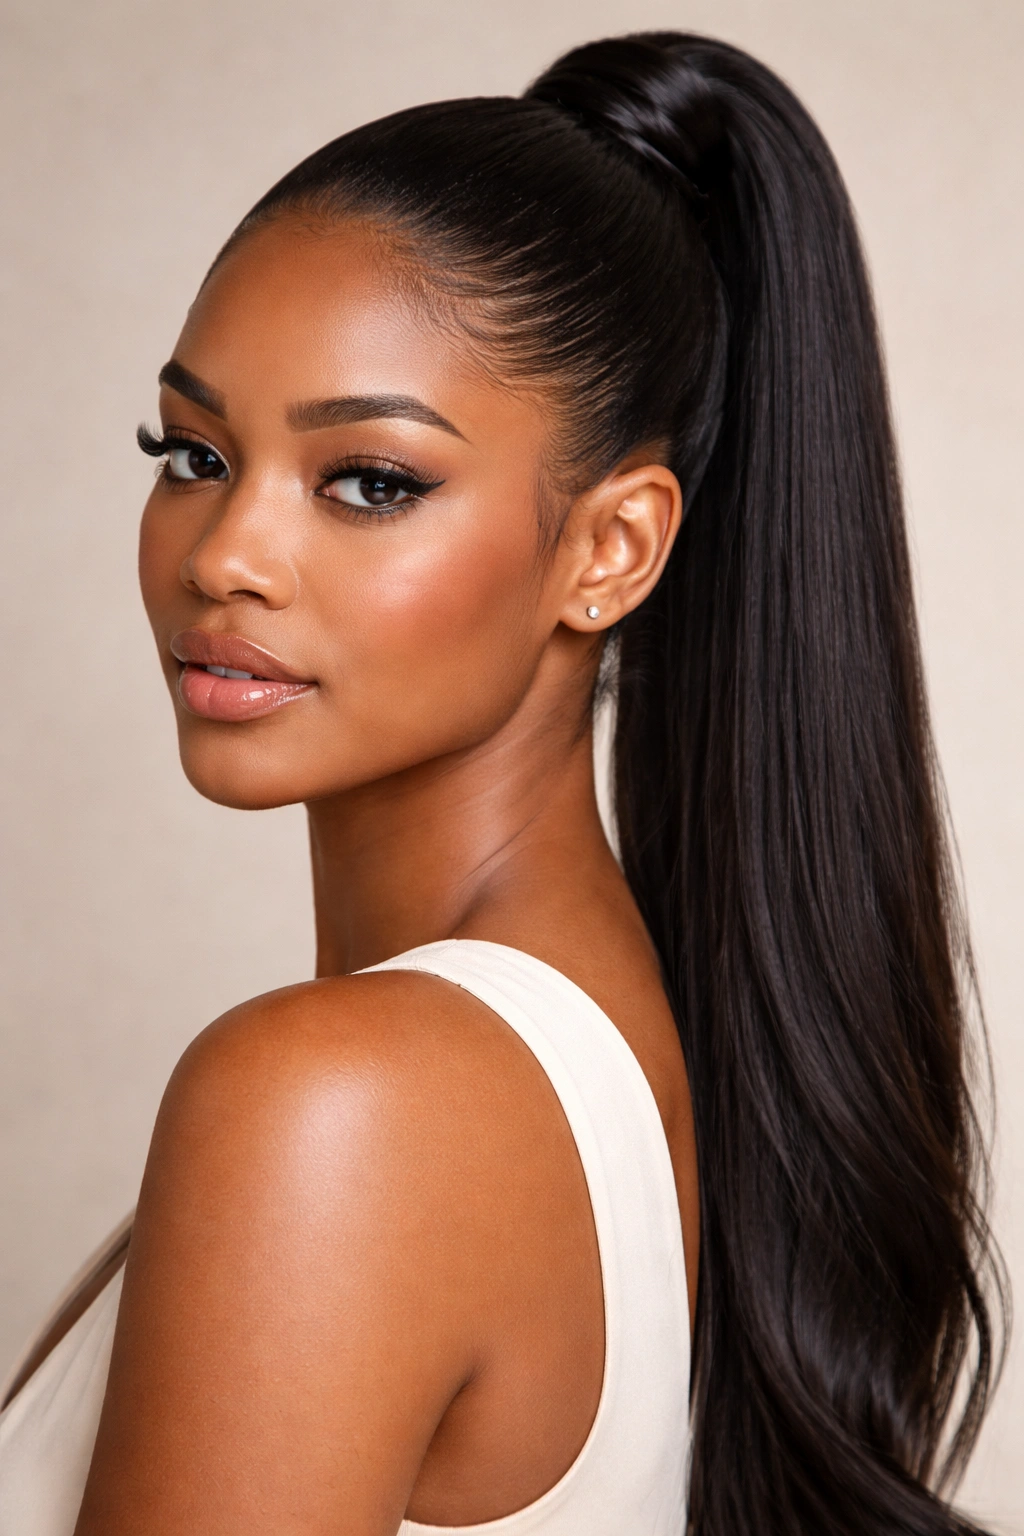
3. Middle-Part Sleek Weave Ponytail
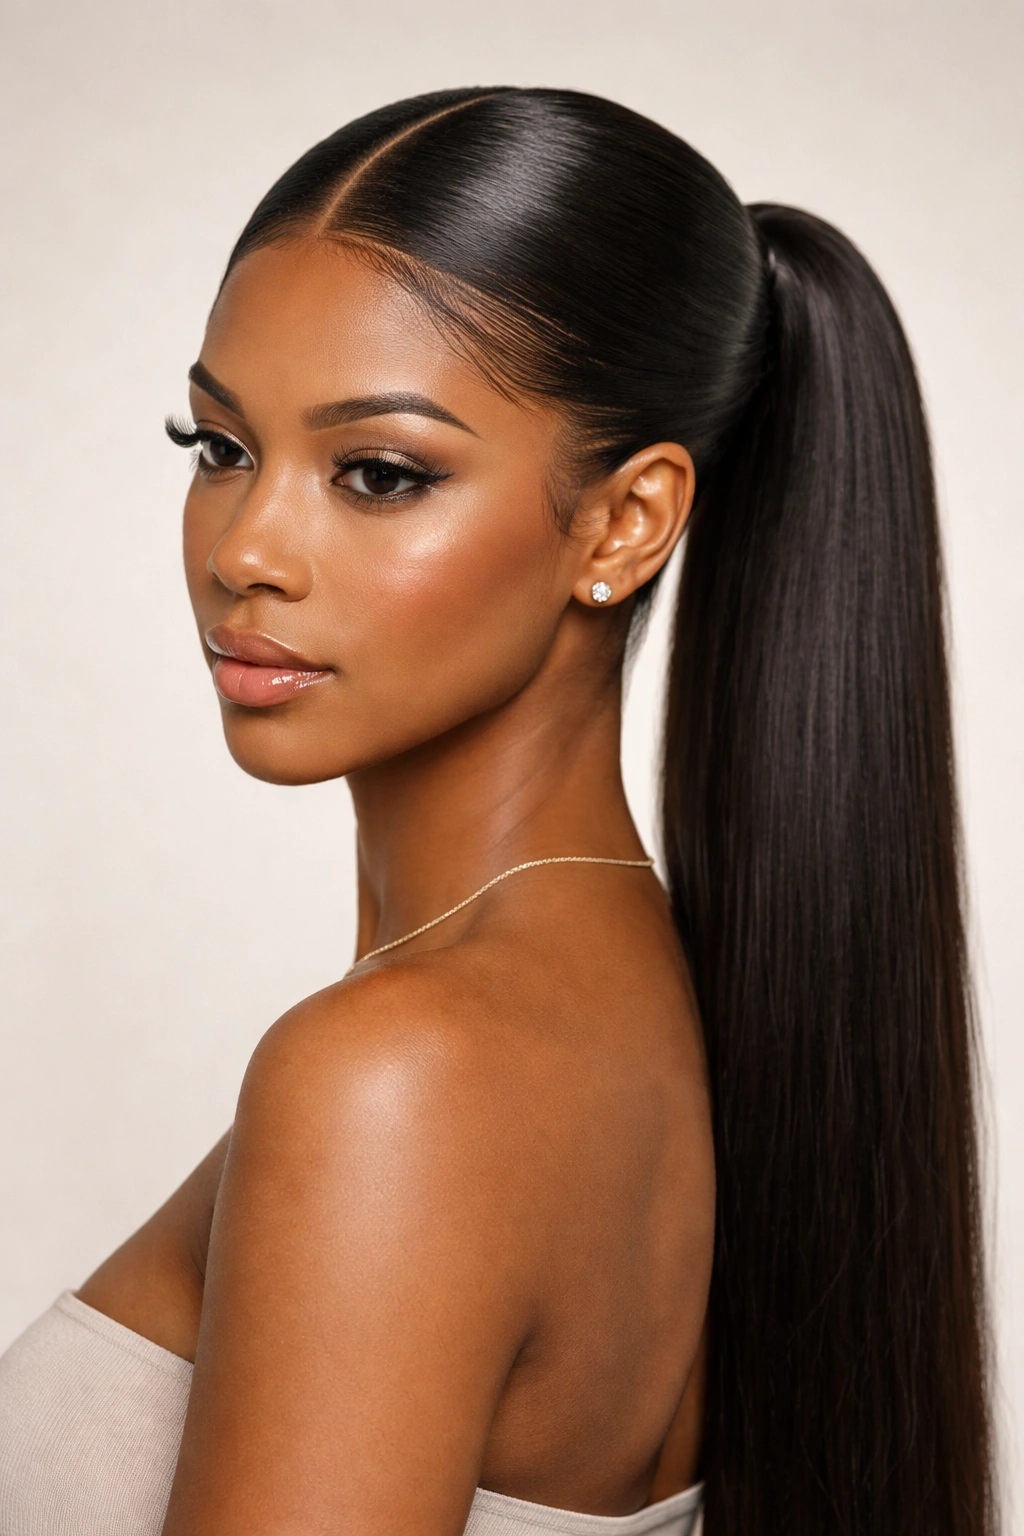
A middle-part sleek ponytail is a style that commands attention, especially if your weave has clean, even texture throughout. The middle part creates symmetry and draws focus to your facial structure, and when paired with a sleek ponytail, it creates a look that’s both modern and timeless. This style works particularly well if you have a longer face shape, as the horizontal line of the part balances facial proportions beautifully.
Creating a Razor-Sharp Part
The middle part is only as good as its crispness, and that crispness comes from precision and the right products. Using a rattail comb, create a line from the center of your forehead straight back to the crown, using your natural hair growth pattern as a guide. Most people’s hair naturally parts slightly off-center, so finding and honoring that natural line makes the part look effortless.
Once you’ve established the part, apply a small amount of hard-hold gel along the part line using the tip of the rattail comb, then use the same comb to push hair slightly away from the parting on both sides. This creates definition and prevents the part from closing up as you smooth the rest of your hair. From there, smooth each side of the head independently, creating sleekness that flows backward from the part toward the ponytail.
Building the Complete Look
- Use a rattail comb and hard-hold gel to create a defined middle part
- Apply smoothing cream to damp hair and blow-dry with tension using a round brush
- Smooth each half of the head separately to maintain the part definition
- Use a smoothing iron to create permanent sleekness
- Gather hair at your preferred height, keeping both sides of the part intact
- Create a clean ponytail with the elastic centered at your intended height
- Wrap a section around the elastic and pin securely
- Use edge control along the part line to maintain definition all day
This style pairs beautifully with a glowing skin-focused makeup look, since the middle part naturally frames the face.
4. Bubble Braid Sleek Weave Ponytail
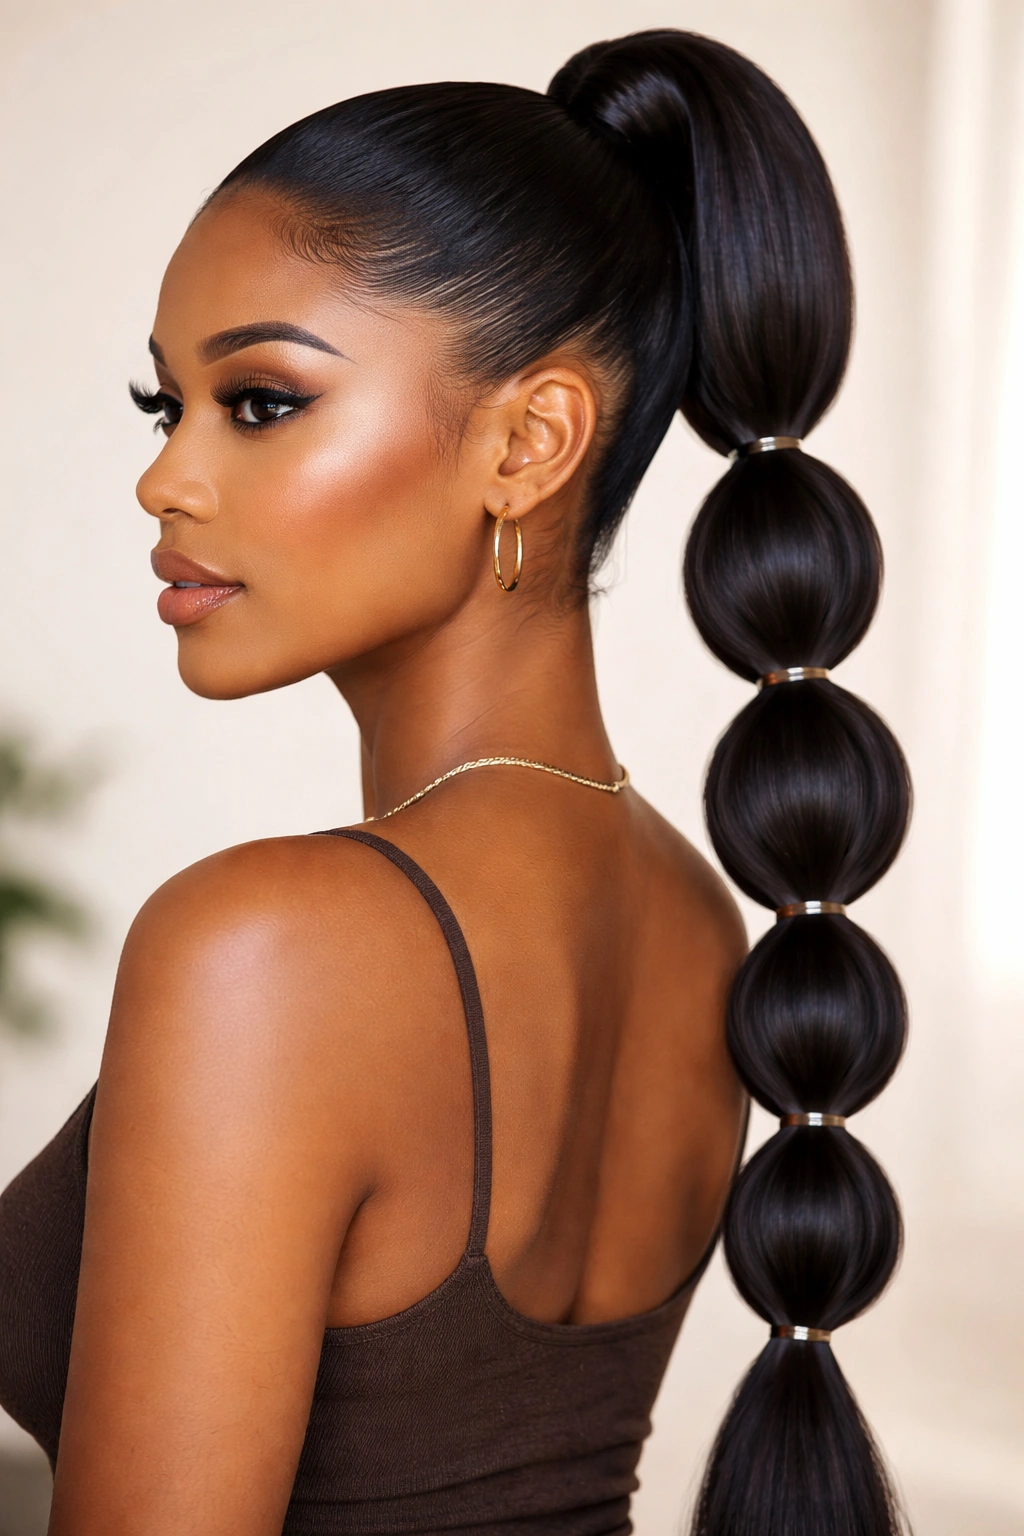
The bubble braid ponytail is the style that bridges playful and polished—it has the structured elegance of a ponytail with the visual interest and movement of braid work. Creating bubble braids with a weave requires a slightly different approach than with natural hair, since weave hair doesn’t have the same flexibility or grip. The key is using the right products and securing each bubble with multiple small elastics spaced evenly.
The Bubble Braid Method That Actually Holds
Begin with a fully sleek ponytail, smooth from the scalp and gathered tightly. The bubbles are created by adding small elastics every 1.5 to 2 inches down the length of the ponytail, then gently pushing the hair between each elastic outward to create a puffy segment. The crucial step is using a lightweight hold spray before you create the bubbles, and then again after you’ve shaped each one. The spray helps the hair maintain its fluffy shape between the elastics rather than collapsing flat.
The spacing of your elastics determines the visual impact—closer spacing creates more, smaller bubbles with a delicate look, while wider spacing creates fewer, bolder bubbles that feel more dramatic. For a professional look, aim for 5 to 7 bubbles evenly distributed down the length of your ponytail. The goal is for each bubble to be roughly the same size, which takes practice but becomes intuitive after a few attempts.
Creating Consistent, Even Bubbles
- Start with a fully sleek, tightly gathered ponytail
- Apply a lightweight hold spray to prepare the hair
- Mark where you want to place elastics using finger spacing—every 1.5 to 2 inches
- Place each elastic and gently pull the hair between elastics outward to create a puff
- Smooth the elastic area with a fine-bristle brush and apply light hold spray
- Check that bubbles are roughly equal in size and adjustment as needed
- Use bobby pins to secure any loose pieces around each elastic
- Finish with a final light spray for lasting hold
The bubble braid is perfect for occasions where you want to show that you’ve put thought and effort into your styling without creating an overly formal appearance.
5. Sleek Weave Ponytail with Laid Baby Hairs
One of the most striking details of a truly polished weave style is the treatment of baby hairs—those shorter pieces around the hairline that, when properly laid, create an incredibly refined, groomed appearance. A sleek ponytail with perfectly laid baby hairs looks expensive, intentional, and undeniably elegant. The laying process is straightforward but requires the right products and a bit of patience.
Laying Baby Hairs With Professional Results
Baby hairs are best laid after your ponytail is complete, since you’ll be working around the edges and back of the scalp. Start with your edges already smoothed as part of your initial hair preparation, but focus a second pass specifically on the baby hair area once your ponytail is gathered. Apply a strong-hold gel (specifically formulated for edges or locs) using a fine-bristle brush or a firm toothbrush, working from the hairline backward and keeping everything flush against the scalp.
The key is applying enough product that the hair stays in place, but not so much that it looks wet or flaky. Once you’ve applied the gel, use a smoothing iron on a low setting to gently seal the laid hairs, moving in the direction they’ve been smoothed. This heat step is what transforms product-held hairs into permanently laid hairs that will last through the day. A final light spray of flexible hold hairspray protects the laid edges without creating stiffness.
The Complete Baby Hair Laying Process
- Prepare hair with smoothing cream and blow-dry with a round brush first
- Complete your sleek ponytail, then focus on the baby hair areas
- Apply strong-hold edge gel using a fine-bristle brush, working from hairline backward
- Keep all hair flush against the scalp as you apply the gel
- Use a smoothing iron on a low setting to seal the laid hairs with gentle heat
- Check the front, back, and sides—baby hairs should lay consistently all around
- Apply a light flexible-hold spray to set everything
- Use a satin pillowcase at night to preserve the laid edges
Laid baby hairs are the detail that turns a good ponytail into a polished, expensive-looking style.
6. Side-Swept Sleek Weave Ponytail

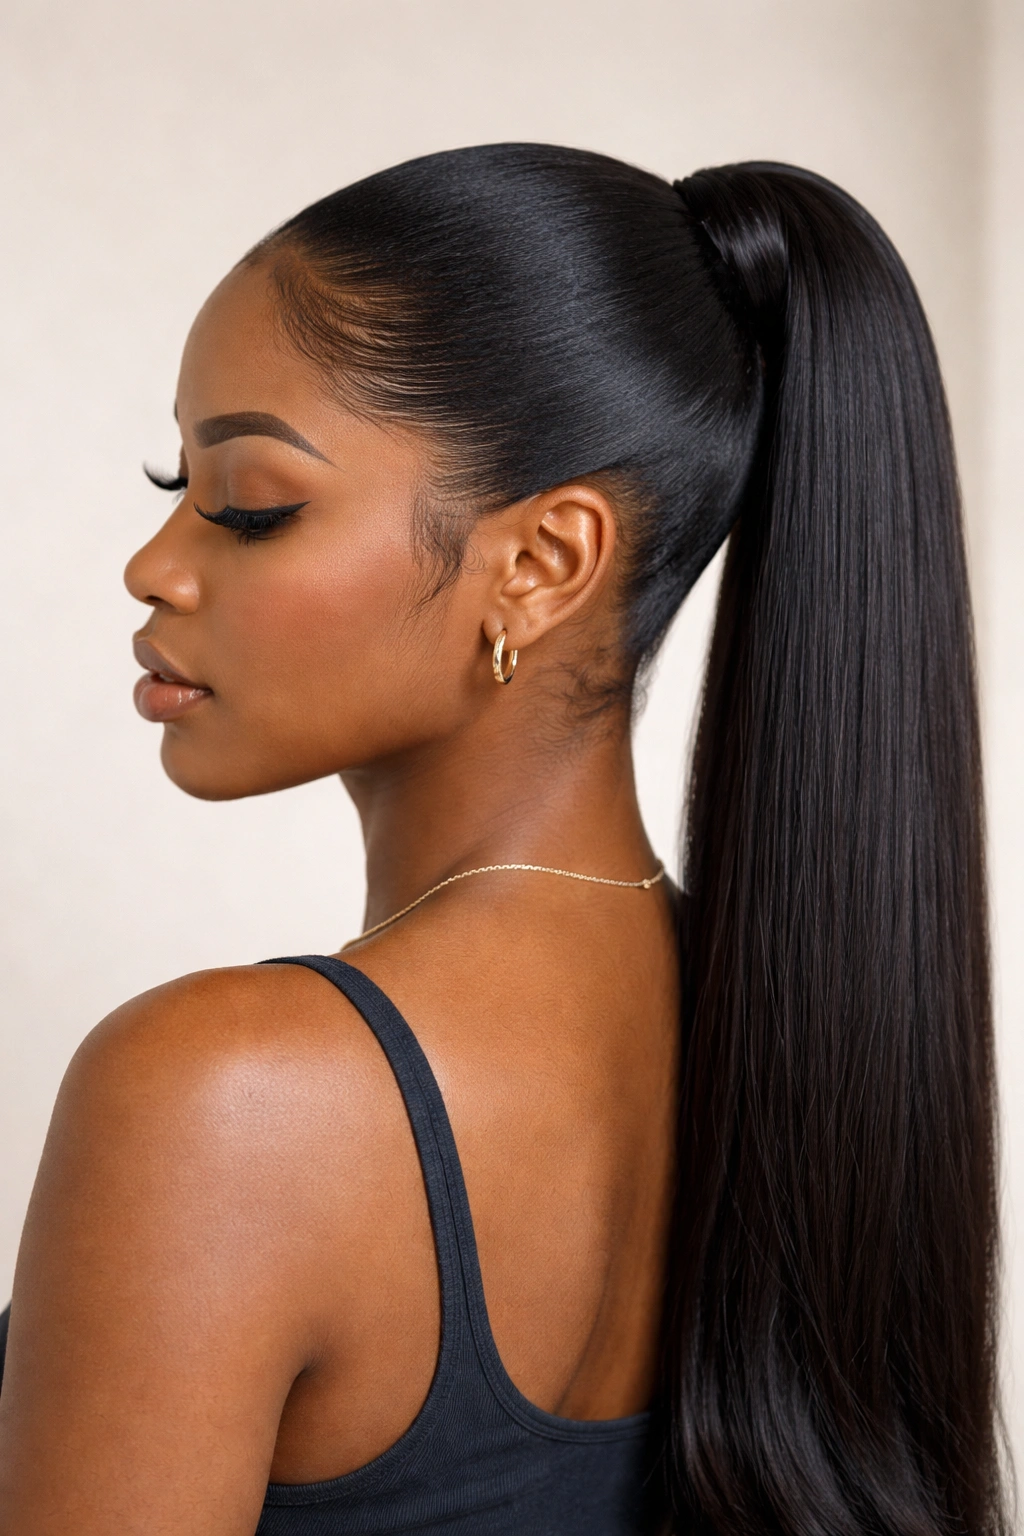
A side-swept ponytail has an inherent glamour—it’s flattering to nearly every face shape, creates beautiful visual lines, and feels effortlessly romantic. The sweep comes from how you position the part and how you smooth the hair as it moves from one side of the head to the other, creating diagonal lines rather than straight-back lines. This style works especially well with longer weaves, as the diagonal movement is more dramatic and visually interesting.
Creating the Sweep With Intention
Begin by creating a deep part on one side of your head, positioning it between your temple and the natural part line—roughly an inch to the side of center. From this deep-side part, smooth all the hair on one side backward and over toward the opposite side of your head, using smoothing cream and blow-drying with a round brush to create the directional flow. The hair on the smaller side of the part is smoothed back toward the same destination, creating a unified sweep.
The actual ponytail should be positioned slightly off-center, toward the back of the opposite side from your part. So if you’ve parted on the left, your ponytail will be positioned more toward the right back area. This offset positioning is what creates the visual sweep—it’s not just hair pulled back, it’s hair that’s been directed and moved to create a specific silhouette. When you look in the mirror, the eye should follow the flow from the deep part, across the forehead area, and back toward the ponytail.
Building the Swept Look
- Create a deep part on one side, roughly an inch from the natural center
- Apply smoothing cream to damp hair and blow-dry with a round brush, directing hair toward the opposite side
- Use smoothing iron sections to create permanent sleekness and directional flow
- Gather hair slightly off-center, positioned toward the back of the head (opposite the part side)
- Use a clear or color-matched elastic to minimize visibility
- Wrap a section around the elastic and pin securely
- Smooth any texture using a fine-bristle brush and edge control
- Apply flexible hold spray to maintain the swept direction throughout the day
This style is particularly stunning in side-view photographs and creates a very feminine, romantic silhouette.
7. Faux Hawk Sleek Weave Ponytail
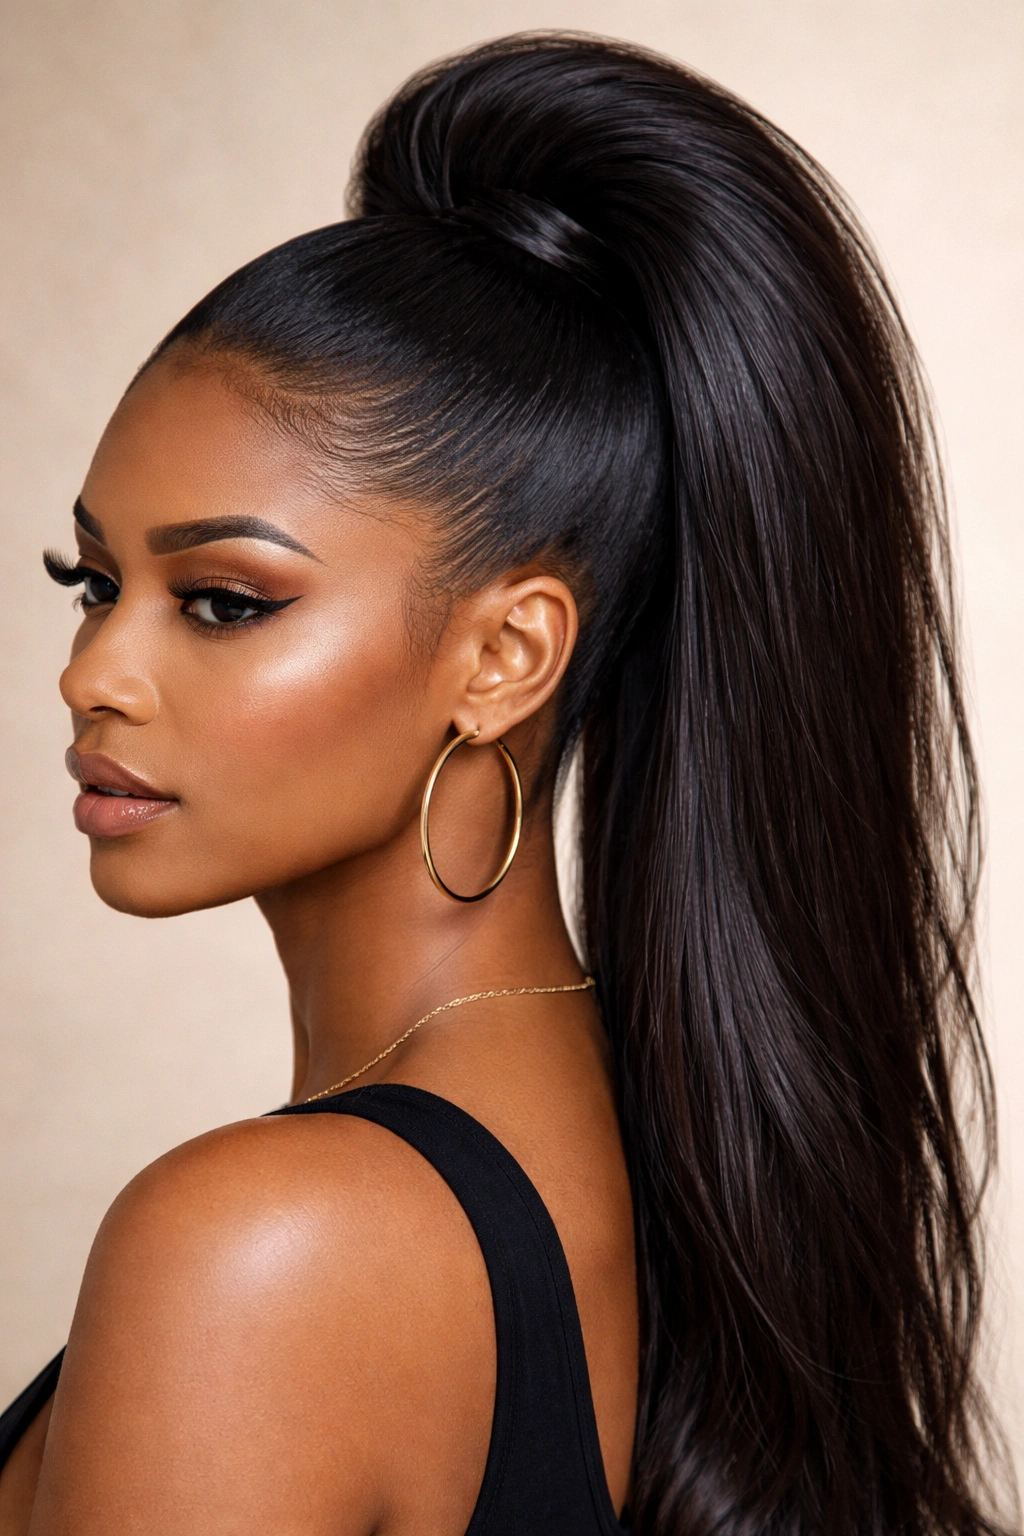
A faux hawk ponytail is the edgy cousin of the classic high ponytail—it takes the elongating, face-flattering properties of a sleek ponytail and adds architectural interest through strategic sectioning and styling. This style involves creating height at the crown and smoothing the sides tightly, making the ponytail itself the focal point of the design. It’s bold, modern, and works especially well with longer weaves.
Creating Dramatic Height and Contrast
The faux hawk begins with sectioning your hair into three zones: the crown area (which will become the ponytail), and two side sections that frame the face. The crown section extends from your forehead to the back of your head in a vertical path that’s roughly 2 to 3 inches wide. Everything outside this central path is smoothed tightly against the scalp, creating contrast and making the crown section stand out.
Start by blow-drying the crown section with a round brush to create lift and volume, while simultaneously smoothing the side sections flat against the head using a paddle brush and smoothing cream. Once the side sections are fully sleek, you can apply smoothing iron to them to create a permanent flat appearance. The crown section should retain some body and texture, which you can enhance by teasing the roots slightly before smoothing the outer layer. This layered approach creates dimension within the ponytail itself.
Building the Faux Hawk Effect
- Divide hair into three sections: crown (vertical path) and two smooth side sections
- Apply smoothing cream to side sections and blow-dry them flat against the scalp
- Use smoothing iron on the side sections to create permanent sleekness
- Blow-dry the crown section with a round brush to create lift
- Lightly tease the roots of the crown section for subtle dimension
- Smooth the outer layer of the crown section with a brush
- Gather only the crown section into a high ponytail
- Create a sleek elastic and wrap-and-pin finish
- Use edge control to maintain smooth sides throughout the day
This style is perfect if you want people to notice your hair—it’s undeniably a statement.
8. Sleek Weave Ponytail with Braided Wrap
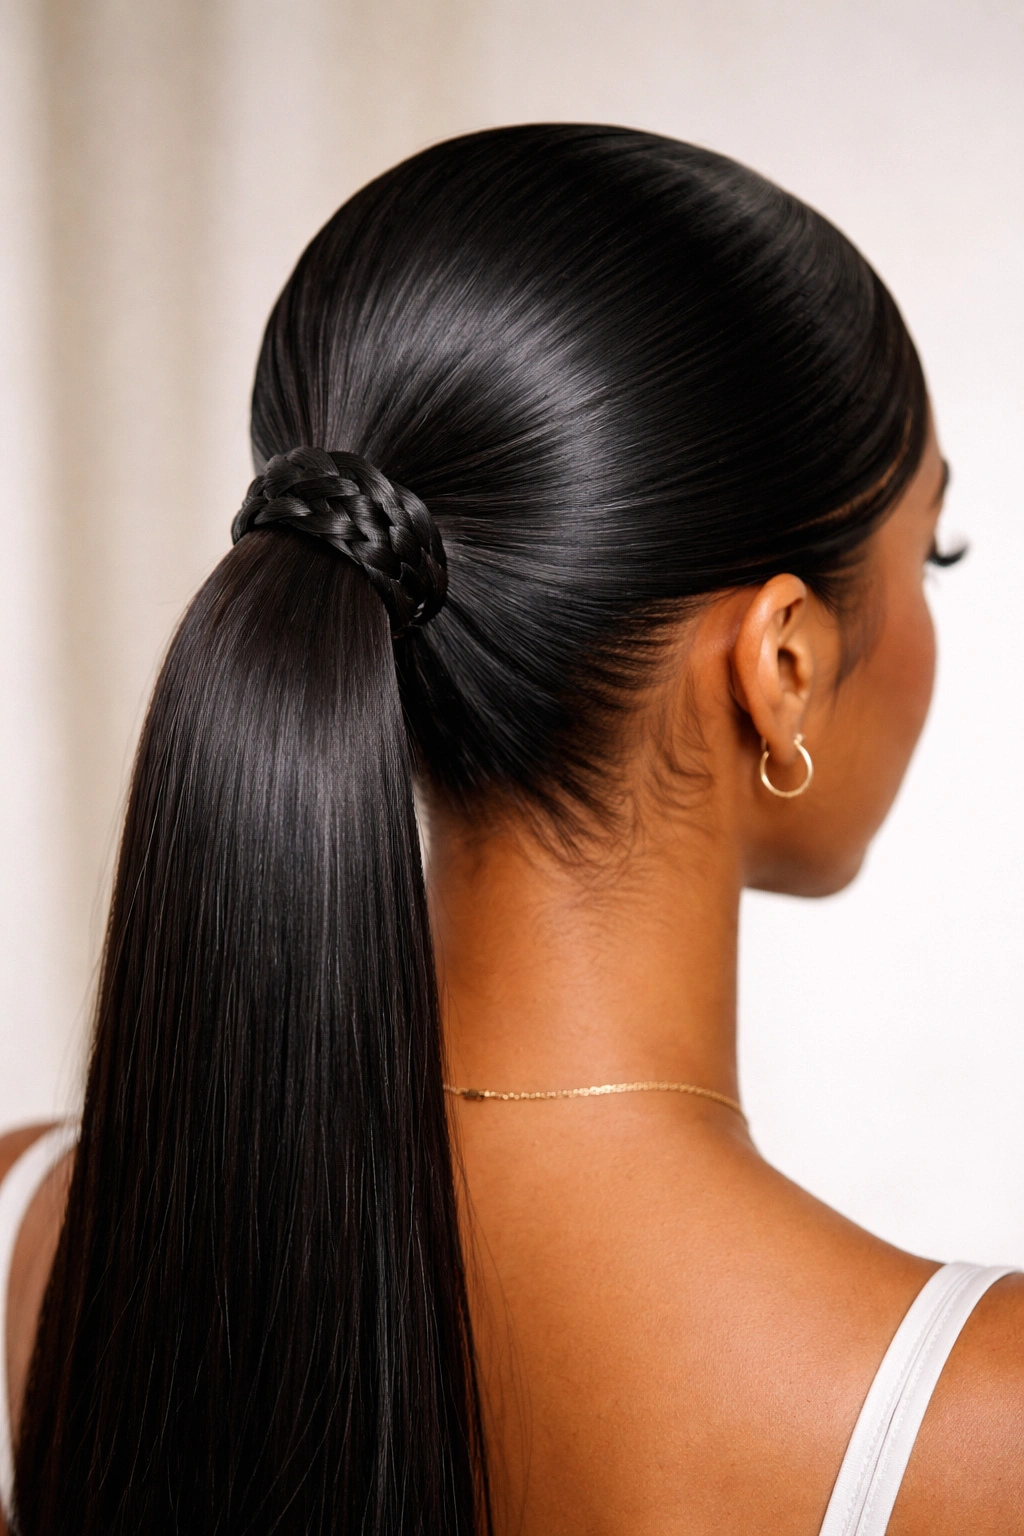
A braided wrap transforms a simple ponytail into an intricate-looking style that actually requires minimal extra effort. Instead of wrapping a straight section of hair around the elastic, you create a small three-strand braid and use that braid as your wrap. This adds texture, visual interest, and an elevated, intentional appearance that makes the style feel much more complex than it actually is.
Creating a Polished Braided Wrap
Once your sleek ponytail is gathered and secured, take a small section from the ponytail—about the thickness of a pencil—and begin creating a tight, even three-strand braid. The braid should be as close to the base of the ponytail as possible, wrapping around where the elastic sits. Keep the braid tension consistent throughout; any looseness will be immediately visible and will cheapen the look of the style.
As you wrap the braid around the elastic, use bobby pins to secure it after every half-wrap, which keeps it from shifting or loosening as the day goes on. The braid should fully cover the elastic from every angle—front, back, and both sides. Once the wrap is completely pinned and in place, you can trim any excess hair or tuck the end of the braid underneath the wrap. A final light spray of flexible hold hairspray keeps everything in place without making the braid look stiff.
The Braided Wrap Process
- Complete a fully sleek ponytail gathered at your desired height
- Take a pencil-thin section from the ponytail for your braid
- Create a tight, even three-strand braid as close to the elastic as possible
- Wrap the braid around the elastic, securing with bobby pins every half-wrap
- Ensure the braid fully covers the elastic from all angles
- Tuck the end of the braid under the wrap and secure with a final bobby pin
- Trim any excess hair or loose pieces from the braid
- Apply a light flexible-hold spray to set the braid
- Check from multiple angles to ensure complete coverage of the elastic
A braided wrap elevates any ponytail and works beautifully with both casual and formal occasions.
9. Sleek Weave Ponytail with Twisted Accent
If you love the idea of a braided wrap but prefer something quicker and slightly more subtle, a twisted accent is your answer. Twists are faster to create than braids, create beautiful visual texture, and can be as bold or as understated as you want them to be based on how tightly you twist and how many twists you add to your wrap.
Mastering the Twist Wrap Technique
Instead of a three-strand braid, a twisted wrap involves taking two sections from your ponytail and twisting them together around the elastic. For a single-twist wrap, take two pencil-thin sections from the ponytail, separate them into right and left portions, and twist them around each other in a tight spiral as you wrap around the elastic. The tension should be consistent—not so tight that the twist looks strained, but tight enough that it holds its shape all day.
The visual difference between a single twisted wrap and multiple twisted wraps is significant. A single wrap is subtle and refined, creating just enough texture to show that thought has been put into the styling. Multiple wraps—perhaps three or four thin twisted sections layered around the elastic—create a much bolder, more dramatic look. You can even mix twist directions (clockwise for some, counterclockwise for others) to create additional visual interest, though this should be done sparingly to avoid looking chaotic.
Creating a Twisted Wrap
- Complete a fully sleek ponytail gathered at your desired height
- Take two pencil-thin sections from the ponytail
- Separate each section into right and left strands
- Twist the strands around each other tightly as you wrap around the elastic
- Secure with bobby pins every half-wrap to prevent shifting
- Ensure the twisted wrap fully covers the elastic
- Tuck the end of the twist under itself and secure with a final bobby pin
- For multiple twists, repeat the process with additional thin sections
- Apply a light flexible-hold spray to maintain the twist texture
This style is perfect for days when you want something a little more interesting than a straight wrap, but without the time commitment of a full braid.
10. Sleek Weave Ponytail with Curved Edges
A sleek ponytail with curved, sculpted edges is the ultimate statement in intentional grooming—it’s what you see on red carpets, in high-fashion editorials, and on people who clearly understand that details matter. This style takes the basic sleek ponytail and elevates it by paying meticulous attention to the edges, creating sharp, curved lines that frame the face and follow the natural curves of the skull.
Sculpting Curved Edges for Maximum Impact
Curved edges require precision, the right products, and often some heat styling. Start with your standard sleek ponytail preparation—smooth the entire head, create your ponytail, and lay your baby hairs. Then, focus specifically on the edges around your face, the temples, and the back of the neck. Using a strong edge control product (something with a firm hold that won’t flake) and a firm brush or comb, sculpt the edges into curved lines that follow the contour of your head.
The curves should be intentional and symmetrical—if you create a curve on one temple, create a matching curve on the other side. The curves can follow your natural hairline, or you can create more exaggerated curves that are further away from the face, depending on your preference and face shape. Once you’ve sculpted the curves, use a smoothing iron on a low setting to gently heat-set them, making them semi-permanent. The curved edges should last through most of the day, and many people refresh them with edge control as needed.
Creating Sculpted, Curved Edges
- Begin with a fully sleek ponytail, smooth baby hairs, and laid edges
- Apply strong-hold edge control to the temples, front hairline, and back nape area
- Using a firm brush or edge control applicator, sculpt intentional curves
- Create symmetrical curves on both sides of the face for balance
- Follow the natural contours of your skull, or create exaggerated curves as desired
- Use a smoothing iron on a low setting to heat-set the curved edges
- Apply a final light layer of edge control to lock in the curves
- Use a flexible-hold spray over the edges to protect the sculpted shape
- Refresh edges with a light application of edge control as needed throughout the day
This style is pure elegance and shows that you understand the power of grooming details.
Final Thoughts
A sleek weave ponytail that lays flat and stays in place all day isn’t an accident—it’s the result of understanding your weave texture, using the right products, and following a deliberate technique from start to finish. The difference between a ponytail that looks polished and one that looks unfinished often comes down to small details: the way you section your hair before smoothing, the product combination you use, whether you apply heat to seal everything down, and how much attention you pay to edges and baby hairs.
The ten styles in this guide represent different approaches to the sleek ponytail, but they all share common foundations: a smooth, flat base at the scalp, proper sectioning and product application, and finishing details that elevate the entire look. Start with whichever style resonates with you, and once you’ve mastered the technique, you’ll find that adapting it becomes second nature. You’ll begin noticing small tweaks that work for your specific weave type, the products that give you the best hold in your climate, and the styling combinations that make you feel most confident.
Remember that a great sleek ponytail isn’t about perfection—it’s about intention. It’s about showing that you’ve taken time to care for your hair and to present yourself thoughtfully. That intention is what transforms a basic ponytail into a style that makes you stand taller and feel genuinely polished.