Easy hairstyles for naturally curly hair work best when they respect the bend instead of trying to erase it. A curl has its own memory, and the quickest styles usually lean into that memory: a pineapple, a loose twist, a clip placed where the hair already wants to fold.
What trips people up is the idea that curly hair needs more work than straight hair. Usually it just needs different work. A satin scrunchie, a wide-tooth comb, a handful of bobby pins, and ten minutes can do more than a whole sink full of styling drama.
The trick is choosing styles that match the day you’re having. Some curls want to stay loose and fluffy. Others are better off pinned up, braided back, or tucked under a headband so the front stops arguing with the rest of it.
These are the styles I keep coming back to because they don’t fight the hair’s shape. They save time, they look intentional even when they’re slightly messy, and most of them can be done without making your arms feel like they spent an hour in the gym.
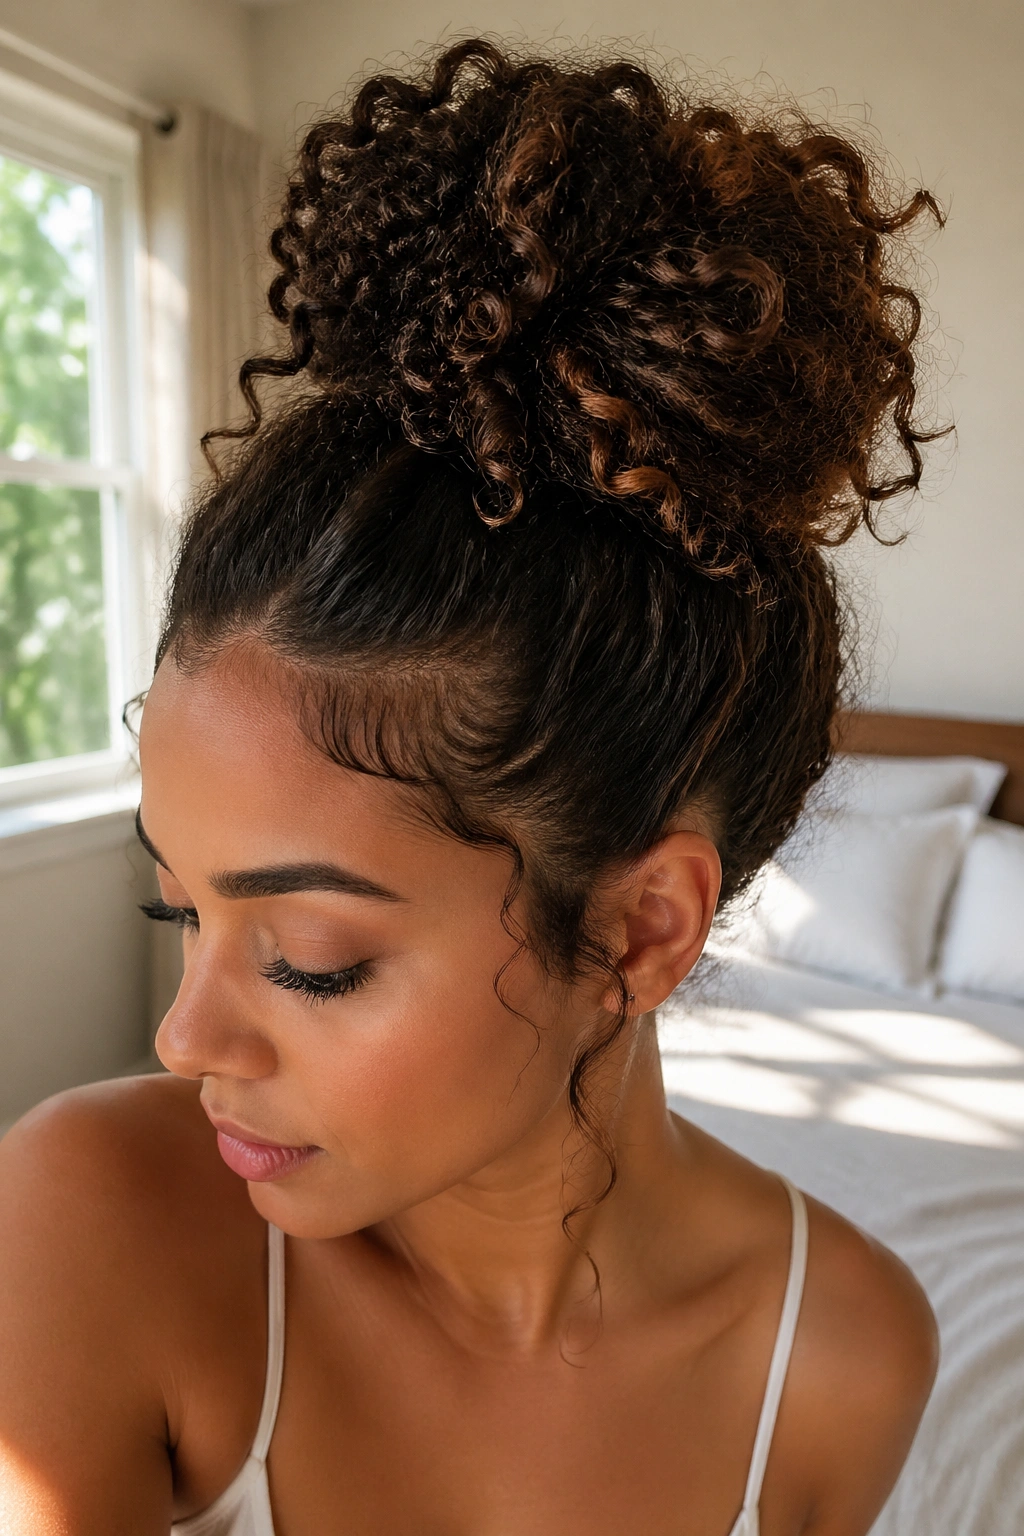
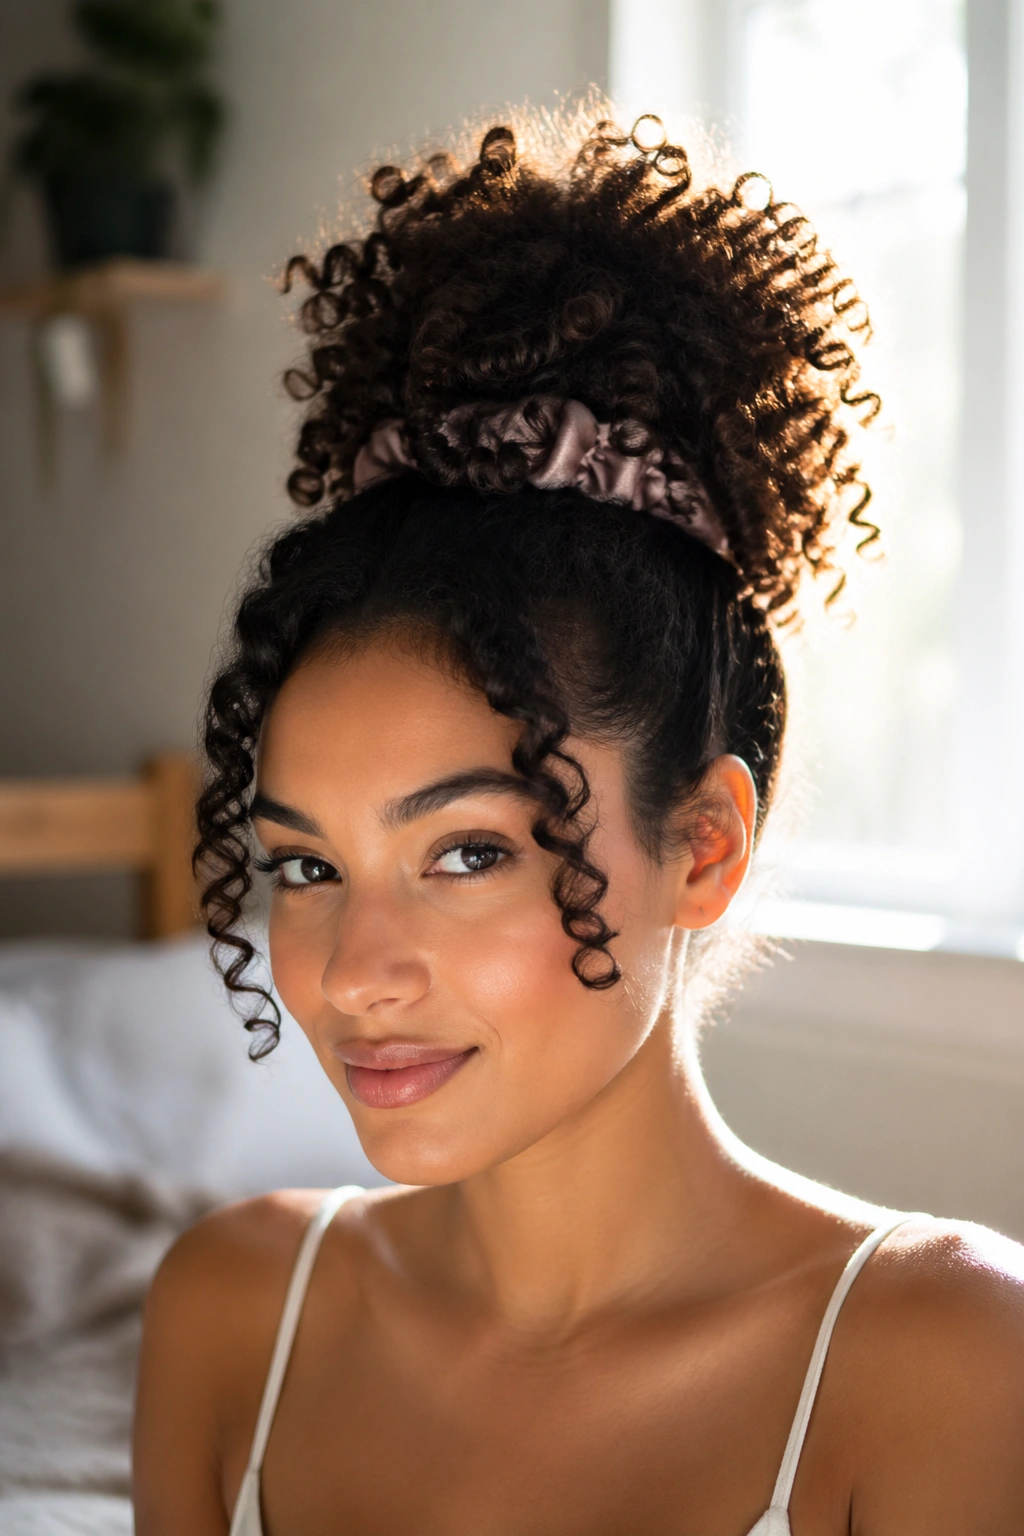
1. Pineapple Puff for Naturally Curly Hair
The pineapple is the closest thing curly hair has to a reset button. It keeps the curl pattern from getting crushed, and it takes so little effort that it earns its place on the messiest mornings.
Why It Works
Gather your curls at the very top of your head, but don’t yank them into submission. A satin scrunchie is the right tool here because it holds without leaving that sharp dent a regular elastic makes. The goal is height, not tension.
This style is especially kind to curls that frizz when they’re handled too much. Leave a few face-framing pieces loose if your hair is long enough, and let the back spill upward in a soft cloud.
- Best for: Day-two or day-three curls, shoulder-length hair, and thicker textures
- Tools: Satin scrunchie, water mist, fingers
- Time: About 30 seconds
- Watch for: A puff that sits too low; that turns into a saggy ponytail fast
My rule: if the scrunchie feels tight enough to give you a headache, it’s too tight.
2. Half-Up Twist-Back
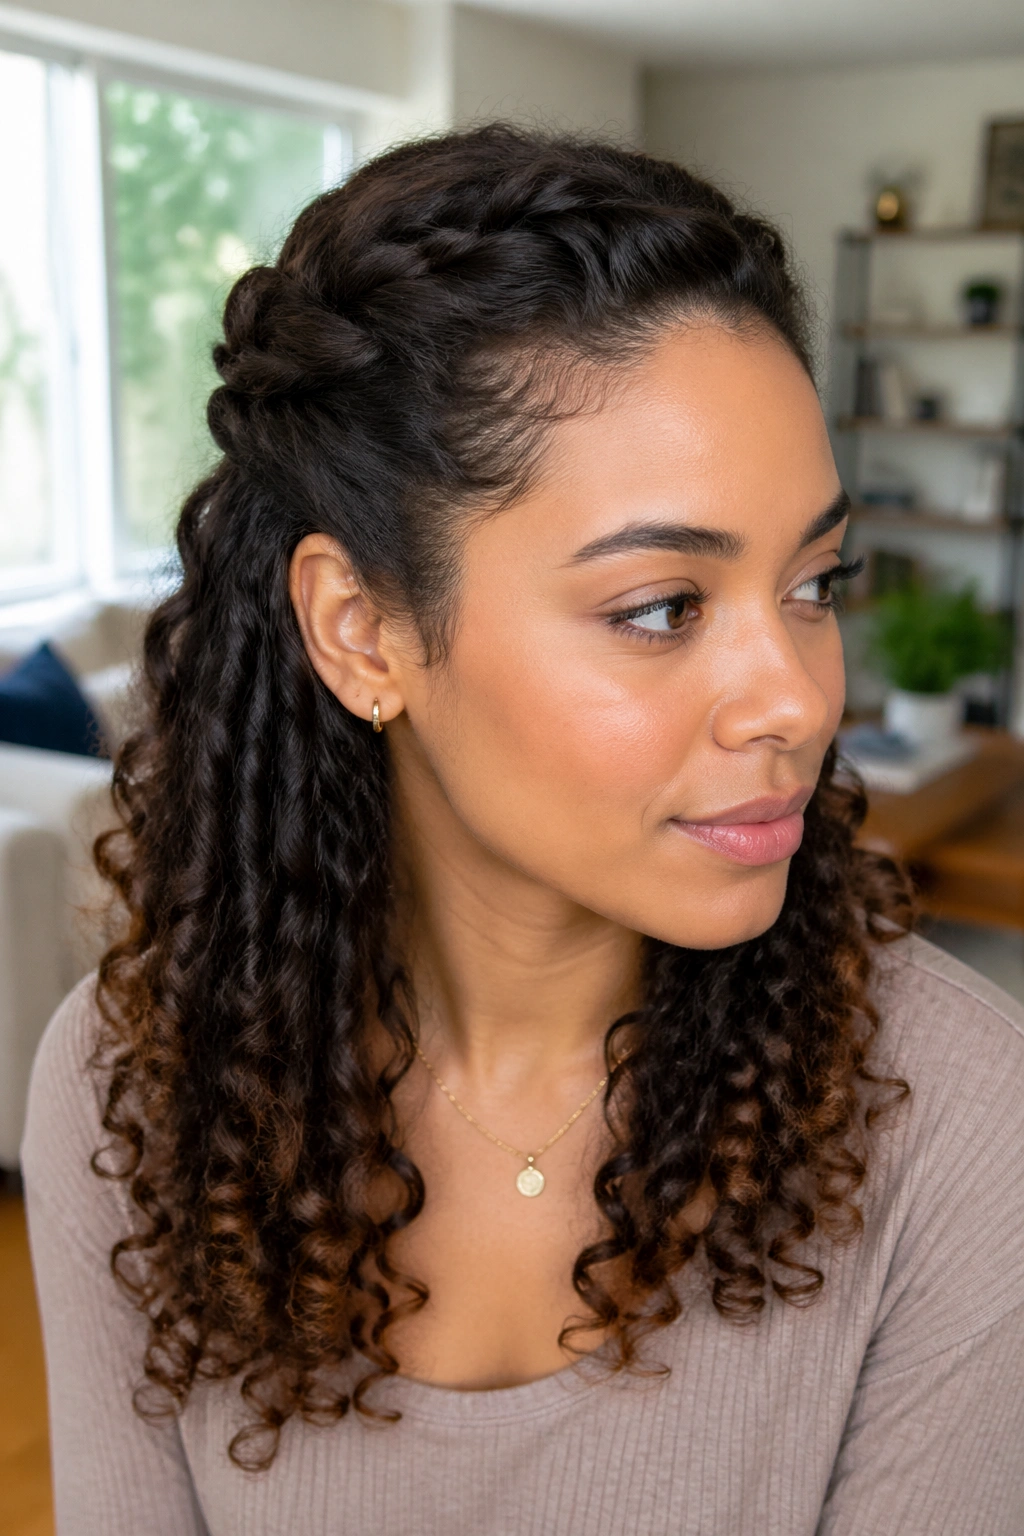
Why does a half-up twist-back work so well on curly hair? Because it pulls the front away from your face without stealing the shape from the rest of it.
Take a section from each temple, twist it backward, and pin both sides together at the back of the crown. The twist can be loose and a little uneven. That is part of the charm. Curly hair forgives less than people think, but it also hides a lot.
How to Wear It
If your curls are layered, twist a little farther back so the shorter pieces stay tucked in. If your hair is fine, use two crossed bobby pins instead of one. That tiny X shape holds better than a single pin and slips less.
A soft, half-up twist is one of those easy hairstyles for naturally curly hair that looks more polished than the effort it takes. And that is the sweet spot.
3. Low Curly Ponytail
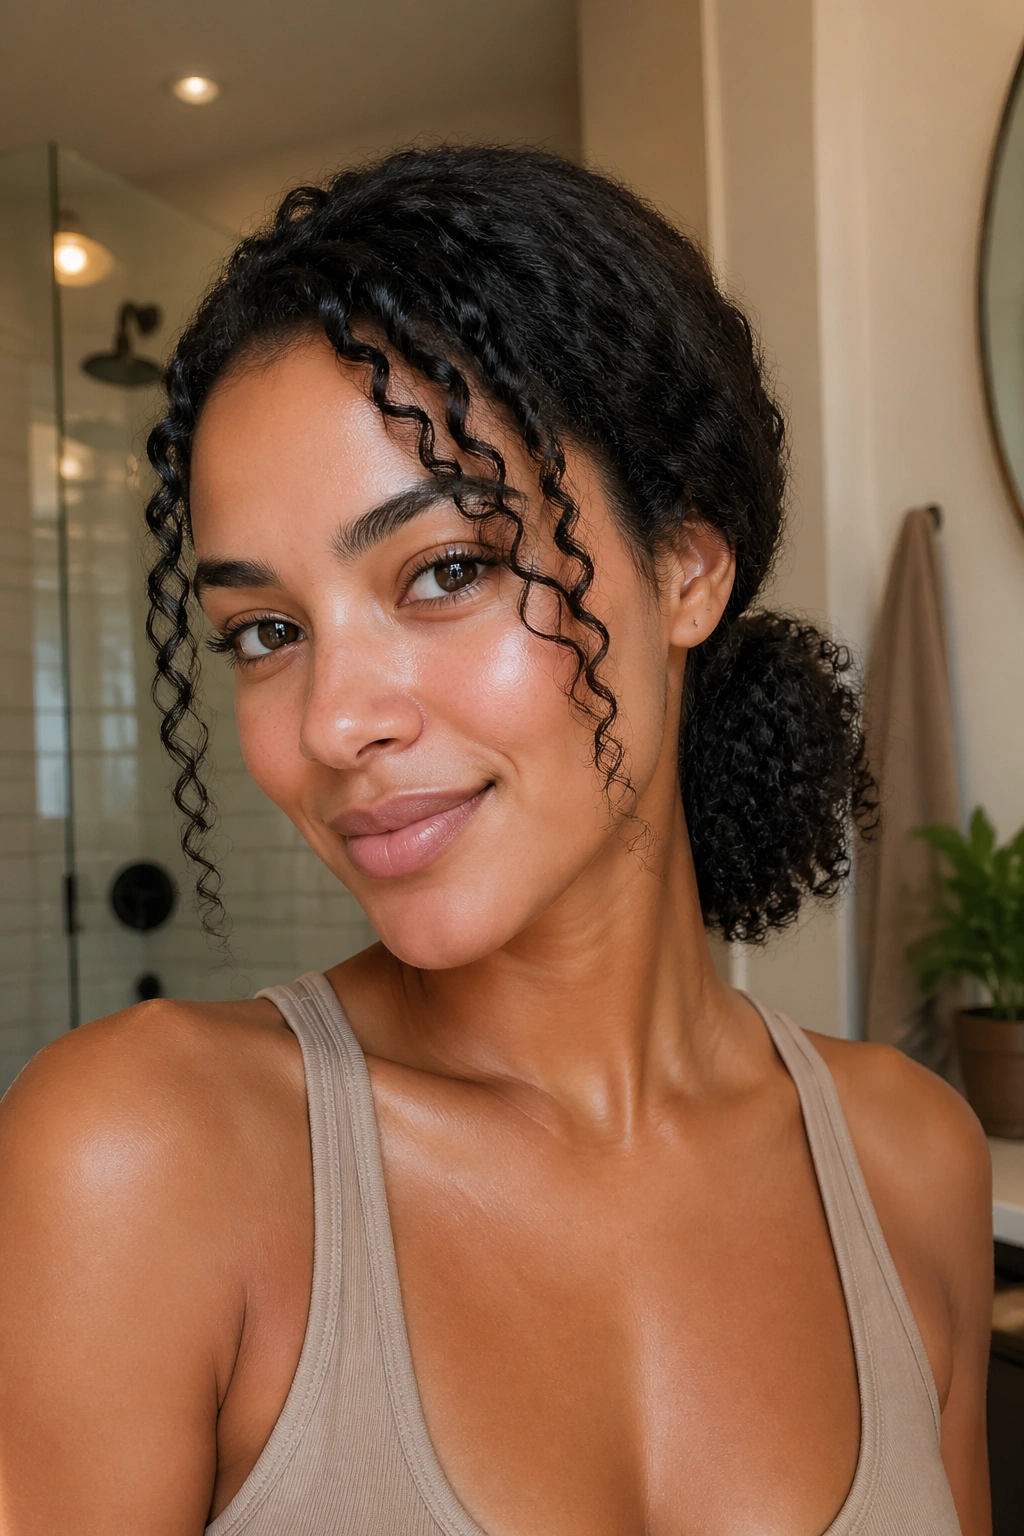
The low curly ponytail is what I reach for when the curl pattern still looks good but the roots have started to lose interest. It is tidy without flattening the entire head.
Pull the hair back at the nape, not mid-back. A low placement keeps the curl fall relaxed and stops the ponytail from feeling stiff. Wrap a small 1-inch section of hair around the elastic to hide the band, then secure the end underneath with one pin.
- Use a snag-free elastic. Cotton ties tend to grab and puff out the base.
- Keep the crown soft. A little lift at the roots makes the style look alive.
- Leave two front pieces out if you want movement around the face.
- Skip heavy brushing. Fingers or a wide-tooth comb are enough.
The nice thing about this style is that it works with volume, not against it. That matters more on curly hair than people admit.
4. Claw-Clip French Twist
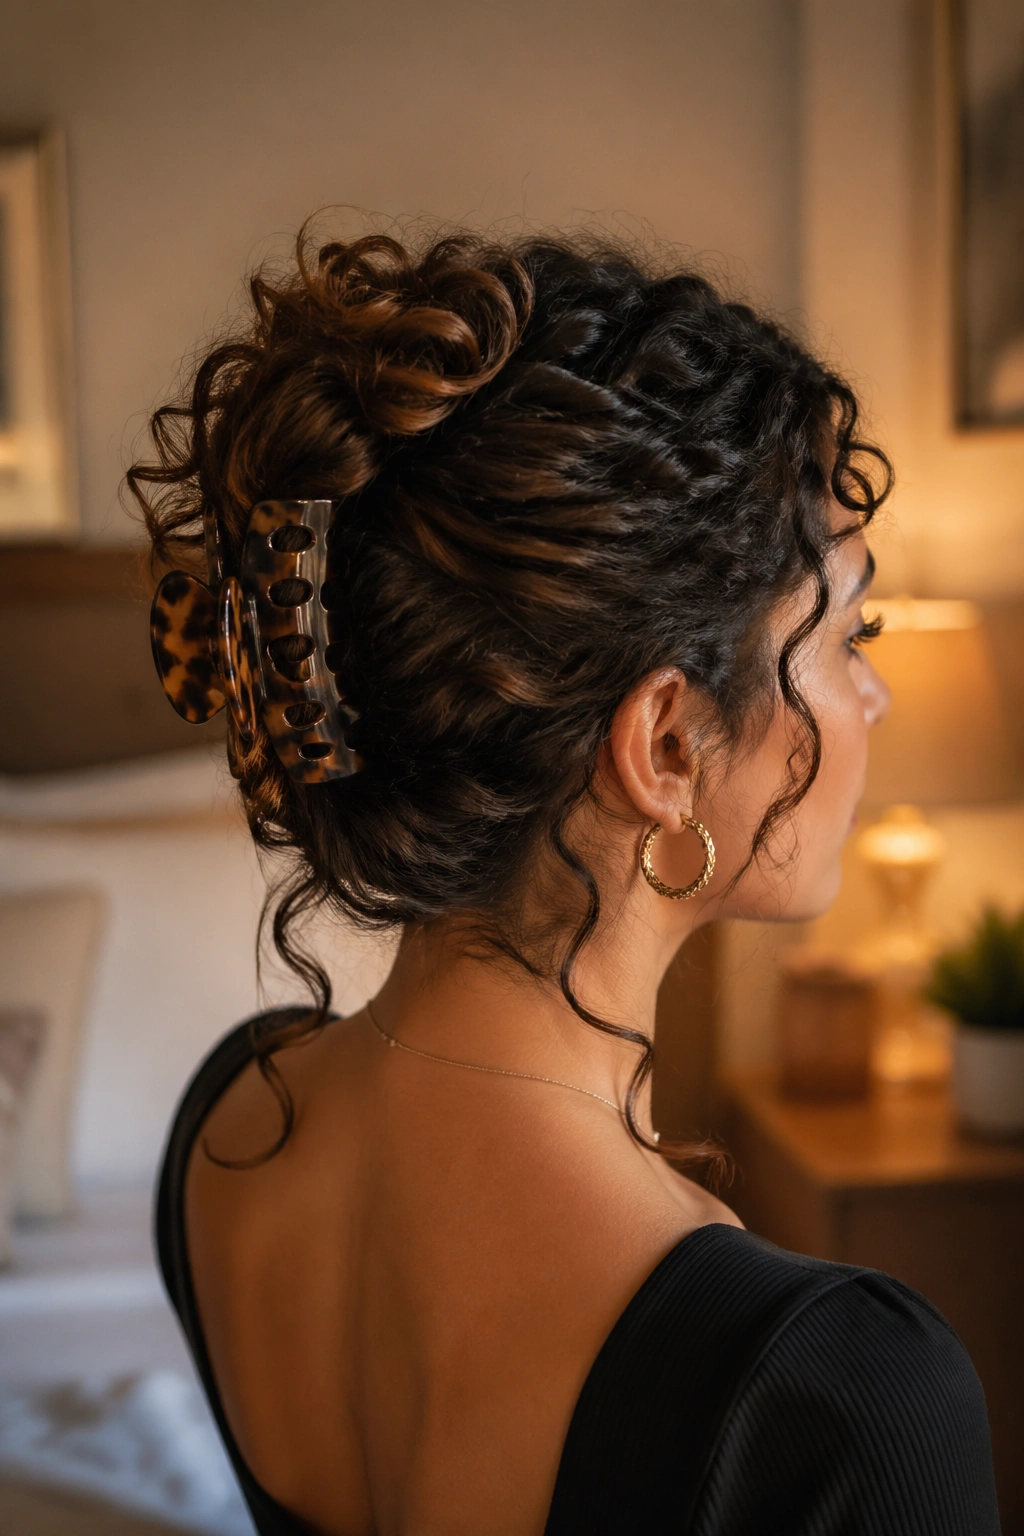
A claw-clip French twist sounds fancier than it is. It is really just a smart way to fold curly hair upward so the ends become part of the shape instead of something you fight with.
Start by gathering the hair at the back of the head, then twist it upward in one motion so the length folds against itself. Slide a large clip, usually 3 to 4 inches wide, over the twist so it catches the center. If the hair is thick, use two smaller clips instead of one heroic clip that gives up halfway through the day.
The best part is the looseness. A French twist on curly hair does not need to be sleek to look finished. The curl ends can spill out a little, and that actually makes the style better.
If your hair is shoulder length, let the twist sit lower. If it is longer, tuck the ends more fully. Same idea. Different finish.
5. Double Space Buns
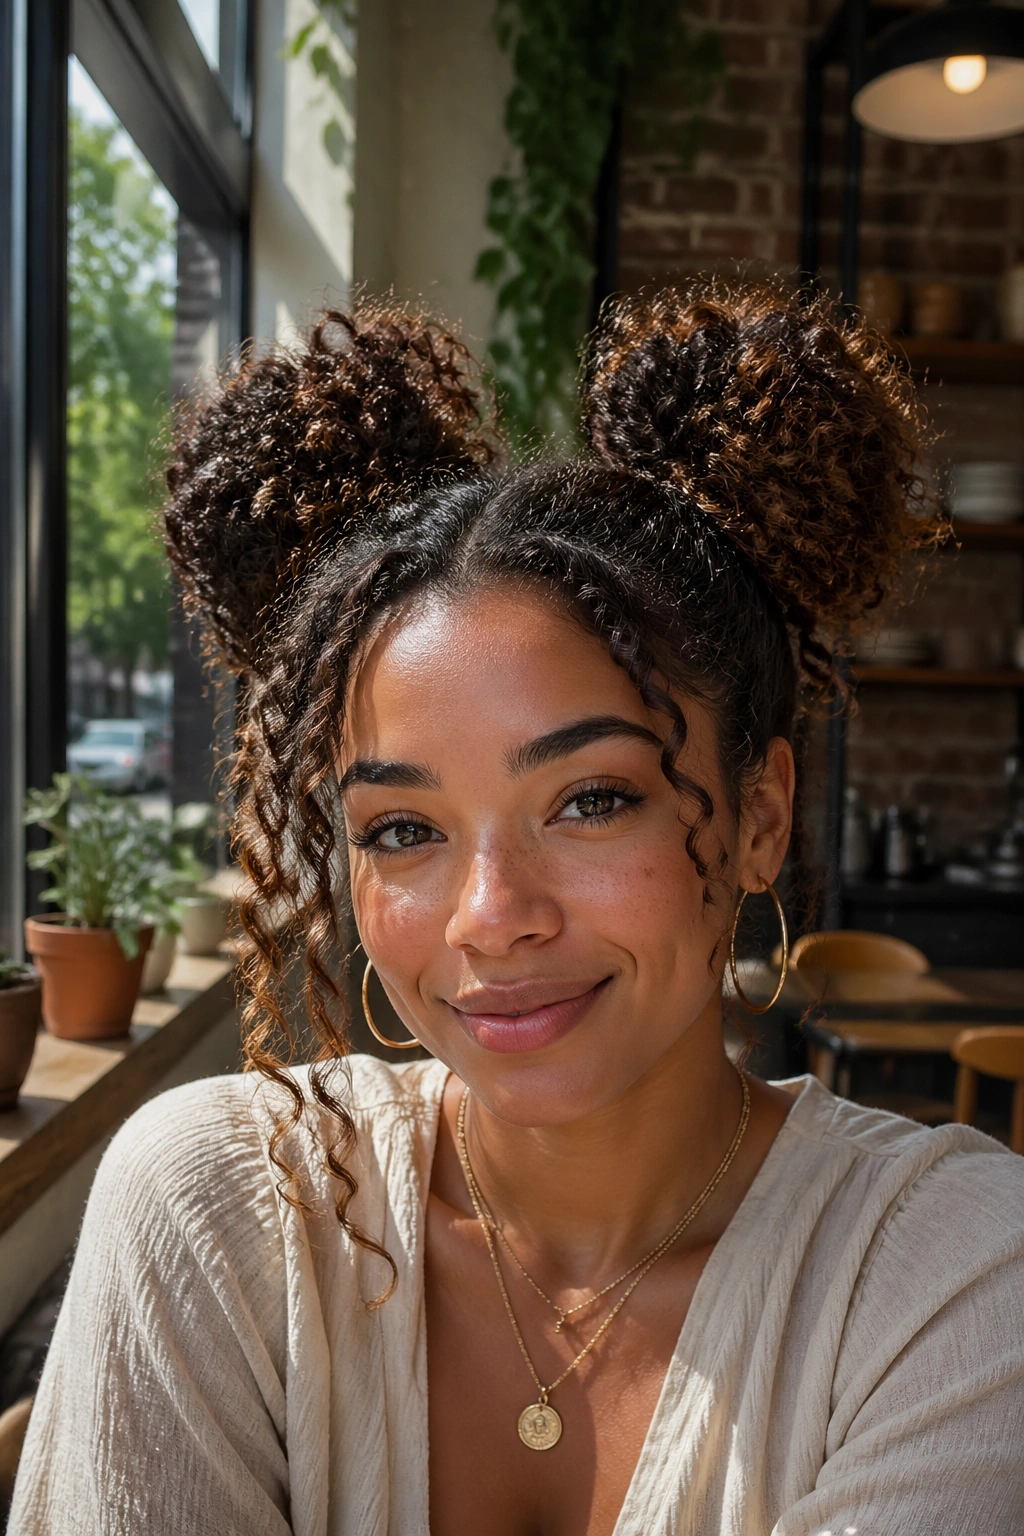
Unlike one big bun, double space buns spread the volume out, which keeps heavy curls from dragging everything flat by lunchtime.
Part the hair down the middle and make two high ponytails. Twist each section into a bun, but do not wind them so tightly that the curls lose all their shape. Secure each side with a small scrunchie or two pins. The buns do not need to match exactly. That is one of the few times a little unevenness looks better than precision.
This style is especially good when your curls are a bit frizzy but still have body. The buns hide the roughness and keep the texture front and center. If your hair is long, let the ends stick out a little instead of trying to trap every last strand.
It feels playful, yes. It also keeps the neck free, which is worth something on its own.
6. High Curly Bun
A high curly bun looks cleaner when it is slightly loose. Tight buns on curly hair can flatten the root and make the whole thing look smaller than it really is.
Flip your head over, gather the hair at the crown, and secure it with a satin scrunchie. Then twist the length once or twice and wrap it around the base. Use three to five bobby pins around the bun, not one giant elastic that presses everything down. If the curls are bulky, leave the ends exposed on purpose. It adds shape.
This style is a good answer for gym days, hot kitchens, and mornings when you want the face clear in under five minutes. If the crown looks a little flat, lift it with your fingertips before pinning. No brush needed.
And no, it does not need to be slick. Curly buns look better when they still look like curls.
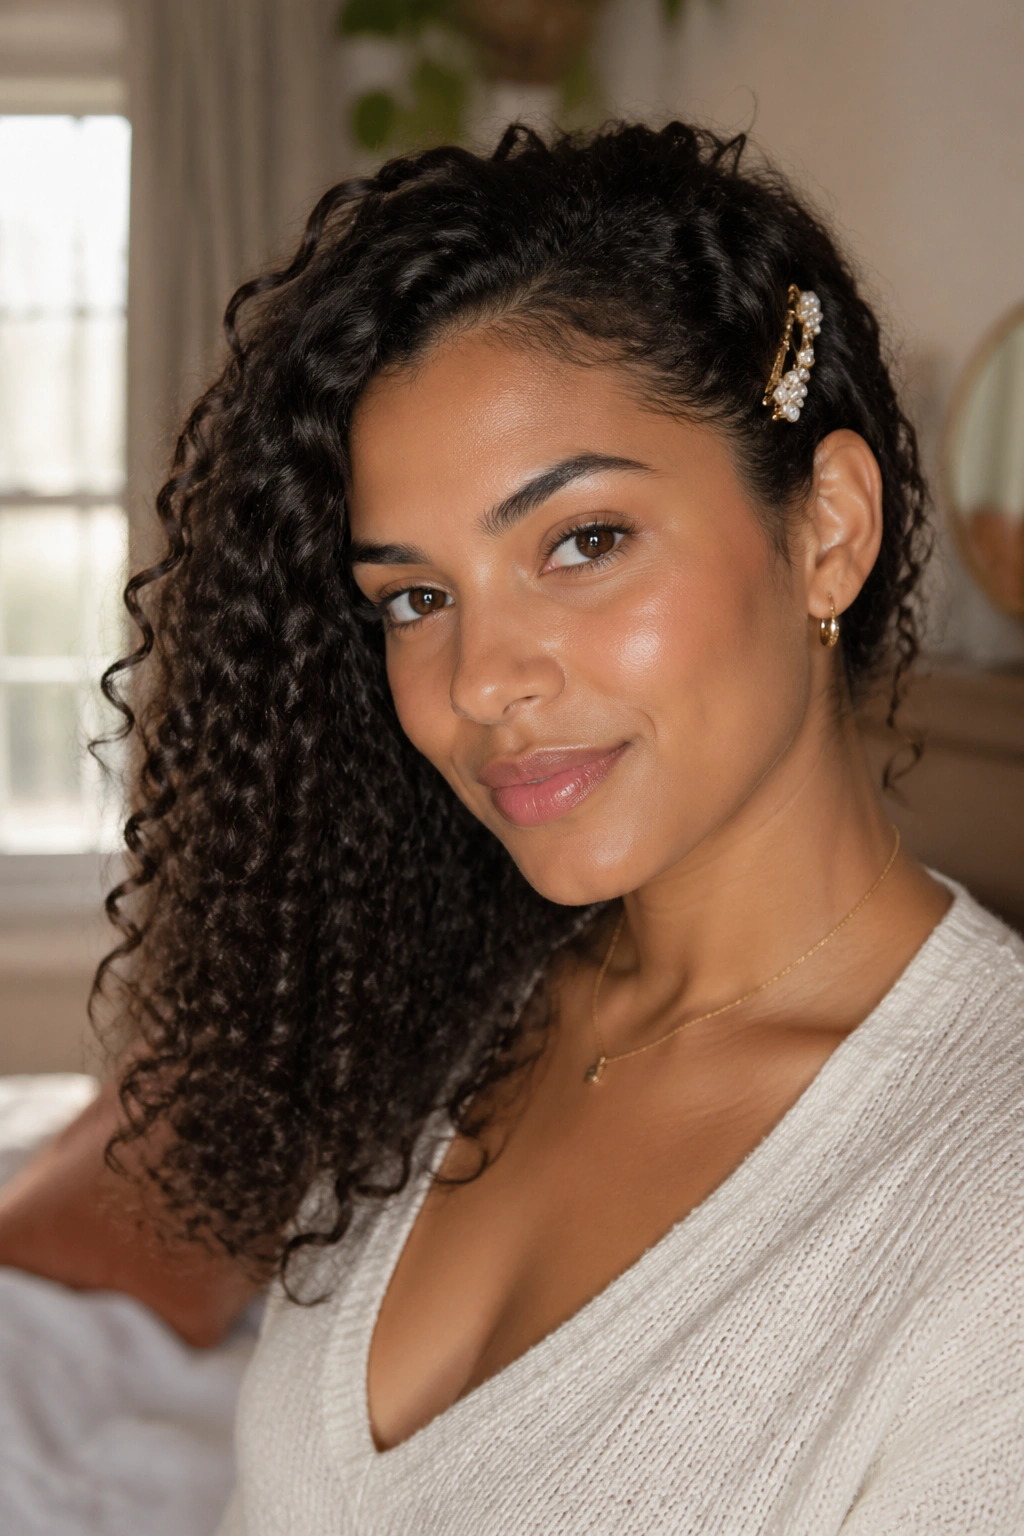
7. Side-Swept Clipback
Does a side-swept clipback sound too simple? That is exactly why it works.
Sweep one side of the hair behind the ear and secure it with a decorative clip, a barrette, or two crossed bobby pins. The other side stays loose, so the style keeps volume instead of turning into a pinned-down helmet. On curly hair, that balance matters a lot.
How to Keep It From Slipping
If the front layer keeps sliding out, mist the section lightly with water and smooth in a pea-sized bit of curl cream. Let it sit for a minute, then pin. A clip grips better when the hair has a little texture, not when it is freshly polished and slippery.
This is one of the easiest styles for bangs, face-framing layers, or a curl pattern that gets odd near the temples. It looks casual, but it still feels intentional. Small win. Useful win.
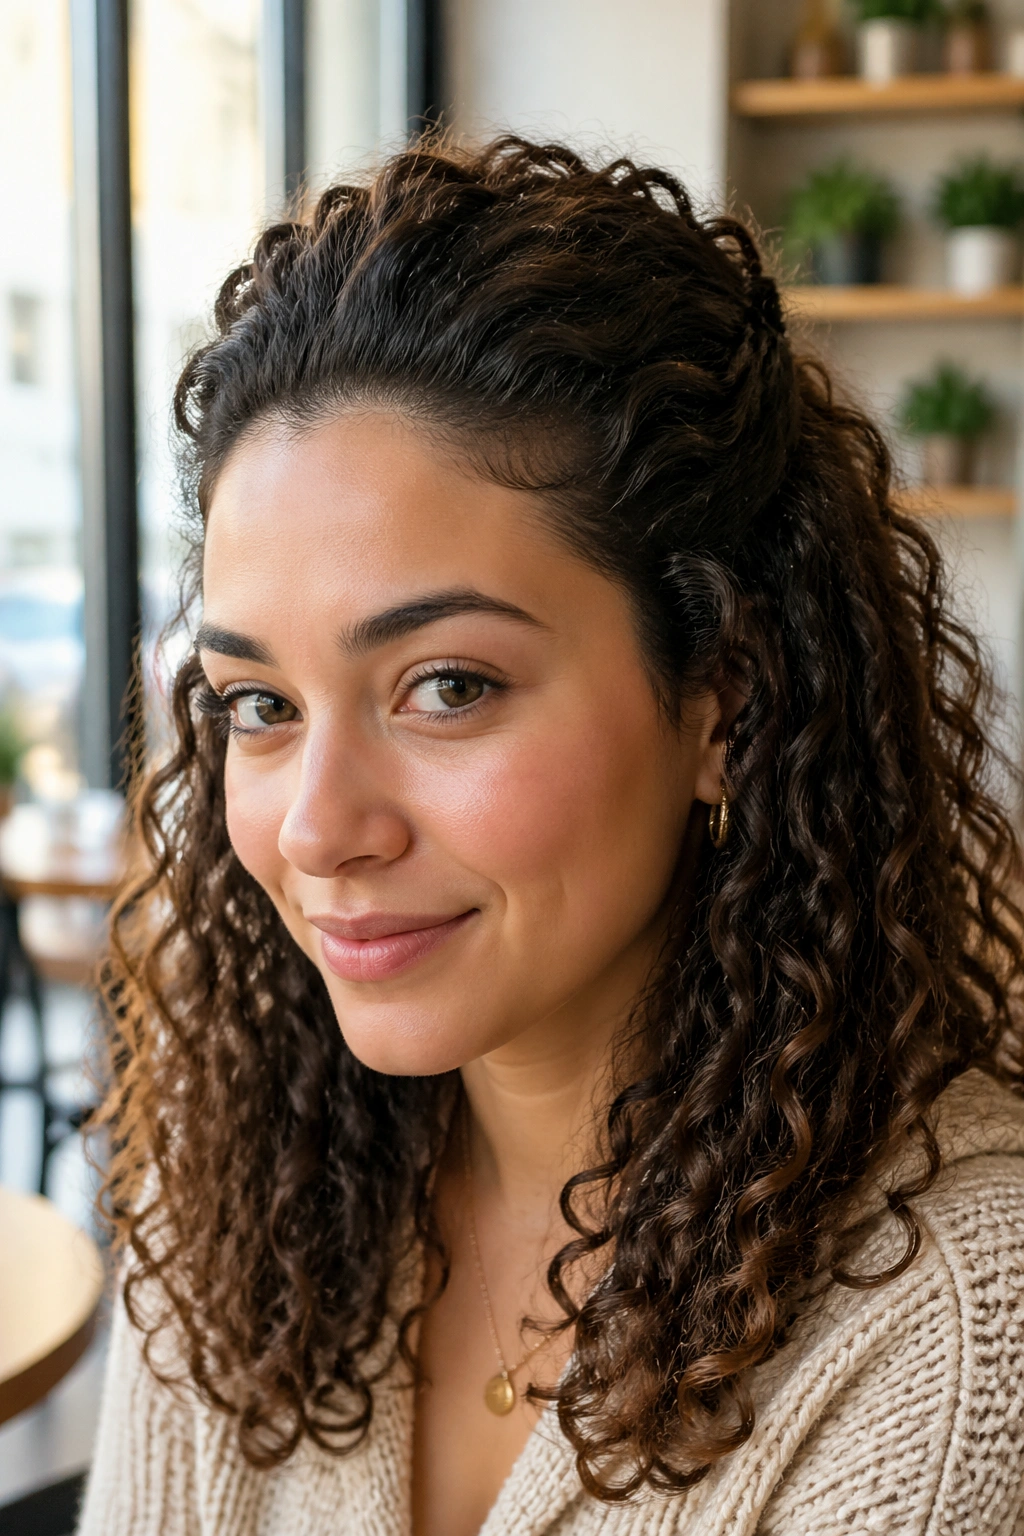
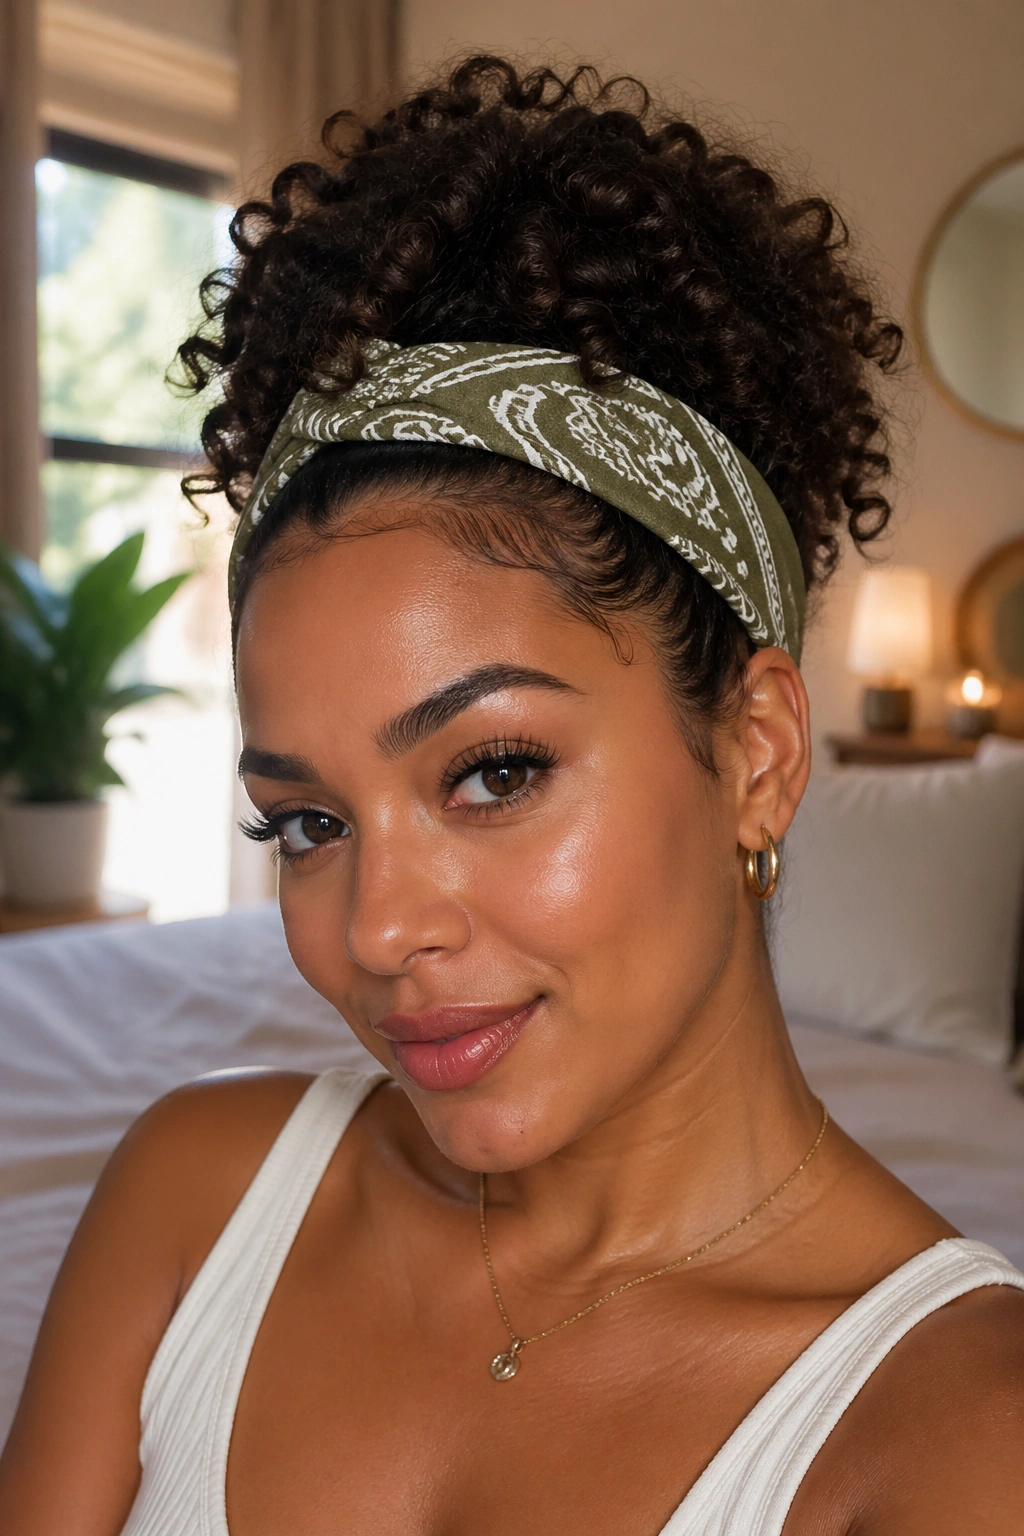
8. Wide-Headband Tuck
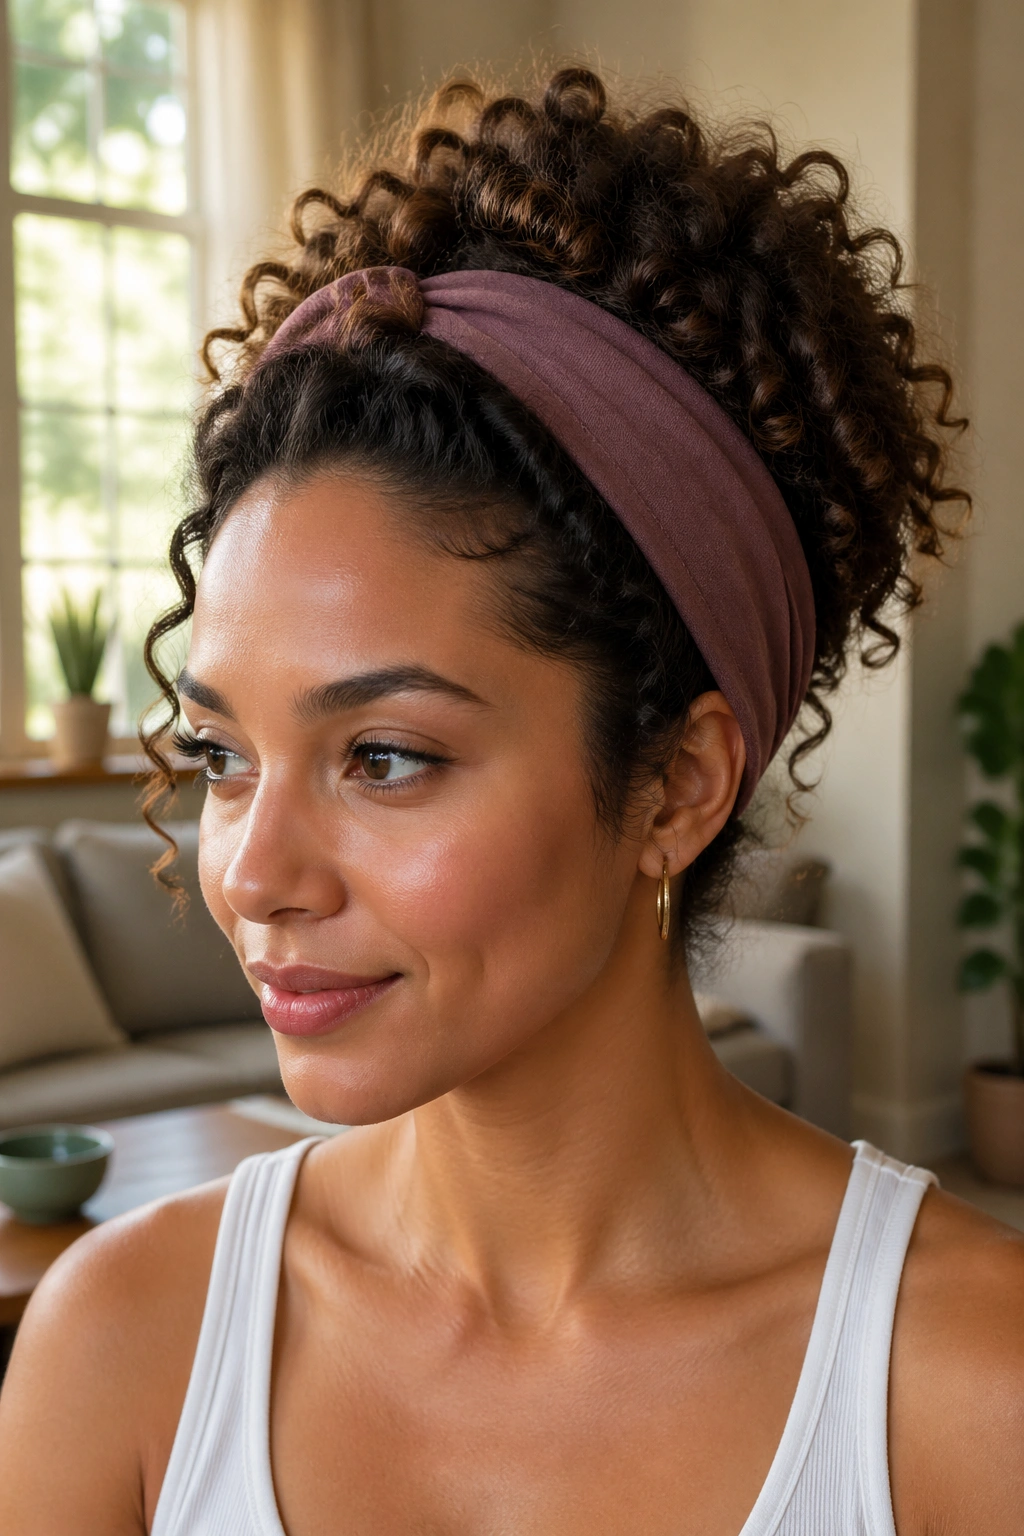
A wide headband can save the day when the front section frizzes before the rest of the hair even wakes up. It is one of the fastest easy hairstyles for naturally curly hair because the headband does half the styling for you.
Choose a band that is about 1.5 to 2 inches wide so it sits flat instead of digging into the curls. Place it just behind the hairline, then tuck the front pieces up and over the band if you want a rolled look. Leave the crown slightly lifted so the style does not collapse.
- Works well on second-day curls
- Good for medium and long lengths
- Better with a soft fabric band than a hard plastic one
- Useful when you want the face open but the curls still visible
This is one of those styles that looks best when it is a little soft around the edges. If the curls stick out a bit, that’s fine. That’s the point.
9. Braided Crown
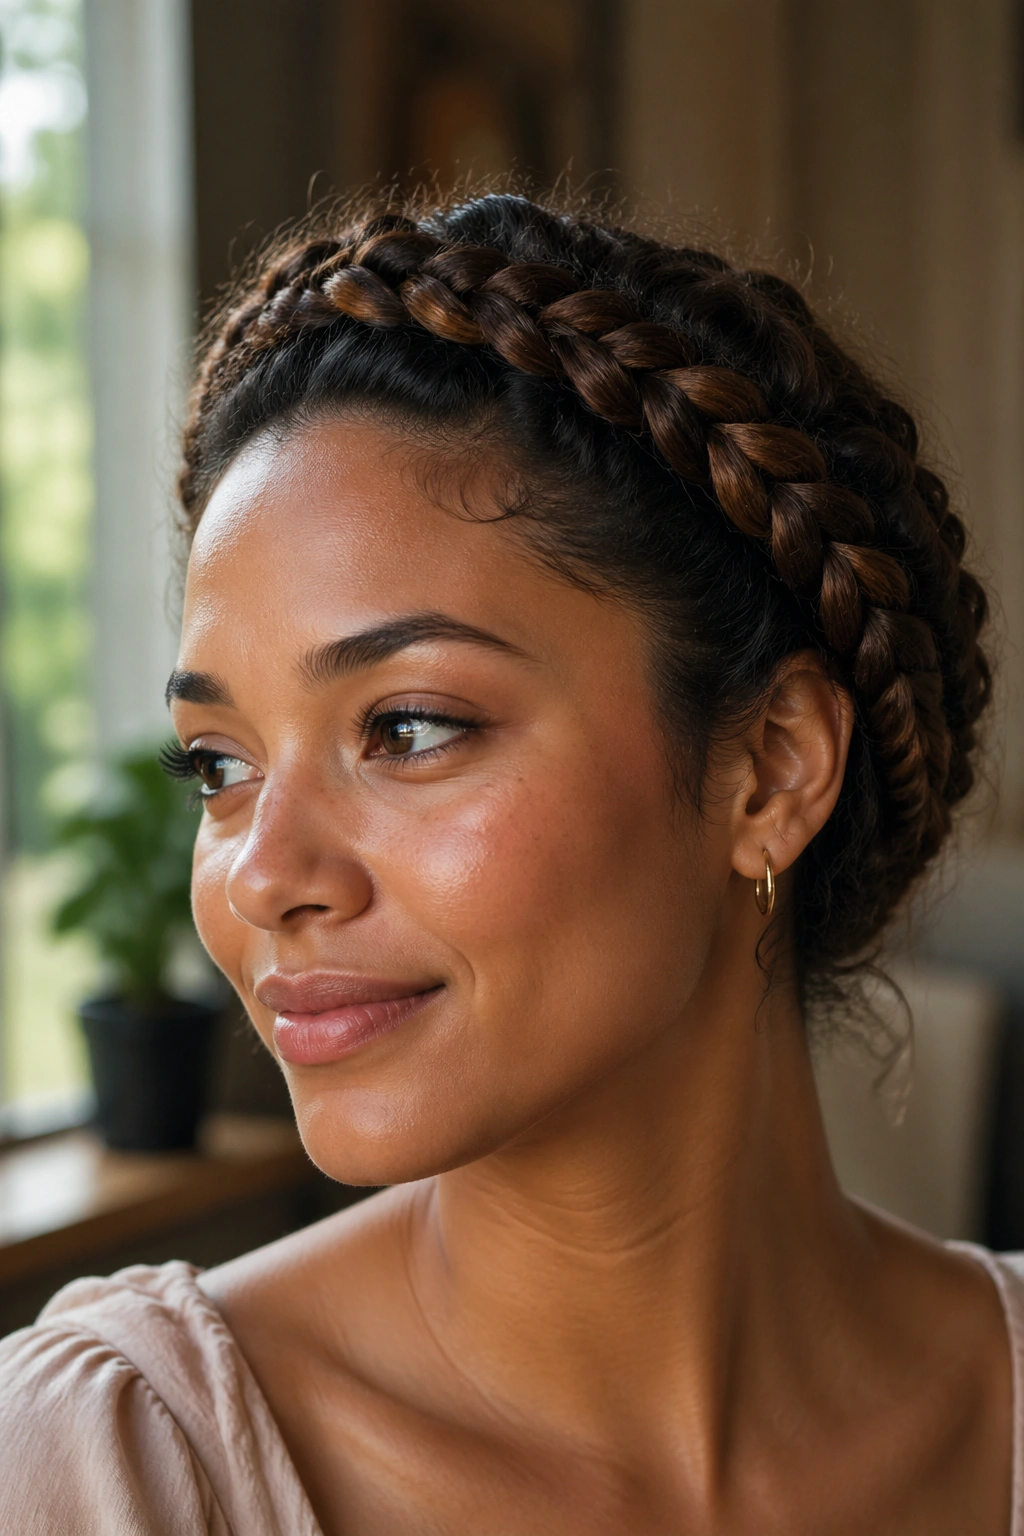
A braid around the hairline looks more complicated than it is. The shape does most of the work, and curly hair gives it some natural texture so the braid never looks too neat.
Start behind one ear, braid along the front hairline, then continue around the head and pin the end under the opposite side. If a full braid feels fiddly, twist the section instead and pin it in a curved line. The finish is different, but the effect is close enough for most days.
Twist vs. Braid
A braid gives a tighter, more defined edge. A twist is softer and faster. On hair with a lot of shrinkage, the twist is often easier because the smaller sections stay more manageable.
What I like here is the way the style keeps hair off the face without flattening the rest of it. The crown stays full. The ends stay tucked. The whole thing feels stable, which is rare enough to mention.
10. Bubble Ponytail
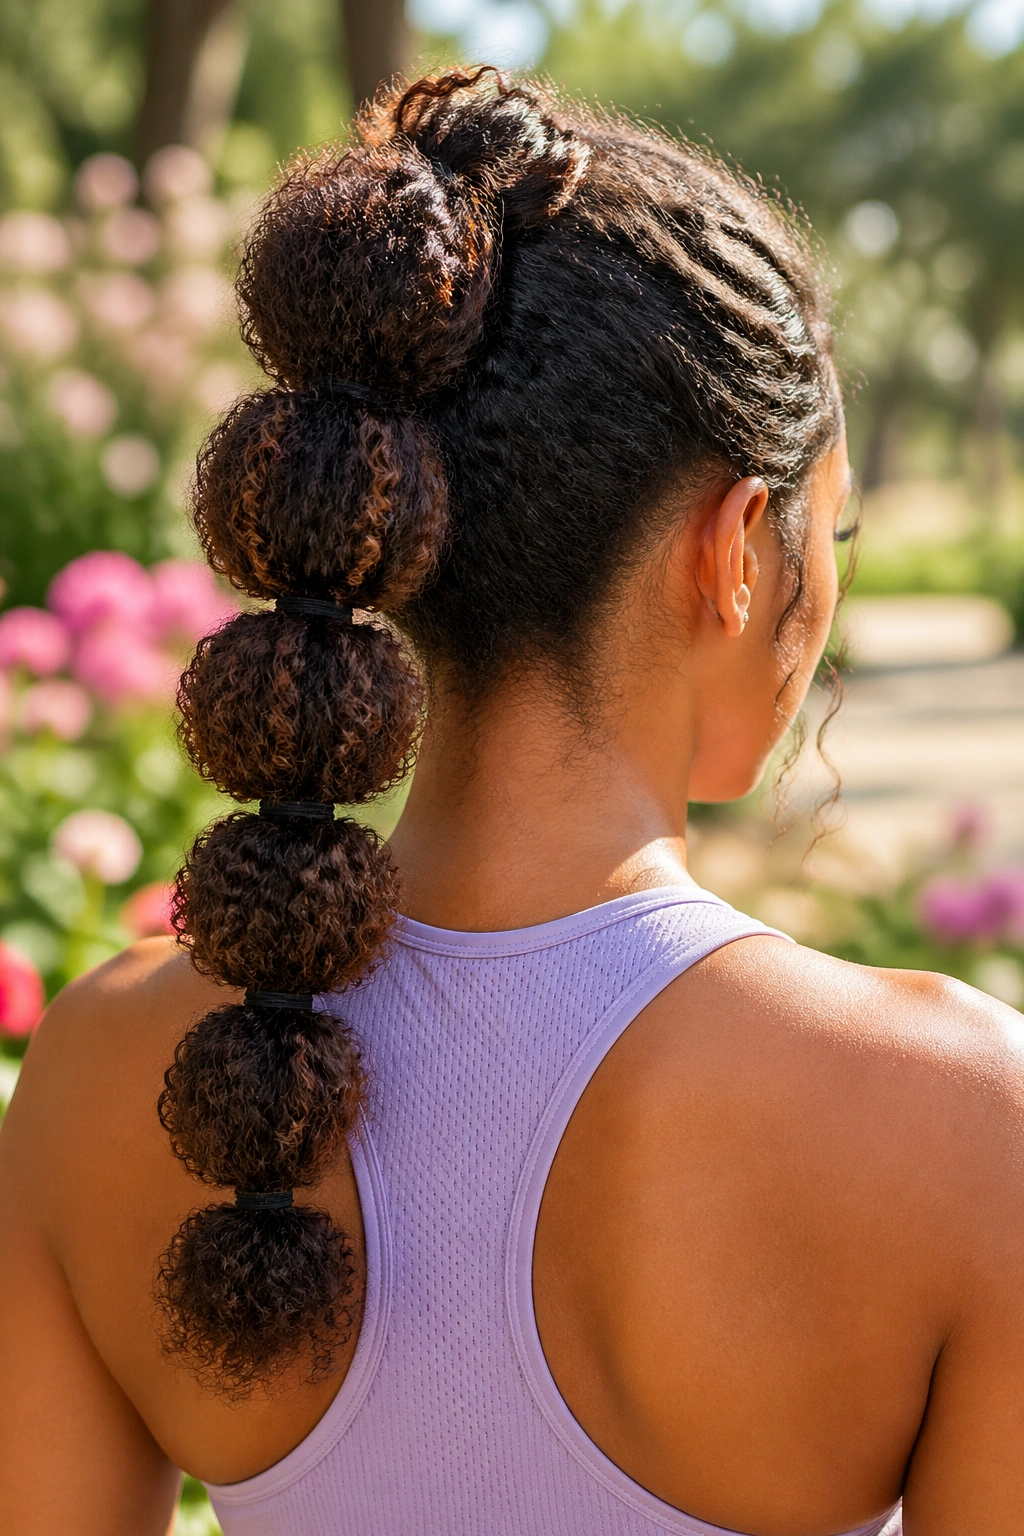
The bubble ponytail gets dismissed as playful, which is a shame. On curly hair, it is one of the easiest ways to make a ponytail look deliberate instead of accidental.
Start with a high or mid ponytail and place small elastics every 2 to 3 inches down the length. After each elastic, gently pull the section between the bands outward so it forms a round “bubble.” The curls fill the shape on their own, which saves you from having to force volume.
This style works best when the ponytail has some length. If the hair is short, the bubbles can look crowded. If it is long, the sections read clearly and the style feels balanced.
A little frizz is fine here. In fact, too much smoothing can make the bubbles look stiff. Better to keep the texture and let the shape do the talking.
11. Flat Twists at the Hairline
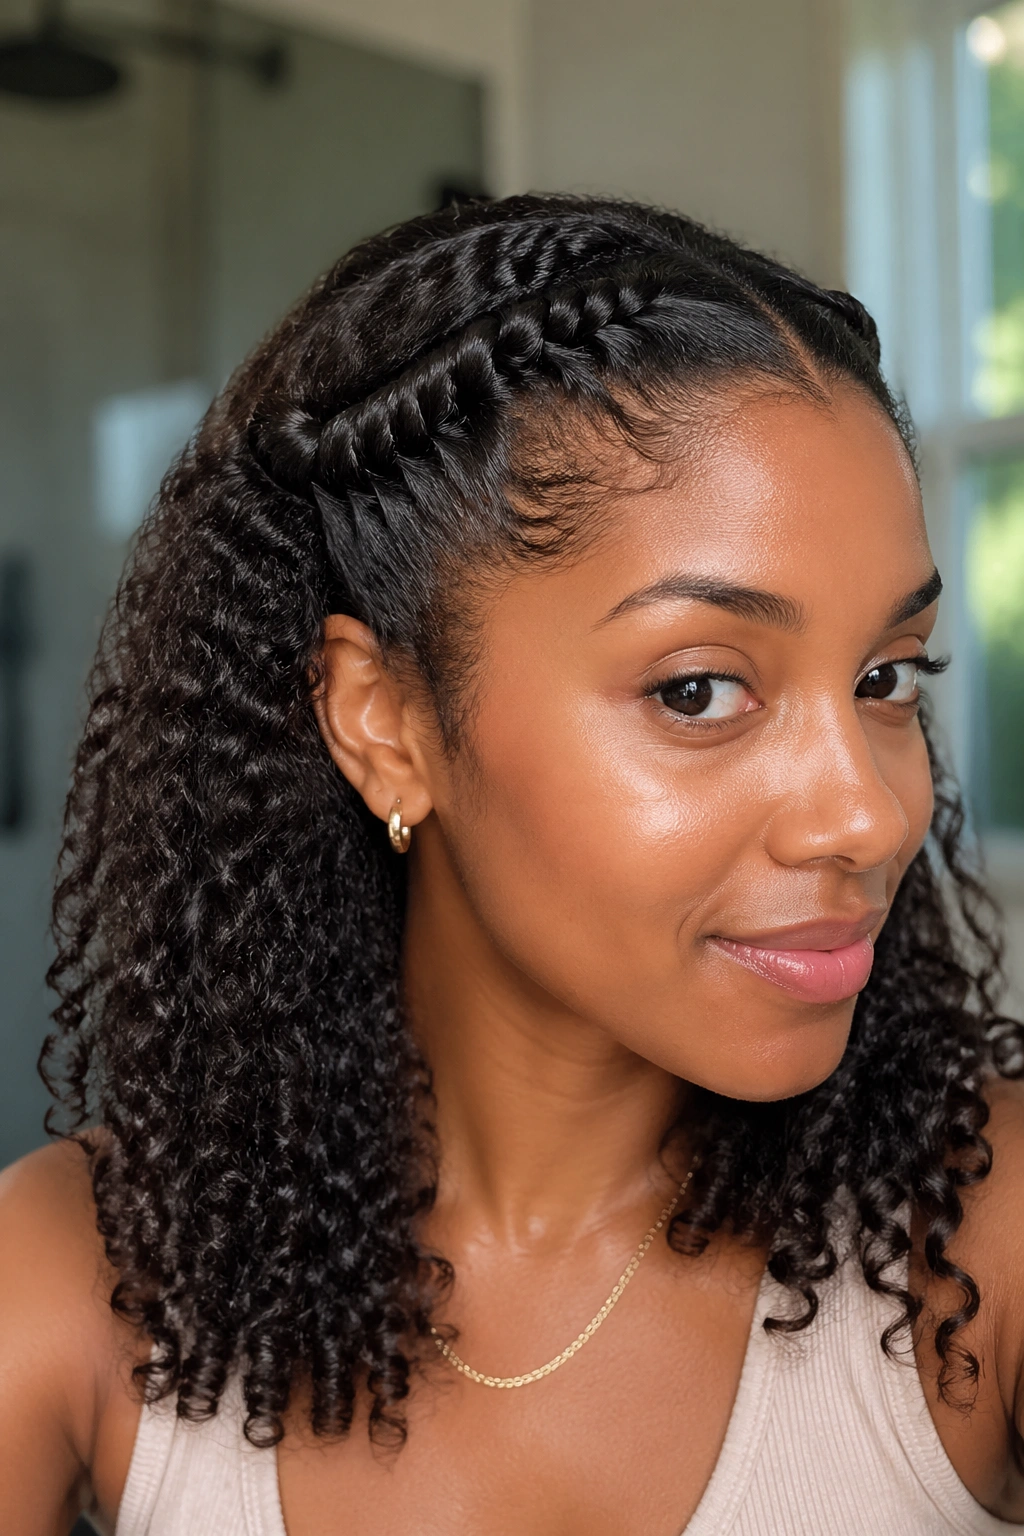
Flat twists at the hairline are the curly-hair answer to front pieces that refuse to sit still. They pull the messy zone back without asking the rest of the hair to cooperate.
Unlike a full braid, flat twists lie close to the scalp and take less time to set up. Take two small front sections, twist them backward against the head, and pin each one behind the ears or at the crown. The rest of the hair stays loose.
This is a good choice when you want to keep a wash-and-go feeling but need the front out of your eyes. It also works well with bangs that are growing out and curls that separate too much around the temples.
If your hair is very slippery, use a touch of styling cream before twisting. If it is dry and fluffy, a mist of water is enough. Small adjustment. Big difference.
12. Low Chignon
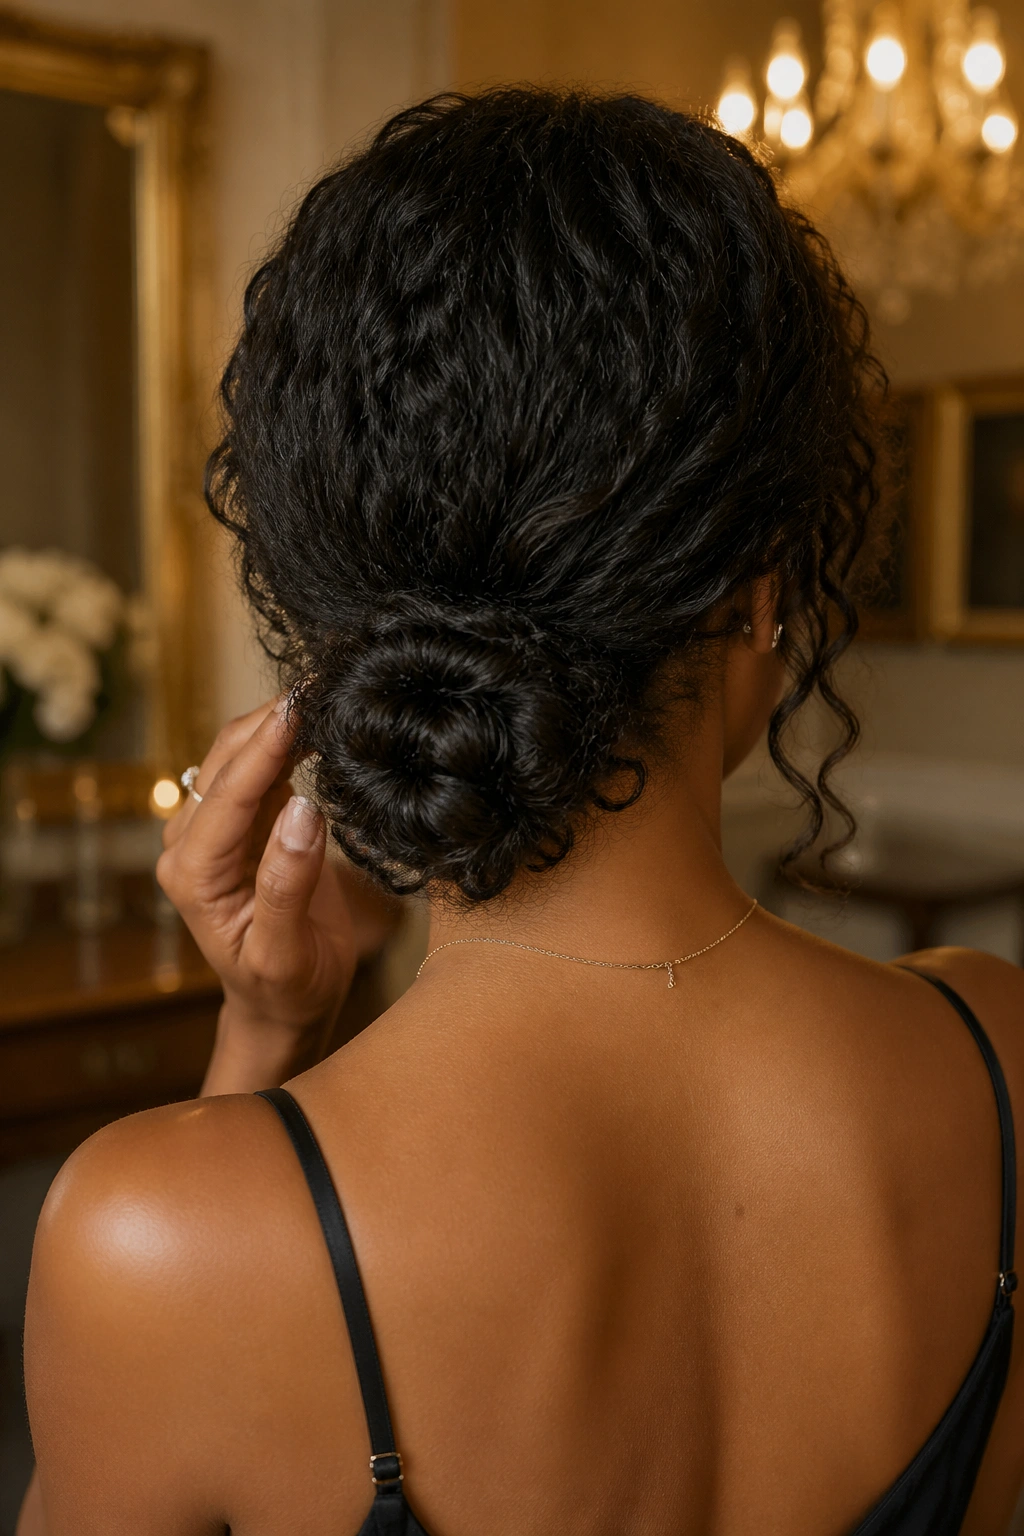
There is a difference between a low bun that looks like an afterthought and a chignon that looks like you meant it. Curly hair does the second one well when the pins are placed with a little care.
Gather the hair low at the nape, twist it once, and fold the length into a compact coil. Pin the coil from both sides so the weight is spread out. A chignon usually needs four bobby pins, sometimes more if the curls are thick or layered. The trick is to pin into the twist, not just around it.
The style works best when the crown has a little smoothness but the bun itself stays textured. That contrast is what keeps it from looking too flat. If the hair is extra dry, rub a tiny bit of cream between your palms before smoothing the top.
This is the one I reach for when I want something calm and a little dressed up without turning the hair into a shell.
13. Half-Up Top Knot for Naturally Curly Hair
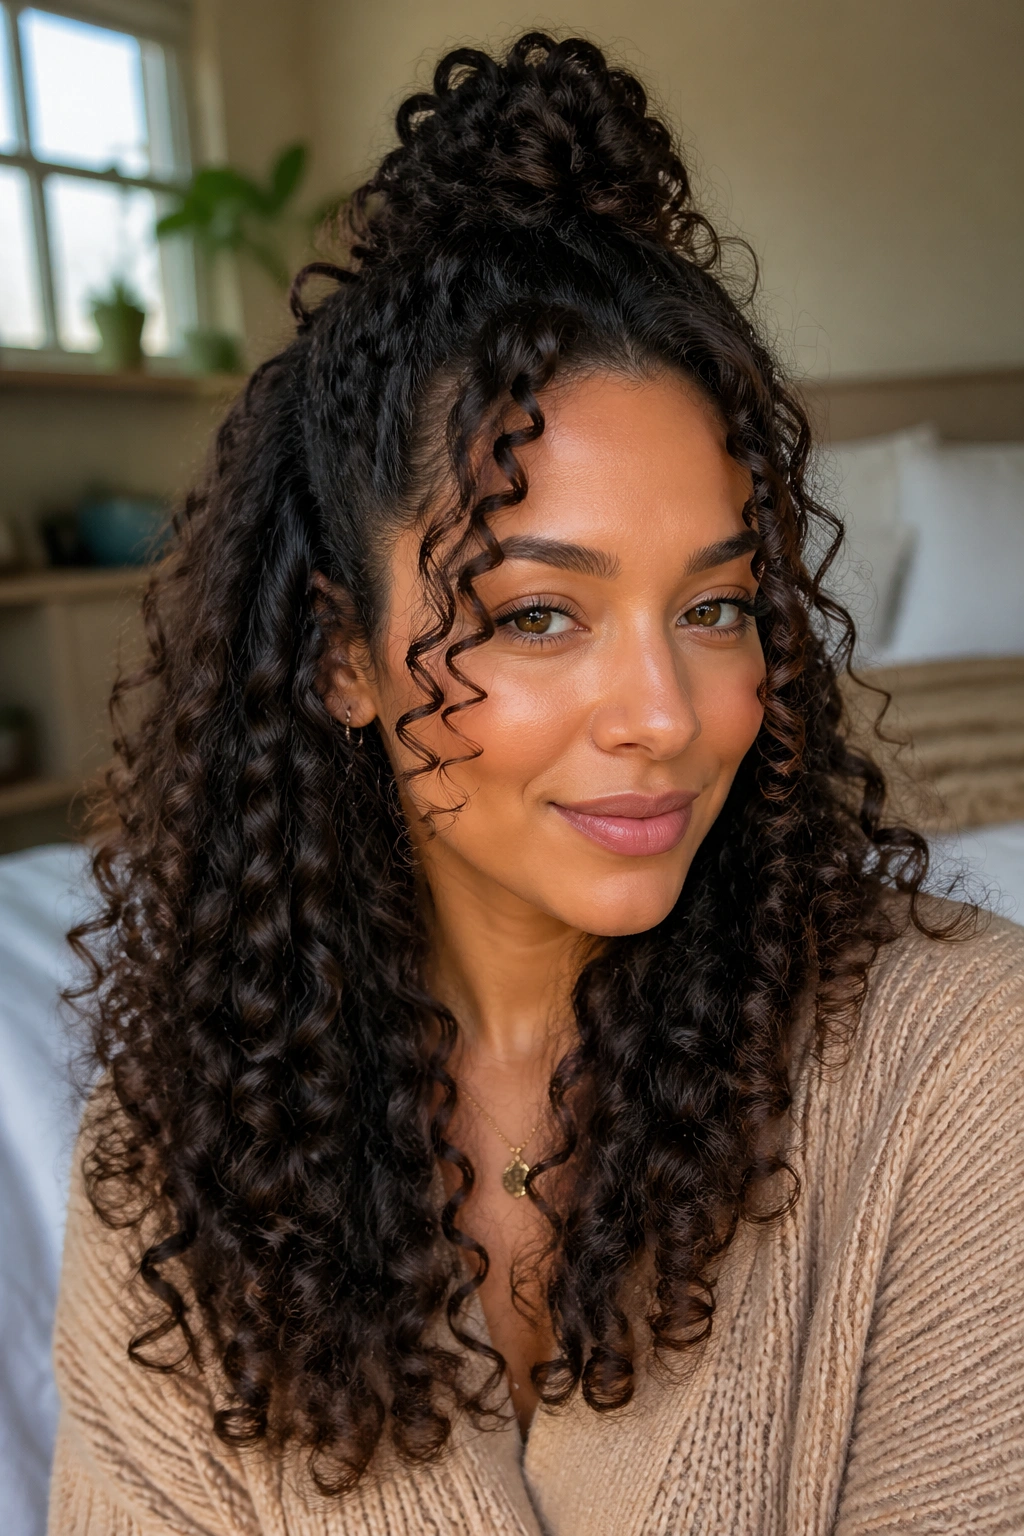
A half-up top knot saves shape without turning the whole head into a bun. That is the reason it keeps showing up in real life, not just in photos.
Take the top third of the hair and gather it at the crown. Twist it once, wrap it into a small knot, and secure it with a scrunchie or two pins. Leave the lower curls loose so the style keeps movement. If your curls are long, let the knot stay a little messy. If they are shorter, keep it compact so the ends do not stick out at odd angles.
This is one of the best easy hairstyles for naturally curly hair when you want volume up top but still want the length visible. It works on fresh curls, stretched curls, and the kind of hair that has been flipped over a shoulder all afternoon.
If the crown feels flat, gently lift the roots with your fingertips before pinning. That tiny bit of lift changes the whole silhouette.
14. Silk Scarf Updo
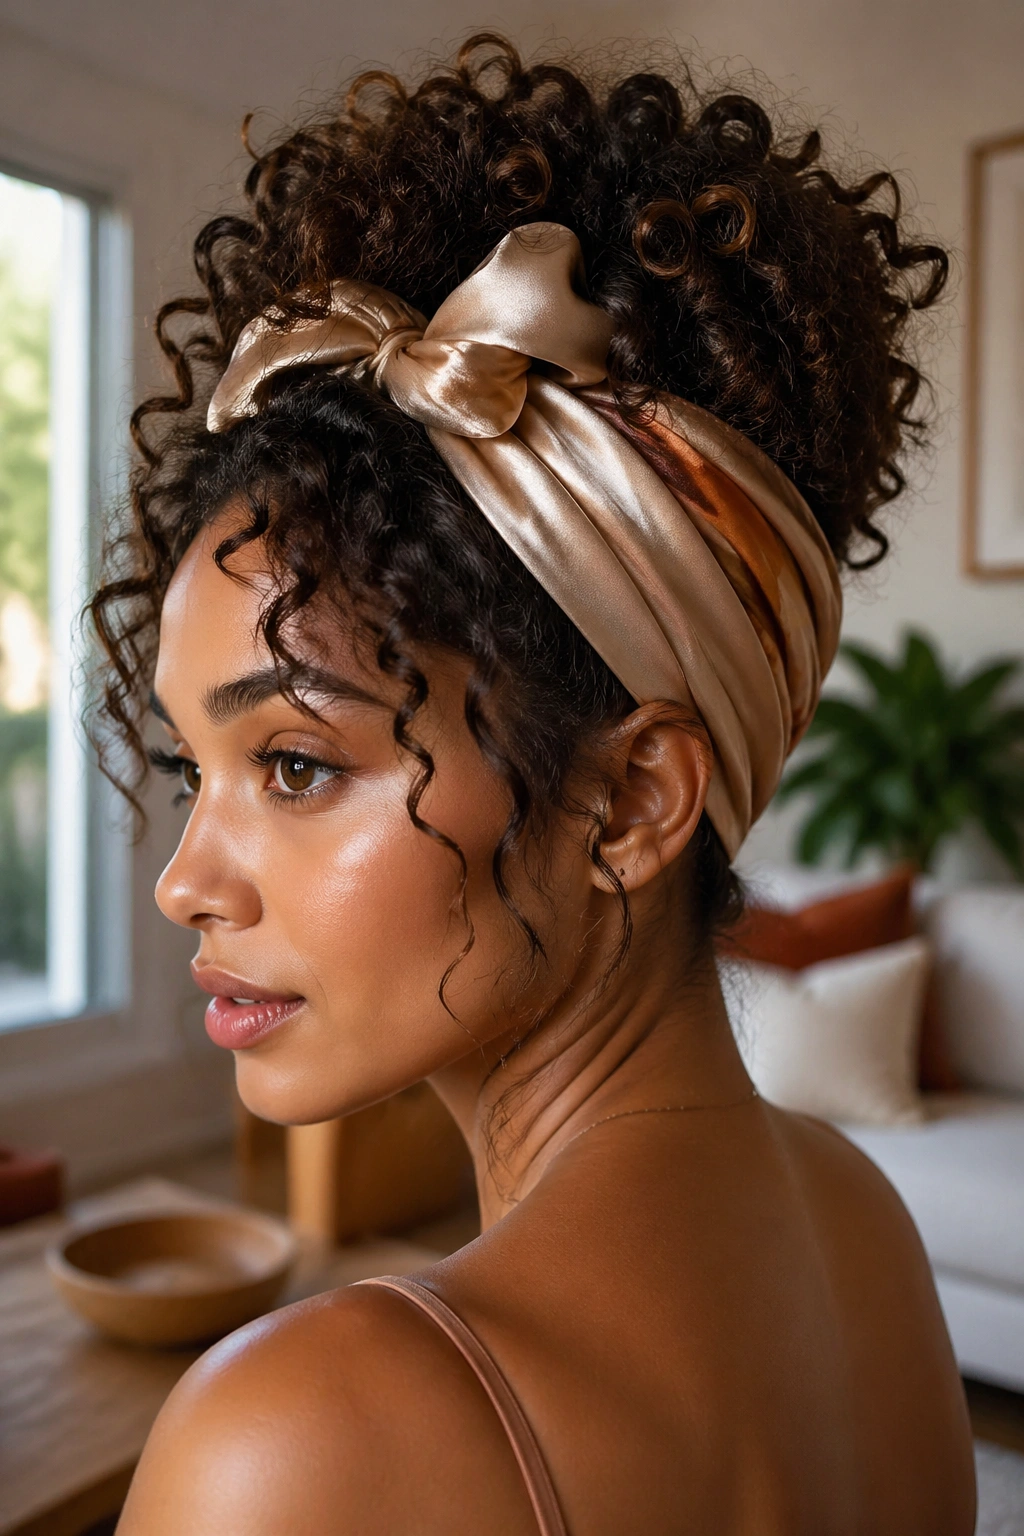
What does a silk scarf do besides look nice? It gives the style structure and keeps the top from puffing out too fast.
Fold a square scarf into a wide band, about 2 inches across, and tie it around the head or around a low bun. The scarf can hold the front back, hide a messy base, or anchor a puff while the curls spill underneath. A long rectangular scarf works too, but the square one is easier to control.
How to Tie It
Place the scarf at the nape or along the hairline, then bring the ends up and tie them once with a snug knot. Tuck the loose ends under if they are too long. The knot should feel secure, not tight enough to leave a mark.
This style is especially good when the curls are clean but slightly puffy at the roots. The scarf reins that in without killing the texture. And yes, a satin scarf does help reduce friction. The hair feels it.
15. Mini Bantu Knots
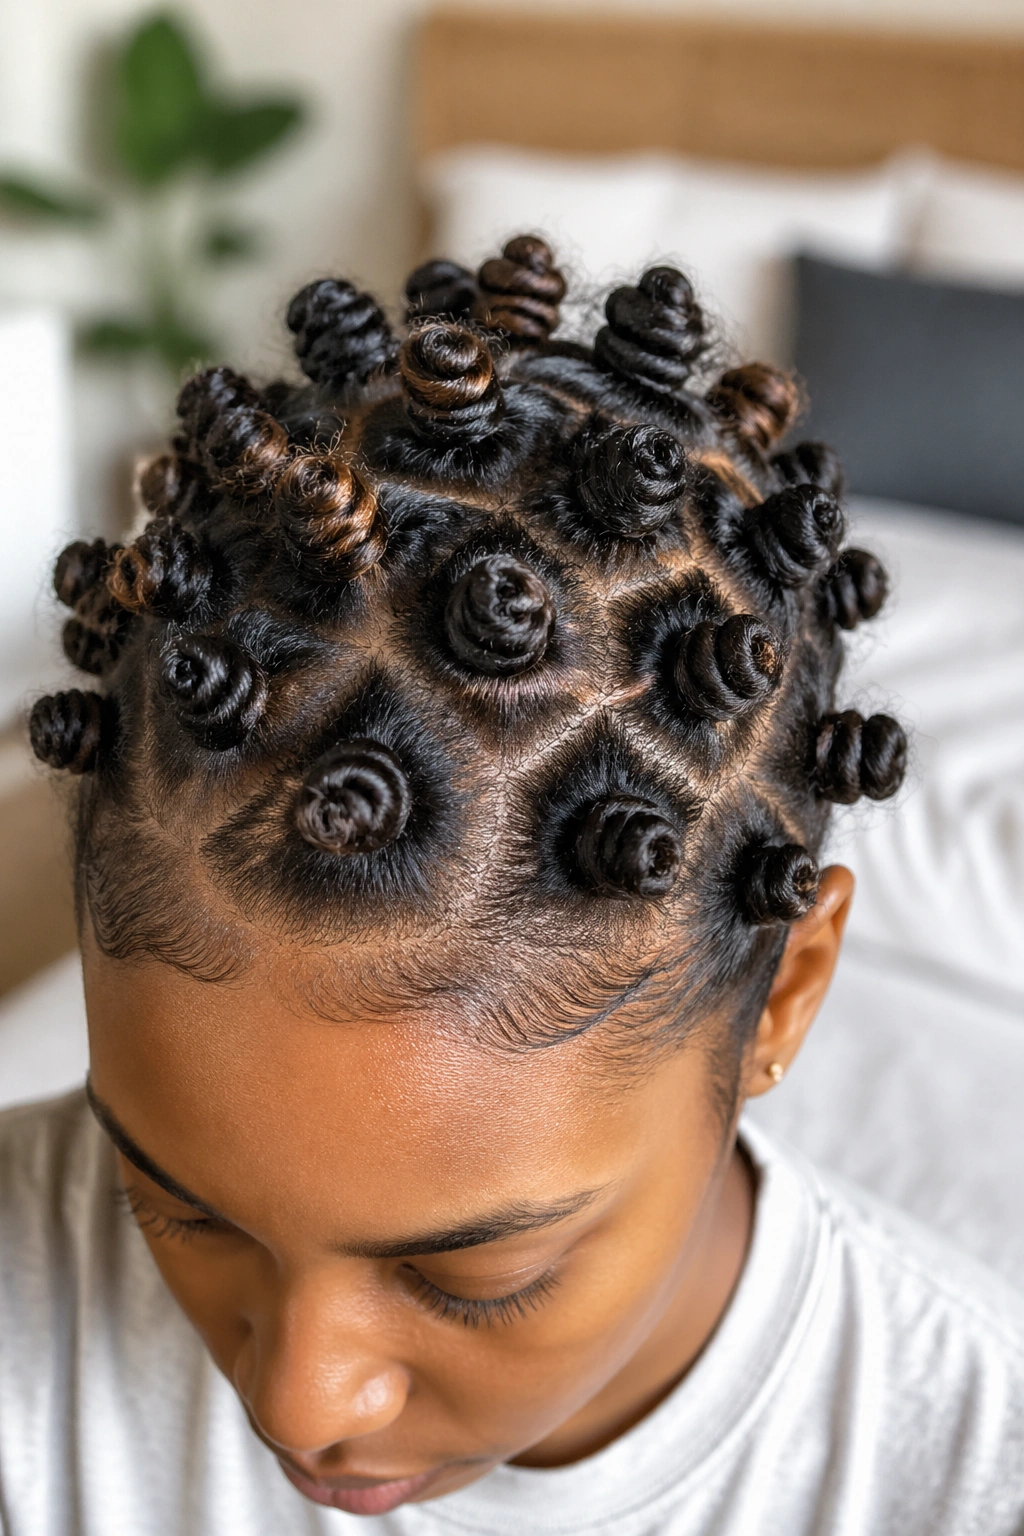
Mini Bantu knots look sculpted, but the process is simple once you stop trying to make every section identical. That is the part that usually slows people down.
Section the hair into small squares, usually about 1 to 1.5 inches each. Twist each section until it coils back on itself, then wrap the coil into a tiny knot close to the scalp. Secure it with a pin or tuck the ends under the knot if the hair is cooperative. If the curls are dry, add a little cream first so the knot holds shape instead of fraying.
They can be worn as a style on their own or taken down later for more defined curls. Either way, they work because the sections are controlled without being stiff. The scalp should feel snug, not pulled.
One caution: do not make them so tight that the roots ache after an hour. A neat knot is one thing. A sore head is another.
16. Side Braid into Ponytail
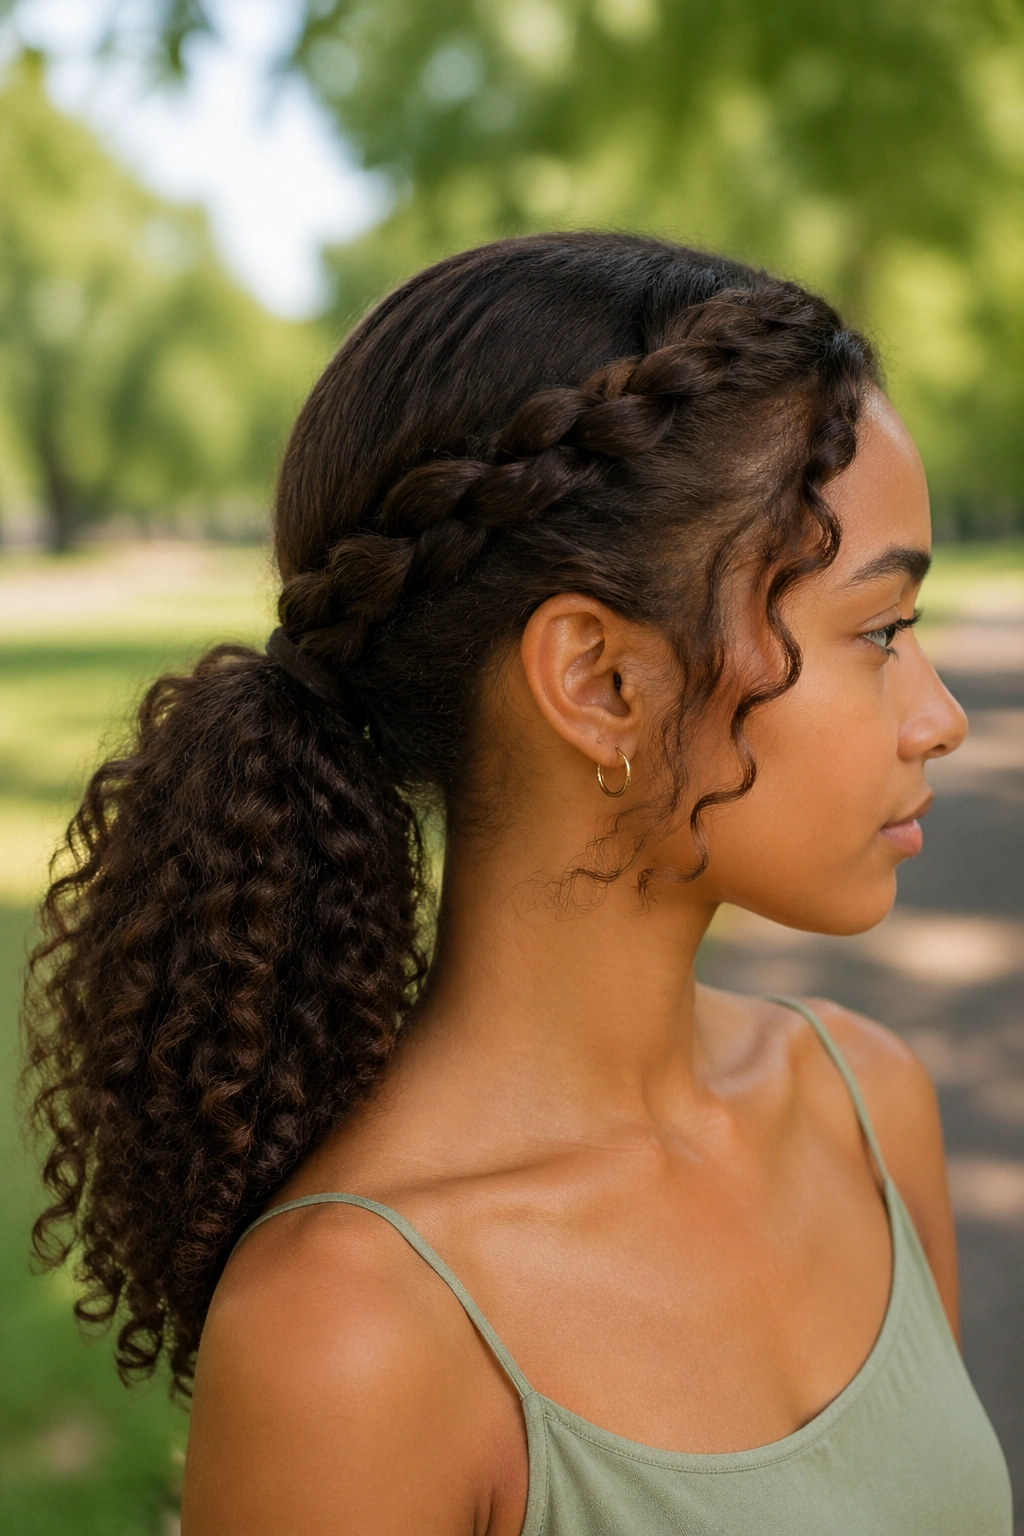
A side braid into ponytail is what you do when a regular ponytail feels too plain and the front pieces keep escaping. It looks intentional without asking for much.
Start a braid at one temple and work it back toward the ear, then gather the braid with the rest of the hair into a ponytail at the nape or slightly lower. The braid acts like a built-in side panel, which is useful if your curls are thick or if you have layers that fall out of everything else.
Unlike a plain ponytail, this style gives shape along one side of the head. That makes it especially good for people growing out bangs or trying to control a heavy front section. The braid does not need to be tight. A loose, chunky braid often sits better on curly hair because it matches the texture instead of flattening it.
If you want extra hold, pin the braid flat before adding the ponytail elastic. Small step. Better result.
17. Curly Faux Hawk
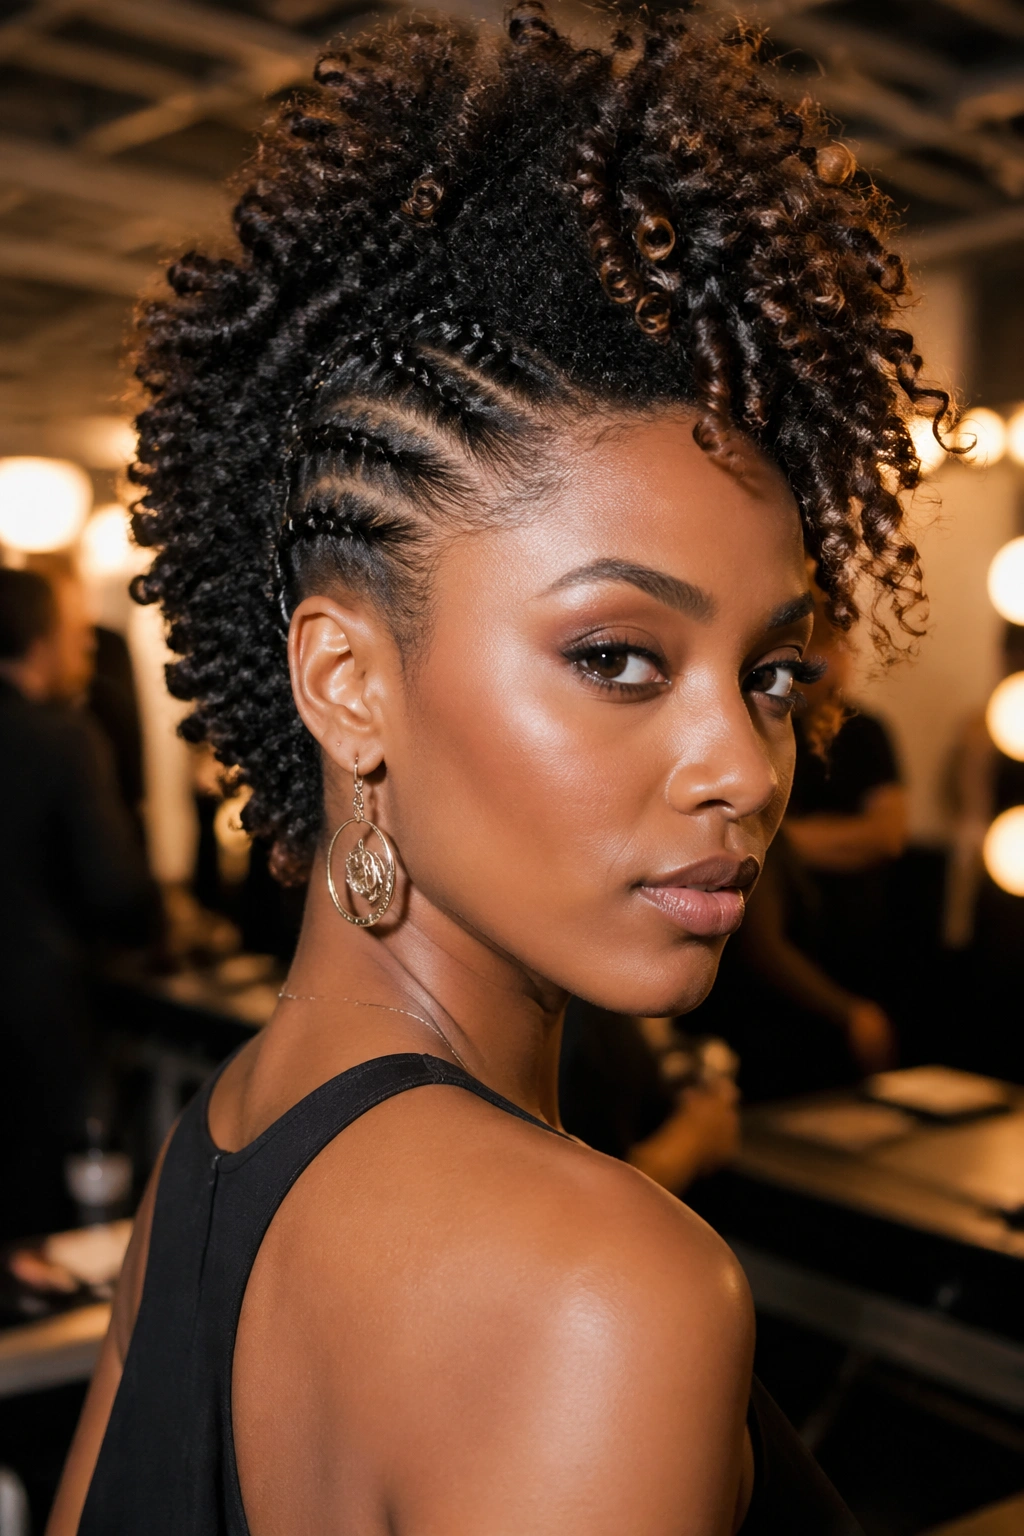
When you want volume in the middle and less hair on the sides, the curly faux hawk solves the problem without much drama.
Pin the sides up toward the middle of the head, leaving the center strip free and full. The pins can be hidden under the curls, so the shape reads as one strong line instead of a bunch of little clips. If the hair is short to medium length, this works especially well because the curls stack on top of each other instead of collapsing.
- Use 4 to 8 bobby pins depending on thickness
- Smooth the sides with a bit of cream if they puff too much
- Leave the center loose so the curl pattern stays visible
- Good for nights out, concerts, or any day that needs a sharper shape
This style has a little attitude, which is part of the appeal. It is also practical. The sides stay put, and the center gets to keep all the volume it wants.
18. Pinned-Back Volume Crown
The best version of this style barely looks styled. That is why it works.
Take the front sections and pin them back behind the crown, but leave the rest of the hair loose and full. The pins should disappear under the curls, not sit on top like a row of little flags. Cross two pins into an X if you need more grip. That usually holds better than one pin stretched to its limit.
This is the style for the days when you want the face open but do not want to commit to a full updo. It keeps the top lifted, shows off the curl pattern, and stops the front from crowding your eyes. If the hair is extra thick, pin one side at a time and let the curls fall over the back pin points.
A tiny mist of water can help the front sections settle. After that, hands off. Curly hair tends to look better when it is not fussed over every three minutes.
19. Rolled Bandana Style
What makes a bandana style different from a headband? The bandana gives you more control over the shape, and the roll gives the curls a place to sit.
Fold the bandana into a strip about 2 inches wide, place it at the hairline or nape, and roll the front or side sections into it depending on the look you want. Tie the ends at the top or back, then tuck any loose fabric under the knot so it stays neat. A cotton bandana grips more than a slick scarf, which is useful when the hair is slippery.
This style is handy when you want something casual that still feels finished. It works on curls that have gone a little wild at the roots and on lengths that need a gentle reset. The fabric also helps protect the edges of the hair from constant rubbing.
If the bandana feels bulky, fold it narrower. If it slips, switch to a less slippery fabric. That tiny tweak usually fixes the whole thing.
20. Loose Updo With Tendrils
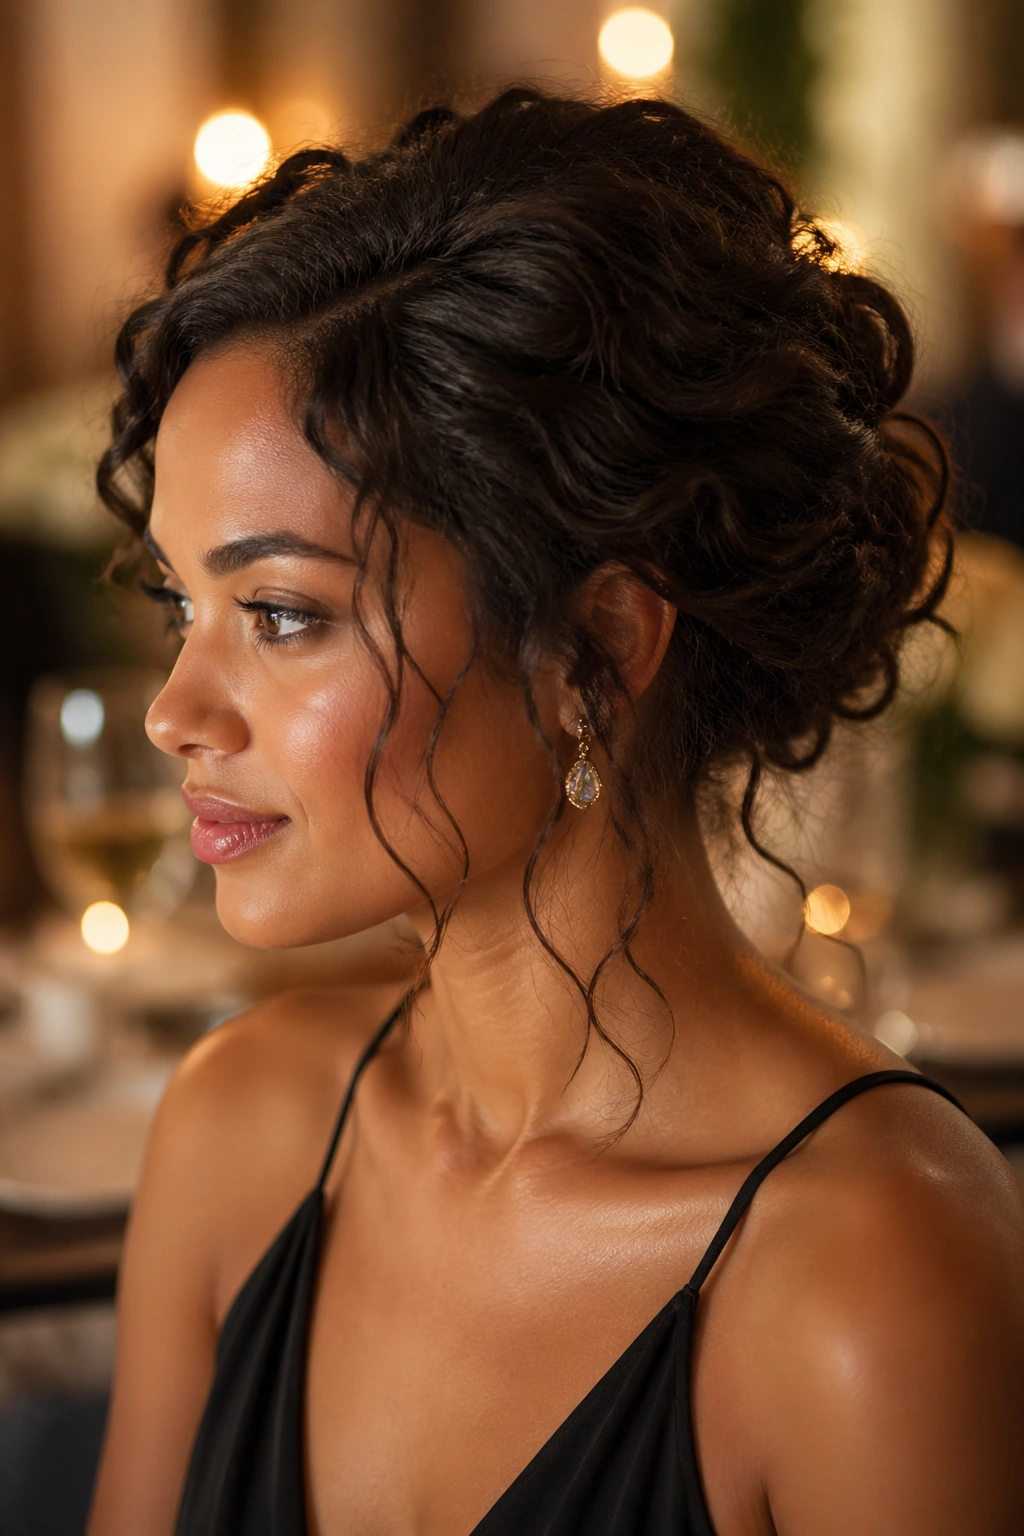
A loose updo with tendrils is what happens when you stop trying to make curly hair behave like it is at a job interview and let it keep some softness around the face.
Sweep the hair back into a low or mid twist, but leave a few thin curls out at the temples and near the jaw. Pin the updo in place with four to six bobby pins, then gently pull a couple of curls free so they sit as face-framing pieces. Those tendrils keep the style from looking too severe.
- Best for dinners, parties, and weddings
- Works better when the curls are defined, not brushed out
- Leave 2 to 4 tendrils for a softer line
- Use pins that match your hair color if you want them to disappear
The style has a nice tension to it: the back is controlled, the front stays loose, and the curls carry the whole thing. That contrast is what makes it hold up.
21. Wrapped-Base Puff for Naturally Curly Hair
The wrapped-base puff is one of the most reliable easy hairstyles for naturally curly hair because it gives the curls a clear shape without fighting the volume. Gather the hair high or mid-level, secure it with a soft elastic, then take a small 1-inch section from the underside and wrap it around the base until the band disappears.
That little wrap matters. It turns a plain puff into something cleaner, and it keeps the elastic from looking like an afterthought. If the hair is short or very dense, use two pins under the wrap so the end stays hidden.
This style works especially well when the curls have body but the ends are a little tired. The puff lifts everything, the wrapped base makes it look finished, and the texture stays front and center where it belongs. A tiny bit of edge control around the hairline is optional, not required. I usually prefer a light touch anyway.
If you only keep one thing from all these styles, keep this: curly hair usually looks better when you work with the shape it already has. That is the whole trick. Not perfect. Just honest, quick, and a little bit loose in the right places.