Double braided ponytails are having a major moment right now, and honestly, it’s easy to see why. There’s something undeniably polished about twin braids meeting at the back of your head, whether you’re heading to a professional meeting, a casual weekend outing, or getting ready for something special. The beauty of this style is that it works across so many different occasions and hair types — you can dress it down with a relaxed, loose braid or elevate it with sleek, tight braiding and metallic accents.
The versatility of double braided ponytails goes beyond just looking good. This hairstyle actually solves real problems: it keeps long hair completely contained, it distributes the weight more evenly than a single ponytail (which means less strain on your scalp), and it creates visual interest without requiring specialized tools or hours of styling time. Whether your hair is thick, thin, curly, straight, or somewhere in between, there’s a double braid ponytail approach that will work for you and flatter your face shape.
What makes these styles so exciting is how they’ve evolved. You’re no longer limited to the basic “two braids, one ponytail” approach you might remember from childhood. Modern double braided ponytails play with placement, braid texture, embellishments, and finishes in ways that feel fresh and intentional. From athletic wear to black-tie events, this hairstyle adapts beautifully — you just need to know which variation suits your specific situation and how to execute it with confidence.
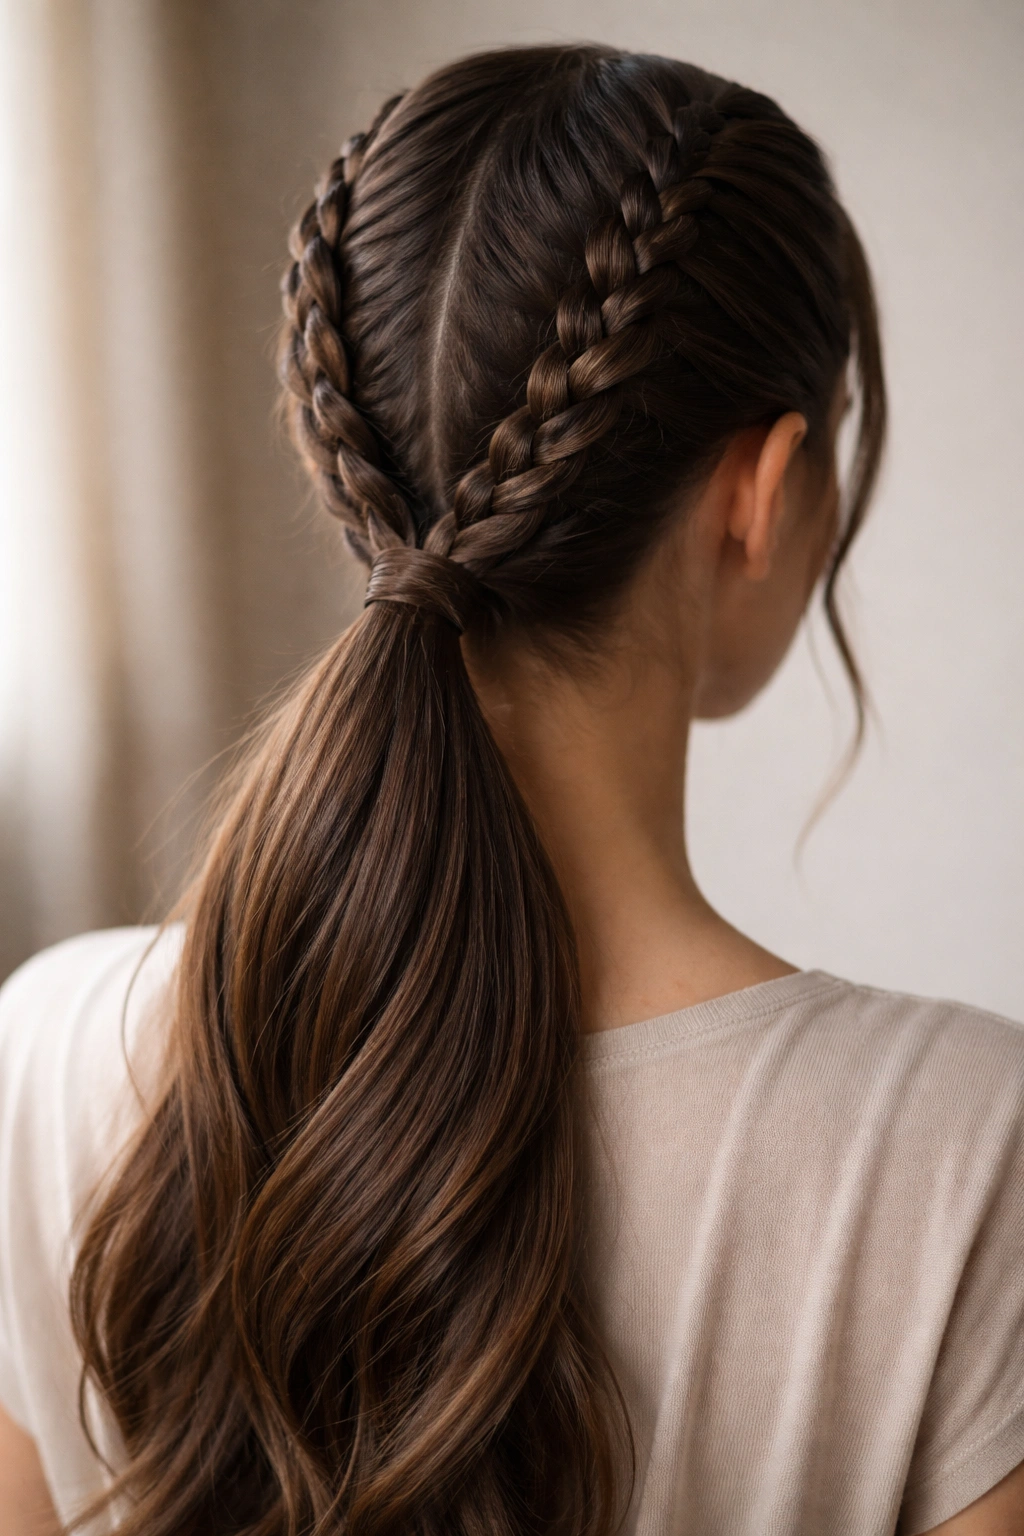
1. The Classic Double Dutch Braided Ponytail
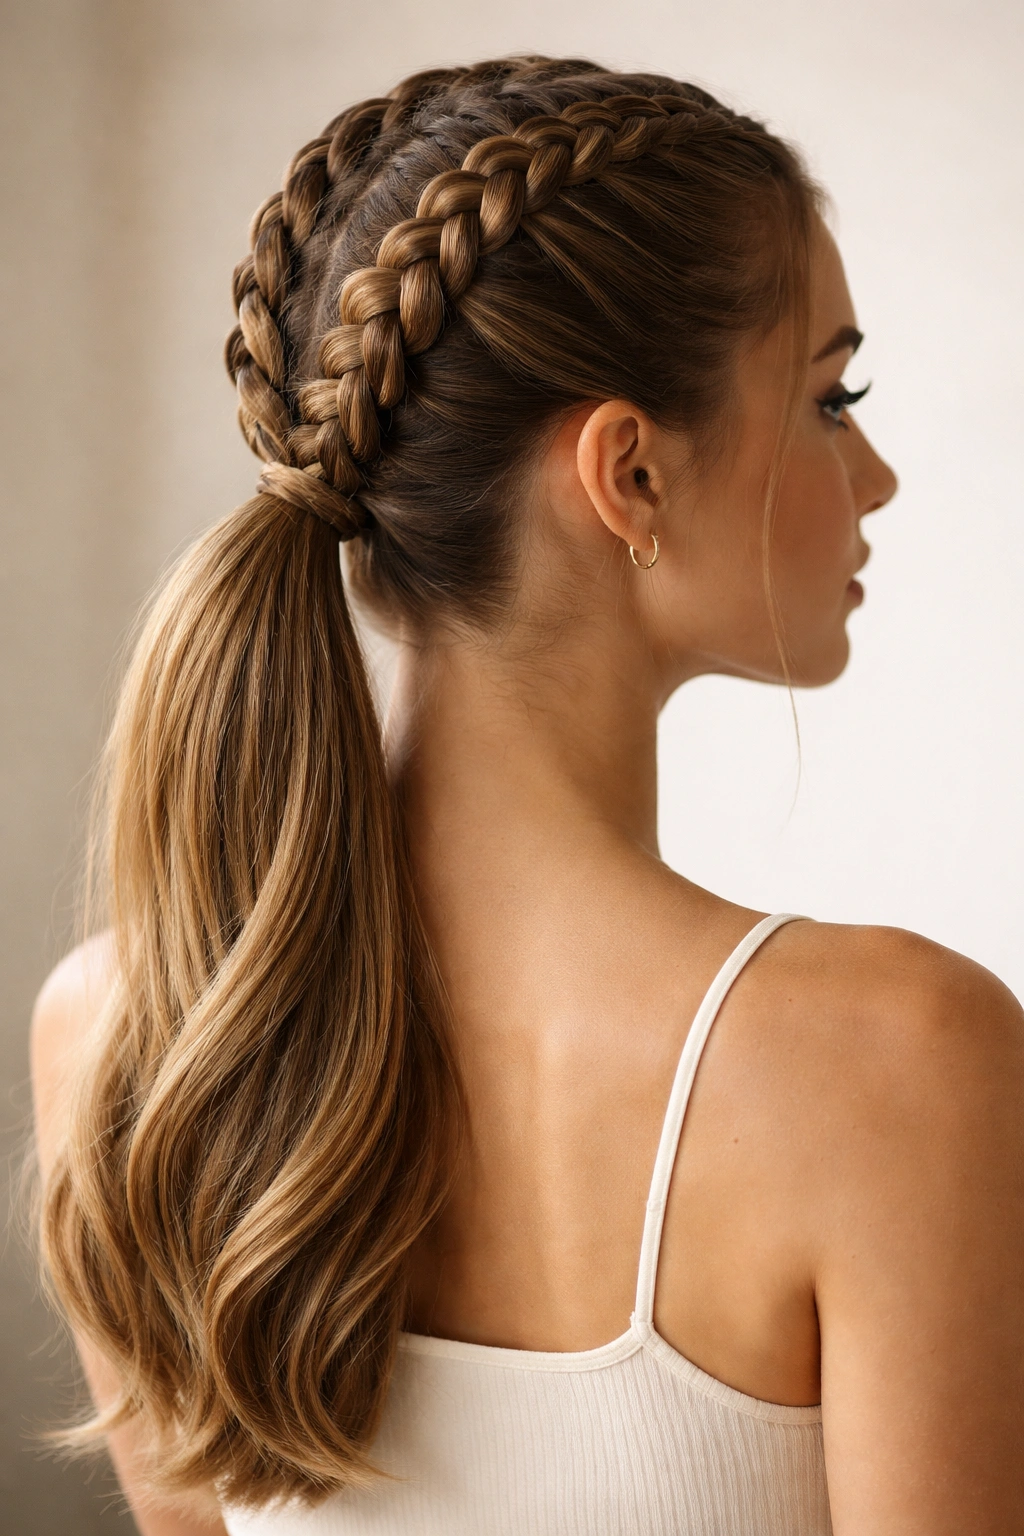
The Double Dutch Braided Ponytail is the foundational style that inspired everything else on this list. This look features two separate Dutch braids (which sit on top of your head rather than flowing underneath) that start at your crown and run parallel down the back of your head, meeting at the nape of your neck where they merge into a single sleek ponytail. The result is incredibly polished and put-together, with the Dutch braids creating defined texture that photographs beautifully.
What Makes This Style Stand Out
This version works because the Dutch braiding creates an instantly sophisticated look that reads as intentional and well-planned, even though it’s actually quite forgiving to execute. The elevated braids open up your face and neck, which is flattering for most face shapes, and the structured braiding means the style holds up beautifully throughout a full day without loosening or looking messy. The single ponytail at the back provides balance — it’s not too juvenile, but it’s not overly formal either.
Perfect For and How to Style It
- Special occasions where you want to look polished but not overdone — think rehearsal dinners, wedding guests, date nights, or professional events
- Thick or medium-weight hair that holds braids well without slipping
- Face shapes that benefit from an open forehead — ovals, hearts, and squares work particularly well
- Creating a base for hair accessories like pearl clips, metallic cuffs, or a silk ribbon woven through the braids
- Achieving a style that works for both daytime and evening events without modification
Styling tip: Section your hair down the center all the way from your forehead to your nape before starting — this ensures your two braids are perfectly symmetrical. Dutch braid from the crown downward on each side, keep the tension even, and secure each braid with a small elastic before combining them into one ponytail with a larger elastic at the base.
2. The Bohemian Textured Double Braided Ponytail

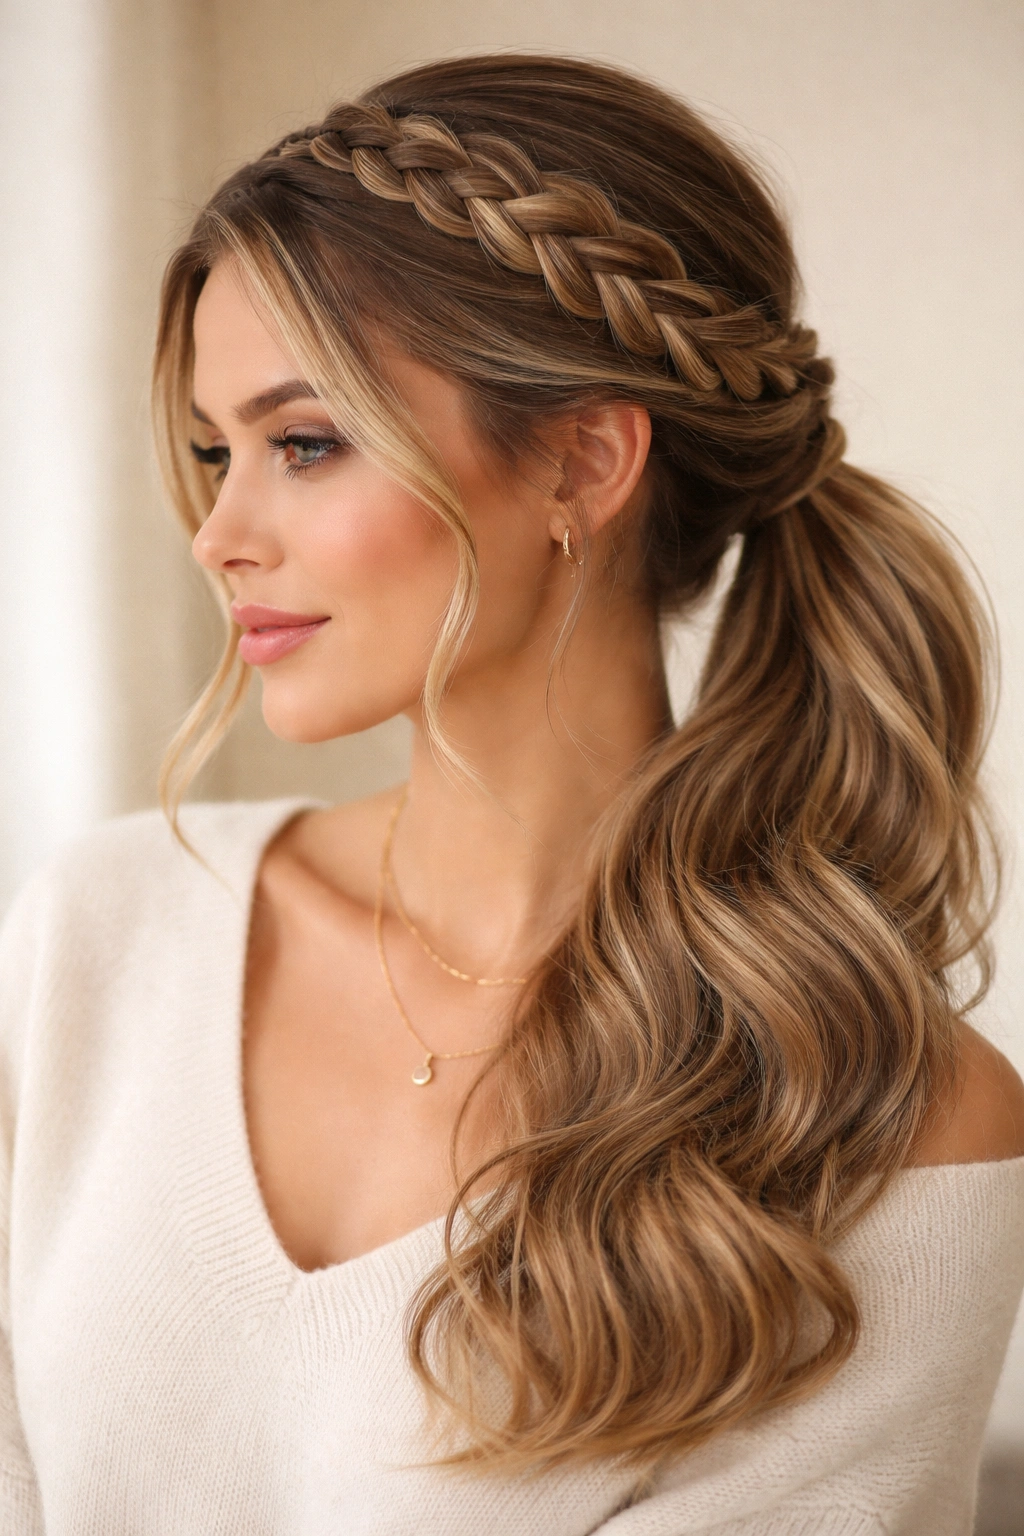
If you want to soften the look and create something with more movement and romance, the Bohemian Textured version deliberately abandons the polished, tight aesthetic. Instead, you’re creating two loose Dutch or French braids (French braids are more fluid than Dutch) and leaving them intentionally undone, pulling sections of hair out from between the braid strands as you go. The effect is effortlessly romantic, with wisps framing your face and an overall sense of relaxed elegance.
Why It Feels So Effortlessly Beautiful
This style works because imperfection is the entire point — you’re not trying to create a crisp, structured look but rather a lived-in, just-did-this-casually aesthetic. The loose, textured braids create volume and movement that flatters most face shapes, and because the style is intentionally undone, minor flyaways and imperfect sections actually add to the charm rather than detracting from it. This is the version that works beautifully in candid photos and natural lighting.
How to Get the Effortless Effect Right
- Start with second-day hair or texture spray applied the night before — freshly washed hair is actually harder to work with for this style
- Create two side-parted sections rather than a center part for a more romantic, unbalanced feel
- Use French braids rather than Dutch braids (French braids sit on top but curve slightly, creating a more flowing look)
- Pull out small sections of hair deliberately as you braid, working from the bottom of each braid upward
- Leave your ponytail slightly loose at the base and curve a small piece around the elastic to hide it
- Consider adding a small delicate clip or fresh flower for a garden-party vibe
Worth knowing: This style photographs better than it looks in the mirror, so if you’re styling for a photo shoot or special event, don’t be discouraged by what you see in a direct reflection — the angle and lighting changes everything.
3. The Sleek and Sporty Double Braided Ponytail
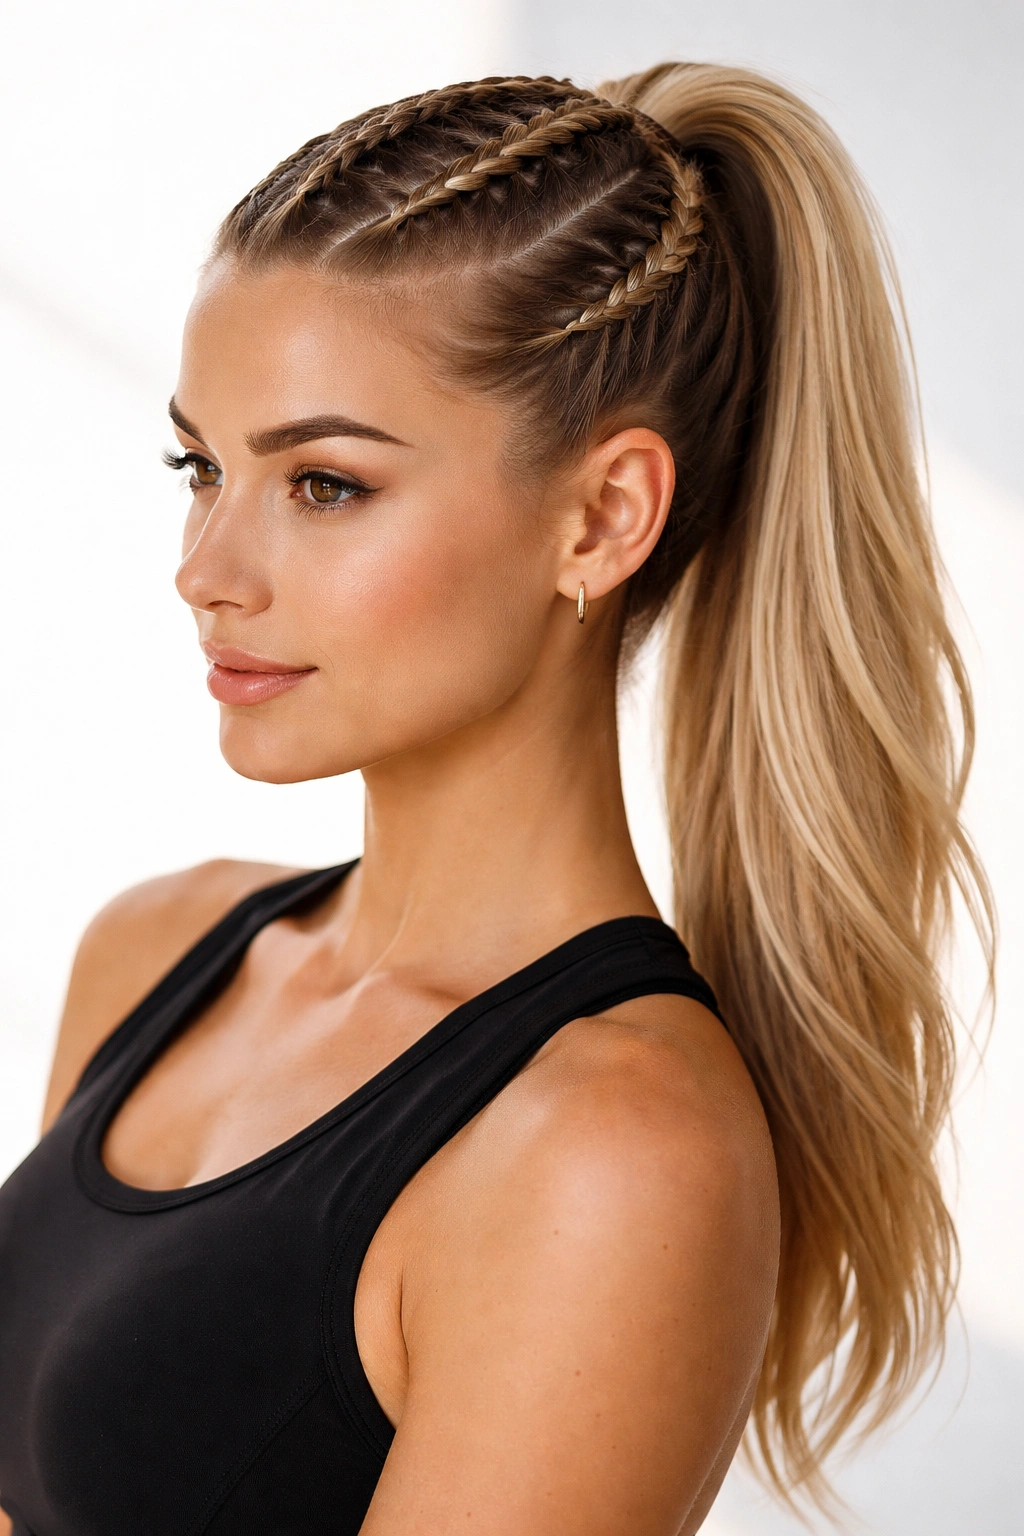
For workouts, athletic activities, or days when you need hair that absolutely won’t budge, the Sleek and Sporty version is your answer. This style features two tight French braids (the braids are kept smooth and close to the scalp) that start at your hairline and run straight back, combining into a high, secure ponytail at your crown. The effect is maximally functional while still looking intentional and stylish — this isn’t a lazy approach but a deliberate commitment to keeping your hair completely under control.
Why Athletes and Active People Love This Style
This works because the tight braiding keeps every single strand in place, the high ponytail prevents hair from moving across your face during activity, and the style is designed to handle sweat, movement, and time without loosening or frizzing. It’s also forgiving with various hair textures — even fine hair stays put when braided this tightly — and it dries quickly if you need to shower afterward without undoing the style first.
Creating the Maximum Security Version
- Use a texturizing spray or dry shampoo at the roots for better grip — slippery hair braids loose
- Part your hair slightly off-center for a less severe look (dead-center parts can look harsh with this tight styling)
- Braid as close to the scalp as possible, keeping tension even on both sides so the braids are equidistant
- Use a small elastic (the kind cheerleaders use) to secure the base of each braid before combining them
- Gather both braids and wrap a thick, smooth elastic around the ponytail base several times for security
- Use a small clip or bobby pin to anchor any shorter layers that might escape at the nape
- Consider finishing with hairspray on the braids themselves for extra hold through sweat and movement
Pro tip: If you’re doing this for a workout, braid your hair the night before and sleep in the braids — they’ll be tighter and hold longer because your hair has had time to set into the pattern.
4. The Side-Swept Double Braided Ponytail
Rather than centering your braids down the back of your head, the Side-Swept version takes an entirely different approach. You’re creating two braids on one side of your head that curve toward the opposite side, meeting at a low ponytail positioned off to one side of the nape. The asymmetry is modern and flattering, and the side placement adds movement and dimension that feels romantic without trying too hard.
What Makes the Asymmetry Work
This style is compelling because asymmetry naturally draws the eye and creates visual interest that a centered style can’t achieve. The curved path of the braids is more dynamic, and the side ponytail creates an opportunity to show off the texture and color of your hair in a way that centered styles don’t. For people with longer hair, this style prevents the weight of a centered ponytail from creating tension at the crown.
Styling the Asymmetrical Version
- Create a deep side part — the deeper the part, the more pronounced the side-swept effect will be
- Braid the section of hair nearest your ears first, curving the braid toward the opposite side of your head
- Braid the second section slightly lower and with a gentler curve, so both braids flow toward your opposite shoulder
- Let the ponytail hang naturally where both braids meet, rather than forcing it into a rigid position
- Gently pull and texture the braids to soften the structured look
- Consider a long braid from the base of the ponytail extending down your back for extra drama
Insider note: This style works particularly well for people with fine hair, because creating two separate braids distributes the hair more evenly than a single ponytail, so there’s less strain on any single section of the scalp.
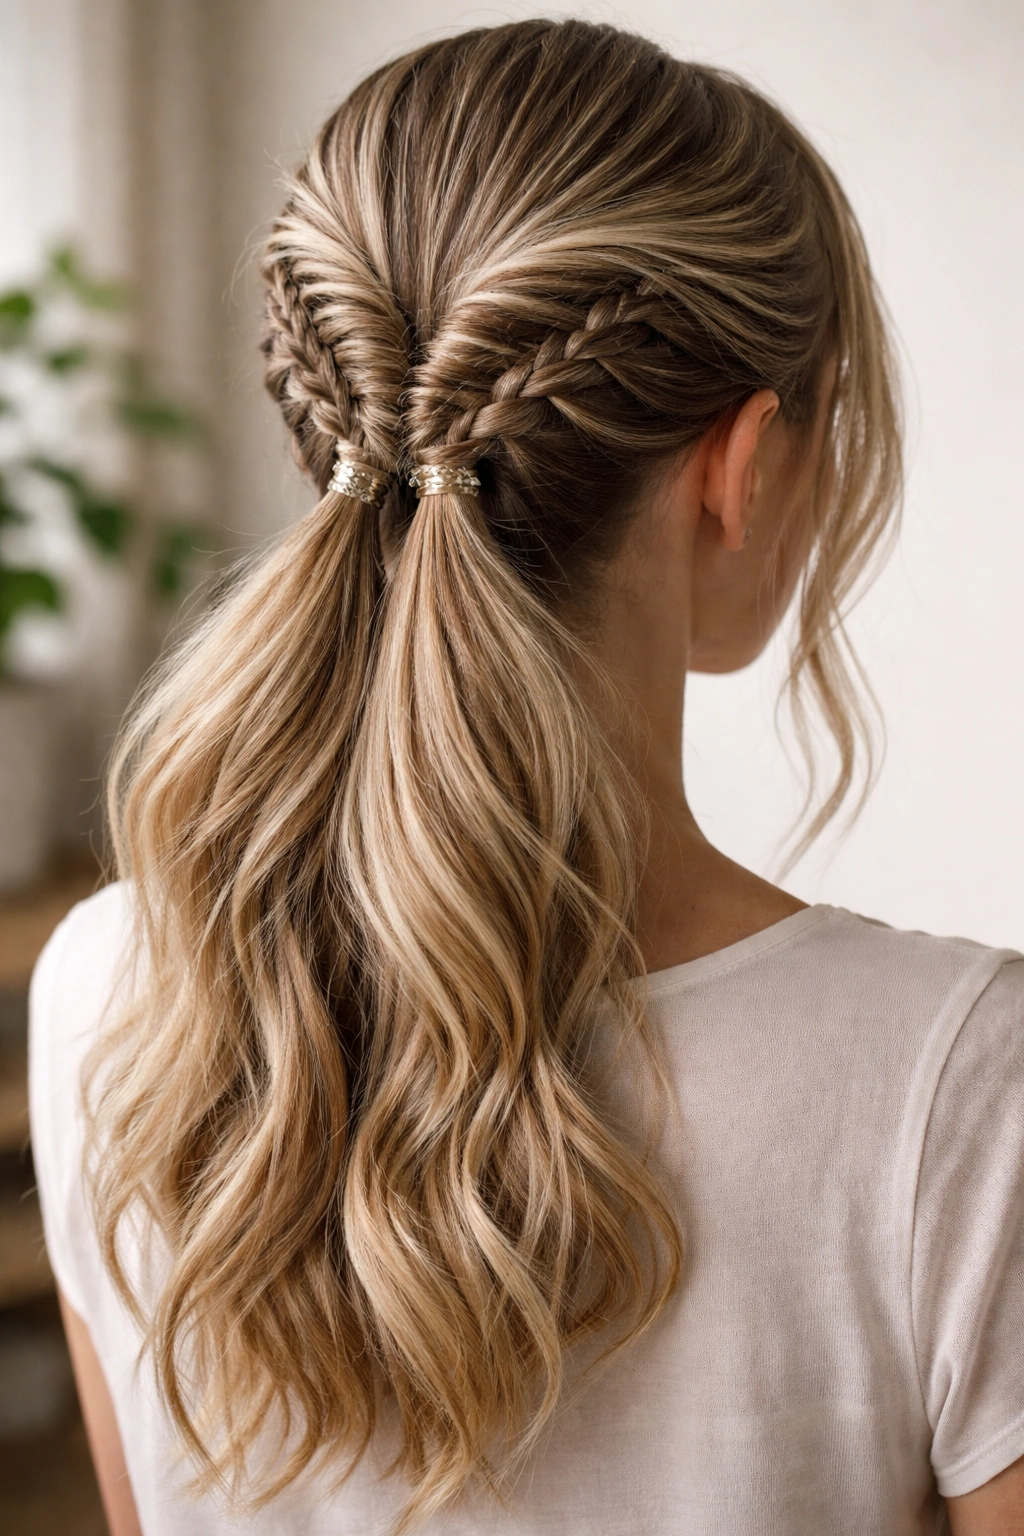
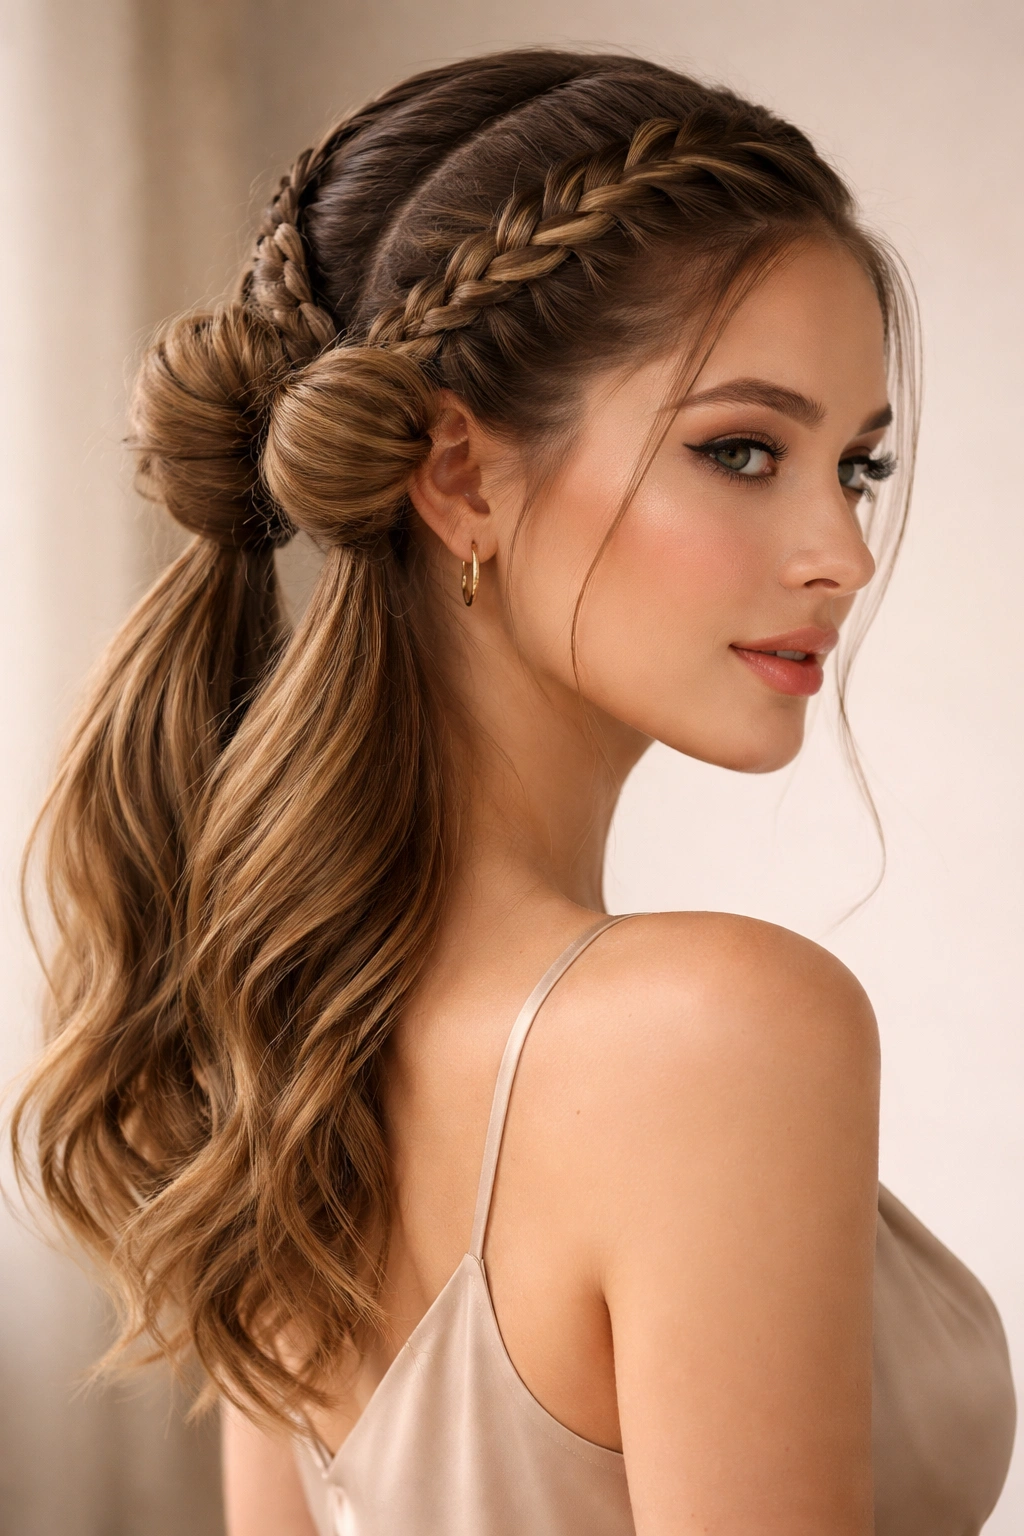
5. The Crown Braided Double Ponytail with Wrapped Base
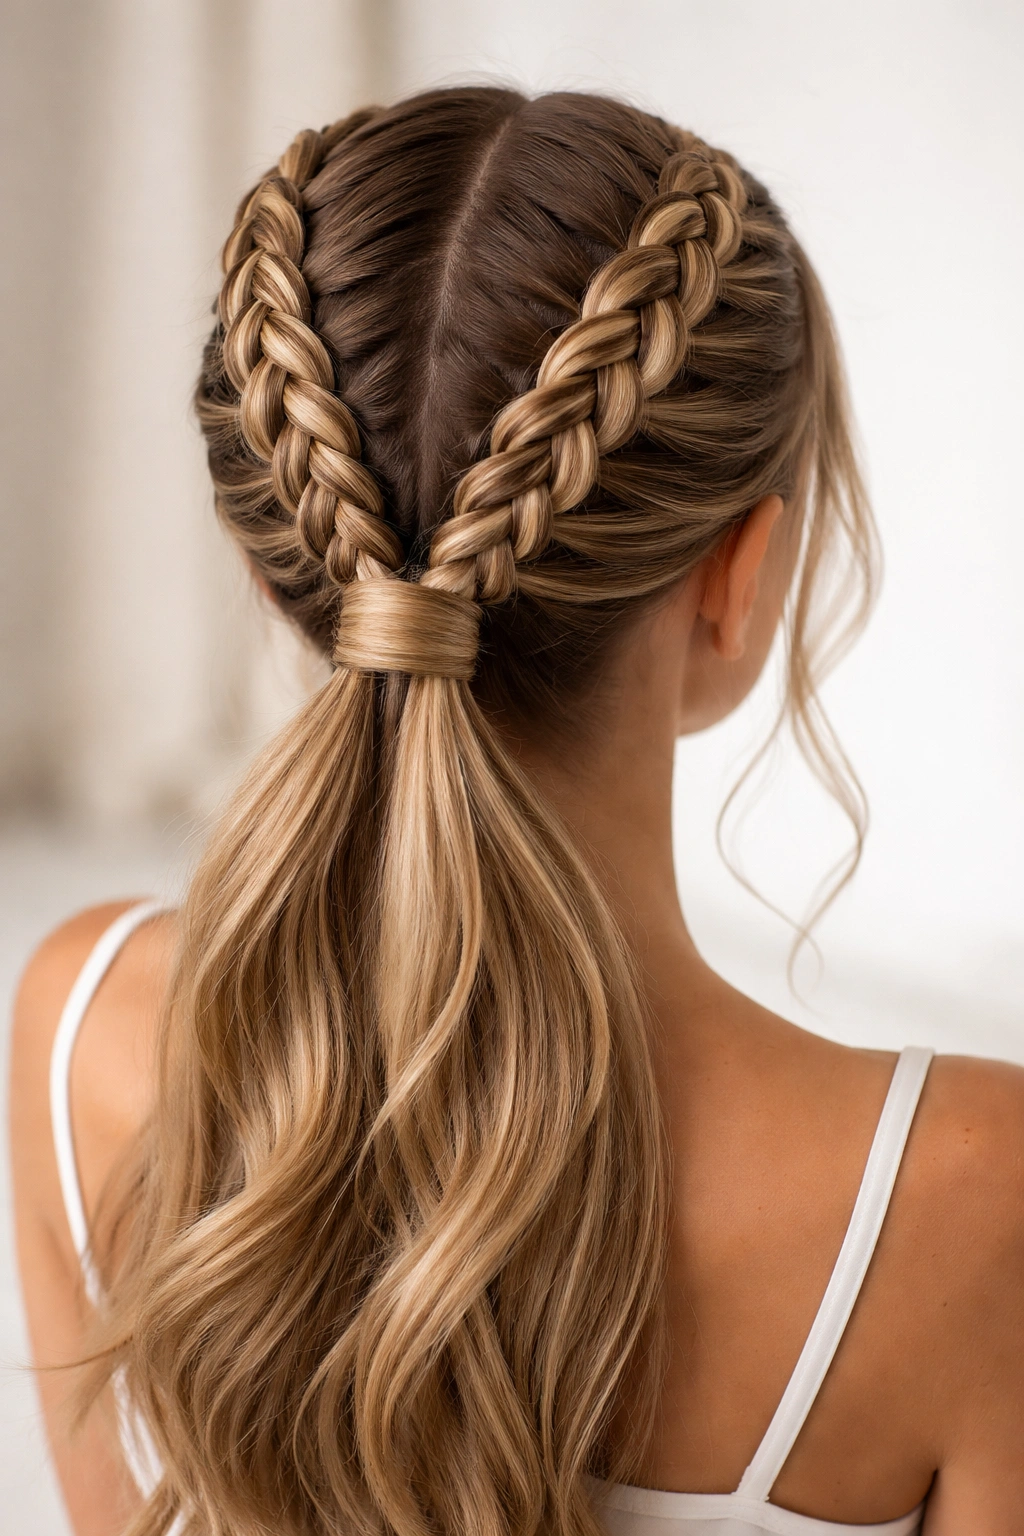
This variation is all about creating an elevated, almost tiara-like effect by positioning your braids higher and wrapping them with a coordinating section of hair. You’re creating two braids that start at the crown and wrap around the top of your head (think of the shape of a halo or crown), then cascading down into twin ponytails at the back. A piece of hair wrapped around the base where the braids meet creates a polished, secure-looking finish.
Why This Style Photographs Like a Dream
This works because the elevated placement of the braids creates a crown-like shape that flatters the face and draws attention upward, the wrapped base creates a custom, high-end look that appears more complicated than it actually is, and the twin ponytails create movement and volume that single ponytails simply can’t match. The overall effect reads as intentional and special without being costume-y or over the top.
Creating Your Crown Braid Effect
- Determine how high you want the crown effect by creating a section across the top of your head from ear to ear
- Braid this top section (you can use either a French or Dutch braid here), keeping the braid slightly loose for a soft effect
- Create a second braid directly beneath the first, following the same path and ending at the nape
- Gather both braids into two low ponytails at the back, positioning them about 2 inches apart
- Take a 1-inch section of hair from one of the ponytails and wrap it around the base of the ponytails where they meet, securing the wrapped section with a bobby pin hidden within the wrap
- Tease the ponytails slightly at the base to create volume before finishing
Worth knowing: This style requires more bobby pins and elastics than a basic braided ponytail, so have extras on hand — there’s nothing more frustrating than committing to a style and realizing partway through that you don’t have enough supplies.
6. The Fishtail Double Braided Ponytail
If you want visual complexity without the tight, structured look of Dutch or French braids, the Fishtail Double Braided Ponytail delivers exactly that. Fishtail braids create an intricate, lacy appearance because you’re weaving thin sections from each side of the braid rather than taking thicker sections like you do in traditional braiding. The texture is delicate and detailed, creating a style that feels special without being too formal.
Why Fishtail Braids Create Magic
This works because the fishtail technique creates incredible visual texture and movement even when the braids are kept relatively neat and tight. The intricate weaving pattern catches light differently depending on how you move, creating dimension that reads as more sophisticated and intentional than simpler braids. Fishtail braids also work beautifully in various hair textures — they actually look better in slightly wavy or textured hair than in completely straight hair.
Mastering the Fishtail Technique
- Divide your hair into two equal sections (rather than the three sections needed for a traditional braid)
- Take a small section (about ½ inch) from the outer edge of the right section and cross it over to the left section
- Take a small section from the outer edge of the left section and cross it over to the right section
- Repeat this alternating pattern all the way down — the smaller your sections, the more intricate the final look
- Create two fishtail braids on either side of your head, keeping them relatively loose for maximum texture
- Combine both fishtail braids into a single low ponytail for a polished finish
- Pull and gently texturize each braid to emphasize the lacy pattern
Pro tip: Fishtail braids are much easier to execute on second-day or textured hair — try using a salt spray or texture cream the night before if you’re working with freshly washed, slippery hair.
7. The Braided Crown Bun Double Ponytail Hybrid
This style takes the concept of double braided ponytails and transforms the ponytails themselves into buns, creating something between a braided updo and a braided ponytail. You’re creating two braids from the temples toward the back of your head where they meet, and instead of tying them into a ponytail, you’re wrapping and pinning the braids into two small buns positioned side by side. The result is completely polished and works beautifully for formal events.
What Makes This Transition from Ponytail to Bun Worthwhile
This works because the bun finish is more formal and structured than a hanging ponytail while still maintaining the visual interest and texture of double braids. The two buns positioned side by side create a more modern take on traditional updo hairstyles, and the style is actually quite secure — the braids hold the buns in place even without excessive pinning. For people with very long hair, this style prevents the bulk and weight that a full double ponytail creates.
Building Your Braided Bun Base
- Create two Dutch or French braids from the temples toward the nape, keeping them relatively tight
- At the back of your head where the braids meet, take the first braid and wrap it into a small bun shape
- Secure the bun with bobby pins inserted into the braid folds (they’ll be invisible when pinned correctly)
- Repeat with the second braid, wrapping it into a bun directly next to the first one
- Smooth any flyaways with a fine-tooth comb and a light hairspray
- Optional: add a decorative comb, clip, or hair stick through the center of the buns for an elevated finish
Styling tip: This works better with hair that’s at least shoulder-length — shorter hair doesn’t have enough length to wrap into a convincing bun after braiding.
8. The Boxer Braids Ponytail Combination
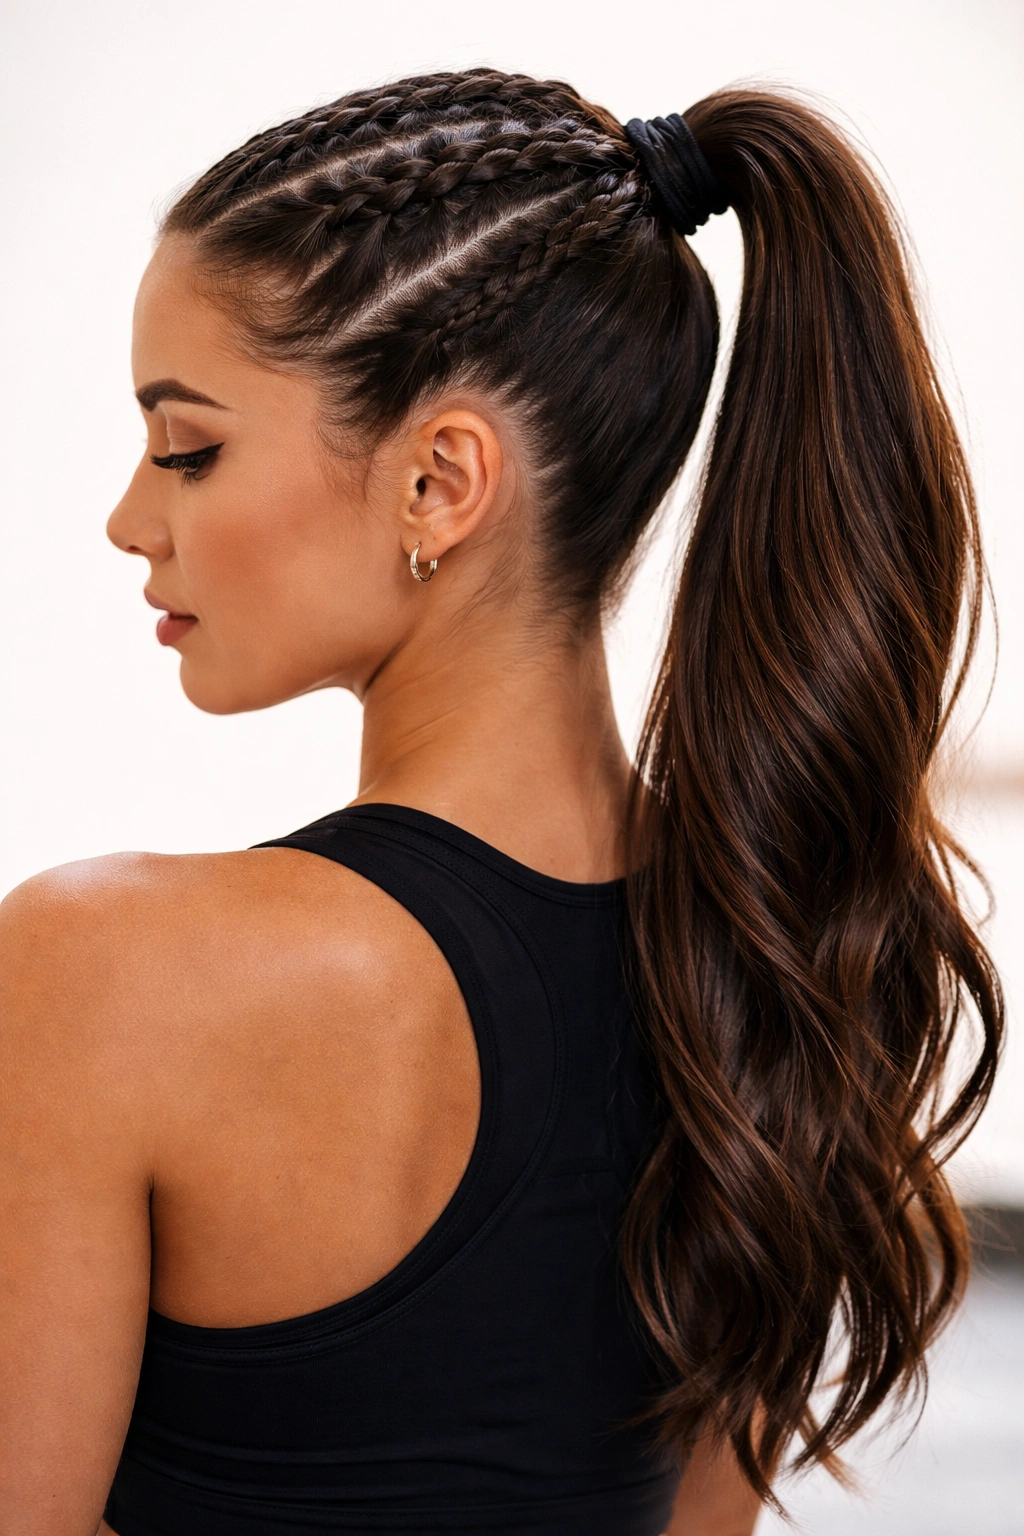
Boxer braids (sometimes called “Dutch pigtails”) are tight, high-contrast braids that sit right on top of the scalp. When you combine two boxer braids and tie them into a high ponytail, you get a style that’s simultaneously athletic and polished. This works beautifully for active days when you want to look put-together but still feel completely secure, and it has become increasingly popular for both gym days and casual social events.
Why Boxer Braids Translate to Polished Style
This works because the tight braids create incredible definition and visual interest, the high ponytail creates a lifted, youthful appearance, and the overall effect is modern and intentional. Boxer braids are experiencing a major moment in fashion and beauty right now, and they pair beautifully with the right outfit, whether you’re wearing athletic wear or dressed up for a casual night out. The style is practical enough for activity but visually interesting enough to feel intentional.
Creating Truly Tight Boxer Braids
- Use a texturizing spray or dry shampoo beforehand to give your hair grip — slippery hair slides out of tight braids
- Create a very clean center part that runs from your forehead to the nape of your neck
- Dutch braid one side very tightly, starting as close to your hairline as possible
- Repeat on the other side, making sure both braids are equally tight and positioned the same distance from the center part
- Gather both braids at the crown level and secure them into a high ponytail
- Go back and gently pull small sections from each braid to add softness (this step is optional but transforms the look from pure athletic to fashion-forward)
Worth knowing: The first time you create tight boxer braids, your arms will probably hurt — this is completely normal. You’re using muscles you don’t normally engage when styling hair. It gets easier with practice.
9. The Scarf-Wrapped Double Braided Ponytail
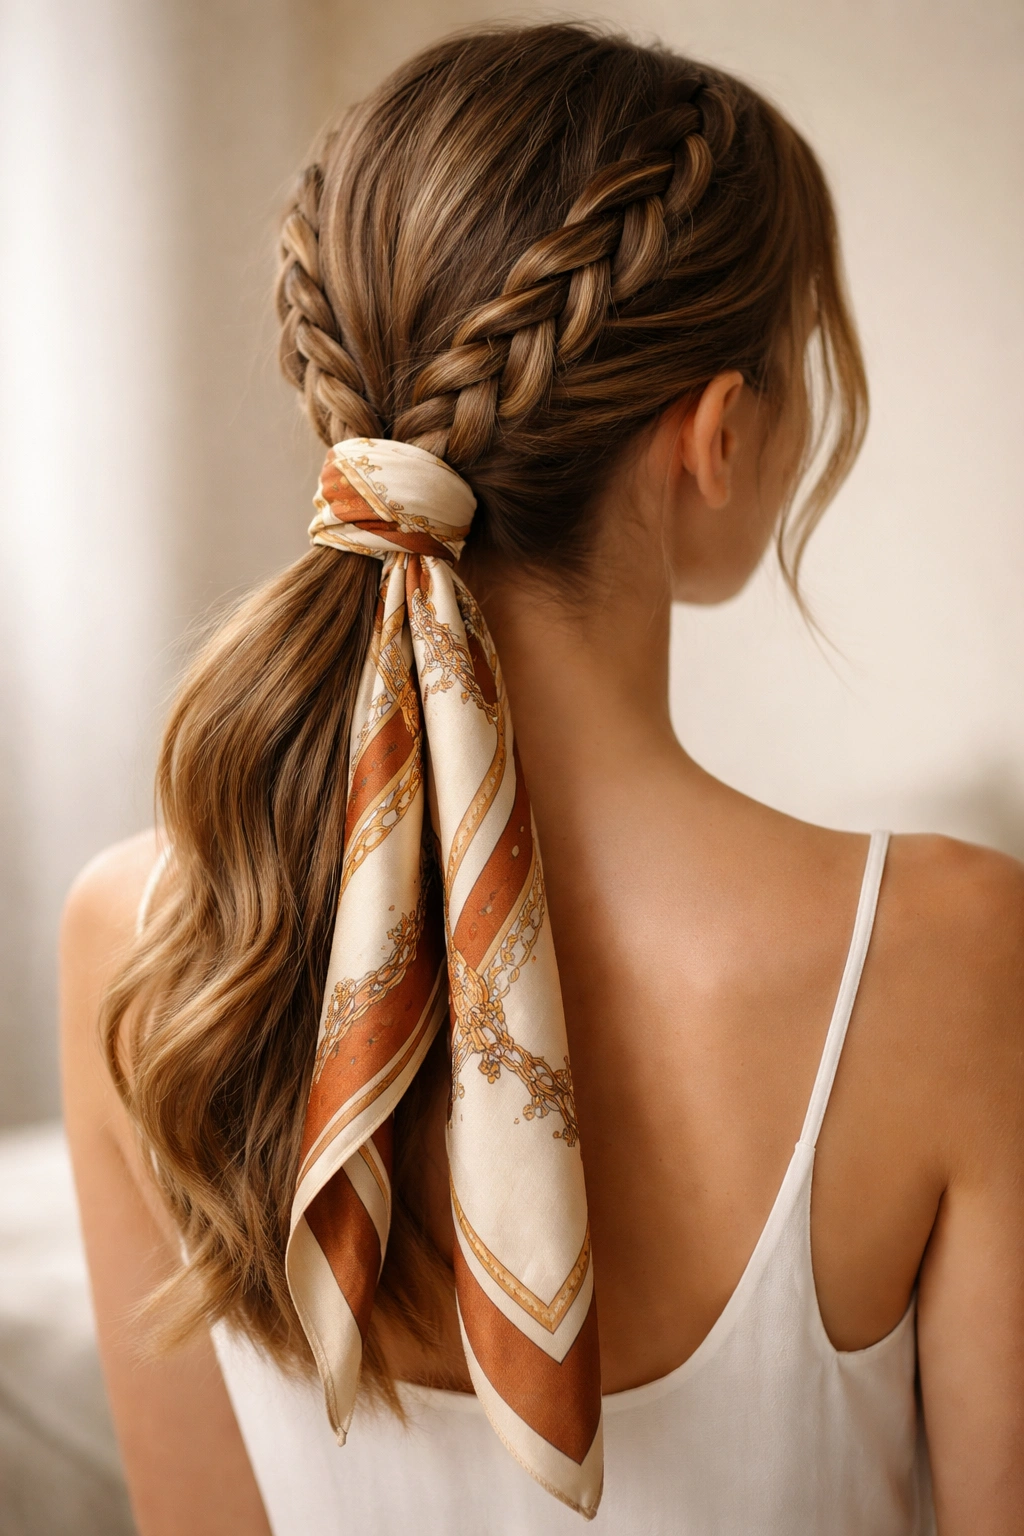
Adding a scarf to your double braided ponytail transforms the entire aesthetic and gives you endless styling options. You’re creating two standard braids and then wrapping a coordinating silk scarf around the ponytail base, letting the scarf tails flow down with the ponytail or tie them off to the side. This approach instantly elevates the style and offers serious versatility — change your scarf and you’ve changed your entire vibe.
What Makes Scarf Wrapping Transform a Style
This works because fabric adds texture, color, and dimension that hair alone can’t achieve, and the scarf creates a custom, curated appearance that reads as intentional styling rather than just tying your hair back. The scarf also serves a functional purpose — it covers elastics and helps protect your hair from breakage. You can wear this style dressed down with a casual outfit or elevated with something more formal, depending on your scarf choice.
The Art of Scarf Wrapping
- Create two braids and secure them into a ponytail with a small elastic
- Choose a scarf in a color and material that coordinates with your outfit — silk and linen work beautifully, while heavier fabrics can feel costume-y
- Fold the scarf into a long, narrow band approximately 2-3 inches wide
- Wrap the folded scarf around the base of your ponytail, covering the elastic completely
- Tie the scarf ends with a knot directly over the elastic, leaving the tails to cascade down the side of the ponytail or tie them together at the bottom
- Tuck the knot underneath itself slightly so it sits flush against the ponytail base
Pro tip: Keep several scarves in your hair kit — a neutral solid, a patterned print, and a metallic are the essentials. You can literally change your entire look by swapping the scarf in 30 seconds without redoing your braids.
10. The Micro Braided Double Ponytail
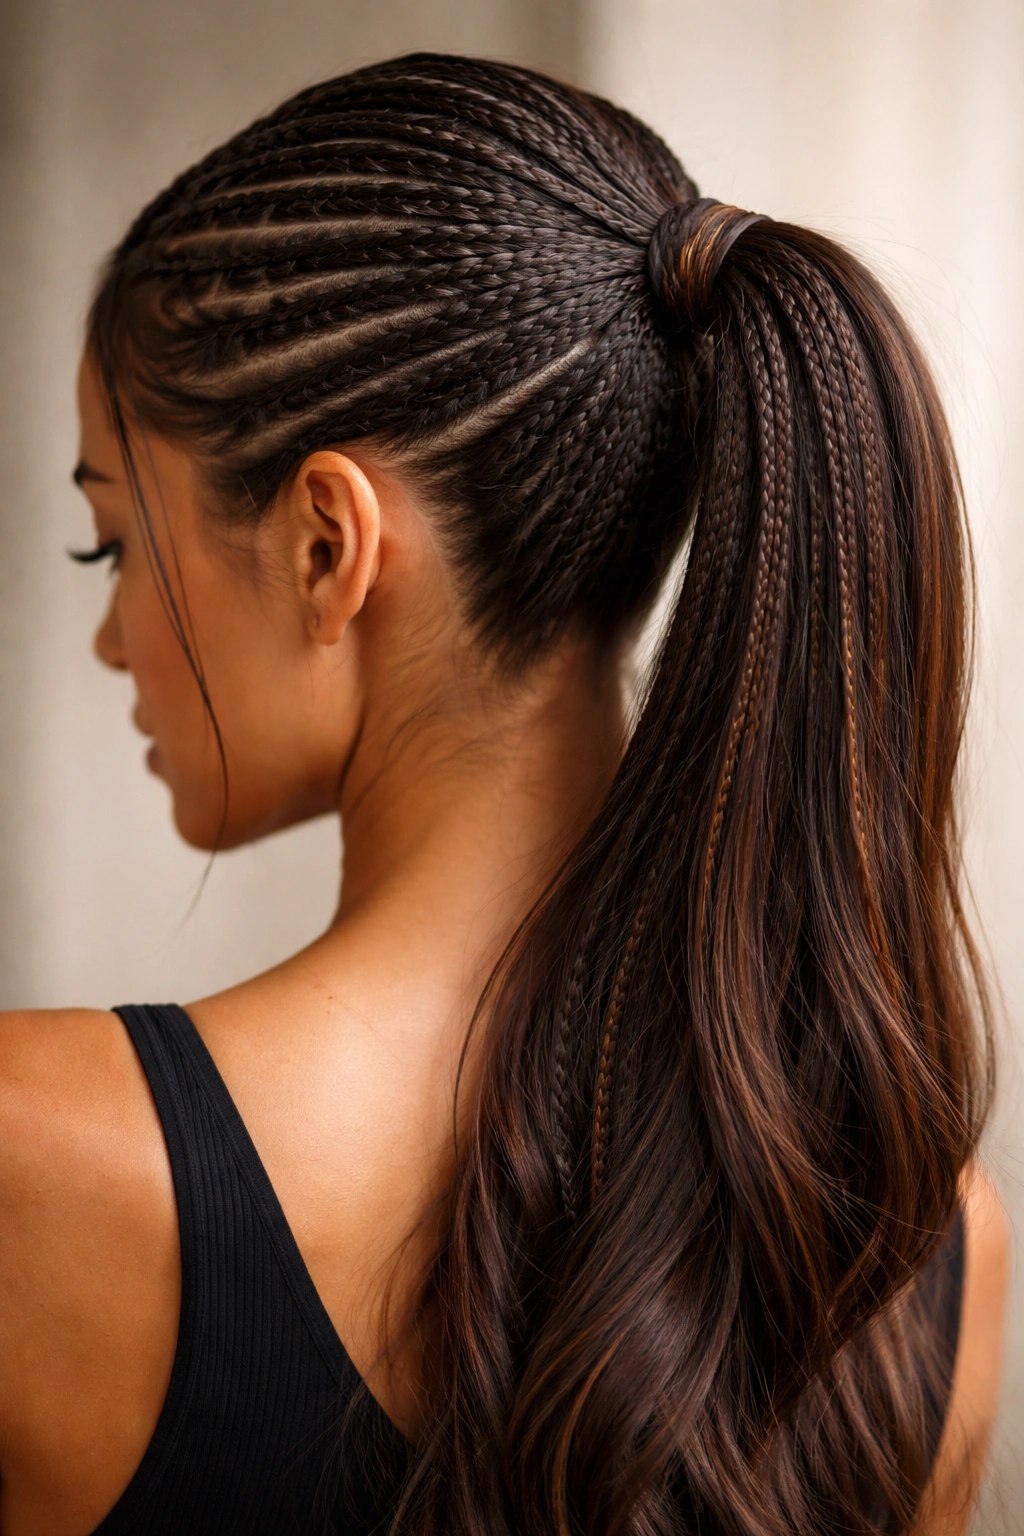
For a style that’s more delicate and intricate, the Micro Braided Double Ponytail uses multiple thin braids instead of just two thick ones. You might create 4-6 small braids on each side of your head that combine into a larger ponytail base, or you could create thin braids throughout the crown that all meet at a single ponytail. The effect is maximally detailed and creates incredible texture without the bulk that thick braids can create.
Why Multiple Thin Braids Create Visual Magic
This works because multiplying the number of braids increases visual complexity exponentially — what looks like one intricate style is actually several simpler braids working together. Thin braids also work beautifully for people with fine hair, because they distribute the weight more evenly than thicker braids, reducing tension on any single section of scalp. The detailed texture photographs beautifully and creates an eye-catching style without being inappropriate for professional settings.
Executing the Multi-Braid Approach
- Decide on your pattern — you might do 3 braids on each side, or you might do a scattered pattern with braids positioned throughout your crown
- Part each braid section cleanly before you start braiding
- Keep each individual braid relatively tight, even though they’re thin, so they hold up throughout the day
- Secure each braid at the end with a tiny elastic or bobby pin
- Gather all the braids together at the back of your head and combine them into one or two ponytails
- Optional: after gathering them, create one larger braid from the ponytail base downward for extra detail
Insider note: This style is much more time-intensive than a standard double braid, so plan an extra 15-20 minutes for styling. However, the detailed effect often makes people think you’ve invested much more time and effort than you actually have.
11. The Bubble Ponytail with Double Braid Base
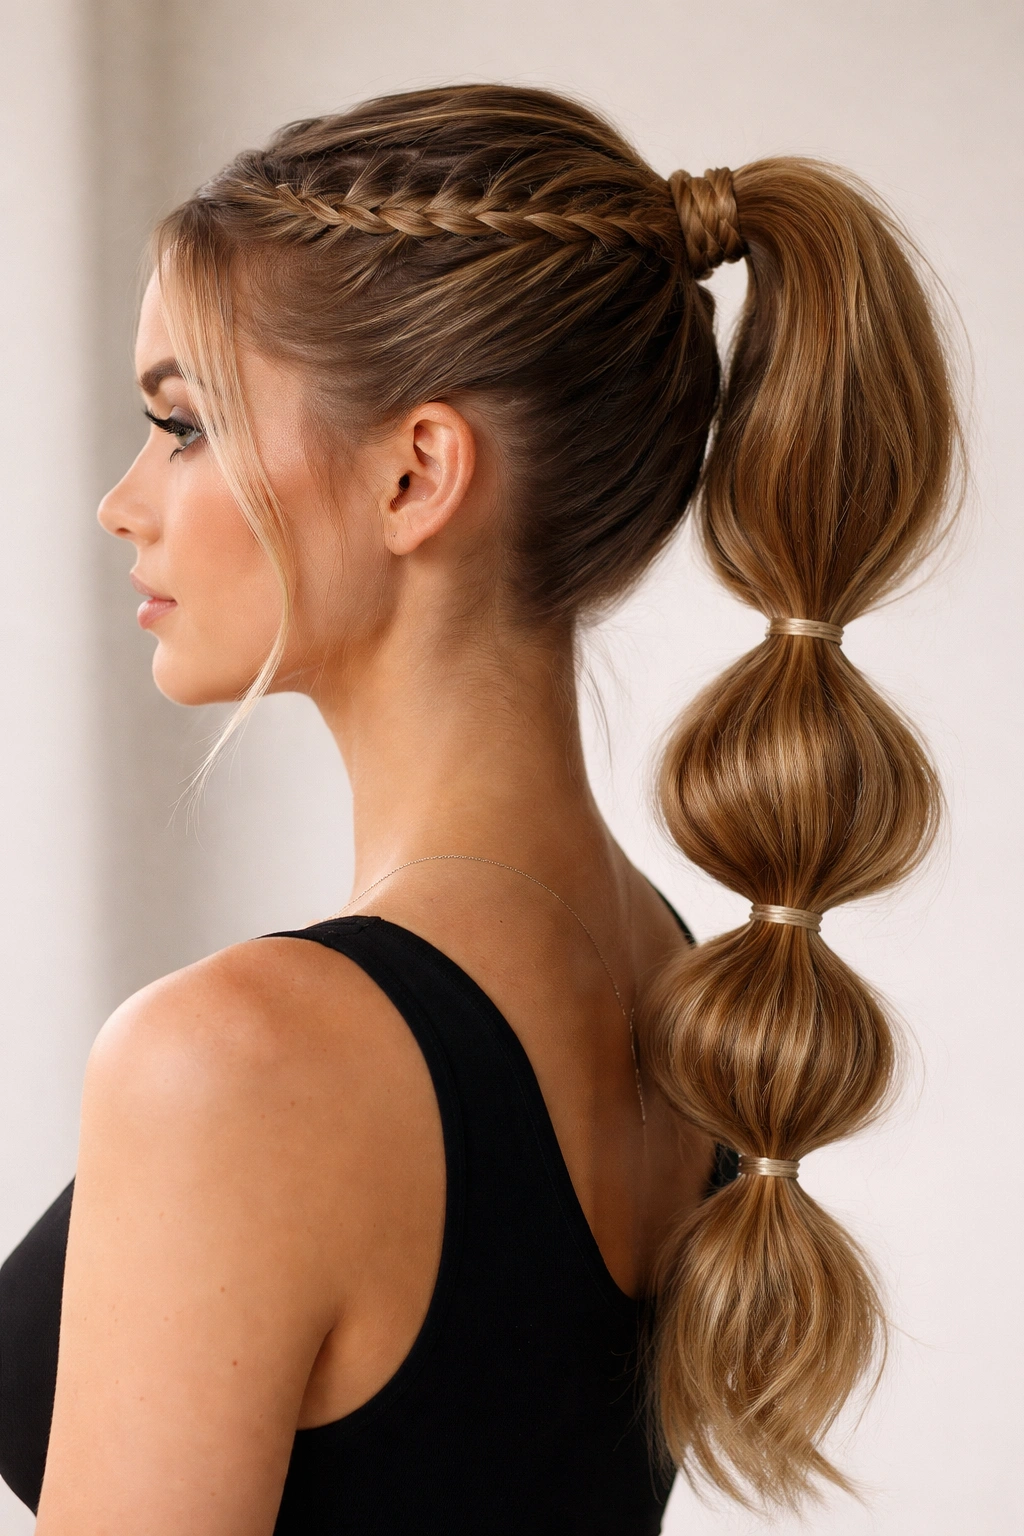
This modern style combines double braids with the bubble ponytail technique, creating something that’s simultaneously trendy and wearable. You’re creating two braids and tying them into a ponytail, then dividing the ponytail into sections and tying smaller elastics down the length at regular intervals, creating bubble shapes throughout. The effect is playful and fashion-forward while still being appropriate for many different settings.
Why the Bubble Ponytail Has Become a Modern Classic
This works because the bubble sections create visual interest and movement that a standard ponytail can’t achieve, the look is distinctly modern without being juvenile, and the style is incredibly customizable — you can make the bubbles tight or loose, space them far apart or close together, and even wrap small braids around each bubble section for extra detail. The double braid base ensures the style reads as intentional and thoughtfully designed rather than just playing with a simple ponytail.
Creating Perfect Bubbles From Your Ponytail
- Create two braids and secure them into a ponytail at whatever height you prefer — high, mid, or low positioning all work beautifully
- Starting about 2-3 inches below the ponytail elastic, place your first bubble elastic around the ponytail, creating a puffy section above it
- Gently pull the hair in that bubble section to fluff it and create volume
- Move down another 2-3 inches and place your next elastic, creating another bubble
- Continue this pattern down the entire length of your ponytail — aim for 4-6 bubbles depending on your hair length
- Go back and gently tease each bubble section slightly with a fine-tooth comb for maximum volume
Pro tip: Use clear or colored elastics that match your hair to make the bubble sections look intentionally designed rather than just places where hair is gathered.
12. The Metallic Accent Double Braided Ponytail
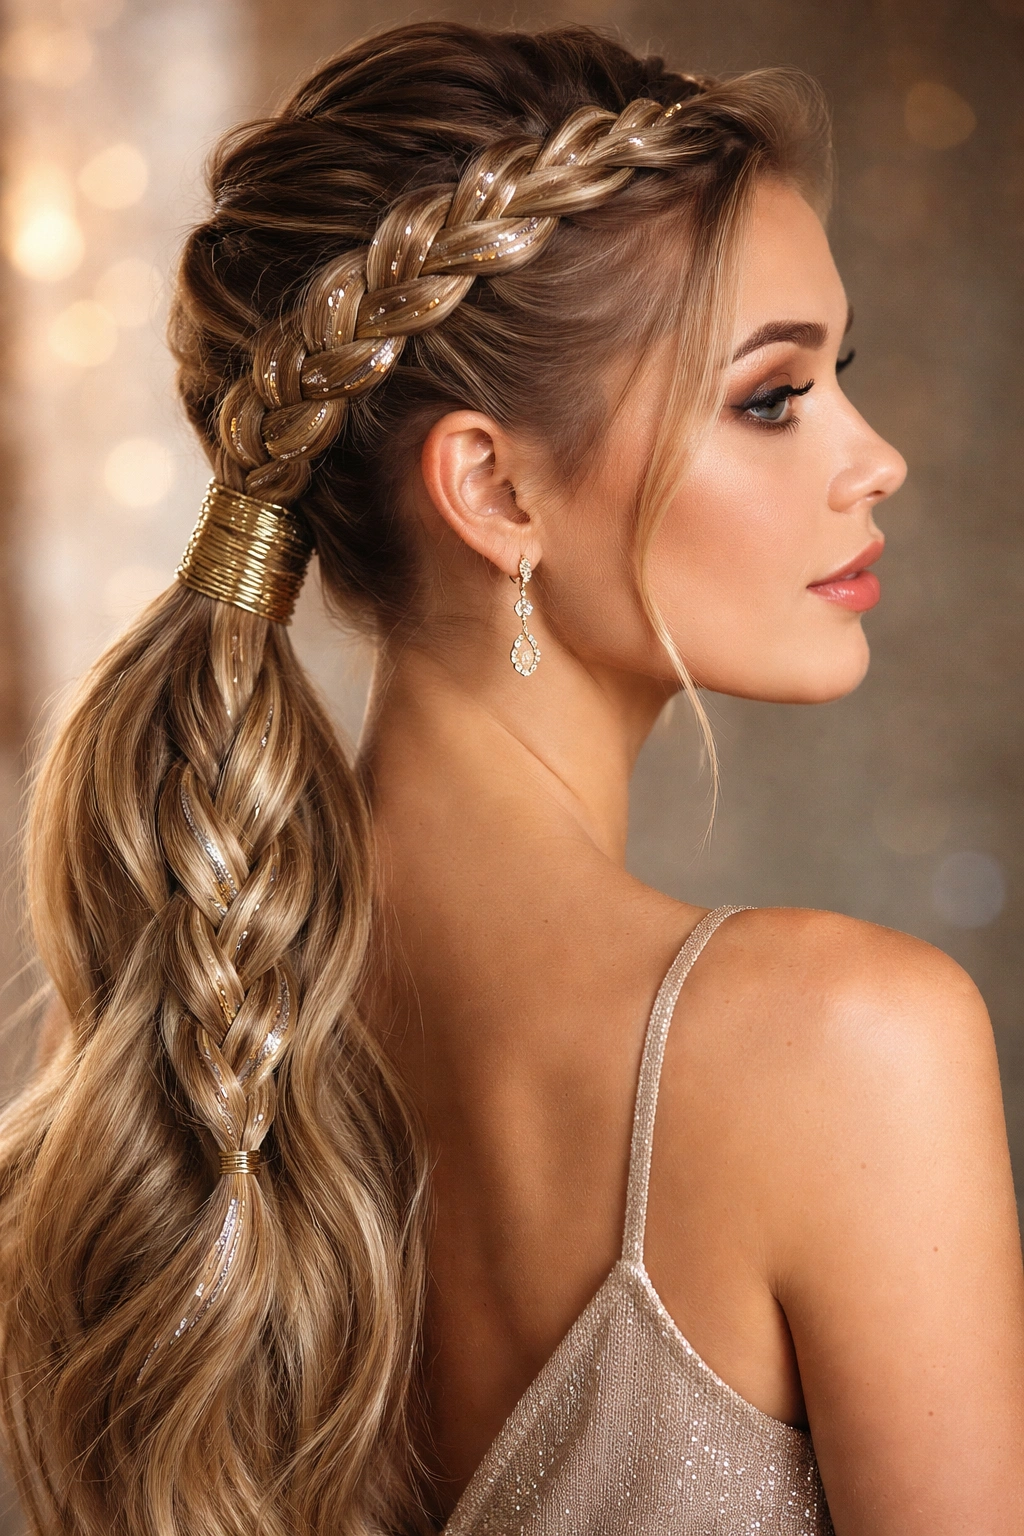
For special events, festivals, or any time you want to add glamorous sparkle, the Metallic Accent Double Braided Ponytail integrates metallic thread, chains, or foil-wrapped sections directly into your braids. You’re creating two standard braids but incorporating shiny elements throughout, creating a style that’s both polished and party-ready. This approach transforms a simple braided ponytail into something statement-making.
Why Metallic Details Elevate Without Overwhelming
This works because metal adds just enough visual interest and shine to make the style feel special without requiring you to do anything structurally different with your braids. The metallic elements catch light and draw attention to the braids themselves, which means all that work you put into creating neat, even plaits actually gets noticed. This detail-oriented approach reads as thoughtfully styled rather than accidentally fancy.
Integrating Metallic Elements Into Your Braids
- Option 1: Use metallic string or thin metallic chain threaded through your braids before you start — this requires planning and takes practice but creates the most seamless effect
- Option 2: Wrap small sections of your hair with foil or metallic tape as you braid — easier to execute and creates a bold, graphic look
- Option 3: Braid small metallic chains or strings in alongside a section of hair, letting them weave in and out of the braid naturally
- Option 4: Add metallic hair cuffs or rings at the base of your ponytail and scattered throughout the braids themselves
- Combine metallic accents with other elements like a scarf wrap or flower crown for maximum impact
Worth knowing: If you’re using actual metal chains or jewelry, make sure they’re lightweight enough not to pull your hair or create uncomfortable tension. Test the weight before committing to wearing it for an extended period.
Final Thoughts
Double braided ponytails offer an incredible range of styling possibilities that work across almost every situation in your life. Whether you’re looking for something athletic and practical, romantic and effortless, or polished and formal, there’s a version here that will work for your hair type, face shape, and personal style. The beauty of double braids is that they distribute weight evenly across your scalp while creating visual interest that single braids or simple ponytails can’t match.
The key to success with any of these styles is practice and patience with yourself. Your first attempt at tight boxer braids might not feel as secure as you’d like, or your fishtail braids might feel awkwardly lumpy compared to what you see in photos. This is completely normal — hair styling is a skill, and every skill improves with repetition. Each time you create a style, you learn something about how your specific hair behaves, what your hands naturally do, and how much tension works best for you.
Invest in quality elastics, bobby pins, and styling products that actually work for your hair type. Cheap elastics that pull and break your hair will make every style feel frustrating, while the right tools transform the entire experience. Keep several options on hand — a tiny elastic for tight braids, a larger elastic for ponytails, a decorative clip or scarf for finishing touches. These small investments pay dividends in styling confidence and the longevity of your braids throughout the day.