Dutch braids are one of those hairstyles that look incredibly impressive but are far more achievable than most people realize—especially when you’re combining them with a ponytail. Unlike French braids, which sit on top of the hair, Dutch braids create a bolder, more textured effect by weaving the sections underneath each other, making them stand out beautifully in any direction you wear them. The moment you master the basic motion, you’ll find yourself reaching for this combination repeatedly because it works with virtually any hair texture, face shape, and occasion.
What makes Dutch braid ponytails perfect for beginners is that they’re forgiving in ways many other braided styles aren’t. If your sections aren’t perfectly even or your tension wavers slightly, it actually adds to the textured, intentional look rather than detracting from it. A slightly loose or undone Dutch braid reads as effortlessly cool instead of sloppy—which can’t be said for every braiding technique. You’re also working with a contained area (the scalp and crown) before anchoring everything into a ponytail, so there’s built-in structure and fewer opportunities for things to go wrong.
The real advantage, though, is that Dutch braid ponytails take you from “just pulled my hair back” to “I spent actual time on this” within five minutes once you know what you’re doing. They work equally well for gym sessions, professional settings, casual hangouts, or fancy events—the style simply changes based on how you position the braid, what texture you start with, and how intentionally you style the ponytail section. These ten approaches show you exactly how to approach this hairstyle from multiple angles, each designed so you can execute it even if braiding still feels foreign to your hands.
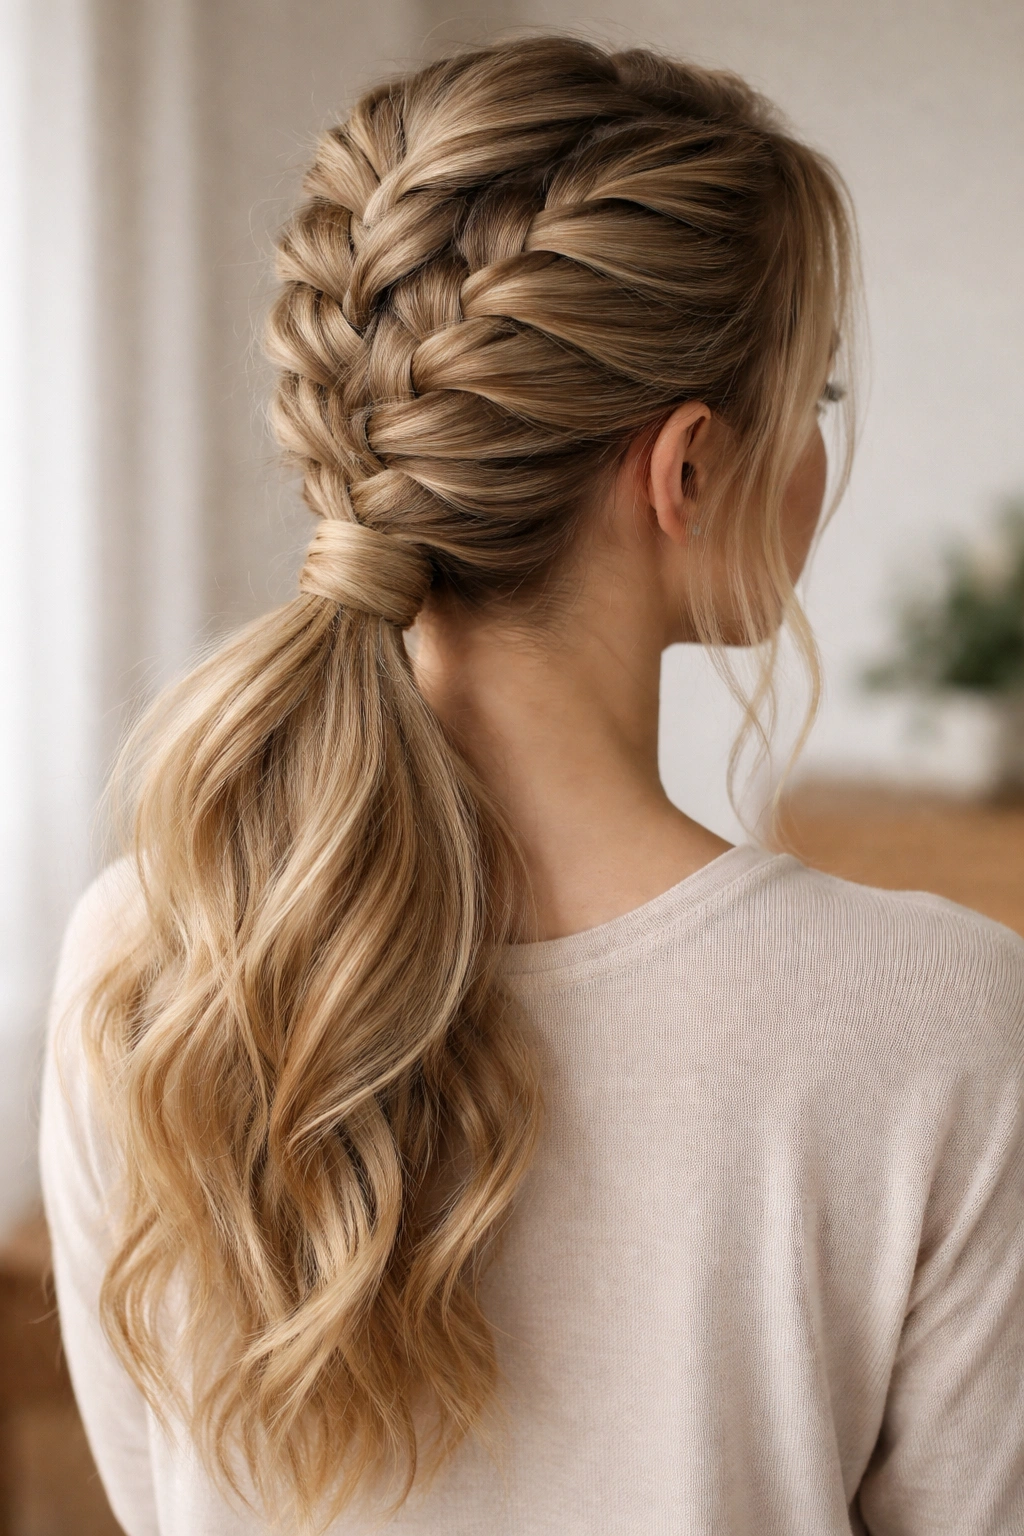
1. Classic Dutch Braid into Ponytail
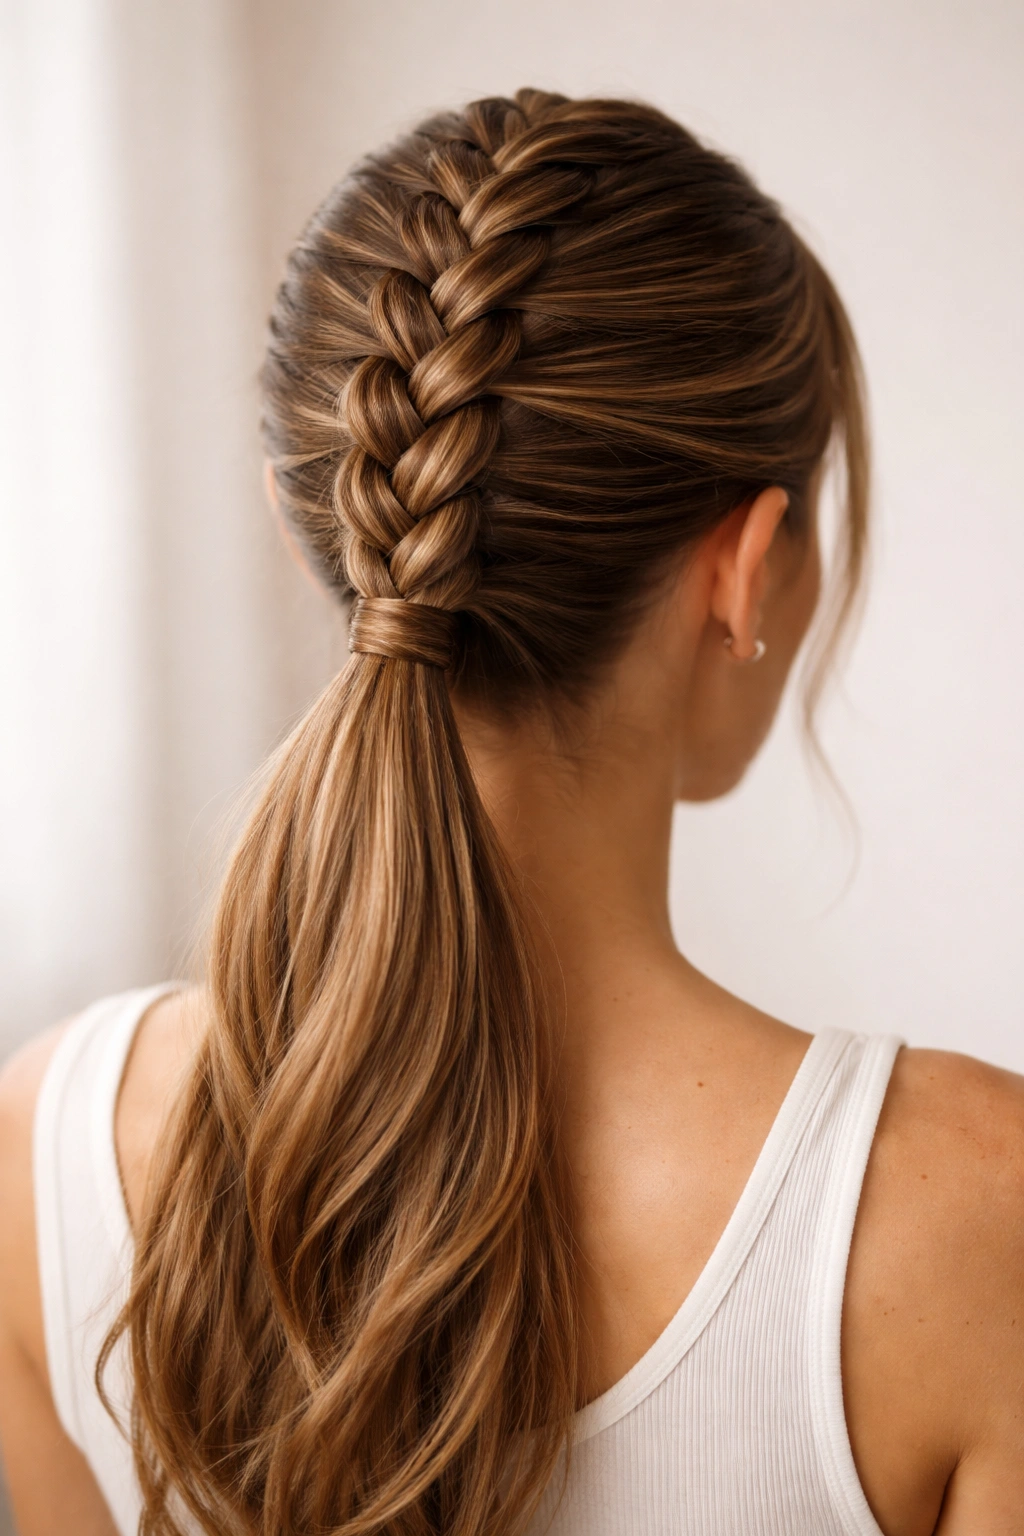
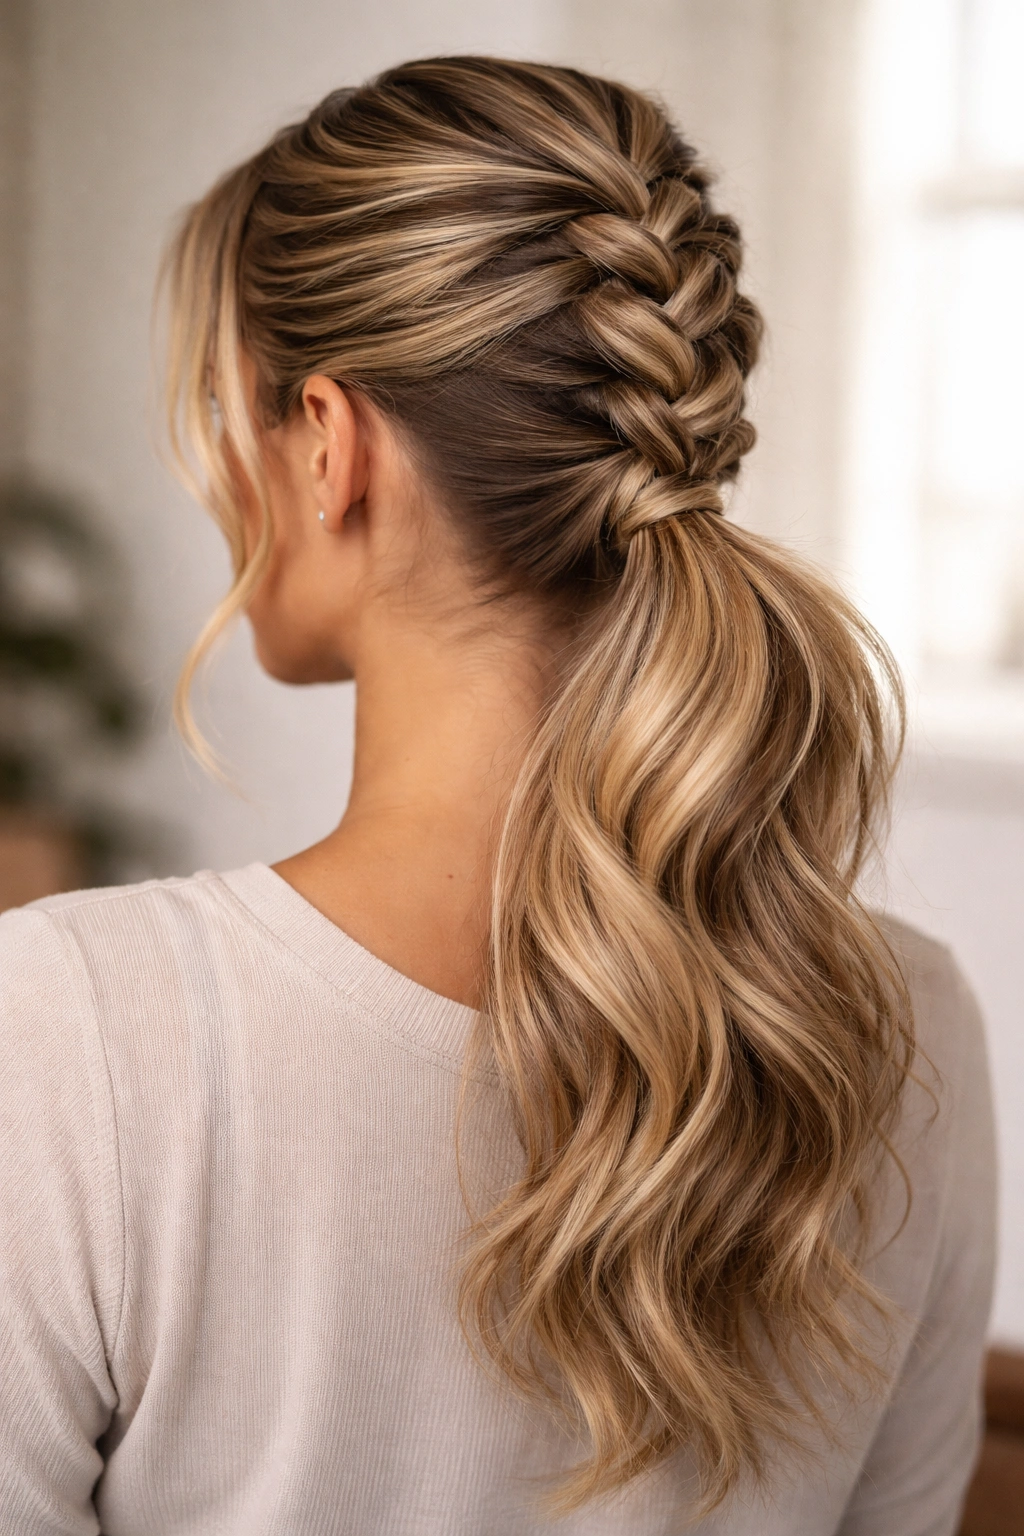
This is the foundational version, and it’s where almost everyone starts because it teaches you the core technique while producing a genuinely polished result. You’ll create a single Dutch braid running from the crown straight down the back of your head, then gather all your hair into a ponytail at the nape of your neck, allowing the finished braid to sit at the front and center of that ponytail.
Why This Works for Beginners
The classic approach removes the complexity of splitting your attention between multiple sections or unusual angles. You’re braiding in a straight line you can feel throughout the process, giving you constant feedback about where your hands should be. The braid becomes a visual anchor for the rest of the style, and because it’s centered, it’s incredibly forgiving—slight imperfections look intentional rather than accidental. Most importantly, this version gives you thousands of examples online to reference, so if you get stuck, help is literally one search away.
How to Execute It Perfectly
Start by applying a light texturizing spray or mousse to damp hair—this prevents your sections from sliding around and makes the braid grip much more securely. Flip your head forward and brush everything straight back, then flip your head back and start at the crown. Take three small, even sections of hair, then weave them by bringing the outer right section underneath the middle, then the outer left underneath the middle. Continue down to the nape, secure the braid with a small elastic, then gather all your hair into a low or mid-height ponytail, leaving the braid as the focal point at the base.
Pro tip: Rough up the finished braid gently with your fingertips to add texture and width—this makes it look fuller and intentionally undone, which actually hides imperfect braiding.
2. Double Dutch Braid Side Ponytail
Two braids instead of one instantly transforms the visual impact, and positioning them on either side of your head before bringing them into a side ponytail creates an asymmetrical, fashion-forward look that somehow feels more forgiving than it actually is. This style works especially well if you have medium to long hair and want something that reads as more elaborate without actually taking significantly longer.
The Appeal for Learners
Creating two braids gives you redundancy—if one isn’t perfect, the other one can balance it out visually. The side ponytail position also means the braids fall across the side of your face or shoulder rather than straight down your back, so any texture variations disappear into the overall shape of the style. Many people find two smaller braids easier to control than one thicker braid, since you’re working with less hair in each section, and the repetition of braiding twice actually builds your muscle memory faster.
Step-by-Step Breakdown
Create a deep side part, running from one temple across to the nape on the opposite side. On the larger section, begin a Dutch braid at the temple and braid down to the ear level, securing it with a small elastic. On the smaller section, start a Dutch braid at the temple on the opposite side and braid down as far as your hair allows. Gather all your hair to one side (typically where the larger section falls) and secure everything into a side ponytail at about ear height. The two braids will naturally frame your face and sit prominently against the ponytail.
Worth knowing: If your hair is naturally straight, mist the finished braids lightly with hairspray before you arrange the ponytail—this helps the braids hold their shape when you’re manipulating everything into place.
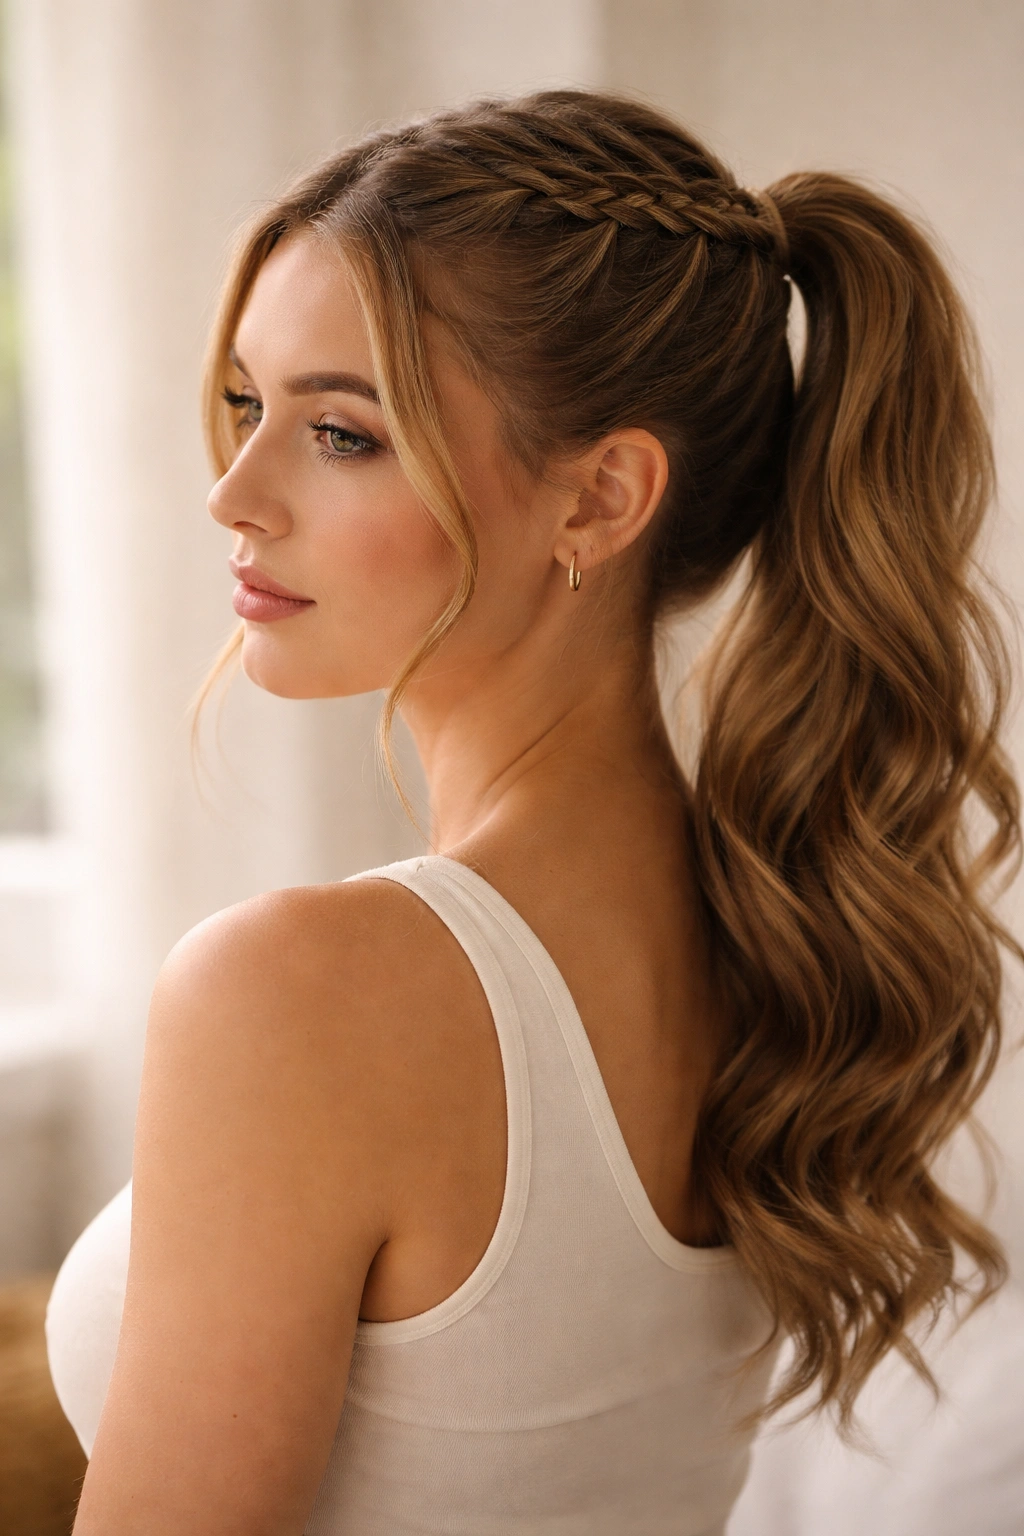
3. Dutch Braid Crown with Low Ponytail
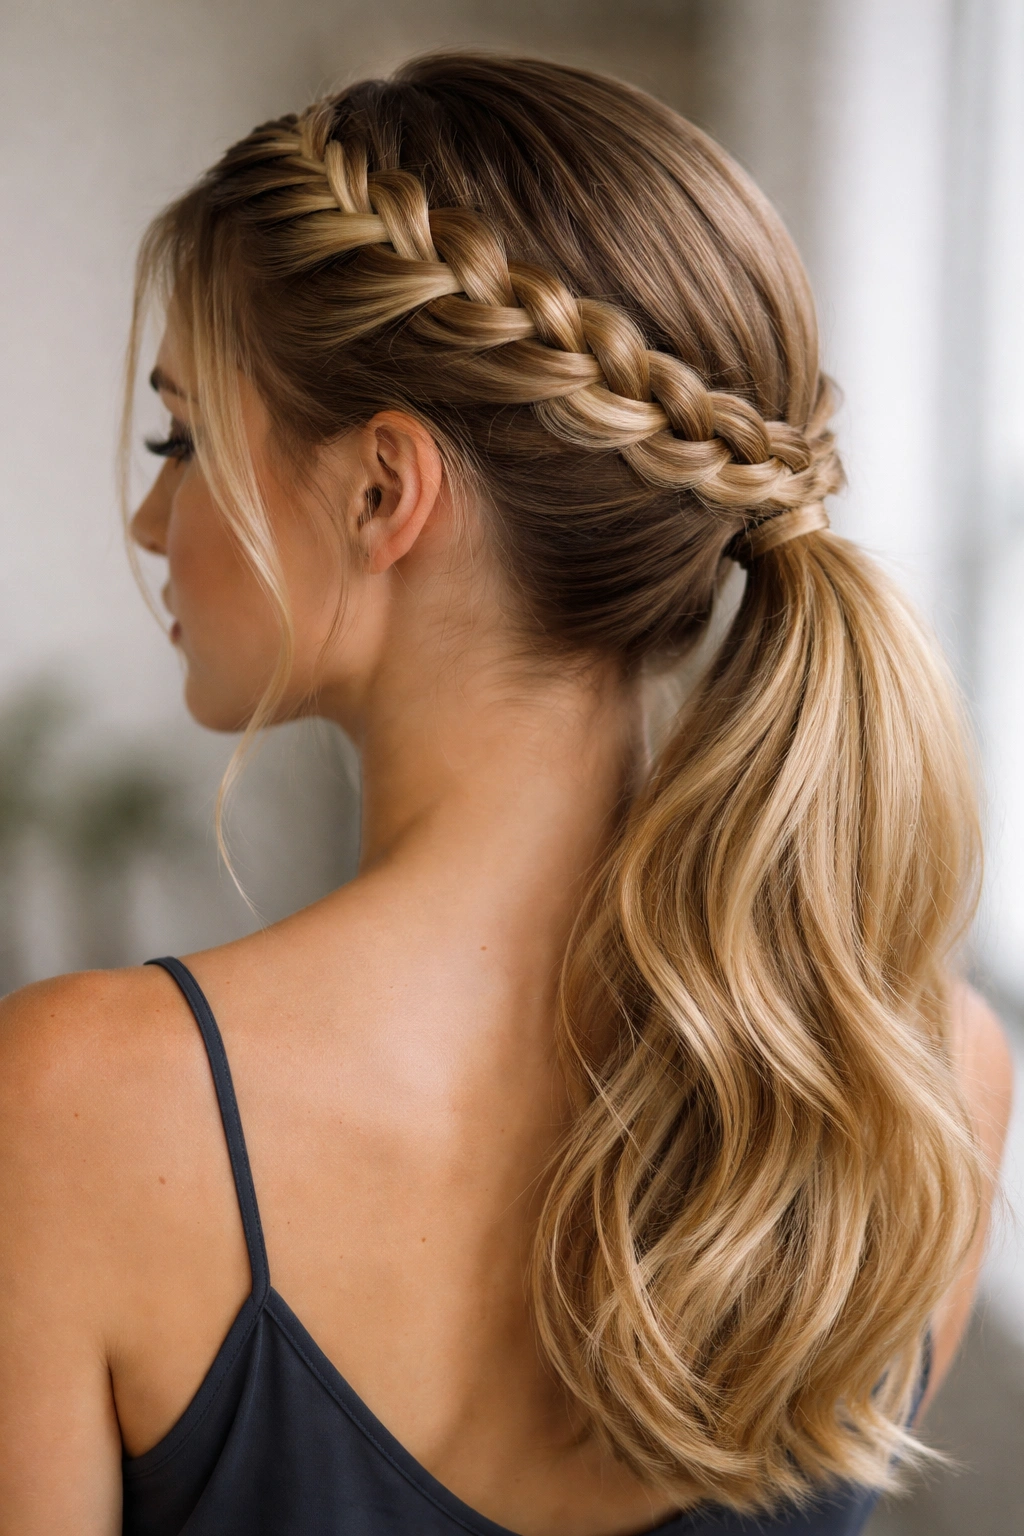
Imagine a Dutch braid that starts at one ear, wraps around the back of your head, and ends near the opposite ear—then you gather everything into a low ponytail that sits where the braid ends. This creates a crown effect that’s elegant enough for weddings but casual enough for weekends, and the combination of the braid’s visual interest with the simplicity of a low ponytail somehow makes the whole thing feel more sophisticated than its parts.
Why Beginners Excel at This Style
The crown position means you’re braiding around the curve of your head rather than in one direction, which actually helps you maintain consistent tension—your hands naturally follow the shape of your skull. You’re not fighting against gravity to keep the braid in place, and the ponytail base anchors the whole thing securely. The low ponytail position is also supremely practical; it stays put during movement, doesn’t pull on your roots, and looks intentional whether you’re wearing it sleek or slightly undone.
The Execution Method
Start by creating a side part, then begin your Dutch braid at one ear, working the braid horizontally across the back of your head as if you’re tracing an invisible crown line. As you approach the opposite side, continue the braid down slightly rather than stopping at ear height. Secure the braid with a bobby pin or small elastic, then gather all your remaining hair and the tail of the braid into a low ponytail at the nape of your neck. You’ll notice the braid naturally frames the ponytail, creating depth that a regular low ponytail alone wouldn’t have.
Insider note: Subtle texture is your friend here—use a texturizing spray before you start, and don’t panic if the braid isn’t perfectly tight; a crown that reads slightly undone actually looks more intentional than one that’s pristine.
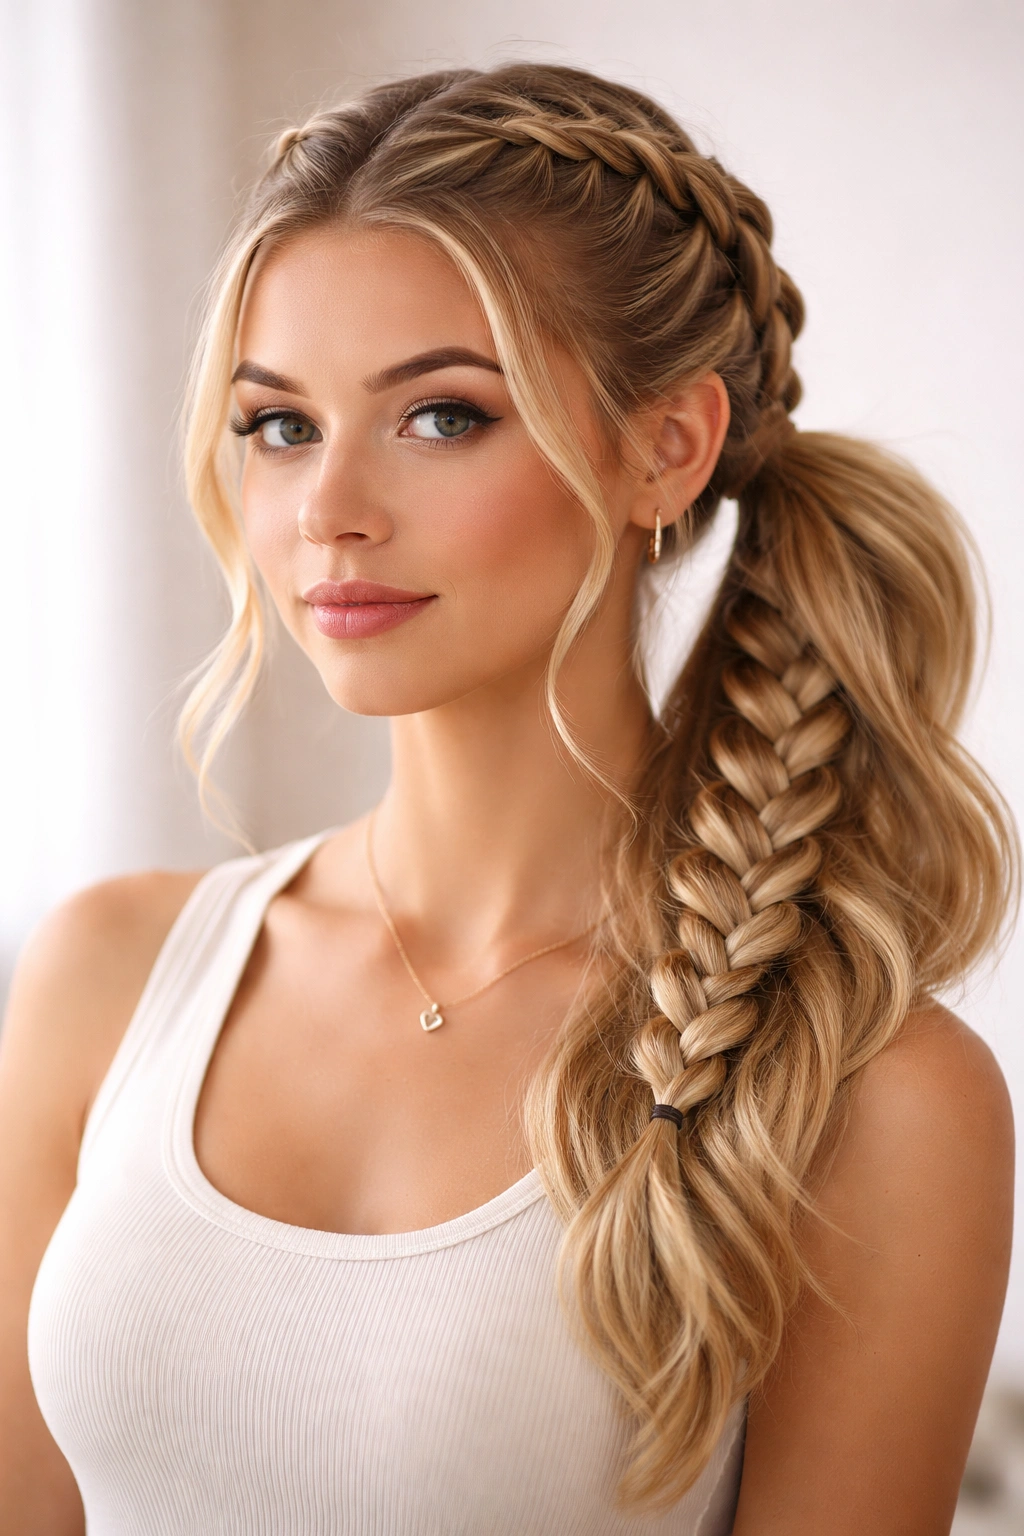
4. Half-Up Dutch Braid Ponytail
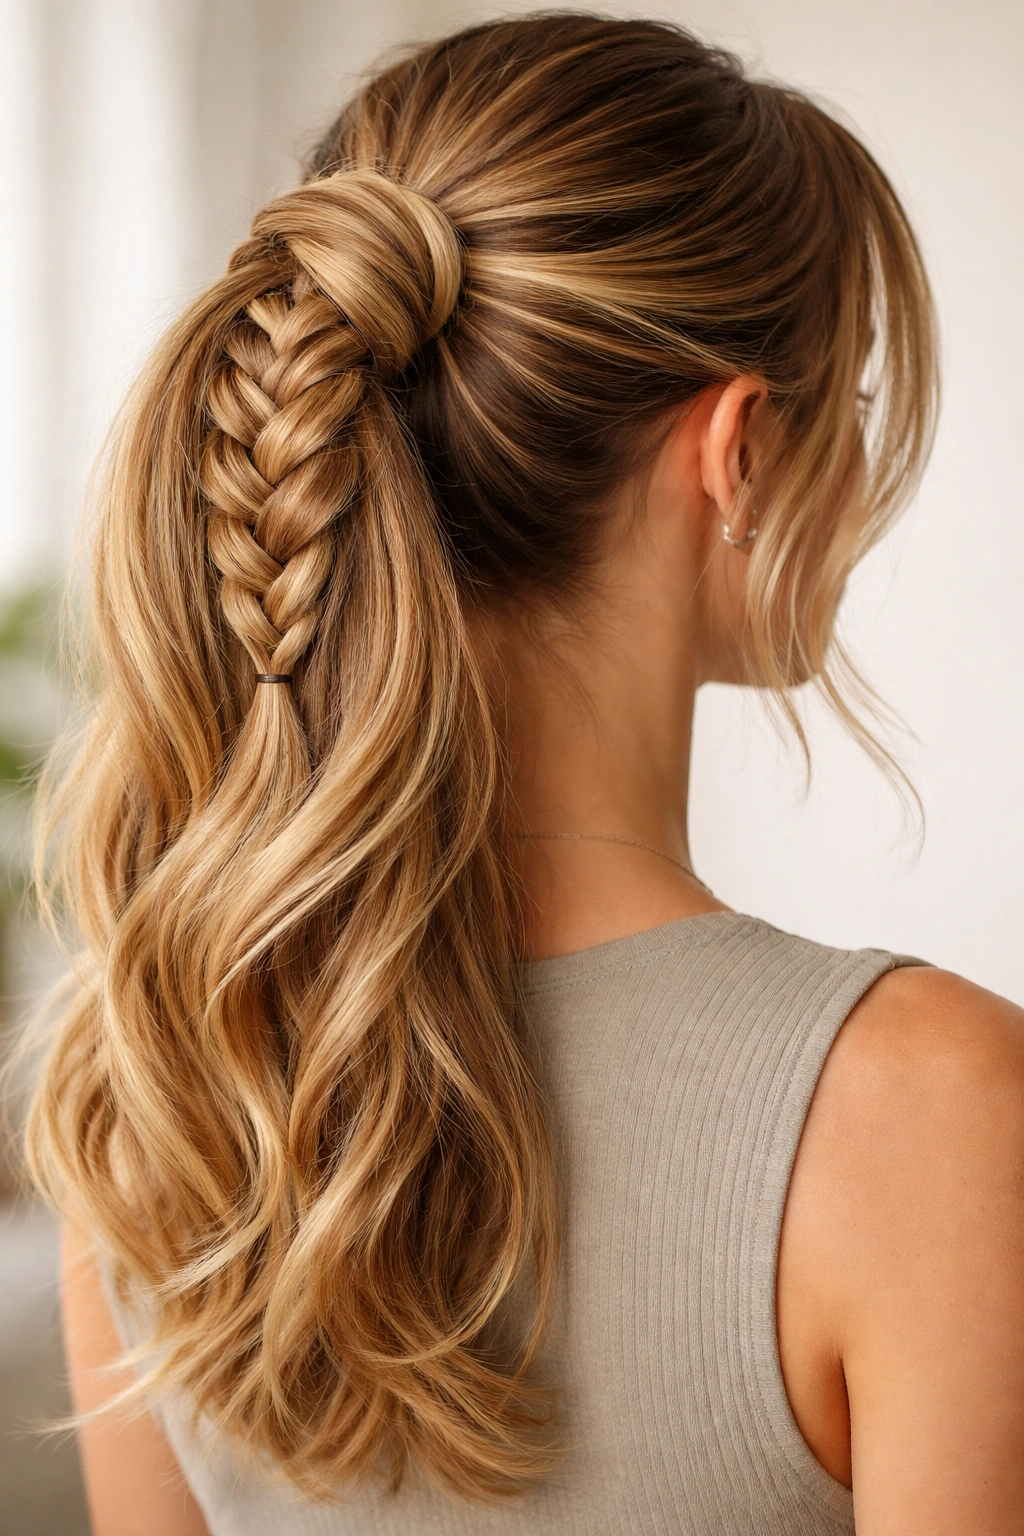
This hybrid style takes a Dutch braid from the crown down to about mid-head height, then you gather just the braided portion plus some surrounding hair into a half-up ponytail, leaving the bottom half of your hair completely down. It’s the perfect option when you want the visual interest of a braid but don’t want the full commitment of a complete updo, and it looks polished enough for work while feeling comfortable for all-day wear.
Perfect for Beginners Because
You’re only braiding about one-third to one-half of your head, which means you have a natural stopping point and don’t have to worry about the braid losing its shape as you approach your nape. The half-up structure also gives you more room to work with—if your braid isn’t perfectly centered or straight, the loose hair below it creates visual balance and draws the eye to the overall shape rather than braiding details. This style also tolerates second-day hair better than most braided looks, and it photographs beautifully from almost any angle.
How to Braid and Secure It
Start your Dutch braid at the crown, working straight back, and braid down to approximately the middle of your head (roughly the level of your ears). Secure the braid temporarily with a small elastic or bobby pin. Gather the braided section plus 2 to 3 inches of unbraided hair on each side, and secure everything into a half-up ponytail at the crown. You can leave this ponytail tight and sleek, or gently pull at the braided section to loosen it and add volume.
What to watch for: If your hair is very fine or short, start your braid slightly lower than the crown so you have enough surrounding hair to create the half-up shape without the ponytail pulling uncomfortably.
5. Twisted Dutch Braid Ponytail
This version combines a Dutch braid with a twist, literally—you’ll braid the first few inches in the traditional Dutch braid method, then switch to twisting the remaining sections together before anchoring everything into a ponytail. It’s a great transition style if you’re moving from basic braiding to more advanced techniques, and the two-texture combination creates visual interest that feels more elaborate than it actually is.
Why This Speaks to Beginners
You’re not committing to a full braid, which takes pressure off—if you’re unsure about your braiding skills, you can switch to twisting quickly and nobody will know the difference. Twisting is arguably easier than braiding for many people because it requires less coordination and only involves two sections instead of three. The style itself looks intentional and modern; it reads as a design choice rather than a compromise, and the texture combination keeps the eye moving along the length rather than scrutinizing one section too closely.
The Technical Approach
Begin with a Dutch braid at your crown using three sections, continuing for about 3 to 4 inches (typically to the level of the back of your ears). Then, instead of continuing to braid, gather the braided portion into one section and the loose hair on either side into another section. Twist these two sections around each other toward the nape, allowing the braid to sit visually separated from the twist. Secure both the braid and twist together into a ponytail at the nape of your neck, letting them coexist within the same elastic.
Pro tip: Use a texturizing spray before you start, and after securing the ponytail, gently pull at both the braided and twisted sections to loosen them slightly—this creates softness and hides any irregularities in the transition between the braid and twist.
6. Dutch Braid Wrap-Around Ponytail
Instead of running your braid straight down the center of your head, you’ll wrap it around the base of a completed ponytail like a ribbon, creating an entirely different visual effect that’s more modern and less “traditional braid” than any other version. This approach actually makes the braiding easier because you’re working at a fixed point rather than trying to keep your hands aligned as you work down the back of your head.
The Beginner Advantage Here
You create your ponytail first, which gives you a stable anchor and removes the uncertainty of “how far down should I braid?” The braid itself is shorter and more accessible, since you’re only working around the base rather than the entire length of your hair. You can also see the entire result as you work, which means you can adjust the braid’s position and tension in real-time rather than hoping it looks right when you’re done. Many beginners find this approach less intimidating because the stakes feel lower—if the braid isn’t perfect, it’s wrapped around the base where it’s less scrutinized.
How to Create This Style
Gather your hair into a ponytail at whatever height feels right (typically mid-height), and secure it tightly with an elastic. Take a small section of hair from within the ponytail (or use a piece of thread or ribbon as an alternative), and begin a Dutch braid around the base of the ponytail, wrapping it like a spiral. Once you’ve wrapped around completely, or wrapped as far as you want to go, pin the end of the braid or wrap underneath the base of the ponytail where it’ll be hidden.
Insider note: If you struggle with braiding, use a thin ribbon or metallic thread wrapped around the base instead of an actual hair braid—it creates the same visual effect and eliminates the braiding element entirely.
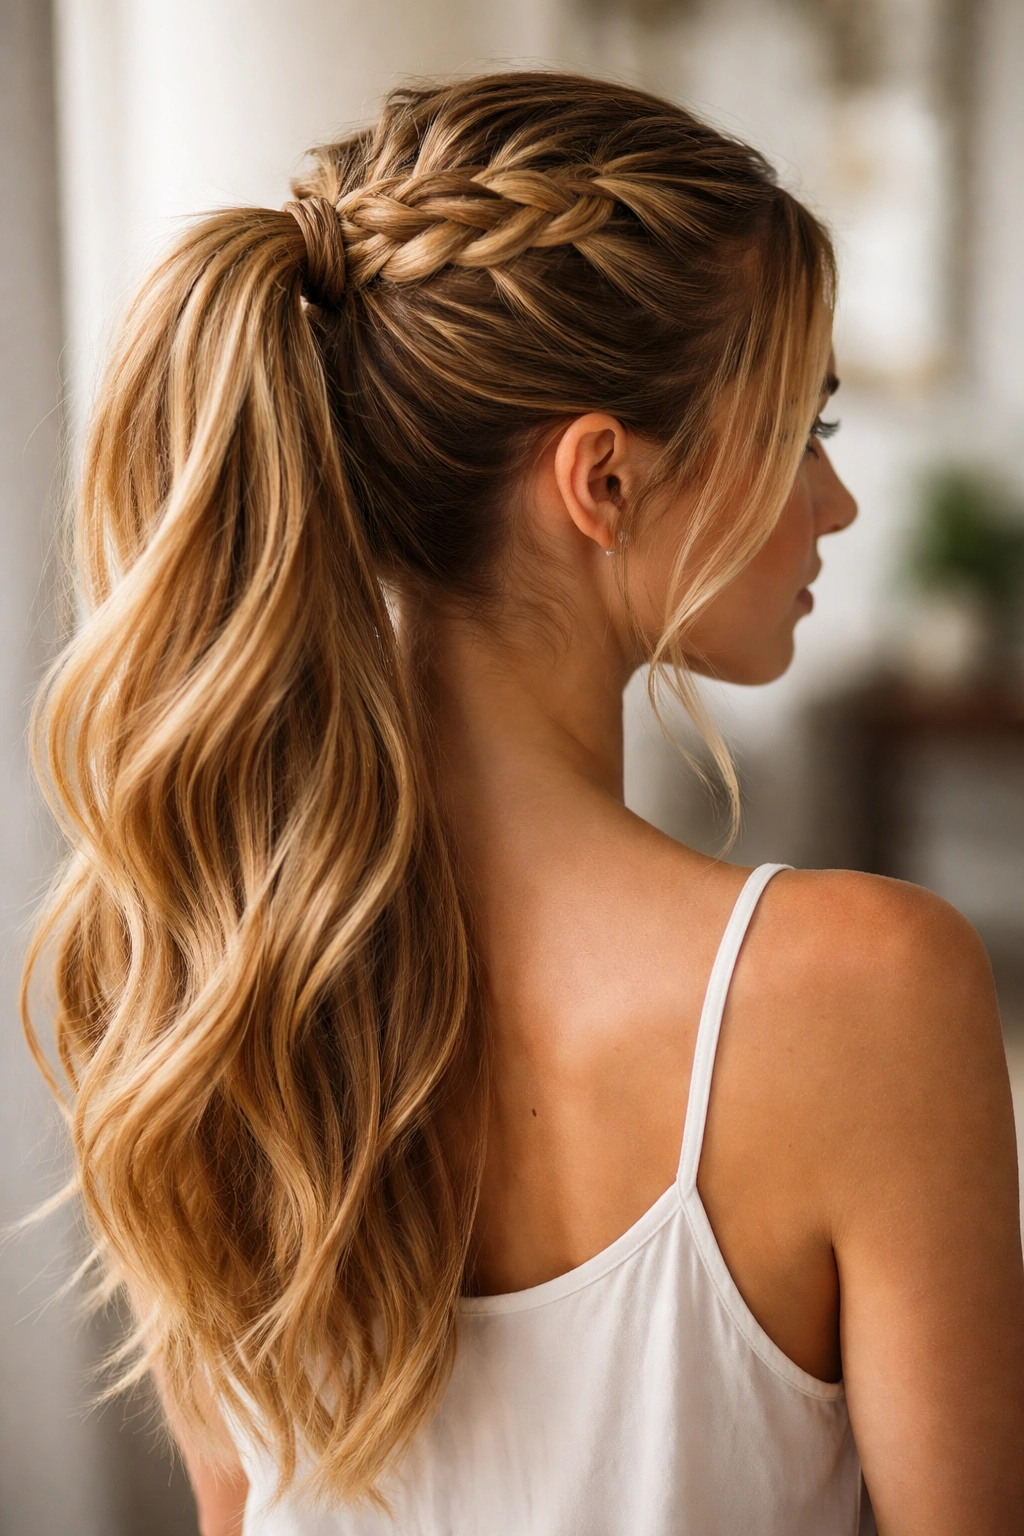
7. Messy Dutch Braid Ponytail
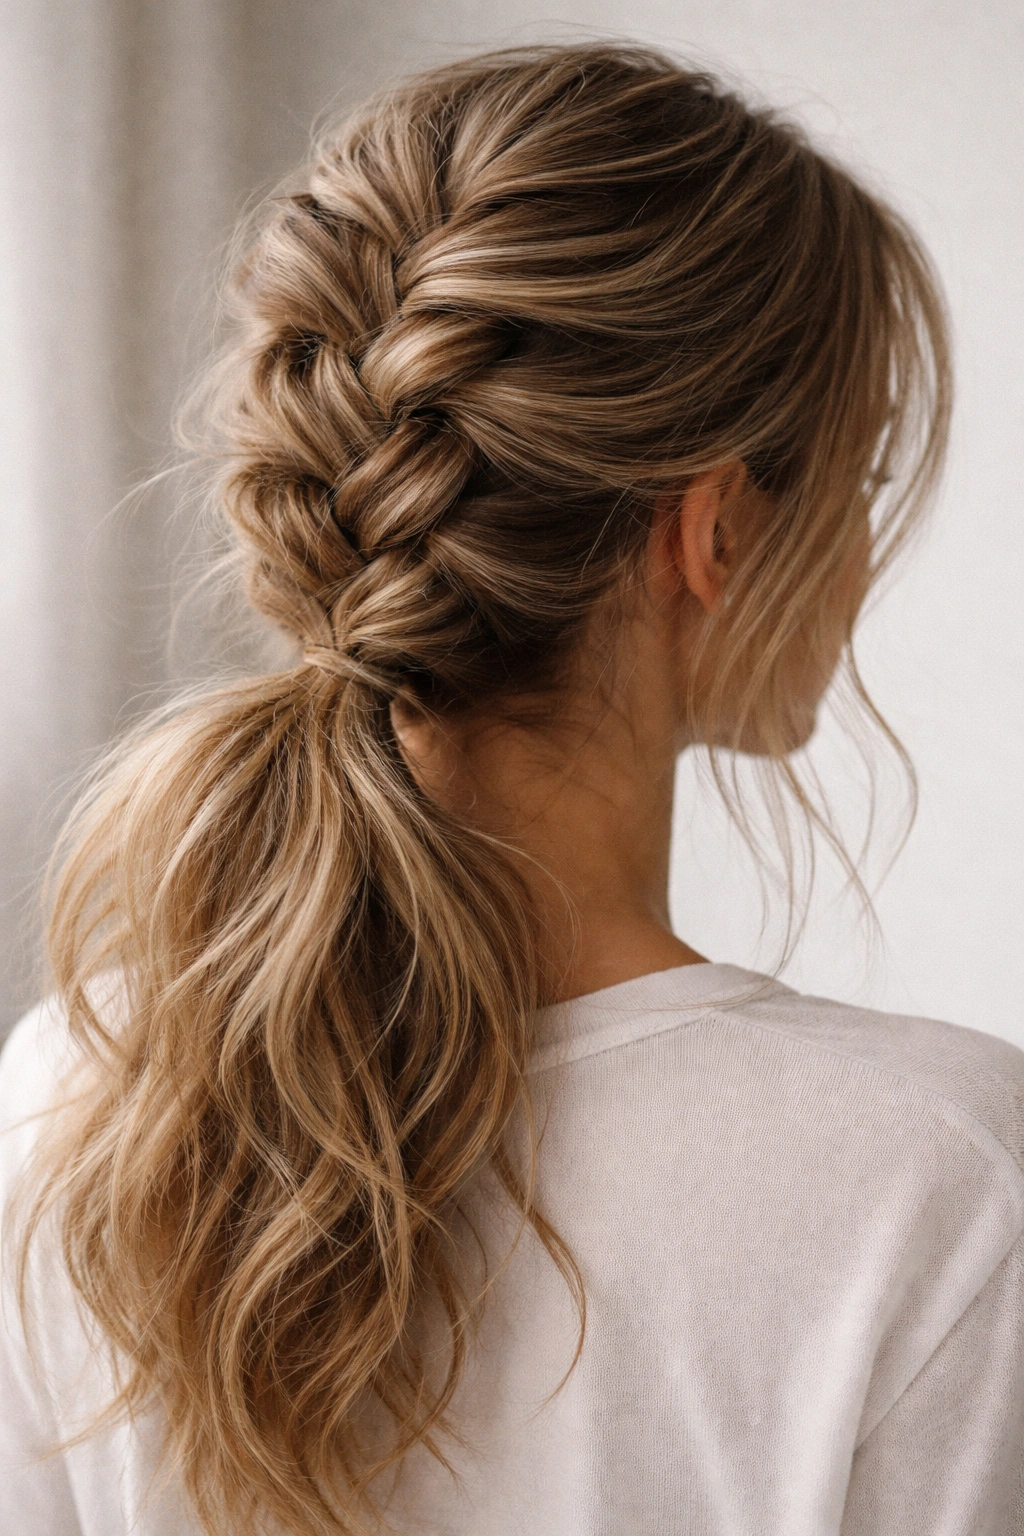
This version leans into texture and deliberately undone-ness from the start, which paradoxically makes it easier for beginners because perfection isn’t the goal. You’ll create a loose, textured Dutch braid, then gather it into a similarly undone ponytail, letting pieces fall where they will. The result looks effortlessly cool and hides every imperfection in your braiding.
Why Beginners Often Excel at This
You’re explicitly not trying to be perfect, which removes the pressure that often causes tension in your hands when you’re first learning to braid. A slightly uneven braid is actually desirable here, as is loose sections and stray pieces. This style also works brilliantly with textured, wavy, or naturally curly hair because the frizz and movement enhance rather than detract from the look. Many people find their best results with this style because they’re focused on the overall vibe rather than technical precision.
The Execution Method
Start with hair that has natural texture—either from waves, heat styling, or a texturizing product. Begin your Dutch braid at the crown and braid loosely down the back of your head, deliberately leaving sections slightly undone and pulling at the braid as you go to create a thick, textured appearance. Secure the braid lightly with an elastic. Gather all your hair into a low ponytail, and pull at sections of both the braid and the ponytail to loosen them further. Leave a few face-framing pieces to fall forward.
Worth knowing: This style actually looks better the next day than it does fresh—let it sit overnight and the texture becomes even more pronounced and intentional-looking.
8. Dutch Braid Bubble Ponytail
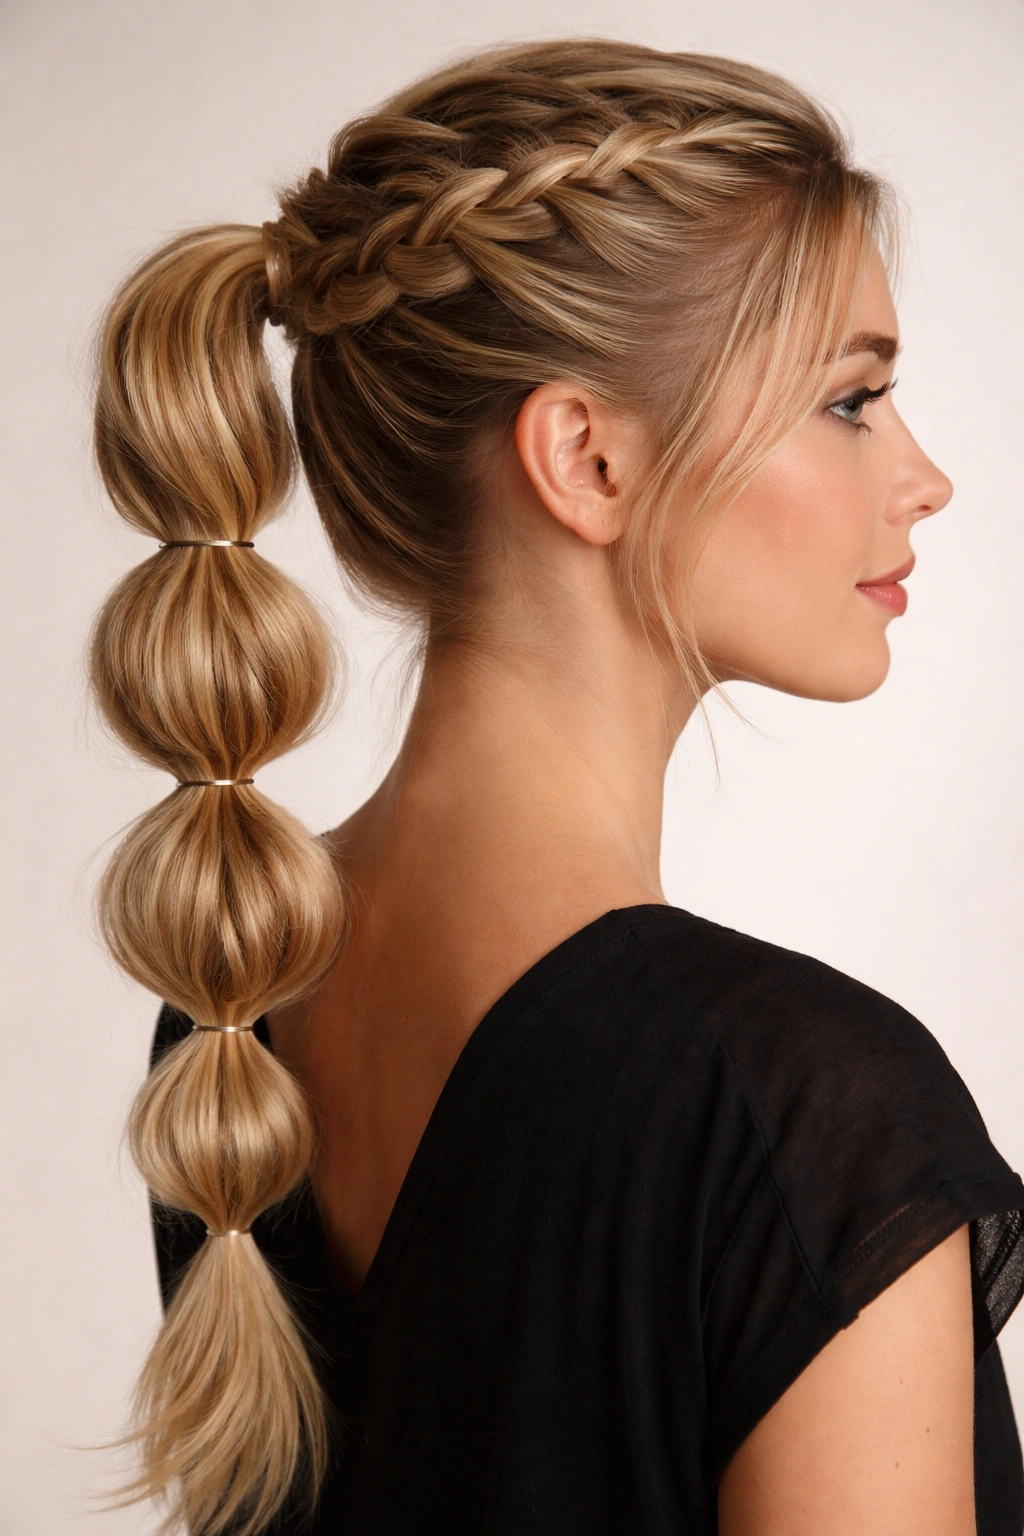
You’ll braid down to the nape, then divide the ponytail section into multiple smaller sections and secure each with its own elastic, creating a segmented “bubble” effect. This style sits at the intersection of braided and fun, and it’s surprisingly easier than you’d think because the bubbles hide any inconsistencies in the braid’s thickness or tension.
Perfect for Learning Because
The bubble element is visually so interesting that it immediately draws the eye away from braiding details. The segmentation also provides natural breaking points if you’re still building endurance in your braiding hands—you can take a break between sections without it being obvious. This style also works across ages and occasions; it’s playful enough for casual wear but looks intentional and well-considered enough for more polished settings. The segmentation also means each bubble can be independently adjusted and loosened, so you can customize the look as you wear it throughout the day.
Step-by-Step Process
Create a Dutch braid from crown to nape, then gather everything into a ponytail. Starting just below the elastic, wrap a second small elastic around a section of the ponytail about 1.5 inches below the base elastic. Repeat this process down the length of the ponytail, placing elastics 1.5 to 2 inches apart. Once all the elastics are in place, gently pull the hair between each elastic outward to create the bubble effect—the fuller you pull, the more dramatic the bubbles become.
Pro tip: Use thin, discreet elastics in a color that matches your hair so they disappear visually; this lets the bubbles and braid be the stars of the show rather than the elastics.
9. Sleek Dutch Braid High Ponytail
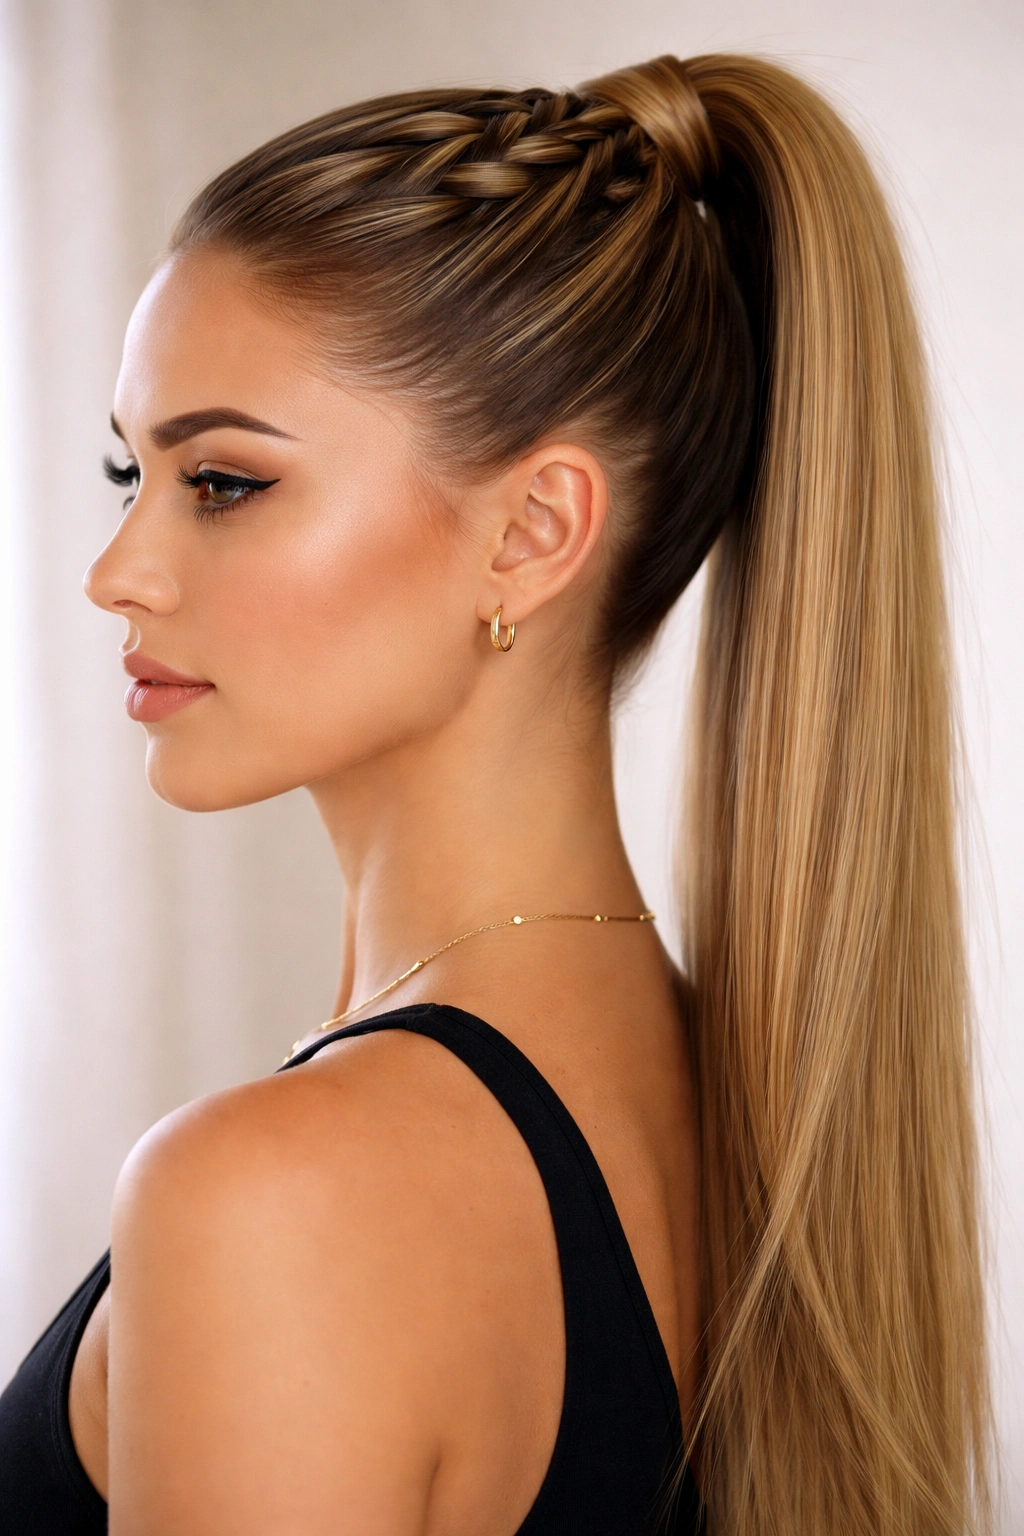
This is the polished, professional version—a tight Dutch braid running from crown to nape, paired with a slicked-back, high ponytail that’s smooth and intentional rather than soft and undone. It’s modern, it’s powerful-looking, and it’s the perfect choice when you want to look like you’ve put genuine effort into your appearance.
Why Beginners Can Master This
The high ponytail position means everything is anchored away from your face and neck, so any stray pieces or imperfections in your braiding are far less visible. The slicked-back texture of the overall style actually helps the braid appear more polished because everything is smooth and controlled. You’re not fighting against flyaways or texture variations; you’re using styling products and technique to create intentional control. Many beginners find this approach less daunting than a soft style because the products and gel do some of the work for you.
How to Achieve This Look
Apply a smoothing gel or edge control to damp hair, brush everything back away from your face, and secure any flyaways with bobby pins. Begin your Dutch braid at the crown, braiding tightly and keeping consistent tension throughout. Secure the braid at the nape with a tight elastic. Gather all your hair into a high ponytail at the crown, and use the gel or smoothing product to slick down any stray pieces. Wrap a small section of hair from the ponytail around the base to hide the elastic, and pin it in place.
Insider note: This style is actually easier to execute on second-day hair because existing texture helps the braid grip and stay in place; freshly washed hair is too slippery to keep everything as tight as this style demands.
10. Textured Dutch Braid with Hair Wrap Ponytail
For your final approach, you’ll create a loose, textured Dutch braid, then secure the ponytail with a second braid wrapped around its base like an embellishment. It’s ornate without being complicated, and the second braid element gives you a second chance to practice your skills while creating a cohesive, intentional-looking result.
The Learning Advantage
You’re essentially braiding twice, which means double the practice without it feeling like overwhelming. The first braid can afford to be looser and less perfect because it’ll be anchored and hidden slightly by the ponytail. The second braid, wrapped around the base, is shorter and more accessible, so you can focus on precision there if the first braid wasn’t perfect. The overall style looks intricate and considered, which means you can feel genuinely proud of the result even if neither individual braid is technically flawless.
The Complete Technique
Create a Dutch braid from crown to nape, using a texturizing product to make it grip better and leaving it deliberately loose. Secure the braid with an elastic, then gather all your hair into a ponytail at whatever height feels right. Take a small, thin section of hair from the ponytail and create a second, tighter Dutch braid that wraps around the base of the ponytail in a spiral or loop. Secure the end of the second braid underneath the ponytail base where it’ll be hidden. Gently pull at the first braid to loosen it further and create dimension.
What to watch for: Make sure the second braid is noticeably tighter and neater than the first—this visual contrast between the textures actually makes the overall style look more intentional and designed.
Final Thoughts
Dutch braid ponytails become exponentially easier the moment you stop thinking of them as a single complicated technique and start viewing them as a series of small, repeatable motions. You’re literally doing the same three-section weave motion over and over, and your hands will eventually find their rhythm whether you’re thinking about it or not. The real skill lies in choosing the right version for your hair type, texture, and the vibe you’re going for on any given day—and these ten approaches give you permission to experiment widely.
The most important thing isn’t achieving perfection in your early attempts; it’s braiding regularly enough that your hands build the neural pathways to execute the motion without constant conscious direction. Practice on days when you don’t have anywhere to be, so you’re not stressed about the results. Every single person who can braid started exactly where you are now, and the journey from “this looks kind of messy” to “wait, I actually made this” happens faster than you’d think.