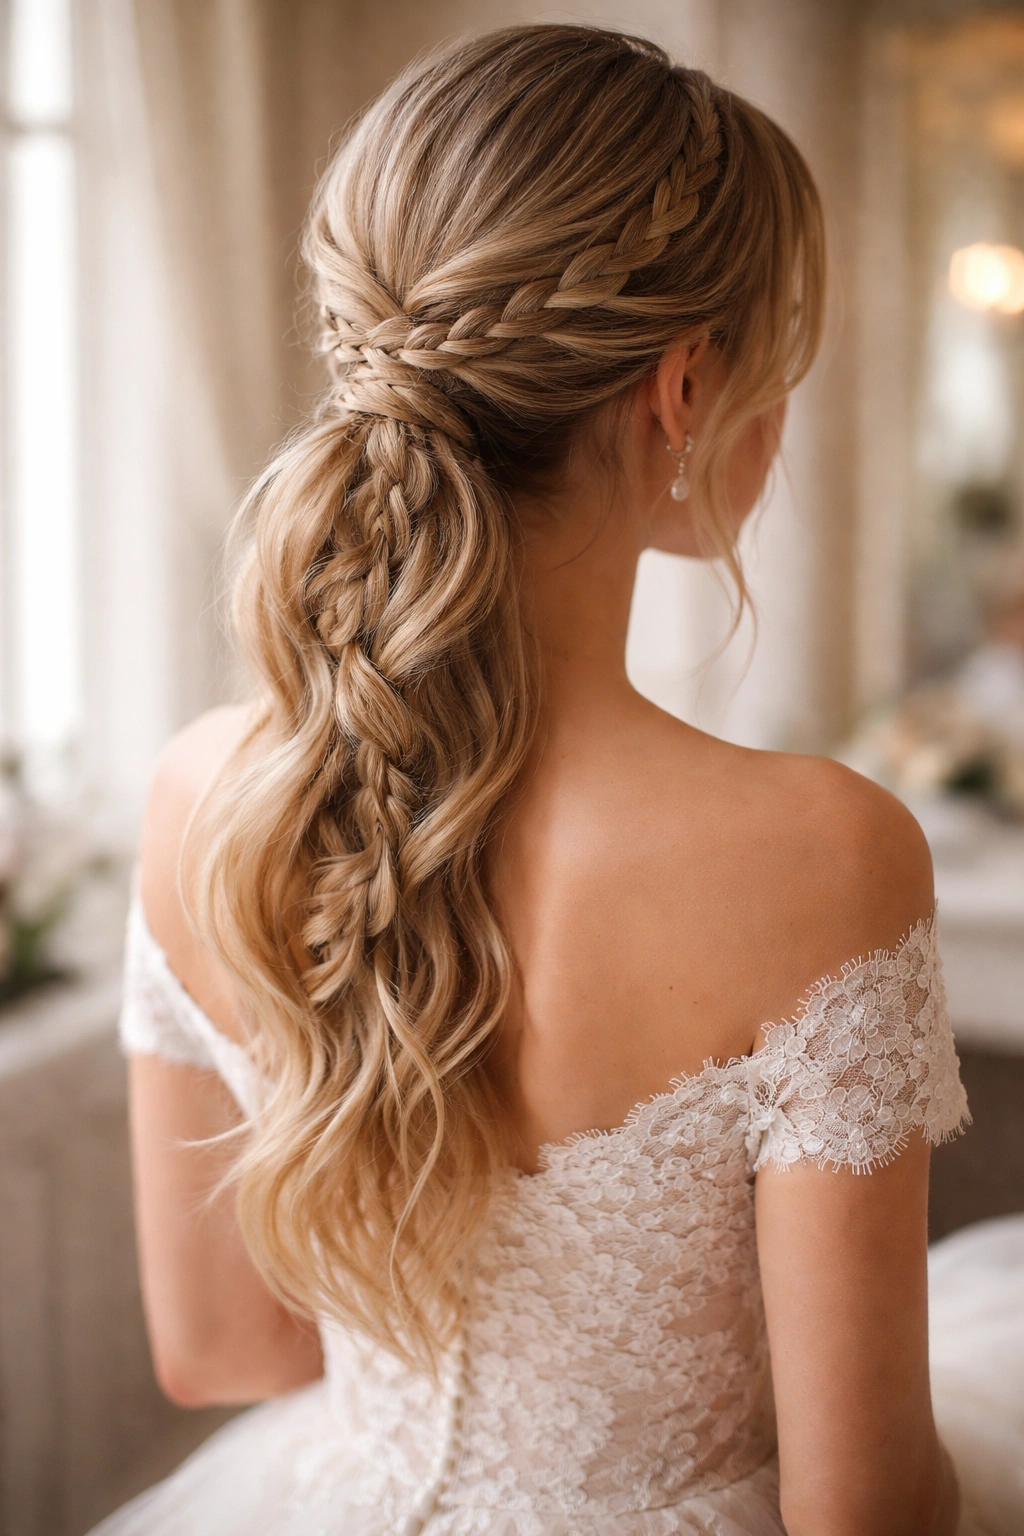
Bohemian style has captivated brides for years because it strikes that rare balance—romantic without being overly fussy, effortlessly beautiful without looking like you didn’t try. A bohemian braid ponytail does something magical at a wedding: it feels like you woke up looking perfectly undone, when in reality, you’ve created something intricate and carefully crafted. These hairstyles work whether you’re saying vows in a garden, on a beach, in a barn, or anywhere else that calls for a softer, more organic aesthetic.
The beauty of bohemian braids for wedding ponytails is their versatility. They can anchor loose, romantic waves or frame your face with delicate woven sections. They look equally stunning with a traditional white gown, a bohemian lace dress, or even a sleek modern silhouette—the braids add texture and dimension that photographs beautifully from every angle. More importantly, these styles hold throughout your entire wedding day and night of dancing without looking stiff or overly done.
What makes a bohemian braid different from other braiding styles is the emphasis on movement, texture, and that intentional “just happened to be this beautiful” quality. The braids aren’t perfectly tight or geometrically precise; they have a looseness that lets pieces fall naturally around your face and neck. Combined with a low or mid-height ponytail, this creates a look that’s both sophisticated and laid-back—exactly what modern bohemian style demands.
Preparing Your Hair for Bohemian Braids
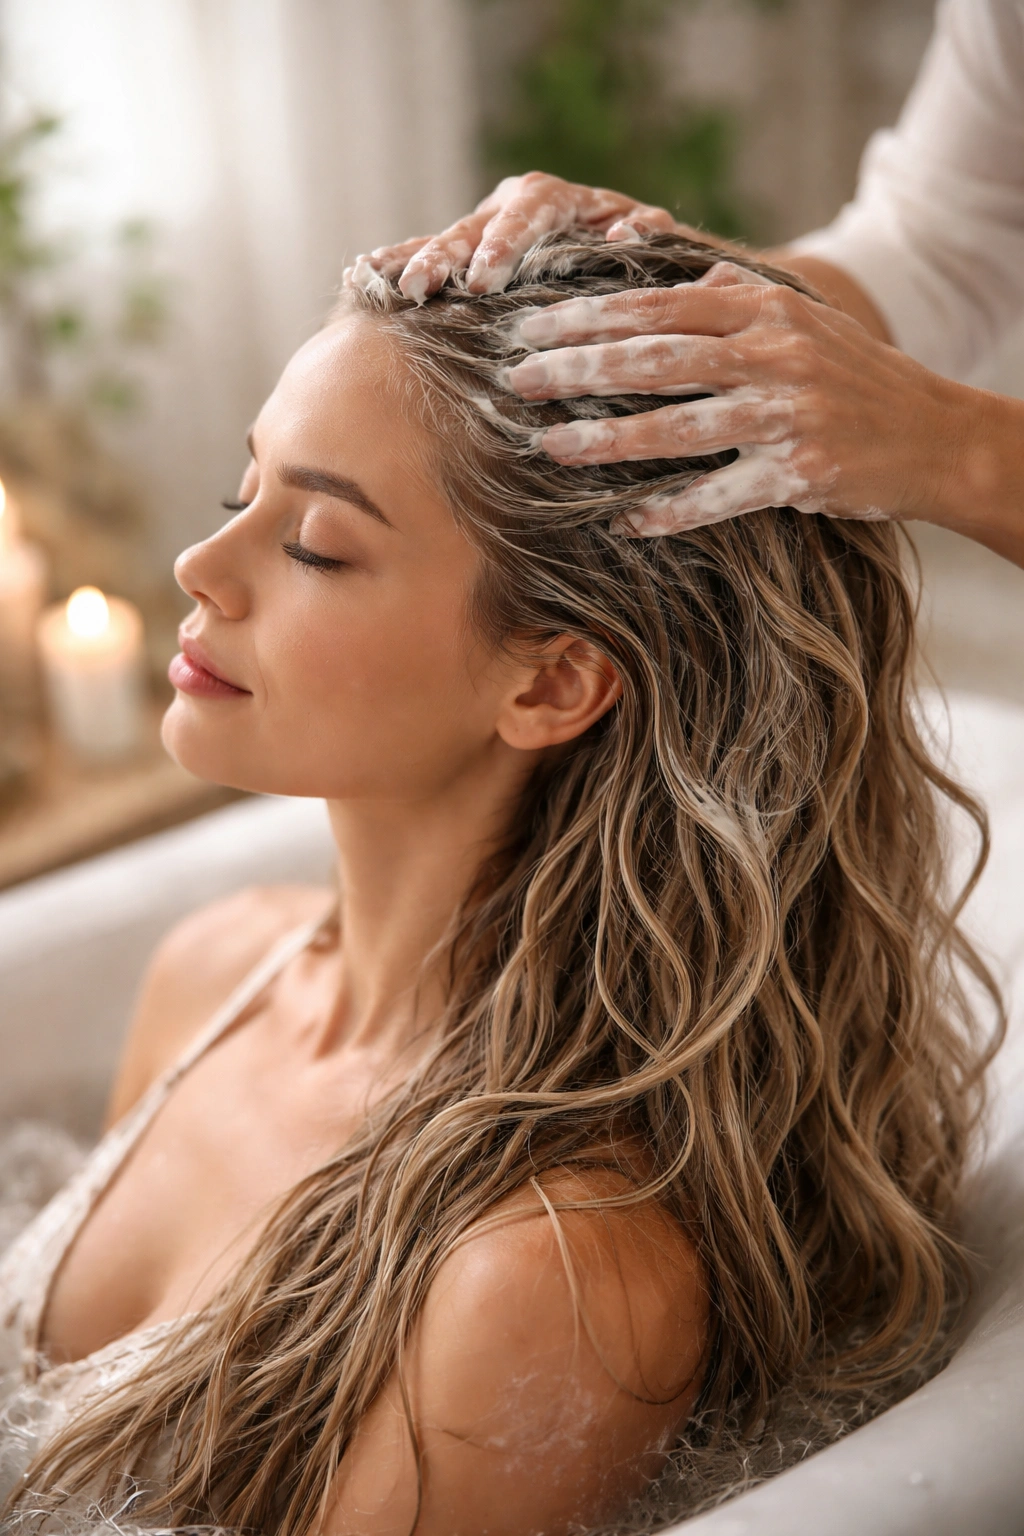
The foundation of any stunning bohemian braid ponytail starts days before your wedding day. Your hair needs to be in optimal condition to hold braids beautifully and look luminous in photos. This means deep conditioning treatments, scalp care, and strategic timing around your last wash.
The ideal approach is washing your hair 2-3 days before your wedding. Fresh-washed hair is actually too slippery for braids to grip well and tend to fall out more easily throughout the day. Hair that’s a few days old has just the right amount of natural oils and slight texture to hold braids securely without needing products that make it feel heavy or look greasy.
If you have fine or thin hair, consider getting a volumizing blowout 1-2 days before your wedding day. A good blowout creates body and texture at the roots, which makes braids sit higher and look fuller. Ask your stylist to focus on giving you movement and dimension rather than a sleek, polished finish—that texture is essential for bohemian braids.
For thick or coarse hair, a smoothing treatment the week before your wedding helps manage frizz and makes braiding easier. However, you don’t want your hair too slick; if you do a smoothing treatment, ask for one that controls frizz without creating a glass-like finish that makes braids slip.
Tools and Accessories That Make Bohemian Braids Work
Bohemian braid ponytails require surprisingly few tools, but the right ones make an enormous difference in execution and longevity. The key is having products and accessories that enhance the braids without announcing their presence.
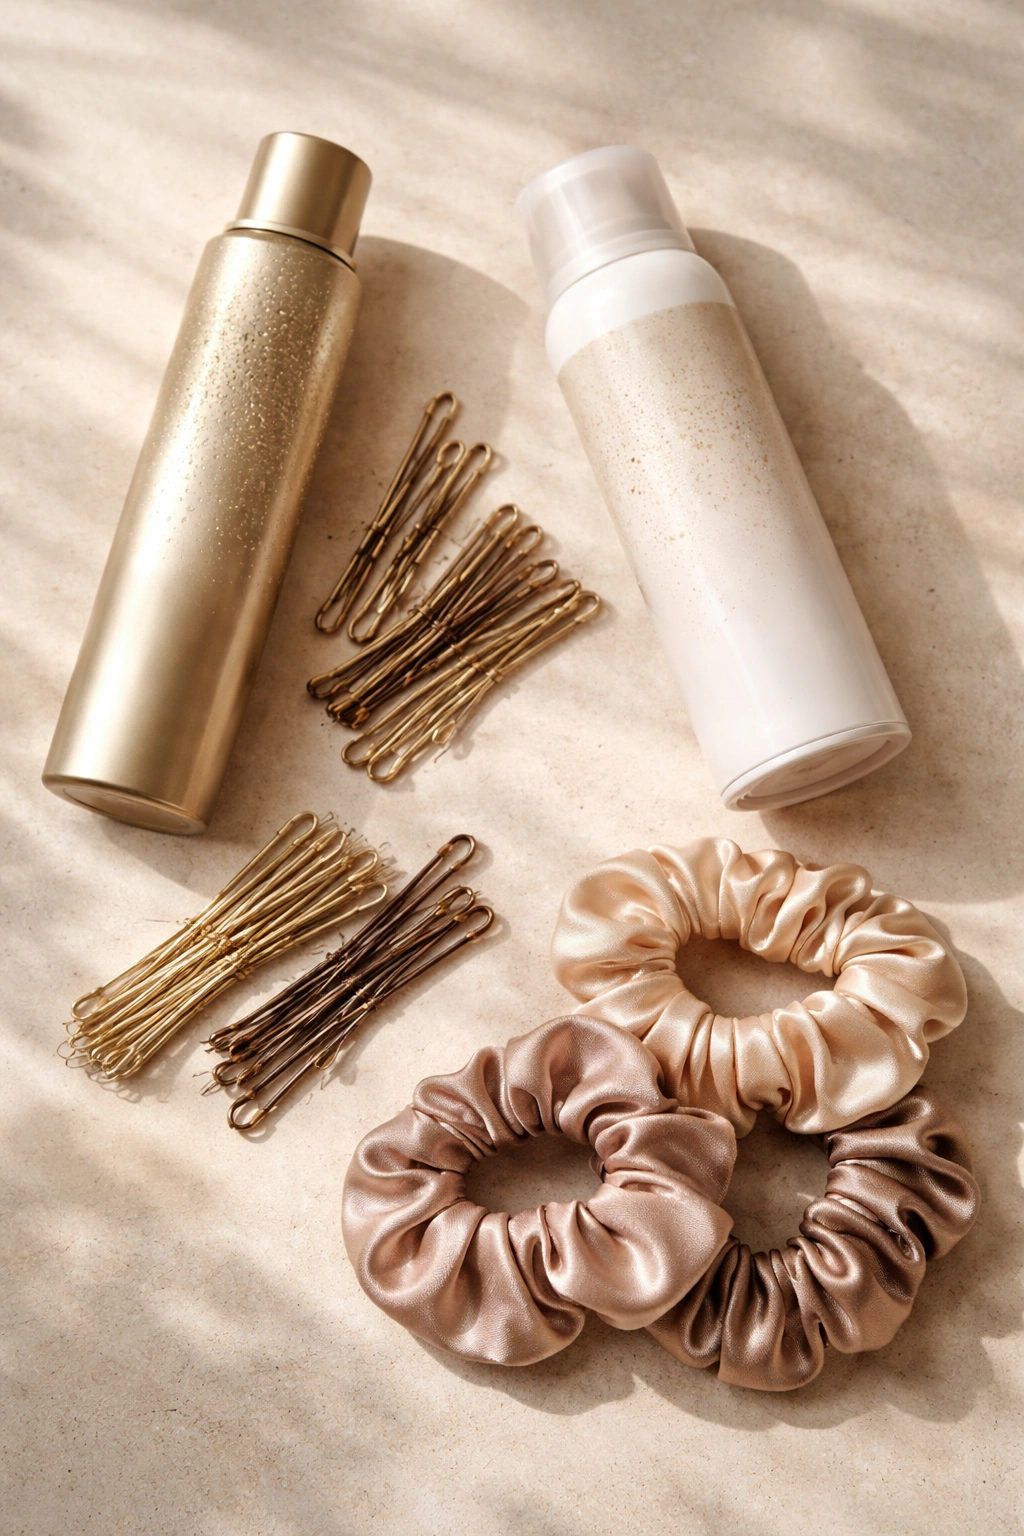
Texturizing spray or dry shampoo is your secret weapon. Apply it the morning of your wedding or the evening before, focusing on your roots and throughout the length of your hair. This creates grip and micro-texture that makes braids hold dramatically better and gives them a softer, more romantic appearance rather than slick, polished braids.
You’ll need bobby pins in your hair color (not black if you have lighter hair, not blonde if you have darker hair—the contrast shows). Opt for the thin, small-sized bobby pins that disappear into braids easily. Have at least 20-30 on hand; you’ll use more than you expect.
Silk or satin hair ties are non-negotiable. Regular elastic hair ties create creases and can cause breakage and frizz, especially in fine hair. A silk or satin hair tie slides smoothly and won’t create that telltale crease where your ponytail is secured.
If you want your braids to stay secure all day (and you should), a flexible styling cream or light paste helps keep flyaways in check without making anything look wet or heavy. Use it sparingly—you want to tame, not paste down. A very light hand with product is the bohemian philosophy.
Consider adding delicate hair accessories: thin gold or silver wire wrapped through braids, small fresh flowers tucked into sections, pearl-topped bobby pins strategically placed, or a hairpin that spans across the back of your head. These small touches elevate the look from pretty to genuinely stunning without feeling costume-like.
Mastering the Core Techniques
Before you dive into the 10 specific styles below, there are three braiding techniques that form the foundation of bohemian braid ponytails. Master these, and you’ll be able to execute any of the styles that follow.
The Dutch Braid (Reverse French Braid)
Unlike a traditional French braid where you braid over, a Dutch braid goes under, creating a braid that sits on top of your hair rather than sinking into it. This is what gives bohemian braids their dimensional, textured appearance. Start at your crown with a small section, divide it into three strands, then braid under (crossing the right section under the center, then the left under the center). As you go, gradually add small sections of loose hair from the sides into the braid. The key to making this look bohemian rather than tight: keep your hands relaxed, don’t pull the sections taut, and deliberately leave a bit of looseness as you go.
The Loose, Undone Finish
After you’ve braided, go back and deliberately loosen the braid by gently pulling small sections out sideways along the entire length. Start at the bottom and work your way up. This transforms a neat braid into something that looks romantically tousled. You’re not unraveling the braid; you’re widening each section so the braid looks fuller and has that undone quality. This single step is what separates a bohemian braid from a neat, structured braid.
The Strategic Flyaway Taming
Once your braids are in and you’ve loosened them, use a tiny amount of flexible styling cream or mousse on your fingers and gently smooth flyaways and wisps around your hairline and temples. Don’t slick everything down; just soften the edges so you look polished, not frizzy. This creates that “intentionally beautiful” aesthetic rather than “I tried too hard.”
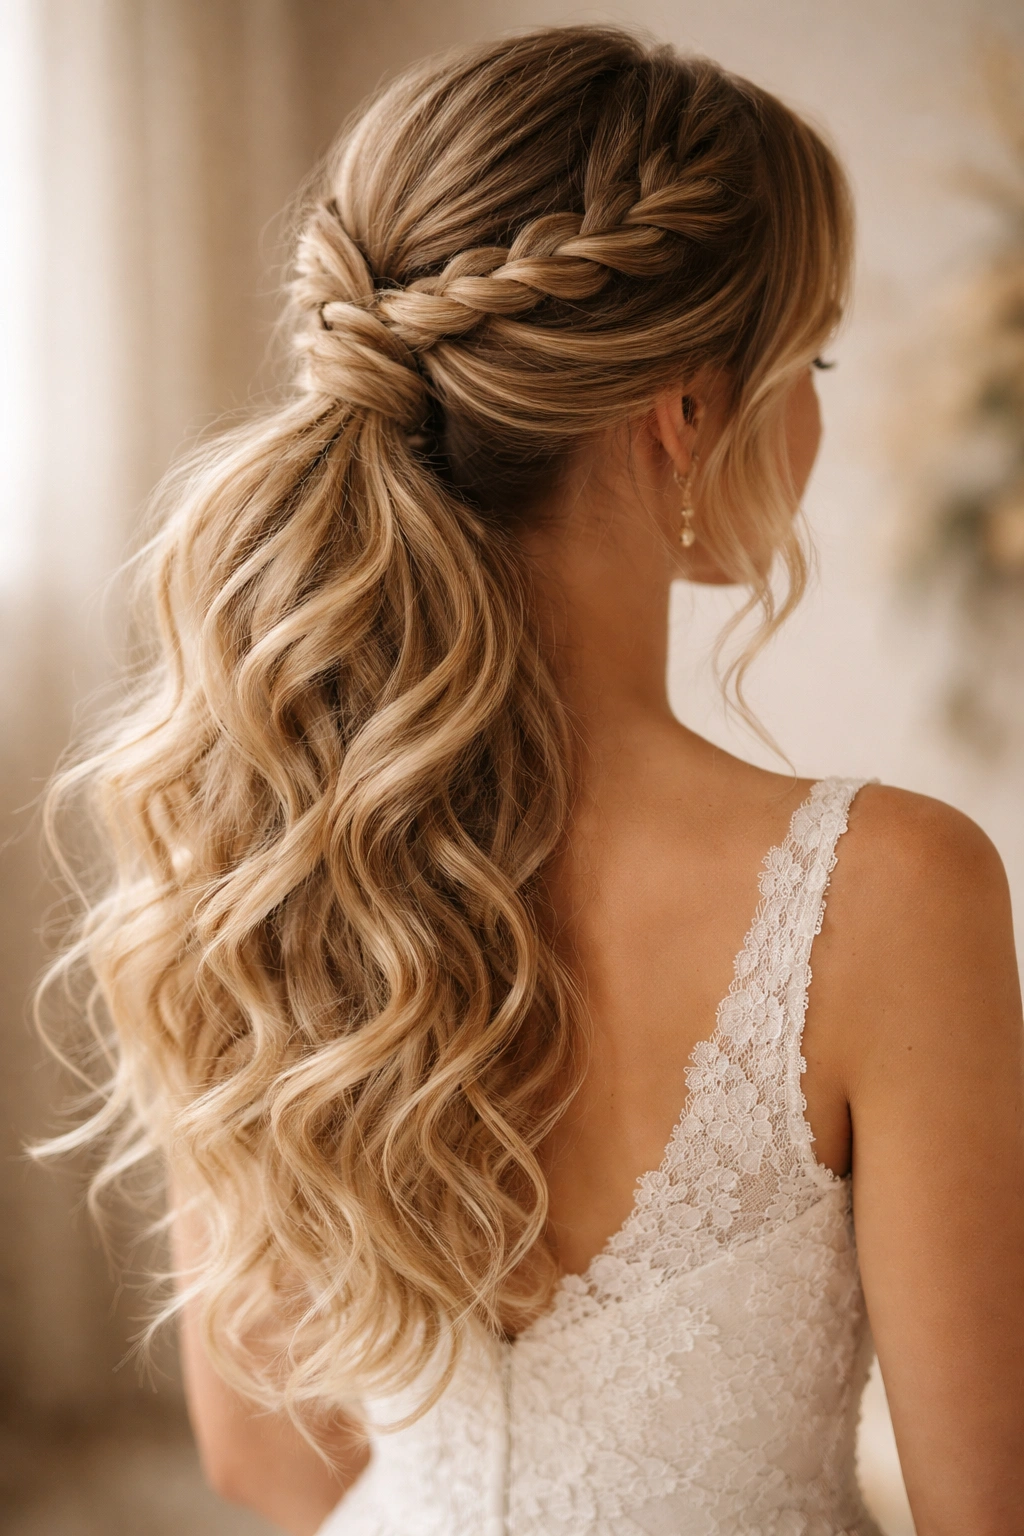
1. The Half-Up Double Dutch Braid Ponytail
This style is pure romantic elegance—two Dutch braids frame your face from the temples, meeting at the back where they anchor into a low ponytail. The effect is somehow both intricate and effortless, giving your wedding photos a timeless, fairy-tale quality.
Why Brides Love This Style
The half-up double Dutch braid is forgiving because the braids on either side balance the style visually. If one braid isn’t perfectly symmetrical, it doesn’t look obviously off-balance. It also works beautifully with updos that have some dimension and with simple, sleek hair underneath. The braids frame your face and highlight your eyes and makeup, which is essential for wedding photos. Plus, this style keeps hair off your shoulders without committing to a full updo, which is perfect if you want to show off your dress’s back detail.
How to Execute It Perfectly
Start at one temple and create a Dutch braid that runs back toward your ear, then down the side of your head. As you braid, gradually add hair from the side and back, collecting more hair as you go. When you reach the nape of your neck, secure the braid with a bobby pin. Repeat on the other side. Once both braids reach the back, gather all your hair (including the braids) into a low ponytail at the nape of your neck, securing it with a silk hair tie. Loosen both Dutch braids by pulling sections out gently, then use a texturizing spray to set everything in place. The loosened braids should look like they have substantial volume and movement.
Pro Styling Tip
Curl your ponytail hair before putting it up. When you create the ponytail, those curls will add texture and dimension to the ends, creating a fuller, more romantic silhouette. This takes the style from pretty to genuinely stunning and photographs beautifully.
2. The Single Wrap-Around Braid Ponytail
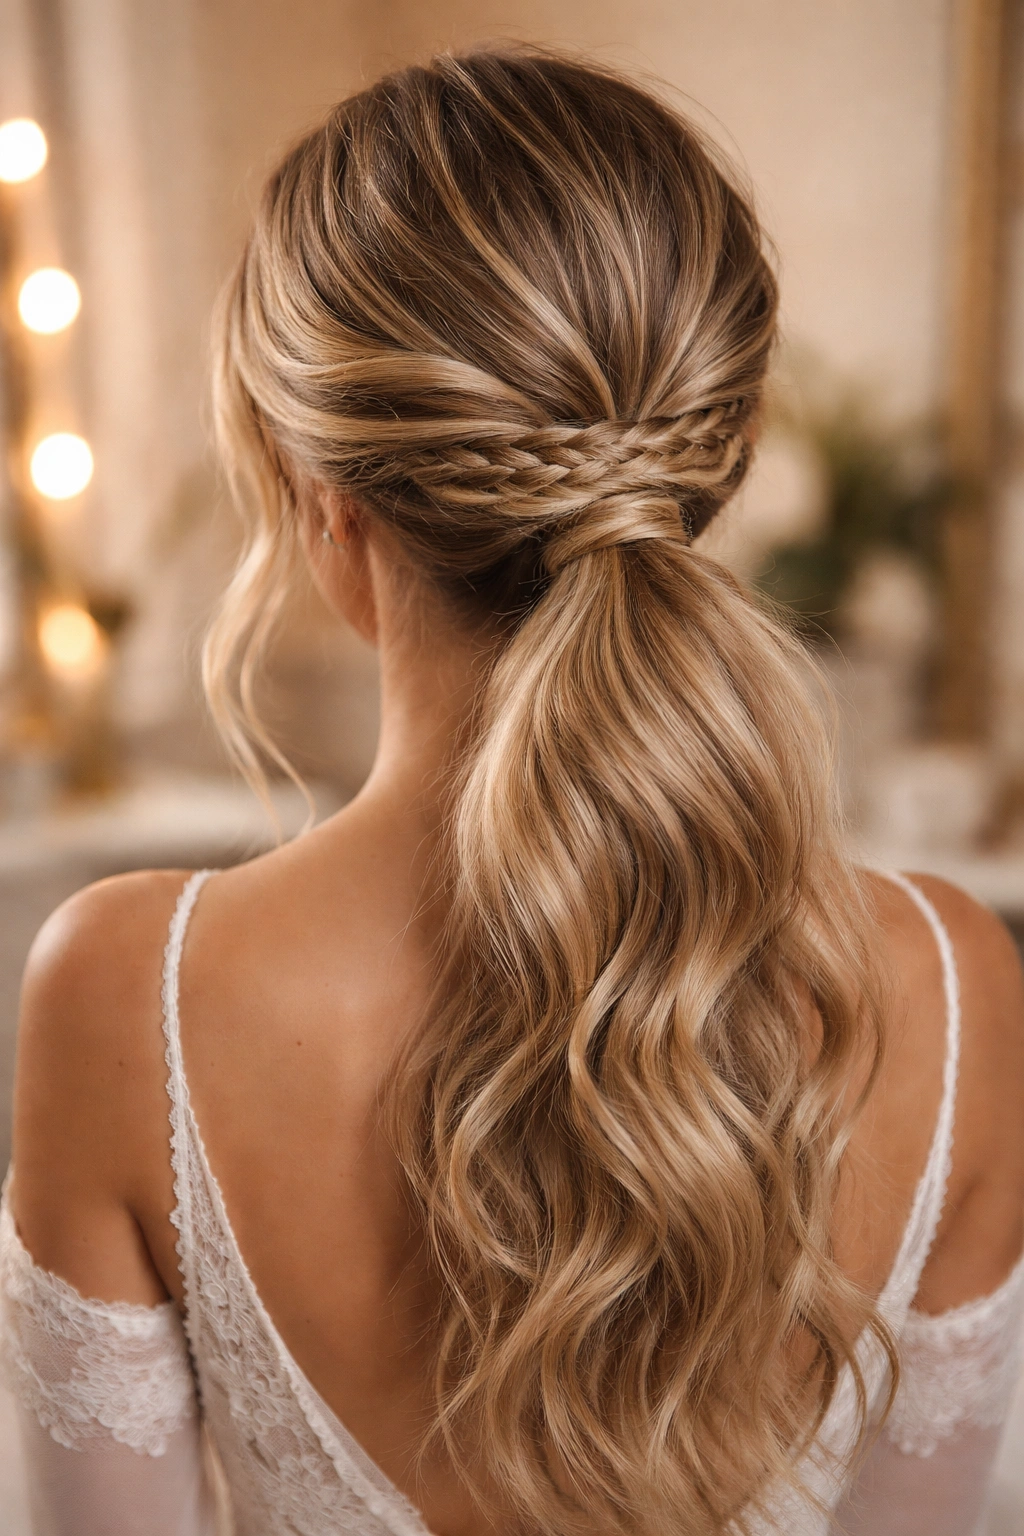
Imagine taking your hair into a standard low ponytail, then taking a small section of that ponytail and braiding it, then wrapping that braid around the base of the ponytail like a crown. This is an elegant, sophisticated variation that’s less complicated than you’d think but looks dramatically more polished than a basic ponytail.
The Visual Appeal
What makes this style distinctly bohemian is that the wrap-around braid sits raised and proud, not hidden. It draws the eye to the back of your head and creates a beautiful focal point. In wedding photos taken from the side or back, this style absolutely shines. It’s particularly stunning if you have darker hair because the texture of the braid really stands out, but it works beautifully on any hair color.
Building the Style Step by Step
Create a low ponytail first, securing it loosely so you have room to work. Take a 1-2 inch section from the front of your ponytail (the part closest to your scalp) and braid it loosely into a Dutch braid. Braid it only about 3-4 inches down. Then carefully wrap this braided section around the base of your ponytail in a circular motion, securing the end with bobby pins tucked underneath. Loosen the wrapped braid gently so it looks textured rather than sleek. Use a light hairspray to keep everything in place without making it look stiff.
Wedding Day Bonus
Tuck a single strand of baby’s breath or a small delicate flower behind the wrapped braid for a subtle but meaningful floral touch. This works beautifully in photos and adds an extra layer of wedding-day romance without looking over-the-top.
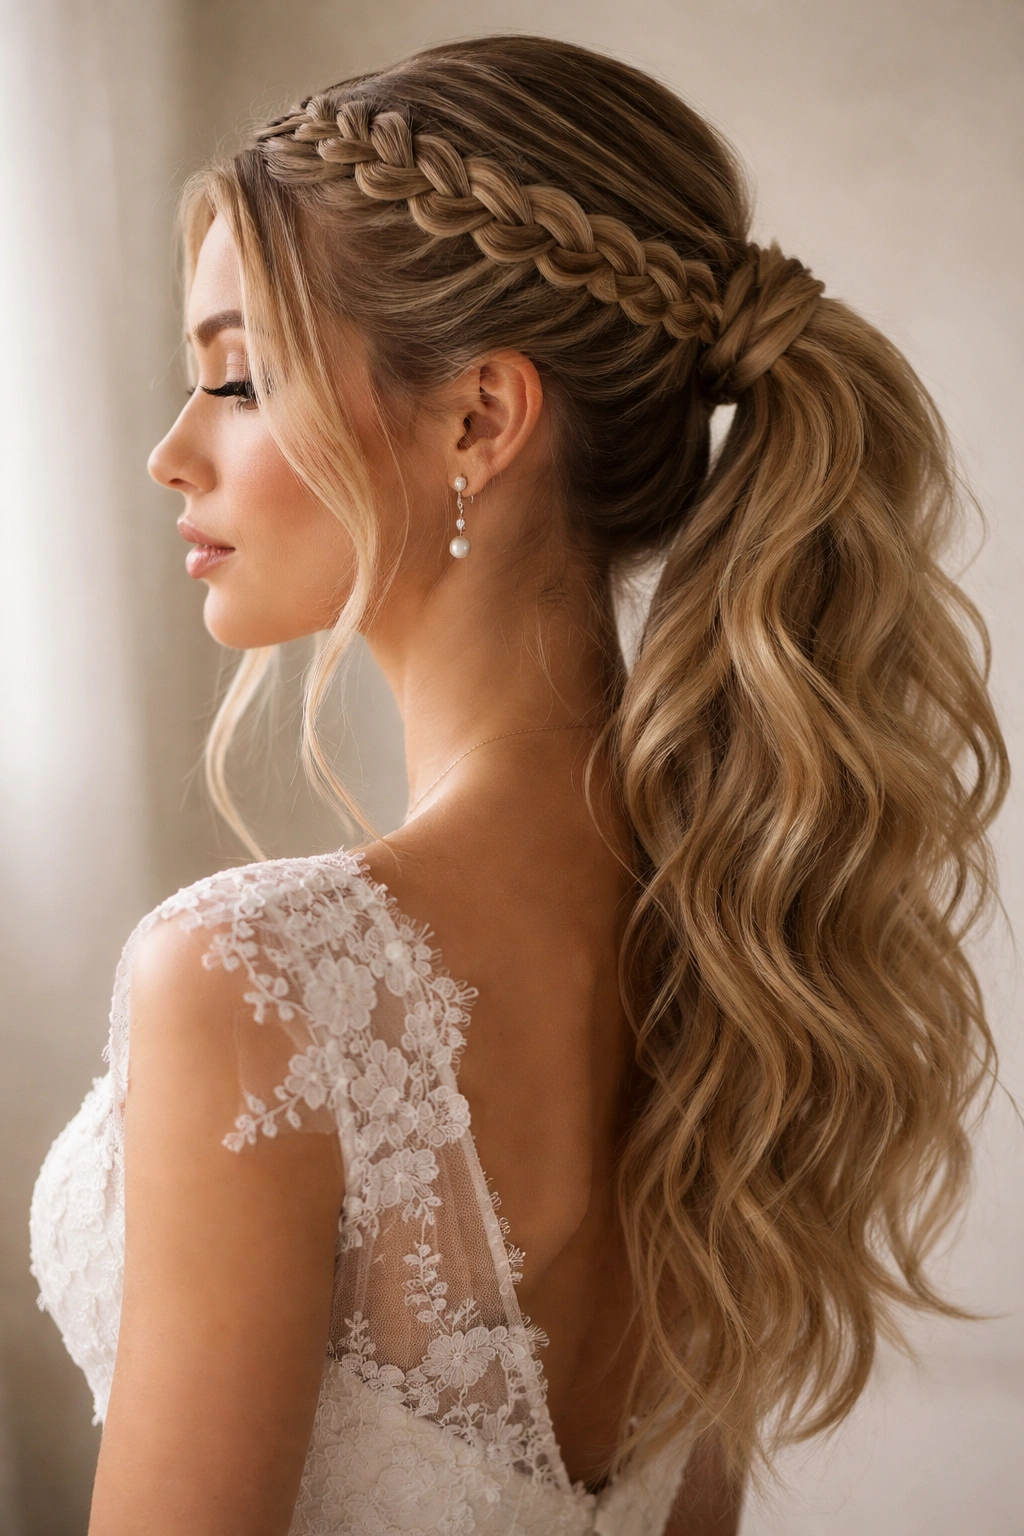
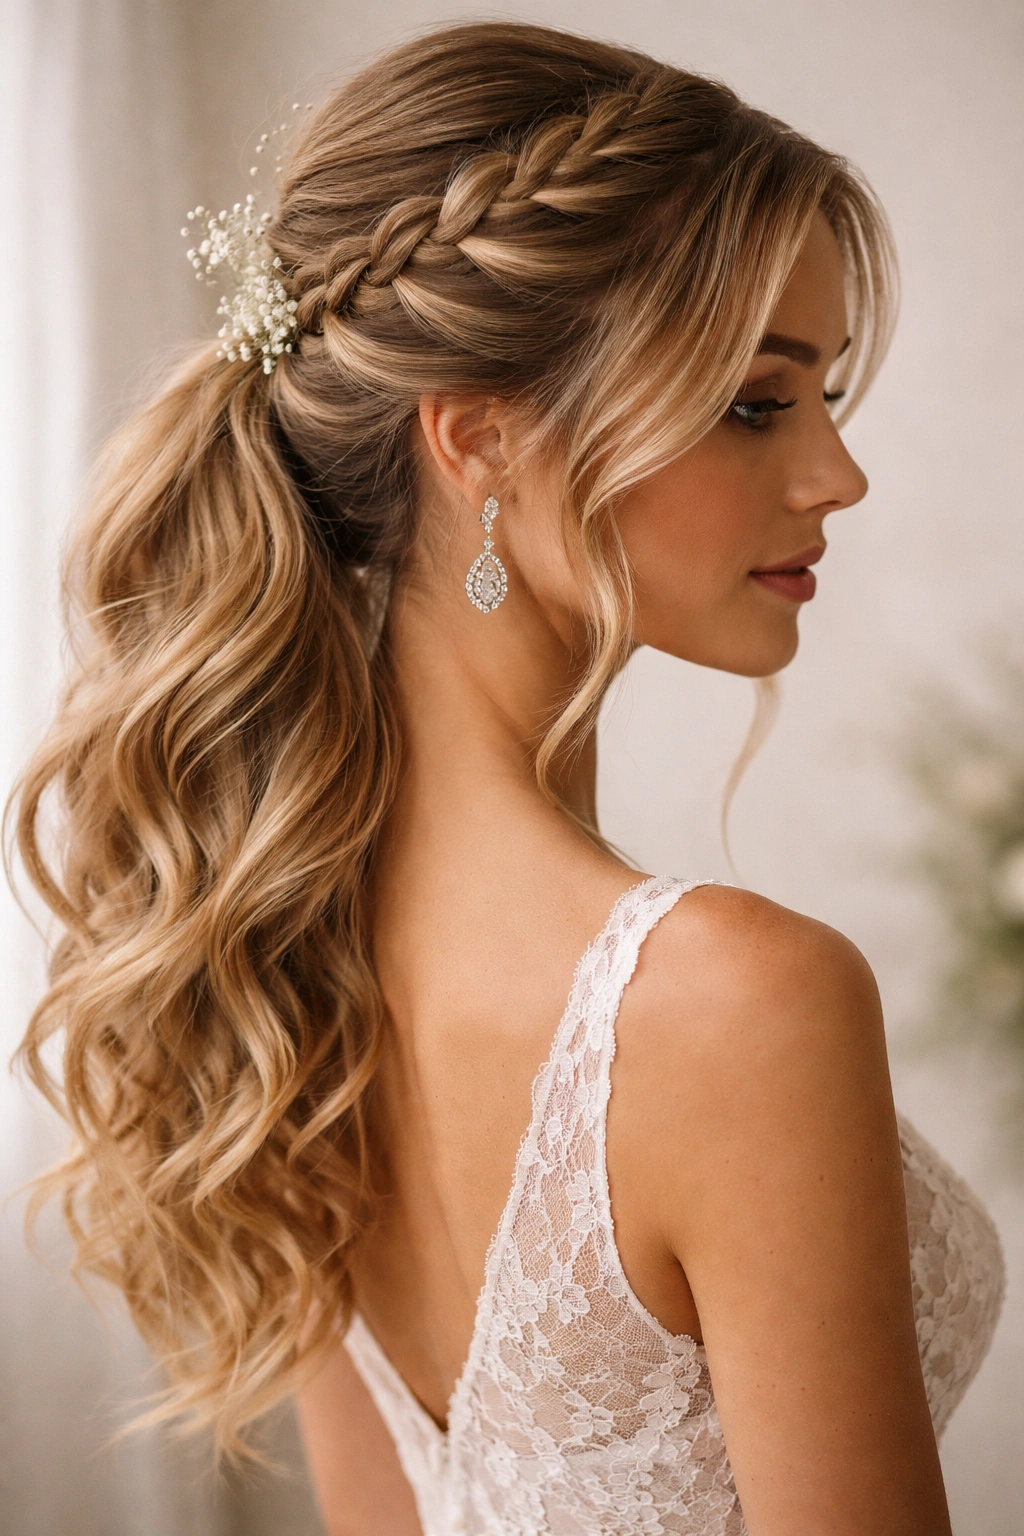
3. The Crown Braid Ponytail
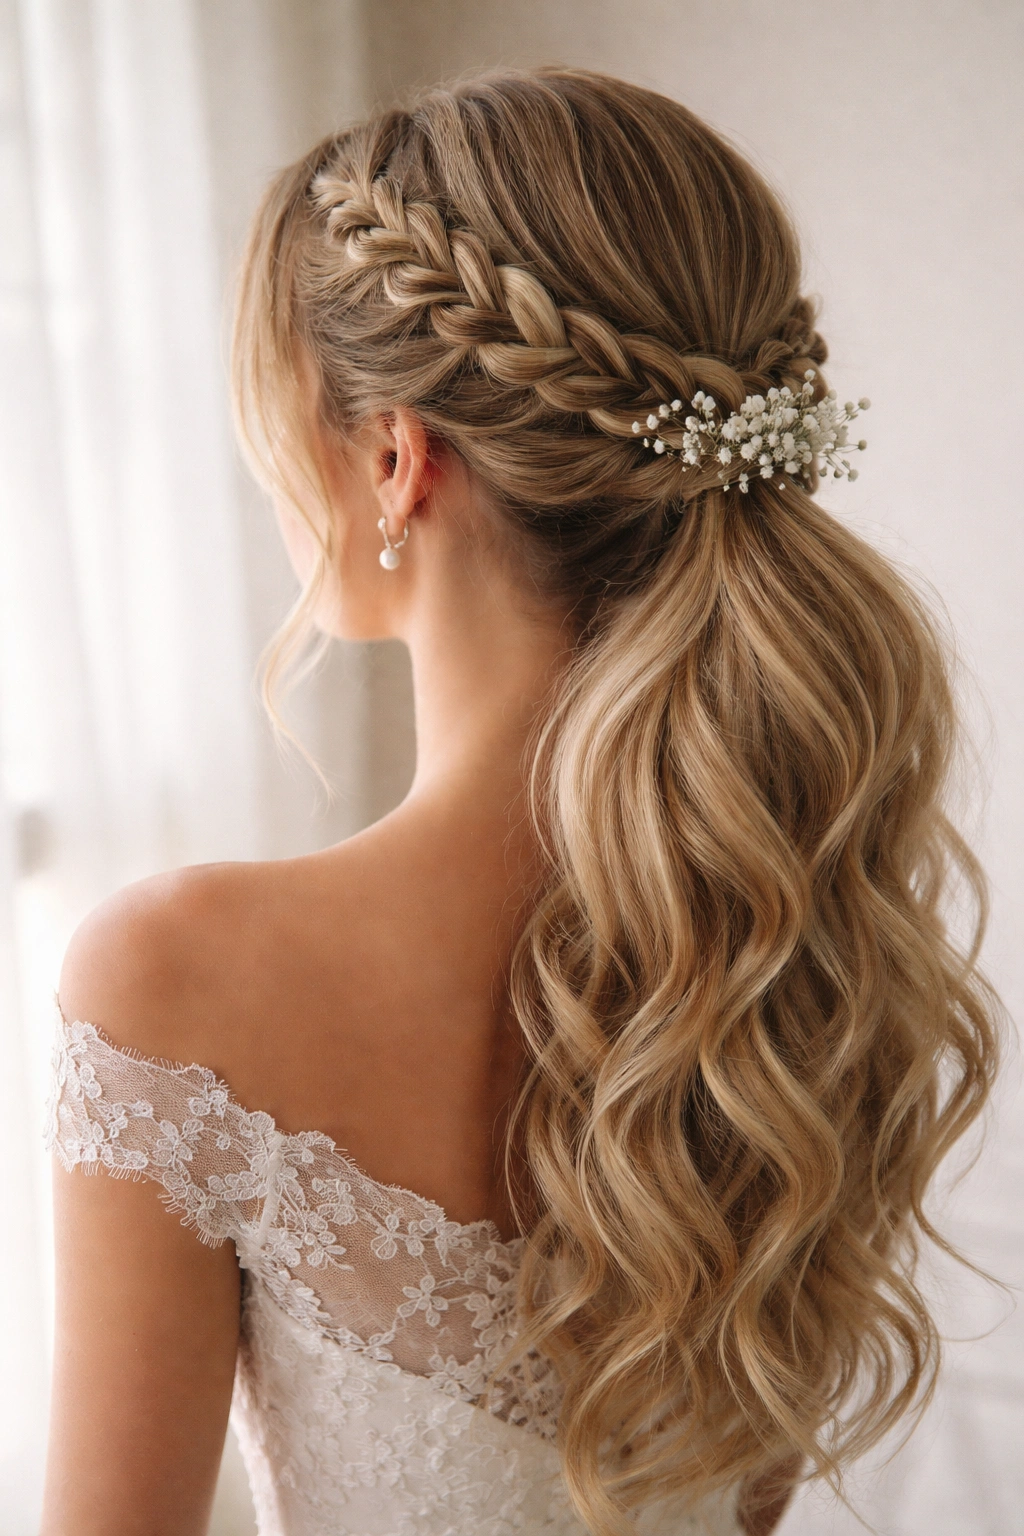
A crown braid starts at one side of your head and wraps around the crown like a halo before gathering into a low ponytail at the back. It’s a showstopper style that says “I put genuine thought and effort into my appearance” without screaming “dramatic updo.”
Why This Works for Weddings
Crown braids are inherently romantic and flattering. They lift hair off your shoulders and neck, which is perfect for keeping you cool at an outdoor wedding and for showing off any jewelry you’re wearing. The style also photographs beautifully from above (think ceremony photos or first-dance photos), and it reads as intentional and styled without being overly complicated.
Creating a Stunning Crown Braid
Start at one temple and create a Dutch braid that runs along your hairline, gradually curving toward the back of your head. Collect hair as you braid so that by the time you reach the opposite side, you’ve incorporated most of the hair around your crown. The braid should curve gracefully, not sit too tight or too loose. Once you’ve reached the far side, stop braiding and pull all your remaining hair down into a low ponytail at the nape, including the end of your crown braid. Loosen the crown braid significantly—this makes it look fuller and more romantic. The crown should have visible texture and slight waves from the loosening process.
Accessory Elevation
Thread a delicate gold or silver ribbon through the crown braid as you create it, or weave it through afterward. Let the ribbon hang down the sides slightly. This adds a subtle shimmer that catches light in photos and feels genuinely bridal without being costume-like.
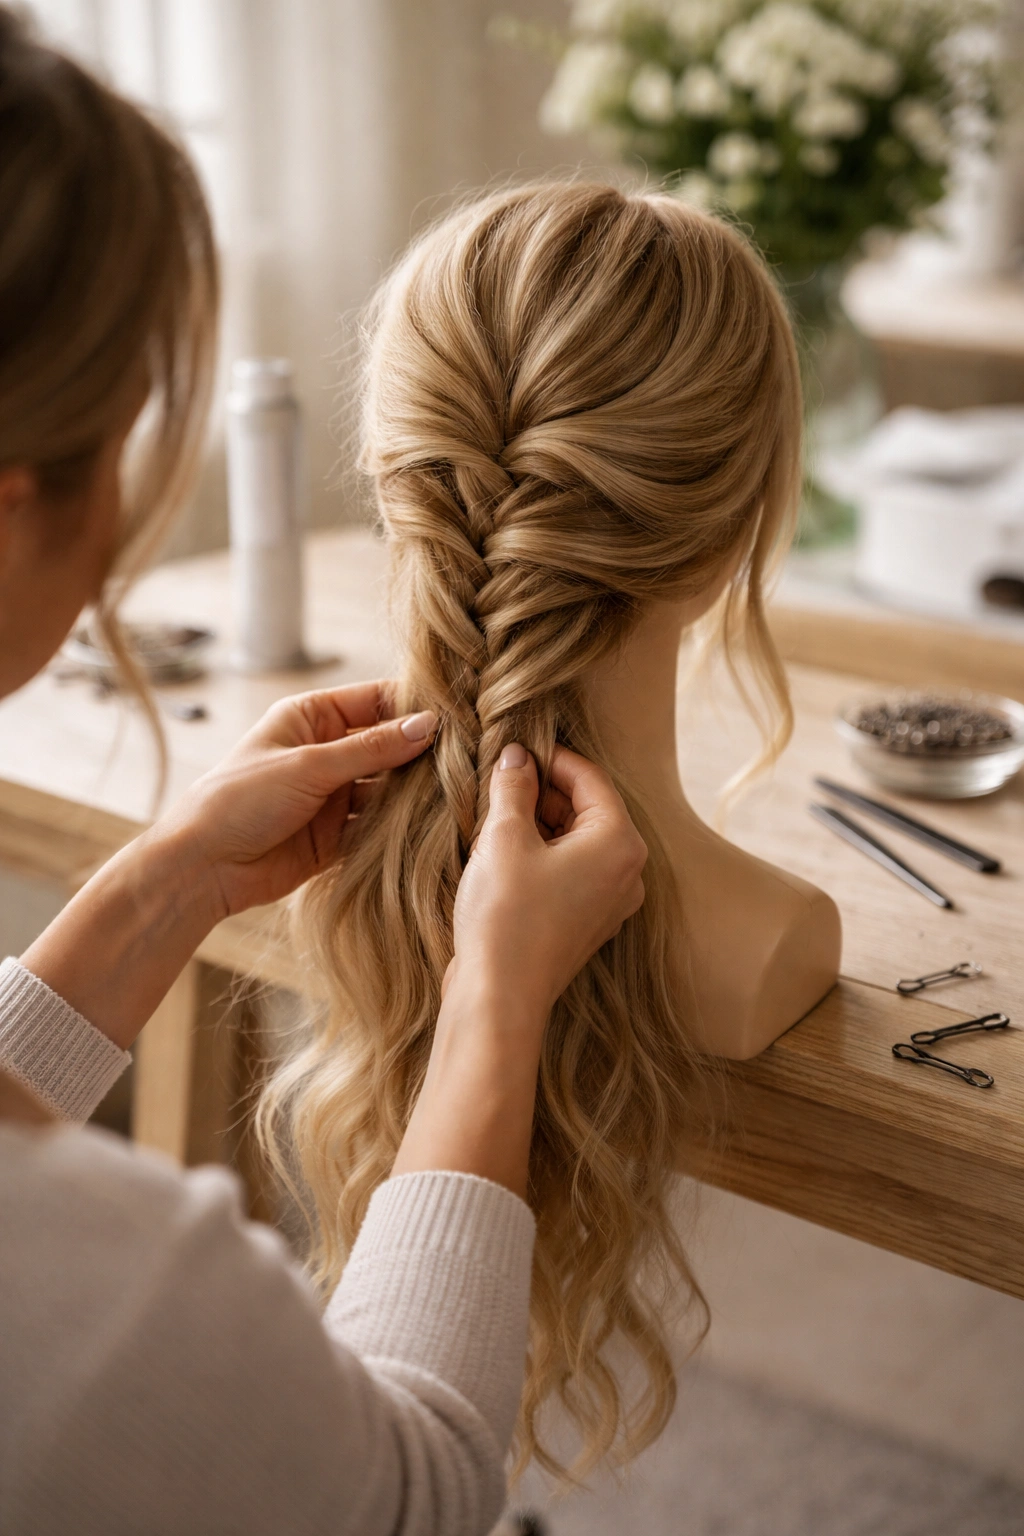
4. The Fishtail Wrap Ponytail
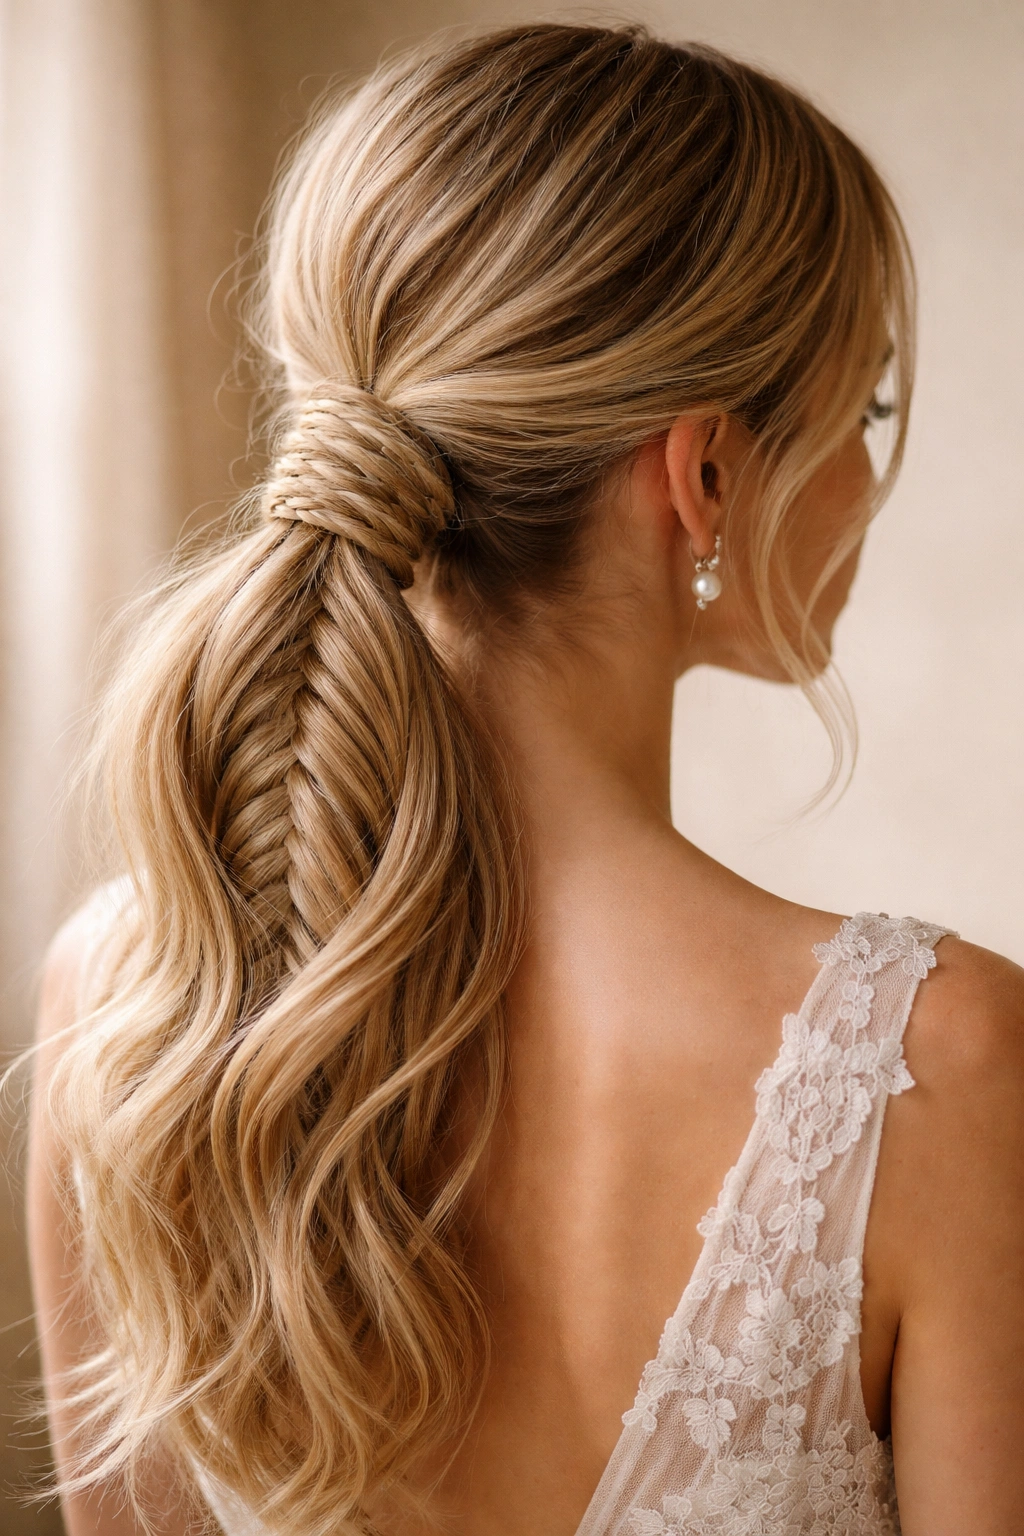
Fishtail braids have a different texture than traditional braids—they’re made by crossing small sections of hair over each other, creating a woven appearance that’s distinctly delicate and intricate-looking. When you use a fishtail braid to wrap around the base of a ponytail, you get a style that’s visually complex but surprisingly approachable.
The Intricate Appearance Factor
Fishtail braids look significantly more complicated and detailed than they actually are to create. They’ll make people assume you spent an hour on your hair when you really spent 30 minutes. They also have an inherent movement and texture that photographs gorgeously, especially in natural light or golden-hour wedding photography. The narrower, woven appearance is distinctly more delicate than a thick Dutch braid.
Constructing a Fishtail Wrap
Create a low ponytail first and secure it gently. Take a small section from the front of your ponytail (about 1-2 inches) and begin a fishtail braid: take a tiny piece of hair from the outside right, cross it over to the inside left. Then take a tiny piece from the outside left, cross it over to the inside right. Continue this alternating pattern, taking small, consistent pieces each time. When your fishtail braid is about 4 inches long, carefully wrap it around the base of your ponytail in a circular motion, securing the end underneath with bobby pins. Gently loosen the fishtail braid by pulling small sections sideways so it looks fuller and more textured.
The Texture Game
After loosening, spritz with texturizing spray and run your fingers gently through it. You want the fishtail to look like it has substance and movement. This is where the magic happens—the spray plus the gentle loosening transforms a neat fishtail into something that looks romantically tousled.
5. The Side-Swept Braided Ponytail
A side-swept style brings asymmetry and movement to your wedding day. Your ponytail sits lower on one side of your head, and braids emerge from the opposite side, creating a diagonal line that’s deeply flattering and photograph-friendly.
The Flattering Geometry
Side-swept styles are inherently flattering because they create diagonal lines on your face and head. These diagonals are more interesting and dynamic than symmetrical styles, which is why they photograph particularly well. If you’re concerned about a particular angle or want to emphasize one side of your face, a side-swept style is perfect because you control where the visual focus lands.
Building the Side-Swept Look
Part your hair slightly off-center toward the side where you want the ponytail to eventually land. Create a Dutch braid (or two) starting from the opposite temple, weaving it back toward the base of your ponytail. You can do a single braid that curves gracefully, or two smaller braids that converge. Gather all your hair into a low ponytail on the side opposite from where you started your braid. The braids should curve elegantly toward the ponytail, creating a natural-looking flow. Loosen both the braids and the ponytail section generously so everything has visible texture and softness.
Hair and Makeup Coordination
With a side-swept style, your makeup (especially your eye makeup) becomes more prominent on one side of your face. Consider slightly heavier makeup application on the side that’s more visible in profile, and make sure your hair is pulled back just enough to show your face without being overly severe.
6. The Twisted Braided Ponytail with Loose Curls
Sometimes the most beautiful bohemian styles marry braids with intentionally loose, undone curls. In this style, loose curls cascade down while strategically placed braids frame the back of your head and anchor everything into a ponytail.
The Balance of Structure and Movement
This style works because it combines structure (the braids) with softness (the curls). The braids keep everything styled and secure, while the curls provide movement and romance. It’s the perfect middle ground between “I styled my hair” and “I have beachy waves”—you get the intentional beauty of both.
Creating the Texture
Start by curling your entire head with a curling iron or by creating overnight curls the night before your wedding. Use a texturizing spray to break up the curls slightly so they don’t look too uniform. Once you have texture throughout, create one or two loose Dutch braids (depending on the thickness of your hair) starting from the crown and angling back toward where your ponytail will sit. These braids should start to incorporate curled sections as you go. Once you reach the back, gather all your hair into a low ponytail, making sure some of the curls fall loosely around it rather than being completely pulled up. The ponytail is more of a gentle anchor than a tight gathering point.
Product Decisions
Use a light texture spray rather than a heavy hairspray so the curls can still move throughout the day. Your goal is pieces falling around your face and neck by the end of the night—you want the style to evolve elegantly, not stay locked in place.
7. The Double Ponytail with Braided Details
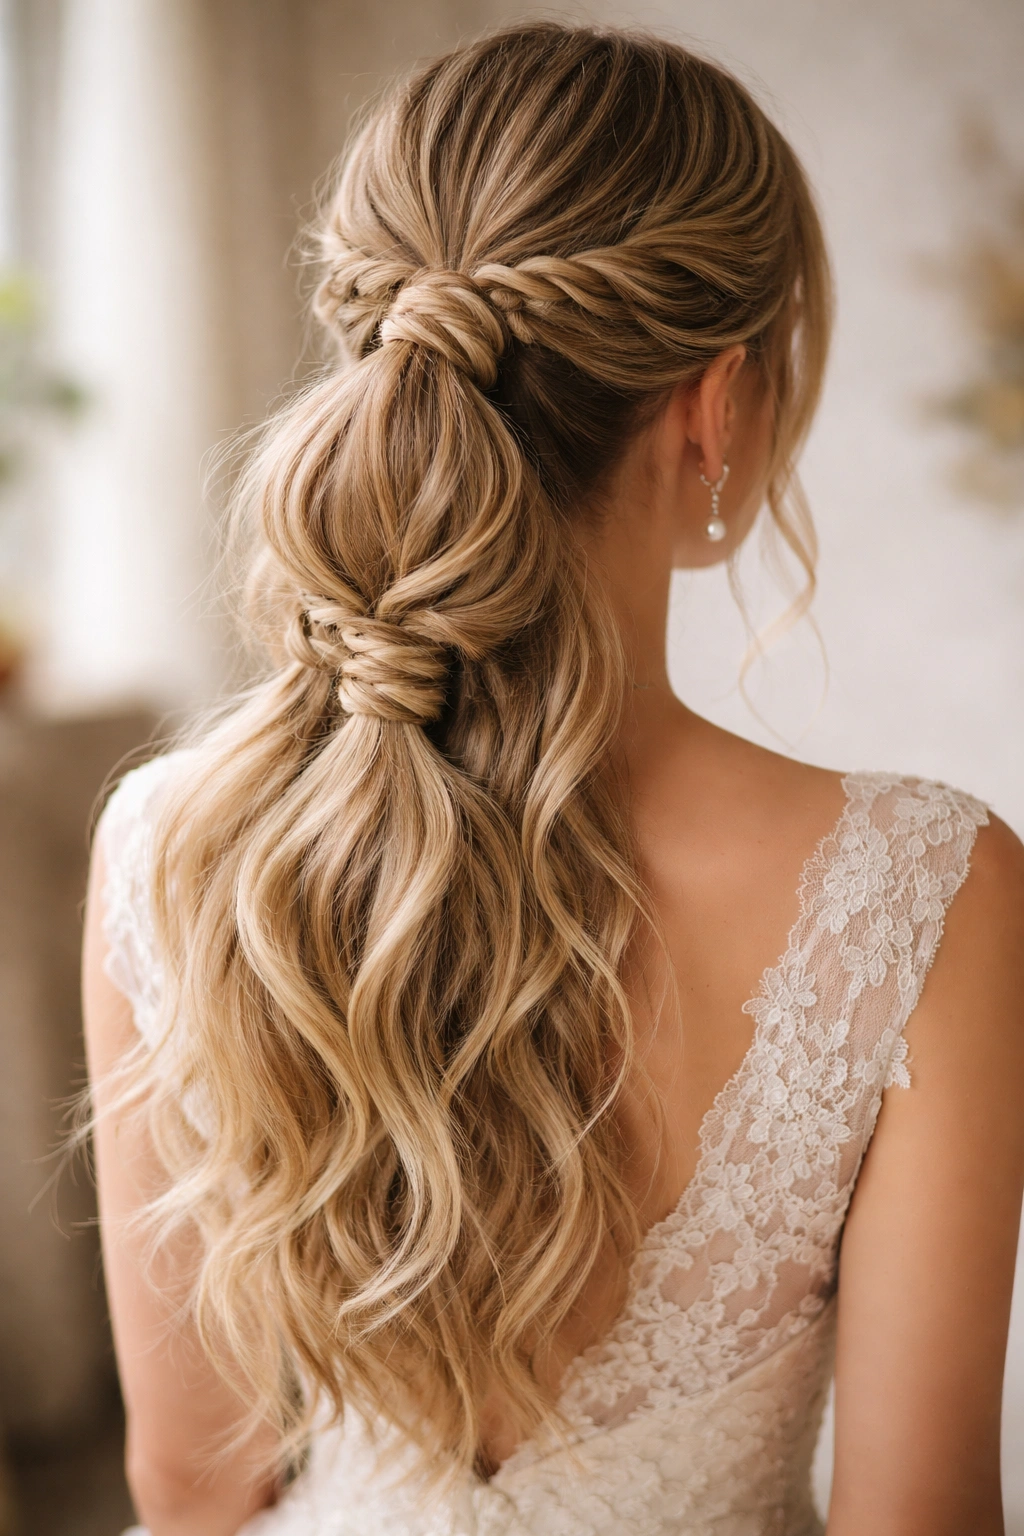
This playful bohemian style uses two smaller ponytails positioned one above the other, with a delicate braid or braided section connecting them or decorating them. It’s youthful and romantic without being juvenile.
When This Style Shines
The double ponytail works particularly well if you have very long hair (past your mid-back) because the length becomes a design element rather than something that needs to be managed. It also creates a lovely visual line down the back of your head in photographs. This style is perfect if you want to feel special and distinct without going for a full updo.
Executing Double Ponytails Correctly
Create a higher ponytail at the crown, securing it loosely. Create a second ponytail just below it using the remaining hair. Now, take a small section from the top ponytail and braid it loosely, wrapping it around the base of that ponytail like you did with the single wrap-around style. Do the same with the bottom ponytail. Alternatively, you can create one continuous braid that starts at the top ponytail, wraps around its base, then flows down and wraps around the bottom ponytail’s base. Loosen both braids generously and use a light spray to set everything.
Personalization Through Accessories
This style gives you lots of places to tuck flowers, ribbons, or delicate accessories. You could tuck flowers at the base of each ponytail, or thread ribbon through the braids. Small pearl pins placed strategically add bridal elegance.
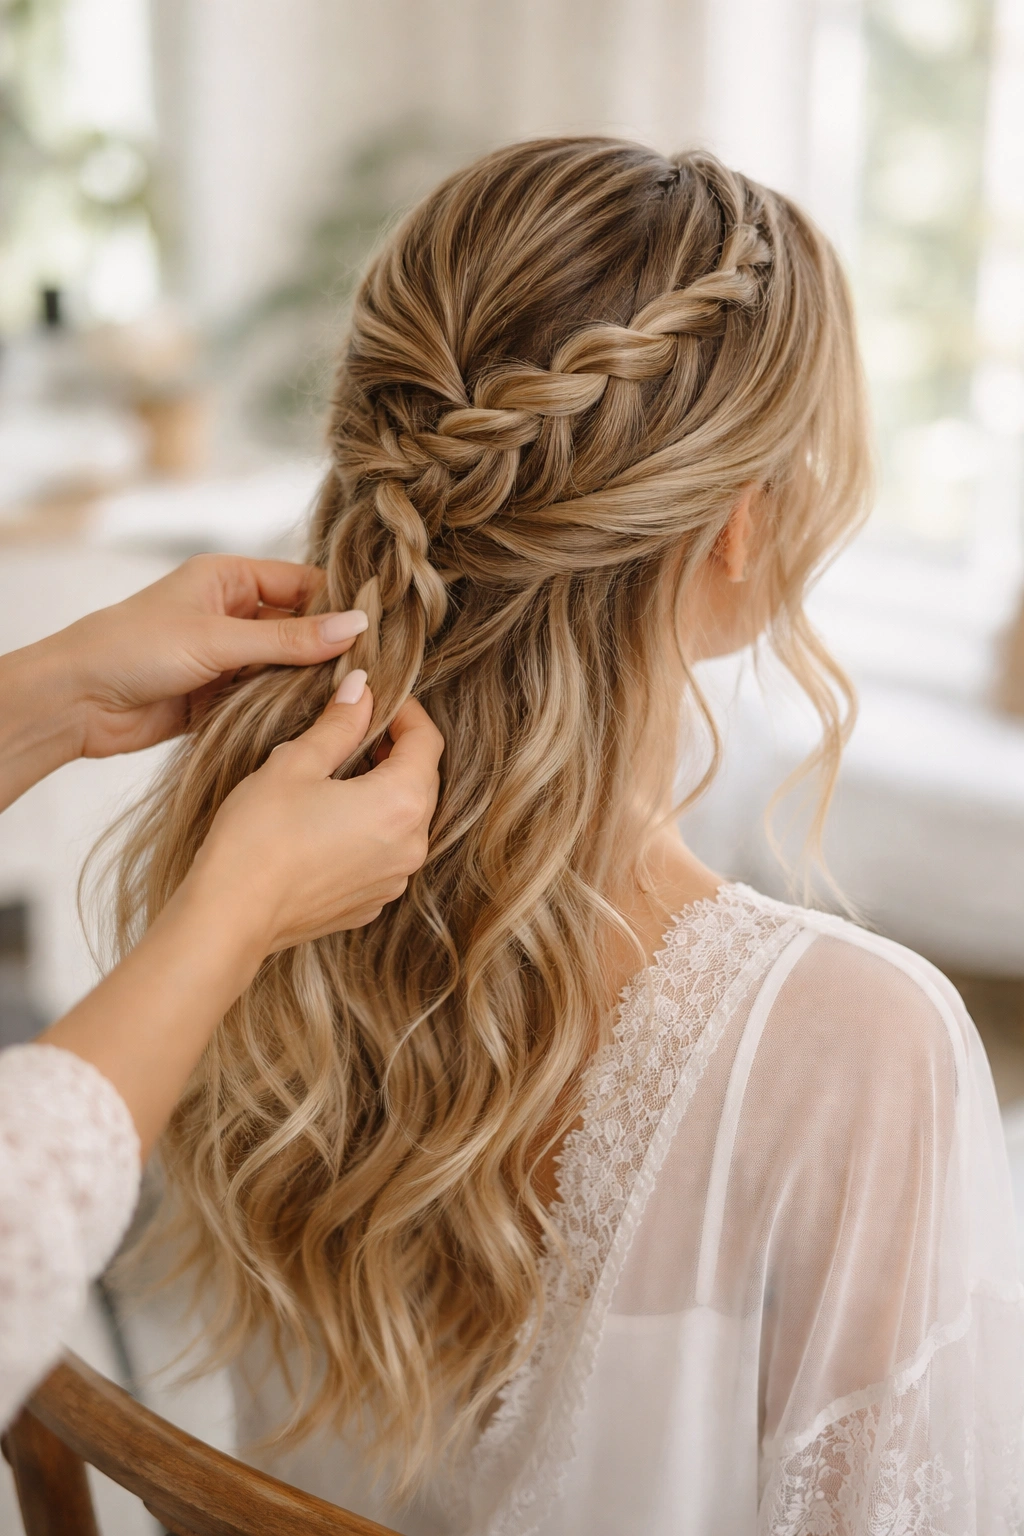
8. The Waterfall Braid Ponytail
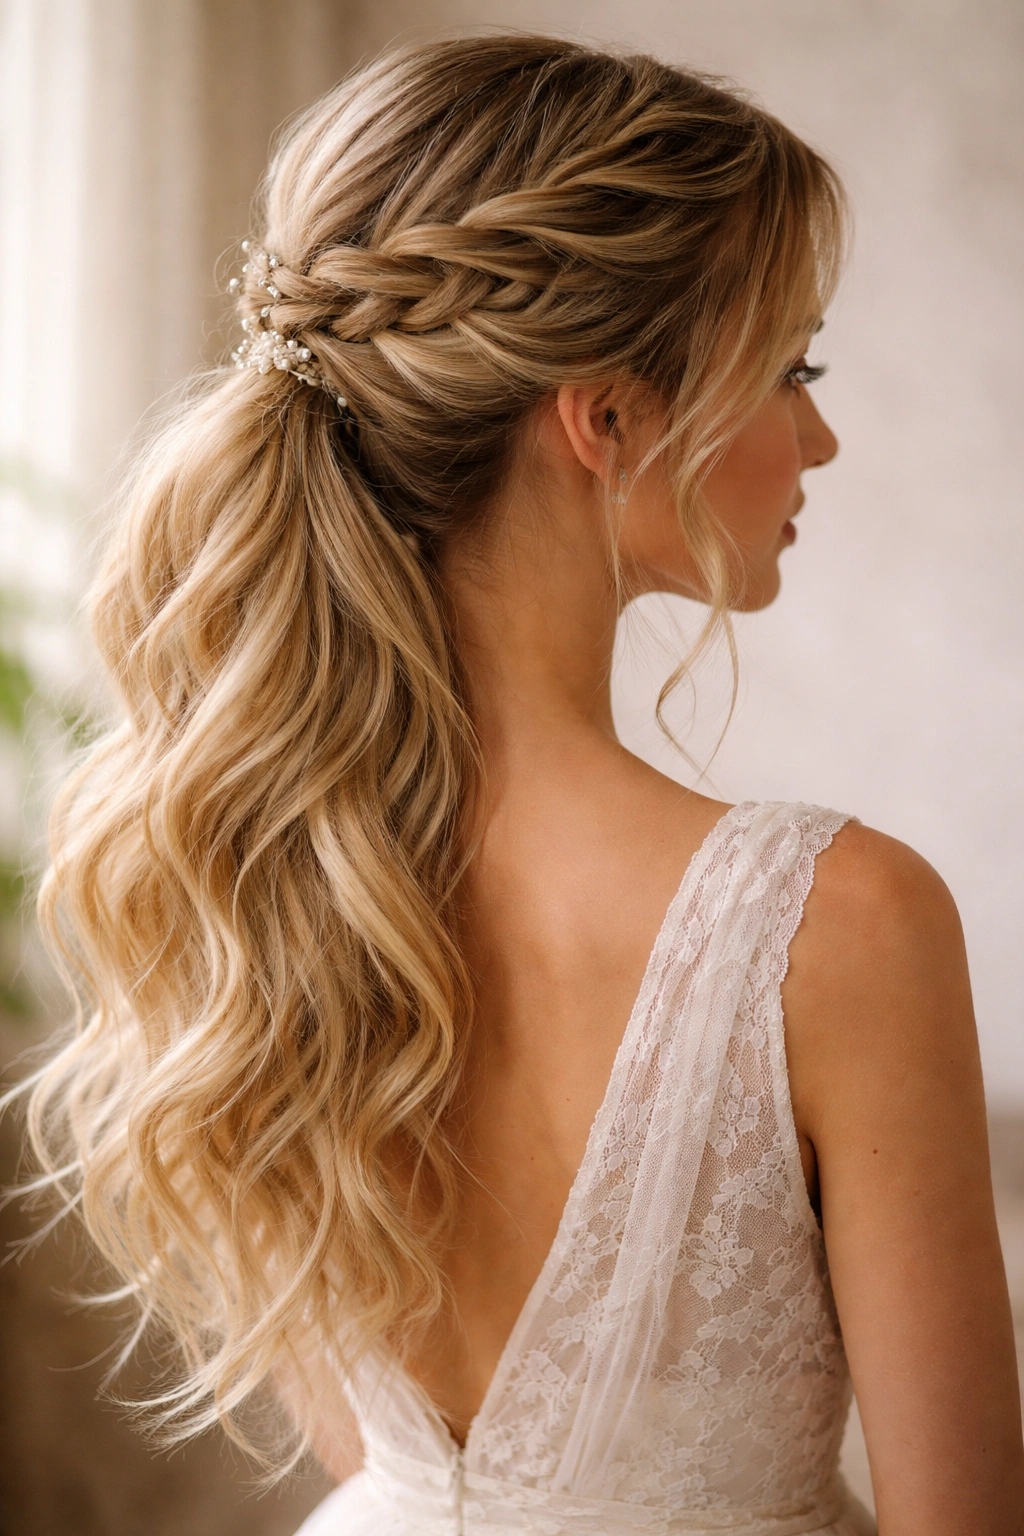
A waterfall braid creates a cascading effect where sections of hair appear to fall freely while being woven through a braid. When anchored into a ponytail, it creates a stunning, ethereal appearance that’s unmistakably romantic.
Why Waterfall Braids Look Ethereal
Waterfall braids have an inherent sense of movement and freedom. Because sections of hair are left out of the braid to fall freely, it looks effortless and romantic rather than structured. This is exactly what bohemian style is all about—the appearance of effortless beauty.
Creating a Convincing Waterfall
Start at one side of your head, level with your temple. Create a braid, but as you go, occasionally drop a section of hair from your braid and pick up new hair from below, creating the “waterfall” effect where hair appears to cascade out. The dropped sections create the visual of hair flowing freely. Angle your braid toward the back of your head where your ponytail will eventually be. Once you reach the back, secure the braid with a bobby pin, then gather all your hair (including the waterfall sections you dropped and all loose hair) into a low ponytail.
The magic is in the loose sections—they should look intentionally pretty and soft, not messy. Use texturizing spray on these sections to ensure they stay textured throughout the day.
Photography Angle
Waterfall braids photograph beautifully from the side because you can see the cascading effect clearly. If you know you’ll be taking side-profile photos during your ceremony, this is an excellent style choice.
9. The Multi-Braid Bohemian Ponytail
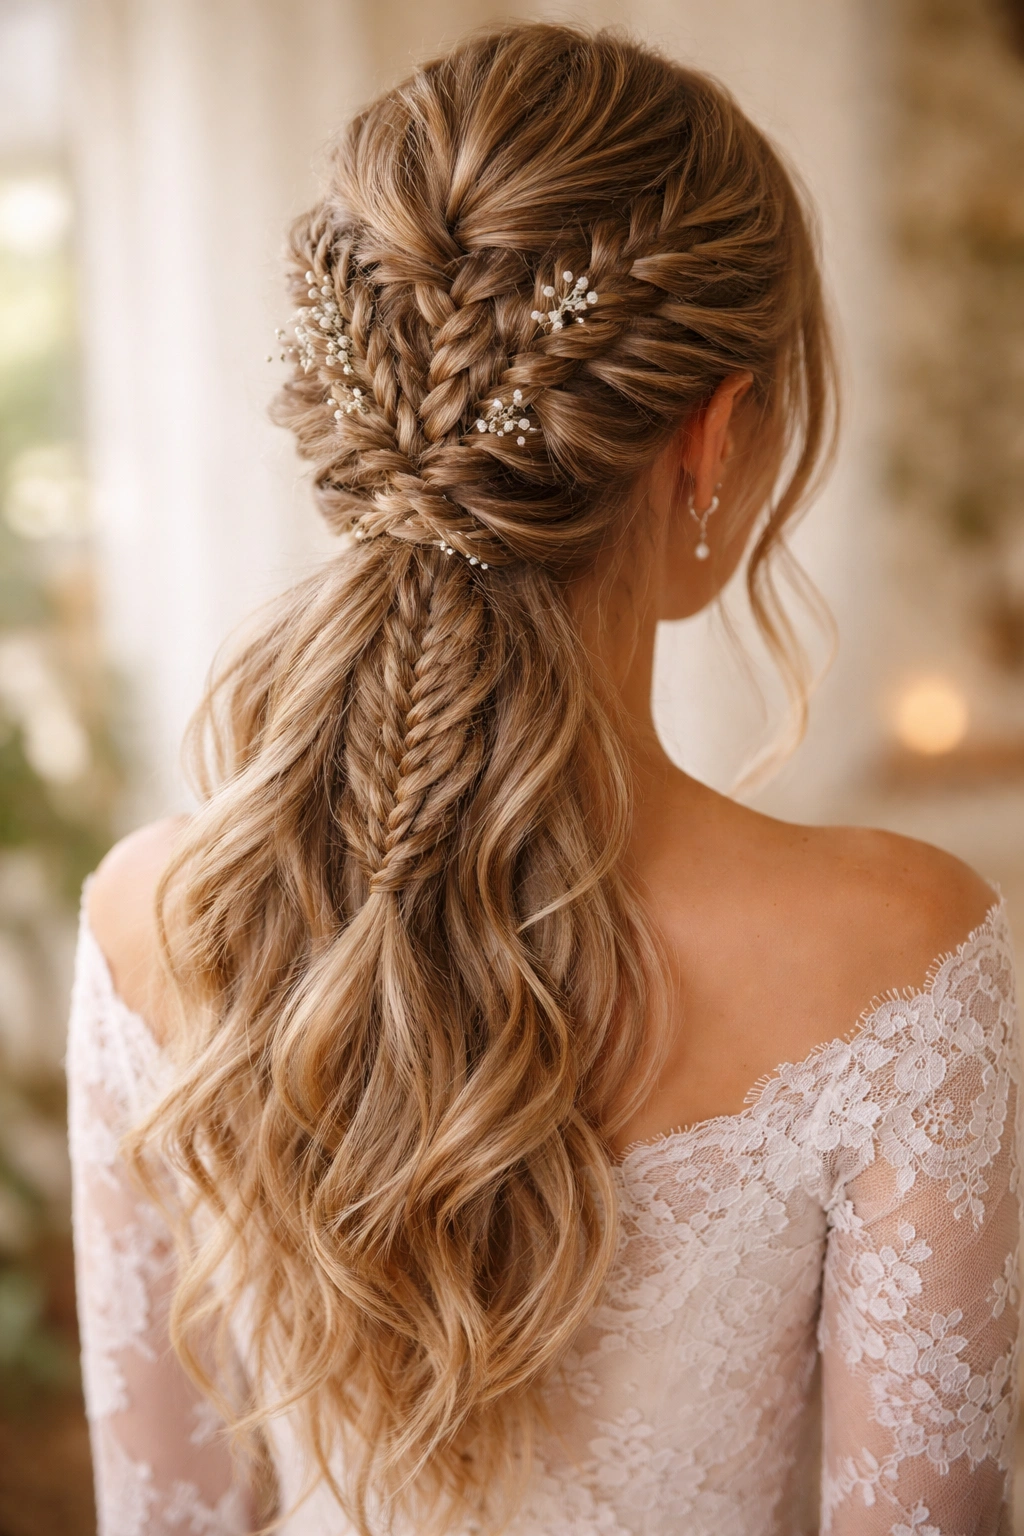
For brides who want maximum impact and visual interest, multiple braids of varying textures (some Dutch, some fishtail, some loose) converge at the back of the head to create an intricate, utterly stunning ponytail.
Pulling Off Maximum Complexity
This style requires more practice and more styling time, but the payoff is extraordinary. Multiple braids create visual complexity that reads as incredibly sophisticated and designed. It’s perfect if you love the idea of your hair being a statement piece at your wedding.
Building a Multi-Braid Style
Designate three sections of your hair: one at the crown, one on each side. Create a different type of braid in each section—perhaps a Dutch braid at the crown, a fishtail on the right, and a loose three-strand braid on the left. Angle all three braids toward the back of your head, gathering them into a single low ponytail at the nape. Each braid should be loosened generously so you can see the texture and distinction of each braiding technique. The result is a beautifully complex arrangement at the back of your head that says you put genuine artistry into your appearance.
Considering Hair Thickness
This style works best if you have thicker hair or a lot of it. If you have finer hair, two braids (rather than three) create the same level of interest without looking overwhelming. Work with your hair’s natural characteristics rather than against them.
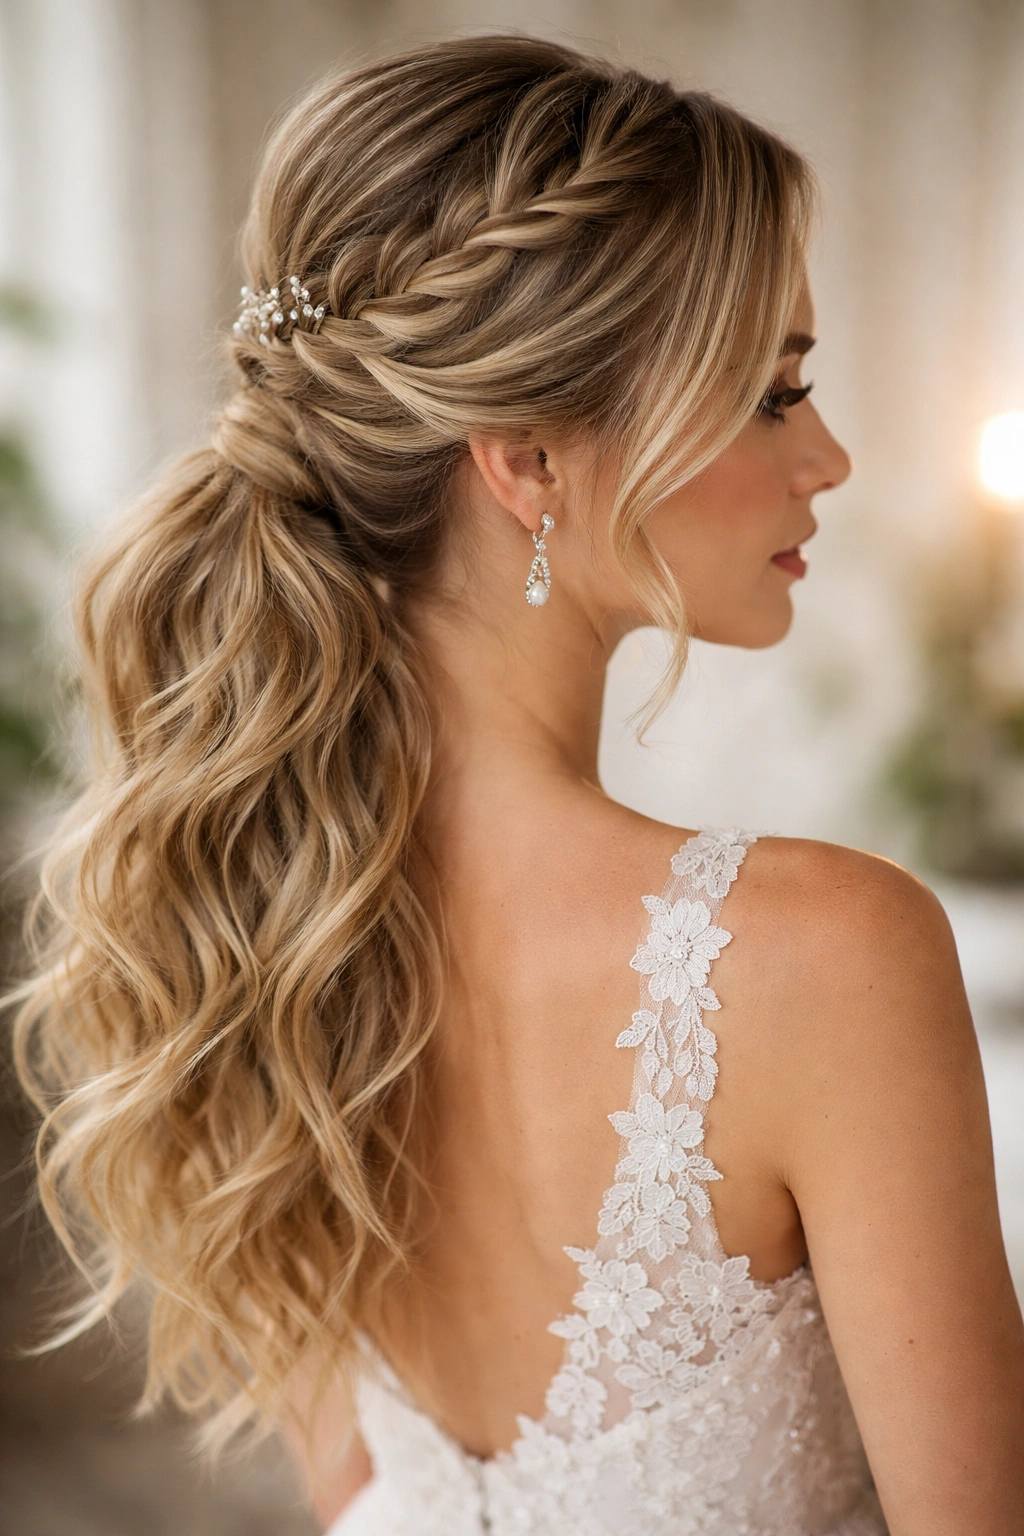
10. The Romantic Low Ponytail with Looped Braids
The final style is elegant and understated—a low, loose ponytail with delicate braids looped and tucked throughout rather than being structural elements. It’s the style for brides who love the idea of braids but want them to feel like accents rather than the main event.
The Subtle Sophistication
This style reads as effortlessly romantic because the braids don’t dominate the look. Instead, they’re beautiful details that catch the eye when you move, when light hits your hair in photos, or when someone looks closely. It’s the hairstyle equivalent of delicate jewelry—understated but utterly elegant.
Creating Looped Braids Within a Ponytail
First, create a soft, low ponytail with some gentle waves or curls already worked into it. Then, take small sections from within the ponytail and braid them loosely. Once you’ve braided a section (3-4 inches), loop it back onto itself and secure it with a bobby pin tucked underneath, so the braid forms a small decorative loop. Repeat this 2-4 times throughout the ponytail, varying where you place the loops for a natural, not-too-planned appearance. These loops add texture and visual interest without making the overall style feel complicated.
The Finishing Touch
Use a very light hairspray and avoid applying product directly to the looped braids—you want them to stay soft and airy. If any flyaways appear throughout the day, they actually add to the romantic, slightly undone feeling of this style.
Selecting the Perfect Bohemian Braid for Your Specific Wedding
Your wedding venue, dress style, and personal taste should all influence which bohemian braid ponytail you choose. Consider how much time you want to spend on your hair—simpler styles like the single wrap-around braid or the looped braids ponytail take 20-30 minutes, while multi-braid styles can take 45-60 minutes.
Think about your hair type as well. Fine or thin hair looks better with looser, less dense braids and styles that don’t require as much hair to look full. Thick, textured hair can handle multiple braids and more complex styles. Very long hair opens up more styling possibilities, while shoulder-length or slightly longer hair might look best with styles that create height at the crown rather than length down the back.
Temperature and weather matter more than people realize. At outdoor summer weddings, styles that keep hair slightly off your neck (crown braids, half-up styles) keep you cooler. At winter weddings, full ponytails with loose elements create warmth and richness.
Preparation and Practice: The Real Secret
The single most important factor in achieving a beautiful bohemian braid ponytail isn’t luck or natural talent—it’s practice. Do a full trial run 2-3 weeks before your wedding. Create the exact style you want, take photos from multiple angles, and assess how it feels, how long it takes, and whether you’d make any changes.
Do another trial run one week before, and potentially a third time just a few days before your wedding. This isn’t excessive; it’s how you build muscle memory so that on your actual wedding day, your hands know exactly what to do and you’re not stressed or frustrated while getting ready.
Have your hair trial done professionally if you’re not confident in your ability to create the style yourself. A good stylist will teach you their techniques, show you exactly where to place bobby pins, and give you a step-by-step breakdown you can follow on your wedding day. Many stylists offer “hair trial and training” sessions specifically for brides who want to do their own hair.
Final Thoughts

A bohemian braid ponytail is the perfect marriage of intentional beauty and effortless romance—exactly what every bride wants to feel and look like on her wedding day. Whether you choose a simple wrap-around braid or an intricate multi-braid design, the key is starting with healthy hair, using the right products sparingly, practicing ahead of time, and deliberately loosening your braids so they look textured and soft rather than tight and severe.
The braids themselves are just the structure; the real magic happens in how you finish them. Loosen them, texture them, add gentle accessories, and let some pieces fall softly around your face and neck. That’s when a styled hairstyle becomes something that looks authentically bohemian—beautiful, intentional, and somehow still effortless. On your wedding day, that’s exactly the feeling you want every time you catch your reflection.