



Article: 12 Curly Afro Hairstyles for All Lengths
Black hair is a canvas for creativity, self-expression, and beauty that’s both deeply personal and culturally significant. Whether you’re rocking a short fade, medium-length curls, or waist-length locks, your afro texture offers endless styling possibilities that celebrate your natural hair while letting you experiment with looks that range from sleek and polished to playful and bold. The challenge isn’t finding ways to style your hair — it’s knowing which styles will work best for your hair length, texture, lifestyle, and the occasion you’re dressing for.
What makes afro hairstyles so powerful isn’t just aesthetic appeal, though that’s certainly part of it. It’s the autonomy they represent. Your curls, coils, and texture are yours to shape, arrange, and showcase in ways that feel authentic to who you are. From tight coils to loose waves, from shoulder-grazing bobs to flowing lengths, your natural hair holds unlimited potential for styles that enhance your features, complement your personal style, and make you feel genuinely confident.
This guide walks you through 12 distinct curly afro hairstyles suited to different lengths and the styling techniques that make each one work. You’ll discover styles you can achieve in minutes for a casual day, others that transform your look for special occasions, and maintenance strategies that keep your hair healthy and beautiful no matter which style you choose. Real talk — the best hairstyle is one that makes you feel like yourself, whether that’s sleek and minimal or voluminous and ornate.
1. High Puff
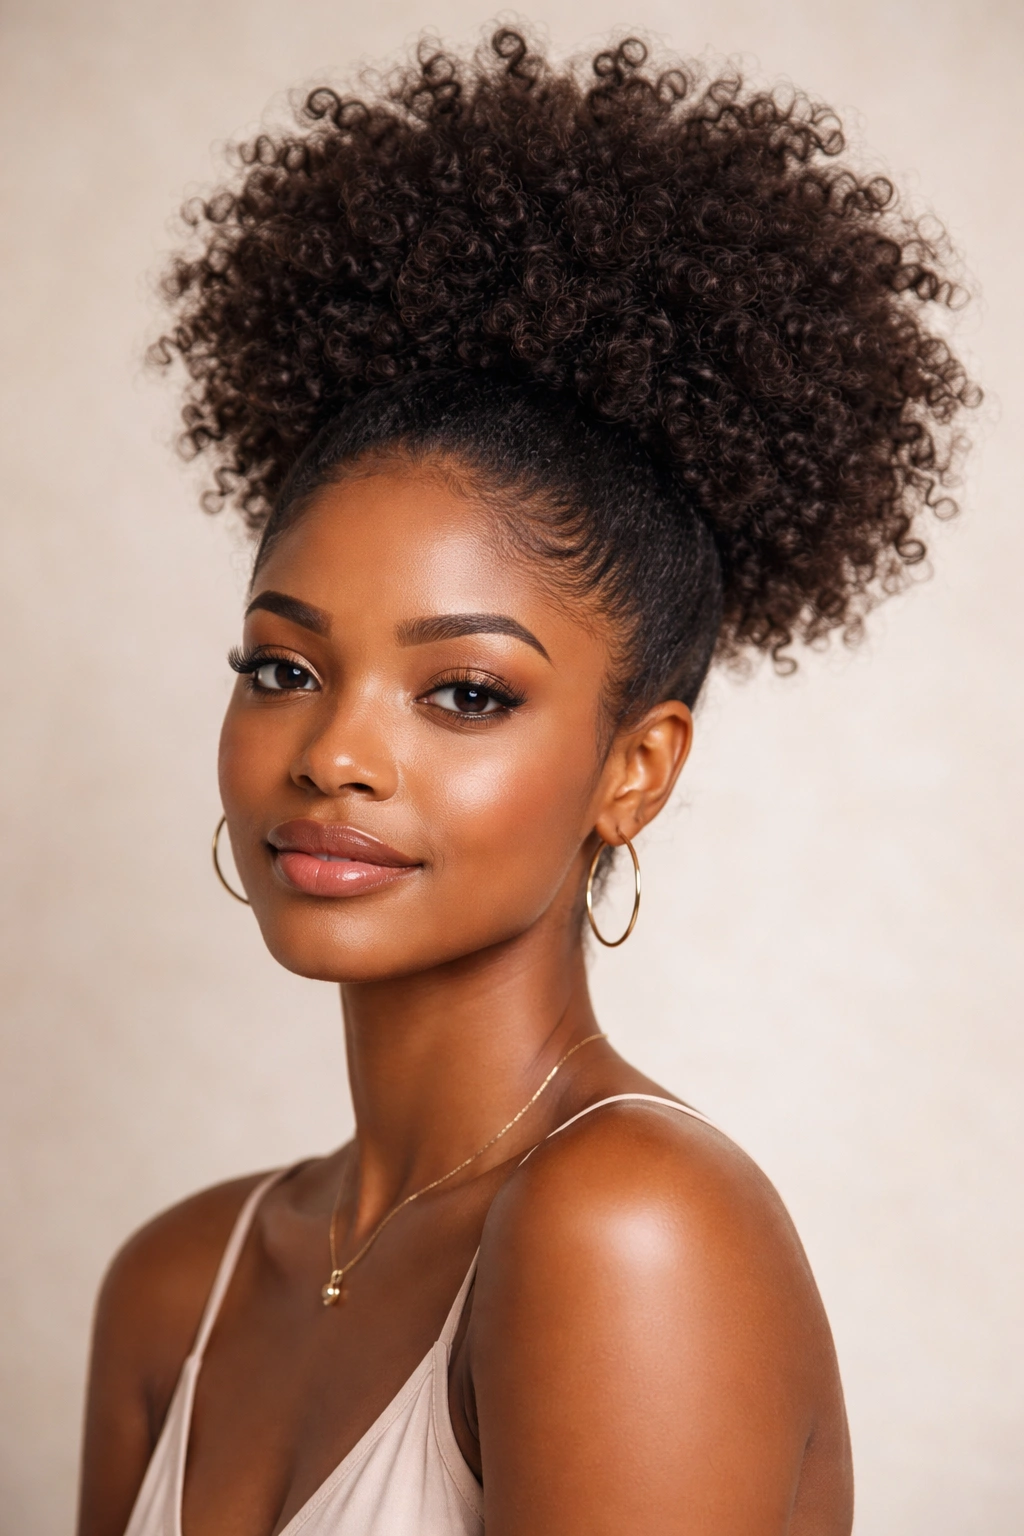
The high puff is the ultimate versatility queen of curly hairstyles, a look that works across hair lengths from chin-length curls all the way to mid-back growth. What makes a high puff work so well is its simple elegance — you’re gathering your hair at the crown or slightly higher, securing it with a hair tie, and letting your natural curls or coils spring outward to create a statement-making crown of texture. The higher you place the puff, the more dramatic and youthful the look becomes; lower it sits, the more refined and polished it feels.
Why It’s the Foundation Style for Any Hair Journey
The high puff works because it requires zero heat, minimal manipulation, and takes five minutes flat. It protects the ends of your hair by gathering them away from daily rubbing against shoulders and clothing — essential for preventing breakage and maintaining length retention over time. Whether you’re a curl enthusiast who washes and styles daily or someone who prefers protective styling between washes, a high puff keeps you looking intentional and put-together while your curls set naturally and actually get stronger.
How to Build the Perfect Puff
- Start with clean, moisturized hair that’s either freshly washed or refreshed with a curl spray
- Use your fingers or a wide-tooth comb to gather hair at the crown, smoothing flyaways with a light gel or edge control
- Secure tightly with a hair tie or elastic that won’t cause breakage — silk or satin elastics are gentler than rubber bands
- Gently pull and fluff sections of the gathered hair to increase volume and create the rounded puff shape
- Pin flyaways with bobby pins if you want a more polished aesthetic, or leave them soft and natural for an undone vibe
- Refresh the puff the next day by misting with water and scrunching upward to reactivate curl definition
Pro tip: A high puff looks exponentially fuller if you’re doing a “two-puff” — gather two separate sections at the sides of your crown and secure each one, creating symmetrical volume on both sides of your head. It’s twice the impact with the same amount of time.
2. Twisted Crown
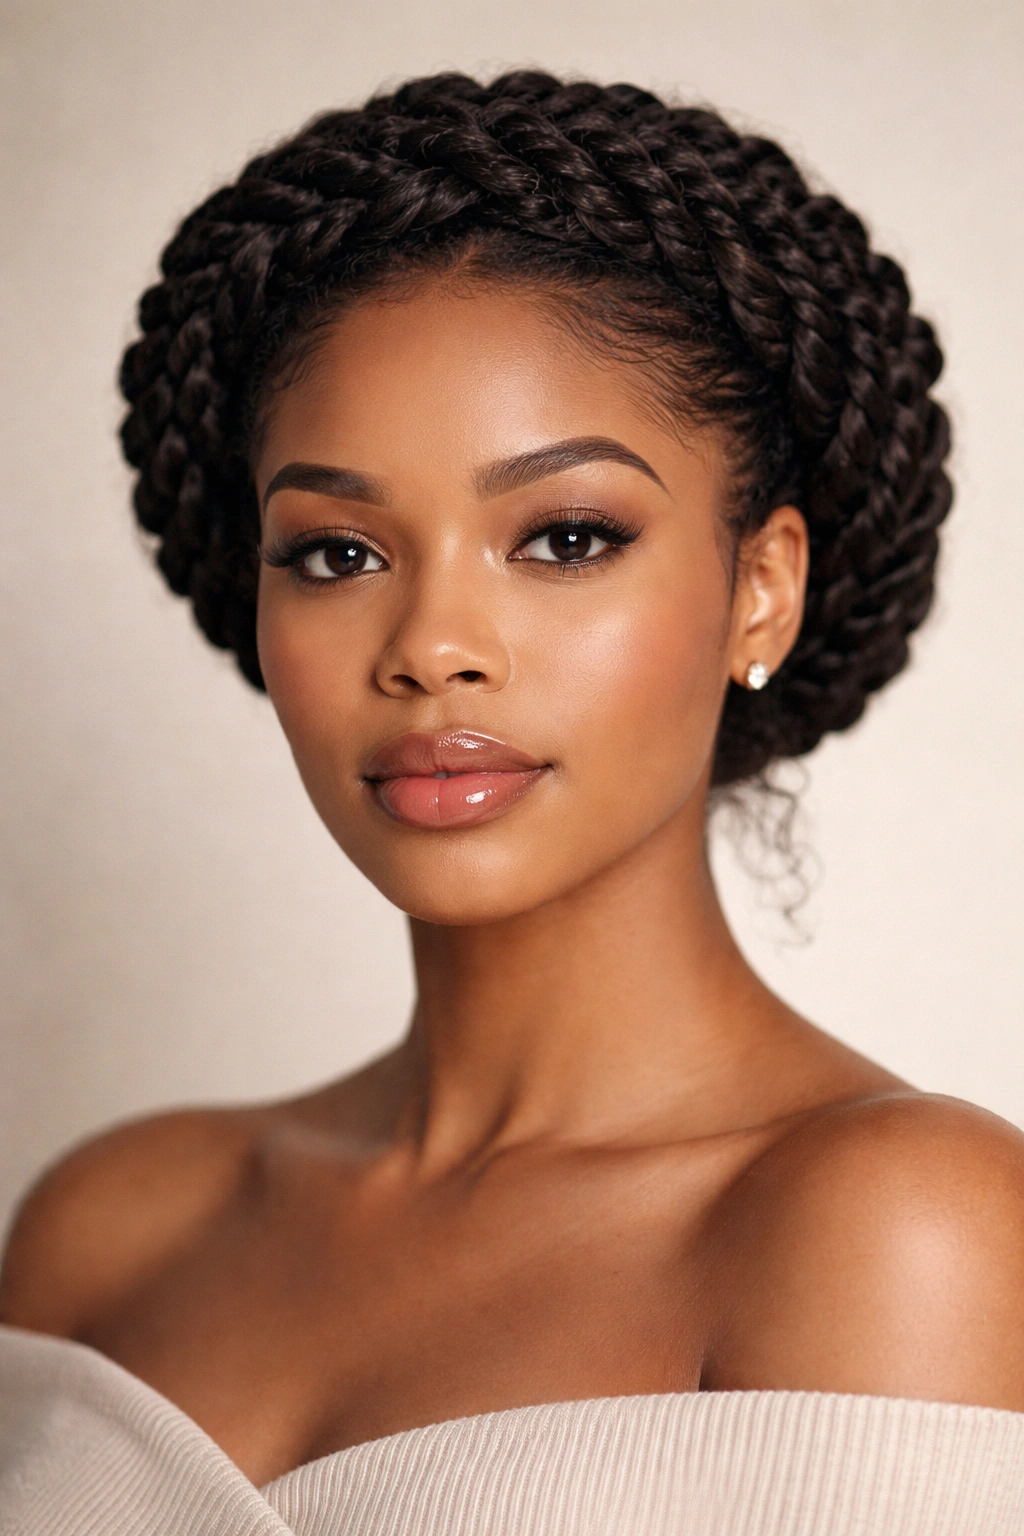
The twisted crown style intertwines your curls into a graceful halo that frames your face while keeping length off your neck and shoulders. This style works beautifully across all lengths, though it’s particularly striking on medium to longer hair where the twists have room to spiral and create dimension. Unlike a simple bun or puff, twists add architectural interest and a polished sophistication that reads as effortlessly elegant rather than just pulled-back-and-done.
The Architecture of Twisted Elegance
Twists are one of the most protective styling methods available to textured hair — they minimize single-strand knots, prevent excessive tangles, and allow your curls to rest and recover from manipulation. A twisted crown specifically protects the delicate hair around your hairline while creating a style that works equally well for casual everyday wear and professional or special-occasion settings. The tightness level is entirely up to you, which means this style adapts to your styling skill and preference.
Creating Your Twisted Crown Step-by-Step
- Divide your hair into two to four sections depending on how thick and voluminous you want the crown to appear
- Starting at one side of your head, take a section and gently twist the curls together while moving horizontally across the back of your head
- As you twist, add small sections of loose hair to incorporate more texture and create a fuller crown effect
- Pin the twist in place with bobby pins once it reaches the opposite side, tucking the end under or blending it into the rest of your curls
- Repeat with additional sections until your entire crown is woven with twisted sections
- Gently pull and separate the twists slightly to add volume and create a softer, fuller appearance
Worth knowing: The day-two twisted crown often looks even better than the first day — the texture softens, the twists relax slightly, and they blend more seamlessly into your overall curl pattern. Sleep on your twisted crown by wrapping it loosely in a silk scarf or pineapple method, and it’ll carry beautifully into the next day.
3. Bantu Knots
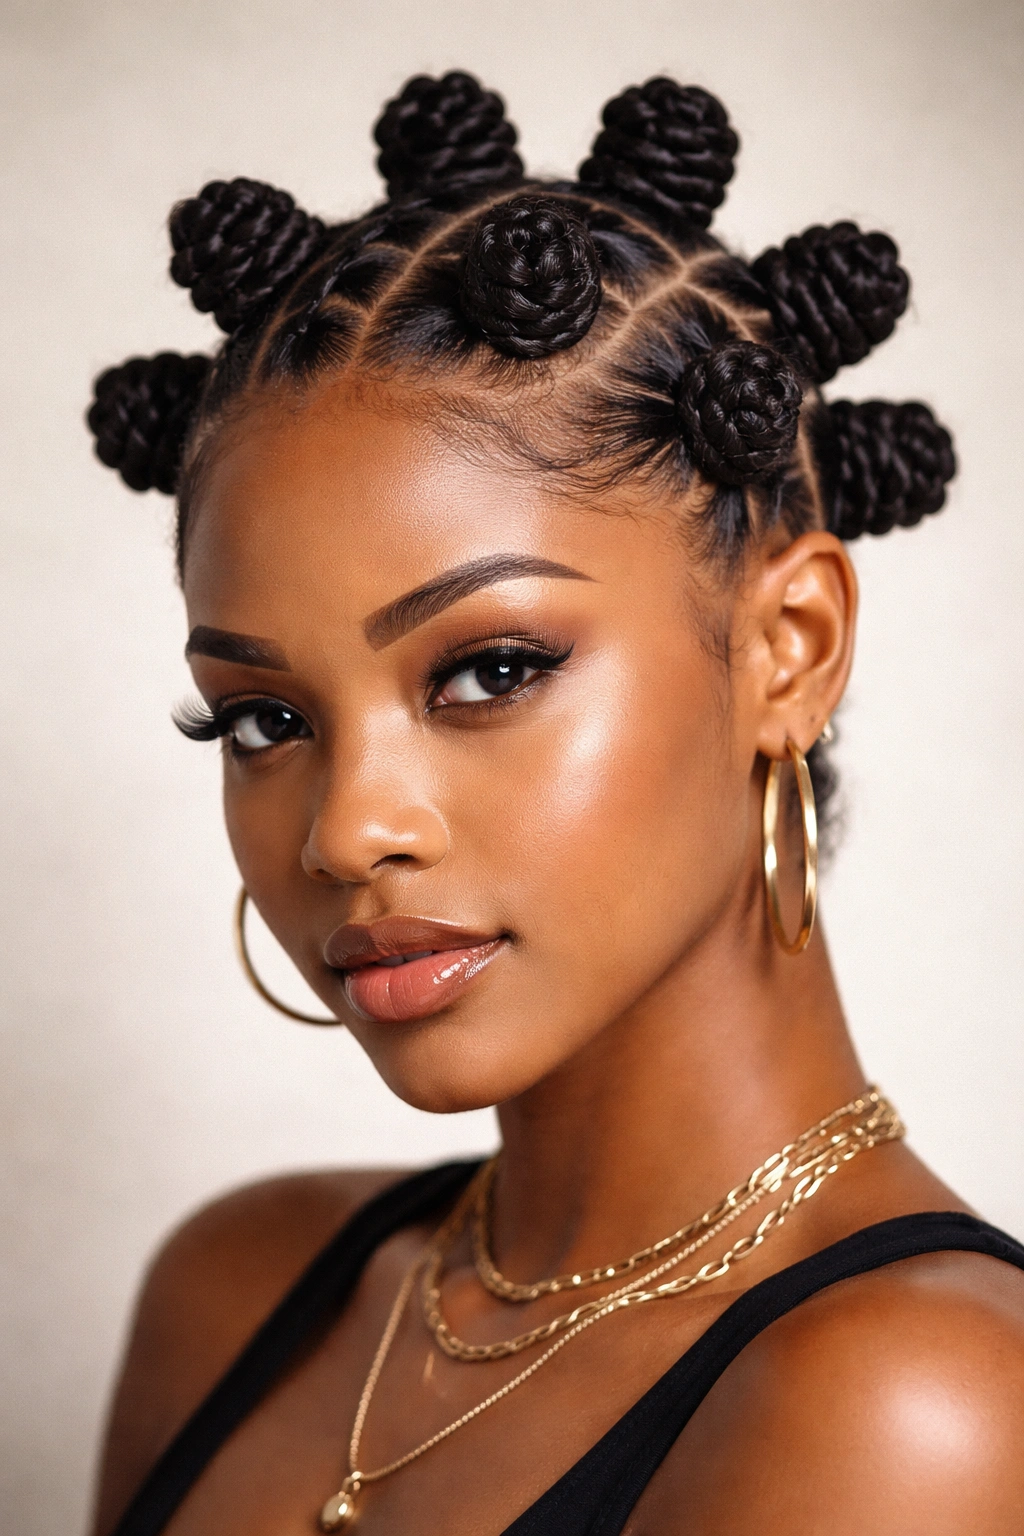
Bantu knots are a traditional African protective style that’s experiencing a well-deserved resurgence because they’re stunning, protective, versatile, and work on virtually any hair length or curl pattern. Each knot is a coiled section of hair twisted tightly and then wrapped back on itself, creating a sculptural knot that sits close to the scalp. You can wear bantu knots as they are for an intentional, textured aesthetic, or unravel them after two to three days for a defined, enhanced curl pattern that looks professionally styled.
Bantu Knots: Protective Styling That’s Also Fashion-Forward
What makes bantu knots special is their dual functionality — they’re a scientifically protective style that literally minimizes manipulation and friction on your strands, while simultaneously being a statement look that celebrates your heritage and natural texture. The knots provide low tension on your scalp and hairline (when done correctly at appropriate tightness), meaning you can keep them in for extended periods without worrying about traction alopecia. The cultural significance adds emotional resonance too — you’re not just styling your hair, you’re honoring a tradition.
The Precise Technique for Bantu Knots That Last
- Section clean, damp hair into six to twelve sections depending on desired knot size and hair volume
- Take one section and twist the curl tightly from roots to ends, creating a uniformly tight twisted rope
- Once fully twisted, coil the entire twist back on itself and tuck the end underneath, securing with a bobby pin or braid clip
- Repeat across your entire head in a pattern that feels balanced — many people do three knots across the front and three across the back
- Dry the knots completely (either air dry overnight or use a diffuser) before handling to allow the curls to set firmly
- When ready to unravel, gently untwist each knot carefully to release the curl pattern — the longer the knots stayed in, the more defined your curls will be
Insider note: If you’re newer to bantu knots, start with six larger knots rather than twelve smaller ones — they’re easier to manage, less time-consuming to create, and the result is still stunning with beautiful, defined curls when unraveled.
4. Coils and Curls
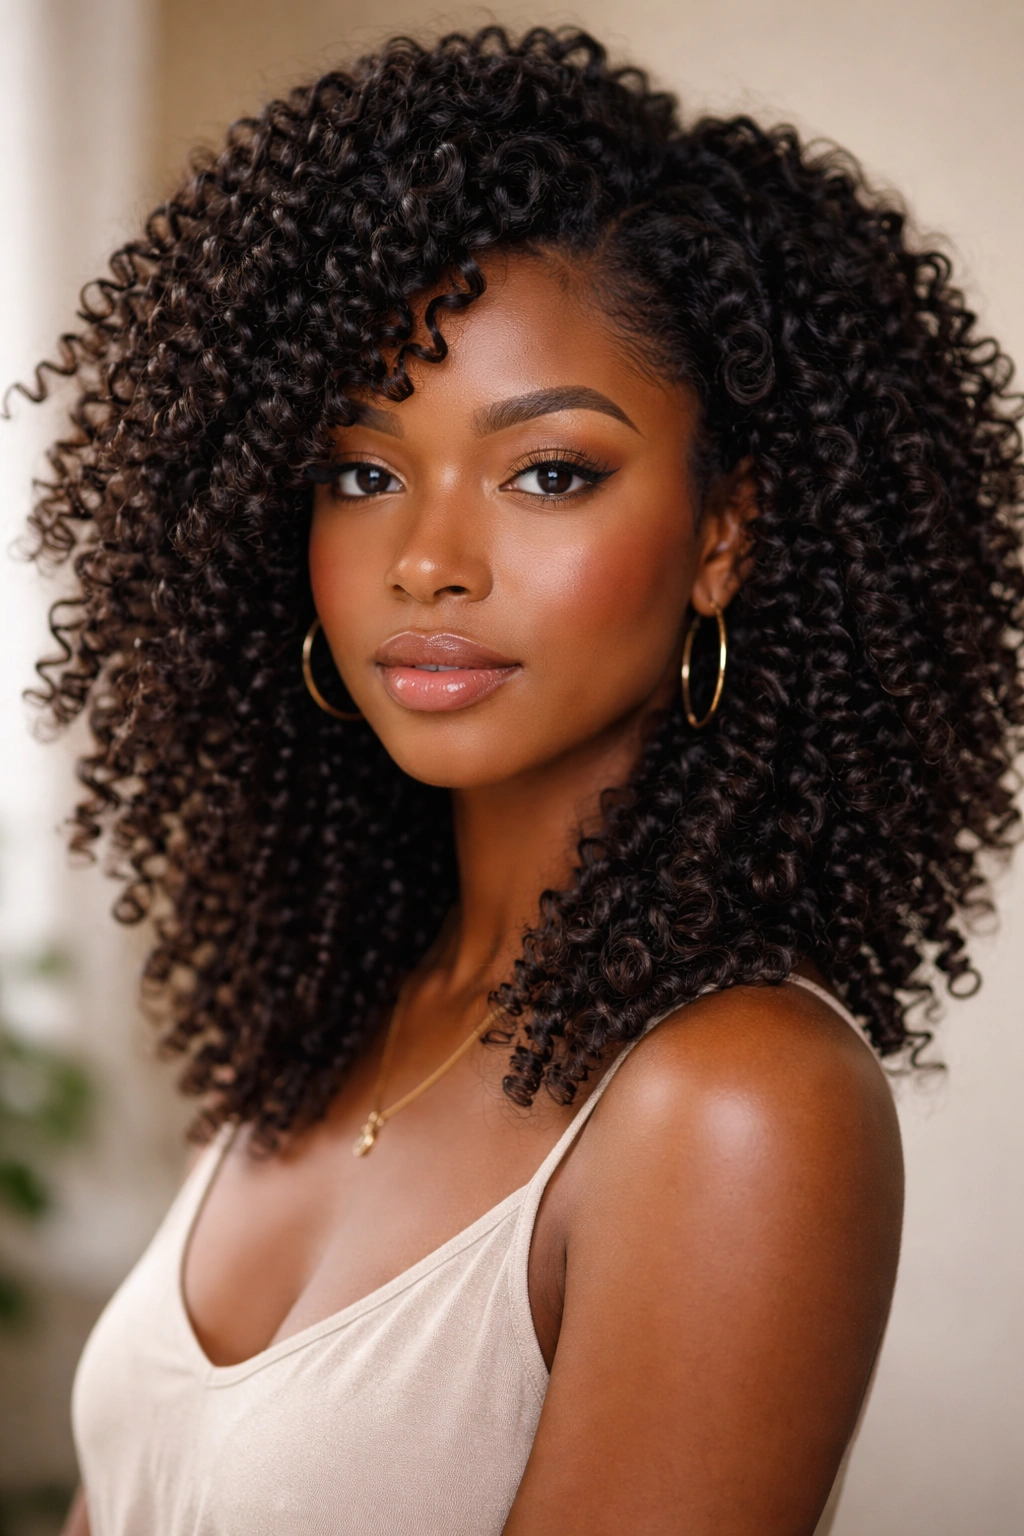
The coils-and-curls style is for anyone who wants to showcase the individual definition of their natural curl or coil pattern while creating a style that’s soft, romantic, and undeniably beautiful. This is achieved by working with your hair’s natural pattern rather than fighting it — enhancing existing definition through proper hydration, the right products, and intentional separation of curl clumps into individual spirals. The result is visibly more textured, more dimensional, and more striking than unstyle curls.
Why Enhanced Definition Transforms Your Entire Look
Enhanced coils and curls catch light differently than blended or unstyled curls — each defined spiral creates its own shadow and highlight, adding depth and dimension to your overall style. This approach works across all lengths but is particularly transformative on longer hair where gravity naturally separates coils and creates a long, flowing spiral pattern. The technique also extends the longevity of your style — defined curls that start strong hold their shape through day two and beyond.
Product and Technique for Show-Stopping Definition
- Start with freshly washed, deeply hydrated hair — moisture is non-negotiable for definition
- Apply leave-in conditioner and styling cream or gel while hair is still soaking wet
- Use the praying hands method or scrunching to distribute product evenly throughout your curl pattern
- Take a small section and gently separate curl clumps into individual spirals using your fingers or a fine-tooth comb — this is where the magic happens
- You’re not detangling; you’re encouraging each coil to spiral independently by gently encouraging them apart
- Once separated, scrunch upward to encourage curl formation and help coils set tightly
- Dry using a diffuser on low to medium heat, or air dry for maximum definition retention
Real talk: Definition requires patience both in the styling process and in letting your hair dry. Rushing the drying step or shaking your curls around will destroy the definition you worked to create. Let them set naturally and you’ll see results that rival professional styling.
5. Space Buns
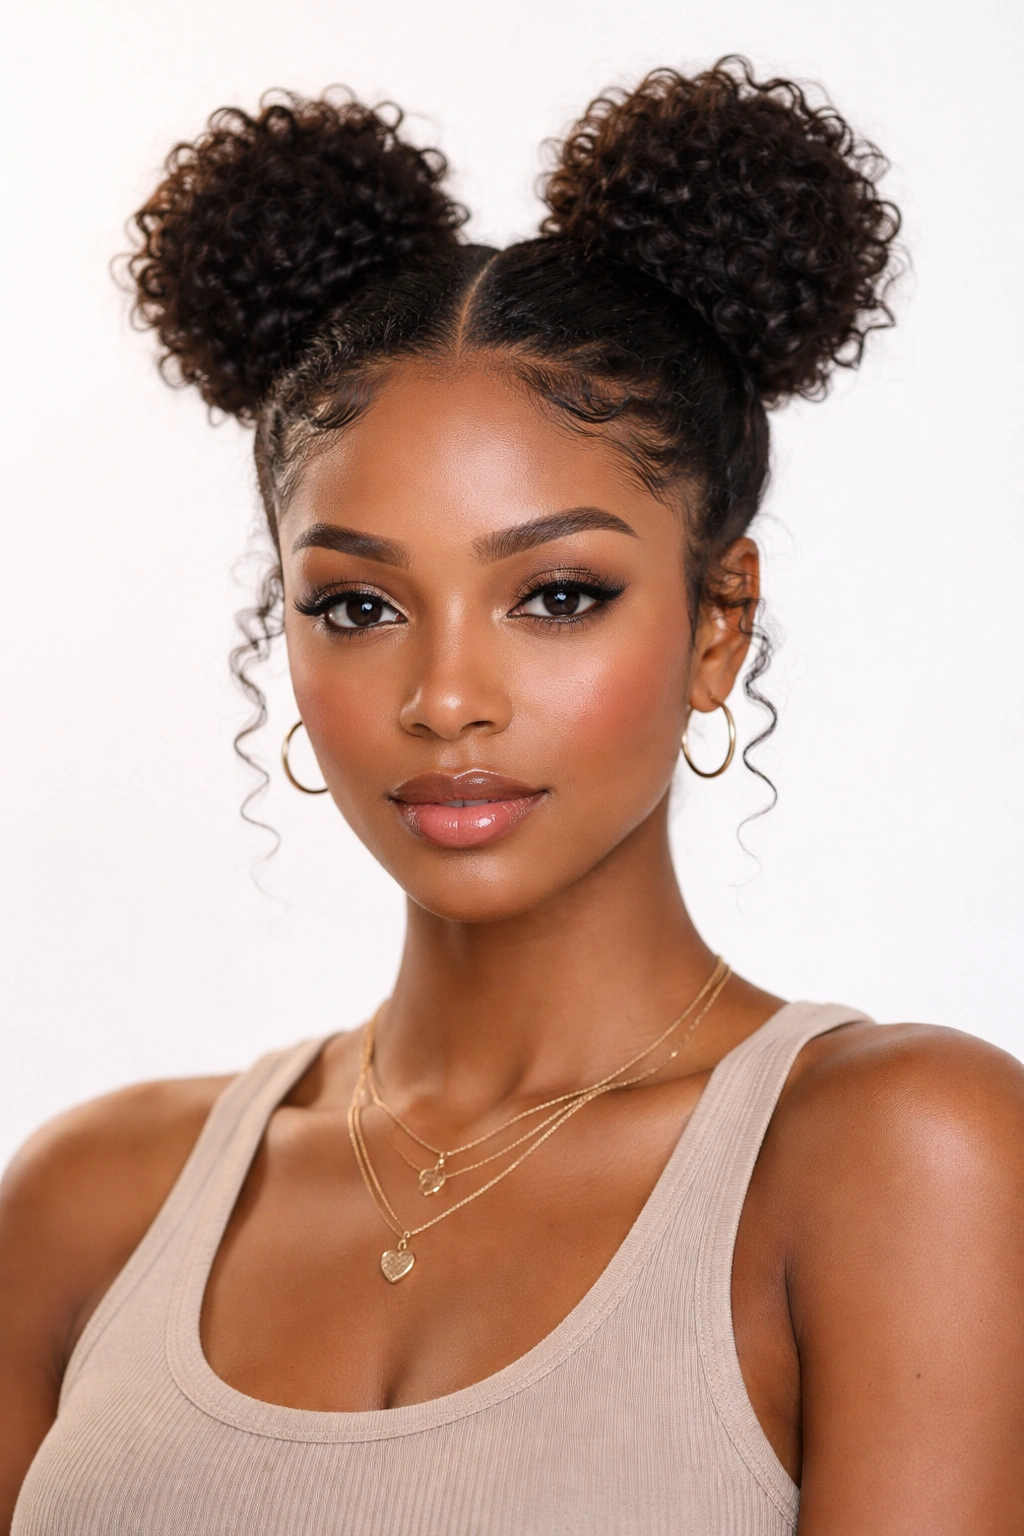
Space buns are the playful, youthful sibling of the high puff, and they work best on medium to longer hair where you have enough length to create two distinct, voluminous buns. Also called double buns or double puffs, this style is unconditionally fun — it catches attention, makes a statement, and gives off creative, confident energy. Whether you’re going for a sweet, feminine vibe or a bold, edgy statement, space buns adapt to your intention.
Why Space Buns Work for Every Occasion (Yes, Really)
The magic of space buns is their chameleon-like ability to shift context based on styling choices. Secured with delicate clips and paired with a flowing dress, they read as whimsical and sweet. Add bold earrings, statement necklaces, and a leather jacket, and suddenly they’re undeniably cool. This is precisely why space buns remain perpetually relevant — they’re not trend-dependent; they’re mood-dependent. You wear them how you want to feel.
The Two-Part Bun Formula
- Divide your hair down the center from forehead to nape, creating two distinct halves
- Gather the right half at the side of your crown and secure tightly with a hair tie, creating a puff or bun shape
- Gather the left half and secure the same way, mirroring the placement and size of the first bun
- Fluff and shape each bun separately, pulling sections gently to increase volume
- Smooth any flyaways with edge control or lightweight gel, securing with bobby pins as needed
- For added visual interest, twist the hair before securing it into the bun shape, or weave a small braid into each bun
Pro tip: Space buns photograph beautifully from above and behind — if you’re styling for photos or video, the camera angle matters significantly to how voluminous and striking they appear. Direct light from above and slightly behind creates gorgeous shadowing that adds depth.
6. Side-Swept Curls
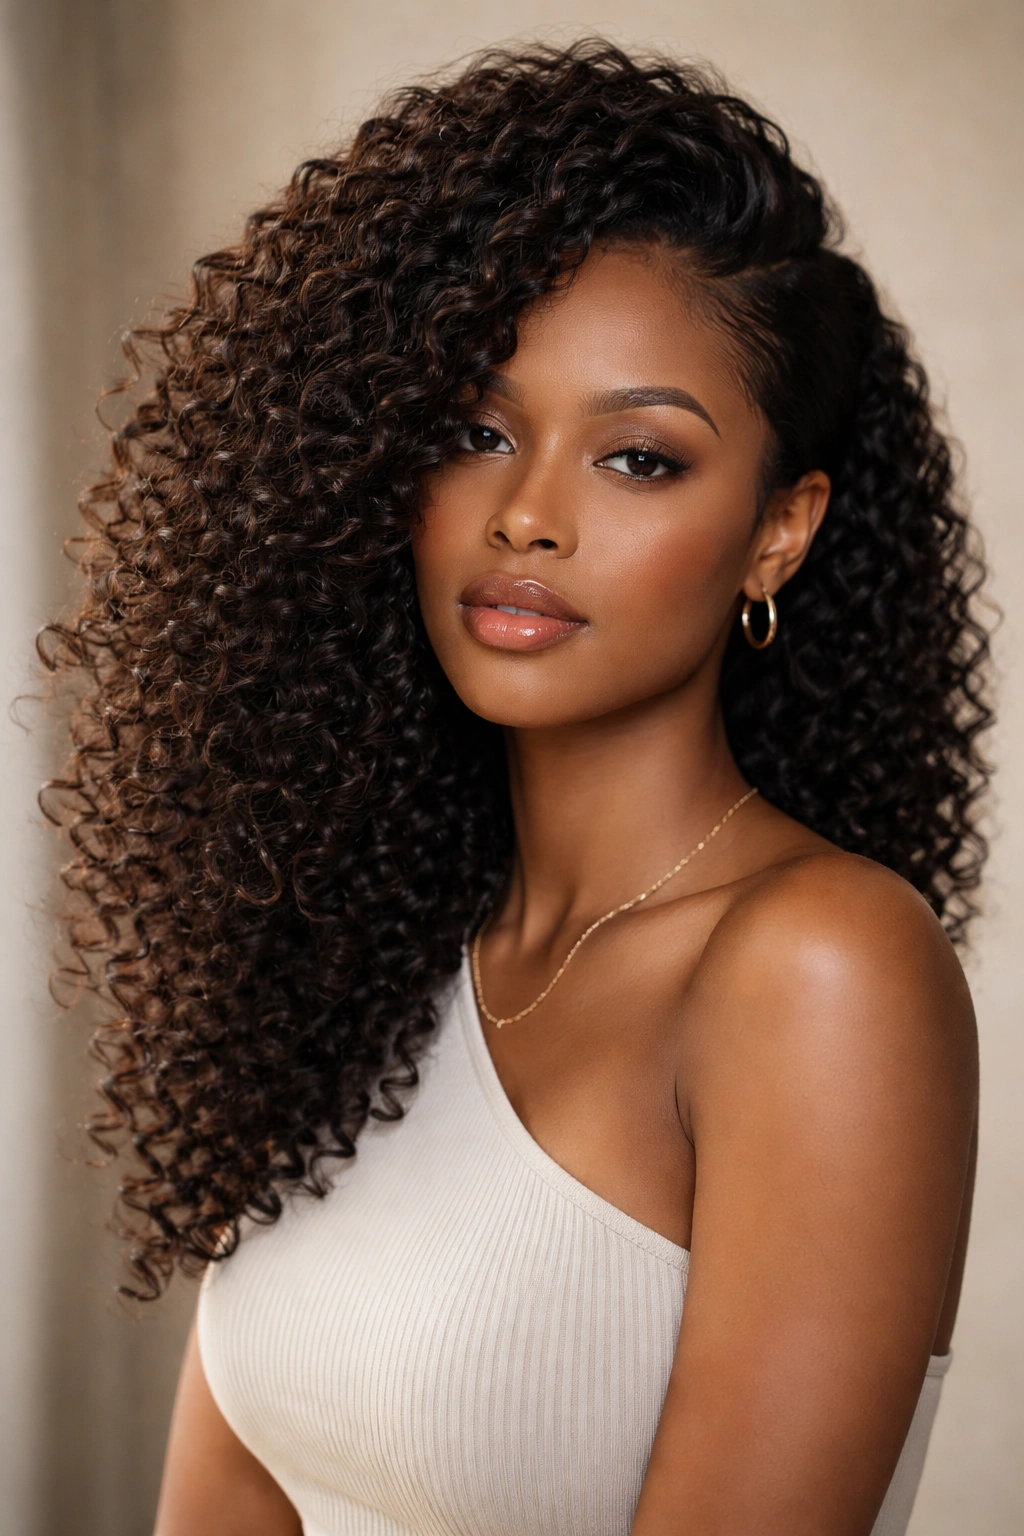
A side-swept curl style is understated elegance at its finest — you’re essentially letting your natural curls flow with intentional volume on one side while creating an off-center, asymmetrical silhouette that’s instantly flattering and sophisticated. This works across all hair lengths and particularly suits people who prefer a more minimal styling approach but still want their hair to feel intentional and polished.
The Psychology of the Side-Sweep
Asymmetrical styling, especially sweeping your hair to one side, creates visual balance by offsetting features and drawing focus where you want it. It’s flattering on virtually every face shape because you’re not creating a harsh center part or symmetrical style — you’re creating flow and movement. From a styling perspective, a side-sweep requires minimal manipulation or heat, meaning your curls stay healthier and you can achieve the look quickly.
Creating the Swept Side Effect
- Start with clean, moisturized curls or refresh existing curls with a curl spray
- Apply lightweight styling cream or gel to increase definition and control
- Use your fingers to direct curl clumps toward your preferred side, creating volume at the roots
- If you want additional texture, gently twist small sections as you sweep them to the side
- Secure behind your ear with a small clip or bobby pin, or leave unsecured if your curls naturally flow that direction
- Scrunch and shape the swept side to create maximum volume and the illusion of length
Worth knowing: The side-sweep looks dramatically different on day two when curls have softened and relaxed slightly. Some people prefer the tighter, more defined look on day one, while others find the softer, more romantic version on day two even more beautiful.
7. Mohawk with Defined Curls
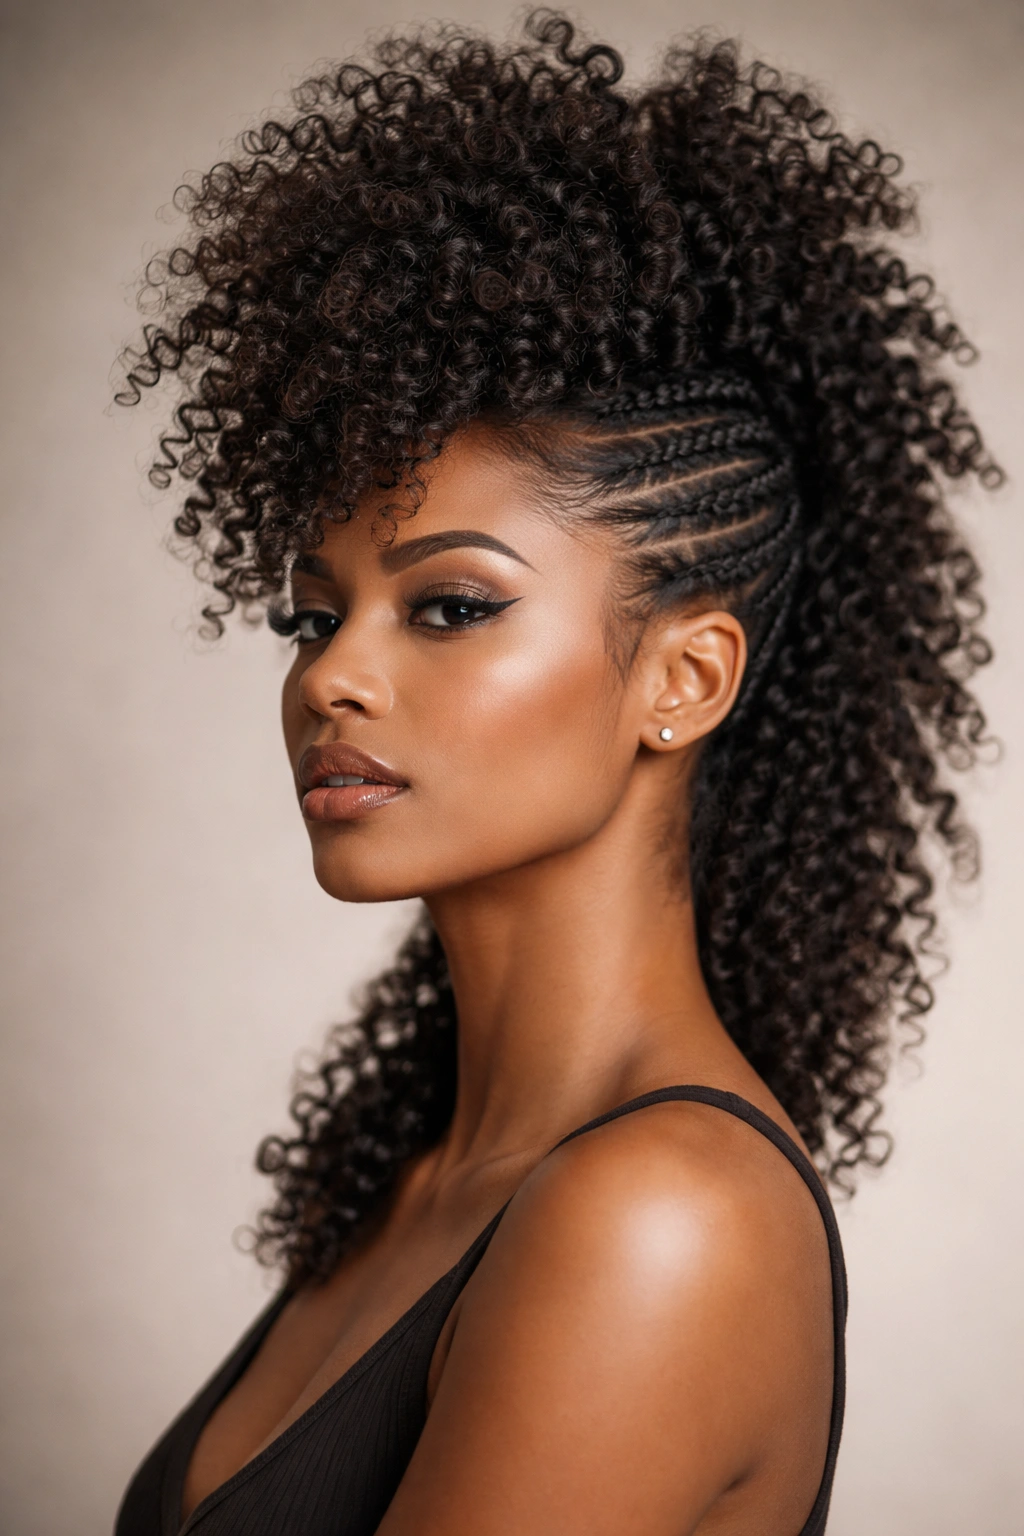
A curly mohawk is a bold, undeniably artistic statement that brings swagger and confidence to your presentation. Instead of shaving the sides (though you can), the curly mohawk keeps your hair on the sides while gathering the center into a tall, voluminous pillar of defined curls. This style works particularly well on people with enough hair length to create visible height and drama, though even shoulder-length hair can rock a softer mohawk version.
Making the Mohawk Uniquely Yours
The beauty of a curly mohawk is that it’s inherently your own — nobody’s natural curl pattern looks identical, which means your mohawk will be entirely unique to your texture and styling approach. This style is also surprisingly protective despite its bold appearance because the sides of your hair can be braided, twisted, or styled away from daily manipulation while your center curls take center stage. It’s a style that says you’re confident in your identity and not afraid to take up space.
Building Your Curly Mohawk
- Section your hair by creating two vertical lines from your forehead to the nape, leaving a three to four inch strip down the center
- Braid, twist, or smooth the side sections away from your face, securing them with clips or pins
- Gather and secure the center strip at the crown with a high-positioned hair tie
- Create your mohawk height by gently pulling and fluffing the secured center section upward
- Define individual curls in the center section using the coil-separation technique described earlier
- Create additional visual impact by adding colorful clips, cuffs, or rings throughout the curls
Insider note: You can sleep in a curly mohawk if you secure the side sections loosely with a silk scarf and allow the center to rest under a pineapple method (loose, high ponytail). This maintains the style and protects your hair simultaneously.
8. Twisted Updo
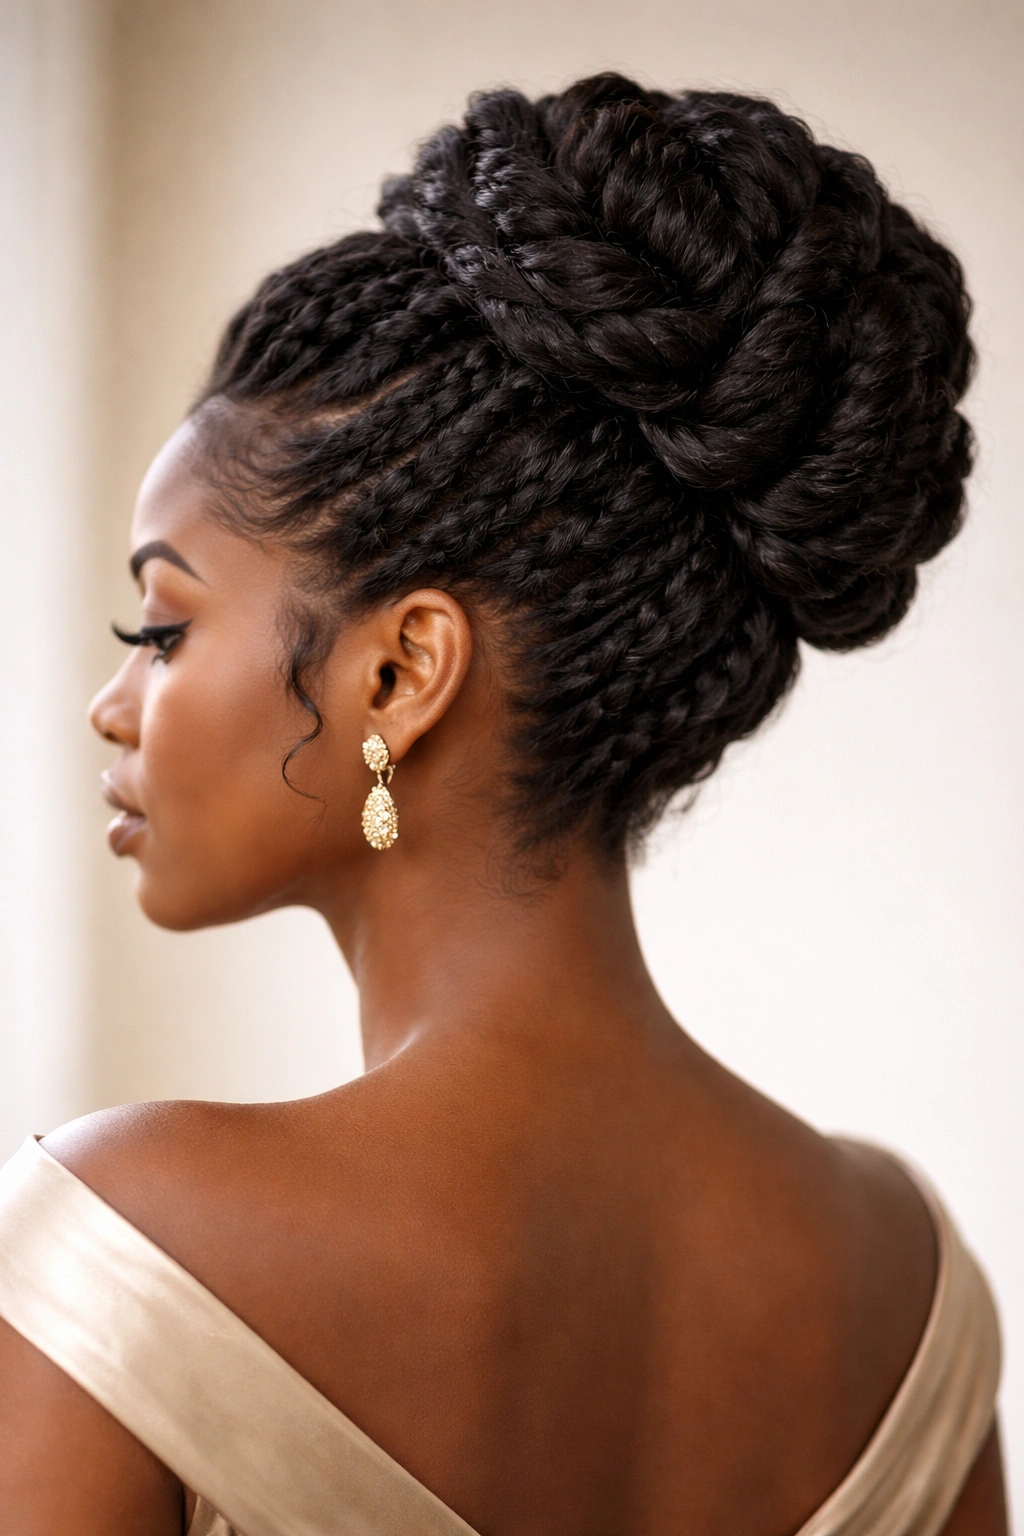
A twisted updo is your go-to for occasions that call for polish, refinement, and elegance — weddings, professional events, formal dinners, or any moment where you want your style to feel intentional and elevated. This style works beautifully on medium to longer hair where you have enough length to create intricate twisting patterns that build into a stunning sculptural updo.
Elegant Without Being Fragile
The twisted updo walks a beautiful line — it looks undeniably polished and formal, yet it’s actually quite stable and long-lasting. Because you’re building the updo from twists rather than just pinning curls up, the structure holds securely for hours. This means you can wear it to an all-day event or through evening activities without constant touch-ups or concern about pieces falling down.
The Precise Steps for a Formal Twisted Updo
- Start with freshly washed, deeply moisturized hair that’s been blow-dried straight or left to air dry for defined curls
- Create a deep side part and smooth the hair to one side with lightweight cream or gel
- Beginning at the nape, divide hair into three to four sections vertically
- Take one bottom section and twist it gently while moving upward and slightly inward
- As you twist, gather additional sections of hair into the twist, building complexity and volume
- Once the twist reaches the crown, coil it into a bun shape and secure tightly with bobby pins
- Repeat the twisting process with remaining sections, layering twisted sections into the bun for a fuller, more intricate appearance
- Smooth any flyaways, secure loose ends, and use bobby pins strategically to hold the entire structure
Pro tip: An updo feels exponentially more refined if you leave a few face-framing tendrils loose around your face. Two to three small spiral curls softly framing your cheekbones add romantic elegance while keeping the overall style polished.
9. Half-Up Coil Style
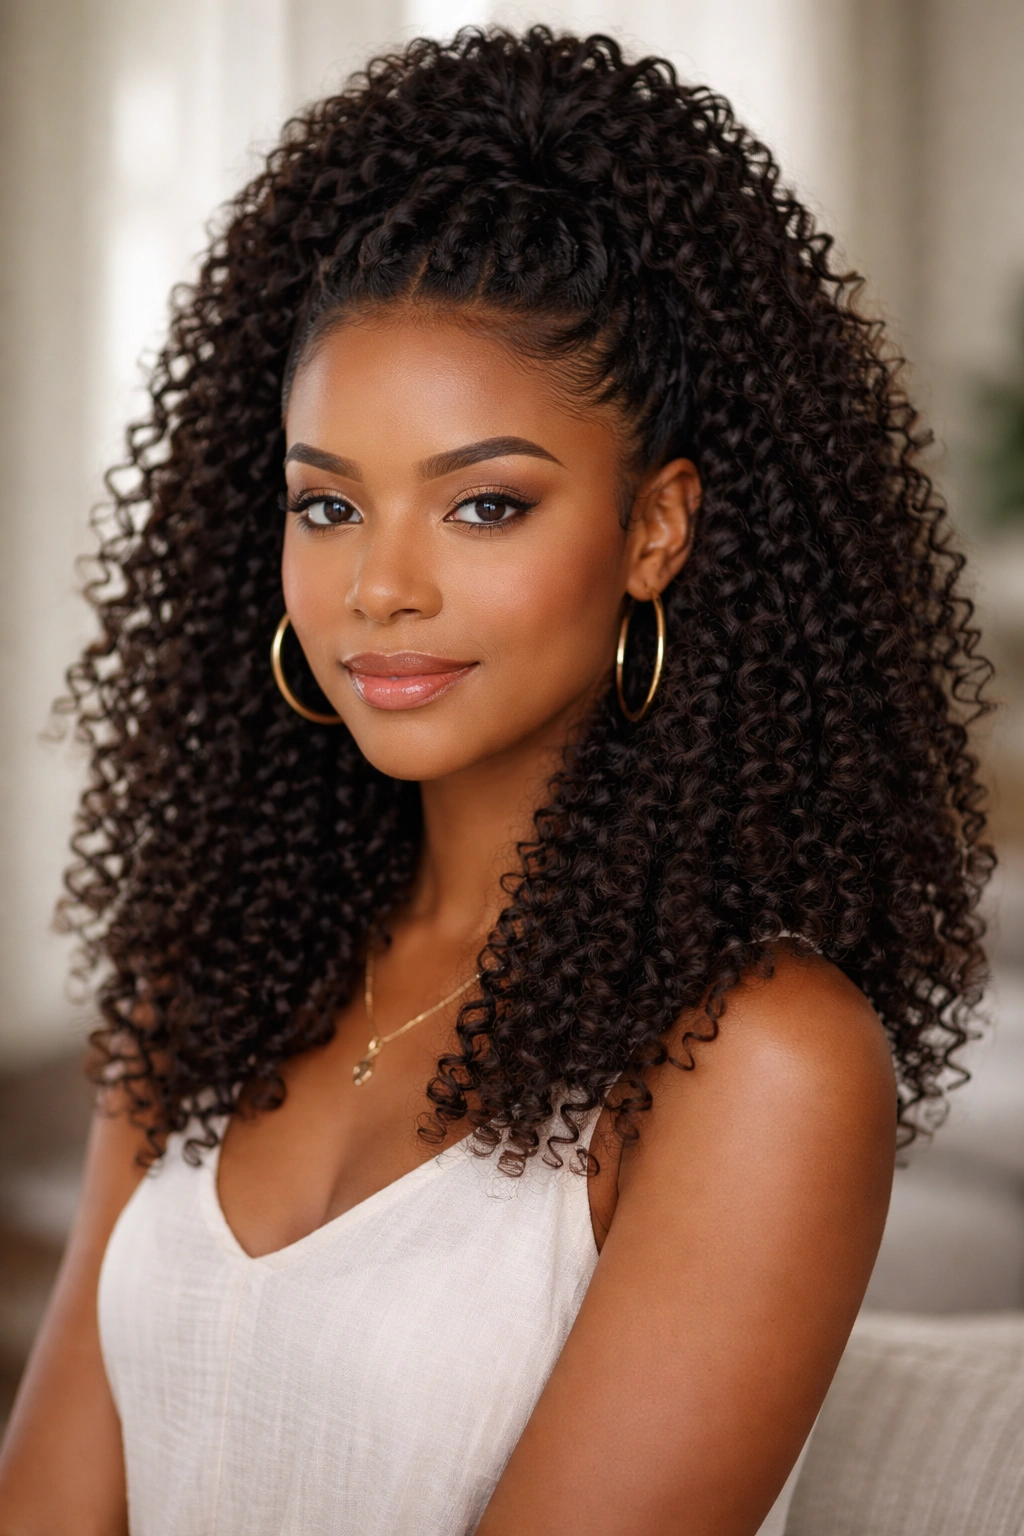
The half-up style is casual sophistication — you’re gathering roughly the top half of your hair up and away from your face while leaving the bottom half flowing freely. This works across virtually all lengths and offers the best of both worlds: you get the face-framing, pulled-back aesthetic without the commitment of a full updo. It’s perfect for days when you want your curls visible and your face clear, but you need functionality.
Why Half-Up Is the Everyday Workhorse Style
A half-up style requires minimal styling time, shows off your curl definition, and keeps hair off your face during work, exercise, or general daily activity without feeling overly formal or styled. It’s the bridge between a completely down style and a full updo — you get the softness and movement of flowing curls with the practicality of pulled-back hair. Countless styling variations exist within the half-up category, meaning you can rotate through different versions throughout the week and never repeat the same look twice.
Techniques for Half-Up Perfection
- Gather the top half of your hair at the crown, taking approximately two inches of hair on each side of your face
- You can twist, braid, or simply smooth this section depending on your preference and time available
- Secure at the crown with a hair tie, claw clip, or decorative barrette
- Gently pull and fluff the gathered section to create volume at the crown
- Leave the bottom half to flow in your natural curl pattern, or enhance definition using the coil-separation technique
- For a romantic variation, release a few small tendrils from the gathered section to frame your face
Real talk: The half-up style actually shows off your curl pattern beautifully because the bottom half flows freely, and the gathered top adds contrast and visual interest. This is an excellent everyday style for curl maintenance and definition.
10. Wash and Go
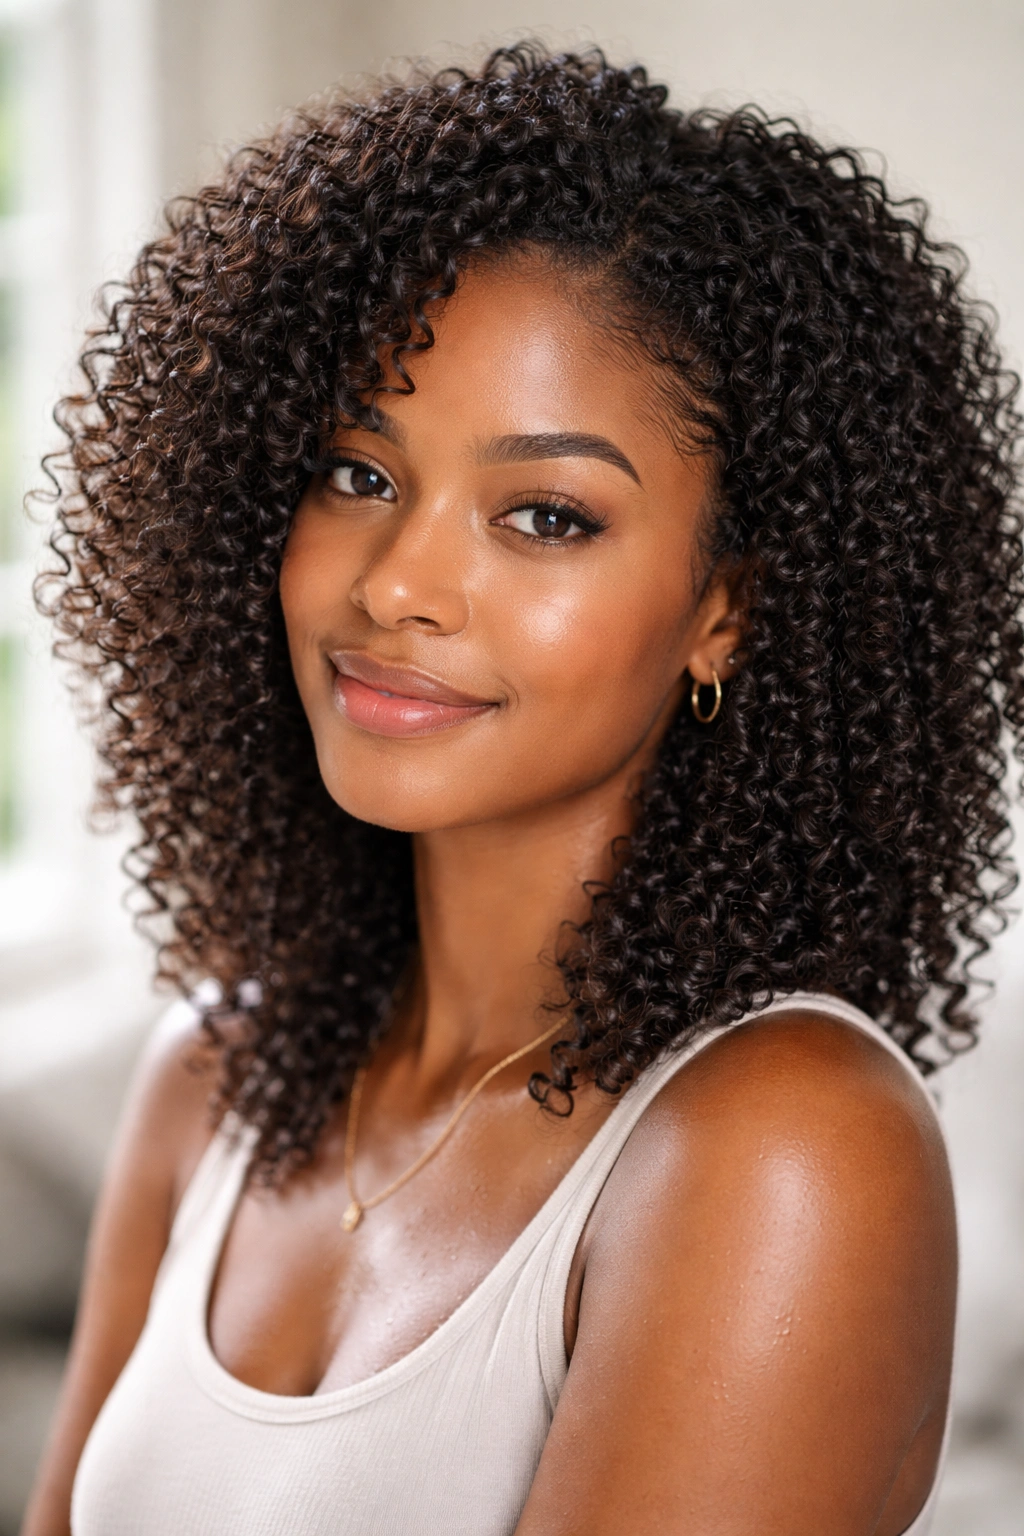
The wash-and-go style is the ultimate celebration of your natural curl pattern with zero styling — you wash your hair, apply products, and let your curls dry in their most natural state. This is simultaneously the simplest and sometimes the most challenging style to perfect because there’s nowhere to hide; your curl pattern, hydration level, and product choice are completely visible. When it works, though, a wash-and-go is effortlessly beautiful and genuinely liberating.
The Science and Art of Making Wash-and-Go Work
A successful wash-and-go depends on three non-negotiable factors: moisture, the right products, and understanding your curl pattern well enough to work with it rather than against it. Your curls are most defined and beautiful when they’re plump with moisture, which is why deep conditioning is so critical to wash-and-go success. The right products hold curl definition without crunch, and they’re specific to your hair — what works for someone else’s curls might not work for yours.
The Formula for a Wash-and-Go That Actually Works
- Wash your hair thoroughly with a sulfate-free shampoo or co-wash, focusing on your scalp
- Apply a deep conditioning treatment and let it sit for at least five minutes while your curls absorb moisture
- Rinse completely with cool water to seal the cuticle layer and enhance shine
- While hair is still dripping wet, apply leave-in conditioner by scrunching it upward into your curls
- Apply styling cream, gel, or curl custard depending on your curl pattern and desired hold level
- Continue scrunching upward with each product application to encourage curl formation
- Cup your curls gently in your hands and allow them to sit for a few minutes while the product sets
- Air dry by keeping your hands out of your hair, or use a diffuser attachment on low to medium heat if you need faster drying
- Once completely dry, you can gently scrunch the crunch if your product left any stiffness
Pro tip: Your wash-and-go will look exponentially better on day two when the curls have softened and blended together. Resist the urge to touch your curls while they’re drying — every touch disrupts the curl formation.
11. Flat Twist Ponytail
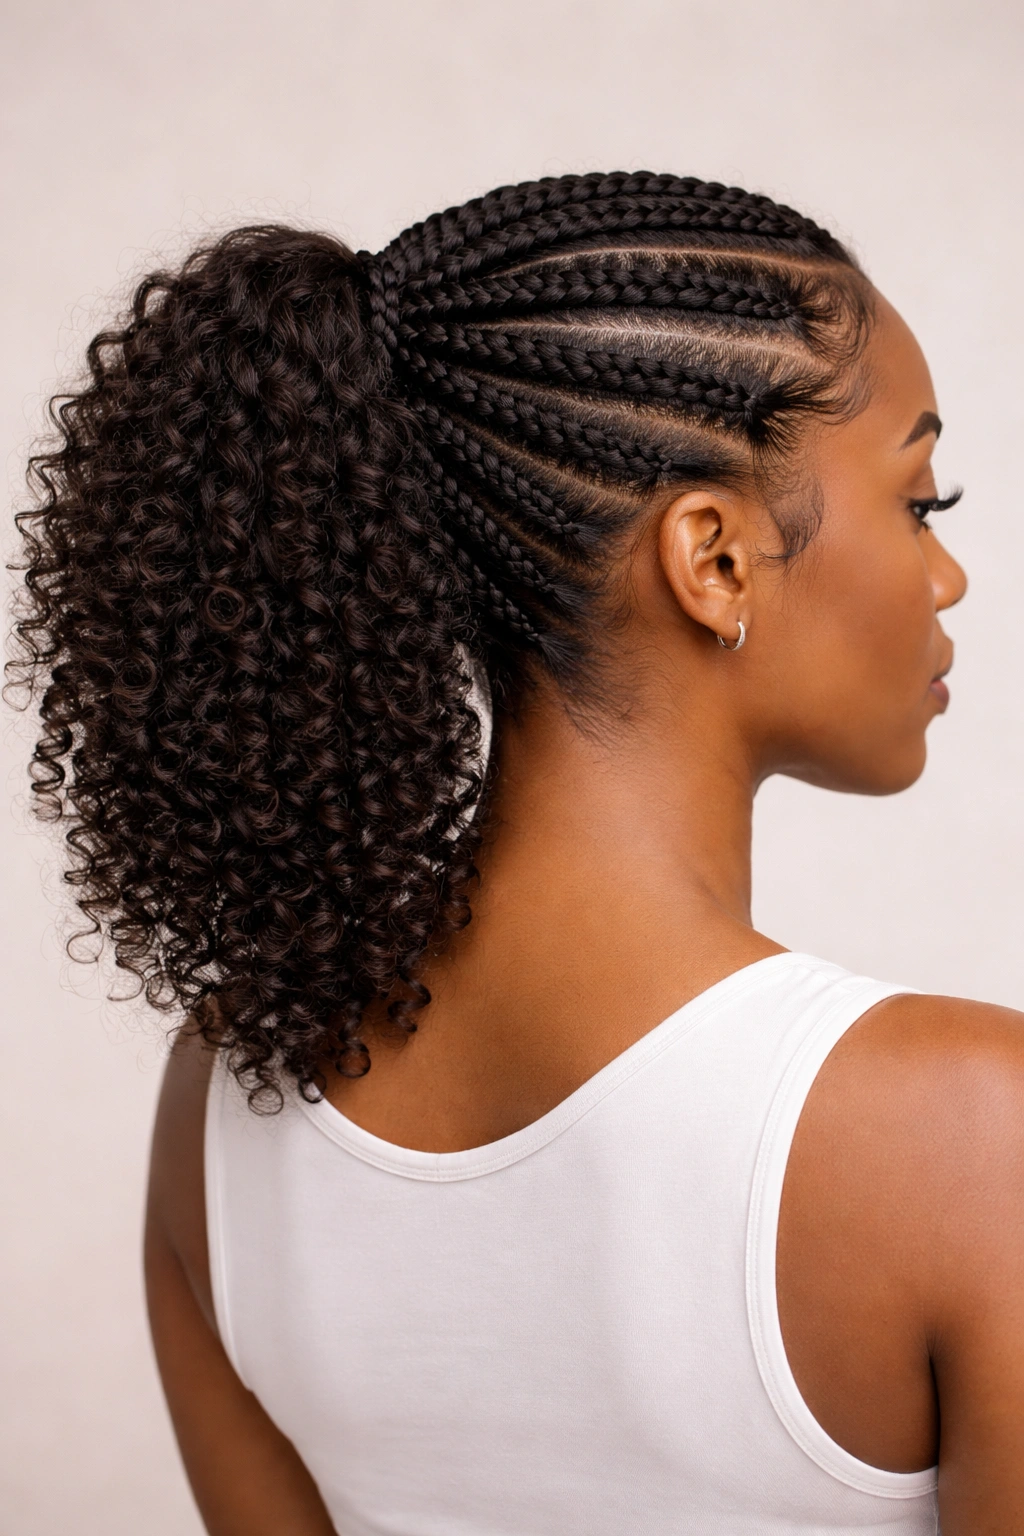
A flat twist ponytail combines the protective benefits of flat twists with the practicality of a secured ponytail, creating a style that’s both elegant and functional. Flat twists run from your hairline backward along your scalp (like cornrows but thicker and with less tension), and they funnel into a gathered ponytail at the nape or crown. This style works beautifully on medium to longer hair and is ideal for anyone who wants a pulled-back look with visual interest and protection.
The Protective Power of Flat Twists
Flat twists applied with appropriate tension don’t pull excessively on your hairline or scalp, meaning you can wear them repeatedly without worrying about traction alopecia. They protect the length of your hair by keeping it contained and off your shoulders, and they allow your curls to set and rest naturally within the twist structure. This makes them ideal for protective styling between wash days or for extending the life of your styling without daily manipulation.
Creating Your Flat Twist Ponytail
- Section your hair with a deep side part and apply smoothing cream to the entire back section
- Starting at one side of your head near your temple, take a one-inch section and divide it into two parts
- Cross one part over the other while simultaneously picking up a thin section of loose hair from your scalp and incorporating it into the twist
- Continue this process moving diagonally toward the back of your head — you’re creating a flat twist that lies against your scalp rather than protruding
- Once you reach the nape, gather all your hair into a ponytail and secure with a hair tie
- Gently pull the flat twists slightly to create a softer, fuller appearance
- Wrap a small section of hair around the hair tie to hide it, creating a polished finish
Worth knowing: Flat twists hold beautifully for multiple days. On day two, they often look even softer and more refined as they’ve relaxed slightly. Sleep on your flat twist ponytail by loosely wrapping it with a silk scarf or using a silk pillowcase.
12. Teardrop Braid Out
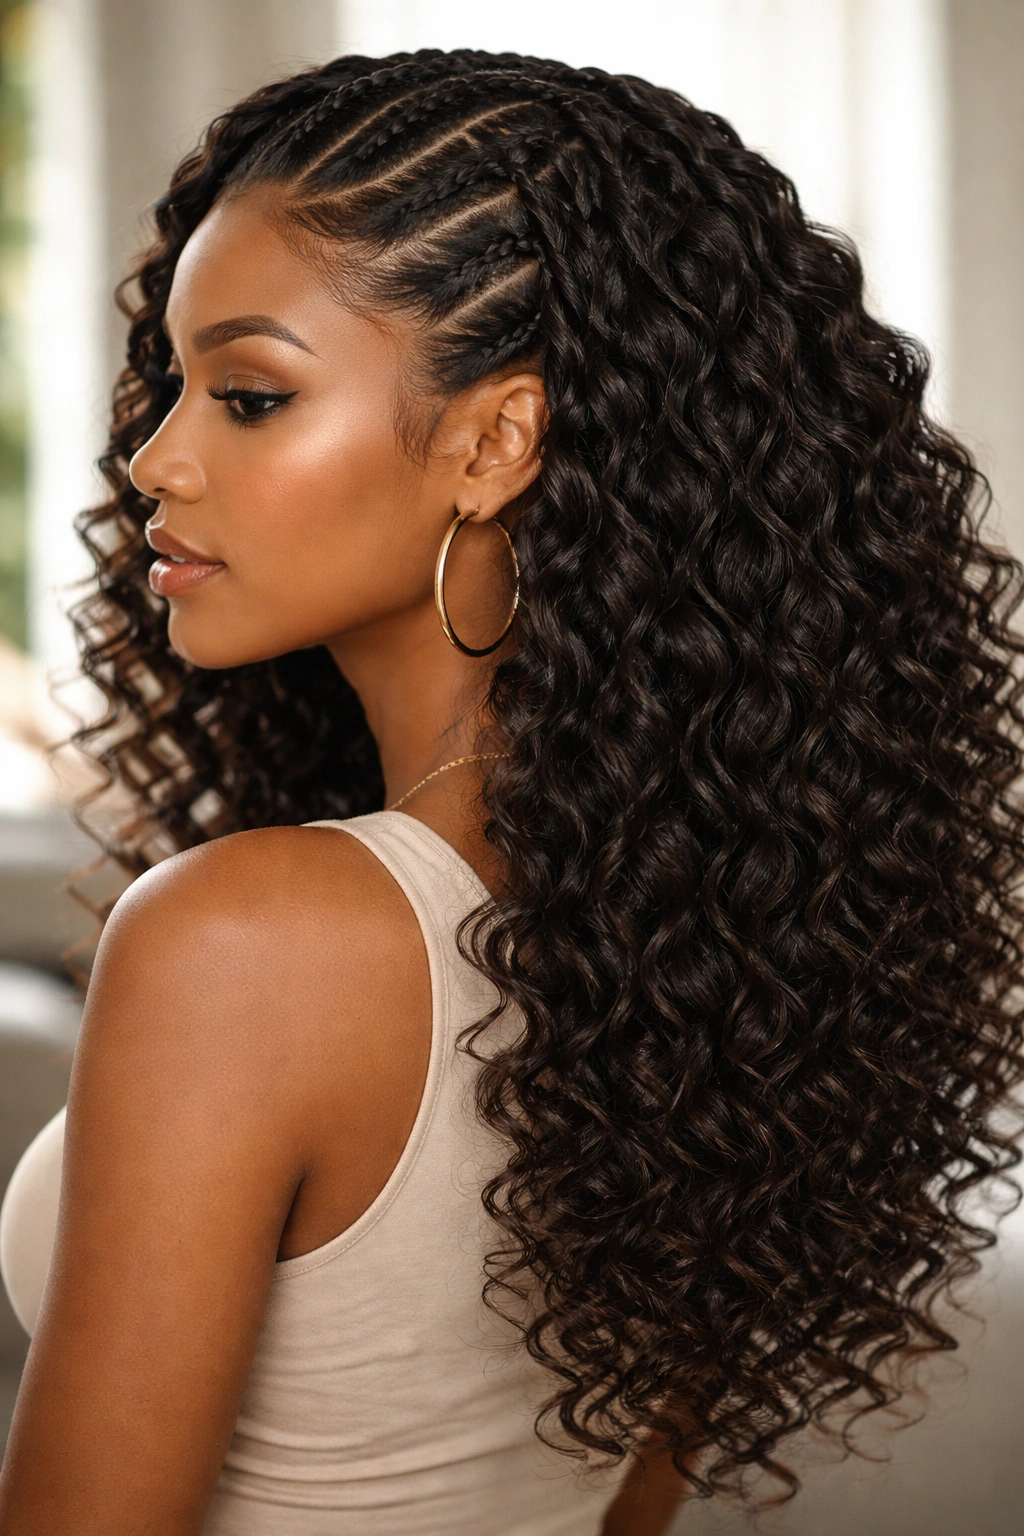
A teardrop braid out is achieved by braiding sections of your hair in a specific direction to create a beautiful reverse wave pattern when the braids are released — the resulting texture looks like a series of graceful teardrops flowing down your hair. This style works on all lengths and showcases curl definition beautifully while creating texture that lasts for multiple days.
The Technique That Creates Stunning Reverse Waves
A braid out works by training your curls into a specific pattern while they set — the smaller the braids, the tighter the resulting wave pattern; the larger the braids, the looser and more flowing the waves become. The teardrop variation creates a visual effect of graduated waves that taper at the ends, adding elegance and dimension. This style is particularly striking on longer hair where the waves have space to flow.
Creating Your Teardrop Braid Out
- Start with damp, freshly washed hair that’s been deep conditioned
- Apply leave-in conditioner and styling cream throughout, scrunching upward to encourage curl formation
- Divide your hair into four to six sections depending on desired wave pattern
- Take one section and create a three-strand braid from roots to ends, braiding smoothly and consistently
- Repeat with remaining sections, keeping the braids at approximately the same tension so waves are consistent
- Allow braids to dry completely — overnight drying creates more defined waves than a few hours
- Once completely dry, gently unravel each braid carefully, starting from the bottom and working toward the roots
- Scrunch gently with your fingers to blend the wave pattern and encourage curl formation
- Use your fingers to separate the braid texture into individual waves and coils
Insider note: The second day of a braid out actually looks better than the first — the waves soften, blend together, and create a more romantic, flowing appearance. Sleep on your braid out loosely wrapped in a silk scarf to maintain the texture.
Styling Your Curls: Maintenance Tips That Keep Styles Looking Fresh

Regardless of which style you choose, a few universal maintenance practices keep your curls looking fresh and healthy. Refresh your style between full washes by misting with a lightweight curl spray or water mixed with leave-in conditioner — this reactivates curl definition without requiring a complete wash. You’re essentially returning moisture to your curls and giving them a gentle reminder of the shape you created when the style was fresh.
Sleep on your styles strategically by either securing them loosely with a silk scarf or using a silk pillowcase instead of cotton. Cotton absorbs moisture from your curls and creates friction that disrupts your pattern; silk allows your curls to rest undisturbed. A pineapple method (gathering curls loosely at the crown in a loose ponytail) protects your styling while allowing curls to breathe and maintain their shape overnight.
Touch your curls minimally once they’re styled — every hand interaction disrupts curl definition and can cause frizz. If you absolutely must adjust your style, use the scrunching method rather than running your fingers through, which disrupts the curl structure. Save intentional manipulation for the day you plan to wash and restyle.
Choosing Your Style Based on Hair Length and Lifestyle
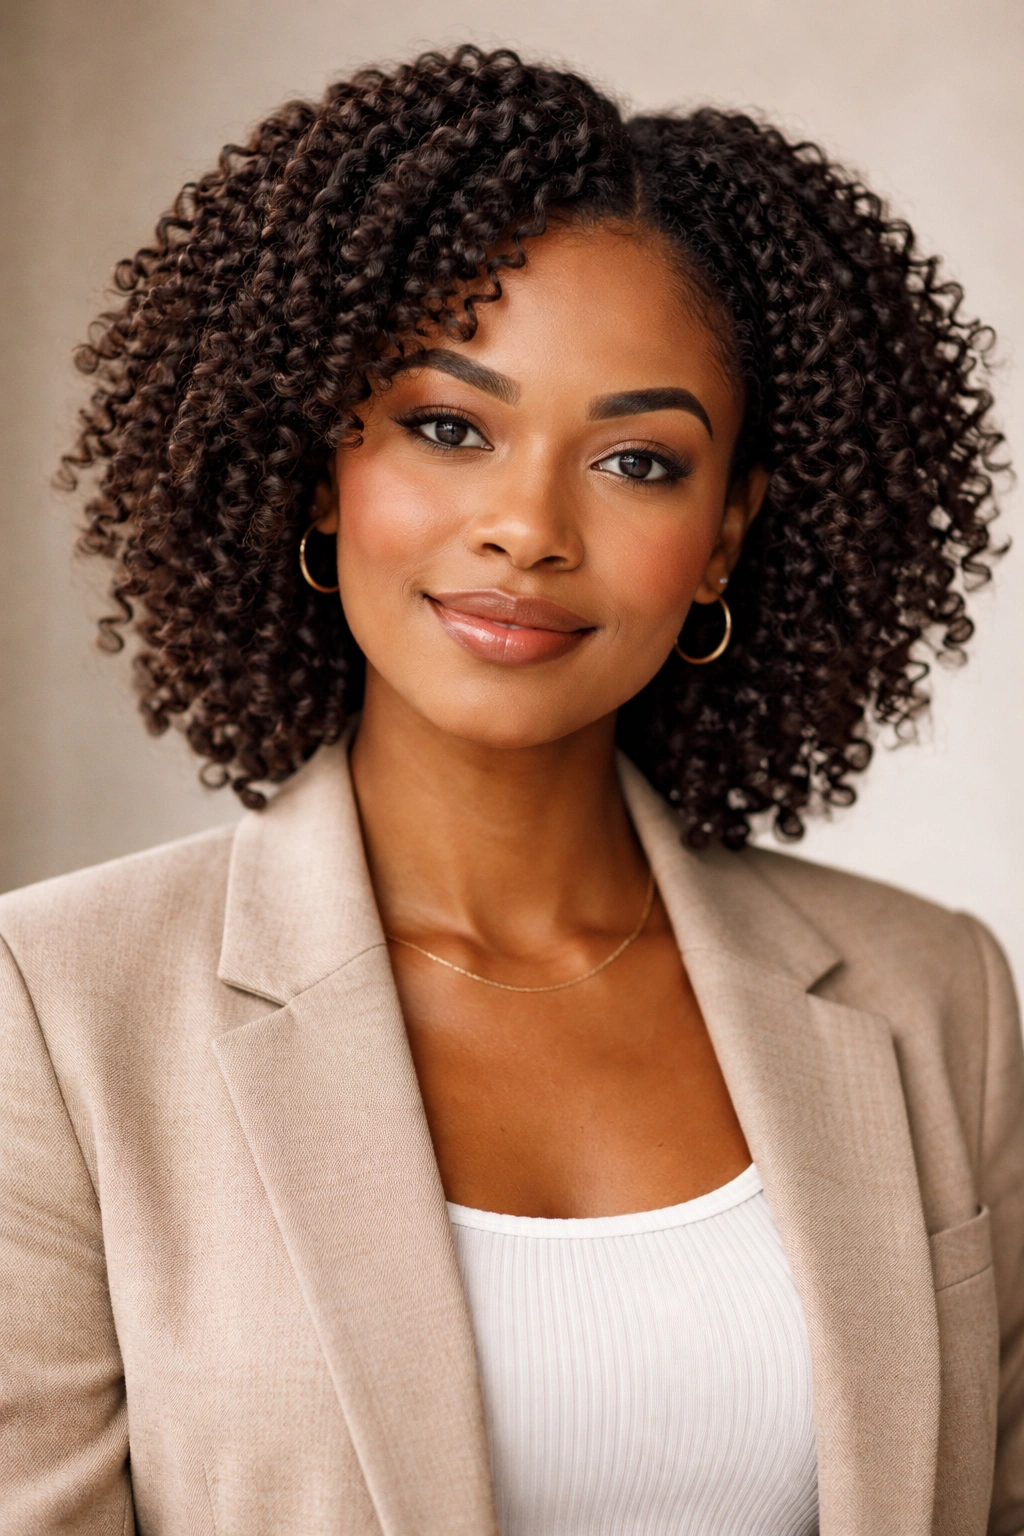
Different styles suit different lengths and daily requirements. If you have short curls (less than two inches), high puffs, coils and curls, and wash-and-goes are your most reliable options. Medium-length hair (two to six inches) opens up possibilities for twisted crowns, bantu knots, flat twists, space buns, and braid outs. Longer hair (beyond six inches) gives you access to all of these plus updo variations and styled half-ups that showcase length and movement.
Your lifestyle matters equally. If you exercise regularly or work in active environments, secured styles like high puffs, ponytails, and flat twists make sense. If your schedule is packed and styling time is precious, wash-and-goes and side-swept curls require minimal time investment. If you attend professional or formal events regularly, updos and twisted crowns give you polished, intentional styling.
Consider your curl pattern and texture as well. Tighter coils hold styles longer and maintain definition beautifully, making protective styles like bantu knots and flat twists excellent choices. Looser curls work wonderfully for wash-and-goes and coil-and-curl enhanced definition. Medium curls have the flexibility to work with virtually every style on this list.
Final Thoughts
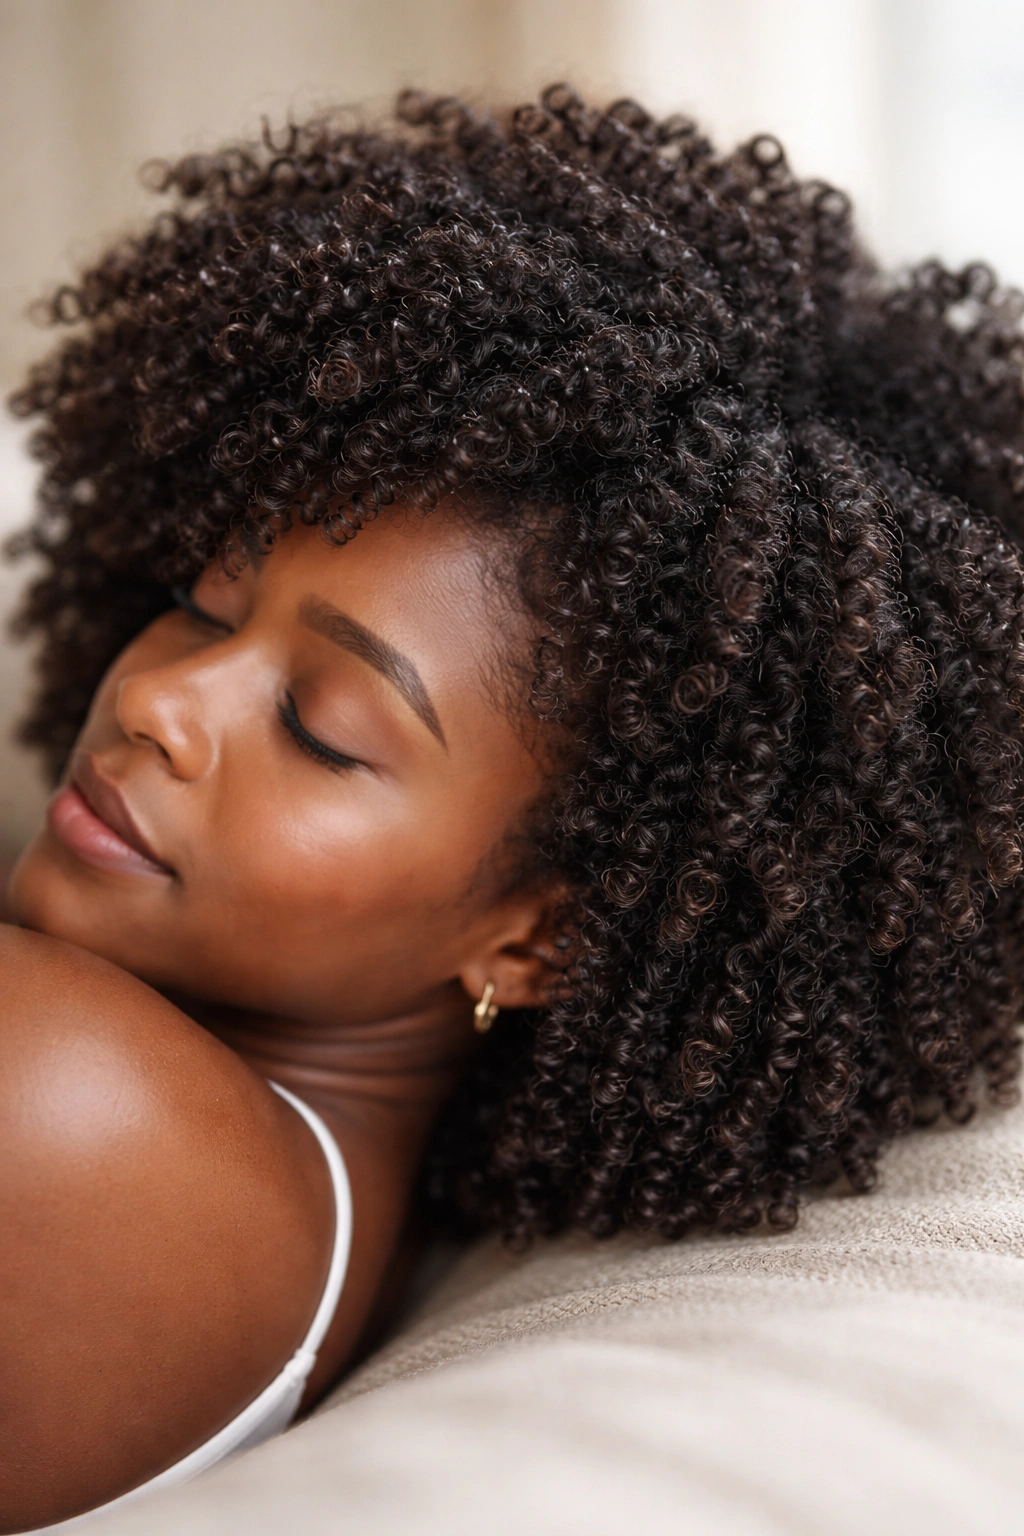
Your natural curls are a complete styling toolbox — you don’t need heat, extensions, or trendy tools to look absolutely stunning. The 12 styles outlined here represent just the beginning of what’s possible with your texture. Once you understand the fundamental techniques (gathering, twisting, braiding, defining, and securing), you can combine and adapt them endlessly, creating signature styles that feel authentically yours.
The most important thing to remember is that your hair health always comes first. A style might look incredible for a day or two, but if it damages your curls or causes breakage, it’s not worth the short-term payoff. Prioritize moisturizing, minimize tension on your scalp and hairline, and give your curls regular breaks from styling. Healthy, well-cared-for curls hold styles better, look more beautiful, and feel stronger.
Start with one or two styles that resonate with you and practice until they become second nature. Once you’ve mastered those, experiment with the others. Your curls will get stronger, your styling skills will improve, and you’ll develop an intuitive understanding of what works best for your hair. That’s when styling becomes less about following instructions and more about expressing yourself through your natural texture.
