Long hair is a canvas for creativity, and braided ponytails unlock a whole new level of styling versatility that goes far beyond the basic hair-pulled-back look. Whether you’re dealing with thick, luscious locks or fine, delicate strands, the combination of braiding and ponytail styling creates texture, visual interest, and a polished appearance that works for casual days, professional settings, and special occasions alike.
The beauty of braided ponytails lies in their adaptability. You can dial up the drama with intricate multi-strand braids, keep things understated with a single elegant plait, or blend braiding techniques to create something entirely unique to your hair type and personal style. The techniques range from beginner-friendly to advanced, meaning there’s genuinely something achievable for every skill level.
What makes braided ponytails especially powerful for long hair is how they solve real problems. They keep your hair tamed and off your face while adding visual dimension that a plain ponytail simply can’t match. Braiding also distributes the weight of long hair more evenly across your scalp, which can actually feel more comfortable than a traditional tight ponytail. Plus, the textured surface of braids catches light beautifully and photographs better than sleek hair alone.
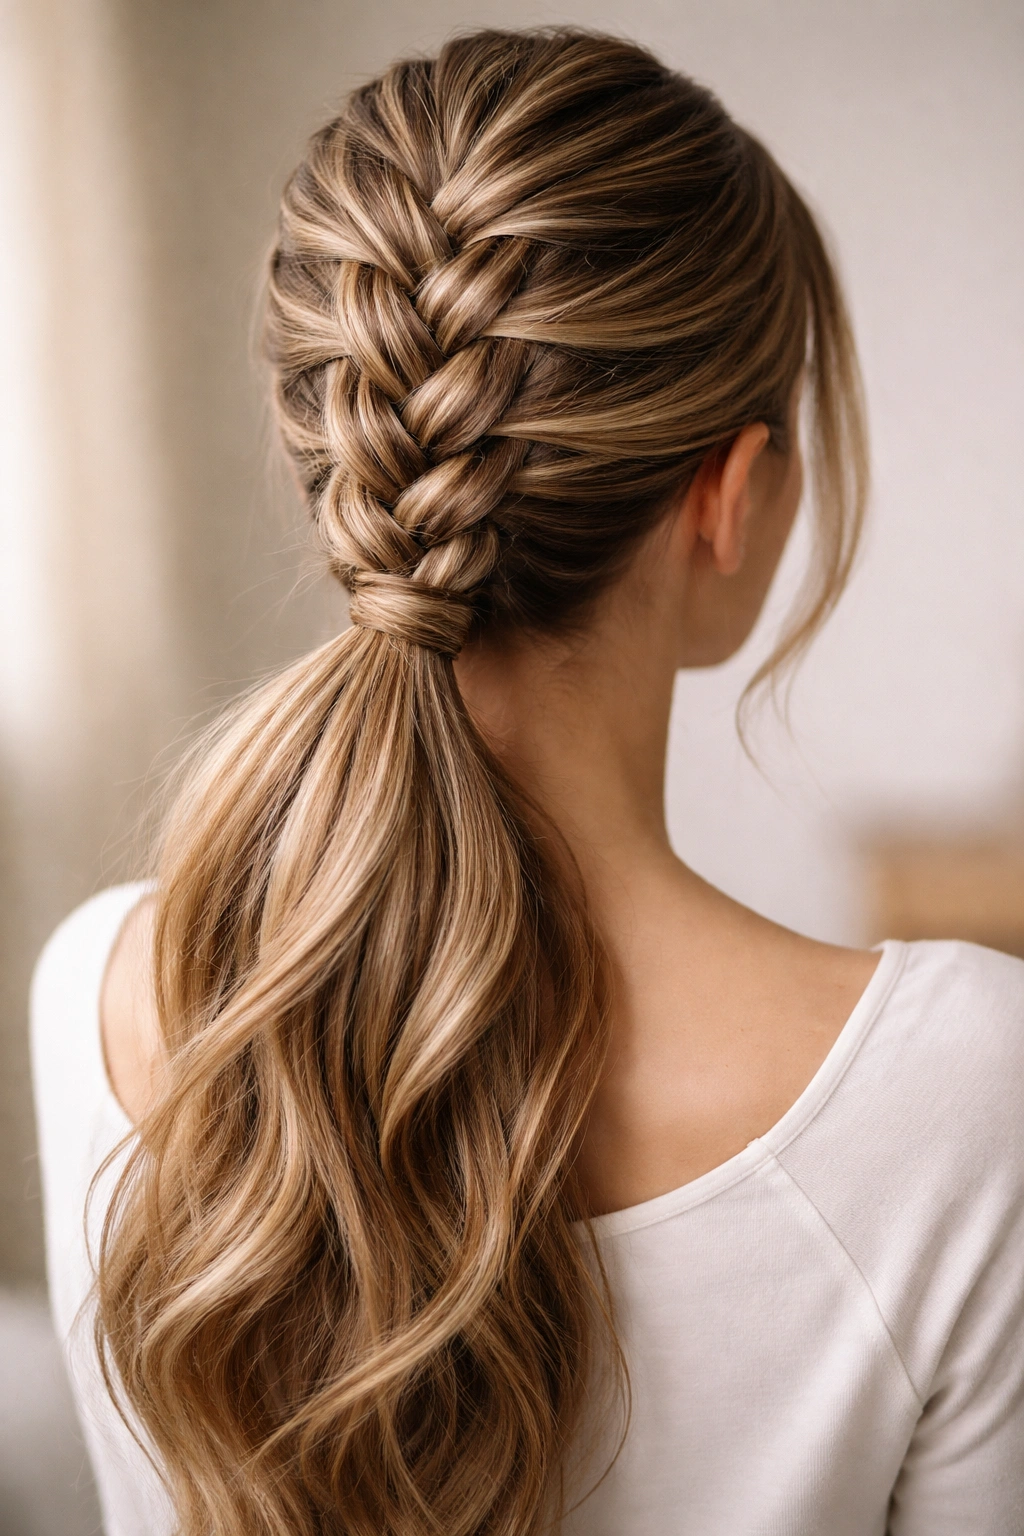
1. Classic Three-Strand Dutch Braid Ponytail
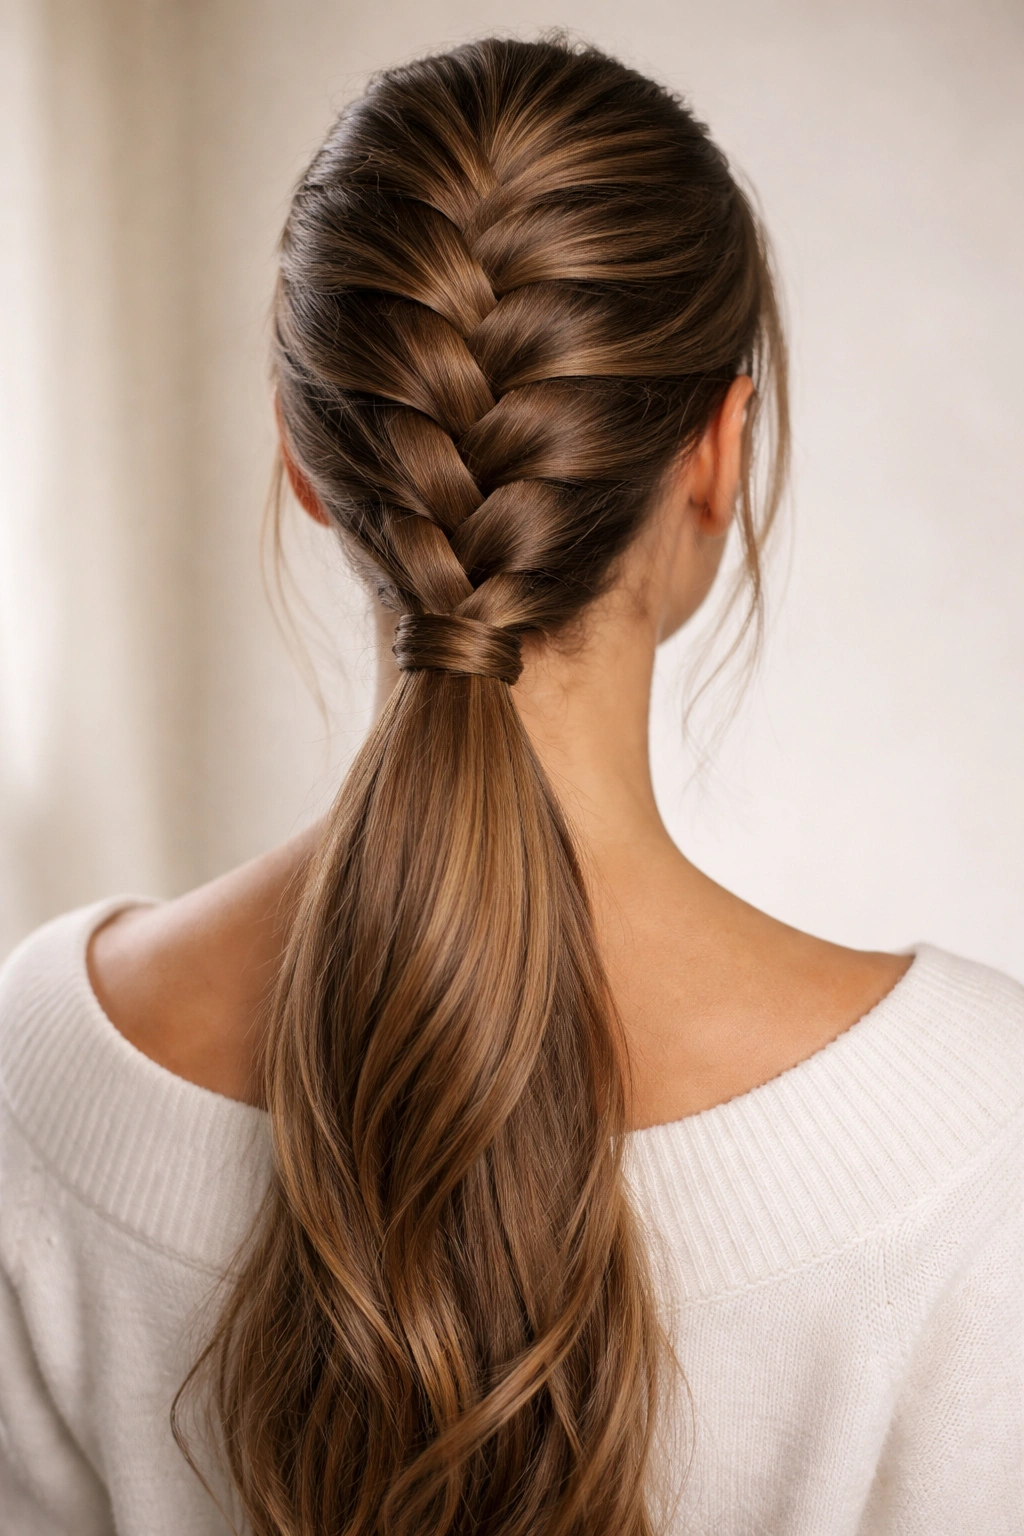
The Dutch braid is the foundation that makes this look work so well—it’s essentially a regular three-strand braid but inverted, meaning you cross strands under instead of over, which creates that beautiful raised, dimensional texture that sits prominently on the head. What makes this version special is how it flows directly into a sleek, streamlined ponytail at the nape of your neck, creating a cohesive, intentional appearance that reads as polished and put-together.
How to Create the Look
Start at your crown and section off a small triangle of hair about 3 inches wide at the hairline. Divide this into three equal sections and begin your Dutch braid—cross the right section under the middle, then the left under the middle, continuing this under-over pattern as you move down the back of your head. As you braid, gently pull and loosen each crossover slightly to create that modern, relaxed texture rather than a tight, pulled look.
The Finishing Steps
- Braid all the way down to the nape of your neck, letting your braid sit in the center-back area
- Secure the braid with a small clear elastic at the base
- Gather all remaining hair below the braid into a low ponytail, incorporating the braided section
- Use a larger elastic to secure the full ponytail
- Tease the ponytail gently with a fine-tooth comb for volume, then smooth the surface with a finishing brush
- Wrap a small section of hair around the elastic to conceal it for a seamless, high-end look
Pro tip: If your hair feels slippery or won’t hold a braid well, apply texturizing spray or dry shampoo to damp hair 30 minutes before styling—this gives your strands grip and makes braiding significantly easier.
2. Fishtail Braid Ponytail
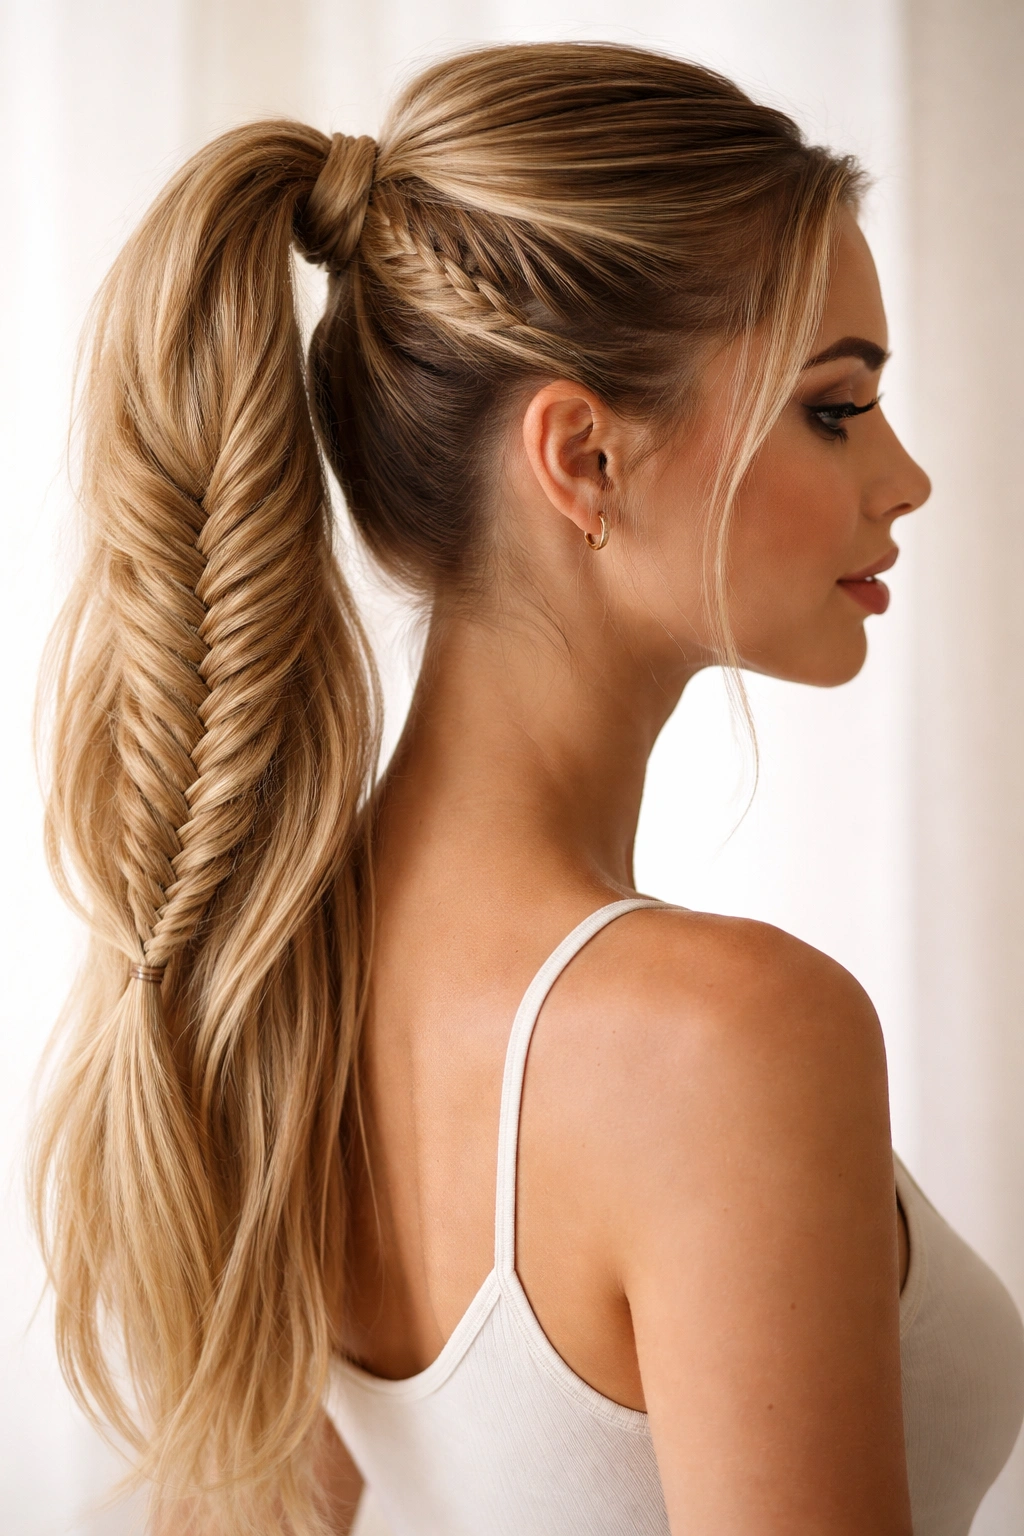
The fishtail braid creates an incredibly intricate, detailed appearance that actually requires fewer hand movements than a traditional three-strand braid, making it more achievable than most people expect. This style produces a distinctive woven, almost lacy texture that looks absolutely stunning when pulled directly into a high ponytail, creating maximum visual contrast between the delicate braid and the sleek tail.
The Fishtail Technique Explained
A fishtail braid works with only two sections instead of three. Divide your hair into two equal sections at the crown. From the right section, take a thin piece of hair from the outer edge and cross it over to join the left section. Repeat on the left side—take a thin piece from the left’s outer edge and cross it into the right section. The key is keeping those outer pieces very thin, which creates the characteristic fine, woven appearance that makes this braid visually distinctive.
Building Dimension and Texture
- Start your braid at the crown and work down to the nape, taking consistently thin sections from the outer edge of each side
- After you’ve completed the braid, gently pull the edges to loosen and expand the braid—this makes the weave more visible and dimensional
- Gather all hair (braided and loose) at your desired ponytail height
- Secure with an elastic and consider wrapping a thin strand of hair around the base for a finished appearance
Worth knowing: Fishtail braids actually look better slightly loose and textured than perfectly tight—they’re one of the rare braiding styles where a little imperfection makes them more visually striking.
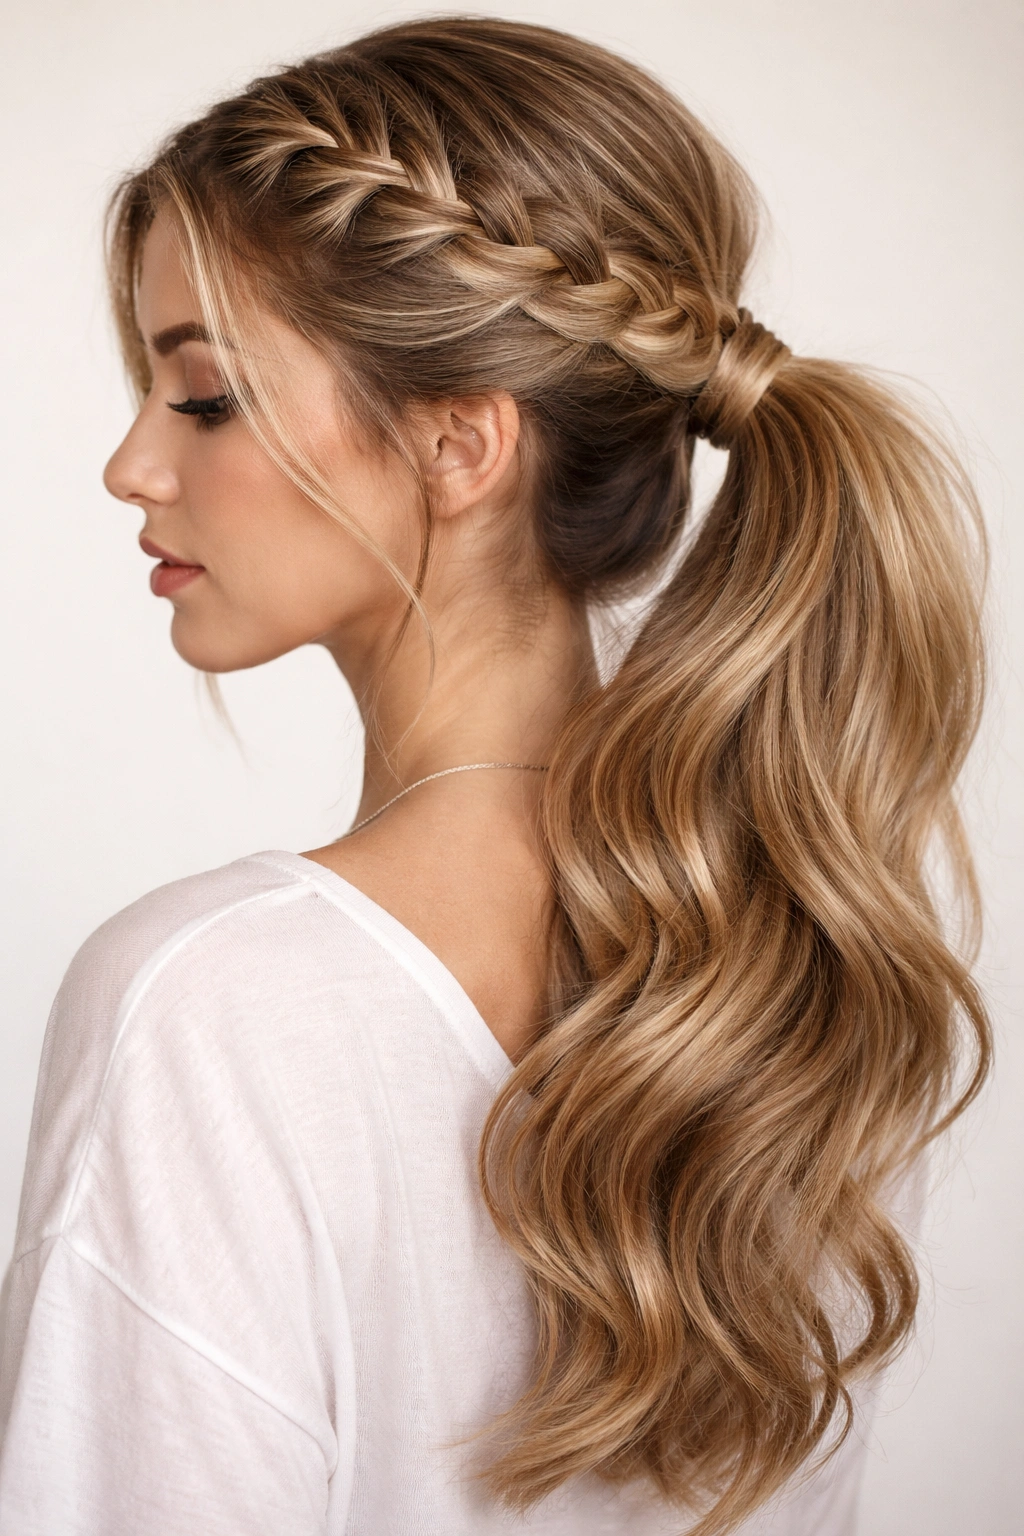
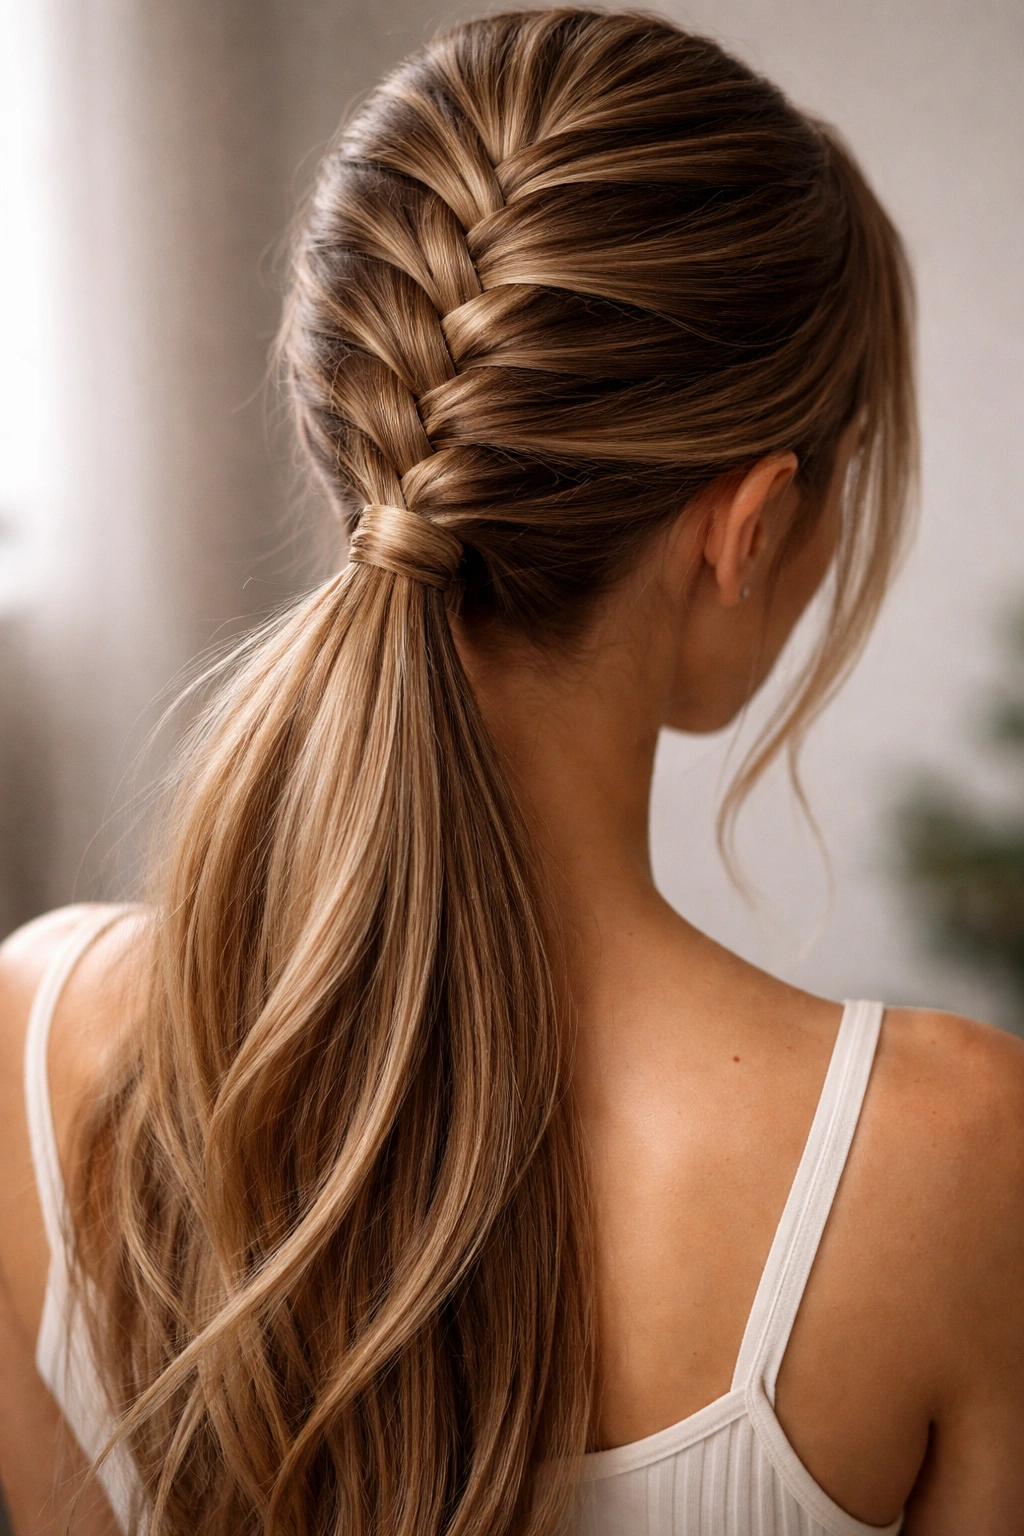
3. French Braid into Sleek Ponytail
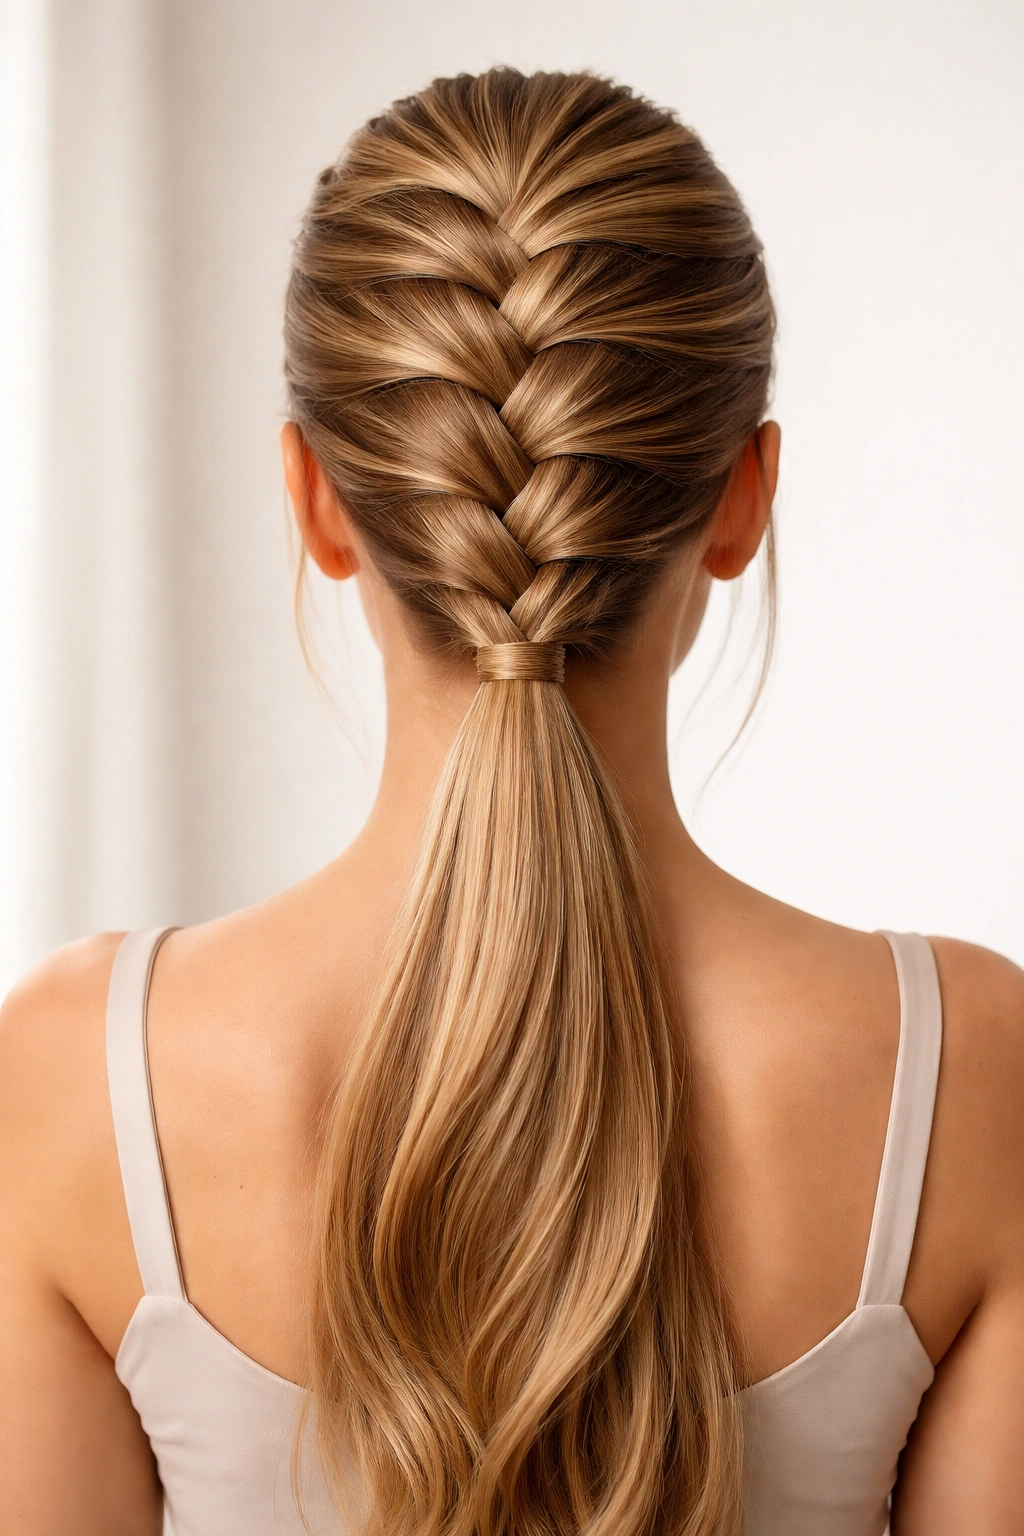
A French braid that incorporates hair as it travels down the head creates a seamless transition into a ponytail because the braiding action is already gathering hair as you go. This means your French braid naturally becomes the foundation of your ponytail without that awkward gap that can happen between a braid and the ponytail base. The result is polished, intentional, and works beautifully for everything from business meetings to cocktail events.
French Braid Fundamentals
Begin at the crown with three small sections of hair. Cross the right section over the middle, then the left over the middle—this is your base. Here’s the key: as you continue braiding downward, add a thin section of new hair to the right section before crossing it over, then add new hair to the left section before crossing it over. This incorporation of new hair is what makes it a French braid and what allows it to gather all your hair as it descends.
Creating the Seamless Transition
- Work your French braid down the center-back of your head, adding sections from both sides as you descend
- When you reach the nape of your neck, you’ll have most of your hair incorporated into the braid
- Secure the braid temporarily with a small elastic
- Gather all remaining loose hair along with the braided section into your desired ponytail position
- Remove the small elastic from the braid end and combine everything into one final ponytail secured with your main elastic
- Gently tug the braid sections to add width and texture
Quick tip: French braids look more elegant when you add slightly larger sections of hair as you go—this creates a fuller, more substantial braid that photographs beautifully.
4. Double Braided Ponytail
Two braids instead of one creates immediate visual impact and a sense of complexity that elevates the entire style. This approach works particularly well for long hair because it distributes the volume more evenly and creates a fuller appearance at the crown. The two braids frame the face subtly while meeting in a unified ponytail that’s both romantic and modern.
Sectioning and Braiding Strategy
Divide your hair down the center from forehead to nape, creating two equal sections. On the left side, start a Dutch or French braid at the temple and work it back toward the center of your head. Simultaneously create a matching braid on the right side. The key is keeping both braids roughly the same thickness and working at the same pace so they meet at the same point at the back of your head.
Bringing the Braids Together
- Complete both braids so they end at roughly the same point on the back of your head
- Gather both braids along with any remaining hair into a high or mid-height ponytail
- Secure with an elastic, then wrap a thin section of hair around the base to hide the elastic
- Pull and loosen both braids slightly to create that modern, textured appearance
- Consider leaving a few face-framing pieces loose for softness, or smooth them back for a more polished aesthetic
Insider note: If one side of your head naturally has more volume or density than the other, start your braid slightly lower on the fuller side to visually balance the final look.
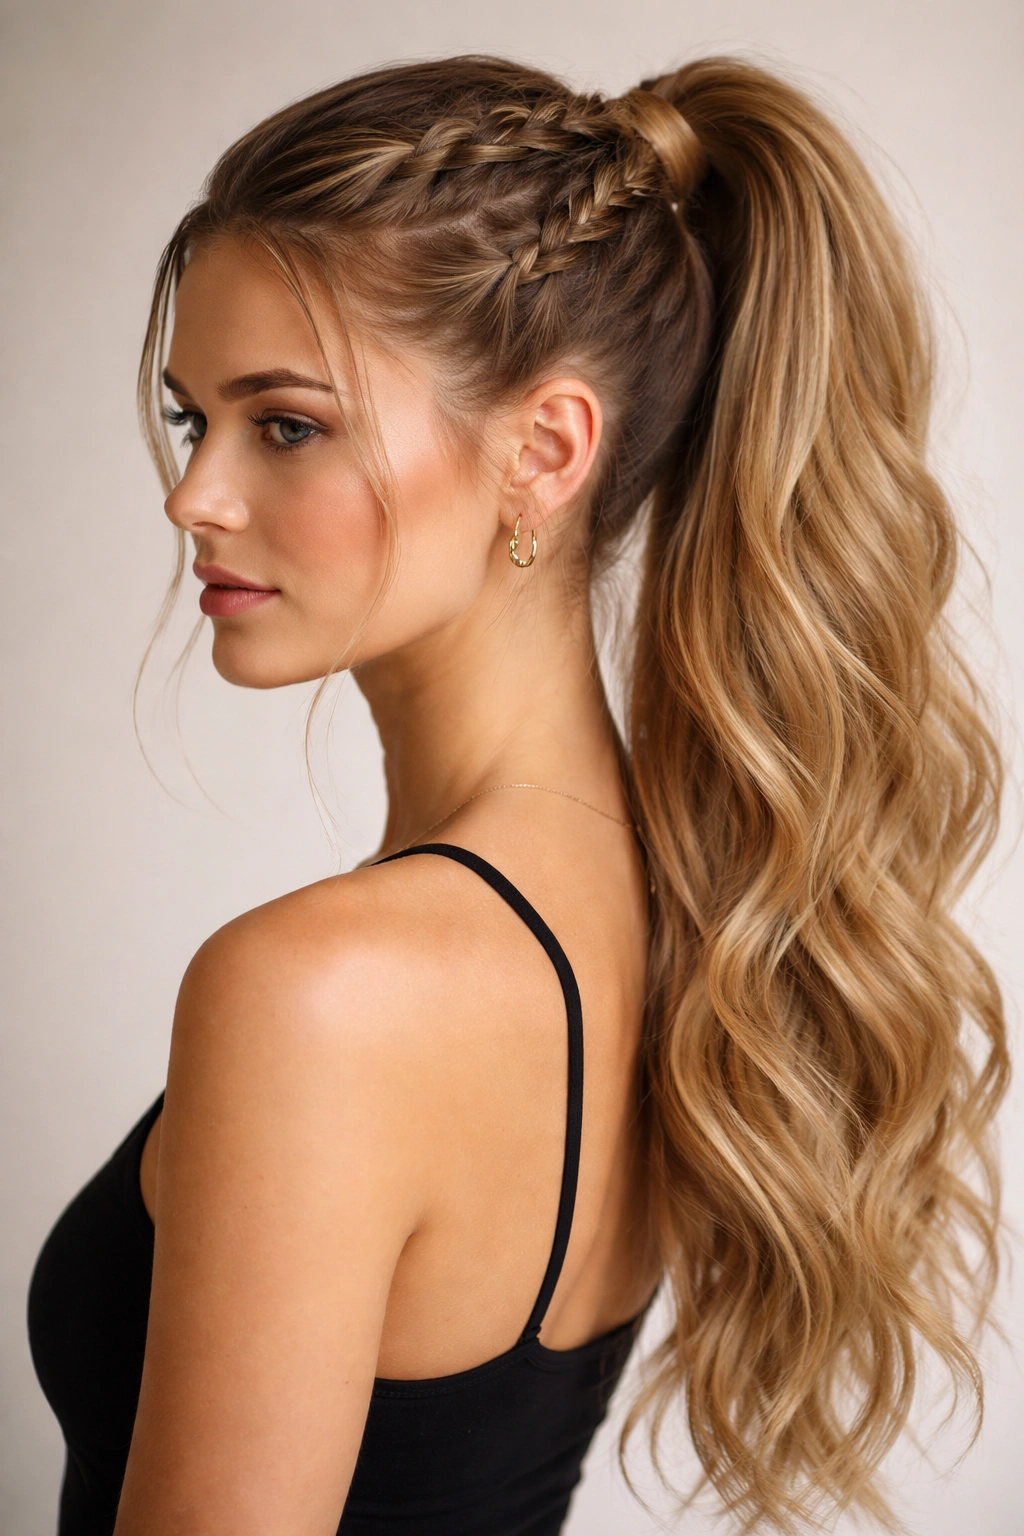
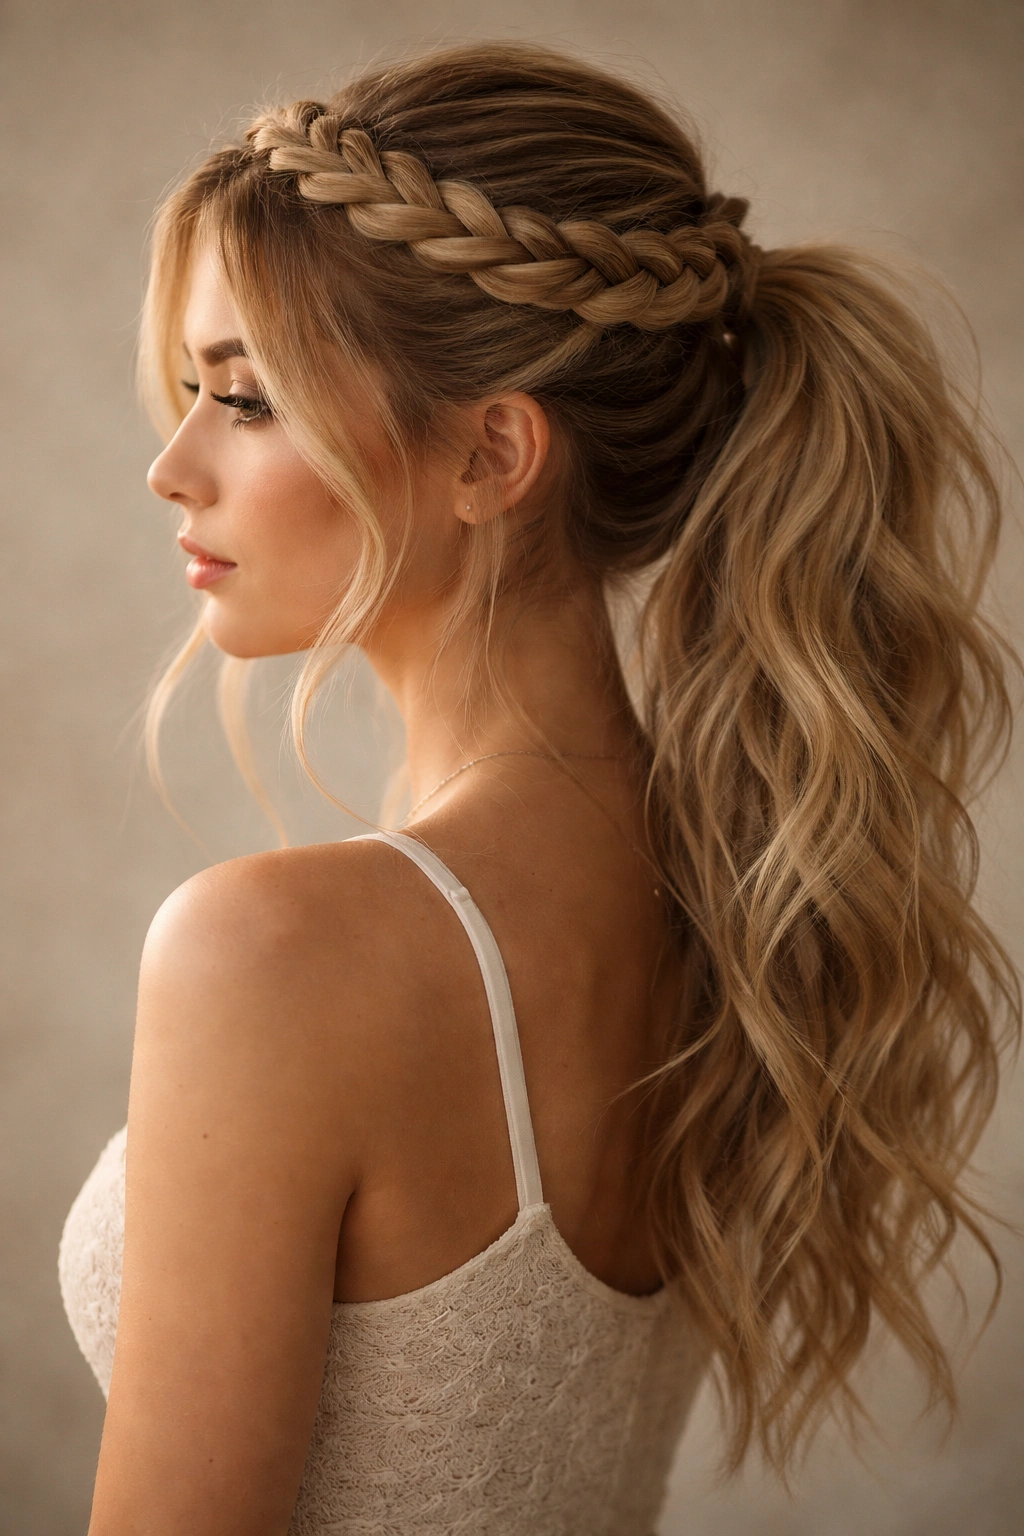
5. Dutch Braid Crown with Low Ponytail
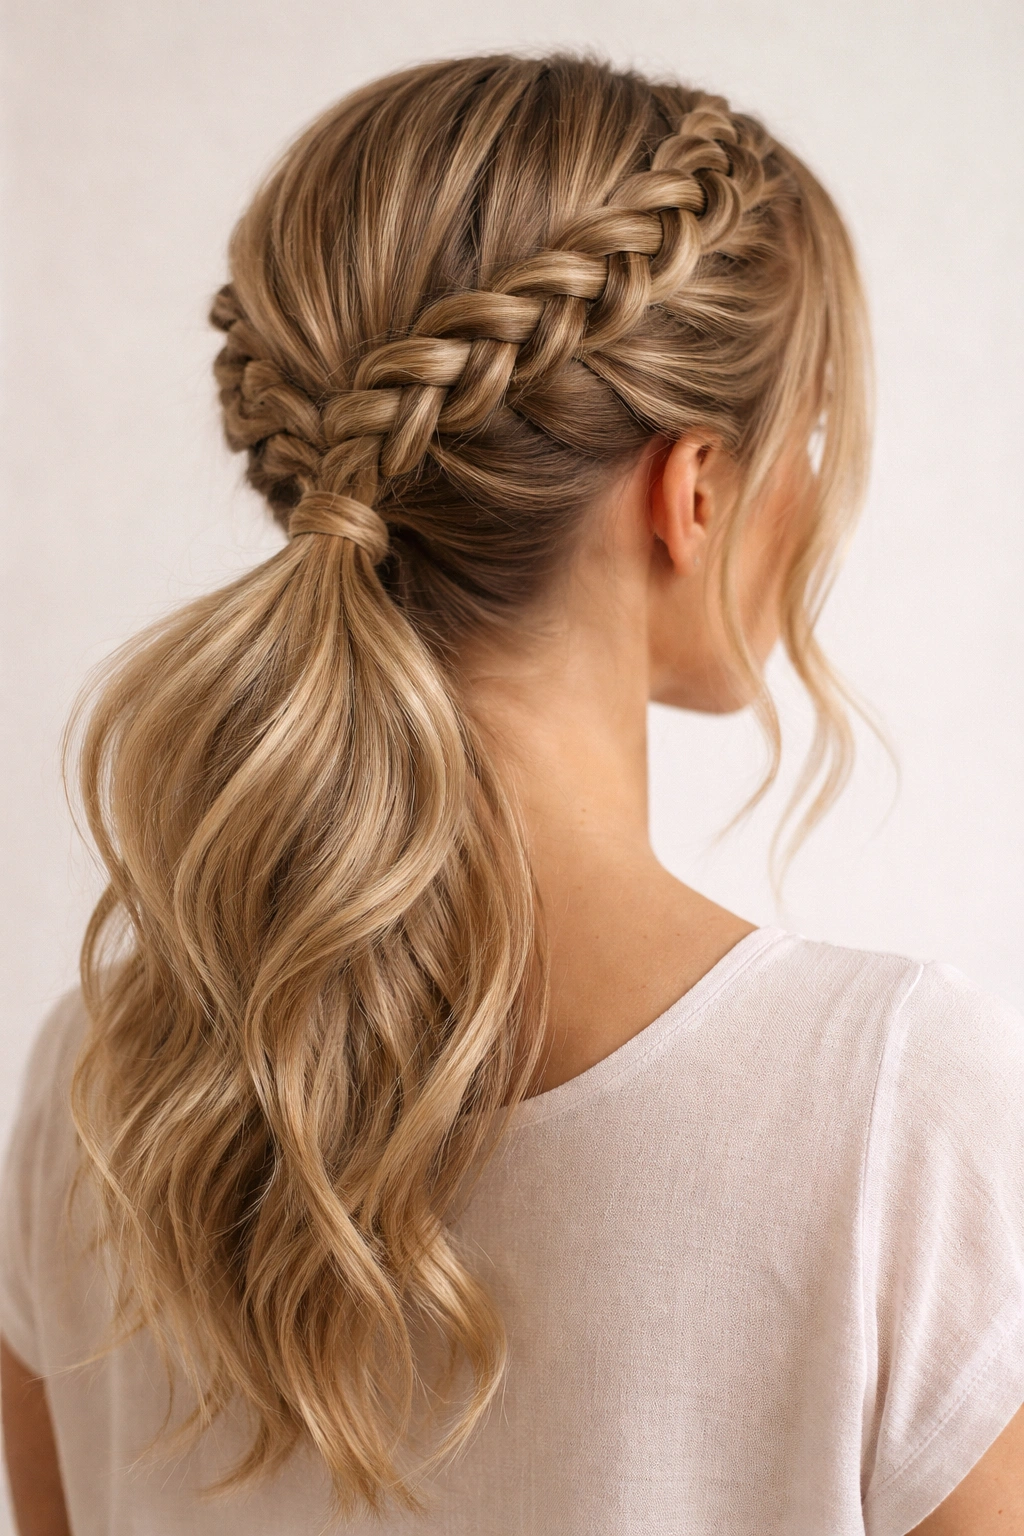
This is the approach to use when you want to create a sense of height and visual interest at the crown while keeping the actual ponytail relaxed and low. The Dutch braid wraps around the upper back of the head like a crown or halo, then releases into a loose, textured low ponytail—it’s simultaneously elegant and effortless-looking, which is exactly the combination most people are actually trying to achieve.
Creating the Crown Effect
Start one Dutch braid at your left temple and braid diagonally back toward the center-back of your head, positioning it to sit roughly 2 inches above the nape. Then start a second Dutch braid at your right temple and mirror the path, so both braids curve back and meet in the center. The two braids should create a crown-like frame around the top and back portions of your head.
Finishing with a Relaxed Tail
- Secure each braid as you complete it, then gather all hair into a low ponytail at the nape of your neck
- Use a slightly loose elastic to maintain that effortless feel
- Remove any bobby pins holding the individual braids and let them blend into the ponytail
- Tease the ponytail gently to add volume and texture
- Wrap a strand around the elastic and secure it with a bobby pin for a seamless appearance
- Leave the overall look slightly undone for maximum visual appeal
Worth considering: This style actually works better on day-two or day-three hair that has some natural texture already—freshly washed, slippery hair can be harder to braid and harder to keep looking intentionally relaxed.
6. Twisted Rope Braid Ponytail
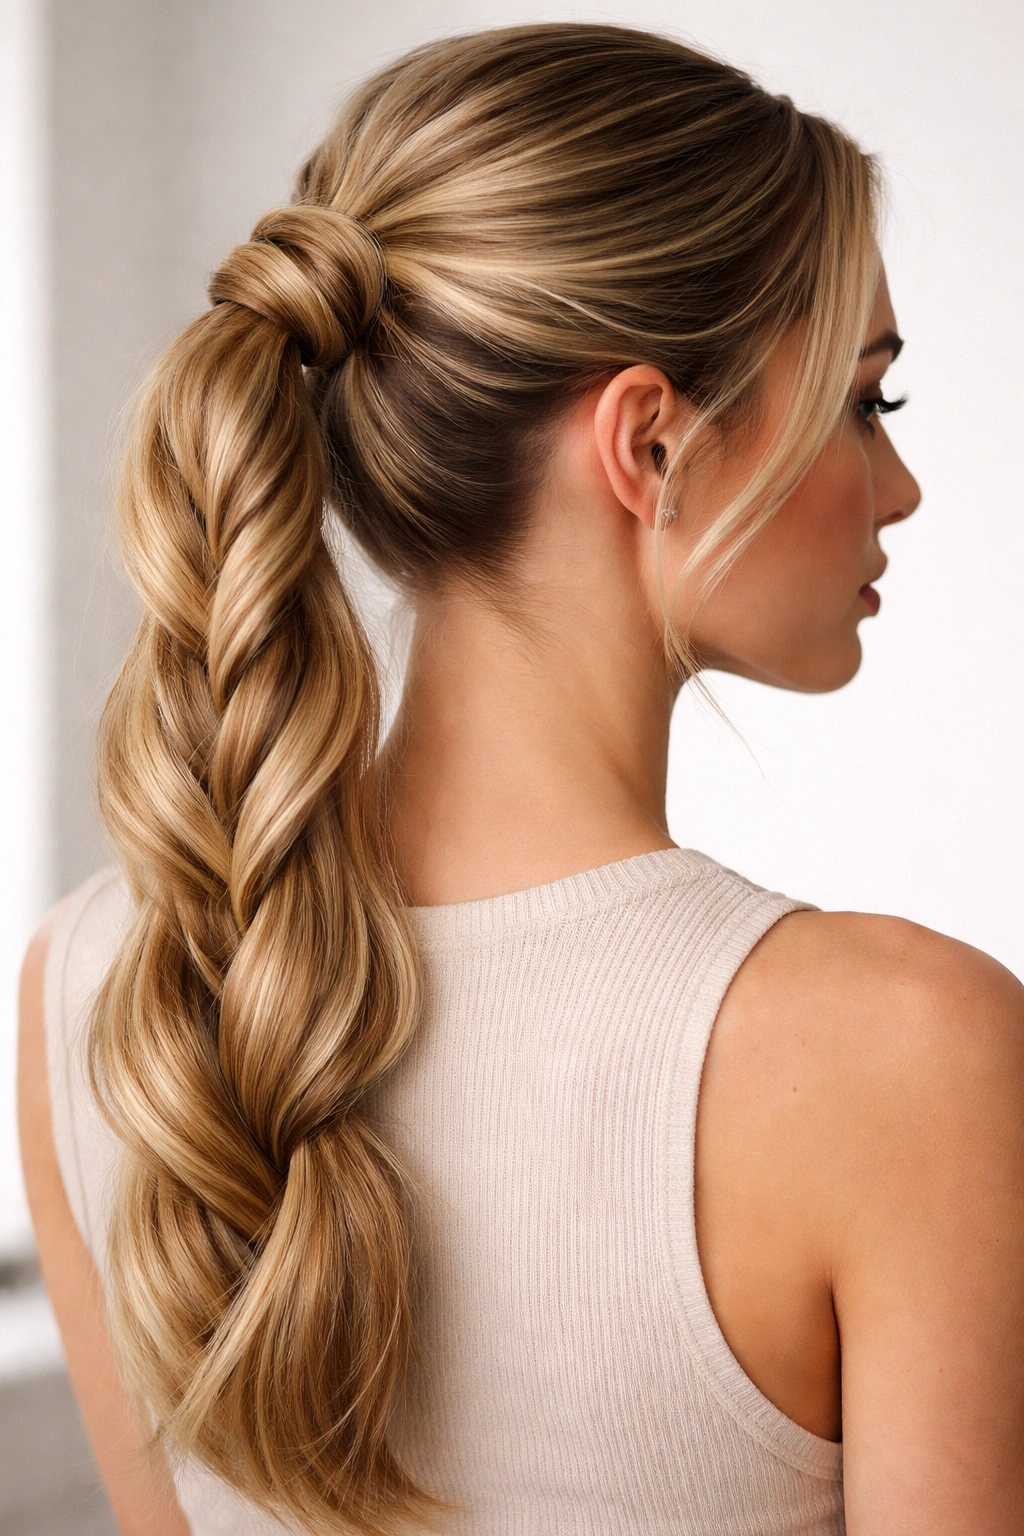
A twisted rope braid creates a completely different visual texture than traditional braids while being surprisingly simple to execute. Two sections of hair are twisted around each other rather than braided in the traditional sense, creating a spiral, rope-like appearance that feels more modern and less formal than standard braids. This style is particularly striking in long hair because the rope effect becomes really prominent and eye-catching.
The Rope-Twisting Technique
Section off a portion of hair at your crown—you can create one rope braid or multiple depending on your preference. Divide this section into two equal parts. Twist the right section clockwise (away from your face) and the left section clockwise simultaneously, then cross the twisted right section over the left. Continue twisting and crossing until you reach the desired length. The rope effect emerges because of that consistent twisting direction before crossing.
Incorporating into Your Ponytail
- Create one or two rope braids depending on your desired fullness and visual impact
- Work each rope braid back toward the nape of your neck
- Gather all hair—braids and loose sections—into your ponytail position
- Secure with an elastic and wrap a strand of hair around the base
- Gently stretch and loosen the rope braids to emphasize the twisted texture
- Consider adding a metallic hair clip or cuff over the elastic for extra visual interest
Pro tip: Rope braids show off hair color beautifully because the twisted texture catches light differently than flat braids—if you have highlights, balayage, or any dimension in your hair, this style really showcases it.
7. Boxer Braids into High Ponytail
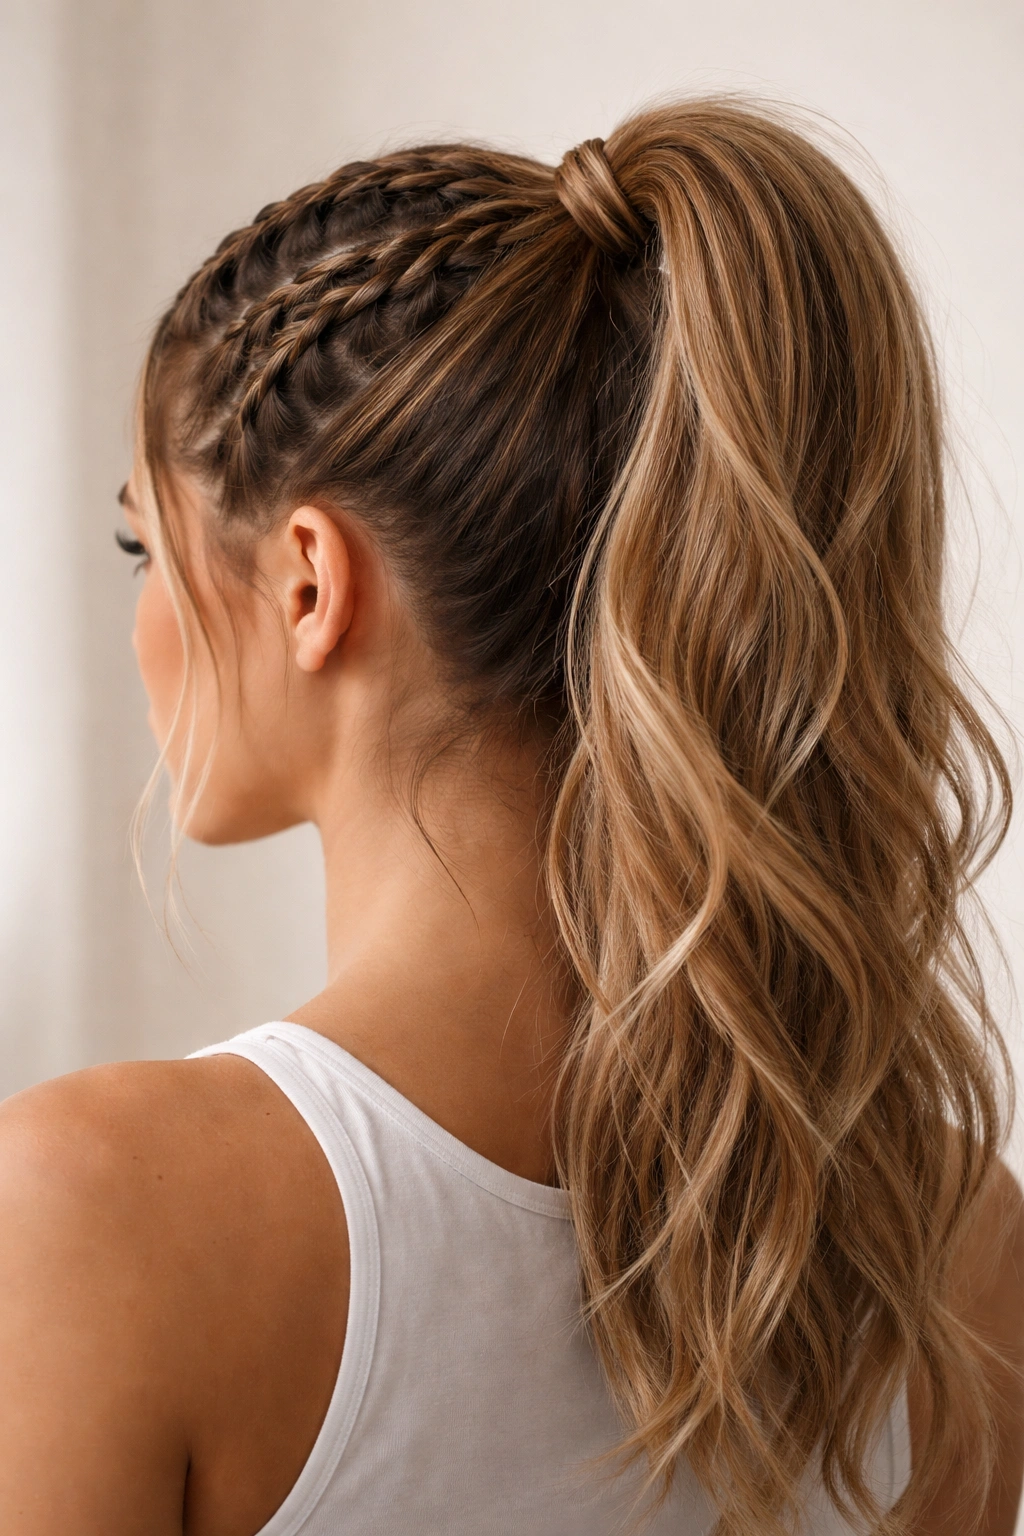
Two Dutch braids running parallel down the back of your head create a sporty, confident aesthetic that’s become increasingly popular for everyday wear, not just athletic activities. This style works beautifully when you pull all the hair into a high, voluminous ponytail at the crown—the braids add dimension and structure while the ponytail creates lift and energy.
Executing the Boxer Braid Base
Start your first Dutch braid at the left side of your crown and work it straight back down the center-left portion of your head. Begin your second braid on the right side and mirror the path down the center-right. Both braids should run parallel to each other, creating a symmetrical, athletic look. The spacing between the two braids matters—typically about 2 inches apart looks intentional and balanced.
Elevating into a High Ponytail
- Complete both braids so they end around the mid-back of your head
- Gather all hair into a high ponytail at the crown, incorporating both braids
- Tease the ponytail at the base to create volume and height
- Smooth the surface with a finishing brush
- Secure with an elastic and wrap a strand around the base
- Gently pull and loosen both braids for texture and dimension
Quick fact: This style actually keeps long hair off your face and neck better than a simple ponytail, making it genuinely functional for workouts, outdoor activities, or just a hot day, while still looking intentional and styled.
8. Waterfall Braid Ponytail
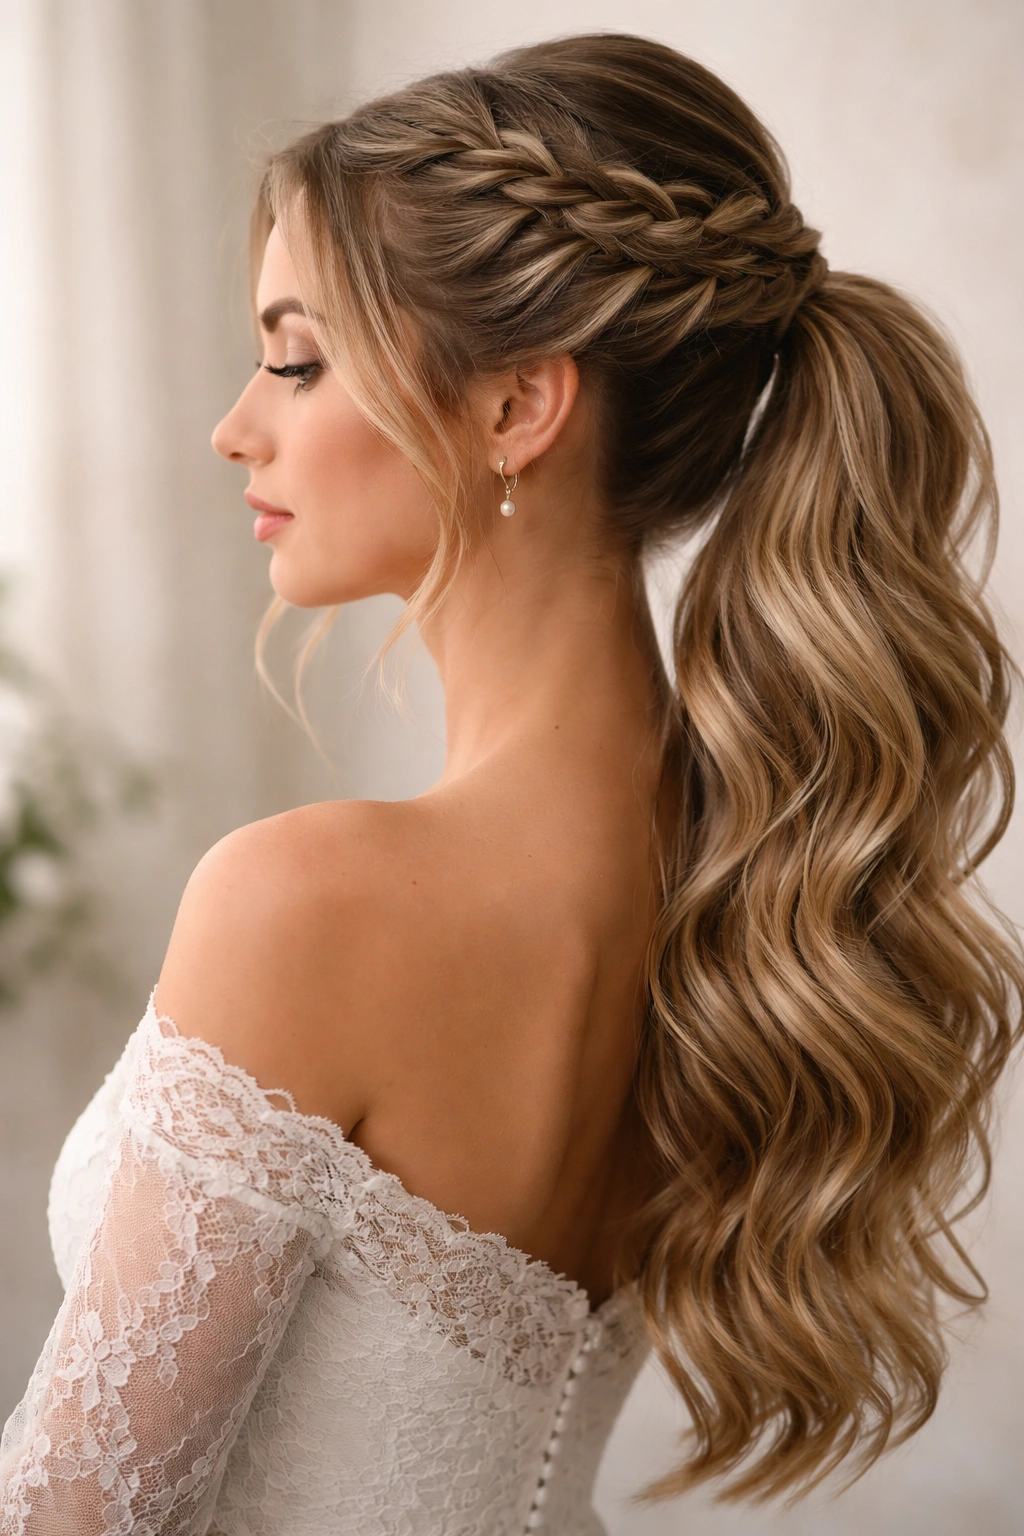
A waterfall braid creates the illusion of hair cascading down the side of your head while the “waterfall” sections stream down your back and integrate into your ponytail. It’s one of the more visually dramatic braiding styles and genuinely earns the description romantic without feeling dated or overdone. This is the style to choose when you want something that reads as special-occasion level even though it’s actually quite achievable.
Understanding the Waterfall Mechanics
Start a French braid at your temple, working diagonally back across the side of your head toward the opposite ear. As you braid, you’ll incorporate sections of hair as usual, but here’s the waterfall element: occasionally, instead of braiding a new section back into the braid, you let it fall and release it, then pick up a new section from below to braid. This creates those cascading strands while the braid itself continues.
Bringing It Into Your Ponytail
- Create your waterfall braid starting from one side and working toward the back of your head
- Let the waterfall strands fall naturally down the back
- Once you’ve completed the braid portion, gather all hair—including the waterfall sections—into a ponytail
- Position the ponytail where you’d like it (high, mid, or low all work beautifully)
- Secure and wrap the elastic with a strand of hair
- Gently tug the braid to add dimension and ensure the waterfall sections are visible
Worth knowing: This braid actually looks better in slightly textured or second-day hair—freshly washed, silky hair can make the waterfall sections slip and flatten, so skip the heavy conditioning treatments the night before you plan to wear this style.
9. Halo Braid into Messy Ponytail
A halo braid wraps around the crown of your head like a crown or tiara, creating maximum visual impact and a romantic, ethereal appearance. When you release it into a messy, textured ponytail, you get the best of both worlds—structure and polish from the braid, plus that effortless, undone vibe from the loose ponytail. This is genuinely one of the most universally flattering braided ponytail options.
Creating the Crown Effect
Start a Dutch or French braid at one ear and work it horizontally across the back of your head to the opposite ear, positioning it so it sits roughly in the middle-back portion of your head. Alternatively, start at the nape of your neck and work the braid upward and around, creating a true crown effect. The path you choose affects the overall aesthetic—a braid that sits lower on the back of the head reads more bohemian, while one that sits higher reads more polished.
Building the Textured Ponytail Finish
- Complete your halo braid so it returns to your starting point
- Secure the braid end with a bobby pin or small elastic hidden underneath
- Gather all remaining hair into a ponytail at your preferred height
- Don’t worry about making the ponytail perfectly smooth—this style looks better slightly messy
- Tease gently at the base for volume without going for a full ratted appearance
- Pull and loosen the halo braid sections to create dimension and texture
Insider note: If your hair is naturally straight and tends to fall flat, apply a light texturizing spray before creating this style—it helps both the braid and the ponytail hold their shape and texture throughout the day.
10. Side Dutch Braid into Side Ponytail
Everything about this style is asymmetrical and slightly off-center, which creates visual interest and a contemporary, fashion-forward appearance. A Dutch braid that starts at one temple and works back toward the opposite ear transitions seamlessly into a side ponytail, creating an elongated line that’s incredibly flattering for most face shapes and hair textures.
Mapping Out the Asymmetrical Path
Decide which side you want your ponytail on—let’s say the right side. Start your Dutch braid on the left temple and work it diagonally back and across toward the right side of your head, aiming for a line that goes from lower-left to upper-right. This diagonal path creates movement and visual dynamism that a straight-back braid doesn’t quite capture.
Securing the Side Ponytail
- Work your braid across and toward your chosen side ponytail location
- Gather all hair into a side ponytail on your preferred side—high, mid, or low all work
- Secure with an elastic and wrap a strand of hair around the base for polish
- Gently tug the braid to add volume and texture
- Consider leaving one or two face-framing strands loose for softness
- The side ponytail should feel balanced with the braid, not competing for visual attention
Pro tip: If you have a stronger or wider side of your face, position your side ponytail on your stronger side to create visual balance—this is a subtle trick that actually makes a noticeable difference in how flattering the overall style appears.
11. Multi-Strand Braid Ponytail
Going beyond the traditional three-strand or two-strand braids opens up possibilities for four-strand, five-strand, or even more intricate braiding patterns. A multi-strand braid creates an incredibly detailed, almost jewelry-like texture that immediately reads as skilled and intentional. The complexity of the braid itself means you can keep the ponytail portion simpler and still have a visually interesting, balanced look.
Understanding Multi-Strand Braid Basics
A four-strand braid divides your hair into four sections instead of three. You’ll work by taking the outer right strand and crossing it over two strands toward the left, then taking the outer left strand and crossing it over two strands toward the right. This over-two pattern creates a beautiful woven appearance that’s more complex than traditional three-strand braids. Five-strand braids follow a similar principle but require more coordination and definitely benefit from practice.
Pairing with Your Ponytail
- Create your multi-strand braid starting at the crown and working down the center-back
- The braid itself will be visually prominent, so keep the overall length moderate to avoid overwhelming long hair
- Gather all hair into a ponytail at your preferred height—you can go quite simple here since the braid is already doing visual work
- Secure and wrap the elastic
- Gently loosen the multi-strand braid to emphasize the intricate texture
- This style works best when you want the braid itself to be the star, not the ponytail
Worth considering: Multi-strand braids do take more time and practice to master, so give yourself grace as you’re learning—YouTube tutorials specifically for the braid type you’re attempting are genuinely helpful since there’s more variation in hand placement with complex braids.
12. Reverse Braid Ponytail
A reverse braid—also called an inside-out braid—flips the traditional braiding direction so you’re crossing strands over the middle rather than under. This creates an appearance that’s subtly different from a standard braid: it sits more prominently on the head with a raised, almost 3D quality. When pulled into a ponytail, the reverse braid creates a distinctive look that feels modern and slightly unexpected.
The Reverse Braid Technique
Begin with three sections of hair at your crown. Cross the right section over the middle, then cross the left section over the middle—so far, this is identical to a regular three-strand braid. Here’s where it reverses: as you continue down, instead of taking new hair from the sides and adding it to your existing sections, you’re still adding hair but you’re working in the traditional three-strand-over pattern. The result is a braid that appears to have more dimension and raises up slightly from the scalp.
Creating the Complete Style
- Work your reverse braid down the center-back of your head, adding sections as you descend
- Continue until you reach the nape of your neck
- Gather all hair into your ponytail position—the reverse braid becomes the foundation
- Secure with an elastic and wrap a strand of hair around the base
- Tug gently at the braid sections to add width and dimension
- The reverse braid will naturally appear slightly raised and textured compared to a standard braid
Final note: Reverse braids photograph beautifully and actually look better at a glance than in person—the raised texture and dimension become really apparent in photos, which makes this an excellent choice if you’re styling for an event where photos will be taken.
Final Thoughts
Braided ponytails offer an incredible range of styling possibilities that transform long hair from simple to stunning while actually serving practical purposes like keeping hair secure and off your face. The techniques range from beginner-friendly (classic three-strand braids) to more advanced (multi-strand and waterfall variations), meaning you can start wherever feels comfortable and build your skills over time.
The real magic of these styles lies in how customizable they are. You can create any of these braided ponytails in a high, mid, or low position depending on your outfit, occasion, and personal preference. You can pull the braids tight for a polished, controlled look or loosen them generously for that modern, undone aesthetic. You can wear them alone or combine multiple braiding techniques in one style for something completely unique to you.
Start with whichever style speaks to you most—there’s no rule saying you need to master them in order. Practice on a lazy Sunday when you have time to experiment and don’t have anywhere to be. Watch your hair in the mirror to understand how your specific texture responds to braiding. And remember that a braid that feels slightly imperfect to you often looks intentionally beautiful to everyone else. Long hair and braiding are a powerful combination, and these twelve styles are just the beginning of what’s possible.