If you’ve ever tried to create a sleek ponytail with curly hair, you know the struggle is real. That frizz that creeps in, the flyaways that escape no matter how tight you pull, the curls that seem determined to spring free—it feels like your hair is actively working against the polished look you’re trying to achieve. But here’s what most curly-haired people don’t realize: sleek ponytails on curly hair aren’t about fighting your texture; they’re about using specific techniques, the right products, and strategic approaches that actually work with your curl pattern instead of against it.
The secret isn’t to blow out your curls straight and then pull them back. That approach damages your hair and strips away the beautiful texture you’ve worked so hard to develop. Instead, truly sleek curly ponytails come from understanding how to clamp down frizz while keeping curls intact, how to use natural oils and specific stylers to create shine and definition simultaneously, and which techniques create that polished, intentional look that reads as effortlessly elegant. This isn’t about abandoning your natural texture—it’s about styling it strategically so it looks intentional, controlled, and genuinely sleek.
The ponytail styles in this guide all work beautifully on textured hair because they’ve been designed around curl behavior, not against it. Each one addresses the specific challenges curly hair faces—moisture loss, frizz formation, curl separation, and maintaining definition throughout the day. Whether you’re dealing with loose waves or tight coils, these twelve approaches give you real options for that polished-but-not-damaged look that actually lasts.
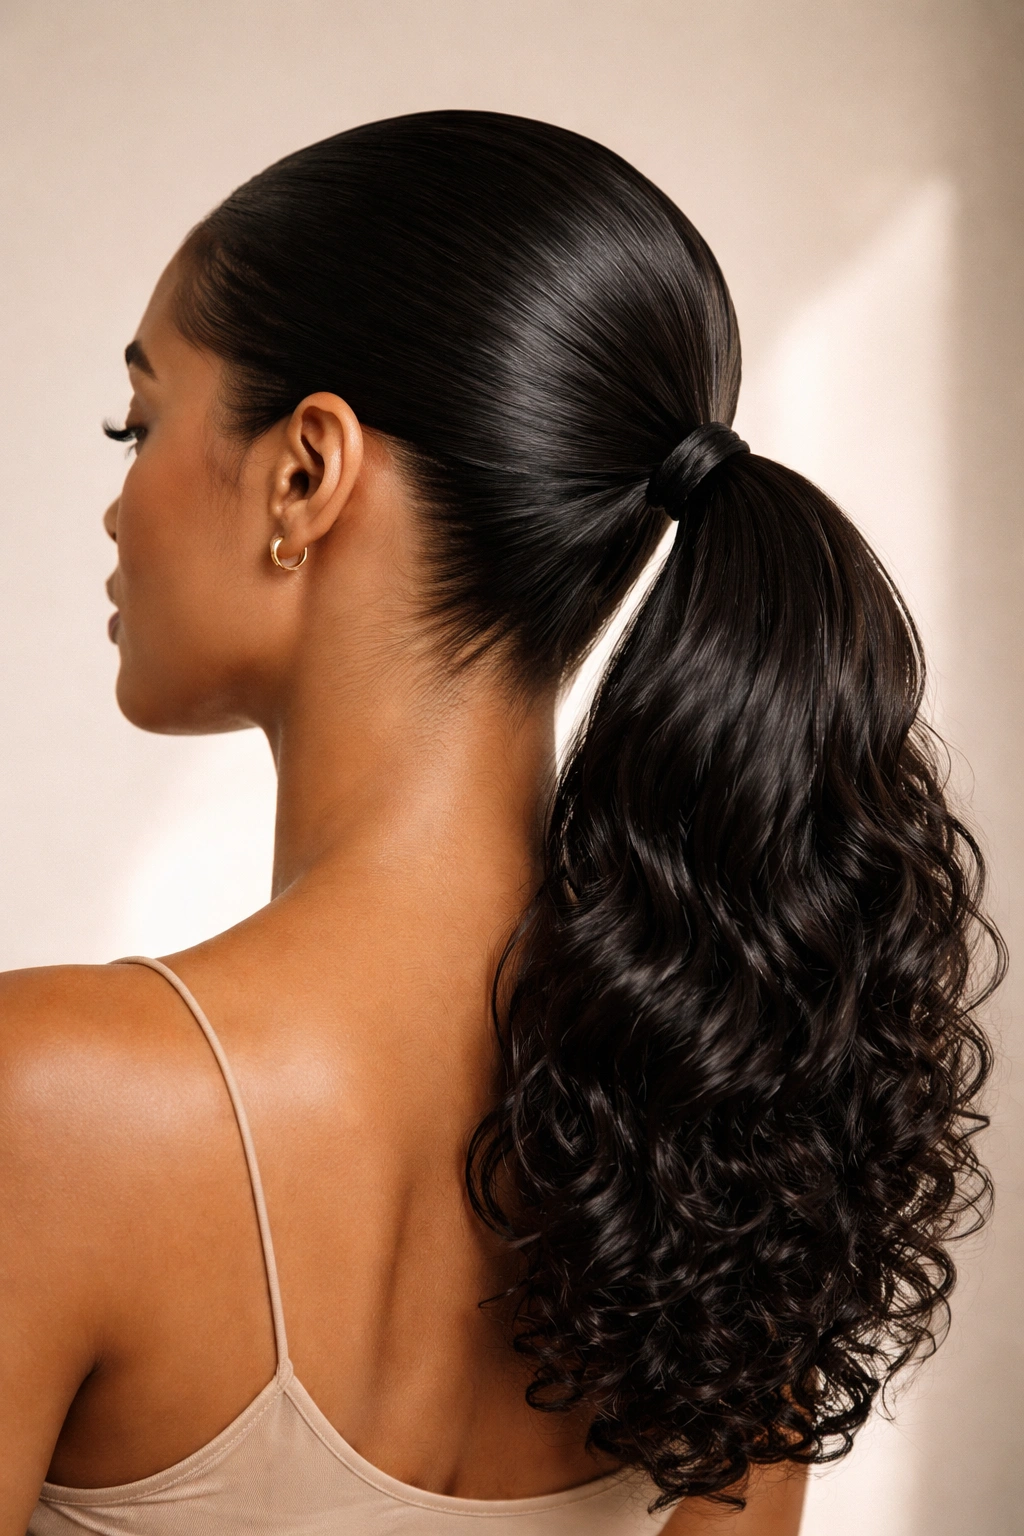
1. The Classic Sleek Low Pony
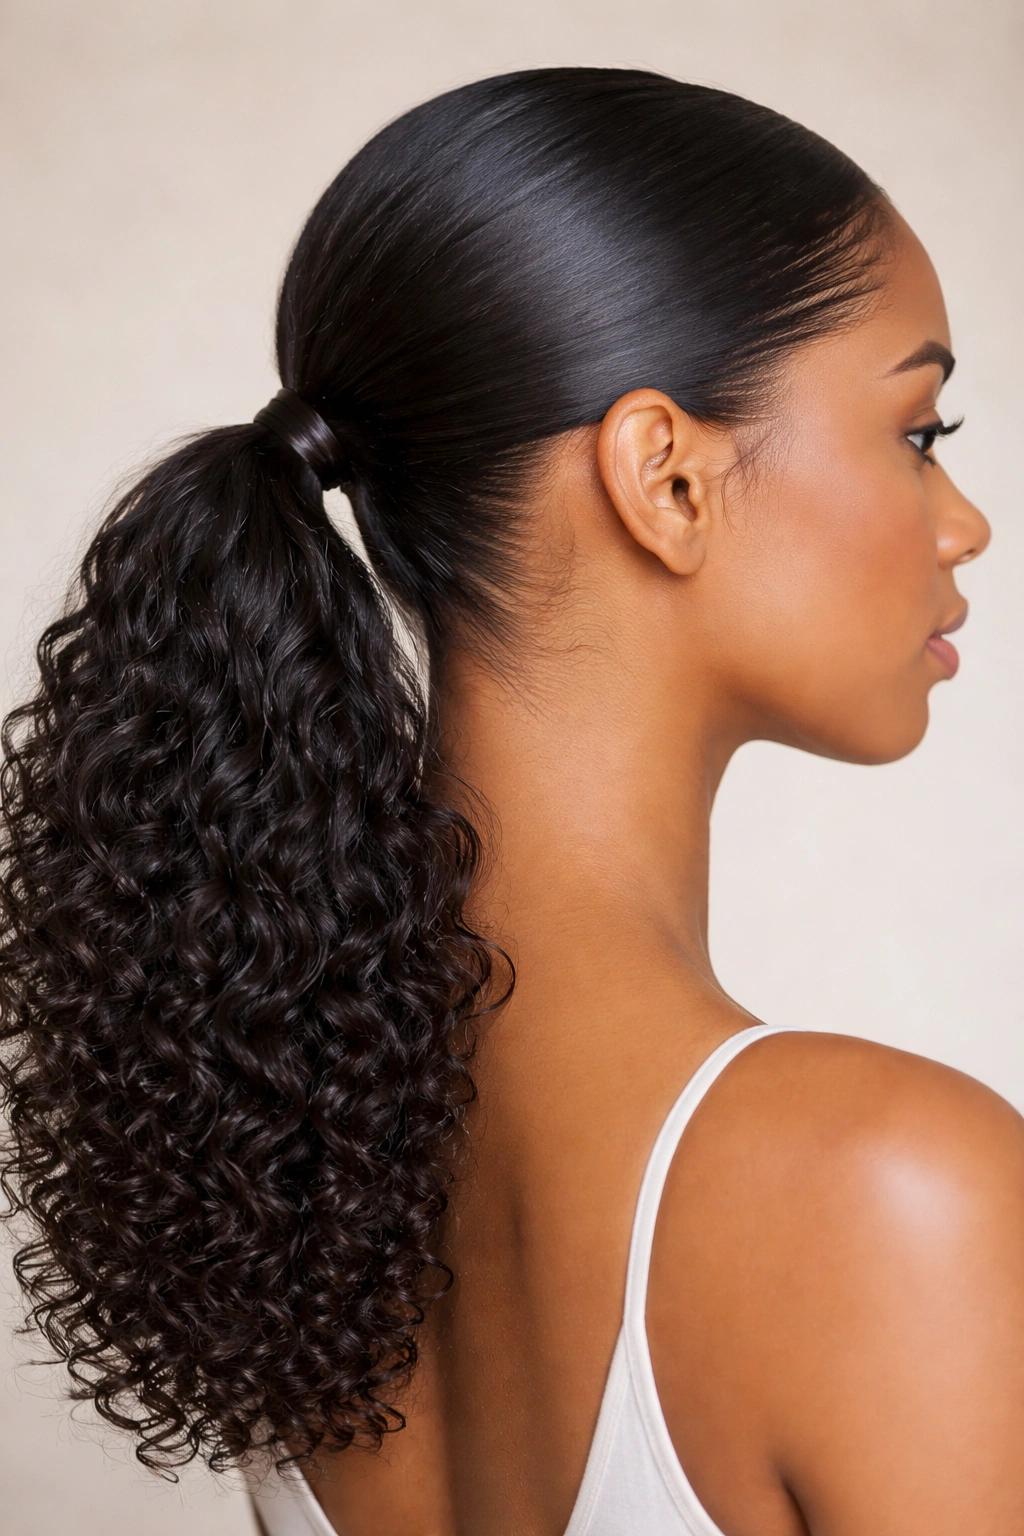
The low ponytail sits at the nape of your neck and works on virtually every curl pattern because it requires minimal tension on your roots and keeps the bulk of your hair (which is where most frizz occurs) consolidated in one place. The key to making this sleek rather than frizzy is starting with well-hydrated curls that have been thoroughly defined during your styling routine, then using a combination of edge control and lightweight smoothing cream to tame the perimeter.
Why It Works for Curly Hair
A low ponytail puts the least amount of stress on your curl structure compared to high or tight styles. Because you’re not pulling hair taut across your entire scalp, your curls retain their natural shape and moisture. The lower placement also means fewer strands are exposed to air friction during the day, which reduces frizz development. This style works whether you’re wearing your hair wet-set, gel-defined, or even partially air-dried, making it incredibly versatile for different curl textures.
How to Style It Perfectly
- Hydrate your curls thoroughly with a leave-in conditioner before styling—dry curls frizz no matter what products you use
- Apply a smoothing cream or curl-defining gel to the perimeter and crown area while hair is still damp
- Let curls set fully (either through air-drying or diffusing) before pulling into the ponytail
- Use a boar-bristle brush or soft paddle brush to gather hair at the nape, smoothing as you go
- Secure with a silk or satin elastic that won’t snag or disrupt the curl pattern
- Apply edge control to any baby hairs or flyaways around the hairline and secure with bobby pins if needed
Pro tip: Pull your ponytail slightly to the side rather than dead-center at the back of your neck—this creates a more intentional, styled appearance and gives you room to smooth the sides without creating tension spots.
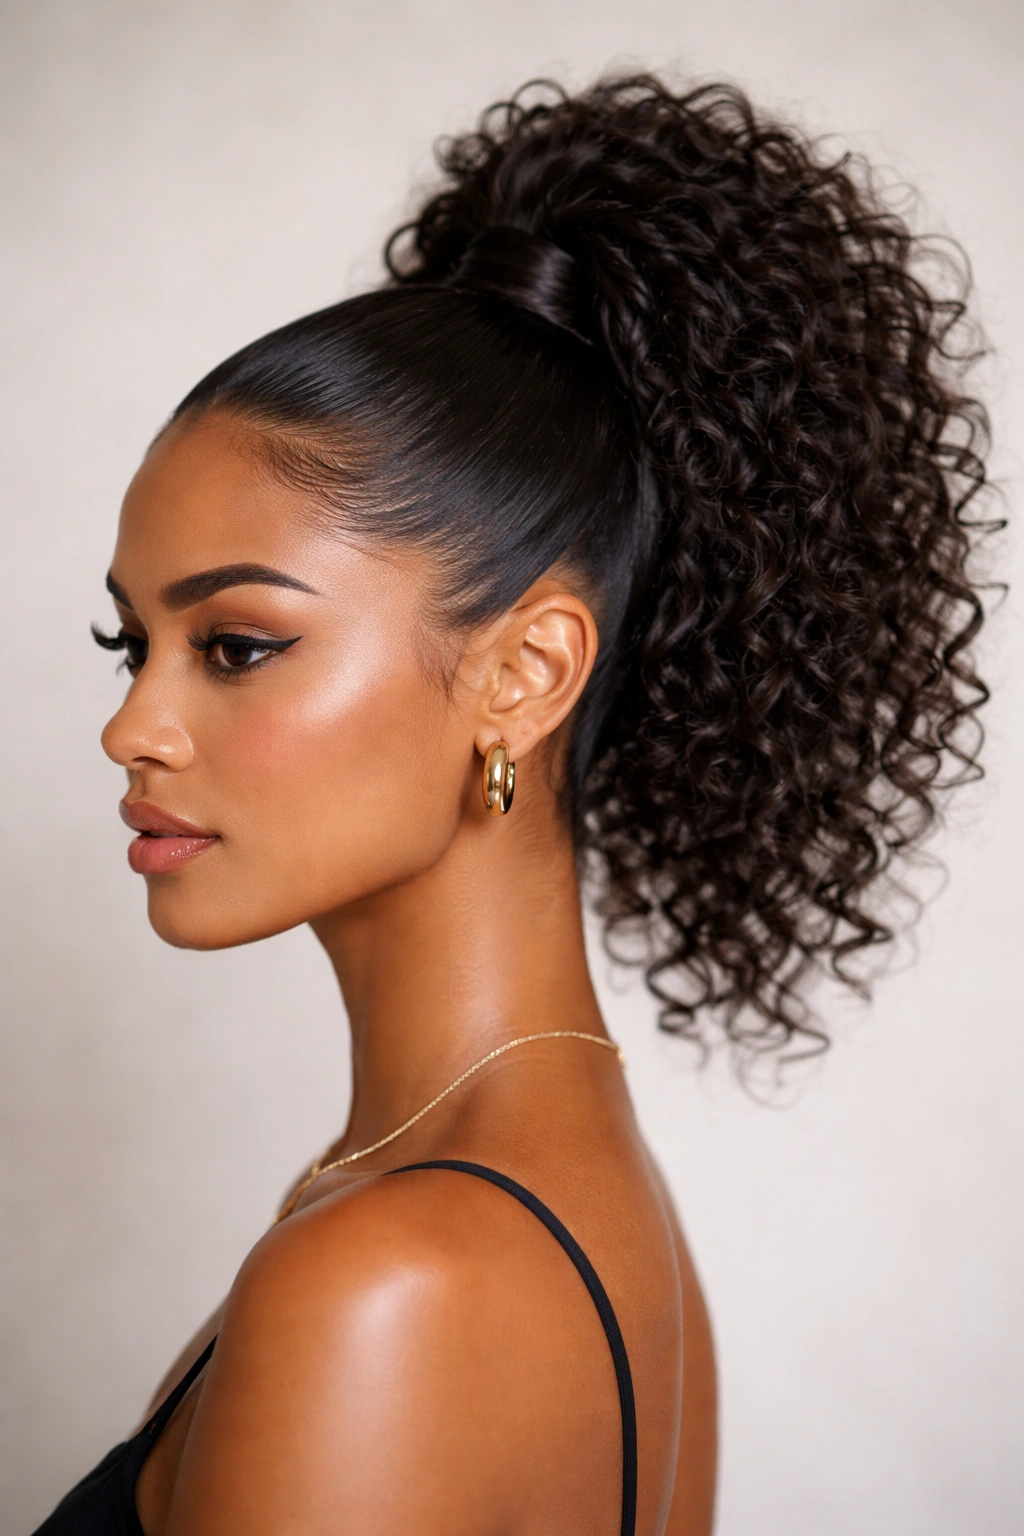
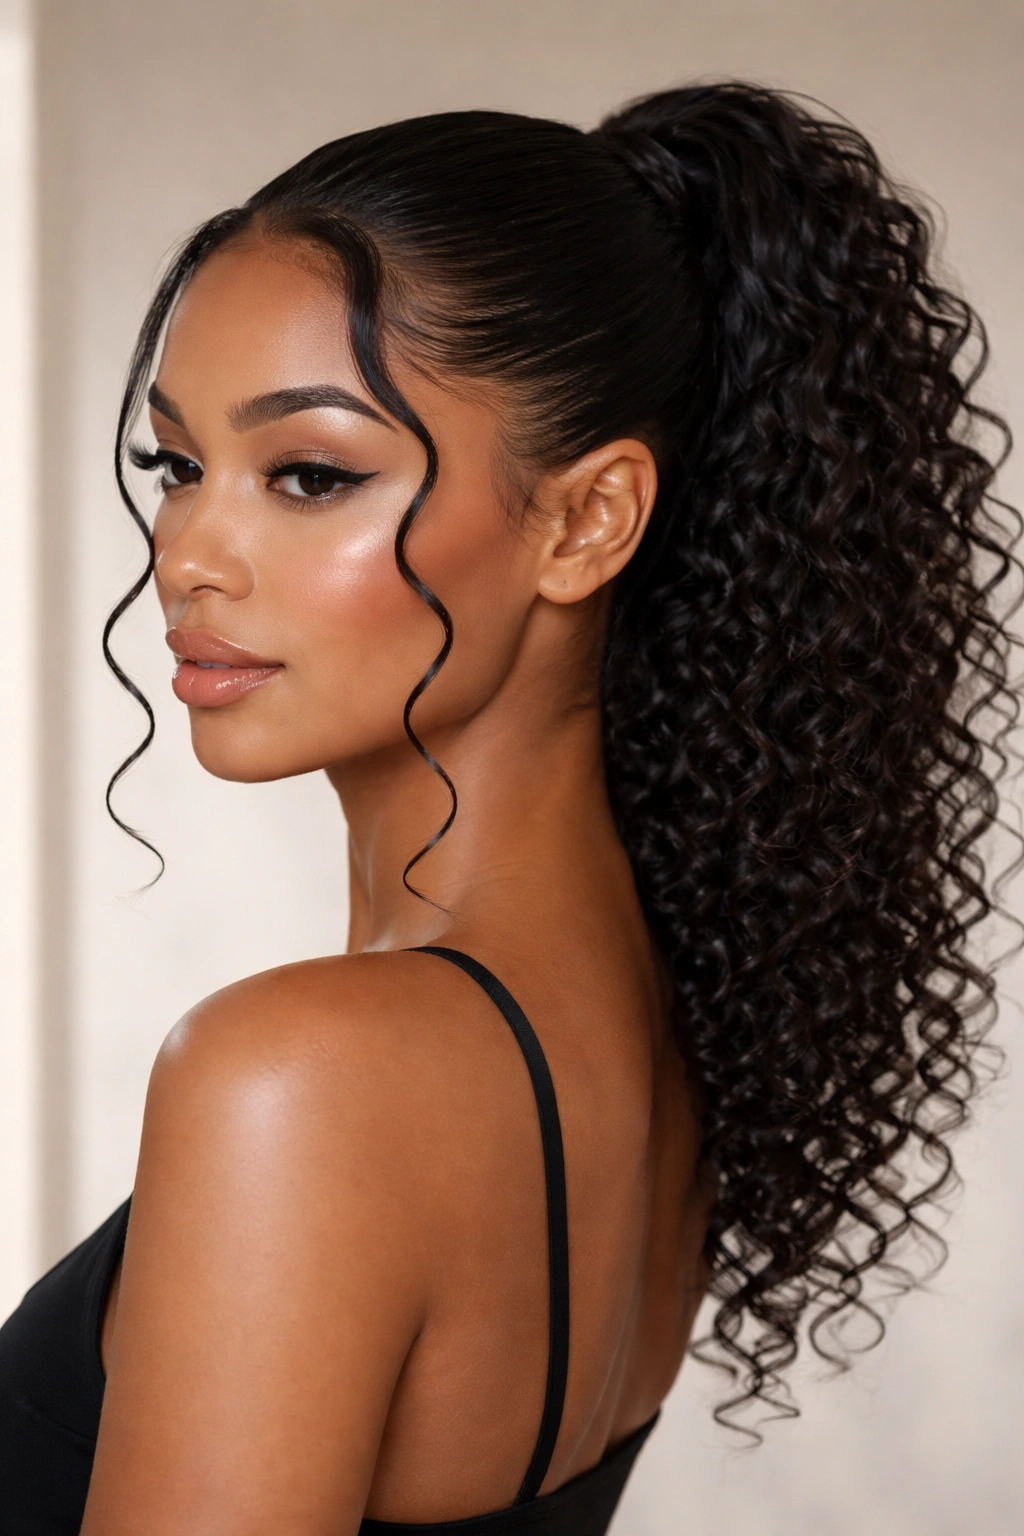
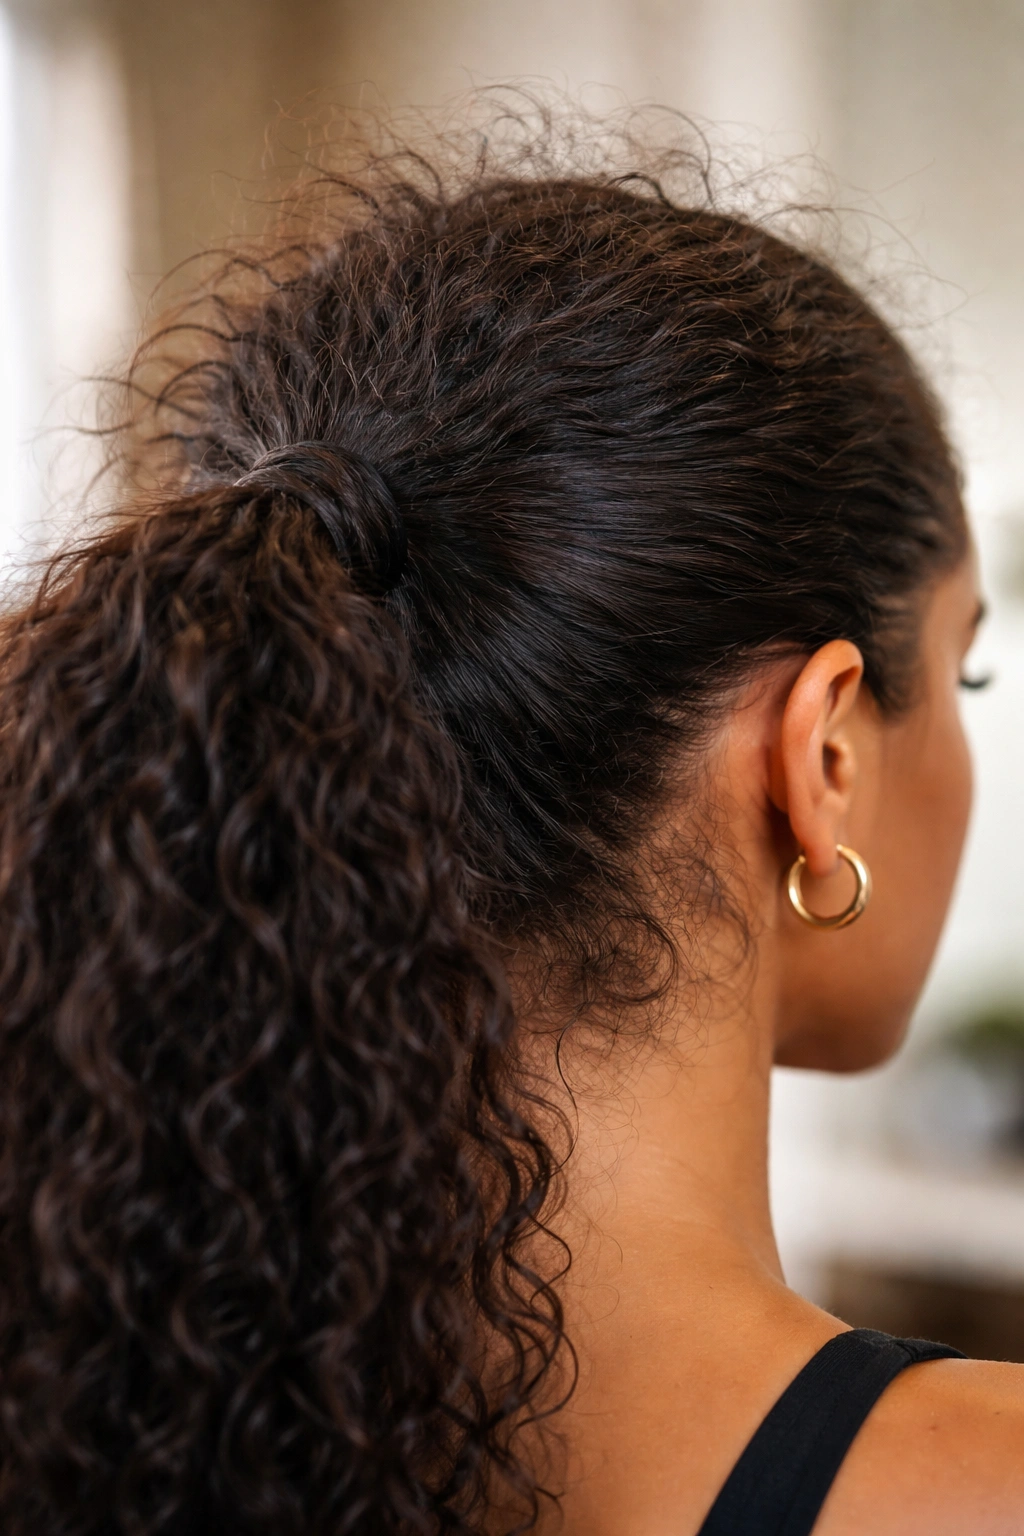
2. The Slicked-Back High Ponytail
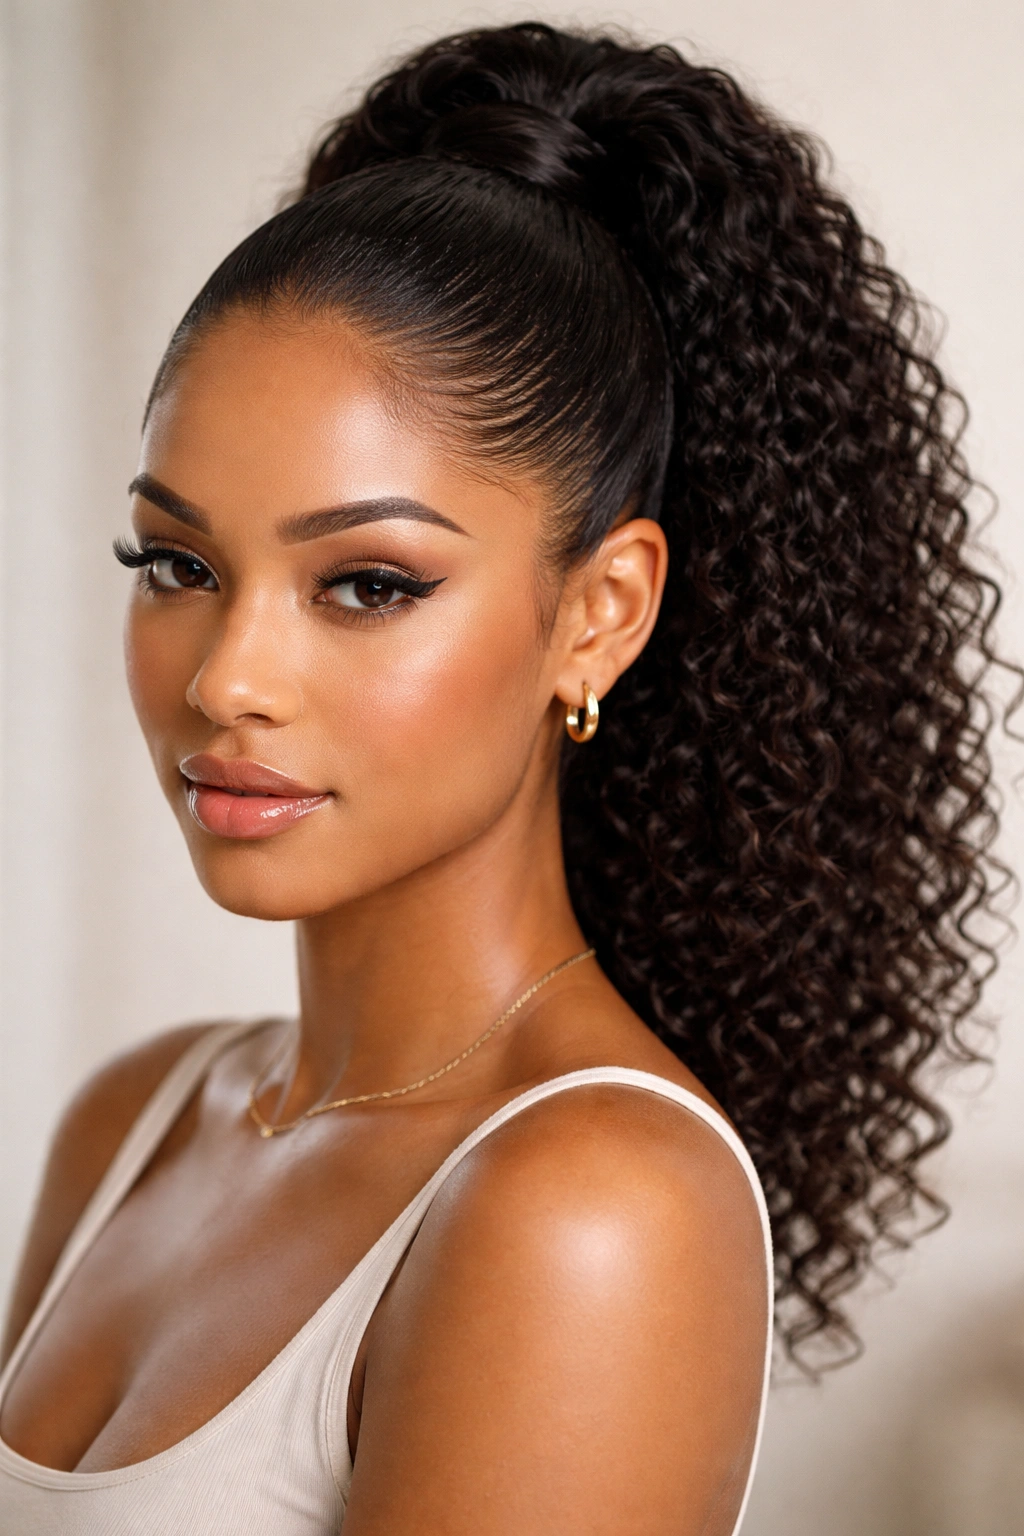
This is the statement version of a sleek ponytail—all the hair pulled tightly back from the face and gathered high on the crown. It sounds like it would be a disaster on curly hair, but when done correctly with the right approach, it’s actually stunning. The sleekness comes from using maximum hold gel applied to damp hair before it sets, not from trying to smooth already-set curls (which causes breakage and damage).
Why It Works for Curly Hair
When you apply gel or smoothing gel to soaking-wet or very damp curls and allow them to set with that product in place, the gel hardens around each curl and creates a naturally sleek appearance without flattening texture. The key is never using hot tools or extreme brushing on curly hair trying to force it straight—the sleekness is created by the product cast and the way your natural curl pattern refines when fully moisturized and defined.
How to Style It Perfectly
- Start with thoroughly wet hair—this is non-negotiable for this technique
- Apply a strong-hold gel generously to the entire head, focusing on the crown and face-frame areas
- Brush hair back with a wide-tooth comb or wet brush while wet, gathering toward the crown
- Secure the ponytail high on your crown (a few inches from the very top, not at the absolute back)
- Allow the gel to air-dry completely—this sets the style and creates the sleek finish
- Once dry, you can smooth any stray curls with a tiny amount of finishing gel or edge control
- Use a fine-tooth comb gently to define any curls that fall within the ponytail itself
Worth knowing: If you’re going for maximum sleekness and you have very loose waves or less-defined curls, you can apply gel in a second layer once the first is partially dry—this creates extra hold and sleekness without damage.
3. The Twisted Wrap Ponytail
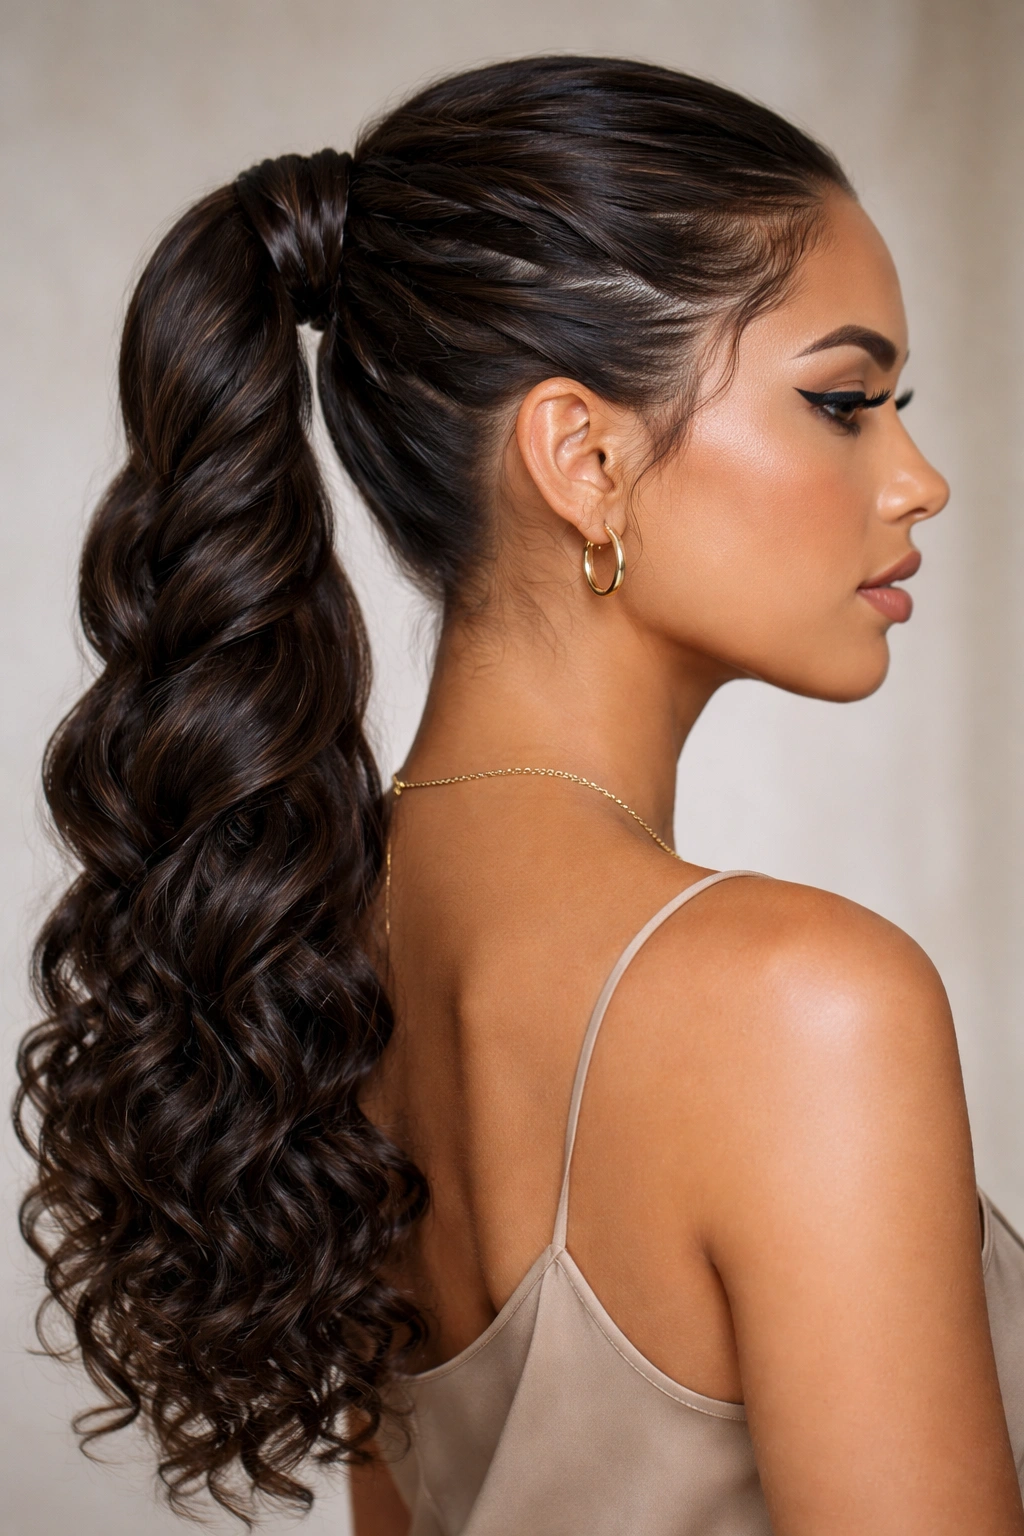
This technique involves twisting sections of hair as you gather them into a ponytail, creating a rope-like effect that looks intricate and intentional while actually being quite simple. The twisting action itself smooths down each section as you work, eliminating individual curl visibility without removing curl definition. It’s one of the most elegant versions of a sleek ponytail for curly hair because it celebrates the texture while clearly controlling it.
Why It Works for Curly Hair
Twisting your hair—whether you’re doing a single spiral or multiple twisted sections combined—naturally flattens the cuticle and creates a smoother appearance without heat or harsh brushing. Your curls remain intact underneath but appear sleek and controlled from the outside. This style also distributes tension evenly rather than concentrating it in one spot, which is gentler on your hair and scalp.
How to Style It Perfectly
- Start with damp, product-styled hair that’s been allowed to set into defined curls
- Take a section from one side of your head near the temple and twist it tightly, moving back toward where your ponytail will sit
- Repeat on the other side, twisting backward
- Add a middle section from the crown, twisting it back as well
- Gather all three twisted sections plus any remaining hair into your ponytail holder
- Tuck the ends of the twisted sections into the base of the ponytail to hide the seam
- Use a smoothing serum or edge control around the face-frame to catch any individual curls
Insider note: This technique works especially well if you have medium to dense curls—the twisting action has enough hair to work with to create that smooth, polished line without looking stringy.
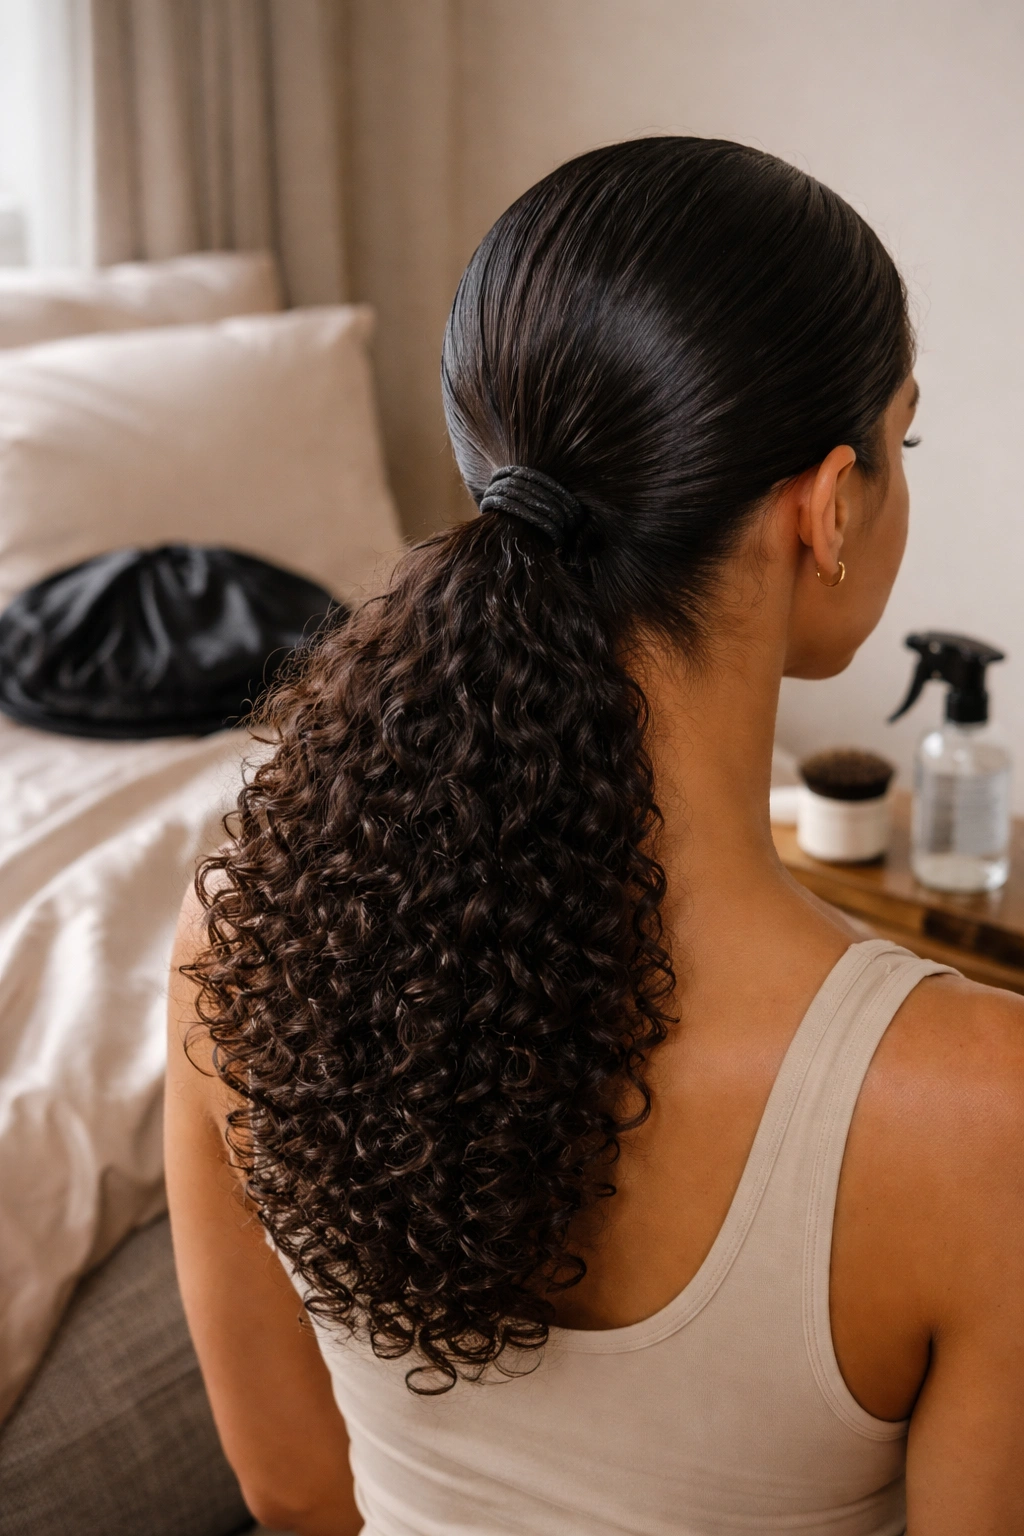
4. The Wet-Set Ponytail
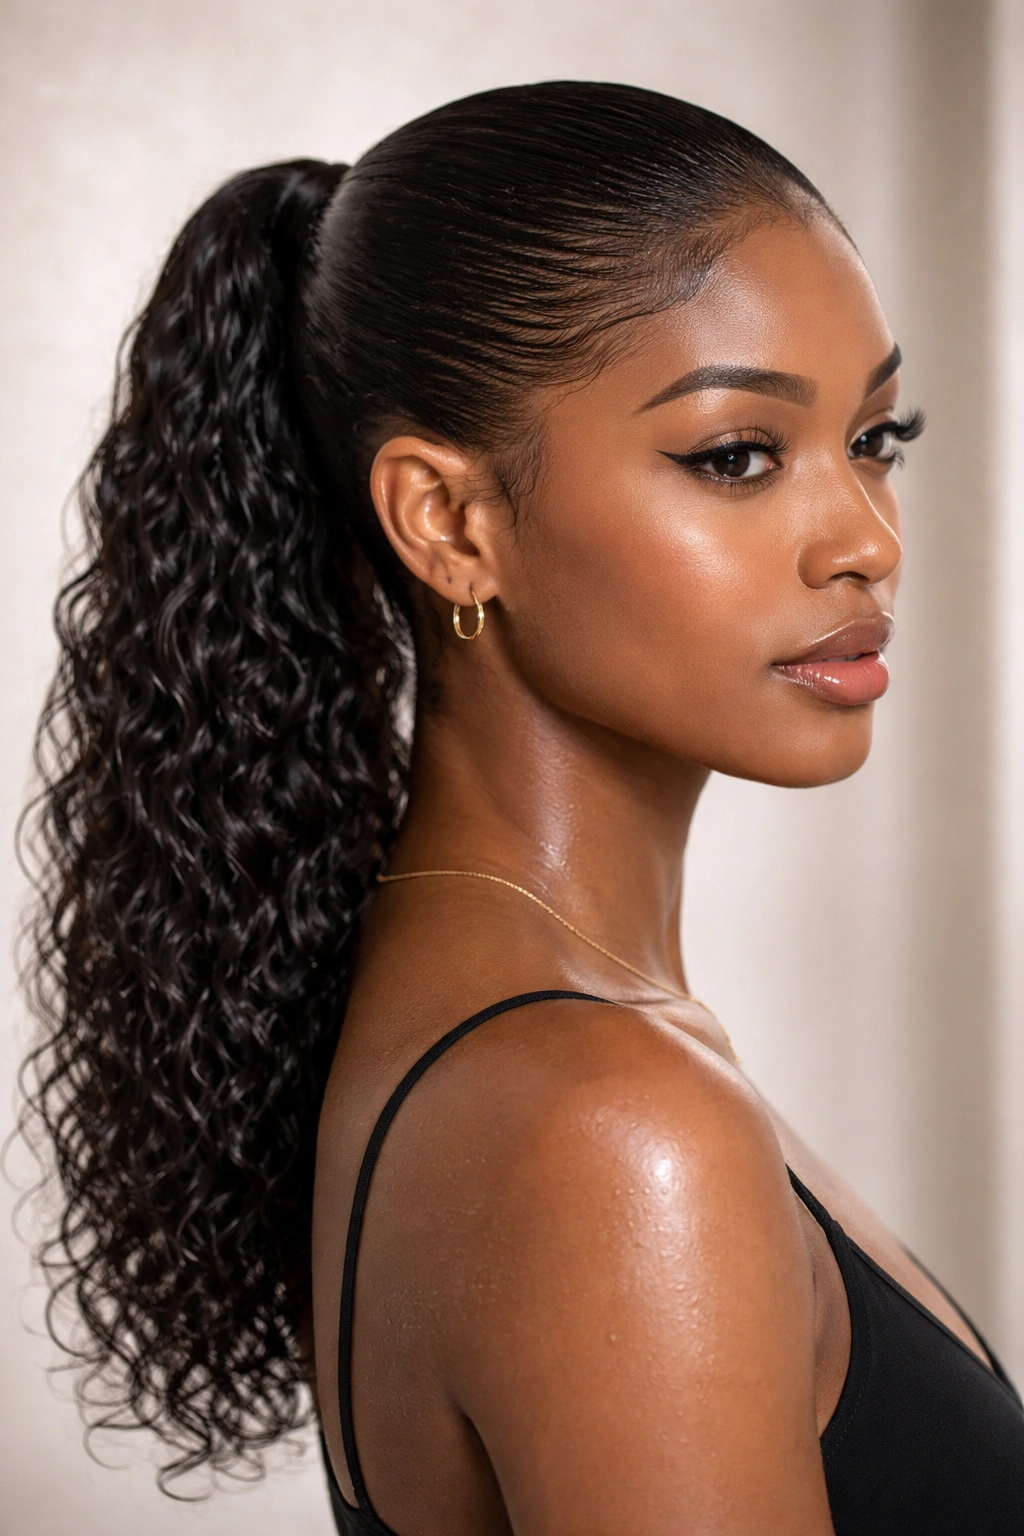
Wet-setting your ponytail is a technique where you apply styling product to very damp hair, pull it into the ponytail position, and allow it to dry there—either overnight, under a bonnet, or via diffuser. This creates an incredibly polished, defined finish because your curls are literally molded into shape as they dry. It requires patience, but the longevity and sleekness you get make it worth it, especially for occasion-worthy styling.
Why It Works for Curly Hair
Curls set their shape as they dry. If you set them in the ponytail position, they’ll dry into that shape—sleek, controlled, and beautifully defined. This works far better than trying to create sleekness on already-dry curls because you’re not fighting against the shape they’ve already formed. Wet-setting also requires minimal product for maximum hold, reducing that crunchy or weighed-down feeling that can happen with heavier products.
How to Style It Perfectly
- Wash your hair and condition thoroughly, then apply a leave-in conditioner
- While soaking wet, apply a light styling gel to the crown and smoothing cream to the perimeter
- Comb hair back smoothly and gather into your ponytail position, securing with a silk elastic
- Sleep on a silk pillowcase or wear a silk bonnet to prevent frizz and disruption
- In the morning (or after 6-8 hours), gently remove the elastic and shake out your ponytail
- Curls will have set into shape—smooth any individual flyaways with a tiny amount of serum
- Retie in your ponytail position and you’re done
Pro tip: If you need your ponytail sooner, use a diffuser on low heat to help speed the drying process, but true wet-setting requires air-drying for the most defined, frizz-free results.
5. The Braided Crown Pony
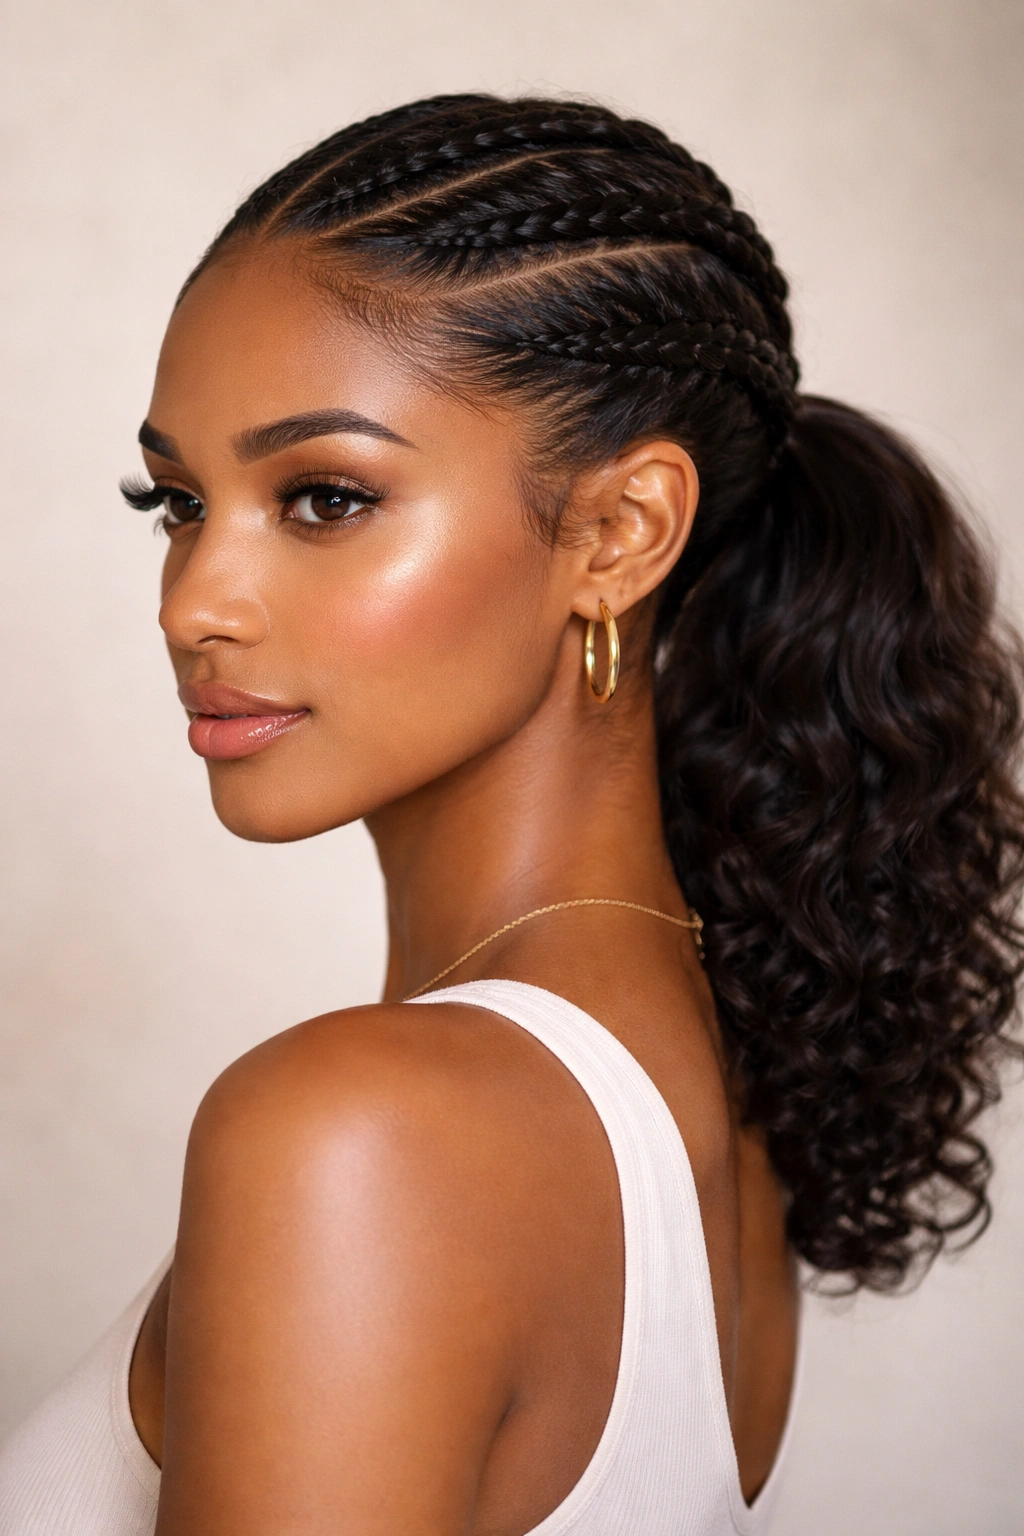
This style combines the smoothing power of braiding with the elegance of a ponytail. You braid sections of hair from the crown downward, gathering them into a central ponytail. The braids create texture and visual interest while the actual ponytail keeps everything controlled and sleek. It’s sophisticated enough for professional settings but playful enough for everyday wear.
Why It Works for Curly Hair
Braiding your hair—whether three-strand, Dutch, or any other style—compresses your curls and creates that smooth, controlled appearance that makes curly hair look intentional and styled. Unlike brushing, which can disrupt curls, braiding glides down the hair shaft and gently smooths it. The individual curls remain intact but appear as one cohesive braid, creating the sleek effect without damage.
How to Style It Perfectly
- Begin with air-dried or gel-set curls—the curls should be defined and separated before you start
- Apply a smoothing cream to the crown and upper back sections
- Braid one section from each temple toward the back, then braid one section down the middle of the crown
- Gather all braids plus remaining hair into a low to mid-height ponytail
- Secure with a silk elastic and gently pull the edges of each braid very slightly to add width and texture
- Smooth the crown and face-frame with edge control
- Consider using a decorative hair clip or cuff around the base of the ponytail for additional polish
Worth knowing: The beauty of braided ponytails is that slightly imperfect braids look intentional and textured, not messy—you don’t need to be a braiding expert to make this look effortlessly polished.
6. The Gel-Smoothed Bubble Ponytail
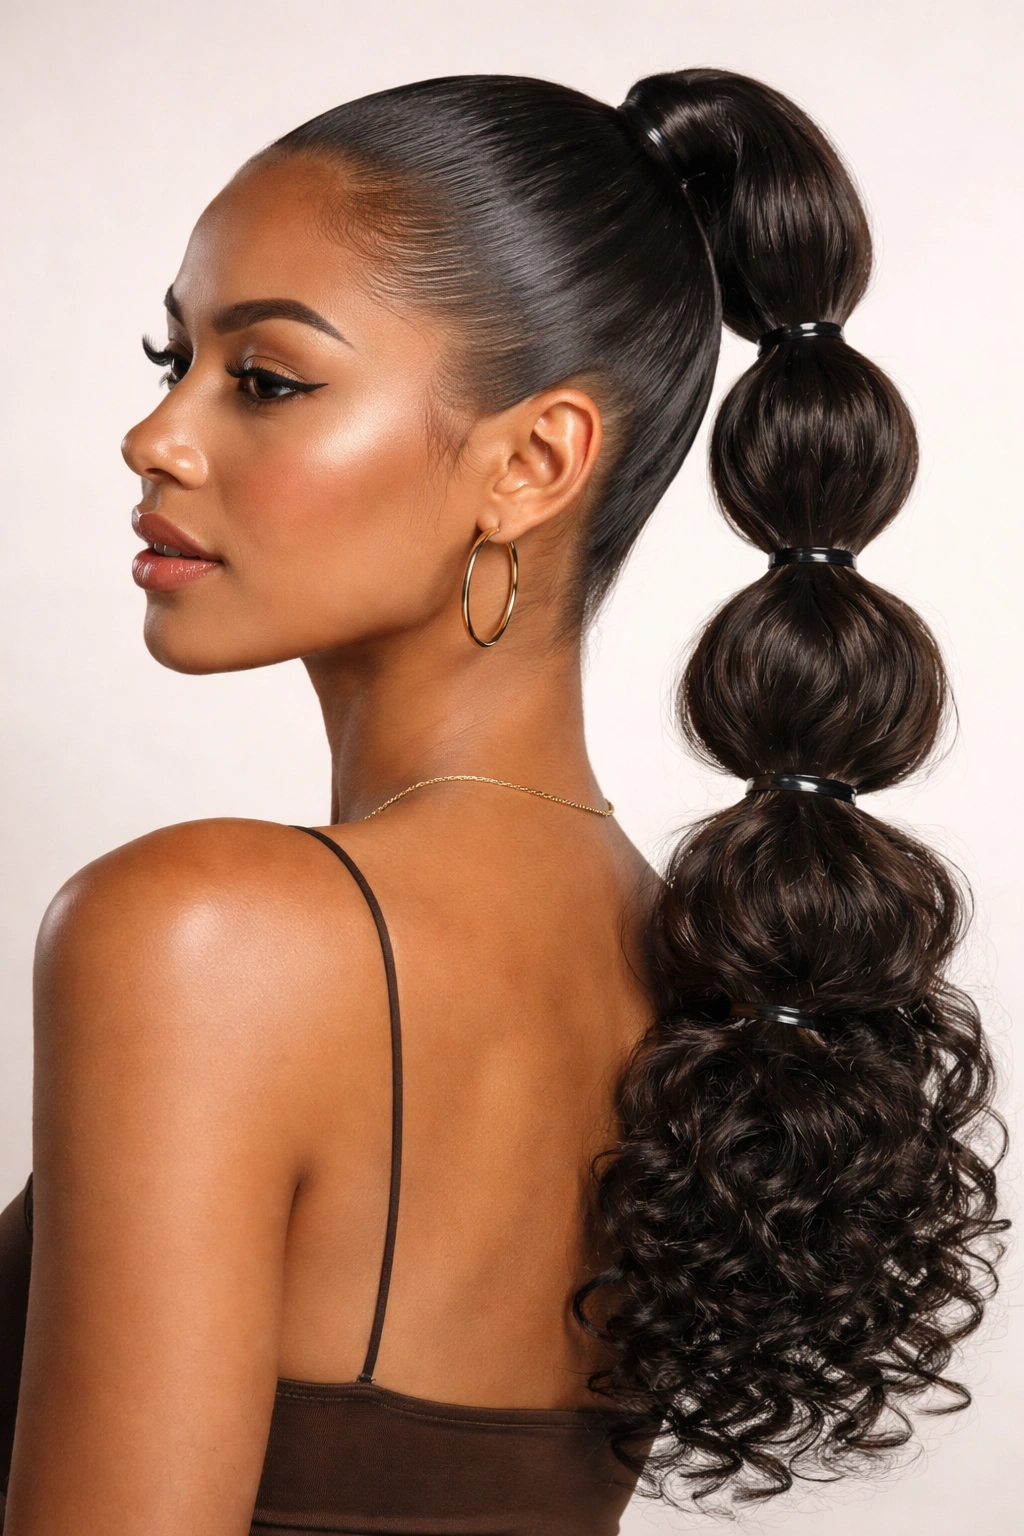
A bubble ponytail uses multiple elastic bands positioned at intervals down the length of the hair, creating visual “bubbles” that give dimension and movement. For curly hair, you achieve this look by applying strong-hold gel to damp hair, creating the bubbles while the gel is setting, and allowing it to dry completely. This creates sleekness in each section without the bouncy, frizzy appearance that curly hair can get when it’s not product-set.
Why It Works for Curly Hair
The gel-and-bubble technique works for curly hair because each section of the ponytail is in its own elastic band, which minimizes tension on any single area. The gel defines and sleeks each bubble individually, so even though you have multiple bands, the overall look is polished and controlled rather than chaotic. The bubbles also create visual separation of your curl pattern, making it look intentionally textured rather than frizzy.
How to Style It Perfectly
- Apply strong-hold gel to damp hair and allow curls to set into defined shape
- Gather all hair into a high or mid-height ponytail and secure with the first elastic band
- Position a second elastic band 2-3 inches below the first, creating the first “bubble” of hair
- Repeat down the length of your ponytail, spacing each band evenly
- Once all bands are in place, gently pull and fluff each bubble section outward to create volume
- Use a fine-tooth comb to define any curls within each bubble
- Apply a light finishing serum to add shine without disrupting the gel set
Pro tip: This style stays intact longer when you use gel because the set is so strong—it can last 2-3 days with minimal touch-ups, making it ideal for busy weeks.
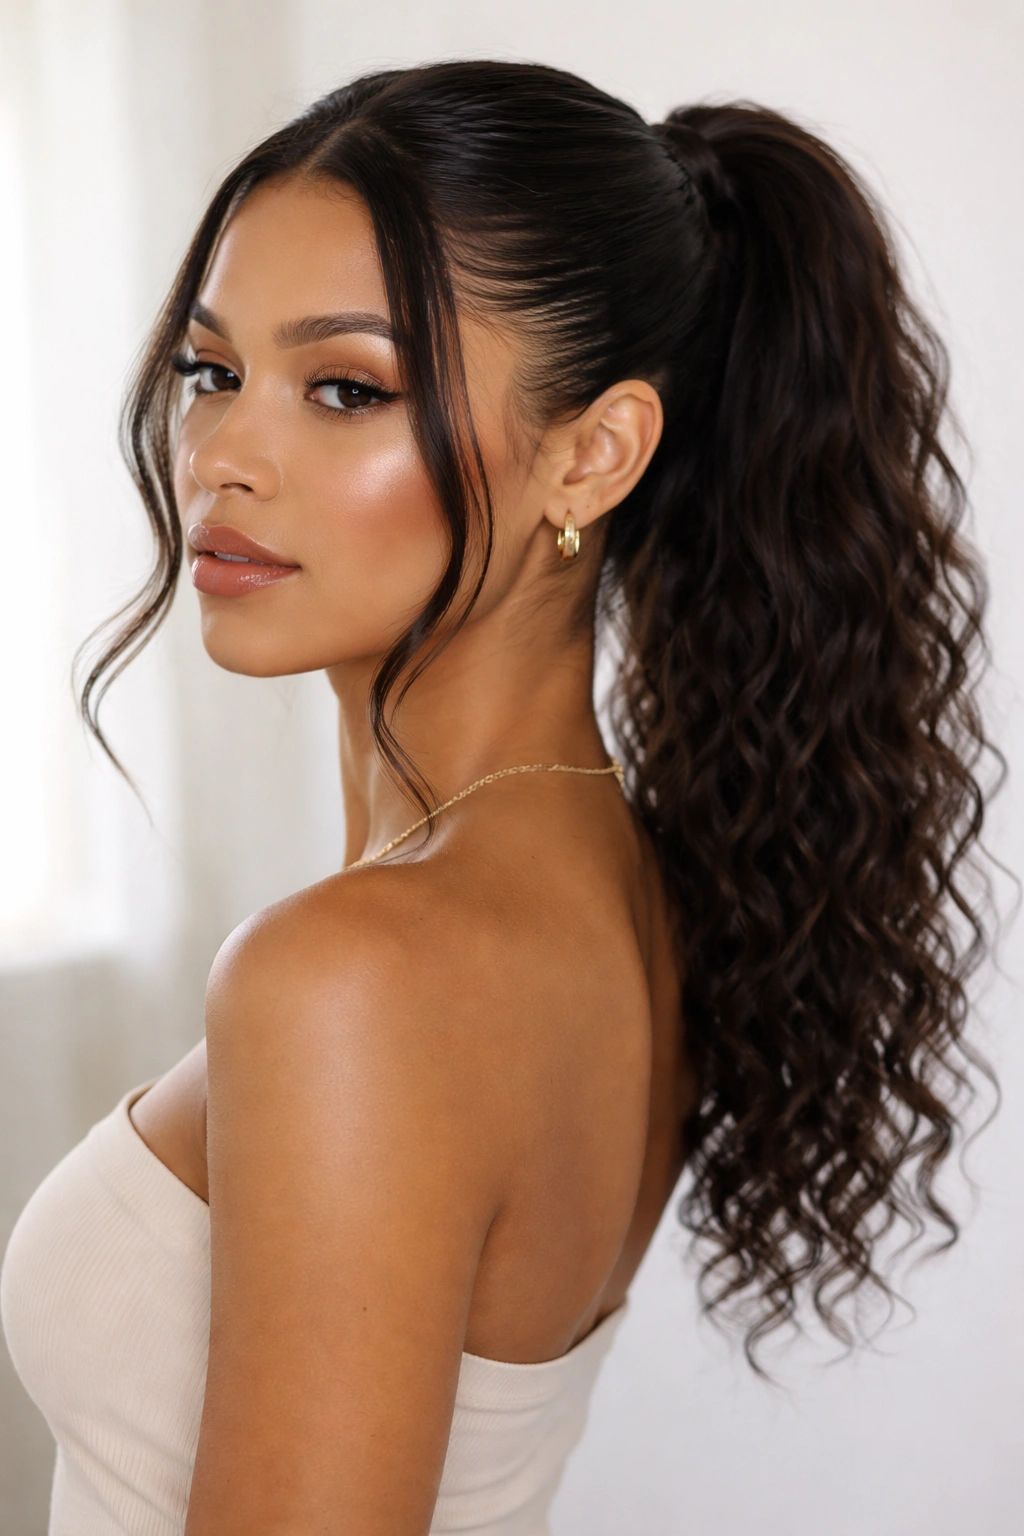
7. The Curved Side Ponytail

Instead of gathering your ponytail straight back or dead-center, pull it to the side and curve it slightly along the contour of your head. This style looks sleek because the curved line creates an intentional, sculpted appearance. It’s one of the most flattering versions of a sleek ponytail for curly hair because it asymmetrical positioning draws the eye in a way that looks sophisticated and deliberate rather than messy.
Why It Works for Curly Hair
Side ponytails naturally sit against the head rather than sticking straight out, which means less surface area is exposed to air and frizz development. The curve of the style also allows you to keep some texture and definition visible in the ponytail itself (rather than it looking completely slicked) while still maintaining a polished, controlled appearance. You get sleekness without losing your curl identity.
How to Style It Perfectly
- Apply a lightweight smoothing cream to damp curls before they dry, focusing on where you’ll be smoothing
- Once curls are set, use a paddle brush or boar-bristle brush to smooth one side of your head
- Gather the hair to the side—slightly lower than you would for a typical side ponytail, around ear level or lower
- The ponytail itself can have full curls; the sleekness comes from the smoothed crown and sides
- Secure with a silk elastic and smooth any flyaways around the hairline and crown
- Use a bobby pin to anchor the elastic to the hair at the back of your head if your ponytail tends to slip
Worth knowing: This style is particularly flattering if you have an angular face shape because the curved line mirrors facial features and creates visual balance.
8. The Sleek Topknot Hybrid
This style combines the sleek appearance of a tight base with the relaxed volume of a topknot. You create a very smooth, defined base at the crown (slicked back from the face) and then allow the ponytail to cascade and sit loosely on top of the base. The contrast between the sleek base and the textured ponytail creates intentional visual interest—it reads as polished and controlled, not messy.
Why It Works for Curly Hair
The key to this style working on curly hair is that the base is smoothed and set firmly (using gel and allowing it to dry completely), while the ponytail portion retains full curl definition. This combination—sleek base plus textured ponytail—is more forgiving than trying to keep your entire head sleek, and it looks more modern and intentional than a completely smooth high pony. Your curls get to be themselves while the style still reads as put-together.
How to Style It Perfectly
- Apply strong-hold gel to damp hair, focusing on the crown and upper back
- While the gel is setting (while hair is still damp), brush hair back very smoothly from your hairline
- Once the base gel is completely dry, gather all hair high on your crown
- The ponytail can be looser than the base—allow some curl texture to show
- Smooth the base with edge control and bobby pins as needed
- Create softness around the base of the ponytail by gently teasing the gathered hair or pulling a few curls free
- The contrast between sleek and textured should feel deliberate, not accidental
Pro tip: This style works beautifully when you diffuse the gel-set curls rather than air-drying them, as the diffuser adds definition and shape to the ponytail portion while the gel is still setting.
9. The Flyaway-Control Scarf Wrap
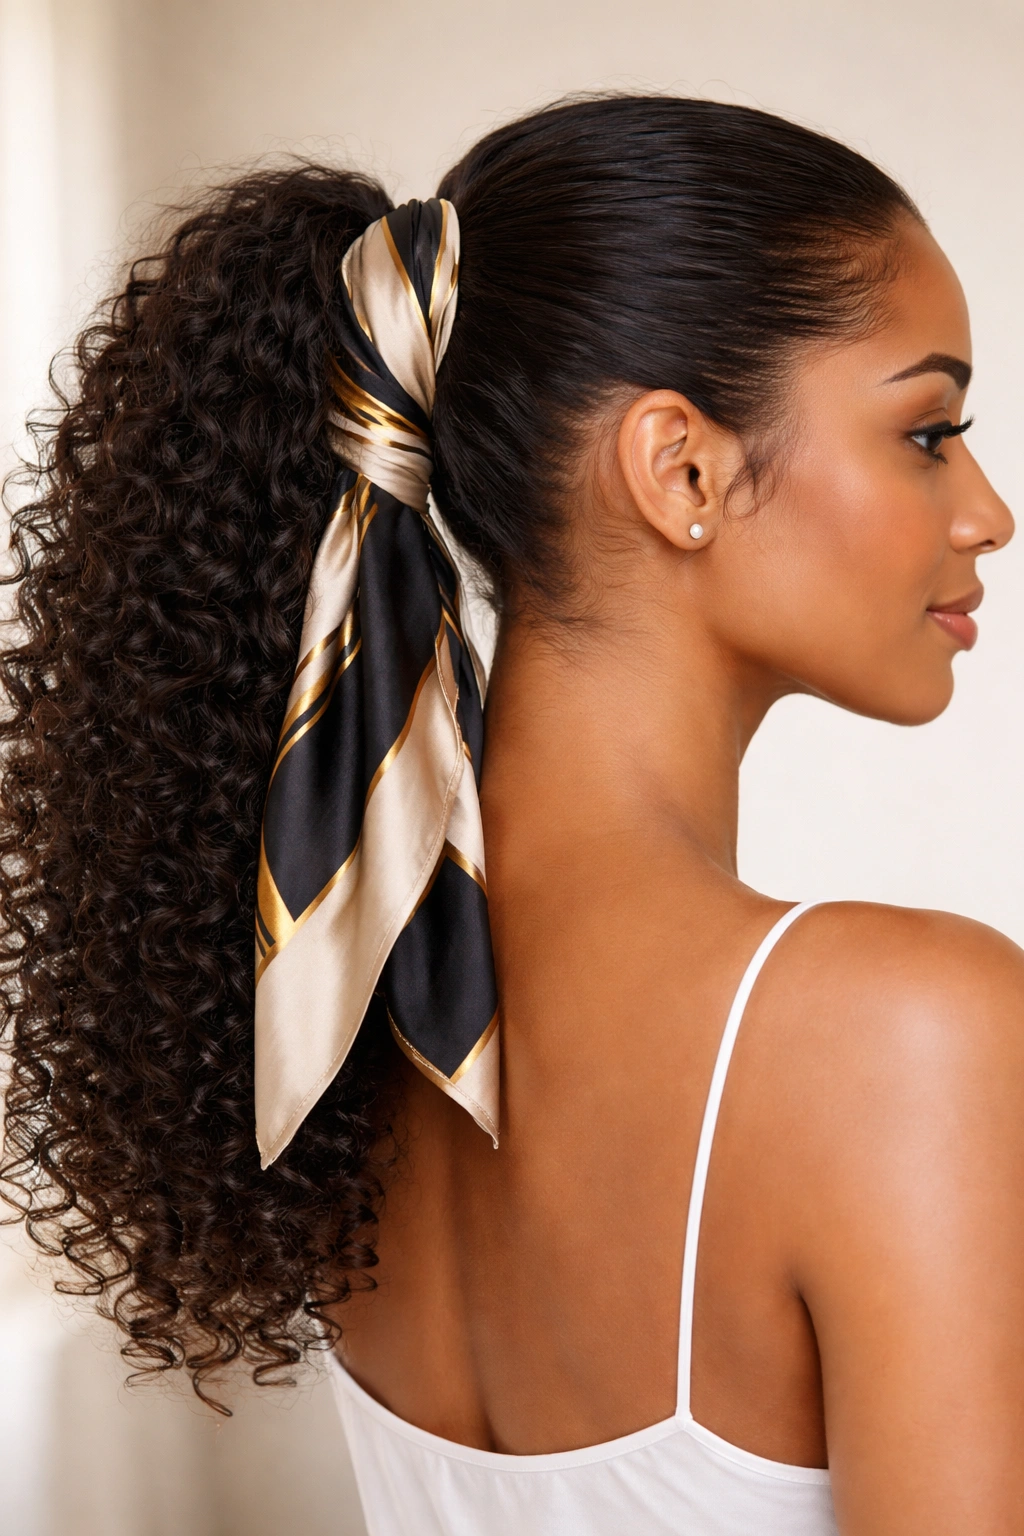
For ultimate sleekness, wrap a silk or satin scarf around the base of your ponytail. The scarf smooths down any flyaways or baby hairs that might otherwise escape, plus it adds a fashion element and protects your ends. This is a legitimate styling technique that works beautifully on curly hair, making it look intentionally accessorized rather than frizzy.
Why It Works for Curly Hair
Flyaways and baby hairs are one of the biggest challenges in creating sleek ponytails on curly hair—they catch light and make the style look less polished. A scarf wrap solves this by covering those troublemakers while adding visual interest. The scarf also reduces friction between your ponytail and your clothing, which means less breakage and frizz development throughout the day. It’s both functional and fashionable.
How to Style It Perfectly
- Create your ponytail using any of the techniques mentioned above
- Take a rectangular silk or satin scarf (approximately 4-6 inches wide)
- Wrap it around the base of the ponytail just below the elastic, overlapping the ends in the back
- Tie the scarf in a secure knot and tuck any loose ends into your ponytail or pin them with a bobby pin
- Smooth any remaining flyaways with edge control before wrapping the scarf
- For additional security and sleekness, you can wrap the scarf around the base twice if your ponytail is very thick
- The scarf becomes a design element—choose colors that complement your skin tone and outfit
Worth knowing: A silk or satin scarf is essential here; cotton will absorb moisture from your curls and create frizz rather than preventing it. Silk and satin have smooth surfaces that won’t disrupt your curl pattern.
10. The Curl-Defining Pony With Tendrils
This approach keeps some strands loose around your face while the bulk of your hair is sleek in the ponytail. The loose tendrils are actually strategically curl-defined (not wispy or stringy), which creates the polished-but-not-severe look that works beautifully on curly hair. You’re not fighting the texture; you’re orchestrating it.
Why It Works for Curly Hair
Pulling all your curly hair back severely can look harsh, especially if you have tighter curls. By leaving intentional face-frame pieces that are fully defined and gelled for sleekness, you soften the overall look while keeping the style clearly polished. The tendrils should be individual curls that are fully moisturized and defined—not random flyaways, but purposeful curl pieces. This looks intentional, modern, and incredibly flattering.
How to Style It Perfectly
- Create defined curls throughout your entire head using your preferred method (gel, mousse, or air-dry styling)
- Before pulling your hair into a ponytail, identify which face-frame pieces you want to leave loose
- Take those pieces and smooth them with a curl-defining serum or lightweight gel, ensuring each curl is separate and defined
- Gather the remaining hair into your ponytail
- Allow the loose face-frame curls to sit against your cheeks and neck, creating a soft frame
- Smooth any frizz around the edges of these loose pieces with a tiny amount of edge control
- The loose curls should look as polished as the ponytail, not messier
Insider note: This style is incredibly flattering for zoom calls and video meetings because the face-framing curls draw attention to your face without the hairstyle overpowering your features.
11. The Slicked Pony With Face-Framing Layers
Similar to the tendril version, but with a focus on actual face-framing layers in your haircut that you’re keeping out of the ponytail. If your curly hair is cut with shorter layers in front, you can style the rest of your hair back into a sleek ponytail while letting those shorter layers frame your face. This creates dimension and visual interest while maintaining the sleek aesthetic.
Why It Works for Curly Hair
If you have layers in your curly hair (which many stylists recommend to reduce bulk and add movement), a slicked ponytail with layers left out looks incredibly intentional and modern. The layers add texture and shape to your face, and because they’re part of your haircut rather than loose flyaways, they feel deliberate and controlled. You get the sleekness of a pulled-back style with the softness that suits most face shapes.
How to Style It Perfectly
- Make sure your layers are cut intentionally for your face shape (this is a conversation with your stylist)
- Style your layers with a curl-defining product and allow them to set
- Create a smooth, slicked ponytail with the rest of your hair using gel and smoothing techniques
- The layers should frame your face while the ponytail sits clearly and distinctly at the back
- Use edge control to smooth any baby hairs into the ponytail base, creating a clear line
- The contrast between the slicked back portion and the layered front should be visible and intentional
Worth knowing: If you don’t have intentional layers, you can create a similar effect by taking very small sections around your face and leaving them out, then heavily defining those sections—but natural layers make this style easiest.
12. The Protective Sleek Bun Ponytail
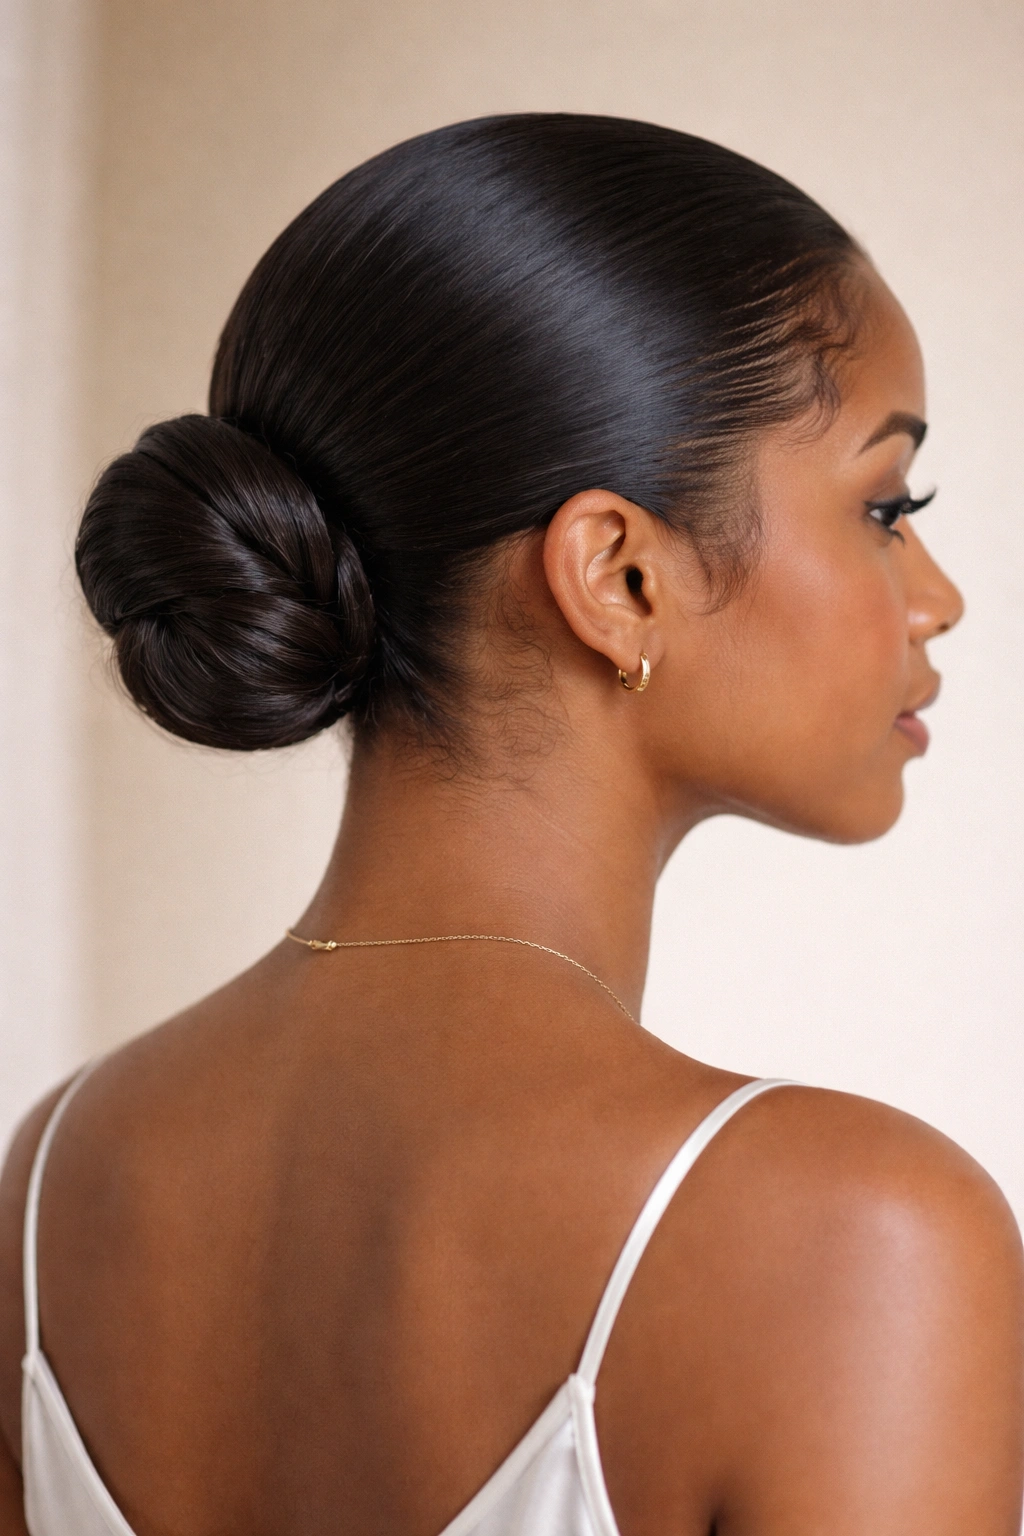
For the ultimate in both sleekness and hair protection, create a low ponytail and then twist or wrap it into a bun at the nape of your neck. This style keeps all your ends tucked and protected, reduces friction between your hair and your clothing, and looks incredibly polished and professional. It’s the sleek ponytail equivalent of a protective style.
Why It Works for Curly Hair
A bun at the nape is a protective style—it keeps your ends safe and minimizes daily wear and tear on your curls. Unlike very tight buns pulled high on the crown, a low bun doesn’t create tension on your scalp or strands. When you combine this with sleek styling techniques, you get a style that looks professional and put-together while actually protecting your curl health. It’s a rare win-win.
How to Style It Perfectly
- Create a sleek low ponytail using any of the gel and smoothing techniques mentioned above
- Once secured, take the ponytail and twist it gently
- Wrap the twisted section into a low, loose bun shape at the nape of your neck
- Secure with bobby pins and a scarf wrap if desired
- Smooth the crown and sides with edge control
- The bun should look relaxed and intentional, not tight and severe
- You can leave a few curls loose around the bun base for softness if preferred
Pro tip: This style holds longest when you’ve allowed your curl gel to fully set before creating the bun, as the set curls hold the bun shape without needing to be super tight.
Essential Products for Sleek Curly Ponytails
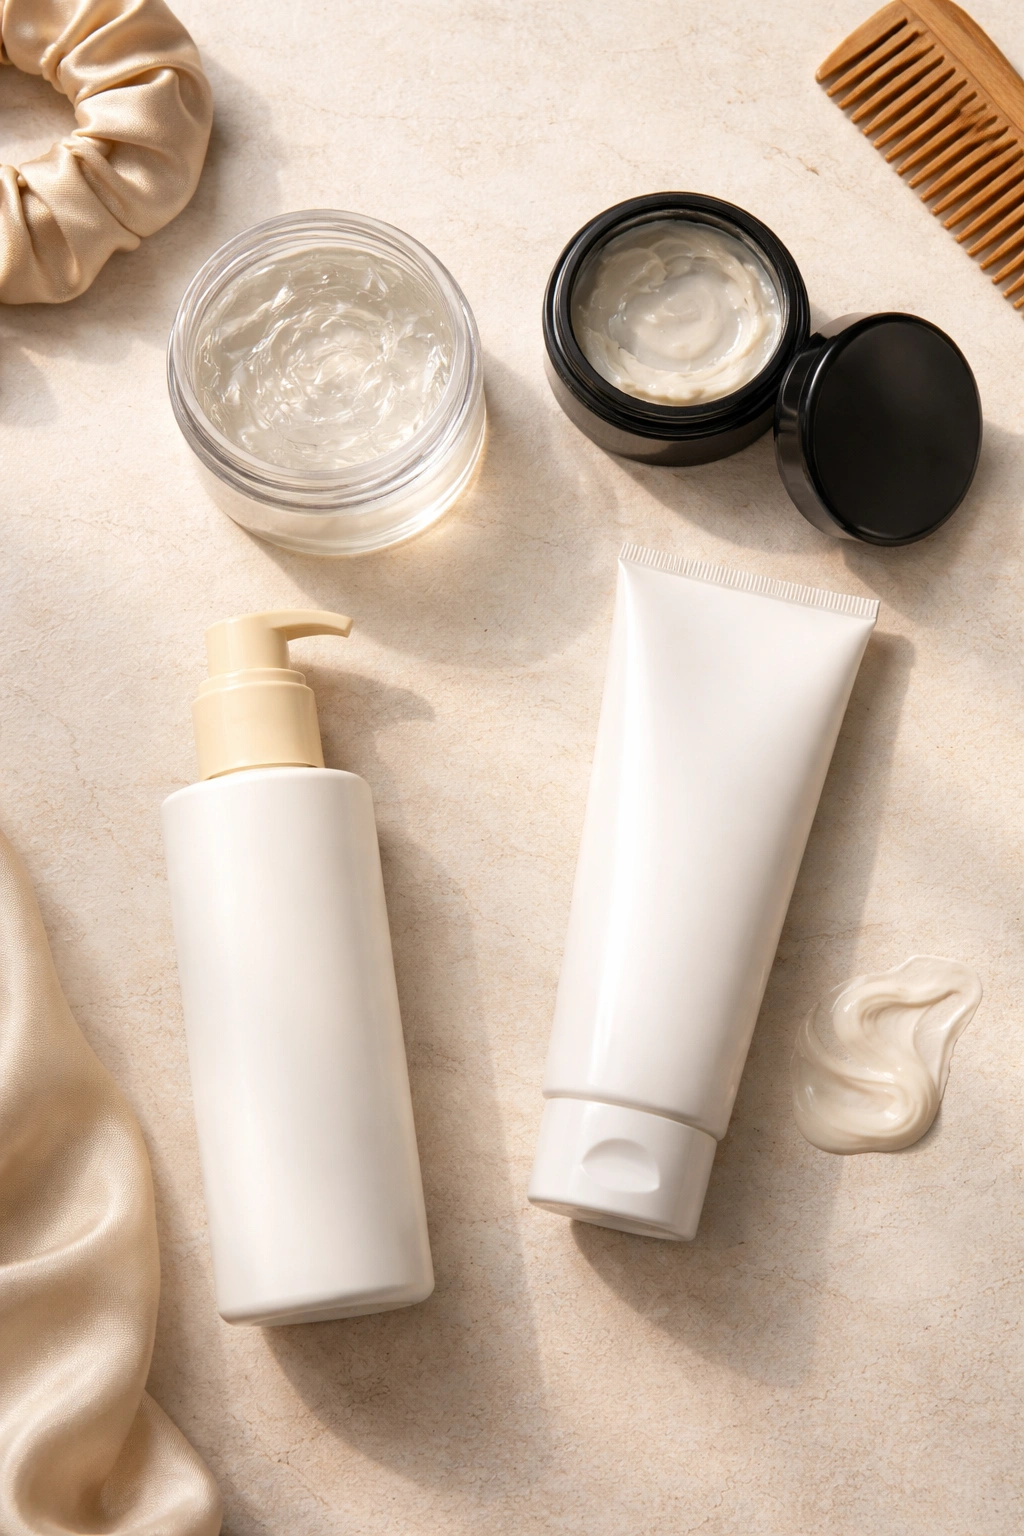
Not all products are created equal when you’re trying to create sleekness on curly hair. The foundation of every sleek ponytail on textured hair starts with the right products—ones that define curl, reduce frizz, and create hold without crunchiness or flaking.
A strong-hold styling gel is non-negotiable. This is what creates the sleek base for any of these styles. Look for gels that are specifically formulated for curly hair and that don’t feel sticky or crunchy once they dry. Some gels are better for lighter curls (more wavy, less dense) while others work for tighter curls—you may need to experiment. The gel should allow you to see curl definition, not flatten your curls completely.
Edge control is your secret weapon for smoothing flyaways and baby hairs. Most edge controls are wax-based and incredibly effective at keeping every stray piece in place. A tiny bit goes a long way—you only need a small amount applied with your fingers or a comb along your hairline and anywhere you see frizz. Look for formulas that aren’t too heavy (which can make your hairline look greasy) but have enough hold to last all day.
A leave-in conditioner or curl-defining cream is essential for keeping your curls hydrated and preventing that dry, frizzy appearance. All the gel in the world won’t create sleekness on dry curls. Apply this when your hair is damp, before you apply any styling gel, and make sure your curls are well-moisturized before you even begin styling. This is the foundation that makes everything else work.
Lightweight smoothing serums or finishing sprays add shine and smooth any residual frizz without weighing your curls down or making them look greasy. These are used as finishing touches after your ponytail is already styled. A tiny bit rubbed between your palms and applied to your ponytail (not your scalp) can add incredible polish.
A silk or satin pillowcase isn’t technically a styling product, but it’s one of the most important investments you can make for maintaining sleek ponytails. Cotton pillowcases cause friction that creates frizz and breakage. Silk and satin reduce this friction dramatically, meaning your ponytail will look sleek the next morning even if you move around while sleeping.
Step-by-Step Technique for Maximum Sleekness
Creating a truly sleek ponytail on curly hair requires a systematic approach. It’s not about one perfect product or one technique—it’s about the combination of steps you follow, in order, with intentionality.
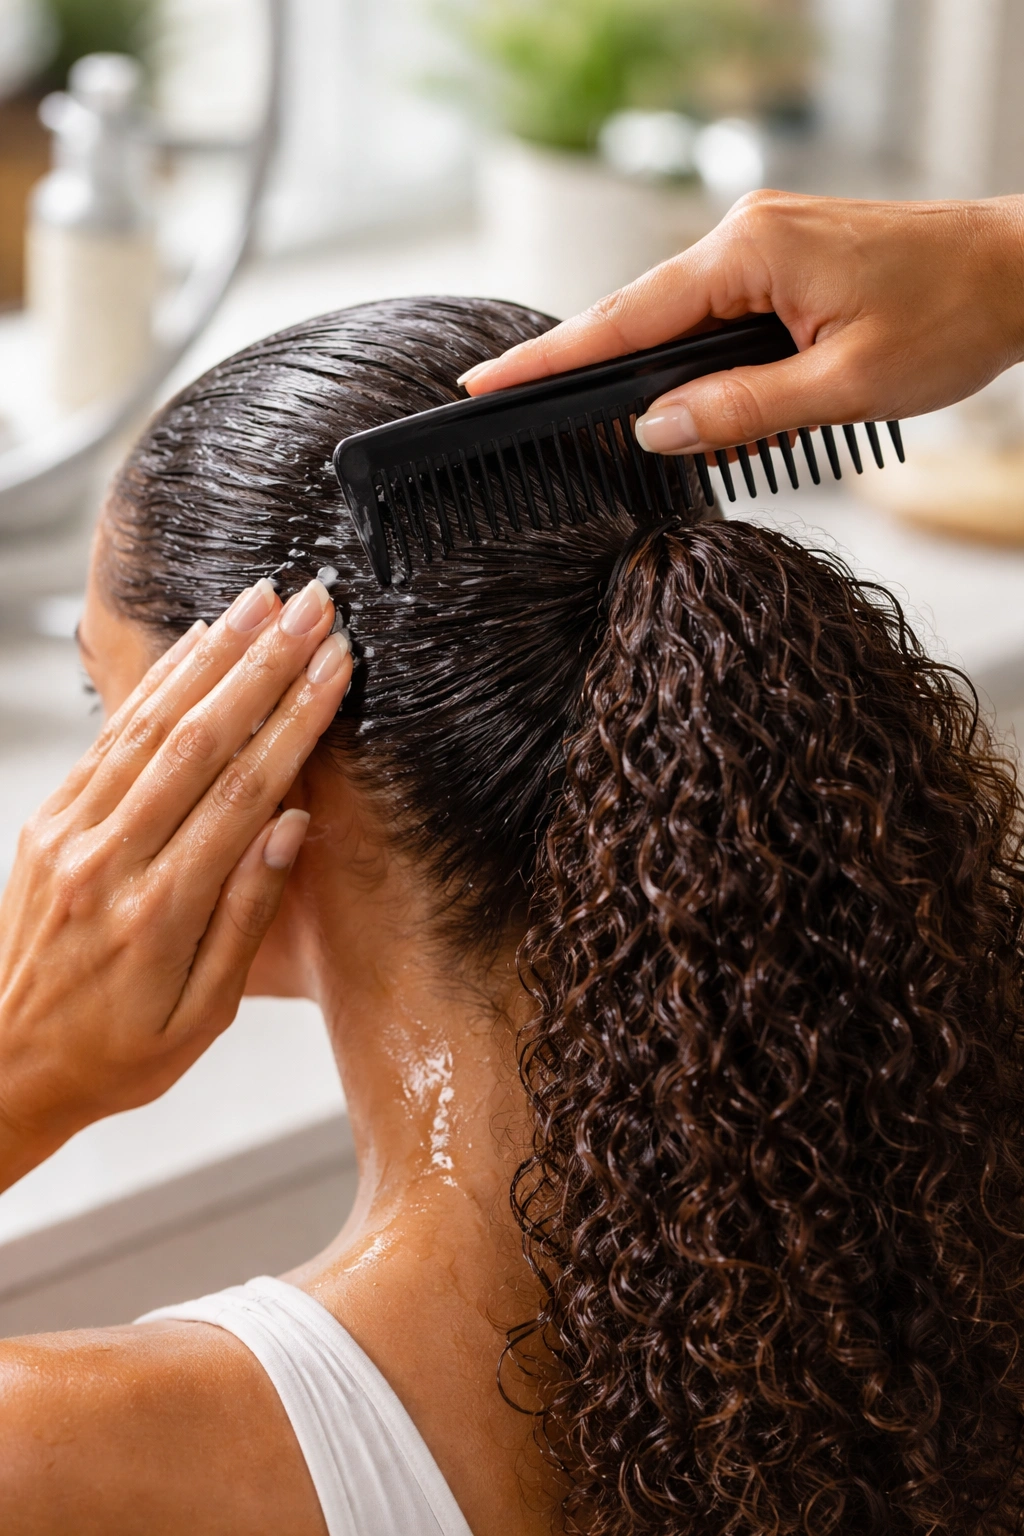
Start with moisture. This is where most people go wrong. If your curls are dry, no amount of gel or edge control will create sleekness. You’ll just get a dry, frizzy-looking ponytail covered in product. Instead, begin by thoroughly hydrating your hair. Wash and deep-condition your curls, then apply a generous amount of leave-in conditioner to damp hair. This is your base layer. Your curls should feel soft and hydrated before you do anything else.
Apply styling gel while your hair is still damp. Wet or very damp hair accepts gel more smoothly than dry hair does. Apply your gel generously, scrunching it into your curls and working it through from roots to ends. This is not a light application—you need enough product to coat all of your curls and create a gel cast that will set as your hair dries. Use a wide-tooth comb to distribute the gel evenly and help smooth your curls into place.
Allow your gel to set fully. This might mean air-drying for 30-60 minutes, or using a diffuser to speed the process. Do not create your ponytail until your gel is completely set and dry. If you pull your hair back while the gel is still wet or damp, the curls will frizz as they dry in the pulled-back position. You want them to set into curl shape first, then be pulled back into the ponytail formation.
Smooth the crown and sides before pulling back. Once your gel is set, use a soft paddle brush or boar-bristle brush to smooth the crown of your head and the sides gently. You’re not trying to flatten your curls into a straight line, but rather smooth them in the direction you want them to go (back toward where your ponytail will be). This creates the sleek appearance without disrupting the curl definition.
Gather your hair with care. Use a soft brush or wide-tooth comb to gather your hair into the ponytail position. Avoid using your fingers, which can disrupt curls. Create as smooth a line as possible from your crown backward to where your ponytail will be. Secure with a silk or satin elastic, never a rubber band, which will crease your curls and cause breakage.
Apply edge control last. Once your ponytail is secured, smooth any baby hairs or flyaways around your hairline with a small amount of edge control. This is your finishing step—it should go on last so it doesn’t get disturbed by the rest of your styling process.
Consider adding texture intentionally. If your ponytail looks too severe or smooth (which can happen with very tight curls), you can gently pull individual curls out and use your fingers to reshape them into more defined ringlets. This adds intentional texture and prevents the style from looking too flattened. The key is that any texture is deliberate, not accidental frizz.
Common Mistakes That Ruin the Sleek Look
Even with the right products and techniques, there are a few consistent mistakes that can derail your sleek ponytail before you even leave the house.
Not waiting for your curls to dry completely. I mentioned this above, but it’s worth repeating because it’s the most common mistake. If you pull your curls back while they’re still wet or damp, they will frizz noticeably as they dry. The combination of moisture and tension creates a frizzy appearance that no amount of gel or edge control can fix after the fact. Be patient. Let your curls dry first, then create the ponytail.
Using too little gel. A “medium” amount of gel won’t cut it when you’re trying to create sleekness on curly hair. You need enough product to fully coat every curl and create a gel cast. This often means using significantly more than you think you need, especially if you have dense curls. If you’re seeing individual dry curls instead of a defined cast, you haven’t used enough gel.
Brushing dry curls. Once your curls have dried, brushing them aggressively will disrupt the curl pattern and create frizz. If you need to smooth your curls after they’ve dried, use a fine-tooth comb very gently, and only on the areas around your ponytail that you’re smoothing down. Never rough-comb dry curls.
Choosing the wrong elastics. Regular rubber bands crease and break curls. Fabric-covered elastics are better but still can catch on your curl pattern. Silk or satin elastics are genuinely worth the small additional cost because they create less friction and damage. If you’re making your curls look sleek but then putting them in a damaging elastic, you’re undoing your work.
Applying edge control too generously. A tiny amount of edge control goes a long way. If you apply too much, your hairline will look greasy and weighed down rather than sleek. Start with a small amount (about the size of a pea), and only apply more if you can still see stray hairs. You should never see visible edge control—it should be invisible.
Not moisturizing before styling. Dry curls will frizz no matter what you do. Make sure your curls are well-hydrated with a leave-in conditioner before you ever apply gel. If your curls feel dry as you’re styling, mist them lightly with water and reapply some leave-in conditioner.
Expecting the same technique to work for all curl types. A technique that works beautifully for loose waves might not work as well for tight coils, and vice versa. You may need to adjust the amount of gel, the brushing technique, or the drying method based on your specific curl pattern. Be willing to experiment and modify approaches to find what works for your hair.
Styling Tips for Different Curl Patterns

Not all curly hair is the same, and what works brilliantly for one curl pattern might not work as well for another. Here are some adjustments you can make based on your specific texture.
If you have loose waves (2A-2C), you have an advantage with these sleek ponytail styles—your curls are less dense, which means less frizz and easier styling. You may need less gel than someone with tighter curls, and you can often get away with air-drying instead of using a diffuser. Focus on smoothing techniques and edge control, as your main challenge is likely loose flyaways rather than frizz throughout. These styles will give you maximum sleekness relatively quickly.
If you have medium coils (3A-3C), you’re probably dealing with both frizz and curl definition as challenges. You need enough gel to fully define and set your curls, but you also want to preserve the curl shape without it looking flattened. Use a diffuser as you’re setting your curls, and focus on smoothing only the outer layer as you create your ponytail—the interior curls can maintain their full shape and definition.
If you have tight coils or a very dense curl pattern (4A-4C), you likely need generous amounts of gel to create true definition and sleekness. Your curls may also take longer to dry, so be patient with the setting process. You might need to use multiple gel applications (light layer, let it partially dry, add another layer) to create maximum sleekness. Once your curls are fully set and you’ve smoothed the crown and sides, you’ll achieve remarkable sleekness because your tighter curl pattern holds shape and definition really well.
If you have textured hair that’s somewhere between straight and curly, experiment with lighter gel first, then add more if needed. You may also find that smoothing creams work better for you than gels, or that a combination of both creates the best results. Don’t assume that just because your curls are looser, the techniques won’t work—try them and adjust based on your results.
Make-Ahead Styling: What Actually Works
If you want your sleek ponytail to last multiple days or to create it the day before an event, you need strategies that actually work rather than just hoping for the best.
Wet-setting is your friend. If you wet-set your ponytail (as described in style #4), you can sleep on it and wake up with a perfectly set style that maintains its sleekness for days. Use a bonnet or silk pillowcase to protect it while you sleep, and you’ll wake up to a style that needs minimal touch-ups.
Refresh with water, not more gel. If your ponytail has been in for a few days and is starting to lose definition, lightly mist it with water and allow it to air-dry slightly. Don’t add another layer of gel, which will look crusty and heavy. A light mist of water will rehydrate your curls and refresh the definition.
Sleep with your ponytail on a silk pillowcase. Even if you haven’t wet-set, sleeping on a silk pillowcase will preserve your ponytail style far better than a cotton one. Cotton causes friction that creates frizz and disrupts the style. Silk lets your curls move without friction, so you’ll wake up with minimal frizz and largely the same style you created the day before.
Use a second elastic loosely if your ponytail is very thick. If you have very dense curls and your ponytail is large, the tension from a single elastic can cause the ponytail to slip or the elastic to dig into your hair by the next day. Use a second silk elastic loosely placed an inch or two below the first to distribute the tension and prevent the ponytail from slipping or getting distorted.
Apply edge control in the evening and morning. Edge control is temporary—it doesn’t last all night. If you’ve applied it before bed, touch it up in the morning on any areas that have frizz or flyaways. A quick reapplication takes 30 seconds and makes a big difference in the overall appearance of your style.
Final Thoughts
The truth about sleek ponytails on curly hair is that they’re entirely achievable—but they require understanding your hair’s needs rather than fighting against them. Every one of these twelve styles works because it acknowledges that your curls need moisture, that gel creates the best sleekness without damage, and that the way you pull your hair back matters more than how tight you pull it.
The single most important factor isn’t which style you choose; it’s that you start with thoroughly moisturized curls and apply styling product while your hair is still damp. This foundation determines whether your ponytail will look sleek and polished or dry and frizzy, no matter which specific technique you use. Everything else—the edge control, the smoothing, the choice of elastic—builds on this base.
Experiment with different styles until you find the ones that suit your lifestyle, face shape, and curl pattern best. Some days you might want the elegance of a braided crown pony; other days a simple wet-set low pony is perfectly sleek and low-maintenance. The versatility is part of what makes these styles so valuable. You’re not choosing between your curls and sleekness anymore; you’re celebrating both simultaneously.