



If you’re someone with beautiful natural hair who’s constantly battling the morning rush, you’ve probably stood in front of the mirror more times than you’d like to admit, wondering how to pull off something that looks intentional and polished when you’ve got fifteen minutes before you need to walk out the door. The good news? Afro ponytails are the secret weapon for looking put-together without the time commitment of styling from scratch. They celebrate your texture, require minimal tools, and work whether your hair is freshly washed, a few days old, or somewhere in between. The trick isn’t finding complicated styles—it’s knowing which approaches work fast and which ones are worth the five extra minutes because they deliver serious visual impact.
What makes ponytails such a game-changer for textured hair is their versatility. You can dress them up for professional settings, wear them casual for weekend errands, or add one or two intentional flourishes to make them feel current and fashion-forward. The best part? Most of these styles require nothing more than what you probably already have at home—a good brush or comb, some bobby pins, and maybe a hair tie or two. You don’t need expensive products, heat tools, or salon-level skill to make any of these work beautifully.
The styles I’m sharing come from what actually works in real life, not just what looks good in a photo. These are styles you can execute while half-asleep, repeat consistently without damaging your hair, and wear confidently whether you’re heading to the office, running errands, or heading into a full day where you need something that’ll stay put and look fresh the entire time. Let’s walk through each one so you can pick your favorites and start rotating them into your weekly routine.
1. The Classic High Ponytail
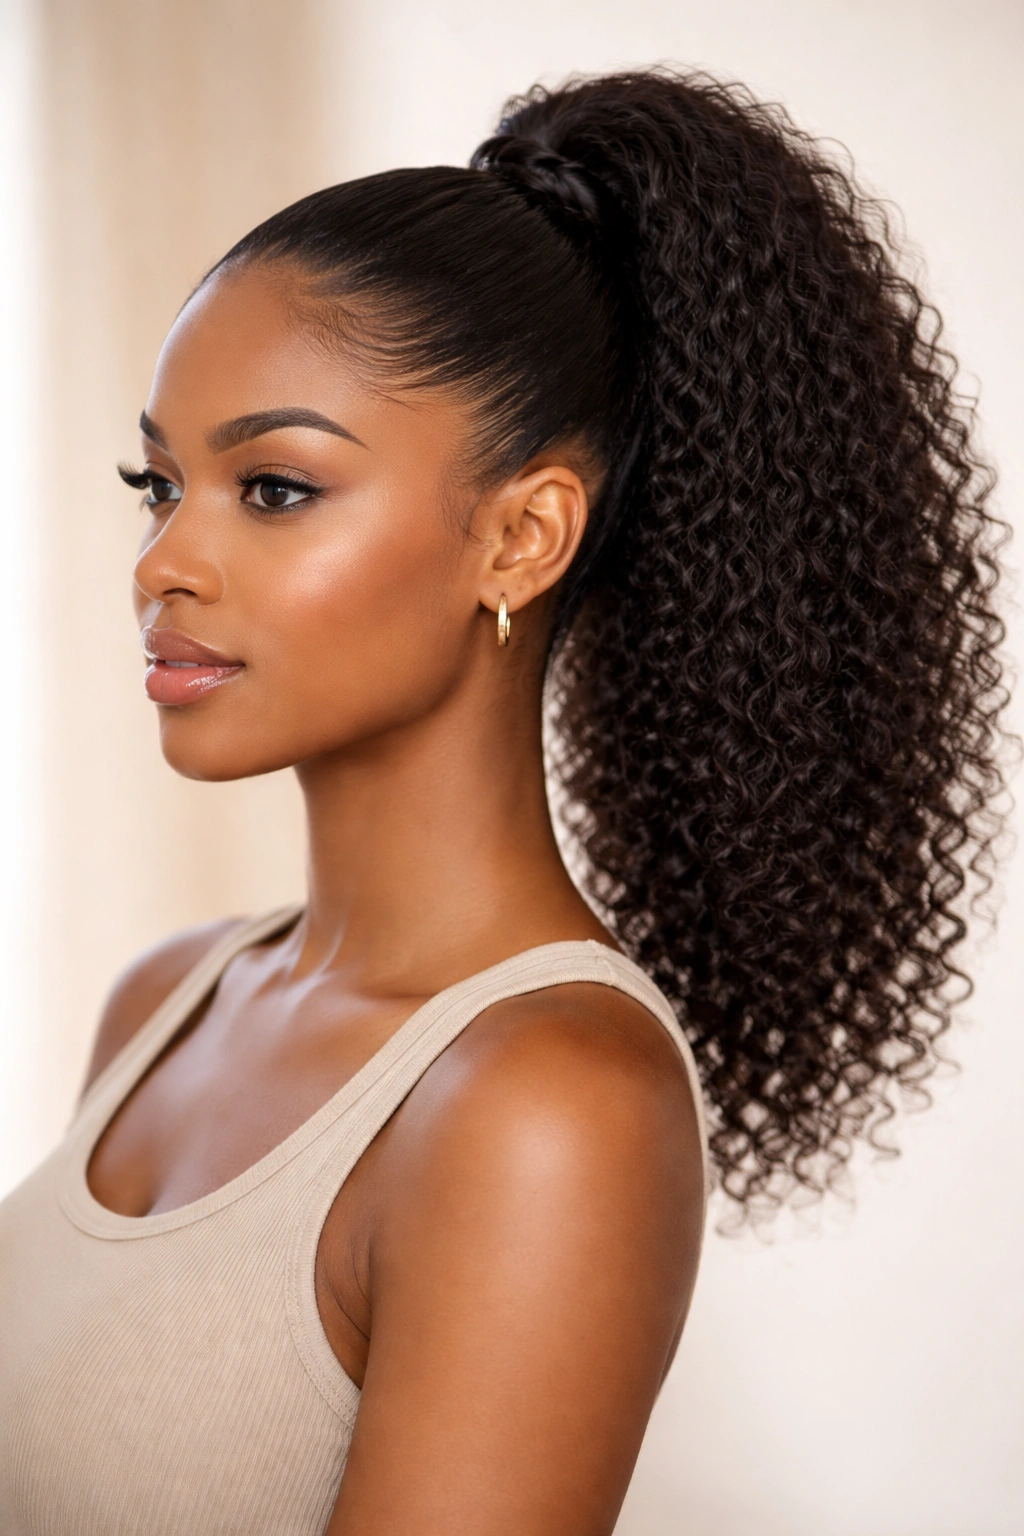
The high ponytail is your bread-and-butter style—simple, clean, and ready in under five minutes once you’ve gotten your brush through your hair. This one sits at the crown of your head and creates instant visual lift, which actually makes you look more awake even if you’re running on two cups of coffee. The height draws attention upward and keeps hair off your face, which is essential when you’re having a skin day where you’d rather not worry about breakouts touching your hairline.
Why It Works for Busy Mornings
A high ponytail is forgiving with different hair densities and textures. Whether your hair is coily, kinky, wavy, or a gorgeous combination of all three, a high pony accommodates it beautifully. It also doesn’t require your hair to be freshly washed—day-old or even day-three hair actually holds this style better because it has a bit more grip and texture naturally built in. You can wear it sleek, textured, or a mix of both, and it reads as intentional no matter what.
The height of a high ponytail also serves a practical function: it keeps hair completely away from your neck and shoulders, which is perfect if you’re someone who runs warm or if you’re wearing anything with a collar or crew neck. It won’t brush against your skin and create that uncomfortable sensation that makes you want to fidget with your hair all day.
How to Execute It Quickly
Start by gently brushing or combing your hair from the ends upward, loosening any tangles without causing unnecessary breakage. Use your fingers to gather hair at the crown—you want the base to sit about two to three inches from the very top of your head, not at the absolute tippy-top. Secure it with a sturdy elastic that won’t slip throughout the day. If you want extra polish, smooth down the hair around your hairline with a soft brush and a tiny bit of edge control cream or even a damp toothbrush.
Pro tip: For a more voluminous finish that looks less severe, gently tease or fluff the base of your ponytail before securing it. This creates dimension and makes the pony feel fuller and more modern.
2. The Low Ponytail for Understated Elegance
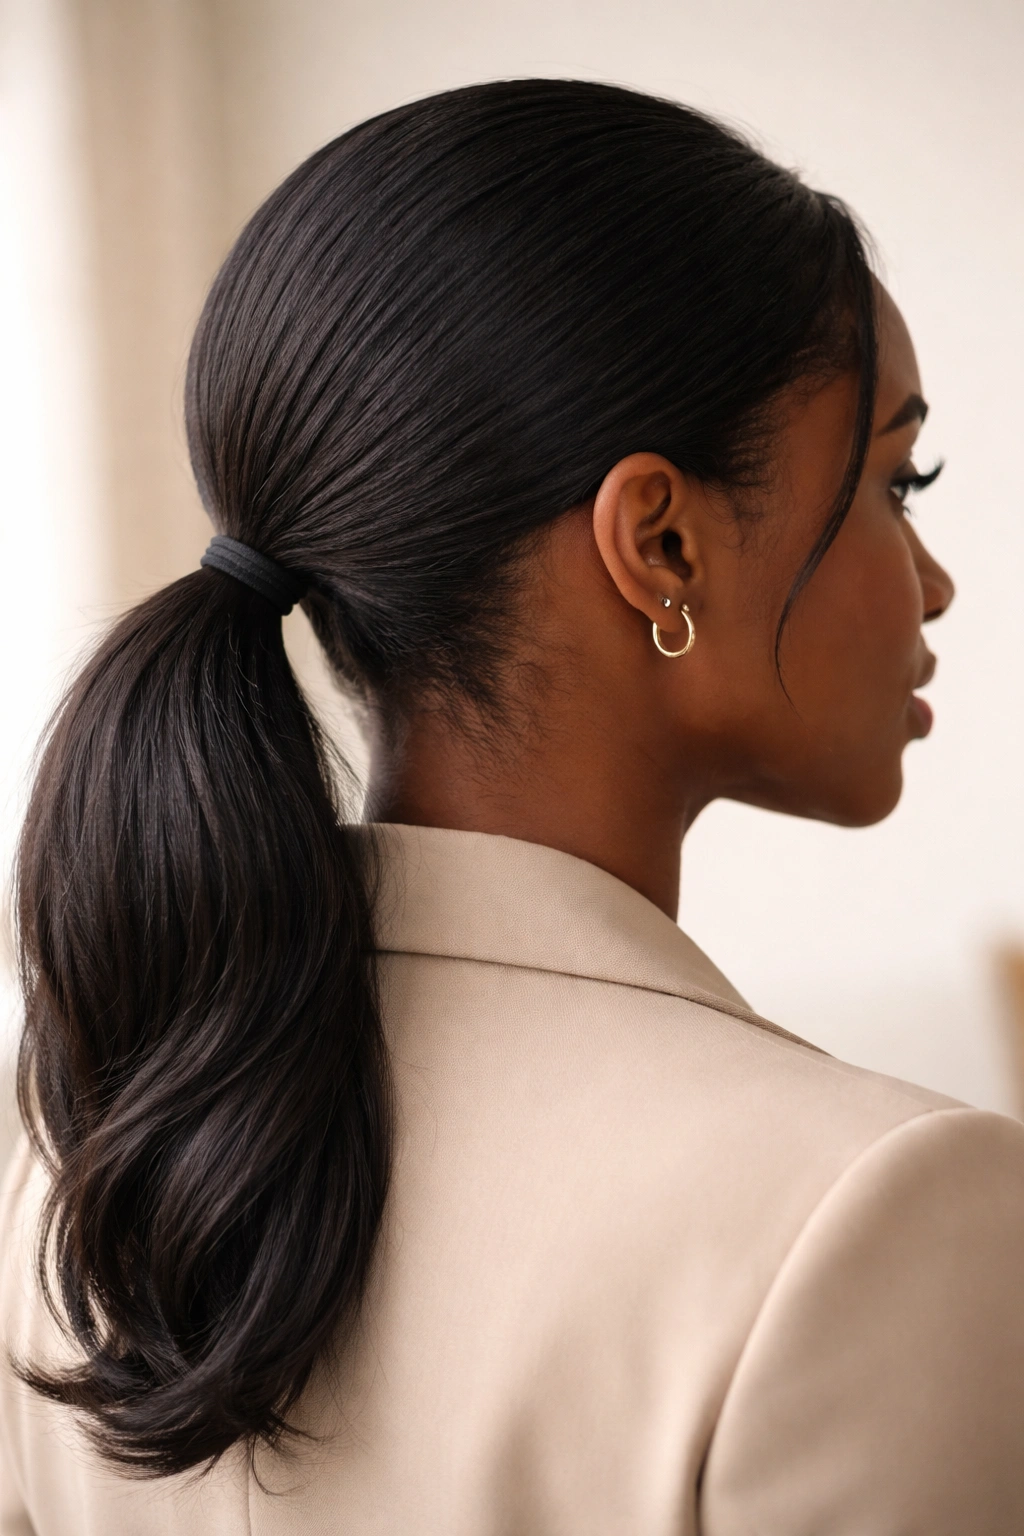
The low ponytail sits at the nape of your neck, right where your hairline meets your neck, and it’s the sophisticated cousin of the high pony. This style has an inherently polished, put-together feel that works beautifully for professional settings, client meetings, or any situation where you want to look composed and intentional without trying too hard. It works particularly well if you have a longer face shape, as it doesn’t elongate your features the way a high ponytail sometimes can.
Why This Style Reads as Elevated
Low ponytails have a naturally refined quality because of their placement. They don’t scream “I threw my hair up in five seconds”—even though you probably did. The lower positioning means your hair drapes more naturally from the base, creating softer lines that feel less utilitarian and more deliberately styled. You can wear this with your hair completely smooth for a sleek professional look, or you can keep your natural texture visible for something that feels more current and authentic to your natural hair aesthetic.
A low pony also works across different ages and professional environments in ways a high pony sometimes doesn’t. Whether you’re a college student, a working professional, or somewhere in between, a low ponytail reads as appropriate and intentional.
Making It Work with Textured Hair
The key to a beautiful low ponytail with natural hair is starting with hair that has some grip and definition. If your hair is freshly washed and soaking wet, you’ll have trouble gathering it cleanly without everything wanting to separate. Day-two or day-three hair is actually ideal because it has enough texture and moisture retention to stay cohesive. As you gather your hair at the nape of your neck, use a comb or your fingers to gently smooth the sides and back, creating a neat base without pulling so tightly that you’re creating stress on your hairline.
If you want a sleeker finish, apply a small amount of edge control or styling cream to the outer sections of your ponytail base, then smooth everything down with a fine-tooth comb. Let it set for a minute, and you’ll have definition that lasts all day.
Pro tip: A low ponytail looks exponentially more polished if you take a small section of hair from the base of your ponytail and wrap it around the elastic. This hides the elastic entirely and gives the style a finished, boutique quality.
3. The Sleek Ponytail with Defined Edges
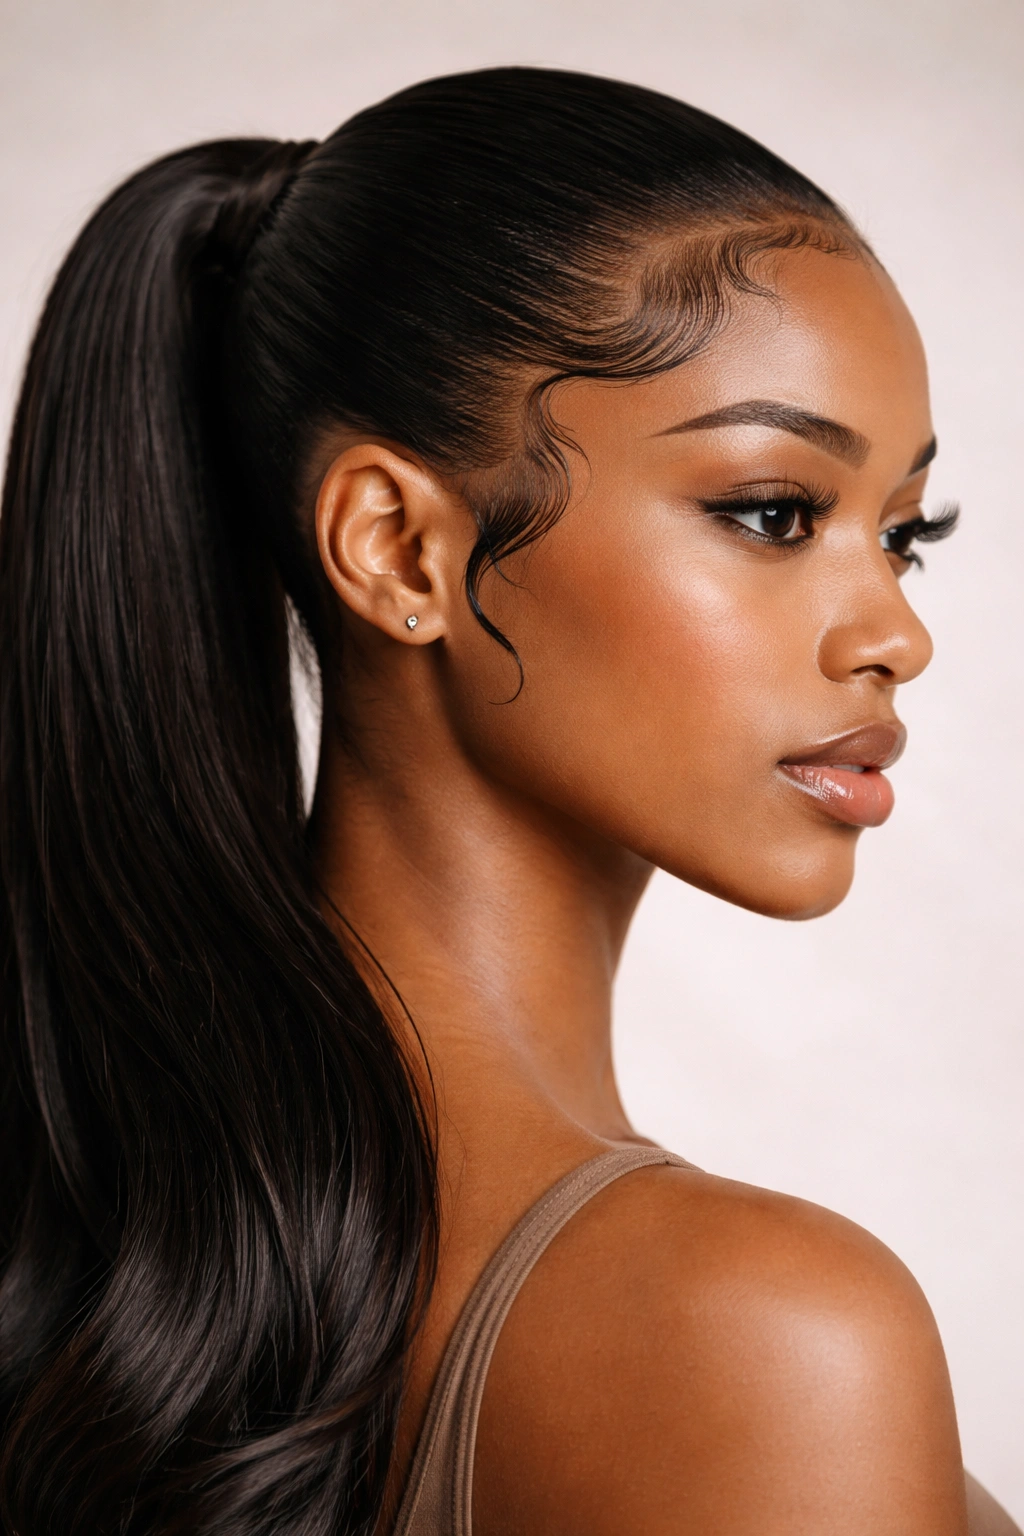
This is the style that says “I woke up and handled my business.” A sleek ponytail with intentionally defined edges is all about control and precision—your hair is smooth, your edges are crisp, and there’s not a hair out of place. This style works for everything from job interviews to special events, and it’s the perfect answer on mornings when you want to feel absolutely confident in how you look.
What Makes the Edges Stand Out
The edges are actually the game-changer here. Your baby hairs and hairline aren’t just smoothed down—they’re deliberately sculpted into a specific pattern, usually a smooth swoosh or a geometric shape that frames your face intentionally. This transforms what could be a basic ponytail into something that feels intentional and polished. Defined edges show that you’ve put thought into your look, even if the whole process took just ten minutes.
The sleekness of this style also means that everything is controlled and unified. There’s no frizz, no loose strands, no texture peeking out—just clean lines and intentional styling. It’s a particularly powerful look if you work in environments where polish and professionalism are valued, or if you just want to feel like you have complete control over how you present yourself.
The Actual Process for Flawless Edges
You’ll need your regular brush or comb, a container of edge control (gel, pomade, or even a smoothing cream works), and optionally a boar-bristle brush or old toothbrush to apply and shape everything. Start with smooth, gathered hair—use your regular comb to brush everything straight back into your ponytail base. Once that’s secured, work on your edges: take a small amount of edge control on your brush and apply it to your baby hairs and hairline, then use firm but gentle strokes to smooth everything down in the direction you want it to go.
For a classic look, smooth everything straight back. For something with more personality, create an arched shape where the edges follow the curve of your face. Let your edge control set for about a minute, and you’ve got definition that’ll hold through your entire day.
Pro tip: If your edges feel stiff or flaky after the edge control sets, lightly mist them with water and a hold spray instead of more product. This maintains the shape while softening the appearance.
4. The Textured Puff Ponytail
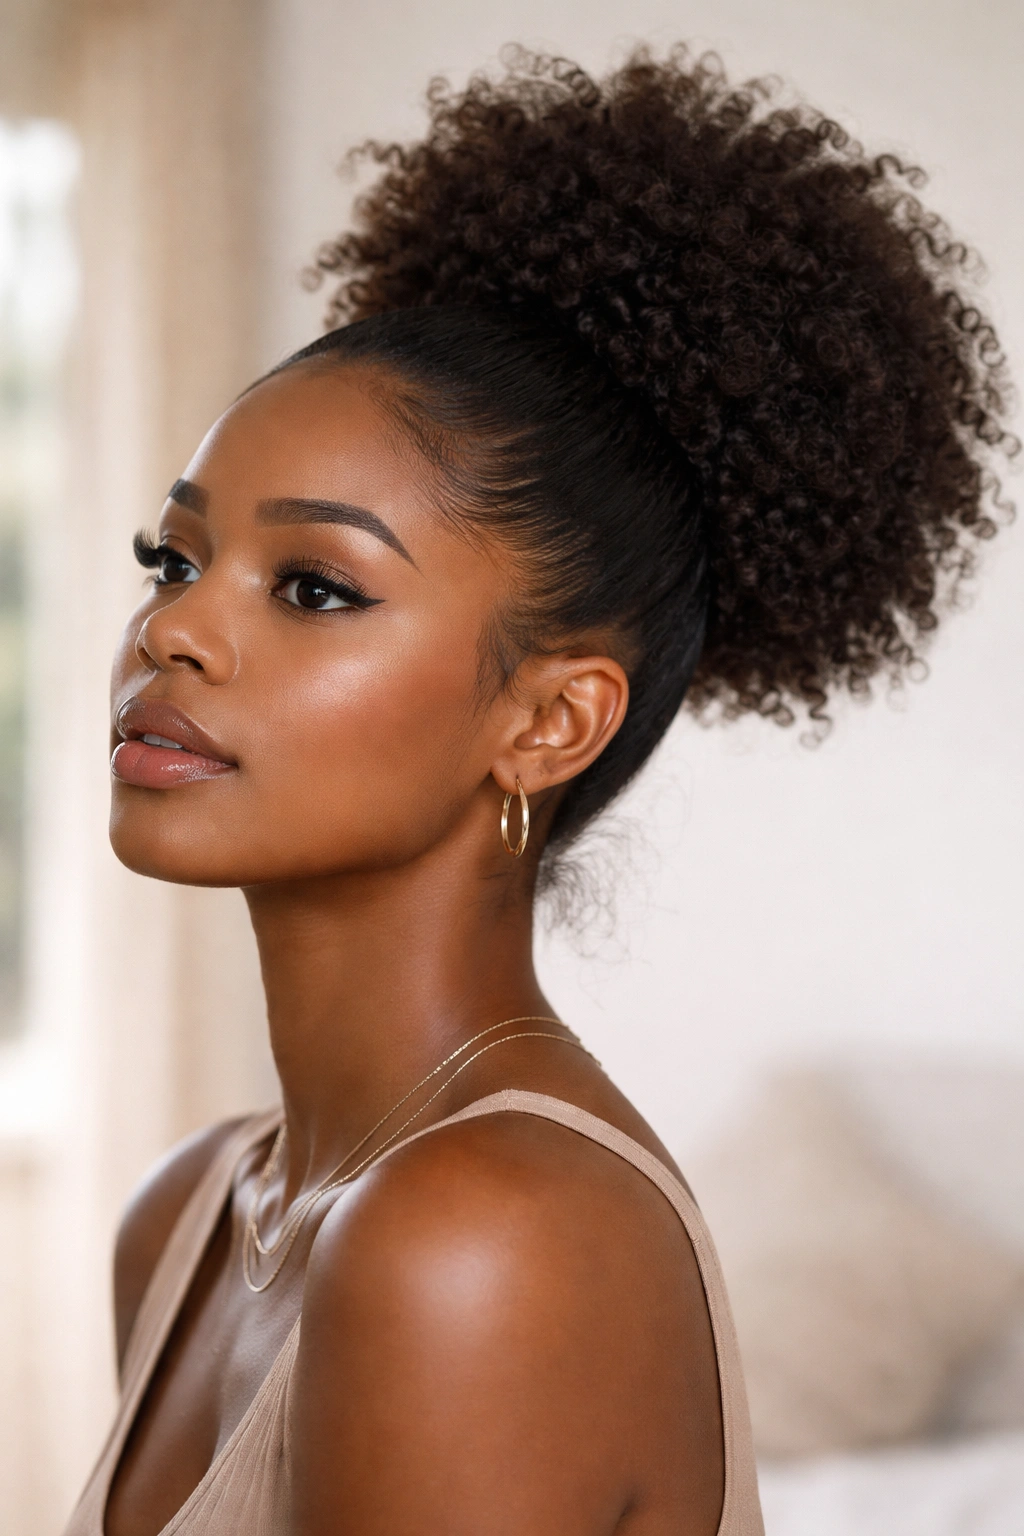
This is the style that celebrates your hair exactly as it is. A textured puff ponytail keeps all your curl pattern, coil definition, and natural texture visible—you’re not smoothing anything down or trying to elongate your hair. Instead, you’re gathering it up, securing it, and letting your beautiful natural texture be the focal point. This style works spectacularly on wash days when your hair is freshly dried, and it’s also perfect for second or third-day hair when everything has relaxed slightly and your curl pattern is even more defined.
Why Texture Is Your Asset Here
The whole point of a textured puff ponytail is that you’re not fighting against your hair—you’re working with it. Your coils, curls, and kinks have dimension and movement that straight hair simply can’t replicate, and this style puts that front and center. It’s also incredibly freeing because there’s no smoothing, no edge control, no trying to make your hair look like something it’s not. You brush gently to remove tangles, gather it up, secure it, and you’re done.
A textured puff ponytail also tends to look bigger and fuller than a sleek ponytail using the exact same amount of hair, which is visually stunning and creates an instant sense of volume and presence. If you’ve ever worried that your natural texture looks too thin or doesn’t have enough substance, a puff ponytail proves otherwise.
Getting the Texture Just Right
Start with hair that’s had at least a few hours to dry and settle into its natural pattern. Using a wide-tooth comb or your fingers, gently gather your hair at your chosen height—high, mid, or low, whatever you prefer. The key is being gentle enough that you’re not disrupting your curl pattern, but firm enough that everything is secure. You want individual curl clumps visible, not a matted-down appearance.
Use a ponytail holder that won’t create creases or dents in your hair—silk or satin coated elastics are ideal. If you want extra security and a more finished look, you can take a small section of hair from the base and wrap it around the elastic, just like with the sleek ponytail. But with a textured puff, you can also leave it totally natural and loose, with flyaways visible—that’s actually part of the charm.
Pro tip: If your puff droops throughout the day, use a bobby pin inserted horizontally through the base of the ponytail and into the surrounding hair for extra support and lift.
5. The Side Ponytail for Playful Personality
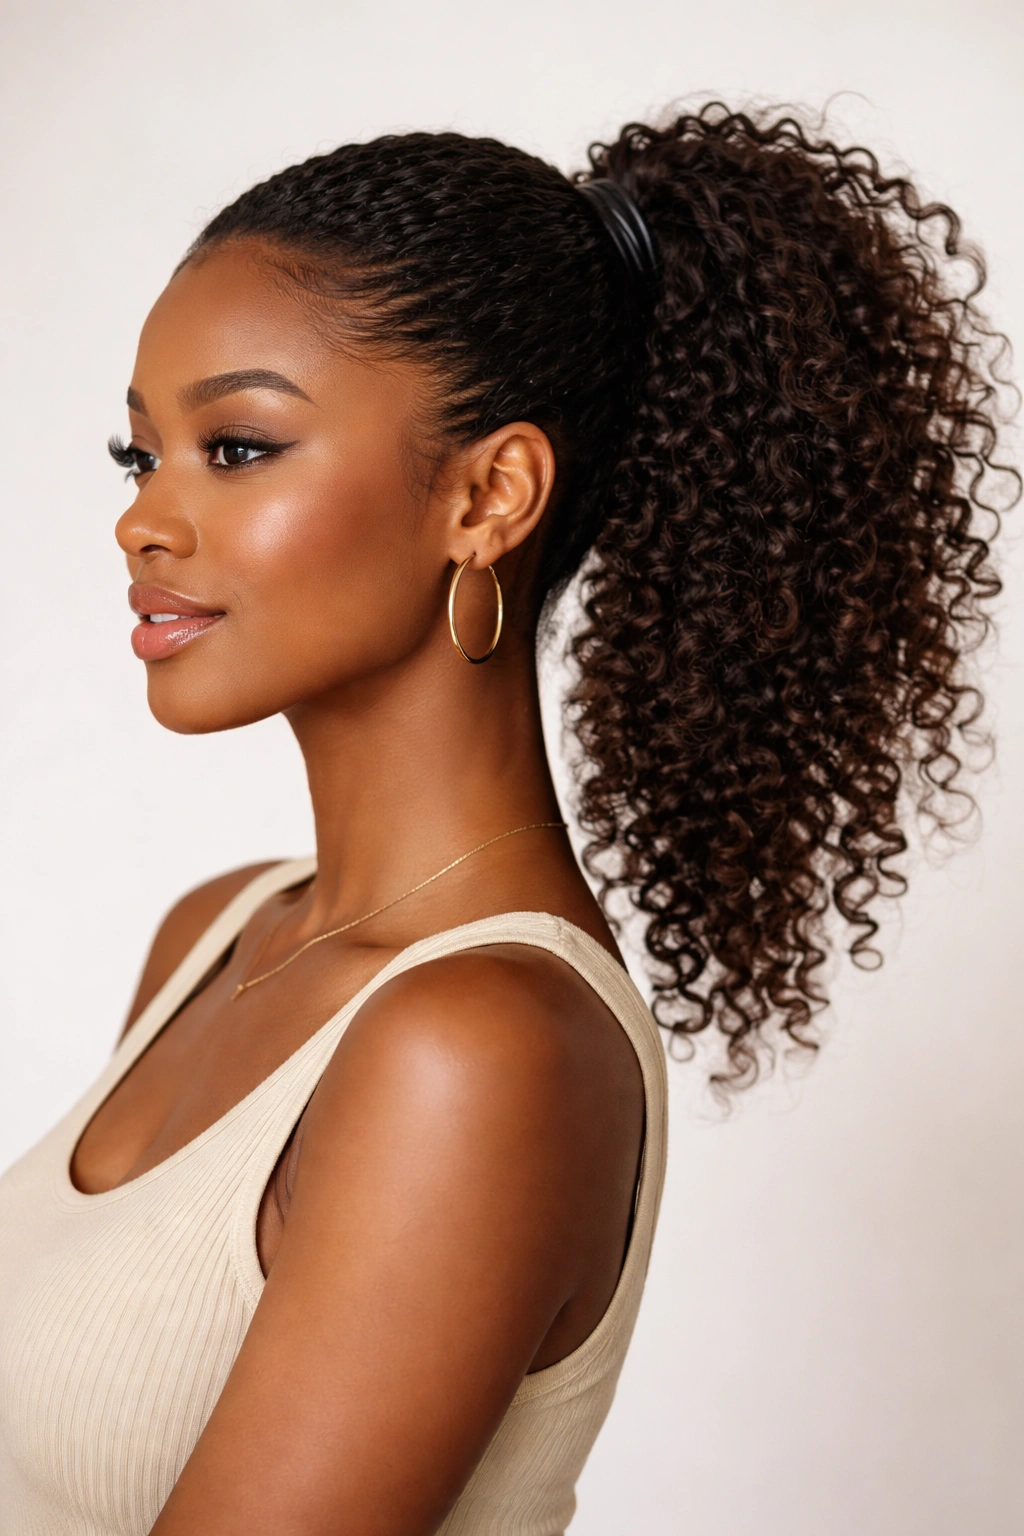
A side ponytail is gathered off to one side rather than at the center back, creating an asymmetrical, more fashion-forward look. This style has instant personality—it’s playful without being childish, and it works beautifully for creative fields, casual environments, or anytime you want your style to signal that you’re fun and comfortable taking fashion risks. A side pony is also amazing if you have a middle part that you’re tired of, or if you’re dealing with breakage or damage on one side that you’d rather not emphasize.
The Visual Impact of Asymmetry
An asymmetrical style immediately looks more intentional and modern than a centered one. It draws the eye away from one side of your face (useful if you’re having a breakout situation) and toward the other. It also has a creative, slightly rebellious energy that reads as confident—you’re not following the traditional centered style rules, and that confidence shows.
A side ponytail also allows you to play with the placement. You can gather it high on one side (very playful and youthful), low on one side (more sophisticated), or even at ear level for something that splits the difference between the two.
Making It Look Intentional
The key to a side ponytail looking polished rather than haphazard is making sure your side part is clean and defined. Use a rattail comb or the pointed end of your regular comb to create a distinct line from your crown to one side of your forehead. Gather your hair along that part line and secure it on whichever side you’ve chosen.
For a sleeker finish, smooth the hair around your face and parting line with a small brush and light edge control. For a textured finish, let your natural curl pattern be visible but gently comb everything in the direction of your ponytail so it reads as intentional.
Pro tip: A side ponytail looks especially striking if you take a very small section of hair from the front and wrap it around your elastic (just like the edge wrapping technique from the sleek ponytail section). This detail elevates the whole look and makes it feel more deliberate.
6. The Half-Up Ponytail for Maximum Flexibility
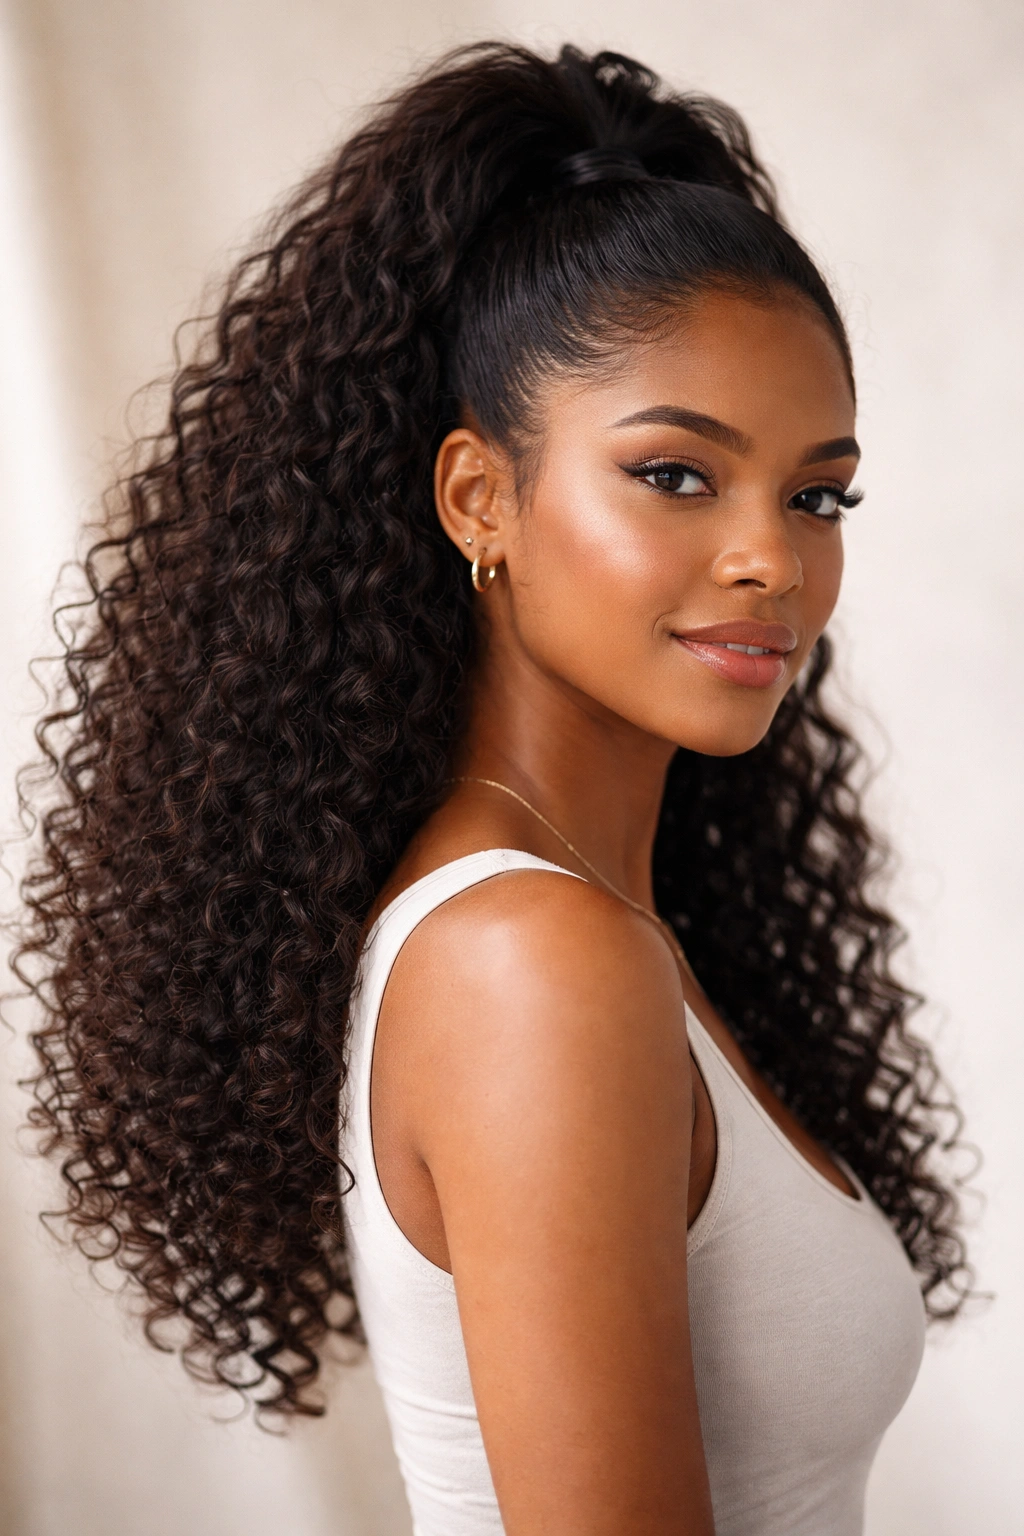
The half-up ponytail is exactly what it sounds like: you’re gathering just the top half of your hair into a ponytail while leaving the bottom half down. This style splits the difference between “fully styled” and “I’m showing off my length”—you get the benefits of a ponytail (hair off your face, polished upper appearance) while still displaying your beautiful length and texture. This is perfect for days when you want a little polish without committing to a full style.
Why Half-Up Works for Busy Mornings
A half-up ponytail requires less sectioning precision than a full ponytail because you’re only working with part of your hair. Even if your sections aren’t perfectly even or perfectly placed, it doesn’t read as sloppy—it reads as intentionally relaxed. You also get to keep your hair down, which means you’re showing off more of your style, more of your length, and more of your texture, which is the whole reason you grew it out in the first place.
This style is also incredibly comfortable for different activities. It keeps hair off your face and neck without creating the concentrated weight at the base that a full ponytail sometimes does. If you’re going to be moving around a lot—running errands, exercising, a long day where you’ll be in and out of different environments—a half-up keeps you cool and comfortable while looking intentional.
The Mechanics of a Clean Half-Up
Start by identifying where you want your half-up to sit—this is usually about an inch or two above ear level. Use a brush or comb to gently gather just the hair from that point upward and backward, creating a section that will become your ponytail base. Secure it, and you’re essentially done, though you can refine it from there.
For a sleeker look, smooth the hair around your face and your part line. For a more textured, relaxed vibe, let your natural texture be visible throughout. You can also take a small section from the base of your half-up and wrap it around the elastic, just like with the other ponytail styles.
Pro tip: A half-up looks even more polished if the top section is slightly smaller and more refined than the bottom section. This creates a nice visual balance and makes the whole style feel intentional.
7. The Twisted Ponytail for Subtle Texture Detail
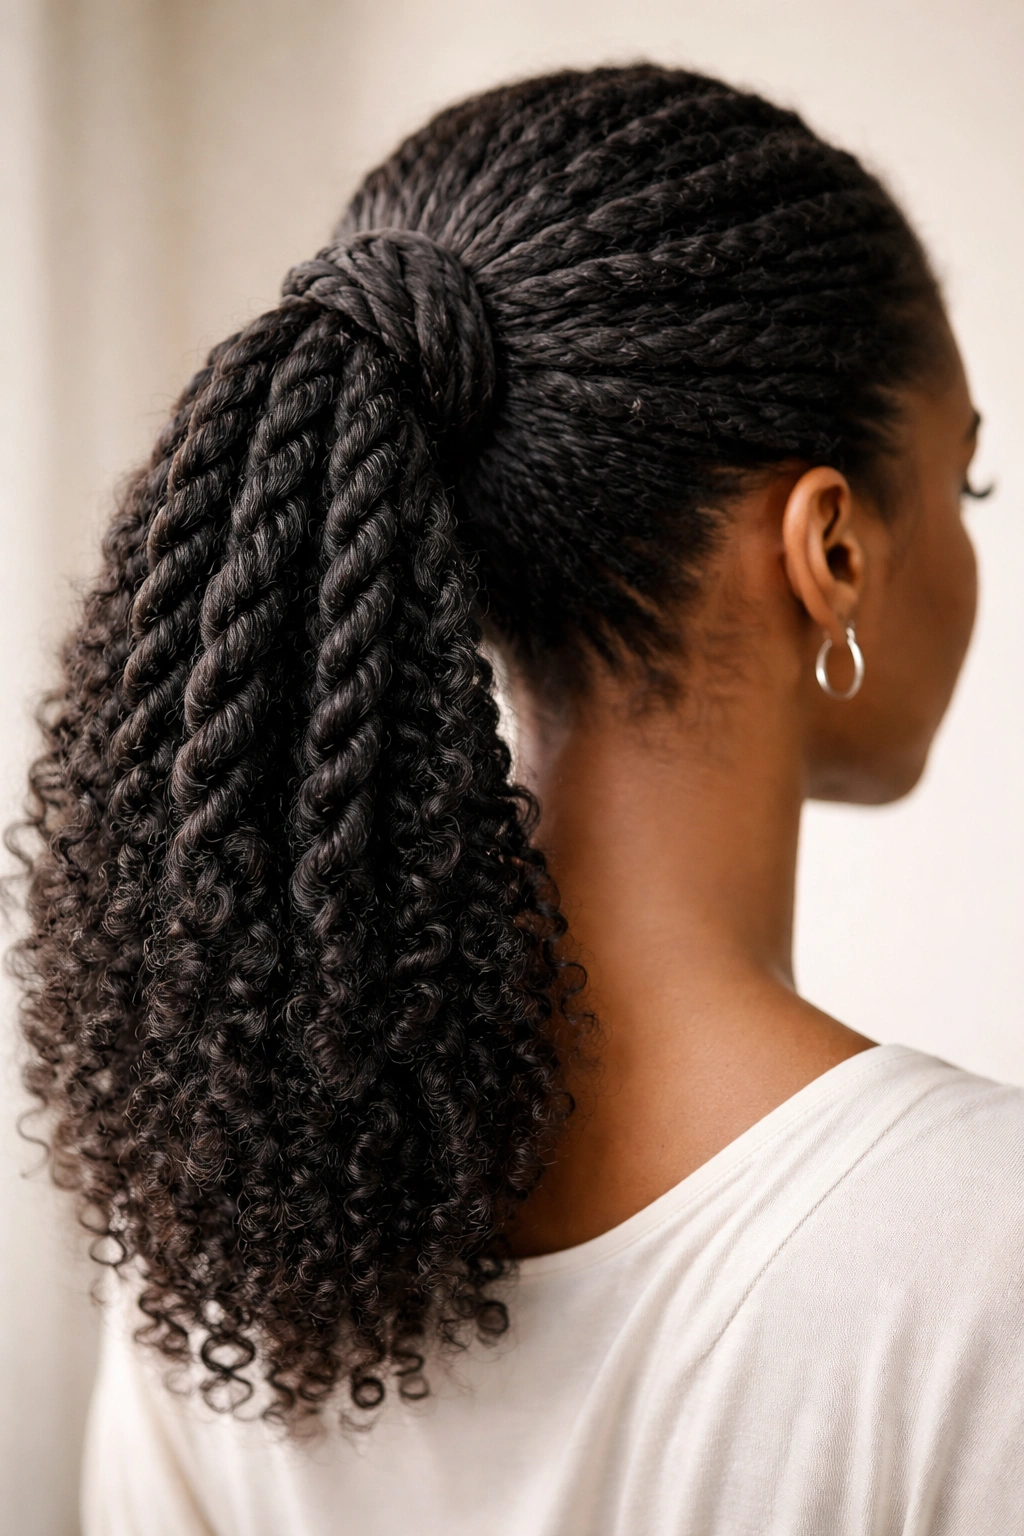
A twisted ponytail adds dimension and visual interest without being complicated or time-consuming. You’re taking sections of hair, twisting them, and then incorporating them into your ponytail, which creates the appearance of more intricate styling than you’ve actually done. This is the perfect style for days when you want something slightly more interesting than a basic ponytail but you’re not in the mood for braiding.
How Twists Transform Your Ponytail
Twists add movement and definition to your pony without disrupting your natural texture too much. A section that’s just smoothed back looks simple—a section that’s been twisted looks intentionally styled. You also get more grip and hold with twisted sections, which means your ponytail will stay secure and look polished throughout the day, even as you move around and do your thing.
Twists also work beautifully with all curl patterns. They don’t require you to straighten anything or fight against your natural texture—they work with it. A twist in coily hair maintains the coil pattern while adding definition. A twist in wavy hair adds structure without removing the wave.
The Actual Twisting Technique
Take a section of hair from one side of your head—start near your temple and gather a 1 to 2-inch section. Using your fingers, gently twist that section, turning it toward the back of your head. As you twist, you’re naturally smoothing that section and creating definition. When you reach the nape of your neck or your ponytail gathering point, secure it along with the rest of your hair.
Repeat on the other side, creating a matched twist on both sides. The two twisted sections frame your face and lead back into your central ponytail, creating a cohesive, intentional look that honestly only takes about thirty seconds more than a regular ponytail.
Pro tip: If your twists start to come undone throughout the day, use a light hairspray or hold spray to set them. A quick spritz applied to the twist as you’re creating it will help it hold its shape all day.
8. The Braided Wrap Ponytail for Polished Impact
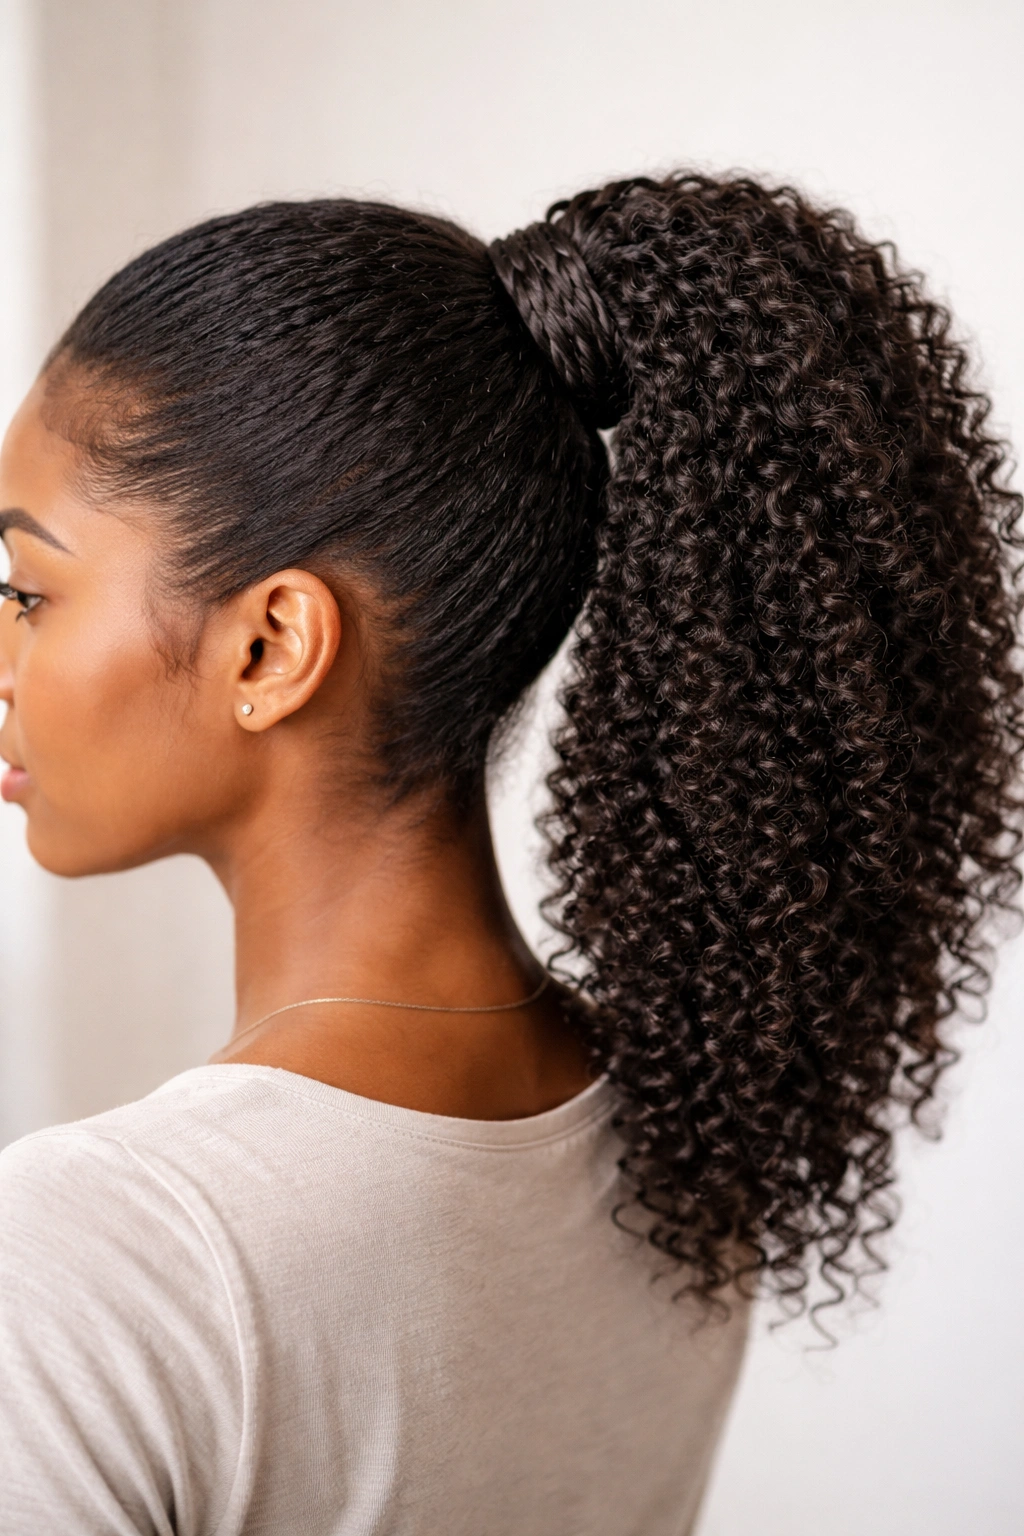
The braided wrap ponytail takes the wrapped-elastic technique and elevates it into a full design element. Instead of just taking a small section and wrapping it around your elastic, you’re creating a small braid (or even a twist) that wraps around the base of your ponytail. This detail transforms a basic ponytail into something that looks like you spent twenty minutes styling when you actually spent eight.
The Power of Intentional Detail
A braided wrap adds sophistication and polish instantly. It signals that you’ve put thought into your appearance without looking overdone or like you’re trying too hard. It also works across all settings—professional environments appreciate the intentional detail, casual settings appreciate the creativity, and you personally get to feel like you’re wearing something that’s genuinely yours and reflects your style.
A braided wrap also serves a practical function: it secures your ponytail even better than a regular elastic alone, which means you can go about your day without worrying that your pony is slipping or loosening.
Creating Your Braided Wrap
Gather your hair into a ponytail using your preferred method (sleek, textured, high, low—whatever you like). Then take a small section from the front or side of your gathered hair, right at the base of your ponytail. Create a three-strand braid using just that section—it only needs to be about two inches long. Once your braid is created, wrap it around the base of your elastic, and secure the end with a bobby pin tucked underneath so it’s hidden.
If braiding feels complicated or you’re short on time, you can use a twist instead of a braid—it’s literally just two sections of hair twisted around each other, and it creates the same polished effect with half the complexity.
Pro tip: Make your braid or twist from hair that’s slightly damp or has a tiny bit of product in it (gel or edge control works). This gives you more grip and control, and your braid will stay neat and defined throughout the day rather than getting fuzzy or loose.
9. The Top Knot Bun for When You Need Maximum Hold
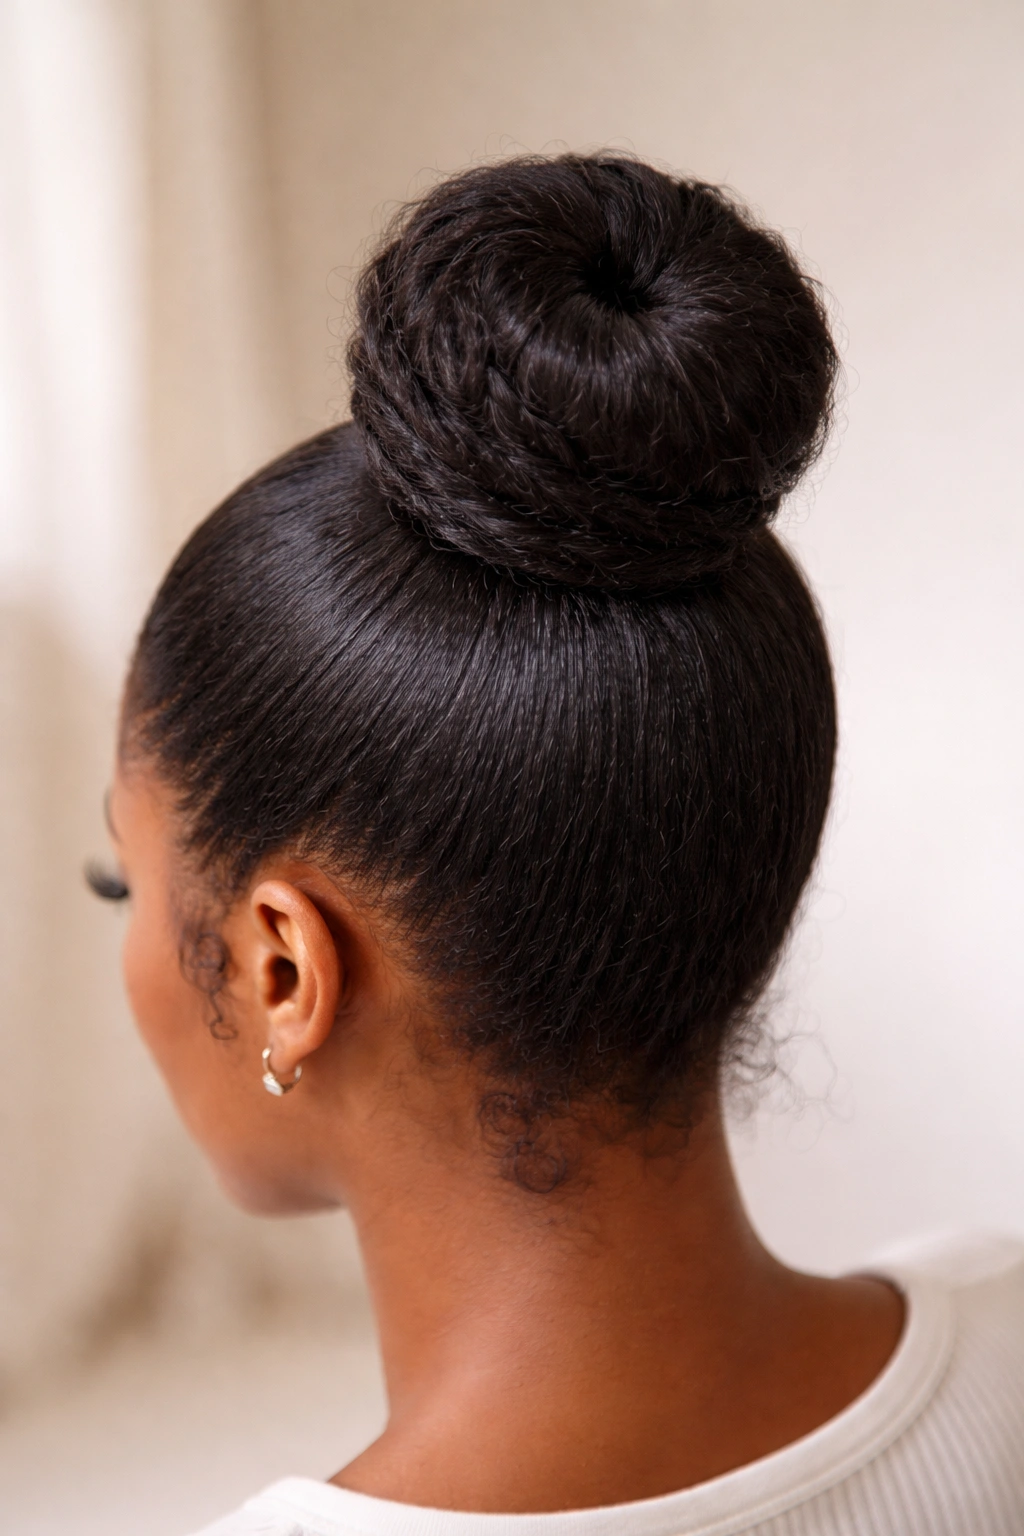
The top knot bun is technically a ponytail variant where you’re twisting or coiling your gathered ponytail into a bun shape at the crown of your head. This style is your answer for days when you need your hair completely secure, fully off your face and neck, and not moving for hours. It works beautifully for exercise, all-day events, or situations where you need hair that absolutely won’t slip or shift.
Why This Style Is So Secure
A top knot bun keeps hair gathered tightly at the crown, which means the weight is distributed at a single point that stays completely stable. As you move—whether you’re exercising, sitting through a long meeting, or running around handling business—your bun isn’t going anywhere. It’s also incredibly flattering if you have a longer face shape, as it draws attention upward and makes your face appear wider and more balanced.
A top knot bun also has a no-nonsense energy that’s perfect for busy mornings. It says “I’m taking care of business” without requiring any complicated styling. It’s practical, it’s chic, and it works in nearly every environment from casual to professional.
The Steps for a Secure Top Knot
Gather your hair into a high ponytail using an elastic that has strong hold. Once your ponytail is secured, take the length of your ponytail and twist it firmly as you wrap it around the base, creating a coil. As you coil, you’re naturally tightening everything and creating the bun shape. Once you’ve coiled all your hair, secure the finished bun with bobby pins inserted at multiple angles—at least three to four pins—so the bun absolutely won’t budge.
For extra security, you can mist the finished bun with light hairspray or a hold spray. This sets everything in place and gives you confidence that your bun will stay exactly where you put it.
Pro tip: If your hair is very long or very thick, you might want to use multiple elastics as you create your bun—one at the base of your ponytail, then another halfway through your bun, then your bobby pins for the final securing. This distributes the weight and creates a bun that’s even more secure.
Final Thoughts
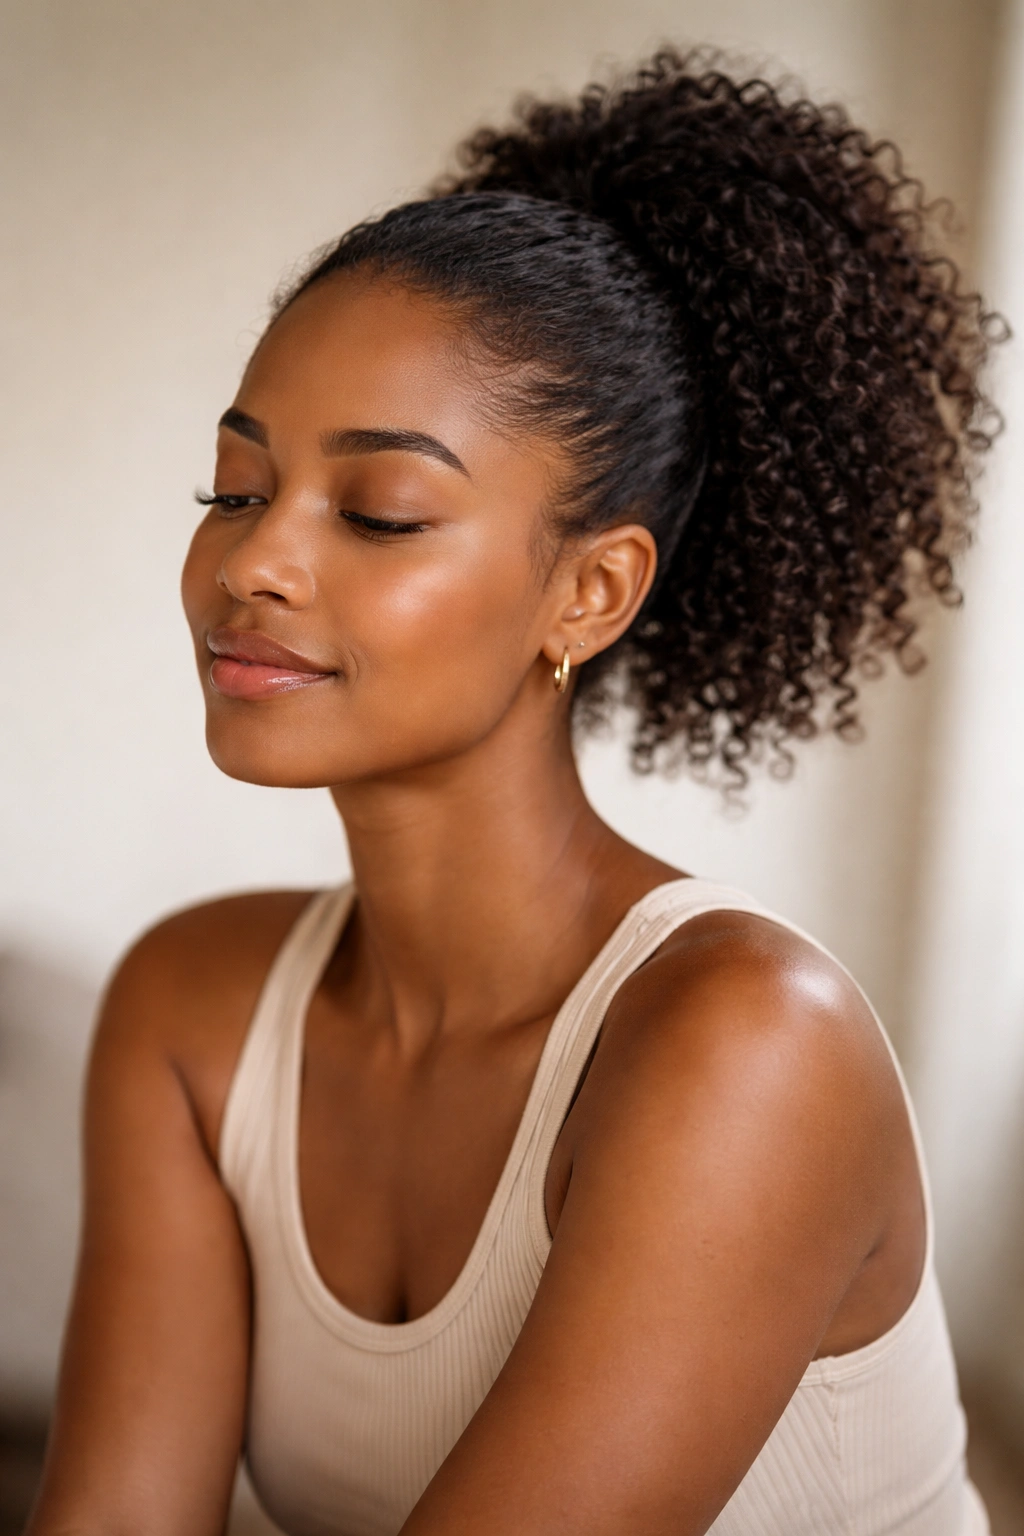
The beauty of these nine styles is that they’re all genuinely achievable in the time you actually have available in the morning. You don’t need special products, expensive tools, or skills you have to develop over months of practice. You need a comb, an elastic, maybe some bobby pins and edge control if you want to get fancy, and a willingness to try a few different variations until you find your favorites. Most importantly, these styles celebrate your natural hair instead of asking you to fight against it. Your texture, your curl pattern, your density—that’s what makes these styles work beautifully. The key is just picking one, practicing it once or twice so your hands know the motions, and then rotating through them throughout your week so you’re never bored and always feeling confident in how you look.
