



Twist styles have become one of the most versatile and visually striking options in natural hair care, especially for those working with shorter or medium-length textures. What makes twists so appealing isn’t just their aesthetic beauty — it’s the practical flexibility they offer. You can wear them as is, pin them up into elaborate updos, let them naturally blend together as they lock over time, or unravel them to create voluminous, defined waves. Whether you’re looking for a protective style that lasts weeks, a way to give your hair a break from daily manipulation, or simply a change that feels fresh and intentional, there’s a twist variation that fits your hair length, lifestyle, and styling goals.
The beauty of twist styles specifically designed for short to medium hair is that they work with your hair’s natural structure rather than fighting against it. You don’t need bone-straight lengths or a massive amount of hair to create stunning, well-defined twists. In fact, shorter hair often holds twist patterns more crisply, which can actually make your style look sharper and more defined. The key is understanding which twist variation suits your specific hair length, texture, and the amount of time and effort you’re willing to invest.
This isn’t just about following trends. Twists have deep roots in Black hair culture, representing both a practical styling method and an expression of identity and creativity. When you choose a twist style, you’re engaging with a technique that’s been perfected over generations — and you get to adapt it to match your unique look, lifestyle, and hair needs. Let’s explore ten distinct twist styles that work beautifully on short and medium hair, along with exactly how to create them, maintain them, and make them your own.
1. Two-Strand Twists
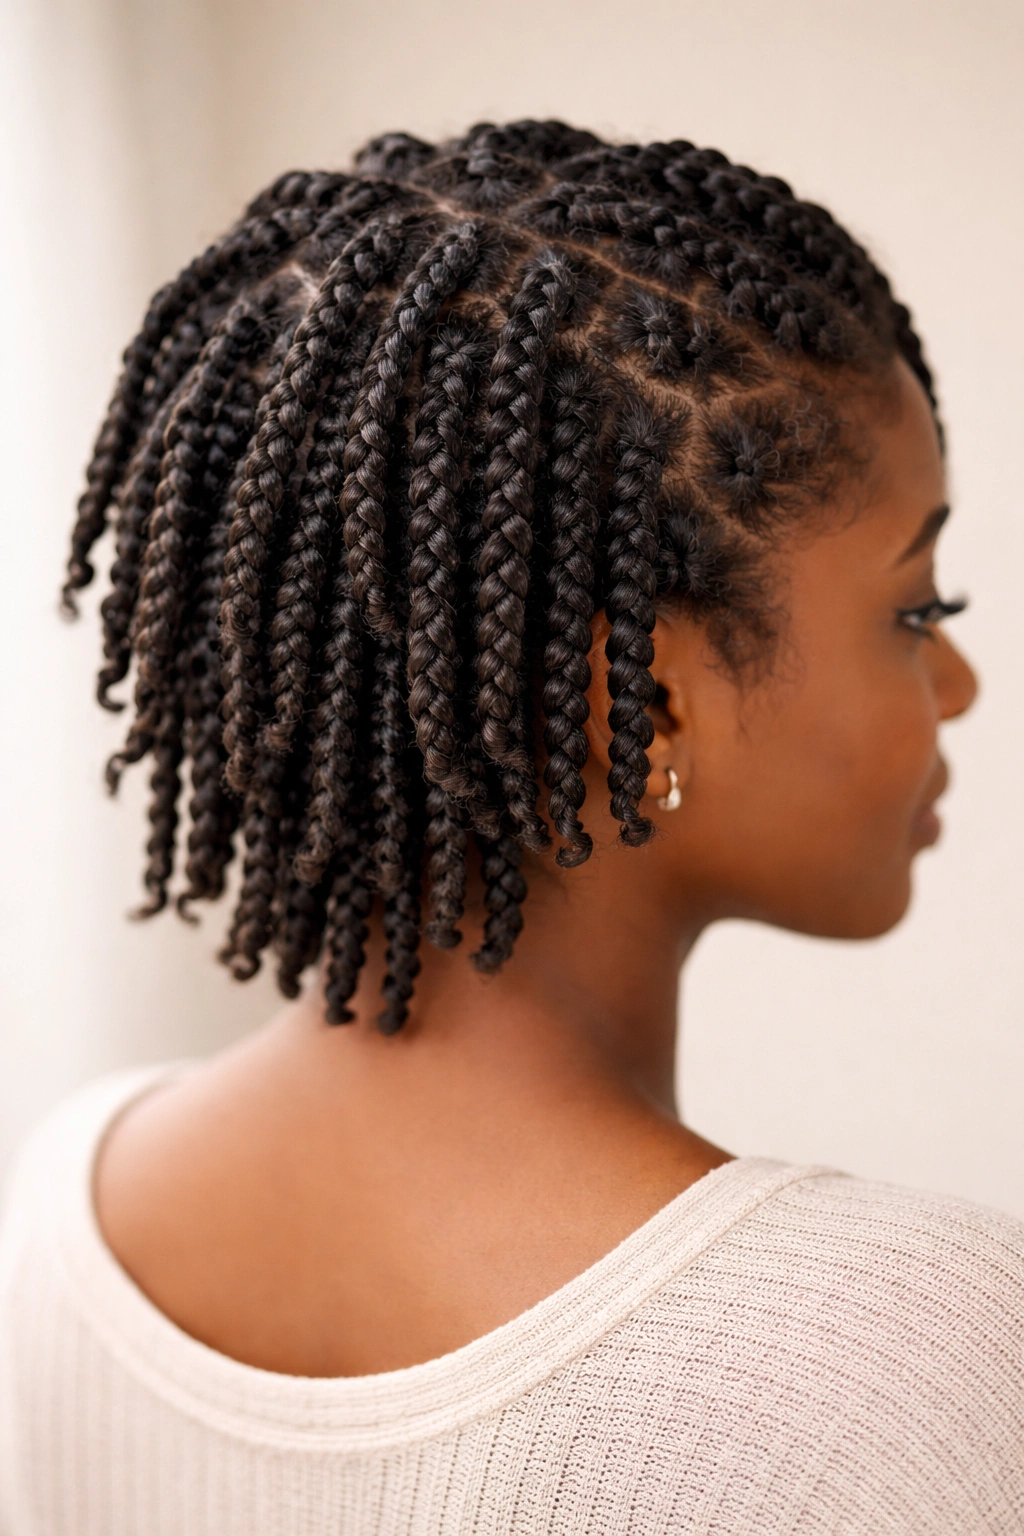
Two-strand twists are the foundational twist style — they’re simple to create, deeply versatile, and work across virtually every hair length and texture. The technique involves taking a section of hair, dividing it into two strands, and wrapping one strand around the other from root to tip, creating that signature twisted pattern. What makes two-strand twists so appealing for shorter to medium hair is that they create defined, individual sections that you can wear down, style into updos, or let them naturally blend together over time.
Why This Style Works So Well for Shorter Hair
Two-strand twists on shorter hair create an immediate, noticeable change in volume and dimension. The twisted texture catches light differently than loose natural hair, giving your hair an animated, textured appearance that photographs beautifully. On medium-length hair, you have even more styling flexibility — you can wear them down as a full protective style or pin sections up to create intricate patterns. The key advantage is that they don’t require minimum length thresholds like some other styles do.
How to Create Two-Strand Twists
- Detangle your hair completely using a wide-tooth comb or detangling brush, working in small sections from tip to root
- Section your hair into square or rectangular grid patterns, depending on how many twists you want — larger sections create thicker, chunkier twists that install faster, while smaller sections create finer twists with more definition
- Apply a twist cream, butter, or gel to a section, focusing on distributing product evenly from root to tip
- Divide the section into two equal strands and begin twisting by wrapping one strand over and around the other, maintaining consistent tension
- Continue to the ends, and if desired, seal the ends by rolling them between your fingers or dipping in hot water
- Repeat for all sections
Pro tip: For maximum definition and longevity, twist while your hair is damp or wet — the moisture helps the curl pattern set and hold. Avoid over-manipulation, which causes frizz and weakens the twist structure.
Styling Variations and Maintenance
You can wear two-strand twists loose for a full textured look, or gather them into a high ponytail, bun, or crown-like pattern for an instant updo. Many people also enjoy unraveling twists after one to two weeks to reveal beautifully defined waves and coils underneath. With proper moisturizing and regular nighttime protection using a bonnet or silk scarf, two-strand twists typically last two to four weeks depending on your hair’s texture and how actively you style them.
2. Box Twists
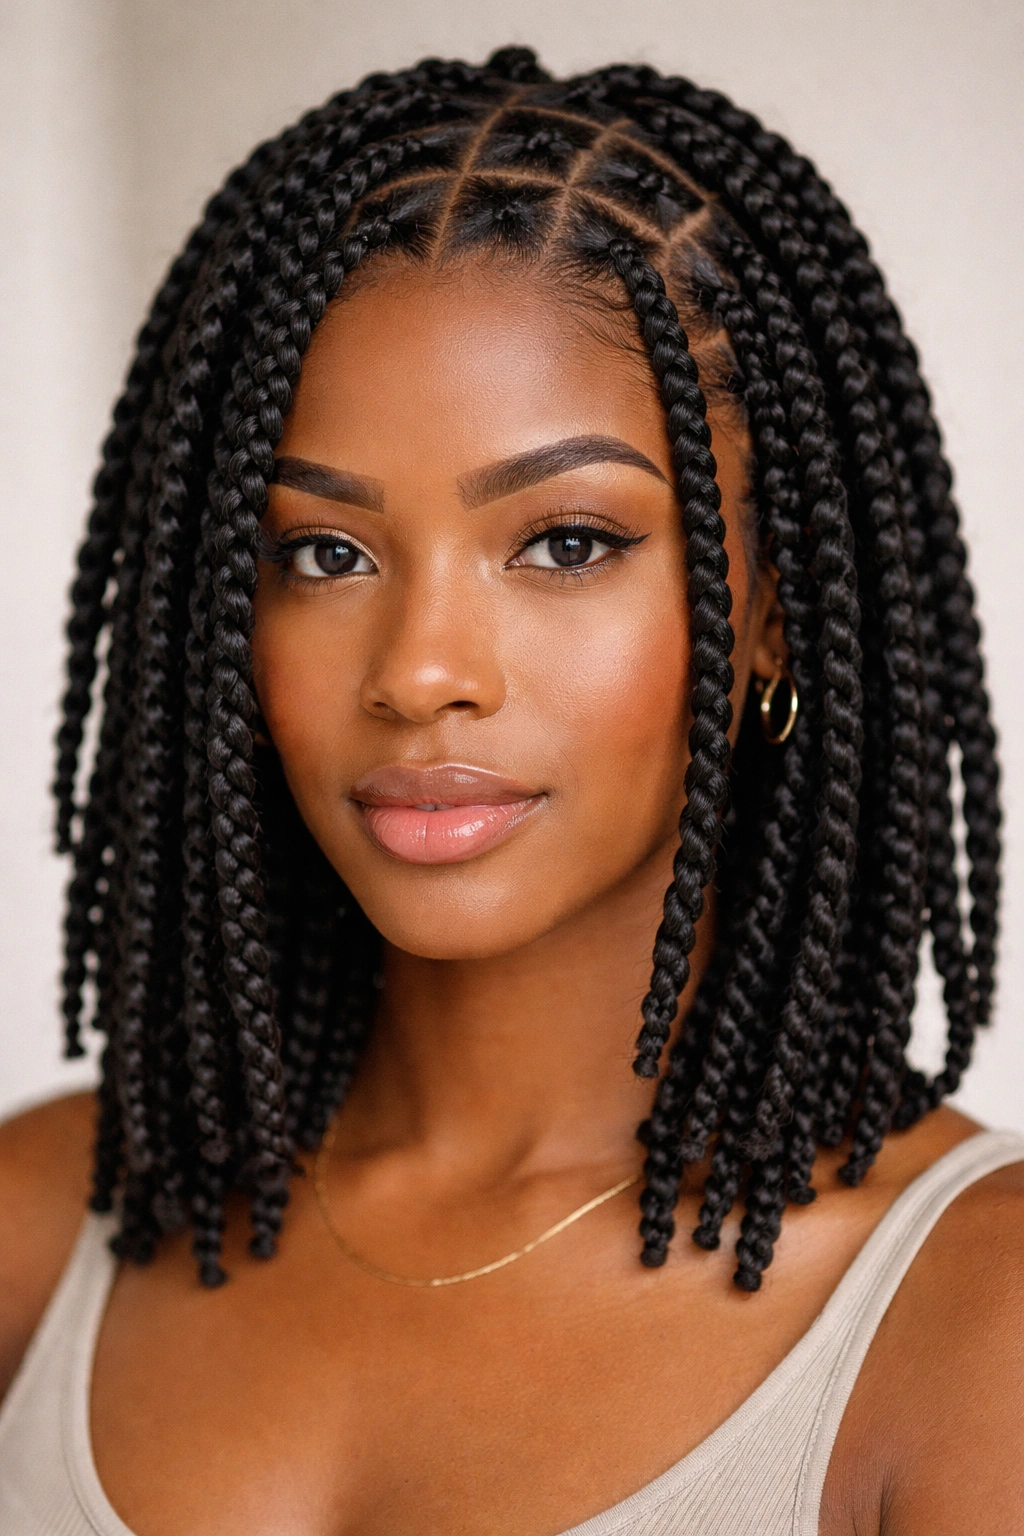
Box twists are essentially two-strand twists that’re twisted within a defined box-braided base, creating a structured look that sits cleanly against the scalp. Rather than twisting directly from the roots, you create a small box braid (usually three to four inches) and then transition into the twist for the remaining length. The result is a style that looks more intentional and polished, with a neat appearance at the roots and looser, bouncier twists throughout the length.
The Structure and Visual Impact
What distinguishes box twists is that neat, organized appearance they bring to the overall look. The boxed sections at the scalp create clean geometric patterns, which is particularly striking on shorter hair where the scalp pattern becomes a visible design element. The contrast between the structured braided base and the textured twist length creates visual interest and depth. Many people find that box twists feel more formal or styled than regular two-strand twists, making them a great choice if you’re heading to work, events, or situations where you want your style to look intentional and well-maintained.
Creating Box Twists Step-by-Step
- Start with clean, moisturized, detangled hair and create a grid pattern of boxes using your comb as a guide
- Beginning at one section, create a small three-strand braid starting from the roots — keep this braided section relatively short (three to five inches depending on your preference and hair length)
- Once you’ve braided the base, divide the remaining hair into two strands and begin your twist, incorporating the hair from the braid as you transition
- Maintain consistent tension between the braid and twist to create a seamless appearance
- Work through all sections systematically, completing the braided base for each section before moving to the twist
Styling Options and Longevity
Box twists typically last three to five weeks because the braided base provides additional structure and hold. You can wear them down, pin sections back, or create an updo by gathering the twists together. The braided component makes them particularly durable for active lifestyles — they’re less likely to unravel or become frizzy even with regular movement.
3. Marley Twists
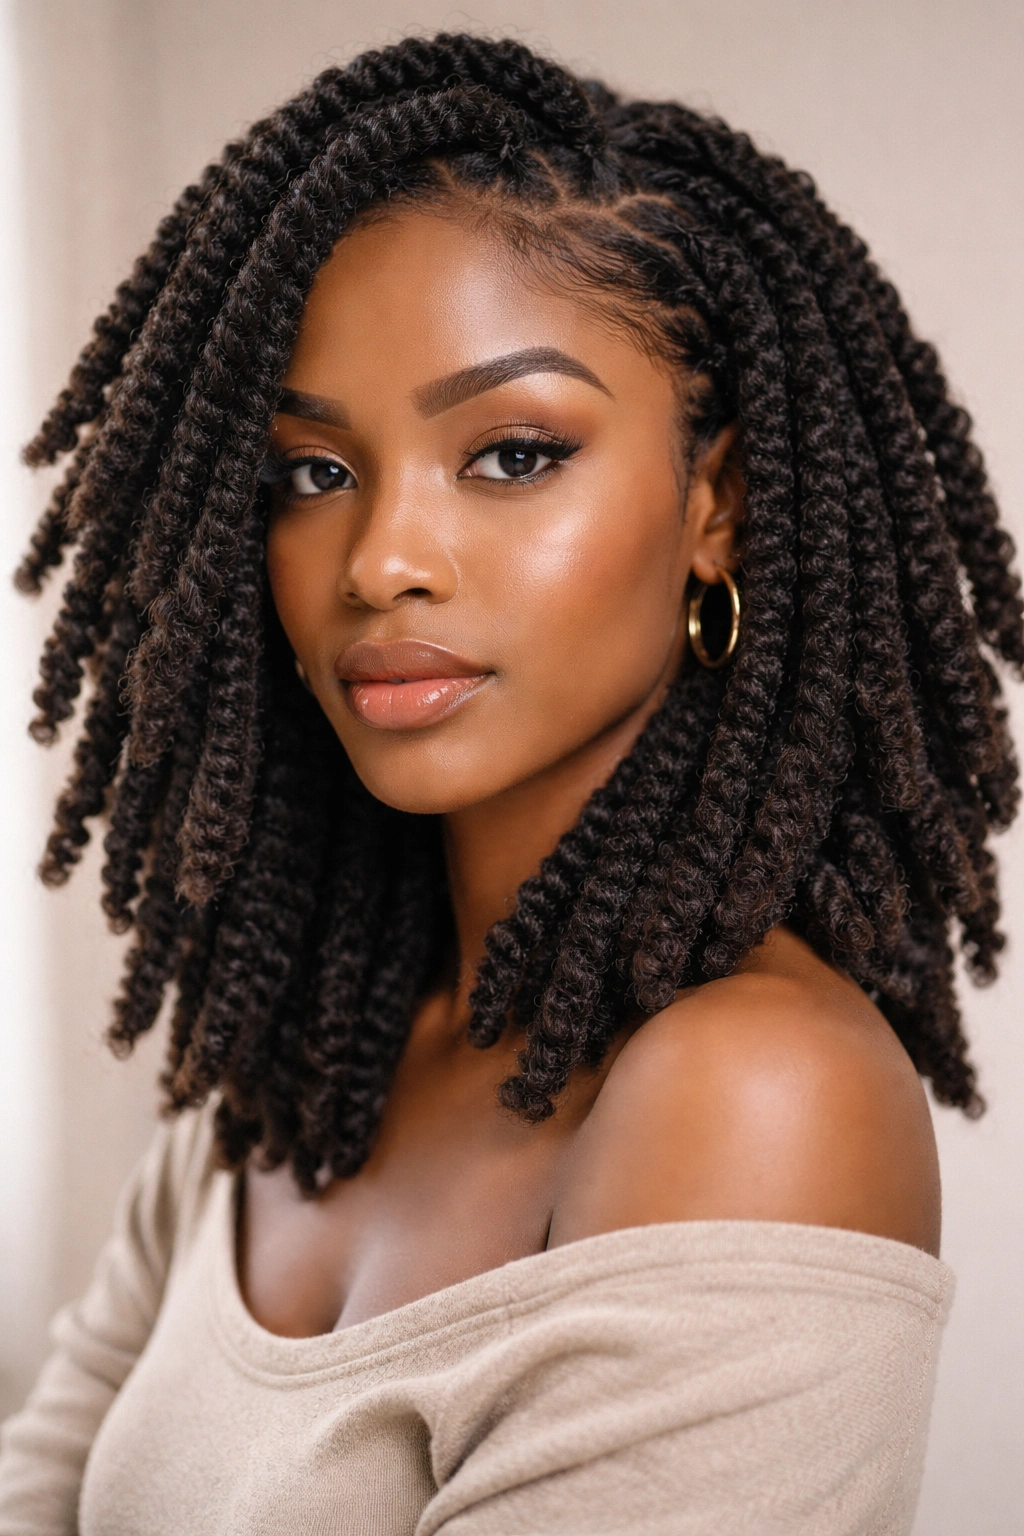
Marley twists earn their name from the type of synthetic hair traditionally used to create them — Marley hair is a textured, kinky synthetic fiber that blends beautifully with coily natural textures. This style involves twisting your natural hair together with a small amount of synthetic hair extension material, creating twists that are thicker, longer-lasting, and often more voluminous than what you’d achieve with natural hair alone. For people with shorter hair or finer textures, Marley twists are a game-changer because the added texture creates dramatic definition and visible dimension.
Why Add Extensions to Your Twists
The primary advantage of Marley twists is longevity combined with transformative volume. While natural-hair-only twists might last three to four weeks, Marley twists can last six to eight weeks or even longer because the synthetic component doesn’t absorb as much moisture and maintains its structure. For people transitioning their natural hair or working with shorter textures, Marley twists also allow you to experiment with length and fullness without waiting for your natural hair to grow. The synthetic hair adds texture that complements coily hair patterns, creating a more defined, dimensional look.
Installing Marley Twists on Shorter Hair
- Prepare your natural hair by detangling thoroughly and applying a light oil or leave-in conditioner
- Section your hair into the desired pattern — Marley twists work beautifully in larger sections, creating thicker twists that install faster
- Take a small piece of Marley hair (roughly the thickness of a pencil) and fold it in half
- Attach this folded section to your natural hair section at the roots by twisting all three components (both sides of the folded extension plus your natural hair) together
- Continue twisting from root to tip, maintaining even tension
- Seal the ends by dipping them briefly in warm water
Worth knowing: Marley hair comes in various colors and textures, so you can choose extensions that match your natural hair closely or intentionally create contrast. The kinky texture of Marley hair tends to hide any separation between your natural hair and extensions beautifully.
Maintenance and Removal
Marley twists require regular moisture, but because they’re a protective style, you’re not manipulating your natural hair daily. Moisturize your scalp and twists every three to four days with a light spray or oil. When you’re ready to remove them (after six to eight weeks), gently unravel each twist carefully to avoid breaking your natural hair. This style is excellent for people who want their protective style to last longer or who are giving their natural hair an extended break from styling and manipulation.
4. Rope Twists
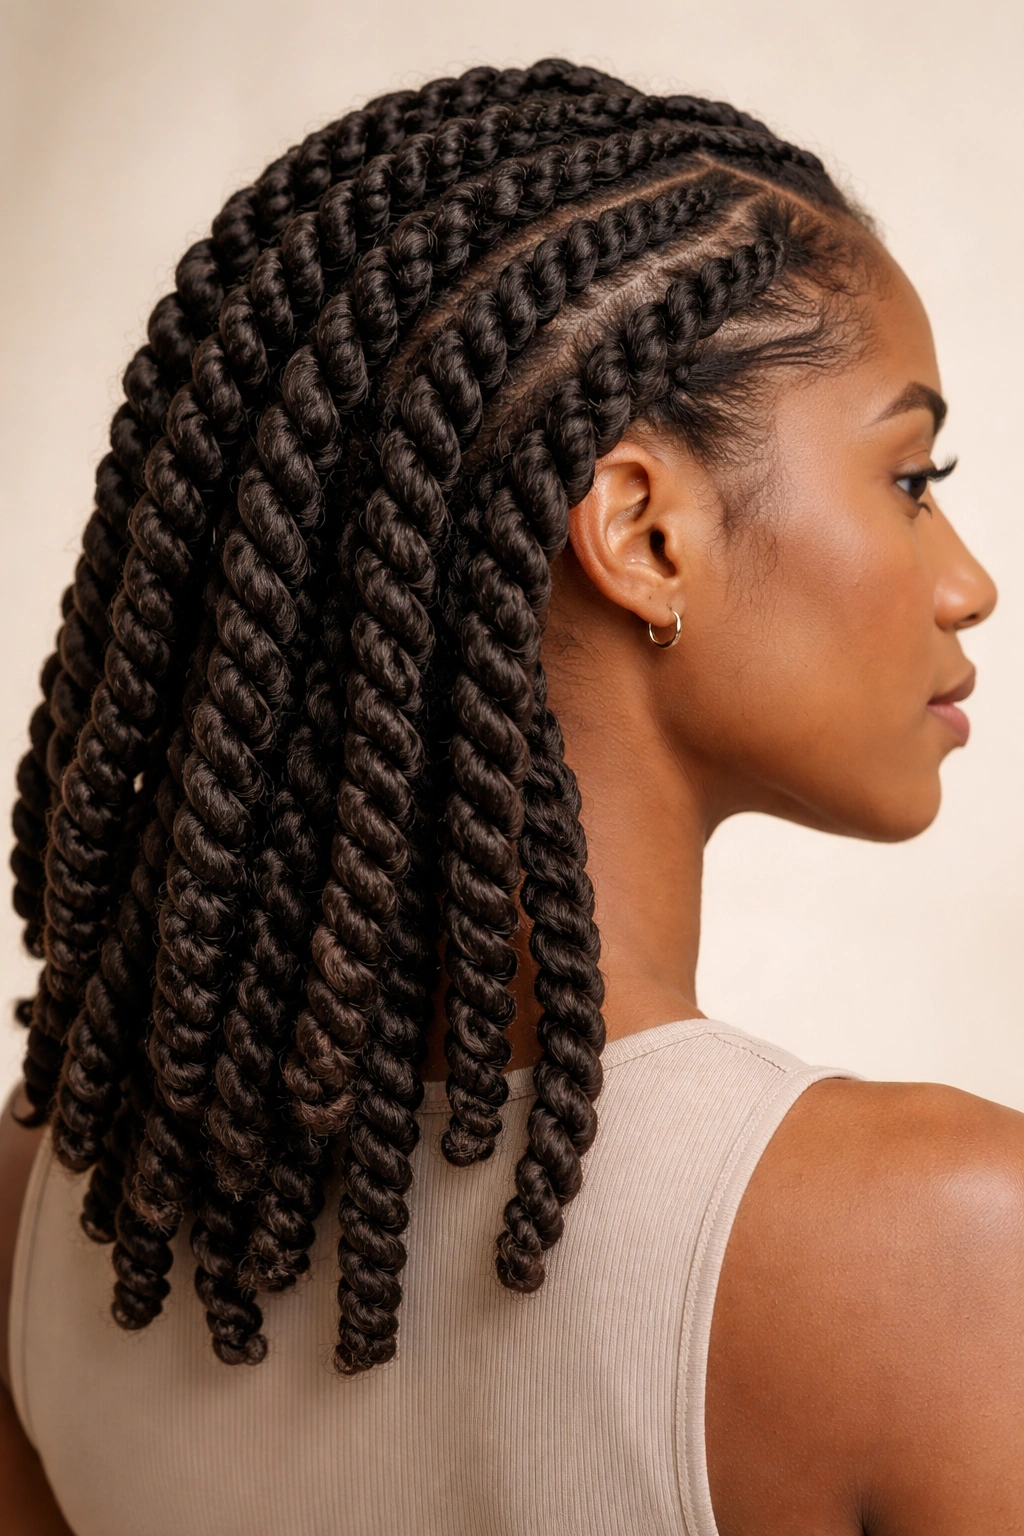
Rope twists are created using a technique that’s distinctly different from standard two-strand twists — instead of wrapping one strand around another, you’re creating a rope-like pattern by wrapping the strands in the same direction. The result is a thicker, more textured appearance that creates visual impact without requiring as many individual twists. Rope twists are particularly effective on shorter hair because fewer twists mean less installation time while still creating a full, dimensional look.
The Technique and Why It Creates Different Texture
With rope twists, you divide hair into two strands and wrap both strands in the same rotational direction (rather than opposite directions like traditional twists). This creates a rope-like effect that sits slightly differently on the head and catches light in a unique way. The resulting texture is chunkier and more pronounced, which works wonderfully on shorter hair where you want maximum visual impact. Many people find that rope twists give their hair a more sculptural appearance compared to smoother two-strand twists.
Step-by-Step Rope Twist Installation
- Prepare your hair with thorough detangling and moisturizing product application
- Create sections based on your desired twist size — rope twists work beautifully in larger sections
- Divide a section into two strands of equal thickness
- Instead of wrapping one strand around the other, wrap both strands in the same direction (both clockwise or both counterclockwise), maintaining even tension
- Continue this wrapping motion from root to tip — the rope effect should become visible within the first few inches
- Complete all sections, then seal the ends if desired
Styling Versatility and Care
Rope twists look striking worn down, but they also pin up beautifully for events or everyday upstyles. The thicker structure means they typically last four to five weeks with proper care. Moisturize regularly every few days, and protect your twists at night with a bonnet or silk scarf to maintain definition and prevent frizz. The rope pattern is particularly forgiving of some frizz, which makes this style great for people who are less concerned about maintaining a perfectly sleek look and more interested in texture and dimension.
5. Senegalese Twists
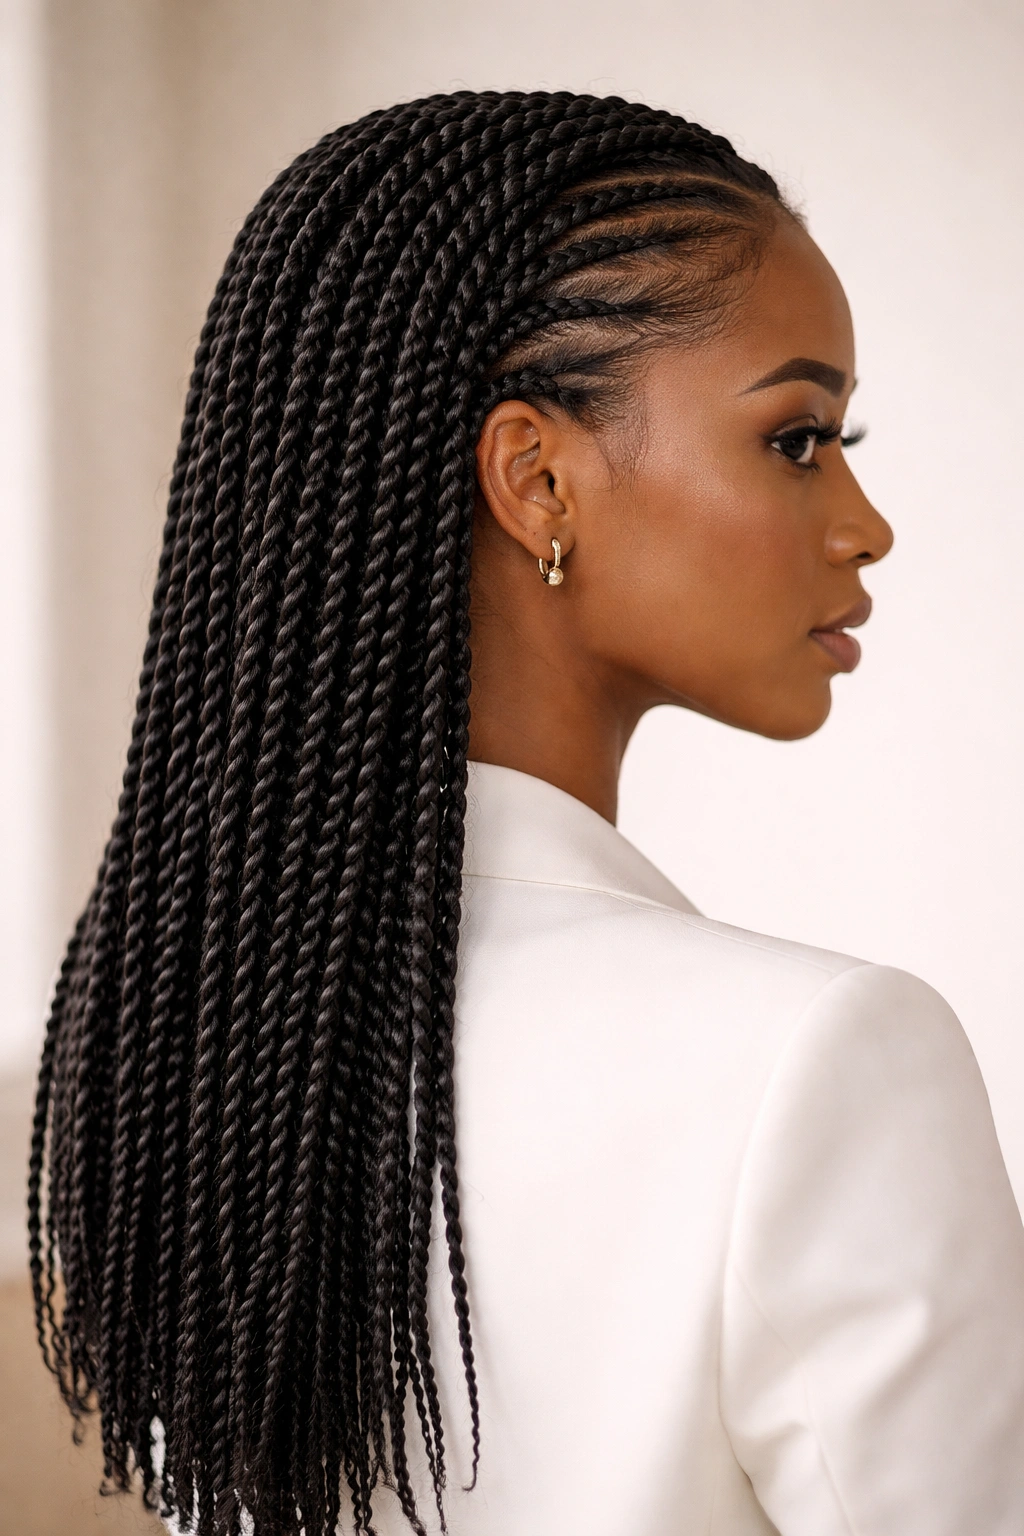
Senegalese twists are a protective style that combines elements of twisting with clean, polished aesthetics. Also called rope twists (though technically different from the rope twist style above), they involve twisting extensions around your natural hair, typically using braiding hair or a similar lightweight extension material. The distinguishing feature is that Senegalese twists often have a refined, elegant appearance — they’re sleeker and smoother than textured styles like Marley twists, and they create a more uniform, intentional look.
Aesthetic Appeal and Professional Versatility
Senegalese twists bridge the gap between protective styling and polished elegance. They look undeniably styled and intentional without appearing casual or playful like some texture-heavy styles. For this reason, many people choose Senegalese twists for professional environments, special occasions, or when they want their hair to feel both protective and sophisticated. On shorter hair, Senegalese twists create clean geometric patterns that are almost sculptural in appearance.
How to Create Senegalese Twists
- Thoroughly detangle and moisturize your natural hair
- Create clean sections using a rattail comb — Senegalese twists often look best in medium-sized sections that create visible structure
- Select braiding hair in a color that matches or complements your natural hair
- Divide the braiding hair into two sections and attach both sections to your natural hair at the roots
- Twist all three components together (your natural hair plus both braiding hair sections), maintaining very even, consistent tension
- Continue to the ends, creating a smooth, rope-like twist
- Seal the ends neatly — some people do this by dipping in hot water, others by wrapping the ends tightly
Pro tip: Use high-quality braiding hair that moves smoothly and doesn’t separate easily. Cheaper synthetic hair can look dull and separates more readily, which defeats the polished aesthetic you’re going for with Senegalese twists.
Longevity and Daily Wear
Senegalese twists typically last four to six weeks, making them an excellent long-term protective style. They’re durable enough for regular styling, confident enough for professional settings, and they require reasonable maintenance — moisturize your scalp and twists every three to four days with a light product. Many people appreciate that Senegalese twists don’t require the constant frizz management that some textured styles do, making them lower-maintenance while still looking intentional and well-styled.
6. Spring Twists
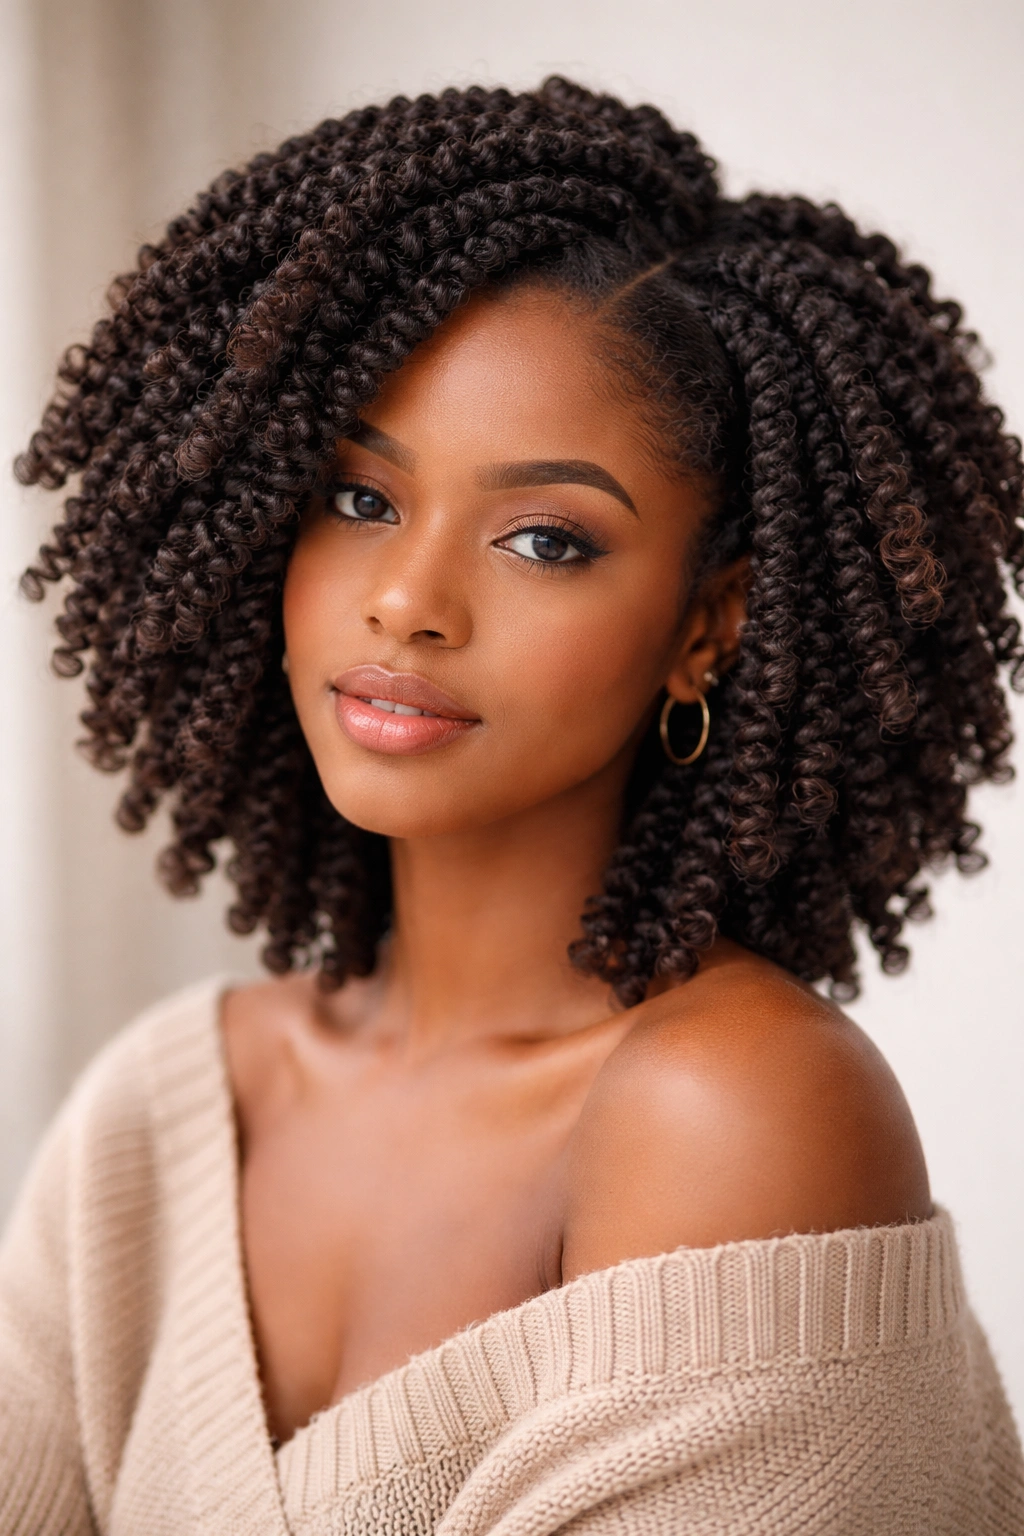
Spring twists are a newer innovation in protective styling that creates incredibly voluminous, bouncy twists through the use of pre-twisted coily extensions. Rather than twisting your hair and extension material together, you wrap your natural hair around ready-made coiled extension material, creating twists that are naturally full, springy, and have a distinctly different aesthetic from traditionally-twisted styles. For shorter hair, spring twists deliver dramatic volume and a playful, textured appearance.
Why Spring Twists Offer Unique Volume
The magic of spring twists lies in the pre-coiled extension material. When you wrap your natural hair around these coils, you create a thick, full twist without needing massive amounts of extension hair or creating twists that are too tight. The result is a style that feels bouncy, textured, and visually voluminous — perfect if you’re transitioning to natural hair, working with shorter lengths, or simply wanting your hair to have serious presence and movement. Spring twists also tend to have a more youthful, playful energy compared to sleeker twist styles.
Installing Spring Twists on Short Hair
- Start with clean, well-moisturized, thoroughly detangled hair
- Section your hair into your desired pattern — spring twists work well in medium to larger sections
- Unravel or prepare your spring twist extension (this comes pre-coiled and often needs to be loosened slightly)
- Position the spring twist extension perpendicular to your natural hair section
- Begin wrapping your natural hair around the spring extension, maintaining consistent tension and creating a spiral pattern
- Continue wrapping from root to tip, making sure your natural hair is well-integrated into the coils
- Secure the end by wrapping tightly or tucking it into the coil structure
The Playful Aesthetic and Maintenance Reality
Spring twists create undeniable visual impact — they’re bold, they’re dimensional, and they feel energetic in a way that other twist styles don’t. They work beautifully for people who want their hair to make a statement and who enjoy the bouncy, coily aesthetic. Keep in mind that they do require regular maintenance to keep them looking fresh. Frizz can be more visible than with other styles, so moisturize frequently and protect them well at night. They typically last three to five weeks, depending on how actively you style them and your hair’s tendency toward frizz.
7. Passion Twists
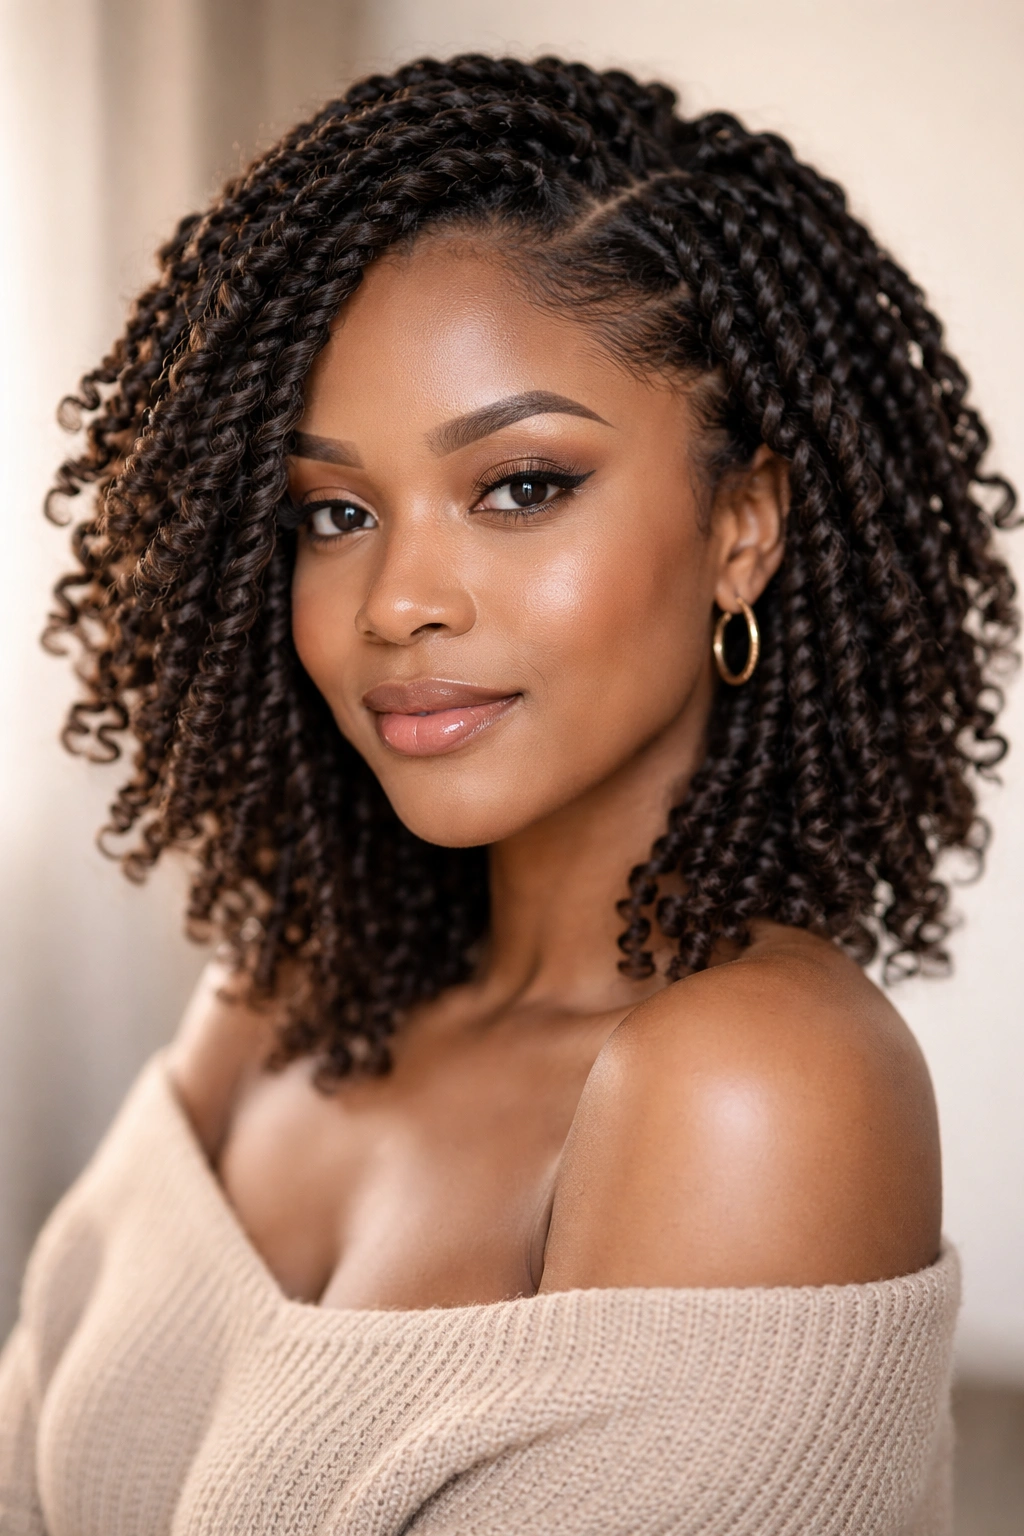
Passion twists are springy, voluminous twists created by wrapping pre-twisted extensions around your natural hair, resulting in a fuller, softer aesthetic compared to spring twists. The distinction is subtle but noticeable — passion twists tend to be slightly looser and softer, creating a more relaxed vibe than the bouncy spring aesthetic. They became increasingly popular as a protective style that offers volume without the sleekness of traditional twists or the structure of braids.
The Softer, Looser Appeal
Where spring twists are springy and defined, passion twists have a more flowing, relaxed quality. The pre-twisted extensions are typically wrapped more loosely around your natural hair, creating a softness that some people find more wearable for everyday life. Passion twists are particularly popular for people who want their protective style to feel less styled and more naturally textured. On shorter hair, passion twists create dimension and visible structure without appearing overly done.
Creating Passion Twists Step-by-Step
- Prepare your hair with thorough detangling and light moisturizing
- Create sections — passion twists work beautifully in medium sections
- Take your passion twist extension (pre-twisted braiding hair) and position it along your natural hair section
- Begin wrapping your natural hair around the extension, creating a spiral pattern from root to tip
- Maintain medium tension — you want definition but not tightness
- Continue throughout all sections, keeping the twists relatively consistent in size and appearance
Worth knowing: Passion twist extensions come in various textures and colors. Some are finer and create delicate twists, while others are thicker and create more dramatic volume. Choose based on whether you want your style to feel refined or bold.
Styling and Longevity
Passion twists look beautiful worn down and freely, or you can pin them into updos and gathered styles for variety. They typically last three to five weeks with regular moisturizing. The relaxed nature of passion twists means they’re slightly lower-maintenance than spring twists — frizz is less noticeable because the style is intentionally textured and soft. This makes them a great choice if you want a protective style that doesn’t require constant attention to maintain its appearance.
8. Flat Twists
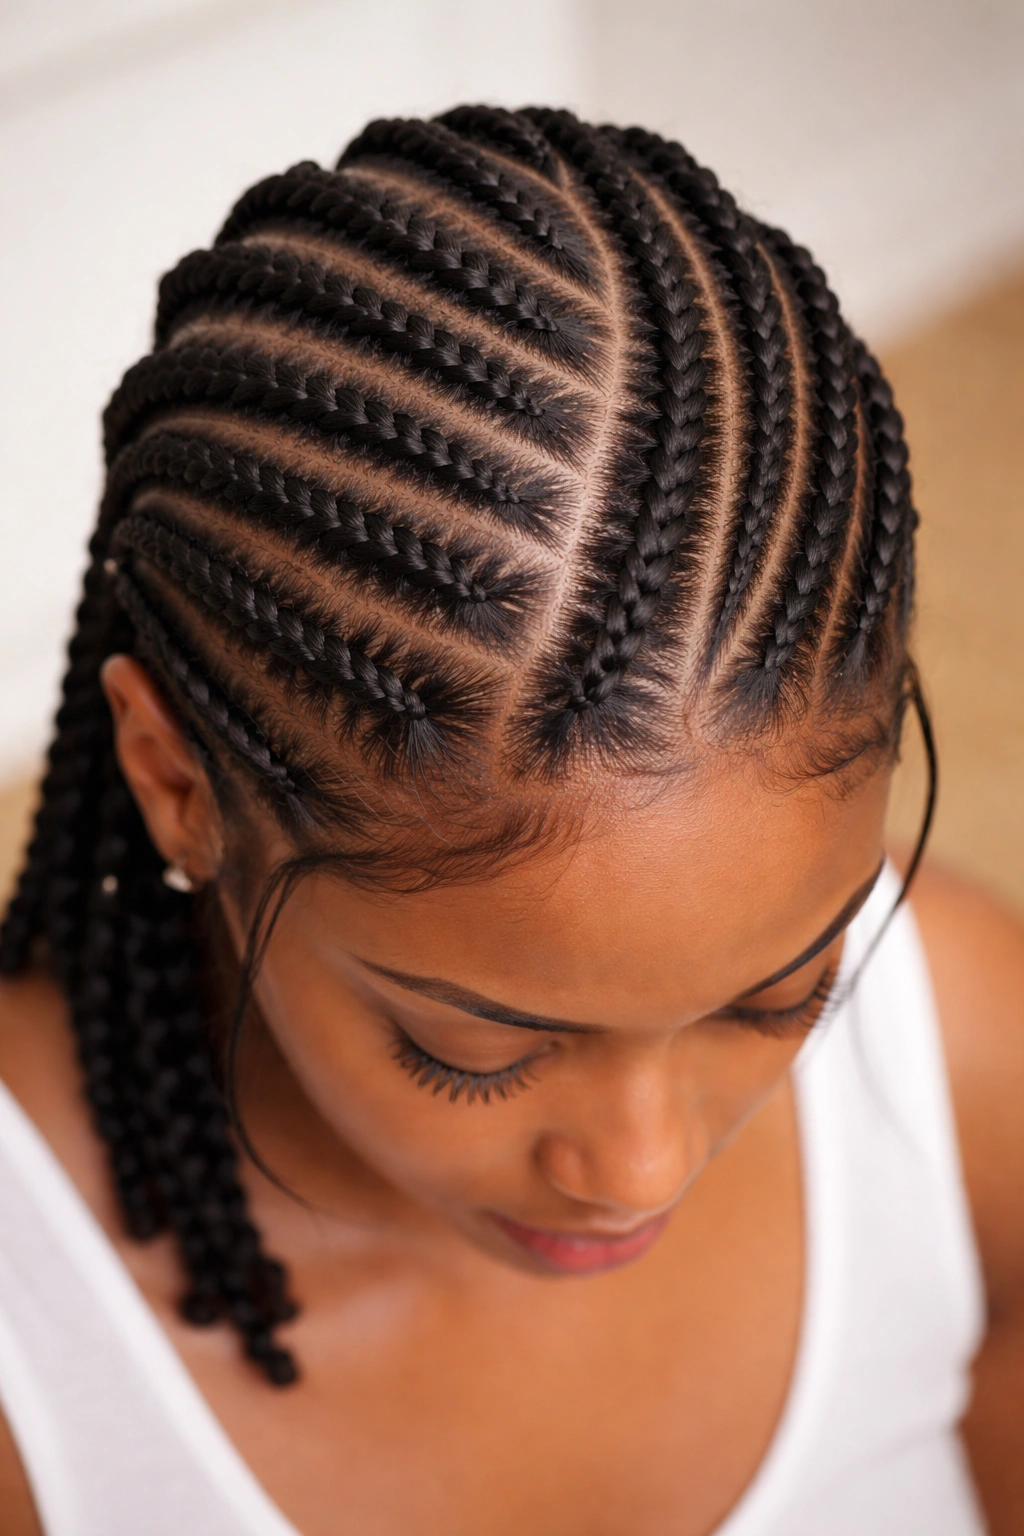
Flat twists are a cornrow-adjacent style where you twist your hair in a flat pattern directly against the scalp, similar to how you’d create cornrows but using a twist motion instead of a braiding motion. The result is a neat, organized style where visible twisted patterns create geometric designs across your scalp. For shorter hair, flat twists create beautiful patterns and give you a protective style that’s neat enough for professional settings while still being distinctly styled.
The Structured Aesthetic and Versatility
Flat twists are perfect if you want your protective style to showcase intentional design at the scalp level. Because the twists sit directly against your head, the patterns you create become a visible design element — you can make straight lines, curved patterns, circular designs, or geometric shapes depending on how you direct the twists. This makes flat twists especially fun for people who enjoy the artistry of hairstyling and want their protective style to be visually interesting from every angle.
How to Create Flat Twists
- Start with thoroughly detangled, slightly dampened hair
- Plan your pattern — decide whether you want curved lines, straight lines, or geometric designs
- Beginning at your hairline, take a small section and divide it into two strands
- Start twisting at the roots, simultaneously moving along the scalp in your desired direction — you’re twisting and directing the twist along a path rather than twisting in one place
- Continue adding hair from the scalp to each strand as you move, maintaining consistent tension so the twist sits flat and clean
- Complete your planned path and finish the remaining loose hair at the ends however you prefer (leave loose, secure with a small rubber band, curl, or tuck underneath)
- Repeat for additional flat twist patterns
Maintenance and Wearing Options
Flat twists typically last two to three weeks before they start to loosen and lose definition. You can tuck the loose ends under themselves to create updos, or leave them hanging freely for a mixed style. Protect them at night with a bonnet to prevent frizz and maintain the flat pattern. This style is excellent if you’re working with shorter hair because the neat, organized appearance makes shorter lengths look intentional and polished rather than simply grown-out.
9. Chunky Twists
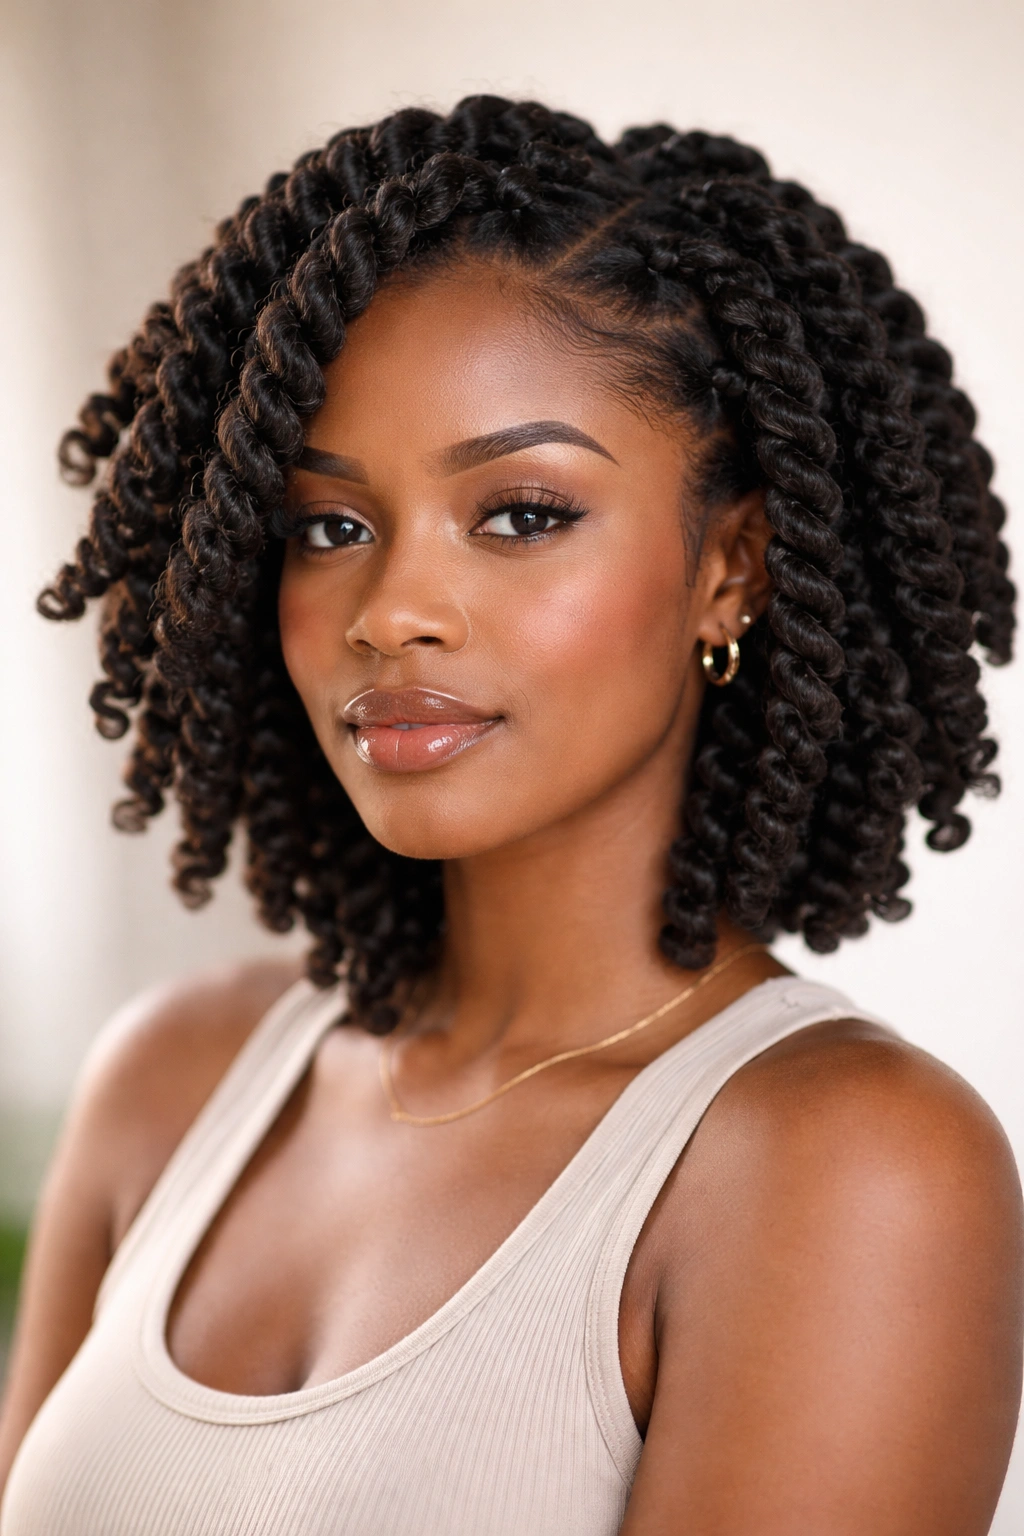
Chunky twists are exactly what they sound like — thick, substantial twists created with larger hair sections that deliver maximum visual impact with minimal styling time. Rather than creating numerous thin twists, you’re working with significantly fewer, much thicker twists that cover your entire head. For people with shorter hair, chunky twists are a game-changer because they create a full, textured look without requiring hours of installation or hundreds of individual twists.
Why Fewer, Thicker Twists Work on Short Hair
The beauty of chunky twists is efficiency combined with style. A head of chunky twists might take two to four hours to install compared to eight to twelve hours for fine, numerous twists. Visually, chunky twists create dimensional texture and volume that translates beautifully on shorter hair — you don’t need length to make them look substantial and styled. The thick twists also tend to be more durable and last longer because they’re less prone to loosening or unraveling.
Installing Chunky Twists
- Detangle thoroughly and apply moisturizing product
- Create large square or rectangular sections — you might only have six to twelve sections total for a full head depending on your hair density
- Take one large section and divide it into two thick strands
- Begin your twist at the roots using the same wrapping motion as traditional two-strand twists, but with the larger sections
- Continue to the ends, maintaining consistent, even tension throughout
- Repeat for all sections
Pro tip: Apply product generously to chunky sections before twisting — the larger surface area means product sometimes gets missed if you’re not thorough. Good product distribution helps the twist hold definition and prevents drying.
Styling and Long-Term Wear
Chunky twists work beautifully worn down for maximum texture and dimension, but you can also gather them into a ponytail or bun for a completely different look. They typically last three to five weeks depending on how you style them. The thick structure means they’re relatively low-maintenance — moisturize regularly, protect at night, and they’ll maintain their appearance well. Many people find that chunky twists feel like the perfect sweet spot between the time investment of traditional twists and the visual impact you’re looking for.
10. Micro Twists
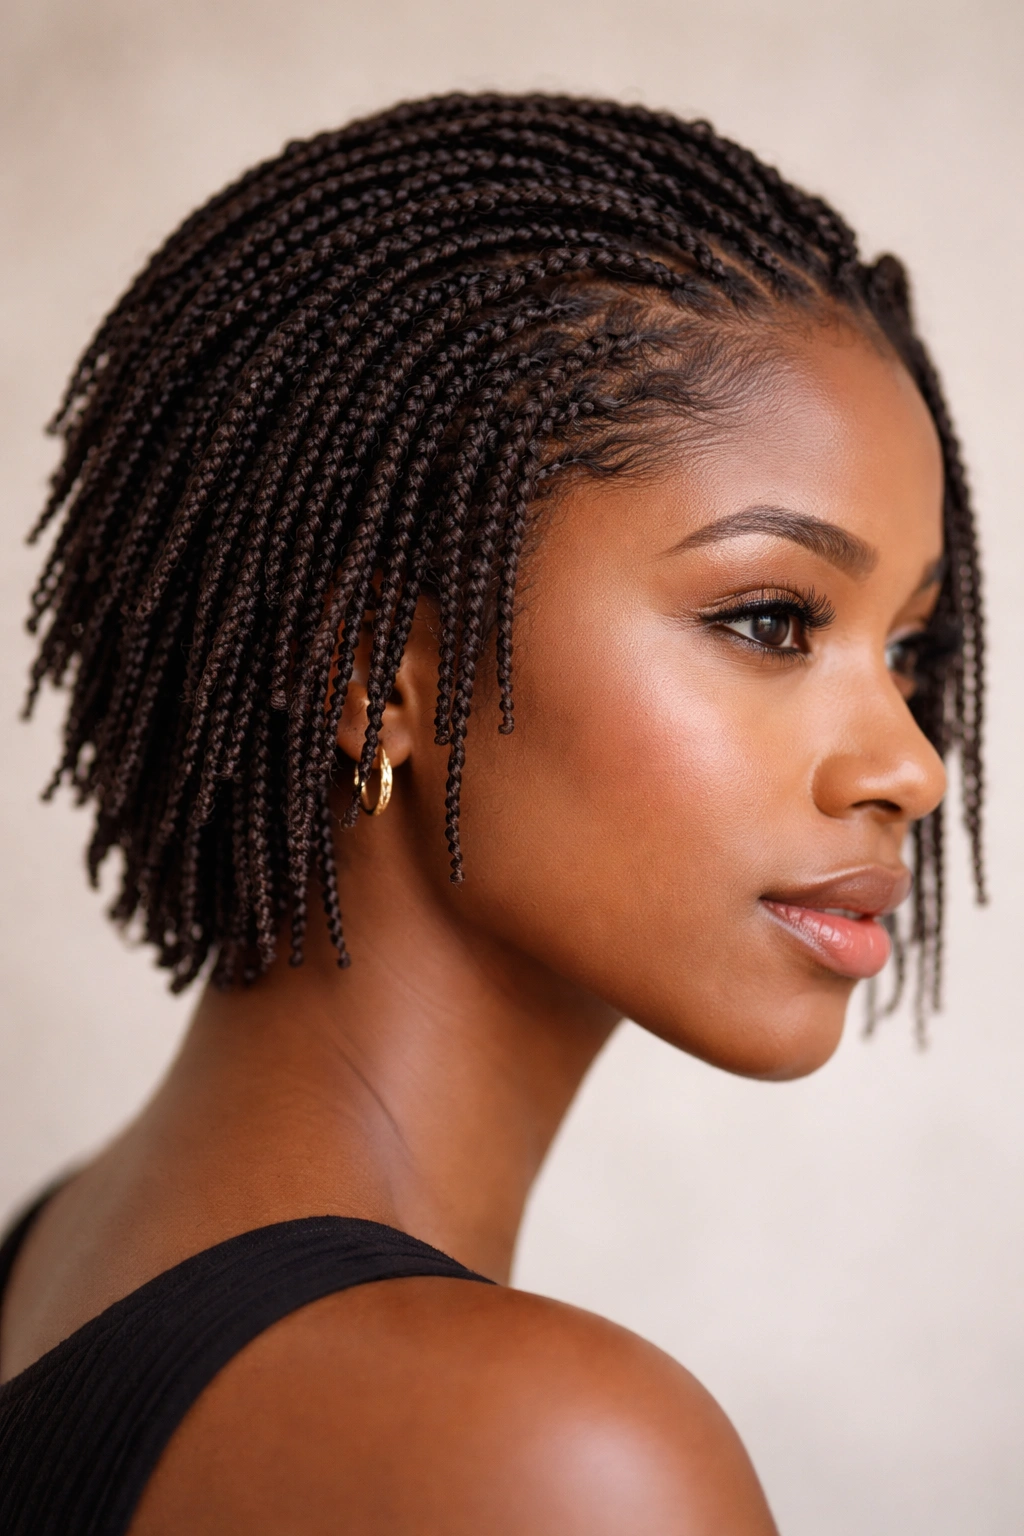
Micro twists represent the opposite end of the spectrum from chunky twists — they’re thin, delicate twists created with tiny sections of hair that deliver incredible detail and definition. While they require significantly more installation time (often eight to fourteen hours or more), the result is a style of stunning intricacy and visual sophistication. Micro twists work beautifully on shorter hair because the fine definition photographs beautifully and creates a polished, refined appearance.
The Intricate Beauty and Time Commitment
Micro twists are for people who love detail, appreciate the artistry of hair styling, or enjoy the meditative process of creating their style. Each tiny twist is distinct and visible, creating a visual effect of incredible intricacy. On shorter hair, micro twists create a sleek, intentional look that reads as highly styled. Many people find micro twists empowering because creating them is a process — you’re investing significant time in yourself, which many people find therapeutic and meaningful.
Creating Micro Twists: The Patient Approach
- Thoroughly detangle your hair, working gently to avoid breakage
- Create very small, uniform sections using a rattail comb
- Apply product to each small section
- Divide the section into two very thin strands
- Begin your twist at the roots, maintaining light but consistent tension
- Continue to the ends, ensuring the twist is defined and intact
- Repeat for every section — this is the time-intensive part, but consistency creates the polished look
Worth knowing: Consider having a professional install your micro twists if you have the budget. The repetitive motion can cause hand fatigue, and a professional will create more uniform twists that look incredibly cohesive.
Longevity and Styling Versatility
Micro twists are the longest-lasting twist style — they can last six to eight weeks or even longer because the small sections don’t loosen as readily. They look stunning worn down, they pin up beautifully into elaborate updos, and you can even let them lock together naturally over time if you’re not retightening them. With proper care — regular moisturizing and nighttime protection — micro twists maintain their definition and appearance throughout their entire lifespan. This is the go-to style for people who want one protective style that will last for months with minimal manipulation.
Final Thoughts
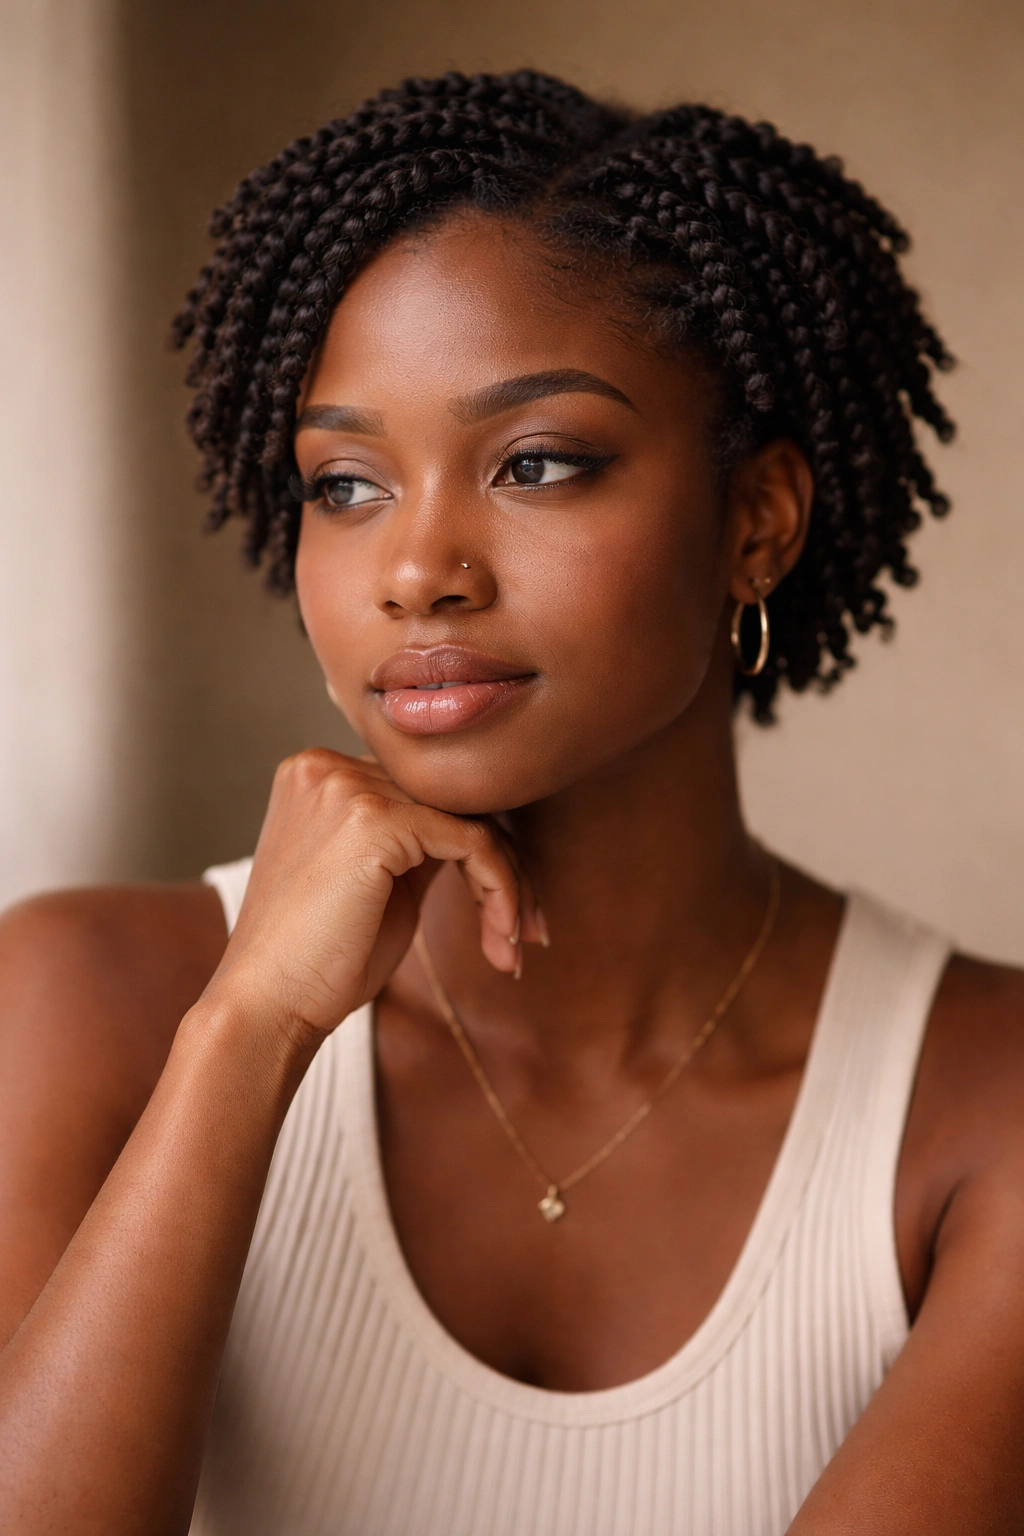
The twist style you choose ultimately depends on your hair length, personal aesthetic, available time, and how long you want your protective style to last. If you’re new to twists, starting with two-strand twists or chunky twists gives you a manageable learning curve while still delivering beautiful results. If you have more time and love the styling process, micro twists or box twists offer additional sophistication and visual interest. For maximum volume and impact, spring twists or passion twists bring dramatic transformation to shorter hair. The wonderful truth is that with ten distinct options, there’s absolutely a twist style that fits your unique needs and makes you feel confident and beautiful.
What matters most is choosing a style that you’ll actually maintain and that makes you feel genuinely good when you look in the mirror. Twists aren’t just a protective style — they’re a way to express your creativity, celebrate your hair’s texture, and give yourself a break from daily manipulation while still looking intentionally styled. Experiment, have fun with your choices, and remember that your hair has room for exploration and play.
