



Managing natural hair doesn’t mean you have to choose between protective styling and a fresh, put-together look. Small afro styles offer the perfect balance — they protect your hair from daily manipulation and environmental stress while keeping you looking polished and intentional. Whether you’re dealing with a wash-and-go situation, heading into a busy work week, or simply want your natural texture to shine without a major styling commitment, these styles deliver real versatility.
The beauty of small afro styles is that they work for virtually every curl pattern and hair density. From loose waves to tight coils, from fine strands to thick, voluminous hair, there’s a styling option that’ll complement your unique texture. These aren’t one-size-fits-all looks either — you can customize them with your preferred accessories, parting patterns, and the amount of hair you use in each section. The key is understanding the mechanics of each style so you can execute it with confidence and adjust it to match your specific hair needs.
What makes small afro hairstyles so practical is that most of them can be done at home without professional styling tools or extensive training. Sure, some styles take longer than others, but none of them require you to sit in a chair for eight hours. You’ll learn exactly how to create definition, maintain volume, and keep your edges fresh throughout the week. These styles also allow your hair to breathe — they’re not tight enough to cause tension alopecia, and they give your strands room to move naturally while still looking intentional and styled.
1. Knotless Box Braids with Soft Edges
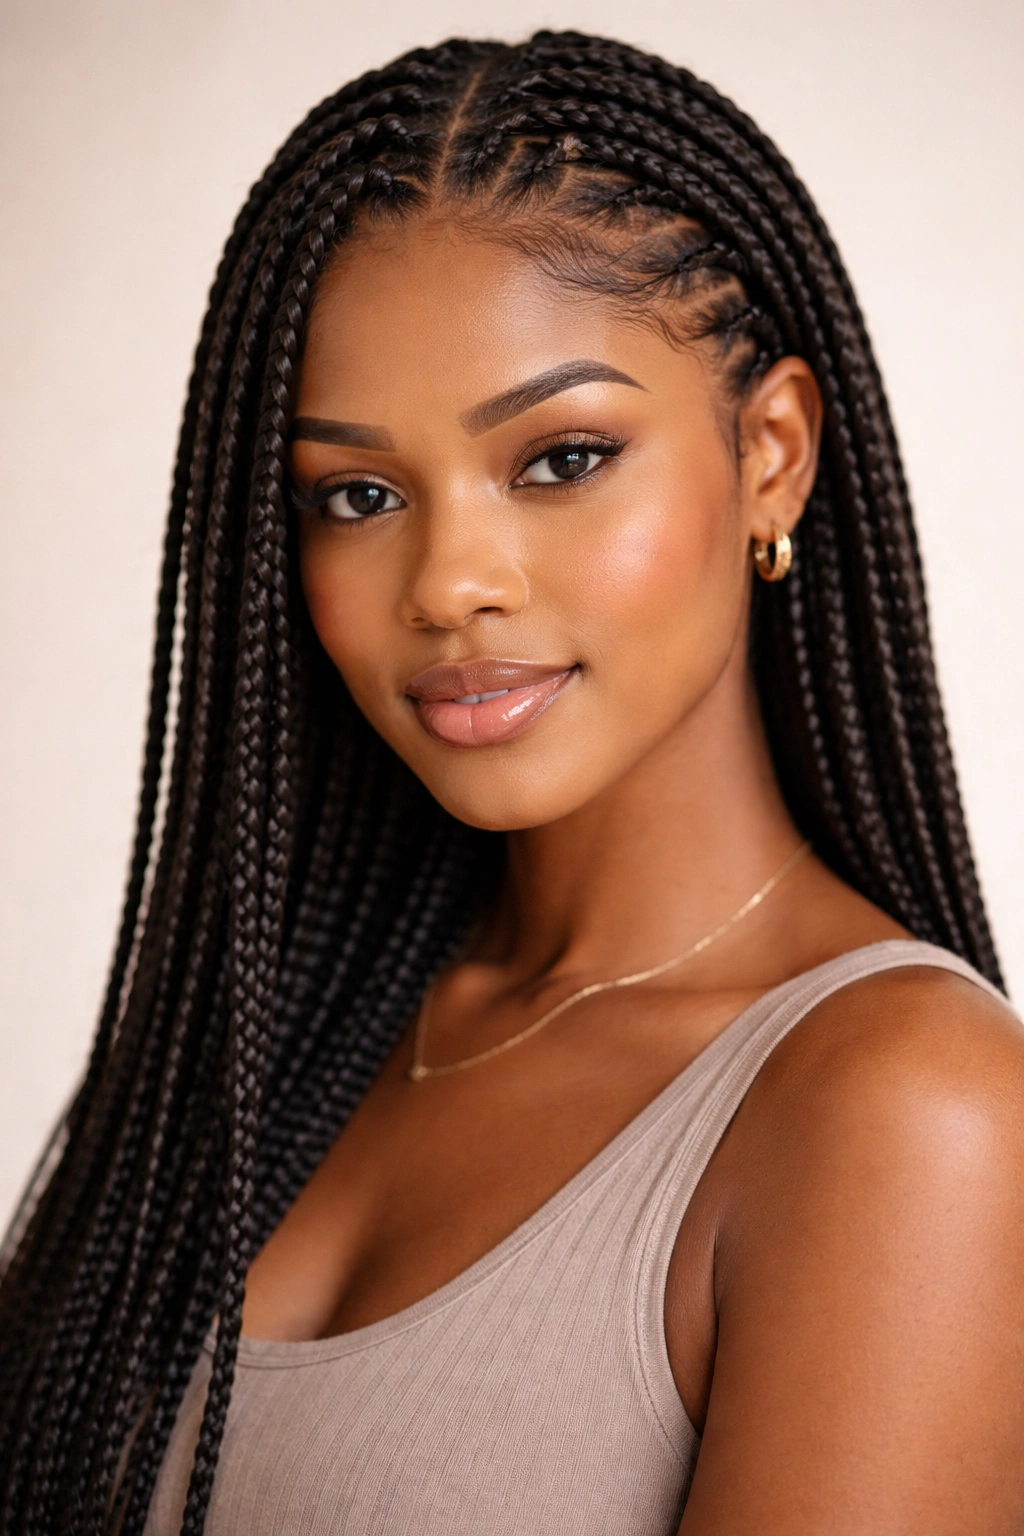
Knotless box braids are the go-to small afro style for anyone who wants protection without the heaviness of traditional box braids. The difference lies in how the braid starts — instead of tying knots at the root, you feed hair gradually into the braid pattern, creating a smoother, flatter foundation that feels lighter on your scalp and looks more refined at the hairline.
Why They’re Worth Your Time
The magic of knotless braids is that they’re gentler on your edges and natural hair strands. Because there’s no knot pulling at the root, you’re reducing tension and potential breakage right where your hair is most vulnerable. The graduated feeding technique also means the braids blend seamlessly with your natural hairline, creating a finished look that doesn’t scream “protective style” — it looks intentional and fashionable. Many people find they can wear knotless braids longer, sometimes up to six weeks, because the gentler construction doesn’t fatigue the strands.
How to Create Definition and Maintain Volume
- Keep your sections small but not microscopic — about the size of a quarter or slightly smaller for authentic small afro styling
- Use lightweight synthetic hair or human hair extensions to avoid adding unnecessary weight to your natural strands
- Braid consistently so the size remains uniform throughout — this creates a polished, professional appearance
- Leave the last inch or two of each braid unbraided to create those signature soft, fuzzy ends that soften the style
- Moisturize your braids twice weekly with a lightweight misting spray to keep your natural hair hydrated underneath
Pro tip: Install knotless braids slightly looser than you think you need them. They’ll tighten up naturally within the first day or two as the braids settle and your hair adjusts to the weight.
2. High Puff with Wrap-Around Edges
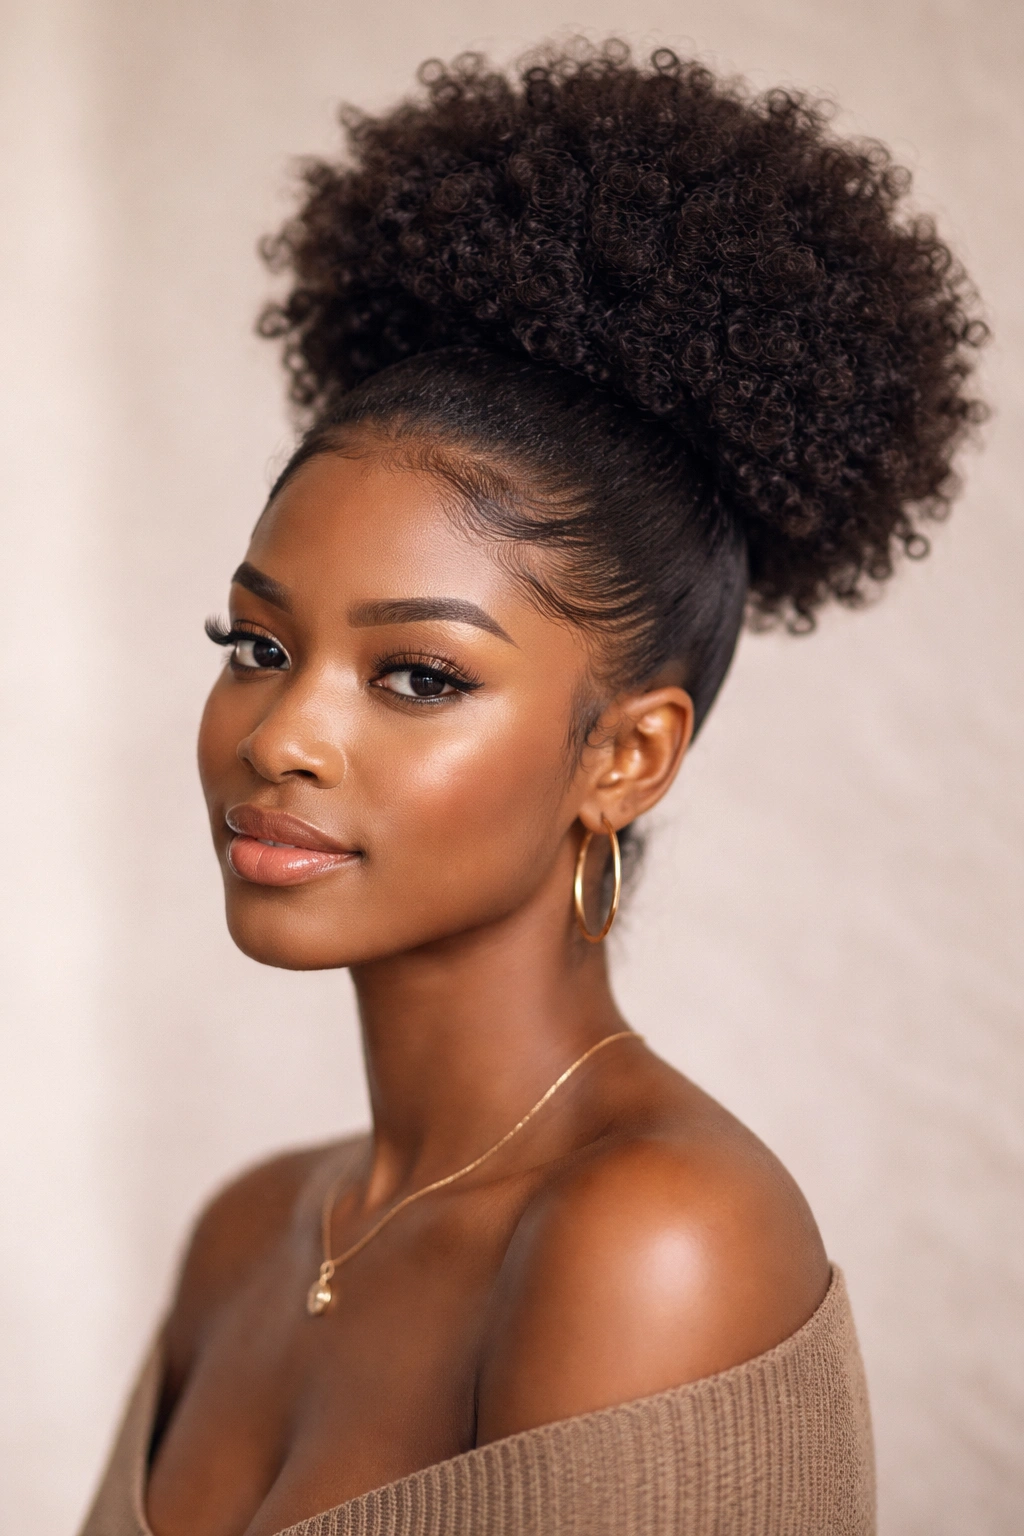
A high puff is the quintessential small afro style that works whether your hair is freshly washed or a few days old. This style gathers your hair into a ponytail at the crown, fluffs it into a rounded puff, and frames your face with soft, wispy edges. The wrap-around edge technique — where you create a ring of hair around the base of the ponytail — elevates this style from casual to sophisticated.
The Mechanics Behind a Voluminous Puff
Your puff’s size and shape depend on a few factors: how high you gather the ponytail, how much hair you use, and how aggressively you fluff it. Start by sectioning hair from your temples, over your crown, and down to the nape of your neck — this determines which strands go into the puff and which frame your face. Gathering the hair into a high ponytail at the crown gives you that desirable height and makes the puff sit away from your head rather than flattening against your scalp. The fluffing process is where magic happens — use your fingers to gently separate and lift sections of the ponytail, working from the inside out to create dimension and prevent a tight, pulled appearance.
Creating Polished, Defined Edges
- Brush your hairline and edges with a soft brush, never rough or aggressive strokes
- Apply edge control to the front sections you’re leaving out, smoothing them against your face in a flattering pattern
- Create a wrap-around edge by taking a small section of hair and wrapping it horizontally around the base of your ponytail to hide the elastic
- Secure the wrap with a bobby pin, making sure the ends tuck neatly underneath
- Consider creating soft waves or swoops in your wrapped section using a rattail comb for extra polish
Worth knowing: A high puff actually works better on hair that’s been washed two or three days prior. Fresh-wash hair is slippery and harder to manipulate, while slightly older hair has more grip and holds the puff shape longer.
3. Curved Braids with Natural Texture
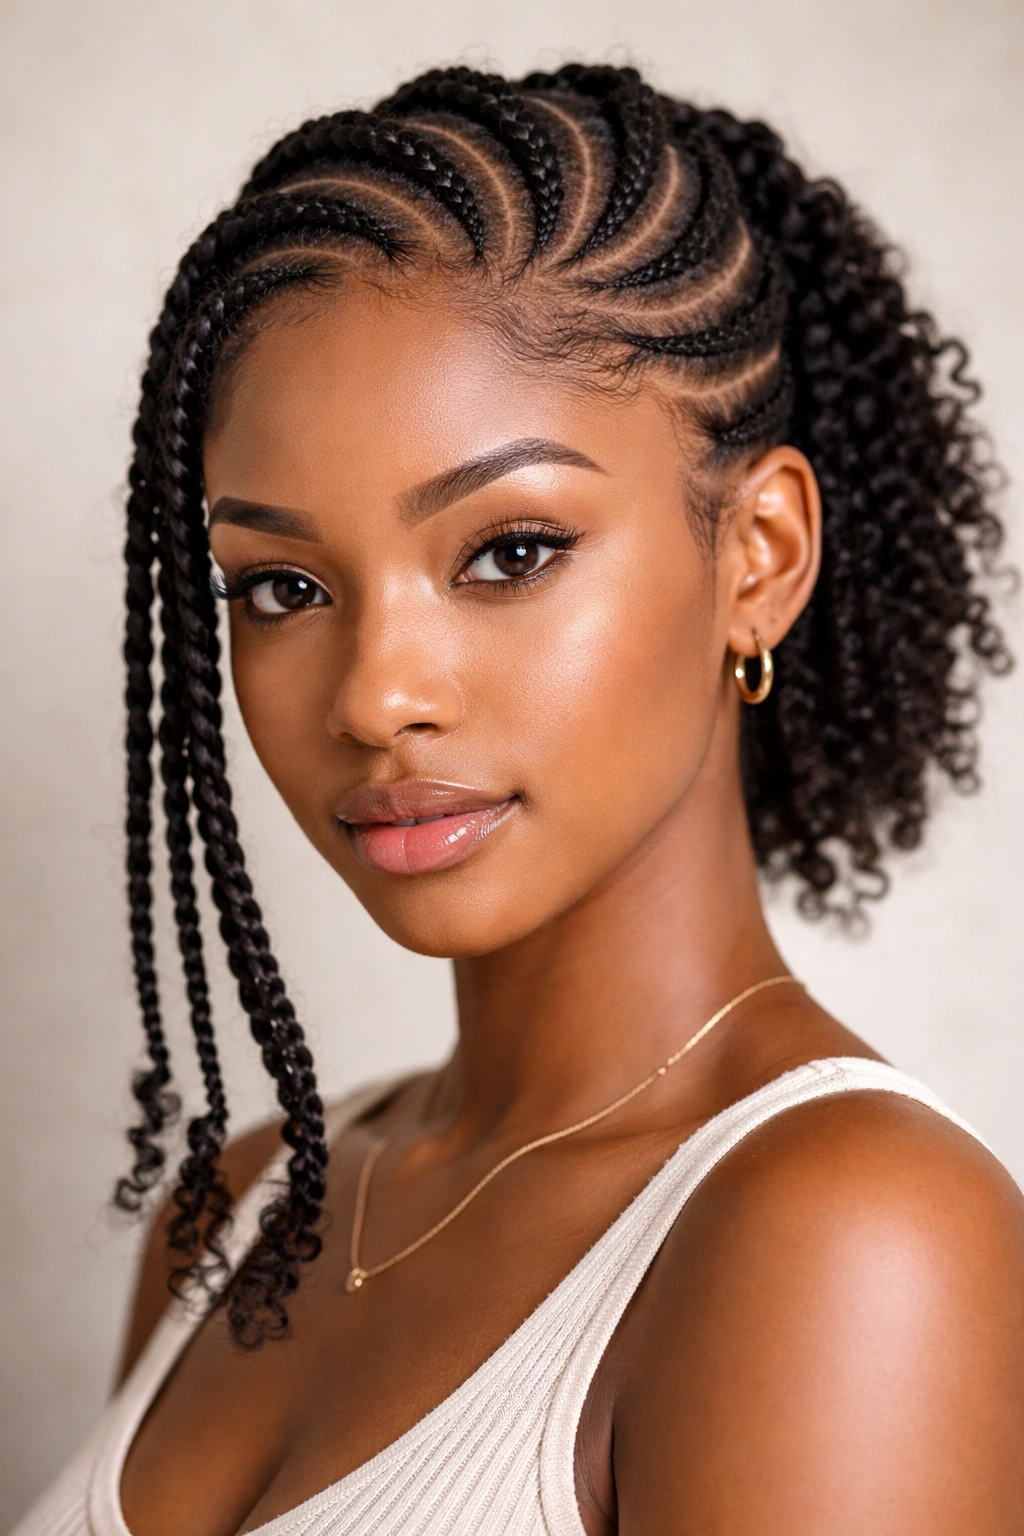
Unlike straight-line braids that follow your scalp’s natural divisions, curved braids follow organic, flowing lines that hug your head’s shape. This styling approach creates visual interest while maintaining the small afro aesthetic. The curved pattern can follow your hairline, create a circular motion around your crown, or even form artistic designs. This style celebrates your hair’s natural movement while keeping it protected and neatly contained.
How Curved Braids Enhance Your Natural Shape
Braiding along curves requires you to follow the contours of your head rather than fighting against them. Start your parts at your hairline and curve them slightly inward as they move toward the back of your head. This technique follows the natural topology of your scalp, which means the braids sit flatter and feel more comfortable. The curved pattern also creates a more sophisticated visual effect than straight braids — it draws the eye along flowing lines that feel intentional and artistic. Many people find that curved braids photograph better and create a more flattering frame around the face.
Maintaining Texture and Preventing Frizz
- Braid tightly enough to last 2-3 weeks, but never so tight that you feel pulling at your roots
- Use a damp, smooth brush to lay down your edges before you start braiding for a cleaner parting
- Install extensions or synthetic hair that matches your natural hair’s thickness to maintain consistent texture throughout each braid
- Moisturize nightly by misting your braids with water and a lightweight leave-in conditioner
- Sleep with a silk or satin bonnet to prevent frizz and reduce friction that loosens the braids
- Refresh curling texture along the braids by misting with water and using a curling iron on low heat to re-define the curl pattern
Insider note: Curved braids work particularly well for people with elongated face shapes, as the flowing lines visually soften angular features.
4. Twisted Knots and Defined Curls
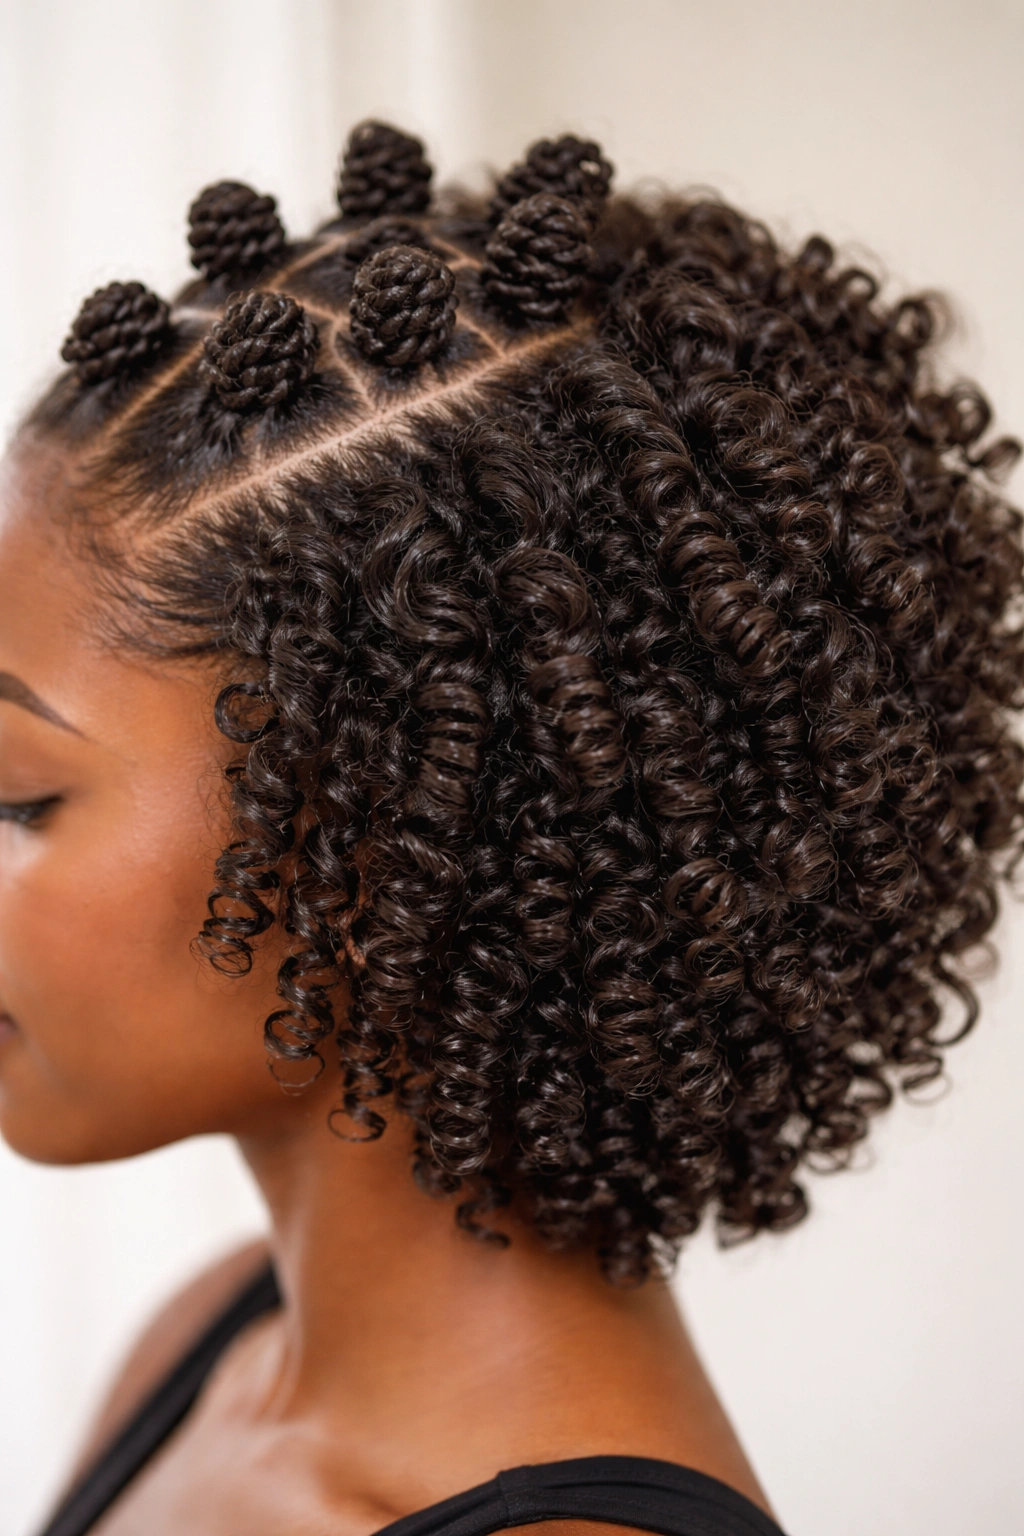
Twisted knots — also called bantu knots or two-strand knots — are a styling technique where you take a section of hair and twist it around itself, then coil it into a knot shape on your scalp. When you release them, you get beautifully defined curls and coils. This small afro style works beautifully for people with tighter curl patterns and creates a voluminous, textured appearance without any braiding.
Why Twisted Knots Create Superior Definition
Two-strand twists hold tension differently than braids. Because you’re working with only two strands of hair, the twist is tighter and creates more compression of your natural curl pattern. When you release a twisted knot, the curl memory in your hair springs back into a tightly coiled shape. The knot coiling intensifies this effect even further — you’re basically setting your curls multiple times in the same section. This layered tension creates curls with serious definition and bounce that last longer than curls created by other methods.
Creating Knots That Hold and Look Polished
- Section your hair into small, manageable parts — about ½ inch to ¾ inch sections for genuinely small afro styling
- Two-strand twist each section from root to tip, maintaining consistent tension throughout
- Once you reach the end of the hair, coil the twisted section into a knot shape, tucking the ends underneath so nothing sticks out
- Secure each knot with a bobby pin at the base so it can’t unravel
- Leave the knots in for at least four hours — overnight is ideal — so your curls set completely
- Release gently by uncoiling and untwisting, working from the tip up toward the root to avoid disturbing the curl shape
- Fluff and separate the curls with your fingers, adding a light mist of curl cream for definition and shine
Pro tip: Mist your twisted knots with a curl-setting spray or light gel before you coil them. This helps the curls hold their shape after you release them and extends the style’s lifespan to a week or more.
5. Braided Crown with Loose Curls
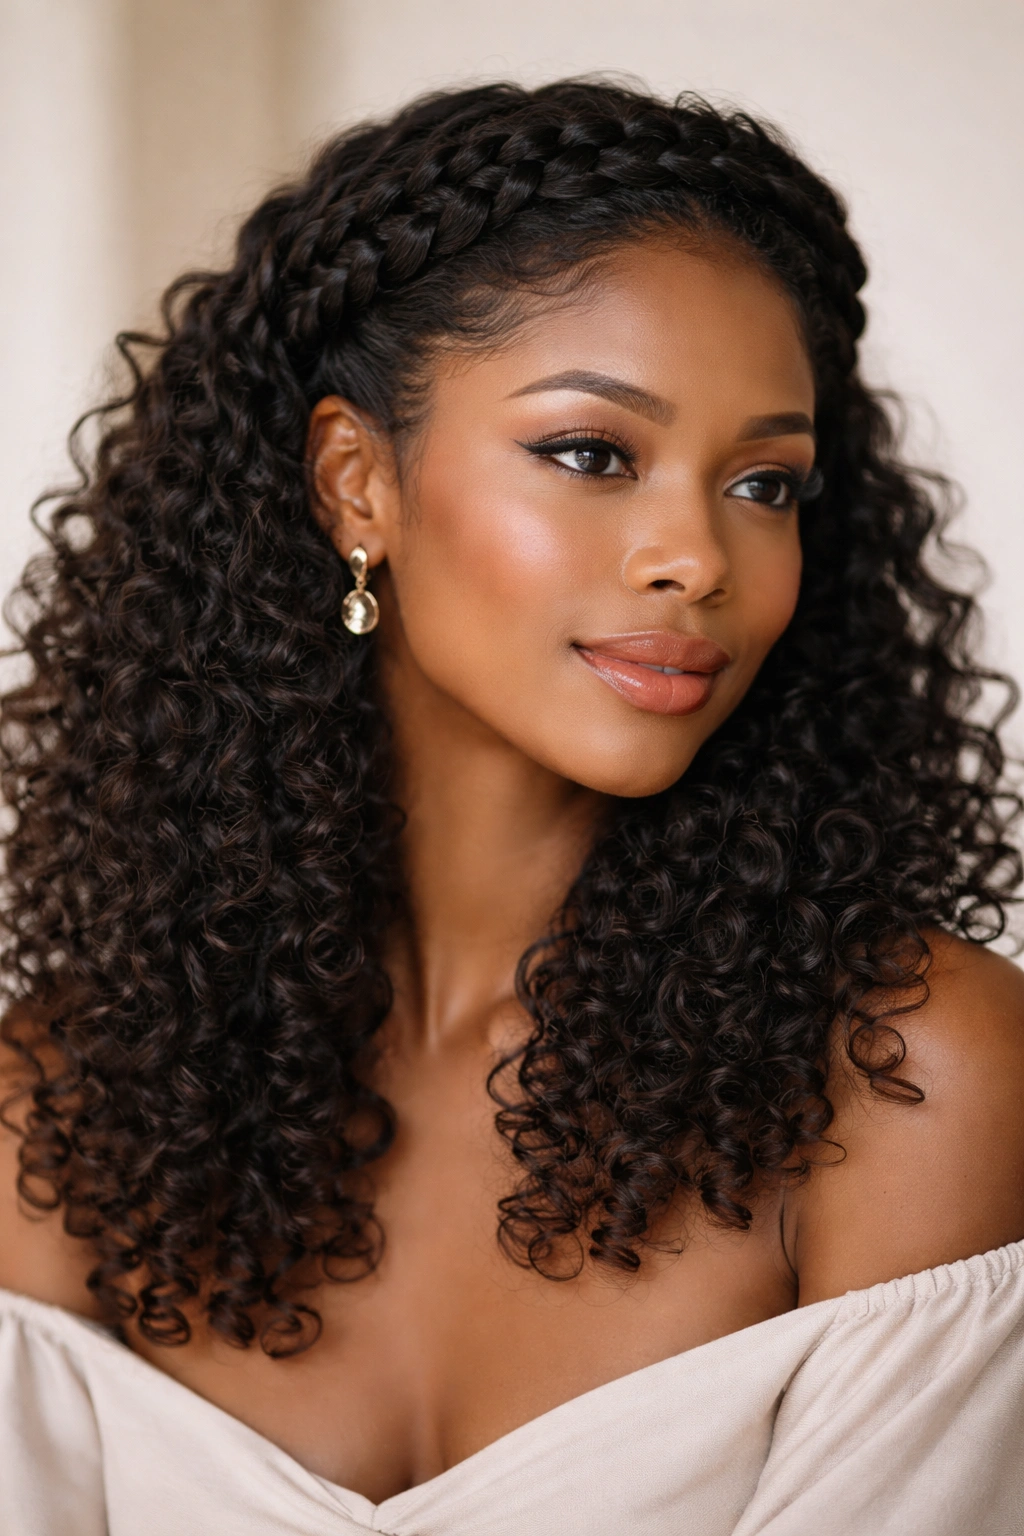
A braided crown combines protective styling with free-hanging curls, giving you structure at the top while letting your natural texture shine underneath. This style starts with one or two braids that encircle your head like a crown, with the remaining hair left loose and curly. It’s perfect for special occasions or days when you want something more dressed up than a simple puff but less formal than fully braided styles.
Constructing a Crown That Sits Flush Against Your Head
Start by creating a clean, horizontal part that runs from temple to temple, over the crown of your head. This section becomes your braided crown. Take small braids — about the size of a pencil — and braid them along this line, following the natural curve of your head. You can create one thick crown braid or two thinner ones that sit parallel to each other. The key is braiding tightly enough that the braids stay in place and create clean lines, but not so tightly that you’re pulling your hairline. Many people create a second, lower crown braid that encircles the back of the head, creating a complete crown effect.
Styling the Loose Hair Beneath the Crown
- Wash and condition your hair thoroughly before styling so the loose curls have maximum definition
- Apply leave-in conditioner and curl cream to damp hair, scrunching upward to encourage curl formation
- Create your braids while your hair is still damp — this helps the crown braids stay neat while the loose hair dries into curls
- Plait the crown braids tightly from root to tip, tucking the ends underneath so they’re hidden by the loose hair
- As the loose hair dries, it naturally forms curls and coils based on your hair’s curl pattern
- Once fully dry, you can gently separate and fluff the loose curls for more volume, or leave them in defined sections for a more polished look
- Moisturize the loose curls with a light oil or curl cream to enhance shine and fight frizz
Worth knowing: This style actually looks better on day three or four after installation, once the braids have softened slightly and the loose curls have fully settled into their natural pattern.
6. Small Locks or Faux Locs
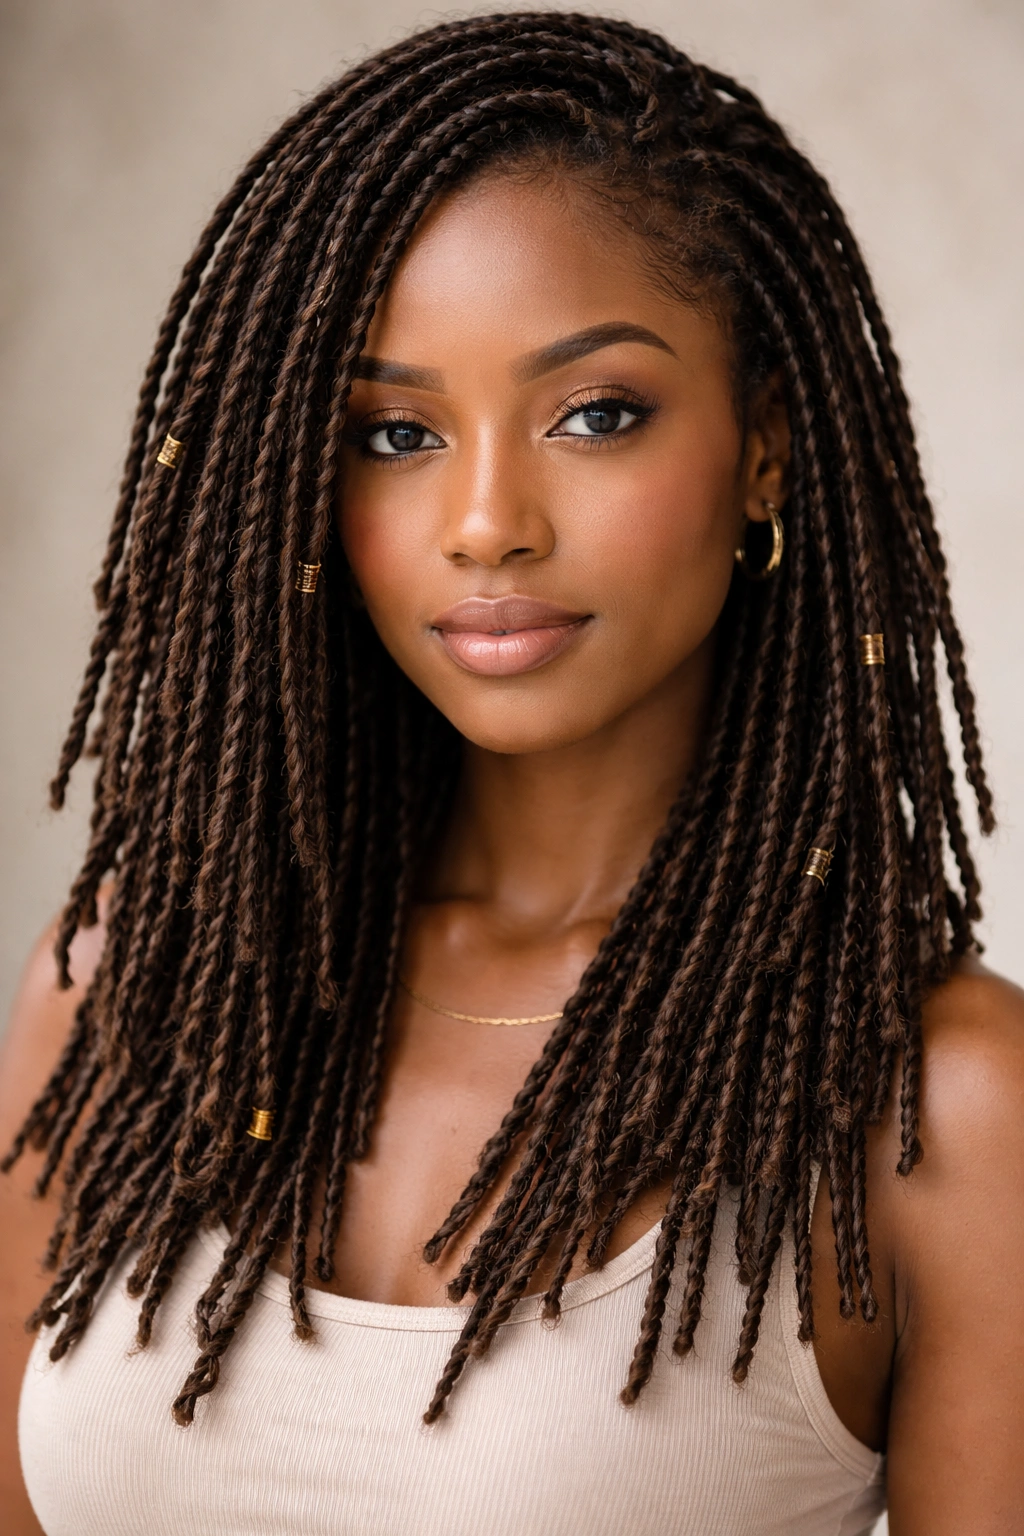
Small locs — whether you’re maintaining permanent locs or creating temporary faux locs with hair extensions — are a bold, striking small afro style that doubles as serious hair protection. Permanent locs are created through consistent maintenance of two-strand twists or braids, while faux locs offer a temporary alternative that you can install and remove without committing to the long-term maintenance.
The Difference Between Permanent and Faux Locs
Permanent locs require commitment and consistent maintenance every 4-6 weeks as your roots grow out, but they eventually become self-maintaining sections of hair that loc up naturally. Faux locs use synthetic hair or extensions wrapped around your natural hair, creating the aesthetic of locks without the permanent installation. Faux locs give you flexibility — you can style them, uninstall them, and wear them again. Both options protect your natural hair from daily manipulation and environmental damage, but they require different maintenance approaches.
Installing and Maintaining Small Locs That Last
- For faux locs, start with small two-strand twists in your natural hair, about ½ inch to ¾ inch in diameter
- Wrap extensions or synthetic hair around each twist, starting at the root and working toward the tip in a spiral pattern
- Secure the ends by tucking them underneath the extensions so nothing sticks out
- Maintain moisture by misting your locs with water and a lightweight leave-in spray twice weekly
- Sleep with a silk bonnet to reduce friction and prevent frizz at the loc edges
- Retwist your locs every 4-6 weeks, starting at the roots where new growth is visible
- Use a crochet hook or latch hook to tighten the locs by pulling loose hairs at the edges back into the loc structure
- If permanent locs are your goal, eventually you can skip the extensions and let your natural hair loc up on its own through consistent retwisting
Pro tip: Small locs work best on hair that’s at least shoulder-length, so if you have shorter natural hair, consider faux locs or wait until you’ve grown out a few inches.
7. Finger Coils with Volume
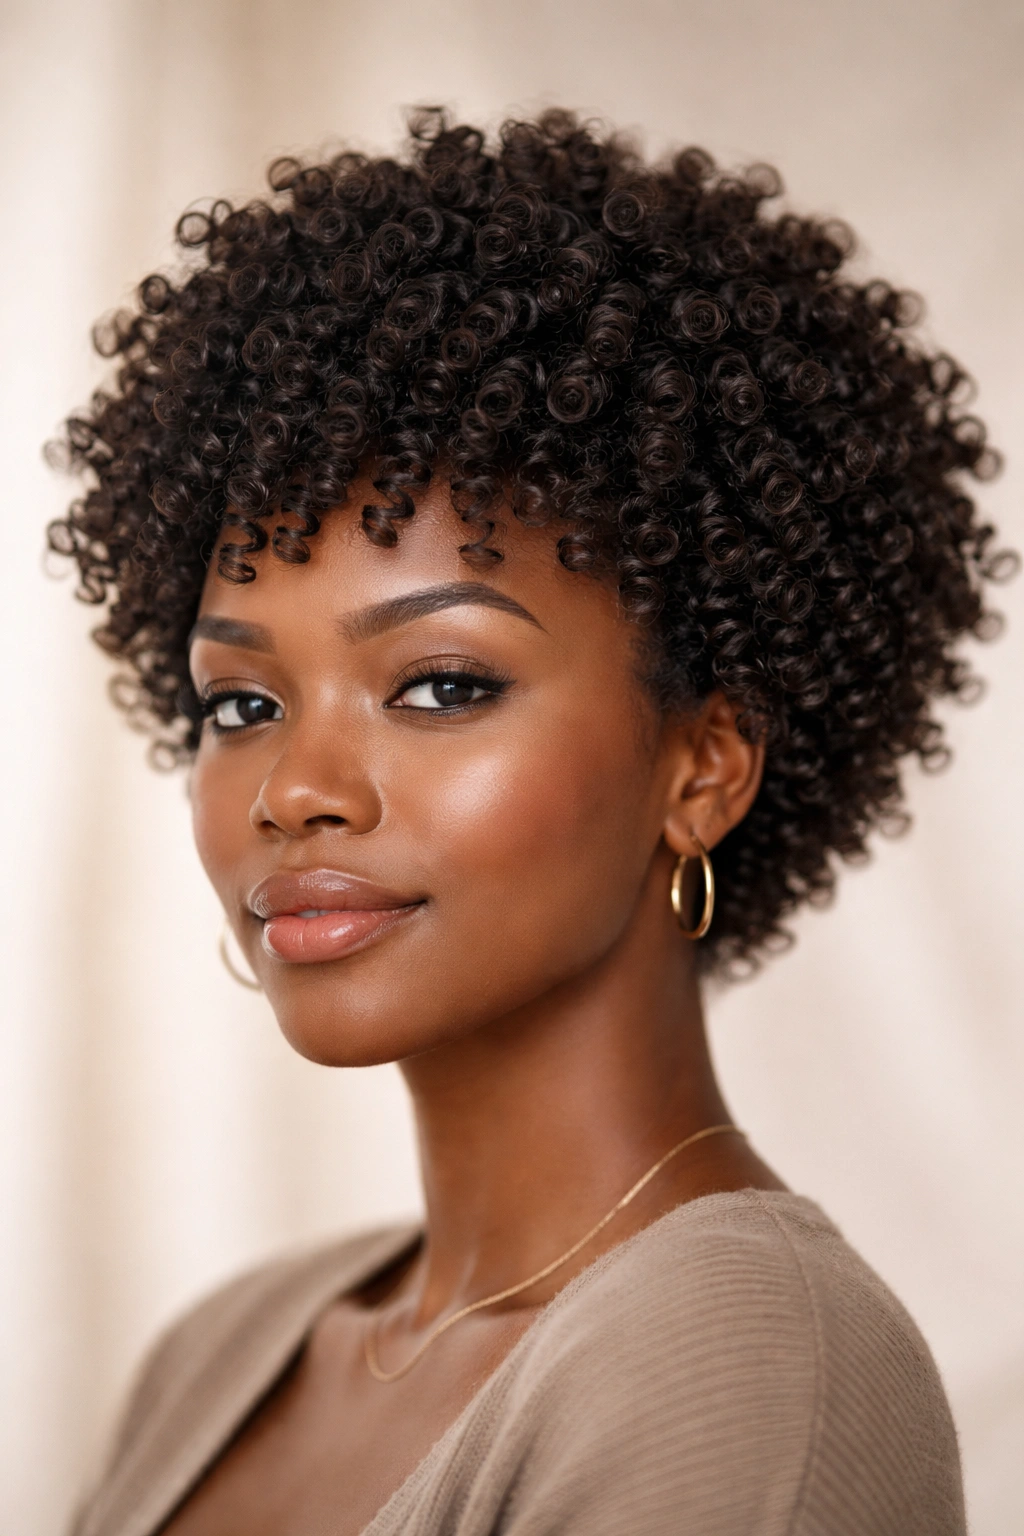
Finger coils are created by wrapping small sections of hair around your index finger, then sliding your finger out to leave a coiled shape. This technique celebrates your natural curl pattern while creating defined, bouncy coils that look intentional and styled. It’s a small afro style that requires time and patience to install, but the results are absolutely worth it — coils last 2-3 weeks easily and look more voluminous and textured than most other natural hair styles.
Why Finger Coils Create Such Defined Texture
When you wrap hair around your finger, you’re creating a tight spiral shape that compresses your natural curl pattern into an even smaller coil. Unlike braids or twists, coils don’t rely on tension between two or more sections — they’re just your natural hair shaped into a coil and held by moisture and curl memory. This means coils don’t stretch or loosen as easily, and they maintain their definition throughout their lifespan. The coil pattern also creates a beautiful visual texture — each coil catches light individually, creating dimension and visual interest.
Installing Coils That Hold Their Shape
- Start with freshly washed, damp hair so your curls have maximum elasticity and your hair is most receptive to styling
- Apply a lightweight styling cream or gel to small sections of hair — about ½ inch at a time
- Wrap each section around your index finger from root to tip, keeping tension consistent so the coil is even throughout
- Slide your finger out slowly so you don’t disturb the coil shape — the coil should hold its shape on its own
- Allow coils to air dry completely before touching or moving them — this sets the shape
- Once fully dry, gently separate coils with your fingers if desired for more volume
- Maintain moisture by misting with water and leave-in conditioner every other day
- Refresh coils by misting with water and a bit of styling cream, then scrunching them upward to re-set the shape
Insider note: Finger coils look more impressive and voluminous if you coil your hair when it’s soaking wet rather than just damp — the added moisture helps the coils hold their shape more dramatically.
8. Tapered Bangs with Side Part
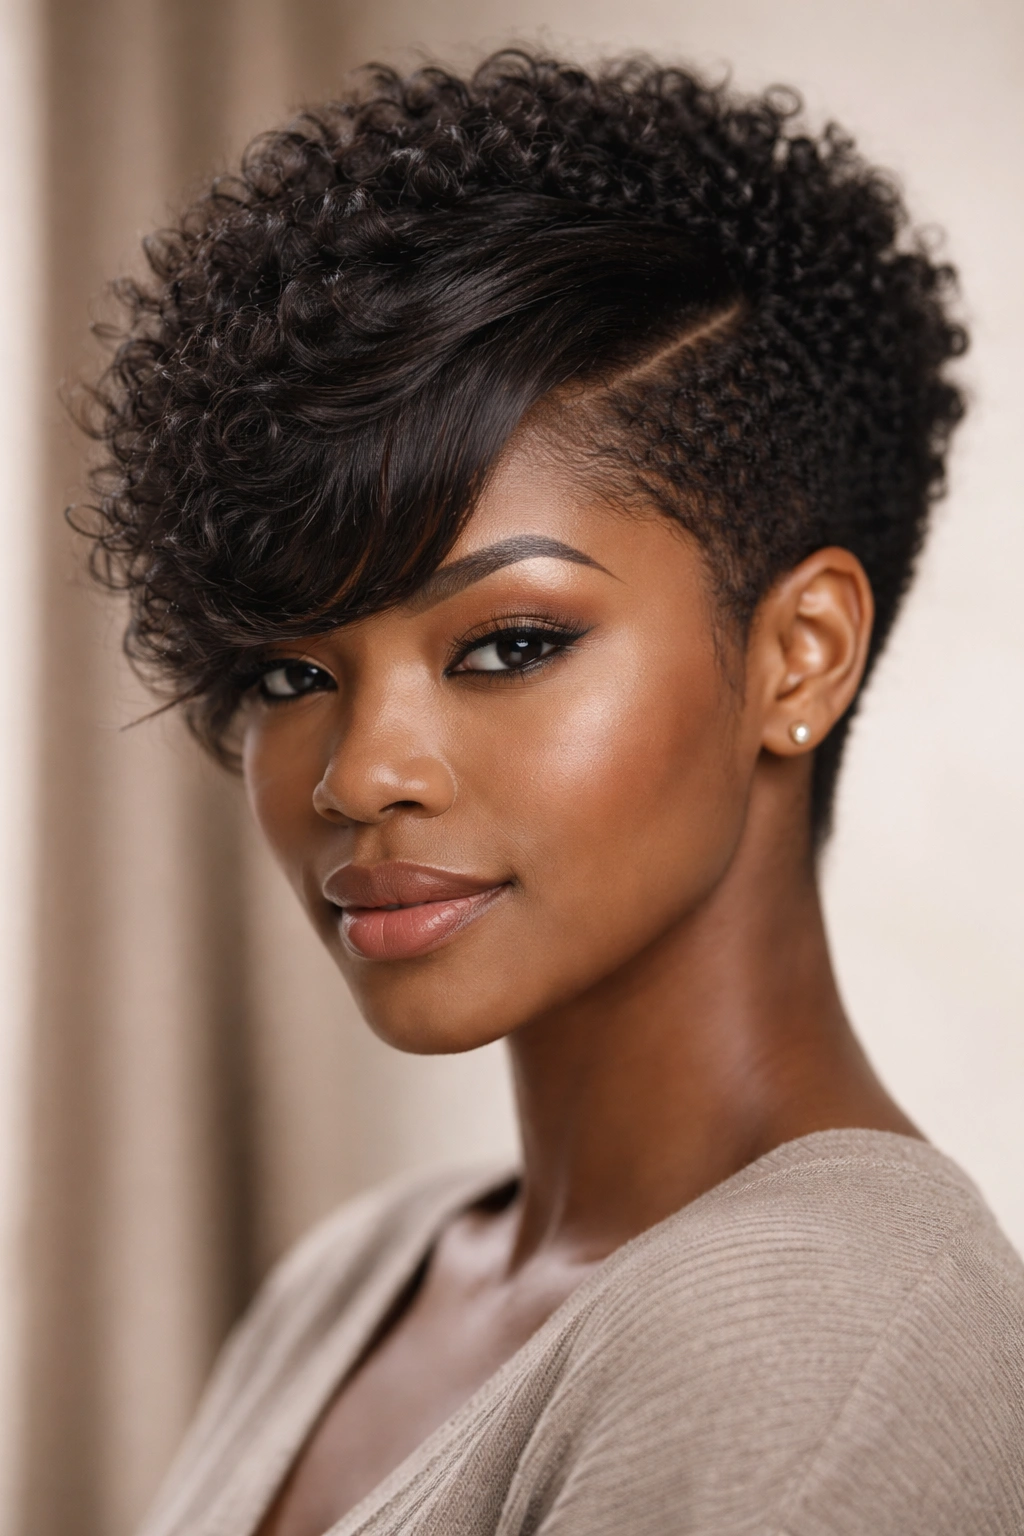
A tapered bang creates a neat, intentional look by cutting or styling your front hair shorter than the rest, creating a gradient from short to longer. Combined with a deep side part, this creates a sophisticated, modern small afro style that works for professional settings and casual days alike. The key is understanding how to create the tapered effect with styling rather than committing to a permanent haircut.
Creating Tapering Without Permanent Cuts
If you’re not ready to cut your hair, you can create a tapered bang effect through styling. Section off your front hair — from temple to temple across your forehead — and curl it in tighter, smaller curls than the rest of your hair. The tighter curl pattern makes this section appear shorter and creates visual tapering. Alternatively, you can braid or twist your front section while leaving the back looser, which also creates a tapered appearance through texture contrast. Pin or tie your front section so it sits forward and doesn’t blend in with the rest of your hair.
Styling a Side Part That Complements Your Face
- Create your side part by drawing a line with a fine-tooth comb from your temple to the back of your ear
- Make this line deliberate and clean using edge control to smooth down the parting line
- All your hair should flow away from this part line, creating asymmetry
- Smooth and style the smaller side (the side with less hair) against your face using edge control
- Allow the larger side to flow back and off your face, creating volume at the crown
- Enhance the tapered bang effect by applying more curl cream to your front section than the rest of your hair, creating tighter definition
- Use a blow dryer on low heat to direct your hair away from the part line and toward your desired direction
Worth knowing: A side part flatters most face shapes when the part sits roughly one-third of the way across your scalp — not dead center, but not extremely exaggerated either. Experiment to find the position that feels most flattering for your face shape.
9. Spiral Curls with Twisted Details
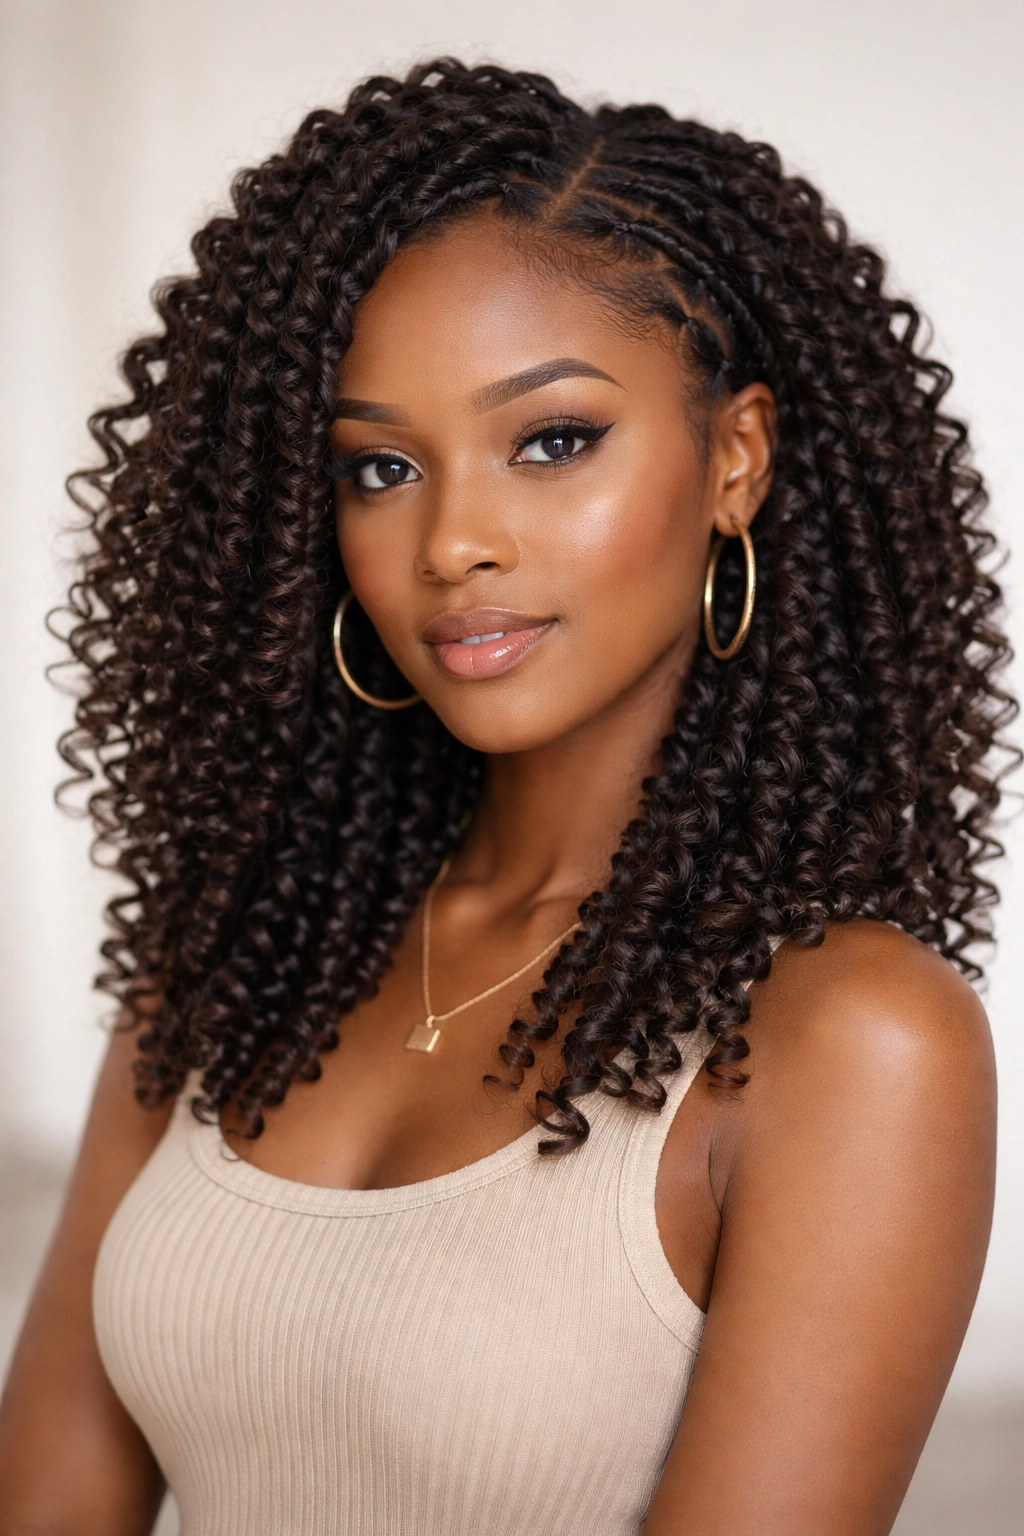
Spiral curls offer a delicate, romantic take on the small afro style by creating elongated, perfectly coiled curls throughout your hair. Unlike finger coils that sit upright, spirals hang down, showcasing your hair’s length while maintaining impressive definition. This style works beautifully for special occasions, date nights, or whenever you want your natural texture elevated into something extra.
Creating Spirals That Hang Beautifully
Spiral curls require a bit more technique than some other styles, but once you understand the mechanics, they’re worth the effort. Take small sections of hair — about ½ inch wide — and wrap them around a curling iron, flexi-rod, or even a pencil for traditional spiral wrapping. The key is wrapping consistently: start at the root and wrap toward the tip, keeping the hair smooth so the spiral is tight and even. Hold the curl in place as it cools, then gently release. The cooled curl holds its shape beautifully because the heat has set your curl pattern.
Adding Twisted Details for Extra Interest
- Create spiral curls throughout most of your hair for a uniform, polished look
- Incorporate small two-strand twists into your spirals by creating a few twists among your curls for texture variation
- Wrap some sections around your curling tool while leaving other sections as twists
- This mix of spirals and twists creates visual interest and shows off different dimensions of your natural texture
- Use different sizes of curling tools — some thin spirals and some thicker spirals — to create variety
- Apply a heat protectant spray before using any heat tools
- Use low to medium heat on your curling tool to prevent damage to your natural hair
- Once cooled, gently separate and fluff your spirals with your fingers for more dimension and movement
Pro tip: Spiral curls last longer if you set them with a lightweight curl cream or gel before you use heat. This helps your natural curl pattern hold the spiral shape after the heat cools down.
10. Mini Twists with Layered Effect
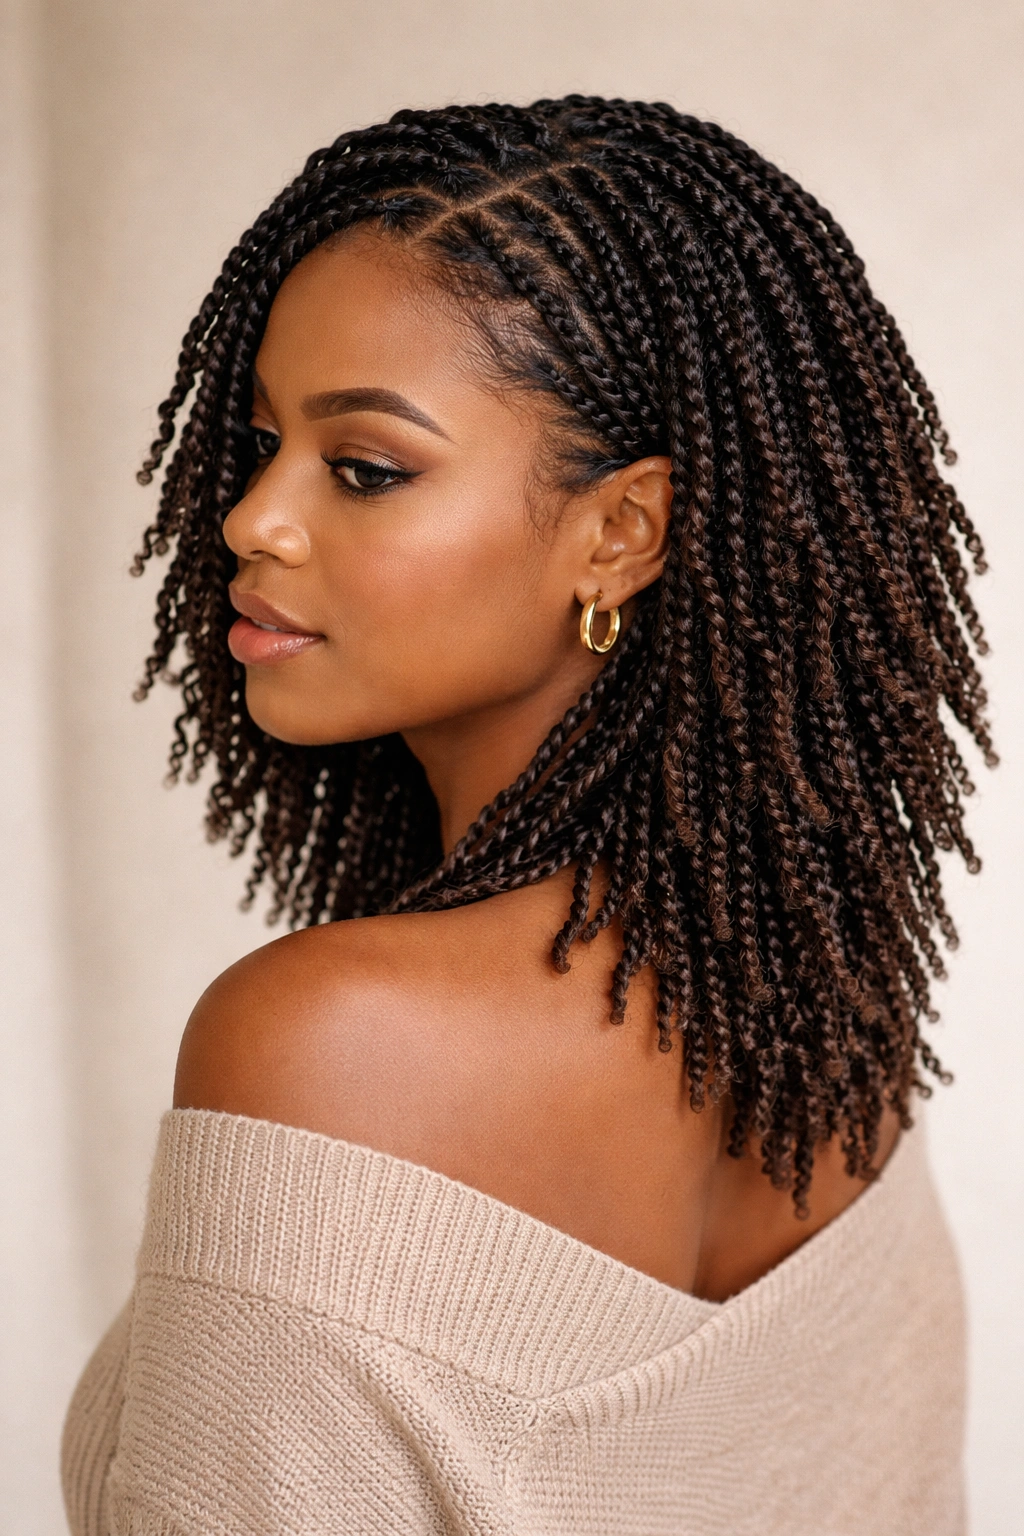
Mini twists are two-strand twists created in smaller sections, offering a protective style that maintains a neat, intentional appearance for weeks. Creating a layered effect by varying the thickness of your twists or positioning them at different heights on your head adds visual interest and creates a more sophisticated silhouette.
Why Layering Mini Twists Elevates the Style
Standard mini twists all the same thickness can sometimes feel monotonous or flat. Layering interrupts that uniformity — thinner twists on top, slightly thicker twists in the middle, and back to thinner twists at the back creates visual dimension. Some people create layers by positioning twists at different distances from the scalp: some close to the head, others hanging free. Others create layers through color, using different shades of extension hair to add visual interest. These subtle variations transform mini twists from a basic protective style into something that looks more intentional and fashionable.
Installing Layered Twists That Look Polished
- Divide your hair into small sections that are uniform in size
- Create two-strand twists by taking two sections of hair and wrapping them around each other from root to tip
- Maintain consistent tension and thickness so your twists look professional and uniform within their layer group
- Create thinner twists in your top layer (one-quarter inch thick) for a delicate frame around your face
- Create slightly thicker twists in your middle section (three-eighths inch thick) for visual variety
- Finish with thinner twists again in your back section
- Alternatively, create all your twists the same size, but position some close to your scalp and allow others to hang freely
- Secure each twist at the root with a bobby pin if it tends to unravel
- Moisturize nightly by misting with water and a lightweight leave-in conditioner
- Refresh twists after two weeks by re-twisting the roots where new growth appears, maintaining the original twist pattern
Worth knowing: Mini twists last longest — up to four weeks — when you create them with a lightweight synthetic hair or quality human hair extensions. Your natural hair twists alone will last 2-3 weeks before they begin to unravel.
Final Thoughts
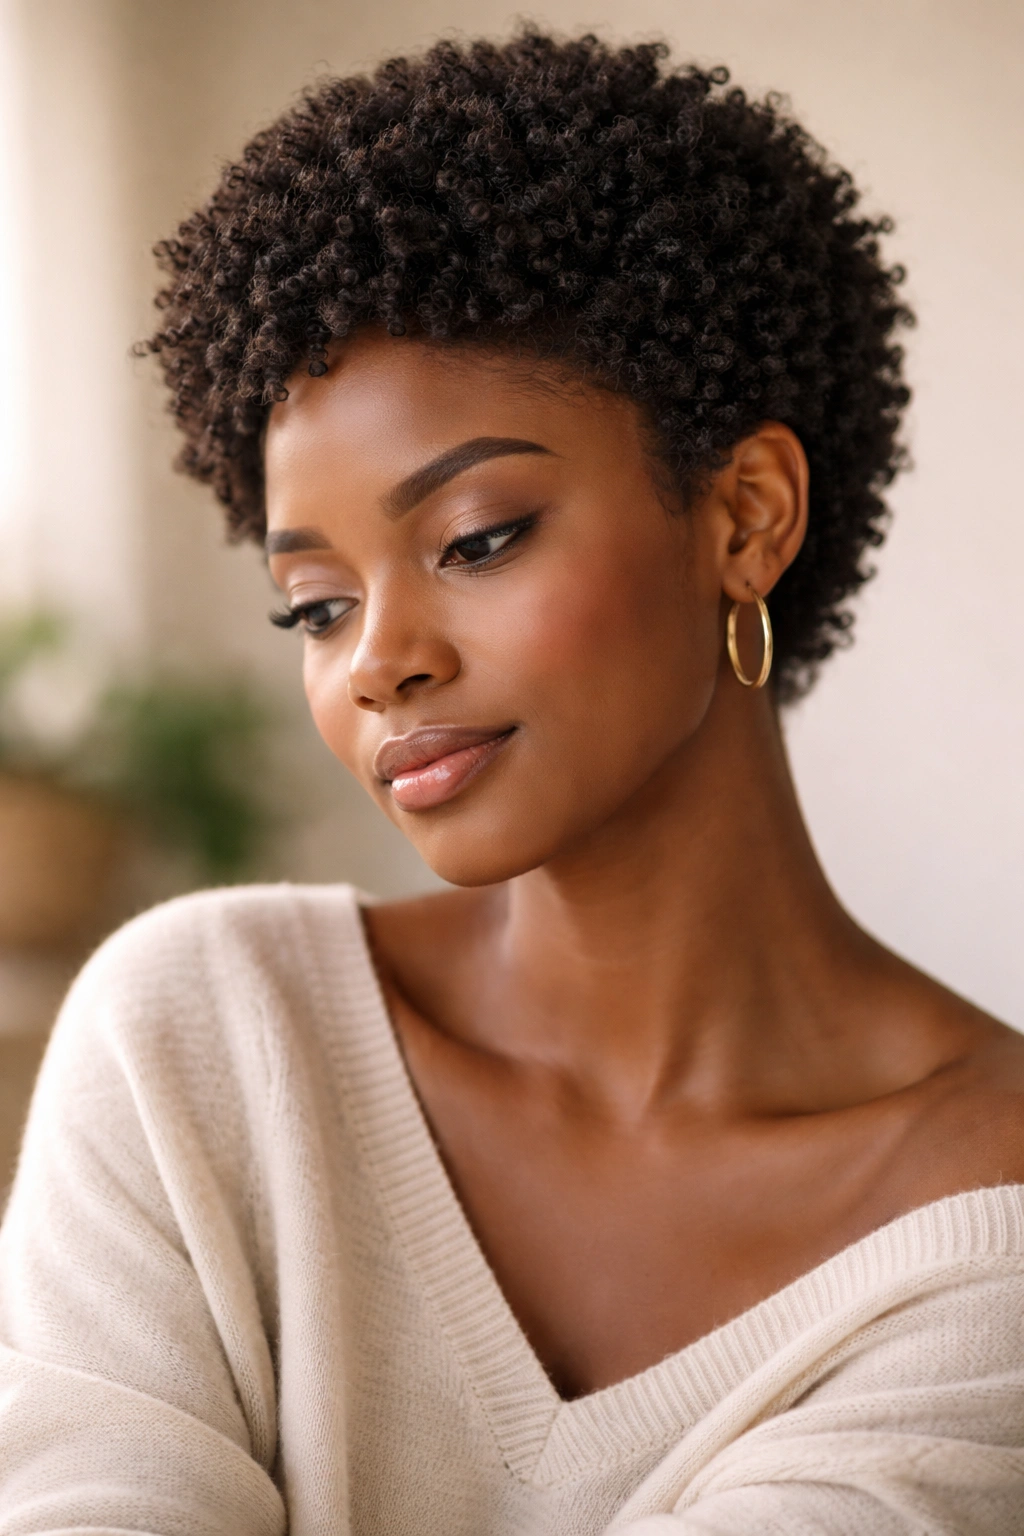
Small afro styles prove that protective styling doesn’t require sacrificing aesthetics or spending hours in the salon chair. Whether you choose the gentle protection of knotless braids, the romantic appeal of spiral curls, or the bold statement of small locs, these styles work because they honor your natural texture while keeping your hair healthy and strong. The versatility of these options means you can rotate through different styles throughout the year, giving your hair breaks from different manipulation types while keeping your look fresh and intentional.
The most important thing is choosing a style that aligns with your lifestyle, maintenance capacity, and how your specific hair type responds to different techniques. Not every style works perfectly for every hair texture or density, and that’s completely normal. Experiment, pay attention to how your hair feels after each style, and adjust based on what you observe. Your hair will tell you what it needs — listen to those signals, and you’ll develop an intuitive sense for which small afro styles work best for you.
