Boho braids aren’t just a passing trend—they’re a celebration of natural texture, cultural heritage, and creative expression that works beautifully with afro hair. The bohemian aesthetic embraces loose, romantic, sometimes deliberately “undone” vibes, which actually aligns perfectly with the texture and movement of afro hair. The freedom to blend braiding styles, add accessories, vary the thickness, and create asymmetrical patterns means you can craft a completely personalized look that feels authentically you.
The best part? You don’t need to book an expensive salon appointment to rock these styles. With some patience, the right tools, and a little guidance, you can create stunning boho braids at home that rival any professional installation. Whether you’re working with type 4a, 4b, or 4c hair, whether you’re braiding your own hair or having a friend help, these techniques are absolutely achievable. You’ll save money, work on your own timeline, and develop skills that let you refresh and redesign your braids whenever the mood strikes.
Many people assume boho braids require lots of maintenance or that they’re only for certain hair types. The reality is much more flexible. Afro hair’s natural texture, density, and ability to hold braids actually makes it ideal for boho styling. The challenge isn’t the hair itself—it’s knowing which styles suit your specific texture and what techniques will let you achieve them smoothly at home. That’s exactly what we’re covering here. These ten boho braids range from beginner-friendly styles to more intricate designs, and each one comes with the practical details you need to execute it successfully on your own hair.
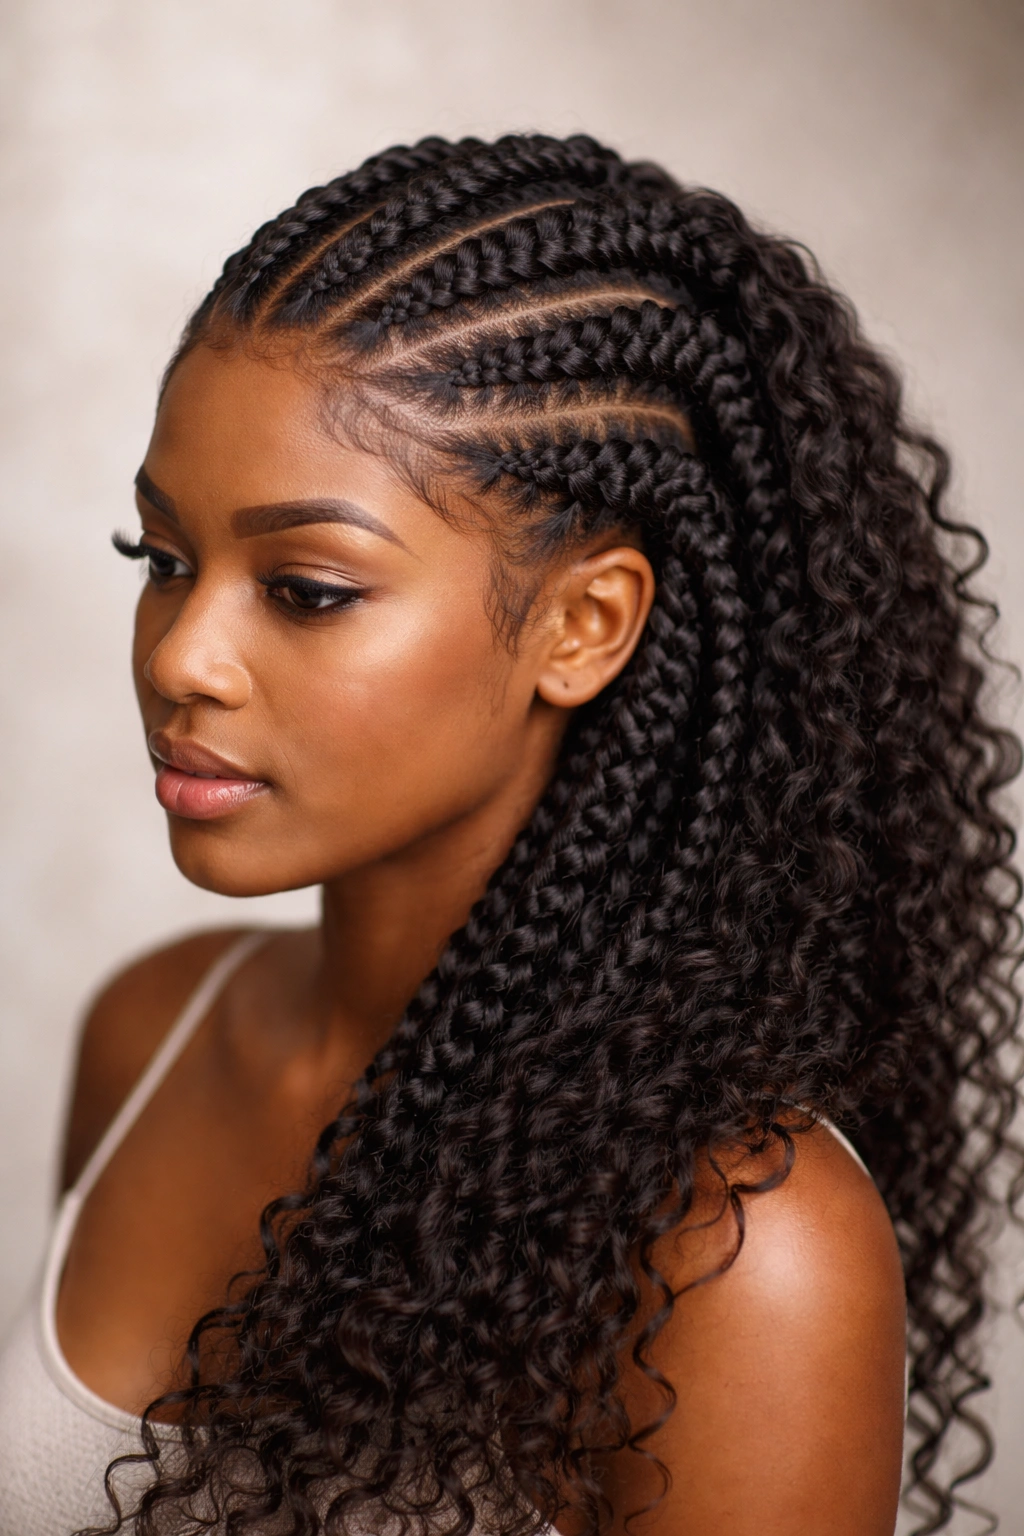
1. Loose Feed-in Box Braids with Mixed Lengths
Feed-in box braids are the foundation of countless boho looks because they create that effortlessly textured, piece-y aesthetic that defines the bohemian vibe. The “feed-in” technique means you’re gradually feeding extension hair into a base section, which prevents harsh tension at the scalp and creates a softer, more blended appearance than traditional box braids. Mixing the braid lengths—making some slightly shorter, others longer, creating an intentional asymmetry—instantly elevates the boho factor.
Why This Style Works for Afro Hair
Feed-in box braids work beautifully with afro texture because the technique respects your natural hairline and reduces stress on delicate edge hair. The mixed lengths prevent the bulky, uniform appearance that sometimes happens with box braids, instead creating a flowing, deliberately undone look. You can subtly vary thickness throughout, making some braids thicker and others thinner, which enhances the boho aesthetic and requires less extension hair than uniform styles.
How to Execute This at Home
Start by shampooing and deeply conditioning your hair—moisturized hair braids more smoothly. Section your hair into a grid pattern using a rat-tail comb. For feed-in braids, take a thin triangular section at the scalp and begin with your natural hair, then gradually feed in extension hair (a blend of human hair and Kanekalon works well for boho texture) as you braid down. Braid some sections to shoulder length, others to mid-back, creating intentional variation. Leave some sections unbraided at the front for a softer face frame. The entire process typically takes 6-8 hours depending on your hair density and braid count.
Pro tip: Use a spray bottle with water and a light leave-in conditioner to keep sections moist as you braid. Dry hair slips and tangles during the braiding process, while hydrated hair holds sections neatly.
2. Butterfly Locs with Coils and Wraps
Butterfly locs are a textured, organic-looking loc alternative that sits perfectly in the boho realm. Unlike traditional locs, which develop a smooth, uniform appearance, butterfly locs feature visible coils, wraps, and open-ended hair that creates that carefully-curated messy aesthetic boho styling celebrates. The technique involves wrapping extension hair around a base section, then coiling or twisting the extension, creating intentional texture throughout the length.
The Boho Appeal and Natural Hair Compatibility
Butterfly locs work exceptionally well with afro hair because they don’t require the hair to fully lock or mature into solid locs—you get the protective style benefits with the flexibility of adjustable styling. The visible texture prevents the slicked-back appearance some worry about with loc styles, instead creating movement and visual interest. They’re lighter than traditional locs, which reduces stress on your edges and scalp over the wearing period.
Installation Steps and Customization
After cleansing and conditioning your hair, create medium-sized sections using a rat-tail comb—typically 8-15 sections depending on your preferred fullness. For each section, gather your natural hair and extension hair together, then wrap the extension tightly around the base several times. As you continue down the length, twist or coil the extension hair loosely, occasionally leaving small gaps where you intentionally don’t wrap, which creates that textured butterfly effect. Some stylists add beads, rings, or wraps at intervals for extra boho flair. The installation takes roughly 5-7 hours and they typically last 6-8 weeks.
Worth knowing: Butterfly locs dry faster than traditional locs if you wash them, making them easier to maintain at home over the weeks you’re wearing them.
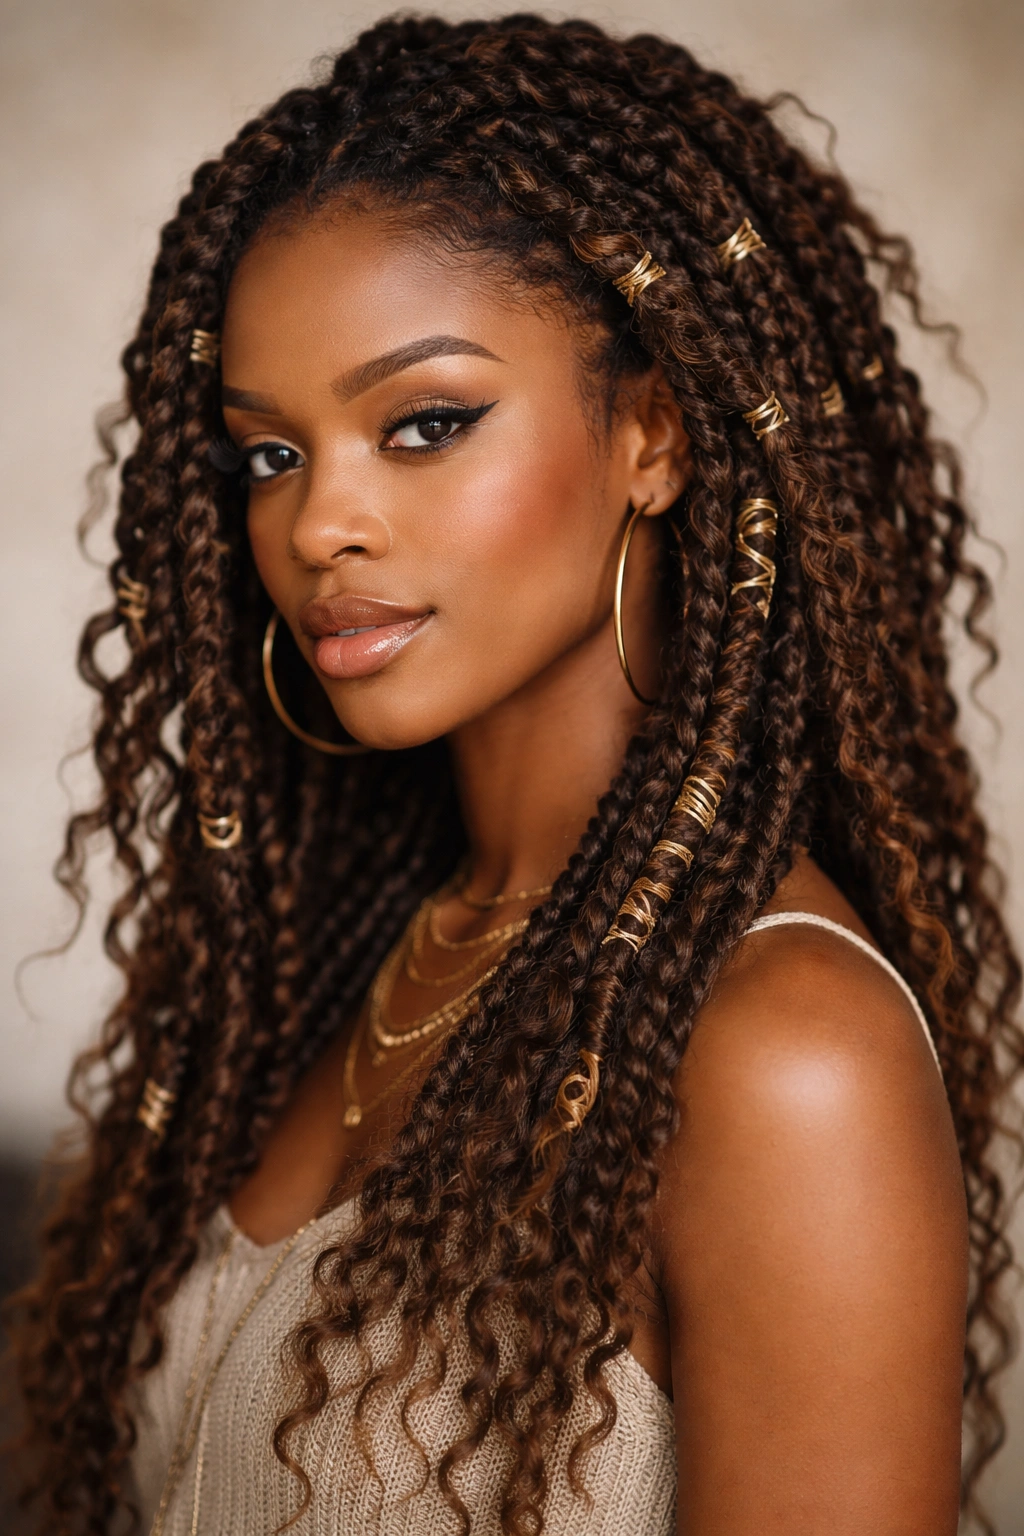
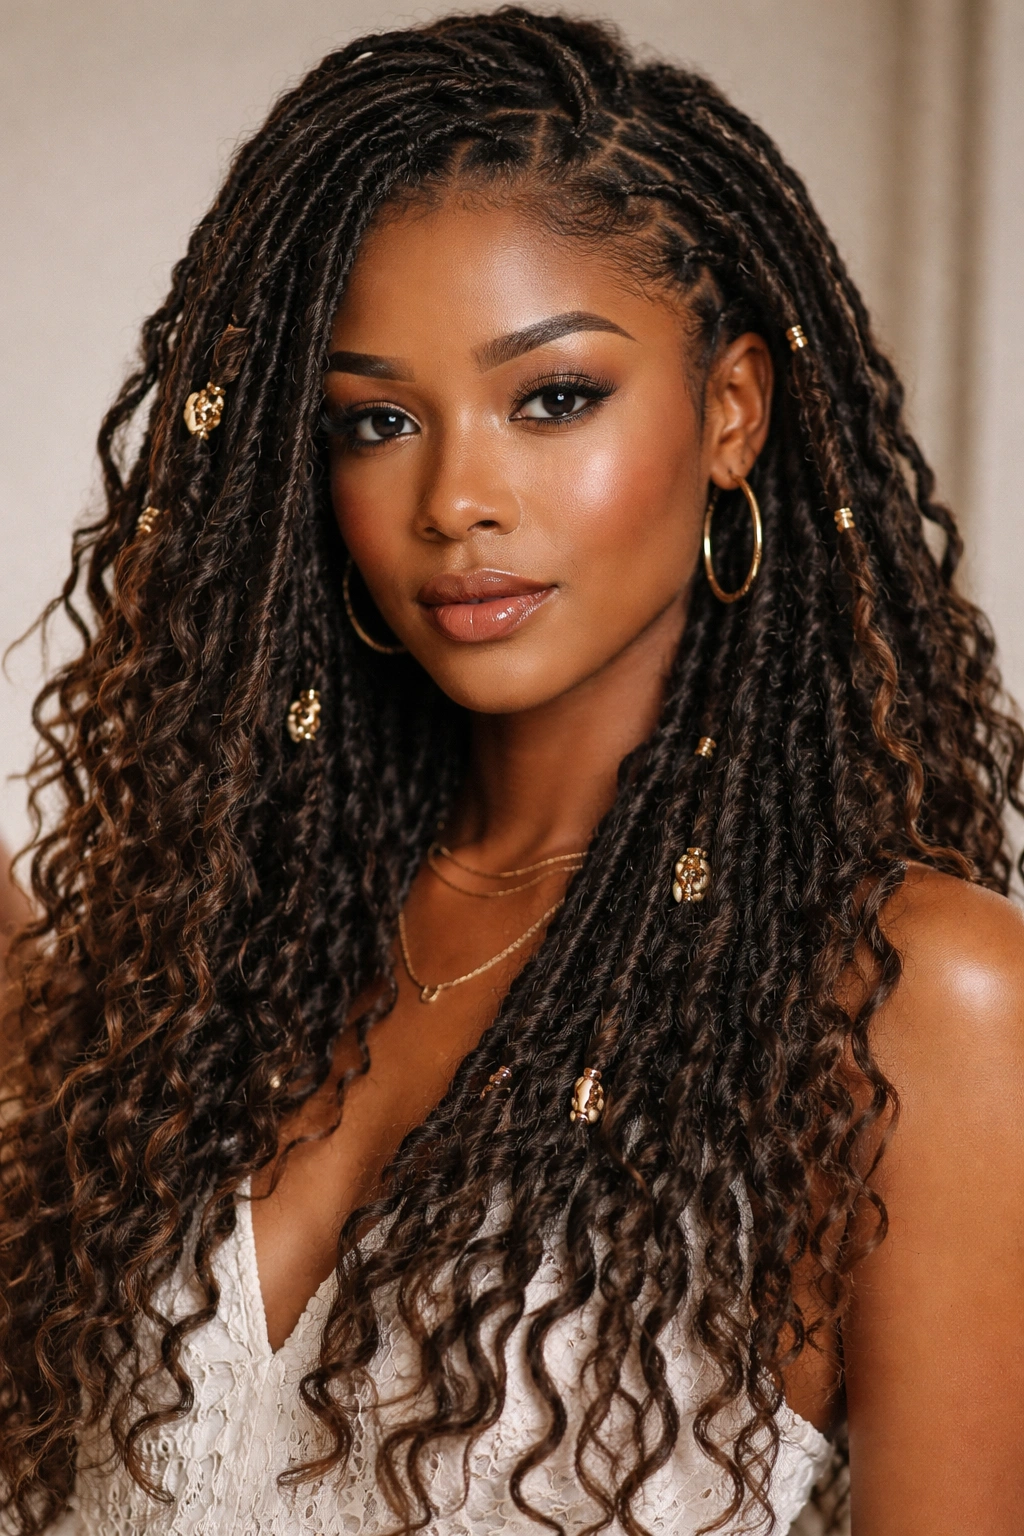
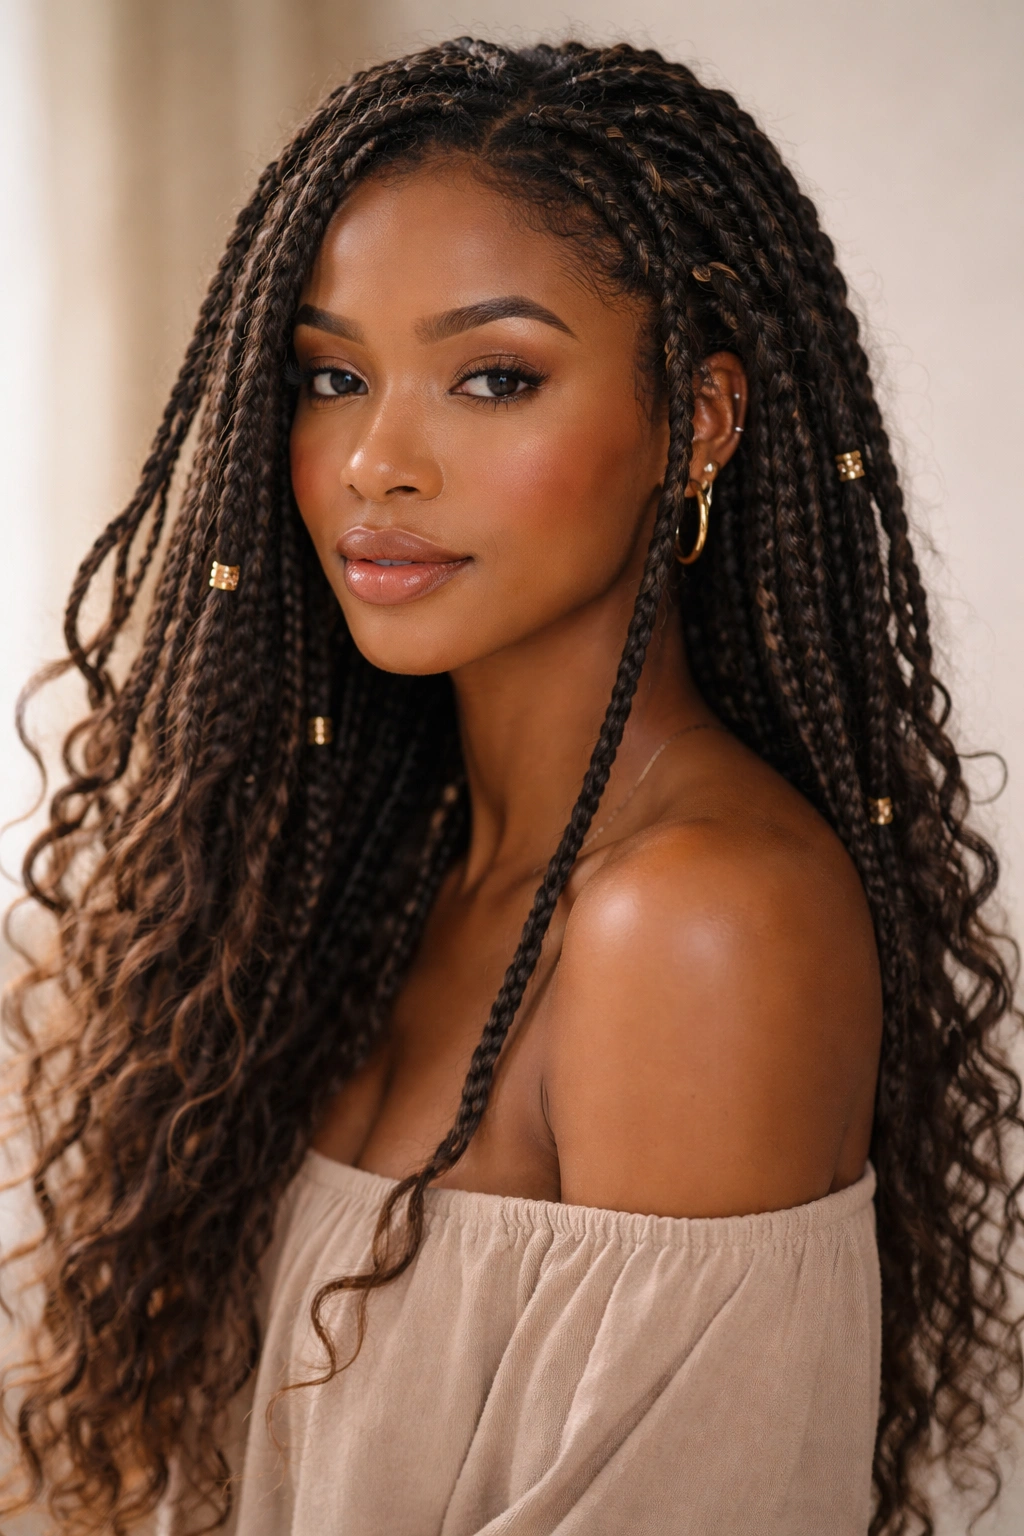
3. Knotless Braids with Ombre Extension Hair
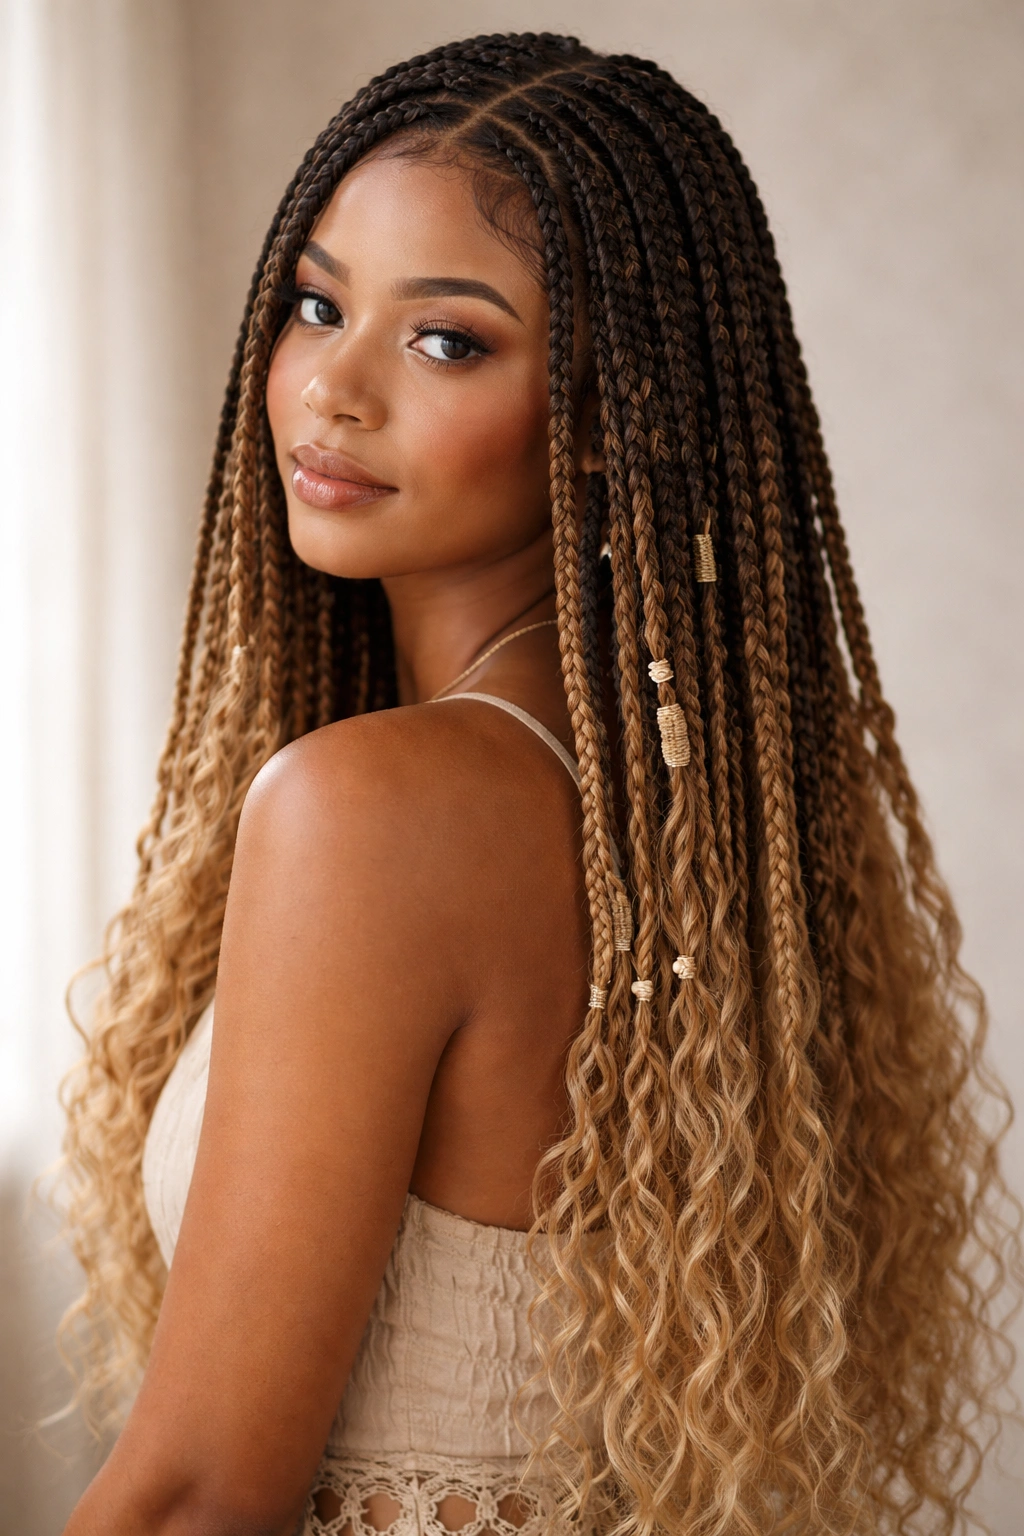
Knotless braids eliminate the bulky knot at the base by starting with a tiny section of your natural hair and gradually feeding in extension hair as you braid down—similar to feed-ins but creating a completely seamless appearance from scalp to tip. Add ombre extension hair (hair that transitions from one color to another) and you’ve got an instantly boho-luxe style that looks like you spent all day styling. The color gradient creates depth and visual movement without requiring chemical color treatments on your natural hair.
Scalp-Friendly Design and Texture Benefits
Knotless braids reduce tension significantly compared to traditional box braids because there’s no knot putting pressure on your hairline. For afro hair specifically, this means your edges stay intact and healthy throughout the wearing period. The ombre effect is purely aesthetic—it doesn’t damage your hair—and the gradual color transition creates a softer, more artistic look than solid-colored extension hair.
Achieving Ombre Knotless Braids at Home
Cleanse, deep condition, and thoroughly dry your hair. Create clean sections using a fine-tooth comb and the grid pattern method. Starting at the scalp, take a very thin section of your natural hair and begin braiding. After about half an inch, introduce the ombre extension hair—typically darker at the base, transitioning to a lighter shade. Continue braiding downward, maintaining even tension. The braids work best when you keep the sections relatively small (about the diameter of a pencil or slightly thicker) so the ombre color gradient shows clearly. Plan for 6-8 hours of braiding time for a full head.
Pro tip: If you’re sensitive to scalp pain during long braiding sessions, take 15-minute breaks every hour to rest your neck and shoulders.
4. Passion Twists with Mixed Textures

Passion twists are lightweight, fluffy-textured locs created by twisting extension hair around sections of your natural hair. They’re less dense than traditional braids and locs, sitting in this beautiful middle ground that makes them ideal for boho styling. The “passion” comes from the soft, romantic appearance—they look effortlessly whimsical, especially when you use extension hair in colors or textures that contrast with your natural hair.
Why Passion Twists Suit Afro Hair and Boho Aesthetics
Passion twists work brilliantly with afro texture because they require minimal manipulation of your natural hair and provide serious protection while looking anything but “protective.” They’re significantly lighter than braids or locs, reducing tension on your scalp and edges. The fluffy, textured appearance is inherently boho—there’s no way for them to look overly groomed or stiff, which is exactly what makes this style perfect for the bohemian vibe.
Installation Process and Styling Options
After cleansing and conditioning, section your hair into a grid. For each section, divide your natural hair and the extension hair into two strands and twist them together, wrapping them around each other rather than over and under like a traditional braid. The twist creates a rope-like, organic-looking texture. You can make passion twists any length you want—many people opt for shoulder-length or longer for maximum boho flow. Some stylists create intentional color blocking by using different extension colors in different sections. Full installation typically takes 5-6 hours.
Insider note: Passion twists look better when you intentionally leave them slightly loose and undone rather than trying to make them perfectly uniform—the softness is the whole point.
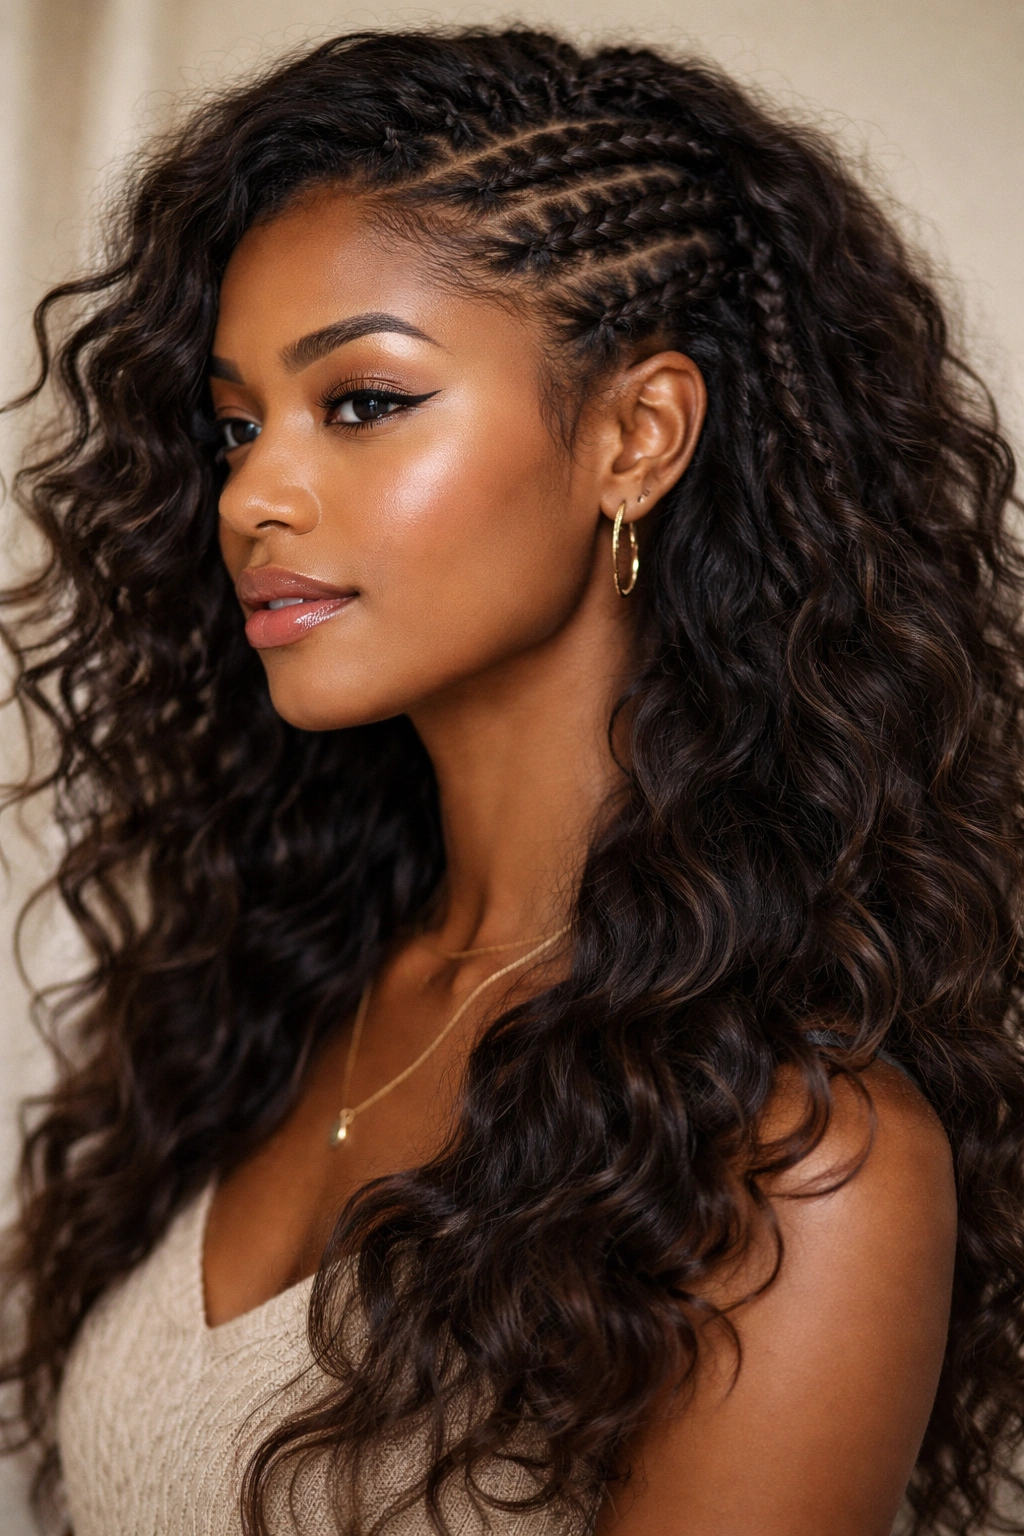
5. Twisted Crown with Loose Tendrils

A twisted crown style takes the most romantic element of boho braiding—soft, framing pieces around the face—and elevates it into a statement look. You’re creating twists that wrap around the crown of your head (like a halo or crescent moon), leaving the rest of your hair down, half-up, or in another style. The key is keeping those face-framing tendrils loose and slightly textured so they look naturally tousled rather than meticulously styled.
Perfect for Afro Texture and Daily Wear
This style shines with afro hair because your natural texture creates that effortless wave and dimension the boho aesthetic craves. The twists frame your face beautifully without requiring your entire head to be styled in braids—you get the boho effect with minimal commitment. It’s equally stunning worn with hair down, half-up, or pulled into a high puff, making it genuinely versatile for your life.
Creating the Crown Effect at Home
Start with hair that’s been moisturized and styled—whether that’s a wash day style, day-two texture, or freshly twisted-out hair. Take a section from one temple and create a two-strand twist that travels across the back of your head to the opposite side, securing it gently at the other temple with bobby pins that match your hair color. You can add a second crown twist if you want more visual depth. The magic is in the tendrils: deliberately pull small sections of hair loose from the twist as you create it, and soften the overall look by smoothing it with a light hand rather than making it sleek. Use a light oil or edge control only on the crown twist itself; let your natural hair frame your face completely undone.
Pro tip: This style works beautifully on second or third-day hair when your texture has some history and natural wave to it.
6. Fulani-Inspired Braids with Beads and Wraps
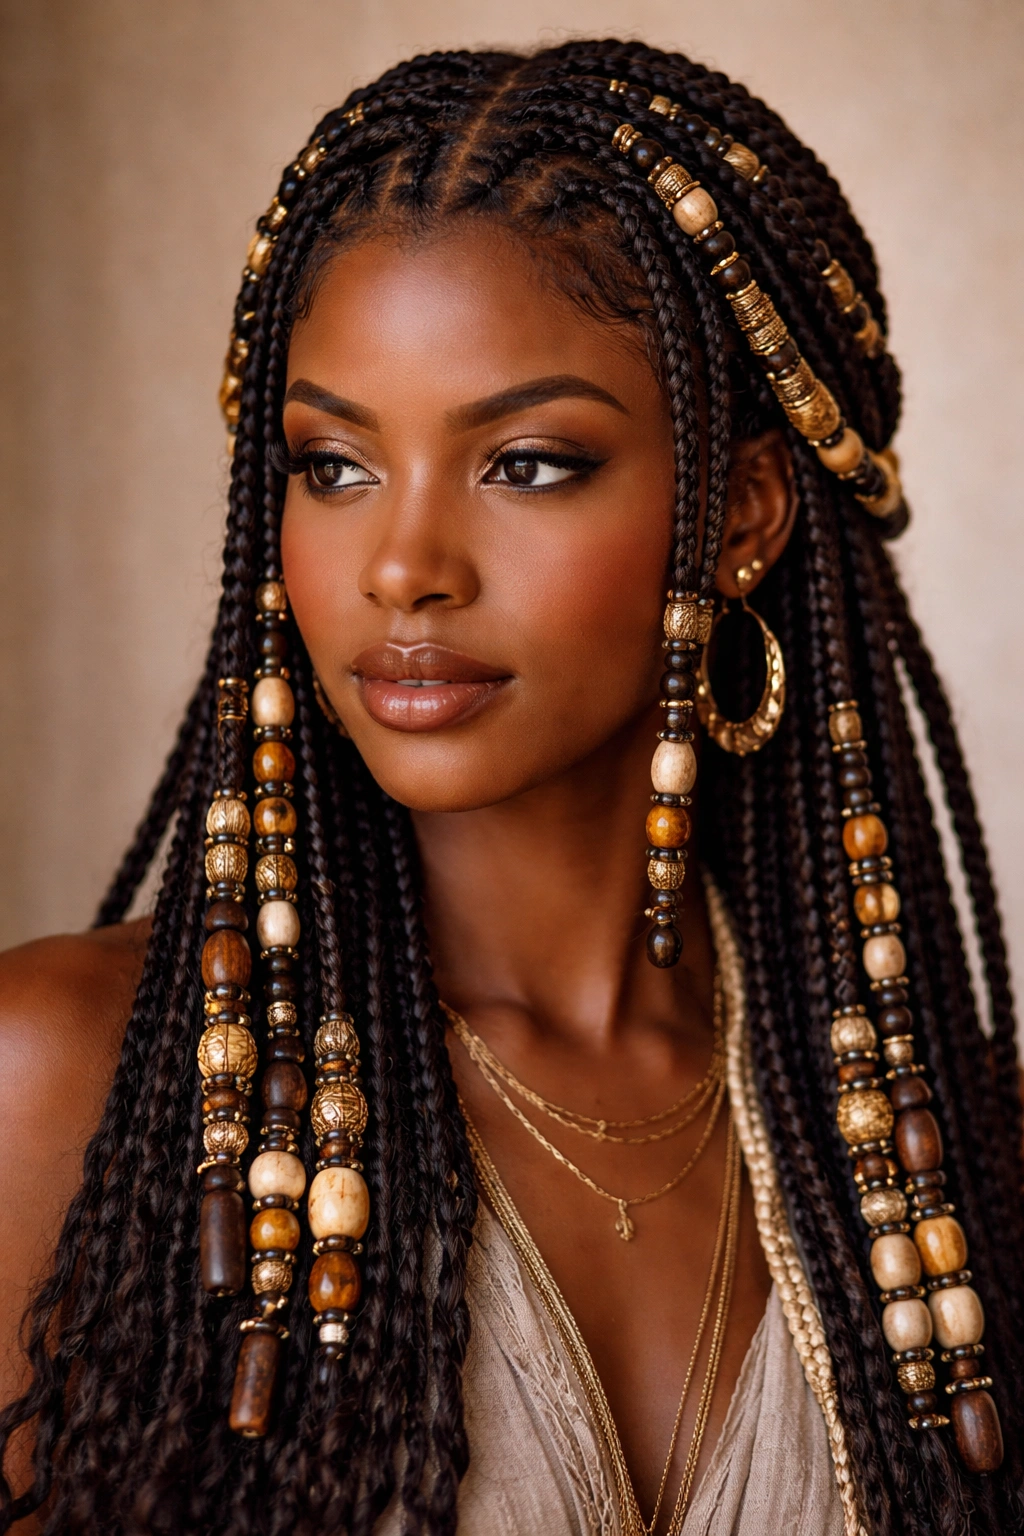
Fulani braids are rooted in West African tradition and feature thin braids often adorned with gold beads, cowrie shells, or decorative wraps. The boho aesthetic borrows this style’s deliberate adornment and cultural richness, celebrating the heritage and artistry behind the braid work. Fulani-inspired braids typically feature thick cornrows in the center with thinner braids branching off, and multiple beads or ornamental elements threaded throughout.
Cultural Connection and Aesthetic Appeal
Choosing to wear Fulani-inspired braids is both a fashion statement and a celebration of African aesthetics. The beadwork adds shimmer, movement, and an intentional “dressed up” quality that makes the style feel special. For afro hair, this braid technique offers excellent protection while creating that textured, embellished boho-luxe look that photographs beautifully.
Technique and Embellishment Options
Begin with thoroughly cleaned and conditioned hair. Create one thick cornrow down the center of your head, starting from your hairline and working toward the nape. On either side of the center row, create several thinner braids following your hair’s natural pattern. As you braid, thread beads onto the extension hair before braiding that section, so the beads sit along the braid itself. You can also wrap thread, yarn, or thin fabric strips around completed braids to add color and texture. Gold-tone beads are traditional, but copper, silver, or wooden beads work beautifully too. The beads catch light as you move, creating that boho-luxe shimmer. Allow 4-6 hours for installation depending on bead count.
Worth knowing: Beads can pull on your braids if they’re too heavy, so use lightweight options and distribute them evenly throughout rather than clustering them.
7. Side-Swept Dutch Braids Blended into Waves
Dutch braids (also called inside-out braids) create that crisp, three-dimensional appearance that reads as both structured and romantic when you blend them into waves. A side-swept Dutch braid travels from your temple diagonally back toward the nape, then dissolves into loose waves or a half-up puff, creating asymmetry and movement. It’s boho because it’s intentionally imperfect—the braids don’t take over your whole head, and the transition into free hair is deliberately soft and gradual.
Why This Works for Afro Hair
Dutch braids on afro hair create gorgeous dimension because your natural texture makes the braid stand out visually against the rest of your hair. The contrast between the braided section and your unbraided hair creates exactly that artfully undone boho aesthetic. Because you’re only braiding one side, it’s manageable to do on yourself with a hand mirror setup.
Creating the Side-Swept Look
Determine which side you want to sweep the braid to. Starting at your opposite temple (so if you want the braid to sweep right, start on your left side), take a small triangular section. Create a Dutch braid by crossing sections underneath rather than over (the opposite of a traditional three-strand braid), which makes the braid appear raised and textured. Braid toward your ear and down toward the nape, allowing the braid to curve gently with the natural contour of your head. As you reach the nape, transition into loose waves or texture by softening your grip and letting your natural hair mix with the braid, or stop the braid and secure it, letting the rest of your hair fall freely. The beauty is in the soft transition—not a clean end, but a gradual dissolve.
Pro tip: Rough up the finished braid slightly with your fingers to soften any overly neat sections. Boho braids should look like they happened naturally.
8. Goddess Braids with Scalp Tension Variation
Goddess braids are thicker, fluffier cornrows that create a softer, more organic appearance than traditional cornrows. The boho version plays with tension variation—some sections braided smoothly and tightly, others left deliberately loose and fluffy. You might tighten the braids near your face for definition, then loosen the tension as the braids travel back, creating a gradient from structured to soft.
Texture and Protection Without Rigidity
Goddess braids work beautifully with afro hair because they create protective styling without the sleek, controlled appearance that some people associate with protective styles. The thickness and fluffiness mean they look intentional and fashionable rather than purely functional. The tension variation prevents the look from becoming too uniform or severe—you get movement and personality.
Executing Tension Variation at Home
After cleansing and conditioning, create thick sections across your head using a rat-tail comb. Begin your first braid at your hairline, using tight, smooth tension for the first few inches to frame your face with definition. As you braid downward, consciously loosen your tension slightly every inch or so, creating a gradient from tight to soft. You can also experiment with varying thickness within the same braid—one thick plait, then a slightly thinner section, then thick again. This creates visual interest and that deliberately undone boho texture. Use flexible braiding hair like Kanekalon to achieve the fluffier appearance; traditional synthetic hair tends to look crisper. Plan for 3-4 hours to complete a full head of goddess braids.
Insider note: Goddess braids look significantly boho-er when you intentionally tousle them slightly after finishing, pulling at sections to create that soft, romantic texture.
9. Bohemian Locs with Crochet Installation
Crochet locs are created by crocheting pre-made or hand-rolled loc hair into sections of your natural hair, creating instant locs without the months of maturation time traditional locs require. The “bohemian” version uses textured, sometimes colorful locs, and intentionally leaves some natural hair visible at the roots, creating a blend between your natural hair and the locs. This approach is both protective and deeply boho—the visible roots honor your natural texture while the locs add dimension and drama.
Why Crochet Locs Suit Afro Hair and Boho Styling
Crochet locs reduce the time and physical stress of traditional loc installation. Because you’re not waiting for locs to mature, you get the look immediately, and you can change them up whenever you want. For boho styling, the visible roots and textured appearance of crochet locs is actually preferred—that undone, slightly disheveled quality is exactly what makes boho beautiful. The style works with all afro hair types.
Crochet Installation Process
Begin with clean, conditioned hair. Create a grid of sections appropriate to your desired loc fullness. For each section, you’ll either hand-roll pre-made loc hair or use crochet locs purchased from a beauty supply. Using a crochet hook (usually a 0.75mm or smaller), insert the hook into your sectioned natural hair at the base, hook the crochet loc hair, and pull it through. Continue crocheting down the length of each braid, creating a secure bond between your natural hair and the loc hair. Many people leave visible roots—purposefully creating a section of natural, unadorned hair near the scalp that blends into the loc, creating a boho multi-texture look. The installation takes 4-6 hours depending on loc count and thickness.
Worth knowing: If you want that visible-roots boho look, don’t crochet all the way to your scalp—leave the first half-inch or inch of natural hair unworked for that beautiful blend.
10. Wavy Faux Locs with Loose Twists
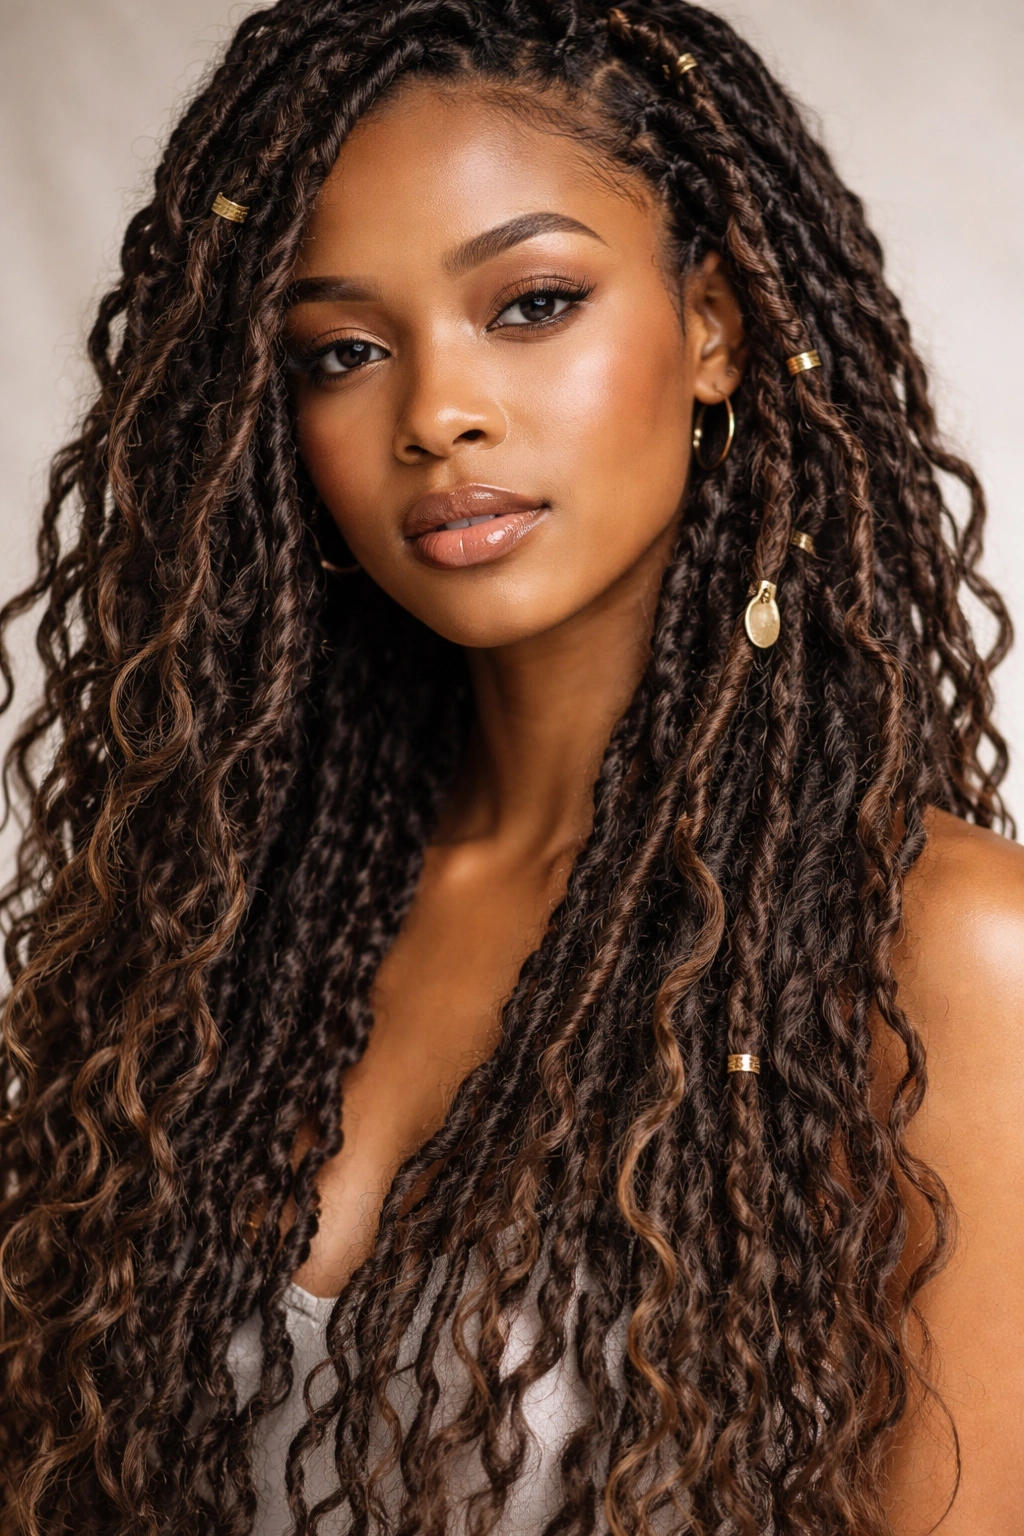
Faux locs created with a loose twist technique give you that loc-like appearance with way more flexibility and less commitment. Instead of traditional fist-rolling or crochet installation, you’re creating loose two-strand twists with loc hair, which produces a softer, more undone aesthetic. The “wavy” element comes from intentionally allowing the twists to relax and separate slightly, creating a textured, nearly dread-lock-like appearance that still reads as loose and boho.
Perfect Boho Meets Protective Styling
Wavy faux locs represent the ultimate boho compromise: you get that stunning, artistic loc-like appearance without the permanence or scalp tension of real locs. The loose twist method reduces stress on your hairline and scalp significantly. The inherent texture and movement make them look intentionally undone and artful rather than meticulously styled, which is the boho sweet spot.
Creating Loose Faux Locs at Home
After cleansing and conditioning, section your hair into medium-sized subsections. For each section, divide your natural hair and faux loc hair into two strands and create a two-strand twist, spiraling the two sections around each other as you travel down the length. Unlike traditional faux locs where you want the twist tight and smooth, here you want to keep moderate, deliberate looseness. Once you’ve completed all the twists, gently separate and fluff sections with your fingers to create that wavy, undone texture. You can also lightly unravel the twists just slightly, creating a looser, less defined braid-like appearance. Use textured extension hair rather than super-smooth synthetic for the best boho effect. Installation takes 5-7 hours depending on fullness.
Pro tip: These faux locs look significantly more boho when you allow them to relax for 24 hours after installation before fluffing them—they’ll naturally soften and separate into that perfect undone aesthetic.
Final Thoughts
The beauty of boho braiding is that there’s no single “right” way to do it—these ten styles are starting points for creativity, not rigid rules. The most stunning boho braids on afro hair share common characteristics: they celebrate natural texture, they’re slightly imperfect, they feature intentional movement, and they honor both your hair’s needs and your personal aesthetic. Whether you choose tightly woven feed-ins, lightweight twists, beaded Fulani braids, or wavy faux locs, the key is embracing that deliberately undone, artistic quality that makes boho so compelling.
The practical advantage of styling these braids at home is far greater than just the money you save, though that’s certainly real. You develop genuine skill with each installation, you learn exactly what your hair responds to, and you build confidence in your ability to create professional-quality styles whenever you want. Your first attempt might take longer than expected, or you might need to adjust a section here and there. That’s completely normal and actually part of the process. By your second or third time installing a particular style, you’ll be significantly faster and more efficient.
Remember that moisture is essential throughout the wearing period—whether your braids last two weeks or two months depends partly on how well you moisturize and care for them. Regular light spritzing with water and leave-in conditioner, protective sleeping with a silk or satin scarf, and gentle handling of your edges will keep your braids looking fresh and your hair healthy. The goal isn’t just a beautiful style; it’s beauty combined with hair health and longevity. When you approach boho braiding that way, you’re building a sustainable practice that keeps your hair thriving while letting your creativity and personal style shine through.